1
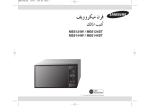
ME6124ST
6/7/06
11:19 AM
Page 1
∞jhhôµ«e ¿ôa
∂dÉŸG π«dO
ME6124ST
Code No.: DE68-03292A-02
ME6124ST
6/7/06
11:19 AM
Page 2
áeÓ°ùdG äÉWÉ«àMG
áeÓ°ùdG
.IóFGR ∞jhhôµ«e ábÉ£d πªàÙG ¢Vô©àdG Öæéàd äÉWÉ«àMG
.áeÓ°ùdÉH ≥∏©àJ áeÉg äGOÉ°TQEG
.kÓÑ≤à°ùe É¡«dEG ´ƒLô∏d É¡H ßØàMGh ájÉæ©H äGOÉ°TQE’G CGôbG
äGAGôLEG PÉîJG øe ócCÉàdG AÉLôdG ,∞jhhôµ«ŸG ¿ôa ‘ πFGƒ°ùdG hCG ΩÉ©£dG »¡W πÑb
.á«dÉàdG áeÓ°ùdG
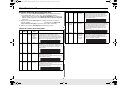
:∞jhhôµ«ŸG ¿ôa ‘ á«fó©e »¡W IGOCG …CG ΩGóîà°SG ô¶ëj
á«fó©ŸG ÊGhC’G •
á«°†ØdG hCG á«ÑgòdG ±QÉNõdG äGP IóFÉŸG äGhOCG •
∂dP ¤EG Éeh ,∑ƒ°ûdGh á«fó©ŸG äɵ°SÉŸG •
.¿ôØdG ∞∏àJ IQGô°T hCG »Hô¡c ¢SÉe çóëj ób
:ÖÑ°ùdG
:Úî°ùJ ô¶ëj
ΩɵMEÉH á≤∏¨ŸGh AGƒ¡dG øe É¡¨jôØJ ” »àdG ÊGhC’Gh äÉfɪWÈdGh äÉLÉLõdG •
∫ÉØWC’G ΩÉ©W äÉfɪWôH ∫Éãe
.Iô°û≤dG hP ΩÉ©£dG •
ºWɪ£dGh √ô°û≤H ¥óæÑdGh ¢†«ÑdG ∫Éãe
.᪩WCÓd á«LQÉÿG Iô°û≤dG QÉéØfG çGóMEG ¤EG §¨°†dG IOÉjR …ODƒJ ób
:ÖÑ°ùdG
.∂dP ¤EG Éeh ¢SÉ«cC’Gh í£°SC’G Ö≤Kh áØ∏ZC’G ádGREÉH ºb
:í«ª∏J
.kÉZQÉa ¿ƒµj ÉeóæY ∞jhhôµ«ŸG ¿ôa 𫨰ûJ ô¶ëj
.¿ôØdG ¿GQóL ∞∏àJ ób
:ÖÑ°ùdG
GPEG ∞jhhôµ«ŸG ábÉW ¢UÉ°üàeÉH AÉŸG Ωƒ≤j .¿ôØdG ‘ kÉehO AÉŸG øe kÉHƒc ∑ôJG
:í«ª∏J
.CÉ£ÿG ≥jô£H ÆQÉa ƒgh ¬∏«¨°ûàH âªb
.¥QƒdG hCG ¢Tɪ≤dG øe ™£≤H AGƒ°S ∞∏ÿG ‘ IOƒLƒŸG ájƒ¡àdG äÉëàa á«£¨J ô¶ëj
.¿ôØdG øe øNÉ°ùdG AGƒ¡dG ≠jôØJ óæY ¥QƒdG hCG ¢Tɪ≤dG ‘ ¿GÒædG π©à°ûJ ób
:ÖÑ°ùdG
.¿ôØdG øe ≥ÑW êGôNEG óæY äGRÉØb kÉehO Ωóîà°SG
.≥Ñ£dG ¤EG ΩÉ©£dG øe IQGô◊G kÉehO π≤àæJh ∞jhhôµ«ŸG ábÉW ¥ÉÑWC’G ¢†©H ¢üà“
:ÖÑ°ùdG
.áæNÉ°S ¥ÉÑWC’G ¿ƒµJ ‹ÉàdÉHh
.¿ôØ∏d á«∏NGódG ¿GQó÷G hCG Úî°ùàdG AGõLCG ¢ùŸ ô¶ëj
,»¡£dG AÉ¡àfG ó©H ≈àM ¥hôM çó– ób áLQóH áæNÉ°S ¿GQó÷G √òg ¿ƒµJ ób
:ÖÑ°ùdG
»∏NGódG í£°ù∏d ∫É©à°TÓd á∏HÉb OGƒe ájCG á°ùeÓÃ íª°ùJ ’ .∂dòc hóÑJ ⁄ ¿EGh
.k’hCG OÈj ¿ôØdG ´O .¿ôØ∏d
:¿ôØdG ∞jƒŒ ‘ ¿GÒf ∫É©à°TG ôWÉfl π«∏≤àd
¿ôØdG ‘ ∫É©à°TÓd á∏HÉb OGƒe øjõîJ ô¶ëj •
᫵«à°SÓÑdGh á«bQƒdG ¢SÉ«cC’G øe ᫵∏°ùdG á£HQC’G ádGREÉH ºb •
∞ë°üdG ∞«Øéàd ∞jhhôµ«ŸG ¿ôa ΩGóîà°SG ô¶ëj •
øY ¬∏°üah ¬∏«¨°ûJ ±É≤jEÉH ºbh kÉ≤∏¨e ¿ôØdG ÜÉÑH ßØàMG ,¿ÉNO OƒLh á¶MÓe ádÉM ‘ •
.»Hô¡µdG QÉ«àdG Qó°üe
.∫ÉØWC’G ᪩WCGh πFGƒ°ùdG Úî°ùJ óæY Qò◊G ≈NƒJ
ºàJ ≈àM ¿ôØdG 𫨰ûJ ±É≤jEG ó©H πbC’G ≈∏Y á«fÉK 20 ¤EG π°üJ QɶàfG Ióe kÉehO ∑ôJG •
.IQGô◊G áLQO ádOÉ©e
.Úî°ùàdG ó©H kÉehO ¬Ñ«∏≤Jh IQhô°†dG óæY Úî°ùàdG AÉæKCG Ö«∏≤àdÉH ºb •
AÉfE’G ¿Éc GPEG ¥hô◊ÉH áHÉ°UEÓd ¢Vô©àJ ó≤a .Úî°ùàdG ó©H AÉfE’G πªM óæY Qò◊G ≈NƒJ •
.kGóL ÉæNÉ°S
k
.¿É«∏¨dG áé«àf ¿GQƒØdG ô£ÿ ¢Vô©àdG øe QòMG •
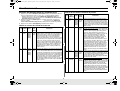
.IQÉ°†dG ∞jhhôµ«ŸG ábÉ£d ¢Vô©àdG á«dÉàdG áeÓ°ùdG äÉWÉ«àMÉH ΩGõàd’G ΩóY øY èàæj ób
(ÜÉÑdG »∏Øb) ¿ÉeC’G πØ≤H åÑ©dG hCG ìƒàØe ¿ôØdG ÜÉHh ¿ôØdG 𫨰ûJ ±hôX …CG â– Öéj ’ (CG)
.πØ≤∏d ¿ÉeC’G »àëàa ‘ Å°T …CG ™°Vh hCG
hCG ΩÉ©£dG äÓ°†a ºcGÎH ìɪ°ùdG hCG »LQÉÿG í£°ùdGh ¿ôØdG ÜÉH ÚH Å°T …CG ™°Vh ô¶ëj (Ü)
ᣰSGƒH ¥ÓZE’G ΩɵMEG í£°SCGh ÜÉÑdG áaɶf øe ócCÉJ .¥ÓZE’G AGõLCG í£°SCG ≈∏Y ∞¶æŸG
.áªYÉf áaÉL ¢Tɪb á©£≤H ºK á∏∏Ñe ¢Tɪb á©£b ᣰSGƒH ΩGóîà°S’G ó©H É¡ë°ùe
áfÉ«°U »æa ᣰSGƒH ¬MÓ°UEG ºàj ≈àM ¬H ∞∏J OƒLh ádÉM ‘ ∞jhhôµ«ŸG 𫨰ûJ ô¶ëj (ê)
.á©æ°üŸG ácô°ûdG iód ÜQóŸGh πgDƒŸG ∞jhhôµ«ŸG
:‘ ∞∏J OƒLh ΩóY øe ócCÉàdGh ΩɵMEÉH ÜÉÑdG ¥ÓZEG Öéjh
¥ÓZE’G ΩɵMEG í£°SCGh ÜÉÑdG »∏Øbh ÜÉÑdG (1)
(ΩɵMEÉH áWƒHôe ÒZ hCG IQƒ°ùµe) ÜÉÑdG äÓ°üØe (2)
»Hô¡µdG QÉ«àdG πÑc (3)
ÜQóŸGh πgDƒŸG ∞jhhôµ«ŸG áfÉ«°U »æa ÒZ ¢üî°T …CG ᣰSGƒH ¬MÓ°UEG hCG ¿ôØdG §Ñ°V ô¶ëj (O)
.á©æ°üŸG ácô°ûdG iód
.1
.2
.3
.4
.5
.6
.7
.8
2
ME6124ST
6/7/06
11:19 AM
Page 3
áeÓ°ùdG äÉWÉ«àMG
hCG ᫵«à°SÓH á≤©∏e ™°V ,¥hô◊ÉH áHÉ°UEÓd ¢Vô©àdG ∫ɪàMGh ¿GQƒØdG çhóM Öæéàd •
.√ó©Hh ¬FÉæKCGh Úî°ùàdG πÑb Ö«∏≤àdÉH ºbh äÉHhô°ûŸG ‘ á«LÉLR É°üY
ó©H ¿GQƒa çhóM ∫ɪàMG »æ©j ɇ ,¿É«∏¨dG ôNCÉàj ¿CG øµÁ πFGƒ°ùdG Úî°ùJ AÉæKCG :ÖÑ°ùdG
.¥hô◊ÉH áHÉ°UEÓd ∂°Vô©J ‘ ÖÑ°ùàj ób …òdG ôeC’G .¿ôØdG øe á«fB’G êGôNEG
:á«dÉàdG á«dhC’G äÉaÉ©°SE’G äGOÉ°TQEG ™ÑJG ,¥hô◊ÉH áHÉ°UEÓd ∂°Vô©J ádÉM ‘ •
.πbC’G ≈∏Y ≥FÉbO 10 IóŸ OQÉÑdG AÉŸÉH ¥hôë∏d ¢Vô©J …òdG Aõ÷G ôªZG •
.»Ñ£dG ¢TÉ°ûdG øe áØ«¶fh áaÉL ¢Tɪb á©£≤H ¬à«£¨àH ºb •
.¥ô◊G ≈∏Y ∫ƒ°ùZ hCG âjR hCG Ëôc ™°†J ’ •
πØ°SC’G Égô£b øe ™°ShCG ≈∏YC’G Égô£b ¿ƒµj á«fBG ÎNG ,ÉgÓYCG ≈àM á«fB’G Aπà kGóHCG º≤J ’ •
” GPEG ô°ùµ∏d ≥«°†dG ≥æ©dG äGP äÉLÉLõdG kÉ°†jCG ¢Vô©àJ ób .πFÉ°ùdG ¿GQƒa Öæéàd
.ΩRÓdG øe ÌcCG É¡æ«î°ùJ
.πØ£∏d ¬FÉ£YEG πÑb ∫ÉØWC’G Ídh ΩÉ©W IQGôM áLQO øe kÉehO ≥≤– •
ôéØæJ ób å«M ,É¡«∏Y »WÉ£ŸG Aõ÷G ™°Vh ™e πØ£dÉH á°UÉÿG Í∏dG áLÉLR Úî°ùJ ô¶ëj •
.óFGõdG Úî°ùà∏d â°Vô©J GPEG áLÉLõdG
.∞∏à∏d »Hô¡µdG QÉ«àdG πÑc ¢†jô©J ΩóY ≈∏Y ¢UôMG .9
øY QÉ«àdG πÑc OÉ©HEG ≈∏Y ¢UôMGh ,AÉŸG ‘ ¢ùHÉ≤dG hCG »Hô¡µdG QÉ«àdG πÑc ôªZ ô¶ëj •
.áæNÉ°ùdG í£°SC’G
.¬H Ú°UÉÿG ¢ùÑ≤ŸG hCG »FÉHô¡µdG QÉ«àdG πÑc ∞∏J ádÉM ‘ RÉ¡÷G 𫨰ûJ ô¶ëj •
.ÜÉÑdG íàa óæY ¿ôØdG øe ´GQP áaÉ°ùe ≈∏Y ∞b .10
.¥hô◊ÉH áHÉ°UEÓd ¢Vô©àdG ‘ QÉîÑdG hCG øNÉ°ùdG AGƒ¡dG ÖÑ°ùàj ób :ÖÑ°ùdG
.¿ôØ∏d »∏NGódG ∞jƒéàdG áaɶf ≈∏Y ßaÉM .11
á«°VQCG hCG ¿GQóL ≈∏Y á≤°UÓdGh IôKÉæàŸG äƒjõdG hCG ΩÉ©£dG ÉjÉ≤H ÖÑ°ùàJ ¿CG øµÁ :ÖÑ°ùdG
.¿ôØdG IAÉØc π«∏≤Jh AÓ£dG ±ÓJEG ‘ ¿ôØdG
.ó«ªéàdG ∂a ™°Vh AÉæKCG á°UÉNh ,𫨰ûàdG AÉæKCG ' á©bôb'' 䃰U ßMÓJ ób .12
.…OÉY ôeCG Gòg .á«FÉHô¡µdG ábÉ£dG êôN QGó≤e Ò«¨J AÉæKCG 䃰üdG Gòg ™ª°ùJ ób :ÖÑ°ùdG
kÉ«FÉ≤∏J ¬æY »Hô¡µdG QÉ«àdG π°üa ºàj ,¬∏NGóH Å°T …CG OƒLh ¿hO ∞jhhôµ«ŸG ¿ôa 𫨰ûJ óæY .13
.á≤«bO 30 IóŸ ¬côJ ó©H …OÉY πµ°ûH ¬∏«¨°ûJ ∂æµÁ .¿ÉeCÓd
áeÓ°ùdÉH ≥∏©àJ áeÉg äGOÉ°TQEG
hCG ᫵«à°SÓH ÊGhCG ‘ ¬«¡W hCG ΩÉ©£dG Úî°ùJ óæY ôNB’ ¿BG øe ¿ôØdG πNGO ô¶ædG Öéj ,»¡£dG AÉæKCG
.§≤a IóMGh Iôe Ωóîà°ùJ ∫É©à°TÓd á∏HÉb iôNCG OGƒe øe áYƒæ°üe hCG á«bQh
ΩÉg
øe Üô≤dÉH º¡côJ Öéj ’h .¬H Ö©∏dG hCG ∞jhhôµ«ŸG ¿ôa ΩGóîà°SÉH ∫ÉØWCÓd kGóHCG ìɪ°ùdG Öéj ’
™°Vƒe ¿ƒµJ »àdG AÉ«°TC’G ™°Vh Öéj ’ ∂dòc .¬eGóîà°SG AÉæKCG áÑbGôe ¿hóH ∞jhhôµ«ŸG ¿ôa
.Iô°TÉÑe ¿ôØdG ¥ƒa É¡FÉØNEG hCG ∫ÉØWC’G ΩɪàgG
:ôjò–
ᣰSGƒH ¿ôØdG ìÓ°UEG ºàj ≈àM ¿ôØdG 𫨰ûJ Öéj ’ ,∞∏à∏d ÜÉÑdG πØb hCG ÜÉÑdG ¢Vô©J ádÉM ‘
.πgDƒe ¢üî°T
:ôjò–
øe »≤j …òdG AÉ£¨dG ádGREG øª°†àJ ìÓ°UEG á«∏ªY hCG áfÉ«°üdÉH ΩÉ«≤∏d πgDƒŸG ¢üî°ûdG ÒZ ¢üî°T …CG
.ô£î∏d ¬°ùØf ¢Vô©j ∞jhhôµ«ŸG á©°TC’ ¢Vô©àdG
:ôjò–
.QÉéØfÓd ¢Vô©àJ ób å«M á≤∏¨e äÉjhÉM ‘ πFGƒ°ùdG hCG ᪩WC’G Úî°ùJ Öéj ’
:ôjò–
»àdG áÑ°SÉæŸG äɪ«∏©àdG º¡FÉ£YEG ó©H ’EG áÑbGôe ¿hO ¿ôØdG ΩGóîà°SÉH ∫ÉØWCÓd ìɪ°ùdG Öéj ’
áé«àf É¡d ¿ƒ°Vô©àj ób »àdG ôWÉıG áaô©e º¡d í«àJh ,áæeBG á≤jô£H ¿ôØdG ΩGóîà°SG øe º¡æµ“
.í«ë°üdG ÒZ ΩGóîà°S’G
.kÉ«Ä«H ™ÑàŸG ܃∏°SC’ÉH É¡eGóîà°SG IOÉYEG hCG èàæŸG Gò¡H á°UÉÿG ∞«∏¨àdG OGƒe øe ¢ü∏îàdG AÉLôdG
.áÄ«ÑdG ô°†j ’ ÉÃh ¿ÉeCÉH èàæŸG Gòg øe ¢ü∏îàdG á«Ø«c øY QÉ°ùØà°SÓd ∂H á°UÉÿG á«∏ÙG äÉÄ«¡dÉH ∫É°üJ’G AÉLôdG
3
ME6124ST
6/7/06
11:19 AM
Page 4
∞jhhôµ«ŸG ¿ôa πªY á«Ø«c
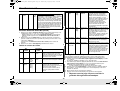
∞jhhôµ«ŸG ¿ôa Ö«côJ
»¡£dG πeÉY
.¿ôØdG ¿Rh πªëà«d ±Éc πµ°ûH Ö∏°U ƒà°ùe í£°S ≈∏Y ¿ôØdG ™°V
¿hÎæLÉŸG ᣰSGƒH ódƒàJ »àdG ∞jhhôµ«ŸG á©°TCG ™jRƒJ ºàj .1
∂dòd .QGhódG ¢Uô≤dG ≈∏Y ΩÉ©£dG ¿GQhO AÉæKCG hÉ°ùàe πµ°ûH
.ájhÉ°ùàe áLQóH ΩÉ©£dG »¡W ºàj
.(º°S 2^5) á°UƒH G ≥ªY ≈àM ∞jhhôµ«ŸG äÉLƒe ΩÉ©£dG ¢üàÁ .2
.ΩÉ©£dG ∫ÓN IQGô◊G ∫É≤àfG QGôªà°SÉH »¡£dG á«∏ªY ôªà°ùJ ºK
:¬°üFÉ°üNh ¬à«Yƒæd kÉ©ÑJ ΩÉ©£dG »¡W äÉbhCG øjÉÑàJh .3
áaÉãµdGh ᫪µdG •
É¡«∏Y …ƒàëj »àdG AÉŸG ᫪c •
(’ ΩCG óª›) á«dhC’G IQGô◊G áLQO •
»¡W ôªà°ùj ,…QGô◊G ™jRƒàdG ᣰSGƒH É¡«¡W ºàj ΩÉ©£dG øe á«∏NGódG AGõLC’G ¿C’h
Qɶàf’G äÉbhCG IÉYGôe Öéj ∂dòd .¿ôØdG øe ΩÉ©£dG êGôNEG ádÉM ‘ ≈àM ΩÉ©£dG
:¿Éª°†d Ö«àµdG Gòg ‘h »¡£dG äÉØ°Uh ‘ IOóÙG
¬£°Sh ≈àM hÉ°ùàe πµ°ûH ΩÉ©£dG »¡W •
IQGô◊G áLQO ¢ùØæd πeɵdÉH ΩÉ©£dG ¢Vô©J •
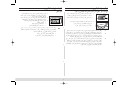
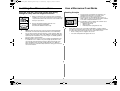
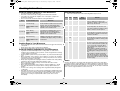
∑ôJh ¿ôØ∏d Ió«L ájƒ¡J OƒLh øe ócCÉJ ,¿ôØdG Ö«côJ óæY .1
,∞∏ÿG øe πbC’G ≈∏Y (äÉ°UƒH 4) äGΪ«àæ°S 10 áaÉ°ùe
. √ÓYCG (äÉ°UƒH 8) kGΪ«àæ°S 20 áaÉ°ùeh ¿ôØdG »ÑfÉL óæYh
º°S20
≈∏YCG øe
øe º°S10
∞∏ÿG
øe º°S10
ÖfÉ÷G
.¿ôØdG πNGO IOƒLƒŸG ∞«∏¨àdG OGƒe áaÉc ádGREÉH ºb .2
.QGhódG ¢Uô≤dGh IQGhódG á≤∏◊G Ö«cÎH ºb
.ájôëH QGhódG ¢Uô≤dG ¿GQhO øe ócCÉJ
☛
πµ°ûH ¿ôØdG IQGôM áLQO ´ÉØJQG ∂dP øY èàæj ób å«M ájƒ¡àdG äÉëàa ó°S ô¶ëj
.‘ɵdG Qó≤dÉH OÈj ≈àM ΩGóîà°SÓd πHÉb ÒZ ¿ôØdG π¶jh .kÉ«FÉ≤∏J ¬∏«¨°ûJ ±É≤jEGh óFGR
±GôWCG áKÓK øe ¿ƒµàj OOÎe QÉ«J ¢ùÑ≤e ‘ πѵdG π«°UƒàH ºb ,á«°üî°ûdG ∂àeÓ°ùd
»FÉHô¡µdG QÉ«àdG πÑc ¿Éc GPEG .õJôg 50 √Qób OOôJh âdƒa 230 √Qób ó¡éHh π«°UƒJ
.¬dGóÑà°S’ »∏ÙG ™FÉÑdÉH π°üJG .¢UÉN πѵH ¬dGóÑà°SG Öéj ,ÉkØdÉJ RÉ¡÷G Gò¡d
π«Ñ°S ≈∏Y ,áHƒWQ hCG IQGôM É¡æe å©ÑæJ AÉ«°TCG QGƒéH ∞jhhôµ«ŸG ¿ôa Ö«côJ ô¶ëj
ábÉ£dG Ohõe äÉØ°UGƒÃ ΩGõàd’G Öéj .áÄaóe hCG …ó«∏≤J ¿ôa QGƒéH ¬©°Vh ,∫ÉãŸG
πÑc ¢ù«jÉ≤e ¢ùØæH ¿ƒµj ¿CG Öéj ¬eGóîà°SG ºàj π°Uƒe πÑc …CGh ¿ôØdÉH ¢UÉÿG
¢Tɪb á©£≤H ÜÉÑdG πØbh á«∏NGódG ¿GQó÷G í°ùeG .¿ôØdG ™e √ójhõJ ºàj …òdG ábÉ£dG
.¤hC’G Iôª∏d ∞jhhôµ«ŸG ¿ôa ΩGóîà°SG πÑb á∏∏Ñe
4
✻
✻
✻
ME6124ST
6/7/06
11:19 AM
Page 5
ójó÷G ∞jhhôµ«ŸG ¿ôa
ójó÷G ∞jhhôµ«ŸG ¿ôa
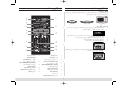
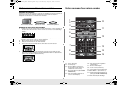
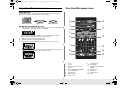
AGõLC’G øe ≥≤ëàdG
ΩóY ádÉM ‘ .√ÉfOCG áæ«ÑŸG äÉjƒàÙG áaÉc OƒLh øe ≥≤–h ∞«∏¨àdG áÑ∏Y øe ∞jhhôµ«ŸG ¿ôa êôNCG
.™FÉÑdÉH π°üJG ,AGõLC’G øe AõL …CG ∞∏J hCG OƒLh
1
2
3
4
5
6
10
IQGhódG á≤∏◊G
á«LÉLõdG á«æ«°üdG
∞jhhôµ«ŸG ¿ôa
11
∞jhhôµ«ŸG ¿ôa OGóYEG
.»°VQCG ±ôW hP »Hô¡c QÉ«J Qó°üà ∂∏°ùdG π°Uh Ö∏°Uh ƒà°ùe í£°S ≈∏Y ¿ôØdG ™°V
:¿ôØdG á°TÉ°T ô¡¶à°S ,»Hô¡µdG QÉ«àdG π«°UƒJ OôéÃ
1
START ENTER COOK TIME TIME2
12
Kg
g
Oz
Lbs QTY
πbC’G ≈∏Y (äÉ°UƒH 4) äGΪ«àæ°S 10 áaÉ°ùe ∑ÎH ¿ôØ∏d Ió«L ájƒ¡J ÒaƒJ øe ócCÉJ
.¬«ÑfÉL óæYh ¬bƒah ¿ôØdG ∞∏N
.¿ôØdG ÜÉH ÚÁ ¤EG OƒLƒŸG ¢†Ñ≤ŸG ÜòL ᣰSGƒH ¿ôØdG ÜÉH íàaG
.á∏∏Ñe ¢Tɪb á©£≤H ¿ôØ∏d »∏NGódG Aõ÷G í°ùeG
.¿ôØdG ∞°üàæe ‘ kÉ≤Ñ°ùe ᩪÛG á≤∏◊G ™°V
7
13
14
15
8
9
' AɨdEG/âbDƒe ∞«bƒJ''
.9
(Pause/Cancel)
(One Minute +) ' + á≤«bO''
' (™jô°S ïÑW) Gõà«ÑdG Úî°ùJ''
.10
.11
(Pizza Reheat(INSTANT COOK))
' Úî°ùà∏d ᫵«JÉeƒJhCG IOÉYEG'
(Auto Reheat)
(More/Less) ' πbCG/ÌcCG'
(Kitchen Timer) ' ïÑ£ŸG âbDƒe''
(Start) ' 𫨰ûJ''
(Clock) ' áYÉ°S''
(Sound) ' 䃰U''
' IóMGh á°ùª∏H ™jô°S ïÑW'' QGQRCG
.4
(Beverage(INSTANT COOK))
' »FÉ≤∏àdG »¡£dG ºFGƒb''
.13
.14
.15
.1
.2
.3
(One Touch Instant Cook)
' (™jô°S ïÑW) ' äÉHhô°ûŸG''
.12
á«æ«°üdG §°Sh ‘ IOƒLƒŸG áKÓãdG äGAƒàædG ºFÓàJ å«ëH á≤∏◊G ¥ƒa á«LÉLõdG á«æ«°üdG ™°V
.¿ôØdG á«°VQCG ‘ IOƒLƒŸG äÉëàØdG ™e
.5
(Auto Cook Menus)
' è∏ã∏d ᫵«JÉeƒJhCG ádGREG'
.6
(Auto Defrost)
ΩÉbQC’G QGQRCG
(Power Level) ' ábÉ£dG iƒà°ùe''
.7
.8
5
2
3
4
5
ME6124ST
6/7/06
11:19 AM
Page 6
𫨰ûàdG
ójó÷G ∞jhhôµ«ŸG ¿ôa
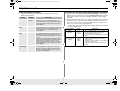
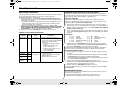
áYÉ°ùdG §Ñ°V
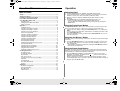
äÉjƒàÙG ∫hóL
.(TIME) ' âbƒdG''h (ENTER) ' ∫ÉNOE’G'' …ô°TDƒe ¢†eƒj .(Clock) ''áYÉ°ùdG'' QõdG ≈∏Y §¨°VG .1
2.............................................................................. áeÓ°ùdG
2.................................................................... áeÓ°ùdG äÉWÉ«àMG
4.............................................................. ∞jhhôµ«ŸG ¿ôa Ö«côJ
4.......................................................... ∞jhhôµ«ŸG ¿ôa πªY á«Ø«c
5.............................................................. ójó÷G ∞jhhôµ«ŸG ¿ôa
5.................................................... AGõLC’G øe ≥≤ëàdG
5................................................ ∞jhhôµ«ŸG ¿ôa OGóYEG
5.................................................. ºµëàdG áMƒd QGQRCG
6...................................................... äÉjƒàÙG ∫hóL
6.............................................................................. 𫨰ûàdG
6.......................................................... áYÉ°ùdG §Ñ°V
6.................. (Pause/Cancel) ' AɨdEG/âbDƒe ∞«bƒJ'' QõdG ΩGóîà°SG
6............................ (One Minute +) ' + á≤«bO'' QõdG ΩGóîà°SG
6................ (Sensor Cook) ' ¢ùÛG ΩGóîà°SÉH »¡£dG'' QGQRCG ΩGóîà°SG
7.......................................... ' ¢ùÛG ΩGóîà°SÉH »¡£dG'' π«dO
7.......................... (Instant Cook) ' ™jô°S ïÑW'' QGQRCG ΩGóîà°SG
7.......................... (Rice/Pasta) äÉæé©ŸG/RQC’G QGQRCG ΩGóîà°SG
8.......................... (Meat/Fish) ∑ɪ°SC’G/Ωƒë∏dG QGQRCG ΩGóîà°SG
9............................ (Snack Bar) ' áØ«ØN äÉÑLh'' QõdG ΩGóîà°SG
9............................................ Úî°ùà∏d ᫵«JÉeƒJhCG IOÉYEG
9................................................ è∏ã∏d ᫵«JÉeƒJhCG ádGREG
10.................................. ábÉ£dG äÉjƒà°ùeh »¡£dG äÉbhCG §Ñ°V
10........................................................ ¢Vô©dG ™°Vh
10.............................. (More/Less) ' πbCG/ÌcCG' øjQõdG ΩGóîà°SG
10.......................... ¬«ÑæàdG äGƒ°UCG QGó°UEG Iõ«e 𫨰ûJ ±É≤jEG/𫨰ûJ
10................................................ ïÑ£ŸG âbDƒe ΩGóîà°SG
10............................................ ∫ÉØWC’G ájɪ◊ ÚeCÉàdG §Ñ°V
11...................................................................... »¡£dG äGOÉ°TQG
11.......................................................... »¡£dG ÊGhCG E
11........................................................ »¡£dG Ö«dÉ°SCG
11........................................................ áeÉY äÉ뫪∏J
12........................................ ¢ùÛG ΩGóîà°SÉH »FÉ≤∏àdG »¡£dG
12.................... ¢ùÛG ΩGóîà°SÉH »¡£dG ‘ áeóîà°ùŸG á«£ZC’Gh ÊGhC’G
12.................................................................. ΩÉg
12.......................................................... »¡£dG π«dO
13.......................................... ' è∏ã∏d ᫵«JÉeƒJhCG ádGRG'' π«dO
E
14...................................................... »¡£dG äÉØ°Uh
15................................................................................ ≥ë∏e
15...................................... É¡∏Mh äÓµ°ûŸG ±É°ûµà°SG π«dO
15...................................................... ∞«¶æàdGh ájÉæ©dG
15.......................................................... CÉ£ÿG πFÉ°SQ
16............................................................äÉØ°UGƒŸG
GPEG .áYÉ°ùdG §Ñ°†d πbC’G ≈∏Y ΩÉbQCG 3 §¨°V Öéj .‹É◊G âbƒdG ∫ÉNOE’ ΩÉbQC’G QGQRCG Ωóîà°SG .2
.5, 0,0 ; ΩÉbQC’G πNOCG 5:00 ‹É◊G âbƒdG ¿Éc
.''áYÉ°ùdG'' ô¡¶Jh ' ∫ÉNOE’G'' ô°TDƒe ¢†eƒj ,¿GƒK 5 Qhôe ó©H .3
.âbƒdG §Ñ°V ” ób ¬fCG ¤EG IÒ°ûe ' :' áeÓY ¢†eƒJ .iôNCG Iôe (Clock) ' áYÉ°ùdG' QõdG ≈∏Y §¨°VG .4
.iôNCG Iôe áYÉ°ùdG §Ñ°V IOÉYEG êÉàëà°S ,»Hô¡µdG QÉ«àdG ´É£≤fG ádÉM ‘
.(Clock) ''áYÉ°ùdG'' QõdG §¨°V ᣰSGƒH »¡£dG AÉæKCG ‹É◊G âbƒdG øe ≥≤ëàdG ∂æµÁ
(Pause/Cancel) ''AɨdEG/âbDƒe ∞«bƒJ'' QõdG ΩGóîà°SG
ɪc .É¡dÉNOEÉH âªb »àdG äGOÉ°TQE’G í°ùà (Pause/Cancel) ''AɨdEG/âbDƒe ∞«bƒJ'' QõdG ∂d íª°ùj
.ΩÉ©£dG è°†f áLQO øe ≥≤ëà∏d âbDƒe πµ°ûH ¿ôØ∏d »¡£dG IQhO ±É≤jEÉH ∂d íª°ùj
(Pause/Cancel) ''AɨdEG/âbDƒe ∞«bƒJ'' QõdG §¨°VG :»¡£dG AÉæKCG âbDƒe πµ°ûH ¿ôØdG ±É≤jE’
.(Start) ' 𫨰ûJ'' QõdG §¨°VG ,iôNCG Iôe AóÑdG IOÉYE’ .IóMGh Iôe
∞«bƒJ'' QõdG §¨°VG :âbƒdG ¢Vô©d ¿ôØdG á°TÉ°T IOÉYEGh äGOÉ°TQE’G í°ùeh »¡£dG ±É≤jE’
.ÚJôe (Pause/Cancel) ''AɨdEG/âbDƒe
(Pause/Cancel) ''AɨdEG/âbDƒe ∞«bƒJ'' QõdG §¨°VG :É¡dÉNOEÉH âªb CÉ£N äGOÉ°TQEG í«ë°üàd
.äGOÉ°TQE’G ∫ÉNOEG óYCG ºK ,IóMGh Iôe
•
•
•
(One Minute +) ''+ á≤«bO'' QõdG ΩGóîà°SG
ΩGóîà°SÉH á≤«bóH á≤«bO Úî°ùàdG Ióe IOÉjR ≥jôW øY ΩÉ©£dG Úî°ùàd áªFÓe á≤jôW QõdG Gòg ôaƒj
.∞jhhôµ«ŸG ábÉ£d iƒà°ùe ≈∏YCG
¤EG É¡àaÉ°VEG ‘ ÖZôJ á≤«bO πµd IóMGh Iôe (One Minute+) ''+ á≤«bO'' QõdG ≈∏Y §¨°VG .1
¢VôY ºàj .»¡£dG âbh ¤EG Úà≤«bO áaÉ°VE’ ÚJôe §¨°VG ,∫ÉãŸG π«Ñ°S ≈∏Y .ΩÉ©£dG »¡W âbh
.kÉ«FÉ≤∏J πª©dG ‘ ¿ôØdG CGóÑjh ,âbƒdG
''+ á≤«bO'' QõdG §¨°V ᣰSGƒH 𫨰ûàdG ó«b èeÉfôH ¤EG ≥FÉbO áaÉ°VEG ∂æµÁ
.É¡àaÉ°VEG ‘ ÖZôJ á≤«bO πµd IóMGh Iôe (One Minute+)
(Sensor Cook) ''¢ùÛG ΩGóîà°SÉH »¡£dG'' QGQRCG ΩGóîà°SG
âbh §Ñ°†H kÉ«FÉ≤∏J Iõ«ŸG √òg Ωƒ≤J ,ΩÉ©£dG Úî°ùJ AÉæKCG å©ÑæŸG QÉîÑdÉH »∏©ØdG Qƒ©°ûdG ∫ÓN øe
á«¡£e ᪩WC’G á«aÉc ¿ƒµJ ¿CG Öéj .Ék≤Ñ°ùe á«¡£ŸG ᪩WC’G øe IOó©àe ´GƒfCGh äÉ«ªµd Úî°ùàdG
.áLÓãdG IQGôM áLQO ‘ áXƒØfih Ék≤Ñ°ùe
≈∏Y) ¬«¡£H Ωƒ≤J …òdG ΩÉ©£∏d πHÉ≤ŸG (Sensor Cook) ''¢ùÛG ΩGóîà°SÉH »¡£dG'' QõdG §¨°VG .1
.kÉ«FÉ≤∏J »¡£dG ‘ ∞jhhôµ«ŸG ¿ôa CGóÑjh '
' á°TÉ°ûdG ¢Vô©J .(QÉ°ûØdG ,∫ÉãŸG π«Ñ°S
á«æ«°üdG ¢†jô©J Öæéàd ¢ù«c πc ÚH ≥FÉbO ¢ùªN IóŸ ô¶àfG ,iôNCG Iôe QÉ°ûØdG »¡W óæY
QõdG §¨°VG ,»¡£dG AÉæKCG ‹É◊G âbƒdG øe ≥≤ëàdG ójôJ âæc GPEG .óFGõdG Úî°ùà∏d á«LÉLõdG
.(Clock) ''áYÉ°S''
6
ME6124ST
6/7/06
11:19 AM
Page 7
𫨰ûàdG
äÉæé©ŸG/RQC’G äÉÑLh ∫hóL
äɶMÓe
RÉ¡L ‘ AÉŸGh RQC’G ™°V .kÉ«aÉ°U AÉŸG íÑ°üj ≈àM OQÉÑdG AÉŸÉH RQC’G π°ùZG
»LÉLR ¢ùcÒH ≥ÑW hCG ∞jhhôµ«ŸG ™e ¬eGóîà°SÉH 샪°ùŸG RQC’G »¡W
5-3 IóŸ RQC’G ∑ôJG .≈£¨e RQC’G ∑ôJG ,»¡£dG ó©Hh ,AÉ£Z hP ôjóà°ùe
.¢†©ÑdG É¡°†©H øY RQC’G ܃ÑM π°üØd ¬Ñ«∏≤àH ºbh á≤«bO
¿É°üî°T
ΩGôL 200
óMGh ¢üî°T
ΩGôL 100
RQC’G
»∏∏«e 375
»∏∏«e 250
AÉŸG
IQGô◊G áLQO
¿RƒdG
ΩÉ©£dG ´ƒf
á«dhC’G
áLQO :RQC’G »ØµJ ᫪c
RQC’G
áaô¨dG IQGôM ¢üî°T 2-1 ¢†«HC’G
áLQO :AÉŸG
áaô¨dG IQGôM
™e ¬eGóîà°SÉH 샪°ùŸG RQC’G »¡W RÉ¡L ‘ áØØÛG äÉæé©ŸG ™°V »∏¨e AÉe:AÉŸG »ØµJ ᫪c äÉæé©ŸG
ºFÓàd É¡ª«°ù≤J ™e ôjóà°ùe »LÉLR ¢ùcÒH ≥ÑW hCG AÉfEG hCG ∞jhhôµ«ŸG
¢üî°T 2-1
áaÉ÷G
ºb ,»¡£dG ó©H .AÉ£Z ¿hO »¡£dÉH ºbh - áLÉ◊G â°†àbG GPEG AÉfE’G
.É¡Áó≤J ºK É¡Ñ«∏≤àH ºb .≥FÉbO 5-2 IóŸ É¡côJGh ,É¡à«£¨àH
¿É°üî°T
ΩGôL 200
óMGh ¢üî°T
ΩGôL 100
RQC’G
ÚLÉæa 5
ÚLÉæa 3
AÉŸG
™e ¬eGóîà°SÉH 샪°ùŸG RQC’G »¡W RÉ¡L ‘ IóªÛG äÉæé©ŸG ™°V »∏¨e AÉe:AÉŸG »ØµJ ᫪c äÉæé©ŸG
¿hO É¡«¡£H ºbh ôjóà°ùe »LÉLR ¢ùcÒH ≥ÑW hCG AÉfEG hCG ∞jhhôµ«ŸG
¢üî°T 2-1 IóªÛG
É¡Ñ«∏≤àH ºb .≥FÉbO 5-2 IóŸ É¡côJGh ,É¡à«£¨àH ºb ,»¡£dG ó©H .É¡à«£¨J
.É¡Áó≤J ºK
¿É°üî°T
ΩGôL 200
óMGh ¢üî°T
ΩGôL 100
äÉæé©ŸG
ÚLÉæa 5
ÚLÉæa 3
AÉŸG
™e ¬eGóîà°SÉH 샪°ùŸG RQC’G »¡W RÉ¡L ‘ áLRÉ£dG äÉæé©ŸG ™°V »∏¨e AÉe:AÉŸG »ØµJ ᫪c äÉæé©ŸG
¿hO É¡«¡£H ºbh ôjóà°ùe »LÉLR ¢ùcÒH ≥ÑW hCG AÉfEG hCG ∞jhhôµ«ŸG
¢üî°T 2-1 áLRÉ£dG
É¡Ñ«∏≤àH ºb .≥FÉbO 5-2 IóŸ É¡côJGh ,É¡à«£¨àH ºb ,»¡£dG ó©H .É¡à«£¨J
.É¡Áó≤J ºK
¿É°üî°T
ΩGôL 250
óMGh ¢üî°T
ΩGôL 125
äÉæé©ŸG
ÚLÉæa 5
ÚLÉæa 3
AÉŸG
¬eGóîà°SÉH 샪°ùŸG RQC’G »¡W RÉ¡L ‘ áØØÛG »àLÉÑ°SE’G áfhôµŸG ™°V »∏¨e AÉe:AÉŸG »ØµJ ᫪c áfhôµŸG
É¡ª«°ù≤J ™e ôjóà°ùe »LÉLR ¢ùcÒH ≥ÑW hCG AÉfEG hCG ∞jhhôµ«ŸG ™e
¢üî°T 2-1 »àLÉÑ°SE’G
ºb ,»¡£dG ó©H .AÉ£Z ¿hO »¡£dÉH ºbh - áLÉ◊G â°†àbG GPEG AÉfE’G ºFÓàd
.É¡Áó≤J ºK É¡Ñ«∏≤àH ºb .≥FÉbO 5-2 IóŸ É¡côJGh ,É¡à«£¨àH
¿É°üî°T
ΩGôL 200
óMGh ¢üî°T
ΩGôL 100
»àLÉÑ°SE’G áfhôµŸG
ÚLÉæa 5
ÚLÉæa 3
AÉŸG
™e ¬eGóîà°SÉH 샪°ùe ÒÑc AÉfEG ‘ É¡©°Vh õdOƒædG ájô©°T á∏àc ô°ùc »∏¨e AÉe:AÉŸG »ØµJ ᫪c
ájô©°T
.AÉ£Z ¿hO É¡«¡£H ºbh õdOƒædG ájô©°T ≈∏Y »∏¨ŸG AÉŸG Ö°U .∞jhhôµ«ŸG
¢üî°T 3-1 õdOƒædG
kGó«L É¡Ñ«∏≤àH ºb ,âbƒdG ∞°üf Qhôe óæY ¬«ÑæJ 䃰U ¿ôØdG QGó°UEG ó©H
ºàj »àdG
Ióªc Úà≤«bO Qhôeh »¡£dG ó©H .á©HÉàª∏d (start) ' 𫨰ûJ'' §¨°VG ºK
‘ É¡«¡W
.É¡Áó≤J ºK É¡Ñ«∏≤àH ºb ,QɶàfG
Úà≤«bO
¢UÉî°TCG 3
IĄY 3
»∏∏«e 1500
¿É°üî°T
IĄY 2
»∏∏«e 1000
óMGh ¢üî°T
IĄY 1
»∏∏«e 500
¢ùÛG ΩGóîà°SÉH »¡£dG π«dO
OĵdG
.¢ùÛG ΩGóîà°SÉH ᪩WC’G øe áØ∏àfl ´GƒfCG »¡W óæY √ÉfOCG IOƒLƒŸG äGOÉ°TQE’G ™ÑJG
ΩÉ©£dG
AGôLE’G
᫪µdG
A-1
‘ »¡£∏d á°ü°üıG QÉ°ûØdG ¢SÉ«cCG øe §≤a kGóMGh kÉ°ù«c Ωóîà°SG
øe øNÉ°ùdG ¢ù«µdG êGôNEG óæY Qò◊G ≈NƒJ .Iôe πc ‘ ∞jhhôµ«ŸG
.iôNCG Iôe ¬eGóîà°SG πÑb OÈ«d ≥FÉbO 5 IóŸ ¿ôØdG ∑ôJG .¬ëàah ¿ôØdG
≈∏Y É¡©°Vh .ácƒ°T ᣰSGƒH äGôe IóY ¢ùWÉ£H IôªK πc Ö≤KG
¿ôØdG ∑ôJGh .≥FÉbO 5-3 IóŸ É¡côJG .IôFGO πµ°T ≈∏Y QGhódG ¢Uô≤dG
.iôNCG Iôe ¬eGóîà°SG πÑb OÈ«d ≥FÉbO 5 IóŸ
∞jhhôµ«ŸG ™e ¬eGóîà°SÉH 샪°ùe ≥ÑW ‘ áLRÉ£dG äGhGô°†ÿG ™°V
∞jhhôµ«ŸG ¥Qh ΩGóîà°SÉH ≥Ñ£dG »£Z .AÉŸG øe ÚJÒÑc Úà≤©∏e ∞°VCGh
…ODƒj) .∞jhhôµ«ŸG ™e ¬eGóîà°SÉH 샪°ùe »µ«à°SÓH AÉ£¨H hCG …QGô◊G
(.èFÉàædG π°†aCG ≈∏Y ∫ƒ°ü◊G ¤EG »LÉLR AÉ£Z ΩGóîà°SG
IÒ¨°U áëàa ∑ôJ øe ócCÉàa ,»µ«à°SÓÑdG AÉ£¨dG ΩGóîà°SÉH âªb GPEG
ºbh ,¿ôØdG øe äGhGô°†ÿG êôNCG .ájƒ¡à∏d ≥Ñ£dG áaÉM øe Üô≤dÉH
5 IóŸ ¿ôØdG ∑ôJG .É¡Áó≤J hCG É¡Ñ«∏≤àH ºb ºK ,Úà≤«bO IóŸ É¡à«£¨àH
.iôNCG Iôe ¬eGóîà°SG πÑb OÈ«d ≥FÉbO
≈∏Y áë°VƒŸG äɪ«∏©àdG ™ÑJGh »LQÉÿG ±Ó¨dG øe ΩÉ©£dG êôNCG
πÑb OÈ«d ≥FÉbO 5 IóŸ ¿ôØdG ∑ôJG .Qɶàf’Gh á«£¨àdÉH á°UÉÿGh IƒÑ©dG
.iôNCG Iôe ¬eGóîà°SG
A-2
A-3
¿É°üî°T
ΩGôL 70
óMGh ¢üî°T
ΩGôL 35
Ió«°ü©dG
»∏∏«e 375
»∏∏«e 185
Í∏dGh AÉŸG
ΩGôL 100 - 85
IƒÑY 1 OóY
QÉ°ûØdG
äGôªK 6 ¤EG 1 øe
.¢ùWÉ£ÑdG øe
¢ùWÉ£ÑdG
ÜGƒcCG 4 ¤EG 1 øe
äGhGô°†ÿG
áLRÉ£dG
ΩGôL 400 - 220
OôØd äÉÑLh
óMGh
(Instant Cook) ''…QƒØdG »¡£dG'' QGQRCG ΩGóîà°SG
A-4
π«Ñ°S ≈∏Y) ¬«¡£H Ωƒ≤J …òdG ΩÉ©£∏d πHÉ≤ŸG ( Instant Cook) ''™jô°S ïÑW'' QõdG ≈∏Y §¨°VG 1
' ∫ÉNOEG' øe πc ¢†eƒj):∫hC’G Ëó≤à∏d ºéM ¢Vô©dG á°TÉ°T ¢Vô©J .(äÉHhô°ûŸG ,∫ÉãŸG
:((QTY.) ' ᫪µdG'' (ENTER)
Ëó≤àdG ΩÉéMCG áaÉc á°TÉ°ûdG ¢Vô©J .√ójôJ …òdG Ëó≤àdG ºéM QÉ«àN’ QõdG ≈∏Y §¨°†dG Qôc 2
.»FÉ≤∏J πµ°ûH »¡£dG ∞jhhôµ«ŸG CGóÑj ,í«ë°üdG Ëó≤àdG ºéM ójó– óæY .IôaƒàŸG
.á≤«bO πc ¬«ÑæJ 䃰U ¿ôØdG Qó°üj ºK .»¡£dG âbh AÉ¡àfG Oôéà ¬«ÑæJ 䃰U ¿ôØdG Qó°ü«°S
ΩÉ©£dG ´ƒf
¿RƒdG
äɶMÓe
A-5
.AÉ£Z ¿hóH ∑Îj ;QÉ«©∏d ‘õN ܃c hCG ¢SÉ«b ܃c Ωóîà°SG
.¿ôØdG ‘ ÜGô°ûdG ™°V
.Úî°ùàdG ó©H kGó«L Ö∏b
™e ∞jhhôµ«ŸG ‘ ¬eGóîà°SÉH 샪°ùe ≥ÑW ‘ Gõà«ÑdG ™°V
.≥Ñ£dG áaÉM √ÉŒ Gõà«ÑdG íFGô°ûd á°†jô©dG ±GôWC’G π©L
.É¡«£¨J ’h .É¡°†©H ¥ƒa íFGô°ûdG ™°†J ’
.Ëó≤àdG πÑb ÚàæKG hCG á≤«bO IóŸ É¡côJG
A-6
•
•
•
•
•
•
܃c ∞°üf
܃c
¿ÉHƒc
áëjô°T
¿Éàëjô°T
íFGô°T 3
íFGô°T 4
äÉHhô°ûŸG
Gõà«ÑdG Úî°ùJ
(Rice/Pasta) ''äÉæé©ŸG/RQC’G'' QGQRCG ΩGóîà°SG
õdOƒædG
AÉŸG
™e ¬eGóîà°SÉH 샪°ùe AÉfEG ‘ Í∏dG hCG AÉŸGh ±É÷G ¿Éaƒ°ûdG ™°V
:¿Éaƒ°ûdG »ØµJ ᫪c Ió«°ü©dG
ºb ,¬«ÑæJ 䃰U ¿ôØdG QGó°UEG ó©H .¬à«£¨J ¿hO ¬«¡£H ºbh ∞jhhôµ«ŸG IQGôM áLQO ¢üî°T 2-1
ºb ,»¡£dG AÉ¡àfG ó©H .á©HÉàª∏d (start) ' 𫨰ûJ'' §¨°VG ºK kGó«L ¬Ñ«∏≤àH
áaô¨dG
.¬æe …ƒ∏©dG Aõ÷G ≈∏Y »æH ôµ°S hCG π°ùY ™°V ºK kGó«L ¬Ñ«∏≤àH OQÉH:Í∏dGh AÉŸG
•
.¬«¡£H Ωƒ≤J …òdG ΩÉ©£dG ´ƒæd πHÉ≤ŸG (Rice/Pasta) ''äÉæé©ŸG/QRC’G'' QõdG ≈∏Y .1
.(ΩÉ©£dG ´ƒf õeQ) "A-1" á°TÉ°ûdG ¢Vô©J
.√ójôJ …òdG ΩÉ©£dG ´ƒf ójóëàd Qôµàe πµ°ûH (Rice/Pasta) ''äÉæé©ŸG/QRC’G' QõdG ≈∏Y §¨°VG
(√ÉfOCG ' äÉæé©ŸG/RQC’G äÉÑLh ∫hóL'' ™LGQ)
.√ójôJ …òdG Ëó≤àdG ºéM ójóëàd 3 hCG 2 hCG 1 ΩÉbQC’G QGQRCG ≈∏Y §¨° .2
(Ëó≤àdG ΩÉéMCG áaô©Ÿ √ÉfOCG ' äÉæé©ŸG/RQC’G äÉÑLh ∫hóL'' ™LGQ)
.»¡£dG AóÑd (Start) ''𫨰ûJ'' QõdG ≈∏Y §¨°VG .3
A-7
7
ME6124ST
6/7/06
11:19 AM
Page 8
𫨰ûàdG
∑ɪ°SC’G/Ωƒë∏dG äÉÑLh ∫hóL
(Meat/Fish) ''∑ɪ°SC’G/Ωƒë∏dG'' QGQRCG ΩGóîà°SG
¢Vô©J .¬«¡£H Ωƒ≤J …òdG ΩÉ©£dG ´ƒæd πHÉ≤ŸG (Meat/Fish) ''∑ɪ°SC’G/Ωƒë∏dG'' QõdG ≈∏Y §¨°VG .1
.(ΩÉ©£dG ´ƒf õeQ) "A-1" á°TÉ°ûdG
…òdG ΩÉ©£dG ´ƒf ójóëàd Qôµàe πµ°ûH (Meat/Fish) ''∑ɪ°SC’G/Ωƒë∏dG''' QõdG ≈∏Y §¨°VG
(√ÉfOCG ' ∑ɪ°SC’G/Ωƒë∏dG äÉÑLh ∫hóL' ™LGQ) .√ójôJ
.√ójôJ …òdG Ëó≤àdG ºéM ójóëàd 3 hCG 2 hCG 1 ΩÉbQC’G QGQRCG ≈∏Y §¨°VG .2
(Ëó≤àdG ΩÉéMCG áaô©Ÿ √ÉfOCG ' ∑ɪ°SC’G/Ωƒë∏dG äÉÑLh ∫hóL'' ™LGQ)
.»¡£dG AóÑd (Start) ''𫨰ûJ'' QõdG ≈∏Y §¨°VG .3
äɶMÓe
IQGô◊G áLQO
¿RƒdG
ΩÉ©£dG ´ƒf ƒµdG
á«dhC’G
O
™e ¬eGóîà°SÉH 샪°ùe ≥ÑW ≈∏Y É¡©°Vh áLRÉ£dG ájôëÑdG ᪩WC’G ÎNG
è∏ãe ΩGôL 200 -150 ᪩WC’G A-3
Ö°ùM í∏e hCG ¿ƒª«d Ò°üY É¡«∏Y ÌfG .¢ùcÒH ≥ÑW hCG ∞jhhôµ«ŸG
ΩGôL 300 -250 ájôëÑdG
≈∏Y kÉ©e É¡©°Vh - óHõdG ¥Qh πãe õÑN ¥QƒH É¡à«£¨àH ºb ºK ,áLÉ◊G
ΩGôL 400-350
3 IóŸ ΩÉ©£dG ∑ôJG »¡£dG ó©H .É¡«¡£H ºb ºK ≥Ñ£dG ‘ IôFGO πµ°T
.Ëó≤àdÉH ºb ºK .≥FÉbO
.øLÉ£dG äÉfƒµe
è∏ãe
óMGh ≥ÑW øLÉ£dG A-4
,(Ò°û≤àdG πÑb ΩGôL 110 ¤EG 85 øe) ºé◊G ¿ÉࣰSƒàe QõL ¿ÉJôªK
,(Ò°û≤àdG πÑb ΩGôL 140 ¤EG 110 øe) ºé◊G ¿ÉࣰSƒàe π°üH ¿ÉJôªK
πÑb ΩGôL 195 ¤EG 165 øe) ºé◊G ¿ÉࣰSƒàe ¢ùWÉ£H ¿ÉJôªK
,IÒ¨°U í∏e á≤©∏e ,ΩhôØŸG …ô≤ÑdG ∞àµdG º◊ øe ΩGôL 450 ,Ò°û≤àdG
íFGô°T ¤EG É¡©£bh äGhGô°†ÿG ô°ûb .πØ∏a IÒ¨°U á≤©∏e ,AÉe ܃c
áëjô°T 12 ¤EG …ô≤ÑdG ºë∏dG π«µ°ûàH ºb ºK ,IóMGh á°UƒH É¡µª°S
¿ƒµàj »àdG ™«£≤àdG á≤∏M ΩGóîà°SÉH πµ°ûdG Iôjóà°ùeh á룰ùeh IÒ¨°U
øLÉW ‘ .ºë∏dG íFGô°T í£°S ájƒ°ùàH ∂dP ó©H ºb .á°UƒH 2 øe É¡µª°S
QɪK ∞°üfh …ô≤ÑdG ºë∏dG íFGô°T ∞°üf ™°V ,¿ƒdÉL ∞°üf ¬ªéM
iôNCG äÉ≤ÑW ™°V .πØ∏ØdGh í∏ŸG ∞°VCGh .¢ùWÉ£ÑdGh π°üÑdGh Qõ÷G
kÉeÉ“ IÉ£¨e …ô≤ÑdG ºë∏dG íFGô°T øe É«∏©dG á≤Ñ£dG ¿CG øe ócCÉJh ,á∏Kɇ
ºb ºK .øLÉ£dG πØ°SCG ¤EG äÉ≤Ñ£dG §¨°VG .AÉŸG ∞°VCG .äGhGô°†ÿÉH
.Ëó≤àdÉH ºb ºK .≥FÉbO 5 IóŸ øLÉ£dG ∑ôJG ,»¡£dG ó©Hh .É¡à«£¨àH
hCG ᪩WC’G ôéàe hCG QGõ÷G øe êRÉ£dG Oó≤ŸG ôjõæÿG º◊ íFGô°T ÎNG
™e ¬eGóîà°SÉH 샪°ùe ≥ÑW ≈∏Y á°UÉe á«bQh áWƒa ™°V .âcQÉe ôHƒ°ùdG
,iôNCG á«bQh áWƒa ΩGóîà°SÉH á«£¨àdÉH ºbh ¢ùcÒH ≥ÑW hCG ∞jhhôµ«ŸG
.Ëó≤àdÉH ºb ºK .»¡£dÉH ∂dP ó©H ºbh
.ºë∏dG äGôc äÉfƒµe
,™£≤oŸG π°üÑdG øe ܃ch ,ΩhôØŸG …ô≤ÑdG ºë∏dG øe øe ΩGôL 450
Úà≤©∏e ,πØ∏ØdG øe IÒ¨°U á≤©∏eh ,í∏ŸG øe IÒ¨°U á≤©∏e ,ábƒØfl á°†«Hh
ºb ºK .Gók «L É¡Ñ«∏≤àH ºbh äÉfƒµŸG ∂∏J áaÉc §∏NG .AÉŸG øe ÚJÒÑc
äGôc ™°V .(»∏∏e 25) * 20 É¡ªéM º◊ äGôc áÄ«g ≈∏Y É¡∏«µ°ûàH
∑ôJ ™e …QGô◊G ∞jhhôµ«ŸG ¥Qh øe ábÉbôH É¡à«£¨àH ºb .AÉfEG ‘ ºë∏dG
5 IóŸ É¡côJG ,»¡£dG ó©Hh .ájƒ¡à∏d »∏∏e 50 ‹GƒM É¡ªéM áëàa
.Ëó≤àdÉH ºb ºK .≥FÉbO
.ºë∏dG ∞«ZQ äÉfƒµe
õÑÿG äGô°ùc øe ܃c ,ΩhôØŸG …ô≤ÑdG ∞àµdG º◊ øe ΩGôL 675
܃c ,™£≤oŸG ô°†NC’G πØ∏ØdG øe ܃c ,™£≤oŸG π°üÑdG øe ܃c ,∞ØÛG
á≤©∏e ,πØ∏a IÒ¨°U á≤©∏e ,ÜÉ°ûJɵdG øe ÚJÒÑc Úà≤©∏e ,á°†«H ,Íd
§«∏N ™°V .kGó«L É¡£∏NGh :äÉfƒµŸG ∂∏J áaÉc §∏NG .í∏e IÒ¨°U
¬ë£°S 󫡪àH ºb :∞«ZQ áÄ«g ≈∏Y íÑ°ü«d ¬∏«µ°ûàH ºbh ≥ÑW ‘ ºë∏dG
2 ‹GƒM É¡ªéM áëàa ∑ôJ ™e ∂«à°SÓÑdG øe AÉ£¨H ¬à«£¨àH ºbh .…ƒ∏©dG
,»¡£dG ó©H .¿ôØdG áeó≤Ÿ …RGƒe πµ°ûH ¿ôØdG ‘ ¬©°V .ájƒ¡à∏d á°UƒH
.Ëó≤àdÉH ºb ºK .≥FÉbO 5 IóŸ ¬côJG
è∏ãe ΩGôL 125 -100
ΩGôL 225-200
ΩGôL 325-300
º◊
ôjõæÿG
Oó≤ŸG
A-5
è∏ãe
óMGh ≥ÑW
äGôc
ºë∏dG
A-6
è∏ãe
óMGh ≥ÑW
∞«ZQ
ºë∏dG
A-7
∑ɪ°SC’G/Ωƒë∏dG äÉÑLh ∫hóL
äɶMÓe
IQGô◊G áLQO
¿RƒdG
ΩÉ©£dG ´ƒf
á«dhC’G
ΩGóîà°SÉH ¥ƒ≤°T 4 - 3 øe É¡≤°ûH ºbh áLRÉ£dG êÉLódG Qhó°U ÎNG è∏ãe
250 -200
Qhó°U
É¡©≤fG hCG …OÉY πµ°ûH É¡«¡£H ºb ºK ,Qó°üdG OGóàeG ≈∏Y IOÉM Úµ°S
ΩGôL
êÉLódG
‘ IÉ£¨e »gh π«∏dG ∫GƒW hCG ÚàYÉ°S IóŸ ∂jód á∏°†ØŸG πHGƒàdG ‘ k’hCG
350 -300
í∏ŸG πHGƒJ hCG ¿ƒª«∏dG Ò°üY hCG Éjƒ°üdG ∫ƒa á°ü∏°U É¡«∏Y ÌfG hCG .áLÓãdG
ΩGôL
‘ kÉ©«ªL É¡©°Vh õÑN ¥QƒH Qhó°üdG »£Z ºK .∂jód á∏°†ØŸG πØ∏ØdG hCG
450 -400
,»¡£dG âbh ∞°üf Qhôe ó©H .É¡«¡£H ºbh ¢ùcÒH ≥ÑW hCG …OÉY ≥ÑW
ΩGôL
(start) ' 𫨰ûJ'' §¨°VG ºK Qhó°üdG Ö«∏≤àH ºb - ¬«ÑæJ 䃰U ¿ôØdG Qó°üj
.Ëó≤àdÉH ºb ºK .≥FÉbO 5-3 IóŸ É¡côJG ,Qhó°üdG »¡W ó©H .á©HÉàª∏d
AÉŸG ‘ É¡©≤fG hCG …OÉY πµ°ûH É¡«¡£H ºbh áLRÉ£dG ∂ª°ùdG íFGô°T ÎNG
ÌfG hCG .áLÓãdG ‘ IÉ£¨e »gh π«∏dG ∫GƒW hCG ÚàYÉ°S IóŸ πÿG hCG ídÉŸG
hCG ∞ØÛG ¿ƒª«∏dG ká°UÉN ∂jód á∏°†ØŸG πHGƒàdG hCG ¿ƒª«∏dG Ò°üY É¡«∏Y
‘ kÉ©«ªL É¡©°Vh õÑN ¥QƒH ∂ª°ùdG íFGô°T »£Z ºK .πØ∏ØdG hCG í∏ŸG
,∂ª°ùdG íFGô°T »¡W ó©H .É¡«¡£H ºbh ¢ùcÒH ≥ÑW hCG …OÉY ≥ÑW
.Ëó≤àdÉH ºb ºK .≥FÉbO 3 IóŸ É¡côJG
8
è∏ãe
200-150
ΩGôL
300-250
ΩGôL
400-350
ΩGôL
íFGô°T
∂ª°ùdG
OĵdG
A-1
A-2
ME6124ST
6/7/06
11:19 AM
Page 9
𫨰ûàdG
(Snack Bar) ''áØ«ØN äÉÑLh'' QõdG ΩGóîà°SG
¢Vô©J .¬«¡£H Ωƒ≤J …òdG ΩÉ©£dG ´ƒæd πHÉ≤ŸG (Snack Bar) ''áØ«ØN äÉÑLh'' QõdG ≈∏Y §¨°VG .1
.(ΩÉ©£dG ´ƒf õeQ) ''A-1'' á°TÉ°ûdG
…òdG ΩÉ©£dG ´ƒf ójóëàd Qôµàe πµ°ûH (Snack Bar) ''áØ«ØN äÉÑLh'' QõdG ≈∏Y §¨°VG
(√ÉfOCG ' áØ«ØÿG äÉÑLƒdG ∫hóL'' ™LGQ) .√ójôJ
§≤a 1 QõdG ôaƒàj .√ójôJ …òdG Ëó≤àdG ºéM ójóëàd 3 hCG 2 hCG 1 ΩÉbQC’G QGQRCG ≈∏Y §¨°VG .2
Ó«JQƒà∏d (Ëó≤àdG ºéM)
.(Ëó≤àdG ΩÉéMCG áaô©Ÿ √ÉfOCG ' áØ«ØÿG äÉÑLƒdG ∫hóL' ™LGQ)
.»¡£dG AóÑd (Start) ' 𫨰ûJ'' QõdG ≈∏Y §¨°VG .3
è∏ã∏d ᫵«JÉeƒJCG ádGREG
iƒà°ùeh ó«ªéàdG ∂a âbh §Ñ°†H ∞jhhôµ«ŸG Ωƒ≤jh ΩÉ©£dG ¿Rh §Ñ°VG ,IóªÛG ᪩WC’G áHGPE’
.Qɶàf’G âbhh ábÉ£dG
.á°TÉ°ûdG ≈∏Y ' 1' ô¡¶j .(Auto Defrost) ''è∏ã∏d ᫵«JÉeƒJCG ádGREG'' QõdG ≈∏Y §¨°VG .1
.((ΩGôLƒ∏«c) ''kg''h (∫ÉNOEG) "ENTER" øe πc ¢†eƒj)
kÉ°†jCG ∂æµÁ ɪc .Qôµàe πµ°ûH ''è∏ã∏d ᫵«JÉeƒJCG ádGREG'' QõdG ≈∏Y §¨°VG ,ΩÉ©£dG ´ƒf §Ñ°†d .2
.kIô°TÉÑe. ΩÉ©£dG ¿Rh ∫ÉNOE’ ΩÉbQC’G QGQRCG ΩGóîà°SG
.(õÑÿG AÉæãà°SÉH) ΩGôLƒ∏«c 2 ¤EG π°üj ≈°übCG óëH ¿RƒdG ójó– øµÁ
Qó°ü«°Sh ,ó«ªéàdG ∂a AÉæKCG »¡£dG âbh á°TÉ°ûdG ¢Vô©à°S .(𫨰ûJ) Start QõdG ≈∏Y §¨°VG .3
.ΩÉ©£dG Ö∏≤H ∑Òcòàd ¬«ÑæJ 䃰U ¿ôØdG
.ΩÉ©£dG Ö∏bGh ,¿ôØdG ÜÉH íàaG .4
.ó«ªéàdG ∂a ±ÉæÄà°S’ ' 𫨰ûJ'' QõdG ≈∏Y §¨°VG .5
è∏ã∏d ᫵«JÉeƒJCG ádGREG π«dO ¤EG ´ƒLô∏d 13 áëØ°U ô¶fG
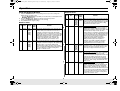
áØ«ØÿG äÉÑLƒdG ∫hóL
äɶMÓe
IQGô◊G áLQO
á«dhC’G
¢ù«c êôNCGh ,Ó«JQƒàdG ¢ù«c øe …ƒ∏©dG Aõ÷G ¢üb
è∏ãe
QGhódG ¢Uô≤dG §°Sh ‘ Ó«JQƒàdG ¢ù«c ™°V ºK ,ᡵædG
Ó«JQƒàdG Ωóîà°SG .Úî°ùàdÉH ºb .kIô°TÉÑe ∞jhhôµ«ŸÉH
.áLÉ◊G Ö°ùM kGQƒa áæNÉ°ùdG
ºb ºK .IôFGO πµ°T ≈∏Y ≥ÑW ‘ áëæLC’G ™°V
è∏ãe
.»©ª°ûdG ¥QƒdÉH É¡à«£¨àH
≥ÑW ≈∏Y ∞jhhôµ«ŸG ¿ôa ‘ IóªÛG ôFÉ£ØdG ™°V
Ióª›
¢ùcÒH ≥ÑW hCG ∞jhhôµ«ŸG ™e ¬eGóîà°SÉH 샪°ùe
ôFÉ£ØdG ∑ôJG »¡£dG ó©H .Úî°ùàdÉH ºbh .≈£¨e ÒZ
.Ëó≤àdÉH ºb ºK .IóMGh á≤«bO IóŸ
᪩WCG äÉfɪWôH øe …ƒ∏©dG Êó©ŸG Aõ÷G ´õfG IQGôM áLQO
AÉ£¨dG ´õfG .áaô¨dG IQGôM áLQO ‘ ∫ÉØWC’G
áaô¨dG
∫óÑà°SGh ,äÉfɪWÈdG øe Êó©ŸG AÉ£¨dGh »µ«à°SÓÑdG
¿ÉªWÈdG ™°V .Êó©ŸG AÉ£¨dG øe ¢ü∏îàdG ™e ,AÉ£¨dG
≈∏Y ∞jhhôµ«ŸG §Ñ°VGh QGhódG ¢Uô≤dG §°Sh ‘
IQGô◊G áLQO ¤EG π°üJ ≈àM ≈∏YCG ábÉW iƒà°ùe
.Ëó≤àdÉH ºb ºK .kGó«L Ö«∏≤àdÉH ºbh .áHƒ∏£ŸG
(More/Less) ' ¢UÉ≤fEG/IOÉjR'' ìÉàØŸG ΩGóîà°SG øµÁ ’
.∫ÉØWC’G ΩÉ©£H ¢UÉÿG ìÉàØŸG ™e
¿ôa ‘ É¡©°Vh IƒÑ©dG øe ΩƒãdG ÈN ™£b êôNCG
è∏ãe
™e ¬eGóîà°SÉH 샪°ùe ≥ÑW ≈∏Y ∞jhhôµ«ŸG
∑ôJG ,»¡£dG ó©H.¢ùcÒH ≥ÑW hCG ∞jhhôµ«ŸG
óHõdG áHGPEG ºàJ ≈àM ≥FÉbO 3 IóŸ ΩƒãdG õÑN ™£b
.Ëó≤àdÉH ºb ºK .πeɵdÉH §°ShC’G Aõ÷G ‘
êÉLódG ™£b ÖJQh ≥ÑW ¥ƒa á«bQh áWƒa ™°V
è∏ãe
.É¡«£¨J ’h .á«bQƒdG áWƒØdG ≈∏Y IôFGO πµ°T ≈∏Y
.≥FÉbO 1 IóŸ É¡côJGh
™£b ´õfGh .ájhÉ°ùàe AGõLCG 4 ¤EG ¢ùWÉ£ÑdG ™ q£b IQGôM áLQO
.Iô°û≤dG ‘ á°UƒH 1^4 ‹GƒM kÉcQÉJ ,¢ùWÉ£ÑdG
áaô¨dG
ºK ,IôFGO πµ°T ≈∏Y ≥ÑW ‘ ¢ùWÉ£ÑdG ô°ûb ™°V
§Ñ°VG .Í÷Gh π°üÑdGh ∞ØÛG ºë∏dG ÌfG
ºàJ ≈àM ábÉ£∏d iƒà°ùe ≈∏YCG ≈∏Y ∞jhhôµ«ŸG
.Í÷G áHGPEG
•
Úî°ùà∏d ᫵«JÉeƒJhCG IOÉYEG
§Ñ°†H kÉ«FÉ≤∏J ∞jhhôµ«ŸG Ωƒ≤«°Sh ,É¡æ«î°ùJ OGôŸG ¥ÉÑWC’G OóYh ≥Ñ£dG ´ƒf OóM ,ΩÉ©£dG Úî°ùàd
.Úî°ùàdG âbh
≥Ñ£dG ´ƒf ójóëàd Qôµàe πµ°ûH (Auto Reheat) ''Úî°ùà∏d ᫵«JÉeƒJhCG IOÉYEG'' QõdG ≈∏Y §¨°VG .1
.óMGh ¢üî°T »ØµJ ᫪c ƒg ≥ÑW πµd ‹hC’G Ëó≤àdG ºéM ¿ƒµj .¬æ«î°ùJ OGôŸG
ôaƒàj .RQC’G Úî°ùJh äÉæé©ŸG Úî°ùJh øLÉ£∏d ÚLÉæa á©HQCG ¤EG π°üJ ᫪c ójó– ∂æµÁ
.ΩÉ©W ≥Ñ£d §≤a óMGh Ëó≤àdG QÉ«N
.ÉgQÉ«àNÉH âªb »àdG ᫪µdGh ≥Ñ£dG á°TÉ°ûdG ¢Vô©J
§¨°VG ,¢UÉî°TCG 3 »ØµJ ᫪µd áÑ°ùædÉH ,∫ÉãŸG π«Ñ°S ≈∏Y .Ëó≤àdG ºéM IOÉjõd ΩÉbQC’G QGQRCG Ωóîà°SG .2
OóY á°TÉ°ûdG ¢Vô©J .(Ëó≤àdG ΩÉéMCÉH ¢UÉÿGh √ÉfOCG OƒLƒŸG »FÉ≤∏àdG Úî°ùàdG ∫hóL ™LGQ) 3 QõdG ≈∏Y
:ÉgójóëàH âªb »àdG ¥ÉÑWC’G
.''»¡£dG âbh'' á°TÉ°ûdG ¢Vô©à°S .(𫨰ûJ) Start QõdG ≈∏Y §¨°VG .3
Úî°ùà∏d ᫵«JÉeƒJCG IOÉYEG ∫hóL
äɶMÓe
¿RƒdG
.áé∏ãŸG kÉ≤Ñ°ùe á«¡£ŸG ᪩WC’G §≤a Ωóîà°SG
¥QƒdG hCG ∂«à°SÓÑdG ¥Qh øe AÉ£¨H ≥Ñ£dG »£Z
.ájƒ¡J äÉëàa ¬H »©ª°ûdG
äÉjƒàÙG
hCG øLGhódG hCG Ωƒë∏dG øe ΩGôL 110-85 (º¶©dÉH ΩGôL 170 ≈àMh) ∑ɪ°SC’G
,¢ùWÉ£ÑdG) ájƒ°ûædG OGƒŸG øe ܃c 2/1 (∂dP ÒZh ,RQC’G ,äÉæé©ŸG
110-85 ‹GƒM) äGhô°†ÿG øe ܃c 2/1 (ΩGôL
•
•
.§≤a áé∏ãŸG ᪩WC’G Ωóîà°SG
äÉëàa ¬H »µ«à°SÓH AÉ£¨H ¬à«£¨àH ºb
.ájƒ¡J
.Ëó≤àdG πÑb kGó«L ΩÉ©£dG Ö∏b
•
•
1 Ëó≤J ºéM
OĵdG
ΩÉ©£dG ´ƒf
A-1
ΩÉ©£dG ≥ÑW
•
ÜGƒcCG 4-1
•
A-2
øLÉ£dG
A-3
A-4
äÉæé©ŸG
RQC’G
A-5
Ö∏©ŸG AÉ°ù◊G
9
¿RƒdG
ΩÉ©£dG ´ƒf
OĵdG
ΩGôL 400
Ó«JQƒàdG A-1
™£b 5-4
™£b 10-8
ΩGôL 60 -50
ΩGôL 110 -100
ΩGôL 160 -150
áëæLCG A-2
êÉLódG
ôFÉ£ØdG A-3
IóªÛG
ΩGôL 70 ∫ÉØWC’G ΩÉ©W A-4
ΩGôL 110
ΩGôL 170
ΩGôL 200
ΩGôL 400
ΩGôL 600
ΩƒãdG õÑN A-5
™£b 4 êÉLódG ™£b A-6
™£b 8
™£b 4 ¢ùWÉ£ÑdG ™£b A-7
™£b 8
ME6124ST
6/7/06
11:19 AM
Page 10
𫨰ûàdG
(More/Less) ''πbCGEG/ÌcCG'' øjQõdG ΩGóîà°SG
ábÉ£dG äÉjƒà°ùeh »¡£dG äÉbhCG §Ñ°V
§≤a ɪ¡eGóîà°SG ºàj .kÉ≤Ñ°ùe áæ«©e »¡W äÉbhCG §Ñ°†H (More/Less) ''πbCG/ÌcCG'' ¿GQõdG ∂d íª°ùj
''Úî°ùà∏d ᫵«JÉeƒJhCG IOÉYEG''h ''áØ«ØÿG äÉÑLƒdG''h ''∑ɪ°SC’G/Ωƒë∏dG''h ''äÉæé©ŸG/RQC’G'' »¡W ´É°VhCG ‘
''πbCG/ÌcCG'' ¿GQõdG Ωóîà°ùj ɪc .''ïÑ£ŸG âbDƒe §Ñ°V''h ''»¡£dG Ióe''h ''äÉHhô°ûŸG''h ''Gõà«ÑdG Úî°ùJ''h
.äGAGôLE’G ∂∏J óMCG ΩGóîà°SÉH π©ØdÉH »¡£dG äCGóH ób ¿ƒµJ ¿CG ó©H §≤a (More/Less)
''¢ùÛG ΩGóîà°SÉH »¡£dG'' QõdG ΩGóîà°SG AÉæKCG (More/Less) ''πbCG/ÌcCG'' á«°UÉN ΩGóîà°SG øµÁ ’h
iƒà°ùeh á«æeR IÎØH Ohõe É¡æe πc ,»¡£dG øe ÚàØ∏àfl Úà∏MôŸ OGóYE’ÉH ∞jhhôµ«ŸG ∂d íª°ùj
.(0) ‹ÉY ¤EG (1) ÅaGO øe IQGô◊G Ió°T ‘ ºµëàdG ábÉ£dG QR ∂d í«àjh .¬H Ú°UÉN ábÉW
IóMGh á∏Môe ≈∏Y »¡£dG
iƒà°ùe §Ñ°V ºàj .»¡£∏d âbh §Ñ°V ¤EG §≤a êÉà– ,IóMGh Iƒ£N øe ᣫ°ùH »¡W á«∏ªY ò«Øæàd
¬æ««©J Öéj ,ôNBG iƒà°ùe …CG ¤EG ábÉ£dG Ú«©J ‘ ÖZôJ âæc GPEG .kÉ«FÉ≤∏J ' ‹ÉY'' iƒà°ùŸG ¤EG ábÉ£dG
.(Power Level) ' ábÉ£dG iƒà°ùe' QõdG ΩGóîà°SÉH
≈àMh IóMGh á«fÉK øe kAóH á«æeR IÎa …CG §Ñ°V ∂æµÁ .»¡£dG âbh §Ñ°†d ΩÉbQC’G QGQRCG Ωóîà°SG 1
.0 ,0 ,0 ,2 ΩÉbQC’G πNOCG ,á≤«bO 20 §Ñ°†d ,∫ÉãŸG π«Ñ°S ≈∏Y .á«fÉK 99h á≤«bO 99
iƒà°ùe' QõdG §¨°VG ,''‹ÉY'' iƒà°ùŸG ÒZ iƒà°ùe ¤EG ábÉ£dG iƒà°ùe §Ñ°V ‘ ÖZôJ âæc GPEG 2
.ábÉW iƒà°ùe ∫ÉNOE’ ΩÉbQC’G QGQRCG Ωóîà°SG ºK ,(Power Level) ' ábÉ£dG
.(Sensor Cook)
.(Auto Defrost) ''è∏ã∏d ᵫJÉeƒJhCG ádGREG'' QõdG ™e (More/Less) ''πbCGEG/ÌcCG'' QõdG ΩGóîà°SG øµÁ ’
.(9) ''IOÉjR'' QõdG ≈∏Y §¨°VG :»FÉ≤∏J »¡W AGôLEG ¤EG âbƒdG øe ójõŸG áaÉ°VE’ .1
.(1) ''¢UÉ≤fEG'' QõdG ≈∏Y §¨°VG :»FÉ≤∏J »¡W AGôLEG âbh π«∏≤àd .2
,¿GƒK 10 QGó≤à ''ïÑ£ŸG âbh §Ñ°V'' ,''»¡£dG Ióe'' ™°VƒdG ‘ π«∏≤àdG/IOÉjõdG ‘ ÖZôJ âæc GPEG
' (1)¢UÉ≤fEG' hCG ' (9)IOÉjR'' øjQõdG ≈∏Y §¨°VG
¬«ÑæàdG äGƒ°UCG QGó°UEG Iõ«e 𫨰ûJ ±É≤jEG/𫨰ûJ
:ábÉ£dG äÉjƒà°ùe
.ójôJ ɪæ«M ¬«ÑæàdG äGƒ°UCG QGó°UEG Iõ«e 𫨰ûJ ±É≤jEG ∂æµÁ
.¢Vô©dG á°TÉ°T ≈∏Y (ON) ' 𫨰ûJ'' ô¡¶j .(Sound) ''䃰U'' QõdG ≈∏Y §¨°VG .1
((START) ' 𫨰ûJ'' QõdG ¢†eƒj)
¢Vô©J .(Sound) ''䃰U'' QõdG ≈∏Y §¨°VG ,iôNCG Iôe 䃰üdG 𫨰ûJ ±É≤jE’ .2
(START) ''𫨰ûJ'' QõdG ¢†eƒj .𫨰ûàdG ±É≤jEÉH ºb (OFF) ' ±É≤jEG' :á°TÉ°ûdG
âbƒdG ¢Vô©d á°TÉ°ûdG Oƒ©J (START) ''𫨰ûJ'' QõdG ≈∏Y §¨°VG .3
(kIô°TÉÑe ¿É«∏¨dG á£≤f â–) 60:ábÉ£dG iƒà°ùe = 6
(ÅaGO) 10:ábÉ£dG iƒà°ùe = 1
(‹ÉY §°Sƒàe) 70:ábÉ£dG iƒà°ùe = 7
(¢†Øîæe) 20:ábÉ£dG iƒà°ùe = 2
(Úî°ùJ) 80:ábÉ£dG iƒà°ùe = 8
(ó«ªéàdG ∂a) 30:ábÉ£dG iƒà°ùe = 3
(¬«Jƒ°S) 90:ábÉ£dG iƒà°ùe = 9 (¢†Øîæe §°Sƒàe) 40:ábÉ£dG iƒà°ùe = 4
(‹ÉY) ‹ÉY :ábÉ£dG iƒà°ùe = 0
(§°Sƒàe) 50:ábÉ£dG iƒà°ùe = 5
QõdG §¨°VG ,ábÉ£dG iƒà°ùe Ò«¨J ‘ ÖZôJ âæc GPEG .»¡£dG AóÑd (Start) ' 𫨰ûJ' QõdG §¨°VG 3
.äGOÉ°TQE’G áaÉc ∫ÉNOEG óYCGh ,(Start) ' 𫨰ûJ' §¨°V πÑb (Pause/Cancel) ''AɨdEG/âbDƒe ∞«bƒJ''
§Ñ°V ∂æµÁ .áØ∏àfl IQGôM äÉLQO â– »¡£dG øe áØ∏àfl πMGôe »¡£dG äÉØ°Uh ¢†©H Ö∏£àJ
.∞jhhôµ«ŸÉH »¡£dG øe πLGôe IóY
ïÑ£ŸG âbDƒe ΩGóîà°SG
.(Kitchen Timer) ''ïÑ£ŸG âbDƒe'' QõdG ≈∏Y §¨°VG
.ÉgójôJ »àdG á«æeõdG IÎØdG §Ñ°†d ΩÉbQC’G QGQRCG Ωóîà°SG
.(Kitchen Timer) ' ïÑ£ŸG âbDƒe'' 𫨰ûàd (Start) ''𫨰ûJ'' §¨°VG
.âbƒdG AÉ°†≤fG óæY ¬«ÑæJ 䃰U Qó°üjh á°TÉ°ûdG ≈∏Y ‹RÉæàdG ó©dG CGóÑj
.''ïÑ£ŸG âbDƒe'' ΩGóîà°SG AÉæKCG ∞jhhôµ«ŸG 𫨰ûJ øµÁ ’ :á¶MÓe
.1
.2
.3
.4
πMGôe IóY ≈∏Y »¡£dG
.á≤HÉ°ùdG áëØ°üdG ‘ ' IóMGh á∏Môe ≈∏Y »¡£dG'' Aõ÷G øe 2 h 1 ÚJƒ£ÿG ™ÑJG 1
' ábÉ£dG iƒà°ùe' QõdG §¨°V Öéj ,IóMGh »¡W á∏Môe øe ÌcCG ∫ÉNOEG óæY
.á«fÉãdG »¡£dG á∏Môe ¤EG ∫ƒNódG øe øµªàJ ¿CG πÑb (Power Level)
' ábÉ£dG iƒà°ùe' QõdG §¨°VG ,áæ«©e »¡W á∏MôŸ ' ‹ÉY'' iƒà°ùŸG ≈∏Y ábÉ£dG iƒà°ùe §Ñ°†d
.ÚJôe (Power Level)
.ÊÉK »¡W âbh §Ñ°†d ΩÉbQC’G QGQRCG Ωóîà°SG 2
ábÉ£dG iƒà°ùe §Ñ°†d ΩÉbQC’G QGQRCG Ωóîà°SG ºK ,(Power Level) ' ábÉ£dG iƒà°ùe' QõdG §¨°VG 3
.á«fÉãdG »¡£dG á∏MôŸ
.»¡£dG AóÑd (Start) ' 𫨰ûJ' QõdG §¨°VG 4
.(Power Level) ''ábÉ£dG iƒà°ùe'' QõdG §¨°V ᣰSGƒH »¡£dG AÉæKCG ' ábÉ£dG iƒà°ùe'' øe ≥≤ëàdG ∂æµÁ
∫ÉØWC’G ájɪ◊ ÚeCÉàdG §Ñ°V
.∂aGô°TEG ¿hO ¬eGóîà°SG øe ∫ÉØWC’G øµªàj ’ ≈àM ∞jhhôµ«ŸG ¿ôa ÚeCÉJ ∂æµÁ
(ÚeCÉJ) "Loc" ô¡¶j .''2' QõdG ≈∏Y §¨°VG ºK §¨°†dG ‘ QGôªà°S’G ™e ' 0' QõdG ≈∏Y §¨°VG .1
.¢Vô©dG á°TÉ°T ≈∏Y
.√ÓYCG IQƒcòŸG Iƒ£ÿG Qôc ,¬æ«eCÉJ AɨdE’ .¬æ«eCÉJ AɨdEG ºàj ≈àM ¿ôØdG ΩGóîà°SG øµÁ ’ ,∂dP ó©H
¢Vô©dG ™°Vh
.¬æ«î°ùJ ¿hO ∞jhhôµ«ŸG ¿ôa πª©j ∞«c áaô©Ÿ ' ¢Vô©dG ™°Vh'' ΩGóîà°SG øµÁ
.1
.√ÓYCG 1 Iƒ£ÿG Qôc ,¢Vô©dG ™°Vh 𫨰ûJ ±É≤jE’
E
E
E E
D
10
ME6124ST
6/7/06
11:19 AM
Page 11
»¡£dG äGOÉ°TQEG
»¡£dG Ö«dÉ°SCG
»¡£dG ÊGhCG
Ö«∏≤àdG
É¡eGóîà°SÉH ≈°UƒŸG äGhOC’G
.»¡£∏d hCG Úî°ùà∏d Ωóîà°ùJ - á«aõÿGh á«LÉLõdG ¥ÉÑWC’Gh ÊGhC’G
ºé◊G äGP ᪩WC’G øe á«LQÉÿG AGõLC’G Òªëàd Ωóîà°ùj - ∞jhhôµ«ŸÉH ¢UÉÿG ÒªëàdG ≥ÑW
.ÒªëàdG ≥ÑW ™e IôaƒàŸG äGOÉ°TQE’G ™ÑJG .∂«µfÉÑdG hCG ºë∏dG íFGô°T ,πãe Ò¨°üdG
ìɪ°ùdGh á«LQÉÿG AGõLC’G Òªëàd Ωóîà°ùj - ∞jhhôµ«ŸG ‘ ¬eGóîà°SÉH 샪°ùe »µ«à°SÓH AÉ£Z
.ΩÉ©£dG ≈∏Y kIô°TÉÑe ¬©°Vh ÖæŒ øµdh QÉîÑdG øe ¢†©H êhôÿ
.ΩÉ©£dG ôKÉæJ ™æŸ AÉ£¨c Ωóîà°ùj - »©ª°ûdG ¥QƒdG
≈∏Y πª©J »gh ;ΩÉ©£dG á«£¨Jh IÒ°üb OóŸ Úî°ùà∏d Ωóîà°ùJ - IóFÉŸG •ƒah á«bQƒdG •ƒØdG
»àdGh ,ÉgôjhóJ OÉ©oŸG á«bQƒdG ∞°TÉæŸG ΩGóîà°SG ô¶ëj .ΩÉ©£dG ôKÉæJ ™æ“h óFGõdG QÉîÑdG ¢UÉ°üàeG
.É¡H ¿GÒædG ∫É©à°TG ¤EG …ODƒj ób ɇ ¿OÉ©e ≈∏Y …ƒà– ób
IQGôM äÉLQO â–h IÒ°üb á«æeR OóŸ ΩÉ©£dG Úî°ùJ ‘ Ωóîà°ùoJ - á«bQƒdG ÜGƒcC’Gh ¥ÉÑWC’G
ɇ ¿OÉ©e ≈∏Y …ƒà– ób »àdGh ,ÉgôjhóJ OÉ©oŸG á«bQƒdG ÜGƒcC’Gh ¥ÉÑWC’G Ωóîà°ùJ ’ .á°†Øîæe
.É¡H ¿GÒædG ∫É©à°TG ¤EG …ODƒj ób
샪°ùe) "Microwave Safe" áeÓY πªëj …òdG IQGô◊G ¿Gõ«e Ωóîà°SG - IQGô◊G ¿Gõ«e
.IOó©àe ™°VGƒe ‘ ΩÉ©£dG è°†f øe ≥≤– .äɪ«∏©àdG áaÉc ™ÑJGh (∞jhhôµ«ŸG ™e É¡eGóîà°SÉH
.¿ôØdG øe ΩÉ©£dG êhôN Oôéà …ó«∏≤àdG IQGô◊G ¿Gõ«e ΩGóîà°SG øµªjo
¢üàÁ .hÉ°ùàe πµ°ûH IQGô◊G ™jRƒJ ºà«d »¡£dG AÉæKCG äGhô°†ÿGh øLGƒ£dG πãe ᪩WC’G Ö«∏≤àH ºb
Ö«∏≤àdÉH ºb ∂dòd ,ÈcCG áYô°ùH ¬æ«î°ùJ ºàjh ábÉ£dG øe ÈcCG kGQób ≥Ñ£dG ÖfÉL ‘ OƒLƒŸG ΩÉ©£dG
.ΩÉ©£dG Ö«∏≤àd ÜÉÑdG íàa óæY ¿ôØdG 𫨰ûJ ±É≤jEG ºàj .¬£°Sh ¤EG ≥Ñ£dG ÖfGƒL øe
ΩÉ©£dG ™°Vh Ö«JôJ
√ÉŒ kɵª°S ÌcC’G AGõLC’G ™°VƒH ,ºë∏dGh êÉLódG ™£b πãe ,ºé◊G …hÉ°ùàe ÒZ ΩÉ©£dG Ö«JÎH ºb
,ΩÉ©£∏d óFGõdG è°†ædG Öæéàdh .∞jhhôµ«ŸG ábÉW øe ÈcCG Qób »≤∏àd QGhódG ¢Uô≤∏d »LQÉÿG Aõ÷G
.QGhódG ¢Uô≤dG §°Sh √ÉŒ ∂ª°ùdG
o á©«aôdG AGõLC’G ™°V
ΩÉ©£dG ájɪM
πª°ûJh .óFGõdG è°†æ∏d ¬°Vô©J Öæéàd Ωƒ«fƒŸC’G ≥FÉbQ øe á©«aQ íFGô°ûH ¬Ød ᣰSGƒH ΩÉ©£dG ájɪëH ºb
.πµ°ûdG á©HôŸG õÑÿG ¥ÉÑWCG ÉjGhRh êÉLódG áëæLCGh πLQCG ±GôWCG ,ájɪ◊G ¤EG êÉà– »àdG AGõLC’G
.∞∏à∏d ¿ôØdG ¢Vô©J ¤EG …ODƒJ ób IÒѵdG äÉ«ªµdG ¿C’ .Ωƒ«fƒŸC’G ¥Qh øe á∏«∏b äÉ«ªc Ωóîà°SG
ΩÉ©£dG Ö∏b
á«∏ªY Èà©oJh .∞jhhôµ«ŸG ábÉ£d AGõLC’G áaÉc ¢Vô©ààd »¡£dG á«∏ªY ∞°üàæe ‘ ΩÉ©£dG Ö∏≤H ºb
.»°û∏d Iõ¡éoŸG ºë∏dG ™£b πãeÒѵdG ºé◊G äGP ᪩WC’G ™e ká°UÉN ᫪gC’G ájÉZ ‘ ΩÉ©£dG Ö∏b
•
•
•
•
•
OóëoŸG ΩGóîà°S’G
Qɶàf’G Ióe
ób .ΩÉ©£dG øe áaƒ°ûµŸG AGõLCÓd óFGõdG è°†ædG Öæéàd ¬æe á©«aQ íFGô°T Ωóîà°SG - Ωƒ«fƒŸC’G ¥Qh
.Qò◊G »NƒJ Öéj Gòd ,∞∏à∏d ¿ôØdG ¢Vô©J ¤EG Ωƒ«fƒŸC’G ¥Qh øe IÒÑc äÉ«ªc ΩGóîà°SG …ODƒj
"Microwave Safe" áeÓY πª– âfÉc GPEG É¡eGóîà°SG ∂æµÁ - ájôé◊Gh á«aõÿGh á«æ«°üdG »¡£dG ÊGhCG
øe ócCÉJ ,"Microwave Safe" áeÓY πª– øµJ ⁄ GPEG .(∞jhhôµ«ŸG ™e É¡eGóîà°SÉH 샪°ùe)
.á«fó©ŸG ±QÉNõdG äGP ¥ÉÑWC’G ΩGóîà°SG ô¶ëj .¿ÉeCÉH ∞jhhôµ«ŸG ™e É¡eGóîà°SG á«fɵeEG
"Microwave Safe" áeÓY πª– âfÉc GPEG §≤a É¡eGóîà°SG øµÁ - ᫵«à°SÓÑdG ÊGhC’G
.iôNC’G ᫵«à°SÓÑdG ÊGhC’G ô¡°üæJ óbh .(∞jhhôµ«ŸG ™e É¡eGóîà°SÉH 샪°ùe)
.∫É©à°TÓd á∏HÉb É¡fCG å«M ,§≤a IÒ°üb OóŸ Úî°ùà∏d Ωóîà°ùJ - Ö°ûÿGh ¢UƒÿGh ¢û≤dG øe áYƒæ°üŸG ÊGhC’G
±É≤jEG ó©H á∏«∏b ≥FÉbO IóŸ »¡£dG á«∏ªY ôªà°ùJh á«∏NGO IQGôëH ∞jhhôµ«ŸG ‘ Iƒ¡£ŸG ᪩WC’G ßØà–
ºé◊G IÒÑc ºë∏dG ™£b πãe ᪩WC’G á°UÉN ,¬é°†of ∫ɪcE’ âbƒdG øe Ióe ΩÉ©£dG ∑ôJG .¿ôØdG 𫨰ûJ
É¡é°†f πªàµ«d âbƒdG øe IóŸG √òg ¤EG ºé◊G IÒѵdG ºë∏dG ™£b êÉà– .á∏eɵdG äGhô°†ÿG äGôªKh
,πãe á∏FÉ°ùdG ᪩WC’G áaÉc Ö«∏≤J hCG êQ Öéj .óFGõdG è°†æ∏d á«ÑfÉ÷G AGõLC’G ¢†jô©J ¿hO §°SƒdG øe
πÑb âbƒdG øe IóŸ äÉHhô°ûŸG ∑ôJG .»¡£dG á«∏ªY ∫ɪàcG óæY ,áæNÉ°ùdG áJ’ƒµ«°ûdG Ühô°ûe hCG AÉ°ù◊G
.Ëó≤àdG πÑb ¬JQGôM áLQO øe ócCÉàdGh kGó«L ¬Ñ«∏≤àH ºb ,∫ÉØWC’G ΩÉ©W Úî°ùJ óæY .Ëó≤àdG
ΩÉ©£dÉH IOƒLƒŸG πFGƒ°ùdG IOÉjR
áYRƒe πFGƒ°ùdG ¿ƒµJ ’ »àdG ᪩WC’G á«£¨J Öéj Gòd .AÉŸG äGQP ¤EG ∞jhhôµ«ŸG ábÉW ÜòéæJ
á∏«∏b ᫪c ∞°VCG .mhÉ°ùàe πµ°ûH IQGô◊G ™jRƒJ ºà«d âbƒdG øe IóŸ É¡côJ hCG mhÉ°ùàe πµ°ûH É¡∏NGO
.»¡£dG ≈∏Y É¡JóYÉ°ùŸ áaÉ÷G ᪩WCÓd AÉŸG øe
•
•
•
•
É¡eGóîà°SÉH ≈°Uƒj ’ »àdG äGhOC’G
‘ ™«aôdG ∂ª°ùdG hP …OÉ©dG êÉLõdG ΩGóîà°SG …ODƒj ób - á«LÉLõdG äÉfɪWÈdGh äÉLÉLõdG
.ô°ùµ∏d ¬°Vô©J ¤EG ∞jhhôµ«ŸG
∂dP øe ≈æãà°ùjh ,¿GÒædG ∫É©à°TG ¤EG …ODƒJ ób å«M ,É¡eGóîà°SG ô£ÿG øe - á«bQƒdG ¢SÉ«cC’G
.∞jhhôµ«ŸG ‘ ΩGóîà°SÓd kÉ°ü«°üN ᪪°üoŸG IQòdG ¢SÉ«cCG
óbh ∞jhhôµ«ŸG ‘ É¡eGóîà°SG AÉæKCG ô¡°üæJ ób - øjΰùdƒÑdG IOÉe øe áYƒæ°üŸG ÜGƒcC’Gh ¥ÉÑWC’G
.᪩WC’G ≈∏Y á«ë°U ÒZ OGƒe ∑ÎJ
.∞jhhôµ«ŸG ‘ ô¡°üæJ ¿CG øµÁ »JÉÑædG øª°ùdG äÉjhÉM - ΩÉ©£dG øjõîàH á°UÉÿG äÉjhÉ◊Gh ᫵«à°SÓÑdG ÊGhC’G
.»¡£dG AóH πÑb á«fó©ŸG AÉ«°TC’G áaÉc êôNCG .¿ôØdG ±ÓJEG ¤EG …ODƒJ ób - á«fó©ŸG ÊGhC’G
áeÉY äÉ뫪∏J
Öéj .É¡æ«î°ùJ ºà«d áaÉãc πbC’G ᪩WC’G øe ∫ƒWCG Ióe ,¢ùWÉ£ÑdG ,πãe áØ«ãµdG ᪩WC’G òNCÉJ
.áaÉL íÑ°üJ ’ ≈àM ¢†Øîæe ábÉW iƒà°ùe ≈∏Y ∞«©°†dG è«°ùædG äGP ᪩WC’G Úî°ùJ
,IójóL »¡W áØ°Uh ΩGóîà°SG óæY .»¡£dG Ióe ‘ áeóîà°ùoŸG »¡£dG ÊGhCG á«Yƒfh ´ÉØJQG ôKDƒj ób
.óFGõdG è°†æ∏d ¬°Vô©J Öæéàd ôNB’ ÚM øe ΩÉ©£dG ≈∏Y øĪWGh »¡£∏d Ióe πbCG Ωóîà°SG
.ÉgQÉéØfG ™æŸ ,≥é°ùdGh
o ¢†«ÑdGh ¢ùWÉ£ÑdG ,πãe á«eÉ°ùŸG ÒZ Iô°û≤dG äGP ᪩WC’G Ö≤K Öéj
¿ƒgó∏d hCG âjõ∏d ÅLÉØŸG ¿É«∏¨dG …ODƒj ób .¿ƒgódG hCG âjõdG Úî°ùJ ᣰSGƒH »∏≤dÉH ≈°Uƒj ’
.Iójó°T ¥hôM çhóM ¤EG
iƒ∏M äÉfƒµe ‘ OƒLƒŸG »∏«÷G ,∫ÉãŸG π«Ñ°S ≈∏Y .ÉgÒZ øe ´ô°SCG øî°ùJ äÉfƒµŸG ¢†©H
¢Vô©àdG Öæéàd ∑QÉÑàYG ‘ äGOÉ°TQE’G √òg ™°V .ᵩµdG øe áfƒî°S ÌcCG ¿ƒµ«°S äÉfhódG
.¥hô◊ÉH áHÉ°UEÓd
áaÉc øe ¢ü∏îàdG ºàj ’ ób ¬fC’ ¬H ≈°Uƒeo ÒZ ∞jhhôµ«ŸG ᣰSGƒH ∫õæŸG ‘ ᪩WC’G ßØM
.∞jhhôµ«ŸÉH á°UÉÿG Úî°ùàdG á«∏ªY ᣰSGƒH IQÉ°†dG ÉjÒàµÑdG
‘ π≤àæJ IQGô◊G ¿CG ’EG ,»¡£dG ÊGhCG Úî°ùàH Ωƒ≤J ’ ∞jhhôµ«ŸG ábÉW ¿CG øe ºZôdG ≈∏Y
øe ΩÉ©£dG êGôNEG óæY ÊGhCÓd kɵ°SÉe kÉehO Ωóîà°SG .»¡£dG äGhOCG ¤EG ¿É«MC’G Ö∏ZCG
.πãŸÉH ΩÉ«≤dG ¤EG ∫ÉØWC’G ¬Lhh ∞jhhôµ«ŸG
áLQO ¤EG É¡JQGôM áLQO π°üJ ¿CG øµÁ å«M ,∞jhhôµ«ŸG ‘ äÉjƒ∏◊G Úî°ùàH ≈°Uƒj ’
.äÉHÉ°UEG ájC’ ¢Vô©àdG Öæéàd ∑QÉÑàYG ‘ äGOÉ°TQE’G √òg ™°V .ájɨ∏d á«dÉY IQGôM
•
•
•
•
•
•
•
•
•
•
•
»¡£dG ÊGhCG QÉÑàNG
:QÉÑàN’G Gòg AGôLEG ∂æµÁ ,∞jhhôµ«ŸG ™e ¬eGóîà°SÉH 샪°ùe ≥Ñ£dG ¿CG øe kÉ≤KGh øµJ ⁄ GPEG
.√QÉÑàNG OGôŸG ≥Ñ£dG ÖfÉL ¤EG ¿ôØdG πNGO ¬©°Vh ,AÉŸG øe kÉHƒc CÓeG 1
•
•
•
ΩGóîà°SÉH IóMGh á≤«bO IóŸ Úî°ùà∏d IóMGh Iôe (One Minute+) ''+ á≤«bO'' QõdG §¨°VG 2
.''‹ÉY'' ábÉ£dG iƒà°ùe
¬fCG ≈∏Y ∂dP ∫O ,kÉÄaGO ≥Ñ£dG íÑ°UCG GPEG .kGOQÉH √QÉÑàNG OGôŸG ≥Ñ£dGh áÄaGO √É«ŸG ¿ƒµJ ¿CG Öéj
.∞jhhôµ«ŸG ‘ ΩGóîà°SÓd í∏°üj ’h ∞jhhôµ«ŸG ábÉW ¢üàÁ
•
11
ME6124ST
6/7/06
11:19 AM
Page 12
»¡£dG äGOÉ°TQEG
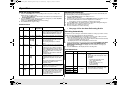
»¡£dG π«dO
∞jhhôµ«ŸG ‘ ºë∏dG »¡W π«dO
.≥ÑW ‘ πeÉ◊G ™°V ºK ,∞jhhôµ«ŸG ™e ¬eGóîà°SÉH 샪°ùŸG »°ûdÉH ¢UÉÿG πeÉ◊G ≈∏Y ºë∏dG ™°V
ájCG ájɪ◊ Ωƒ«fƒŸC’G ≥FÉbQ øe á©«aQ íFGô°T Ωóîà°SG .πØ°SCG ¤EG ºë∏dG øe Úª°ùdG Aõ÷G ™°V
.ºë∏dG øe á©«aQ ™£b hCG ±GôWCG
.É¡H ≈°UƒŸG IóŸG ºë∏dG ∑ôJ πÑb ºë∏dG øe IOó©àe ™°VGƒe ‘ IQGô◊G áLQO ¢SÉ«≤H ºb
äÉLQO ¿CG ßM’ .ΩÉ©£dG êGôNEG ÉgóæY ºàj »àdG IQGô◊G äÉLQO »g á«dÉàdG IQGô◊G äÉLQO
.Qɶàf’G Ióe AÉæKCG ™ØJôJ ᪩WC’G IQGôM
á≤jô£dG
õ¡éoŸG ºë∏dG øe Úª°ùdG Aõ÷G ™°V
ºb ºK .»°ûdÉH ¢UÉÿG πeÉ◊G ≈∏Y »°û∏d
Qhôe óæY .»©ª°ûdG ¥QƒdÉH É¡à«£¨àH
.ΩÉ©£dG Ö«∏≤àH ºb »¡£dG âbh ∞°üf
.≥FÉbO 10 IóŸ ¬côJGh
»°û∏d õ¡éoŸG ºë∏dG øe Úª°ùdG Aõ÷G ™°V
¬à«£¨àH ºK .»°ûdÉH ¢UÉÿG πeÉ◊G ≈∏Y
∞°üf Qhôe óæY .áëàa ¬H »µ«à°SÓH AÉ£¨H
¬côJGh .ΩÉ©£dG Ö«∏≤àH ºb »¡£dG âbh
.≥FÉbO 10 IóŸ
¢ùÛG ΩGóîà°SÉH »FÉ≤∏àdG »¡£dG
QÉîÑdG ᫪c øY ∞°ûµdG ∫ÓN øe kÉ«FÉ≤∏J ΩÉ©£dG »¡£H ' ¢ùÛG ΩGóîà°SÉH »FÉ≤∏àdG »¡£dG'' ∂d íª°ùj
.»¡£dG AÉæKCG ΩÉ©£dG øe áã©ÑæŸG
' ¢ùÛG ΩGóîà°SÉH »FÉ≤∏àdG »¡£dG'' Oóëj .IôîHC’G øe IójóY ´GƒfCG å©ÑæJ ,ΩÉ©£dG »¡W óæY •
»æ©j ɇ ,ΩÉ©£dG øe áã©ÑæŸG IôîHC’G √òg øY ∞°ûµdG ᣰSGƒH ÚÑ°SÉæŸG âbƒdGh ábÉ£dG iƒà°ùe
.»¡£dG âbhh ábÉ£dG iƒà°ùe Ú«©J ¤EG áLÉ◊G ΩóY
∞°ûµ«°S ,''¢ùÛG ΩGóîà°SÉH »¡£dG'' AÉæKCG »µ«à°SÓH AÉ£¨H hCG ¬H ¢UÉÿG AÉ£¨dÉH AÉfEG á«£¨J óæY •
.QÉîÑdÉH AÉfE’G ™Ñ°ûJ ó©H áã©ÑæŸG IôîHC’G øY ' ¢ùÛG ΩGóîà°SÉH »FÉ≤∏àdG »¡£dG''
kGó«L kÉàbh ∂dP ¿ƒµ«°S .‹RÉæàdG ó©dG ‘ »≤ÑàŸG »¡£dG âbh CGóÑj ,Ò°üb mâbƒH »¡£dG AÉ¡àfG πÑb •
.áLÉ◊G óæY »¡£∏d ΩÉ©£dG Ö«∏≤àd
»àdG á°ü∏°üdG hCG πHGƒàdG hCG ÜÉ°ûYC’ÉH ¬∏«ÑàJ øµÁ ,¢ùÛG ΩGóîà°SÉH kÉ«FÉ≤∏J ΩÉ©£dG »¡W πÑb •
á«æH ™≤Ho Qƒ¡X ¤EG ôµ°ùdG hCG í∏ŸG áaÉ°VEG …ODƒj ób ¬fCG á¶MÓe ™e .᪩WC’G Òª– ≈∏Y óYÉ°ùJ
.»¡£dG ó©H ɪ¡àaÉ°VEG Öéj ∂dòd ,ΩÉ©£dG ≈∏Y ¿ƒ∏dG
hCG »¡£dG âbh IOÉjR ‘ (More/Less) ' πbCG/ÌcCG' áØ«XƒH á°UÉÿG áMƒ∏dG ΩGóîà°SG ºàj •
∂∏«°†ØJ ™e Ö°SÉæààd ΩÉ©£dG è°†f áLQO §Ñ°†d áØ«XƒdG √òg ΩGóîà°SG Öéj .¬°UÉ≤fEG
.»°üî°ûdG
•
•
•
•
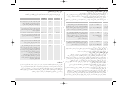
ábÉ£dG iƒà°ùe/»¡£dG Ióe
ΩÉ©£dG
áLQO ‘ ΩGôL ƒ∏«c 0^5 / á≤«bO 12-8
…ô≤ÑdG ºë∏dG
kGó«L ƒ¡£e ÒZ - ájƒÄe áLQO 50 IQGôM º¶Y ¿hóH …ƒ°ûŸG
áLQO ‘ ΩGôL ƒ∏«c 0^5 / á≤«bO 13-9
»¡£dG §°Sƒàe - ájƒÄe áLQO 55 IQGôM
.πWQ 4 ≈àM
áLQO ‘ ΩGôL ƒ∏«c 0^5 / á≤«bO 15-10
ó«L - ájƒÄe áLQO 65 IQGôM
,¤hC’G ¢ùªÿG ≥FÉbó∏d (0) ‹ÉY :ábÉ£dG iƒà°ùe
.(5) §°Sƒàe ºK
:»¡£dG Ióe ¿hóH ôjõæÿG º◊
áLQO ‘ ΩGôL ƒ∏«c 0^5 / á≤«bO 16-12
º¶©H hCG º¶Y
ó«L - ájƒÄe áLQO 70 IQGôM
,¤hC’G ¢ùªÿG ≥FÉbó∏d (0) ‹ÉY :ábÉ£dG iƒà°ùe
.πWQ 4 ≈àM
.(5) §°Sƒàe ºK
¢ùÛG ΩGóîà°SÉH »¡£dG ‘ áeóîà°ùŸG á«£ZC’Gh ÊGhC’G
QÉ«àNÉH á°UÉÿG äGOÉ°TQE’G ™ÑJG ,áØ«XƒdG √òg ΩGóîà°SÉH »¡£dG óæY áÑ«W èFÉàf ≈∏Y ∫ƒ°üë∏d
.Ö«àµdG Gò¡H ∫hGó÷G ‘ IOƒLƒŸGh áÑ°SÉæŸG á«£ZC’Gh ÊGhC’G
É¡H á°UÉÿG á«£ZC’ÉH É¡à«£¨àH ºbh ∞jhhôµ«ŸG ™e É¡eGóîà°SÉH 샪°ùŸG ÊGhC’G kÉehO Ωóîà°SG
.Ö°SÉæe ∫ó©Ã QÉîÑdG êGôNE’ áëàa ∑ôJG ,»µ«à°SÓH AÉ£Z ΩGóîà°SG óæY .᫵«à°SÓH á«£ZCÉH hCG
,AÉ£Z AÉfEÓd øµj ⁄ GPEG .¬eóîà°ùJ …òdG AÉfE’ÉH ¢UÉÿG AÉ£¨dG ΩGóîà°SÉH á«£¨àdÉH kɪFGO ºb
.…QGô◊G ∞jhhôµ«ŸG ¥Qh øe AÉ£Z Ωóîà°SÉa
.kÉÑjô≤J É¡Ø°üf ¤EG ÊGhC’G CÓeG
ó©H ,''¢ùÛG ΩGóîà°SÉH »¡£dG'' IQhO AÉ¡àfG Üôb Ö«∏≤àdG ¤EG êÉà– »àdG ᪩WC’G Ö«∏≤J Öéj
.á°TÉ°ûdG ≈∏Y âbƒ∏d ‹RÉæàdG ó©dG AóH
∞jhhôµ«ŸG ‘ øLGhódG »¡W π«dO
.≥ÑW ‘ πeÉ◊G ™°V ºK ,∞jhhôµ«ŸG ™e ¬eGóîà°SG 샪°ùŸG »°ûdÉH ¢UÉÿG πeÉ◊G ≈∏Y êÉLódG ™°V
.ΩÉ©£dG ôKÉæJ ™æŸ »©ª°ûdG ¥QƒdÉH êÉLódG á«£¨àH ºb
è°†ædG ‘ CGóÑJ »àdG ≥WÉæŸG hCG á©«aôdG ºë∏dG ™£bh Ωɶ©dG ±GôWCG ájɪ◊ Ωƒ«fƒŸC’G ¥Qh Ωóîà°SG
.óFGõdG
.É¡H ≈°UƒŸG Qɶàf’G Ióe êÉLódG ∑ôJ πÑb IOó©àe ™°VGƒe ‘ IQGô◊G áLQO ¢SÉ«≤H ºb
á≤jô£dG
ábÉ£dG iƒà°ùe/»¡£dG Ióe
πeÉM ≈∏Y πØ°SC’ Qó°üdG AõL π©L ™e áLÉLódG ™°V
:»¡£dG Ióe
Ö∏≤dÉH ºb .»©ª°ûdG ¥QƒdÉH É¡à«£¨àH ºb ºK .»°ûdG ‘ ΩGôL ƒ∏«c 0^5 / á≤«bO 10-7
π«°ùj ≈àM »¡£dG ‘ ôªà°SG .âbƒdG ∞°üf Qhôe óæY
ájƒÄe áLQO 80 IQGôM áLQO
ºë∏d …OQƒdG ¿ƒ∏dG »Øàîj ≈àMh áLÉLódG øe ¥ôŸG
.≥FÉbO 10-5 IóŸ ¬côJGh .Ωɶ©dG øe Öjô≤dG
.(7) ‹ÉY §°Sƒàe :ábÉ£dG iƒà°ùe
™°Vh ™e ,≥Ñ£dG ‘ πØ°SC’ êÉLódG º¶Y ™°V
:»¡£dG Ióe
É¡à«£¨àH ºb ºK .≥Ñ£dG ÖfGƒL √ÉŒ ᵫª°ùdG AGõLC’G
.ΩGôL ƒ∏«c 0^5 / á≤«bO 10-7
âbh ∞°üf Qhôe óæY Ö∏≤dÉH ºb .»©ª°ûdG ¥QƒdÉH
≥eɨdG ºë∏d ájƒÄe áLQO 80
øe ¥ôŸG π«°ùj ≈àM »¡£dG ‘ ôªà°SG .»¡£dG
—ÉØdG ºë∏d ájƒÄe áLQO 75
Öjô≤dG ºë∏d …OQƒdG ¿ƒ∏dG »Øàîj ≈àMh áLÉLódG
(7)‹ÉY §°Sƒàe :ábÉ£dG iƒà°ùe
.≥FÉbO 10-5 IóŸ ¬côJGh .Ωɶ©dG øe
•
•
•
•
•
•
•
•
ΩÉg
•
™HÉàJ πãe ,á©HÉààe »¡W á«∏ªY ‘ ¢ùÛG ΩGóîà°SÉH »FÉ≤∏àdG »¡£dG Iõ«e ΩGóîà°SÉH ≈°Uƒj ’
.iôNC’G ó©H »¡£dG äÉ«∏ªY ióMEG
𪩫°S ¢ùÛG ¿CG øe ócCÉà∏dh Ö°SÉæŸG ójÈàdG ≈∏Y ∫ƒ°üë∏d ájƒ¡àdG ó«L ¿Éµe ‘ ¿ôØdG ÖqcQ
.≥«bO πµ°ûH
ÉeóæY ' ¢ùÛG ΩGóîà°SÉH »FÉ≤∏àdG »¡£dG'' Iõ«e Ωóîà°ùJ ’ ,áÄ«°S èFÉàf ≈∏Y ∫ƒ°ü◊G Öæéàd
.kGóL á°†Øîæe hCG kGóL á«dÉY áaô¨dG IQGôM áLQO ¿ƒµJ
Gòg øe IôjÉ£àŸG OGƒŸG ôKDƒJ ó≤a .∞jhhôµ«ŸG ¿ôa ∞«¶æàd IôjÉ£àe áضæe IOÉe ΩGóîà°SG ô¶ëj
.¢ùÛG ≈∏Y ∞¶æŸG
∂dP ôKDƒj ób å«M ,∞«ãc QÉîH hCG RÉZ É¡æe å©Ñæj »àdG Iõ¡LC’G øe Üô≤dÉH ¿ôØdG ™°Vh ÖæŒ
.''¢ùÛG ΩGóîà°SÉH »FÉ≤∏àdG »¡£∏d'' ≥FÓdG AGOC’G iƒà°ùe ≈∏Y
.á∏∏Ñe ¢Tɪb á©£≤H äÓ°†ØdG áaÉc í°ùeG .¿ôØ∏d »∏NGódG ∞jƒéàdG áaɶf ≈∏Y kÉehO ßaÉM
.§≤a ‹õæŸG ΩGóîà°SÓd ¿ôØdG Gòg º«ª°üJ ”
ΩÉ©£dG
πeɵdÉH áLÉLódG
.πWQ 4 ≈àM
êÉLódG ™£b
πWQ 2 ≈àM
12
•
•
•
•
•
•
•
ME6124ST
6/7/06
11:19 AM
Page 13
»¡£dG äɪ«∏©J
''è∏ã∏d ᵫJÉeƒJhCG ádGREG'' π«dO
∞jhhôµ«ŸG ‘ ájôëÑdG ᪩WC’G »¡W π«dO
.ácƒ°ûdG ᣰSGƒH Ò°û≤àdG á∏¡°S íÑ°üoJ ≈àM ∑ɪ°SC’G »¡£H ºb
.≥ÑW ‘ πeÉ◊G ™°V ºK ,∞jhhôµ«ŸG ™e ¬eGóîà°SÉH 샪°ùŸG »°ûdÉH ¢UÉÿG πeÉ◊G ≈∏Y ∑ɪ°SC’G ™°V
¥QƒdG øe AÉ£Z âeóîà°SG GPEG .QÉîÑdÉH ∑ɪ°SC’G »¡W ºà«d ¥ÓZE’G ºµëoe AÉ£Z Ωóîà°SG
.QÉîÑdÉH AÉ£¨dG ®ÉØàMG π≤«°S IóFÉŸG ¥Qh hCG »©ª°ûdG
.»¡£∏d Ióe øe ≈fOC’G ó◊G Qhôe óæY É¡é°†f áLQO øe ócCÉJh ;óFGõdG è°†æ∏d ¢Vô©àJ ∑ɪ°SC’G ´óJ ’
.᪩WC’G øe áØ∏àıG ´GƒfC’G 󫪌 ∂a óæY √ÉfOCG IOƒLƒŸG äGOÉ°TQE’G ™ÑJG •
IQGô◊G áLQO
¿RƒdG
á«dhC’G
Ö∏≤H ºb .Ωƒ«fƒŸC’G ¥QƒH á©«aôdG ±Gƒ◊G ájɪëH ºb á≤«bO 60-20 2000-100
Gòg Ö°SÉæàj .¬«ÑæJ 䃰U ¿ôØdG Qó°üoj ÉeóæY Ωƒë∏dG
ΩGôL
ôjõæÿGh ¿CÉ°†dG º◊h …ô≤ÑdG ºë∏dG ™e èeÉfÈdG
.…ôØŸG ºë∏dGh ºë∏dG ™£bh ∂«à°ùdG íFGô°Th
¥Qh ΩGóîà°SÉH áëæLC’Gh πLQC’G ±GôWCG ájɪëH ºb á≤«bO 60-20 2000-100
¿ôØdG Qó°üjo ÉeóæY ,øLGhódG Ö∏≤H ºb Ωƒ«fƒŸC’G
ΩGôL
πeɵH áLÉLódG èeÉfÈdG Gòg Ö°SÉæj .¬«ÑæJ 䃰U
.ÉgAGõLCG hCG É¡ªéM
äɶMÓe
ΩÉ©£dG ´ƒf
Ωƒë∏dG
OĵdG
á≤jô£dG
2
ºb .Ωƒ«fƒŸC’G ¥Qh ΩGóîà°SÉH ᵪ°ùdG πjP ájɪëH ºb á≤«bO 50-20 2000-100
∑ɪ°SC’G
.¬«ÑæJ 䃰U ¿ôØdG Qó°üjo ÉeóæY ∑ɪ°SC’G Ö«∏≤àH
ΩGôL
íFGô°Th á∏eɵdG ∑ɪ°SC’G èeÉfÈdG Gòg Ö°SÉæj
.¬«∏«ØdG ∂ª°ùdG
ºb .Ωƒ«fƒŸC’G ¥Qh ΩGóîà°SÉH ᵪ°ùdG πjP ájɪëH ºb á≤«bO 50-20 2000-100 ájôëÑdG ᪩WC’G
.¬«ÑæJ 䃰U ¿ôØdG Qó°üoj ÉeóæY ∑ɪ°SC’G Ö«∏≤àH
ΩGôL
.QÉÙGh …Ȫ÷G »¡W èeÉfÈdG Gòg Ö°SÉæj
3
ÉeóæY ¬Ñ∏≤H ºbh ïÑ£ŸG ¥Qh øe á©£b ≈∏Y õÑÿG ™°V
≥ÑW ≈∏Y ∂©µdG ™°V .¬«ÑæJ 䃰U ¿ôØdG Qó°üjo
䃰U ¿ôØdG QGó°UEG óæY ,øµeCG ¿EG ,¬Ñ∏≤H ºbh ‘õN
(.¬HÉH íàa óæY ∞bƒàjh πª©j ¿ôØdG π¶j) .¬«ÑæJ
kÓeÉc ¿Éc AGƒ°S õÑÿG ´GƒfCG áaÉc èeÉfÈdG Gòg Ö°SÉæj
.…hÉ°ùfôØdG õÑÿGh ¬YGƒfCÉH õÑÿG áØZQCGh íFGô°T hCG
.IôFGO πµ°T ‘ õÑÿG áØZQCG ™°V
RƒÑıG ∂«µdG ´GƒfCG áaÉc èeÉfÈdG Gòg Ö°SÉæj
’ ƒgh .IÓÙG IÒ£ØdG Í÷G ∂©ch âjƒµ°ùÑdGh
∂dòch áÁôµdGh ¬cGƒØdG ∂©ch iƒ∏◊G Ö°SÉæj
.¬J’ƒµ°ûdÉH ≈£¨ŸG ∂©µdG
5
∂©µdG /õÑÿG
•
1
øLGhódG
á≤«bO 30-5 700-100
ΩGôL
•
•
•
ábÉ£dG iƒà°ùe/»¡£dG Ióe
™°Vh ™e »°ûdÉH ¢UÉÿG πeÉ◊G ≈∏Y íFGô°ûdG ™°VƒH ºb
:»¡£dG Ióe
ºb ºK .πeÉë∏d »LQÉÿG ÖfÉ÷G √ÉŒ ᵫª°ùdG AGõLC’G ΩGôLƒ∏«c 0^5 / á≤«bO 11-7
ºb »¡£dG âbh ∞°üf Qhôe óæY .»©ª°ûdG ¥QƒdÉH É¡à«£¨àH
íÑ°üoJ ≈àM ∑ɪ°SC’G »¡£H ºb .É¡Ñ«JôJ IOÉYEGh íFGô°ûdG Ö∏≤H .(7)‹ÉY - §°Sƒàe :ábÉ£dG iƒà°ùe
.≥FÉbO 5-3 IóŸ É¡côJGh .ácƒ°ûdG ᣰSGƒH Ò°û≤àdG á∏¡°S
íFGô°ûdG ™°Vh ™e ,»¡£dG ≥ÑW ‘ á«∏ıG íFGô°ûdG ™°V
GPEG .»©ª°ûdG ¥QƒdÉH É¡à«£¨àH ºb ºK .πØ°SCG ¤EG á©«aôdG
íFGô°ûdG Ö∏≤H ºb ,á°UƒH 1/2 øe ÌcCG ∂ª°ùdG
o ¿Éc
»¡£H ºb .»¡£dG Ióe ∞°üf Qhôe óæY É¡Ñ«JôJ IOÉYEGh
.ácƒ°ûdG ᣰSGƒH Ò°û≤àdG á∏¡°S íÑ°üoJ ≈àM ∑ɪ°SC’G
.≥FÉbO 3-2 IóŸ É¡côJGh
4
:»¡£dG Ióe
ΩGôLƒ∏«c 0^5 / á≤«bO 8-4
- §°Sƒàe :ábÉ£dG iƒà°ùe
.(7)‹ÉY
¿hOh πNGóJ ¿hO »¡£dG ≥ÑW ‘ …Ȫ÷G äÉÑM ™°V
:»¡£dG Ióe
ôªà°SG .»©ª°ûdG ¥QƒdÉH É¡à«£¨àH ºb ºK .¢†©H ¥ƒa ¬©°Vh
ΩGôLƒ∏«c 0^5 / á≤«bO 6^5-4
Ö«∏≤àdÉH ºb ºK ,±ÉØ°T ÒZh kÉaÉL íÑ°üoj ≈àM »¡£dG ‘
.≥FÉbO 5 IóŸ É¡côJGh .äGôe áKÓK hCG ÚJôe .(7)‹ÉY - §°Sƒàe :ábÉ£dG iƒà°ùe
ΩÉ©£dG
íFGô°ûdG
0^7 ňM
ΩGôL ƒ∏«c
á«∏ıG íFGô°ûdG
0^7 ňM
ΩGôL ƒ∏«c
…Ȫ÷G
0^7 ňM
ΩGôL ƒ∏«c
∞jhhôµ«ŸG ‘ ¢†«ÑdG »¡W π«dO
.ôéØæj ób ¬fC’ ;√Ò°û≤J ¿hO kGó«L »¡£ŸG ¢†«ÑdG Úî°ùàH kÉ°†jCG º≤J ’h √Ò°û≤J ¿hO ¢†«ÑdG »¡W ô¶ëj
.ôéØæj ’ ≈àM ¢†«ÑdG Ö≤ãH kÉehO ºb
.¬é°†f OGR GPEG kÉaÉL íÑ°üj å«M ,¬d IOóÙG Ióª∏d ¢†«ÑdG »¡£H ºb
•
•
•
∞jhhôµ«ŸG ‘ äGhô°†ÿG »¡W π«dO
»¡W óæY .‘É°VEG AÉe ¤EG êÉà– ’ kÉÑdÉZ .kIô°TÉÑe »¡£dG πÑb äGhô°†ÿG π°ùZ Öéj
.AÉŸG øe ܃c ™HQ ∞°VCG ,AGô°†ÿG É«dƒ°UÉØdGh Qõ÷Gh ¢ùWÉ£ÑdG ,πãe áØ«ãµdG äGhGô°†ÿG
.ºé◊G IÒÑc äGhGô°†ÿG øe ´ô°SCG (A’RÉÑdGh íFGô°T ™£≤oŸG Qõ÷G) ºé◊G IÒ¨°üdG äGhGô°†ÿG è°†æJ
¢Uô≤dG ¥ƒa IôFGO πµ°T ≈∏Y IQòdGh ´ô≤dGh ¢ùWÉ£ÑdG ,πãe á∏eɵdG äGhô°†ÿG ™°Vh Öéj
.»¡£dG Ióe ∞°üf Qhôe ó©H É¡Ñ∏b ” GPEG mhÉ°ùàe πµ°ûH è°†æJ .»¡£dG AóH πÑb QGhódG
™°Vh ™e ≥Ñ£dG áaÉM √ÉŒÉH ,»∏∏chÈdGh ¿ƒ«∏¡dG ,πãe äGhô°†î∏d á«FÉ¡ædG ±GôWC’G kÉehO ™°V
.≥Ñ£dG §°Sh √ÉŒ á«eÉeC’G ±GôWC’G
샪°ùe »µ«à°SÓH AÉ£Z ᣰSGƒH ≥Ñ£dG á«£¨àH kɪFGO ºb ,á©£≤ŸG äGhô°†ÿG »¡W óæY
.¬ëàa ¬Hh ∞jhhôµ«ŸG ™e ¬eGóîà°SÉH
܃≤K IóY ¿É‚PÉÑdGh ´ô≤dGh ¢ùWÉ£ÑdG πãe ÉgÒ°û≤J ºàj ⁄ »àdG á∏eɵdG äGhô°†ÿG Ö≤K Öéj
.ÉgQÉéØfG É¡°Vô©J ™æŸ »¡£dG πÑb
.»¡£dG Ióe ∞°üf Qhôe óæY É¡Ñ«JôJ óYCG hCG á∏eɵdG äGhô°†ÿG Ö∏≤H ºb ,hÉ°ùàe πµ°ûH »¡£∏d
ΩRÓdG âbƒdG ¤EG Qɶàf’G Ióe Ò°ûJ) .Qɶàf’G Ióe ójõJ ¿CG Öéj ,ΩÉ©£dG áaÉãc äOGR ɪ∏c ,ΩÉY πµ°ûHh
∑ôJ øµÁ (.¿ôØdG øe É¡LhôN ó©H É¡é°†f ºà«d ºé◊G IÒÑc ᪩WC’Gh á«dÉ©dG áaÉãµdG äGP äGhô°†î∏d
.kIô°TÉÑe A’RÉÑdG øe ≥ÑW Ëó≤J øµÁ ɪæ«H ,É¡«¡W πªàµj ≈àM ≥FÉbO ¢ùªN IóŸ Ió°†æŸG ≈∏Y ájƒ°ûŸG ¢ùWÉ£ÑdG
äɶMÓe
∫GõJ ’ ób ,IÒNC’G á∏MôŸG ó©H .¬«ÑæJ 䃰U ¿ôØdG Qó°üj ÉeóæY ᪩WC’G 󫪌 ∂a ióe øe ≥≤–
ºàJ ≈àM ó«ªéàdG ∂a á«∏ª©H º≤J ’ .Ég󫪌 áHGPEG ∫ɪcE’ É¡côJG ;Ióª› IÒ¨°üdG AGõLC’G ¢†©H
™æe ¤EG Ωƒ«fƒŸC’G ¥Qh øe IÒ¨°U íFGô°ûH ∑ɪ°SC’Gh ºë∏dG ™£b ∞d …ODƒj .πeɵdÉH è∏ãdG áHGPEG
á룰ùeh á©«aQ íFGô°T Ωóîà°SG ,∂dòd .ΩÉ©£dG øe ≈£°SƒdG AGõLC’G 󫪌 ∂a πÑb ±GôWC’G è°†f
.ΩÉ©£dG øe á©«aôdG AGõLC’Gh ±GôWC’G á«£¨àd Ωƒ«fƒŸC’G ¥Qh øe áªYÉfh
13
•
•
•
•
•
•
•
•
ME6124ST
6/7/06
11:19 AM
Page 14
»¡£dG äɪ«∏©J
»¡£dG äÉØ°Uh
áÄaGódG ¢ùWÉ£ÑdG á£∏°S
Ò©°ûdGh …ô≤ÑdG ºë∏dG »æîj
á°UƒH 0^5 É¡dƒW ™£b ¤EG á©£≤ŸG AGôª◊G IÒ¨°üdG ¢ùWÉ£ÑdG øe ΩGôL 900
.á°UƒH 0^5 É¡dƒW ™£b ¤EG á©£≤e (»¡£ŸG ÒZ) ôjõæÿG º◊ øe áëjô°T 4 OóY
.™£≤oŸG π°üÑdG øe ܃c ™HQ OóY
ôµ°ùdG øe IÒÑc á≤©∏e 2 OóY
í∏ŸG øe IÒÑc á≤©∏e
≥«bódG øe IÒÑc á≤©∏e
¢ùaôµdG ܃ÑM øe á≤©∏e ∞°üf
πØ∏ØdG øe IÒÑc á≤©∏e øªK
ìÉØàdG πN øe IÒÑc á≤©∏e 2^5 OóY
»¡£H ºb .¬à«£¨àH ºbh .¿ƒdÉL ∞°üf ¬ªéM AÉfEG ‘ AÉŸG øe ܃c ™HQh ¢ùWÉ£ÑdG ™°V .1
ºb .ÚJôe Ö«∏≤àdÉH ºb ºK ;(á≤«bO -10-7 IóŸ) è°†æJ ¿CG ¤EG (0)‹É©dG iƒà°ùŸG ‘ ¢ùWÉ£ÑdG
.kÓ«∏b OÈJ »µd kÉÑfÉL É¡©°Vhh É¡à«Ø°üàH
2^5 IóŸ) kÉ°ûg íÑ°üj ≈àM (0) ‹É©dG iƒà°ùŸG ‘ ºé◊G §°Sƒàe AÉfEG ‘ ôjõæÿG º◊ »¡£H ºb .2
IÒÑc á≤©∏à ßØàMG .IóFÉŸG ¥Qh ≈∏Y ºë∏dG ™°V ºK .IóMGh Iôe Ö«∏≤àdÉH ºbh ;(≥FÉbO 3^5 .AGƒ°ûdG ¥ôe øe
ôªà°SG .QÉîÑdG êGôNE’ áëàa ∑ôJ ™e ∂«à°SÓÑdG øe AÉ£Z ¬bƒa ™°V .AGƒ°ûdG ¥ôeh π°üÑdG §∏NG .3
Iôe Ö«∏≤àdÉH ºbh ;(á≤«bO 2^5-1^5 IóŸ) è°†ædG ºàj ≈àM (0) ‹É©dG iƒà°ùŸG ‘ »¡£dG ‘
.IóMGh
‘ »¡£dG ‘ ôªà°SG .Ö«∏≤àdG ™e πØ∏ØdGh ¢ùaôµdG ܃ÑMh ≥«bódGh í∏ŸGh ôµ°ùdG ∞°VCG .4
áaÉ°VE’ÉH πÿG ∞°VCG ºK .(á«fÉK 40-30 IóŸ) ¿É«∏¨dG á∏Môe ¤EG π°üj ≈àM (0) ‹É©dG iƒà°ùŸG
¤EG πFÉ°ùdG π°üj ≈àM (0) ‹É©dG iƒà°ùŸG ‘ »¡£dÉH ºb .Ö«∏≤àdG ™e AÉŸG øe ܃c ∞°üf ¤EG
ºK .IóMGh Iôe Ö«∏≤àdÉH ºbh ;(≥FÉbO 2-1 IóŸ) A»°ûdG ¢†©H kɵ«ª°S íÑ°üojh ¿É«∏¨dG áLQO
.kGó«L Ö«∏≤àdÉH ºbh .¢ùWÉ£ÑdG ≈∏Y §«∏ÿG Ö°U ºK .§«∏ÿG ¤EG ºë∏dG ∞°VCG
.á°UƒH 0^5 ¬dƒW Ö©µe πc ,äÉÑ©µe πµ°T ≈∏Y ™£≤oŸG …ô≤ÑdG ºë∏dG øe ΩGôL 675
.™£≤oŸG π°üÑdG øe ܃c ∞°üf OóY
.IÒÑc ≥«bO á≤©∏e 2 OóY
ôjÉ°Tΰù°SQhh á°ü∏°U øe IÒÑc á≤©∏e 1 OóY
.…ô≤ÑdG ºë∏dG ¥ôe øe (ΩGôL 405-380) áÑ∏Y 1 OóY
(܃c 1 ‹GƒM) á°UƒH 0^5 É¡dƒW íFGô°T ¤EG á©£≤eh ºé◊G ᣰSƒàe QõL IôªK 2 OóY
Ò©°ûdG øe ܃c ∞°üf OóY
á«©ª°ûdG äÉÑf øe ábQh 1 OóY
πØ∏ØdG øe IÒÑc á≤©∏e ™HQ OóY
Ég󫪌 ∂a ó©H ,IóªÛG A’RÉÑdG øe (280-250) IƒÑY 1 OóY
»¡£dÉH ºb .á«£¨àdÉH ºb .AÉfEG ‘ kGó«L ôjÉ°Tΰù°SQhƒdG á°ü∏°Uh ≥«bódGh π°üÑdGh ºë∏dG §∏îH ºb .1
ºbh ºë∏d …OQƒdG ¿ƒ∏dG »Øàîj ≈àM (High(0)) (0)''‹ÉY'' iƒà°ùŸG ‘ ≥FÉbO 8-6 IóŸ
.Iôe Ö«∏≤àdÉH
¬à«£¨àH ºbh .Ö«∏≤àdG ™e πØ∏ØdGh á«©ª°ûdG äÉÑf ábQhh Ò©°ûdGh Qõ÷Gh ºë∏dG ¥ôe ™°VƒH ºb ºK .2
ºK ,Qõ÷Gh ºë∏dG è°†æj ≈àM §°SƒàŸG iƒà°ùŸG ‘ áYÉ°S 1:30 -1 IóŸ »¡£dÉH ºb ºK .AÉ£¨H
.äGôe 3-2 Ö«∏≤àdÉH ºb
ábÉ£dG iƒà°ùe ‘ ≥FÉbO 10 IóŸ ¬«¡£H ºbh .AÉ£¨H ¬à«£¨àH ºbh .É¡Ñ«∏≤Jh A’RÉÑdG áaÉ°VEÉH ºb ºK .3
.Ëó≤àdG πÑb á«©ª°ûdG äÉÑf ¥Qh ádGREÉH ºb .≥FÉbO 10 IóŸ ¬côJGh .§°SƒàŸG
.¢UÉî°TCG 6 »Øµj
Í÷ÉH »∏chÈdG øLÉW
»JÉÑædG øª°ùdG hCG óHõdG øe ܃c ™HQ OóY
.™£≤oŸG π°üÑdG øe ܃c ™HQ OóY
≥«bódG øe IÒÑc á≤©∏e 1^5 OóY
í∏ŸG øe IÒÑc á≤©∏e ∞°üf
áaÉ÷G IOΰùŸG øe IÒÑc á≤©∏e ™HQ
πØ∏ØdG øe IÒÑc á≤©∏e øªK
Í∏dG øe ܃c 1^5 OóY
™£≤eo ôªMCG πØ∏a ܃c ™HQ OóY
Qƒ°ûÑŸG Qó«°ûdG Í÷G øe (܃c 2 OóY) ΩGôL 225
√󫪌 ∂a ó©H ,óªÛG ™£≤oŸG »∏chÈdG øe ΩGôL 280-250 IƒÑY 1 OóY
.(ΩGôL 225) Êhõ∏◊G πµ°ûdG äGP Iƒ¡£ŸG áfhôµŸG øe ܃c 4 OóY
¿ƒdÉL ∞°üf ¬ªéM øLÉW ‘ (0)‹É©dG iƒà°ùŸG ‘ á≤«bO 2-1 IóŸ π°üÑdGh óHõdG »¡£H ºb .1
.IóMGh Iôe Ö«∏≤àdÉH ºbh ,kÉæ«d π°üÑdG íÑ°üoj ≈àM
‘ á«fÉK 60-30 IóŸ »¡£dÉH ºb .ó«÷G Ö«∏≤àdG ™e πØ∏ØdGh IOΰùŸGh í∏ŸGh ≥«bódG ∞°VCG .2
.kÉ°ù∏eCG èjõŸG íÑ°üj ≈àM ¬Ñ«∏≤Jh Í∏dG áaÉ°VEÉH ºb .(0) ¿É«∏¨dG áLQO ≈àM ™ØJôŸG iƒà°ùŸG
‹É©dG iƒà°ùŸG ‘ ≥FÉbO 3-2 IóŸ »¡£dÉH ºbh .§«∏ÿG ™e ¬Ñ«∏≤Jh ôªMC’G πØ∏ØdG ∞°VCG ºK .3
‘ ôªà°SGh Í÷G ∞°VCG ºK .ÚJôe Ö«∏≤àdÉH ºb ºK ,kɵ«ª°S íÑ°üoj ≈àMh ¿É«∏¨dG áLQO ≈àM (0)
.Ühòj ¿CG ¤EG ¬Ñ«∏≤J
iƒà°ùŸG ‘ ≥FÉbO 6-4 IóŸ »¡£dÉH ºbh .¬à«£¨àH ºbh .kGó«L É¡LõeGh ,áfhôµŸGh »∏chÈdG ∞°VCG .4
.Ëó≤àdG πÑb Ö«∏≤àdÉH ºbh .IóMGh Iôe Ö«∏≤àdÉH ºb ºK ,Úî°ùàdG á«∏ªY ºàJ ≈àM (0) ‹É©dG
.¢UÉî°TCG 6 »Øµj
.¢UÉî°TCG 6 »Øµj
Oƒ°SC’G ∫ƒØdG AÉ°ùM
.™£≤oŸG π°üÑdG øe ܃c 1 QGó≤e
ΩhôØe ΩƒK ¢üa 1 OóY
±É÷G ∫ƒØdG øe (ΩGôL 420 áÑ∏Y πc ¿Rh) áÑ∏Y 2 OóY
(ΩGôL 450-390) á©£≤ŸG ºWɪ£dG »æîj øe áÑ∏Y 1 OóY
.êÉLódG ¥ôe øe ΩGôL (405-378) áÑ∏Y 1 OóY
IQòdG øe ΩGôL (240-196) áÑ∏Y 1 OóY
™£≤oŸG QÉ◊G ô°†NC’G πØ∏ØdG á°ü∏°U øe (ΩGôL 110) áÑ∏Y 1 OóY
¥hòdG Ö°ùM ¿ƒªµdG øe IÒÑc á≤©∏e 2-1 OóY
iƒà°ùŸG ‘ »¡£dÉH ºb ºK .á«£¨àdÉH ºb .¿ƒdÉL ´ÉHQCG áKÓK ¬ªéM AÉfEG ‘ ΩƒãdGh π°üÑdG ™°V .1
.è°†ædG ºàj ≈àM á≤«bO 4-2 IóŸ (0) ‹É©dG
;á«≤ÑàŸG ôjOÉ≤ŸG ∞°VCG ºK .ácƒ°T ΩGóîà°SÉH ∫ƒØdG ¢Sô¡H ºbh ∫ƒØdG øe IóMGh áÑ∏Y ∞°VCG .2
.kGó«L É¡Ñ∏bh
¢†ØNG .Ö«∏≤àdG ™e ;≥FÉbO 10 IóŸ (0) ‹É©dG iƒà°ùŸG ‘ AÉ£¨dG ™°Vh ¿hO »¡£dG ™HÉJ .3
.Ëó≤àdG πÑb Ö«∏≤àdÉH ºb .≥FÉbO 5 IóŸ ¬côJGh §°Sƒàe ¤EG ábÉ£dG iƒà°ùe
¿ƒdÉL ∞°üf ‹GƒM ™æ°üj
14
ME6124ST
6/7/06
11:19 AM
Page 15
≥ë∏e
.Úà≤«bO hCG á≤«bO IóŸ ¿ôØdÉH AÉŸG ∑ôJG .»∏¨j ≈àM ≥FÉbO 5 IóŸh ábÉW ≈∏YCÉH ÚLÉæa 4
¢UôëH á«æ«°üdG ™e πeÉ©J .á«æ«°üdG hCG ¿ôØdG ∞«¶æJ óæY ¿ôØdG øe á«LÉLõdG á«æ«°üdG êôNCG
ÅaGO AÉÃ QòëH á«æ«°üdG π°ùZG .kIô°TÉÑe »¡£dG ó©H AÉŸG ‘ É¡©°†J ’h ô°ùµ∏d É¡°†jô©J Öæéàd
.¥ÉÑWC’G ádÉ°ùZ ‘ É¡∏°ùZG hCG ¿ƒHÉ°Uh
øe á©£≤H ¬ØØL ºK .á∏∏Ñe ¢Tɪb á©£b ΩGóîà°SÉH ¿ƒHÉ°üdÉH ¿ôØ∏d »LQÉÿG í£°ùdG ∞¶f
.äÉëàØdG ‘ π«°ùj AÉŸG ´óJ ’ ,∞∏à∏d ¿ôØdG 𫨰ûJ AGõLCG ¢†jô©J Öæéàd .ºYÉædG ¢Tɪ≤dG
áªYÉf ¢Tɪb á©£b ΩGóîà°SG øe ócCÉJ .∞«£∏dG ¿ƒHÉ°üdGh AÉŸÉH ÜÉÑ∏d »LÉLõdG Aõ÷G π°ùZG
.¬°TóN Öæéàd
.áªYÉf ¢Tɪb á©£≤H ¬ë°ùà ºb ,êQÉÿG hCG πNGódG øe ¿ôØdG ÜÉH í£°S ¥ƒa QÉîÑdG ºcGôJ GPEG
…CÉH ∂dP ∫ój ’h áHƒWôdG áÑ°ùf ¬H ™ØJôJ ¿Éµe ‘ ¿ôØdG 𫨰ûJ óæY QÉîÑdG ºcGÎj ¿CG øµÁ
.∞jhhôµ«ŸG ‘ Öjô°ùJ çhóM ≈∏Y ∫ÉM
hCG ¿hÎæLÉŸG áHƒÑfCG ∂dP ¢Vô©j ó≤a ,¬∏NGóH ΩÉ©W OƒLh ¿hO ¿ôØdG 𫨰ûàH kGóHCG º≤J ’
Öæéàd ¬eGóîà°SG ΩóY AÉæKCG ¿ôØdG ‘ AÉŸG øe ¿Ééæa ∑ôJ ‘ ÖZôJ ób .∞∏à∏d á«LÉLõdG á«æ«°üdG
.CÉ£ÿG ≥jô£H ¿ôØdG 𫨰ûJ ádÉM ‘ çóëj ób …òdG ∞∏àdG
É¡∏Mh äÓµ°ûŸG ±É°ûµà°SG π«dO
•
.É¡dƒ∏Mh á∏ªàÙG äÓµ°ûŸG øe áªFÉ≤dG √òg ™LGQ ,¿ôØ∏d áfÉ«°üdG ∫hDƒ°ùà ∫É°üJ’G πÑb
.¬JGP ¿ôØdG ’h ¿ôØdG á°TÉ°T πª©J ’
•
.í«ë°U πµ°ûH »°VQCG ±ôW hP »Hô¡µdG QÉ«à∏d Qó°üe ‘ ¢ùHÉ≤dG π°U
.ìÉàØŸG 𫨰ûJ øe ócCÉJ ,ìÉàØe ∫ÓN øe πª©j »Hô¡µdG QÉ«àdG ¢ùÑ≤e ¿Éc GPEG
.iôNCG Iôe ¬∏NOCG ºK ,¿GƒK ô°ûY ô¶àfGh ,QÉ«àdG Qó°üe øe ¢ùHÉ≤dG êGôNEÉH ºb
.πjóÑà∏d êÉàëj ô¡°üæe …CG ∫GóÑà°SG hCG »FÉHô¡µdG IôFGódG ™WÉb 𫨰ûJ óYCG
.¢ùÑ≤ŸG ìÓ°UEG »FÉHô¡c »æa øe Ö∏WG ,RÉ¡÷G πª©j ⁄ GPEG ,QÉ«àdG ¢ùÑ≤à ôNBG RÉ¡L π«°UƒàH ºb
.ôNBG ¢ùÑ≤à ¿ôØdG π«°UƒàH ºb
•
•
.πª©j ’ ¿ôØdG øµdh ,πª©J ¿ôØdG á°TÉ°T
•
.ΩɵMEÉH ≥∏¨e ÜÉÑdG ¿CG øe ócCÉJ
.ÜÉÑdG πØ≤H á≤dÉY iôNC’G OGƒŸG øe ÉgÒZ hCG ∞«∏¨J OGƒe …CG OƒLh ΩóY øe ≥≤–
.∞∏à∏d ÜÉÑdG ¢Vô©J ΩóY øe ≥≤–
.»¡£dG äGOÉ°TQEG ∫ÉNOEG óYCGh ÚJôe (Cancel) ' AɨdEG' QõdG §¨°VG
CÉ£ÿG πFÉ°SQ
≥FÉbO 5 IóŸ ¿ôØdG ójÈJ AÉLôdG ,á°TÉ°ûdG ≈∏Y "Error3" h "Error1" ádÉ°SôdG Qƒ¡X ádÉM ‘
.ÉæH ¢UÉÿG áeóÿG §îH ∫É°üJ’G AÉLôdG ,πFÉ°SôdG ∂∏J Qƒ¡X QGôµJ ádÉM ‘ .πbC’G ≈∏Y
."Error4" ádÉ°SôdG ô¡¶J ,ΩÉ©£dG è°†f ióe áaô©Ÿ ÜÉÑdG íàØH âªb GPEG
.kGQƒa ÉæH ¢UÉÿG áeóÿG §îH ∫É°üJ’G AÉLôdG ,"Error2" ádÉ°SôdG Qƒ¡X ádÉM ‘
•
•
•
•
•
•
•
•
•
•
•
.IOóÙG á«æeõdG IóŸG Qhôe πÑb »Hô¡µdG QÉ«àdG π°üa ºàj
Iôe ¬∏°U ºK ,¿GƒK 10 Ióe ô¶àfGh QÉ«àdG Qó°üe øe ¢ùHÉ≤dG êôNCG ,áŒÉf ábÉW ∑Éæg øµj ⁄ GPEG
áYÉ°ùdG §Ñ°V óYCG ,''
' áYÉ°ùdG ô°TDƒe ¢Vô©«°S ,»Hô¡µdG QÉ«àdG ´É£≤fG ádÉM ‘ .iôNCG
.»¡£∏d äɪ«∏©J ájCGh
.πjóÑà∏d êÉàëj ô¡°üæe …CG ∫GóÑà°SG hCG »FÉHô¡µdG IôFGódG ™WÉb 𫨰ûJ óYCG
•
•
,É¡∏M øe øµªàJ ⁄ á∏µ°ûe ∂à¡LGh GPEG
hCG »∏ÙG ™FÉÑdÉH π°üJG
SAMSUNG äÉéàæŸ ™«ÑdG ó©H Ée áeóîH
•
•
.ójó°T A§ÑH ΩÉ©£dG »¡W ºàj
¢ùØf ≈∏Y ôNBG RÉ¡L 𫨰ûJ …ODƒj ób .¬H ¢UÉÿG ÒÑeCG 10 ∂∏°S ∫ÓN øe πª©j ¿ôØdG ¿CG øe ócCÉJ
.¬d á°ü°üfl IôFGO ¤EG ¿ôØdG π≤fG ,áLÉ◊G â°†àbG GPEG .»àdƒa ¢ü≤f çhóM ¤EG á«FÉHô¡µdG IôFGódG
•
.»Hô¡c ¢SÉe hCG Qô°T ógÉ°ûJ
,Ωƒ«fƒŸC’G ¥Qh Ωóîà°ùJ âæc GPEG .¿ôØdG øe á«fó©e á£HQCG hCG »¡W ÊGhCG hCG äGhOCG ájCG êôNCG
¥QƒdG ÚH πbC’G ≈∏Y IóMGh (º°S 2^5) á°UƒH áaÉ°ùe ∑ôJGh IÒ¨°U §FGô°T §≤a Ωóîà°SG
.á«∏NGódG ¿ôØdG ¿GQóLh Ωƒ«æeƒdC’G
•
.ÉJGƒ°UCG Qó°üj hCG êõd QGhódG ¢Uô≤dG
.¿ôØdG á«°VQCGh IQGhódG á≤∏◊Gh QGhódG ¢Uô≤dG ∞¶f
.í«ë°U πµ°ûH ¿ÉYƒ°Vƒe IQGhódG á≤∏◊Gh QGhódG ¢Uô≤dG ¿CG øe ócCÉJ
•
•
.¿ƒjõØ«∏àdG hCG ƒjOGôdG …RÉ¡éH ¢ûjƒ°ûJ çhóM ∞jhhôµ«ŸG ΩGóîà°SG ÖÑ°ùj
.ô©°ûdG äÉØØ› πãe iôNC’G IÒ¨°üdG Iõ¡LC’G ΩGóîà°SG áé«àf çóëj Ée ¢ûjƒ°ûàdG ∂dP ¬Ñ°ûj
.ƒjOGôdG hCG ¿ƒjõØ«∏àdG πãe ,iôNC’G Iõ¡LC’G øY kGó«©H ∞jhhôµ«ŸG π≤fG
•
∞«¶æàdGh ájÉæ©dG
.¬H ájÉæ©dGh ¿ôØdG ∞«¶æàd á«dÉàdG äGOÉ°TQE’G ™ÑJG
¿GQóéH áHƒµ°ùŸG πFGƒ°ùdGh ΩÉ©£dG ÉjÉ≤H ≥°üà∏J ób .¿ôØ∏d »∏NGódG ∞jƒéàdG áaɶf ≈∏Y ßaÉM •
.¿ôØdG πªY IAÉØc ‘ ôKDƒj ɇ ,¿ôØdG
OGƒŸG ΩGóîà°SG ô¶ëj .¿ƒHÉ°üdG ™e á∏∏Ñe ¢Tɪb á©£b Ωóîà°SG .kIô°TÉÑe áHƒµ°ùŸG πFGƒ°ùdG í°ùeG •
.áæ°ûÿG áضæŸG
AÉŸG øe ÚfÉéæa QGó≤e Úî°ùàH ºb ,¿ôØdÉH á≤°üà∏ŸG πFGƒ°ùdGh ΩÉ©£dG AGõLCG áHGPEG ‘ IóYÉ°ùª∏d •
¬à©°S ܃c ‘ (¿ôØ∏d á«cR áëFGôH ®ÉØàM’G ‘ ÖZôJ âæc GPEG AÉŸG ¤EG áfƒª«d Ò°üY ∞°VCG)
15
ME6124ST
6/7/06
11:19 AM
Page 16
≥ë∏e
äÉØ°UGƒŸG
Ö©µe Ωób 1^2
RGô£dG ºbQ
¿ôØdG ∞jƒŒ
ó«ªéàdG ∂a øª°†àJ ,ábÉW äÉjƒà°ùe 10
ºµëàdG äÉjƒà°ùe
á«fÉK 99h á≤«bO 99
âbDƒŸG
õJôg 05 ~ âdƒa 230
»Hô¡µdG QÉ«àdG Qó°üe
äGh 1550
∞jhhôµ«ŸG ábÉW ∑Ó¡à°SG
(IEC-705) äGh 1000
áŒÉædG ábÉ£dG
õJôgɨ«e 2450
𫨰ûàdG OOôJ
(≥ªY) 415 * (´ÉØJQG) 297 * (¢VôY) 523
á«LQÉÿG OÉ©HC’G
(≥ªY) 396 * (´ÉØJQG) 229 * (¢VôY) 368
¿ôØdG ∞jƒŒ OÉ©HCG
ΩGôLƒ∏«c 15^5
‘É°üdG ¿RƒdG
ME6124ST
Samsung Electronics Co., Ltd
16
tl]XY[z{lnTWZY`YhmyUGGwGXGG~ SGhG`SGYWW]GG[a\[Gwt
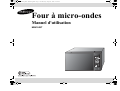
Four à micro-ondes
Manuel d'utilisation
ME6124ST
tl]XY[z{lnTWZY`YhmyUGGwGYGG~ SGhG`SGYWW]GG[a\[Gwt
Consignes de sécurité
Précautions d'emploi
CONSIGNES DE SECURITE POUR EVITER UNE POSSIBLE
EXPOSITION A UNE QUANTITE TROP IMPORTANTE DE
MICRO-ONDES
Précautions d'emploi importantes.
Lisez attentivement ce manuel et conservez-le
précieusement en vue d'une consultation ultérieure.
Avant de faire cuire des aliments ou des liquides dans votre
four à micro-ondes, prenez les précautions suivantes.
La non-observation des consignes de sécurité suivantes peut se traduire par une
exposition dangereuse à l'énergie micro-onde.
A :(a)N'utilisez jamais le four porte ouverte ; vous risqueriez d'être
exposé à une quantité trop importante de micro-ondes. Ne tentez
jamais de neutraliser ou de passer outre le verrouillage de sécurité.
A :(b)Ne placez aucun objet entre la façade du four et la porte et ne
laissez aucune salissure ni aucun reste de produit d'entretien
s'accumuler sur les surfaces assurant l'étanchéité.
A :(c)N'utilisez pas le four si celui-ci est endommagé. Veillez toujours à
ce que la porte soit fermée hermétiquement et que les composants
suivants ne soient pas endommagés :
1. NE placez AUCUN récipient ou ustensile métallique dans le four à micro-ondes :
•
•
•
2.
(1) porte (déformée ou bosselée),
(2) charnières et loquets (cassés ou desserrés),
(3) joints de la porte et surfaces d'étanchéité.
A :(d)Confiez toutes les réparations et opérations de réglage à une main
d'œuvre qualifiée.
3.
4.
5.
6.
7.
8.
2
plats métalliques,
vaisselle comportant des ornements dorés ou argentés,
pics à brochettes, fourchettes, etc.
Pourquoi ? Des arcs électriques ou des étincelles susceptibles d'endommager
le four risqueraient de se former.
NE faites JAMAIS chauffer :
• des bouteilles, des pots ou des récipients fermés hermétiquement ou
emballés sous vide.
Exemple : petits pots pour bébé.
• des aliments entiers.
Exemple : oeufs, noix dans leur coquille, tomates
Pourquoi ? L'augmentation de la pression à l'intérieur du four pourrait les faire
exploser.
Conseil : retirez les couvercles ou percez la peau des aliments ou leur
emballage avant de les placer dans le four.
NE faites JAMAIS fonctionner le four à vide.
Pourquoi ? Les parois du four risqueraient d'être endommagées.
Conseil : laissez en permanence un verre d'eau à l'intérieur du four. Ainsi, si
vous mettez le four en marche par inadvertance alors qu'il est vide,
l'eau absorbera les micro-ondes.
N'obstruez JAMAIS les orifices de ventilation situés à l’arrière du four avec une
pièce de tissu (ex. : chiffon, torchon) ou du papier.
Pourquoi ? le tissu ou le papier risquerait de s'enflammer lorsque l'air est évacué
du four.
Utilisez TOUJOURS des maniques pour retirer un plat du four.
Pourquoi ? certains plats absorbent les micro-ondes ; qui plus est, la chaleur
des aliments est toujours transférée au plat, ce qui le rend chaud.
NE touchez PAS les éléments chauffants ou les parois intérieures du four.
Pourquoi ? ces surfaces peuvent suffire à vous brûler même une fois la cuisson
terminée et même si elles ne vous semblent pas très chaudes. Ne
projetez aucun produit inflammable contre les parois internes du four.
Laissez d’abord le four refroidir.
Pour éviter tout risque d'incendie à l'intérieur du four :
• n'y entreposez aucun produit inflammable,
• retirez les attaches métalliques des sacs en papier ou en plastique,
• n'utilisez pas votre four micro-ondes pour sécher des journaux.
• Si de la fumée s'échappe de l'appareil, laissez la porte de celui-ci fermée et
éteignez-le ou débranchez-le de la prise murale
Soyez particulièrement vigilant lorsque vous réchauffez des liquides ou des
aliments pour bébé.
• Laissez-les TOUJOURS reposer au moins 20 secondes une fois le four éteint,
ceci afin de permettre à la température de s'homogénéiser.
• Remuez SYSTEMATIQUEMENT le contenu une fois le temps de cuisson
écoulé (et pendant la cuisson si nécessaire).
• Manipulez le récipient avec précaution lorsque vous le sortez du four. Vous
risqueriez de vous brûler si celui-ci est trop chaud.
• Un phénomène d' ébullition peut en effet survenir à retardement.
tl]XY[z{lnTWZY`YhmyUGGwGZGG~ SGhG`SGYWW]GG[a\[Gwt
Précautions d'emploi
•
Pour éviter tout phénomène d'ébullition à retardement, remuez le liquide
avant, pendant et après la cuisson à l'aide d'une cuillère en plastique ou d'un
bâtonnet en verre.
Pourquoi ? lorsque vous faites chauffer des liquides, l'ébullition peut survenir à
retardement. En d'autres termes, de l'eau bouillante peut jaillir même
une fois le récipient sorti du four. Vous risquez alors de vous brûler
gravement.
• En cas d'accident, effectuez les gestes de PREMIERS SECOURS suivants :
• immergez la zone brûlée dans de l'eau froide pendant au moins 10 minutes.
• recouvrez-la d'un tissu propre et sec.
• n’appliquez aucune crème, huile ou lotion.
JAMAIS complètement le récipient. Choisissez un récipient
• NE emplissez
r
évasé afin de prévenir tout débordement éventuel. Les bouteilles à goulot
étroit peuvent exploser en cas de surchauffe.
• Vérifiez TOUJOURS la température des laitages ou des aliments pour bébé
avant de les servir.
• NE faites JAMAIS chauffer un biberon encore muni de sa tétine ; celui-ci
risque en effet d'exploser s'il est surchauffé.
CONSIGNES IMPORTANTES DE SECURITE
Lorsque vous faites cuire ou réchauffer des aliments contenus dans des récipients
jetables en plastique, papier ou autre matériau inflammable, il est conseillé de vérifier
de temps à autre la cuisson à l'intérieur du four.
IMPORTANT
Cet appareil N'EST PAS conçu pour être utilisé par des jeunes enfants ou des
personnes invalides non assistés par un adulte responsable. Ne les laissez jamais
sans surveillance à proximité du four lorsque celui-ci est en marche. De même, évitez
d'entreposer ou de cacher tout objet suscitant l'intérêt des enfants au-dessus du four.
AVERTISSEMENT :
si la porte ou les joints de la porte sont endommagés, le four ne doit pas être utilisé tant
que ces pièces n'ont pas été réparées par une main d'œuvre qualifiée.
AVERTISSEMENT :
9. Veillez à ne pas endommager le cordon d'alimentation.
il est très dangereux pour toute personne non habilitée d’effectuer des manipulations
ou des réparations impliquant le démontage de l'habillage de protection contre les
micro-ondes.
•
Evitez que le câble électrique ou la prise n'entre en contact avec de l'eau ou
une surface chauffante.
• N'utilisez pas l'appareil si le cordon ou la fiche est endommagé(e).
10. Lorsque vous ouvrez la porte du four, maintenez une certaine distance entre vous
et l'appareil (env. 50 cm).
Pourquoi ? l'air ou la vapeur s'échappant du four à ce moment précis risque de
vous brûler.
AVERTISSEMENT :
les liquides et autres aliments ne doivent pas être réchauffés dans des récipients
fermés car ils risqueraient d’exploser.
11. Veillez à ce que l'intérieur du four soit toujours propre.
Pourquoi ? les particules d'aliments ou les projections d'huile adhérant aux
AVERTISSEMENT :
parois risquent d'endommager l'appareil ou d'en réduire son efficacité.
n'autorisez un enfant à utiliser le four sans surveillance que si vous lui avez donné les
instructions appropriées lui permettant d'utiliser l'appareil en toute sécurité et de
comprendre les dangers qu'implique une mauvaise utilisation.
12. Il se peut que l'appareil émette de petits bruits secs en cours de fonctionnement
(surtout pendant le mode Décongélation).
Pourquoi ? ces bruits sont normaux lorsque la sortie de l'alimentation électrique
est modifiée.
Veuillez recycler ou éliminer la matériel d'emballage de cet appareil en
respectant les normes de sécurité environnementale en vigueur.
13. Si le micro-ondes est mis en marche à vide, il sera automatiquement mis hors
tension pour des raisons de sécurité. Le four fonctionnera à nouveau normalement
après une période de repos de 30 minutes.
Pour obtenir des renseignements sur les normes écologiques en matière de
traitement des déchets, veuillez prendre contact avec les autorités locales.
3
tl]XY[z{lnTWZY`YhmyUGGwG[GG~ SGhG`SGYWW]GG[a\[Gwt
Installation du four à micro-ondes
Fonctionnement d'un four à microondes
Posez le four sur une surface plane et suffisament
solide pour supporter le poids du four sans risque.
20 cm
au-dessus
10 cm
derrière
10 cm
sur les côtés
Principe de cuisson
1. Le magnétron génère des micro-ondes qui se
1. Lorsque vous installez votre four, assurez une ventilation
répartissent de façon homogène à l'intérieur du four
pendant la cuisson grâce à une rotation du plateau sur
lequel sont placés les produits. Ce procédé assure
donc une cuisson homogène des aliments.
2. Les micro-ondes sont absorbées par les aliments sur
une profondeur d'environ 2,5 cm. La cuisson se
poursuit au fur et à mesure que la chaleur se diffuse
dans les aliments.
3. Les temps de cuisson varient en fonction du récipient
utilisé et des propriétés des aliments :
• quantité et densité,
• teneur en eau,
• température initiale (aliment congelé ou non).
adéquate en laissant un espace d'au moins 10 cm à l'arrière
et sur les côtés du four et un espace de 20 cm devant
l'appareil.
2. Retirez tout élément d’emballage de l’intérieur du four.
Installez l’anneau et le plateau.
Vérifiez que le plateau tourne librement.
✽
✽
✽
N'obstruez jamais les orifices de ventilation, car le four risquerait de
surchauffer et de s'arrêter automatiquement. Il vous faudrait alors
attendre qu'il ait suffisamment refroidi avant de pouvoir le réutiliser.
Pour votre propre sécurité, branchez le câble sur une prise de terre CA
230 V-50 Hz à trois broches. Si vous constatez que cordon d'alimentation
de l'appareil est endommagé, il devra être remplacé par le fabricant, son
réparateur agréé ou une personne qualifiée afin d'éviter tout danger.
N’installez pas le four dans un environnement chaud ou humide (ex. : à
côté d'un radiateur ou d'un four traditionnel). Respectez les
caractéristiques électriques du four. Si vous utilisez une rallonge, celle-ci
doit correspondre aux normes du cordon d'alimentation d'origine. Avant
d'utiliser votre four pour la première fois, nettoyez les surfaces intérieures
et le joint d'étanchéité de la porte à l'aide d'un chiffon humide.
☛
4
La chaleur se diffusant progressivement à l'intérieur des aliments, la cuisson
se poursuit en dehors du four. Les temps de repos mentionnés dans les
recettes et dans ce livret doivent donc être respectés afin d'assurer :
• une cuisson uniforme et à cœur,
• une température homogène.
tl]XY[z{lnTWZY`YhmyUGGwG\GG~ SGhG`SGYWW]GG[a\[Gwt
Votre nouveau four micro-ondes
Votre nouveau four micro-ondes
Contrôle du contenu
Lorsque vous sortez votre four micro-ondes de son emballage, assurez-vous d'avoir en
votre possession tous les éléments représentés ci-dessous. En cas de pièce
manquante ou défectueuse, contactez votre revendeur.
Four à micro-ondes
Plateau en verre
Anneau du plateau
Réglage de votre four micro-ondes
1.
Posez le four sur une surface plane et solide et branchez le cordon électrique sur
une prise avec mise à la terre. Une fois le four sous tension, l'écran d'affichage
indique :
kg
g
Oz.
10
4
11
5
Lbs. QTY.
Assurez une ventilation adéquate du four en laissant un espace d'au moins 10 cm
à l'arrière, sur le dessus et sur les côtés de l'appareil.
2. Ouvrez la porte du four en tirant sur la poignée.
3. Nettoyez-en l'intérieur avec un chiffon humide.
4. Placez l'anneau pré-assemblé dans la cavité située au centre du four.
5.
1
2
3
Placez le plateau en verre sur l'anneau de sorte que les trois pattes de verre
disposées au centre du plateau s'ajustent parfaitement dans les emplacements
prévus à cet effet dans le plancher du four. )
6
12
7
13
8
14
9
15
a :1. Clock (Horloge)
a :2. Sound (Son)
a :3. Boutons One Touch Sensor
Cook (Cuisson par capteur à
l'aide d'une seule touche)
a :4. Beverage (Boisson) (CUISSON
IMMEDIATE)
a :5. Auto Cook Menus (Menus de
cuisson automatique)
5
a :6. Auto Defrost (Décongélation
automatique)
a :7. Boutons numériques
a :8. Power Level (Puissance)
a :9. Pause/Cancel (Pause/Annuler)
a :10.One Minute + (Une minute +)
a :11.Pizza Reheat (Réchauffage de
pizza) (CUISSON IMMEDIATE)
a :12.Auto Reheat (Réchauffage
tl]XY[z{lnTWZY`YhmyUGGwG]GG~ SGhG`SGYWW]GG[a\[Gwt
Votre nouveau four micro-ondes
Fonctionnement
Table des matières
Réglage de l’horloge
1. Appuyez sur le bouton Clock (Horloge). Les témoins « ENTER » (SAISIR) et «
TIME » (HEURE) clignotent.
Consignes de sécurité ...................................................................... 2
Précautions d'emploi ........................................................................ 2
Installation du four à micro-ondes .................................................. 4
Fonctionnement d'un four à micro-ondes ...................................... 4
Votre nouveau four micro-ondes ..................................................... 5
Contrôle du contenu ........................................................................ 5
Réglage de votre four micro-ondes ................................................. 5
Table des matières ......................................................................... 6
Fonctionnement ............... ................................................................. 6
Réglage de l’horloge ....................................................................... 6
Utilisation du bouton Pause/Cancel (Pause/Annuler) ..................... 6
Utilisation du bouton One Minute + (Une minute +) ........................ 6
Utilisation du bouton Sensor Cook (Cuisson par capteur) .............. 6
Guide de cuisson par capteur ......................................................... 7
Utilisation des boutons Instant Cook (Cuisson immédiate) ............. 7
Utilisation du bouton Rice/Pasta (Riz/Pâtes) ................................... 8
Utilisation des boutons Meat/Fish (Viande/Poisson) ....................... 9
Utilisation du bouton Snack Bar (Snack) ....................................... 10
Décongélation automatique .......................................................... 10
Réchauffage automatique ............................................................. 11
Réglage du temps de cuisson et de la puissance ......................... 11
Mode de démonstration ................................................................ 11
Utilisation des boutons More/Less (Plus/Moins) ........................... 12
Activation/désactivation du signal sonore ..................................... 12
Utilisation de la minuterie .............................................................. 12
Réglage de la sécurité enfants ...................................................... 12
Consignes concernant la cuisson ................................................. 13
Ustensiles de cuisine .................................................................... 13
Techniques de cuisson ................................................................. 13
Consignes concernant la cuisson .................................................. 14
Conseils .... .................................................................................... 14
Cuisson automatique par capteur ................................................. 14
Ustensiles et couvercles pour la cuisson par capteur ................... 14
Important ... .................................................................................... 14
Guide de cuisson .......................................................................... 15
Guide de décongélation automatique ........................................... 16
Recettes .... .................................................................................... 17
Annexe ......... .................................................................................... 18
Dépannage .................................................................................... 18
Entretien et nettoyage ................................................................... 18
Message d'erreur .......................................................................... 18
Caractéristiques ............. ............................................................... 19
2. Appuyez sur les boutons numériques pour régler l'heure actuelle. Vous devez
appuyer sur au moins trois numéros pour régler l'horloge. S'il est 5h00, saisissez
5,0,0.
3. Après 5 secondes, le témoin « ENTER » (SAISIR) clignote et l'indication « Cloc »
(HORLOGE) s'affiche.
4. Appuyez à nouveau sur Clock (Horloge). Deux points clignotent pour indiquer
que l'heure est réglée.
En cas de coupure de courant, il convient de régler l'horloge à nouveau.
Vous pouvez vérifier l'heure actuelle pendant la cuisson en appuyant sur le
bouton Clock (Horloge).
Utilisation du bouton Pause/Cancel (Pause/Annuler)
Le bouton Pause/Cancel (Pause/Annuler) vous permet d'annuler les instructions
que vous avez saisies. Il vous permet également d'interrompre momentanément le
cycle de cuisson du four afin de contrôler la cuisson des aliments.
• Pour interrompre momentanément la cuisson en cours : appuyez une fois sur
Pause/Cancel (Pause/Annuler). Pour redémarrer, appuyez sur Start
(Départ).
• Pour arrêter la cuisson, effacez les instructions et ramenez l'affichage du four sur
l'heure actuelle : appuyez deux fois sur Pause/Cancel (Pause/Annuler).
• Pour corriger une erreur que vous venez de saisir : appuyez une fois sur Pause/
Cancel (Pause/Annuler), puis saisissez à nouveau les instructions.
Utilisation du bouton One Minute + (Une minute +)
Ce bouton vous permet de faire chauffer des aliments par tranches d'une minute à une
puissance élevée.
1. Appuyez autant de fois sur le bouton One Minute+ (Une minute +) que vous
souhaitez rajouter de minutes au temps de cuisson. Par exemple, appuyez deux
fois sur le bouton pour un temps de cuisson de deux minutes. Le temps s'affiche et
le four se met en marche automatiquement.
Vous pouvez ajouter des minutes à un programme en cours en appuyant sur le
bouton One Minute+ (Une minute +) autant de fois que vous souhaitez
ajouter de minutes.
Utilisation du bouton Sensor Cook (Cuisson par capteur)
Grâce à un système permettant de détecter la vapeur s'échappant des aliments en
cours de cuisson, cette fonction permet de régler automatiquement le temps de
chauffe optimal pour plusieurs types et quantités d'aliments précuits. Tous les aliments
doivent être précuits et conservés au frais.
1. Appuyez sur le bouton Sensor Cook (Cuisson par capteur) correspondant à
l'aliment que vous souhaitez faire cuire (ex. : Popcorn (Pop-corn)). Le symbole
«
» s'affiche et le four micro-ondes se met en marche automatiquement.
Lorsque vous préparez du pop-corn, patientez au moins cinq minutes entre
chaque sachet afin d'éviter toute surchauffe du plateau en verre. Pour vérifier
l'heure actuelle pendant la cuisson, appuyez sur le bouton Clock (Horloge).
6
tl]XY[z{lnTWZY`YhmyUGGwG^GG~ SGhG`SGYWW]GG[a\[Gwt
Fonctionnement
Guide de cuisson par capteur
•
Utilisation des boutons Instant Cook (Cuisson immédiate)
1. Appuyez sur le bouton Instant Cook (Cuisson immédiate) correspondant à
Respectez les instructions suivantes lorsque vous faites cuire par capteur
différents types d'aliments.
Aliment
Pop-corn
Quantité
85 à 100 g
1 sachet
Pommes de 1 à 6
terre
Légumes
frais
Entrées
individuelle
s
l'aliment que vous souhaitez faire cuire (ex. : Beverage (Boisson)). La première
taille de portion s'affiche. (les témoins « ENTER » (SAISIR) et « QTY » (QTE)
clignotent) :
2. Appuyez plusieurs fois sur le bouton pour sélectionner la taille de portion que vous
souhaitez. Toutes les tailles de portion disponibles s'affichent les unes après les
autres. Une fois que vous avez sélectionné la taille de portion souhaitée, le four
micro-ondes se met en marche automatiquement.
Lorsque le temps de cuisson est écoulé, le four émet un signal sonore. Il en émet
un autre à chaque minute.
Instructions
Ne faites chauffer qu'un seul paquet de pop-corn spécial
micro-ondes à la fois. Soyez prudent lorsque vous
retirez le sachet du four et que vous l'ouvrez. Laissez le
four refroidir pendant au moins 5 minutes avant toute
nouvelle utilisation.
Piquez chaque pomme de terre plusieurs fois à l'aide
d'une fourchette. Disposez-les de manière uniforme sur
le plateau. Laissez reposer 3 à 5 minutes. Laissez le four
refroidir pendant au moins 5 minutes avant toute
nouvelle utilisation.
1 à 4 tasses Placez les légumes frais dans un plat allant au micro-
ondes et ajoutez 2 cuillères à soupe d'eau. Couvrez d'un
film plastique ou d'un couvercle résistant aux microondes (pour de meilleurs résultats, utilisez un couvercle
en verre).
Si vous utilisez un film plastique, pratiquez une petite
ouverture sur le bord du plat pour la ventilation. Retirez
les légumes du four, laissez-les reposer à couvert
pendant 2 minutes, puis remuez et servez. Laissez le
four refroidir pendant au moins 5 minutes avant toute
nouvelle utilisation.
Type d'aliment
Poids
Beverage
(Boisson)
½ tasse
1 tasse
2 tasses
•
Instructions
Pizza Reheat
(Réchauffage de
pizza)
1 part
2 parts
3 parts
4 parts
•
•
•
•
•
220 à 400 g Retirez l'aliment de son emballage et suivez les
instructions figurant sur ce dernier pour connaître la
méthode de couverture du plat et le temps de repos.
Laissez le four refroidir pendant au moins 5 minutes
avant toute nouvelle utilisation.
7
Versez le liquide dans une tasse graduée ou
un verre mesureur et ne couvrez pas.
Placez la boisson dans le four.
Une fois le temps de chauffe écoulé, remuez
bien.
Disposez les parts de pizza, pointes vers le
centre, sur un plat adapté à la cuisson au
micro-ondes.
Veillez à ce que les parts ne se chevauchent
pas. Ne les couvrez pas.
Laissez les reposer 1 à 2 min avant de les
servir.
tl]XY[z{lnTWZY`YhmyUGGwG_GG~ SGhG`SGYWW]GG[a\[Gwt
Fonctionnement
Utilisation du bouton Rice/Pasta (Riz/Pâtes)
A-5
1. Appuyez sur le bouton Rice/Pasta (Riz/Pâtes) correspondant à l'aliment que
vous souhaitez faire cuire. Le code « A-1 » (code de l'aliment) s'affiche.
Appuyez plusieurs fois sur le bouton Rice/Pasta (Riz/Pâtes) pour sélectionner
l'aliment souhaité (reportez-vous au Tableau de cuisson du riz et des pâtes
ci-dessous).
2. Appuyez sur la touche numérique 1, 2 ou 3 pour sélectionner le nombre de
portions souhaité
(reportez-vous au Tableau de
cuisson du riz et des pâtes ci-dessous pour le nombre de portions).
3. Appuyez sur le bouton Start (Départ) pour démarrer la cuisson.
Spaghetti
1à2
portions
Eau :
bouillante
1 Serv.
A-6
Nouilles
1à3
prêtes en portions
2 minutes
Eau :
bouillante
Tableau de cuisson du riz et des pâtes
Code
Type
d'aliment
Poids
Température
initiale
Instructions
A-1
Riz blanc
1à2
portions
Riz :
température
ambiante
Eau :
température
ambiante
Lavez le riz à l'eau froide jusqu'à ce que l'eau s'écoulant
soit claire. Placez le riz et l'eau dans un cuiseur
transparent aux micro-ondes ou dans un plat rond en
Pyrex et couvrez. Une fois le riz cuit, laissez-le reposer
sans retirer le couvercle. Laissez reposer le riz pendant 3 à
5 minutes, puis remuez-le pour séparer les grains.
1 Serv.
A-2
Pâtes
sèches
1à2
portions
Eau :
bouillante
A-4
Pâtes
1à2
surgelées portions
Pâtes
fraîches
1à2
portions
Eau :
bouillante
Eau :
bouillante
A-7
Porridge
1à2
portions
Flocons
d'avoine :
température
ambiante
Eau et lait :
froids
2 S erv.
2 S erv.
Spaghetti
100g
200g
Water
3cups
5cups
Séparez le nid de nouilles et placez-les dans un grand bol
transparent aux micro-ondes. Versez de l'eau bouillante
sur les nouilles et faites cuire sans couvrir. Lorsque le four
émet un signal sonore à mi-cuisson, remuez bien et
appuyez sur Start (Départ) pour continuer. Une fois la
cuisson terminée, laissez reposer deux minutes puis
remuez et servez.
1 Serv.
2 Serv.
3 ser v.
Noodle
1 packet
2 pac kets
3 pac kets
Wa ter
500 m l
1000 ml
1500 ml
Placez les flocons d'avoine secs et l'eau ou le lait dans un
bol transparent aux micro-ondes et faites cuire sans
couvrir. Lorsque le four émet un signal sonore, remuez
bien les flocons et appuyez sur Start (Départ) pour
continuer. Une fois la cuisson terminée, remuez bien et
recouvrez de cassonade ou de miel.
1 Serv.
2 S erv.
Rice
100g
200g
Oats
35g
70g
Water
250ml
375ml
Wa ter & Milk
185 m l
375ml
Placez les pâtes sèches dans un cuiseur ou un bol
transparent aux micro-ondes ou dans un plat rond en
Pyrex. Au besoin, cassez les pâtes pour qu'elles entrent
dans le plat et faites cuire sans couvrir. Couvrez une fois
la cuisson terminée et laissez reposer 2 à 5 minutes.
Remuez et servez.
1 Serv.
A-3
Placez les spaghetti sèches dans un cuiseur ou un bol
transparent aux micro-ondes ou dans un plat rond en
Pyrex. Au besoin, cassez les spaghetti pour qu'elles
entrent dans le plat et faites cuire sans couvrir. Couvrez
une fois la cuisson terminée et laissez reposer 2 à 5
minutes. Remuez et servez.
2 S erv.
Pasta
100g
200g
Water
3cups
5cups
Placez les pâtes surgelées dans un cuiseur ou un bol
transparent aux micro-ondes ou dans un plat rond en
Pyrex et faites cuire sans couvrir.
Couvrez une fois la cuisson terminée et laissez reposer 2 à
5 minutes. Remuez et servez.
Pasta
1 Serv.
125g
2 S erv.
250g
Water
3cups
5cups
Placez les pâtes fraîches dans un cuiseur ou un bol
transparent aux micro-ondes ou dans un plat rond en
Pyrex et faites cuire sans couvrir.
Couvrez une fois la cuisson terminée et laissez reposer 2 à
5 minutes. Remuez et servez.
1 Serv.
2 S erv.
Pasta
125g
250g
Water
3cups
5cups
8
tl]XY[z{lnTWZY`YhmyUGGwG`GG~ SGhG`SGYWW]GG[a\[Gwt
Fonctionnement
Utilisation des boutons Meat/Fish (Viande/Poisson)
Tableau de cuisson de la viande et du poisson
1. Appuyez sur le bouton Meat/Fish (Viande/Poisson) correspondant à l'aliment
que vous souhaitez faire cuire. Le code « A-1 » (code de l'aliment) s'affiche.
Appuyez plusieurs fois sur le bouton Meat/Fish (Viande/Poisson) pour
sélectionner l'aliment souhaité (reportez-vous au Tableau de cuisson de la
viande et du poisson ci-dessous).
2. Appuyez sur la touche numérique 1, 2 ou 3 pour sélectionner le nombre de
portions souhaité
(reportez-vous au Tableau de
cuisson de la viande et du poisson ci-dessous pour le nombre de portions).
3. Appuyez sur le bouton Start (Départ) pour démarrer la cuisson.
Type
d'aliment
A-3
Fruits de
mer
150 à Conser Choisissez des fruits de mer frais et disposez-les
200 g vés au dans un plat transparent aux micro-ondes ou dans
250 à
frais un plat en Pyrex. Arrosez de jus de citron ou salez
300 g
selon vos goûts, recouvrez de papier sulfurisé (type
350 à
Glad Bake) et enfournez le tout. Une fois la cuisson
400 g
terminée, laissez reposer les fruits de mer pendant 3
minutes. Servez.
A-4
Plat mijoté
1 plat Conser Ingrédients pour un plat mijoté
vé au 2 carottes moyennes (85 à 110 g avant épluchage),
frais 2 oignons moyens (110 à 140 g avant épluchage), 2
pommes de terre moyennes (165 à 195 g avant
épluchage), 450 g d'épaule de boeuf hachée, 1
cuillère à café rase de sel, 1 cuillère à café rase de
poivre, 1 verre d'eau. Epluchez et coupez les
légumes en dés de 2,5 cm environ. Formez 12
petites boulettes de boeuf à l'aide des cercles en
laiton Reynolds de 5 cm de diamètre. Etalez
légèrement les boulettes. Dans un plat de cuisson
d'une contenance de 2 litres, disposez en couches la
moitié des boulettes de boeuf, des carottes, des
oignons et des pommes de terre. Salez et poivrez.
Poursuivez avec le reste des ingrédients en vous
assurant que la dernière couche de boulettes est
recouverte de légumes. Ajoutez l'eau. Tassez les
ingrédients. Couvrez le tout. Une fois la cuisson
terminée, laissez le plat reposer pendant 5 minutes.
Servez.
A-5
Bacon
100 à Conser Procurez-vous de fines tranches de lard frais auprès
125 g vé au de votre boucher, traiteur ou supermarché. Placez200 à
frais les sur du papier absorbant dans un plat transparent
225 g
aux micro-modes ou dans un plat en Pyrex,
300 à
recouvrez d'un autre morceau de papier absorbant
325 g
et enfournez le tout. Servez.
A-6
Boulettes
de viande
1 plat Conser Ingrédients pour les boulettes de viande.
vées 450 g de boeuf haché, 1 oignon haché, 1 oeuf battu,
au frais 1 cuillère à café rase de sel, 1 cuillère à café rase de
poivre et 2 cuillères à soupe d'eau. Incorporez tous
les ingrédients et mélangez bien. Façonnez 20
boulettes de viande (25 mm). Placez les boulettes
de viande dans un plat. Recouvrez le tout de film
étirable transparent aux micro-ondes en ménageant
une cheminée de 50 mm à une extrémité. Procédez
à la cuisson. Une fois celle-ci terminée, laissez
reposer les boulettes de viande pendant 5 minutes.
Servez.
Tableau de cuisson de la viande et du poisson
Type
Code d'alime
nt
Poids
Tempér
ature
initiale
Instructions
A-1
Blanc de 200 à
poulet
250 g
300 à
350 g
400 à
450 g
Conser Choisissez des blancs de poulet frais, pratiquez 3 à 4
vé au entailles dans la chair à l'aide d'un couteau aiguisé et
frais faites-les cuire ainsi ou après les avoir fait mariner
dans la préparation de votre choix pendant deux
heures ou toute la nuit à couvert au réfrigérateur.
Vous pouvez également les arroser de sauce soja ou
de jus de citron ou les saupoudrer de sel aux herbes
ou de poivre. Sur une assiette ou dans un plat en
Pyrex, recouvrez entièrement les blancs de papier
sulfurisé et faites cuire. Le four émet un signal sonore
à mi-cuisson. Retournez les blancs et appuyez sur
Start (Départ) pour continuer. Une fois la cuisson
terminée, laissez les blancs reposer pendant 3 à 5
minutes. Servez.
A-2
Filet de
poisson
150 à
200 g
250 à
300 g
350 à
400 g
Conser Choisissez des filets de poisson frais et cuisez-les tels
vé au quels ou après les avoir fait revenir dans la marinade
frais de votre choix pendant deux heures ou toute la nuit à
couvert dans le réfrigérateur. Vous pouvez également
arroser les filets de jus de citron ou les saupoudrer de
votre mélange d'herbes préféré (ex. : assaisonnement
de poivre au citron, sel ou poivre). Surune assiette ou
dans un plat en Pyrex, recouvrez entièrement les
filets de papier sulfurisé et faites-les cuire. Une fois la
cuisson terminée, laissez les filets reposer pendant 3
minutes. Servez.
9
Tempé
rature
initiale
Code
Poids
Instructions
tl]XY[z{lnTWZY`YhmyUGGwGXWGG~ SGhG`SGYWW]GG[a\[Gwt
Fonctionnement
A-7
Pain de
viande
1 plat Conser Ingrédients pour un pain de viande.
vé au 675 g d'épaule de boeuf hachée, 1 tasse de pain
frais rassis émietté, 1 oignon haché, 1 poivron vert haché,
1 tasse de lait, 1 oeuf, 2 cuillères à soupe de
ketchup, 1 cuillère à café rase de poivre, 1 cuillère à
café rase de sel. Incorporez tous les ingrédients et
mélangez bien. Placez le mélange de viande dans
un moule à pain et uniformisez la partie supérieure.
Recouvrez le plat d'un film étirable et ménagez une
cheminée de 5 cm à une extrémité. Placez le tout
dans le four parallèlement à la porte. Une fois la
cuisson terminée, laissez reposer le plat pendant
environ 5 minutes. Servez.
A-4
Aliment pour 70 g
bébé
110 g
170 g
température
ambiante
Retirez le couvercle en métal des pots
pour bébé conservés à température
ambiante. Retirez les couvercles en
plastique et en métal des petits pots et
replacez celui en plastique. Posez le
récipient au centre du plateau tournant et
passez-le au micro-ondes à puissance
élevée jusqu'à obtenir la bonne
température. Remuez bien. Servez
Le bouton More/Less (Plus/Moins) ne
peut pas être utilisé lorsque celui
correspondant à l'alimentation pour bébé
est sélectionné.
A-5
Pain à l’ail
200 g
400 g
600 g
Conservé au
frais
Retirez les baguettes de pain à l'ail de leur
emballage et disposez-les dans le four sur
une assiette adaptée à la cuisson au
micro-ondes ou dans un plat en Pyrex.
Faites chauffez.
Après la cuisson, attendre 3 minutes que
le beurre soit complètement fondu à
l'intérieur des bâtonnets. Servez.
A-6
Croquettes
de poulet
4 unités
8 unités
Conservées
au frais
Placez un morceau de papier absorbant
sur l'assiette et disposez les croquettes en
cercle par dessus. Ne les couvrez pas.
Laissez reposer 1 min.
A-7
Pommes de 4 unités
terre en
8 unités
morceaux
température
ambiante
Coupez la pomme de terre en 4 morceaux
de taille égale. Evidez la pomme de terre
en laissant une épaisseur d'environ 6 mm.
Répartissez régulièrement les morceaux
de pommes de terre évidées sur une
assiette. Parsemez de morceaux de lard,
d'oignons et de fromage. Passez-les au
four à une puissance élevée jusqu'à ce
que le fromage ait fondu.
Utilisation du bouton Snack Bar (Snack)
1. Appuyez sur le bouton Snack Bar (Snack) correspondant à l'aliment que vous
souhaitez faire cuire. Le code « A-1 » (code de l'aliment) s'affiche.
Appuyez plusieurs fois sur le bouton Snack Bar (Snack) pour sélectionner
l'aliment souhaité (reportez-vous au Tableau de cuisson des snacks cidessous).
2. Appuyez sur la touche numérique 1, 2 ou 3 pour sélectionner le nombre de
portions souhaité Seul le bouton 1 (nombre de portions) peut être activé si vous
sélectionnez TORTILLA
(reportez-vous au Tableau de cuisson des snacks pour le nombre de
portions)
3. Appuyez sur le bouton Start (Départ) pour démarrer la cuisson.
Tableau de cuisson des snacks
Code
A-1
Type
d'aliment
Tortilla
Poids
400 g
Température
initiale
Conservées
au frais
A-2
Ailes de
poulet
4à5
unités
8 à 10
unités
Conservées
au frais
A-3
Tourte
surgelée
50 à 60 g Surgelée
100 à
110 g
150 à
160 g
Instructions
Coupez le haut du paquet de tortilla,
retirez le sachet de sauce et posez le
paquet de tortilla directement au centre du
plateau tournant. Réchauffez. Les tortilla
doivent être servies chaudes.
Décongélation automatique
Pour décongeler les aliments, indiquez leur poids ; le micro-ondes règlera alors
automatiquement la durée de décongélation, la puissance et le temps de repos.
1. Appuyez sur le bouton Auto Defrost (Décongélation automatique). Le chiffre
« 1 » s'affiche.
(les témoins « ENTER » (SAISIR) et « kg » (kg) clignotent).
2. Pour définir le type d'aliment, appuyez plusieurs fois sur le bouton Auto Defrost
(Décongélation automatique). Vous pouvez également utiliser le pavé
numérique pour saisir directement le poids des aliments.
Le poids maximal pouvant être saisi est de 2 kg (hormis le pain).
3. Appuyez sur le bouton Start (Départ). Le temps de cuisson s'affiche pendant la
décongélation ; le four émet un signal sonore vous indiquant que vous devez
retourner les aliments.
4. Ouvrez la porte du four et retournez les aliments.
5. Appuyez sur le bouton Start (Départ) pour reprendre la décongélation.
Répartissez régulièrement les ailes sur
une assiette. Couvrez de papier sulfurisé.
Disposez les parts de tourte encore
surgelées dans un plat adapté à la
cuisson au micro-ondes ou en Pyrex. Ne
couvrez pas. Faites chauffez.
Une fois la cuisson terminée, laissez
reposer les parts pendant 1 minute.
Servez.
• Reportez-vous en page 16 pour consulter le
guide de décongélation automatique.
10
tl]XY[z{lnTWZY`YhmyUGGwGXXGG~ SGhG`SGYWW]GG[a\[Gwt
Fonctionnement
Réchauffage automatique
Réglage du temps de cuisson et de la puissance
Le four à micro-ondes vous permet de régler deux niveaux de cuisson, chaque niveau
possédant une durée et une puissance propres. Le bouton de puissance vous permet de
régler le degré de chaleur : Warm (Chaud) (1) - High (Elevé) (0).
Pour faire réchauffer des aliments, sélectionnez le type de plat et le nombre de portions
que vous souhaitez faire réchauffer ; le four à micro-ondes règlera alors
automatiquement la durée de réchauffage.
1. Appuyez plusieurs fois sur le bouton Auto Reheat (Réchauffage auto) pour
sélectionner le type de plat que vous souhaitez faire réchauffer. La taille initiale du
plat équivaut à une portion.
Vous pouvez sélectionner jusqu'à quatre tasses pour le réchauffage des plats
mijotés, des pâtes et du riz. Une seule portion peut être réchauffée par plat.
Le plat et la quantité choisis s'affichent.
2. Utilisez la pavé numérique pour augmenter le nombre de portions. Par
Cuisson à une étape
Pour la cuisson simple en une étape, il vous suffit de régler le temps de cuisson. La
puissance se règle automatiquement sur High (Elevée). Pour régler la puissance sur un
autre niveau, utilisez le bouton Power Level (Puissance).
1. Utilisez le pavé numérique pour définir un temps de cuisson. Vous pouvez régler le
temps de cuisson de 1 seconde à 99 minutes et 99 secondes. Pour régler la durée sur
plus d'une minute, saisissez également les secondes. Par exemple, pour régler 20
exemple, pour trois portions, appuyez sur le bouton 3 (reportezvous au tableau de réchauffage automatique ci-dessous pour
les portions). Le nombre de portions sélectionné s'affiche.
minutes, saisissez 2, 0, 0, 0.
2. Si vous souhaitez régler la puissance sur une autre valeur que High (Elevée), appuyez
3. Appuyez sur le bouton Start (Départ). La durée de cuisson s'affiche.
sur le bouton Power Level (Puissance) puis utilisez le pavé numérique pour saisir une
puissance.
Tableau de réchauffage automatique
Type
d'aliment
Code
Poids
Assiette garnie
A-1
1 portion
•
•
•
Plat mijoté
A-2
Réchauffage
des pâtes
A-3
Réchauffage
du riz
A-4
Soupe en
conserve
A-5
•
1 à 4 tasses
Puissances :
Instructions
•
•
1 = P : 10
(Chaud)
6 = P : 60
(Mijoter)
2 = P : 20
(Faible)
7 = P : 70
(Moyennement élevée)
3 = P : 30
(Décongeler)
8 = P : 80
(Réchauffer)
4 = P : 40
(Moyennement faible) 9 = P : 90
(Saisir)
5 = P : 50
(Moyenne)
0 = P : Hi
(Elevée)
3. Appuyez sur le bouton Start (Départ) pour démarrer la cuisson. Si vous souhaitez
modifier la puissance, appuyez sur le bouton Pause/Cancel (Pause/Annuler) avant
d'appuyer sur Start (Départ) et ressaisissez toutes les instructions.
Certaines recettes nécessitent différentes étapes de cuisson à différentes températures.
Votre micro-ondes vous permet pour cela de cuire vos aliments en plusieurs étapes.
Utilisez uniquement des aliments
précuits et conservés au frais.
Recouvrez l'assiette d'un film plastique
perforé ou de papier sulfurisé.
Sommaire
- 85 à 110 g de viande, volaille ou
poisson
(jusqu'à 170 g non désossée)
- ½ tasse de féculents
(pommes de terre, pâtes, riz, etc.)
- ½ tasse de légumes
(environ 85 à 110 g)
Cuisson en plusieurs étapes
1. Suivez les étapes 1 et 2 de la section « Cuisson en une étape » figurant sur la page
Utilisez uniquement des aliments
conservés au frais.
Couvrez d'un couvercle ou d'un film
plastique perforé.
Remuez bien avant de servir.
précédente.
Lorsque vous saisissez plusieurs étapes de cuisson, appuyez sur le bouton Power
Level (Puissance) avant de passer à la saisie de l'étape suivante.
Pour régler la puissance d'une étape de cuisson sur High (Elevée), appuyez deux fois
sur le bouton Power Level (Puissance).
2. Utilisez le pavé numérique pour définir un deuxième temps de cuisson.
3. Appuyez sur le bouton Power Level (Puissance), puis utilisez les touches numériques
pour régler la puissance de la deuxième étape de cuisson.
4. Appuyez sur le bouton Start (Départ) pour démarrer la cuisson.
Vous pouvez vérifier la puissance en cours de cuisson en appuyant sur le bouton Power
Level (Puissance).
Mode de démonstration
Vous pouvez utiliser le mode de démonstration pour savoir comment votre micro-ondes
fonctionne sans chauffage du four.
1. Appuyez presque simultanément sur le bouton 0 et sur le bouton 1 ou 3.
Pour désactiver le mode de démonstration, répétez l'étape 1 ci-dessus.
11
tl]XY[z{lnTWZY`YhmyUGGwGXYGG~ SGhG`SGYWW]GG[a\[Gwt
Fonctionnement
Consignes concernant la cuisson
Utilisation des boutons More/Less (Plus/Moins)
Ustensiles de cuisine
Les boutons More/Less (Plus/Moins) vous permettent de régler des temps de cuisson
prédéfinis. Ils ne fonctionnent que dans les modes Rice/Pasta (Riz/Pâtes), Meat/Fish
(Viande/Poisson), Snack Bar (Snack), Auto Reheat (Réchauffage automatique),
Pizza Reheat (Réchauffage de pizza), Beverage (Boisson) ou Time Cook (Temps de
cuisson) et Kitchen Time (Minuterie). Utilisez le bouton More/Less (Plus/Moins)
uniquement après avoir démarré la cuisson au moyen d'un de ces modes.
La fonction More/Less (Plus/Moins) ne peut pas être utilisée en même temps que le
bouton Sensor Cook (Cuisson par capteur).
Le bouton More/Less (Plus/Moins) ne peut être utilisé en même temps que la fonction
Auto defrost (Décongélation automatique).
1. Pour AUGMENTER la durée de cuisson automatique : appuyez sur le bouton More
(Plus)(9).
2. Pour REDUIRE la durée de cuisson automatique : appuyez sur le bouton Less
(Moins)(1).
Si vous souhaitez augmenter/réduire la durée de 10 secondes dans les modes Time
Cook (Temps de cuisson) et Kitchen Time (Minuterie), appuyez sur le bouton
More (Plus) (9) ou Less (Moins) (1).
Utilisation recommandée
•
•
•
•
•
•
•
Activation/désactivation du signal sonore
Utilisation limitée
Le signal sonore peut à tout moment être désactivé.
1. Appuyez sur le bouton Sound (Son). Le message « ON » (ACTIVE) s'affiche
•
(le message « START » (DEPART) clignote)
2. Appuyez sur le bouton Sound (Son) pour couper le son. L'écran affiche le message
suivant : « OFF » (DESACTIVE) (« START » (DEPART) clignote).
3. Appuyez sur Start (DEPART). L'heure actuelle s'affiche à nouveau.
•
Utilisation de la minuterie
•
1.
2.
3.
4.
Bols et plats en verre et en vitrocéramique : pour le chauffage ou la cuisson.
Plat brunisseur spécial micro-ondes : permet de dorer l'extérieur des
aliments de petite taille comme les biftecks, les côtelettes ou les crêpes. Suivez les
instructions fournies avec le plat brunisseur.
Film en plastique spécial micro-ondes : permet de retenir la vapeur d'eau.
Ménagez une petite ouverture pour permettre à la vapeur de s'échapper
légèrement ; évitez d'appliquer le film directement sur les aliments.
Papier sulfurisé : permet d'éviter les projections.
Essuie-tout et serviettes en papier : permettent de réchauffer à couvert des
aliments pendant un court laps de temps, d'absorber l'excédent de liquide et
d'éviter les projections. N'utilisez pas de serviettes en papier recyclé car elles
peuvent contenir des particules métalliques et prendre feu.
Assiettes et gobelets en carton : permettent de réchauffer des aliments/
liquides pendant un court laps de temps à basse température. N'utilisez pas de
carton recyclé car il peut contenir des particules métalliques et prendre feu.
Thermomètres : n'utilisez que ceux étiquetés « Transparents aux micro-ondes »
et suivez toutes les instructions. Permettent de contrôler la température des
aliments à différents endroits. Les thermomètres classiques peuvent être utilisés
une fois les aliments retirés du four.
Appuyez sur le bouton Kitchen Timer (Minuterie).
Utilisez le pavé numérique pour définir la durée de fonctionnement de la minuterie.
Appuyez sur le bouton Start (Départ) pour démarrer la minuterie.
Le décompte s'affiche et un signal sonore retentit une fois ce temps écoulé.
Remarque : le micro-ondes ne s'allume pas lorsque la minuterie est utilisée.
•
Papier aluminium : appliquez en de minces bandes sur les aliments pour éviter
que les zones exposées ne soient trop cuites. Une utilisation excessive de papier
aluminium risque d'endommager votre four, soyez donc prudent.
Ustensiles en céramique, porcelaine et grès : n'utilisez que ceux étiquetés «
Transparents aux micro-ondes ». S'ils ne comportent pas cette étiquette, effectuez
un essai pour vous assurer qu'ils peuvent être utilisés sans danger. N'utilisez
jamais de plat comportant un ornement métallique.
Ustensiles en plastique : n'utilisez que ceux étiquetés « Transparents aux
micro-ondes ». Les autres types de plastiques risquent de fondre.
Ustensiles en paille, osier et bois : utilisez-les uniquement pour réchauffer
des aliments pendant un court laps de temps car ils risquent de s'enflammer.
Non recommandé
•
Réglage de la sécurité enfants
•
Cette fonction vous permet de verrouiller le four à micro-ondes de manière à ce qu'il ne
puisse pas être utilisé par les enfants en dehors de votre surveillance.
1. Tout en maintenant le bouton « 0 » enfoncé, appuyez sur le bouton « 2 ». Le terme «
Loc » s'affiche.
A ce stade, le micro-ondes ne peut pas être utilisé à moins d'être déverrouillé. Pour
ce faire, répétez l'étape 1 décrite ci-dessus.
•
•
Récipients et bouteilles en verre : le verre ordinaire est trop fin pour pouvoir
être utilisé dans un micro-ondes et risque donc de se casser.
Sacs en papier : ils risquent de s'enflammer (sauf les sacs pour pop-corn
spécialement conçus pour une utilisation au micro-ondes).
Assiettes et tasses en mousse de polystyrène : elles risquent de fondre et
de laisser un résidu toxique sur les aliments.
Emballages et récipients en plastique pour aliments : les emballages du
type boîtes de margarine risquent de fondre dans le micro-ondes.
Ustensiles métalliques : ils risquent d'endommager le four. Retirez tous
les ustensiles métalliques des plats avant de faire cuire les aliments.
Essai des ustensiles
Si vous ne savez pas si un plat est transparent aux micro-ondes, effectuez le test
suivant :
12
tl]XY[z{lnTWZY`YhmyUGGwGXZGG~ SGhG`SGYWW]GG[a\[Gwt
Consignes concernant la cuisson
Ajout de liquide
1. Remplissez une tasse d'eau et placez-la dans le four, à côté du plat que vous
souhaitez tester.
Les micro-ondes sont attirées par les molécules d'eau. Recouvrez ou laissez reposer
les aliments dont la teneur en eau n'est pas uniforme afin que la chaleur se répartisse
de façon homogène. Ajoutez une petite quantité d'eau aux aliments secs pour leur
permettre de cuire.
Conseils
•
2. Appuyez une fois sur le bouton One Minute + (Une minute +) pour les chauffer
pendant une minute à puissance élevée.
L'eau doit être chaude et le plat que vous testez doit être froid. Si le plat est chaud,
cela signifie qu'il absorbe l'énergie des micro-ondes et ne peut donc pas être
utilisé dans ce four.
•
Techniques de cuisson
•
Mélange
•
Remuez les aliments tels que les plats mijotés et les légumes pendant la cuisson pour
répartir la chaleur de manière uniforme. Les aliments situés en périphérie du plat
absorbent plus d'énergie et chauffent donc plus rapidement ; c'est pourquoi vous devez
les remuer en partant du bord vers le centre. Le four s'éteint automatiquement lorsque
vous ouvrez la porte pour remuer les aliments.
•
Disposition
•
Disposez les aliments de forme inégale (ex. : morceaux de poulet ou côtelettes) de
telle façon que la partie la plus épaisse est orientée vers l'extérieur du plateau tournant
; de cette manière, elle recevra une plus grande quantité de micro-ondes. Pour éviter la
surcuisson, placez les morceaux fins ou délicats au centre du plateau tournant.
•
Protection
Recouvrez les aliments de bandelettes de papier aluminium pour éviter la surcuisson.
Les extrémités des ailes ou des cuisses de volaille et les coins des plats carrés sont
par exemple des zones particulièrement sensibles. Utilisez uniquement de petites
quantités de papier aluminium. Dans le cas contraire, vous risqueriez d'endommager
votre four.
•
Rotation
Retournez les aliments à mi-cuisson pour exposer toutes les parties aux micro-ondes.
Cette méthode se révèle particulièrement efficace pour la cuisson de grandes pièces
de viande comme les rôtis.
Repos
Les aliments cuits au micro-ondes conservent la chaleur et continuent à cuire plusieurs
minutes après l'arrêt du four. Laissez-les donc reposer quelques instants le temps que
la cuisson se termine. Cette consigne s'applique essentiellement aux rôtis et légumes
entiers. Le centre du rôti continue donc à cuire sans pour autant que les parties
extérieures ne soient trop cuites. Tous les liquides (ex. : soupe ou chocolat chaud)
doivent être agités ou remués à la fin de la cuisson. Laissez reposer les liquides
quelques instants avant de les servir. Lorsque vous réchauffez des aliments pour bébé,
remuez bien et vérifiez la température avant de servir.
13
Les aliments denses, comme les pommes de terre, chauffent plus lentement que
les autres aliments. Les aliments à chair délicate doivent être réchauffés à une
puissance moins élevée afin d'éviter qu'ils ne durcissent.
L'altitude et le type d'ustensile utilisé peuvent influer sur le temps de cuisson.
Lorsque vous testez une nouvelle recette, sélectionnez le temps de cuisson
minimal et vérifiez occasionnellement les aliments pour éviter qu'ils ne soient trop
cuits.
Les aliments dont la peau n'est pas poreuse, tel que les pommes de terre ou les
saucisses pour hot-dogs, doivent être percés pour éviter qu'ils n'éclatent.
Il n'est pas conseillé de faire frire les aliments dans de l'huile ou de la graisse
chaude. La graisse et l'huile pourraient entrer en ébullition et déborder, provoquant
ainsi de graves brûlures.
Certains ingrédients chauffent plus vite que d'autres. Par exemple, la confiture
située au cœur d'un beignet sera plus chaude que la pâte. Souvenez-vous en afin
de prévenir tout risque de brûlure.
La confection de conserves maison à l'aide du micro-ondes n'est pas
recommandée car certaines bactéries pathogènes peuvent ne pas être détruites
lors de la cuisson.
Bien que les micro-ondes ne chauffent pas directement les ustensiles, la chaleur
des aliments se transmet souvent à ces derniers. Utilisez toujours une manique
lorsque vous retirez les aliments du four et apprenez aux enfants à procéder de
même.
Il n'est pas recommandé de faire des bonbons dans le micro-ondes car le sucre
peut atteindre des températures très élevées. Souvenez-vous en afin de prévenir
tout risque de blessure.
tl]XY[z{lnTWZY`YhmyUGGwGX[GG~ SGhG`SGYWW]GG[a\[Gwt
Consignes concernant la cuisson
Cuisson automatique par capteur
Guide de cuisson
Le capteur automatique permet de cuire automatiquement les aliments en détectant la
quantité d'humidité produite lors de leur cuisson.
• Lors de la cuisson des aliments, différents types d'humidité sont produits. Le
capteur automatique détermine le temps et la puissance de cuisson adéquates en
détectant la quantité d'eau produite par les aliments, vous évitant ainsi de
procéder à ces réglages.
• Lorsque vous recouvrez un récipient à l'aide de son couvercle ou d'un film
plastique au cours de la cuisson par capteur, ce dernier calcule automatiquement
la quantité d'eau produite une fois le récipient rempli de vapeur.
• Peu de temps avant la fin de la cuisson, le décompte du temps de cuisson restant
démarre. Vous pouvez alors, selon les besoins, retourner ou mélanger les
aliments pour une cuisson uniforme.
• Avant de lancer la cuisson automatique par capteur, parsemez les aliments
d'herbes, d'épices ou de sauces de brunissage. Veuillez cependant noter que le
sel ou le sucre laissent des traces de brûlé sur les aliments. Nous vous conseillons
donc de n'ajouter ces ingrédients qu'une fois la cuisson terminée.
• La fonction More/Less (Plus/Moins) est utilisée pour augmenter ou réduire le
temps de cuisson. Utilisez cette fonction pour obtenir le degré de cuisson qui vous
convient.
Guide de cuisson de la viande
•
•
•
•
Placez la viande sur une grille à rôtir adaptée à la cuisson au micro-ondes, le tout
dans un plat du même type.
Lancez la cuisson en plaçant la viande côté gras vers le bas. Recouvrez les os ou
les parties comportant peu de chair de fines bandelettes de papier aluminium.
Vérifiez la température en différents endroits avant de laisser la viande reposer le
temps recommandé.
Les températures suivantes sont les températures de retrait. La température des
aliments augmente durant le temps de repos.
Aliment
Rôti de
boeuf
Désossé
Jusqu'à 2 kg
Ustensiles et couvercles pour la cuisson par capteur
•
•
•
•
•
Pour obtenir de bons résultats de cuisson à l'aide de cette fonction, suivez les
consignes relatives au choix des récipients et des couvercles dans les tableaux de
ce manuel.
Utilisez toujours des récipients résistants aux micro-ondes et recouvrez-les d'un
couvercle ou d'un film plastique. Lorsque vous utilisez un film plastique, ménagez
une cheminée à une extrémité pour permettre à la vapeur de s'échapper à la
vitesse appropriée.
Utilisez toujours le couvercle spécialement adapté au récipient utilisé. Si l'ustensile
n'est pas équipé d'un couvercle, utilisez un film plastique.
Remplissez les récipients au moins jusqu'à la moitié de leur capacité.
Les aliments nécessitant d'être mélangés ou retournés devront l'être à la fin du
cycle de cuisson par capteur, lorsque le décompte du temps restant s'affiche.
•
•
•
•
•
•
Instructions
Placez la viande, côté gras vers le
8 à 12 min pour 500 g à 50°C :
bas, sur la grille à rôtir. Couvrez
saignant
de papier sulfurisé. Retournez à
9 à 13 min pour 500 g à 55°C : à point mi-cuisson. Laissez reposer le
10 à 15 min pour 500 g à 65°C : bien tout 10 min.
cuit
Puissance : High (Elevée) (0)
durant les 5 premières minutes, puis
Medium (Moyenne) (5).
Porc
Temps de cuisson :
Désossé ou 12 à 16 min pour 500 g à 70°C : bien
non
cuit
Puissance : High (Elevée) (0)
Jusqu'à 2 kg
durant les 5 premières minutes, puis
Medium (Moyenne) (5).
Placez la viande, côté gras vers le
bas, sur la grille à rôtir. Couvrez
d'un film plastique perforé.
Retournez à mi-cuisson. Laissez
reposer le tout 10 min.
Guide de cuisson de la volaille
•
•
•
Important
•
Temps de cuisson/Puissance
Temps de cuisson :
Il n'est pas conseillé d'utiliser la fonction de cuisson automatique par capteur pour
effectuer plusieurs cycles de cuisson continus.
Installez le four dans un endroit bien ventilé pour garantir un refroidissement
adéquat, une bonne circulation de l'air et un fonctionnement optimal du capteur.
Pour éviter tout mauvais résultat, n'utilisez pas le capteur automatique lorsque la
température ambiante est trop basse ou trop élevée.
N'utilisez pas de détergent volatile pour nettoyer votre four. L'humidité produite
suite à l'utilisation de ce type de produit pourrait entraver le bon fonctionnement du
capteur.
Ne placez pas le four à proximité d'appareils produisant un taux élevé d'humidité
ou de gaz afin d'éviter tout dysfonctionnement du capteur automatique.
Conservez toujours l'intérieur du four propre. Nettoyez les salissures à l'aide d'un
chiffon humide.
Ce four est destiné à une utilisation domestique uniquement.
•
Placez la volaille sur une grille à rôtir adaptée à la cuisson au micro-ondes, le tout
dans un plat de même type.
Recouvrez la volaille de papier sulfurisé afin d'éviter les projections.
Recouvrez de fines bandelettes d'aluminium les os, les parties comportant peu de
chair et les zones sensibles à la cuisson.
Vérifiez la température en différents endroits avant de laisser la volaille reposer le
temps recommandé.
Aliment
Poulet
entier
Jusqu'à 2 kg
14
Temps de cuisson/
Puissance
Temps de cuisson :
Instructions
Placez le poulet, côté poitrine vers le bas,
sur la grille à rôtir. Couvrez de papier
sulfurisé. Retournez à mi-cuisson. Cuisez
jusqu'à ce que le jus s'écoulant du poulet soit
Puissance : Medium
clair et que la chair autour des os ne soit plus
High (Moyennement élevée) rosée. Laissez reposer 5 à 10 min.
(7).
7 à 10 min pour 500 g à
80°C
tl]XY[z{lnTWZY`YhmyUGGwGX\GG~ SGhG`SGYWW]GG[a\[Gwt
Consignes concernant la cuisson
•
Aliment
Morceaux
de poulet
Jusqu'à 1 kg
Temps de cuisson/
Puissance
Temps de cuisson :
7 à 10 min pour 500 g à
80°C : viande noire
75°C : viande blanche
Puissance : Medium
High (Moyennement élevée)
(7)
Instructions
•
Placez le poulet dans un plat, côté os orienté
vers le bas et côté le plus épais orienté vers
l'extérieur du plat. Couvrez de papier
sulfurisé. Retournez à mi-cuisson. Cuisez
jusqu'à ce que le jus s'écoulantdu poulet soit
clair et que la chair autour des os ne soit plus
rosée. Laissez reposer 5 à 10 min.
•
•
•
•
Guide de cuisson des fruits de mer
•
•
•
•
•
Cuisez le poisson jusqu'à ce qu'il s'émiette facilement à la fourchette.
Placez le poisson sur une grille à rôtir adaptée à la cuisson au micro-ondes, le tout
dans un plat de même type.
Utilisez un couvercle hermétique pour cuire le poisson à l'étuvée. L'utilisation de
papier sulfurisé ou d'une serviette en papier comme couvercle produit moins de
vapeur.
Ne faites pas trop cuire le poisson et vérifiez sa cuisson une fois le temps
minimum écoulé.Guide de
Aliment
Temps de cuisson/
Puissance
Instructions
Biftecks
Temps de cuisson : Placez les biftecks sur la grille à rôtir, côté le
Filets
Temps de cuisson : Placez les filets dans un plat de cuisson en
7 à 11 min pour 500 g
Jusqu’à 700
Puissance : Mediumg
High (Moyennement
élevée) (7).
•
plus épais orienté vers l'extérieur de la grille.
Couvrez de papier sulfurisé. Retournez et
changez la disposition à mi-cuisson. Cuisez le
poisson jusqu'à ce qu'il s'émiette facilement à la
fourchette. Laissez reposer 3 à 5 min.
4 à 8 min pour 500 g
Jusqu’à 700
Puissance : Mediumg
High (Moyennement
élevée) (7)
prenant soin de recouvrir les morceaux les plus
fins de papier sulfurisé. S'ils mesurent plus de
1,3 cm d'épaisseur, retournez-les et changez la
disposition à mi-cuisson. Cuisez le poisson
jusqu'à ce qu'il s'émiette facilement à la
fourchette. Laissez reposer 2 à 3 min.
Crevettes Temps de cuisson :
4 à 6½ min pour 500 g
Jusqu’à 700
Puissance : Mediumg
High (Moyennement
élevée) (7)
Répartissez les crevettes dans un plat de
manière à éviter qu'elles ne se chevauchent.
Couvrez de papier sulfurisé. Cuisez-les jusqu'à
ce qu'elles deviennent fermes et opaques tout
en les changeant 2 à 3 fois de position en cours
de cuisson. Laissez reposer le tout 5 min.
cuisson des œufs
•
•
•
Ne faites jamais cuire les œufs (durs ou non) dans leur coquille car ils risqueraient
d'exploser.
Percez toujours les œufs entiers afin d'éviter qu'ils n'éclatent.
Cuisez les œufs juste à point ; ils deviennent durs lorsqu'ils sont trop cuits.
Guide de cuisson des légumes
15
Lavez les légumes avant de procéder à la cuisson. Il est souvent inutile d'ajouter
de l'eau. Pour les légumes denses tels que les pommes de terre, les carottes et
les haricots verts, ajoutez environ ¼ de verre d'eau.
Les petits légumes (rondelles de carottes, petits pois, haricots du Cap, etc.)
cuisent plus vite que les plus gros.
Les légumes entiers, comme les pommes de terre, les courges ou les épis de
maïs, doivent être disposés en cercle sur le plateau tournant avant la cuisson. Ils
cuiront de manière plus uniforme si vous les retournez à mi-cuisson.
Dirigez toujours les tiges des légumes (ex. : asperges, brocolis) vers les bords du
plat, pointes vers le centre.
Lorsque vous cuisez des légumes coupés en morceaux, recouvrez toujours le plat
d'un couvercle ou d'un film plastique perforé adapté à la cuisson au micro-ondes.
Avant la cuisson, percez la peau des légumes entiers, non pelés, tels que les
pommes de terre, les courges, les aubergines, etc. afin d'éviter qu'ils n'éclatent.
Pour une cuisson plus uniforme, remuez les légumes entiers ou changez leur
disposition à mi-cuisson.
Généralement, plus l'aliment est dense, plus le temps de repos est long (le temps
de repos correspond au temps nécessaire aux aliments denses et volumineux
pour terminer leur cuisson une fois sortis du four). Une pomme de terre au four
doit reposer pendant cinq minutes avant que sa cuisson ne soit terminée, alors
qu'un plat de petits pois peut être servi immédiatement.
tl]XY[z{lnTWZY`YhmyUGGwGX]GG~ SGhG`SGYWW]GG[a\[Gwt
Consignes concernant la cuisson
Guide de décongélation automatique
•
Remarques
Respectez les instructions suivantes lorsque vous décongelez différents types
d'aliments.
Type
Code d'alim
ent
Poids
Température
initiale
Instructions
1
Viande 100 g à 2
kg
20 à 60 min
Recouvrez les bords pauvres en chair de
papier aluminium. Retournez la viande
lorsque le signal sonore retentit. Ce
programme convient pour la cuisson du
bœuf, de l'agneau, du porc, des côtelettes ou
des émincés.
2
Volaille 100 g à 2
kg
20 à 60 min
Recouvrez les cuisses et les ailes de papier
aluminium. Retournez la volaille lorsque le
signal sonore retentit. Ce programme peut
convenir aussi bien à la cuisson d'un poulet
entier que celle de morceaux de poulet.
3
Poisso
n
100 g à 2
kg
20 à 50 min
Protégez la queue d'un poisson entier avec
du papier d’aluminium. Retournez le poisson
lorsque le signal sonore retentit. Ce
programme convient aussi bien à la cuisson
des poissons entiers qu’à celle des filets.
4
Fruits 100 g à 2
de mer
kg
20 à 50 min
Protégez la queue d'un poisson entier avec
du papier d’aluminium. Retournez le poisson
lorsque le signal sonore retentit. Ce
programme convient à la cuisson des
crevettes, langoustines, mollusques et
palourdes.
5
Pain
Gâtea
u
5 à 30 min
Placez le pain sur une feuille de papier
absorbant et retournez-le dès que le signal
sonore retentit. Posez le gâteau sur une
assiette en céramique et, si possible,
retournez-le dès que le signal sonore retentit
(Le four continue de fonctionner et s'arrête
automatiquement lorsque vous ouvrez la
porte).
Ce programme convient à tous les types de
pain, en tranches ou entiers, ainsi qu'aux
petits pains et aux baguettes. Disposez les
petits pains en cercle.
Ce programme convient à la cuisson de
toutes sortes de gâteaux à base de levure
ainsi qu'à celle des biscuits, de la tarte au
fromage et de la pâte feuilletée. Il n'est pas
adapté à la cuisson des pâtes brisées, des
gâteaux à la crème et aux fruits ou des
gâteaux nappés de chocolat.
100 à 700
g
Vérifiez la cuisson lorsque le four émet un signal. Après l'étape finale, il se peut que de
petites parties restent gelées. Laissez-les reposer quelques instants pour que la
décongélation se poursuive. Ne décongelez pas ces aliments tant que tous les cristaux
de glace n'ont pas fini de fondre. Recouvrir les rôtis et les biftecks de petits morceaux
d'aluminium empêche que les bords ne cuisent trop vite et que le centre ne soit encore
congelé. Utilisez des bandelettes de papier aluminium étroites et lisses pour recouvrir
les bords et les parties plus fines des aliments.
16
tl]XY[z{lnTWZY`YhmyUGGwGX^GG~ SGhG`SGYWW]GG[a\[Gwt
Consignes concernant la cuisson
Recettes
Salade de pommes de terre chaudes
Ragoût de bœuf à l'orge
900 g de petites pommes de terre à peau rouge (Roseval), coupées en morceaux de
1,5 cm
4 tranches de lard (cru) coupées en morceaux de 1,5 cm
¼ tasse d'oignons hachés
2 cc de sucre
1 cc de sel
1 cc de farine
½ cc de graines de céleri
1/8 cc de poivre
2½ cs de vinaigre de cidre
675 g de bœuf découpé en morceaux d'environ 1,5 cm d'épaisseur
½ tasse d'oignons hachés
2 cs de farine
1 cs de sauce Worcestershire
Entre 380 et 405 g de bouillon de bœuf
2 carottes moyennes, coupées en rondelles d'environ 1,3 cm (1 tasse env.)
½ tasse d'orge
1 feuille de laurier
¼ cc de poivre
1 paquet (250 à 280 g) de pois surgelés, décongelés
1. Dans un faitout d'une contenance de 2 litres, incorporez le bœuf, les oignons, la
farine et la sauce Worcestershire. Mélangez bien. Couvrez. Faites cuire à
puissance élevée (0) pendant 6 à 8 minutes, en mélangeant une fois, jusqu'à ce
que la viande ne soit plus rosée.
2. Ajoutez le bouillon, les carottes, l'orge, la feuille de laurier et le poivre. Remuez.
Couvrez. Faites cuire à puissance moyenne pendant 1h00 à 1h30, en mélangeant
2 à 3 fois, jusqu'à ce que les carottes et le bœuf soit bien tendres.
3. Ajoutez les pois. Couvrez. Faites cuire à puissance moyenne pendant 10 minutes.
Laissez reposer pendant 10 minutes. Retirez la feuille de laurier avant de servir.
Pour 6 personnes.
1. Dans un faitout d'une contenance de 2 litres, incorporez les pommes de terre avec
le ¼ de tasse d'eau. Couvrez. Faites cuire à puissance élevée (0) jusqu'à ce que
les pommes de terre soient tendres (7 à 10 min), en mélangeant deux fois.
Egouttez et laissez refroidir le tout quelques instants.
2. Dans un saladier de taille moyenne, faites cuire les tranches de lard à puissance
élevée (0), en mélangeant une fois, jusqu'à ce qu'elles deviennent croustillantes
(2½ à 3½ min) Disposez les tranches sur du papier absorbant. Prélevez une
cuillère à soupe de graisse de cuisson du lard.
3. Mélangez-la avec les oignons. Recouvrez le tout de film étirable et relevez-en un
coin pour laisser s'échapper la vapeur. Faites cuire à puissance élevée (0) jusqu'à
ce que la préparation soit tendre (1½ à 2½ min) ; mélangez.
4. Incorporez le sucre, le sel, la farine, les graines de céleri et le poivre. Faites cuire à
puissance élevée jusqu'à ébullition du mélange (30 à 40 s). Ajoutez le vinaigre et
une ½ tasse d'eau. Faites cuire à puissance élevée (0) jusqu'à ce que le liquide
entre en ébullition et s'épaississe légèrement (1 à 2 min), mélangez.
Ajoutez les
tranches de lard à la sauce. Versez la sauce sur les pommes de terre. Remuez
bien.
Brocolis au fromage
¼ tasse de beurre ou de margarine
¼ tasse d'oignons hachés
1½ cs de farine
½ cc de sel
¼ cc de moutarde
1/8 cc de poivre
1½ tasse de lait
¼ tasse de poivron rouge haché
225 g (2 tasses) de fromage râpé type Cheddar
1 paquet (250 à 280 g) de brocolis hachés surgelés, décongelés
4 tasses de pâtes cuites torsadées (225 g de pâtes sèches)
1. Dans un faitout d'une contenance de 2 litres, faites cuire le beurre et les oignons à
puissance élevée (0) pendant 1 à 2 minutes, en remuant une fois, jusqu'à ce que
les oignons soient bien tendres.
2. Ajoutez la farine, le sel, la moutarde et le poivre. Mélangez bien. Faites cuire à
puissance élevée (0) pendant 30 à 60 secondes jusqu'à ébullition. Incorporez le
lait et mélangez jusqu'à l'obtention d'un mélange onctueux.
3. Incorporez le poivron rouge. Faites cuire à puissance élevée (0) pendant 2 à 3
minutes, en remuant deux fois, jusqu'à ce que le mélange entre en ébullition et
s'épaississe légèrement. Incorporez le fromage et mélangez bien jusqu'à ce qu'il
ait entièrement fondu.
4. Ajoutez les brocolis et les pâtes. Mélangez bien. Couvrez. Faites cuire à
puissance élevée (0) pendant 4 à 6 minutes, en remuant une fois, jusqu'à ce que
le mélange soit bien chaud. Remuez avant de servir.
Pour 6 personnes.
Pour 6 personnes.
Soupe de haricots noirs
1 tasse d'oignons hachés
1 gousse d'ail, émincée
2 boîtes (de 420 g chacune) de haricots noirs, égouttés
1 boîte (entre 390 et 450 g) de tomates concassées
Entre 385 et 405 g de bouillon de bœuf
1 boîte (entre 195 et 240 g) de maïs
1 boîte (110 g) de piments verts, émincés
1 à 2 cc (plus ou moins selon vos goûts) de cumin en poudre
1. Mettez les oignons et l'ail dans un faitout d'une contenance de 3 litres. Couvrez.
Faites cuire à puissance élevée (0) pendant 2 à 4 minutes jusqu'à ce qu'ils
deviennent tendres.
2. Ajoutez une boîte de haricots et écrasez-les à l'aide d'une fourchette. Ajoutez le
reste des ingrédients et mélangez bien.
3. Faites cuire à puissance élevée (0) pendant 10 minutes sans couvercle ;
mélangez. Réglez la puissance sur le niveau moyen et faites cuire pendant 5
minutes. Remuez avant de servir.
Pour environ deux litres de soupe.
17
tl]XY[z{lnTWZY`YhmyUGGwGX_GG~ SGhG`SGYWW]GG[a\[Gwt
Annexe
Dépannage
•
Avant de faire appel à un dépanneur, effectuez les vérifications suivantes.
•
L'affichage et le four ne fonctionnent pas.
•
•
•
•
•
•
•
Insérez correctement la fiche dans une prise avec mise à la terre.
Si la prise est commandée par interrupteur mural, assurez-vous que celui-ci est en
position ouverte.
Retirez la fiche de la prise, attendez dix secondes, puis rebranchez-la.
Relancez le disjoncteur ou remplacez les fusibles grillés.
Branchez un autre appareil sur la prise. Si l'autre appareil ne fonctionne pas,
demandez à un électricien qualifié de réparer la prise.
Branchez le four sur une autre prise.
•
•
L'affichage du four fonctionne mais l'appareil ne s'allume pas.
•
•
•
•
Assurez-vous que la porte est correctement fermée.
Vérifiez qu'il ne reste aucun résidu de matériel d'emballage ou de tout autre
matériau sur le joint de la porte.
Vérifiez que la porte n'est pas endommagée.
Appuyez deux fois sur Cancel (Annuler) et sélectionnez à nouveau les instructions
de cuisson.
•
•
Veillez à ce que l'intérieur du four soit toujours propre. Des particules d'aliments et
des projections de liquides peuvent se coller aux parois du four et réduire ainsi son
efficacité.
Essuyez immédiatement toute projection. Utilisez un chiffon humide et un
nettoyant doux. N'utilisez pas de détergents ou d'abrasifs puissants.
Pour décoller les particules d'aliments ou de liquides tenaces, faites chauffer deux
tasses d'eau dans un récipient en verre d'une capacité de quatre tasses
(additionnée de jus de citron pour désodoriser le four) à la puissance High
(Elevée) ou jusqu'à ébullition. Laissez reposer dans le four pendant une à deux
minutes.
Retirez le plateau en verre du four lorsque vous souhaitez nettoyer le four ou le
plateau. Pour ne pas briser le plateau, manipulez-le avec précaution et ne le
plongez pas dans l'eau immédiatement après la cuisson. Lavez le plateau avec
précaution dans de l'eau chaude savonneuse ou au lave-vaisselle.
Nettoyez la surface externe du four à l'aide de savon et d'un chiffon humide.
Séchez-la à l'aide d'un chiffon doux. Pour ne pas endommager votre four, ne
laissez pas d'eau s'infiltrer par les ouvertures.
Nettoyez la fenêtre de la porte à l'aide d'eau et de savon très doux. Veillez à
utiliser un chiffon doux pour éviter les rayures.
Si de la condensation s'accumule à l'intérieur ou à l'extérieur de la porte du four,
essuyez-la à l'aide d'un chiffon doux. Ce phénomène peut se produire lorsque les
aliments placés à l'intérieur du four possèdent une forte teneur en eau. Cela
n'indique en rien la présence d'une fuite dans le micro-ondes.
Ne faites jamais fonctionner le four à vide ; cela risquerait d'endommager le
magnétron ou le plateau en verre. Vous pouvez laisser un verre d'eau dans le four
lorsqu'il n'est pas utilisé pour éviter tout dommage au cas où il serait mis en
marche accidentellement.
L'appareil s'éteint avant la fin du temps programmé.
•
•
Message d'erreur
•
S'il n'y a pas eu de coupure de courant, retirez la fiche de la prise, attendez dix
secondes, puis rebranchez-la. En cas de coupure de courant, l'horloge affiche «
». Réglez l'heure et saisissez à nouveau les instructions de cuisson.
Relancez le disjoncteur ou remplacez les fusibles grillés.
•
Les aliments cuisent trop lentement.
•
Assurez-vous que le four est le seul appareil branché sur le circuit d'alimentation
électrique de 12 A. L'utilisation d'un autre appareil sur le même circuit risque
d'entraîner une chute de tension. Au besoin, rebranchez le four sur son propre
circuit.
•
•
Des étincelles ou des arcs se forment.
•
Retirez les éventuels ustensiles, plats ou attaches en métal du four. Si vous
employez du papier aluminium, utilisez uniquement de petites bandelettes et
ménagez un espace d'au moins 2,5 cm entre l'aluminium et les parois intérieures
du four.
Si vous ne parvenez pas à résoudre votre problème,
contactez votre revendeur local ou le service
après-vente SAMSUNG
Le plateau tournant fait du bruit ou ne tourne pas en continu.
•
•
Nettoyez le plateau tournant, son anneau et le plancher du four.
Assurez-vous que le plateau tournant et son anneau sont placés correctement.
L'utilisation du micro-ondes provoque des interférences télé ou
radio.
•
Il s'agit du même type d'interférences provoquées par les autres petits appareils,
tels que les sèche-cheveux. Eloignez votre micro-ondes des autres appareils,
comme le téléviseur ou le poste de radio.
Entretien et nettoyage
•
Si « Error1 » (Erreur 1) et « Error3 » (Erreur 3) s'affichent, laissez le four refroidir
pendant au moins
5 minutes. Si ces messages s'affichent fréquemment, veuillez appeler notre
service d'assistance.
Si vous ouvrez la porte en phase de détection, « Error4 » (Erreur 4) s'affiche.
Si « Error2 » (Erreur 2) s'affiche, veuillez appeler immédiatement notre service
d'assistance.
Suivez attentivement ces consignes pour le nettoyage et l'entretien de votre four.
18
tl]XY[z{lnTWZY`YhmyUGGwGX`GG~ SGhG`SGYWW]GG[a\[Gwt
Annexe
Remarque
Caractéristiques
Numéro de modèle
ME6124ST
Dimensions intérieures du four
34 litres
Commandes
10 niveaux de puissance, décongélation incluse
Minuterie
99 minutes, 99 secondes
Alimentation
230 V ~ 50 Hz
Consommation d'énergie
1550 W
Sortie de l'alimentation
1000 W (IEC-705)
Fréquence de fonctionnement
2450 MHz
Dimensions extérieures
523 (L) X 297 (H) X 415 (P)
Dimensions intérieures
368 (L) X 229 (H) X 396 (P)
Poids net
15,5 kg
19
tl]XY[z{lnTWZY`YhmyUGGwGYWGG~ SGhG`SGYWW]GG[a\[Gwt
Samsung Electronics Co., Ltd.
20
tl]XY[z{lnTWZY`YhluUGGwGXGG~ SGhG`SGYWW]GG[a\ZGwt
Microwave Oven
Owner’s Manual
ME6124ST
This manual is made with 100% recycled paper.
Code No.: DE68-03292A-02
tl]XY[z{lnTWZY`YhluUGGwGYGG~ SGhG`SGYWW]GG[a\ZGwt
Safety
Safety Precautions
RECAUTIONS TO AVOID POSSIBLE EXPOSURE TO
EXCESSIVE MICROWAVE ENERGY
Important Safety Instructions.
Read Carefully and keep for future reference.
Before cooking food or liquids in your microwave oven,
please check that the following safety precautions are taken.
Failure to observe the following safety precautions may result in harmful exposure to
microwave energy.
(a) Do not attempt to operate this oven with the door open since opendoor operation can result in harmful exposure to microwave energy.
It is important not to defeat or tamper with the safety interlocks.
(b) Do not place any object between the oven front face and the door or
allow soil or cleaner residue to accumulate on sealing surfaces.
(c) Do not operate the oven if it is damaged. It is particularly important
that the oven door close properly and that there is no damage to the
1. DO NOT use any metallic cookware in the microwave oven:
•
•
•
Metallic containers
Dinnerware with gold or silver trimmings
Skewers, forks, etc.
Reason: Electric arcing or sparking may occur and may damage the oven.
2. DO NOT heat:
(1) Door (bent or dented),
(2) Hinges and latches (broken or loosened),
(3) Door seals and sealing surfaces.
• Airtight or vacuum-sealed bottles, jars, containers
Ex) Baby food jars
• Airtight food.
Ex) Eggs, nuts in shells, tomatoes
Reason: The increase in pressure may cause them to explode.
Tip: Remove lids and pierce skins, bags, etc.
(d) The oven should not be adjusted or repaired by anyone except
properly qualified service personnel.
3. DO NOT operate the microwave oven when it is empty.
Reason: The oven walls may be damaged.
Tip: Leave a glass of water inside the oven at all times. The water will absorb the
microwaves if you accidentally set the oven going when it is empty.
4. DO NOT cover the rear ventilation slots with cloths or paper.
Reason: The cloths or paper may catch fire as hot air is evacuated from the
oven.
5. ALWAYS use oven gloves when removing a dish from the oven.
Reason: Some dishes absorb microwaves and heat is always transferred from
the food to the dish.The dishes are therefore hot.
6. DO NOT touch heating elements or interior oven walls.
Reason: These walls may be hot enough to burn even after cooking has finished,
even though they do not appear to be so. Do not allow inflammable
materials to come into contact with any interior area of the oven. Let the
oven cool down first.
7. To reduce the risk of fire in the oven cavity:
•
•
•
•
Do not store flammable materials in the oven
Remove wire twist ties from paper or plastic bags
Do not use your microwave oven to dry newspapers.
If smoke is observed, keep the oven door closed and switch off or disconnect
the oven from the power supply
8. Take particular care when heating liquids and baby foods.
•
•
•
•
2
ALWAYS allow a standing time of at least 20 seconds after the oven has been
switched off so that the temperature can equalize.
Stir during heating, if necessary, and ALWAYS stir after heating.
Take care when handling the container after heating. You may burn yourself if
thecontainer is too hot.
A risk of delayed eruptive boiling exists.
tl]XY[z{lnTWZY`YhluUGGwGZGG~ SGhG`SGYWW]GG[a\ZGwt
Safety Precautions
•
To prevent delayed boiling and possible scalding, you should put a plastic
spoon or glass stick into the beverages and stir before, during and after
heating.
Reason: During the heating of liquids the boiling point can be delayed; this
means that eruptive boiling can start after the container is removed
from the oven. You may scald yourself.
• In the event of scalding, follow these FIRST AID instructions:
• Immerse the scalded area in cold water for at least 10 minutes.
• Cover with a clean, dry dressing.
• Do not apply any creams, oils or lotions.
• NEVER fill the container to the top and choose a container that is wider at the
top than at the bottom to prevent the liquid from boiling over. Bottles with
narrow necks may also explode if overheated.
• ALWAYS check the temperature of baby food or milk before giving it to the
baby.
• NEVER heat a baby’s bottle with the teat on, as the bottle may explode if
overheated.
IMPORTANT SAFETY INSTRUCTIONS
During cooking, you should look into the oven from time to time when food is being
heated or cooked in disposable containers of plastic, paper or other combustible
materials.
IMPORTANT
Young children or infirm persons should NEVER be allowed to use or play with the
microwave oven. Nor should they be left unattended near the microwave oven when it
is in use. Items of interest to children should not be stored or hidden just above the
oven.
WARNING:
If the door or door seals are damaged, the oven must not be operated until it has been
repaired by a competent person.
9. Be careful not to damage the power cable.
Do not immerse the power cable or plug in water and keep the power cable
away from heated surfaces.
• Do not operate this appliance if it has a damaged power cable or plug.
10. Stand at arm’s length from the oven when opening the door.
Reason: The hot air or steam released may cause scalding.
WARNING:
11. Keep the inside of the oven clean.
Reason: Food particles or spattered oils stuck to oven walls or floor can cause
WARNING:
•
It is hazardous for anyone other than a comperent person to carry out any service or
repair operation which involves the removal of a cover which gives protection against
exposure to microwave energy.
Liquids and other foods must not be heated in sealed containers since they are liable
to explode.
paint damage and reduce the efficiency of the oven.
12. You may notice a “Clicking” sound during operation(especially when the oven is in
WARNING:
defrosting).
Reason: This sound is normal when the electrical power output is changing.
Only allow children to use the oven without supervision when adequate instructions
have been given so that the child is able to use the oven in a safe way and
understands the hazards of improper use.
13. When the microwave oven is operating without any load, the power will be cut off
automatically for safety. You can operate the oven normally after letting it stand for
over 30 minutes.
Please recycle or dispose of the packaging material for this product in an
environmentally responsible manner.
Please contact your local authorities in regard to the enviromentally safe
disposal of this product.
3
tl]XY[z{lnTWZY`YhluUGGwG[GG~ SGhG`SGYWW]GG[a\ZGwt
Installing Your Microwave Oven
How a Microwave Oven Works
Place the oven on a flat, level surface that strong
enough to safely bear the weight of the oven.
Cooking Principle
20cm
above
10cm
behind
10cm
on the side
1. The microwaves generated by the magnetron are
distributed uniformly as the food rotates on the
turntable. The food is thus cooked evenly.
2. The microwaves are absorbed by the food up to a
depth of about 1 inch (2.5 cm). Cooking then continues
as the heat is dissipated within the food.
3. Cooking times vary according to the container used
and the properties of the food:
• Quantity and density
• Water content
• Initial temperature (refrigerated or not)
1. When you install your oven, make sure there is adequate
ventilation for your oven by leaving at least 10 cm (4 inches)
of space behind, and on the sides of the oven and 20 cm (8
inches) of space above.
2. Remove all packing materials inside the oven.
Install the roller ring and turntable.
Check that the turntable rotates freely.
☛
✽
✽
✽
Never block the air vents as the oven may overheat and automatically
switch itself off. It will remain inoperable until it has cooled sufficiently.
For your personal safety, plug the cable into a 3-pin, 230 Volt, 50Hz, AC
earthed socket. If the power cable of this appliance is damaged, it must be
replaced by the manufacturer or its service agent or a similarly qualified
person in order to avoid a hazard.
Do not install the microwave oven in hot or damp surroundings like next
to a traditional oven or radiator. The power supply specifications of the
oven must be respected and any extension cable used must be of the
same standard as the power cable supplied with the oven. Wipe the
interior and the door seal with a damp cloth before using your microwave
oven for the first time.
4
As the centre of the food is cooked by heat dissipation, cooking continues
even when you have taken the food out of the oven. Standing times specified
in recipes and in this booklet must therefore be respected to ensure:
• Even cooking of the food right to the centre
• The same temperature throughout the food
tl]XY[z{lnTWZY`YhluUGGwG\GG~ SGhG`SGYWW]GG[a\ZGwt
Your New Microwave oven
Your New Microwave oven
Checking Parts
Unpack your microwave oven and check to make sure that you have all the parts
shown here. If any part is missing or broken, call your dealer.
Microwave oven
Glass tray
Roller guide ring
Setting Up Your Microwave Oven
1.
Place the oven on a flat, sturdy surface and plug the cord into a grounded outlet.
once plugged in, the display on your oven will show:
kg
g
Oz.
10
4
11
5
Lbs. QTY.
Make sure there is adequate ventilation for your oven by leaving at least four
inches of space behind, above, and to the side of the oven.
2. Open the oven door by pulling on the handle.
3. Wipe the inside of the oven with a damp cloth.
4. Place the pre-assembled ring in the indentation in the center of the oven.
5.
1
2
3
Place the glass tray on top of the ring so that the three glass tabs in the center of
the tray fit securely into the tabs on the floor of the oven. )
1.
2.
3.
4.
5.
6.
7.
8.
5
6
12
7
13
8
14
9
15
Clock
Sound
One Touch Sensor Cook
Buttons
Beverage(INSTANT COOK)
Auto Cook Menus
Auto Defrost
Number Button
Power Level
9.
10.
11.
12.
13.
14.
15.
Pause/Cancel
One Minute +
Pizza Reheat (INSTANT
COOK)
Auto Reheat
More/Less
Kitchen Timer
Start
tl]XY[z{lnTWZY`YhluUGGwG]GG~ SGhG`SGYWW]GG[a\ZGwt
Your New Microwave oven
Operation
Table of Content
Setting the Clock
1. Press the Clock button. The “ENTER” and “TIME” indicators flash.
2. Use the number buttons to enter the current time. You must press at least three
Safety ........... ...................................................................................... 2
Safety Precautions ............................................................................ 2
Installing Your Microwave Oven ...................................................... 4
How a Microwave Oven Works ........................................................ 4
Your New Microwave oven ............................................................... 5
Checking Parts ................................................................................ 5
Setting Up Your Microwave Oven ................................................... 5
Table of Content .............................................................................. 6
Operation ..... ...................................................................................... 6
Setting the Clock ............................................................................. 6
Using the Pause/Cancel Button ...................................................... 6
Using the One Minute + Button ....................................................... 6
Using the Sensor Cook Buttons ...................................................... 6
Sensor Cooking Guide .................................................................... 7
Using the Instant Cook Buttons ....................................................... 7
Using the Rice/Pasta Buttons ......................................................... 7
Using the Meat/Fish Buttons ........................................................... 8
Using the Snack Bar Button ............................................................ 9
Defrosting Automatically .................................................................. 9
Reheating Automatically ................................................................. 9
Setting Cooking Times & Power Levels ........................................ 10
Demonstration Mode ..................................................................... 10
Using the More/Less Buttons ........................................................ 10
Switching the Beeper On/Off ......................................................... 10
Using the Kitchen Timer ................................................................ 10
Setting the Child Protection Lock .................................................. 10
Cooking Instructions ...................................................................... 11
Cooking Utensils ........................................................................... 11
Cooking Techniques ..................................................................... 11
General Tips .................................................................................. 11
Auto Sensor Cook ......................................................................... 12
Utensils & Cover For Sensor Cooking ........................................... 12
Important ... .................................................................................... 12
Cooking Guide .............................................................................. 12
Auto Defrosting Guide ................................................................... 13
Recipes ..... .................................................................................... 14
Appendix .......................................................................................... 15
Troubleshooting Guide .................................................................. 15
Care and Cleaning ........................................................................ 15
Error Message ............................................................................... 15
Specifications ................. ............................................................... 16
numbers to set the clock. If the current time is 5:00 enter, 5,0,0.
3. When 5 seconds has elapsed, “ENTER” indicator flash and “Cloc” will be
displayed.
4. Press Clock again. A colon will blink, indicating that the time is set.
If there is a power interruption, you will need to reset the clock.
You can check the current time while cooking is in progress by pressing the
Clock button.
Using the Pause/Cancel Button
The Pause/Cancel button allows you to clear instructions you have entered. It also
allows you to pause the oven’s cooking cycle, so that you can check the food.
• To pause the oven during cooking: press Pause/Cancel once. To restart, press
Start.
• To stop cooking, erase instructions, and return the oven display to the time of day:
press Pause/Cancel twice.
• To correct a mistake you have just entered: press Pause/Cancel once, then reenter the instructions.
Using the One Minute + Button
This button offers a convenient way to heat food in one minute increments at the High
power level.
1. Press the One Minute+ button once for each minute you wish to cook the food.
For example, press it twice for two minutes. The time will display, and the oven
starts automatically.
Add minutes to a program in progress by pressing the One Minute+ button for
each minute you want to add.
Using the Sensor Cook Buttons
By actually sensing the steam that escapes as food heat, this feature automatically
adjusts the oven’s heating time for various types and amounts of precooked food. All
food should be precooked and at refrigerator temperature.
1. Press the Sensor Cook button corresponding to the food you are cooking
(Popcorn, for example). The display shows “
” and your microwave oven
will begin cooking automatically.
When cooking popcorn, wait at least five minutes between each bag to avoid
overheating the glass tray. If you want to check the current time while cooking is in
progress, press the Clock button.
6
tl]XY[z{lnTWZY`YhluUGGwG^GG~ SGhG`SGYWW]GG[a\ZGwt
Operation
Sensor Cooking Guide
•
Rice/Pasta Chart
Follow the instructions below when sensor cooking different types of food.
Food
Amount
Popcorn
85g - 100g
1 package
Use only one microwave-only bag of popcorn at a time.
Use caution when removing and opening hot bag from
oven. Let oven cool for at least 5 minutes before using
again.
Potatoes
1 to 6 EA.
Prick each potato several times with fork. Place on
turntable in spoke-like fashion. Let stand 3-5 min. Let
oven cool for at least 5 minutes before using again.
Fresh
Vegetables
Single
Entrees
Code
Procedure
A-1
Item
White
Rice
1-2
serves
A-2
2 Tbsp of water. Cover with microwave safe plastic wrap
or lid. (Using the glass cover gives the best results.)
If using plastic wrap be sure to leave a small opening
near the edge of dish for ventilation. Remove vegetable
from oven let sit covered for 2 minutes, stir or serve. Let
oven cool for at least 5 minutes before using again.
Dry Pasta
1-2
serves
A-3
Frozen
Pasta
1-2
serves
instructions for covering and standing. Let oven cool for
at least 5 minutes before using again.
Using the Instant Cook Buttons
A-4
1. Press the Instant Cook button corresponding to the food you are cooking
(Beverage, for example). The display shows the first serving size. (“ENTER” and
“QTY.” will flash):
2. Press the button repeatedly to select the serving size you want. The display will
cycle through all available serving sizes. Once you select the correct serving size,
the microwave will begin cooking automatically.
When the cooking time is over, the oven will beep. The oven will then beep every
minute.
Item
Weight
½ cup
1 cup
2 cups
•
•
•
Use measuring cup or mug ; do not cover.
Place the beverage in the oven.
After heating, stir well.
1 Slice
2 Slices
3 Slices
4 Slices
•
Put the pizza on a microwave-safe plate with
wide end of slice towards the outside edge of
the plate.
Do not let slices overlap. Do not cover.
Before serving, let stand 1-2 min.
Fresh
Pasta
1-2
serves
A-5
Spaghetti
1-2
serves
100g
200g
250ml
375ml
Water:
Place dry pasta into microwave-safe rice coo-ker or bowl
boiling water or round Glass Pyrex dish breaking if necessary to fit without lids on and cook uncovered. After cooking put on
lid, allow standing time of 2-5 minutes. Stir and serve.
2 Minute
noodle
1-3
serves
Using the Rice/Pasta Buttons
1. Press the Rice/Pasta button corresponding to the food you are cooking. The
A-7
display shows “A-1”(item code).
Press the Rice/Pasta button repeatedly to select the item you want.(Refer to the
Rice/Pasta Chart below)
2. Press the Number 1 or2 ,3 button to select the serving size you want.
(Refer to the Rice/Pasta Chart below for the serving)
3. Press Start button to begin cooking.
7
Porridge
1-2
serves
2 S erv.
Pasta
100g
200g
Water
3cups
5cups
Water:
Place frozen pasta into microwave-safe rice cooker or bowl
boiling water or round Glass Pyrex dish without lids on and cook
uncovered.
After cooking put on lid, allow standing time of 2-5 minutes.
Stir and serve.
Pasta
1 Serv.
125g
2 S erv.
250g
Water
3cups
5cups
Water:
Place fresh pasta into microwave-safe rice cooker or bowl
boiling water or round Glass Pyrex dish without lids on and cook
uncovered.
After cooking put on lid, allow standing time of 2-5 minutes.
Stir and serve.
2 S erv.
Pasta
125g
250g
Water
3cups
5cups
Water:
Place dry spaghetti into microwave-safe rice cooker or
boiling water bowl or round Glass Pyrex dish breaking if necessary to fit
- without lids on and cook uncovered. After cooking put on
lid, allow standing time of 2-5 minutes. Stir and serve.
1 Serv.
A-6
2 S erv.
Rice
Water
1 Serv.
Remarks
•
•
Rice:Room Wash rice with cold water until water runs clear. Place the
Water:Room rice and water in a microwave-safe rice cooker or round
glass Pyrex dish with a lid and after cooking allow rice to
stand without removing lid. Stand rice for 3-5 minutes and
stir to separate grains.
1 Serv.
220g - 400g Remove food from outer wrapping and follow box
Beverage
Remarks
1 Serv.
1 to 4 cups Place fresh vegetables in microwave-safe dish and add
Pizza reheat
Initial
Weight Temperature
2 S erv.
Spaghetti
100g
200g
Water
3cups
5cups
Water:
Break noodle cake and place into a microwave-safe large
boiling water bowl. Pour boiling water over noodles and cook
uncovered. After oven beeps at half cooking time, stir well
and press start to continue. After cooking and then
standing time of two minutes, stir and serve.
1 Serv.
2 Serv.
3 ser v.
Noodle
1 packet
2 pac kets
3 pac kets
Wa ter
500 m l
1000 ml
1500 ml
Porridge oats: Place dry porridge oats and water or milk in a microwave
Room
safe bowl and cook uncovered. After oven beeps, stir the
oats well and press start to continue. After cooking, stir
Water&milk: well and top with brown sugar or honey.
Cold
1 Serv.
2 S erv.
Oats
35g
70g
Wa ter & Milk
185 m l
375ml
tl]XY[z{lnTWZY`YhluUGGwG_GG~ SGhG`SGYWW]GG[a\ZGwt
Operation
Using the Meat/Fish Buttons
Meat/Fish Chart
1. Press the Meat/Fish button corresponding to the food you are cooking. The
display shows “A-1”(item code).
Press the Meat/Fish button repeatedly to select the item you want.(Refer to the
Meat/Fish Chart below)
2. Press the Number 1 or2 , 3button to select the serving size you want.
(Refer to the Meat/Fish Chart below for the serving)
3. Press Start button to begin cooking.
Code
Item
Item
Initial
Weight Temperature
Remarks
A-1
Chicken
Breast
200250g
300350g
400450g
Refrige Select fresh chicken breasts, score, insert 3-4 cuts
rated with a sharp knife along breast and cook plain or firstly
marinate with you favo-rite flavor for two hours or
overnight covered in the refrigerator. Or sprinkle
breasts with soy sauce or lemon juice or your favorite
shaker herbs salt or pepper. Then cover breasts with
baking paper tucked in on plate or in Pyrex dish and
cook. At half cooking time oven will beep turn
breast(s) over and press start to continue. After
cooking stand breast(s) for 3-5 minutes. Serve.
A-2
Fish
Fillet
150200g
250300g
350400g
Refrige Select fresh fish fillets and cook plain or marinate with
rated you favorite seafood marin-ade for two hours or
overnight covered in the refrigerator. Or sprinkle fillets
with lemon juice or your favorite shaker herbs
especially lemon pepper seasoning, salt or pepper.
Then cover fillets with baking paper tucked in on plate
or in Pyrex dish and cook. After cooking stand
fillets(s) for 3 minutes. Serve.
8
Remarks
A-3
Sea Food
150200g
250300g
350400g
A-4
Casserole
1 dish Refrig- Ingredients For casserole.
erated 2 medium carrots (85g to 110g Before peeling), 2
medium onions( 110g to 140g. Before peeling), 2
medium potatoes(165g to 195g before peeling), 450
ground chuck beef, teaspoon salt, cup water,
teaspoon pepper. Peel and slice vegetables into inch
thick slices, Form beef into 12 small, flat pattie using
the 2-inch Reynolds Brass Ring. Flattern patties. In
2-quart casserole, layer half of beef patties, half of
carrots, half of onions, and half of potatoes.
Springkle with salt and pepper. Repeat layers,
making sure that top layer of beef patties is
completely covered with vegetables. Add water.
Press layer down into casserole. Cover. After
cooking stand casserole for 5 minutes. Serve.
A-5
Bacon
100125g
200225g
300325g
A-6
Meatball
1 dish Refrig- Ingredients For Meat Balls.
erated 450 g ground beef,cup chopped onion,1 egg beaten,
1 teaspoon salt, teaspoon pepper and 2 tablespoons water.Combine all ingredients and mix well.
Shape into 20 x (25mm) meat balls. Place meat
balls in utensil. Cover with microwave cling wrap
turning back one corner of the wrap by about 50mm
to vent. Cook. After cooking, stand meat balls for 5
minutes. Serve.
A-7
Meat loaf
1 dish Refrig- Ingredients For meat loaf.
erated 675g ground chuck beef, cup fine dry bread
crumbles, cup chopped onion, cup chopped green
pepper, 1 cup milk,1 egg, 2 tablespoons ketchup,
teaspoon pepper, cup teaspoon salt. Combine all
ingredients: mix well. Pack meat mixture firmly in loaf
dish: smooth out top. Cover with plastic wrap, turning
back one corner about 2 inch-es to vent. Place in
oven parallel to front of oven. After cooking stand
casserole for 5 minutes. Serve
Meat/Fish Chart
Code
Initial
Weight Temperature
Refrig- Select fresh seafood and set out on microw-avesafe
erated plate or Pyrex dish. Sprinkle with lemon juice or salt
if desired, cover seafood with baking paper eg. Glad
Bake - tucked in around and cook. After cooking
stand seafood for 3 minutes. Serve.
Refrig- Select fresh bacon rashers from your butcher, deli or
erated supermarket. Place on the absorbent paper towel on
microwavesafe plate or Pyrex dish and cover with
another piece of paper towel and cook. Serve.
tl]XY[z{lnTWZY`YhluUGGwG`GG~ SGhG`SGYWW]GG[a\ZGwt
Operation
Using the Snack Bar Button
Defrosting Automatically
1. Press the Snack Bar button corresponding to the food you are cooking. The
To thaw frozen food, set the weight of the food and the microwave automatically sets
the defrosting time, power level and standing time.
1. Press the Auto Defrost button. The display shows “1”.
(“ENTER” and “kg” will flash).
2. To set the type of your food, press the Auto Defrost button repeatedly. You can
also use the number buttons to enter the weight of the food directly.
It is possible to set up to a maximum of 2 kg(except to bread).
3. Press the Start button. The display will show cooking time during defrosting, the
oven will beep to let you know to turn the food over.
4. Open the oven door, and turn the food over.
5. Press the start button to resume defrosting.
display shows “A-1”(item code).
Press the Snack Bar button repeatedly to select the item you want.(Refer to the
Snack Bar Chart below)
2. Press the Number 1 or 2 , 3 button to select the serving size you want. Only the 1
button(serving) is available for TORTILLA
(Refer to the Snack Bar Chart below for the serving)
3. Press Start button to begin cooking.
Snack Bar Chart
Code
Item
Weight
Initial
Temperature
Remarks
A-1
Tortilla
400g
Refrigerated
Cut top off tortilla bag, remove moisture
sachet and place bag of tortilla directly in
center of microwave turntable. Heat. Use
heated tortilla immediately as required.
A-2
Chicken
wings
4-5 PCS Refrigerated
8-10 PCS
Place wings around plate, spoke-fashion.
Cover with wax paper.
A-3
Frozen Pie
50-60g
Frozen
100-110g
150-160g
Place frozen party pies into microwave
oven on microwave-safe plate or Pyrex
dish uncovered. Heat.
After cooking stand pies for 1 minute.
Serve.
A-4
Baby Food
70g
110g
170g
Remove metal top from room temperature
jars of baby food. Remove plastic lid and
metal lid from cups of baby food replace
lid, discarding metal lid. Place jar cup in
center of turntable and microwave on high
power until temperature is reached. Stir
well. Serve.
The More/Less key cannot be used with
the baby food key.
A-5
Room
Garlic Bread 200g
400g
600g
Refrigerated
A-6
Chicken
Nuggets
4 PCS
8 PCS
Refrigerated
Put a paper on top of plate and arrange
nuggets in spoke fashion on paper towel.
Do not cover. Let stand 1 min.
A-7
Potato
Wedge
4 PCS
8 PCS
Room
Cut potato into 4 even wedges. scoop or
out potato flesh, leaving about 1.4 inch of
skin. Place skins in spoke fashion around
plate, Sprinkle with bacon, onions and
Cheese. Microwave on High power for
until cheese is melted.
• See page 13 for the Auto Defrosting Guide.
Reheating Automatically
To reheat food, select the type of dish and the number of servings you want to reheat,
and the microwave automatically sets the reheating time.
1. Press the Auto Reheat button repeatedly to select the type of dish you wish to
reheat. The initial serving size for each dish is one serving.
You can select up to four cups for casseroles and pasta, Rice tinned reheat. Only
one serving is available for a plate of food.
The display shows the dish and quantity you have chosen.
2. Use the number buttons to increase the serving size. For example, for three
servings, press the 3 button(Refer to the Auto Reheat Chart
below for the servings). The display shows the number of servings you
have selected:
3. Press the Start button. The display will show Cooking Time.
Auto Reheat Chart
Item
Plate of food
Code
Weight
A-1
1 serving
Remove garlic bread sticks from
packaging and place into microwave oven
on microwave-safe plate or Pyres dish.
Heat.
After cooking stand garlic bread sticks for
3 minutes to melt butter in centre
completely. Serve.
Remarks
•
•
•
9
Casserole
A-2
Pasta Reheat
A-3
Rice Reheat
A-4
Tinned Soup
A-5
1-4 Cups
•
•
•
Use only pre-cooked, refrigerated
foods.
Cover plate with vented plastic wrap or
wax paper.
Contents
- 85-110 g meat, poultry or fish
( up to 170 g with bone)
- ½ cup starch
(potatoes, pasta, rice, etc.)
- ½ cup vegetables
(about 85-110 g)
Use only refrigerated foods.
Cover with lid or vented plastic wrap.
Stir foods well before serving.
tl]XY[z{lnTWZY`YhluUGGwGXWGG~ SGhG`SGYWW]GG[a\ZGwt
Operation
Setting Cooking Times & Power Levels
Using the More/Less Buttons
The More/Less buttons allow you to adjust pre-set cooking times. They only work in the
Rice/Pasta, Meat/Fish, Snack Bar, Auto Reheat,
Pizza Reheat, Beverage or Time Cook, Kitchen Time modes. Use the More/Less button only after you have already begun cooking with one of these procedures.
The More/Less feature cannot be used with the Sensor Cook button.
The More/Less key cannot be used with the Auto defrost key.
1. To ADD more time to an automatic cooking procedure: Press the More(9) button.
2. To REDUCE the time of an automatic cooking procedure: Press the Less(1) button.
If you wish to increase/decrease in Time Cook, Kitchen Time mode by 10sec,
press the More(9) or Less(1) button.
Your microwave allows you to set up to two different stages of cooking, each with its own
time length and power level. The power level button lets you control the heating intensity
from Warm (1) to High (0).
One-stage Cooking
For simple one-stage cooking, you only need to set a cooking time. The power level is automatically set to High. If you want to set the power to any other level, you must set it using the
Power Level button.
1. Use the number buttons to set a cooking time. You can set a time from one second to
99 minutes, 99 seconds. To set a time over one minute, enter the seconds too. For
example, to set 20 minutes, enter 2, 0, 0, 0 .
2. If you want to set the power level to something other than High, press the Power Level
Switching the Beeper On/Off
button, then use the number buttons to enter a power level.
You can switch the beeper off whenever you want.
Power Levels:
1. Press the Sound button. The display shows “ON”.
1 = PL:10
(Warm)
6 = PL:60
(Simmer)
2 = PL:20
(Low)
7 = PL:70
(Medium High)
3 = PL:30
(Defrost)
8 = PL:80
(Reheat)
4 = PL:40
(Medium Low)
9 = PL:90
(Sauté)
5 = PL:50
(Medium)
0 = PL:Hi
(High)
3. Press the Start button to begin cooking. If you want to change the power level, press
Pause/Cancel before you press Start, and re-enter all of the instructions.
Some recipes require different stages of cooking at different temperatures. You can set multiple stages of cooking with your microwave.
(“START” will flash)
2. Press the Sound button to turn the volume off. The display shows: “OFF”.(“START”
will flash)
3. Press Start. The display returns to the time of day.
Using the Kitchen Timer
1.
2.
3.
4.
Multi-stage Cooking
1. Follow steps 1 and 2 in the “One-Stage Cooking” section on the previous page.
When entering more than one cooking stage, the Power Level button must be
pressed before the second cooking stage can be entered.
To set the power level at High for a stage of cooking, press the Power Level button
twice.
2. Use the number buttons to set a second cooking time.
3. Press the Power Level button, then use the number buttons to set the power level of
the second stage of cooking.
4. Press Start to begin cooking.
You can check the Power Level while cooking is in progress by pressing the Power Level
button.
Press the Kitchen Timer button.
Use the Number buttons to set the length of time you want the timer to run.
Press Start to begin Kitchen Timer.
The display counts down and beeps when the time has elapsed.
Note: The microwave does not turn on when the Kitchen timer is used.
Setting the Child Protection Lock
You can lock your microwave oven so it can’t be used by unsupervised children.
1. Hold the “0” button and then press the “2” button. The display shows “Loc”.
At this point, the microwave oven cannot be used until it is unlocked. To unlock it,
repeat step 1 above.
Demonstration Mode
You can use the Demonstration Mode to see how your microwave oven operates without the
oven heating.
1.Press the 0 button and the 1 or 3 button almost at the same time.
To turn demo mode off, repeat step 1 above.
10
tl]XY[z{lnTWZY`YhluUGGwGXXGG~ SGhG`SGYWW]GG[a\ZGwt
Cooking Instructions
Cooking Utensils
Cooking Techniques
Recommended Use
•
•
•
•
•
•
•
Stirring
Glass and glass-ceramic bowls and dishes — Use for heating or cooking.
Microwavable browning dish — Use to brown the exterior of small items such
as steaks, chops, or pancakes. Follow the directions provided with your browning
dish.
Microwavable plastic wrap — Use to retain steam. Leave a small opening for
some steam to escape and avoid placing it directly on the food.
Wax paper — Use as a cover to prevent spattering.
Paper towels and napkins — Use for short-term heating and covering; they
absorb excess moisture and prevent spattering. Do not use recycled paper towels,
which may contain metal and can catch fire.
Paper plates and cups — Use for short-term heating at low temperatures. Do
not use recycled paper, which may contain metal and can catch fire.
Thermometers — Use only those labeled “Microwave Safe” and follow all
directions. Check the food in several places. Conventional thermometers may be
used once the food has been removed from the oven.
Stir foods such as casseroles and vegetables while cooking to distribute heat evenly.
Food at the outside of the dish absorbs more energy and heats more quickly, so stir
from the outside to the center. The oven will turn off when you open the door to stir your
food.
Arrangement
Arrange unevenly shaped foods, such as chicken pieces or chops, with the thicker,
meatier parts toward the outside of the turntable where they receive more microwave
energy. To prevent overcooking, place thin or delicate parts toward the center of the
turntable.
Shielding
Shield food with narrow strips of aluminum foil to prevent overcooking. Areas that need
shielding include poultry wing-tips, the ends of poultry legs, and corners of square baking dishes. Use only small amounts of aluminum foil. Larger amounts can damage your
oven.
Limited Use
Turning
•
Standing
•
•
•
Turn foods over midway through cooking to expose all parts to microwave energy. This
is especially important with large items such as roasts.
Aluminum foil — Use narrow strips of foil to prevent overcooking of exposed
areas. Using too much foil can damage your oven, so be careful.
Ceramic, porcelain, and stoneware — Use these if they are labeled
“Microwave Safe”. If they are not labeled, test them to make sure they can be used
safely. Never use dishes with metallic trim.
Plastic — Use only if labeled “Microwave Safe”. Other plastics can melt.
Straw, wicker, and wood — Use only for short-term heating, as they can be
flammable.
Foods cooked in the microwave build up internal heat and continue to cook for a few
minutes after the oven stops. Let foods stand to complete cooking, especially foods
such as roasts and whole vegetables. Roasts need this time to complete cooking in the
center without overcooking the outer areas. All liquids, such as soup or hot chocolate,
should be shaken or stirred when cooking is complete. Let liquids stand a moment
before serving. When heating baby food, stir well and test the temperature before serving.
Not Recommended
•
•
•
•
Adding Moisture
Glass jars and bottles — Regular glass is too thin to be used in a microwave,
and can shatter.
Paper bags — These are a fire hazard, except for popcorn bags that are
designed for microwave use.
Styrofoam plates and cups — These can melt and leave an unhealthy residue
on food.
Plastic storage and food containers — Containers such as margarine tubs
can melt in the microwave.
Metal utensils — These can damage your oven. Remove all metal before
Microwave energy is attracted to water molecules. Food that is uneven in moisture content should be covered or allowed to stand so that the heat disperses evenly. Add a
small amount of water to dry food to help it cook.
General Tips
•
•
cooking.
Testing Utensils
•
If you are not sure whether a dish is microwave-safe or not, you can perform this test:
1. Fill a 1 cup glass measuring cup with water and put it inside your oven, next to the
dish you want to test.
•
•
•
•
2. Press the One Minute + button once to heat them for one minute at High power.
•
The water should be warm and the dish you are testing should be cool. If the dish
is warm, then it is absorbing microwave energy and is not acceptable for use in the
microwave.
11
Dense foods, such as potatoes, take longer to heat than lighter foods. Foods with
a delicate texture should be heated at a low power level to avoid becoming tough.
Altitude and the type of cookware you are using can affect cooking time. When
using a new recipe, use the minimum cooking time and check the food
occasionally to prevent overcooking.
Foods with a non-porous skin such as potatoes or hot dogs, should be pierced to
prevent bursting.
Frying with heating oil or fat is not recommended. Fat and oil can suddenly boil
over and cause severe burns.
Some ingredients heat faster than others. For example, the jelly inside a jelly
doughnut will be hotter than the dough. Keep this in mind to avoid burns.
Home canning in the microwave oven is not recommended because all harmful
bacteria may not be destroyed by the microwave heating process.
Although microwaves do not heat the cookware, the heat from the food is often
transferred to the cookware. Always use pot holders when removing food from the
microwave and instruct children to do the same.
Making candy in the microwave is not recommended as candy can heat to very
high temperatures. Keep this in mind to avoid injury.
tl]XY[z{lnTWZY`YhluUGGwGXYGG~ SGhG`SGYWW]GG[a\ZGwt
Cooking Instructions
Auto Sensor Cook
Cooking Guide
The Auto Sensor allows you to cook your food automatically by detecting the amount of
moistures generated from the food while cooking.
• When cooking food, many kinds of moistures are generated. The Auto Sensor
determines the proper time and power level by detecting these moistures from the
food, eliminating the need to set the cooking time and power level.
• When you cover a container with its lid or plastic wrap during Sensor Cooking, the
Auto Sensor will detect the moistures generated after the container has been
saturated with steam.
• Shortly before cooking ends, the remaining cooking time will begin its count down.
This will be a good time for you to rotate or stir the food for even cooking if it is
necessary.
• Before auto sensor cooking food may be seasoned with herbs, spices or browning
sauces. A word of caution though, salt or sugar may cause burn spots on food so
these ingredients should be added after cooking.
• The More/Less function pad is used to increase or decrease cooking time. You
should use this function to adjust the degree of cooking to suit your personal taste.
Guide for Cooking Meat in Your Microwave
•
•
•
•
Place meat on a microwave-safe roasting rack in a microwave-safe dish.
Start meat fat-side down. Use narrow strips of aluminum foil to shield any bone tips
or thin meat areas.
Check the temperature in several places before letting the meat stand the
recommended time.
The following temperatures are removal temperatures. The temperature of the
food will rise during the standing time.
Food
Pork
Cooking Time:
Boneless or 12-16 min. / 0.5 kg for 70°C Well Done
Power Level: High(0) for first 5
bone-in
min., then Medium(5).
Up to 4 lbs.
Place roast fat-side down on
roasting rack. Cover with vented
plastic wrap. Turn over when
cooking time is half up. Let stand
10 min.
Up to 4 lbs.
•
•
•
•
To obtain good cooking results with this function, follow the directions for selecting
appropriate containers and covers in the charts in this book.
Always use microwave-safe containers and cover them with their lids or with
plastic wrap. When using plastic wrap, turn back one corner to allow steam to
escape at the proper rate.
Always cover with the lid intended for the utensil being used. If the utensil does not
have its own lid, use plastic wrap.
Fill containers at least half full.
Foods that require stirring or rotating should be stirred or turned toward the end of
the Sensor Cook cycle, after the time has started to count down on the display.
•
•
•
•
•
•
8-12 min. / 0.5 kg for 50°C - Rare
9-13 min. / 0.5 kg for 55°C - Medium
10-15 min. / 0.5 kg for 65°C - Well
Done
Power Level: High(0) for first 5
min., then Medium(5).
Guide for Cooking Poultry in Your Microwave
•
•
•
Important
•
Directions
Place roast fat-side down on
roasting rack. Cover with wax
paper. Turn over when cooking
time is half up. Let stand 10 min.
Utensils & Cover For Sensor Cooking
•
Cook Time/Power Level
Cooking Time:
Roast Beef
Boneless
It its not advisable to use the auto sensor cooking feature on a continuous cooking
operation, i.e. one cooking operation immediately after another.
Install the oven in a well ventilated location for proper cooling and airflow and to
ensure the sensor will operate accurately.
To avoid poor results, do not use the Auto sensor when the room ambient
temperature is too high or too low.
Do not use volatile detergent to clean your oven. Moisture resulting from this
detergent may affect the sensor.
Avoid placing the oven near high moisture or gas emitting appliances, since this
will interfere with the proper performance of the Auto Sensor.
Always keep the inside of the oven clean. Wipe all spills with a damp cloth.
This oven is designed for household use only.
•
Place poultry on a microwave-safe roasting rack in a microwave-safe dish.
Cover poultry with wax paper to prevent spattering.
Use aluminum foil to shield bone tips, thin meat areas, or areas that start to
overcook.
Check the temperature in several places before letting the poultry stand the
recommended time.
Food
Whole
Chicken
Up to 4 lbs.
Chicken
Pieces
Up to 2 lbs.
12
Cook Time/Power Level
Cooking Time:
7-10 min. / 0.5kg 80°C
Power Level: Medium
High(7).
Cooking Time:
7-10 min. / 0.5kg
80°C dark meat
75°C light meat
Power Level: Medium
High(7).
Directions
Place chicken breast-side down on roasting
rack. Cover with wax paper. Turn over when
the cooking time is half up. Cook until juices
run clear and meat near the bone is no
longer pink. Let stand 5-10 min.
Place chicken bone-side down on dish, with
the thickest portions towards the outside of
the dish. Cover with wax paper. Turn over
when the cooking time is half up. Cook until
juices run clear and meat near the bone is no
longer pink. Let stand 5-10 min.
tl]XY[z{lnTWZY`YhluUGGwGXZGG~ SGhG`SGYWW]GG[a\ZGwt
Cooking Instructions
Guide for Cooking Seafood in Your Microwave
•
•
•
•
Auto Defrosting Guide
Cook fish until it flakes easily with a fork.
Place fish on a microwave-safe roasting rack in a microwave-safe dish.
Use a tight cover to steam fish. A lighter cover of wax paper or paper towel
provides less steaming.
Do not overcook fish; check it at minimum cooking time.Guide for
Food
Steaks
Cook Time/Power Level
•
Code
Directions
4-8 min. / 0.5 kg
Cooking Time:
4-6½ min. / 0.5 kg
Cooking Eggs in Your Microwave
•
•
•
•
•
•
•
•
•
Remarks
1
Meat
100-2000g
20-60 mins
Shield the sdges with aluminium foil. Turn the
meat over, when the over beeps. This
programme is suitable for beef, lamb, pork,
steaks, chops, minced meat.
2
Poultry 100-2000g
20-60 mins
Shield the leg and wing tios with aluminium
foil. Turn the poultry over, when the oven
beeps. This programme is suitable for whole
shicken as well as for chicken portions.
3
Fish
100-2000g
20-50 mins
Shield the tail of a whole fish with aluminium
foil. Turn the fish over, when the oven beeps.
This programme is suitable for whole fishes
as well as for fish fillets.
4
Sea
Food
100-2000g
20-50 mins
Shield the tail of a whole fish with aluminium
foil. Turn the fish over, when the oven beeps.
This programme is suitable for shrimp, prawn
shell fish, clarn.
5
Bread
Cake
100-700g
5-30 mins
Put bread on a piece of kitchen paper and
turn over, as soon as the oven beeps. Place
cake on a ceramic plate and if possible, turn
over, as soon as the oven beeps. (Oven
keeps operating and is stoppde, when you
open the door.)
This programme is suitable for all kinds of
bread, slicde or whole, as well as for bread
rolls and baguettes. Arrange bread rolls in a
circle.
This programme is suitable for all kinds of
yeast cake, biscuit, cheese cake and puff
pastry. It is not suitable for short/crust pastry,
fruit and cream cakes as well as for cake with
chocolate topping.
Never cook eggs in the shell, and never warm hard-cooked eggs in the shell; they
can explode.
Always pierce whole eggs to keep them from bursting.
Cook eggs just until set; they become tough if overcooked.
Guide for Cooking Vegetables in Your Microwave
•
Initial
Temperature
Cooking Time:
Arrange shrimp in a baking dish without
overlapping or layering. Cover with wax paper.
Up to 0.7 kg
Cook until firm and opaque, stirring 2 or 3 times.
Power Level: Medium- Let stand 5 min.
High(7).
•
Weight
7-11 min. / 0.5 kg
Arrange fillets in a baking dish, turning any thin
pieces under Cover with wax paper. If over ½
Up to 0.7 kg
inch thick, turn over and rearrange when
Power Level: Medium- cooking time is half up. Cook until fish flakes
High(7).
easily with a fork. Let stand 2-3 min.
Shrimp
Item
Cooking Time:
Arrange steaks on roasting rack with meaty
portions towards the outside of rack. Cover with
Up to 0.7 kg
wax paper. Turn over and rearrange when
Power Level: Medium- cooking time is half up. Cook until fish flakes
High(7).
easily with a fork. Let stand 3-5 min.
Fillets
Follow the instructions below when defrosting different types of food.
Vegetables should be washed just before cooking. Often, no extra water is
needed. If dense vegetables such as potatoes, carrots and green beans are being
cooked, add about ¼ cup water.
Small vegetables (sliced carrots, peas, lima beans, etc.) will cook faster than larger
ones.
Whole vegetables, such as potatoes, acorn squash or corn on the cob, should be
arranged in a circle on the turntable before cooking. They will cook more evenly if
turned over after half the cooking time.
Always place vegetables like asparagus and broccoli with the stem ends pointing
towards the edge of the dish and the tips toward the center.
When cooking cut vegetables, always cover the dish with a lid or vented
microwavable plastic wrap.
Whole, unpeeled vegetables such as potatoes, squash, eggplant, etc., should
have their skin pricked in several spots before cooking to prevent them from
bursting.
For more even cooking, stir or rearrange whole vegetables halfway through the
cooking time.
Generally, the denser the food, the longer the standing time. (Standing time refers
to the time necessary for dense, large foods and vegetables to finish cooking after
they come out of the oven.) A baked potato can stand on the counter for five
minutes before cooking is completed, while a dish of peas can be served
immediately.
Notes
Check foods when the oven signals. After the final stage, small sections may still be
icy; let them stand to continue thawing. Do not defrost until all ice crystals have thawed.
Shielding roasts and steaks with small pieces of foil prevents the edges from cooking
before the center of the food has defrosted. Use narrow, flat, smooth strips of aluminum
foil to cover the edges and thinner sections of the food.
13
tl]XY[z{lnTWZY`YhluUGGwGX[GG~ SGhG`SGYWW]GG[a\ZGwt
Cooking Instructions
Recipes
Beef and Barley Stew
Warm Potato Salad
Broccoli and Cheese Casserole
1. In a 2-quart casserole, combine potatoes and ¼ cup water. Cover with lid. Cook at
High(0) until potatoes are tender (7-10 min.); stir twice. Drain and set aside to cool
slightly.
2. In a medium bowl, cook bacon at High(0) until crisp (2½-3½ min.); stir once. Place
bacon on a paper towel. Reserve 1 Tbs. drippings.
3. Combine drippings and onion. Cover with plastic wrap; turn back a corner to vent
steam. Cook at High(0) until tender (1½-2½ min.); stir once.
4. Stir in sugar, salt, flour, celery seed, and pepper. Cook at High(0) until mixture
boils (30-40 sec.). Stir in vinegar and ½ cup water. Cook at High(0) until liquid boils
and thickens slightly (1-2 min.); stir once. Add bacon to dressing. Pour dressing
over potatoes. Stir well.
900g small red potatoes, cut into ½-inch pieces
4 slices bacon (uncooked), cut into ½-inch pieces
¼ cup chopped onion
2 tsp. sugar
1 tsp. salt
1 tsp. flour
½ tsp. celery seed
1
/8 tsp. pepper
2½ Tbs. apple cider vinegar
675 g beef stew cubes, cut into ½-inch pieces
½ cup chopped onion
2 Tbs. all-purpose flour
1 Tbs Worcestershire sauce
1 can (380-405g) beef broth
2 medium carrots, cut into ½-inch slices (about 1 cup)
½ cup barley
1 bay leaf
¼ tsp. pepper
1 pkg. (250-280g) frozen peas, thawed
1. In a 2-quart casserole, combine beef, onion, flour, and Worcestershire; mix well.
Cover with lid. Cook at High(0) for 6 to 8 minutes until beef is no longer pink,
stirring once.
2. Stir in beef broth, carrots, barley, bay leaf, and pepper. Cover with lid. Cook at
Medium for 1 to 1½ hours until carrots and beef are tender, stirring 2 to 3 times.
3. Stir in peas. Cover with lid. Cook at Medium for 10 minutes. Let stand for 10
minutes. Remove bay leaf before serving.
Makes 6 servings.
¼ cup butter or margarine
¼ cup chopped onion
1½ Tbs. flour
½ tsp. salt
¼ tsp. dry mustard
1/8 tsp. pepper
1½ cups milk
¼ cup chopped red pepper
225g (2 cups) cheddar cheese, shredded
1 pkg. (250-280g) frozen chopped broccoli, thawed
4 cups cooked spiral shaped pasta (225g dry)
1. In a 2-quart casserole, cook butter and onion at High(0) for 1 to 2 minutes until
onion is soft, stirring once.
2. Add flour, salt, mustard, and pepper; mix well. Cook at High(0) for 30 to 60
seconds until mixture boils. Stir in milk until smooth.
3. Stir in red pepper. Cook at High(0) for 2 to 3 minutes until mixture boils and
thickens slightly, stirring twice. Stir in cheese until melted.
4. Add broccoli and pasta, mix well. Cover with lid. Cook at High(0) for 4 to 6 minutes
until heated through, stirring once. Stir before serving.
Makes 6 servings.
Makes 6 servings.
Black Bean Soup
1 cup chopped onion
1 clove garlic, minced
2 cans (420g each) black beans, drained
1 can (390-450g) stewed tomatoes, chopped
1 can (385-405g) chicken broth
1 can (195-240g) corn
1 can (110g) chopped green chilies
1-2 tsp. ground cumin, or to taste
1. Place onion and garlic in a 3-quart casserole. Cover with lid. Cook at High(0) for 2
to 4 minutes until tender.
2. Add one can of beans, mash beans with a fork. Add remaining ingredients; mix
well.
3. Cook uncovered, at High(0) for 10 minutes; stir. Reduce power to Medium and
cook for 5 minutes. Stir before serving.
Makes about 2 quarts.
14
tl]XY[z{lnTWZY`YhluUGGwGX\GG~ SGhG`SGYWW]GG[a\ZGwt
Appendix
Troubleshooting Guide
Before you call a repair person for your oven, check this list of possible problems and
solutions.
•
Neither the oven’s display nor the oven operate.
•
•
•
•
•
•
•
Properly insert the plug into a grounded outlet.
If the outlet is controlled by a wall switch, make sure the wall switch is turned on.
Remove the plug from the outlet, wait ten seconds, then plug it in again.
Reset the circuit breaker or replace any blown fuse.
Plug another appliance into the outlet; if the other appliance doesn’t work, have a
qualified electrician repair the outlet.
Plug the oven into a different outlet.
•
•
•
The oven’s display works, but the power won’t come on.
•
•
•
•
Make sure the door is closed securely.
Check to see if packing material or other material is stuck to the door seal.
Check for door damage.
Press Cancel twice and re-enter all cooking instructions.
Error Message
•
•
•
The power goes off before the set time has elapsed.
•
•
If there has not been a power outage, remove the plug from the outlet, wait ten
seconds, then plug it in again. If there was a power outage, the time indicator will
display “
” Reset the clock and any cooking instructions.
Reset the circuit breaker or replace any blown fuse.
Make sure the oven is on its own 12A amp circuit line. Operating another
appliance on the same circuit can cause a voltage drop. If necessary, move the
oven to its own circuit.
You see sparks or arcing.
•
Remove any metallic utensils, cookware, or metal ties. If using foil, use only
narrow strips and allow at least one inch between the foil and interior oven walls.
The turntable makes noises or sticks.
•
•
Clean the turntable, roller ring and oven floor.
Make sure the turntable and roller ring are positioned correctly.
Using your microwave causes TV or radio interference.
•
This is similar to the interference caused by other small appliances, such as hair
dryers. Move your microwave further away from other appliances, like your TV or
radio.
Care and Cleaning
•
•
•
•
If “Error1” and “Error3” are displayed, please let oven cool for at least
5 minutes. If these messages are displayed frequently, please call our service line.
If you open the door on the way to sensing, “Error4” will be displayed.
If “Error2“ is displayed, please call our service line immediately.
If you have a problem you cannot solve,
Contact your local dealer or SAMSUNG
after - sales service
The food is cooking too slowly.
•
glass at High power for five minutes or until boiling. Let stand in the oven for one
or two minutes.
Remove the glass tray from the oven when cleaning the oven or tray. To prevent
the tray from breaking, handle it carefully and do not put it in water immediately
after cooking. Wash the tray carefully in warm sudsy water or in the dishwasher.
Clean the outside surface of the oven with soap and a damp cloth. Dry with a soft
cloth. To prevent damage to the operating parts of the oven, don’t let water seep
into the openings.
Wash the door window with very mild soap and water. Be sure to use a soft cloth
to avoid scratching.
If steam accumulates inside or outside the oven door, wipe with a soft cloth. Steam
can accumulate when operating the oven in high humidity and in no way indicates
microwave leakage.
Never operate the oven without food in it; this can damage the magnetron tube or
glass tray. You may wish to leave a cup of water in the oven when it is not in use to
prevent damage if the oven is accidentally turned on.
Follow these instructions to clean and care for your oven.
Keep the inside of the oven clean. Food particles and spilled liquids can stick to the
oven walls, causing the oven to work less efficiently.
Wipe up spills immediately. Use a damp cloth and mild soap. Do not use harsh
detergents or abrasives.
To help loosen baked on food particles or liquids, heat two cups of water (add the
juice of one lemon if you desire to keep the oven fresh) in a four-cup measuring
15
tl]XY[z{lnTWZY`YhluUGGwGX]GG~ SGhG`SGYWW]GG[a\ZGwt
Appendix
Specifications
Model Number
ME6124ST
Oven Cavity
1.2 cu.ft
Controls
10 power levels, including defrost
Timer
99 minutes, 99 seconds
Power Source
230 V ~ 50 Hz
Power consumption Microwave
1550 Watts
Power Output
1000 Watts (IEC-705)
Operating frequency
2450 MHz
Outside Dimensions
523 (W) X 297 (H) X 415 (D)
Oven Cavity Dimensions
368 (W) X 229 (H) X 396 (D)
Weight Net
15.5 kg
Samsung Electronics Co., Ltd.
16