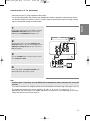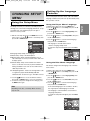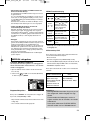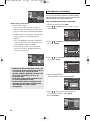
1
DVD_Cover P560_XFA 4/15/06 5:25 PM Page 3 DVD Player DVD-Speler DVD-P560 1024K_P560_XFA_Eng 4/17/06 12:00 PM Page 2 PRECAUTIONS 1. Setting up - Refer to the identification label located on the rear of your player for its proper operating voltage. - Install your player in a cabinet with adequate ventilation holes. (7~10cm) Do not block ventilation holes on any of the components for air circulation. - Do not push the disc tray in by hand. - Do not stack components. - Be sure to turn all components off before moving the player. - Before connecting other components to this player, be sure to turn them off. - Be sure to remove the disc and turn off the player after use, especially if you don’t use it for a long time. - To disconnect the apparatus from the mains, the plug must be pulled out trom the mains socket, therefore the mains plug shall be readily operable. player may not operate correctly. If this occurs, leave the player at room temperature until the inside of the player becomes dry and operational. 4. Disc - Do not clean record-cleaning sprays, benzene, thinner, or other volatile solvents that may cause damage to the disc surface. - Do not touch the disc’s signal surface. Hold by the edges or by one edge and the hole in the center. - Wipe the dirt away gently; never wipe a cloth back and forth over the disc. 5. Environmental info - The battery used in this product contains chemicals that are harmful to the environ ment. - So, dispose of batteries in the proper man ner, according to federal, state, and local regulations. 2. For your safety - This product utilizes a laser. Use of controls or adjustments or performance of procedures other than those specified herein may result in hazardous radiation exposure. - Do not open covers and do not repair yourself. Refer servicing to qualified personal. 3. Caution - Your player is not intended for industrial use but for domestic purposes. Use of this product is for personal use only. - Do not put any container filled with liquid or any small metal objects on the player. - Exterior influences such as lightning and static electricity can affect normal operation of this player. If this occurs, turn the player off and on again with the POWER button, or disconnect and then reconnect the AC power cord to the AC power outlet. The player will operate normally. - When condensation forms inside the player due to sharp changes in temperature, the 2 The product unit accompanying this user manual is licensed under certain intellectual property rights of certain third parties. This license is limited to private non-commercial use by end-user consumers for licensed contents. No rights are granted for commercial use. The license does not cover any product unit other than this product unit and the license does not extend to any unlicensed product unit or process conforming to ISO/OUR 11172-3 or ISO/OUR 13818-3 used or sold in combination with this product unit. The license only covers the use of this product unit to encode and/or decode audio files conforming to the ISO/OUR 11172-3 or ISO/OUR 13818-3. No rights are granted under this license for product features or functions that do not conform to the ISO/OUR 11172-3 or ISO/OUR 13818-3. CAUTION: USE OF ANY CONTROLS, ADJUSTMENTS, OR PROCEDURES OTHER THAN SPECIFIED HEREIN MAY RESULT IN HAZARDOUS RADIATION EXPOSURE. 4/17/06 12:00 PM Page 3 BEFORE YOU STAR T Accessories Remote Control User’s Manual Batteries for Remote Control (AAA Size) Video/Audio Cable Install Batteries in the Remote control 1. Open the battery cover on the back of the remote control. 2. Insert two AAA batteries. Make sure that the polarities (+ and -) are aligned correctly. 3. Replace the battery cover. If remote control doesn’t operate properly: - Check the polarity + - of the batteries (Dry-Cell) - Check if the batteries are drained. - Check if remote control sensor is blocked by obstacles. - Check if there is any fluorescent lighting nearby. TABLE OF CONTENT Precautions. . . . . . . . . . . . . . . . . . . . . . . . . . . . . . . 2 Before you start . . . . . . . . . . . . . . . . . . . . . . . . . . . 3 Setup General Features . . . . . . . . . . . . . . . . . . . . . . . . . . 4 Disc Type and Characteristics . . . . . . . . . . . . . . . . 5 Description . . . . . . . . . . . . . . . . . . . . . . . . . . . . . . . 6 Tour of the Remote Control . . . . . . . . . . . . . . . . . . 8 Connections Choosing a Connection . . . . . . . . . . . . . . . . . . . . . 9 Basic Functions Playing a Disc . . . . . . . . . . . . . . . . . . . . . . . . . . . 15 Using the Search and Skip Functions . . . . . . . . . 16 Using the Display Function . . . . . . . . . . . . . . . . . 16 Using the Disc and Title Menu . . . . . . . . . . . . . . 17 Using the Function Menu . . . . . . . . . . . . . . . . . . 17 Repeat Play . . . . . . . . . . . . . . . . . . . . . . . . . . . . . 17 Slow Play . . . . . . . . . . . . . . . . . . . . . . . . . . . . . . . 18 Advanced Functions Adjusting the Aspect Ratio (EZ View) . . . . . . . . . 18 Selecting the Audio Language . . . . . . . . . . . . . . . 19 Selecting the Subtitle Language. . . . . . . . . . . . . . 19 Changing the Camera Angle . . . . . . . . . . . . . . . . 20 Using the Instant Replay/Skip Function . . . . . . . . 20 Using the Bookmark Function . . . . . . . . . . . . . . . 20 Using the Zoom Function . . . . . . . . . . . . . . . . . . . 21 How to insert a Memory Card . . . . . . . . . . . . . . . 21 Clips Menu for MP3/WMA/JPEG/ CD Audio/MPEG4. . . . . . . . . . . . . . . . . . . . . . . . . 21 Folder Selection . . . . . . . . . . . . . . . . . . . . . . . . . . 22 MP3/WMA/CD Audio Playback. . . . . . . . . . . . . . . 22 MPEG4 Playback . . . . . . . . . . . . . . . . . . . . . . . . . 23 Picture CD Playback. . . . . . . . . . . . . . . . . . . . . . . 24 Changing Setup Menu Using the Setup Menu . . . . . . . . . . . . . . . . . . . . . 25 Setting Up the Language Features . . . . . . . . . . . 25 Setting Up the Audio Options . . . . . . . . . . . . . . . . 26 Setting Up the Display Options . . . . . . . . . . . . . . 27 Setting Up the Parental Control . . . . . . . . . . . . . . 28 Reference Firmware Upgrade . . . . . . . . . . . . . . . . . . . . . . . . 30 Troubleshooting . . . . . . . . . . . . . . . . . . . . . . . . . . 31 Specifications . . . . . . . . . . . . . . . . . . . . . . . . . . . . 32 3 English 1024K_P560_XFA_Eng 1024K_P560_XFA_Eng 4/17/06 12:00 PM Page 4 SETUP General Features Excellent Sound Dolby Digital, a technology developed by Dolby Laboratories, provides crystal clear sound reproduction. Screen Both regular and widescreen(16:9) pictures can be viewed. Slow Motion An important scene can be viewed in slow motion. Parental Control (DVD) The parental control allows users to set the level necessary to prohibit children from viewing harmful movies such as those with violence, adult subject matter, etc. Various On-Screen Menu Functions You can select various languages (Audio/Subtitle) and screen angles while enjoying movies. Progressive Scan Progressive scanning creates an improved picture with double the scan lines of a conventional interlaced picture. EZ VIEW (DVD) Easy View enables picture adjustment to match your TV's screen size (16:9 or 4:3). Digital Photo Viewer (JPEG) You can view Digital Photos on your TV. Repeat You can repeat a song or movie simply by pressing the REPEAT button. MP3/WMA This unit can play discs created from MP3/WMA files. Instant Replay (DVD) This function is used to replay the previous 10 seconds of a movie from the current position. Instant Skip (DVD) This function skips playback ahead 10 seconds. MPEG4 This unit can play MPEG4 formats within an avi file. Memory Card Multi card slot to support 10 types of memory cards: Memory Stick, Memory Stick-Pro, Memory Stick Duo, SD, Mini SD Card and XD-Picture Card, MMC, RS-MMC, Smart Media Card, Compact Flash. 4 Note - Discs which cannot be played with this player. • DVD-ROM • DVD-RAM • CD-ROM • CDV • CDI • CVD • CDGs play audio only, not graphics. - Ability to play back may depend on recording conditions. • DVD-R, +R • CD-RW • DVD+RW, -RW (V mode) - The unit may not play certain CD-R, CD-RW and DVD-R due to the disc type or recording conditions. COPY PROTECTION Many DVD discs are encoded with copy protection. Because of this, you should only connect your DVD player directly to your TV, not to a VCR. Connecting to a VCR results in a distorted picture from copyprotected DVD discs. This product incorporates copyright protection technology that is protected by methods claims of certain U.S. patents and other intellectual property rights owned by Macrovision Corporation and other rights owners. Use of this copyright protection technology must be auzthorized by Macrovision Corporation, and is intended for home and other limited viewing uses only unless otherwise authorized by Macrovision Corporation. Reverse engineering or disassembly is prohibited. PROGRESSIVE SCAN OUTPUTS (525p/625p) “CONSUMERS SHOULD NOTE THAT NOT ALL HIGH DEFINITION TELEVISION SETS ARE FULLY COMPATIBLE WITH THIS PRODUCT AND MAY CAUSE ARTIFACTS TO BE DISPLAYED IN THE PICTURE, IN CASE OF 525 OR 625 PROGRESSIVE SCAN PICTURE PROBLEMS, IT IS RECOMMENDED THAT THE USER SWITCH THE CONNECTION TO THE ‘STANDARD DEFINITION’ OUTPUT. IF THERE ARE QUESTIONS REGARDING YOUR TV SET COMPATIBILITY WITH THIS MODEL 525p AND 625p DVD PLAYER, PLEASE CONTACT SAMSUNG'S CUSTOMER SERVICE CENTER.” 1024K_P560_XFA_Eng 4/17/06 12:00 PM Page 5 Disc Type and Characteristics Disc Types (Logos) Recording Types DVD Audio + Video VIDEO-CD Audio + Video AUDIO-CD Disc Size Max. Playing Time Characteristics 12 Cm Single-sided 240 min. Double-sided 480 min. 8 Cm Single-sided 80 min. Double-sided 160 min. - DVD contains excellent sound and video due to Dolby Digital and MPEG-2 system. - Various screen and audio functions can be easily selected through the on-screen menu. 12 Cm 74 min. 8 Cm 20 min. 12 Cm 74 min. 8 Cm 20 min. Audio Disc Markings ~ PAL Play Region Number PAL broadcast system in U.K, France, Germany, etc. Dolby Digital disc STEREO DIGITAL SOUND Stereo disc - Video with CD sound, VHS quality & MPEG-1 compression technology. - CD is recorded as a Digital Signal with better audio quality, less distortion and less deterioration of audio quality over time. Region Number Both the DVD player and the discs are coded by region. These regional codes must match in order for the disc to play. If the codes do not match, the disc will not play. The Region Number for this player is described on the rear panel of the player. Digital Audio disc DivX Certification DTS disc DivX, DivX Certified, and associated logos are trademarks of DivXNetworks, Inc and are used under license. MP3 disc You must only insert one DVD disc at a time. Inserting two or more discs will not allow to play them back and it may cause damage to the DVD player. 5 English This DVD player is capable of playing the following types of discs with the corresponding logos: 1024K_P560_XFA_Eng 4/17/06 12:00 PM Page 6 Description Front Panel Controls 10 1 2 1. 3 STANDBY/ON ( ) When the unit is first plugged in, the indicator lights. When STANDBY/ON is pressed on, the indicator goes out and the player is turned on. 2. STANDBY indicator When the unit is first plugged in, this indicator lights. 3. MULTI CARD INPUT Insert a Memory Card. 4. DISC TRAY Place the disc here. 5. OPEN/CLOSE ( ) Press to open and close the disc tray 4 5 6 7 8 9 6. SKIP ( ) / SEARCH Use to reverse skip a scene or music. 7. STOP ( ) Stops disc play. 8. PLAY/PAUSE ( ) Begin or pause disc play. SKIP ( ) / SEARCH Use to reverse skip a scene or music. 9. 10. DISPLAY Operation indicators are displayed here. Front Panel Display Total playing time/Displays various messages concerning operations such as PLAY, STOP, LOAD ... nodSC: No disc loaded. OPEn: The disc tray is open. LOAd: Player is loading disc information. 6 1024K_P560_XFA_Eng 4/17/06 12:00 PM Page 7 Rear Panel 2 English 1 1 3 1.DIGITAL AUDIO OUT JACKS - Use either an optical or coaxial digital cable to connect to a compatible Dolby Digital receiver. - Use to connect to an A/V Amplifier that contains a Dolby Digital, MPEG2 or DTS decoder. 2. COMPONENT VIDEO OUT JACKS - Use these jacks if you have a TV with Component Video in jacks. These jacks provide PR, PB and Y video. - If Component(P-SCAN) Video Output is selected in Setup Menu, progressive scan mode will work. - If Component(I-SCAN) Video Output is selected in Setup Menu, interlaced scan mode will work. 4 5 3. AUDIO OUT JACKS Connect to the Audio input jacks of your television or audio/video receiver. 4. VIDEO OUT JACK - Use a video cable to connect to the Video input jack on your television. - The Video Output in Setup Menu must be set to Component(I-SCAN) or S-Video. 5. S-VIDEO OUT JACK - Use the S-Video cable to connect this jack to the S-Video jack on your television for higher picture quality. - The Video Output in Setup Menu must be set to S-Video. Note - Consult your TV User’s Manual to find out if your TV supports Progressive Scan. If Progressive Scan is supported, follow the TV User’s Manual regarding Progressive Scan settings in the TV’s menu system. - If Component (P-SCAN) Video Output is selected in Setup Menu, S-Video will not work. - See pages 27 ~ 28 to get more information on how to use the setup menu. 7 1024K_P560_XFA_Eng 4/17/06 12:00 PM Page 8 Tour of the Remote Control 14 15 1 5. INSTANT REPLAY Button This function is used to replay the previous 10 seconds of a movie from the current position. 6. SKIP Buttons ( ) / Use to skip the title, chapter or track. 7. STOP Button ( 8. MENU Button Brings up the DVD player’s menu. 9. /,¥/ Buttons ENTER/ This button functions as a toggle switch. 2 16 3 4 5 6 7 8 17 18 19 ) 10. EZ VIEW Button The aspect ratio of a picture can easily be adjusted according to the screen size of your TV (16:9 or 4:3). 11. DISC MENU Button Brings up the Disc menu. 12. SUBTITLE Button 13. AUDIO Button Use this button to access various audio functions on a 9 14. ZOOM Button Enlarge DVD Picture. 10 11 20 21 12 13 22 23 15. OPEN/CLOSE ( ) Button To open and close the disc tray. 16. STEP Button Advances play one frame at a time. 17. INSTANT SKIP Button This function skips playback ahead 10 seconds. 18. PLAY/PAUSE Button ( Begin/Pause disc play. 19. RETURN Button Returns to a previous menu. ) 20. INFO Button Displays the current disc mode. 1. DVD POWER Button Turns the power on or off. 2. NUMBER Buttons 21. CANCEL Button Use to remove menus or status displays from the screen. 22. DVD/M.CARD button Use to operate DVD/M.CARD. 3. VIDEO SEL. Button Selects video output formats. 23. REPEAT Button Allows you to repeat play a title, chapter, track, or disc. 4. SEARCH Buttos ( ) / Allow you to search forward/backward through a disc. 8 1024K_P560_XFA_Eng 4/17/06 12:00 PM Page 9 CONNECTIONS The following shows examples of connections commonly used to connect the DVD player with a TV and other components. Before Connecting the DVD Player - Always turn off the DVD player, TV, and other components before you connect or disconnect any cables. - Refer to the user’s manual of the additional components (such as a TV) you are connecting for more information on those particular components. Connection to a TV (For Video) 1 Using video/audio cables, connect the VIDEO (yellow)/AUDIO (red and white) OUT terminals on the rear of the DVD player to the VIDEO (yellow)/AUDIO (red and white) IN terminals of TV. 2 Turn on the DVD player and TV. RED WHITE YELLOW Audio Cable Video Cable RED WHITE YELLOW 3 Press the TV/VIDEO button on the TV's remote control to select Video. Note - Noise may be generated if the audio cable is too close to the power cable. - If you want to connect to an Amplifier, please refer to the Amplifier connection page. (See pages 13 to 14) - The number and position of terminals can vary depending on your TV set. Please refer to the user's manual of the TV. - If there is one audio input terminal on the TV, connect it to the [AUDIO OUT][left] (white) terminal of the DVD player. - If you press the VIDEO SEL. button when DVD Player is in stop mode or no disc is inserted, the Video Output mode changes in the following sequence: (S-VIDEO ➝ Component (I-SCAN) ➝ Component(P-SCAN)) 9 English Choosing a Connection 1024K_P560_XFA_Eng 4/17/06 12:00 PM Page 10 Connection to a TV (S-Video) - Connecting to your TV using an S-Video cable. - You will enjoy high quality images. S-Video separates the picture element into black and white(Y) and color(C) signals to present clearer images than regular video input mode. (Audio signals aredelivered through the audio output.) 1 Using an S-Video cable (not included), connect the SVIDEO OUT terminal on the rear of the DVD player to the S-VIDEO IN terminal of TV. 2 Using the audio cables, connect the AUDIO (red and white) OUT terminals on the rear of the DVD player to the AUDIO (red and white) IN terminals of TV. Turn on the DVD player and TV. RED 3 Press the TV/VIDEO button on the TV's remote control to select S-Video. WHITE Audio Cable RED S-Video Cable (not included) WHITE 4 Set the Video Output to S-Video in the Display Setup menu. (See pages 27 to 28) Note - If you want to connect to an Amplifier, please refer to the Amplifier connection page. (See pages 13 to 14) - The number and position of terminals can vary depending on the TV set. Please refer to the user's manual of the TV. - Please do not connect S-Video and Component Video (Y, Pb, Pr) output simultaneously, as they may interfere and degrade both video output quality. 10 1024K_P560_XFA_Eng 4/17/06 12:00 PM Page 11 Connection to a TV (Interlace) - Connecting to your TV using Component video cables. English - You will enjoy high quality and accurate color reproduction images. Component video separates the picture element into black and white(Y), blue(PB), red(PR) signals to present clear and clean images. (Audio signals are delivered through the audio output.) 1 Using component video cables (not included), connect the COMPONENT VIDEO OUT terminal on the rear of the DVD player to the COMPONENT IN terminal of TV. 2 Using the audio cables, connect the AUDIO (red and white) OUT terminals on the rear of the DVD player to the AUDIO (red and white) IN terminals of TV. Turn on the DVD player and TV. RED 3 Press the TV/VIDEO button on the TV's remote control to select Component or DVD. RED BLUE GREEN WHITE Audio Cable RED WHITE RED BLUE GREEN Component cable (not included) 4 Set the Video Output to Component (I-SCAN) in the Display Setup menu. (See pages 27 to 28) Note - If Video output is incorrectly set to S-VIDEO with the Component cables connected, the screen will turn red. - If you want to connect to an Amplifier, please refer to the Amplifier connection page. (See pages 13 to 14) - The component terminal of TV can be marked by “R-Y, B-Y, Y” or “Cr, Cb, Y” instead of “PR, PB, Y” depending on the manufacturer. The number and position of terminals can vary depending on the TV set. Please refer to the user's manual of the TV. 11 1024K_P560_XFA_Eng 4/17/06 12:00 PM Page 12 Connection to a TV (Progressive) 1 Using component video cables (not included), connect the COMPONENT VIDEO OUT terminal on the rear of the DVD player to the COMPONENT IN terminal of TV. 2 RED BLUE GREEN Using the audio cables, connect the AUDIO (red and white) OUT terminals on the rear of the DVD player to the AUDIO (red and white) IN terminals of TV. Turn on the DVD player and TV. RED 3 Press the input selector on your TV remote control until the Component signal from the DVD player appears on the TV screen. WHITE Audio Cable RED WHITE RED BLUE GREEN Component cable (not included) 4 Set the Video Output to Component (P-SCAN) in the Display Setup menu. (See pages 27 to 28) To see the progressive video output, -You Consult TVsupporting User’s Manual to find out need ayour TV set the progressive scanif your TV supports Progressive Scan. If Progressive Scan isfunction. supported, follow TV up User’s Manual regarding Progressive Scan settings in the TV’s input And you havethe to set the TV menu system. - Depending on your TV, the connection method may differ from the illustration above. Note - What is "Progressive Scan"? Progressive scan has twice as many scanning lines as the interlace output method has. Progressive scanning method can provide better and clearer picture quality. 12 1024K_P560_XFA_Eng 4/17/06 12:00 PM Page 13 Connection to an Audio System (2 Channel Amplifier) 1 English Using the audio cables, connect the AUDIO (red and white) OUT terminals on the rear of the DVD player to the AUDIO (red and white) IN terminals of the Amplifier. 2 Using the video signal cable(s), connect the VIDEO, SVIDEO or COMPONENT OUT terminals on the rear of the DVD player to the VIDEO, S-VIDEO or COMPONENT IN terminal of your TV. 3 WHITE RED Turn on the DVD player, TV, and Amplifier. Audio Cable RED WHITE 2-channel amplifier 4 Press the input select button of the Amplifier to select external input in order to hear sound from the DVD player. Note - Please turn the volume down when you turn on the Amplifier. Sudden loud sound may cause damage to the speakers and your ears. - Please set the audio in the menu screen according to the Amplifier. (See pages 26 to 27) - The position of terminals can vary depending on the Amplifier. Please refer to the user's manual of the Amplifier. 13 1024K_P560_XFA_Eng 4/17/06 12:00 PM Page 14 Connection to an Audio System (Dolby digital, MPEG2 or DTS Amplifier) 1 If using an optical cable (not included), connect the DIGITAL AUDIO OUT (OPTICAL) terminal on the rear of the DVD player to the DIGITAL AUDIO IN (OPTICAL) terminal of the Amplifier. If using a coaxial cable (not included), connect the DIGITAL AUDIO OUT (COAXIAL) terminal on the rear of the DVD player to the DIGITAL AUDIO IN (COAXIAL) terminal of the Amplifier. 2 Using the video signal cable(s), connect the VIDEO, SVIDEO or COMPONENT OUT terminals on the rear of the DVD player to the VIDEO, S-VIDEO or COMPONENT IN terminal of TV. OR 3 Coaxial Cable (not included) Optical Cable (not included) Turn on the DVD player, TV, and Amplifier. Dolby digital or DTS amplifier 4 Press the input select button of the Amplifier to select external input in order to hear sound from the DVD player. Note - Please turn the volume down when you turn on the Amplifier. Sudden loud sound may cause damage to the speakers and your ears. - Please set the audio in the menu screen according to the Amplifier. (See pages 26 to 27) - The position of terminals can vary depending on the Amplifier. Please refer to the user's manual of the Amplifier. - Please remove the dust cover before using the optical cable (not included) and put the cover on the cable again when it's not used. 14 1024K_P560_XFA_Eng 4/17/06 12:00 PM Page 15 BASIC FUNCTIONS 4. Stopping Play Press the STOP ( Before Play - Turn on your TV and set it to the correct Video Input by pressing TV/VIDEO button on the TV remote control. - If you connected an external Audio System, turn on your Audio System and set it to the correct Audio Input. After plugging in the player, the first time you press the DVD POWER button, this screen comes up: If you want to select a language, press a NUMBER button. (This screen will only appear when you plug in the player for the first time.) If the language for the startup screen is not set, the settings may change whenever you turn the power on or off. Therefore, make sure that you select the language you want to use. Once you select a menu language, you can change it by pressing the button on the front panel of the unit for more than 5 seconds with no disc in the unit. Then the SELECT MENU LANGUAGE window appears again where you can reset your preferred language. Press 1 for English Touche 2 pour Français Drücken Sie 3 für Deutsch Pulsar 4 para Español Premere 5 per Italiano Druk op 6 voor Nederlands Playback 1. Press the OPEN/CLOSE ( ) button. The STANDBY indicator light goes out and the tray opens. 2. Place a disc gently into the tray with the disc’s label facing up. - You must only insert one DVD disc at a time. Inserting two or more discs will not allow to play them back and it may cause damage to the DVD player. 3. Press the PLAY/PAUSE ( ) button or OPEN/ CLOSE ( ) button to close the disc tray. ) button during play. 5. Removing Disc Press the OPEN/CLOSE ( English Playing a Disc ) button. 6. Pausing Play Press the PLAY/PAUSE ( ) or STEP button on the remote control during play. - Screen stops, no sound. To resume, press the PLAY/PAUSE ( ) button once again. 7. Step Motion Play (Except CD) Press the STEP button on the remote control during play. - Each time the button is pressed, a new frame will appear. - No sound is heard during STEP mode. - Press the PLAY/PAUSE ( ) button to resume normal play. - You can only perform step motion play in the forward direction. 8. Slow Motion Play Press and hold the SEARCH ( / ) button to choose the play speed between 1/8, 1/4 and 1/2 of normal during PAUSE or STEP mode. - No sound is heard during slow mode. - Press the PLAY/PAUSE ( ) button to resume normal play. - Reverse slow motion play will not work. Note - If the player is left in the stop mode for more than one minute without any user interaction, a screen saver will be activated. Press the PLAY/PAUSE ( ) button to resume normal play. - If the player is left in the stop mode for more than about 30 minutes, the power will automatically shut off. (Automatic Power-Off Function) - If the player is left for about 5 minutes in pause mode, it will stop. - This ( ) icon indicates an invalid button press. - When you stop disc play, the player remembers where you stopped, so when you press PLAY/PAUSE ( ) button again, it will pick up where you left off. (unless the disc is removed or the player is unplugged, or if you press the STOP ( ) button twice.) 15 1024K_P560_XFA_Eng 4/17/06 12:00 PM Page 16 Using the Search and Skip Functions During play, you can search quickly through a chapter or track, and use the skip function to jump to the next selection. Searching through a Chapter or Track During play, press the SEARCH ( or remote control for more than 1 second. DVD 2X, 4X, 64X, 128X VCD 4X, 8X CD 2X, 4X, 8X ) button on the Note - The speed marked in this function may be different from the actual speed of playback. - No sound is hearing during search mode (Except CD). Skipping Tracks During play, press the SKIP ( or ) button. - When playing a DVD, if you press the SKIP ( ) button, it moves to the next chapter. If you press the SKIP ( ) button, it moves to the beginning of the chapter. One more press makes it move to the beginning of the previous chapter. - When playing a VCD 2.0 in Menu Off mode, or a VCD 1.1 or a CD, if you press the SKIP ( ) button, it moves to the next track. If you press the SKIP ( ) button, it moves to the beginning of the track. One more press makes it move to the beginning of the previous track. - If a track exceeds 15 minutes when playing a VCD and you press the button, it moves forward 5minutes If you press the button, it moves backward 5 minutes. Note Only Menu Off is available for VCD2.0. Each press of the DISC MENU button toggles between Menu On and Menu Off. 16 Using the Display Function When Playing a DVD/VCD/MPEG4 1. During play, press the INFO button on the remote control. - You can select Info in the function menu by pressing the MENU button. 2. Press the / buttons to select the desired item. - Only Menu Off is available for VCD2.0. Each press of the DISC MENU button toggles between Menu On and Menu Off. 3. Press the ¥/ buttons to make the desired setup and then press the ENTER button. - You may use the number buttons of the remote control to directly access a title, chapter or to start the playback from the desired time. 4. To make the screen disappear, press the INFO button again. Note To access the desired title when there is more than one in the disc. For example, if there is more than one movie on a DVD, each movie will be identified. Chapter Most DVD discs are recorded in chapters so that you can quickly find a specific passage (similar to tracks on an video CD). Allows playback of the film from a desired time. You must enter the starting time as a reference.The time search function does not operate on some disc. Audio Refers to the language of the film soundtrack. In the example, the soundtrack is played in English 5.1CH. A DVD disc can have up to eight different soundtracks. Refers to the subtitle languages available in the disc. You will be able to choose the subtitle languages or, if you prefer, turn them off from the screen. A DVD disc can have up to 32 different subtitles. (Divx) File size has a relationship with resolution of a title. The larger file size is, the higher resolution is displayed. If the file resolution is small, it scales up automatically, so you can see the larger screen. 4/17/06 12:00 PM Page 17 Using the Disc and Title Menu Using the Function Menu Using the Function Menu 1. Press the MENU button during playback. Using the Disc Menu 1. During the playback of a DVD disc, press the MENU button on the remote control. 2. Press the / buttons to select Disc Menu, then press the or ENTER button. Press ENTER key for Disc Menu Enter Return 2. Press the / buttons to select Function, then press the or ENTER button. - Info (See pages 16) - Zoom (See page 21) - Bookmark (See pages 20 to 21) - Repeat (See pages 17 to 18) - EZ View (See pages 18 to 19) - Angle (See page 20) Menu Note - Depending on a disc, the Disc Menu may not work. - You can also use the Disc Menu, using the DISC MENU button on the remote control. - Only Menu Off is available for VCD2.0. Each press of the DISC MENU button toggles between Menu On and Menu Off. Using the Title Menu 1. During the playback of a DVD disc, press the MENU button on the remote control. 2. Press the / buttons to select Title Menu, then press the or ENTER button. Info Zoom Bookmark Repeat EZ View Angle 3. Press the / buttons to select one of the six functions. Then press the or ENTER button to access the function. You can also directly select these functions using their respective buttons on the remote control. - INFO - EZ VIEW - REPEAT Repeat Play Repeat the current track, chapter, title, a chosen section (A-B), or all of the disc. When playing a DVD/VCD Press ENTER key for Title Menu 1. Press the REPEAT button on the remote control. Repeat screen appears. Enter Return Menu Note - Depending on a disc, the Title Menu may not work. - Title Menu will only be displayed if there are at least two titles in the disc. 2. Press the ¥/ buttons to select Chapter, Title or A-B, then press the ENTER button. - DVD repeats play by chapter or title, VCD repeat play by disc or track. - Chapter ( ): repeats the chapter that is playing. - Title ( ): repeats the title that is playing. - Disc ( ): repeats the disc that is playing. - Track ( ): repeats the track that is playing. - A-B: repeats a segment of the disc that you select. T DVD Off 01 01 A - B Off 01 01 A - B VCD 17 English 1024K_P560_XFA_Eng 1024K_P560_XFA_Eng 4/17/06 12:00 PM Page 18 Using the A-B Repeat function 1. Press the REPEAT button on the remote control. 2. Press the ¥/ buttons to Select A-B button. 3. Press the ENTER button at the point where you want repeat play to start (A). B is automatically highligh ted. 4. Press the ENTER button at the point where you want the repeat play to stop (B). - To return to normal play, press the CANCEL button. 5. To return to normal play, press REPEAT button again, then press the ¥/ buttons to select Off and press ENTER button. ADVANCED FUNCTIONS Adjusting the Aspect Ratio (EZ View) To play back using aspect ratio (DVD) DVD Off 01 T 01 A - B ENTER REPEAT VCD Off 01 01 A - B Note - A-B REPEAT allow you to set point (B) directly after point (A) has been set. - Depending on a disc, the Repeat function may not work. - When playing VCD2.0, this function works only when Press the EZ VIEW button. - The screen size changes when the button is pressed repeatedly. - The screen zoom mode operates differently depending on the screen setting in the Display Setup menu. - To ensure correct operation of the EZ VIEW button, you should set the correct aspect ratio in the Display Setup menu. (See pages 27 to 28). 4:3 Letter Box the menu is off. Select Menu Off by pressing the DISC MENU button. If you are using a 16:9 TV Slow Play This feature allows you slowly to repeat scenes containing sports, dancing, musical instruments being played etc., so you can study them more closely. When playing a DVD 1. During play, press the PLAY/PAUSE ( ) button. 2. Press and hold the SEARCH ( / ) button to choose the play speed between 1/8, 1/4 and 1/2 of normal during PAUSE or STEP mode. 18 For 16:9 aspect ratio discs - WIDE SCREEN Displays the content of the DVD title in 16:9 aspect ratio. - SCREEN FIT The top and bottom portions of the screen are cut off. When playing a 2.35:1 aspect ratio disc, the black bars at the top and bottom of the screen will disappear. The picture will look vertically stretched. (Depending on a type of disc, the black bars may not disappear completely.) - ZOOM FIT The top, bottom, left and right of the screen are cut off and the central portion of the screen is enlarge For 4:3 aspect ratio discs - Normal Wide Displays the content of the DVD title in 16:9 aspect ratio. The picture will look horizontally stretched. - SCREEN FIT The top and bottom portions of the screen are cut off and the full screen appears. The picture will look vertically stretched. - ZOOM FIT The top, bottom, left and right portions of the screen are cut off and the central portion of the screen is enlarged. - Vertical Fit When a 4:3 DVD is viewed on a 16:9 TV, black bars will appear at the left and right of the screen in order to prevent the picture from looking horizontally stretched. e 4/17/06 12:00 PM Page 19 If you are using a 4:3 TV For 16:9 aspect ratio discs - 4:3 Letter Box Displays the content of the DVD title in 16:9 aspect ratio. The black bars will appear at the top and bottom of the screen. - 4:3 Pan&Scan The left and right portions of the screen are cut off and the central portion of the 16:9 screen is displayed. - SCREEN FIT The top and bottom portions of the screen are cut off and a full screen appears. The picture will look vertically stretched. - ZOOM FIT The top, bottom, left and right of the screen are cut off and the central portion of the screen is enlarged. For 4:3 aspect ratio discs - Normal Screen Displays the content of the DVD title in 4:3 aspect ratio. - SCREEN FIT The top and bottom portions of the screen are cut off and the full screen appears. The picture will look vertically stretched. - ZOOM FIT The top, bottom, left and right portions of the screen are cut off and the central portion of the screen is enlarged. Note This function may behave differently depending on the type of disc. 2. To remove the AUDIO icon, press the CANCEL or RETURN button. Note - This function depends on audio languages are encoded on the disc and may not work. - A DVD disc can contain up to 8 audio languages. - To have the same audio language come up whenever you play a DVD; Refer to “Using the Audio Language” on page 26. Selecting the Subtitle Language You can select a desired subtitle quickly and easily with the SUBTITLE button. Using the SUBTITLE button (DVD/MPEG4) 1. Press the SUBTITLE button. The subtitle languages are represented by abbreviations. The subtitle changes when DVD the button is pressed Off repeatedly. MPEG4 Subtitle Selection Selecting the Audio Language External Subtitle Off External subtitle option will appear, depends the DivX Disc. readme.TXT Non-standard fonts are not supported You can select a desired audio language quickly and easily with the AUDIO button. Using the AUDIO button 1. Press the AUDIO button. The Audio changes when the button is pressed repeatedly. The audio languages are represented by abbreviations. DVD When playing a VCD, you can select among Stereo, Left or Right. VCD Stereo MPEG4 Press AUDIO button at remocon repeatedly to PCM 1/2 select the desired Audio on MPEG4 then press the ENTER . Enter Press Subtitle button at remocon repeatedly to select the desired subtitle language on a MPEG4. Return Menu MPEG4 Off 2. To remove the SUBTITLE icon, press the CANCEL or RETURN button. Note - You have to change the desired subtitle in the Disc Menu, according to discs. Press the DISC MENU button. - This function depends on what subtitles are encoded on the disc and may not work on all DVDs. - A DVD disc can contain up to 32 subtitle languages. - To have the same subtitle language come up whenever you play a DVD; Refer to “Using the Subtitle Language” on page 26. 19 English 1024K_P560_XFA_Eng 1024K_P560_XFA_Eng 4/17/06 12:00 PM Page 20 Changing the Camera Angle When a DVD contains multiple angles of a particular scene, you can use the ANGLE function. Using the ANGLE function (DVD) If the disc contains multiple angles, the ANGLE appears on the screen. 1. During play or pause mode, press the MENU button on the remote control. 2. Press the / buttons to select Function, then press the or ENTER button. 3. Press the / buttons to select Angle, then press the or ENTER button. Using the Bookmark Function This feature lets you bookmark sections of a DVD or VCD (Menu Off mode) so you can quickly find them at a later time. Using the Bookmark Function (DVD/VCD) 1. During play, press the MENU button on the remote control. 2. Press the / buttons to select Function, then press the or ENTER button. Info Zoom Bookmark Repeat EZ View Angle Info Zoom Bookmark Repeat EZ View Angle 4. Press the ¥/ buttons or you can use the number buttons on the remote control to select the desired angle. Note - If the disc has only one angle, this feature won’t work. Currently, very few discs have this feature. - Depending on the disc, these functions may not work Using the Instant Replay/Skip Function Using the Instant Replay function (DVD) If you miss a scene, you can see it again using this function. If you press the INSTANT REPLAY button, the current scene moves backward about 10 seconds, and plays back. 3. Press the / buttons to select Bookmark, then press the or ENTER button. 4. When you reach the scene you want to mark, press the ENTER button. Up to three scenes may be marked at a time. Note - Only Menu Off is available for VCD2.0. Each press of the DISC MENU button toggles between Menu On and Menu Off. - Depending on a disc, the Bookmark function may not work. Recalling a Marked Scene 1~3. The first 1~3 steps are the same as those for “Using the Bookmark Function” on page 20. 4. Press the ¥/ buttons to select a marked scene. Using the Instant Skip function (DVD) Use this function to skip playback about 10 seconds ahead of the current scene. Press the INSTANT SKIP button. - Playback will skip ahead 10 seconds. Note Depending on the disc, these functions may not work. 20 5. Press the PLAY/PAUSE ( scene. ) button to skip to the marked Clearing a Bookmark 1~3. The first 1~3 steps are the same as those for “Using the Bookmark Function” on page 20. 4. Press the ¥/ buttons to select the bookmark number you want to delete. 4/17/06 12:00 PM Page 21 5. Press the CANCEL button to delete a bookmark number. Using the Zoom Function Using the Zoom Function (DVD/VCD) 1. During play or pause mode, press the MENU button on the remote control. 2. Press the / buttons to select Function, then press the or ENTER button. 3. Press the / or ¥/ buttons to select the part of the screen you want to zoom in on. Press the ENTER button. - During DVD play, press ENTER to zoom in 2X/4X/2X/Normal in order. - During VCD play, press ENTER to zoom in 2X/4X/2X/Normal in order. Info Zoom Bookmark Repeat EZ View Angle When cards are inserted in two slots, the card which is inserted first has a priority on playback. Note - If it is not fully inserted, the “Memory Card” will not work. Some memory cards may not be perfomed correctly. - If you remove the “Memory Card” during Memory Card operation, the recorded data may become corrupted. It is better to remove it after pressing DVD/M.CARD button to return to DVD/CD Mode. - Memory Stick Duo, Mini SD, and RS-MMC must be inserted into a slot using adapter. But some Memory cards may not be performed correctly depending on the adapter condition. - DVD/CD cannot be played in the Memory Card mode. If you press the DVD/M.CARD or OPEN/CLOSE button in M.CARD mode, the system will automatically enter the DVD/CD mode. - When pressing the DVD/M.CARD button to play the disc again, the player doesn’t remember where you stopped. When playing a Memory Card 1. Insert a Memory Card. 2. Press the DVD/M.CARD button on the remote control. 3. Depending on the file type stored on the Memory card, audio files will be played the same way as MP3/WMA files and picture files will be played the same way as Picture CD’s files. How to insert a Memory Card This unit accepts 10 different types of Memory Cards Insert the Memory Card correctly with the label facing up, otherwise it may not work. Clips Menu for MP3/WMA/JPEG/CD Audio/MPEG4 CD Audio or discs with MP3/WMA/JPEG contain individual songs and/or pictures that can be organized into folders as shown below. They are similar to how you use your computer to put files into different folders. Stop Multi card slot to support 10 types of memory cards: Memory Stick, Memory Stick-Pro, Memory Stick Duo, SD, Mini SD Card and XD-Picture Card, MMC, RS-MMC, Smart Media Card, Compact Flash. Open the disc tray. Place the disc on the tray. Close the tray. The tray closes and this screen displays. Off Disc √ MS 21 English 1024K_P560_XFA_Eng 1024K_P560_XFA_Eng 4/17/06 12:00 PM - : Name of currently playing file. - : Current Playback Time. - Page 22 : Current Playback Mode : There are four modes. They can be selected in order by pressing the REPEAT button. - Off: Normal Playback - Track: Repeats the current track. - Folder: Repeats the current folder. - Random: Files in the disc will be played in random order. - : MP3 file icon. - : Folder con. - : WMA file icon. - : Current Folder icon. - : JPEG file icon. - : AVI file icon. - : CD Audio file icon. The folder can be selected both in Stop or play mode - To select the Parent Folder Press the RETURN button to go to parent folder, or press the / buttons to select “..” and press ENTER to go to the parent folder. - To select the Peer Folder buttons to select the desired folder, then Press the / press ENTER. - To select the Sub-Folder buttons to select the desired folder, Press the / then press ENTER. Ro o t WM A JPEG P arent Fol der MU SIC C urrent Fol der 1st S ub-Fol ders 2nd SON G FILE 1 P eer Fol ders SON G FILE 2 SONG F ILE 3 M PEG4 FILE S 22 1. Open the disc tray. Place the disc on the tray. Close the tray. - Only one kind of file is played back when a disc or a folder contains both MP3 and WMA files. or ¥/ buttons to select a song file. 2. Press the / Press ENTER to begin playback of the song file. Play Off Repeat/Random playback Press the REPEAT button to change the playback mode. There are four modes, such as Off, Track, Folder and Random. - Off: Normal Playback - Track: Repeats the current song file. - Folder: Repeats the song files which have the same extension in the current folder. - Random: Song files which have the same extension will be played in random order. Folder Selection M P3 MP3/WMA/CD Audio Playback To resume normal play, press the CANCEL button. CD-R MP3/WMA file When you record MP3 or WMA files on CD-R, please refer to the following. - Your MP3 or WMA files should be ISO 9660 or JOLIET format. ISO 9660 format and Joliet MP3 or WMA files are compatible with Microsoft's DOS and Windows, and with Apple's Mac. This format is the most widely used. - When naming your MP3 or WMA files, do not exceed 8 characters, and enter “.mp3, .wma” as the file extension. General name format : Title.mp3. or Title.wma. When composing your title, make sure that you use 8 characters or less, have no spaces in the name, and avoid the use of special characters including: (.,/,\,=,+). - Use a decompression transfer rate of at least 128 Kbps when recording MP3 files. Sound quality with MP3 files basically depends on the rate of compression/decompression you choose. Getting CD audio sound requires an analog/digital sampling rate, that is conversion to MP3 format, of at least 128 Kbps and up to 160 Kbps. However, choosing higher rates, like 192 Kbps or more, only rarely give better sound quality. Conversely, files with decompression rates below 128 Kbps will not be played properly. 4/17/06 12:00 PM Page 23 - Use a decompression transfer rate of at least 64Kbps when recording WMA files. Sound quality with WMA files basically depends on the rate of compression/decompression you choose. Getting CD audio sound requires an analog/digital sampling rate, that is conversion to WMA format, of at least 64Kbps and up to 192Kbps. Conversely, files with decompression rates below 64Kbps or over 192Kbps will not be played properly. - Do not try recording copyright protected MP3 files. Certain "secured" files are encrypted and code protected to prevent illegal copying. These files are of the following types: TM Windows Media (registered trade mark of Microsoft Inc) and TM SDMI (registered trade mark of The SDMI Foundation). You cannot copy such files. - Important: The above recommendations cannot be taken as a guarantee that the DVD player will play MP3 recordings, or as an assurance of sound quality. You should note that certain technologies and methods for MP3 file recording on CD-Rs prevent optimal playback of these files on your DVD player (degraded sound quality and in some cases, inability of the player to read the files). - This unit can play a maximum of 500 files and 500 folders per disc. MPEG4 Playback ( ( Function Description Reference page Skip or During play, press the or button, it moves forward or backward 5 minutes. During play, press the SEARCH ( or ) button and press again to search at a faster speed. Allows you to search at a faster speed in an AVI file. (2X, 4X, 8X) Allows you to search at a slower speed in an AVI file. (1/8X, 1/4X, 1/2X) Each time the STEP button is pressed, a new frame will appear. - ) Search or ) Slow Motion Play Step Motion Play ZOOM 2X/4X/2X/Normal in order - P 15 P 15 P 21 - These functions may not work depending on MPEG4 file. CD-R AVI file This unit can play the following video compression formats within the AVI file format: - DivX 3.11 contents - DivX 4 contents (Based on MPEG4 Simple Profile) - DivX 5 contents (MPEG4 simple profile plus additional features such as bi-directional frames. Qpel and GMC are also supported.) - XviD MPEG4 compliant Contents. This unit supports all resolutions up to maximum below. MPEG4 Play Function AVI files are used to contain the audio and video data. Only AVI format files with the “.avi” extensions can be played. 1. Open the disc tray. Place the disc on the tray. Close the tray. or ¥/ buttons to select an avi file 2. Press the / (DivX/XviD), then press the ENTER button. Stop MPEG4 Function Description English 1024K_P560_XFA_Eng Off DivX3.11 & DivX4 & XviD DivX5 Bitrate may fluctuate: 720 x 480 @30fps Device may skip decoding the 720 x 576 @25fps high bitrate portions and begin : Maximum bitrate : 4Mbps decoding again when Bitrate returns to normal. Note - Some MPEG4 files created on a personal computer may not be play back. That is why Codec Type, Version and Higher resolution over specification is not supported. - This unit supports CD-R/RW written in MPEG4 in accordance with the “ISO9660 format”. Repeat Playback Press the REPEAT button to change playback mode. There are 3 modes, such as Off, Folder and Title. - Folder : Repeats the AVI files which have the same extension in the current folder. - Title : repeats the title that is playing. 23 1024K_P560_XFA_Eng 4/17/06 12:00 PM Page 24 Picture CD Playback 1. Select the desired folder. buttons to select a Picture file in the clips 2. Press the / menu and then press the ENTER button. 3. Press the INFO button on the remote control to select the menu you want to view and then press the ENTER button. Note - Depending on a file size, the amount of time between each picture may be different from the manual. - If you don’t press any button, the slide show will start automatically in about 10 seconds by default. MP3-JPEG Playback You can play JPEG using music as a backgound. Note - If no buttons on the remote control are pressed for 10 seconds, the menu will disappear. - Press the STOP button to return to the clips menu. - When playing a Kodak Picture CD, the unit displays the Photo directly, not the clips menu. buttons to select an MP3 file in the clips 1. Press the / menu and then press the ENTER button. buttons to select a JPEG file in the 2. Press the / clips menu and then press the ENTER button. - Music willplay from the beginning 3. Press Stop button when you want to stop the playback. Note MP3 and JPEG files have to be on the same disc. CD-R JPEG Discs Rotation : Each time the ENTER button is pressed, the picture rotates 90 degrees clockwise. Zoom buttons to select the part of the : Press the / screen you want to zoom in on. Press the ENTER button. Each time the ENTER button is pressed, the picture is enlarged up to 2X. Slide Show • : The unit enters slide show mode. • Before beginning the Slide Show, the picture interval must be set. • : When this icon is selected and ENTER is pressed, the pictures change automatically with about a 6 second interval. • : The pictures change automatically with about a 12 second interval. • : The pictures change automatically with about a 18 second interval. Timer: 24 - Only files with the “.jpg” and “.JPG” extensions can be played. - If the disc is not closed, it will take longer to start playing and not all of the recorded files may be played. - Only CD-R discs with JPEG files in ISO 9660 or Joliet format can be played. - The name of the JPEG file may not be longer than 8 characters and should contain no blank spaces or special characters (. / = +). - Only a consecutively written multi-session disc can be played. If there is a blank segment in the multi-session disc, the disc can be played only up to the blank segment. - A maximum of 500 images can be stored on a single CD. - Kodak Picture CDs are recommended. - When playing a Kodak Picture CD, only the JPEG files in the pictures folder can be played. - Kodak Picture CD: The JPEG files in the pictures folder can be played automatically. - Konica Picture CD: If you want to see the Picture, select the JPEG files in the clips menu. - Fuji Picture CD: If you want to see the Picture, select the JPEG files in the clips menu. - QSS Picture CD: The unit may not play QSS Picture CD. - If the number of files in 1 Disc is over 500, only 500 JPEG files can be played. - If the number of folders in 1 Disc is over 500, only JPEG files in 500 folders can be played 1024K_P560_XFA_Eng 4/17/06 12:00 PM Page 25 Setting Up the Language Features CHANGING SETUP MENU If you set the player menu, disc menu, audio and subtitle language in advance, they will come up automatically every time you watch a movie. Using the Setup Menu 1. With the unit in Stop mode, press the MENU button on the buttons to select Setup, then remote control. Use the / press the or ENTER button. Language Setup Audio Setup Display Setup Parental Setup : DivX(R) Registration 1. With the unit in Stop mode, press the MENU button. buttons to select Setup, then press the 2. Press the / or ENTER button. buttons to select Language Setup, then 3. Press the / press the or ENTER button. buttons to select Player Menu, then press 4. Press the / the or ENTER button. buttons to select the desired language, 5. Press the / then press the or ENTER button. - The language is selected and the screen returns to Language Setup menu. - To make the setup menu disappear, press the MENU button. LANGUAGE SETUP ❶ Language Setup: Setup of the Language. ❷ Audio Setup : Setup of the Audio Options. ❸ Display Setup : Setup of the Display Options. Use to select which type of screen you want to watch and sever al display options. ❹ Parental Setup : Setup of the Parental Level. Allows users to set the level necessary to prevent children from viewing unsuitable movies such as those with violence, adult subject matter, etc. ❺ DivX(R) Registration : Please use the Registration code to register this player with the DivX(R) Video On Demand format. To learn more go to www.divx.com/vod. buttons to access the different features. 2. Press the / Press the or ENTER button to access the sub features. 3. To make the setup screen disappear after setting up, press the MENU button again. Note Depending on the disc, some Setup Menu selections may not work. Using the Disc Menu Language This function changes the text language only on the disc menu screens. 1. With the unit in Stop mode, press the MENU button. buttons to select Setup, then press the 2. Press the / or ENTER button. buttons to select Language Setup, then 3. Press the / press the or ENTER button. buttons to select Disc Menu, then press 4. Press the / the or ENTER button. buttons to select the desired language, 5. Press the / then press the or ENTER button. - If the selected language is not recorded on the disc, the original pre-recorded language is selected. - The language is selected and the screen returns to Language Setup menu. - To make the setup menu disappear, press the MENU button. LANGUAGE SETUP 25 English Using the Player Menu Language The Setup menu lets you customize your DVD player by allowing you to select various language preferences, set up a parental level, even adjust the player to the type of television screen you have. 1024K_P560_XFA_Eng 4/17/06 12:00 PM Page 26 Using the Audio Language Using the DivX Subtitle Language 1. With the unit in Stop mode, press the MENU button. buttons to select Setup, then press the 2. Press the / or ENTER button. buttons to select Language Setup, then 3. Press the / press the or ENTER button. buttons to select Audio, then press the 4. Press the / or ENTER button. 1. With the unit in Stop mode, press the MENU button. buttons to select the desired language, then 5. Press the / press the or ENTER button. - Select “Original” if you want the default soundtrack language to be the original language the disc is recorded in. - If the selected language is not recorded on the disc, the original pre-recorded language is selected. - The language is selected and the screen returns to Language Setup menu. - To make the setup menu disappear, press the MENU button. buttons to select the desired language, 5. Press the / buttons to select Setup, then press the 2. Press the / or ENTER button. buttons to select Language Setup, then 3. Press the / press the or ENTER button. buttons to select DivX Subtitle, then press 4. Press the / the or ENTER button. then press the or ENTER button. - The language is selected and the screen returns to Language Setup menu. - To make the setup menu disappear, press the MENU button. LANGUAGE SETUP Player Menu : English Disc Menu √ Unicode Western Central Cyrillic Greek Audio Subtitle DivX Subtitle Setup LANGUAGE SETUP Player Menu Disc Menu Audio Subtitle DivX Subtitle : English Original : English √ English Français : English Deutsch : English Español Enter Return Menu Setting Up the Audio Options Italiano : Western Setup Using the Subtitle Language 1. With the unit in Stop mode, press the MENU button. buttons to select Setup, then press the 2. Press the / or ENTER button. buttons to select Language Setup, then 3. Press the / press the or ENTER button. buttons to select Subtitle, then press the 4. Press the / or ENTER button. buttons to select the desired language, 5. Press the / then press the or ENTER button. - Select “Automatic” if you want the subtitle language to be the same as the language selected as the audio language. - Some discs may not contain the language you select as your initial language; in that case the disc will use its original language setting. - The language is selected and the screen returns to setup menu. - To make the setup menu disappear, press the MENU button. Audio Options allows you to setup the audio device and sound status settings depending on the audio system in use. 1. With the unit in Stop mode, press the MENU button. buttons to select Setup, then press the 2. Press the / or ENTER button. buttons to select Audio Setup, then press 3. Press the / the or ENTER button. buttons to select the desired item, then 4. Press the / press the or ENTER button. Language Setup Audio Setup Display Setup Parental Setup : DivX(R) Registration AUDIO SETUP Dolby Digital Out :PCM MPEG-2 Digital Out :PCM DTS :Off Dynamic Compression :On PCM Down Sampling :On LANGUAGE SETUP ❶ Dolby Digital Out - PCM : Converts to PCM(2CH) audio. - Bitstream : Outputs Dolby Digital via the digital output. Select Bitstream when connecting to a Dolby Digital Decoder. 26 4/17/06 12:00 PM Page 27 ❷ MPEG-2 Digital Out - PCM : Converts to PCM(2CH) audio. - Bitstream : Converts to MPEG-2 Digital Bitstream (5.1CH or 8CH). Select Bitstream when using the Digital Audio Output. ❸ DTS Select On when connecting to a DTS Decoder. - Off : Doesn’t output digital signal. - On : Outputs DTS Bitstream via digital output. Note • There is no analog audio output when you play a DTS sound disc. ❹ Dynamic Compression - On : To select dynamic compression. - Off : To select the standard range. ❺ PCM Down Sampling - On : Select this when the Amplifier connected to the player is not 96KHz compatible. In this case, the 96KHz signals will be down converted to 48KHZ. - Off : Select this when the Amplifier connected to the player is 96KHz compatible. In this case, all signals will be output without any changes. Note Even when PCM Down sampling is Off • Some discs will only output down sampled audio through the digital outputs. • To make the Setup menu disappear, press the MENU button. ❶ TV Aspect Depending on a type of television you have, you may want to adjust the screen setting (aspect ratio). - 4:3 Letter Box : Select when you want to see the total 16:9 ratio screen DVD supplies, even though you have a TV with a 4:3 ratio screen. Black bars will appear at the top and bottom of the screen. - 4:3 Pan&Scan : Select this for conventional size TVs when you want to see the central portion of the 16:9 screen. (Extreme left and right side of movie picture will be cut off.) - 16:9 Wide : You can view the full 16:9 picture on your wide screen TV. DISPLAY SETUP TV Aspect Still Mode Screen Messa Black Level TV System Video Output : PAL : S-Video ❷ Still Mode These options will help prevent picture shake in still mode and display small text clearer. - Auto : When selecting Auto, Field/Frame mode will be automatically converted. - Field : Select this feature when the screen shakes in the Auto mode. - Frame : Select this feature when you want to see small letters more clearly in the Auto mode. ❸ Screen Messages Manufactured under license from Dolby Laboratories. “Dolby” and the double-D symbol are trademarks of Dolby Laboratories. Use to turn on-screen messages On or Off. ❹ Black Level Adjusts the brightness of the screen.(On or Off) It does not function in Progressive mode. “DTS” and “DTS Digital Out” are trademarks of Digital Theater Systems, Inc. ➎ TV System - NTSC : In case of using NTSC disc Setting Up the Display Options • If your TV system only has PAL-Video input, you must choose “PAL”. When you choose “PAL”, Interlace output format is PAL 60 Hz output. Display options enable you to set various video functions of the player. • If your TV system only has NTSC, input you must choose “NTSC ”. 1. With the unit in Stop mode, press the MENU button. buttons to select Setup, then press the 2. Press the / or ENTER button. buttons to select Display Setup, then press 3. Press the / the or ENTER button. buttons to select the desired item, then 4. Press the / press the or ENTER button. - PAL : In case of using PAL disc Language Setup Audio Setup Display Setup Parental Setup : DivX(R) Registration • If your TV system only has NTSC-Video input, you must choose “NTSC”. • If your TV system only has PAL input, you must choose “PAL ”. 27 English 1024K_P560_XFA_Eng 1024K_P560_XFA_Eng 4/17/06 12:00 PM Page 28 DISPLAY SETUP TV Aspect : 4:3 L-Box Still Mode : Auto Screen Messages : On Black Level : Off TV System : PAL TV System NTSC Video Output √ PAL Setup ➏ Video Output Select Video Output. - S-VIDEO : Select when you want to use Video and SVideo Out. - COMPONENT(I-SCAN) : Select when you want to use Component Interlace (625i/525i) Out. Setting Up the Parental Control The Parental Control function works in conjunction with DVDs that have been assigned a rating, which helps you control the types of DVDs that your family watches. There are up to 8 rating levels on a disc. Setting Up the Rating Level 1. With the unit in Stop mode, press the MENU button. buttons to select Setup, then press the 2. Press the / or ENTER button. - COMPONENT(P-SCAN) : Select when you want to use Component Progressive (625p/525p) Out. • If you press the VIDEO SEL. button, Video output mode is changed in regular sequence in no disc mode. (S-VIDEO ➝COMPONENT(I-SCAN) ➝ COMPONENT(P-SCAN)) • If the Yes/No selection in the Display Setup sub Menu is not made within 10 seconds, Language Setup Audio Setup Display Setup Parental Setup : DivX(R) Registration buttons to select Parental Setup, then 3. Press the / press the or ENTER button. the screen returns to the previous menu. DISPLAY SETUP TV Aspect : 4:3 L-Box Still Mode : Auto Screen Messages : On Black Level TV System Video Output Language Setup Audio Setup Display Setup Parental Setup : DivX(R) Registration buttons to select Rating Level, then press 4. Press the / the or ENTER button. • Consult your TV User’s Manual to find out if your TV supports Progressive Scan. If Progressive Scan is supported, follow the TV User’s Manual regarding Progressive Scan settings in the TV’s menu system. • If Video Output is set incorrectly, the screen may be blocked. • When the resolution is changed during playback, it may take a few seconds for a normal image to appear. PARENTAL SETUP Rating level : Kids Safe Change Password 5. Enter your password. - By default, password is set to 0000. PARENTAL SETUP Rating Level : Kids Safe Change Password Enter Password buttons to select the Rating Level you want, 6. Press the / then press the or ENTER button. e.g) Setting up in Kids Safe. PARENTAL SETUP Rating Level Level Rating : Kids Safe √ Kids Safe Change Password Level 2 Level 3 Level 4 Level 5 Level 6 Setup Enter 28 Return Menu 1024K_P560_XFA_Eng 4/17/06 12:00 PM Page 29 Note: • To make the setup menu disappear, press the MENU button. For example, if you select up to Level 6, discs that contain Level 7,8 will not play. English Changing the Password 1. With the unit in Stop mode, press the MENU button. buttons to select Setup, then press the 2. Press the / or ENTER button. Language Setup Audio Setup Display Setup Parental Setup : DivX(R) Registration buttons to select Parental Setup, then 3. Press the / press the or ENTER button. The Enter Password screen appears. Enter your password. Language Setup Audio Setup Display Setup Parental Setup : DivX(R) Registration button to select Change Password, then 4. Press the / press the or ENTER button. Enter your password (default password). Enter the new password again. PARENTAL SETUP Rating Level :Kids Safe Change Password Setup PARENTAL SETUP Rating Level :Kids Safe Change Password Enter Password Setup Enter Return Menu PARENTAL SETUP Rating Level :Kids Safe Change Password Enter New Password Setup Enter Return Menu Note If you have forgotten your password, see “Forgot Password” in the Troubleshooting Guide. 29 1024K_P560_XFA_Eng 4/17/06 12:00 PM Page 30 REFERENCE Firmware upgrade 2. Press the ¥/ buttons to select Total, then press the ENTER button. Introduction Samsung will often support the software upgrade to improve the performance of this unit to the latest status, through Samsung Internet Site (www.samsung.com). Because the specially new mpeg4 codec continues and it is appearing. What improvements are made depends on the upgrade software you are using as well as the software that your DVD-player contained before the upgrade. How to make an upgrade disc Write the downloaded file onto a blank CD-R or CDRW disc, using the following settings: Firmware upgrade starts - In the middle of the writing, the tray will open automatically. After taking out the disc, please wait for about 2 minutes. - If the unit was succesfully updated, the unit will turn off and on after closing the tray automatically. When the unit turns on, this screen will display. 3. Press the number buttons to select the desired 1. You have to download a new file through Download Center of Samsung Internet Site (www.samsung.com). 2. Write the file to Disc using CD-RW of your computer. language Press Touche Note - File System CD-ROM ISO Level - Character set ISO 9660 - Finalized, single session - Write speed low Upgrade procedure 1. Open the disc tray. Place the disc on the tray. Close the tray. The Firmware upgrade screen appears. Firmware upgrade appears on the display 30 Drücken Sie Pulsar 1 for English 2 pour Français 3 für Deutsch 4 para Español Premere 5 per Italiano Druk op 6 voor Nederlands Note - If the “Select Menu Language” doesn’t appear, please contact to “Samsung Service Center”. - Do not press any button and unplug the power code during upgrade. - The upgrade procedure may change, refer to the web site (www.samsung.com). 1024K_P560_XFA_Eng 4/17/06 12:00 PM Page 31 Troubleshooting Before requesting service (troubleshooting), please check the following. Page No operations can be performed with the remote control. • Check the batteries in the remote control. They may need replacing. • Operate the remote control at a distance of no more than 20 feet. • Remove batteries and hold down one or more buttons for several minutes to drain the microprocessor inside the remote control to reset it. Reinstall batteries and try to operate the remote control again. P3 Disc does not play. • Ensure that the disc is installed with the label side facing up. • Check the region number of the DVD. P5 5.1 channel sound is not being reproduced. The icon appears on screen. • 5.1 channel sound is reproduced only when the following conditions are met. : 1) The DVD player is connected with the proper Amplifier 2) The disc is recorded with 5.1 channel sound. • Check whether the disc being played has the “5.1 ch” mark on the outside. • Check if your audio system is connected and working properly. • In a SETUP Menu, is the Audio Output set to Bitstream? • The features or action cannot be completed at this time because: 1. The DVD’s software restricts it. 2. The DVD’s software doesn’t support the feature (e.g., angles). 3. The feature is not available at the moment. 4. You’ve requested a title or chapter number or search time that is out of range. English Action Problem P13~14 P26~27 Disc Menu doesn’t appear. • Check if the disc has a Menu. Play mode differs from the Setup Menu selection. • Some of the functions selected in the Setup Menu may not work properly if the disc is not encoded with the corresponding function. P25~29 The screen ratio cannot be changed. • The Screen Ratio is fixed on your DVDs. P27~28 No audio. • Make sure you have selected the correct Digital Output in the Audio Options Menu. P26~27 The screen is blocked • Press the button (on front panel) for more than 5 seconds under no disc inside. All settings will revert to the factory settings. P15 Forgot password • Press the button (on front panel) for more than 5 seconds under no disc inside. \ All settings including the password will revert to the factory settings. Don't use this unless absolutely necessary. P28~29 If you experience other problems. The picture is noisy or distorted • Go to the contents and find the section of the instruction book that contains the explanations regarding the current problem, and follow the procedure once again. • If the problem still cannot be solved, please contact your nearest authorized service center. • Make sure that the disc is not dirty or scratched. • Clean the disc. P2 31 1024K_P560_XFA_Eng 4/17/06 12:00 PM Page 32 Specification General Power Requirements AC 110-240 V, 60/50 Hz Power Consumption 9W 1.7 Kg Weight 430mm (W) X 205mm (D) X 37mm (H) Dimensions +5°C to +35°C Operating Temperature Range Operating Humidity Range 10 % to 75 % Reading Speed : 3.49 ~ 4.06 m/sec.` Approx. Play Time (Single Sided, Single Layer Disc) : 135 min. DVD (DIGITAL VERSATILE DISC) Disc CD : 12Cm (COMPACT DISC) Reading Speed : 4.8 ~ 5.6 m/sec. Maximum Play Time : 74 min. CD : 8Cm (COMPACT DISC) Reading Speed : 4.8 ~ 5.6 m/sec. Maximum Play Time : 20 min. Reading Speed : 4.8 ~ 5.6 m/sec. Maximum Play Time : 74 min. (Video + Audio) VCD : 12Cm Video Output Composite Video 1 channel : 1.0 Vp-p (75 Ω load) Component Video Y : 1.0 Vp-p (75 Ω load) Pr : 0.70 Vp-p (75 Ω load) Pb : 0.70 Vp-p (75 Ω load) Luminance Signal : 1.0 Vp-p (75 Ω load) Chrominance Signal : 0.3 Vp-p (75 Ω load) S-Video L(1/L), R(2/R) 2 Channel Audio Output 48 kHz Sampling : 4 Hz to 22 kHz 96 kHz Sampling : 4 Hz to 44 kHz *Frequency Response *S/N Ratio 110 dB *Dynamic Range 100 dB *Total Harmonic Distortion 0.004 % *: Nominal specification - Samsung Electronics Co., Ltd reserves the right to change the specifications with out notice. - Weight and dimensions are approximate. 32 1024K_P560_XFA_Eng 4/17/06 12:00 PM Page 33 Contact SAMSUNG WORLD WIDE If you have any questions or comments relating to Samsung products, please contact the SAMSUNG customer care centre. Region North America Latin America Europe CIS Country CANADA MEXICO U.S.A ARGENTINE BRAZIL CHILE COSTA RICA ECUADOR EL SALVADOR GUATEMALA JAMAICA PANAMA PUERTO RICO REP. DOMINICA TRINIDAD & TOBAGO VENEZUELA BELGIUM CZECH REPUBLIC DENMARK FINLAND FRANCE GERMANY HUNGARY ITALIA LUXEMBURG NETHERLANDS NORWAY POLAND PORTUGAL SLOVAKIA SPAIN SWEDEN U.K RUSSIA UKRAINE AUSTRALIA CHINA HONG KONG INDIA Asia Pacific INDONESIA JAPAN MALAYSIA PHILIPPINES SINGAPORE THAILAND Middle East & Africa TAIWAN VIETNAM SOUTH AFRICA U.A.E Customer Care Center ☎ 1-800-SAMSUNG (7267864) 01-800-SAMSUNG (7267864) 1-800-SAMSUNG (7267864) 0800-333-3733 0800-124-421 800-726-7864(SAMSUNG) 0-800-507-7267 1-800-10-7267 800-6225 1-800-299-0013 1-800-234-7267 800-7267 1-800-682-3180 1-800-751-2676 1-800-7267-864 1-800-100-5303 02 201 2418 844 000 844 38 322 887 09 693 79 554 08 25 08 65 65 (0,15€/Min) 01805 - 121213 (€ 0,12/Min) 06 40 985 985 199 153 153 02 261 03 710 0900 20 200 88 (€ 0.10/Min) 231 627 22 0 801 801 881 80 8 200 128 0850 123 989 902 10 11 30 08 585 367 87 0870 242 0303 8-800-200-0400 8-800-502-0000 1300 362 603 800-810-5858, 010- 6475 1880 2862 6001 3030 8282 1600 1100 11 0800-112-8888 0120-327-527 1800-88-9999 1800-10-SAMSUNG (7267864) 1800-SAMSUNG (7267864) 1800-29-3232 02-689-3232 0800-329-999 1 800 588 889 0860 7267864 (SAMSUNG) 800SAMSUNG (7267864) Web Site www.samsung.com/ca www.samsung.com/mx www.samsung.com www.samsung.com/ar www.samsung.com/br www.samsung.com/cl www.samsung.com/latin www.samsung.com/latin www.samsung.com/latin www.samsung.com/latin www.samsung.com/latin www.samsung.com/latin www.samsung.com/latin www.samsung.com/latin www.samsung.com/latin www.samsung.com/latin www.samsung.com/be www.samsung.com/cz www.samsung.com/dk www.samsung.com/fi www.samsung.com/fr www.samsung.de www.samsung.com/hu www.samsung.com/it www.samsung.lu www.samsung.com/nl www.samsung.com/no www.samsung.com/pl www.samsung.com/pt www.samsung.com/sk www.samsung.com/es www.samsung.com/se www.samsung.com/uk www.samsung.ru www.samsung.com/ur www.samsung.com/au www.samsung.com.cn www.samsung.com/hk www.samsung.com/in www.samsung.com/id www.samsung.com/jp www.samsung.com/my www.samsung.com/ph www.samsung.com/sg www.samsung.com/th www.samsung.com/tw www.samsung.com/vn www.samsung.com/za www.samsung.com/mea 1024K_P560_XFA_Eng 4/17/06 12:00 PM Page 34 Memo 1024K_P560_XFA_Eng 4/17/06 12:00 PM Page 35 Memo 1024K_P560_XFA_NL 4/17/06 3:35 PM Page 2 VOORZORGSMAATREGELEN 1. Installeren - Zorg ervoor dat de stroomvoorziening in uw huis overeenkomt met die op het identificatieplaatje aan de achterkant van de dvdspeler. - Plaats de speler in een kastje met voldoende ventilatieruimte. (7~10cm). Dek de ventilatieopeningen niet af. - Duw de disklade niet met de hand naar binnen. - Plaats de speler niet op of onder andere installatiecomponenten. - Schakel alle componenten uit voordat u de speler verplaatst. - Schakel andere installatiecomponenten eerst uit voordat u deze op de speler aansluit. - Verwijder de disk en schakel de speler uit na gebruik, vooral wanneer u deze langere tijd niet gaat gebruiken. - Haal de stekker uit het stopcontact om het apparaat van het stroomnet te halen. 2. Voor uw veiligheid - Dit product maakt gebruik van een laserstraal. Gebruik van mechanismen, aanpassingen of handelingen anders dan zoals in deze gebruiksaanwijzing vermeld, kunnen blootstelling aan schadelijke straling tot gevolg hebben. - Maak de dvd-speler nooit open en voer zelf geen reparaties uit. Laat onderhoud en reparaties over aan een gekwalificeerde monteur. 3. Let op - Deze speler is niet ontworpen voor industrieel gebruik maar voor particuliere doeleinden. Dit product is uitsluitend bestemd voor particulier gebruik. - Plaats geen houders gevuld met vloeistof, of kleine metalen voorwerpen op de speler. - Externe invloeden, zoals bliksem of statische elektriciteit, kunnen de normale werking van de speler beïnvloeden. Schakel in dat geval de speler uit en weer in met de POWER-knop, of haal de stekker uit het stopcontact en steek hem er vervolgens weer in. De speler werkt daarna weer normaal. 2 - Wanneer u de speler van een koude naar een warme omgeving verplaatst, kan condensvorming optreden, waardoor de speler eventueel niet meer goed werkt. Wacht in dat geval totdat de speler op kamertemperatuur is gekomen en de condens is opgedroogd. 4. Disks - Gebruik nooit reinigingssprays, benzine, thinner of andere oplosmiddelen die het oppervlak van de disk zouden kunnen beschadigen. - Raak het beschreven oppervlak van de disk niet aan. Houd de disk met uw vingers aan de rand en in de opening vast. - Maak de disk voorzichtig schoon en beweeg de doek nooit heen en weer over de disk. 5. Batterij - De batterij die in dit product wordt gebruikt, bevat chemicaliën die schadelijk zijn voor het milieu. - Gooi batterijen daarom nooit weg bij het nor male huisafval maar lever ze in op de daar voor bestemde verzamelpunten. De producteenheid die bij deze gebruikershandleiding hoort, valt onder licentie van bepaalde intellectuele eigendomsrechten van bepaalde derde partijen. Deze licentie is beperkt tot niet-commercieel gebruik in de privé-sfeer door eindconsumenten voor de inhoud van de licentie. Er worden geen rechten verleend voor commerciële doeleinden. De licentie dekt geen andere producteenheid dan deze producteenheid. De licentie geldt niet voor andere producteenheden of -processen zonder licentie conform ISO/OUR 11172-3 of ISO/OUR 13818-3, die gebruikt of verkocht worden in combinatie met deze producteenheid. De licentie dekt alleen het gebruik van deze producteenheid voor het coderen en/of decoderen van geluidsbestanden conform ISO/OUR 11172-3 of ISO/OUR 13818-3. Er worden onder deze licentie geen rechten verleend voor productkenmerken of -functies die niet conform ISO/OUR 11172-3 of ISO/OUR 13818-3 zijn. LET OP: GEBRUIK VAN MECHANISMEN, AANPASSINGEN OF HANDELINGEN ANDERS DAN ZOALS IN DEZE GEBRUIKSAANWIJZING VERMELD, KUNNEN BLOOTSTELLING AAN SCHADELIJKE STRALING TOT GEVOLG HEBBEN. 4/17/06 3:35 PM Page 3 VOORDAT U BEGINT INHOUDSOPGAVE Voorzorgsmaatregelen . . . . . . . . . . . . . . . . . . . . . . 2 Voordat u begint . . . . . . . . . . . . . . . . . . . . . . . . . . 3 Accessoires Afstandsbediening Gebruikershan dleiding Batterijen voor de afstandsbediening (AAAformaat) Audio- en videokabel Batterijen plaatsen in de afstandsbediening 1. Open het batterijklepje aan de achterkant van de afstandsbediening. 2. Plaats twee AAA batterijen. Let bij het plaatsen op de correcte polariteit (+ en -). 3. Schuif het batterijklepje weer op de afstandsbediening. Als de afstandsbediening niet correct werkt - Controleer de polariteit (+ - ) van de batterijen (Dry-Cell) - Controleer of de batterijen leeg zijn. - Controleer of de sensor van de afstandsbediening door voorwerpen wordt geblokkeerd. - Controleer of zich tl-verlichting in de directe omgeving bevindt. Instellingen Algemene kenmerken. . . . . . . . . . . . . . . . . . . . . . . 4 Disktype en kenmerken . . . . . . . . . . . . . . . . . . . . . 5 Beschrijving . . . . . . . . . . . . . . . . . . . . . . . . . . . . . . 6 De toetsen van de afstandsbediening . . . . . . . . . . 8 Aansluiten Een verbinding kiezen . . . . . . . . . . . . . . . . . . . . . . 9 Basisfuncties Een disk afspelen . . . . . . . . . . . . . . . . . . . . . . . . 15 De functie Zoeken en SKIP gebruiken . . . . . . . . 16 De Display functie gebruiken . . . . . . . . . . . . . . . . 16 Het Diskmenu het Titelmenu gebruiken . . . . . . . 17 Het menu Functie gebruiken . . . . . . . . . . . . . . . . 17 Afspelen herhalen . . . . . . . . . . . . . . . . . . . . . . . . 17 Vertraagd afspelen . . . . . . . . . . . . . . . . . . . . . . . 18 Speciale functies De beeldverhouding instellen (EZ VIEW). . . . . . . 18 Taalkeuze geluidsspoor . . . . . . . . . . . . . . . . . . . . 19 Taalkeuze ondertiteling. . . . . . . . . . . . . . . . . . . . . 19 De camerahoek wijzigen . . . . . . . . . . . . . . . . . . . 20 De functie Passage direct herhalen/ SKIP . . . . . . 20 De functie Bladwijzers . . . . . . . . . . . . . . . . . . . . . 20 De functie Zoom . . . . . . . . . . . . . . . . . . . . . . . . . . 21 Het plaatsen van een geheugenkaart . . . . . . . . . 21 Menu Clips voor MP3/WMA/JPEG/MPEG4/ CD Audio . . . . . . . . . . . . . . . . . . . . . . . . . . . . . . . 21 Mappen selecteren . . . . . . . . . . . . . . . . . . . . . . . . 22 MP3/WMA/CD Audio afspelen . . . . . . . . . . . . . . . 22 MPEG4 afspelen . . . . . . . . . . . . . . . . . . . . . . . . . 23 Foto-CD's afspelen . . . . . . . . . . . . . . . . . . . . . . . . 24 Instellingenmenu wijzigen Het instellingenmenu gebruiken . . . . . . . . . . . . . . 25 De taalfuncties instellen . . . . . . . . . . . . . . . . . . . . 25 De geluidopties instellen. . . . . . . . . . . . . . . . . . . . 26 De beeldopties instellen . . . . . . . . . . . . . . . . . . . . 27 Kinderslot instellen . . . . . . . . . . . . . . . . . . . . . . . . 28 Naslag Firmware upgrade . . . . . . . . . . . . . . . . . . . . . . . . 30 Problemen oplossen. . . . . . . . . . . . . . . . . . . . . . . 31 Specificaties . . . . . . . . . . . . . . . . . . . . . . . . . . . . . 32 3 Nederlands 1024K_P560_XFA_NL 1024K_P560_XFA_NL 4/17/06 3:35 PM Page 4 INSTELLINGEN Algemene kenmerken Voortreffelijke geluidskwaliteit Dolby Digital, een technologie die door Dolby Laboratories werd ontwikkeld, staat garant voor een kristalheldere geluidsweergave. Beeldscherm Zowel normale weergave als breedbeeld (16:9). Vertraagd afspelen U kunt belangrijke scènes vertraagd afspelen. Kinderslot (DVD) Met het kinderslot kunt u de klassering instellen van films waarnaar kinderen niet mogen kijken, omdat er bijvoorbeeld geweld in voorkomt of omdat ze om andere redenen niet geschikt zijn voor jeugdige kijkers. Keuzemenu’s op het tv-scherm U kunt bij het afspelen van films via een menu de taal voor geluid en ondertiteling kiezen en van camerastandpunt wisselen. Progressieve scan Met progressieve scan wordt een betere beeldkwaliteit bereikt doordat het aantal scanlijnen van een conventioneel interlaced beeld wordt verdubbeld. EZ VIEW (DVD) Met Easy View kunt u het beeldformaat aanpassen aan het schermformaat (16:9 of 4:3) van uw tv. Weergave van digitale foto’s (JPEG) Hiermee kunt u digitale foto’s op uw tv bekijken. Herhalen Wanneer u een nummer of een film wilt herhalen, drukt u eenvoudig op de REPEAT toets. MP3/WMA Met dit apparaat kunt u dvd’s afspelen die uit MP3/WMA-bestanden zijn samengesteld. Passage direct herhalen (DVD) Met deze functie kunt u de laatste 10 seconden van een film vanaf de huidige positie direct herhalen. Direct overslaan (SKIP)(DVD) Met deze functie kunt u de opname 10 seconden “vooruitspoelen”. MPEG4 Met dit apparaat kunt u MPEG4-formaten binnen een avi-bestand afspelen. Geheugenkaart Ingang voor meerdere kaarten voor de ondersteuning van 11 soorten geheugenkaarten: Memory Stick, Memory Stick-Pro, Memory Stick Duo, SD, mini SD-kaart en XD-Picture Card, MMC, RS-MMC, Smart Media-kaart, Compact Flash 4 Opmerking - De volgende disks kunnen niet worden afgespeeld op deze speler. • DVD-ROM • DVD-RAM • CD-ROM • CDV • CDI • CVD • Super audio-cd (behalve de CD-laag) • CDG’s spelen alleen audio af, geen beelden. - Van de volgende disks zijn de afspeelmogelijkheden afhankelijk van de opnamecondities. • DVD-R, +R • CD-RW • DVD+RW, -RW (V modus) - De speler kan bepaalde CD-R’s , CD-RW’s en DVD-R’s mogelijk niet afspelen vanwege het schijftype of de opnamecondities. KOPIEERBEVEILIGING Veel dvd’s bevatten een kopieerbeveiliging. Sluit uw dvd-speler daarom rechtstreeks aan op uw tv en niet op een videorecorder. Aansluiting via een videorecorder kan leiden tot vervormde weergave van dvd’s met kopieerbeveiliging. Dit product bevat copyrightbeschermingstechnologie die beschermd wordt door methodeclaims van bepaalde patenten in de Verenigde Staten en andere intellectuele eigendomsrechten die in het bezit zijn van Macrovision Corporation en andere rechtmatige eigenaren. Het gebruik van deze copyrightbeschermingstechnologie moet zijn goedgekeurd door Macrovision Corporation en is uitsluitend bedoeld voor privé-gebruik en weergave voor een beperkt publiek, tenzij Macrovision Corporation een andere goedkeuring heeft verleend. Reverse engineering of demonteren is niet toegestaan. PROGRESSIEVE SCANUITGANGEN (525p/625p) CONSUMENTEN DIENEN ER REKENING MEE TE HOUDEN DAT NIET IEDERE HOGE-DEFINITIE TV-SET VOLLEDIG COMPATIBEL IS MET DIT PRODUCT. DIT KAN ERVOOR ZORGEN DAT NIET ALLE BEELDEN JUIST WORDEN WEERGEGEVEN. ALS U PROBLEMEN ONDERVINDT IN DE PROGRESSIEVE SCAN BEELDEN BIJ DE 525 OF 625, WORDT U AANGERADEN DE AANSLUITING OVER TE SCHAKELEN NAAR DE “STANDAARD DEFINITIES”-UITGANG. ALS U VRAGEN HEEFT OVER DE COMPATIBILITEIT VAN ONZE TV-SET MET DE DVD-SPELERS MODELLEN 525p EN 625p, KUNT U CONTACT OPNEMEN MET ONZE KLANTENSERVICE. 1024K_P560_XFA_NL 4/17/06 3:35 PM Page 5 Disktype en kenmerken Disktype (logo) Opnametype DVD Audio + Video VIDEO-CD Audio + Video AUDIO-CD Diskformaat Maximale speelduur 12 Cm Enkelzijdig 240 min. Dubbelzijdig 480 min. 8 Cm Enkelzijdig 80 min. Dubbelzijdig 160 min. 12 Cm 74 min. 8 Cm 20 min. 12 Cm 74 min. 8 Cm 20 min. Audio Aanduidingen op de disk ~ PAL DIGITAL SOUND - De geluids- en beeldkwaliteit van dvd’s is uitstekend dankzij Dolby Digital en het mpeg-2 systeem. - U kunt verschillende scherm- en audiofuncties selecteren via het schermmenu. - Video met cd-geluid, VHSkwaliteit en MPEG-1-compressietechnologie. - Een cd is opgenomen als digitaal signaal met minder vervorming en een betere en duurzamere geluidskwaliteit. Regiocode Regiocode PAL tv-systeem in Engeland, Frankrijk, Duitsland etc. Dolby Digital-disk STEREO Kenmerken Stereo-disk Disk met digitaal geluid Zowel de dvd-speler als de dvd’s zijn per regio gecodeerd. De regiocodes moeten overeenkomen om de dvd te kunnen afspelen. Als de codes niet overeenkomen, kunt u de dvd niet afspelen. De regiocode voor dit apparaat staat op de achterzijde van de speler. DTS-disk DivX-certificatie MP3-disk Plaats slechts één dvd-disk per keer in de speler. Wanneer u twee of meer disks plaatst, is afspelen niet meer mogelijk en kan de dvdspeler worden beschadigd. DivX, DivX Certified, en de bijbehorende logo's zijn handelsmerken van DivXNetworks, Inc en worden gebruikt onder licentie. 5 Nederlands Met deze dvd-speler kunt u de volgende soorten disks met de corresponderende logo's afspelen: 1024K_P560_XFA_NL 4/17/06 3:35 PM Page 6 Beschrijving Componenten frontpaneel 10 1 2 1. STANDBY/ON ( ) 3. 4. DISKLADE 9 STOP ( ) Stopt het afspelen van de disk. 8. MULTI-KAARTINGANG Plaats hier een geheugenkaart. 8 7. Wanneer u de speler voor het eerst inschakelt, gaat dit lampje branden. 7 SKIP ( ) / SEARCH Hiermee kunt u naar een vorige scène of naar een vorig muziekstuk springen. catielampje en wordt de speler ingeschakeld. STANDBY-indicator 6 6. Wanneer STANDBY/ON wordt ingedrukt, dooft het indi- 2. 5 4 3 9. AFSPELEN / PAUZE ( ) Afspelen van disk starten of onderbreken. SKIP ( ) / SEARCH Hiermee kunt u naar een volgende scène of naar een volgend muziekstuk springen. Plaats hier de disk. 5. OPEN/CLOSE ( ) Druk op deze toets om disklade te openen en te sluiten. 10. DISPLAY Hier worden de gekozen functies getoond. Display frontpaneel Totale afspeeltijd / geeft informatie weer over verschillende functies, zoals PLAY, STOP, LOAD... nodSC: geen disk geplaatst. OPEn: de disklade is open. LOAd: Speler is bezig met laden van gegevens van de disk. 6 1024K_P560_XFA_NL 4/17/06 3:35 PM Page 7 Rear Achterpaneel 1 3 1.DIGITAL AUDIO OUT AANSLUITINGEN - Gebruik naar keuze een optische of coaxiale digitale kabel om de speler aan te sluiten op een Dolby Digital receiver. - Gebruik naar keuze een optische of coaxiale digitale kabel om de speler aan te sluiten op een versterker met een Dolby Digital, MPEG2 of DTS decoder. 2. COMPONENTVIDEO-OUT AANSLUITINGEN - Gebruik deze aansluitingen als u over een tv beschikt met ”Component Video in” aansluitingen. Deze aansluitingen bestaan uit Pr, Pb en Y video. - Als de video-uitgang P-SCAN is geselecteerd in het instellingenmenu, wordt de progressieve scanmodus gebruikt. - Als de video-uitgang I-SCAN is geselecteerd in het instellingenmenu, wordt de interlace scanmodus gebruikt. 4 Nederlands 1 2 5 3. AUDIO UIT AANSLUITINGEN Om de speler aan te sluiten op de audio-ingangen van de tv of audio-video receiver. 4. VIDEO UITGANG - Gebruik een videokabel om de speler aan te sluiten op de video-ingang van uw tv. - De video-uitgang in het menu Instellingen moet worden ingesteld op S-Video. 5. S-VIDEO-UITGANG - Voor een hogere weergavekwaliteit kunt u deze uitgang via een S-Video-kabel verbinden met de SVideo-ingang van uw tv. - De video-uitgang in het menu Instellingen moet worden ingesteld op S-Video. Opmerking - Raadpleeg de gebruiksaanwijzing van uw tv om na te gaan of uw tv Progressive Scan (P-SCAN) ondersteunt. Is dit het geval, volg dan de in deze gebruiks-aanwijzing genoemde instructies voor het instellen van het menu van uw tv op Progressive Scan. - Het is mogelijk dat er geen beeld ontstaat als het aangesloten wordt op een tv of beeldscherm dat niet aan het hierboven gegeven formaat aangepast is. - Zie pagina 27 ~ 28 voor meer informatie over het gebruik van het instellingenmenu Setup. 7 1024K_P560_XFA_NL 4/17/06 3:35 PM Page 8 De toetsen van de afstandsbediening 5. INSTANT REPLAY toets Met deze functie kunt u de laatste 10 seconden van een film vanaf de huidige positie direct herhalen. 6. 14 15 1 Toetsen voor overslaan ( / ) Een titel, hoofdstuk of track overslaan. 7. STOP toets ( 8. MENU toets ) 9. ¥ toetsen ENTER/ Hiermee opent u het instellingenmenu van de dvd-speler. 2 Deze toets functioneert als een schakeltoets. 10. EZ VIEW toets 16 3 Met Easy View kunt u de beeldverhouding gemakkelijk aanpassen aan het schermformaat (16:9 of 4:3) van uw tv. 4 5 6 7 8 11. DISC MENU toets 17 Hiermee toont u het menu van de geplaatste disk. 12. SUBTITLE toets 18 19 13. AUDIO toets Hiermee hebt u toegang tot verschillende geluidsfuncties op een disk. 14. ZOOM 9 Hiermee vergroot u het dvd-beeld. 15. OPEN/CLOSE ( 10 20 21 11 12 13 22 23 ) toets Hiermee opent en sluit u de disklade. 16. STEP toets De frames worden een voor een afgespeeld. 17. INSTANT SKIP toets Met deze functie kunt u de opname 10 seconden “vooruitspoelen”. 18. AFSPELEN / PAUZE ( ) toets Hiermee start of onderbreekt u het afspelen van de disk. 19. RETURN toets Hiermee gaat u terug naar het vorige menu. 20. INFO Hiermee geeft u de huidige diskmodus weer. 21. CANCEL toets Met deze toets kunt u menu’s en andere informatie van 1. DVD POWER toets Hiermee zet u het apparaat aan of uit. 2. Cijfertoetsen 3. VIDEO SEL Video-uitgangsmodus wijizigen. 4. Toetsen voor zoeken ( / ) Hiermee kunt u vooruit/achteruit door de disk zoeken. het scherm wissen. 22. DVD/M.CARD toets Voor bediening van dvd of geheugenkaart. 23. REPEAT toets Hiermee kunt u een titel, hoofdstuk, track of disk herhalen. 8 1024K_P560_XFA_NL 4/17/06 3:35 PM Page 9 AANSLUITEN Hieronder vindt u voorbeelden van verbindingen die vaak worden gebruikt om de DVD-speler aan te sluiten op een televisie of andere apparatuur. Voor u de DVD-speler aansluit - Schakel de DVD-speler, TV en andere apparatuur altijd uit voor u kabels aansluit of ontkoppelt. - Kijk in de gebruikershandleiding van de apparatuur (zoals een TV) die u wilt aansluiten voor meer informatie over deze apparatuur. Aansluiten op een TV (video) 1 Maak gebruik van video- of audiokabels en sluit de video (geel)/audio (rood en wit) uitgaande aansluitingen aan de achterzijde van de DVD-speler aan op de video (geel)/ audio (rood en wit) ingaande aansluitingen van uw TV. 2 Zet de DVD-speler en de TV aan. ROOD WIT GEEL Audiokabel Videokabel ROOD WIT GEEL 3 Druk net zo lang op de knop op uw afstandbediening waarmee u de ingang kunt selecteren, totdat op het scherm van uw tv het videosignaal van de DVD-speler wordt weergegeven. Opmerking - Als de geluidskabel te dicht bij de voedingskabel wordt geplaatst kan dit enig geluid veroorzaken. - Als u de speler wilt aansluiten op een versterker, raadpleegt u de pagina waarop de aansluiting op een versterker wordt beschreven (Zie pagina’s 13 to 14) - Het aantal en de plaats van de aansluitingen kan variëren, afhankelijk van uw tv. Raadpleeg de gebruiksaanwijzing van uw tv. - Als de tv is voorzien van één audio-ingang, verbindt u deze met de [AUDIO OUT] [links] (witte) uitgang van de DVD-speler. - Als u op de knop VIDEO SEL. drukt wanneer de DVD-speler in de stopmodus staat of wanneer er geen disk in de speler zit, zal de video-uitgangmodus in de volgende volgorde worden gewijzigd: (S-VIDEO ➝ Component (I-SCAN) ➝ Component(P-SCAN)) 9 Nederlands Een verbinding kiezen 1024K_P560_XFA_NL 4/17/06 3:35 PM Page 10 Aansluiting op een tv (S-Video) - Aansluiting op uw tv via een S-Video kabel. - Hiermee krijgt u een hogere weergavekwaliteit. S-Video verdeelt het beeldelement in zwart/wit(Y) en kleur(C) signalen voor een hogere weergavekwaliteit dan via de normale video-ingangsmodus. (Audiosignalen worden geleverd via de audio-uitgang.) 1 Sluit met een S-Videokabel (niet bijgeleverd) de S-VIDEO OUT aan de achterzijde van de dvd-speler aan op SVIDEO IN van uw tv. 2 Verbind met behulp van audiokabels de AUDIO (rood en wit) OUT aan de achterzijde van de dvd-speler met de AUDIO (rood en wit) IN van uw tv. Schakel de dvd-speler en tv in. ROOD 3 Druk net zo lang op de knop op uw afstandbediening waarmee u de ingang kunt selecteren totdat op het scherm van uw tv het S-video-signaal van de dvd-speler wordt weergegeven. WIT Audiokabel ROOD S-Video-kabel (niet bijgeleverd) WIT 4 Stel in het instellingenmenu de video-uitgang in op S-Video (Zie pagina’s 27 tot 28) Opmerking - Als u de speler wilt aansluiten op een versterker, raadpleegt u de pagina waarop de aansluiting op een versterker wordt beschreven (Zie pagina’s 13 tot 14) - Het aantal en de plaats van de aansluitingen kan variëren, afhankelijk van uw tv. - Maak niet tegelijkertijd gebruik van de uitgangen voor S-Video en componentvideo (Y, Pb, Pr). Deze kunnen elkaar hinderen en de kwaliteit van beide video-uitgangen. 10 1024K_P560_XFA_NL 4/17/06 3:35 PM Page 11 Aansluiting op een tv (interlace) - Aansluiting op uw tv via Component videokabels. Nederlands - Voor een hoge beeldkwaliteit en nauwgezette kleurweergave Component video verdeelt het beeldelement in zwart/wit (Y), blauw (PB), rood (PR) signalen voor heldere en scherpe beelden. (Audiosignalen worden geleverd via de audio-uitgang.) 1 Maak gebruik van componentvideokabels (niet bijgeleverd) en sluit de COMPONENT VIDEO OUT aan de achterzijde van de dvd-speler aan op de COMPONENT-IN van uw TV. 2 Verbind met behulp van audiokabels de AUDIO (rood en wit) OUT aan de achterzijde van de dvd-speler met de AUDIO (rood en wit) IN van uw tv. Schakel de dvd-speler en tv in. ROOD 3 Druk net zo lang op de knop op uw afstandbediening waarmee u de ingang kunt selecteren totdat op het scherm van uw tv het componentsignaal van de dvd-speler wordt weergegeven. ROOD BLAUW GROEN WIT Audiokabel ROOD WIT ROOD BLAUW GROEN Componentkabel (niet bijgeleverd) 4 Stel in het instellingenmenu de video-uitgang in op Component (I-SCAN). (Zie pagina’s 27 tot 28) Opmerking - Als de video-uitgang onjuist is ingesteld op S-Video terwijl de componentkabels zijn aangesloten, zal het scherm rood worden. - Als u de speler wilt aansluiten op een versterker, raadpleegt u de pagina waarop de aansluiting op een versterker wordt beschreven (Zie pagina’s 13 tot 14) - De componentuitgang van uw tv kan, afhankelijk van de fabrikant, zijn aangeduid met “R-Y, B-Y, Y” of “Cr, Cb, Y”, in plaats van “PR, PB, Y Het aantal en de plaats van de aansluitingen kan variëren, afhankelijk van uw tv. Zie de gebruiksaanwijzing van uw tv. 11 1024K_P560_XFA_NL 4/17/06 3:35 PM Page 12 Aansluiting op een tv (progressief) 1 Maak gebruik van componentvideokabels (niet bijgeleverd) en sluit de COMPONENT VIDEO OUT aan de achterzijde van de dvd-speler aan op de COMPONENT IN van uw TV. 2 ROOD BLAUW GROEN Verbind met behulp van audiokabels de AUDIO (rood en wit) OUT aan de achterzijde van de dvd-speler met de AUDIO (rood en wit) IN van uw tv. Schakel de dvd-speler en tv in. ROOD 3 Druk net zo lang op de knop op uw afstandbediening waarmee u de ingang kunt selecteren totdat op het scherm van uw tv het componentsignaal van de dvd-speler wordt weergegeven. WIT Audiokabel ROOD WIT ROOD BLAUW GROEN Componentkabel (niet bijgeleverd) 4 Stel in het instellingenmenu de video-uitgang in op Component (P-SCAN). (Zie pagina’s 27 tot 28) Als u de progressieve video-output wilt zien: -You Raadpleeg om tescan achterhalen of uw tv progressief scannen ondersteunt. need a TVde settelevisiehandleiding supporting the progressive Als datfunction. het geval bevat instructies over de instellingen voor proinput Andis,you havede to televisiehandleiding set up the TV gressief scannen. Voer deze instructies uit in het menusysteem van de tv. - Afhankelijk van uw televisie, kan de gebruikte methode afwijken van bovenstaande afbeelding. Opmerking - Wat is progressief scannen? Bij progressief scannen is het aantal scanlijnen twee keer zo groot als bij de interlace-methode. De progressieve scanmethode zorgt voor een beter en scherper beeld. 12 1024K_P560_XFA_NL 4/17/06 3:35 PM Page 13 Aansluiting op een audiosysteem (tweekanaals versterker) 1 Nederlands Verbind met behulp van de audiokabels de AUDIO (rood en wit) OUT aan de achterzijde van de dvd-speler met de AUDIO (rood en wit) IN van de versterker. 2 Verbind met behulp van de videosignaalkabels de VIDEO, S-VIDEO of COMPONENT OUT aan de achterzijde van de DVD-speler met de VIDEO, S-VIDEO of COMPONENT IN op de tv 3 ROOD Schakel de dvd-speler, tv en versterker in. WIT Audiokabel ROOD WIT tweekanaals stereoversterker 4 Selecteer externe input met de inputselectieknop van de versterker om het geluid van de dvd-speler te horen. Raadpleeg de gebruikershandleiding van uw versterker om de audio-ingang van uw versterker in te stellen. Opmerking - Zet het geluid zachter voordat u de versterker aanzet. Een plotseling luid geluid kan zowel de speakers als uw oren beschadigen. - Stel het geluid in het schermmenu af op de versterker. (Zie pagina’s 26 tot 27) - De plaats van de uitgangen kan variëren, afhankelijk van de versterker. Zie de gebruiksaanwijzing van de versterker. 13 1024K_P560_XFA_NL 4/17/06 3:35 PM Page 14 Aansluiting op een audiosysteem (Dolby digital-, MPEG2- of DTS-versterker) 1 Wanneer u een optische kabel (niet bijgeleverd) gebruikt, verbindt u de DIGITAL AUDIO OUT (OPTICAL) aan de achterzijde van de dvd-speler met de DIGITAL AUDIO IN (OPTICAL) van de versterker. Wanneer u een coaxkabel (niet bijgeleverd) gebruikt, verbindt u de DIGITAL AUDIO OUT (COAXIAL) aan de achterzijde van de dvd-speler met de DIGITAL AUDIO IN (COAXIAL) van de versterker. 2 Verbind met behulp van de videosignaalkabels de VIDEO, S-VIDEO of COMPONENT OUT aan de achterzijde van de DVD-speler met de VIDEO, S-VIDEO of COMPONENT IN op de tv. eller 3 Coaxkabel (niet bijgeleverd) Optische kabel (niet bijgeleverd) Schakel de dvd-speler, tv en versterker in. Dolby Digital- of DTS-versterker 4 Selecteer externe input met de inputselectieknop van de versterker om het geluid van de dvd-speler te horen. Opmerking - Zet het geluid zachter voordat u de versterker aanzet. Een plotseling luid geluid kan zowel de speakers als uw oren beschadigen. - Stel het geluid in het schermmenu af op de versterker. (Zie pagina’s 26 tot 27) - De plaats van de uitgangen kan variëren, afhankelijk van de versterker. Zie de gebruiksaanwijzing van de versterker. - Verwijder het stofkapje voordat u de optische kabel (niet bijgeleverd) gebruikt en plaats het stofkapje weer op de kabel als u deze niet gebruikt. 14 1024K_P560_XFA_NL 4/17/06 3:35 PM Page 15 Een disk afspelen Voordat u gaat afspelen - Zet uw tv aan en stel met behulp van de afstandsbediening de juiste video-ingang in. - Als u een extern audiosysteem hebt aangesloten, zet u dit audiosysteem aan en kiest u de juiste ingang. Nadat u de stekker van de speler in het stopcontact hebt gestoken en voor het eerst op de POWER toets van de speler drukt, wordt het volgende scherm weergegeven. Als u een taal wilt selecteren, drukt u op de betreffende cijfertoets. (Dit scherm wordt alleen weergegeven wanneer u de speler voor het eerst inschakelt.) Als u de taal niet in dit startscherm instelt, kunnen de instellingen veranderen wanneer u de speler in- of uitschakelt. Kies daarom de taal die u wilt gebruiken. Wanneer u een menutaal hebt geselecteerd, kunt u die wijzigen door op 5 seconden op de toets op het voorpaneel van de speler te drukken terwijl er geen disk is geplaatst. Het scherm SELECT MENU LANGUAGE wordt opnieuw weergegeven, waarin u de gewenste taal kunt selecteren. Press 1 for English Touche 2 pour Français Drücken Sie 3 für Deutsch Pulsar 4 para Español Premere 5 per Italiano Druk op 6 voor Nederlands Afspelen 1. Druk op de toets OPEN/CLOSE ( ). Het STANDBY-lampje gaat uit en de lade gaat open. 2. Plaats voorzichtig een disk in de lade, met het etiket naar boven. 3. Druk op AFSPELEN/PAUZE ( ( ) om de lade te sluiten. ) of op OPEN/CLOSE - Wanneer het afspelen wordt gestopt, onthoudt de speler de plaats waar op STOP is gedrukt. Wanneer u weer op AFSPELEN/PAUZE ( ) drukt, wordt het afspelen voortgezet vanaf de plaats waar u bent gestopt. 4. Afspelen stopzetten Druk tijdens het afspelen op de toets STOP ( ). 5. Disk verwijderen Druk op de toets OPEN/CLOSE ( ). 6. Afspelen tijdelijk onderbreken Druk tijdens het afspelen op de afstandsbediening op AFSPELEN/PAUZE ( ) of op STEP. - Het scherm stopt, geen geluid. Om weer door te gaan, drukt u nogmaals op AFSPELEN/PAUZE ( ). 7. Beeld voor beeld afspelen (m.u.v. CD) Druk tijdens weergave op de toets STEP op de afstandsbed ening. - Iedere keer dat de toets wordt ingedrukt, verschijnt er een nieuw beeld. - U hoort geen geluid in de STEP-modus. - Druk op AFSPELEN/PAUZE ( ) voor normale weergave.(Stap voor stap afspelen is mogelijk in voorwaartse richting). - Beeld-voor-beeld weergave is alleen in voorwaartse richting mogelijk. 8. Vertraagd afspelen Houd de toets ZOEKEN ( / ) ingedrukt om in de modus PAUSE of STEP de weergavesnelheid te vertragen tot 1/8, 1/4 of 1/2 van de normale snelheid. - U hoort geen geluid tijdens het vertraagd afspelen. - Druk op AFSPELEN/PAUZE ( ) voor normale weergave. Opmerking - Als de speler langer dan 1 minuut in de stopstand staat zonder dat u een toets indrukt, wordt de schermbeveiliging gestart. Druk op AFSPELEN/PAUZE ( ) voor normale weergave. - Als de speler langer dan dertig minuten in de stopstand staat, zal de stroom automatisch wor den uitgeschakeld. (functie voor automatisch uitschakelen) - Indien de speler 5 minuten in de pauzestand heeft gestaan, stopt deze. - Dit pictogram ( ) betekent dat u op een ongeldige toets hebt gedrukt. 15 Nederlands BASISFUNCTIES 1024K_P560_XFA_NL 4/17/06 3:35 PM Page 16 De functie Zoeken en SKIP gebruiken Tijdens het afspelen kunt u snel vooruit- of terugzoeken in een hoofdstuk of track en de SKIP-functie gebruiken om naar de volgende of vorige selectie te springen. Zoeken in een hoofdstuk of track Druk langer dan 1 seconde op de toets ZOEKEN ( van de afstandsbediening. DVD 2X, 4X, 64X, 128X VCD 4X, 8X CD 2X, 4X, 8X of ) Opmerking - De opgegeven snelheden in deze functie kunnen afwijken van de feitelijke afspeelsnelheid. De Display functie gebruiken Tijdens het afspelen van een DVD/VCD/MPEG4 1. Druk tijdens het afspelen op de toets INFO van de afstandsbediening. - Druk op de toets MENU om de functie INFO in het functiemenu te selecteren. 2. Druk op om het gewenste item te selecteren. - Wanneer u een VCD 2.0 afspeelt, werkt deze functie alleen wanneer het menu is uitgeschakeld. 3. Druk op de toets ¥ om de gewenste instelling te realiseren en druk vervolgens op ENTER. - U kunt de cijfertoetsen op de afstandsbediening gebruiken om rechtstreeks naar een titel of hoofdstuk te gaan of om de weergave te starten vanaf het gewenste tijdstip. 4. Het scherm verdwijnt als u weer op de toets INFO drukt. Opmerking - U hoort geen geluid tijdens het zoeken (behalve bij een CD). De gewenste titel openen als er meer dan één titel op de disk staat. Als er bijvoorbeeld meerdere films op een DVD staan, worden alle films vermeld. Tracks overslaan Druk tijdens het afspelen op de toets SKIP ( of ). - Wanneer u een dvd afspeelt en op de toets SKIP ( ) drukt, gaat de speler door naar het volgende hoofdstuk. Wanneer u op de toets SKIP ( ) drukt, gaat de speler terug naar het begin van het hoofdstuk. Drukt u nogmaals op deze toets, dan gaat de speler naar het begin van het vorige hoofdstuk. - Wanneer u een VCD 2.0 met uitgeschakeld menu, een VCD 1.1 of een CD/DVD-AUDIO afspeelt en op de toets SKIP ( ) drukt, gaat de speler door naar de volgende track. Wanneer u op de toets SKIP ( ) drukt, gaat de speler terug naar het begin van de track. Wanneer u nogmaals op deze toets drukt, gaat de speler naar het begin van de vorige track. - Indien een track op een VCD langer duurt dan 15 minuten en u op de toets drukt, gaat de speler 5 minuten verder in de track. Indien u op de toets , gaat de speler 5 minuten terug in de track. Opmerking Wanneer u een VCD 2.0 afspeelt, werkt deze functie alleen wanneer het menu is uitgeschakeld. 16 Chapter De meeste DVD's zijn onderverdeeld in hoofdstukken, zodat u een bepaalde passage snel kunt vinden (vergelijkbaar met tracks op een video-CD). Film afspelen vanaf het gewenste tijdstip. U dient de starttijd in te voeren als referentie. Op sommige disks werkt de tijdzoekfunctie niet. Audio Verwijst naar de taal van de soundtrack van de film. In het voorbeeld wordt het geluidsspoor afgespeeld in Engels 5.1CH. Een DVD kan maximaal acht verschillende geluidssporen bevatten. De talen waarin ondertiteling op de disk beschikbaar is. U kunt de taal van de ondertiteling kiezen of, indien gewenst, de ondertiteling op het scherm uitschakelen. Een DVD kan maximaal 32 verschillende ondertitelingen bevatten. DivX De bestandsgrootte staat in verband met de resolutie van een titel. Hoe groter een bestand, des te hoger de resolutie die wordt weergegeven. Als de bestandsresolutie te klein is, wordt deze automatisch geschaald. U kunt dan een groter scherm zien. 4/17/06 3:35 PM Page 17 Het Diskmenu het Titelmenu gebruiken Het menu Functie gebruiken Het Disc Menu (Diskmenu) gebruiken 1. Druk tijdens het afspelen van een DVD op de toets MENU van de afstandsbediening. 2. Selecteer met de toetsen Disc Menu en druk vervolgens op de toets of ENTER. Press ENTER key for Disc Menu Enter Return Het menu Functie gebruiken (DVD/VCD) 1. Druk tijdens weergave op de toets MENU. 2. Druk op om Function te selecteren, en druk vervolgens op de toets of ENTER. - Info (zie pagina’s 16) - Zoom (zie pagina 21) - Bladwijzer (Bookmark) (Zie pagina’s 20 tot 21) - Herhalen (Repeat) (zie pagina’s 17 tot 18) - EZ VIEW (Zie pagina’s 18 tot 19) - Hoek (Angle) (Zie pagina’s 20) Menu Opmerking - Afhankelijk van de disk werkt het Diskmenu mogelijk niet. - U kunt het Diskmenu ook openen met de toets DISC MENU op de afstandsbediening. - Bij VCD 2.0 kunt u met de toets DISC MENU het menu in- en uitschakelen. Het Title Menu (Titelmenu) gebruiken 1. Druk tijdens het afspelen van een DVD op de toets MENU van de afstandsbediening. 2. Selecteer met de toetsen Title Menu en druk vervolgens op de toets of ENTER. Nederlands 1024K_P560_XFA_NL Info Zoom Bookmark Repeat EZ View Angle 3. Druk op om een van de vijf functies te selecteren. Druk vervolgens op de toets of ENTER om naar deze functie te gaan. U kunt deze functies ook direct selecteren met behulp van de desbetreffende toets op de afstandsbediening. - INFO - EZ VIEW - REPEAT Afspelen herhalen Herhaal de huidige track, hoofdstuk, titel of een geselecteerde sectie (A-B) of de hele disk. Tijdens het afspelen van een DVD/VCD Press ENTER key for Title Menu 1. Druk op de toets REPEAT op de afstandsbediening. Het menu voor herhalen verschijnt. Enter Return Menu Opmerking - Afhankelijk van de disk werkt Titelmenu mogelijk niet. - Title Menu Titelmenu wordt alleen weergegeven als de disk minimaal twee titels bevat. 2. Selecteer met de toetsen ¥ Chapter (Hoofdstuk), Title (Titel) of A-B en druk vervolgens op ENTER. - De DVD herhaalt per hoofdstuk of titel, de VCD per track of disk. - Chapter (Hoofdstuk) ( ): herhaalt het hoofdstuk dat wordt afgespeeld. - Title (Titel) ( ): herhaalt de titel die wordt afgespeeld. - Disc (Disk) ( ): herhaalt de disk die wordt afgespeeld. - Track ( ): herhaalt de track die wordt afgespeeld. - A-B: herhaalt het disksegment dat u hebt geselecteerd. T DVD Off 01 01 A - B Off 01 01 A - B VCD 17 1024K_P560_XFA_NL 4/17/06 3:35 PM Page 18 De functie A-B Repeat gebruiken 1. Druk op de toets REPEAT op de afstandsbediening. 2. Druk op de toets ¥/ selecteer met de toetsen A-B. 3. Druk op de toets ENTER aan het begin van het gedeelte dat u wilt herhalen (A). B wordt automatisch gemarkeerd. 4. Druk op de toets ENTER aan het einde van het gedeelte dat u wilt herhalen (B). - Als u de normale weergave wilt hervatten, drukt u op de toets CANCEL. 5. Om weer over te schakelen naar normale weergave, drukt u opnieuw op de toets REPEAT. Daarna kiest u met de toetsen ¥/ de optie Uit en drukt u vervolgens op de toets ENTER. DVD Off 01 T 01 A - B ENTER REPEAT VCD Off 01 SPECIALE FUNCTIES De beeldverhouding instellen (EZ VIEW) Afspelen in de normale beeldverhoudingen (DVD) Druk op de toets EZ VIEW. - Telkens wanneer u op de toets drukt, verandert het beeldformaat. - De werking van de zoomfunctie kan verschillen, afhankelijk van de scherminstelling in het menu Weergave instellen (Display Setup ). - Om ervoor te zorgen dat de toets EZ VIEW het gewenste resultaat geeft, moet u in het menu Weergave instellen (Display Setup) de juiste beeldverhoudingen instellen. (Zie pagina’s 27 tot 28) 01 A - B 4:3 Letter Box Opmerking - A-B REPEAT (A-B herhalen) biedt u mogelijkheid om punt (B) in te stellen meteen nadat punt (A) is ingesteld. - Afhankelijk van de disk werkt de herhaalfunctie mogelijk niet. - Wanneer u een VCD 2.0 afspeelt, werkt deze functie alleen wanneer het menu is uit geschakeld. Als uw tv een beeldverhouding van 16:9 heeft Vertraagd afspelen Met deze functie kunt u scènes met sport, dansen, het bespelen van muziekinstrumenten etc., langzaam afspelen, zodat u die beter kunt bekijken. Tijdens het afspelen van een DVD 1. Druk tijdens het afspelen op de toets AFSPELEN/PAUZE ( 2. Houd SEARCH ( / ) ingedrukt om in de modus PAUSE of STEP de weergavesnelheid te vertragen tot 1/8, 1/4 of 1/2 van de normale snelheid. 18 ) Voor disks met een beeldverhouding van 16:9 - WIDE SCREEN (Panorama) De inhoud van de DVD wordt weergegeven in een beeldverhouding van 16:9. - SCREEN FIT (Automatisch) De ruimte boven en onder het beeld wordt verwijderd. Wanneer u een disk met een beeldverhouding van 2.35:1 afspeelt, verdwijnen de zwarte balken aan de boven- en onderkant van het scherm. Het beeld ziet eruit alsof het verticaal is uitgerekt. (Afhankelijk van het type disk verdwijnen de zwarte balken mogelijk niet helemaal.) - ZOOM FIT (ZOOM Aanpassen) De randen aan de boven-, onder-, linker- en rechterkant van het scherm worden afgesneden en het middelste gedeelte van het scherm wordt uitvergroot. Voor disks met een beeldverhouding van 4:3 - Normaal breed De inhoud van de DVD wordt weergegeven in een beeldverhouding van 16:9. Het beeld ziet eruit alsof het horizontaal is uitgerekt. - SCREEN FIT (Automatisch) De ruimte boven en onder het beeld wordt verwijderd en het beeld wordt beeldvullend weergegeven. Het beeld ziet eruit alsof het verticaal is uitgerekt. - ZOOM FIT (ZOOM Aanpassen) De randen aan de boven-, onder-, linker- en rechterkant van het scherm worden afgesneden en het middelste gedeelte van het scherm wordt uitvergroot. - Verticaal aanpassen Wanneer een DVD met een beeldverhouding van 4:3 wordt afgespeeld op een tv met een beeldverhouding van 16:9, worden de linker- en rechterkant van het scherm opgevuld met zwarte balken zodat het beeld er niet uitziet alsof het horizontaal is uitgerekt. 4/17/06 3:35 PM Page 19 Als uw tv een beeldverhouding van 4:3 heeft Voor disks met een beeldverhouding van 16:9 - 4:3 Letter Box (Brievenbus) De inhoud van de dvd wordt weergegeven in een beeldverhouding van 16:9. Aan de boven- en onderkant van het scherm ziet u zwarte balken. - 4:3 Breedtetrimming De randen aan de linker- en rechterkant van het scherm worden afgesneden en het middelste gedeelte van het 16:9-beeld wordt weergegeven. - VOLLEDIG SCHERM De ruimte boven en onder het beeld wordt verwijderd en het beeld wordt beeldvullend weergegeven. Het beeld ziet eruit alsof het verticaal is uitgerekt. - ZOOM AANPASSEN De randen aan de boven-, onder-, linker- en rechterkant van het scherm worden afgesneden en het middelste gedeelte van het scherm wordt uitvergroot. Voor disks met een beeldverhouding van 4:3 - Normaal scherm De inhoud van de dvd wordt weergegeven in een beeldverhouding van 4:3. - VOLLEDIG SCHERM De ruimte boven en onder het beeld wordt verwijderd en het beeld wordt beeldvullend weergegeven. Het beeld ziet eruit alsof het verticaal is uitgerekt. - ZOOM AANPASSEN De randen aan de boven-, onder-, linker- en rechterkant van het scherm worden afgesneden en het middelste gedeelte van het scherm wordt uitvergroot. 2. Als u het pictogram AUDIO wilt verwijderen, drukt u op CANCEL of RETURN. Opmerking - Deze functie is afhankelijk van de geluidstalen die op de disk staan, en werkt mogelijk niet met alle DVD's. - Een DVD kan maximaal 8 verschillende geluidstalen bevatten. - Als u steeds dezelfde geluidstaal wilt gebruiken wanneer u DVD's afspeelt, raadpleegt u “Geluidstaal gebruiken” op pagina 26. Taalkeuze ondertiteling Met de toets SUBTITLE kunt u snel en eenvoudig de gewenste taal kiezen. De toets SUBTITLE gebruiken (DVD/MPEG4) 1. Druk op de toets SUBTITLE. Telkens wanneer u op de toets drukt, verandert de taal van de ondertiteling. De talen voor de ondertiteling worden weergegeven met afkortingen. DVD Off Opmerking De werking van deze functie kan verschillen afhankelijk van het type disk. MPEG4 Subtitle Selection Taalkeuze geluidsspoor Met de toets AUDIO kunt u snel en eenvoudig de gewenste taal kiezen. Met de toets AUDIO (DVD/VCD/MPEG4) 1. Druk op de toets AUDIO. Telkens wanneer u op de toets drukt, verandert de taal van het geluidsspoor. De talen voor het geluid worden weergegeven met afkortingen. readme.TXT Non-standard fonts are not supported Druk herhaaldelijk op de knop Subtitle op uw afsMPEG4 tandsbediening om de gewenste ondertitelingstaal Off op een MPEG4 te selecteren en druk vervolgens op de toets ENTER. Enter Return Menu 2. Als u het pictogram SUBTITLE wilt verwijderen, drukt u op CANCEL of RETURN. DVD Bij het afspelen van een VCD kunt u kiezen uit Stereo, Rechts of Links. External Subtitle Off Afhankelijk van de DivXschijf verschijnt de optie externe ondertiteling. VCD Stereo MPEG4 Druk herhaaldelijk op de knop Audio op uw afstandsPCM 1/2 bediening om de gewenste audio op een MPEG4 te selecteren en druk vervolgens op de toets ENTER. Opmerking - Afhankelijk van de DVD's kunt u de gewenste taal voor ondertiteling instellen in het Disc Menu (Diskmenu). Druk op de toets DISC MENU. - Deze functie is afhankelijk van de ondertitelingstalen die op de disk staan, en werkt mogelijk niet met alle DVD’s. - Een DVD kan maximaal 32 verschillende ondertitelingstalen bevatten. - Als u steeds dezelfde ondertitelingstaal wilt gebruiken wanneer u DVD’s afspeelt, raadpleegt u “Ondertitelingstaal gebruiken” op pagina 26. 19 Nederlands 1024K_P560_XFA_NL 1024K_P560_XFA_NL 4/17/06 3:35 PM Page 20 De camerahoek wijzigen Wanneer een DVD meerdere camerastandpunten van een bepaalde scène bevat, kunt u de functie ANGLE selecteren. De Hoekfunctie gebruiken (DVD) Als de disk meerdere camerastandpunten bevat, wordt de ANGLE-indicatie op het scherm weergegeven. 1. Druk tijdens het afspelen op de toets MENU van de afstandsbediening. om Function te selecteren, en druk 2. Druk op vervolgens op de toets of ENTER. om Hoek te selecteren, en druk vervolgens 3. Druk op op de toets of ENTER. De functie Bladwijzers Met deze functie kunt u secties van een DVD of VCD (met uitgeschakeld menu) markeren, zodat u ze later snel terug kunt vinden. De bladwijzerfunctie gebruiken (DVD/VCD) 1. Druk tijdens het afspelen op de toets MENU van de afstandsbediening. om Function te selecteren, en druk 2. Druk op vervolgens op de toets of ENTER. Info Zoom Bookmark Repeat EZ View Angle Info Zoom Bookmark Repeat EZ View Angle 4. Druk op de knoppen ¥/ of de cijfertoetsen op de afstandsbediening om de gewenste hoek in te stellen. Opmerking - Als de disk maar één camerastandpunt heeft, werkt deze functie niet. Momenteel beschikken maar heel weinig disks over deze mogelijkheid. - Afhankelijk van de disk werkt deze functie mogelijk niet. De functie Passage direct herhalen/ SKIP De functie Passage direct herhalen (DVD) Als u een scène hebt gemist, kunt u die met behulp van deze functie opnieuw bekijken. Druk op de toets INSTANT REPLAY, De laatste 10 seconden van de scène worden herhaald. De functie Passage direct overslaan (DVD) Gebruik deze functie om in de huidige scène 10 seconden vooruit te spoelen. Druk op de toets INSTANT SKIP. - De scène wordt 10 seconden “vooruitgespoeld”. Opmerking Afhankelijk van de disk werkt deze functie mogelijk niet. 20 om Bladwijzer te selecteren en druk 3. Druk op vervolgens op of ENTER. 4. Wanneer u bij de scène bent die u wilt markeren, drukt u op ENTER. U kunt maximaal drie scènes tegelijk markeren. Opmerking - Wanneer u een VCD 2.0 afspeelt, werkt deze functie alleen wanneer het menu is uitgeschakeld. - Afhankelijk van de disk werkt de bladwijzerfunctie mogelijk niet. Een gemarkeerde scène terugvinden 1~3. Stap 1 tot 3 is identiek aan die voor gebruik van de blad wijzerfunctie op pagina 20. 4. Druk op ¥ om een gemarkeerde scène te selecteren. 5. Druk op AFSPELEN/PAUZE ( gemarkeerde scène te gaan. ) om naar de Een bladwijzer wissen 1~3. Stap 1 tot 3 is identiek aan die voor gebruik van de blad wijzerfunctie op pagina 20. 4. Druk op ¥ om het nummer te selecteren van de bladwijzer die u wilt verwijderen. 4/17/06 3:35 PM Page 21 5. Druk op CANCEL om een bladwijzernummer te verwijderen. De functie Zoom De zoomfunctie gebruiken (DVD/VCD) 1. Druk tijdens het afspelen of in de pauzestand op de toets MENU van de afstandsbediening. om Function te selecteren, en druk 2. ruk op vervolgens op de toets of ENTER. om Zoom te selecteren en druk vervolgens 3. Druk op op of ENTER. of ¥/ om het deel van het scherm te 4. Druk op selecteren waarop u wilt inzoomen. Druk op de toets ENTER. - Bij het afspelen van een DVD drukt u herhaaldelijk op ENTER voor een vergroting van achtereenvolgens 2X/4X/2X/normaal. - Bij het afspelen van een VCD drukt u herhaaldelijk op ENTER voor een vergroting van achtereenvolgens 2X/4X/2X/normaal. Info Zoom Bookmark Repeat EZ View Angle Wanneer in twee ingangen kaarten zijn geplaatst, krijgt de eerst geplaatste kaart prioriteit bij het afspelen. Opmerking - Als de geheugenkaart niet volledig is ingevoerd zal deze niet werken. Sommige geheugenkaarten worden niet correct uitgevoerd. - Als u de geheugenkaart verwijdert terwijl deze in gebruik is kan dit de opgenomen informatie beschadigen. Het is beter de geheugenkaart te verwijderen na het indrukken van de DVD/M.CARD-toets om terug te keren naar de DVD/CD-modus. - Memory Stick Duo, Mini SD, en RS-MMC moeten ingevoerd worden met gebruik van een adapter. Maar sommige geheugenkaarten werken mogelijk niet goed, afhankelijk van de adapter. - Dvd’s of cd’s kunnen niet worden afgespeeld in de geheugenkaartmodus. Als u in de geheugenkaartmodus op de DVD/M.CARD of OPEN/CLOSE-toets drukt gaat het systeem automatisch over naar de DVD/CD-modus. - Als u op de DVD/M.CARD-toets drukt om de schijf weer af te spelen, weet de speler niet meer waar het spelen was onderbroken. Het afspelen van een geheugenkaart Het plaatsen van een geheugenkaart Deze eenheid accepteert 10 soorten geheugenkaarten Plaats de geheugenkaart met het etiket naar boven, anders werkt deze misschien niet. 1. Plaats een geheugenkaart. 2. Druk op de DVD/M.CARD-toets op de afstandsbediening. 3. Afhankelijk van het type bestand dat op de geheugenkaart opgeslagen staat, worden geluidsbestanden op dezelfde manier afgespeeld als MP3/WMA-bestanden, en worden fotobestanden op dezelfde manier afgespeeld als beeldcdbestanden. Menu Clips voor MP3/WMA/ JPEG/MPEG4/CD Audio CD Audio of disks met MP3/WMA/JPEG/MPEG4 bestanden bevatten songs en/of foto’s die in mappen kunnen worden geordend, zoals hieronder wordt getoond. Dit is vergelijkbaar met het ordenen van bestanden in mappen op uw pc. Stop Ingang voor meerdere kaarten voor de ondersteuning van 10 soorten geheugenkaarten: Memory Stick, Memory Stick-Pro, Memory Stick Duo, SD, mini SDkaart en XD-Picture Card, MMC, RS-MMC, Smart Media-kaart, Compact Flash. Open de disklade. Plaats de disk in de lade. Sluit de lade. Nadat de lade is gesloten, verschijnt dit scherm. Off Disc √ MS 21 Nederlands 1024K_P560_XFA_NL 1024K_P560_XFA_NL 4/17/06 3:35 PM Page 22 - : Naam van het bestand dat op dat moment wordt afgespeeld. - : Afspeeltijd van het huidige bestand. - : Huidige afspeelstand: Er zijn vier standen: Deze kunnen worden geselecteerd met behulp van de toets REPEAT. - Uit: Normaal afspelen - Track: De huidige track herhalen. - Map(Folder): De huidige map herhalen. - Willekeurig: De bestanden op de disk worden in willekeurige volgorde afgespeeld.. MP3/WMA/CD Audio afspelen 1. Open de disklade. Plaats de disk in de lade. Sluit de lade. - Als een disk zowel MP3- als WMA-bestanden bevat, kan slechts één type worden afgespeeld. ¥ een muziekbestand. 2. Selecteer met de toetsen Druk op ENTER om het muziekbestand af te spelen. Play Off - : Pictogram voor MP3-bestand. - : Pictogram voor WMA-bestand. - : Pictogram voor JPEG-bestand. Repeat/willekeurige weergave - : Pictogram voor AVI-bestand. - : Pictogram voor CD Audio-bestand. - : Mappictogram. - : Pictogram voor huidige map. Druk op de toets REPEAT om de afspeelmodus te wijzigen. Er zijn vier modi: Uit, Track, Map en Willekeurig. - Uit: Normaal afspelen - Track: Herhaalt het huidige muziekbestand. - Map (Folder) : Herhaalt de muziekbestanden met dezelfde extensie in de huidige map. - Willekeurig: Muziekbestanden met dezelfde extensie worden in willekeurige volgorde afgespeeld. Mappen selecteren De map kan zowel in de modus Stop (Stoppen) als de modus Play (Afspelen) worden geselecteerd. Als u het normaal afspelen wilt hervatten, drukt u op de toets CANCEL. - De bovenliggende map selecteren Druk op de toets RETURN om naar de bovenliggende map te om ”..” te selecteren en druk gaan of gebruik de toetsen vervolgens op ENTER om naar de bovenliggende map te gaan. MP3/WMA op CD-R - Een map op hetzelfde niveau selecteren om de gewenste map te selecteren Gebruik de toetsen en druk vervolgens op ENTER. - Een submap selecteren om de gewenste map te selecteren Gebruik de toetsen en druk vervolgens op ENTER. WMA JPEG Parent Folder MUSIC Current Folder 1st Sub-Folders 2nd SONG FILE 1 Peer Folders SONG FILE 2 SONG FILE 3 MPEG4 FILES 22 - Uw MP3- of WMA-bestanden moeten zijn opgeslagen in een ISO 9660- of JOLIET-indeling. MP3- en WMA-bestanden die zijn opgeslagen in een ISO 9660- of Joliet-indeling zijn compatibel met Microsoft DOS, Microsoft Windows en Apple Mac. Dit zijn de meest gebruikte indelingen. - Geef uw MP3- of WMA-bestanden namen van maximaal 8 tekens en gebruik als bestandsextensie ".mp3"of ".wma". Algemene notatie voor de naam: “Titel.mp3” of “Titel.wma”. Gebruik bij het samenstellen van een titel niet meer dan 8 tekens en geen spaties of een van de onderstaande tekens: (.,/,\,=,+). Root MP3 Wanneer u MP3- of WMA-bestanden opneemt op een CD-R disk, moet u op het volgende letten. - Gebruik een overdrachtssnelheid voor decompressie van minimaal 128 kpbs als u MP3-bestanden opneemt. De geluidskwaliteit van MP3-bestanden hangt vooral af van de gekozen bitrate. Voor een geluidskwaliteit die vergelijkbaar is met die van een audio-cd, is een analoge/digitale sam plingfrequentie (conversie naar mp3-indeling) van minimaal 128 kbps en maximaal 160 kbps vereist. Een hogere snelheid, bijvoorbeeld 192 kbps of hoger, levert echter maar zelden een betere geluidskwaliteit op. Bestanden met een lagere samplingfrequentie dan 128 kbps worden daarentegen niet correct afgespeeld. D z - - 4/17/06 3:35 PM Page 23 - Gebruik tijdens het opnemen van WMA-bestanden een bitrate van minimaal 64 kbps. De geluidskwaliteit van WMA-bestanden hangt vooral af van de gekozen bitrate. Voor een geluidskwaliteit die vergelijkbaar is met die van een audio-cd, is een analoge/digitale samplingconversie (conver sie naar WMA-indeling) van minimaal 64 kbps en maximaal 192 kbps vereist. Bestanden met een bitrate van minder dan 64 kbps of meer dan 192 kbps worden daarentegen niet correct afgespeeld. - Probeer geen MP3-bestanden op te nemen die auteursrechtelijk zijn beschermd. Bepaalde "beveiligde" bestanden zijn gecodeerd om illegaal kopiëren tegen te gaan. Het gaat hierbij om de volgende bestandstypen: Windows MediaTM (gedeponeerd handelsmerk van Microsoft Inc) en SDMITM (gedeponeerd handelsmerk van The SDMI Foundation). U kunt dergelijke bestanden niet kopiëren. - Belangrijk: Bovenstaande aanbevelingen moeten niet worden gezien als garantie dat de DVD-speler MP3-bestanden afspeelt, noch als waarborg met betrekking tot de geluidskwaliteit. Door bepaalde technologieën en methoden voor het opnemen van MP3-bestanden op CD-R kunnen deze bestanden misschien niet optimaal worden afgespeeld op de DVD-speler (vermin derde geluidskwaliteit en in sommige gevallen problemen bij het lezen van de bestanden). - Dit apparaat kan maximaal 500 bestanden en 500 mappen per disk afspelen. MPEG4 afspelen Functie MPEG4 afspelen AVI-bestanden bevatten geluids- en videogegevens. Alleen AVI-bestanden met de extensie “.avi” kunnen worden weergegeven. 1. Open de disklade. Plaats de disk in de lade. Sluit de lade. Close the tray. of ¥ een avi-bestand (DivX/XviD) 2. Selecteer met en druk vervolgens op ENTER. Stop Off Repeat/Afspelen Druk op de toets REPEAT om de afspeelmodus te wijzigen. Er zijn 3 modi, namelijk Uit, Map en Titel. - Map: Herhaalt de AVI-bestanden met dezelfde extensie in de huidige map. - Titel : herhaalt de titel die wordt afgespeeld. MPEG4 Functiebeschrijving Functie Beschrijving Zie pagina Overslaan Druk tijdens het afspelen op of om 5 minuten ( of ) vooruit of terug te springen. Druk tijdens het afspelen op SEARCH ( of ) en druk Zoeken nogmaals voor een hogere ( of ) zoeksnelheid. Hiermee kunt u sneller in een AVI-bestand zoeken. 2X, 4X, 8X Hiermee kunt u vertraagd in Vertraagd een AVI-bestand zoeken. afspelen (1/8X, 1/4X, 1/2X) Iedere keer dat de STEPStap voor toets wordt ingedrukt, verstap afspelen schijnt er een nieuw beeld. ZOOM - Nederlands 1024K_P560_XFA_NL - P 15 P 15 P 21 2X/4X/2X/normaal op volgorde - Afhankelijk van het MPEG4-bestand werkt deze functie mogelijk niet. AVI-bestand op CD-R Deze speler kan de volgende videocompressieformaten binnen het AVI-bestandsformaat afspelen. - DivX 3.11-inhoud - DivX 4-inhoud (gebaseerd op MPEG4 Simple Profile) - DivX 5-inhoud (MPEG4 simple profile plus extra functies zoals bidirectionele frames. Qpel en GMC worden ook ondersteund.) - XviD MPEG4-compatibele inhoud. Deze speler ondersteunt alle resoluties tot het onderstaande maximum. DivX3.11 & DivX4 & XviD DivX5 Bitrate kan fluctueren: Speler slaat de hoge bitrate-gedeelten mogelijk over en start het decoderen wanneer de bitrate weer normaal is. 720 x 480 @30fps 720 x 576 @30fps : Maximum bitrate : 4Mbps Opmerking - Sommige MPEG4-bestanden die op een pc werden aangemaakt, worden mogelijk niet afgespeeld. Daarom worden de Codectypes, versies en hogere resoluties dan de vermelde, niet worden ondersteund. - Deze speler ondersteunt CD-R/RW- MPEG4 disks die voldoen aan het “ISO9660 formaat”. 23 1024K_P560_XFA_NL 4/17/06 3:35 PM Page 24 Foto-CD's afspelen 1. Selecteer de gewenste map. om een fotobestand te selecteren 2. Druk op de toetsen i n het clipsmenu en druk vervolgens op de toets ENTER. 3. Druk op de toetsen INFO om het menu dat u wilt bekijken te selecteren en druk vervolgens op de toets ENTER. Opmerking - Afhankelijk van de grootte van een bestand, kan de werkelijk tijdsinterval tussen de verschillende foto’s afwijken van de ingestelde tijdsinterval. - Als u niet op een knop drukt, wordt de diashow automatisch gestart en wordt elke tien seconden een nieuwe foto weergegeven. MP3/JPEG afspelen Un kunt JPEG’s afspelen met muziek op de achtergrond. Opmerking - Druk op de knop STOP om naar het clipsmenu terug te keren. - Bij het afspelen van een Kodak foto-CD, geeft de speler niet het clipsmenu, maar de foto direct weer. Draaien (Rotation) Zoomen om het deel van het scherm te : Druk op selecteren waarop u wilt inzoomen. Druk op de toets ENTER. Telkens wanneer u op de toets ENTER drukt, wordt de foto uitvergroot (tot 2X). Diashow (Slide Show) : De diashowmodus wordt geopend. • Voordat de diashow kan worden gestart, moet de foto-interval worden ingesteld. • : De foto's wisselen automatisch ongeveer elke 6 seconden. • : De foto's wisselen automatisch ongeveer elke 12 seconden. • : De foto's wisselen automatisch ongeveer elke 18 seconden. Timer: 24 Opmerking MP3- en JPEG-bestanden dienen op dezelfde schijf te staan. JPEG op CD-R : Telkens wanneer u op de toets ENTER drukt, wordt de foto 90 graden rechtsom gedraaid. • om een MP3-bestand te 1. Druk op de knoppen / selecteren in het menu Clips en druk vervolgens op de knop ENTER. om een JPEG-bestand te 2. Druk op de knoppen / selecteren in het menu Clips en druk vervolgens op de knop ENTER. - De muziek wordt vanaf het begin afgespeeld. 3. Druk op de knop Stop (Stoppen) wanneer u het afspelen wilt beëindigen. - Alleen bestanden met de extensie ".jpg" of ".JPG" kunnen worden weergegeven. - Als de disk niet is afgesloten, duurt het langer voordat de weergave begint en worden mogelijk niet alle aanwezige bestanden weergegeven. - Alleen CD-R disks met JPEG-bestanden die zijn opgeslagen in ISO 9660- of Joliet-indeling kunnen worden weergegeven. - De namen van de JPEG-bestanden mogen niet langer zijn dan 8 tekens en mogen geen spaties of de volgende speciale tekens bevatten: (. / = +). - Alleen multisessiedisks waarvan de sessies achter elkaar zijn opgenomen, kunnen worden weergegeven. Als een leeg gedeelte voorkomt op een multisessiedisk, kunnen alleen de bestanden worden weergegeven die voor het lege gedeelte staan. - Er kunnen maximaal 3000 foto's worden opgeslagen op één CD. - Aanbevolen worden Kodak foto-CD’s. - Tijdens het weergeven van een Kodak foto-CD worden alleen de JPEG-bestanden in de fotomap weergegeven. - Kodak foto-CD: De JPEG-bestanden in de fotomap kunnen automatisch worden afgespeeld. - Kodak foto-CD: Om de foto’s te zien, selecteert u de JPEGbestanden in het clipsmenu. - Kodak foto-CD: Om de foto’s te zien, selecteert u de JPEGbestanden in het clipsmenu. - QSS foto-CD: Mogelijk speelt het apparaat de QSS foto-CD niet af. - Als een disk meer dan 500 bestanden bevat, kunnen alleen de eerste 500 JPEG-bestanden worden weergegeven. - Als een disk meer dan 500 mappen bevat, kunnen alleen de JPEG-bestanden in de eerste 500 mappen worden weergegeven. 1024K_P560_XFA_NL 4/17/06 3:35 PM Page 25 De taalfuncties instellen INSTELLINGEN MENU WIJZIGEN Het instellingenmenu gebruiken Menutaal speler Met het instellingenmenu kunt u allerlei instellingen van uw DVD-speler wijzigen, zoals de taal, het kinderslot en zelfs het gebruikte type tv-scherm. 1. Druk vanuit de stopstand op de toets MENU van de afs om Setup te selecteren en tandsbediening. Druk op druk vervolgens op of ENTER. Language Setup Audio Setup Display Setup Parental Setup : DivX(R) Registration 1. Druk in de stopstand op de toets MENU. om Setup te selecteren en druk vervolgens 2. Druk op op of ENTER. om Taal instellen te selecteren en druk ver 3. Druk op volgens op of ENTER. Menutaal Speler en druk 4. Selecteer met de toetsen vervolgens op de toets of ENTER. om de gewenste taal te selecteren en druk 5. Druk op vervolgens op of ENTER. - De taal wordt geselecteerd en op het scherm verschijnt het menu Taal instellen (Language Setup) weer. - Het scherm verdwijnt als u op de toets MENU drukt. LANGUAGE SETUP ❶ Taal instellen : Instellen van de taal. ❷ Instellingen Geluid : Instellen van de geluidsopties. ❸ Instellingen Beeld : Instellen van de beeldopties. Hier kunt u allerlei beeldopties instellen, waaronder het gebruikte type tv-scherm. ❹ Kinderslot : Instellen van het niveau van het kinderslot. Met het kinderslot kunt u de klassering instellen van films waarnaar kinderen niet mogen kijken, omdat er bijvoorbeeld geweld in voorkomt of omdat ze om andere redenen niet geschikt zijn voor jeugdige kijkers. ➎ DivX(R) Registratie : Voor het aanmelden van deze speler voor het Div(R) Video On Demand-formaat hebt u uw registratiecode nodig. Voor meer informatie kunt u terecht op www.divx.com/vod. voor selectie van de diverse opties. Druk ver 2. Druk op volgens op de toets of ENTER om naar deze functie te gaan. 3. Druk ten slotte nogmaals op de toets MENU om het instellin genmenu van het scherm te verwijderen. Opmerking Afhankelijk van de disk zijn sommige instellingsopties mogelijk uitgeschakeld. De taal van het Disc Menu (diskmenu) instellen Deze functie bepaalt alleen de taal van de diskmenu’s. 1. Druk in de stopstand op de toets MENU. om Setup te selecteren en druk vervolgens 2. Druk op op of ENTER. om Taal instellen te selecteren en druk ver 3. Druk op volgens op of ENTER. Menutaal Disk en druk ver 4. Selecteer met de toetsen volgens op de toets of ENTER. om de gewenste taal te selecteren en druk 5. Druk op vervolgens op of ENTER. - Indien de geselecteerde taal niet op de disk is opgenomen, wordt de taal waarin de disk werd opgenomen, geselecteerd. - De taal wordt geselecteerd en op het scherm verschijnt het menu Taal instellen (Language Setup) weer. - Het scherm verdwijnt als u op de toets MENU drukt. LANGUAGE SETUP 25 Nederlands Indien u het menu van de speler, het menu van de disk, audio en de taal van de ondertiteling vooraf instelt, worden de instellingen automatisch ingeschakeld wanneer u een film kijkt. 1024K_P560_XFA_NL 4/17/06 3:35 PM Page 26 Taalkeuze geluidsspoor 1. Druk in de stopstand op de toets MENU. om Setup te selecteren en druk vervolgens 2. Druk op op of ENTER. om Taal instellen te selecteren en druk ver 3. Druk op volgens op of ENTER. om Taal Geluid te selecteren, en druk 4. Druk op vervolgens op of ENTER. om de gewenste taal te selecteren en druk 5. Druk op vervolgens op of ENTER. - Selecteer “Origineel” indien u wilt dat de standaardtaal van de soundtrack de taal is waarin de disk oorspronkelijk werd opgenomen. - Indien de geselecteerde taal niet op de disk is opgenomen, wordt de taal waarin de disk werd opgenomen, geselecteerd. Taalkeuze voor ondertiteling voor DivX 1. Druk in de stopstand op de toets MENU. om Setup te selecteren en druk vervolgens 2. Druk op op of ENTER. om Taal instellen te selecteren en druk ver 3. Druk op volgens op of ENTER. om Taal DivX Ondertitels te selecteren, en 4. Druk op druk vervolgens op of ENTER. om de gewenste taal te selecteren en druk 5. Druk op vervolgens op of ENTER. - De taal wordt geselecteerd en op het scherm verschijnt het menu Taal instellen weer. - Het scherm verdwijnt als u op de toets MENU drukt. LANGUAGE SETUP Player Menu - De taal wordt geselecteerd en op het scherm verschijnt het menu Taal instellen weer. : English Disc Menu √ Unicode Western Central Cyrillic Greek Audio Subtitle - Het scherm verdwijnt als u op de toets MENU drukt. DivX Subtitle Setup LANGUAGE SETUP Player Menu Disc Menu Audio Subtitle DivX Subtitle : English Original : English √ English Français : English Deutsch : English Español Italiano : Western Setup Taalkeuze voor ondertiteling 1. Druk in de stopstand op de toets MENU. om Setup te selecteren en druk vervolgens 2. Druk op op of ENTER. om Taal instellen te selecteren en druk ver 3. Druk op volgens op of ENTER. om Taal Ondertitels te selecteren, en druk 4. Druk op vervolgens op of ENTER. om de gewenste taal te selecteren en druk 5. Druk op vervolgens op of ENTER. - Selecteer “Automatisch” indien u wilt dat de taal van de ondertiteling gelijk is aan de taal die is ingesteld voor het geluidsspoor. - - Enter Return Menu De geluidopties instellen Met de geluidopties kunt u het geluid en de geluidsstatus instellen, afhankelijk van het gebruikte audiosysteem. 1. Druk in de stopstand op de toets MENU. om Setup te selecteren en druk vervolgens 2. Druk op op of ENTER. om Instellingen Geluid te selecteren en 3. Druk op druk vervolgens op of ENTER. om de gewenste optie te selecteren en druk 4. Druk op vervolgens op of ENTER. Het is mogelijk dat niet iedere disk de taal bevat die u als eerste taal selecteert; in dat geval gebruikt de disk de oorspronkelijke taalinstelling. Language Setup Audio Setup Display Setup Parental Setup : DivX(R) Registration AUDIO SETUP De taal wordt geselecteerd en op het scherm verschijnt het menu Taal instellen weer. Dolby Digital Out :PCM MPEG-2 Digital Out :PCM DTS :Off Dynamic Compression :On PCM Down Sampling :On Het scherm verdwijnt als u op de toets MENU drukt. LANGUAGE SETUP ❶ Dolby Digitaal UIT audio - PCM: Converteert naar PCM (2CH) audio. - Bitstream: converteert naar Dolby Digitaal Bitstream wanneer een digitale audio-uitgang wordt gebruikt. Kies voor Bitstream wanneer een Dolby Digital decoder wordt gebruikt. 26 4/17/06 3:35 PM Page 27 ❷ MPEG-2 Digitaal - PCM: Converteert naar PCM (2CH) audio. - Bitstream: Converteert naar MPEG-2 Digital Bitstream (5.1CH of 8CH). Selecteer Bitstream als u gebruik maakt van digitale audio-uitvoer. ❸ DTS - Uit: geen geluid via digitale uitgang. - Aan: DTS Bitstream, alleen via digitale uitgang. Kies voor DTS wanneer de speler op een DTS Decoder is aangesloten. Opmerking - Er is geen analoge audio-uitvoer wanneer u een DTS disk afspeelt. ❹ Dynamische Compressie - Aan : Om dynamische compressie te selecteren. - Uit : Om het standaardbereik te selecteren. ❶ Normaal/Breedbeeld (TV Aspect) Afhankelijk van het gebruikte type televisie, kunt u de instellingen voor het beeld aanpassen (beeldformaat). - 4:3 Letter Box: Selecteer deze optie als u het gehele 16:9-scherm wilt zien dat DVD biedt, ook al heeft uw TV een beeldformaat van 4:3. Aan de boven- en onderkant van het scherm ziet u zwarte balken. - 4:3 Pan&Scan: Selecteer deze optie voor conventionele tv’s als u het centrale deel van het 16:9-scherm wilt zien. (De uiterste rechter- en linkerkant van het beeld worden afgesneden). - 16:9 Breed (16:9 Wide): U ziet het volledige 16:-beeld op uw breedbeeldtelevisie. ➎ PCM codering DISPLAY SETUP - Aan : Selecteer deze optie als de versterker die op de speler is aangesloten niet 96KHz-compatibel is. De 96KHz-signalen worden nu geconverteerd naar 48KHZ. - Uit : Selecteer deze optie als de versterker die op de speler is aangesloten 96KHz-compatibel is. Alle sig nalen worden nu onveranderd afgegeven. Opmerking Zelfs wanneer PCM-codering is uitgeschakeld • Sommige disks geven alleen audiocodering af via de digitale uitgangen. • Het scherm verdwijnt als u op de toets MENU drukt. TV Aspect Still Mode Screen Messa Black Level TV System Video Output : PAL : S-Video ❷ Stilstaand Beeld (Still Mode) Met deze opties wordt het trillen van het beeld in stilstaande modus voorkomen en kleine tekst scherper weergegeven. - Auto: Wanneer voor Auto is gekozen, worden de instellingen voor Veld/Frame automatisch bepaald. - Veld (Field): Kies hiervoor wanneer het beeld in de Auto-stand trilt. Geproduceerd onder licentie van Dolby Laboratories. “Dolby” en het symbool met de dubbele D zijn handelsmerken van Dolby Laboratories. - Frame: Kies hiervoor wanneer u in de Auto-stand kleine letters duidelijker wilt weergeven. ❸ Meldingen via TV (Screen Messages) “DTS” en “DTS Digital Out” zijn handelsmerken van Digital Theater Systems, Inc. De weergave van berichten op het scherm Aan of Uit zetten. ❹ Zwartniveau (Black Level) De beeldopties instellen Met beeldopties kunt u allerlei videofuncties van de speler instellen. 1. Druk in de stopstand op de toets MENU. om Setup te selecteren en druk vervolgens 2. Druk op op of ENTER. om Instellingen Beeld te selecteren en druk 3. Druk op vervolgens op of ENTER. om de gewenste optie te selecteren en druk 4. Druk op vervolgens op of ENTER. Language Setup Audio Setup Display Setup Parental Setup : DivX(R) Registration Past de intensiteit van het scherm aan.(Aan of Uit) Het werkt niet in de Progressive mode (progressieve modus). ➎ TV Systeem (TV System) - NTSC : Bij gebruik van een NTSC-disk • Als uw tv-systeem alleen een PAL-video-ingang heeft, moet u “PAL” selecteren. Als u “PAL” selecteert, wordt PAL 60 Hz uitvoer gebruikt als indeling voor Interlace-uitvoer. • Als uw tv-systeem alleen een NTSC-video-ingang heeft, moet u “NTSC” selecteren. • Als u het NTSC TV-systeem instelt, bedraagt de output mist 60 Hz. - PAL : Bij gebruik van een PAL-disk • Als uw tv-systeem alleen een NTSC-video-ingang heeft, moet u “NTSC” selecteren. • Als uw tv-systeem alleen een PAL-video-ingang heeft, moet u “PAL” selecteren. • Als u het PAL TV -systeem instelt, de output mist 50 Hz. 27 Nederlands 1024K_P560_XFA_NL 1024K_P560_XFA_NL 4/17/06 3:35 PM Page 28 DISPLAY SETUP TV Aspect : 4:3 L-Box Still Mode : Auto Screen Messages : On Black Level : Off TV System : PAL TV System NTSC Video Output √ PAL Setup Kinderslot instellen De functie Kinderslot werkt met DVD’s die voorzien zijn van een classificatie. Zo kunt u controle houden over het type films waarnaar uw gezin kijkt. Een disk bevat maximaal acht classificatieniveaus. Het classificatieniveau instellen ➏ Video Uitgang (Video Output) Selecteer de video-uitgang. - S-Video : Selecteer deze optie als u de Video- en 1. Druk in de stopstand op de toets MENU. om Setup te selecteren en druk vervolgens 2. Druk op op of ENTER. - I-SCAN : Selecteer deze optie als u de Component-uitgang voor interlaced scannen (625i/525i) wilt gebruiken. - P-SCAN : Selecteer deze optie als u de Component-uitgang voor progressief scannen (625p/525p) wilt Language Setup Audio Setup Display Setup Parental Setup : DivX(R) Registration gebruiken. • Als u op de VIDEO SEL. knop drukt, wordt de video output vorm automatisch in de geen disk vorm veranderd. (S-VIDEO ➝ I-SCAN ➝ P-SCAN) om Kinderslot te selecteren en druk vervol3. Druk op gens op of ENTER. • Als niet binnen 10 seconden voor Ja of Nee wordt gekozen in het submenu Instellingen Beeld, gaat u terug naar het vorige menu. Language Setup Audio Setup Display Setup Parental Setup : DivX(R) Registration DISPLAY SETUP TV Aspect : 4:3 L-Box Still Mode : Auto Screen Messages : On Black Level TV System Video Output om het Kinderslot te selecteren en druk verv4. Druk op olgens op of ENTER. PARENTAL SETUP Rating level : Kids Safe Change Password • Raadpleeg de gebruiksaanwijzing van uw tv om na te gaan of uw tv Progressive Scan ondersteunt. Is dit het geval, volg dan de in deze gebruiks-aanwijzing genoemde instructies voor het instellen van het menu van uw tv op Progressive Scan. • Als de Video output verkeerd geplaatst is, kan het scherm geblokkeerd worden. • Als de resolutie tijdens het afspelen wordt gewijzigd, kan het enkele seconden duren voordat beeld weer normaal wordt weergegeven. 5. Voer uw toegangscode in. - Het wachtwoord is standaard ingesteld 0000. PARENTAL SETUP Rating Level : Kids Safe Change Password Enter Password om het gewenste classificatieniveau te 6. Druk op selecteren en druk vervolgens op of ENTER. bijvoorbeeld Kinderen. PARENTAL SETUP Rating Level Level Rating : Kids Safe √ Kids Safe Change Password Level 2 Level 3 Level 4 Level 5 Level 6 Setup Enter 28 Return Menu 1024K_P560_XFA_NL 4/17/06 3:35 PM Page 29 Het scherm verdwijnt als u op de toets MENU drukt. Als u bijvoorbeeld niveau 6 kiest, worden disks van niveau 7 of 8 niet afgespeeld. k - De toegangscode wijzigen Language Setup Audio Setup Display Setup Parental Setup : DivX(R) Registration Nederlands 1. Druk in de stopstand op de toets MENU. om Setup te selecteren en druk vervolgens 2. Druk op op of ENTER. om Kinderslot te selecteren en druk vervol 3. Druk op gens op of ENTER. Language Setup Audio Setup Display Setup Parental Setup : DivX(R) Registration om Veranderen Toegangscode te 4. Druk op selecteren en druk vervolgens op of ENTER. Voer uw nieuwe toe gangscode in. Voer de nieuwe toegangscode nogmaals in. PARENTAL SETUP Rating Level :Kids Safe Change Password Setup PARENTAL SETUP Rating Level :Kids Safe Change Password Enter Password Setup Enter Return Menu PARENTAL SETUP Rating Level :Kids Safe Change Password Enter New Password Setup Enter Return Menu Opmerking Als u uw toegangscode bent vergeten, raadpleegt u Toegangscode vergeten in het gedeelte Problemen oplossen. 29 1024K_P560_XFA_NL 4/17/06 3:35 PM Page 30 NASLAG Firmware upgrade 2. Druk op ¥ om Total te selecteren, en druk vervolgens op ENTER. Inleiding Via de Samsung-website (www.samsung.com) ondersteunt Samsung mogelijk software upgrades ter verdere verbetering van de prestaties van deze speler. Zoals in het geval van upgrade van de speciale nieuwe mpeg4 codec. Welke verbeteringen worden aangebracht, is afhankelijk van de gebruikte upgrade software en van de tot dan toe door de DVD-speler gebruikte software. Een upgrade-disk maken 1. Download het upgrade-bestand van het Download Center op de Samsung website (www.samsung.com). 2. Brand het bestand met behulp van uw pc op een CD-RW. Opmerking - Bestandssysteem CD-ROM ISO niveau - Tekenset ISO 9660 - Gefinaliseerd, enkele sessie - Schrijfsnelheid laag De firmware upgrade wordt gestart - Halverwege het schrijven wordt de disklade automatisch geopend. Wacht twee minuten nadat u de disk hebt ver wijderd. - Als de update van de speler is geslaagd, wordt de speler uit- en ingeschakeld nadat de lade automatisch is gesloten. - Nadat de speler is ingeschakeld, wordt dit scherm weergegeven. 3. Kies de gewenste taal met behulp van de cijfertoetsen. Press Touche Upgrade procedure Drücken Sie Pulsar 1. Open de disklade. Plaats de disk in de lade. Sluit de lade. Het firmware upgrade-scherm verschijnt. Het scherm Firmware upgrade verschijnt op het scherm 30 1 for English 2 pour Français 3 für Deutsch 4 para Español Premere 5 per Italiano Druk op 6 voor Nederlands Opmerking - Als het scherm “Select Menu Language” niet verschijnt, moet u contact opnemen met het “Samsung Service Center”. - Tijdens de upgrade geen toets indrukken of de stekker uit het stopcontact trekken. - De upgrade procedure kan zijn gewijzigd; raadpleeg in dat geval de website (www.samsung.com). 1024K_P560_XFA_NL 4/17/06 3:35 PM Page 31 Problemen oplossen Controleer voordat u contact opneemt met het service center het volgende: Actie De afstandsbediening werkt niet. • Controleer de batterijen in de afstandsbediening. Mogelijk dient u deze te vervangen. • Gebruik de afstandsbediening op een afstand van niet meer dan 6 meter. • Verwijder de batterijen en houd één of meerdere knoppen gedurende een paar minuten ingedrukt, zodat de microprocessor in de afstandsbediening gereset kan worden. Installeer de batterijen weer en controleer de afstandsbediening nu werkt. Disk wordt niet afgspeeld. • Controleer of het etiket van de disk aan de bovenzijde zit. • Controleer het regionummer van de DVD. 5.1 channel-geluid wordt niet weergegeven. • 5.1 channel-geluid wordt alleen weergegeven als aan de volgende voorwaarden wordt voldaan: 1) De DVD-speler is aangesloten op een geschikte versterker 2) De disk is opgenomen met 5.1 channel-geluid. • Controleer of aan de buitenzijde van de disk die wordt afgespeeld, “5.1 ch” wordt vermeld. • Controleer of uw audiosysteem is aangesloten en goed werkt. • Is de Audio Output (audio-uitgang) in het instellingenmenu ingesteld op Bitstream? Pagina P3 Nederlands Probleem P5 P13~14 P26~27 Het pictogram wordt op het scherm weergegeven. • De functies of actie zijn momenteel niet mogelijk omdat: 1. De software van de DVD dit beperkt. 2. De software van de DVD de functie niet ondersteunt (bijvoorbeeld camerastandpunten). 3. De functie momenteel niet beschikbaar is. 4. U een titel, hoofdstuknummer of zoektijd hebt gevraagd buiten het toegestane bereik. Disc Menu wordt niet weergegeven. • Controleer of de disk een menu bevat. De afspeelmodus wijkt af van de selectie in het instellingenmenu. • Een aantal functies die in het instellingenmenu zijn geselecteerd, werken niet goed indien de disk niet met de overeenkomstige functie is gecodeerd. P25~29 De beeldschermverhoudingen kunnen niet worden gewijzigd. • De schermratio op de DVD is vastgelegd. P27~28 Geen geluid. • Controleer of u de juiste digitale uitgang hebt geselecteerd in het menu Audio Setup (Audio instellen). P26~27 Het scherm is geblokkeerd • Houd de toets meer dan 5 seconden ingedrukt zonder dat een disk is geplaatst. Alle instellingen worden teruggezet in de fabrieksinstellingen. Toegangscode vergeten. • Houd de toets meer dan 5 seconden ingedrukt zonder dat een disk is geplaatst. Alle instellingen, inclusief de toegangscode, worden teruggezet in de fabrieksinstellingen. Gebruik deze optie uitsluitend in noodgevallen. If you experience other problems. • Ga naar de Inhoudsopgave en zoek het hoofdstuk waarin toelichting wordt gegeven op het probleem. Herhaal de procedure. • Als u het probleem nog niet kunt oplossen, neem dan contact op met een erkend servicecentrum in uw omgeving. Hebt u andere problemen? • Controleer of de disk vuil of krassen bevat. • Reinig de disk. P15 P28~29 P2 31 1024K_P560_XFA_NL 4/17/06 3:35 PM Page 32 Specificaties General Aansluitwaarden AC 110-240 V, 60/50 Hz Energieverbruik 9W Gewicht Afmetingen 430mm (W) X 205mm (D) X 45mm (H) Werktemperatuurbereik +5°C to +35°C Gebruiksvochtigheidsbereik 10 % to 75 % DVD (DIGITAL VERSATILE DISC) CD : 12Cm Disc 1.7 Kg (COMPACT DISC) CD : 8Cm (COMPACT DISC) VCD : 12Cm Leessnelheid: 3.49 ~ 4.06 m/sec. Speelduur (enkelzijdige disk met 1 laag): 135 min. Leessnelheid: 4.8 ~ 5.6 m/sec. Maximale afspeeltijd: 74 min. Leessnelheid: 4.8 ~ 5.6 m/sec. Maximale afspeeltijd: 20 min. Leessnelheid: 4.8 ~ 5.6 m/sec. Maximale afspeeltijd: 74 min. (Video + Audio) Composite Video 1 kanaal: 1.0 Vp-p (75 Ω) Component Video Pr : 0.70 Vp-p (75 Ω load) Y : 1.0 Vp-p (75 Ω load) Video Pb : 0.70 Vp-p (75 Ω load) Output S-Video 2 Channel Audio Output *Frequency Response Luminantiesignaal: 1.0 Vp-p (75 Ω) Chrominantiesignaal: 0,3 Vp-p (75 Ω) L(1/L), R(2/R) 48 kHz Sampling : 4 Hz tot 22 kHz 96 kHz Sampling : 4 Hz tot 44 kHz *S/N Ratio *Dynamic Range *Total Harmonic Distortion 110 dB 100 dB 0.004 % *: Nominale waarde - Samsung Electronics Co., Ltd behoudt zich het recht voor de specificaties zonder nadere aankondiging te wijzigen. - Maten en gewichten kunnen afwijken. 32 1024K_P560_XFA_NL 4/17/06 3:35 PM Page 33 Contact Samsung wereldwijd Wanneer u suggesties of vragen heeft met betrekking tot Samsung producten, gelieve contact op te nemen met de consumenten dienst van Samsung. Region North America Latin America Europe CIS Country CANADA MEXICO U.S.A ARGENTINE BRAZIL CHILE COSTA RICA ECUADOR EL SALVADOR GUATEMALA JAMAICA PANAMA PUERTO RICO REP. DOMINICA TRINIDAD & TOBAGO VENEZUELA BELGIUM CZECH REPUBLIC DENMARK FINLAND FRANCE GERMANY HUNGARY ITALIA LUXEMBURG NETHERLANDS NORWAY POLAND PORTUGAL SLOVAKIA SPAIN SWEDEN U.K RUSSIA UKRAINE AUSTRALIA CHINA HONG KONG INDIA Asia Pacific INDONESIA JAPAN MALAYSIA PHILIPPINES SINGAPORE THAILAND Middle East & Africa TAIWAN VIETNAM SOUTH AFRICA U.A.E Customer Care Center ☎ 1-800-SAMSUNG (7267864) 01-800-SAMSUNG (7267864) 1-800-SAMSUNG (7267864) 0800-333-3733 0800-124-421 800-726-7864(SAMSUNG) 0-800-507-7267 1-800-10-7267 800-6225 1-800-299-0013 1-800-234-7267 800-7267 1-800-682-3180 1-800-751-2676 1-800-7267-864 1-800-100-5303 02 201 2418 844 000 844 38 322 887 09 693 79 554 08 25 08 65 65 (0,15€/Min) 01805 - 121213 (€ 0,12/Min) 06 40 985 985 199 153 153 02 261 03 710 0900 20 200 88 (€ 0.10/Min) 231 627 22 0 801 801 881 80 8 200 128 0850 123 989 902 10 11 30 08 585 367 87 0870 242 0303 8-800-200-0400 8-800-502-0000 1300 362 603 800-810-5858, 010- 6475 1880 2862 6001 3030 8282 1600 1100 11 0800-112-8888 0120-327-527 1800-88-9999 1800-10-SAMSUNG (7267864) 1800-SAMSUNG (7267864) 1800-29-3232 02-689-3232 0800-329-999 1 800 588 889 0860 7267864 (SAMSUNG) 800SAMSUNG (7267864) Web Site www.samsung.com/ca www.samsung.com/mx www.samsung.com www.samsung.com/ar www.samsung.com/br www.samsung.com/cl www.samsung.com/latin www.samsung.com/latin www.samsung.com/latin www.samsung.com/latin www.samsung.com/latin www.samsung.com/latin www.samsung.com/latin www.samsung.com/latin www.samsung.com/latin www.samsung.com/latin www.samsung.com/be www.samsung.com/cz www.samsung.com/dk www.samsung.com/fi www.samsung.com/fr www.samsung.de www.samsung.com/hu www.samsung.com/it www.samsung.lu www.samsung.com/nl www.samsung.com/no www.samsung.com/pl www.samsung.com/pt www.samsung.com/sk www.samsung.com/es www.samsung.com/se www.samsung.com/uk www.samsung.ru www.samsung.com/ur www.samsung.com/au www.samsung.com.cn www.samsung.com/hk www.samsung.com/in www.samsung.com/id www.samsung.com/jp www.samsung.com/my www.samsung.com/ph www.samsung.com/sg www.samsung.com/th www.samsung.com/tw www.samsung.com/vn www.samsung.com/za www.samsung.com/mea 1024K_P560_XFA_NL 4/17/06 3:35 PM Page 34 Memo 1024K_P560_XFA_NL 4/17/06 3:35 PM Page 35 Memo DVD_Cover P560_XFA 4/15/06 5:25 PM Page 2 ELECTRONICS AK68-01024K