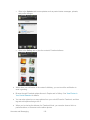
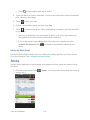
Download User Guide

Transcript
User Guide
©2012 Sprint. Sprint and the logo are trademarks of Sprint. Other marks are the property of their
respective owners.
Table of Contents
Get Started.................................................................................................................................. 13 Your Device at a Glance ......................................................................................................... 13 Front panel........................................................................................................................... 13 Back panel ........................................................................................................................... 14 Set Up Your Device ................................................................................................................. 14 Activate Your Device ............................................................................................................... 17 Complete the Setup Application .............................................................................................. 18 Set Up Voicemail ..................................................................................................................... 18 Sprint Account Information and Help ....................................................................................... 19 Sprint Account Passwords ................................................................................................... 19 Manage Your Account ......................................................................................................... 19 Sprint Support Services ....................................................................................................... 20 Device Basics ............................................................................................................................. 21 Your Device’s Layout .............................................................................................................. 22 Key Functions ...................................................................................................................... 22 Back Panel........................................................................................................................... 24 Turn Your Device On and Off .................................................................................................. 25 Restart Your Device ................................................................................................................ 25 Turn Your Screen On and Off ................................................................................................. 25 Use the Lock Screen ........................................................................................................... 26 Touchscreen Navigation .......................................................................................................... 27 Your Home Screen .................................................................................................................. 29 Extended Screens ............................................................................................................... 30 Customize the Home Screen ............................................................................................... 31 Status Bar................................................................................................................................ 32 Notifications Panel ............................................................................................................... 35 Notification LED ................................................................................................................... 37 Enter Text ................................................................................................................................ 37 Touch Input Keyboard ......................................................................................................... 37 Swype Keyboard.................................................................................................................. 40 Table of Contents
i
Tips for Editing Text ............................................................................................................. 42 Phone.......................................................................................................................................... 45 Make Phone Calls ................................................................................................................... 45 Call Using the Phone Dialer ................................................................................................. 45 Call From Call History .......................................................................................................... 46 Call From People ................................................................................................................. 46 Call Using a Speed Dial Number ......................................................................................... 46 Call a Number in a Text Message or Email Message .......................................................... 47 Call Emergency Numbers .................................................................................................... 47 Receive Phone Calls ............................................................................................................... 48 Answer an Incoming Call ..................................................................................................... 48 Mute the Ringing Sound ...................................................................................................... 48 Use the Quiet Ring on Pickup Feature ................................................................................ 48 Reject an Incoming Call ....................................................................................................... 48 Reject a Call and Send a Text Message ............................................................................. 48 Visual Voicemail ...................................................................................................................... 49 Set Up Visual Voicemail ...................................................................................................... 49 Review Visual Voicemail ...................................................................................................... 50 Listen to Multiple Voicemail Messages ................................................................................ 51 Configure Visual Voicemail Options .................................................................................... 51 Configure Visual Voicemail Settings .................................................................................... 52 Automatically Enable the Speakerphone ............................................................................. 53 Change Your Main Greeting via the Voicemail Menu .......................................................... 53 Edit the Display Name via the Voicemail Menu ................................................................... 53 Delete Your Messages ........................................................................................................ 53 Voicemail (Traditional)............................................................................................................. 54 Set Up Voicemail ................................................................................................................. 54 Voicemail Notification .......................................................................................................... 54 Retrieve Your Voicemail Messages ..................................................................................... 55 Phone Call Options ................................................................................................................. 55 Caller ID ............................................................................................................................... 55 Call Waiting.......................................................................................................................... 56 3-way Calling ....................................................................................................................... 56 Table of Contents
ii
Call Forwarding.................................................................................................................... 56 In-call Options ...................................................................................................................... 57 Set Up Speed Dialing .............................................................................................................. 57 Recent Calls (Call History) ...................................................................................................... 58 View Recent Calls ................................................................................................................ 58 Save a Number From Call History ....................................................................................... 59 Prepend a Number From History ......................................................................................... 59 Erase History ....................................................................................................................... 60 Device Settings ........................................................................................................................... 61 Personalization Settings .......................................................................................................... 61 Scene................................................................................................................................... 61 Change the Home Screen Wallpaper .................................................................................. 62 Change the Default Ringtone .............................................................................................. 62 Sound Set ............................................................................................................................ 63 Wireless & Networks Settings ................................................................................................. 63 Wi-Fi Settings ...................................................................................................................... 64 Bluetooth Settings................................................................................................................ 64 Mobile Network .................................................................................................................... 64 4G ........................................................................................................................................ 64 Usage .................................................................................................................................. 64 Airplane Mode...................................................................................................................... 64 VPN Settings ....................................................................................................................... 65 Tethering & Sprint Hotspot Settings .................................................................................... 65 Internet Pass-through .......................................................................................................... 65 Call Settings ............................................................................................................................ 65 Voicemail Settings ............................................................................................................... 65 Other Call Settings ............................................................................................................... 65 Internet Call Settings ........................................................................................................... 66 Sound Settings ........................................................................................................................ 67 General Sound Settings ....................................................................................................... 67 Incoming Calls ..................................................................................................................... 68 Notifications ......................................................................................................................... 68 System ................................................................................................................................. 69 Table of Contents
iii
Display Settings ....................................................................................................................... 69 Auto-rotate Screen............................................................................................................... 69 Brightness ............................................................................................................................ 69 Sleep.................................................................................................................................... 70 Notification Flash ................................................................................................................. 70 Calibrate the Screen ............................................................................................................ 70 Storage Settings ...................................................................................................................... 70 Reset Your Device ............................................................................................................... 70 Power Management Settings .................................................................................................. 71 Adjust the Screen Brightness and Screen On-Time ............................................................ 71 Manage Your Device’s Wireless Functions ......................................................................... 72 Set the Email Synchronization Schedule ............................................................................. 72 Close Applications Not In Use ............................................................................................. 72 Applications Settings ............................................................................................................... 72 Allow Installation of Third-Party Programs ........................................................................... 73 Clear Application Cache and Data ....................................................................................... 73 Application Associations ...................................................................................................... 73 Account & sync ........................................................................................................................ 73 Set Up a New Account ......................................................................................................... 73 Manage Existing Accounts .................................................................................................. 74 Synchronize Google Apps ................................................................................................... 74 Synchronize Exchange ActiveSync ..................................................................................... 74 Log in to and Synchronize Your Social Network Accounts .................................................. 75 Location ................................................................................................................................... 76 Connect to PC Settings ........................................................................................................... 77 Security ................................................................................................................................... 77 Set Up Screen Lock ............................................................................................................. 77 Use Facial Recognition to Lock Your Device ....................................................................... 77 Use a Screen Unlock Pattern .............................................................................................. 77 Use a Screen Unlock PIN .................................................................................................... 78 Use a Screen Unlock Password .......................................................................................... 78 Disable the Screen Lock ...................................................................................................... 79 Set Up SIM Lock .................................................................................................................. 79 Table of Contents
iv
Credential Storage ............................................................................................................... 79 Language & Keyboard Settings ............................................................................................... 79 Language Settings ............................................................................................................... 79 Keyboard Settings ............................................................................................................... 79 Privacy & Backup Settings ...................................................................................................... 80 Date & Time Settings .............................................................................................................. 80 Accessibility Settings ............................................................................................................... 80 System Updates ...................................................................................................................... 81 Firmware Update ................................................................................................................. 81 Update Profile ...................................................................................................................... 81 Update PRL ......................................................................................................................... 81 Check for System Software Updates Manually ................................................................... 81 About Phone............................................................................................................................ 81 People ......................................................................................................................................... 82 Ways of Getting Contacts Into Your Device ............................................................................ 82 Transfer Contacts from Your Old Phone ............................................................................. 83 The People Screen.................................................................................................................. 83 Your People List .................................................................................................................. 84 Set Up Your Profile .............................................................................................................. 85 Add a New People Entry...................................................................................................... 85 Save a Phone Number ........................................................................................................ 85 Details Screen ......................................................................................................................... 86 Merge Entries in People .......................................................................................................... 86 Accept Matched Contacts Suggestions ............................................................................... 86 Manually Merge Entries in People ....................................................................................... 87 View a List of All Your Linked Entries .................................................................................. 87 Break Linked Entries ............................................................................................................ 87 Edit Entries in People .............................................................................................................. 87 Add a Number to an Entry ................................................................................................... 88 Edit the Phone Number of an Entry ..................................................................................... 88 Select a Ringer Type for an Entry ........................................................................................ 88 Assign a Picture to an Entry ................................................................................................ 88 Add an Email Address to an Entry ....................................................................................... 89 Table of Contents
v
Send Contact Information as a vCard .................................................................................. 89 Delete an Entry .................................................................................................................... 89 Delete Multiple Entries ......................................................................................................... 89 Find Entries in People ............................................................................................................. 90 Find Contacts by Name ....................................................................................................... 90 Find Group Entries............................................................................................................... 90 Back Up and Import Entries in People .................................................................................... 90 Back Up People Entries to the Storage Card ...................................................................... 90 Import Entries From the Storage Card ................................................................................. 91 Work with Groups .................................................................................................................... 91 Create a Group and Add Entries ......................................................................................... 91 Edit a Contact Group ........................................................................................................... 91 Send a Text or Multimedia Message to a Group ................................................................. 92 Send an Email Message to a Group .................................................................................... 92 Rearrange Your Contact Groups ......................................................................................... 92 Rearrange Members in a Contact Group ............................................................................. 92 Delete a Group .................................................................................................................... 93 People Widgets ....................................................................................................................... 93 Add the People Widget ........................................................................................................ 93 Set the Default Communication Method .............................................................................. 93 Get In Touch With a Contact ............................................................................................... 93 Accounts and Messaging ............................................................................................................ 95 Gmail / Google ........................................................................................................................ 95 Create a Google Account .................................................................................................... 95 Sign In to Your Google Account .......................................................................................... 96 View Your Gmail Inbox ........................................................................................................ 97 Send a New Gmail Message ............................................................................................... 97 Reply To or Forward an Email Message ............................................................................. 98 Get Help............................................................................................................................... 98 Email ....................................................................................................................................... 98 Add a POP3 or IMAP Email Account ................................................................................... 98 Add an Exchange ActiveSync Account ................................................................................ 99 Create Another Email Account ............................................................................................ 99 Table of Contents
vi
Check Your Mail Inbox......................................................................................................... 99 Manage Email Messages .................................................................................................. 101 Compose and Send Email ................................................................................................. 102 Work with Exchange ActiveSync Email ............................................................................. 105 Change the Email Account Settings .................................................................................. 106 Add the Mail Widget........................................................................................................... 108 Text Messaging and MMS ..................................................................................................... 108 Open Messages................................................................................................................. 108 Send a Text Message (SMS) ............................................................................................. 108 Send a Multimedia Message (MMS) .................................................................................. 110 Save and Resume Composing a Draft Message ............................................................... 112 View and Reply to a Message ........................................................................................... 112 Manage Message Conversations ...................................................................................... 114 Text and Multimedia Message Options ............................................................................. 116 Add the Messages Widget ................................................................................................. 118 Social Networking Accounts .................................................................................................. 118 Facebook ........................................................................................................................... 118 Friend Stream .................................................................................................................... 120 YouTube ............................................................................................................................ 122 Google Talk ....................................................................................................................... 124 Applications and Entertainment ................................................................................................ 127 Google Play ........................................................................................................................... 127 Find and Install an Application ........................................................................................... 127 Open an Installed Application ............................................................................................ 129 Uninstall an Application ..................................................................................................... 129 Create a Google Wallet Account ....................................................................................... 129 Get Help............................................................................................................................. 130 Navigation ............................................................................................................................. 130 Google Maps ..................................................................................................................... 130 Google Latitude ................................................................................................................. 135 HTC Footprints .................................................................................................................. 138 Telenav GPS Navigation ................................................................................................... 141 Music ..................................................................................................................................... 142 Table of Contents
vii
Listen to Music ................................................................................................................... 142 Connected Media............................................................................................................... 148 Sprint Music Plus ............................................................................................................... 149 Music - MP3 Store ............................................................................................................. 150 FM Radio ........................................................................................................................... 151 Sprint TV & Movies ................................................................................................................ 152 Watch TV and Movies ........................................................................................................ 153 Sprint TV & Movies FAQs .................................................................................................. 154 NASCAR Sprint Cup Mobile .................................................................................................. 155 HTC Watch ............................................................................................................................ 156 Create or Sign In to Your HTC Watch Account ................................................................. 156 The Watch App .................................................................................................................. 157 Browse the Video Store ..................................................................................................... 157 Rent or Buy a Video........................................................................................................... 157 Manage Your Video Library ............................................................................................... 158 Check or Change the HTC Watch Settings ....................................................................... 158 HTC Watch FAQs .............................................................................................................. 159 Web and Data ........................................................................................................................... 160 Ways to Connect ................................................................................................................... 160 Wi-Fi ...................................................................................................................................... 160 Turn Wi-Fi On and Connect to a Wireless Network ........................................................... 161 Check the Wireless Network Status .................................................................................. 161 Connect to a Different Wi-Fi Network ................................................................................ 162 Add the Wi-Fi Widget ......................................................................................................... 162 Sprint 4G ............................................................................................................................... 162 Turn Sprint 4G On and Connect to the Sprint 4G Network ................................................ 162 Check Sprint 4G Network Status ....................................................................................... 163 Add the Sprint 4G Widget .................................................................................................. 163 Data Services (Sprint 3G and 4G Networks) ......................................................................... 163 Your User Name ................................................................................................................ 163 Launch a Web Connection ................................................................................................ 164 Data Connection Status and Indicators ............................................................................. 164 Turn the Data Connection On or Off .................................................................................. 164 Table of Contents
viii
Data Services FAQs .......................................................................................................... 165 Virtual Private Networks (VPN) ............................................................................................. 166 Prepare Your Device for VPN Connection ......................................................................... 166 Set Up Secure Credential Storage .................................................................................... 166 Add a VPN Connection ...................................................................................................... 166 Connect to a VPN .............................................................................................................. 167 Disconnect From a VPN .................................................................................................... 167 Browser ................................................................................................................................. 167 Go to a Website ................................................................................................................. 167 The Browser Menu ............................................................................................................ 167 Navigate and Zoom on a Web Page .................................................................................. 168 Select Links on a Web Page .............................................................................................. 169 Browser Windows .............................................................................................................. 170 Download from the Web .................................................................................................... 170 Copy Text, Look Up Information, and Share ..................................................................... 171 View Bookmarks and Previously Visited Web Pages ........................................................ 173 Set Browser Options .......................................................................................................... 174 Sprint Hotspot........................................................................................................................ 177 Set Up Sprint Hotspot ........................................................................................................ 177 Manage Sprint Hotspot ...................................................................................................... 178 Turn Off Sprint Hotspot ...................................................................................................... 178 Add the Sprint Hotspot Widget .......................................................................................... 178 Use Your Device as a Modem ............................................................................................... 179 Connect Your Device to the Internet Through a Computer (Internet Pass-through) ............. 179 Camera and Video .................................................................................................................... 180 Take Pictures and Shoot Videos ........................................................................................... 180 View Pictures and Videos Using Gallery ............................................................................... 186 Select an Album................................................................................................................. 186 View Photos and Videos .................................................................................................... 187 Zoom In or Out on a Photo ................................................................................................ 187 Watch Videos..................................................................................................................... 188 View Photos in Your Social Networks ................................................................................ 189 Edit Your Photos ................................................................................................................ 190 Table of Contents
ix
Print Your Photos ............................................................................................................... 191 Send Your Photos and Videos ........................................................................................... 192 Share Your Photos and Videos on the Web ...................................................................... 193 Close Gallery ..................................................................................................................... 195 Tools and Calendar................................................................................................................... 196 Calendar ................................................................................................................................ 196 Create an Event ................................................................................................................. 197 Invite Guests to Your Event (Google Account Only) .......................................................... 198 Sending a Meeting Request (Exchange ActiveSync only) ................................................. 198 Event Alerts ....................................................................................................................... 198 Change Calendar Views .................................................................................................... 199 Manage Calendar Events .................................................................................................. 202 Display and Synchronize Calendars .................................................................................. 204 Change Calendar Settings ................................................................................................. 205 About the Calendar Widget ................................................................................................ 205 Calculator .............................................................................................................................. 205 Clock & Alarm........................................................................................................................ 206 Open the Clock Application ............................................................................................... 206 Desk Clock ......................................................................................................................... 206 World Clock ....................................................................................................................... 207 Alarm Clock ....................................................................................................................... 208 Read eBooks ......................................................................................................................... 210 Stocks.................................................................................................................................... 213 Weather ................................................................................................................................. 215 News Feeds .......................................................................................................................... 218 Car Panel .............................................................................................................................. 220 Dock Mode ............................................................................................................................ 221 HTC Sync .............................................................................................................................. 221 HTCSense.com ..................................................................................................................... 228 Sign Up for Your HTCSense.com Account ........................................................................ 228 Voice Commands .................................................................................................................. 229 Automatic Speech Recognition (ASR) ............................................................................... 229 Voice Recorder .................................................................................................................. 230 Table of Contents
x
Voice Input ......................................................................................................................... 231 Bluetooth ............................................................................................................................... 232 Turn Bluetooth On or Off ................................................................................................... 232 Change the Device Name .................................................................................................. 232 Connect a Bluetooth Headset or Car Kit ............................................................................ 232 Reconnect a Headset or Car Kit ........................................................................................ 233 Disconnect or Unpair From a Bluetooth Device ................................................................. 234 Send Information Using Bluetooth ..................................................................................... 234 Where Sent Information is Saved ...................................................................................... 235 Receive Information From Another Device ........................................................................ 236 Use Bluetooth FTP Server ................................................................................................. 237 microSD Card ........................................................................................................................ 237 Remove the microSD Card ................................................................................................ 237 Insert the microSD Card .................................................................................................... 238 Check the microSD Card Memory ..................................................................................... 239 Erase the microSD Card .................................................................................................... 239 Unmount the microSD Card ............................................................................................... 239 Use the microSD Card as a USB Drive ............................................................................. 239 Update Your Device .............................................................................................................. 240 Update Your Device Firmware ........................................................................................... 240 Update the Operating System ........................................................................................... 242 Update Your Profile ........................................................................................................... 242 Update Your PRL ............................................................................................................... 242 Sprint Worldwide Wireless Service ........................................................................................... 243 Activate Sprint Worldwide Service on Your Account ............................................................. 243 Your SIM Card ....................................................................................................................... 243 Install the SIM card ............................................................................................................ 243 Enable Global Roaming Mode .............................................................................................. 246 Manually Set Your Global Roaming Options for CDMA Networks..................................... 246 Make and Receive Worldwide Calls ...................................................................................... 246 Make Calls Using Plus (+) Code Dialing ............................................................................ 246 Sprint Voicemail Service ....................................................................................................... 247 Set Up Your Voicemail Access Number ............................................................................ 247 Table of Contents
xi
New Message Indicators ................................................................................................... 247 Retrieve Voicemail Messages ........................................................................................... 247 Voicemail Troubleshooting ................................................................................................ 248 International Data Roaming ................................................................................................... 248 Get Started With International Data Services .................................................................... 248 Access Email and Data Services on GSM/UMTS Networks ............................................. 248 Access Email and Data Services on CDMA Networks ...................................................... 249 Status Messages ................................................................................................................... 249 Contact Sprint for Assistance ................................................................................................ 250 Index ......................................................................................................................................... 252 Table of Contents
xii
Get Started
This section gives you all the information you need to set up your device and Sprint service the
first time.
Your Device at a Glance
Set Up Your Device
Activate Your Device
Complete the Setup Application
Set Up Voicemail
Sprint Account Information and Help
Your Device at a Glance
The following illustrations outline your device's primary external features and buttons.
Front panel
Get Started
13
Back panel
Set Up Your Device
You must first install and charge the battery to begin setting up your device.
1. Install the battery.

Hold the device upside down and with the back of the device facing you.

Push the battery compartment cover up with your thumbs and remove it from the
device.
Get Started
14

Open the battery compartment door.

Pull out the battery, and then remove the film that covers it.

Insert the battery into the slot, contacts side first, and then close the battery
compartment door to lock the battery in place.
Get Started
15

Replace the battery compartment cover.
2. Charge your battery.

Plug one end of the USB cable to the AC adapter.

Plug the other end of the USB cable into the charger/accessory jack on the lower left
side of your device.

Plug the AC adapter into an electrical outlet. Fully charging a battery may take up to
three hours.
Note: Your device’s battery should have enough charge for the device to turn on and find a
signal, run the setup application, set up voicemail, and make a call. You should fully
charge the battery as soon as possible.
3. Press
to turn the device on.

If your device is activated, it will turn on, search for Sprint service, and begin the
setup application.

If your device is not yet activated, see Activate Your Device for more information.
Get Started
16
Activate Your Device
Depending on your account or how and where you purchased your device, it may be ready to
use or you may need to activate it on your Sprint account.
► If you purchased your device at a Sprint Store, it is probably activated and ready to use.
► If you received your device in the mail and it is for a new Sprint account or a new line of
service, it is designed to activate automatically.

When you turn the device on for the first time, you should see a Hands Free
Activation screen, which may be followed by a PRL Update screen and a Firmware
Update screen. Follow the onscreen instructions to continue.
► If you received your device in the mail and you are activating a new device for an
existing number on your account (you’re swapping devices), you can activate on your
computer online or directly on your device.

Activate on your computer:
•

Go to sprint.com/activate and complete the online instructions to activate your
device
Activate on your device:
•
Turn on your new device. (Make sure the old one is turned off.) Your device will
automatically attempt Hands-Free Activation.
•
Touch Activate to override auto-activation and start the manual activation
wizard.
•
Follow the onscreen prompts to complete the activation process.
► To confirm activation, make a phone call. If your device is still not activated or you do not
have access to the Internet, contact Sprint Customer Service at 1-888-211-4727 for
assistance.
Tip:
Do not press
while the device is being activated. Pressing
activation process.
cancels the
Note: If you are having any difficulty with activation, contact Sprint Customer Service by calling
1-888-211-4727 from any other phone.
Get Started
17
Complete the Setup Application
Once your device has been turned on and activated, you will then be guided to the setup
process. Touch Next or Skip to skip any of the screens.
●
Internet connection: Select manual or automatic synchronization of information. For
more information, see Account & sync.
●
Set up Wi-Fi network: Connect to a Wi-Fi network. For more information, see Wi-Fi.
●
Use Google location: Turn on Google location services. For more information, see
Location.
●
Tell HTC: Choose whether to allow HTC to collect anonymous data in the background
about how you use your device.
●
Set up accounts: Set up your email and social network accounts including Google,
Exchange ActiveSync, Mail, Watch, Facebook, Flickr, and Twitter for HTC Sense. For
more information, see Account & sync.
Note: You do not need to sign up for a Google Account to use your device. However, to
download applications from the Play Store or chat in Google Talk, you must link your
device to a Google Account.
●
Transfer my stuff: Transfer information from your old phone. You can do this at a later
time. For more information, see Transfer Contacts from Your Old Phone.
●
Set current time: If your time zone cannot be detected, you can set your date and time
manually.
Set Up Voicemail
Your device automatically transfers all unanswered calls to your voicemail, even if your device is
in use or turned off. You should set up your Sprint Voicemail and personal greeting as soon as
your device is activated. Always use a password to protect against unauthorized access.
1. From the Home screen, touch Phone. (If your screen is locked, press
the display and then drag the ring up to unlock the screen.)
2. Touch and hold
to dial your voicemail number.
3. Follow the system prompts to:

Create your password.

Record your name announcement.

Record your greeting.
Get Started
18
to turn on
Note: Voicemail Password – Sprint strongly recommends that you create a password when
setting up your voicemail to protect against unauthorized access. Without a password,
anyone who has access to your device is able to access your voicemail messages.
Sprint Account Information and Help
Find out about account passwords and information about managing your account and finding
help.
Sprint Account Passwords
As a Sprint customer, you enjoy unlimited access to your personal account information, your
voicemail account, and your data services account. To ensure that no one else has access to
your information, you will need to create passwords to protect your privacy.
Account User Name and Password
If you are the account owner, you will create an account user name and password when you
sign on to sprint.com. (Click Sign in/Sign up and then click Sign up now! to get started.) If you
are not the account owner (if someone else receives the bill for your Sprint service), you can get
a sub-account password at sprint.com.
Voicemail Password
You’ll create your voicemail password when you set up your voicemail. See Set Up Voicemail
for more information on your voicemail password.
Data Services Password
With your Sprint phone, you may elect to set up an optional data services password to control
access and authorize Premium Service purchases.
For more information, or to change your passwords, sign on to sprint.com or call Sprint
Customer Service at 1-888-211-4727.
Manage Your Account
Manage your Sprint account from your computer, your Sprint phone, or any other phone.
Online: sprint.com
●
Access your account information.
●
Check your minutes used (depending on your Sprint service plan).
●
View and pay your bill.
●
Enroll in Sprint online billing and automatic payment.
●
Purchase accessories.
Get Started
19
●
Shop for the latest Sprint phones.
●
View available Sprint service plans and options.
●
Learn more about data services and other products like games, ringtones, screen
savers, and more.
From Your Sprint Phone
1. From the Home screen, touch Phone.
2. Do any of the following:

Touch
to check minute usage and account balance.

Touch
to make a payment.

Touch
answers to other questions.
to access a summary of your Sprint service plan or get
From Any Other Phone
●
Sprint Customer Service: 1-888-211-4727.
●
Business Customer Service: 1-888-788-4727.
Sprint Support Services
Sprint 411 and Sprint Operator Services let you easily access information and calling assistance
from your Sprint device.
Sprint 411
Sprint 411 gives you access to a variety of services and information, including residential,
business, and government listings; movie listings or showtimes; driving directions, restaurant
reservations, and major local event information. You can get up to three pieces of information
per call, and the operator can automatically connect your call at no additional charge.
There is a per-call charge to use Sprint 411, and you will be billed for airtime.
► From the Home screen, touch Phone, and then touch
.
Sprint Operator Services
Sprint Operator Services provides assistance when you place collect calls or when you place
calls billed to a local telephone calling card or third party.
► From the Home screen, touch Phone, and then touch
.
For more information or to see the latest in products and services, visit us online at sprint.com.
Get Started
20
Device Basics
Your device is packed with features that simplify your life and expand your ability to stay
connected to the people and information that are important to you. The topics in this section will
introduce the basic functions and features of your device.
Your Device’s Layout
Turn Your Device On and Off
Turn Your Screen On and Off
Touchscreen Navigation
Your Home Screen
Status and Notifications
Enter Text
Device Basics
21
Your Device’s Layout
The illustrations below outline your device’s basic layout.
Key Functions
●
3.5 mm Headset Jack allows you to plug in either a stereo headset or an optional
headset for convenient, hands-free conversations.
CAUTION!
Inserting an accessory into the incorrect jack may damage the device.
●
Proximity Sensor automatically switches the display screen off when you hold the
device near your face during a call. When activated, the proximity sensor does not affect
the device’s 3G, 4G, or Wi-Fi connection.
●
Front Indicator Light (LED) shows your device’s status or pending notifications at a
glance.
●
Menu Key lets you access additional available actions for the current screen or
onscreen option.
●
Home Key lets you display the main Home screen. When in standby mode, touch and
hold to open the recently used applications window.
●
Microphone allows other callers to hear you clearly when you are speaking to them.
Device Basics
22
●
Search Key lets you search information on the current screen or application. For
example, while in Contacts, touch
to search for a contact.
●
Back Key lets you return to the previous screen, or close a dialog box, options menu,
the Notifications panel, or onscreen keyboard.
●
Touchscreen lets you view and control all the features of your device.
●
Earpiece lets you hear the caller and automated prompts.
●
Front Camera allows you to take photos and videos or start a video call.
●
Power Button lets you turn the device on or off, turn the screen on or off, restart the
device, or switch your device to airplane mode.
Device Basics
23
Back Panel
●
Flash helps illuminate subjects in low-light environments when the camera is focusing
and capturing a photo or video.
●
Camera Lens lets you take pictures and videos.
●
Battery Compartment Cover covers the battery compartment, SIM card, and microSD
card slots.
●
Charger/Accessory Jack allows you to connect the device charger or the USB cable
(included).
CAUTION!
Inserting an accessory into the incorrect jack may damage the device.
●
Volume Button allows you to adjust the ringer or media volume or adjust the voice
volume during a call.
●
Speaker lets you hear the different ringers and sounds. The speaker also lets you hear
the caller’s voice in speakerphone mode.
Device Basics
24
Turn Your Device On and Off
The instructions below explain how to turn your device on and off.
Turn Your Device On
► Press and hold
.
Turn Your Device Off
1. Press and hold
to open the Power options menu.
Note: When the screen is locked and you press
, it will only turn off the screen and not
the device. You will need to unlock the screen first before you press and hold
to
turn the device off. See Turn Your Screen On and Off for details.
2. Touch Power off to turn the device off.
Restart Your Device
Restarting the device will close all running apps and will clear all temporary files in the device’s
memory. Make sure to save your work before restarting the device.
1. Press and hold
for about two seconds.
2. On the Power options menu, touch Restart.
3. In the Restart phone confirmation box, touch Restart.
Turn Your Screen On and Off
Your device allows you to quickly turn the screen off when not in use and to turn it back on and
unlock it when you need it.
Turn the Screen Off When Not in Use
► To quickly turn the screen off, press
. Pressing
again or receiving an
incoming call will turn on your device screen and show the lock screen.
To save battery power, the device automatically turns off the screen after a certain period of
time when you leave it idle. You will still be able to receive messages and calls while the
device’s screen is off.
Note: For information on how to adjust the time before the screen turns off, see Screen
Timeout.
Turn the Screen On and Unlock It
1. To turn the screen on, press
Device Basics
.
25
2. Flick the ring up to unlock the screen.
Use the Lock Screen
Aside from protecting the device’s screen from unwanted touches, the lock screen also displays
important information, updates, and messages at a glance, or provide shortcut icons to your
favorite applications.
Unlock the Screen
1. When the screen is off, press
to show the lock screen.
2. Do any of the following:

Flick the ring up to unlock the screen. When you have an incoming call, flicking the
ring up answers the call.

Drag a shortcut icon, a photo, or a message to the ring to unlock the screen and
launch the related application.
Note: If you have set up a screen lock, you will be prompted to draw the pattern or enter the
password or PIN. See Set Up Screen Lock.
Device Basics
26
Touchscreen Navigation
Your device’s touchscreen lets you control actions through a variety of touch gestures.
Touch
When you want to type using the onscreen keyboard, select items onscreen such as application
and settings icons, or press onscreen buttons, simply touch them with your finger.
Touch and Hold
To open the available options for an item (for example, a contact or link in a Web page), touch
and hold the item.
Swipe or Slide
To swipe or slide means to quickly drag your finger vertically or horizontally across the screen.
Drag
To drag, touch and hold your finger with some pressure before you start to move your finger.
While dragging, do not release your finger until you have reached the target position.
Flick
Flicking the screen is similar to swiping, except that you need to swipe your finger in light, quick
strokes. This finger gesture is always in a vertical direction, such as when flicking the contacts
Device Basics
27
or message list.
Rotate
For most screens, you can automatically change the screen orientation from portrait to
landscape by turning the device sideways. When entering text, you can turn the device
sideways to bring up a bigger keyboard. See Touch Input Keyboard for more details.
Note: The Auto-rotate check box in
>
> Settings > Display needs to be selected for
the screen orientation to automatically change.
Pinch and Spread
“Pinch” the screen using your thumb and forefinger to zoom out, or “spread” the screen to zoom
in when viewing a picture or a Web page. (Move fingers inward to zoom out and outward to
zoom in.)
Device Basics
28
Your Home Screen
The Home screen is the starting point for your device’s applications, functions, and menus. You
can customize your Home screen by adding application icons, shortcuts, folders, widgets, and
more. Your Home screen extends beyond the initial screen. Swipe the screen left or right to
display additional screens.
Rearrange the Home Screen
Reorder your extended screens in any way that fits how you use them. For example, move the
screens with frequently used widgets, shortcuts, and folders closer to the Home screen.
1. Pinch the Home screen to display thumbnail images of all the screens.
Note: The thumbnail with an outline is always the main Home screen.
2. Touch and hold the thumbnail of the screen you want to move. Your device vibrates.
Don’t lift your finger just yet.
Device Basics
29
3. Drag the thumbnail to its new position, and then lift your finger.
Extended Screens
In addition to the Home screen, your device has six extended Home screens to provide more
space for adding icons, widgets, and more. Swipe across the screen to move from one screen
to another.
●
While on an extended screen, press
Device Basics
to return to the Home screen.
30
Go Directly to a Particular Screen
1. From any screen, pinch the screen to display thumbnail images of all screens.
Tip:
On the Home screen, you can press
to display the thumbnail images of all screens.
2. Touch the screen you want to open, and you’ll be taken there.
Customize the Home Screen
Learn how to add items, create folders, move, or remove items from the Home screen.
Add Items to the Home Screen or to an Extended Home Screen
1. Touch and hold an empty area on a screen. (If the current screen doesn’t have room,
swipe the screen left or right to display an extended screen.)
2. On the Add items to Home section of the Personalize screen, touch the type of item you
want to add, and then select the item.

Widget: Add widgets to a screen such as a clock, calendar, mail, people, Wi-Fi and
Bluetooth toggles, social networking apps, and more.

App: Add shortcuts to your favorite apps so can open them from the Home screen
with just one touch.

Shortcut: Add shortcuts to applications, bookmarks, contacts, settings, and more.
Touch a category and then touch the item you want to add.
Create Folders on the Home Screen or Extended Home Screen
1. On the Home screen, touch and hold any app icon or shortcut. Then drag it over another
icon you want to group it with.
2. Release your finger to create the folder.
After creating your folder you can choose to rename it or add more apps and shortcuts.
Device Basics
31
Move, Remove, or Edit Items on the Home Screen or Extended Screen
1. Touch and hold the item you want to move, remove, or edit.
2. Do one of the following:

To move the item, drag it to a new area and then release it.

To remove the item, drag it to the Remove icon at the top-right corner of the screen
and release it.

You can change the settings of some of the widgets (for example, you can change
the city that is displayed on the weather clock widget). To edit a widget, drag it to the
Edit icon at the top-left corner of the screen, and then follow screen instructions.
Status Bar
The status bar at the top of the Home screen provides device and service status information on
the right side and notification alerts on the left. To view notification alerts, touch and hold the
status bar and drag it down.
Device Basics
32
Status Icons
Icon
Description
Signal strength (More bars = stronger signal)
No service
Device is “roaming” off the Nationwide Sprint Network
Connected to a Wi-Fi network
Connected to the Sprint 4G Network
Sprint 3G Network is available
Sprint 3G Network available and active (with icon animation)
Sprint 3G Network is currently unavailable
Device’s location feature is on and available for location-based services such as
GPS navigation
Device’s location feature off and your location is available only for 911
Device microphone muted
Device speaker muted
Vibrate mode
Shows current battery charge level (icon shown is fully charged)
Bluetooth on
Connected to Bluetooth device
Airplane mode
Alarm set
Speakerphone on
Wired microphone headset connected
Device Basics
33
Wired headset connected
Notification Icons
Icon
Description
New text or multimedia message
New voicemail
New Gmail message
New Microsoft Exchange ActiveSync or POP3/IMAP email message
Problem with text or multimedia message delivery
New instant message from Google Talk
Upcoming event
Music is playing
General notification (for example, sync error)
Wi-Fi is on and wireless networks are available
4G is on and the Sprint 4G Network is available
Sprint Hotspot is on (connected to the Sprint 4G Network)
Sprint Hotspot is on (connected to the Sprint 3G Network)
Data synchronizing – connected to HTC Sync
New location detected
More (undisplayed) notifications
Missed call
Call in progress
FM Radio app in use
Matched contacts suggestion
Uploading data (animated)
Downloading data (animated)
Device Basics
34
Waiting to upload
Content downloaded
Device connected to computer via USB cable
Storage card is blank
Downloaded Play Store app installed successfully
Notifications Panel
When you get a new notification, you can open the Notifications panel to see the message,
reminder, or event notification. The Notifications panel lets you quickly switch between recently
opened apps, and also lets you easily turn on settings such as 4G, Wi-Fi, and Bluetooth.
Open the Notifications Panel
To open the Notifications panel, touch and hold the status bar, and then slide your finger
downward. If you have several notifications, you can scroll down the screen to view more
notifications.
Deleting Notifications
You can easily remove notifications.
► Simply touch the notification you want to delete, and then drag it horizontally off the
screen.
Device Basics
35
Switch Between Recently Opened Apps
On the Notifications panel, you can easily access up to eight apps you just recently opened.
1. Open the Notifications panel.
2. In the Recent applications section, slide your finger left or right to see recently opened
apps.
3. Tap an application to open it.
Tip:
Touch and hold
to view recently opened applications.
Use Quick Settings
The Quick Settings tab lets you easily turn on 4G, Wi-Fi, Bluetooth, and more. It also provides a
quick shortcut to all device settings.
1. Open the Notifications panel.
2. Tap the Quick Settings tab.
3. Tap the check box next to an item to turn it off or on.
Close the Notifications Panel
► Do either of the following:

Touch and hold the bottom bar of the Notifications panel, and then drag it up the
screen.
Device Basics
36

Press
.
Notification LED
The Notification LED located near the right end of the earpiece provides information on the
device status or pending notifications.
LED Status
Solid green
Solid orange
Flashing orange
Flashing green
Indication
Battery is fully charged (when the device is connected to the AC
adapter or a computer).
Battery is charging.
Battery is low. (Power is below 14%.)
You have a pending notification (for example, a new message or a
missed call).
Note: The indicators are listed in order of priority. For example, if your device is connected to
the AC adapter and the battery is charging, the LED will be solid red and will not switch
to a flashing green light even if there is a pending notification.
Enter Text
You can type on your device using one of the available touchscreen keyboards.
Touch Input Keyboard
When you start a program or select a box that requires entry of text or numbers, the touch input
keyboard becomes available. You can choose from three keyboard layouts: Standard, Phone,
and Compact.
Change the Touch Input Keyboard Layout
You can choose from three different keyboard layouts to suit your typing style. To change the
keyboard layout, do the following:
1. From the Home screen, touch
> Settings > Language & keyboard > Touch Input.
2. Tap Keyboard types, and then select from the following keyboard types:

Standard. This layout is similar to a desktop computer keyboard. This is the default
keyboard layout.
Device Basics
37

Phone. This layout resembles a traditional wireless phone keypad.

Compact. This layout features two letters on each key. The keys are slightly larger
than on the standard layout.
Enter Text Using the Touch Input Keyboard
Use the following keys while entering text using the onscreen keyboard:
Key
Description
Touch and hold keys with gray characters at the top to enter numbers, symbols,
or accented letters. The gray character displayed on the key is the character that
will be inserted when you touch and hold that key. Some keys have multiple
characters or accents associated with them.
Shift key. Touch to capitalize the next letter you enter. Touch twice to turn on
caps lock.
Numeric key. Touch to switch to the numeric and symbol keyboard.
Alphabet key. While in numeric or symbol keyboard, touch to switch to the
alphabetic keyboard
Enter key. Touch to create a new line.
Backspace key. Touch to delete the previous character. Touch and hold to
delete multiple characters
Voice input key. Touch to speak the words you want to type. See Voice Input.
Touch to hide the touch input keyboard.
Touch to toggle between Multitap and XT9 predictive modes when using the
Compact or Phone layout. See Predictive Text.
Change to Landscape Keyboard
When entering text, you can choose to use the landscape orientation of the touch input
keyboard by turning the device sideways. This pops up a larger Standard keyboard that lets you
type easily using two thumbs.
Note: The landscape keyboard is not supported in all applications.
Device Basics
38
Enter Text by Speaking
Try speaking the words to enter them in most text fields that let you use the touch input
keyboard.
Important:
First make sure to select the language you’ll be using in the Voice input &
output settings.
Since your device uses Google’s speech-recognition service, you need to be
connected to the Internet to enter text by speaking.
1. Press and hold the language key. Your device then cues you to speak.
2. Tell your device what you want to be typed in.
Set the Voice Input Language
1. From the Home screen, touch
typing.
> Settings > Language & keyboard > Google voice
2. Tap Select input languages, and then choose the language you want.
Note: Available languages depend on the voice input languages supported by Google.
Adjust the Touch Input Settings
► From the Home screen, touch
> Settings > Language & keyboard > Touch Input.
●
Keyboard types lets you select the keyboard layout to use. You can choose from
Standard, Phone, or Compact.
●
International keyboard lets you add or remove languages from the touch input
language list.
●
Bilingual prediction lets you activate word prediction for a second language.
●
Text input lets you set text input options when entering text, calibrate the keyboard, and
set sound or vibration feedback whenever you touch a key.


Standard
•
Prediction: Enable the word prediction feature.
•
Spell correction: Correct typographical errors by selecting from a list of possible
words based on the keys you have touched as well as neighboring keys.
Phone & Compact
Device Basics
39


●
•
Spell correction: Correct typographical errors by selecting from a list of possible
words that reflect the characters of the keys you have touched as well as
characters of nearby keys.
•
Word completion: Select from a list of possible combinations based on the
characters that appear on the keys that you touched.
Other settings
•
Sound feedback: Cause keys to audibly click when touched.
•
Vibrate when typing: Cause keys to vibrate when touched.
Finger touch precision
•
Calibration tool: Lets you recalibrate the keyboard if you feel that the keys are
not responding accurately to your touches.
•
Reset calibration: Reset the calibration back to factory default.
Chinese Text input lets you set options when entering text in Chinese

Pinyin: Choose Traditional Chinese or Simplified Chinese. In Simplified Chinese,
you can enable Fuzzy Pinyin pairs.

Stroke: Choose Traditional Chinese or Simplified Chinese mode.
●
Tutorial lets you go through tutorials to learn how to use the touch input keyboard
features.
●
Trace keyboard lets you choose the pen color and pen width to use when tracing letters
on the keyboard.
●
Personal dictionary lets you add, edit, or remove words in the predictive text dictionary.
For more information, see Add a Word to the Predictive Text Dictionary and Edit or
Delete a Word in Your Personal Dictionary.
Swype Keyboard
Enter text by sliding on or touching the keys on the Swype® keyboard, or by speaking.
Switch to the Swype Keyboard
By default, your device uses the touch input keyboard for text input. You can change the input
method to the Swype keyboard.
1. Start an app that requires text or numbers.
2. Tap a text box, and then slide open the Notifications panel.
Device Basics
40
3. Tap Select input method > Swype.
Enter Text Using Swype
Slide your finger on the Swype keyboard to enter text.
1. Start an app or select a text field that requires text or numbers.
2. Briefly press and hold the first letter of the word you want to enter, and then slide your
finger to the other letters of the word.
3. When you’ve reached the last letter, lift your finger.
For example, to enter the word “the”, press and hold t, and then slide your finger to h
and e.
Note: If you’ve entered a word that Swype doesn’t recognize, word suggestions appear at the
top of the keyboard. Tap a word to enter it to your text.
Enter Text by Typing on the Swype Keyboard
Instead of using Swype, you can enter text by touching these keys on the Swype keyboard:
Key
Description
Press and hold keys with characters at the top to enter numbers, symbols, or
accented letters. The gray character displayed on the key is the character that
will be inserted when you press and hold that key. Some keys have multiple
characters or accents associated with them.
Shift key. Tap to enter an uppercase letter. Tap twice to turn on caps lock.
Tap to switch to the numeric and symbol keyboard.
Enter key. Tap to create a new line.
Backspace key. Tap to delete the previous character.
Language key. Tap to change the keyboard language.
Tap to enter words by speaking.
Swype key. Tap to view a tutorial on how to use Swype, see tips, and get help.
Device Basics
41
Adjust the Swype Keyboard Settings
► While using the Swype keyboard, touch and hold
.

Select input method. Switch between Swype and Touch Input.

How to Swype. View the Swype help file and tutorial.

Personal dictionary. Manage the Swype predictive text dictionary.

Preferences. Change Swype preferences such as audio feedback, vibrate on
keypress, tip indicator, word suggestion or autocorrection.

Language Options. Change your Swype language settings.
Tips for Editing Text
Your device gives you many options to make entering text easier, including copying, cutting,
and pasting text, using voice-to-text input, customizing the user dictionary, using predictive text,
and more.
Predictive Text
The onscreen keyboard has predictive text to help you type quickly and accurately. Predictive
text input is enabled by default, and word suggestions are displayed as you type.
To enter a word in predictive mode, do any of the following:
●
If you see the word you want highlighted, you can simply touch the space bar to insert
the word into your text.
●
If you see the word you want shown in the suggestions before you have finished typing
the entire word, touch the word to insert it into your text.
●
If an arrow is shown to the right of the suggestion list, touch the arrow to see more
suggestions.
Add a Word to the Predictive Text Dictionary
Your device comes with a list of words that it references for predictive text suggestions.
Sometimes you may need to add a word to the predictive text dictionary, for example a name or
a specialized technical word.
Device Basics
42
While entering text using the Standard keyboard layout, if you touch any word on the suggestion
list, it is automatically added to the predictive text dictionary if it was not in the dictionary
already.
To manually add a word to the predictive text dictionary:
1. From the Home screen, touch
> Personal dictionary.
> Settings > Language & keyboard > Touch Input
2. Touch Edit personal dictionary, and then touch Add new.
3. Enter the word to add, and then touch OK.
Edit or Delete a Word in Your Personal Dictionary
You can edit or remove words that you previously added to the predictive text dictionary.
1. From the Home screen, touch
> Personal dictionary.
> Settings > Language & keyboard > Touch Input
2. Touch Edit personal dictionary.
3. Do one of the following:

To edit a word, touch the word, enter your changes, and then touch OK.

To delete a word, touch
touch Delete.
> Delete, select the words you want to delete, and then
Back up Your Personal Dictionary to Your Storage Card
You can use your microSD storage card to back up the new words you’ve added to your
personal dictionary.
1. From the Home screen, touch
> Settings > Language & keyboard > Touch Input.
2. Touch Personal dictionary > Sync personal dictionary > Copy to storage card.
3. When prompted, touch OK.
Restore Your Personal Dictionary from Your Storage Card
1. From the Home screen, touch
> Settings > Language & keyboard > Touch Input.
2. Touch Personal dictionary > Sync personal dictionary > Restore from storage
card.
3. When prompted, touch OK.
Device Basics
43
Select Text
Highlight the text that you want to copy or cut.
1. Touch and hold the text field that contains the text to select until the magnifier appears.
2. Drag your finger to move the text cursor to a letter within the text that you want to select.
3. After positioning the text cursor, lift your finger.
4. Touch and hold the screen to select the word closest to the text cursor. When the word
is highlighted, drag the start and end markers to select the text you want.
Tip:
When selecting text you want to edit, touch Select all in the text selection menu to select
everything in the text field.
Copy and Paste Text
1. After you have selected the text you want to copy, touch Copy or Cut. The selected text
is then copied to the clipboard.
2. Touch and hold a text field in the same or other app until the magnifier appears.
3. Drag your finger to move the text cursor to where you want to paste the text.
4. After positioning the text cursor, lift your finger. The text selection menu then pops up.
5. Touch Paste.
Device Basics
44
Phone
With the Nationwide Sprint Network and your device’s phone, you can enjoy clear calling across
the country.
Make Phone Calls
Receive Phone Calls
Visual Voicemail
Voicemail (Traditional)
Phone Call Options
Recent Calls (Call History)
Make Phone Calls
There are several convenient ways to place calls from your device.
Call Using the Phone Dialer
The most “traditional” way to place a call is by using the phone’s dialer screen.
1. From the Home screen, touch
to display the phone’s dialer screen.
2. Touch the number keys on the Phone keypad to enter the phone number.
Phone
45

As you enter digits, Smart Dial searches for contacts that match. If you see the
number you want to dial, touch it to place the call immediately without entering the
rest of the number.

If you enter an incorrect digit, touch
touch and hold
Tip:
to erase it. To erase the entire number,
.
Touch
to close the Phone keypad and to see if there are more matching numbers or
contacts. To browse through the filtered list, flick through the list or slide your finger up or
down the list slowly.
1. Touch Call to call the number.
2. To end the call, touch End call.
Call From Call History
A quick way to call a contact you have talked to recently is to use Call History.
1. From the Home screen, touch
2. Touch the Call History tab (
> People.
).
3. Touch an entry on the Call History list to place a call to that entry.
Note: You cannot make calls from History to entries identified as No ID or Restricted.
Tip:
Touch and hold an entry in the Call history list to open the options menu where you can
select to view the contact information (if number is stored in People), edit the number
before you redial, send a text message, or delete the entry from the Call history list and
more.
Call From People
Look up your contacts from People to place a call.
1. From the Home screen, touch
> People.
2. Touch the contact you want to call to open the Contact details screen.
3. Touch Call [number type] to place a call.
For additional information, see People.
Call Using a Speed Dial Number
Speed dial numbers let you dial numbers by touching and holding a single number on the
Phone keypad. See Set Up Speed Dialing for information on assigning speed dial numbers.
1. From the Home screen, touch
Phone
to display the phone dialer’s screen.
46
2. Touch and hold the speed dial key on the Phone keypad. The display confirms that you
have dialed the number when it shows “Dialing” on the upper right side of the screen.
Call a Number in a Text Message or Email Message
While viewing a text message or email message, you can place a call to a number that is in the
body of the message.
1. From the Home screen, touch
email account.
> Messages. If necessary, select a messaging or
2. Touch the phone number in the message.
3. On the phone dialer screen, touch Call. Your device then dials the phone number.
For additional information, see Text Messaging and MMS and Email.
Call Emergency Numbers
You can place calls to 911 even if the device’s screen is locked or your account is restricted.
To call the 911 emergency number when the device’s screen is locked with a screen lock:
1. Unlock the screen. For more information, see Turn Your Screen On and Off.
2. Touch Emergency call on the screen.
3. Touch
.
To call the 911 emergency number normally or when your account is restricted:
1. Unlock the screen. For more information, see Turn Your Screen On and Off.
2. Touch Phone on the Home screen.
3. Touch
.
Enhanced 911 (E911) Information
This device features an embedded Global Positioning System (GPS) chip necessary for utilizing
E911 emergency location services where available.
When you place an emergency 911 call, the GPS feature of your device seeks information to
calculate your approximate location. Depending on several variables, including availability and
access to satellite signals, it may take up to 30 seconds or more to determine and report your
approximate location.
Important:
Phone
Always report your location to the 911 operator when placing an
emergency call. Some designated emergency call takers, known as Public
47
Safety Answering Points (PSAPs), may not be equipped to receive GPS location
information from your device.
Receive Phone Calls
When you receive a phone call from a contact, the Incoming call screen appears and displays
the caller ID icon, name, and phone number of the calling party. When you receive a phone call
from someone who is not stored in People, only the default caller ID icon and phone number
appear on the Incoming call screen.
Note: If your device is turned off, all calls automatically go to voicemail.
Answer an Incoming Call
► If the display is on, touch Answer.
► If the display is off, the display will come on with the Lock screen. To answer the call,
flick the ring up, or touch and hold the Answer button and then drag it to the ring.
Mute the Ringing Sound
To mute the ringer without rejecting the call, you can do any of the following:
●
Press the volume button.
●
Touch
●
Place the device face down on a level surface. (You can do this even on the Lock
screen.)
> Mute.
Use the Quiet Ring on Pickup Feature
Your device automatically reduces the ringer volume when you pick up the device to answer
calls.
1. From the Home screen, touch
> Settings > Sound.
2. Scroll down the screen, and then select the Quiet ring on pickup check box.
3. Press
.
Reject an Incoming Call
► If the display is on, touch Decline.
► If the display is off, the display will come on with the Lock screen. Press and hold the
Decline button and then drag it to the ring to reject and send the call to your voicemail.
Reject a Call and Send a Text Message
You can automatically send a default text message to a caller and reject the incoming voice call.
Phone
48
► Touch
> Send message when you have an incoming call to send the text message.
While on the Phone screen, you can change the default text message by touching
Settings > Edit default message.
>
Visual Voicemail
Visual Voicemail gives you a quick and easy way to access your voicemail. Now you can find
exactly the message you are looking for without having to listen to every voicemail message
first. This new feature periodically goes out to your voicemail, and gathers the caller information
from all of the current voicemails. It then populates a list with the caller name and number, along
with the length of time and priority level of the voicemail message.
Set Up Visual Voicemail
Your device automatically transfers all unanswered calls to your voicemail, even if your device is
in use or turned off. You should set up your Sprint voicemail and personal greeting as soon as
your device is activated.
Note: To set up your traditional voicemail box, see Set Up Voicemail.
1. From the Home screen, touch
> Voicemail.
2. Touch Personalize now and follow the voice prompts to:

Create a password (part of standard voicemail).

Record your name announcement.

Record your greeting.
3. When prompted to enter information, use the onscreen dialpad to enter your numeric
responses.
Important:
Voicemail Password – Sprint strongly recommends that you create a password
when setting up your voicemail to protect against unauthorized access. Without a
password, anyone who has access to your device is able to access your
voicemail messages.
4. Once you have completed the setup process, return to the voicemail page (see step 1).
Phone
49
5. Touch the Welcome to Voicemail message on the screen to play a brief explanation of
the voicemail services.
Review Visual Voicemail
Visual Voicemail lets you easily access and select which messages you want to review.
1. From the Home screen, touch
> Voicemail.
2. Touch a message to review it. The following is a description of the features available
while reviewing a voicemail message.
Phone

Touch
> Lock to prevent the message from accidentally being deleted.

Timeline provides a visual timeline for the current message. Touch and drag this bar
to scrub through the message to different points.

Touch

Touch

Touch
to reply to the message. You can then record a reply and tag the reply
message for both Urgency and Privacy. Tap Send to deliver the new message.

Touch
> Forward to forward the message to anyone with either an email or
phone number. This allows you to send the voicemail message to several recipients
at the same time.

Touch
to turn the speakerphone on or off during playback. If the speakerphone
feature was enabled within the Voicemail Settings menu, the speakerphone will
always be automatically enabled during voicemail playback.
to pause the playback, or touch
to resume.
to call the person who left the voicemail message.
50

Touch
deletion.
to delete the current voicemail message. Touch OK to confirm the
Listen to Multiple Voicemail Messages
When you are done listening to a voicemail message you can easily access other voicemail
messages without returning to the main voicemail screen.
1. Listen to the current voicemail message.
2. Swipe your finger left or right to display the next or previous message. (It will begin
playing automatically.)
You can navigate through voicemail messages as frequently as you’d like. You can even move
to the next or previous message before you’re finished listening to the current one.
Configure Visual Voicemail Options
To access the voicemail menu options:
1. From the Home screen, touch
2. Touch
> Voicemail.
and select from the following:

Compose to compose a new voicemail message.

Move to SD to copy a voicemail message to the SD card.

Play all new to play all new messages.

Delete to delete selected messages from your current list of available voicemail
messages.

Search to search through voicemail messages for keywords.

Settings to configure your voicemail application settings.
To access a voicemail message’s options:
1. From the Home screen, touch
> Voicemail.
2. Touch a voicemail message, touch
, and select from the following:
3. Lock/Unlock to prevent deletion of the selected voicemail message.

Phone
Text message to create and send a new text message to the sender’s phone
number.
51

Reply to reply to the voicemail. You can then reply to the sender or forward it to
anyone with either an email or phone number. This allows you to send this voicemail
message to several recipients at the same time.

Forward to forward the voicemail to another recipient.

Add to contacts to add the sender’s phone number to your Contacts list.
Configure Visual Voicemail Settings
The Visual Voicemail settings menu lets you access settings for notifications, pictures,
greetings, and more.
1. From the Home screen, touch
2. Touch
Phone
> Voicemail.
> Settings. From this menu, you can:

Touch Voicemail-to-Text to start a trial subscription of this service.

Touch Personalize voicemail to adjust your voicemail greeting. See Change Your
Main Greeting via the Voicemail Menu.

Touch Notifications to determine how you are notified of new voicemails. Choose
from Select sound or Vibrate.

Touch Inbox sort order to change how the messages are sorted.

Select Pictures to replace the default Visual Voicemail message icon with a specific
Contacts entry’s image. This image is pulled from the entry’s Contact details.

Touch Playback screen to set the font size in Transcription font size or to toggle
voicemail text transcription in Show text transcription.

Select Speakerphone to automatically activate the speakerphone when you review
your Visual Voicemail. See Automatically Enable the Speakerphone.

Touch Display name to enter a name or number that is attached to your outgoing
voicemails as part of an identification string. See Edit the Display Name via the
Voicemail Menu.

Touch Auto forward to email to set the email address where you will receive copies
of new voicemail messages.

Touch Check for update to update the Voicemail app.

Touch Help to open the Visual Voicemail Help Web page.

Touch About Voicemail to view build information about the current Visual Voicemail
application.
52
Note: Other voicemail settings can be accessed by touching
Voicemail settings.
>
> Settings > Call >
Automatically Enable the Speakerphone
Every time you access a selected message from your Visual Voicemail list, you can configure
the device to automatically launch the built-in speakerphone so that you can clearly hear the
message.
1. From the Home screen, touch
2. Touch
> Voicemail.
> Settings.
3. Select the Speakerphone check box to activate the feature. Otherwise, clear the
Speakerphone check box to deactivate the speakerphone.
Change Your Main Greeting via the Voicemail Menu
Your main greeting can be changed directly via the Visual Voicemail system. This direct access
saves you from having to navigate within the voicemail menu.
1. From the Home screen, touch
2. Touch
> Voicemail.
> Settings > Personalize voicemail.
3. Touch OK to connect to the Sprint voicemail system. Follow the prompts to change your
current greeting.
Edit the Display Name via the Voicemail Menu
From your Visual Voicemail menu, you can quickly change the name or number attached to
your voice messages.
1. From the Home screen, touch
2. Touch
> Voicemail.
> Settings > Display name.
3. Touch the existing identification field and enter a new identifying name or number (used
to identify you to recipients of your voice messages).
4. Touch OK to save your information.
Delete Your Messages
1. From the Home screen, touch
> Voicemail.
2. Do any of the following:
Phone

Touch and hold a voicemail entry from the list and touch Delete message.

Open a message and touch
to delete it.
53
Voicemail (Traditional)
In addition to Visual Voicemail, your device and Sprint service always offer traditional voicemail
service accessed through the Phone application.
Set Up Voicemail
Your device automatically transfers all unanswered calls to your voicemail, even if your device is
in use or turned off. You should set up your Sprint Voicemail and personal greeting as soon as
your device is activated. Always use a password to protect against unauthorized access.
1. From the Home screen, touch
2. Touch and hold
.
to dial your voicemail number.
3. Follow the system prompts to:

Create your password.

Record your name announcement.

Record your greeting.
Important:
Voicemail Password – Sprint strongly recommends that you create a password
when setting up your voicemail to protect against unauthorized access. Without a
password, anyone who has access to your device is able to access your
voicemail messages.
Voicemail Notification
There are several ways your device alerts you to a new message:
●
By sounding the assigned ringer type.
●
By displaying
within the Notifications area of the Status bar when a single new
unheard voicemail message is received.
●
By flashing the front indicator light (LED), if enabled.
Note: When you are roaming off the Nationwide Sprint Network, you may not receive
notification of new voicemail messages. Sprint recommends that you periodically check
your voicemail by dialing 1 + area code + your wireless phone number. When your
voicemail answers, press
and enter your password. Roaming rates apply when
you access voicemail while roaming off the Nationwide Sprint Network.
Note: Your device accepts messages even when it is turned off. However, your device notifies
you of new messages only when it is turned on and you are in a Sprint service area.
Phone
54
Retrieve Your Voicemail Messages
You can review your messages directly from your wireless device (using either traditional
voicemail or Visual Voicemail) or from any other touch-tone phone.
Use Traditional Voicemail to Access Your Messages
1. From the Home screen, touch
2. Press and hold
.
.
3. Follow the voice prompts to listen to and manage your voicemail messages.
Use Another Phone to Access Your Messages
1. Dial your wireless phone number.
2. When your voicemail answers, press the asterisk key (*) on the phone.
3. Enter your password.
Tip:
When you call voicemail from another phone, you first hear the header information (date,
time, and sender information) for the message. To skip directly to the message, touch
during the header.
Use Visual Voicemail to Access Your Messages
1. From the Home screen, touch
> Voicemail.
2. Touch an entry to listen to the message.
Note: You are charged for airtime minutes when you are accessing your voicemail from your
wireless device.
Phone Call Options
Your device provides many useful features and options to help you make the most of your
calling experience.
Caller ID
Caller ID identifies a caller before you answer the phone by displaying the number of the
incoming call. If you do not want your number displayed when you make a call, follow these
steps.
1. From the Home screen, touch
2. Touch
.
.
3. Enter a phone number.
Phone
55
4. Touch
.
To permanently block your number, call Sprint Customer Service.
Call Waiting
When you’re on a call, Call Waiting alerts you to incoming calls by sounding two beeps. Your
device’s screen informs you that another call is coming in and displays the caller’s phone
number (if it is available and you are in digital mode).
To respond to an incoming call while you’re on a call:
► Touch
> Flash. (This puts the first caller on hold and answers the second call.)
To switch back to the first caller:
► Touch
> Flash again.
Note: For those calls where you don’t want to be interrupted, you can temporarily disable Call
Waiting by touching
before placing your call. Call Waiting is
automatically reactivated once you end the call.
3-way Calling
With 3-Way Calling, you can talk to two people at the same time. When using this feature, the
normal airtime rates will be charged for each of the two calls.
1. From the Home screen, touch
.
2. Enter a number and touch
.
3. Once you have established the connection, touch
> Add call, and dial the second
number. (This puts the first caller on hold and dials the second number.)
4. When you’re connected to the second party, touch Merge.
If one of the people you called hangs up during your call, you and the remaining caller stay
connected. If you initiated the call and are the first to hang up, all callers are disconnected.
To end the three-way call, touch
.
Call Forwarding
Call Forwarding lets you forward all your incoming calls to another phone number – even when
your device is turned off. You can continue to make calls from your device when you have
activated Call Forwarding.
Note: You are charged a higher rate for calls you have forwarded.
To activate Call Forwarding:
Phone
56
1. From the Home screen, touch
2. Touch
.
.
3. Enter the area code and phone number to which you want your calls forwarded.
4. Touch
. (You will hear a tone to confirm the activation of Call Forwarding.)
To deactivate Call Forwarding:
1. From the Home screen, touch
2. Touch
.
.
3. Touch
deactivation.)
. (You will see a message and hear a tone to confirm the
In-call Options
Touching
during a call displays a list of available in-call features.
Touch an option to select it. The following options may be available through the Options menu:
Note: When the device is completing a call, only the People, Flash, and Speaker on options
are available.
●
Add call to initiate a three-way call.
●
Flash to accept another incoming call and put the first caller on hold. Touch Flash again
to talk to the first caller.
●
Speaker on or Speaker off to route the device’s audio through the speaker or through
the earpiece.

Touch Speaker On to route the device’s audio through the speaker. (You can adjust
the speaker volume by pressing the volume up or down button.)

Touch Speaker Off to use the device’s earpiece.
Warning:
Because of higher volume levels, do not place the device near your ear during
speakerphone use.
●
Mute to mute the microphone. Touch Unmute to unmute the microphone.
●
People to display your contacts list.
Set Up Speed Dialing
Your device can store up to nine phone numbers in speed dial locations.
Phone
57
To assign a speed dial number to a contact:
1. From the Home screen, touch
2. Touch
> People, and then touch an entry.
> Set speed dial.
3. Touch the list menu under Number to select a number from the contact to assign to
speed dial.
4. Touch the list menu under Location to assign the number to a speed dial location.
5. Touch Save.
Note: If you assign a number to an already in-use speed dial location, the new phone number
will automatically replace the previous speed dial assignment.
Recent Calls (Call History)
The Call History tab of the People application lists all recent incoming, outgoing, and missed
calls. Call History makes redialing a number fast and easy. It is continually updated as your
device automatically adds new numbers to the beginning of the list.
Note: History records only calls that occur while the device is turned on. If a call is received
while your device is turned off, it will not be included in History.
View Recent Calls
1. From the Home screen, touch
> People.
2. Touch the Call History tab (
).
Each entry contains the phone number (if it is available) and People entry name (if the
number is in People).
Phone
58
3. Do any of the following on the Call History tab:

Touch
at the right side of a number or contact to view the call history for that
number or contact.

To filter the Call History list, touch
want to show up on the list.

To make a call from Call History, see Call From Call History.
> View, and then select the type of call you
Save a Number From Call History
If the phone number of a person who called is not in People, you can choose to save the
number after you hang up.
1. From the Home screen, touch
2. Touch the Call History tab (
> People.
).
3. Touch and hold the received call, and then touch Save to People on the options menu.
4. Tap Create new contact.
5. The phone number is automatically added to the Mobile box in the Phone section.
Enter the name and other contact information.
Tip:
To store the number as another type (for example, home number), touch the Mobile
button.
6. Touch Save.
After you have saved the number, your device displays the new People entry. (See Your People
List.)
Note: You cannot save phone numbers already in People or from calls identified as No ID or
Restricted.
Prepend a Number From History
If you need to make a call from History and you are outside your local area code, you can add
the appropriate prefix by prepending the number.
1. From the Home screen, touch
2. Touch the Call History tab (
> People.
).
3. Touch and hold the entry you want to call and touch Edit number before calling.
4. Enter the prefix and touch
Phone
to call the number.
59
Erase History
1. From the Home screen, touch
2. Touch the Call History tab (
> People.
).
3. Do either of the following:
Phone

To delete an entry, touch and hold the entry, and then touch Delete from call
history.

To erase all History entries, touch
> Remove call history.
60
Device Settings
This section provides an overview of items you can change using your phone’s Settings menus.
Personalization Settings
Wireless & Networks Settings
Call Settings
Sound Settings
Display Settings
Storage Settings
Power Management Settings
Application Settings
Account & sync
Location Settings
Connect to PC Settings
Security Settings
Language & Keyboard Settings
Privacy & Backup Settings
Date & Time Settings
Accessibility Settings
System Updates
About Phone
Personalization Settings
Use the Personalize menu to customize your device’s display, select a new Scene, add items to
the Home screen, or change the sound settings.
Scene
Customize your device’s Home and extended screens’ appearance by selecting a scene to
reflect your lifestyle. Scenes are preset screen layouts that you can quickly apply.
Device Settings
61
Select a Scene
1. From the Home screen, touch
> Personalize.
2. On the Display tab, touch Scene.
3. Touch a scene to apply it.
Rename or Delete a Scene
You can rename or delete a custom scene.
1. From the Home screen, touch
> Personalize.
2. On the Display tab, touch Scene.
3. Select the scene you want to rename or delete.
4. Touch
and do any of the following:

Touch Rename, enter the new Scene name, and then touch Done.

Touch Delete, touch the scene or scenes that you want to delete, and then touch
Delete > OK.
Change the Home Screen Wallpaper
Changing your device’s wallpaper with a preset wallpaper or your favorite photo is a quick and
easy way to change the feel of your device and give it a fresh look. Browse the collection of
wallpapers included in your device or choose from photos that you have taken with the camera.
You can also change to an animated wallpaper.
1. From the Home screen, touch
> Wallpaper.
2. Do either of the following:

Touch Gallery to use a picture that you have captured using the camera or copied to
your device as wallpaper. You can crop the picture before setting it as wallpaper.

Touch HTC wallpapers to use a preset image.

Touch Live wallpapers to choose from preset animated wallpapers.
3. Touch Save or Set wallpaper.
Change the Default Ringtone
You can change the default ringtone for incoming calls.
1. From the Home screen, touch
Device Settings
> Personalize.
62
2. On the Sound tab, touch Ringtone.
3. Touch the ringtone you want to use, and then touch Apply. The ringtone briefly plays
when selected.
Tip:
See Phone Ringtone for an alternate way to set the ringtone for incoming calls.
Sound Set
Sound sets are collections of ringtone, notification, and alarm sounds that you can use to
personalize the way your device alerts you. You can apply a preset sound set or create your
own.
Apply a Sound Set
1. From the Home screen, touch
2.
> Personalize.
On the Sound tab, touch Sound set.
3. Touch the sound set you want to use.
4. You can touch
that sound set.
to hear samples of the ringtone, notification sounds, and alarm for
5. Touch Apply.
Tip:
To download more sound sets, touch Get more in Sound set.
Create a Sound Set
1. From the Home screen, touch
> Personalize.
2. On the Sound tab, touch Sound set > Add.
3. Enter a new sound set name, and then touch Done.
4. Select the new sound set you’ve created, touch Apply, and then press
. To
customize your newly created sound set, make sure it is selected in Sound set. Then
choose your preferred sounds for Ringtone, Notification sound, and Alarm on the
Sound tab.
Note: Your device automatically saves your changes to the currently selected sound set.
Wireless & Networks Settings
This group of settings lets you control your device’s wireless network settings (3G and 4G),
Wi-Fi settings, Bluetooth, roaming, and more.
Device Settings
63
Wi-Fi Settings
Your device lets you take advantage of Wi-Fi hotspots for high-speed data access using
available computer networks. For details on your device’s Wi-Fi features and settings,
see Wi-Fi.
Bluetooth Settings
Your device’s Bluetooth capabilities let you use wireless headsets, send and receive pictures
and files, and more. For details on your device’s Bluetooth settings, see Bluetooth.
Mobile Network
This menu lets you turn your data connection on or off, set options when you’re roaming, and
more. For details on mobile networks, see Data Services (Sprint 3G and 4G Networks). For
details on roaming, see International Data Roaming.
4G
Your device give you access to the Sprint 4G Network where available. For details on your
device’s 4G features and settings, see Sprint 4G.
Usage
You can use the Usage monitor to keep track of how many bytes of data you use each month,
set the date of each month to automatically reset the data usage counter, and more.
Airplane Mode
Airplane Mode allows you to use many of your device’s features, such as Gallery, Camera, and
Music, when you are on an airplane or in any other area where making or receiving calls or data
is prohibited. When you set your device to Airplane Mode, it cannot send or receive any calls or
access online information.
To quickly turn Airplane Mode on or off:
► Press and hold
, and then touch Airplane mode in Power options. While in
Airplane Mode, the status bar will display
.
To turn Airplane Mode on or off in Settings:
1. From the Home screen, touch
> Settings > More.
2. Select the Airplane mode check box and press
bar will display
.
. While in Airplane Mode, the status
Add the Airplane Mode Widget
Add the Airplane Mode widget to the home screen to make it faster to turn Airplane Mode on or
off.
Device Settings
64
1. Touch and hold an available spot on one of the screens.
2. On the Add to home tab, touch Widget > Settings > Airplane Mode, and then
touch Select.
VPN Settings
Connect to your corporate intranet sites via VPN. For details on VPN, see Virtual Private
Networks (VPN).
Tethering & Sprint Hotspot Settings
You can share your device’s Internet connection with your computer or other devices using the
USB cable or Sprint Hotspot. For details, see Sprint Hotspot and Use Your Device as a Modem.
Internet Pass-through
You can set your device to use your computer’s Internet connection instead of using Wi-Fi or
the mobile network.
1. Connect your device to the computer with the USB cable.
2. On the Choose a connection type screen, touch Internet pass-through.
Tip:
You can always access the Choose a connection type screen when you see
in the
notification bar. Slide open the Notifications panel, and touch the related notification to
access the screen.
Call Settings
Your device’s Call settings menu lets you configure your voicemail options and a number of
other settings for the phone application.
► To get to Call settings, touch
> Settings > Call.
Voicemail Settings
Below is a list of voicemail settings.
●
Voicemail service: Select the carrier you use for your voicemail.
●
Voicemail settings: Touch to set the phone number you call to access your voicemail.
●
Clear voicemail notification: Touch this to delete your voicemail notifications.
See Configure Visual Voicemail Settings for details on using your Voicemail.
Other Call Settings
Below is a list of other call settings in addition to voicemail settings.
●
Hearing Aids: Select this option to enable Hearing Aid Compatibility.
Device Settings
65
●
GSM call settings: Touch to access GSM specific call settings.
●
CDMA call settings: Touch to access CDMA specific call settings.
●
Phone settings: Touch to access additional phone settings such as enabling notification
previews, and more.
TTY Mode
A TTY (teletypewriter, also known as a TDD or Text Telephone) is a telecommunications device
that allows people who are deaf, hard of hearing, or who have speech or language disabilities,
to communicate by telephone.
Your device is compatible with select TTY devices. Please check with the manufacturer of your
TTY device to ensure that it supports digital wireless transmission. Your device and TTY device
will connect using a special cable that plugs into your device’s headset jack. If this cable was
not provided with your TTY device, contact your TTY device manufacturer to purchase the
connector cable.
When establishing your Sprint service, please call Sprint Customer Service using the state
Telecommunications Relay Service (TRS) by first dialing
. Then
provide the state TRS with this number: 866-727-4889.
To turn TTY Mode on or off:
1. From the Home screen, touch
mode.
> Settings > Call > CDMA call settings > TTY
2. Touch TTY Full, TTY HCO, or TTY VCO. Touch TTY Off to turn TTY mode off.
Note: When enabled, TTY mode may impair the audio quality of non-TTY devices connected
to the headset jack.
Warning:
911 Emergency Calling
Sprint recommends that TTY users make emergency calls by other means,
including Telecommunications Relay Services (TRS), analog cellular, and
landline communications. Wireless TTY calls to 911 may be corrupted when
received by public safety answering points (PSAPs), rendering some
communications unintelligible. The problem encountered appears related to TTY
equipment or software used by PSAPs. This matter has been brought to the
attention of the FCC, and the wireless industry and the PSAP community are
currently working to resolve this.
Internet Call Settings
Below are available internet call settings.
●
Accounts: Touch to set up your SIP accounts.
Device Settings
66
●
Use Internet calling: Touch to select how you will use your SIP account.
Sound Settings
The Sound settings menu lets you control your device’s audio, from ringtones and alerts to
touch tones and notifications.
General Sound Settings
Use the following settings for such features as silent mode, vibrate, and overall device volume.
Silent Mode
The Silent mode option allows you to mute all sounds without turning your device off.
To activate Silent mode:
 Press the volume down button in standby mode until you see the image below on the
screen.
The Silent mode icon (
) appears on the status bar.
To deactivate Silent mode:
► Press the volume up button repeatedly to select a volume level.
Vibrate
To set your device to vibrate instead of making any sounds:
 Press the volume down button in standby mode until you see the image below on the
screen.
The device vibrates and the vibrate mode icon (
) appears on the status bar.
To set your device to always vibrate in addition to any ringer settings:
1. From the Home screen, touch
> Settings > Sound.
2. Select the Vibrate check box.
3. Touch
Device Settings
.
67
Volume
You can separately adjust your device’s ringtone, media and alarm volumes, and notification
sound.
1. From the Home screen, touch
> Settings > Sound > Volumes.
2. Drag the volume sliders on the screen to adjust the ringtone, media, alarm, or
notification volume, and then touch OK.
Note: You can adjust the ringer volume in standby mode (or the earpiece volume during a call)
by pressing the volume up or down button.
Incoming Calls
You can select and assign ringtones for your incoming calls.
Phone Ringtone
Select a default ringtone for incoming calls. Your device provides a variety of ringtones that you
can set as the default ringtone of your device.
1. From the Home screen, touch
> Settings > Sound > Phone ringtone.
2. Touch the ringtone you want to use, and then touch Apply. The ringtone briefly plays
when selected.
Note: You can use *.wav, *.mid, *.mp3, *.wma, or other types of sound files that you have
downloaded from the Internet or copied from your computer as ringtones.
Other Incoming Call Options
You can choose to enable or disable the following incoming call features:
●
Quiet ring on pickup. See Use the Quiet Ring on Pickup Feature.
●
Pocket mode. When selected, the device rings louder when it’s inside your bag or
pocket.
●
Flip for speaker. During a call, you can activate the speakerphone by flipping the device
over.
Notifications
Use the settings menus to assign specific ringtones for notifications.
Notification Ringtone
Your device provides a variety of sounds that you can set as the default sound for notifications.
1. From the Home screen, touch
Device Settings
> Settings > Sound > Notification sound.
68
2. Touch the sound you want to use, and then touch Apply. The sound plays when
selected.
System
The System settings menu lets you select whether you hear tones when touching numbers on
the dialpad, selecting onscreen options, and more.
●
Dial pad touch tones: Select the touch tone to use.
●
Touch sounds: Play sounds when making an onscreen selection.
●
Screen lock sound: Play sounds when locking or unlocking the screen.
●
Vibrate feedback: Vibrate when touching soft keys and during certain other instances.
●
Emergency tone: Set behavior when an emergency call is placed.
Display Settings
Adjusting your device’s display settings not only helps you see what you want, it can also help
increase battery life.
Auto-rotate Screen
By default, the screen orientation automatically changes when the device is rotated. To disable
automatic screen orientation:
1. From the Home screen, touch
> Settings > Display.
2. Clear the Auto-rotate screen check box and touch
.
Note: Not all application screens support automatic rotation. The screen orientation
automatically changes to landscape mode when you turn the device sideways.
Brightness
By default, the screen brightness automatically adjusts depending on the surrounding lighting
conditions.
To manually adjust screen brightness:
1. From the Home screen, touch
> Settings > Display.
2. Touch Brightness, and then clear the Automatic brightness check box.
3. Drag the slider to adjust the brightness.
4. Touch OK.
Device Settings
69
Sleep
After a period of inactivity, the device screen turns off to conserve battery power. You can set
the idle time before the screen turns off.
1. From the Home screen, touch
> Settings > Display > Sleep.
2. Tap the time before the screen turns off.
Note: Extended screen timeout periods reduce the battery’s talk and standby times.
Tip:
To turn off and lock the screen quickly, press
.
Notification Flash
You can set the type of notifications that will cause the LED to blink.
Calibrate the Screen
Recalibrate the screen if you feel that the screen orientation does not respond properly to the
way you hold the device.
1. From the Home screen, touch
> Settings > Display > G-Sensor calibration.
2. Place the device on a flat surface, and then touch Calibrate.
3. After the recalibration process, touch OK.
Storage Settings
The SD & phone storage settings menu lets you manage internal storage on your device and
provides options for your microSD card.
Reset Your Device
Resetting the device deletes all data and resets the device back to its initial state — the state
before you turned on the device for the first time. These items will be deleted when you reset
the device:
●
Your Google Account
●
All other email and social networking accounts
●
System and application data and settings
●
Downloaded applications
Important:
Make sure to back up important data you have on the device or your microSD
card before you perform a reset.
Device Settings
70
Reset Your Device via Settings
1. From the Home screen, touch
> Settings > Storage > Factory data reset.
2. If you also want to erase all data in the installed microSD card, select Erase SD card.
3. Touch Reset phone.
4. Touch Erase everything. Your device will power down and reset itself, which may take
up to 10 minutes.
Once the device has reset, it will run through the Hands Free Activation and update processes
again. When finished, you will see the Welcome screen and Setup application. See Complete
the Setup Application to start over.
Reset Your Device Using the Device Keys
1. With the device turned off, press and hold the volume down button, and then
press
.
2. When the device’s display turns on, release the volume button.
3. Use the volume button to select FACTORY RESET, and then press
be deleted from the device.)
. (All data will
Power Management Settings
Save battery power by using Power Saver, adjusting the screen brightness, or by controlling
your device’s wireless function and data delivery.
Adjust the Screen Brightness and Screen On-Time
Control your screen's brightness and on-time to save battery life.
●
From the Home screen, touch
> Settings > Display > Brightness, and then modify
the backlight setting as desired. See Brightness.
●
Add the Power Control widget to the home screen to easily adjust the screen
brightness. From the Home screen, touch
> Personalize > Widget > Power
Control.
●
Decrease the time before the screen turns off when the device is idle. From the Home
screen, touch
> Settings > Display > Sleep, and then select a timeout value. See
Screen Timeout.
●
To turn off the screen, press
Device Settings
. The device will continue to function.
71
Manage Your Device’s Wireless Functions
To save battery life, you can disable the 4G, Bluetooth, GPS, Sprint Hotspot, and Wi-Fi
functions of the device when not in use.
To change wireless settings:
► From the Home screen, touch
> Settings. Disable any wireless functions (for
example, Bluetooth or Wi-Fi) that are not in use.
To change GPS settings:
► From the Home screen, touch
the GPS satellites checkbox.
> Settings > Location. Disable the GPS by clearing
To add a wireless function widget to your Home screen:
► From the Home screen, touch
> Personalize > Widget > Settings, and then touch
the widget you would like to add (for example, 4G, Bluetooth, GPS, Sprint Hotspot, or
Wi-Fi).
Set the Email Synchronization Schedule
If you use the device to send and receive email, you can set your email account to download
email more or less frequently as desired. The more frequently your device checks for new
messages, the more quickly the battery will run down.
1. From the Home screen, touch
> Mail.
2. If you have set up multiple email accounts on your device, switch to the email account
that you want to edit by touching
.
3. In the Inbox, touch
> Settings > Send & Receive > Update schedule.
4. In the Frequency section, touch Peak times or Off-peak times, and then select an
email download frequency.
Close Applications Not In Use
You can also close applications that are not in use to conserve battery power.
1. From the Home screen, touch
> Settings > Apps.
2. Touch the Running tab, and then touch the application you would like to close.
3. Touch Stop.
Applications Settings
This menu lets you control your application settings, including allowing installation of nonGoogle Play applications, freeing up storage space, and assigning default applications.
Device Settings
72
Allow Installation of Third-Party Programs
By default, you can install only programs and games downloaded from Google Play.
To install third-party programs on the device:
► From the Home screen, touch
sources check box.
> Settings > Security, and then select the Unknown
To uninstall third-party programs on the device:
1. From the Home screen, touch
> Settings > Apps.
2. Touch the Downloaded, On SD card, Running or All tab, and then touch the
application you want to uninstall.
3. On the Application info screen, touch Uninstall.
Note: You cannot uninstall programs that are preinstalled on the device.
Clear Application Cache and Data
Free up storage space and device memory by deleting application cache and data.
1. From the Home screen, touch
> Settings > Apps.
2. Touch the Downloaded, On SD card, Running, or All tab, and then touch the
application whose cache or data you want to delete.
Tip:
Touch
to bring up sort options.
3. In the Application info screen, touch Clear data or Clear cache.
Application Associations
You can assign the default applications to open when certain types of information are
encountered. For example, you can choose to open Mail instead of Gmail whenever you touch
an email address.
Account & sync
The Account & sync settings menu lets you add and manage all your email, social networking,
and picture and video sharing accounts.
Set Up a New Account
1. From the Home screen, touch
> Settings > Account & sync.
2. Touch Add account.
3. Touch an account type.
Device Settings
73

Exchange ActiveSync, Facebook, Flickr, Google, HTC Sense, Mail, Twitter for HTC
Sense, Watch, and more.
4. Enter your account information and follow screen instructions to proceed.

Depending on the account type, you may need to enter an email address or user
address, password, domain name, or other information. For Exchange ActiveSync
accounts, contact your server administrator to determine what information you will
need.
Manage Existing Accounts
1. From the Home screen, touch
> Settings > Account & sync.
2. Touch an account to edit its settings.

Touch a field to edit its settings.

Touch Remove account to delete the account from your device.
Synchronize Google Apps
Your device’s Google Apps™, such as Gmail, Calendar, and Contacts, give you access to the
same personal information (email messages, events, and contacts) that you add, view, and edit
on your computer using Gmail or Google Calendar. Synchronize the Google Apps you want to
keep information up-to-date.
Note: You need to be signed in to your Google Account to synchronize Google Apps.
To select which Google Apps to synchronize:
1. From the Home screen, touch
Tip:
> Settings > Account & sync.
Select the Auto-sync check box to automatically synchronize all applications. When the
Auto-sync check box is cleared, you can synchronize individual applications manually
by selecting their respective check boxes.
2. Touch Google.
3. Select the Google Apps you want to synchronize.
To stop synchronization:
► When the device is synchronizing, touch Cancel sync to stop synchronization.
Synchronize Exchange ActiveSync
You can synchronize your device with your company’s Microsoft Exchange Server to access
your device’s Exchange Server account’s email, contacts, and calendar events.
Device Settings
74
Note: You need to have an Exchange ActiveSync account set up on your device. See Add an
Exchange ActiveSync Account.
To select which Exchange ActiveSync items to synchronize:
1. From the Home screen, touch
ActiveSync.
> Settings > Account & sync > Exchange
2. Select the Exchange ActiveSync items you want to synchronize.
To change the synchronization schedule:
1. From the Home screen, touch
> Settings > Account & sync > Exchange
ActiveSync > Update schedule.
2. Set the start and end of your Peak time.
3. In Frequency, touch Peak times or Off-peak times to set the time interval at which the
device will check for new data.
To manually start synchronization:
► On the Microsoft Exchange ActiveSync screen, touch Sync now.
To change account settings:
1. From the Home screen, touch
> Settings > Account & sync > Exchange
ActiveSync > Account settings.
2. Change the general settings, mail, and calendar settings according to your preference.
3. Touch
.
Log in to and Synchronize Your Social Network Accounts
If you set up a Facebook, Flickr, or Twitter for HTC Sense account when you first turned on your
device, you can quickly login and synchronize information such as status messages and friends
lists between your device and your social network accounts on the Web.
Note: You need to have an existing Facebook, Flickr, or Twitter account.
Log in to Facebook or Twitter
1. From the Home screen, touch
> Settings > Account & sync.
2. Touch Add account > Facebook or Twitter for HTC Sense.
3. Follow screen instructions to enter your user name and password and touch Sign in or
Log in.
Device Settings
75
Log in to Flickr
1. From the Home screen, touch
> Settings > Account & sync.
2. Touch Add account > Flickr.
3. Enter your Yahoo! ID and password and touch Sign In.
Synchronize Your Facebook or Twitter Account
1. From the Home screen, touch
> Settings > Account & sync.
2. Touch Facebook or Twitter for HTC Sense.
3. Touch Sync now.
Remove a Social Network Account
1. From the Home screen, touch
> Settings > Account & sync.
2. Touch the account you want to remove.
3. Touch Remove account.
Location
Your Location settings menu lets you select how your device determines its location (using the
wireless network, GPS satellites, both, or neither). The Security settings menu let you set device
security, lock codes, passwords, administrator settings, and more.
The Location feature allows the network to detect your position. Turning Location OFF will hide
your location from everyone except 911.
Note: Turning Location ON will allow the network to detect your position using GPS
technology, making some Sprint applications and services easier to use. Turning
Location OFF will disable the GPS location function for all purposes except 911, but will
not hide your general location based on the cell site serving your call. No application or
service may use your location without your request or permission. GPS-enhanced 911 is
not available in all areas.
To enable your device’s Location setting feature:
1. From the Home screen, touch
> Settings > Location > Location setting.
2. Read the Location disclaimer and then touch ON.
3. Touch
Device Settings
.
76
When you turn the Location setting feature on, the device displays the
bar. When you turn Location setting off, the device displays the
icon on the status
icon.
Connect to PC Settings
You can set the default action your device will take when you connect a USB cable to a
computer.
1. From the Home screen, touch
type.
> Settings > Connect to PC > Default connection
2. Select Charge only, Disk drive, HTC Sync, USB Tethering, or Internet passthrough.
3. Select Ask me to make your device prompt you for a choice every time you connect a
USB cable to a computer.
Security
The Security settings menus let you set device security, lock codes, passwords, administrator
settings, and more.
Set Up Screen Lock
You can increase the security of your device by creating a screen lock. When enabled, you
have to draw the correct unlock pattern on the screen, enter the correct PIN, or enter the correct
password to unlock the device’s control keys, buttons, and touchscreen.
Use Facial Recognition to Lock Your Device
1. From the Home screen, touch
> Settings > Security > Screen lock.
2. Touch Face Unlock.
3. Touch Continue to begin the facial recognition process.
4. Keep your face steady inside the dotted oval.
5. Touch Continue to confirm.
You’ll be prompted to create a backup Screen unlock method in case you can’t unlock the
phone using the facial recognition feature.
Use a Screen Unlock Pattern
1. From the Home screen, touch
> Settings > Security > Screen lock.
2. Touch Pattern.
3. Read the information on the screen and touch Next.
Device Settings
77
4. Study the example pattern on the screen and touch Next.
5. Draw the screen unlock pattern by connecting at least four dots in a vertical, horizontal,
or diagonal direction. Lift your finger from the screen when finished.
6. The device records the pattern. Touch Continue.
7. When prompted, draw the screen unlock pattern again, and then touch Confirm.
Tip:
Clear the Use visible pattern check box if you do not want the unlock pattern to display
on the screen when you unlock it.
If you fail to draw the correct unlock pattern on the screen after five attempts, you will be
prompted to wait for 30 seconds before you can try again.
Use a Screen Unlock PIN
1. From the Home screen, touch
> Settings > Security > Screen lock.
2. Touch PIN.
3. Enter a PIN and touch Continue.
4. Enter your PIN again to confirm and touch OK.
If you fail to enter the correct PIN after five attempts, you will be prompted to wait for 30
seconds before you can try again.
Use a Screen Unlock Password
1. From the Home screen, touch
> Settings > Security > Screen lock.
2. Touch Password.
Device Settings
78
3. Enter a password and touch Continue.
4. Enter your password again to confirm and touch OK.
Note: If you fail to enter the correct password after five attempts, you will be prompted to wait
for 30 seconds before you can try again.
Disable the Screen Lock
1. From the Home screen, touch
> Settings > Security > Screen lock.
2. Draw your unlock screen pattern, enter your PIN, or enter your password, and then
touch Continue. If you fail to enter the correct password after five attempts, you will be
prompted to wait for 30 seconds before you can try again.
3. Touch None.
Set Up SIM Lock
Create a SIM card lock to prevent unauthorized phone calls from your device when you’re
roaming and a SIM card is installed on your device.
1. From the Home screen, touch
> Settings > Security > Set up SIM card lock.
2. Touch Change SIM PIN.
3. Follow screen instructions to create the SIM PIN, and then select the Lock SIM card
option to require the PIN before using the device.
Credential Storage
Use Credential storage to store security certificates and other credentials needed to connect to
certain wireless networks, Virtual Private Networks (VPNs), and more. See Set Up Secure
Credential Storage.
Language & Keyboard Settings
Your device’s Language & keyboard settings let you select a language for the devices screens
and menus, as well as manage a personal user dictionary. The Language & keyboard settings
let you select a preferred input method, control keyboard settings, and more.
Language Settings
Changing the language adjusts the keyboard layout, date and time formatting, and more.
1. From the Home screen, touch
> Settings > Language & keyboard > Language.
2. Touch the language you want to use, and then touch
Keyboard Settings
For details on the onscreen keyboard, see Enter Text.
Device Settings
79
to apply the language.
Privacy & Backup Settings
Your device enables you to increase your privacy by disabling some lockscreen notifications.
► From the Home screen, touch
> Settings > Privacy.

Select Phone notification preview to show incoming call and missed call
notifications on the lock screen.

Select Message notification preview to show newly received messages on the lock
screen.

Touch Back up my settings to save a copy of your Wi-Fi passwords, bookmarks,
app data, and other settings in your Google Account. Clearing the check box will
erase your backed up information from your Google Account.

Touch Backup account to set the Google Account you want to use for backing up
your information.

Select Automatic restore to restore your app data and settings whenever you
reinstall an app.
Date & Time Settings
By default, your device automatically uses the network-provided date, time zone, and time.
However, you can set the date, time zone, and time manually if you need to.
1. From the Home screen, touch
> Settings > Date & time.
2. Clear the Automatic date & time and Automatic time zone check boxes.
3. Touch Set date. In the Change date window, scroll the date wheel to change the date.
Touch OK when finished.
4. Touch Set time. In the time window, scroll the time wheel to adjust the time. Touch OK
when finished.
5. Touch Select time zone, and then select the time zone in the list. Scroll down the list to
view more time zones.
6. Select the Use 24-hour format check box to toggle between using a 12-hour or 24-hour
time format.
7. Touch Select date format, and then select how you want dates to display on your
device. The selected date format also applies to the date displayed in the Alarm Clock.
Accessibility Settings
The Accessibility menu lets you enable and manage accessibility-related applications.
Device Settings
80
► From the Home screen, touch
> Settings > Accessibility.

Touch TalkBack, and then touch the switch to enable your device to provide spoken
feedback such as what you touch, activate, and more.

Select Power button ends call to use the power button to end a call.

Select Auto-rotate screen to enable your device to rotate the display to landscape
mode.

Touch Touch & hold delay, and then select the length of the delay.

Touch Install web scripts to allow apps to install accessibility scripts from Google.
System Updates
From time to time, system software updates for your device may be available. Your device can
automatically check and notify you if an update is available. You can download and install the
update to your device. Depending on the type of update, the update may erase all your personal
data and customized settings, and it could also remove any programs you have installed. Make
sure that you have backed up the information and files you want to keep.
Note: Checking and downloading system software updates may incur additional data transfer
fees.
Firmware Update
See Update Your Device Firmware for details.
Update Profile
See Update Your Profile for details.
Update PRL
See Update Your PRL for details.
Check for System Software Updates Manually
1. From the Home screen, touch
update.
> Settings > System updates > HTC software
2. On the System updates screen, touch Check now.
About Phone
The About Phone menu lets you access important phone information, see mobile network
information, view legal and safety information, and more.
Device Settings
81
People
In People, you can easily manage your communications with contacts through phone,
messaging, and email. You can also view updates on their Facebook, Flickr, and Twitter
accounts.
If you are synchronizing contacts with your Google Account, with your PC, or with an Exchange
Server, any contacts stored in those accounts are displayed in People. You can also
synchronize contacts from your Facebook account in People.
Ways of Getting Contacts Into Your Device
The People Screen
Details Screen
Merge Entries in People
Edit Entries in People
Find Entries in People
Back Up and Import Entries in People
Work with Groups
People Widgets
Ways of Getting Contacts Into Your Device
There are many ways of adding contacts to your device.
●
Your old phone Use the Transfer app to transfer contacts from your old phone to your
new device using Bluetooth. For more information, see Transfer Contacts from Your Old
Phone.
●
Gmail contacts that are imported to your device after you set up a Google Account. For
more information, see Gmail.
●
Phone contacts For more information, see Add a New People Entry.
●
Exchange ActiveSync Server For more information, see Mail.
●
Contacts on your computer For more information, see HTC Sync.
●
Facebook For more information, see Your People List.
People
82
Transfer Contacts from Your Old Phone
Easily transfer contacts from your old phone to your new device through Bluetooth. Depending
on your old phone’s model, you may also transfer other types of data such as calendar events
and text messages to your new device.
1. From the Home screen, touch
> Transfer.
2. Touch Next and then choose your old phone’s name and model.
3. On your old phone, turn Bluetooth on and set it to discoverable mode.
4. On your new device, touch Next to continue. Your device automatically turns Bluetooth
on and searches for Bluetooth devices.
5. From the device list, choose your old phone and then touch Next. Your new device then
tries to pair with your old phone. You’ll see a security passkey on the screen.
6. On your old phone, enter this passkey or simply confirm it.
7. Select the Contacts check box (and other supported types of data you want to import),
and then touch Next.
8. When your new device finishes importing data, touch Done.
The People Screen
The People screen gives you easy access to all your contacts, as well as even faster access to
the people and groups of people you contact most often.
► From the Home screen, touch
see the icon.
> People. You may need to scroll down the screen to
The People screen has the following tabs:
1. People gives you access to all contacts on your device, online accounts, and more. You
can also use this tab to open or update your profile. For more information, see Set Up
Your Profile.
2. Groups lets you assign contacts to groups so you can easily send an SMS, MMS, or
email message to a whole group. For more information, see Work with Groups.
3. Call History lists all your dialed numbers and received and missed calls. For more
information, see Recent Calls (Call History).
People
83
Note: If you signed in to your Google Account and Facebook account when you first set up the
device, your contacts from those accounts will appear in the contacts list when you open
People.
Your People List
The People screen of People shows all your contacts, including Google contacts, Exchange
ActiveSync contacts, Phone contacts, and Facebook contacts.
1. Touch to filter your contacts list and display only the contacts from particular account
types (for example, Google contacts or Facebook contacts).
2. Touch to search a contact by typing on the box or touch
voice.
to search a contact by
3. Touch a contact to open the contact details for that contact.
4. Appears when a contact has sent you something such as new email messages, posted
live feeds, or when it’s the contact’s birthday.
5. Touch the photo or icon to open a menu where you can quickly choose how to
communicate with the contact. Depending on the contact information stored, you can
call, send a text or email message, see the contact’s Facebook profile, and locate the
contact’s address in Google Maps.
6. Touch to set up, edit, or send your profile. For more information, see Set Up Your
Profile.
7. The Facebook status or upcoming Facebook event appears when you link the contact to
their Facebook account.
People
84
8. Check out who’s online in Google Talk™. Online status icons are displayed if you’re
signed in to Google Talk on your device. For example,
means the contact is
available to chat.
Set Up Your Profile
My profile provides a convenient way to store your personal contact information so that you can
easily send it to other people.
1. From the Home screen, touch
> People.
2. On the People screen, touch My profile.
Tip:
If you are logged in to your Facebook account through Facebook, instead of Me, you’ll
see your Facebook name. Touch your name and touch
> Edit.
1. Enter your name and contact details.
2. Touch Save.
Add a New People Entry
1. From the Home screen, touch
2. On the People screen, touch
> People.
> Add contact.
Note: If you have set up a Google Account or an Exchange ActiveSync email account, the
Contact type option appears to determine which account the contact will sync with.
1. Touch the Name box, enter the first and last name of the contact and touch OK.
2. Enter the contact information in the boxes provided. Touch
onscreen keyboard and view other contact information.
if you want to close the
3. Touch Save.
Tip:
ICE - In Case of Emergency
To make it easier for emergency personnel to identify important contacts, you can list
your local emergency contacts under “ICE” in your device’s People list. For example, if
your mother is your primary emergency contact, list her as “ICE-Mom” in your Contacts.
To list more than one emergency contact, use “ICE1-___,” “ICE2-___,” etc.
Save a Phone Number
1. From the Home screen, touch
.
2. Enter the phone number by touching the keys on the keypad.
3. Touch Save to People. (This button appears after entering six digits.)
4. Touch Create new contact or Save to existing contact.
People
85
5. Do one of the following:

Enter the new contact name and touch Save.

Touch an existing contact name and touch Save
Details Screen
When you touch a contact on the People screen, the Details screen opens, showing you the
information stored for that contact, exchanged messages and phone calls with that contact,
Facebook notifications, and more.
The Details screen has the following tabs:
1. Details shows the information you have stored for the contact, and allows you to get in
touch with the contact directly by touching any of the displayed methods. For example, if
the contact has a stored work phone number, touch Call Work to call that number. You
can also add one of the contact’s phone numbers as a speed dial number. For more
information, see Call Using a Speed Dial Number.
2. Thread shows all message, mail, and call history information related to the contact..
3. Updates shows the contact’s updates and events from social network accounts you’ve
linked like Facebook, Twitter, and Flickr.
4. Gallery shows the linked contact’s Facebook and Flickr albums and photos. For more
information, see View Photos in Your Social Networks.
Merge Entries in People
If you have the same contacts on your device, Google Account, and social network accounts
such as Facebook and Twitter, your device will try to combine them automatically or let you
decide which contacts to combine. Combining the same contacts avoids duplicated entries in
your contacts list.
Accept Matched Contacts Suggestions
When your device finds contacts that can be merged, you’ll see a link icon (
notifications area of the status bar.
) in the
1. Slide the Notifications panel down, and then touch Matched contacts suggestion. Your
device displays all suggested contacts that you can merge.
2. To merge, touch
People
.
86
3. Touch OK.
Note: If you don’t want to merge any of your contacts, touch Dismiss all.
Manually Merge Entries in People
1. From the Home screen, touch
> People.
2. On the People screen, touch the entry (not the icon or photo) you want to merge with
another entry on your device.
3. On the upper right corner of the screen, touch
or
(if there are suggested links.)
4. Do one of the following:

On the Suggest links section, touch
to link the entry to the selected account.

On the Add contact section, touch one of the options to link to another contact.
5. Touch Done.
View a List of All Your Linked Entries
1. From the Home screen, touch
> People.
2. On the People screen, touch
> Linked contacts. The All linked contacts screen
then opens where you can see the account types and information merged.
3. You can choose to break the link of an account type or relink.
4. When you’re done, touch OK.
Break Linked Entries
1. From the Home screen, touch
> People.
2. On the People screen, touch the entry (not the icon or photo) whose contact information
link you want to break.
3. On the upper right corner of the screen, touch
4. On the Linked contacts section, touch
.
beside the entry to break the link.
5. Touch Done.
Edit Entries in People
You can add another phone number, email address, or assign a photo to a contact in People.
Note: You cannot edit the contact information of a Facebook friend.
People
87
Add a Number to an Entry
1. From the Home screen, touch
> People, and then touch an entry.
2. Scroll down the screen and touch Edit.
3. On the Phone section, touch Add.
4. Touch the type of phone number you want to add. (For example, Home or Work.)
5. Enter the phone number and touch Save.
Edit the Phone Number of an Entry
1. From the Home screen, touch
> People, and then touch an entry.
2. Scroll down the screen and touch Edit.
3. On the Phone section, touch the number you want to edit.
4. Edit the number using the keypad.
Tip:
Touch the Number type (for example, Mobile) to change it. Touch X at the right side of a
number to delete it.
5. Touch Save.
Select a Ringer Type for an Entry
Assign a ringer type to an entry in People so you can identify the caller by the ringer type. See
Change the Default Ringtone.
1. From the Home screen, touch
> People, and then touch an entry.
2. Scroll down the screen, and then touch Ringtone.
3. Select a ringtone (the ringtone plays back) from the menu and touch OK.
Assign a Picture to an Entry
Assign a picture to a contact entry to display it when that contact calls you.
1. From the Home screen, touch
> People, and then touch an entry.
2. Touch the contact’s photo.
3. Touch Gallery or Camera.

People
If you selected Gallery, select an album to find the picture, touch the picture you
want to use, crop the picture, and touch Save.
88

If you selected Camera, the camera will launch and you will use it to take a new
picture. (See Take Pictures and Shoot Videos.)
4. Touch Save.
Add an Email Address to an Entry
1. From the Home screen, touch
> People, and then touch an entry.
2. Scroll down the screen and touch Edit.
3. On the Email section, touch Add.
4. Enter the email address and touch Save.
Send Contact Information as a vCard
1. From the Home screen, touch
> People.
2. On the People screen, do the following:

To send a contact’s information, touch and hold the name of the contact (not the icon
or photo) and then touch Send contact as vCard.

To send your contact information, touch and hold [Your name] My profile and then
touch Send my profile.
3. Touch the box under the contact name or your name, to select how you want to send it.
4. Select the type of information you want to send, and then touch Send.
5. Enter the recipient’s number or email address, and then touch Send.
You can also send the vCard using Bluetooth. To learn how to send files through Bluetooth, see
Bluetooth.
Delete an Entry
1. From the Home screen, touch
> People.
2. Touch a contact you wish to delete.
3. Touch
> Delete.
4. Touch OK to confirm.
Delete Multiple Entries
1. From the Home screen, touch
2. On the People screen, touch
People
> People.
> Delete.
89
3. Select the entries you want to delete, and then touch Delete.
4. Touch OK to confirm.
Find Entries in People
There are multiple ways to find the contact or group entries you are looking for.
Find Contacts by Name
1. From the Home screen, touch
> People.
2. Do one of the following:

Scroll through all the entries.

Scroll up to the beginning of the contacts list and then touch the box with the word
“Search people.” Enter the first letter or letters of a name (such as “dav” for “Dave”).
(The more letters you enter, the more your search narrows.)
3. Touch an entry to display it.
4. To dial the entry’s default phone number (Primary), touch the number under Actions.
Find Group Entries
1. From the Home screen, touch
> People.
2. Scroll to the Groups tab.
3. Scroll through the group names. To display entries belonging to a group, touch the group
name.
4. To display an entry within the group, touch the entry.
5. To dial the entry’s default phone number (Primary), touch the number under Actions.
See Work with Groups for more details.
Back Up and Import Entries in People
Learn how to back up and import entries using the storage card.
Back Up People Entries to the Storage Card
You can back up all your People entries to the microSD card.
1. From the Home screen, touch
2. Touch
> People.
> Import/Export > Export to SD card.
3. When asked to confirm, touch OK.
People
90
Import Entries From the Storage Card
You can import only those contacts that were exported to the storage card using the Export to
SD card feature on the device. See Back Up People Entries to the Storage Card.
1. From the Home screen, touch
2. Touch
> People.
> Import/Export > Import from SD card.
3. If you have Google or Exchange ActiveSync accounts set up on your device, touch the
type for the imported contacts.
Tip:
Touch
to stop the import process.
Work with Groups
On the Groups tab, you can assign contacts to groups so you can easily send text, multimedia,
or email messages to a whole group. You can also sync your device’s groups with the groups in
your Google Account, accessible using your computer’s Web browser. By default, the Frequent
group automatically stores the contacts you dial or get calls from the most.
Create a Group and Add Entries
1. From the Home screen, touch
2. Touch
> People > Groups tab.
> Add group.
3. Enter a name for the group and touch
.
4. Select the entries you want in the group. You can use the search bar to search for
entries quickly or touch
to hide the onscreen keyboard and scroll through the list.
5. Touch Save. (Touch
6. Touch
to close the keyboard if you do not see the Save button.)
to select a photo for the group.
7. Touch Save.
Edit a Contact Group
1. From the Home screen, touch
> People > Groups tab.
2. Touch and hold a group and touch Edit group.
3. You can:
People

Touch the group name to change the name. You can only change the name for
groups that you’ve created.

Touch the icon to the left of the group name to change or remove the group photo.
91

To add entries to the group, touch
Save.
, touch the entries you want to add, and touch

To remove entries from the group, touch
remove.
at the right side of the entry you want to
4. Tap Save.
Send a Text or Multimedia Message to a Group
1. From the Home screen, touch
> People > Groups tab.
2. Touch the group you want to send a message to.
3. Go to the Group action tab (
) and touch Send group message.
Note: Depending on your account, you may be charged per group member for each message
sent. For example, if you send a message to a group of five people, you will be charged
for five messages.
For instructions on composing and sending your message, see Send a Text Message (SMS).
Send an Email Message to a Group
1. From the Home screen, touch
> People > Groups tab.
2. Touch the group you want to send the email message to.
3. Go to the Group action tab (
) and touch Send group mail.
4. Select your email account to use.
For instructions on composing and sending your message, see Gmail / Google and Email.
Rearrange Your Contact Groups
1. From the Home screen, touch
2. Touch
> People > Groups tab.
> Edit groups.
3. Touch and hold
at the end of the group you want to move. When the row is
highlighted, drag it to its new position.
4. Touch Save.
Rearrange Members in a Contact Group
1. From the Home screen, touch
> People > Groups tab.
2. Touch the group to view its members.
People
92
3. Touch
> Edit group.
4. Touch and hold
at the end of the contact name you want to move. When the row is
highlighted, drag it to its new position.
5. Touch Save.
Delete a Group
1. From the Home screen, touch
> People > Groups tab.
2. Touch and hold a group and touch Clear group.
Note: You can only delete groups that you’ve created.
People Widgets
Stay in touch with different circles of friends or colleagues in your life. Using the People widget,
you can instantly place a call, send a message, view details of a favorite contact, and even
check Facebook and Twitter updates. You can add several People widgets on the Home
screen, with a different group of contacts on each widget.
Add the People Widget
1. From the Home screen, touch
> Personalize > Widget > People.
2. Choose the widget style, and then touch Select.
3. Select the group you want to add to the widget.
4. Drag the widget to a blank Home screen, and then release.
Set the Default Communication Method
1. Touch
and go to the People widget.
2. Touch the name of the contact you want to edit.
3. Touch Set default action, and then select the default communication method you want
for the contact.
Get In Touch With a Contact
1. Touch
and go to the People widget.
2. Do any of the following:

People
Touch a contact photo or icon to perform the default communication method you’ve
selected. For example, if you’ve set it to call the contact’s work number, then the
device will open Phone and dial that number.
93

People
Touch the name of the contact to open the contact details screen. On the contact
details screen, choose how you want to communicate with the contact by touching
an option under Actions.
94
Accounts and Messaging
With Sprint service and your device’s messaging capabilities, you have the opportunity to share
information through many different channels and accounts.
Gmail
Email
Text Messaging and MMS
Social Networking Accounts
Gmail / Google
You will need a Google Account to access several device features such as Gmail, Google
Maps, Google Talk, and the Google Play Store app. Before you are able to access Google
applications, you must enter your account information. These applications sync between your
device and your online Google Account.
Create a Google Account
If you do not already have a Google Account, you can create one online or using your device.
Note: You can also create and sign into your Google/Gmail account through your device’s
Setup application.
Note: Although you need a Gmail account to use certain features of your device, such as
Google Play, you do not need to use Gmail as the default account for your device.
Create a Google Account Online
1. From a computer, launch a Web browser and navigate to google.com.
2. On the main page, click Sign-in > Create an account now.
3. Follow the onscreen prompts to create your free account.
4. Look for an email from Google in the email box you provided, and respond to the email
to confirm and activate your new account.
Create a Google Account Using Your Device
1. From the Home screen, touch
> Settings > Account & sync.
2. Touch Add account, and then touch Google.
3. Touch Next, and then touch Create.
Accounts and Messaging
95
4. Enter your First name, Last name, and desired Username, and then touch Next.
5. When prompted, enter and reenter a password.
6. Create a security question and answer, enter a secondary email address to help you
recover your password if you ever lose it, and then touch Create.
Note: When setting up a new Google Account, either on your device or online, you will be
prompted to add a secondary email address. Enter a second Gmail address or any other
email address from which you currently send and receive email. This address is used to
authenticate your account should you ever encounter problems or forget your password.
It is strongly encouraged for Android users so you can regain access to Google services
and purchases on your device.
7. Read and accept the Google Terms of Service, and then touch I agree, Next.
8. Enter the characters shown, and then touch Next.
9. After your device connects with the Google servers, select the items you would like to
sync with your device, and then touch Sync now.
10. Touch Finish setup and your device will synchronize the selected items.
Sign In to Your Google Account
1. From the Home screen, touch
> Settings > Account & sync.
2. Touch Add account > Google.
3. Touch Next > Sign in.
4. Enter your Gmail username and password, and then touch Sign in.
5. After your device connects with the Google servers, select the items you would like to
sync with your device and then touch Sync now.
6. Touch Finish setup and your device will synchronize the selected items.
Accounts and Messaging
96
View Your Gmail Inbox
All your received emails are delivered to your Inbox.
 From the Home screen, touch
> Gmail. Your Gmail inbox then opens.
Send a New Gmail Message
1. From the Home screen, touch
> Gmail >
.
2. If you’ve set up multiple Google Accounts on your device, choose which Gmail address
you want to use for sending your email. Touch the box that shows your current Gmail
address, and then touch another address that you want to use for sending.
3. Enter the message recipient’s email address in the To field. If you are sending the email
to several recipients, separate the email addresses with a comma.
Note: If you want to send a carbon copy (Cc) or a blind carbon copy (Bcc) of the email to other
recipients, touch
> Add Cc/Bcc.
4. Enter the email subject, and then compose your email.
5. If you want to attach a picture, touch
> Attach file.
6. Locate and then touch the picture you want to attach.
7. After composing your message, touch
.
Note: While composing the message, touch
message.
Accounts and Messaging
> Save draft. Or touch
97
to discard the
Reply To or Forward an Email Message
1. From the Home screen, touch
> Gmail.
2. Touch the email message or conversation.
3. To reply to the sender, touch
Forward.
. Or, touch
and choose whether to Reply all or
4. Do one of the following:

If you selected Reply or Reply all, enter your reply message.

If you selected Forward, specify the message recipients.
Note: Touch Respond inline if you want to interleave your new message with the received
email. However, this removes any attachments or formatting in the original email.
5. Touch
.
Get Help
To find out more about using Gmail, touch
Google Mobile Help site.
> Help. The Web browser will take you to the
Email
Use the Mail application to send and receive email from your webmail or other accounts, using
POP3 or IMAP. You can also access your Exchange ActiveSync email and other features on
your device. Mail allows you to stay connected 24 hours a day anywhere on the Nationwide
Sprint Network.
Add a POP3 or IMAP Email Account
1. From the Home screen, touch
> Mail.
2. Do one of the following:

If this is your first time to add an email account in Mail, touch Other (POP3/IMAP) on
the Choose a mail provider screen.

If you have already added an email account in Mail, touch
> New Account.
When the Choose a mail provider screen is displayed, touch Other (POP3/IMAP).
3. Enter the Email address and Password for the email account, and then touch Next.
Important:
If the account type you want to set up is not in the device database, you will be
asked to enter more details. You should get all pertinent information for the email
account, such as incoming and outgoing server settings, before you proceed.
4. Enter the Account name and Your name, and then touch Finish setup.
Accounts and Messaging
98
Add an Exchange ActiveSync Account
If you synchronize your device with your Exchange ActiveSync account, you can read, manage,
and send email in the same easy way as with a POP3/IMAP account. However, you can also
access some powerful Exchange features. You can add one or more Microsoft Exchange
ActiveSync accounts on your device. You can sync with Microsoft Exchange Server 2003
Service Pack (SP2) or later.
1. From the Home screen, touch
> Mail.
2. Do one of the following:

If this is your first time to add an email account in Mail, touch Microsoft Exchange
ActiveSync on the Choose a mail provider screen.

If you have already added an email account in Mail, touch
> New Account.
When the Choose a mail provider screen is displayed, touch Microsoft Exchange
ActiveSync.
3. Enter the Exchange ActiveSync account details, and then touch Next.
Note: Your corporate Exchange Server must support auto-detect for the device to
automatically set up the Exchange ActiveSync account. If your corporate Exchange
Server does not support auto-detect, you will need to enter your Exchange Server
settings after you touch Next. Ask your Exchange Server administrator for details.
4. Select the type of information you want to synchronize and touch Finish setup.
Create Another Email Account
While you are viewing one email account, you can access the tool to create another email
account.
1. From the Home screen, touch
2. Touch
> Mail.
> New account.
3. Select the type of account you want to add.
4. Enter the Email address and Password for the email account, and then touch Next.
5. Change the default values of Account name and Your name, and then touch Finish
setup.
Check Your Mail Inbox
When you open the Mail application, it displays the inbox of one of your email accounts that
you’ve set up on your device.
Accounts and Messaging
99
Switch Between Email Accounts
1. From the Home screen, touch
> Mail.
2. Touch the bar that shows the current email account, and then touch another account.
View Email Messages From All Your Email Accounts
You can view email messages from all your accounts just in one place without having to switch
to different accounts.
1. From the Home screen, touch
> Mail.
2. Touch the bar that shows the current email account, and then touch All accounts.
Email messages are color coded so you can easily distinguish which email accounts
they belong to.
Note: Up to 15 email accounts can be shown in the unified inbox.
Switch Between Inbox Views
If you have lots of email messages, it may take you some time to browse through the long list
your emails into different categories.
► From the Home screen, touch
view of your inbox.
> Mail, and then touch one of the tabs to change the

Received: Displays email messages as individual items.

Thread: Displays messages as conversations, grouped according to the subject line.
Touch a subject in the list to show the email conversation.

Favorites: Displays all email messages from a contact group. To choose which
contact group to display, touch
> View, and then select a group. For more
information on contact groups, see Working with Groups.

Unread: Displays only unread messages.

Marked (Exchange ActiveSync only): Displays all flagged messages.

Invites (Exchange ActiveSync only): Displays meeting invitations which you have not
yet accepted or declined.
Accounts and Messaging
100

Attached: Displays all messages that have attachments.
Note: If you do not see some of the tabs mentioned above, touch and hold any existing tab to
show tabs that you can add to the tab bar.
Refresh an Email Account
Whatever your automatic synchronization settings are, you can also synchronize your sent and
received email messages manually at any time.
1. From the Home screen, touch
> Mail.
2. Do any of the following:

While in the account you want to synchronize, touch
> Refresh.

If you have several email accounts, you can refresh them all at the same time.
Switch to All accounts and then touch
> Refresh.
Sort Email Messages
You can sort email messages by date received, priority, subject, sender, or size.
1. From the Home screen, touch
2. Touch
> Mail.
> Sort, and select from the sorting options.
Quickly Browse Your Inbox
If you have a long list of email messages in your inbox, it may not be easy to browse the list and
find an email that you want. You can quickly browse through your inbox by using finger
gestures.
1. From the Home screen, touch
> Mail.
2. On the email inbox, select a sorting order for displaying your email messages. For more
information, see Sort Email Messages.
3. Touch and hold two fingers on any email message, and then drag upward or downward
without lifting your fingers. Your screen then jumps to the set of email messages based
on your chosen sorting order.
Manage Email Messages
Learn how to move and delete email messages, while also learning to organize your folders.
Delete Email Messages
1. From the Home screen, touch
Accounts and Messaging
> Mail.
101
2. Switch to the email account that you want to use.
3. Do one of the following on the email inbox:

To delete one or more email messages, touch the check before the email message/s
that you want to delete.

To delete all email messages from your inbox, touch the check before an email
message, and then touch
> Select All.
4. Touch Delete.
Move Email Messages to Another Folder
1. From the Home screen, touch
> Mail.
2. Switch to the email account that you want to use.
3. On the email inbox, touch the check boxes of email messages you want to move.
4. Touch Move to, and then touch the folder where to move the email messages.
Move an Email Message After Reading
1. From the Home screen, touch
> Mail.
2. Switch to the email account that you want to use.
3. On the email inbox, touch a message to open it.
4. In the open message, touch
> Move to
5. Touch the folder where you want to move the email message.
Switch to Other Mail Folders
1. From the Home screen, touch
> Mail.
2. Switch to the email account that you want to use.
3. On the email inbox, touch
.
4. Touch the mail folder that you want to view.
Compose and Send Email
1. From the Home screen, touch
> Mail.
2. Switch to the email account that you want to use for sending email.
3. On the email inbox, touch
Accounts and Messaging
.
102
4. Fill in one or more recipients. You can:
Tip:

Enter email addresses directly in the To field, separating them with a comma.
As you enter email addresses, any matching addresses from your contacts list are
displayed. Touch a match to enter the address directly.

Touch the
icon, and then select the contacts you want to send the email to. You
can also select contact groups as recipients, or search and add contacts from the
company directory if you have set up an Exchange ActiveSync account on your
device. When you have selected all the message recipients, touch Done.
If you want to send a carbon copy (Cc) or a blind carbon copy (Bcc) of the email to other
recipients, touch
> Show Cc/Bcc.
5. Enter the subject, and then compose your message.
6. To add an attachment, touch Attach, and choose from the following options:

Picture: Select Camera to take a photo and attach it, or Gallery to attach a photo
from your microSD card.

Video: Select Camcorder to capture a video and attach it, or Videos to attach a
video from your microSD card.

Audio: Select Voice Recorder to make a voice recording and attach it, or Files to
attach a music file or voice recording from your microSD card.

App recommendation: Select an app to recommend to your friends.

Location: Attach location information to the email. You can send your current
location (requires GPS to be turned on), a location stored in Footprints, or a location
you pick on a map. (For more information about GPS, Maps, and Footprints, see
Navigation.)

Document: Attach a PDF file or an Office document, such as a text file or a
spreadsheet.

Contact (vCard): Attach someone’s contact information.

Appointment (vCalendar): Attach a calendar event.

File: Attach any file from your storage card.
7. Tap Send to send the message immediately, or touch Save as draft if you want to send
it later.
Note: If there’s no Wi-Fi or data connection available or Airplane mode is on when you send
your email, the email is saved to the Outbox folder. Once there’s Wi-Fi or data
Accounts and Messaging
103
connection available, the saved email will be sent automatically next time your device
syncs.
Resume a Draft Email Message
1. From the Home screen, touch
> Mail.
2. Switch to the email account that you want to use.
3. On the email inbox, touch
> Drafts.
4. Touch the message.
5. When you finish editing the message, touch Send.
Read and Reply to an Email Message
1. From the Home screen, touch
> Mail.
2. Switch to the email account that you want to use.
3. On the email inbox, touch the email you want to read.
4. Do any of the following:

Reply to the email: To reply the sender, touch Reply. To reply the sender and all
other people in the email message, touch Reply all.

Forward the email: Touch Forward.

Delete the email: Touch Delete.

Mark the email as unread: Touch
> Mark unread.
Set the Priority for an Email Message
You can set the priority for an email message that you send.
1. From the Home screen, touch
> Mail.
2. Switch to the email account that you want to use.
3. Compose an email message. For more information, see Compose and Send Email.
4. Touch
> Set priority.
5. Select the priority for the message.
If you selected High or Low priority, the priority appears below the subject line of the message.
Accounts and Messaging
104
Print Your Email Messages
Do you need to print your email? Not a problem. Connect your device to a supported printer and
start printing out your email messages.
Note: Both printer and your device must be turned on and connected to the same local
network. To learn how to connect the device to the local wireless network, see Turn WiFi On and Connect to a Wireless Network. To learn how to connect the printer to the
local network, refer to your printer user guide.
Note: The local network must not be behind a firewall.
1. From the Home screen, touch
> Mail.
2. Switch to the email account that you want to use.
3. On the email inbox, touch the email you want to print.
4. Touch
> Print.
5. If the printer appears on the list, touch it. Otherwise, touch Scan for printers or Add
printer and then follow the onscreen instructions to add the printer to the list.
6. In the Print preview screen, you can select which pages to print, set the number of
copies, or select to fit the email messages on the page.
Tip:
Touch Advanced to set the page size, print layout, and page orientation, and whether
you want to print in color or black-and-white.
7. Touch Print.
You can check the printing progress by opening the Notifications panel, and then touching the
item you’re printing.
Work with Exchange ActiveSync Email
If you sync your device with your work Exchange ActiveSync account, you can read, reply,
send, and manage email in the same easy way as with a POP3/IMAP account. In addition, you
can also use some powerful Exchange features.
Note: You must switch to your Exchange ActiveSync email account before you can use these
features. For more information, see Switch Between Email Accounts.
Flag Email Messages
1. From the Home screen, touch
> Mail.
2. Switch to your Exchange ActiveSync email account.
3. Do any of the following on the email inbox:
Accounts and Messaging
105

While viewing your Exchange ActiveSync email inbox, touch the white flag icon (
that appears on the right of an email message. The icon turns red ( ) after you
flagged the email.

Touch an email message. On the open message, touch the flag icon.
Synchronize Exchange ActiveSync
You can set Exchange ActiveSync to automatically check for new Exchange ActiveSync email
messages. For more information, see Synchronize Exchange ActiveSync.
Set Your Out of the Office Status
You can set your Out of Office status and auto-reply message right from your device.
1. From the Home screen, touch
> Mail.
2. Switch to your Exchange ActiveSync email account.
3. Touch
> Out of the office.
4. Touch the field below I am currently, and then select Out of the office.
5. Set the dates and times for the period when you will be out of the office.
6. Enter the auto-reply message.
7. Touch Save.
Send a Meeting Request
1. From the Home screen, touch
> Mail.
2. Switch to your Exchange ActiveSync email account.
3. Touch
> New meeting invitation.
4. Enter the meeting details, and then touch Save.
Change the Email Account Settings
1. From the Home screen, touch
> Mail.
2. Switch to the email account that you want to change.
3. Touch
> Settings, and choose from these options:

Account settings: Change the email account settings such as the name, email
address, password, and description.

General settings
Accounts and Messaging
106
)


•
Font size: Set the font size when reading email messages.
•
Use signature: Select to append a signature to your outgoing email messages.
•
Signature: Set the signature for outgoing email messages.
•
Set as default account: Select to use the current email account as the default
account to send email messages.
•
Attachment cache: Select where to save email attachments.
•
Ask before deleting: Select to display a confirmation box when deleting email
messages.
•
Refresh on open: Select to automatically refresh an email folder when you open
it.
•
Portrait body preview: Set the number of lines of text to display for email
messages in the Inbox.
Send & Receive
•
Mail size limit: Set the maximum email file size for incoming messages.
•
Message format: Set email messages to display in HTML or plain text format.
•
Update schedule: Set the frequency with which to check for new email
messages.
•
Download past mail: Set the number of days to download past email messages.
•
Include file attachment: Set the size of email attachments that will be
automatically downloaded with email messages.
•
Auto download message: Select to automatically download the email message
as you scroll down the screen.
•
Folder to sync: Select the folder to synchronize whenever you launch Mail.
•
Reply with original text: Select to reply email messages with the original
receive email.
•
Always bcc me: Select to always send yourself a copy of all email messages
that you send.
Notification settings
•
Email notifications: Select to turn on email notifications on your device.
Accounts and Messaging
107

•
Notification sound: Set the device to play a sound when a new email message
arrives.
•
Notification vibrate: Set the device to vibrate when a new email message
arrives.
Delete account: Tap to delete an email account.
4. Touch
to save your changes.
Delete an Email Account
1. From the Home screen, touch
> Mail.
2. Switch to the email account that you want to delete.
3. Touch
> Settings > Delete account.
Add the Mail Widget
Add the Mail widget to view your POP3/IMAP or Exchange ActiveSync email messages on the
Home screen. To learn how to add widgets, see Customize the Home Screen.
Text Messaging and MMS
With Text Messaging (SMS), you can send and receive instant text messages between your
wireless device and another messaging-ready phone.
Multimedia messages, or MMS, can contain text and pictures, recorded voice, audio or video
files, picture slideshows, contact cards (vCard), or appointments (vCalendar).
See your service plan for applicable charges for messaging.
Open Messages
► From the Home screen, touch
> Messages.
The All messages screen opens, where all your sent and received messages are neatly
grouped into conversations, by contact name or phone number.

Scroll up or down the list of conversations by swiping your finger on the screen.

Touch a contact name or number to view the exchange of messages.
Send a Text Message (SMS)
Quickly compose and send text messages on your device.
1. From the Home screen, touch
2. Touch
> Messages.
.
Accounts and Messaging
108
3. Fill in one or more recipients. You can:

Enter phone numbers directly in the To field. If you’re sending the message to
several phone numbers, separate the phone numbers with a comma. As you enter
information, any matching phone numbers from your contacts list are displayed.
Touch a match to enter that number or address directly.

Touch
, and then select the phone numbers of the contacts to whom you want to
send the message. You can also select contact groups as recipients. When you have
selected all the message recipients, touch Done.
4. Touch the “Add text” box and then start composing your message.
Note: A counter appears at the top of the Send button to tell you how many characters you
have entered and how many characters are left. Once you go over the 160-character
limit, a new message is created but automatically joined into one when received.
Your text message automatically becomes a multimedia message if you enter an email
address as the recipient, add a message subject, attach an item, or compose a very long
message.
5. Touch Send or touch
to save the message as a draft.
Use Preset Messages
Preset messages make it easy to compose text messages.
1. From the Home screen, touch
2. Touch
> Messages.
.
3. Fill in one or more recipients. You can:
Accounts and Messaging
109

Enter phone numbers directly in the To field. If you’re sending the message to
several phone numbers, separate the phone numbers with a comma. As you enter
information, any matching phone numbers from your contacts list are displayed.
Touch a match to enter that number or address directly.

Touch
, and then select the phone numbers of the contacts to whom you want to
send the message. You can also select contact groups as recipients. When you have
selected all the message recipients, touch Done.
4. Touch the “Add text” box, and then touch
messages.
> Quick text. You will see the list of preset
5. Do any of the following:

Touch a preset message to add it to your text message.

To add a new message, touch

To delete preset messages, touch
delete, and then touch Delete.

To edit a preset message, touch
> Edit. Touch the message you want to edit,
edit the message, and then touch OK.
> Add. Enter your message and touch OK.
> Delete. Touch the messages you want to
Send a Multimedia Message (MMS)
When you need to add a little more to a text message, you can send a multimedia message
(MMS) with pictures, voice recordings, audio or video files, contact cards (vCard), or
appointments (vCalendar).
1. From the Home screen, touch
2. Touch
> Messages.
.
3. Fill in one or more recipients. You can either:

Enter phone numbers or email addresses directly in the To field. If you’re sending
the message to several recipients, separate the phone numbers or email addresses
with a comma. As you enter information, any matching phone numbers or addresses
from your contacts list are displayed. Touch a match to enter that number or address
directly.

Touch
, and then select the phone numbers of the contacts to whom you want to
send the message. You can also select contact groups as recipients. When you have
selected all the message recipients, touch Done.
4. Touch
> Add subject to add a subject line to your message.
5. Touch the “Add text” box, and then start composing your message.
Accounts and Messaging
110
6. Touch
and then select the type of attachment:

Picture. Select Camera to take a photo and attach it, or Gallery to attach a photo
from your storage card.

Video. Select Camcorder to capture a video and attach it, or Videos to attach a
video from your storage card.

Audio. Select Voice Recorder to make a voice recording and attach it, or Music &
sounds to attach a music file or voice recording from your storage card.

App recommendation. Share a link about your favorite app with your friends.

Location. Add your current location (requires GPS to be turned on), or a location
you pick on a map to your message. See Google Maps.

Contact (vCard). Select a contact from your device, and then select which contact
information you want to attach.

Appointment (vCalendar). Select the calendar event you want to attach.
7. To see options for replacing or reviewing your attachment, touch
touch
> Discard to start over.
8. Touch Send, or touch
. You can also
to save message as a draft.
Create a Slideshow
1. From the Home screen, touch
2. Touch
> Messages.
.
3. Fill in one or more recipients. You can either:

Enter phone numbers or email addresses directly in the To field. If you’re sending
the message to several recipients, separate the phone numbers or email addresses
with a comma. As you enter information, any matching phone numbers or addresses
from your contacts list are displayed. Touch a match to enter that number or address
directly.

Touch
, and then select the phone numbers of the contacts to whom you want to
send the message. You can also select contact groups as recipients. When you have
selected all the message recipients, touch Done.
4. Touch
> Add subject to add a subject line to your message.
5. Touch
and then attach a photo, video, or audio in the multimedia message you’re
composing
Accounts and Messaging
111
6. Touch
> Slideshow, then choose to insert before or after the last slide.
7. Do any of the following:

To add a slide, touch

To add music or a voice recording to a slide, touch

To add a caption to a slide, touch the “Add text” box.

To edit a slide, touch
the slide.

To preview the slideshow, touch
playback controls.
8. Touch Send or touch
, and then choose to add a photo or a video.
> Audio after adding a slide.
, and then choose to replace, remove, or set the duration of
> Preview. Touch the preview screen to see the
to save message as a draft.
Save and Resume Composing a Draft Message
While composing a text or multimedia message, touch
as a draft. You can resume composing a draft message.
1. From the Home screen, touch
to automatically save your message
> Messages.
2. On the All messages screen, touch
> Drafts.
3. Touch the message, and then resume editing it.
4. When you finish editing the message, touch Send.
View and Reply to a Message
Depending on your notification settings, the device plays a ringtone, vibrates, or displays the
message briefly in the status bar when you receive a new text or multimedia message. To
change the notification for new text and multimedia messages, see Text and Multimedia
Message Options.
A new message icon (
multimedia message.
) also appears in the status bar to notify you of a new text or
1. To open and read the message, you can:
Accounts and Messaging
112

Touch and hold the status bar, and then slide down to open the Notifications panel.
Touch the new message to open and read it.

From the Home screen, touch
> Messages.
2. While reading the message, you can:

Reply with a text message. Touch the “Add text” box, enter your reply message,
and then touch Send.

Reply with a multimedia message. Touch the “Add text” box, enter your reply
message, touch
to choose an attachment for your message, and then touch
Send.

Call or save a phone number contained in the message. Touch the phone
number, and then choose whether to dial the number or add it to your contacts.

Open a link in the message. Touch the link to open it in the Web browser.

Send to or save an email address contained in the message. Touch the email
address. Then choose whether to send an email, send a multimedia message, or
save the email address to your contacts.

Forward a message. Touch the message (do not touch a link or a phone number) to
open the options menu, and then touch Forward.

Check message details. Touch the message (do not touch a link or a phone
number) to open the options menu, and then touch View message details.
Reply to an Alternate Contact Phone Number
When a contact has multiple phone numbers stored on your device, you’ll see the particular
phone number used within the message. There’s also a bold letter before the phone number to
indicate the number type (for example, M stands for Mobile).
Keep in mind that your response will be sent to the phone number of the latest message you’ve
received from this contact.
1. From the Home screen, touch
> Messages.
2. On the All messages screen, touch a contact (or phone number) to display the exchange
of messages with that contact.
3. Touch the “Add text” box, and then enter your reply message.
4. Touch
> Recipient phone number.
Accounts and Messaging
113
5. Select another phone number for this contact, and then touch OK.
View and Save an Attachment from a Multimedia Message
If you are concerned about the size of your data downloads, check the multimedia message
size first before you download it.
Note: When Auto-retrieve in MMS settings is disabled, only the message header is
downloaded. To download the entire message, touch the Download button at the right
side of the message. For details, see Text and Multimedia Message Options.
●
If there’s a media attachment such as a photo or video in a received message, touch it to
view the content.
●
If the attachment is a contact (vCard), touch it to view the contact information, and then
touch Save to add to your contacts.
●
If the attachment is an appointment or event (vCalendar), touch it to choose the calendar
where to save it, and then touch Import.
●
To save the attachment to your storage card, touch and hold the multimedia message,
and then choose to save the type of attachment from the options menu.
Manage Message Conversations
Text and multimedia messages that are sent to and received from a contact (or a number) are
grouped into conversations or message threads in the All messages screen. Threaded text or
multimedia messages let you see exchanged messages (similar to a chat program) with a
contact on the screen.
Protect a Message from Deletion
You can lock a message so that it will not be deleted even if you delete the other messages in
the conversation.
1. From the Home screen, touch
> Messages.
2. On the All messages screen, touch a contact (or phone number) to display the exchange
of messages with that contact.
3. Touch the message (not a link or a phone number) that you want to lock, and then touch
Lock message. A lock icon
is displayed at the lower right of the message.
Delete a Single Message
1. From the Home screen, touch
> Messages.
2. On the All messages screen, touch a contact (or phone number) to display the exchange
of messages with that contact.
Accounts and Messaging
114
3. Touch the message (not a link or a phone number) that you want to delete.
4. If the message is locked, touch Unlock message on the options menu, and then touch
the message again to display the options menu.
5. Touch Delete message on the options menu.
6. When prompted to confirm, touch OK.
Delete Several Messages Within a Conversation
1. From the Home screen, touch
> Messages.
2. On the All messages screen, touch a contact (or phone number) to display the exchange
of messages with that contact.
3. Touch
> Delete.
4. Touch Delete by selection.
Note: You can also touch Delete by phone number if the contact used multiple phone
numbers throughout the conversation and you want to delete the messages sent from a
particular number.
5. Select the messages you want to delete, and then touch Delete.
Delete a Conversation
1. From the Home screen, touch
> Messages.
2. Do any of the following:

On the All messages screen, touch and hold a contact (or phone number) whose
messages you want to delete, and then touch Delete.

While looking at the exchange of messages in a conversation, touch
> Delete >
Delete thread. Any locked messages in the conversation thread will not be deleted
unless you select the Delete locked messages check box.
3. When prompted to confirm, touch OK to delete the entire thread.
Delete Several Conversations
1. From the Home screen, touch
> Messages.
2. On the All messages screen, touch
> Delete.
3. Select the conversation threads you want to delete.
4. Touch Delete. Any locked messages will not be deleted.
Accounts and Messaging
115
Text and Multimedia Message Options
1. From the Home screen, touch
> Messages.
2. On the All messages screen, touch
> Settings. You can set the following options:
Notifications
●
●
Received messages

Received notification: Select this option if you want to receive a notification in the
status bar when a new text or multimedia message arrives.

Play notification sound: If you want the device to ring when a new message
arrives, select this option.

Notification sound: Select a ringtone that is specific to new text and multimedia
messages. Note that the ringtone briefly plays when selected.

Vibrate: Select this option if you want the device to vibrate when a new text or
multimedia message arrives.

Notification preview: Select this option if you want to see a preview of new
messages on the lock screen and status bar.
Sent messages

Sent notification: Select this option if you want to receive a notification in the status
bar when a message is sent successfully.

Failure notification: Select this option if you want to receive a notification in the
status bar when a message is not sent successfully.

Play notification sound: If you want the device to ring when a sent or failure
notification is received, select this option.

Notification sound: Select a ringtone that is specific to sent or failure notifications.
Note that the ringtone briefly plays when selected.

Vibrate: Select this option if you want the device to vibrate when a new text or
multimedia message arrives.

Display message on screen: Set your device to show pop-up notifications (not just
in the status bar) when your messages are sent successfully or not. You can also
select None to disable this option.
Text messages (SMS) Settings
●
SMS characters: Select this option to correctly display special accented characters in
SMS messages.
Accounts and Messaging
116
Multimedia messages (MMS) Settings
●
Auto-retrieve: Select this option to automatically retrieve all your multimedia messages
completely. When selected, the multimedia message header plus the message body and
attachments will automatically download to your device. If you clear this check box, only
the multimedia message header will be retrieved and shown in your All messages
screen.
●
Roaming auto-retrieve: Select this option to automatically retrieve messages while
roaming.
●
Priority setting: Set the message priority of text messages sent.
●
Maximum message size: Set the maximum file size of a multimedia message. The
multimedia message will not be sent out if it exceeds the file size set here.
●
Connection settings: View various connection settings such as the connection name
and server address.
General
●
●
Recipient list settings

Show sent message history: Include the sent message history when searching for
a message recipient.

Show call history: Include the call history when searching for a message recipient.

Show email address: Include email addresses when searching for a message
recipient.
Message preview

●
●
Message preview: Set the number of lines of text to appear in the conversation on
the All messages screen.
Storage settings

Delete old messages: Automatically delete older messages, except for locked
messages, when the set limits are reached.

Text message limit: Choose the maximum number of text messages to store in
each conversation thread. (This does not include locked messages.)

Multimedia message limit: Choose the maximum number of MMS messages to
store in each conversation thread. (This does not include locked messages.)
Message forwarding
Note: Forwarding service may incur additional charges. Contact Sprint for details.
Accounts and Messaging
117
●
●

Forward to phone number: Lets you forward text and multimedia messages to
another phone.

Forward to email address: Lets you forward text and multimedia messages to an
email address.
Signature

Use signature: Tap to compose your own signature.

Signature: Select this option to add a signature to all your outgoing text and
multimedia messages.
Emergency alerts

Presidential alert: Set this option to receive emergency alerts issued by the
President of the United States.

Extreme alert: Set this option to receive extreme emergency alerts issued by the
government.

Severe alert: Set this option to receive severe emergency alerts issued by the
government.

Amber alert: Set this option to receive AMBER alerts so you can help to find a
missing child.

Test emergency alert: Set this option to receive test alerts.
Add the Messages Widget
Add the Messages widget so you can read your messages right on the Home screen. To learn
how to add widgets, see Customize the Home Screen.
Social Networking Accounts
Stay in touch on the go with all your social networking accounts. Post updates on Facebook,
and Twitter, chat on Google Talk, see what everyone’s talking about from YouTube, and more.
Facebook
View your Facebook updates in supported applications on the device. See Account & sync to
learn how to sign in to Facebook.
After signing in to Facebook, you can:
●
See all your Facebook contacts and their instant status updates in People.
●
Open the People application, touch a contact on the People screen, and then:
Accounts and Messaging
118

Slide to the Updates tab to see updates such as posted status messages, uploads,
and profile changes.

Slide to the Gallery tab to view the contact’s Facebook albums.
●
When there is a notification of the contact’s birthday, you can touch the notification to
send a greeting.
●
Browse through Facebook photo albums in People and in Gallery. See View Photos in
Your Social Networks for details.
●
You can also upload one or more photos from your microSD card to Facebook, and then
tag and add captions that go with it.
●
When you’re viewing the albums of a Facebook friend, you can also share a link to a
particular album, or comment on the album photos.
Accounts and Messaging
119
●
Check your friends’ Facebook status updates in Friend Stream. See Friend Stream
●
Add your Facebook events and your friends’ birthdays to the Calendar application.
Synchronizing Facebook
See Account & sync.
Change Facebook Update Settings
1. From the Home screen, touch
> Settings > Account & sync.
2. Touch Facebook.
3. Touch Update schedule, and then select the time interval.
Friend Stream
Friend Stream connects you to your social networks. Share and get updates from friends in
popular networks like Facebook and Twitter in a single feed. With Friend Stream, you can easily
track your friends’ status messages, photo uploads, notifications, and more – or comment and
post your own.
Note: You must be signed in to at least one social network account to use Friend Stream. To
use your Facebook account on Friend Stream, you need to be signed in via Facebook.
Open Friend Stream
 From the Home screen, touch
> Friend Stream. Friend Stream opens in the All tab.
Slide your finger on the bottom row to see location updates or social network
notifications.
1. When you touch someone’s photo or name, you can:
Accounts and Messaging
120

Check the person’s profile details.

Look at the person’s Facebook wall.

Check the person’s posted tweets.
2. When you touch someone’s status update, you can:

View all tweets.

Write a comment.

Like someone’s Facebook posts.

Look at someone’s album photos.
Update Your Status
You can update your status on one or on all social network accounts you are signed in to.
1. From the Home screen, touch
2. On the All tab, touch
> Friend Stream.
.
3. Enter your status update.
4. If you want to post your update to a specific social network account, touch
accounts you want to exclude and touch Done.
, clear the
Note: Only the accounts that you are signed in to will be shown on the dialog box.
1. Touch
and then choose what you want to attach to your tweet or status update:

To add a picture, touch Camera to take a photo and attach it or Gallery to attach a
photo from your storage card.

To add a location, touch Location to add your current location or a location you pick
on a map.

To share about an app, touch App recommendation.
2. Tap Post.
Comment and Like Facebook Posts
1. From the Home screen, touch
> Friend Stream.
2. On the All tab, touch someone’s status update, and do any of the following:

Touch a photo or the album name shown in the status update to view and comment
on the album photos using the Gallery app.
Accounts and Messaging
121

Touch Like to like the person’s status update.

Touch the text box at the bottom, enter your comment, and then touch Post.
Check Notifications From Your Social Networks
1. From the Home screen, touch
> Friend Stream.
2. Slide to the Notifications tab to easily see a single feed of your notifications from different
social networks. It can be a comment on your Facebook post, a mention or direct
message in Twitter, a tagged photo of you, and more.
Add the Friend Stream Widget
Use the Friend Stream widget so you can easily update your status and view other people’s
status updates right on the Home screen. If you want to keep up with just one person’s
Facebook updates, you can add the Friend Channel widget. You can find it in the Friend Stream
widget layout options.
1. From the Home screen, touch
> Personalize > Widget > Friend Stream.
2. Select the widget style, and then touch Select.
3. Drag the widget to a blank space on a screen, and then release.
YouTube
YouTube is an online video streaming service that allows you to view and upload videos.
Note: You must have an Internet connection to access YouTube.
Watch Videos in YouTube
1. From the Home screen, touch
to see the icon.)
> YouTube. (You may need to scroll down the screen
2. Do one of the following:

Touch a video to play it.

Touch Browse > All or any other category. Tap the tabs to filter the videos, and then
touch a video to play it.

Touch
, enter a search keyword in the text box, and then touch
search results screen, touch a video to play it.
. On the
3. While watching a video:

Turn your device sideways or double-tap the screen to watch the video in full-screen.
Accounts and Messaging
122

In full screen, touch the screen to pause, resume playback, or drag the slider to jump
to a different part of the video.

Touch a tab to learn more about the video, see related videos, or check out what
other viewers think.

Touch
to like or

Touch
to see other options.

Touch
to return to the YouTube main screen.
4. Touch
to unlike the video.
to stop playback and return to the videos list.
Share Videos in YouTube
You can share a video by sending its link to your contacts.
1. From the Home screen, touch
> YouTube.
2. Touch a video to play it.
3. While watching a video, touch
.
4. Choose how you want to share the video link from the available options.
5. Follow screen instructions to send the video link to your contacts.
Capture a Video and Share it on YouTube
You need to be signed in to your Google Account to upload your video to YouTube.
1. From the Home screen, touch
> YouTube.
2. Touch
.
3. Touch
to start recording video. When you are done capturing, touch
.
4. Touch Done.
5. Select the YouTube account you want to use, enter a title for your video, enter a
description or tags for your video, and set the privacy level.
6. Touch Upload.
Close YouTube
► While on the YouTube screen, touch
Accounts and Messaging
or
123
.
Google Talk
Google Talk is Google’s instant messaging program. It lets you communicate with other people
that also use Google Talk. If you signed in to your Google Account when you first set up your
device, you are already signed in to Google Talk.
Start a Chat
1. From the Home screen, touch
Tip:
> Talk. The Friends list appears.
The Friends list is where you add and manage your friends in Google Talk.
2. Touch a friend in the Friends list.
3. Enter your message in the text box.
4. Touch
.
5. While chatting, touch
, and then touch any of these options:

End chat: End your current chat.

Go off the record: Your Google Talk messages are stored in the Chats folder of
your Gmail account. Touch this option if you don’t want to store your chat messages.

Friend info: View your friend’s contact details. You can also block or remove your
friend.

Add to chat: Add another friend to your chat. The friend you invited and the friend
you’re currently chatting with receive an invitation to a group chat. Each one who
accepts the invitation joins the group chat.

Clear chat history: Delete the chat history.

Settings: You can add additional accounts to use in Talk.

Help: Touch this to go to the online help.

Send feedback: Send feedback to Google about your experience with Talk.
Accept a Chat Invitation
When a friend sends you a Google Talk message, you receive a notification. Your friend’s entry
in your Friends list turns active and displays the message.
► Do one of the following to chat with your friend:

In the Friends list, touch the friend who sent you the invitation to chat.

Slide open the Notifications panel, and then touch the chat notification.
Accounts and Messaging
124
Change Your Online Status and Picture
1. From the Home screen, touch
> Talk.
2. In the Friends list, touch your name to open the Status screen.
3. Enter your new status message, or touch
choose a custom status from the list.
to close the onscreen keyboard and
4. Touch the online status beside your picture, and then select the status you want on the
menu.
5. Touch your picture, and then do one of the following:

Touch Select from Gallery to choose another picture on your phone.

Touch Take with Camera to take a new picture.

Touch Remove to remove your photo.
6. Touch
.
Your online status, message, and picture appear in your contact’s Friends lists and in other
apps where your Google Talk status is displayed.
Invite a Friend
1. From the Home screen, touch
2. Touch
> Talk.
.
3. Enter the Google Talk instant messaging ID or Gmail address of the friend you want to
add.
4. Touch Done.
View All Friends
Initially, only those friends that you often chat with — the most popular — are shown in the
Friends list.
●
To view all your friends, touch
> Display options > Name.
●
To view only friends that you often chat with, touch
or Recency.
> Display options > Availability
Block a Friend
You can block a friend from sending you messages. When blocked, your friend is removed from
the Friends list and is added to the Blocked friends list.
Accounts and Messaging
125
1. From the Home screen, touch
> Talk.
2. Touch the friend you want to block.
3. Touch
> Friend info > Block.
Unblock a Friend
1. From the Home screen, touch
2. Touch
> Talk.
> Settings.
3. Touch your account, and then touch Blocked friends.
4. Touch the name of the blocked friend, and then touch OK.
Change the Settings or Signing Out
1. From the Home screen, touch
2. In the Friends list, touch
> Talk.
, and then touch:

Settings, and then touch your account to change the application and notification
settings.

Sign out to sign out from Google Talk.
Accounts and Messaging
126
Applications and Entertainment
All your device’s features are accessible through the Applications list.
Google Play
Navigation
Music
Sprint TV & Movies
NASCAR Sprint Cup Mobile
HTC Watch
Google Play
Google Play™ is the place to go to find new apps for your device. Choose from a wide variety of
free and paid apps ranging from productivity apps to games. When you find an app you want,
you can easily download and install it on your device.
To access Google Play, you must first connect to the Internet using your device’s Wi-Fi, Sprint
4G, or data connection and sign in to your Google Account. See Web and Data and Sign In to
Your Google Account for details.
Important:
Sprint’s policies often do not apply to third-party applications. Third-party
applications may access your personal information or require Sprint to disclose
your customer information to the third-party application provider. To find out how
a third-party application will collect, access, use, or disclose your personal
information, check the application provider’s policies, which can usually be found
on their website. If you aren’t comfortable with the third-party application’s
policies, don’t use the application.
Find and Install an Application
When you install apps from Google Play Store and use them on your device, they may require
access to your personal information (such as your location, contact data, and more) or access
to certain functions or settings of your device. Download and install only apps that you trust.
1. From the Home screen, touch
> Play Store.
2. When you open Google Play for the first time, the Terms of Service window will appear.
Touch Accept to continue.
Applications and Entertainment
127
3. Do any of the following to find an app:

Browse through featured apps. Scroll through the list of featured apps when you
open Google Play.

Browse apps by categories. First, slide to the Categories screen. Then touch a
category. Under a category, you can view the apps by Top paid, Top free and more.

Browse apps recommended by Sprint. First, touch Sprint, and then scroll through
the list.

Search for an app. Touch
on the Google Play home screen, enter the name or
type of app you’re looking for, and then touch
.
4. When you find the application that you like, touch it and read its description and user
reviews.
Warning:
Be cautious when downloading apps that have access to your device’s functions
or a significant amount of your data. You’re responsible for the results of using
downloaded applications on your device.
1. To download or purchase the application, touch Install (for free applications) or the price
button (for paid applications).
2. If you agree to the conditions, touch Accept & download or Accept & buy to begin
downloading and installing the app.
If you selected a paid application, you’re redirected to the Google Wallet screen to pay
for the application before it’s downloaded to your device. See Create a Google Wallet
Account.
Applications and Entertainment
128
Note: You can uninstall an app for a refund within a limited time after your purchase. To know
more about the refund policy for paid apps, please visit the Google Play Help site
(support.google.com/googleplay).
Open an Installed Application
► Do one of the following:

If you see
application.
on the status bar, open the Notifications panel, and then touch the

From the Home screen, touch
> Play Store, and then touch
the My Apps screen, touch the application.

From the Home screen, touch
. On the All apps screen, slide to the Downloaded
tab ( ), and then touch the application.
> My Apps. On
Uninstall an Application
You can uninstall any application that you have downloaded and installed from Play Store.
1. From the Home screen, touch
2. Touch
> Play Store.
> My Apps.
3. Touch the application you want to uninstall, and then touch Uninstall.
4. When prompted, touch OK.
5. Choose the reason for removing the application, and then touch OK.
Create a Google Wallet Account
You must have a Google Wallet account associated with your Google Account to purchase
items from Google Play.
► Do one of the following:

On your computer, go to www.google.com/wallet to create a Google Wallet account.

The first time you use your device to buy an item from Google Play, you’re prompted
to enter your billing information to set up a Google Wallet account.
Warning:
When you’ve used Google Wallet once to purchase an application from Google
Play, the device remembers your password, so you don’t need to enter it the next
time. For this reason, you should secure your device to prevent others from using
it without your permission. (For more information, see Security.)
Applications and Entertainment
129
Get Help
If you need help or have questions about Google Play, touch
> Help while in the Google
Play screen. The Web browser will take you to the Google Play Help site.
Navigation
Your device offers a number of location-based navigation programs to help you figure out where
you are and get you where you’re going.
Google Maps
Google Maps lets you track your current location, view real-time traffic situations, and receive
detailed directions to your destination. It also provides a search tool where you can locate
places of interest or an address on a map, or view locations at street level.
Notes: You need an active mobile data or Wi-Fi connection to use Google Maps.
To find your location with Google Maps, you need to enable location sources. To learn
how, see Location Settings.
The Google Maps application does not cover every country or city.
Get Around Maps
When you open Google Maps, you can easily find your location on the map or check out nearby
places by panning and zooming in and out on the map.
1. From the Home screen, touch
> Maps.
2. Touch
to show your current location. The blinking blue marker
location on the map.
shows your
3. Do any of the following:
To
Move around
Do this
Swipe your finger to any direction on the screen to view
nearby places on the map.
Move the map based on
how you hold the device
Zoom in
Touch
Zoom out
Applications and Entertainment
.
●
Place your thumb and index fingers on top of the
area that you want to zoom in, and then spread
your fingers apart.
●
Double-tap the area on the map that you want to
zoom in.
Pinch your thumb and index finger on the map to
zoom out.
●
130
View information for a
random location
●
Touch and hold a location on the map. A balloon
opens over the location, with the address and a
thumbnail from street view (if available).
●
Touch the balloon to see more information. You
can get directions to the location, check for nearby
places of interest, and more.
Search for a Location
In Google Maps, you can search for a location, such as an address or a type of business or
establishment (for example, museums).
1. From the Home screen, touch
> Maps.
2. Enter the place you want to search in the search box.
3. Touch
to search for the location you entered or touch a suggested search item. The
search results are displayed as markers on the map.
4. Do either of the following:

Touch a marker ( ) to see if that is what you’re looking for, and then touch the
balloon if it is.

Touch RESULTS LIST to show the search results as a list, and then touch the
location. Details about the selected location display on the screen.
5. Touch the onscreen buttons to view the location on a map, get directions, view the
location in Street View, if available, and more. Scroll down the screen to view more
options.
Applications and Entertainment
131
Look at a Location in Street View
Street View mode (available only in selected areas) provides a street-level view of the location.
1. From the Home screen, touch
> Maps.
2. Do one of the following:

Touch and hold a location on the map, and then touch the balloon that appears.

Search for the place you want to view in Street View. See Search for a Location and
Search a Place of Interest Near You for details. When you find the place you’re
looking for, touch its balloon.
3. On the location details screen, touch Street View
.
4. To navigate in Street View, do any of the following:

Swipe your finger on the screen to pan up or down or to look in other directions.

To move to any part of the location or zoom in to an area, drag
you want to go.

Touch
> Compass mode to turn Compass mode on. Tilt, pan, or turn your
device to view the area around the location.
5. To return to the street map, touch
to the direction
> Go to map.
View Map Layers
Initially, Google Maps opens with a street map. You can view additional map layers, such as
satellite images, traffic information, your Google Latitude friends’ locations, and more. You can
view multiple layers at the same time.
Applications and Entertainment
132
Note: Not all locations have information to support all Map layers or all zoom levels. To learn
more about layers, visit Google Maps on the Web: maps.google.com
1. From the Home screen, touch
2. Touch
> Maps.
.
3. Select any of the following:

Traffic: (Available only in selected areas.) Real-time traffic conditions are displayed
over roads as color-coded lines. Each color represents how fast the traffic is moving.

Satellite: Google Maps uses the same satellite data as Google Earth™. Satellite
images are not real-time. Google Earth acquires the best imagery available, most of
which is approximately one to three years old.

Terrain: Shows the elevation of the map you’re viewing. Elevation is limited to
natural geographic features, like mountains and canyons and does not apply to
buildings.

Transit Lines: Shows the routes of public transportation services.

Latitude: When you have joined Latitude, you can view your friends’ locations as a
layer on the map. For information, see Google Latitude.

My Maps: Shows maps that you have created in Google Maps on the Web.

Wikipedia: Shows places that have Wikipedia information.

Clear Map: Clear layers and view only the street map.

Recently used search keywords will also appear on the Layers list.
Search a Place of Interest Near You
Use Places to find places of interest near your current location. Places uses Google Maps to
search common places that you would want to find, such as the nearest gas station or ATM
kiosk.
Before you use Places, you need to enable location sources. See Location Settings to learn
how.
1. From the Home screen, touch
> Places.
2. Touch the type of place you want to search. The search results can be displayed in a list
or as markers on the map. You can switch between the two views by touching MAP
VIEW or RESULTS LIST.
3. Do any of the following:
Applications and Entertainment
133

If the search results are displayed as markers on the map, you can touch the marker
to show its balloon. Then touch the balloon to view more information about the place.

If the search results are displayed in a list, you can touch a place to show its details.
See Search for a Location to learn what you can do on the location information screen.
Adding a Place to Search
In Places, you can add other places of interest that you frequently search for, such as a church
or a pizza restaurant.
1. From the Home screen, touch
2. Touch
> Places.
> Add a search.
3. Enter the place you want to add to Places’ search items, and then touch
is added as a button on the Places screen.
. The place
Get Directions
Get detailed directions to your destination. Google Maps can provide directions for travel by
foot, public transportation, or car.
1. From the Home screen, touch
2. While viewing a map, touch
> Maps.
.
3. Do any of the following:

Use your current location as the starting point, or enter a location from where to start
in the first text box. Then enter your destination in the second text box.

Touch
map.
to select an address from your contacts or a point that you touch on a
4. Choose how you want to get to your destination by touching the car, public transit, or
walk button.
Applications and Entertainment
134
5. Touch GET DIRECTIONS.
6. Touch DIRECTIONS LIST to see the directions to your destination in a list.
7. If the place you’ve set as your destination has several locations available, choose which
one to go to.
8. Touch any part of the route to see the point on the map.
9. Touch the arrow buttons on the map to follow the directions.
When you’re finished viewing or following the directions, touch
> Clear Map to reset the
map. Your destination is automatically saved in the Google Maps history.
Clear the Map
After you’ve searched on a map or got directions, you can clear any markers you may have
drawn on it.
► Touch
> Clear Map.
Get Help
Get help and more information about Maps. Touch
takes you to the Google Maps Help site.
> Help. The Web browser opens and
Google Latitude
Google Latitude™ user location service lets you and your friends share locations and status
messages with each other. It also lets you send text and email messages, make phone calls,
and get directions to your friends’ locations.
Applications and Entertainment
135
Your location is not shared automatically. You must join Latitude, and then invite your friends to
view your location or accept their invitations. Only friends that you have explicitly invited or
accepted can see your location.
Open and Join Latitude
1. From the Home screen, touch
2. While viewing a map, touch
> Maps.
> Join Latitude.
After you’ve joined Latitude and closed the Maps application, do one of the following to open it:
► From the Home screen, touch
> Latitude.
► From the Home screen, touch
> Maps, and then touch
> Latitude.
Invite Friends to Share Their Locations
1. From the Home screen, touch
2. Touch
> Latitude.
> Location Settings > Manage your friends >
.
3. Choose how to add friends:

Select from Contacts: Select any number of friends from People entries.

Add via email address: Enter one or more email addresses.
4. When the Send sharing requests dialog box opens, touch Yes.
If your friends already use Latitude, they receive an email request and a notification on Latitude.
If they have not yet joined Latitude, they receive an email request that tells them to sign in to
Latitude with their Google Account.
Respond to an Invitation
When you get a sharing request from a friend, you can:
●
Accept and share back: You and your friend can see each other’s locations.
●
Accept, but hide my location: You can see your friend’s location, but they can’t see
yours.
●
Don’t accept: No location information is shared between you and your friend.
View Your Friends’ Locations
You can view your friends’ locations on a map or in a list.
Applications and Entertainment
136
When you open Maps, your friends’ locations are shown. Each friend is represented by their
picture (from People) with an arrow pointing to their approximate location. If a friend has chosen
to share city-level locations, their picture does not have an arrow and appears in the middle of
the city.
To see a friend’s profile and connect, touch the photo. Your friend’s name appears in a balloon.
Touch the balloon to open a screen with details about your friend and many connection options.
When you open Latitude you see a list of your Latitude friends, with a summary of their last
known locations, status, and so on. Touch a friend in the list to open a screen with details about
the friend and many connection options.
Connect With and Manage Friends
Touch a friend’s contact details balloon in map view or touch a friend in list view to open your
friend’s profile. Touch any of the following buttons or options on the profile screen:
Shows your friend’s location on the map.
Get directions to your friend’s location.
View your friend’s location in Street View.
Your
friend’s
photo
Ping for
check in
Sharing
options
Opens Quick contact and lets you view your friend’s contact details, send
your friend an email message, and more.
Send your friend a notification to “check in” to a meeting place, and when
your friend checks in, you’ll get a notification so you know your friend has
arrived.
Select from the following:
● Share best available location. Share your precise location
information.
●
Share only city level location. Share only the city you’re in, not the
streetlevel location. Your friend can see your photo icon in the
middle of the city you’re in. To share more precise location again,
touch Best available location.
●
Remove
this friend
Hide from this friend. Stop sharing your location with this friend, in a
list or on a map.
Remove the friend from your list and stop sharing locations with him or her
altogether.
Applications and Entertainment
137
Change Privacy Settings
You have control over how and when you can be found by your friends. Only the last location
sent to Latitude is stored with your Google Account. If you turn off Latitude or are hiding, no
location is stored.
1. From the Home screen, touch
> Latitude.
2. Touch your own name, and then touch Edit privacy settings.
3. Set the following options to your preferences:

Location reporting
•
Detect your location: Let Latitude detect and update your location as you move.
The update frequency is determined by several factors, such as how recently
your location has changed.
•
Set your location: Choose from several options to manually select your location.
•
Do not update your location: Hide your location from all your friends.

Enable location history: Keep track of where you’ve been.

Manage your friends: Add or remove friends from Latitude.

Sign out of Latitude: Disable Latitude and stop sharing your location or status. You
can always join Latitude again.

Automatic check-ins: Allow Latitude to automatically check you into places you
have designated such as work or home.

Check-in notifications: Enables Latitude to suggest places for you to check in.

Manage your places: Lets you designate places to automatically check in or to
never check into.
HTC Footprints
HTC Footprints™ provides an easy way to record favorite places and revisit those places. A
footprint consists of a photo you take of a location such as a restaurant or sightseeing
destination stored together with a precise GPS position and other information about that location
such as the street address and phone number.
The next time you want to visit the same place, simply access the footprint. You can then dial
the phone number or view the location in Google Maps.
Note: GPS satellites must be selected in Settings > Location so that your device can
determine your GPS location. You will be asked to turn GPS on if the option is turned off.
Applications and Entertainment
138
Note: Make sure that the Geo-tag photos option in the camera application is selected. For
more information, see Change Camera Settings.
Create a Footprint
1. From the Home screen, touch
2. Touch
to capture the photo.
3. Touch
> Footprints.
> Camera.
4. Crop the photo and touch Save. See Edit Your Photos to learn how to crop photos.
5. Do the following:

Enter a name for the Footprint.

Touch Select categories to put the Footprint into a category to make it easier for
you to find it.

Touch Edit to change the name, category, or address of the Footprint, enter the
phone and website, and add a voice memo to the Footprint.

Touch Reshoot to recapture the Footprint photo.
6. Touch Done.
Revisit a Footprint
1. From the Home screen, touch
> Footprints.
2. Touch a Footprint category.
Applications and Entertainment
139
3. Touch the Footprint you want to revisit.
Edit or Delete a Footprint
1. From the Home screen, touch
> Footprints.
2. Touch a Footprint category.
3. Touch and hold the Footprint you want to edit or delete.
4. Touch Edit or Delete on the options menu.
Export your Footprints
You can back up footprints by exporting them to a storage card. You can also open exported
footprint files in other applications such as Google Earth on your computer.
1. From the Home screen, touch
> Footprints.
2. Do any of the following:

To export all your footprints, touch All footprints >
> Export.

To export all footprints from a particular category, touch a category, and then
touch
> Export.
Exported footprints are saved as .kmz files in the Footprints_Data folder on your microSD card.
If you exported multiple footprints at one time, they are saved together in one .kmz file.
Applications and Entertainment
140
Import Footprints
You can restore footprints you previously backed up to the storage card. You can also import
.kmz files that you saved in other applications, or use a photo as a footprint.
1. From the Home screen, touch
2. Touch
> Footprints.
> Import.
3. Do one of the following:

To import a photo, touch Photos, navigate to the photo you want to import, and then
touch the photo. Crop the photo and then touch Save. You can then add Footprints
information such as location and category.

To import saved footprints or another .kmz file from the microSD card, touch
Footprints data, and then touch the file you want to import. If a footprint on the
device is the same as one you want to import, you are asked whether you want to
overwrite it.
Add the Footprints Widget
Add the Footprints widget to view and access your footprints on the Home screen. To learn how
to add the Footprint widget, see Customize the Home Screen.
Telenav GPS Navigation
TeleNav GPS Navigator™ gives you turn-by-turn directions onscreen and over the
speakerphone.
Note: Depending on your service plan, TeleNav GPS Navigator may require a monthly
subscription. Contact Sprint for information and pricing.
Register TeleNav GPS Navigator
Before you can use TeleNav GPS Navigator, your device and service must be registered.
1. From the Home screen, touch
> TeleNav GPS Navigator.
2. Follow the onscreen instructions to register your device.
Use TeleNav GPS Navigator
1. From the Home screen, touch
> TeleNav GPS Navigator.
2. Select an option and follow the onscreen instructions to get directions, view maps, or
access additional services and options.
Applications and Entertainment
141

Drive To lets you enter an address (by either speaking it or by entering it on the
keypad) or select from categories such as My Favorites, Recent Places, or
Businesses to search for turn-by-turn directions.

Search provides a categorized list of locations such as Gas Stations, Grocery
Stores, and Hospitals to help find local businesses and services.

Maps lets you view maps for your current location or for any other location (same
categories as Drive To).

Places provides a categorized list of locations such as Gas Stations, Grocery Stores,
and Hospitals to help find local businesses and services.

Extras provides ways to customize your TeleNav GPS app.
Music
Your device lets you discover, download, and listen to your favorite music through a variety of
applications.
Listen to Music
Enjoy listening to songs and music on your device using the Music application.
Note: You need to copy music files to your storage card first to use the Music application to
play music. To find out how to copy files to the storage card, see Your Device’s microSD
Card.
Play Music
► From the Home screen, touch
> Music.
Touch any song from your library to start playing. On the Now playing screen, you can:
●
Touch
> Output to play music on another device using Connected media. For more
information, see Connected Media.
●
Touch and drag your finger across the progress bar (
song.
●
Touch
●
Touch
to go to the previous song or touch
to go to next song in the Now playing
list. You can also swipe your finger left or right across the screen to go to the previous or
next music album.
●
Touch
) to jump to any part of the
to open the Music Library.
to pause or touch
Applications and Entertainment
to resume playing the song.
142
●
Touch
to switch between showing the Now playing list and Now playing screen. You
can rearrange songs in the Now playing list.
●
Touch
●
Touch
to cycle through the repeat modes: repeat all songs, repeat current song,
don’t repeat.
●
Touch
> Sound enhancer to enjoy listening to your music with SRS. Or, if you’re
using a wired headset, you can also choose from various preset equalizer settings. (SRS
and equalizer are not available when you’re using a Bluetooth stereo headset.)
to turn shuffle on or off. (Shuffle is off when the button is gray.)
Note: Press the volume up or down button to adjust the playback volume.
Play Music from the Lock Screen
When you are playing music and the screen turns off, you can control the music playback right
from the lock screen when you wake up the device by pressing
.
If you only see the album art, slide your finger across the screen to flip the album art and display
the playback controls.
Note: You can also pause music playback directly from the Notifications panel.
Browse Music in the Library
1. From the Home screen, touch
Applications and Entertainment
> Music.
143
2. Touch
on the Now playing screen or Now playing list to go to the Library.
3. Touch a song in a category to play it. The Now playing list is updated with the song list
from your selected category.
Note: You can add, remove, or rearrange the tabs in the Library.
Create Playlists
Personalize your music experience by creating music playlists. Make a playlist containing just
your favorite songs or create one to match your mood for the day. You can make as many
playlists as you like.
1. From the Home screen, touch
2. Touch
> Music.
to go to the Library.
3. Touch Categories > Playlists.
4. Touch
.
5. Enter a playlist name, and then touch
.
6. Touch Categories > Songs to see a complete list of songs on your microSD card.
7. Select the check boxes of songs you want to add to the playlist and then touch Add.
8. Touch Save.
Play the Songs in a Playlist
1. From the Home screen, touch
Applications and Entertainment
> Music.
144
2. Touch
to go to the Library.
3. Touch Categories > Playlists.
4. Touch a playlist to open it.
5. Touch the first song or any song in the playlist.
When you touch a song in the playlist, the Now playing list is updated with the song list from
your playlist.
Manage Your Playlists
After creating a playlist, you can add more songs to it, rearrange their order, and more.
To add songs to a playlist:
1. From the Home screen, touch
2. Touch
> Music.
to go to the Library.
3. Touch Categories > Playlists.
4. Touch a playlist to open it.
5. Touch
> Edit playlist >
.
6. Go to the Songs category or any other category.
7. Select the songs you want to add to the playlist and then touch Add.
Note: While playing a song, touch
> Add to playlist to add the current song to a playlist.
To rearrange the songs in a playlist:
1. From the Home screen, touch
2. Touch
> Music.
to go to the Library.
3. Touch Categories > Playlists.
4. Touch a playlist to open it.
5. Touch
> Edit playlist.
6. Touch and hold
at the end of the song title you want to move. When the row is
highlighted, drag it to its new position, and then release.
7. Touch Save.
To delete a song in a playlist:
Applications and Entertainment
145
1. From the Home screen, touch
2. Touch
> Music.
to go to the Library.
3. Touch Categories > Playlists.
4. Touch a playlist to open it.
5. Touch
> Edit playlist.
6. Touch the checkboxes of the songs you want to delete, and then touch Save.
To delete a playlist:
1. From the Home screen, touch
2. Touch
> Music.
to go to the Library.
3. Touch Categories > Playlists.
4. Touch
> Delete playlists.
5. Select the playlists to delete, and then touch Delete.
Set a Song as a Ringtone
You can select a song from the Music application’s Library and set it as your device’s ringtone
or as a ringtone for a specific contact.
1. From the Home screen, touch
2. Touch
> Music.
to go to the Library.
3. Select the song that you want to use as ringtone, and then play it back.
4. On the Now playing screen, touch
> Set as ringtone.
5. In the Set as ringtone options menu, touch:

Phone ringtone to set the song as your device’s ringtone.

Contact ringtone to assign the song as ringtone for your contacts. You need to
choose the contacts you want to associate the song with in the next screen.
6. To confirm that the song was added as a ringtone, touch
>
> Settings >
Sound > Phone ringtone. The song should be in the ringtone list and selected.
Applications and Entertainment
146
Trim an MP3 Ringtone
Music has a built-in ringtone trimmer. You can trim an MP3 song and set a part of it as your
ringtone.
1. From the Home screen, touch
2. On the Now playing screen, touch
> Music.
> Set as ringtone.
3. In the Set as ringtone options menu, touch Trim the ringtone.
4. Use the onscreen controls to trim your ringtone.

Drag the two trim sliders (
ringtone to begin and end.
) approximately to the part where you want the

Touch the left and right arrow buttons (
points of the ringtone.

The markers (
) to more precisely set the start and end
) show where the ringtone starts and ends.
5. After you’ve finished trimming, touch Set as. Then choose whether to set the trimmed
song as your Phone ringtone or Contact ringtone.
6. To check if the song was added as a ringtone, touch
>
> Settings > Sound >
Phone ringtone. The song should be in the ringtone list and selected.
Send Music Using Bluetooth
You can select a song from the Music application’s Library and send it to another phone or to a
computer using Bluetooth.
Applications and Entertainment
147
1. From the Home screen, touch
2. Touch
> Music.
to go to the Library.
3. Select the song that you want to send, and then play it back.
4. On the Now playing screen, touch
> Share > Share file > Bluetooth.
In the next few steps, you’ll be asked to turn on Bluetooth on your device and connect to the
receiving Bluetooth device so the music can be sent. For more information, see Turn Bluetooth
On or Off.
Find Music Videos on YouTube
You can find music videos of the song you’re listening to on YouTube.
1. From the Home screen, touch
2. Touch
> Music.
to go to the Library.
3. Select the song that you want, and then play it back.
4. On the Now playing screen, touch
> Find videos.
Use the Music Widget
You can use the Music widget to play music right from your Home screen. To find out how you
can add this widget to your Home screen, see Customize the Home Screen.
Connected Media
Sharing photos, videos, and music with a bigger circle of friends is easy on your home network.
Simply connect your device to the network and instantly show your captured photos and videos
on a big TV, or start streaming your favorite music tracks on hi-fi speakers — all via DLNA®. For
more information about DLNA, visit www.dlna.org.
Note: Before you share media through the network:
Connect your device to the network via Wi-Fi.
Connect the TV or speakers to the network. Check the documentation that came with
your TV or speakers to know how.
1. Open the Gallery or Music app.
2. Locate the media that you want to share, and then touch it.
3. Do one of the following:
Applications and Entertainment
148
Tip:

While viewing a photo or playing a video, touch

While playing music on the Now playing screen, touch
If Wi-Fi is off, touch
.
> Output.
to turn it on and connect to your network.
1. Choose the device on your network where you want to play the media, and then touch
Done.
2. Once connected to the other device, you can touch:
/
Play or pause the media on the other device.
Go to the previous photo or music track.
Go to the next photo or music track.
Shuffle your music playlist.
> Repeat
Select a repeat mode for photos.
Show available media that you can share.
Turn on SRS when playing music.
Switch to the Now playing list when playing music.
Connect to another player on the network.
While playing media on another device, you can touch
and do other things on your device.
To return from where you took off, slide open the Notifications panel, and then touch the device
you’re connected to.
Sprint Music Plus
Sprint Music Plus is your one-stop shop for music, ringtones, and ringback tones.
Download Sprint Music Plus
1. From the Home screen, touch
> Sprint Music Plus. The Web browser opens to the
Sprint Music Plus download page.
2. Touch Download app now to download and install Sprint Music Plus from Google Play.
3. On the Google Play download page, touch Update > Accept and download.
Applications and Entertainment
149
Open Sprint Music Plus
1. From the Home screen, touch
> Sprint Music Plus.
2. Touch Continue.
3. Touch the categories to begin shopping for music, ringtones, and ringback tones. Or,
touch the Search All Stores box to search for music in the Sprint Music Plus store.
Music - MP3 Store
Amazon MP3 lets you preview, purchase, download, and listen to over a million songs right on
your device. MP3 Store provides you with one-touch access to digital music from amazon.com.
Amazon has more than 6 million DRM-free MP3 tracks you can purchase and download to your
device.
Important:
You can download MP3s using Sprint 4G or Wi-Fi connection. You can browse
and preview songs using any data connection.
Purchase and Download Music
1. From the Home screen, touch
> Amazon MP3.
2. The first time you open Amazon MP3, you will be asked to select Store or Player.
Touch Store.
3. From the Amazon MP3 store, touch:

Bestsellers to display bestselling albums and songs.

New Releases to display newly-released albums and songs.

Genres to search for songs or albums by genres.
Applications and Entertainment
150

Search store to search specific songs, albums, or artists. Use the keyboard to enter
your search criteria in the text box and touch
.
4. On the list of albums and songs, do one of the following:

Touch the price at the right side of the album or song to purchase it and then touch
Buy. (If there is no microSD card installed or if there is not enough free memory
space on the card, you will see an alert.)

Touch a song name to play a preview.

Touch an album to view the songs in it and then touch a song to play a preview. You
can purchase individual songs in an album.
5. Enter the email address and password that you use to access Amazon, and touch
Sign-in.
FM Radio
Listen to your favorite FM radio station on your device.
Note: You will first need to connect a wired headset to the audio jack of your device to use FM
Radio. FM Radio uses the stereo headset as the FM radio antenna. The wired headset
is not included with your device. It must be purchased separately.
Use FM Radio
1. From the Home screen, touch
> FM Radio.
2. The first time you launch FM Radio, it automatically scans for available FM stations,
saves them as presets, and plays the first FM station found. Touch
to stop the autoscan.
Applications and Entertainment
151
3. On the FM Radio screen, you can:

Touch
to view the All presets list, and then select a station you want to listen to.

Touch
to go to the previous available FM station, or
available FM station.

Drag the slider (

Touch
to fine-tune the radio frequency by -0.1 MHz, or touch
radio frequency by +0.1 MHz.

Touch

Press the volume buttons on the side of the device to adjust the volume.

To repeat scanning and saving of FM stations, touch

Touch
to mute the sound or to change the sound output to Mono or Stereo. You
can also switch the sound output between the Speaker and Headset.
to go to the next
) to tune in to a frequency on the FM band.
to fine-tune the
to add a preset name for the current station you are tuned into.
> Scan & Save.
Add Station Names
1. From the Home screen, touch
> FM Radio.
2. Tune in to an FM station, and then touch
.
3. Enter a station name for the selected FM station, and then touch Save.
Close or Turn Off FM Radio
► Do one of the following while tuned in to a FM station:

To close the FM Radio screen and continue listening to the radio, touch
.
FM Radio continues to run in the background. To go back to the FM Radio screen,
open the Notifications panel, and then touch FM Radio.

To close the FM Radio app completely, touch
Radio screen.
on the upper right corner of the FM
Sprint TV & Movies
The Sprint TV & Movies application offers a wide variety of accessible channels and movies.
Subscription options include comprehensive basic packages as well as a full menu of “a la
carte” channels and movies. Since available categories and content are subject to change, visit
http://sprintchannels.mobitv.com for updated information on channels and pricing.
Applications and Entertainment
152
Watch TV and Movies
1. From the Home screen, touch
> Sprint TV & Movies.
Depending on your settings, your device may prompt you to update the application
and/or accept a data connection.
Note: You must turn off Wi-Fi before you can view Sprint TV & Movies. If you launch Sprint TV
& Movies and have Wi-Fi enabled, a message will appear onscreen asking you if you
want to turn off Wi-Fi.
2. On the Sprint TV & Movies home screen, do one of the following:

Slide your finger left or right on the screen to browse through featured shows,
channels, and movies. Touch an item to view more information.

Touch an icon on the Live Channels section at the bottom of the screen to start
viewing live TV. You can also touch the Live TV tab at the top of the screen to select
from available channels.

Touch On Demand to select from a list of TV shows arranged conveniently into
categories.

Touch Movies to select from a list of movies that you can stream on your device.

Touch Shop to view available channel packages and to order subscriptions.
Note: The first time you access a channel, the system will prompt you to purchase access
(unless the channel doesn’t have a monthly fee). Select Subscribe to purchase access,
or select Preview to view a preview of the selected channel.
3. Touch the live TV, on-demand show, or movie that you’ve selected. The clip will
automatically load and begin playing.
4. While watching a clip, touch the screen to surf to a different channel. The Live Channels
list at the bottom of the screen will tell you the channel you’re watching as well as other
channels that you have access to. Slide your finger on the screen to scroll through the
channels. Once you find a channel, show, or movie that you want to watch, scroll to it
and then touch it.
Applications and Entertainment
153
Sprint TV & Movies FAQs
Will I know if I’m receiving an incoming call while I’m viewing or listening to a media clip?
No. All incoming calls will roll into voicemail while you are playing a clip. If the caller leaves a
voicemail, you will see the voicemail icon on the screen.
How long are the clips? Will I know the estimated time it will take to play the clip prior to
accessing it?
Once you have selected a channel, you will see a listing of the available clips, with each clip’s
length displayed after the clip’s title. In general, a clip’s duration will depend on the story or
content being provided, and can be fairly short or as long as a few minutes.
Can I access a clip wherever I am, as long as I have my device?
As long as you are on the Nationwide Sprint Network, you will have access to the audio and
video clips.
Note: Sprint TV service does not work while roaming off of the Nationwide Sprint Network or
where service is unavailable.
Are the videos that I’m viewing “live” videos?
It depends on the content provider. Some of the channels available through Sprint TV & Movies
stream live content. Others provide media on demand with video and audio clips that are
refreshed throughout the day, but those are not “live.”
After purchasing access to an Available Channel for a monthly fee, do I receive any
confirmation? That is, how do I know it has been purchased?
The next time you access the channel, you bypass the Preview/Purchase dialog box and go
directly to the available content.
If I don’t subscribe to a data plan, will I still be able to view the multimedia clips?
Yes. For service access charges, please consult your Sprint service plan or visit sprint.com.
What does it mean when the video pauses and I see the word “loading” at the bottom of
the screen?
This happens when the device is loading the data necessary to play the clip. It typically occurs
when there is heavy traffic on the network.
How can I cancel service if I decide I don’t want it?
To cancel your Sprint TV service, visit sprint.com and sign on to My Sprint with your account
number and password. From this page, you have the ability to cancel the service or any
channels to which you subscribe.
If I put on my stereo headset and insert it into the device’s headset jack, can I turn off the
screen while I am playing an audio (or video) clip without interrupting the clip?
Yes. When you insert your stereo headset into the device’s headset jack, the device
automatically goes into “headset mode,” allowing you to turn the screen off and continue playing
the clip.
Applications and Entertainment
154
(Likewise, if your device is in “headset mode,” a phone call will not disconnect when you turn off
the screen.)
Can I surf to a different channel while I am playing a clip?
Yes. While you are playing a clip, touch the screen to surf to a different channel. The Live
Channels list at the bottom of the screen will tell you which channel you are watching as well as
other channels that you have access to. Slide your finger on the screen to scroll through the
channels. Once you find a channel, show, or movie that you want to watch, scroll to it and then
touch it.
NASCAR Sprint Cup Mobile
Now you have the ability to get every bit of NASCAR coverage, news, and stats right on your
device.
1. From the Home screen, touch
> NASCAR. Depending on your settings, your device
may prompt you to update the application.
2. If prompted, read the permission check disclaimer, make a selection and touch OK.
Follow the onscreen instructions until you reach the main NASCAR Sprint Cup Mobile
page.
3. Select your favorite driver.
4. Navigate the main page by scrolling around on the screen.
5. Touch an onscreen option to activate features that include:

Home is the main NASCAR homepage where you can view stats on a current race,
choose to follow a specific driver, view special NASCAR promotions and other
NASCAR-specific multimedia content.
•
Touch
> Home to return to the main NASCAR page. This applies to each of
these options.

Race Recap provides overviews of the current races, pictures, commentary,
additional photos, and race stats.

SPEED displays a list of selectable multimedia video clips from the SPEED channel
that are specific to NASCAR.

All-star displays information about the annual NASCAR Sprint All-Star Race.

My Driver to customize your NASCAR experience by following specific drivers.
Information includes driver-specific stats and NASCAR RSS feeds. You can also get
additional stats, review other driver info, or change drivers.

Stats & Schedule lets you track race information such as: NSCS Recap, NNS
Recap, Point Standings, Season Stats, and Schedule.
Applications and Entertainment
155

Miss Sprint Cup is your insider to NASCAR by providing news, information, blogs
and twitter updates to the goings-on within NASCAR.

Videos displays a list of selectable multimedia content. Other features include
streaming multimedia content from NASCAR radio stations or other racing radio
shows.

News & Alerts provides you with quick access to NASCAR-specific news, photos,
and driver stats. You can also customize alerts for new information such as ALL
NASCAR News, Sprint Cup News, etc.

Twitter lets you get the latest tweets from NASCAR drivers, the media, and more.

Fantasy lets you connect with other NASCAR enthusiasts. You will have to login
using a NASCAR.COM Community login. If you do not have this information, visit
community.nascar.com to get an account.

FanZone displays a list of selectable content available to Sprint subscribers such as
Sweepstakes, Video clips (footage and music) and Screensavers.

Settings and Help displays help information for usage of the NASCAR application
and features.

Exit to quit the NASCAR application.
HTC Watch
With the HTC Watch™ online video service, you can get a glimpse of the latest movie trailers
and enjoy watching Hollywood blockbusters or TV shows.
Create your HTC Watch account so you can:
●
Rent or buy movies and TV shows online.
●
Recommend videos instantly.
●
Watch your purchased videos on up to five HTC devices that have access to HTC Watch
using your same account.
Create or Sign In to Your HTC Watch Account
1. From the Home screen, touch
> Watch. If this is your first time to use the service,
read and accept the license agreement before you continue.
2. Touch
, and then go to the All videos tab (
).
3. Touch Tap to sign in to Watch.
4. Create a new HTC Watch account, or directly sign in if you already have one.
Applications and Entertainment
156
Tip:
You can also go to Settings > Account & sync to create your HTC Watch account.
The Watch App
On the Watch application’s main screen, you’ll see movies and TV shows that you’ve
downloaded from the HTC Watch video store.
► From the Home screen, touch
> Watch.
●
Swipe left or right across the screen to browse through the videos, and then touch one to
watch it.
●
Touch Recommended to check recently released movies and TV shows in the video
store.
●
Touch
to check your video library and manage your downloads.
●
Touch
to browse the HTC Watch video store.
Tip:
You can connect your device to an HDTV and enjoy watching your videos on the big
screen. To connect your device, you’ll need an HDTV with an available HDMI port, a
supported MHL-HDMI adapter, and an HDMI cable (all sold separately). Contact Sprint
for the availability of these accessories.
Browse the Video Store
Explore the catalog of items in the HTC Watch video store. Browse TV shows and movies
available for rent or purchase. You can also view trailers for select videos.
1. From the Home screen, touch
> Watch, and then touch
.
2. Browse the recommended and featured selections, or browse by category.
3. To do a quick search, touch
and enter the title that you’re looking for.
4. Touch a video to view its synopsis.
5. After reading the synopsis, you can:

Touch
to watch the trailer, if available.

Touch
to recommend the video to your contacts via email, text, tweet, and more.

Rent or buy the video when you’re ready.
Rent or Buy a Video
Your billing information is stored on your HTC Watch account so you won’t need to enter it
every time you rent or buy a video.
1. From the Home screen, touch
Applications and Entertainment
> Watch, and then touch
157
.
2. Browse the recommended and featured selections, or browse by category.
3. To do a quick search, touch
and enter the title that you’re looking for.
4. While browsing the video selections, touch
to rent or
Or touch a video to view its synopsis, and then touch
to buy the video.
to rent or
to buy the video.
5. If this is your first time to rent or purchase, touch Add a payment card, and then enter
your credit card details and billing address.
Note: Make sure to use a credit card that’s registered in the same region as the one
associated to your HTC Watch account.
6. Confirm your rental or purchase.
7. Touch Download.
You can go to your library to check your downloads.
Manage Your Video Library
Use the video library to manage your downloads and see all your video purchases. From the
video library, you can also start watching a video as it’s being downloaded.
1. From the Home screen, touch
2. Touch
> Watch.
, and then touch any of these tabs:

Downloaded
device.
Lists videos that have been fully downloaded to your current HTC

All videos
Lists all videos that you have rented or purchased and allows you to
manage your downloads. You can pause, resume, or redownload a video.

Progress
Shows the progress of your video downloads. You can touch a video
to start watching it as it’s being downloaded.
When the download is complete, the video cover appears in the Downloaded
videos tab and also on the Watch main screen.
Check or Change the HTC Watch Settings
1. From the Home screen, touch
2. Touch
> Watch.
> Settings.

Account: Modify your account settings.

My purchases: Check your purchase history.
Applications and Entertainment
158

Payment methods: Edit or delete your credit card information.

Device management: When you download videos from the video store, your HTC
device will automatically be added to your HTC Watch account. If you own more than
one HTC device that has access to HTC Watch, you can download and watch videos
on up to five devices.
Touch Remove device if you want to unlink and remove an HTC device from your
account.

Re-check store region: If you travelled elsewhere, let HTC Watch detect your
location and determine the video store region from where you can rent or buy videos.
HTC Watch FAQs
Why am I asked to sign in again to my account?
Whenever a time interval (about 20 minutes) has passed, you’ll be asked to sign in again to
your HTC Watch account before you can continue to rent or purchase videos or access some
settings. This is a safety precaution to check your identity and to ensure that you acknowledge.
How long is a video rental?
Depending on the studio’s terms and the country where you downloaded the video, the rental
period can be 24 or 48 hours, starting from the first viewing. If you’re not immediately watching
the video, you have up to 30 days before the rental expires.
Why won’t HTC Watch allow me to remove a device and add a new one?
Removing a device is available once every 120 days when you’ve already reached the
maximum of five HTC devices in your account.
How do I remove my HTC Watch account from my device?
1. From the Home screen, touch
2. Touch
> Watch.
> Settings > Account.
3. Touch Remove account.
You can also go to Settings > Account & sync to remove your HTC Watch account.
Applications and Entertainment
159
Web and Data
This section addresses your device’s data connections and the built-in Web browser. Additional
data-related features can be found in Accounts and Messaging, Applications and Entertainment,
and Tools and Calendar.
Ways to Connect
Wi-Fi
Sprint 4G
Data Services (Sprint 3G and 4G Networks)
Virtual Private Networks (VPN)
Browser
Sprint Hotspot
Use Your Device as a Modem
Connect Your Device to the Internet Through a Computer (Internet Pass-through)
Ways to Connect
Your device’s data capabilities let you wirelessly access the Internet or your corporate network
through a variety of connections, including:
●
Wi-Fi
●
Sprint 4G
●
Data Services (Sprint 3G Network)
●
Virtual Private Networks (VPN)
●
Sprint Hotspot
Wi-Fi
Wi-Fi provides wireless Internet access over distances of up to 300 feet. To use your device’s
Wi-Fi, you need access to a wireless access point or “hotspot”.
The availability and range of the Wi-Fi signal depends on a number of factors, including
infrastructure and other objects through which the signal passes.
Web and Data
160
Turn Wi-Fi On and Connect to a Wireless Network
1. From the Home screen, touch
> Settings.
2. Touch the Wi-Fi switch to turn Wi-Fi on. The device will scan for available wireless
networks.
3. Touch Wi-Fi. The network names and security settings of detected Wi-Fi networks are
displayed in the Wi-Fi networks section.
4. Do one of the following:

Touch an open Wi-Fi network to automatically connect to it.

Touch a secured Wi-Fi network, enter the security key, and touch Connect.

If the wireless network you want to connect to is not in the list of detected networks,
scroll down the screen, and then touch Add Wi-Fi network. Enter the wireless
network settings, and then touch Save.
5. Check the status bar. When your device is connected to a wireless network, the Wi-Fi
icon (
) appears in the status bar and tells you the approximate signal strength
(number of bands that light up).
If Network notification in Wi-Fi settings is enabled, this icon (
) appears in the status
bar whenever the device detects an available wireless network within range.
Note: The next time your device connects to a previously accessed secured wireless network,
you will not be prompted to enter the WEP key again, unless you reset your device to its
factory default settings.
Check the Wireless Network Status
1. From the Home screen, touch
> Settings > Wi-Fi.
2. Touch the wireless network that the device is currently connected to. You will see a
message box showing the Wi-Fi network name, status, speed, signal strength, and other
details.
Web and Data
161
Note: If you want to remove the device’s wireless network settings, touch Forget on this
window. You need to enter the settings again if you want to connect to this wireless
network.
Connect to a Different Wi-Fi Network
1. From the Home screen, touch
> Settings > Wi-Fi. Detected Wi-Fi networks are
displayed in the Wi-Fi networks section. To manually scan for available Wi-Fi networks,
on the Wi-Fi settings screen, touch
> Scan.
2. Touch another Wi-Fi network to connect to it.
Note: If the wireless network you want to connect to is not in the list of detected networks,
scroll down the screen, and touch Add Wi-Fi network. Enter the wireless network
settings and touch Save.
Add the Wi-Fi Widget
Add the Wi-Fi widget to the Home screen to make it faster for you to turn Wi-Fi on or off.
1. Touch and hold an available spot on one of the Home screens.
2. From the Personalize screen, touch Widget > Settings > Wi-Fi.
Sprint 4G
Sprint 4G provides your device with wireless Internet access over greater distances than Wi-Fi
and delivers data transfer rates of up to 30 Mbps. To connect your device to Sprint 4G Network,
you need access to a Sprint 4G base station.
For more information about the availability of Sprint 4G in your location, visit
sprint.com/coverage.
Note: The availability and range of the Sprint 4G depends on a number of factors including
your distance to the Sprint 4G base station, and infrastructure and other objects through
which the signal passes.
Turn Sprint 4G On and Connect to the Sprint 4G Network
1. From the Home screen, touch
> Settings.
2. Scroll down the screen and touch the 4G switch to turn Sprint 4G on. The device will
automatically scan and connect to the Sprint 4G Network.
3. Check the status bar. When your device is connected to the Sprint 4G Network, the 4G
icon (
) appears in the status bar and tells you the approximate signal strength
(number of bands that light up). If Network notification in 4G settings is enabled, this
icon (
Web and Data
) appears in the status bar whenever the device detects the Sprint 4G Network.
162
Note: The Sprint 4G Network is self-discoverable, which means no additional steps are
required for your device to connect to it.
Check Sprint 4G Network Status
1. From the Home screen, touch
> Settings.
2. Scroll down the screen and touch 4G. The network provider name, signal strength, and
IP address are displayed.
Add the Sprint 4G Widget
Add the Sprint 4G widget to the Home screen to make it faster for you to turn it on or off.
1. Touch and hold an available spot on one of the Home screens.
2. From the Personalize screen, touch Widget > Settings > 4G.
Data Services (Sprint 3G and 4G Networks)
With your Sprint service, you are ready to start enjoying the advantages of data services. This
section will help you learn the basics of using your data services, including managing your user
name, launching a data connection, and navigating the Web with your device.
Important:
Certain data services requests may require additional time to process. While your
device is loading the requested service, the touchscreen may appear
unresponsive when in fact they are functioning properly. Allow the device some
time to process your data usage request.
Your User Name
When you buy your device and sign up for service, you’re automatically assigned a user name,
which is typically based on your name and a number, followed by “@sprintpcs.com.” (For
example, the third John Smith to sign up for Sprint data services might have
[email protected] as his user name.)
When you use data services, your user name is submitted to identify you to the Nationwide
Sprint Network. Your user name is automatically programmed into your device. You don’t have
to enter it.
Update Your User Name
If you choose to change your user name and select a new one online, or make any changes to
your services, you must then update the profile on your device.
1. From the Home screen, touch
> Settings > System updates.
2. Touch Update Profile.
Web and Data
163
Launch a Web Connection
Launching a Web connection is as simple as opening the browser on your device.
●
From the Home screen, touch
> Internet. Your data connection starts and you see
the home page. You can change the default home page. See Set Browser Options.
●
From the Home screen, touch
page link and then touch it.
> Mail or Messages. Open a message with a Web
Data Connection Status and Indicators
Your device displays the current status of your data connection through indicators at the top of
the screen. The following symbols are used:
●
Your device is connected to the Sprint 4G Network. When only a band lights up,
your device is connected to the Sprint 4G Network but the signal is weak. When your
device detects the high-speed Sprint 4G Network but is not connected to it,
this icon ( ) appears at the top of the screen.
●
Your device is connected to the Sprint 3G Network. When the arrows are white, your
device is transferring data (for example, when you are opening a Web page). When the
arrows are gray (
), your device is connected to the network but is not currently
transferring data (for example, when you are viewing a Web page that is completely
open). In either state, you can receive incoming calls.
If you do not see an indicator, your device does not have a current data connection. To launch a
connection, see Launch a Web Connection.
Turn the Data Connection On or Off
Turn your data connection off to optimize the device’s battery life. It can also save money on
data charges. However, when your data connection is turned off, you may not always receive
automatic updates to your email, social network accounts, and other synchronized information.
1. From the Home screen, touch
> Settings.
2. Touch the Mobile network switch to turn the data connection on and off.
Add the Data Connection Widget
Add the Data connection widget to the Home screen to make it faster for you to turn the device’s
data connection on or off.
1. Touch and hold an available spot on one of the Home screens.
2. From the Personalize screen, touch Widget > Settings > Mobile Network.
Web and Data
164
Data Services FAQs
How will I know when my device is ready for data service?
Your user name (for example, [email protected]) will be displayed when you access
Settings > About phone > Phone identity > Current username.
How do I sign in for the first time?
You are automatically signed in to access data services when you turn on your device.
How do I know when my device is connected to data services?
Your device automatically connects when you use data service or an incoming message arrives.
You will also see the
or
indicator.
Can I make calls and use data services at the same time?
Depending on the current configuration of your device, you may be able to make calls and use
data services at the same time.
With DDTM mode off (default, configured in Settings > Call > CDMA call settings):
●
If you are using the Sprint 3G Network when a voice call comes in, data transmission is
suspended and will automatically resume when you complete your voice call.
●
If you are on a voice call, you will not be able to establish connection with the Sprint 3G
Network.
With DDTM on (configured in Settings > Call > CDMA call settings):
●
You cannot use voice and data services simultaneously. If you receive a call while data
service is active, your device will forward the call to voicemail. You can place an
outgoing call at any time, but it will interrupt any in-progress data session. Your device
will not automatically resume an interrupted data session.
With DDTM off or on:
●
You can make or receive a voice call while you are connected to the Sprint 4G Network.
Incoming calls will not disrupt or suspend your data connection.
When is my data connection active?
Your connection is active when data is being transferred. Outgoing calls are allowed; incoming
calls go directly to voicemail. When active, the arrows on the
4G icon
icon light up or you’ll see the
.
When is my data connection dormant?
If your device receives no data for ten seconds, the connection goes dormant. When the
connection is dormant, you can make and receive voice calls. (The connection may become
active again quickly.)
If your device receives no data for an extended period of time, the connection will terminate.
Web and Data
165
Can I sign out of data services?
You can sign out without turning off your device; however, you will not be able to browse the
Web or use other data services (unless you establish a Wi-Fi connection.) While signed out, you
can still place or receive phone calls, check voicemail, and use other voice services. You may
sign in again at any time. To sign out, go to Settings > Wireless & networks and clear the
Mobile network check box.
Virtual Private Networks (VPN)
From your device, you can add, set up, and manage virtual private networks (VPNs) that allow
you to connect and access resources inside a secured local network, such as your corporate
network.
Prepare Your Device for VPN Connection
Depending on the type of VPN you are using at work, you may be required to enter your login
credentials or install security certificates before you can connect to your company’s local
network. You can get this information from your network administrator.
Before you can initiate a VPN connection, your device must first establish a Wi-Fi or data
connection. For information about setting up and using these connections on your device, see
Launch a Web Connection and Turn Wi-Fi On and Connect to a Wireless Network.
Set Up Secure Credential Storage
If your network administrator instructs you to download and install security certificates, you must
first set up the device’s secure credential storage.
1. From the Home screen, touch
> Settings > Security > Screen lock.
2. Set up a screen lock.
Tip:
If using a PIN or password screen lock, use at least eight characters without any spaces.
You can then download and install the certificates needed to access your local network. Your
network administrator can tell you how to do this.
Add a VPN Connection
1. From the Home screen, touch
> Settings > More > VPN.
2. Touch Add VPN network, and then touch the type of VPN you want to add.
3. Enter the VPN security details you have obtained from your network administrator.
4. When you have finished, touch Save.
The VPN is then added to the VPNs section of the VPN settings screen.
Web and Data
166
Connect to a VPN
1. From the Home screen, touch
> Settings > VPN.
2. In the VPNs section, touch the VPN that you want to connect to.
3. When prompted, enter your login credentials, and then touch Connect. When you are
connected, the VPN connected icon
bar.
appears in the notification area of the status
4. Open the Web browser to access resources such as intranet sites on your corporate
network. For more information, see Browser.
Disconnect From a VPN
1. Touch and hold the status bar, and then drag down to open the Notifications panel.
2. Touch the VPN connection to return to the VPN settings screen, and then touch the VPN
connection to disconnect from it.
When your device has disconnected from the VPN, the VPN disconnected icon
in the notification area of the status bar.
is displayed
Browser
Open the browser to start surfing the Web. The browser is fully optimized and comes with
advanced features that let you enjoy Internet browsing on your device.
Go to a Website
1. From the Home screen, touch
> Internet.
2. On the browser screen, touch the URL box at the top of the screen.
3. Enter the website address. As you enter the address, matching website addresses will
appear on the screen.
4. Do any of the following:

Touch an address to go directly to that website.

Continue entering the website address, and then touch
.
The Browser Menu
Although the home page offers a broad and convenient array of sites and services for you to
browse, not all sites are represented, and certain functions, such as going directly to specific
websites, are not available. For these and other functions, you will need to use the browser
menu. The browser menu offers additional options to expand your use of the Web on your
device. Open the browser menu from any Web page you are viewing by touching
.
Web and Data
167
Options available under the browser menu include:
●
Home: Returns you to your default home page.
●
Forward: Returns you to a previously viewed page (after having touched
●
Add to: Allows you to bookmark the current site or to put a shortcut on the Home
screen.
●
Bookmarks: Allows you to access and manage your bookmarks. See View Bookmarks
and Previously Visited Web Pages.
●
Windows: Allows you to open additional browser windows. See Browser Windows.
●
Find on page: Allows you to find specific text on a Web page.
●
View desktop site: Lets you display the regular desktop version of the website.
●
Share page: Lets you send the website URL using Bluetooth, Friend Stream, Gmail,
Mail, Messages, or Peep.
●
Downloads: Lets you view applications that you have downloaded from the Web.
●
History: Keeps a list of links to your most recently visited sites. To navigate to a site,
touch a site. See View Bookmarks and Previously Visited Web Pages.
●
Settings: Opens the browser settings.
●
Print: Lets you print Web pages to a connected Wi-Fi printer.
).
Navigate and Zoom on a Web Page
1. From the Home screen, touch
> Internet.
2. Do any of the following:

Turn your device sideways to display the Web browser in landscape orientation.
Note: If the screen orientation doesn’t change automatically, turn on automatic screen
orientation. Touch
>
> Settings > Display, and then select the Auto-rotate
screen check box.

Swipe your finger on the screen to navigate and view other areas of the Web page.

Quickly touch the screen twice to zoom in; quickly touch the screen twice again to
zoom out.
Web and Data
168

Spread or pinch the screen to zoom in and out.
Select Links on a Web Page
You can touch a link to open it, or touch and hold a link for more options.
Tip:
Zoom in on the Web page when links are too small for touching directly on the screen.
Link
Web page address
(URLs)
What to do
● Touch the link to open the Web page.
●
●
Email address
Location address
Phone number
Web and Data
Touch and hold the link to open a menu that allows you to
open, bookmark, copy to the clipboard, or share the link.
Touch to send an email message to the email address.
●
Touch and hold, and then touch Copy on the menu to copy
the email address to the clipboard. You can paste the email
address later when creating a new contact or sending a
new email message.
Touch the address to copy it or map it using Google Maps.
Touch to open the Phone screen and call the number. Touch the
phone number to copy, call, send a text message to that number,
or save the number to a contact in People.
169
Browser Windows
Open multiple browser windows to make it easier for you to switch from one website to another.
1. From the Home screen, touch
2. While viewing a Web page, touch
3. Touch
Tip:
> Internet.
> Windows.
.
To open a browser window in private browsing mode, touch
.
4. Enter the address of the Web page you want to go to, and then touch
5. While viewing a Web page,touch
.
> Windows.
6. Select the browser window you want to view by sliding your finger on the screen from
right to left.
7. Touch a Web page window to open it in full-screen mode.
Download from the Web
Do more than just browsing the Web. You can download Web files such as photos and apps,
and then save them on your storage card.
Download Applications From the Web
You can download applications directly from your favorite websites. Applications downloaded
from the Web can be from unknown sources. To protect your device and personal data, we
strongly recommend that you download and install only applications you trust.
1. From the Home screen, touch
> Settings > Security.
2. Select the Unknown sources check box.
3. When the Attention dialog box opens, touch OK.
4. From the Home screen, touch
> Internet.
5. Go to the website where you can download the application you want.
Web and Data
170
6. Follow the website’s instructions for downloading the application.
View Your Downloads
1. From the Home screen, touch
> Internet.
2. While viewing a Web page, touch
> Downloads.
Copy Text, Look Up Information, and Share
You can select text on a Web page and then:
●
Copy it.
●
Search the term on the Internet.
●
Share the text in a new email, text, or multimedia message or in your status update on a
social network.
Select Text
1. From the Home screen, touch
> Internet.
2. While viewing a Web page, touch and hold on a word.
Tip:
To select text in a link, touch and hold the link, and then touch Select text.
3. Drag the start and end markers to highlight the surrounding text you want to select. You
can drag to increase or decrease the text selection area.
4. Touch an icon to copy, search or translate, or share the selected text.
Web and Data
171
5. To select a larger block of text, you can drag these markers up or down.
Copy and Paste Text
1. From the Home screen, touch
> Internet.
2. While viewing a Web page, touch and hold on a word.
3. Drag the start and end markers to highlight the surrounding text you want to copy. You
can drag to increase or decrease the text selection area.
4. Touch Copy (
). The selected text is then copied to the clipboard.
5. In a text box (for example while composing a message), touch and hold at the point
where you want to paste the text.
6. Touch Paste.
Search Text
1. From the Home screen, touch
> Internet.
2. While viewing a Web page, touch and hold on a word.
3. Drag the start and end markers to highlight the surrounding text you want to search or
translate. You can drag to increase or decrease the text selection area.
4. Touch Web Search (
).
Paste Text in a New Message or Social Network Status Update
1. From the Home screen, touch
Web and Data
> Internet.
172
2. While viewing a Web page, touch and hold on a word.
3. Drag the start and end markers to highlight the surrounding text you want to share. You
can drag to increase or decrease the text selection area.
4. Touch Share (
).
5. Select an option to paste the selected text in a new email, text or multimedia message,
or in your status update on a social network such as Twitter.
View Bookmarks and Previously Visited Web Pages
You can store as many bookmarks as you want on your device. You can also access a
convenient list of the sites you have visited, or quickly view the pages that you access most
often.
Bookmark a Web Page
1. From the Home screen, touch
> Internet.
2. While viewing a Web page, touch
> Add to > Bookmark.
3. If you want, edit the bookmark name.
4. To put the bookmark into a folder, touch
5. Touch
on the Bookmark this page screen.
on the Add to screen, and then touch
.
6. Touch the new folder name, and then touch Done.
7. Touch Done to add the bookmark.
Open a Bookmarked Page
1. From the Home screen, touch
2. Touch
> Internet.
> Bookmarks.
3. On the Bookmarks tab (
touch it.
), navigate to the bookmark you want to open, and then
Manage Bookmarks
1. From the Home screen, touch
2. Touch
> Internet.
> Bookmarks.
3. On the Bookmarks tab (
), touch
> Edit.
4. On the Select a bookmark to edit screen, you can:
Web and Data
173

Edit the bookmark: Touch
, enter your changes and touch Done.

Rearrange bookmarks: Touch and hold
after a bookmark you want to move.
When it is highlighted, drag it to its new position and then release.

Delete a bookmark: Touch the checkbox before the bookmark you want to delete.
5. Touch Done.
View and Manage Previously Visited Pages
1. From the Home screen, touch
2. Touch
> Internet.
> Bookmarks.
3. On the History tab (
), you can:

Open a previously visited page: Navigate to the page that you want to view, and
then touch the page.

Clear the list of previously visited pages: Touch
> Clear all.
View and Manage Pages That You Often Visit
1. From the Home screen, touch
2. Touch
> Internet.
> Bookmarks.
3. On the Most visited tab (
), you can:

Open a favorite Web page: Navigate to the page you want to view, and then touch
the page.

Change the bookmarks view: Touch

Clear the list of most visited pages: Touch
> Thumbnails or List.
> Clear all.
Set Browser Options
The web browser comes with a variety of options to enhance your mobile web browsing
experience.
Set Your Home Page
1. From the Home screen, touch
2. Touch
> Internet.
> Settings > General > Set homepage.
3. In the Set homepage screen, select the home page you want to use.
Web and Data
174

Current page to set the current Web page you are browsing as your home page.

Blank page to use an empty browser window as your home page.

Default page to set the SprintWebSM home page as your home page.

Most visited sites to have all of your most visited sites displayed as your home
page.

Other to enter the URL of the website you want to use as your home page.
Browse Full Versions of Web Pages
Some websites display a mobile version of their pages to mobile Web browsers. You can
choose to view the full version of all pages, even for these sites.
1. From the Home screen, touch
2. Touch
> Internet.
, and then select View desktop site.
Find Text In a Web Page
1. From the Home screen, touch
2. While viewing a Web page, touch
> Internet.
> Find on page.
3. Enter the search item. As you enter characters, matching characters will be highlighted.
Touch the left or right arrow to go to the previous or next matching item.
Other Browser Options
You can set the browser display, privacy, and security settings on the browser’s Settings
screen.
1. From the Home screen, touch
2. While viewing a Web page, touch


> Internet.
> Settings.
General
•
Set homepage: For more information, see Set Browser Options.
•
Form auto-fill: Enable filling out forms with predefined information.
•
Auto-fill text: Lets you define information to be used by Form auto-fill.
Privacy & security
•
Clear cache: Touch to delete all locally cached content and databases.
•
Clear history: Touch to delete your browsing history.
Web and Data
175


•
Show security warnings: Select to display a warning if there is a problem with a
website’s security.
•
Accept cookies: Select to allow websites to save and read cookies stored on
your device.
•
Clear all cookie data: Touch to delete all browser cookies.
•
Remember form data: Select to save all data you’ve entered in forms on Web
pages.
•
Clear form data: Touch to delete all saved form data.
•
Enable location: Select to allow websites to request access to your lcoation.
•
Clear location access: Touch to delete all location access for all Web pages
you’ve visited.
•
Remember passwords: Select to save all usernames and passwords you use to
access secured websites.
•
Clear passwords: Touch to delete all saved passwords you use to access
secured websites.
Accessibility
•
Force enable zoom: Do not allow websites to control zoom behavior.
•
Text scaling: Set the relative text sizes for your viewing comfort.
•
Minimum font size: Set the font size for the Tiny size.
•
Zoom on double-tap: Set the percentage to zoom in when you double-tap the
browser screen.
•
Inverted rendering: Reverse white to black and vice versa.
•
Contrast: Set the contrast when Inverted rendering is enabled.
Advanced
•
Set search engine: Set the default search engine to use.
•
Open in background: Select to open a new Browser window behind the current
one you’re vewing.
•
Enable JavaScript: Select to support JavaScript content on Web pages.
•
Enable Flash and plug-ins: Select to support Flash and other Web plug-ins.
•
Website settings: Set advanced settings for individual websites.
Web and Data
176

•
Download storage: Set where to save downloaded files.
•
Default zoom: Set the default zoom level when you open full versions of Web
pages.
•
Open pages in overview: Select to display an overview of newly-opened Web
pages.
•
Auto-fit pages: Format webpages to fit the screen.
•
Block pop-ups: Select to block pop-up windows.
•
Text encoding: Set the text encoding to properly display text on Web pages.
•
Enable GIF animation: Select to display GIF animation on Web pages.
•
Reset to default: Touch to reset the browser settings to default.
Bandwidth management
•
Search result preloading: Allow the browser to preload search results in the
background.
•
Load images: Select to display images on Web pages.
Sprint Hotspot
Sprint Hotspot turns your device into a Wi-Fi hotspot and shares your device’s data connection
with as many as eight computers or mobile devices via Wi-Fi. When you open Sprint Hotspot,
your device creates a secured Wi-Fi network where you can connect your computer and other
devices to access the Internet.
To use your device as a Wi-Fi hotspot, make sure that your device has an active data
connection. For more information, see Sprint 4G and Data Services (Sprint 3G and 4G
Networks).
Note: To connect to your device’s Wi-Fi network, you need a computer with built in Wi-Fi or a
Wi-Fi adapter.
Set Up Sprint Hotspot
1. From the Home screen, touch
> Sprint Hotspot.
2. Touch OK on the introduction screen.
3. Enter a new name in the Router name (SSID) text box, or use the default router name.
4. Select a network security method from the Security list. If you selected WEP, WPA
(TKIP), or WPA2 (AES), enter a network key (password) in the Password box.
Web and Data
177
5. Select the Sprint Mobile Hotspot check box at the top of the screen to turn on the
wireless router.
When Sprint Hotspot is active and is ready to share its 3G connection, the 3G hotspot icon (
appears in the status bar. When Sprint Hotspot is active and is ready to share its 4G
connection, the 4G hotspot icon ( ) appears in the status bar.
Manage Sprint Hotspot
You can set the number of computers or devices or allow only specific devices to connect and
use Sprint Hotspot to connect to the Internet.
1. From the Home screen, touch
> Sprint Hotspot.
2. Touch OK on the introduction screen.
3. Touch Manage users, and then set the following options:

Select the Allowed users only check box if you want to allow only specific devices
or computers to connect to Sprint Hotspot on your device. When you select this
option, this icon
appears in the status bar every time a new device or computer
attempts to connect to Sprint Hotspot. To allow connection, touch Allow on the
Manage users screen.

Max. connections: Touch to set the maximum number of devices and computers
that can connect to and use Sprint Hotspot.

Allowed users: Lists the MAC addresses of computers and devices that you have
allowed connection to Sprint Hotspot on your device.

Block users: Lists the MAC addresses of computers and devices that are not
allowed to connect to Sprint Hotspot on your device. Touch an entry to allow
connection to Sprint Hotspot.
4. Touch Done.
5. Select the Sprint Mobile Hotspot check box at the top of the screen to turn on the
wireless router with your new settings.
Turn Off Sprint Hotspot
1. From the Home screen, touch
> Settings > More > Tethering & Sprint Hotspot.
2. Clear the Sprint Hotspot check box.
Add the Sprint Hotspot Widget
Add the Sprint Hotspot widget to the Home screen to make it faster for you to turn Sprint
Hotspot on or off. To learn how to add widgets, see Customize the Home Screen.
Web and Data
178
)
Use Your Device as a Modem
Get online with your notebook or desktop computer at any time, using your device’s data
connection.
1. Install HTC Sync on your computer. To learn how, see HTC Sync.
2. Make sure that your device has an active data connection. For more information, see
Sprint 4G and Data Services (Sprint 3G and 4G Networks).
3. Connect the device to the computer using the provided USB cable.
4. On the Connect to PC screen, select USB tethering, and then touch Done.
Note: When you are using your device as a modem, the USB mass storage feature is
disabled, and you will not be able to use HTC Sync.
Connect Your Device to the Internet Through a
Computer (Internet Pass-through)
If you don’t have a data plan for your device or you don’t have access to a Wi-Fi network, you
can still go online on your device by using your computer’s Internet connection.
1. Install HTC Sync on your computer. To learn how, see HTC Sync.
2. Make sure your computer is connected to the Internet.
Important:
Sprint recommends that you turn off your local network’s firewall. Also, if your
computer connects to the Internet via PPP (for example, dial-up, xDSL, or VPN),
Internet Pass-through will only support TCP protocol.
3. Connect the device to the computer using the provided USB cable.
4. On the Connect to PC screen, select Internet pass-through, and then touch Done.
Web and Data
179
Camera and Video
You can use the camera or camcorder to take and share pictures and videos. Your device
comes with a 5.0 megapixel camera with an autofocus feature that lets you capture sharp
pictures and videos.
Take Pictures and Shoot Videos
View Pictures and Videos Using Gallery
Take Pictures and Shoot Videos
Whether traveling for business or fun, enjoy taking pictures and videos of your trip and
encounters with your device’s camera.
Important:
Be sure the microSD card is present before you use your device’s camera.
Photos and videos captured with the camera are stored onto the microSD card.
For more information on how to install a microSD card on your device, see Insert
the microSD Card.
Launch the Camera
► To launch the camera in photo mode and take photos, from the Home screen, touch
> Camera.
► To launch the camera directly in video mode so you can immediately start capturing
videos, from the Home screen, touch
> Camcorder.
Viewfinder Screen and Other Controls
When you turn your device left or right, the onscreen camera controls automatically rotate
depending on how you hold your device.
You’ll find the following controls on the Viewfinder screen:
●
Zoom bar (
Camera and Video
) For more information, see Zooming.
180
●
Gallery button (
) Shows the last photo or video you’ve captured. Touch to view the
photo or video in Gallery. For more information, see View Pictures and Videos Using
Gallery.
●
Autofocus indicator (
●
Effects button (
●
Photo/Video mode switch (
●
Flash button (
●
Shutter release/Record button (
and Shoot Videos.
●
Switch to front or main camera button (
Front Camera.
) For more information, see Autofocus.
) For more information, see Add Effects.
) Easily switch between photo or video mode.
) Choose a flash mode depending on your lighting conditions.
or
) For more information, see Take Pictures
) For more information, see Use the
Zooming
Before taking a photo or video, you can first use the onscreen zoom bar to zoom in or out of
your subject.
Simply slide your finger across the zoom bar to zoom in or out.
When you’re recording video, the zoom bar is always shown onscreen. You can freely zoom in
or out while recording.
Autofocus
Whenever you point the camera at a different subject or location, it shows the autofocus
indicator at the center of the viewfinder screen.
Camera and Video
181
You can leave the autofocus indicator at the center of the screen, or you can move it by
touching another area on the screen that you want to focus on.
Use the Front Camera
Take a picture or shoot a video of yourself using the front camera.
1. From the Home screen, touch
> Camera or Camcorder.
2. On the Viewfinder screen, touch
.
3. To switch back to the main camera, to
uch
again.
Note: Some camera features are not available when you’re using the front camera, such as
autofocus, zooming, flash, face detection, and HD recording.
Add Effects
It’s easy to make your photos look more interesting. Use the available camera effects to make
your photos look as if they’ve been taken through special lenses and filters. You can also apply
effects to videos.
Choose an effect before taking a photo or video.
1. From the Home screen, touch
2. On the Viewfinder screen, touch
> Camera or Camcorder.
.
3. Scroll through the available effects and touch one that you like.
4. When you choose certain photo effects such as depth of field, distortion, or vignette,
drag the bar that appears on the right side of the screen to adjust the intensity of the
effect.
Take Pictures
1. From the Home screen, touch
> Camera.
2. Before taking the photo, you can:

Zoom in on your subject.

Touch the flash button repeatedly to select a flash mode depending on your lighting
conditions:
•
Auto flash
•
Flash on
Camera and Video
182
•
Flash off

Touch
and choose the resolution and other camera settings you want to use.

Choose an effect to apply to your photo.
3. Point the camera and focus on your subject.
If you’re taking pictures of people, the camera will automatically recognize faces and
adjust the focus. You’ll see recognition boxes around people’s faces.
Note: You can turn off the Auto focus and Face detection features in the camera settings.
4. When you’re ready to take the photo, touch
.
5. Choose what you want to do with the photo you’ve just taken. See Review Screen for
details.
Camera Flash FAQ
Why doesn’t the camera flash turn on?
The flash light quickly consumes battery power. To save battery power, the camera disables the
flash light or locks it to Flash off mode (even when you have set it to Auto flash or Flash on)
when one of the following occurs:
●
You have an incoming call. If you have set the flash light to Flash on, it turns back on
after you answer and end the call.
●
Your device’s battery power is running low. Recharge the battery so that the camera can
have enough battery power to use the flash light.
Cold weather lowers battery performance and affects the flash light. To make sure the camera
has enough battery life to power up the flash light, keep your device warm. When not in use, put
the device inside your jacket to keep it warm, and try to avoid sudden temperature changes that
may affect battery performance.
Record Video
1. From the Home screen, touch
Camera and Video
> Camcorder.
183
2. Touch
. To record video in HD, set the video quality to HD (1280 x 720).
3. Choose an effect to apply to your video.
4. Frame your subject on the Viewfinder screen.
5. Touch
to start recording.
6. While recording video, you can:

Touch the zoom bar to freely zoom in or out.

Change the focus to a different subject or area by touching an area on the screen.

Touch the flash button to switch the camera light on (
recording.
7. To stop recording, touch
) or off (
) during
again.
8. Choose what you want to do with the video you’ve just recorded. See Review Screen for
details.
Review Screen
After capturing a photo or video, the review screen will display the photo or the starting image of
the video that you have just captured.
On the Review screen, you can:
●
Touch
to delete the photo or video.
●
Touch
to send the photo or video to another phone or your computer using
Bluetooth, send it by email, or select a social network where you want to upload it to.
●
Touch
●
Touch
to watch the video.
●
Touch
or
choose how you want to use the photo, such as using it as your wallpaper.
Camera and Video
to return to the Viewfinder screen.
184
Change Camera Settings
Open the menu panel to access and change camera settings.
To open the camera settings, touch
following settings:
while on the Viewfinder screen. You can change the
●
Self-timer (photo mode only): Lets you set a time delay before your camera
automatically takes the photo.
●
Image adjustments: Slide your finger across each slider bar to adjust the exposure,
contrast, saturation, and sharpness.
●
White balance: Lets you change the white balance to enable the camera to capture
colors more accurately by adjusting to your current lighting environment.
●
ISO (photo mode only): Lets you choose an ISO level or set it back to Auto. Higher ISO
numbers are better for taking pictures in low light conditions.
●
Resolution (photo mode only): Lets you select a photo resolution to use.
●
Review duration: Lets you set the time for a captured photo or video to be displayed on
the review screen before the camera changes back to the viewfinder screen.
●
Stereo recording (video mode only): Select to record sound in stereo when capturing
videos.
●
Record with audio (video mode only): Lets you choose whether to record audio when
capturing videos.
●
Widescreen (photo mode only): When selected (default), photo resolutions available are
in 5:3 ratio and you can use the entire Viewfinder screen to frame your subject. When
not selected, photo resolutions available for selection are in standard 4:3 ratio.
●
Geo-tag photos (photo mode only): Lets you store the GPS location in your captured
photos.
●
Auto enhance (photo mode only): Select to reduce noise when using a high ISO setting
and to automatically adjust photo brightness.
●
Auto focus (photo mode only): Enables or disables centered autofocus. Autofocus is
enabled by default.
●
Face detection (photo mode only): Allows the camera to recognize faces and adjust the
focus when you take pictures of people. Face detection will be turned off if you disable
autofocus.
●
Grid (photo mode only): Allows you to display a grid on the viewfinder screen so you can
easily frame and center your subject before taking the photo.
Camera and Video
185
●
Auto Upload (photo mode only): Allows your device to automatically share your photos
on your social networks.
●
Reset to default: Lets you change the camera settings back to default.
Close Camera
► On the viewfinder screen, touch
or
.
View Pictures and Videos Using Gallery
Relive the fun while viewing photos and videos of your latest travels or your pet’s newest tricks.
Get an audience by tagging your Facebook and Flickr friends. You can even play your media on
a TV screen or print your photos right from your device.
Important:
To start using Gallery, make sure you have photos or videos copied on your
storage card.
You can edit and add effects to photos stored on your microSD card. You can also easily use a
photo as your contact icon, location icon, or wallpaper.
Select an Album
► From the Home screen, touch
> Gallery.
All your photos and videos are organized by albums for easy viewing.
Folders on your storage card that contain photos and videos will also be treated as albums and
will be listed below the preset albums. The actual folder names will be used as the album
names.
●
Camera shots lets you view photos and videos that are stored in the camera’s folder.
Camera and Video
186
●
All photos lets you view all photos that are stored in all the folders on the storage card.
●
All videos lets you view all videos that are stored in all the folders on the storage card.
●
Photos and videos that you set as your favorites will be grouped under My favorites.
●
If you have downloaded any photos and videos, these will be placed in the All
downloads album.
When viewing pictures in Gallery, scroll up the screen to view more albums. Simply touch an
album to view the photos or videos in that album.
Note: Depending on the number of pictures stored on the microSD card, it may take some time
for Gallery to load all your photos on the screen.
View Photos and Videos
1. From the Home screen, touch
> Gallery.
2. Touch an album to browse through the photos and videos of that album.
3. Do any of the following:

Touch a photo or video to view it in full screen.

Touch and hold on a photo or video to open a selection menu and choose what to do
with the photo or video.
4. To select another album, touch
to return to the Albums screen.
Zoom In or Out on a Photo
1. From the Home screen, touch
Camera and Video
> Gallery.
187
2. Touch a photo album to browse through the photos of that album.
3. Touch a photo to view it in full screen.
4. Do any of the following:

Tap the screen twice quickly to zoom in, and then touch the screen twice quickly
again to zoom out.

Press your thumb and index finger on the screen and then spread your fingers apart
to zoom in; pinch your fingers together to zoom out. See Touchscreen Navigation for
details.
Watch Videos
1. From the Home screen, touch
> Gallery.
2. Touch a video album to browse through the videos of that album.
3. Touch a video to play it.
4. While watching the video, you can:

Touch the screen to display the onscreen controls.

Use the onscreen controls to play or pause the video.

Slide the video timeline to jump to any part of the video.

Move backwards or advance forwards in the video.

Touch More > Sound enhancer to turn on SRS (not available when you’re using a
Bluetooth headset) and enjoy an enhanced audio experience.

Touch More > Full screen to toggle between full and best-fit screens.
You can play these high-definition MP4 video formats in Gallery:
●
H.263 profile 0 @ 30 fps, WVGA (800x480), max 2 Mbps
●
MPEG-4 simple profile @ 30 fps, 720p (1280x720), max 6 Mbps
Camera and Video
188
●
H.264 baseline profile @ 30 fps, 720p (1280x720), max 6 Mbps
View Photos in Your Social Networks
Right in Gallery, check what you and your friends have uploaded to your social networks
(Facebook and Flickr only). You can view photos in your online albums the same way you view
photos on your storage card.
Note: You need to be logged in to your Facebook or Flickr account to view Facebook or Flickr
photos.
Note: When logging on to your Flickr account, you may be asked to give authorization for the
application to connect to the Flickr website and access your Flickr account.
View Photos on Facebook
1. From the Home screen, touch
> Gallery.
2. Touch Albums > Facebook.
3. Touch your account name or your friend’s account on the list to view the photos in the
account.
4. Touch an album to view the pictures inside.
View Photos on Flickr
1. From the Home screen, touch
> Gallery.
2. Touch Albums > Flickr.
3. Touch your account name or your friend’s account on the list to view the photos in the
account.
4. Touch an album to view the pictures inside.
Comment on Photos in Your Social Networks
Add comments to your uploaded photos as well as to your friends’ photos.
1. From the Home screen, touch
> Gallery.
2. Touch Albums > Facebook or Flickr.
3. Touch your account name or your friend’s account on the list to view the photos in the
account.
4. Touch an album to view the pictures inside.
5. Do one of the following:
Camera and Video
189

Touch and hold a photo, and then touch Add comment.

While viewing a photo in full screen, touch anywhere on the screen and touch
Comments.
6. Touch the “Write a comment box.”
7. Enter your comment, and then touch Comment.
Edit Your Photos
Do basic editing tasks on your photos such as rotation and cropping. You can also enhance
your photos by applying effects such as high contrast, vintage appearance, and more.
Rotate a Photo
1. From the Home screen, touch
> Gallery.
2. Touch an album.
3. Touch and hold on the photo that you want to rotate, and then touch Edit.
4. In the menu that opens, select either Rotate right or Rotate left.
Tip:
You can also rotate a photo while you’re viewing it in fullscreen. Touch the screen,
touch Edit, and then select either Rotate right or Rotate left.
Crop a Photo
1. From the Home screen, touch
> Gallery.
2. Touch an album.
3. Touch and hold on the photo that you want to crop, and then touch Edit.
4. In the menu that opens, touch Crop. You’ll see a crop box around the photo.
5. To adjust the crop box size, touch and hold the edge of the box. When directional arrows
appear, drag your finger inward to or outward to resize the crop box.
Camera and Video
190
6. To move the crop box to the part of the photo that you want to crop, drag the crop box to
the desired position.
7. Touch Save to apply the changes to the picture.
The cropped photo is saved on the storage card as a copy. The original photo remains
unedited.
Tip:
You can also crop a photo while viewing it fullscreen. Touch the screen, touch Edit >
Crop, and follow the instructions above.
Add Effects
1. From the Home screen, touch
> Gallery.
2. Touch an album.
3. Touch and hold on the photo that you want to add effects to, and then touch Edit.
4. In the menu that opens, touch Effects. On the panel that opens, you’ll see options
available to you.
5. Touch an effect to apply on the photo.
6. Touch Save to keep the changes.
The enhanced photo is saved in the storage card as a copy. The original photo remains
unedited.
Tip:
You can also add an effect to a photo while viewing it fullscreen. Touch the screen,
touch Edit > Effects, and follow the instructions above.
Print Your Photos
Connect your device to a supported printer and print out your photos.
Note: Both printer and your device must be turned on and connected to the same local
network. To learn how to connect the device to the local wireless network, see
Turn Wi-Fi On and Connect to a Wireless Network. To learn how to connect the printer
to the local network, refer to your printer user guide.
Note: The local network must not be behind a firewall.
1. From the Home screen, touch
> Gallery.
2. Touch an album.
3. Touch and hold on the photo that you want to print, and then touch Print. Your device
automatically scans for the printer.
Camera and Video
191
4. If the printer appears on the list, touch it. Otherwise, touch Scan for printers or Add
printer and then follow onscreen instructions to add the printer to the list.
5. In the Print preview screen, you can set the number of copies or select to fit the photo on
the page.
6. Touch Advanced to set the page size, print layout, and page orientation, and choose if
you want to print in color or black-and-white.
7. Touch Print.
You can check the printing progress by opening the Notifications panel and then touching the
item you’re printing.
Send Your Photos and Videos
Send photos and videos via email or MMS or to another device or your computer using
Bluetooth.
Send Photos or Videos by Email
You can send photos, videos, or both by attaching them in an email message.
1. From the Home screen, touch
> Gallery.
2. Touch the album that contains the photos or videos you want to share.
3. Touch Share > Gmail or Mail.
4. Select the photos or videos you want to share, and then touch Next.
5. Compose your message, and then touch Send.
Note: If you selected Mail and you have multiple email accounts, the default email account will
be used.
Send a Photo or Video by MMS (Multimedia Messaging)
Although you can send several photos or videos in a multimedia message, it may be better to
just send one at a time, especially if the files are large in size.
1. From the Home screen, touch
> Gallery.
2. Touch the album that contains the photos or videos you want to share.
3. Touch Share > Messages.
4. Touch the photo or video you want to send. The photo or video is automatically added
into the multimedia message.
5. Compose your message, and then touch Send.
Camera and Video
192
Send Photos or Videos Using Bluetooth
You can select photos, videos, or both and send them to another phone or to a computer using
Bluetooth.
1. From the Home screen, touch
> Gallery.
2. Touch the album that contains the photos or videos you want to share.
3. Touch Share > Bluetooth.
4. Select the photos or videos you want to share, and then touch Next.
In the next few steps, you’ll be asked to turn on Bluetooth on your device and connect to the
receiving Bluetooth device so the files can be sent. For more information, see Bluetooth.
Share Your Photos and Videos on the Web
With Gallery, you can share photos and videos on your social networks, as well as post videos
on YouTube. You can also use the Camera or Camcorder application to share a photo or video
right after you’ve captured it.
Share Photos and Videos on Facebook
You need to be logged in to your Facebook account to upload photos.
1. From the Home screen, touch
> Gallery.
2. Touch the album that contains the photos or videos you want to share.
3. Touch Share > Facebook.
4. Touch the photo you want to share.
5. Write a description for the photo
6. Choose who can see your post. Choose specific friends or an entire list.
7. Se the location for the photo.
8. Touch Post.
Share Photos and Videos on Flickr
You need to be logged in to your Flickr account to upload photos and videos.
Note: If you are not logged in to your Flickr account, you will be prompted to log in and
download the HTC Flickr Downloader application. Follow the onscreen instructions to
proceed.
1. From the Home screen, touch
Camera and Video
> Gallery.
193
2. Touch the album that contains the photos or videos you want to share.
3. Touch Share > Flickr.
4. Select the photos or videos you want to share and then touch Next.
5. Do the following:

In Upload photos and videos to, touch the Flickr album where you want to upload
the photos. You can also create a new Flickr photo album by touching Create
album.

Touch the box under Who can see these photos and videos?, and then touch the
people who can view the uploaded photos and videos.
6. Touch Add tag and description, and then do any of the following:

Enter a different title and description for each photo or video.

To tag friends on your photo, touch Tag this photo and then touch the part where
your friend is. From the list that shows, select who you want to tag, and then touch
Save.

Slide to the left to go to the next photo or video.
7. Touch Save, and then touch Done.
Share Photos on Picasa
You need to be signed in to a Google Account to be able to upload pictures to the Picasa™
photo organizing service.
1. From the Home screen, touch
> Gallery.
2. Touch the album that contains the photos you want to share.
3. Touch Share > Picasa.
4. Select the photos you want to share, and then touch Next.
5. Add a caption to the photos.
6. Select the online album where you want to upload the photos, or touch
new album.
7. Touch Upload.
You can view the photos online at picasaweb.google.com.
Camera and Video
194
to create a
Share Videos on YouTube
You can share your videos by uploading them to YouTube™. Before you do this, you must
create a YouTube account and sign in to that account from your device.
1. From the Home screen, touch
> Gallery.
2. Touch the album that contains the videos you want to share.
3. Touch Share > YouTube.
4. Select the videos you want to share and then touch Next.
5. Enter a title for the videos you’re uploading.
6. Enter tags and a description.
7. Set the privacy level.
8. Touch Upload.
Close Gallery
► While in the Gallery screen, touch
Camera and Video
to close the application.
195
Tools and Calendar
Learn how to use many of your device’s productivity-enhancing features.
Calendar
Calculator
Clock & Alarm
Read eBooks
Stocks
Weather
News Feeds
Car Panel
Dock Mode
HTC Sync
HTCSense.com
Voice Commands
Bluetooth
microSD Card
Calendar
Never miss an important date again. Use the Calendar app to schedule your events, meetings,
and appointments. You can set up your device to stay in sync with the following types of
calendars:
●
On your device, sign in to your Google Account so you’ll be able to sync the Calendar
app with your Google Calendar online. You can add multiple Google Accounts.
●
If you’re using Microsoft Outlook® on your computer, you can set up HTC Sync on your
computer to sync Outlook Calendar with the Calendar app.
●
If you have a Microsoft Exchange ActiveSync account and you have added it on your
device, you can sync the Calendar app with your Exchange ActiveSync calendar events.
If you’ve signed in to your social network accounts such as Facebook, birthdays and events of
friends will appear in Calendar.
Tools and Calendar
196
Create an Event
You can create events that sync with your Google Calendar, your computer’s Outlook Calendar,
or Exchange ActiveSync calendar, as well as events that appear on your device only.
1. From the Home screen, touch
2. On any Calendar view, touch
> Calendar.
.
Note: To quickly create an event in monthly, weekly, or daily Calendar view, touch and hold an
empty time slot or date and touch New event.
3. If you have more than one calendar, select a calendar in which to add the event by
touching the Calendar menu arrow (
) at the top of the screen and selecting any of
the following calendars:

Select your Google Account to create a Google Calendar event. If you have several
Google calendars on the Web, select one in which to add your event.

Select PC Sync to create calendar events on your device. You can sync them with
your computer’s Outlook Calendar using HTC Sync.

Select your Exchange ActiveSync account to create an Exchange ActiveSync
calendar event.

Select Facebook to create a Facebook event that synchronizes with your Facebook
account.
4. Enter a name for the event.
5. To specify the date and time of the event, do one of the following:

If there is a time frame for the event, touch the From and To date and time to set
them.

If it is a special occasion such as a birthday or an all-day event, set the From and To
date, and then select the All Day check box.
6. Enter the event location and description.
7. Set the reminder time.
Note: You can add another reminder time in a Google Calendar event. Touch
reminder to add another reminder.
> Add
8. If the event occurs on a regular basis, touch the Repetition box, and then choose how
often the event occurs.
9. Touch Save.
Tools and Calendar
197
Invite Guests to Your Event (Google Account Only)
If you want to invite guests to your event, you need to create and add the event in your Google
Calendar. An email invitation will be sent to your guests using your Google Account.
1. From the Home screen, touch
> Calendar.
2. Create a new event. See Create an Event.
3. Touch the Calendar type at the top of the screen and then select your Google Account
(or one of your other Google Calendars).
4. Add details about the event, such as date and time, location, and more.
5. Touch the To field (below the Calendar type), enter the email addresses of everyone you
want to invite to the event. Separate multiple addresses with commas. You can also
touch
to select the people you want to invite from your contacts list.
6. Touch Save to add the event to your Google Calendar.
If the people to whom you send invitations use Google Calendar, they’ll receive an invitation in
Calendar and by email.
Sending a Meeting Request (Exchange ActiveSync only)
If you have an Exchange ActiveSync account set up on your device, you can use Calendar to
create a meeting appointment and send a meeting request email to the people you want to
invite to your meeting.
1. From the Home screen, touch
> Calendar.
2. Create a new event. See Create an Event.
3. Touch the Calendar type at the top of the screen and then select your Exchange
ActiveSync account.
4. Add details about the event, such as date and time, location, and more.
5. In the To field (below the Calendar type), enter the email addresses of everyone you
want to invite to the event. Separate multiple addresses with commas. You can also
touch
to select the meeting attendees from your contacts or the company directory.
6. Touch Save to add the event and send the meeting request to your invitees.
Event Alerts
If you have set at least one reminder for an event, the upcoming event icon
the notifications area of the status bar to remind you of the upcoming event.
Tools and Calendar
198
will appear in
1. Touch and hold the status bar, and then slide your finger down the screen to open the
Notifications panel.
2. Do one of the following:

Touch Clear to dismiss event reminders and all other notifications. Other types of
notifications such as new messages and missed calls will also be deleted.

After sliding open the Notifications panel, touch the calendar event reminder. You’ll
then see a list of all pending event reminders. Touch Snooze all to snooze all event
reminders for five minutes, or touch Dismiss all to dismiss all event reminders.

Touch
to keep the reminders pending in the notifications area of the status bar.
Change Calendar Views
1. From the Home screen, touch
> Calendar.
2. Touch the tabs at the bottom of the screen to change the Calendar view.
Tip:

Day view

Week view

Month view

Agenda view

Meeting invitations
If you don’t see all of the tabs above, touch
> Edit tabs to add or remove tabs.
Day View
The list of events for one day is displayed and the weather information shows at the top of the
screen. The weather information appears only if the event is within the five-day forecast of the
Weather app.
1. From the Home screen, touch
2. Touch
> Calendar.
(Day view).
Tools and Calendar
199
3. Slide left or right across the screen to view earlier or later days.
Agenda View
1. From the Home screen, touch
2. Touch
> Calendar.
(Agenda view).
3. In Agenda view:
A list of all your events display in chronological order.
The colored bars on the left side of the events indicate the type of calendar the event is
part of. To find out what each color represents, touch All calendars at the top of the
screen.
Tools and Calendar
200
Week View
1. From the Home screen, touch
2. Touch
> Calendar.
(Week view).
3. In Week view:

Events of one week display as a chart.

Touch and hold on a time slot to create a new event at that time.

Touch an event (shown as colored blocks) to view its details.

Slide left or right across the screen to view earlier or later weeks.
Month View
1. From the Home screen, touch
2. Touch
> Calendar.
(Month view).
3. In Month view:

You’ll see markers on days that have events.

Touch

Touch a day to view the events of that day.
Tools and Calendar
to create a new event.
201

Touch and hold a day to open an options menu from which you can also choose to
create an event or switch to either Day or Agenda view.

Slide up or down the screen to view earlier or later months.
Manage Calendar Events
Use Calendar to keep track of important events in your life.
View an Event
You can view your own events as well as events that other people have shared with you.
1. From the Home screen, touch
> Calendar.
2. In Day view or Agenda view, touch an event. The Event details screen then opens and
shows the summary of the event.
3. Depending on the event information, do any of the following:

Find the event’s location in Maps.

Call any phone number included in the event location or description.

Check the participants of the event.

If the event was sent as a meeting invitation, respond to the invitation.

If it’s an Exchange ActiveSync calendar event, reply by email to the organizer or to
all the guests. Touch
> Reply or Reply all.

Select any text and look it up on the Web.
Tools and Calendar
202
4. Touch the reminder time to change it. Touch
to save your changes.
Edit an Event
You can edit events that you have created.
1. From the Home screen, touch
> Calendar.
2. In Day or Agenda view, touch an event.
3. Touch
> Edit event.
4. Make your changes to the event.
5. When you’re done editing, touch Save.
Erase Events
1. From the Home screen, touch
> Calendar.
2. Do any of the following:

In Day or Agenda view, touch an event, and then touch
> Delete event.

In Day, Agenda, or Week view, touch and hold an event and touch Delete or Delete
event.

On the event details screen, touch
> Edit event > Delete.
Share an Event (vCalendar)
You can share a calendar event as a vCalendar to someone’s phone using Bluetooth or by
sending it as a file attachment with your email or message.
1. From the Home screen, touch
> Calendar.
2. Touch an event to open the event details screen, and then touch
> Forward.
3. Touch one of the send options:

Bluetooth. You’ll be asked to turn on Bluetooth on your device and connect to the
receiving Bluetooth device.

Mail. A new message window opens and automatically includes the event as a
vCalendar attachment. Your default email account will be used to send the message.

Message. A new multimedia message window opens and automatically includes the
event as a vCalendar attachment.
Tools and Calendar
203
Display and Synchronize Calendars
You can select which calendars to show or hide on your device’s Calendar, and which ones to
keep synchronized.
Show or Hide Calendars
1. From the Home screen, touch
> Calendar.
2. Touch All calendars, and then select or clear a calendar to show or hide it.
3. Select All calendars to display all calendars.
Note: By default, all your Google calendars are synchronized on your device.
Note: You cannot create a new Google calendar on your device. You can only sync with
Google calendars that you’ve created or subscribed to on the Web.
The calendars are kept synchronized on your device, whether or not you hide them.
Stop Synchronizing a Google Calendar
You can choose which Google calendars to stop synchronizing.
1. From the Home screen, touch
> Calendar.
2. Touch All calendars.
3. Clear the check box of the Google Calendar you want to remove from your calendars
list.
4. Touch
to update Calendar with the new changes and return to the Calendar view
you were viewing.
The calendars that you remove from your calendars list will no longer be synchronized on your
device, but you remain subscribed to them and can work with them in Google Calendar on the
Web.
Synchronize an Exchange ActiveSync Calendar
If you have set up a Microsoft Exchange ActiveSync account on your device, you can also
synchronize Exchange ActiveSync calendar events on your device. Calendar events on your
Exchange ActiveSync will also show in Calendar if you chose to synchronize with the Exchange
ActiveSync Server.
To check if Exchange ActiveSync items are set to be synchronized:
► From the Home screen, touch
ActiveSync.
Tools and Calendar
> Settings > Account & sync > Exchange
204
Synchronize an Outlook Calendar
See HTC Sync.
Change Calendar Settings
You can change Calendar settings to specify how it displays events and how it notifies you of
upcoming events.
1. From the Home screen, touch
2. In any Calendar view, touch


> Calendar.
> Settings.
Reminder settings
•
All calendars: Select this check box to use the same event reminder settings for
all types of calendars. If you clear this check box, you can set different reminder
settings for each calendar.
•
Apply settings to: Select the calendar you want to apply the changes to.
•
Set alerts & notifications: Configure event reminders to open an alert, send you
a notification, or turn off event notifications on your device.
•
Default reminder time: Choose how soon before an event you want to be
notified.
•
Select ringtone: Choose a ringtone to sound when you receive an event
reminder.
Calendar view setting
•
First day of week: Set the month and week views to start on a Sunday or
Monday.
•
Include weather: Select this check box to show weather information in the day
view events list.
•
City: If weather is included, by default, day view displays your current location’s
weather. You can change it to display the weather of another city.
About the Calendar Widget
You can add a Calendar widget to your Home screen. The widgets offer different calendar
views. Touching a day or event on the widget brings you to the Calendar app.
Calculator
Your device comes with a built-in calculator.
Tools and Calendar
205
1. From the Home screen, touch
> Calculator.
2. Enter numbers or formulas using the onscreen keys.
3. Do any of the following:

Turn your device sideways to switch to a scientific calculator, and then enter
numbers or formulas using the onscreen keys. The scientific calculator lets you
perform more complex calculations with square root, logarithmic, and trigonometric
functions.

Touch
to remove one digit at a time. Touch and hold
the entire number.
4. Touch
or touch Clear to delete
for the result.
Clock & Alarm
Get more from the Clock app than just the regular date and time. Use your device as a desk
clock complete with weather information or as a world clock so you can see what time it is in
several cities across the globe. You can also use it as an alarm clock, stopwatch, and
countdown timer.
Open the Clock Application
1. Do either of the following:

Touch the Clock widget on the Home screen.

From the Home screen, touch
> Clock.
2. Touch the tabs at the bottom row or drag across the tabs to switch between the different
functions of the Clock application.

Desk Clock

World Clock

Alarms

Stopwatch

Timer
: For more information, see Desk Clock.
: For more information, see World Clock.
: For more information, see Alarm Clock.
: Lets you use the clock as a stopwatch.
: Lets you use the clock as a timer.
Desk Clock
The Desk Clock displays the current date, time, and weather, an alarm clock indicator, and a
battery charging indicator. You can dim the screen to show only the time and date.
Tools and Calendar
206
1. From the Home screen, touch
> Clock. Opening the Clock application from the All
apps screen brings you directly to the Desk Clock screen.
2. On the Desk Clock screen:

Touch the dock mode button ( ) to change to the dock mode screen. The dock
mode screen shows the time, date, weather, music, and shortcuts on an animated
weather wallpaper.

View the weather information of your current location. Touch the weather information
to open the Weather application where you can see weather forecasts of the next
few days. (For more information, see Weather.)
World Clock
Use the Clock application’s World Clock tab to check the current time in several places around
the globe simultaneously. You can also set your home city, add more cities to the world clock
list, and manually set your time zone, date, and time.
Set Your Home City
1. From the Home screen, touch
2. Touch
> Clock > World Clock tab.
> Home settings.
3. Enter your home city. Matching cities and countries based on the letters you entered
appear on the screen.
4. Touch your city when it appears on the list. Your home city will appear at the list of cities.
Tools and Calendar
207
Add Cities to the World Clock List
Add more cities to the World Clock screen so you can instantly check the date and time in these
cities.
1. From the Home screen, touch
2. Touch
> Clock > World Clock tab.
> Add city.
3. Enter the city name you want to add. Matching cities and countries based on the letters
you entered appear on the screen.
4. Scroll through the matching list and touch the city that you want to add.
Delete or Rearrange Cities on the World Clock List
1. From the Home screen, touch
2. Touch
> Clock > World Clock tab.
> Edit.
3. Do one of the following:

To remove a city or cities on the list, touch check box before the city or cities, and
then touch Delete.

To rearrange the cities on the list, touch and hold
after the city you want to move.
When the city is highlighted, drag it to its new position, and then release it.
Manually Set the Time Zone, Date, and Time
To set the time zone, date, and time on your device manually, you need to turn off auto time
synchronization first.
1. From the Home screen, touch
2. Touch
> Clock > World Clock tab.
> Local time settings.
3. Clear the Automatic check box and then set the time zone, date, and time as required.
For more information, see Date & Time Settings.
Alarm Clock
You can use the Clock application’s Alarms tab to set up one or more wake-up alarms.
Tools and Calendar
208
Set an Alarm
1. From the Home screen, touch
> Clock > Alarms tab.
2. Touch one of the default alarms on the screen.
3. On the Set alarm screen, set the alarm time by sliding your finger up or down on the
Hour and Minute counters and AM/PM.
4. Enter the alarm Description, set the Alarm sound and Repeat, and select the Vibrate
check box if you want the device to vibrate when the alarm goes off.
5. Touch Done.
Add an Alarm
1. From the Home screen, touch
2. Touch
> Clock > Alarms tab.
> Add alarm.
3. On the Set alarm screen, set the alarm time by sliding your finger up or down on the
Hour and Minute counters and AM/PM.
4. Enter the alarm Description, set the Alarm sound and Repeat, and select the Vibrate
check box if you want the device to vibrate when the alarm goes off.
5. Touch Done.
Note: Disable an alarm by clearing the check box of the alarm on the Alarms tab.
Disable or Delete an Alarm
1. From the Home screen, touch
Tools and Calendar
> Clock > Alarms tab.
209
2. Do any of the following:

To disable an alarm, clear the checkbox after the alarm.

To delete an alarm, touch
then touch Delete.
> Delete. Select the alarms you want to delete, and
Change Alarm Settings
If you’ve set one or more alarms, you can change their settings such as the alarm volume, how
long to snooze the alarm, and more.
1. From the Home screen, touch
2. Touch
> Clock > Alarms tab.
> Settings, and then change any of the following:

Alarm in silent mode (this is selected by default): Allows the alarm to sound even
when your device is in silent mode. Clear this check box if you want to silence the
alarm when the volume is in silent mode.

Alarm volume: Set the volume level that you want for the alarm.

Snooze duration: Set how long to snooze between alarms.

Side button behavior: Determines what happens to the alarm when you press the
volume buttons. You can set the buttons to snooze or dismiss the alarm, or disable
the button. The side button works only when the device’s screen is not locked.
While on the lock screen, you can snooze or dismiss the alarm by touching and
holding the Snooze or Dismiss button and then dragging it inside the ring.
Read eBooks
Start your own library of bestsellers and literary classics right on your device. Use the Reader
application to read and download eBooks from Kobo, an online bookstore.
We’ve included some eBooks for you to try. To browse for more titles from Kobo, you need to
be connected to the Internet.
1. From the Home screen, touch
> Reader.
2. Slide your finger left or right across the screen to browse through the available eBooks.
You can also touch
to browse through these eBooks in list view.
3. Touch an eBook to open it.
4. Do any of the following while reading an eBook:

Slide your finger left or right to flip through pages in the eBook.

To zoom in or out, spread or pinch your thumb and index fingers across the page.
Tools and Calendar
210

To view the eBook in landscape, turn your device sideways.

Tap anywhere on the screen to use these controls:
•
Touch
to quickly jump between chapters by dragging the slider.
•
Touch Jump to view the table of contents and your bookmarked pages. You can
also see the notes and highlights that you’ve marked in the eBook.
•
Touch Mark to add a bookmark.
•
Touch Font size to change the font size.
•
Touch Share to recommend the eBook to your friends. You can share the book
title in your social networks, or send it as a text message or email.
5. When you’re done reading, touch
to close the eBook.
Note: When you reopen an eBook, it will take you to the page that you last viewed.
Search Inside an eBook
1. From the Home screen, touch
> Reader.
2. Slide your finger left or right across the screen to browse through the available eBooks.
You can also touch
to browse through these eBooks in list view.
3. Touch an eBook to open it.
4. Touch
and type the word or words you want to search for.
5. Touch
. You’ll see the number of matches in the eBook.
6. Touch
to preview where the matches appear.
7. Touch a match to go to the page that contains the text you’re looking for.
If you want to take your search further, select the text, and then touch Quick Lookup. For more
information on how to select text, see Select Text.
Add a Note or Highlight Text
Spotted an interesting quote or an unusual fact? Make a note or highlight the text.
1. From the Home screen, touch
> Reader.
2. Slide your finger left or right across the screen to browse through the available eBooks.
You can also touch
to browse through these eBooks in list view.
3. Touch an eBook to open it.
Tools and Calendar
211
4. Touch and hold on a word, and then drag the start and end markers to select the
surrounding text.
5. On the pop-up bar, touch:

Highlight to mark the selected text.

New note to add a short comment or remark.

Quick Lookup to search the Internet.
View Your Notes and Highlights
1. From the Home screen, touch
> Reader.
2. Slide your finger left or right across the screen to browse through the available eBooks.
You can also touch
to browse through these eBooks in list view.
3. Touch an eBook to open it.
4. Touch
> Jump.
5. Go to the Notes or Highlights tab to view the information that you want.
Download an eBook
Browse the bookstore and choose from hundreds of available titles to download. Before you
download an eBook, make sure that you have:
●
a microSD card installed on your device.
●
an Internet connection.
●
a Kobo account and an Adobe® ID account. If you don’t have these accounts yet, either
sign up from your device or from your computer’s Web browser. (On your computer, go
to: kobobooks.com/signup.html and adobe.com/cfusion/membership/index.cfm.)
1. From the Home screen, touch
> Reader.
Note: If you have not yet logged in to Kobo and Adobe ID accounts, touch
sign in.
2. On the Reader main screen, touch
3. In the eBooks by Kobo tab (
.
), do any of the following to find a book:

Touch a category to see available book titles.

View more categories. Touch
Tools and Calendar
> Accounts to
> Browse or Discover.
212

Touch
to find a specific book title or author.
4. Touch the eBook you want to download. You’ll then see information such as the eBook’s
price, summary, and ratings.
5. Touch
to place your order.
6. Provide your purchase details, and then touch Buy.
7. Touch
to download the eBook. When downloading is complete, you’ll find the eBook
in your library.

After you’ve used Kobo once to purchase an eBook, your device remembers your
billing details so you don’t need to enter them the next time.

If you’ve previously bought eBooks from Kobo using your computer, go to the
Available for download tab (
device.
) in Reader to download the eBooks to your
Add the My Shelf Widget
Use the My Shelf widget to easily open your eBooks for reading right from your Home screen.
For more information, see Customize the Home Screen.
Stocks
Use the Stocks application to get the latest stock updates for stock quotes and market indices
you follow.
1. From the Home screen, touch
see the icon.)
Tools and Calendar
> Stocks. (You may need to scroll down the screen to
213
2. Do any of the following:

Touch an item to view its information.

Touch
to update the stock information.

Touch
to add a stock quote or stock market index.

To change the stock list order, touch
> Edit. Touch and hold
at the end of
the item you want to move, drag it to its new position, and then touch Done.
3. When you’ve selected a particular stock quote or stock market index, you can:

View the item’s trade information as well as its price chart for a specific period.

Touch the time buttons below the chart to view up to a year of an item’s past trade
information.
Add a Stock Quote or Stock Market Index
1. From the Home screen, touch
2. Touch
> Stocks.
and enter the stock quote or stock market index in the text box.
3. In the results list, touch the stock quote or stock market index you want to add.
Delete a Stock Quote or Stock Market Index
1. From the Home screen, touch
2. Touch
> Stocks.
> Edit.
3. Touch the check box before the item you want to delete, and then touch Done.
Change Stocks Settings
1. From the Home screen, touch
2. Touch
> Stocks.
> Settings, and then change the settings.

Update when opened: Update the stock information every time you open the Stocks
application.

Set color for price raise: Change the color for displaying stock price increases to
either red or green, depending on what’s being used in your country.
Update Stock Information
1. From the Home screen, touch
Tools and Calendar
> Settings > Account & sync > Stocks.
214
2. Change the following sync options:
3. Sync stock info: Select to automatically download stock information. You may incur
additional data connection fees
Add the Stocks Widget
1. From the Home screen, touch
> Personalize > Widget > Stocks.
2. Choose the widget style, and then touch Select.
3. Drag the widget to a blank space on the Home screen, and then release.
View Your Stocks on the Lock Screen
Display the stocks and stock market information you’re following right on the device’s lock
screen.
1. From the Home screen, touch
> Personalize.
2. On the Display tab, touch Lock screen style.
3. Slide your finger left until the Stocks lock screen is displayed, and then touch Apply.
4. Briefly press
to put the device in standby mode, and then briefly press
again to display the Lock screen. Your stocks and stock market information display on
the screen.
Weather
You can use the Weather application and widget to check the current, upcoming, hourly, and
daily weather forecast.
In addition to your current location, you can also view weather forecasts for other cities around
the globe. Your settings in the Weather application also control the weather information that is
shown in the Clock and Calendar.
Important:
To automatically update your current location’s weather in the Weather app and
widget as well as Clock and Calendar:
Your device must be connected to the Internet.
Turn on location services so that you’ll be able to check your current location’s
weather on the HTC Clock widget, Weather application, and the Weather widget.
From the Home screen, touch
> Settings > Location, and then select the
Use wireless networks check box.
Tools and Calendar
215
Use Weather
1. From the Home screen, touch
> Weather. (You may need to scroll down the screen
to see the icon.) The Weather app opens and displays the weather in your current
location.
2. On the Weather screen, you can:

Swipe your finger up or down the screen to check the weather in other cities (if
available).

Touch More details online at the bottom of the Weather screen to see more
weather details on the Web.

Touch
and do any of the following:
•
Touch
to update the weather information.
•
Touch
to add a city.
•
Touch Hourly to view an hourly weather chart.
•
Touch 4-day to view the weather forecast for the next four days.
•
Touch
to view the weather information back in full screen.
Add a City in Weather
1. From the Home screen, touch
2. Touch
> Weather.
> Add.
Tools and Calendar
216
3. Enter the location you want to add on the text box. As you enter text, the list is filtered to
show the possible locations based on the letters you entered.
4. Touch the city to select it.
Arrange or Delete Cities in Weather
1. From the Home screen, touch
2. Touch
> Weather.
> Edit.
3. Do one of the following:

To move a city, touch and hold
new position.
at the end of the city name and then drag it to its

To delete a city, touch the check box before the city you want to delete.
4. Touch Done.
Change Weather Options
1. From the Home screen, touch
2. Touch
> Weather.
> Settings.
3. Select the options you want:

Select the Update when opened check box to refresh weather updates every time
you open the Weather application.

Select the Scheduled sync check box to automatically download weather updates
after a period of time.

To set an auto update schedule, touch Update schedule and choose a schedule.

Touch Temperature scale to choose whether to display weather in Celsius or
Fahrenheit.

Sound effects. Select whether to play sound effects related to the weather
conditions.

Monitor my location. Select whether to monitor your current location.

Weather alerts. Show weather alerts on the lock screen in the mornings.
About the Weather Widget
Use the Weather widget to instantly check weather forecasts of your current location and other
cities without having to open the Weather application.
Tools and Calendar
217
The Weather widget comes in different looks and styles. You can add this widget to the Home
screen, if it’s not yet added.
To find out how you can add a widget, see Customize the Home Screen.
News Feeds
Don’t get left behind with yesterday’s stories. Use the News application to subscribe to news
feeds that cover breaking news, sports, top blogs, and more. You can also get updates based
on specific keywords.
Subscribe to News Channels
1. From the Home screen, touch
> News. News opens in the All items screen.
2. Touch All items > Subscriptions > Add feeds.
3. Do one of the following:

Touch a category such as Blogs or Business to select from popular news feeds.

Touch Search more to search for a specific keyword or a feed URL.
4. After selecting the channel or channels you want to subscribe to, touch Add.
Note: To manually check for updates, on the All items screen, touch
> Refresh.
Search News Stories
Easily find stories that interest you by entering a search keyword. Stories on your subscribed
channels that contain the keyword are displayed making it easier to find the story you want.
1. From the Home screen, touch
> News.
2. Touch
and enter the keyword in the text box. The stories that contain the keyword
display on the screen.
3. Touch a story to read it.
Read a News Story
1. From the Home screen, touch
> News.
2. Touch All items > Subscriptions, and then touch a channel.
3. Scroll through the list of stories, and then touch a story to read it.
4. While reading a story, you can:

Touch Like if you like the story.
Tools and Calendar
218

Touch
to star the story as a favorite. To access your favorite stories, return to
the All items screen, and then touch All items > My items > Starred items.

Touch Share to share the story via Google reader share, message (link to the story
only), or email.

Touch

Touch
> Add tags to tag the story to another channel or category you’ve
subscribed.

Touch
and
to go to the previous or next story in the channel.
> Font size to change the font size.
5. If you want to read the whole story, touch Read full article. This opens the story in the
Web browser. See Browser for details.
Change News Settings
1. From the Home screen, touch
2. Touch
> News.
> Settings.

Accounts: Select the Google Account you want News to sync with.

Update when opened: Update the content of the channels you’ve subscribed to
every time you open the News app.

News content: Choose how to read news stories by default: whether as a summary
or as a full Web page article.

Mobile view: If you’ve selected to view the news content as a Web page article,
choose to display Web page articles optimized for mobile viewing.
Add the News Widget
Read snippets of stories that you have subscribed to right on the Home screen.
1. From the Home screen, touch
> Personalize > Widget > News.
2. Select the widget style, and then touch Select.
3. Select the channel whose stories you want to display on the widget, and then touch
Select.
4. Drag the widget to a blank space on a screen, and then release.
Tools and Calendar
219
Car Panel
With the Car Panel, you can easily access footprints, locate places in Google Maps, and
navigate to a destination that you want. You can also make calls and search the Web.
1. From the Home screen, touch
> Car Panel.
2. On the Car Panel screen, touch:

Footprints: Check the places you’ve been before, and then choose one to set as
your destination. See Footprints for details.

Navigation: Get help navigating to your destination using Google Maps Navigation.
For details on Google Maps Navigation, visit google.com/mobile/navigation/ .

Voice search: Search the Web with Google search by simply dictating words into
your device’s microphone.

View map: View a map of your location using Google Maps. See Google Maps for
details.

Search: Search the Web with Google search by entering a word or phrase.

Make a call: Quickly dial Favorites, dial someone from your call history list, or use
the Phone dialer. See Make Phone Calls for details.
Make a Call in Car Panel
1. From the Home screen, touch
> Car Panel.
2. On the Car Panel screen, touch Make a call, and then touch any of the available
buttons:

Favorites: Access your favorite contacts and touch one to place your call.

Recent calls: See a list of your recent calls and touch one to place your call.

Dialer: Use the Phone dialer to dial a number or directly select a contact to call.
Exit Car Panel
► Do any of the following:

On the Car Panel screen, touch

Touch and hold the status bar, drag it down to open the Notifications panel, and then
touch Car mode enabled.
Note: Touching
Tools and Calendar
or
> Exit.
will not close the Car Panel.
220
Dock Mode
Place the device on the dock to switch to Dock Mode and display the weather in your current
location, the date and time, Friend Stream updates, and shortcuts to your photos, Connected
Media, and Calendar.
Note: The dock is purchased separately and is not included in the box.
Using Dock Mode
1. Place the device on the dock.
2. While in Dock Mode, you can:

Touch
to dim the screen. Touch anywhere on the screen to light it up again.

Touch
> Settings to change the Dock Mode settings.

Touch the shortcut icons at the bottom of the screen to start a slideshow of your
photos, launch Connected Media, or access your calendar.
3. To exit Dock Mode, touch
or disconnect the device from the dock.
Note: While in Dock Mode, the device’s buttons are disabled except for
to access the settings
that you can press
HTC Sync
You have your new vacation photos on your device while your business calendar is on your
computer. Why not make these types of files and information available on both devices? With
HTC Sync you can:
●
Synchronize contacts between Microsoft Outlook, Outlook Express, or Windows
Contacts on your computer and your device.
●
Sync your calendar events between the Outlook or Windows Calendar on your computer
and your device.
●
Bring your photos, videos, documents, songs, and playlists from your computer to your
device so you can enjoy them on the go.
●
Easily import your captured photos and videos from your device to your computer.
●
Sync bookmarks in the HTC Bookmarks favorites folder on your computer and all
bookmarks stored on your device’s Web browser.
●
Install third-party mobile phone apps (not downloaded from Play Store) from your
computer.
Tools and Calendar
221
●
Back up and sync information from your device to your computer before you do a factory
reset or a software (ROM) upgrade of your device.
Note: The available categories and options depend on the device you’ve connected to your
computer.
Before You Install HTC Sync
Here’s what you need to do to install, set up, and use HTC Sync on your computer.
1. Make sure that you have an installed storage card on your device to sync multimedia
files and documents.
2. HTC Sync requires USB 2.0 on your computer to connect and sync with your device.
3. Download the HTC Sync installer from htc.com/us/support. For the steps on how to
install HTC on your computer, see Install HTC Sync.
4. Connect your device to your computer using the supplied USB cable and set up HTC
Sync to recognize your device. Follow the steps in Set Up HTC Sync to Recognize Your
Device.
5. Choose the information to sync between your computer and your device and how you
want to sync your selections. To easily set up synchronization using HTC Sync’s guided
wizard, follow the steps in Set Up Synchronization.
6. Sync your computer with your device automatically or manually. See Set Up HTC Sync
to Recognize Your Device for details.
Install HTC Sync
1. On your computer, download the HTC Sync installer from htc.com/us/support.
Important:
The HTC Sync version that you’ve downloaded can be installed on Microsoft
Windows XP, Windows Vista, and Windows 7.
2. Quit all running programs and temporarily disable your computer’s anti-virus application.
3. Double-click the HTCSync.exe file and follow the onscreen instructions to install HTC
Sync.
4. After installing HTC Sync, the HTC Sync icon ( ) is added to your computer’s system
tray (check the bottom-right side of your computer screen). You can double-click this
icon to open HTC Sync.
Set Up HTC Sync to Recognize Your Device
1. Do one of the following:
Tools and Calendar
222

Connect your device to the computer with the supplied USB cable.

If your device is already connected, touch and hold the status bar and drag your
finger down to open the Notifications panel. Then touch the status that shows Select
to change USB connection type.
2. On the Choose a connection type screen, touch HTC Sync > Done.
3. Your device will attempt to find HTC Sync on your computer. Wait for a few seconds for
the process to finish.
Note: If your device displays a message indicating that it’s unable to find HTC Sync, try
disconnecting and reconnecting the USB cable, and then repeat steps 1 to 2.
1. When your device finds HTC Sync, your computer will display the Phone Connection
Wizard. Click Next.
2. Enter the name you want for your device, and then click Finish. The Device panel
opens.
Tip:
Check the HTC Sync icon at the bottom right side of your computer screen. If it has a
green arrow ( ), that means your device has successfully connected with your
computer and HTC Sync recognizes your device.
Get to Know the HTC Sync Workspace
After HTC Sync recognizes your device, use the Device panel to set your sync options, see your
device’s general information, check the used and available space on your microSD card, and
begin synchronization.
Note: The available categories and options depend on the device you’ve connected to your
computer.
●
You can click a category of items to see its sync options on the right side of the Device
panel. Clicking Overview displays your device’s basic software information and microSD
card usage, change the device name, or install third-party applications to your device.
Tools and Calendar
223
●
The Sync now button lets you start syncing the categories and options you’ve selected.
●
The estimated storage usage bar beside the Sync now button shows you the estimated
microSD card space that will be used when there are new items to be synchronized and
added to your device.
Set Up Synchronization Using HTC Sync
Use the HTC Sync Device panel on your computer to choose the types of files and information
you want to sync between your device and computer.
Music Sync Options
Bring the music tracks and songs you play on your computer to your device. If you have
playlists created in Apple® iTunes® or Microsoft® Windows Media® Player, you can sync these
too and enjoy them on the go.
Note: You can sync audio files in these formats: *.aac, *.amr, *.m4a, *.mid, *.midi, *.mp3,
*.wav, and *.wma.
1. On the Device panel, click Music, and then click the On button.
Turning Music sync on means you want this category included every time you sync your
computer and device.
2. Select Sync music files from, and then click Add.
3. Choose the folder that contains your audio files, and then click OK.
All supported audio files added to this folder will also be copied to your device’s storage
card during synchronization.
4. Select Sync music files from iTunes and Windows Media Player if you’re using these
on your computer, and then choose the songs or playlists you want to sync with your
device.
Gallery Sync Options
You can automatically sync photos and videos between your device and computer.
Note: You can sync photos and videos in these formats:
Photos: *.bmp, *.gif, *.jpeg, *.jpg, and *.png.
Videos: *.3gp, *.3g2, *.mp4, and *.wmv.
1. On the Device panel, click Gallery, and then click the On button.
Turning Gallery sync on means you want this category included every time you sync
your computer and device.
Tools and Calendar
224
2. To automatically import your camera shots to your computer during synchronization,
select Copy device Camera Shots to PC.
Photos and videos from your storage card will be saved to the \My Photos\Device
Camera Shots folder on your computer.
3. Select Sync PC photos & videos from, and then click Add.
4. Choose the folder on your computer that contains your multimedia files, and then click
OK.
All supported image and video files added to this folder will also be copied to your
device’s storage card during synchronization.
Calendar Sync Options
Your device can sync appointments and events with your calendar in Outlook (Outlook XP,
Outlook 2003, or Outlook 2007) or Windows Calendar.
1. On the Device panel, click Calendar, and then click the On button.
Turning Calendar sync on means you want this category included every time you sync
your computer and device.
2. Select the application you want to sync calendar events with.
3. Choose from which point you want to start synchronizing your calendar events.
4. In cases where conflicting information is found on both the device and computer, choose
which information you want to keep.
Note: Only the calendar fields supported on your device will be synchronized.
People Sync Options
Sync device contacts with your Outlook (Outlook XP, Outlook 2003 or Outlook 2007), Outlook
Express, or Windows Contacts.
1. On the Device panel, click People, and then click the On button.
Turning People sync on means you want this category included every time you sync
your computer and device.
2. Choose the application you want to sync your contacts with.
3. In cases when conflicting information is found on both the device and computer, choose
which information you want to keep.
Note: Only the contact fields supported on your device will be synchronized.
Tools and Calendar
225
Bookmarks Sync Options
Sync Web browser bookmarks between your device and computer.
1. On the Device panel, click Bookmarks, and then click the On button.
Turning Bookmarks sync on means you want this category included every time you sync
your computer and device.
2. Select the Web browser that stores the bookmarks you want to sync to your device.
Important:
If you are using Google Chrome or Firefox Internet browser and have selected it
to sync with your device, make sure to close all browser windows before you
begin synchronization.
Important:
When conflicting information is found on both the device and computer, HTC
Sync keeps the information from your computer.
Documents Sync Options
You can sync files and documents from your computer to your device. You can also sync email
attachments that you stored on your device’s microSD card to your computer.
Note: To open a document on your device, you’ll need a compatible app. Usually, your device
can open and view these file types: Microsoft Office 2003 and 2007 Word (*.doc, *.docx),
Excel (*.xls, *.xlsx), and PowerPoint (*.ppt, *.pptx), PDF files (*.pdf), and text files (*.txt).
You may have installed other apps capable of working with additional file types.
Note: To sync email attachments stored on your device’s microSD card to your computer, you
must set up an Exchange ActiveSync or POP3/IMAP email account on your device using
Mail. For more information, see Email.
1. On the Device panel, click Documents, and then click the On button.
Turning Documents sync on means you want this category included every time you sync
your computer and device.
2. To sync email attachments that you’ve stored on your device’s microSD card, select
Copy all download Mail documents to PC.
3. To sync files and documents from your computer to your device’s storage card, select
Sync PC documents from, and then click Add.
4. Choose a folder that contains the files you want to sync with your device, and then click
OK.
Email attachments from your device’s microSD card will be saved to the \My
Documents\Device documents\ folder on your computer. Documents from your
Tools and Calendar
226
computer will be saved to the \My Documents\Device documents\ folder on your
microSD card.
Synchronize Your Device Using HTC Sync
After you’ve selected the items you want to synchronize, you can now synchronize your device
and your computer. Check the estimated usage bar beside the Sync now button for the
estimated file size of new items to sync on your device.
1. Connect your device to the computer with the supplied USB cable.
2. On your device’s Choose a connection type screen, touch HTC Sync and then touch
Done.
3. On the Device panel on your computer, click Sync now.
4. After synchronization is complete, click Disconnect
5. Safely remove your device as required by your computer’s operating system.
The next time you connect your device to your computer, synchronization automatically begins
based on your sync options.
Install Apps From Your Computer to Your Device
If you have applications (files with an .apk extension) on your computer, you can use HTC Sync
to install them to your device. We strongly recommend you install only applications that you
trust.
1. On your device, touch
sources check box.
>
> Settings > Security, and then select the Unknown
Note: You only have to do this step once. You do not need to do this step again next time you
install another application from your computer to your device.
2. Connect your device to the computer using the supplied USB cable.
3. On your device’s Choose a connection type screen, touch HTC Sync > Done.
4. On your computer, double-click the HTC Sync icon in the system tray ( ) to open HTC
Sync.
5. On the Device panel, click Overview > Application installer.
6. Browse for the application file on your computer, and then click Open. The installation
process starts on your device.
7. Check your device’s screen to see if there are additional instructions to complete the
installation.
Tools and Calendar
227
8. After installation is complete, click Disconnect.
9. Safely remove your device as required by your computer’s operating system.
Synchronize Another Device With Your Computer
You can switch from one device to another, if you have more than one device to sync.
1. Connect another device to your computer, and then set up HTC Sync to recognize this
device.
2. Click the device you want to set up or begin synchronization. The Device panel then
opens, where you can separately customize your sync settings for this device.
3. To switch to another device to sync, click Devices, and then click the device’s name or
image.
Download the Latest HTC Sync Upgrade
Visit the HTC support website (htc.com/us/support) from time to time to check for the most
recent HTC Sync upgrade so you can download and install it on your computer.
After installing the latest upgrade, set up HTC Sync again to recognize and sync with your
device.
HTCSense.com
You can use your HTCSense.com account to access HTC Hub where you can download
widgets, sound sets, scenes, and featured apps for your device.
Sign Up for Your HTCSense.com Account
You can sign up for your HTCSense.com account on your device or your computer’s Web
browser.
Sign Up From Your Device
1. From the Home screen, touch
> Settings > Account & sync.
2. Touch Add account > HTC Sense.
3. Follow the onscreen instructions to sign up for your HTCSense.com account.
Sign Up From Your Computer
Make sure you have your device close by. You’ll need it to complete the sign-up process.
1. On your computer, open your Web browser.
2. Go to htcsense.com.
Tools and Calendar
228
3. Follow the onscreen instructions to sign up for your HTCSense.com account.
After signing up to HTCSense.com on the Web, you have to sign in using the same account
credentials on your device.
Update Your HTCSense.com Account Details
1. On your computer, open your Web browser and sign in to your HTCSense.com account.
2. Click Account in the upper-right corner of the page.
3. Update your account details, and then click Save Changes.
Voice Commands
Use your voice to control your phone.
Automatic Speech Recognition (ASR)
You can use your device’s built-in automatic speech recognition (ASR) software to dial a phone
number in People or to launch device functions. All you have to do is to talk into the device, and
ASR will recognize your voice and complete tasks by itself.
Activate ASR
1. From the Home screen, touch
screen to see the icon.)
> Voice Dialer. (You may need to scroll down the
2. The device beeps, the screen displays “Listening...”, and the device prompts you to say
the name of the command you want to use. You can speak the following commands:
Tip:

Call <Name or Voicemail> to call an entry in your contacts list or voicemail. See
Make a Voice Call With ASR.

Dial <Number> to dial a spoken phone number.

Redial to dial the last outgoing call.

Open <Application Name> to open an application in your device. See Open
Applications With ASR.
Use ASR in a quiet environment so it can accurately recognize your commands.
Note: Regardless of which command you use, you will be asked to confirm your choice, or
choose from a menu if ASR is not sure what you would like to do.
Make a Voice Call With ASR
1. From the Home screen, touch
Tools and Calendar
> Voice Dialer.
229
2. After the beep, say:

Call [contact name] to call a person stored in your contacts list.

Dial [contact number] to dial a spoken phone number.
Note: When dialing a phone number, numbers can be three digits (for example, 911), seven
digits (for example, 555-1234), or ten digits (for example, 222-555-1234).
3. Touch OK to confirm or Cancel to cancel the command; or choose from a menu if ASR
is not sure what you would like to do.
Open Applications With ASR
You can jump directly to many applications by saying “Open” followed by the application name.
1. From the Home screen, touch
> Voice Dialer.
2. After the beep, say Open [application name].
3. Touch OK to confirm or Cancel to cancel the command; or choose from a menu if ASR
is not sure what you would like to do.
Voice Recorder
Use your device’s Voice Recorder to record brief memos to remind you of important events,
phone numbers, grocery list items, or to create a ringtone.
Record Voice Memos
1. From the Home screen, touch
screen to see the icon.)
2. Touch
> Voice Recorder. (You may need to scroll down the
and speak into the device’s microphone.
3. To end the recording, touch
.
Play Voice Memos
1. From the Home screen, touch
> Voice Recorder.
2. Do any of the following:

Record a voice memo, and then touch

Touch
.
and then touch the file you want to play.
Share a Voice Memo
1. From the Home screen, touch
Tools and Calendar
> Voice Recorder.
230
2. Touch
, touch and hold the voice memo you want to share, and then touch Share.
3. Select how you want to share the voice memo.
To learn how to send files using Bluetooth, see Bluetooth.
Set a Voice Memo as Your Ringtone
1. From the Home screen, touch
> Voice Recorder.
2. Touch
, touch and hold the voice memo you want to set as a ringtone, and then touch
Set as ringtone.
3. To confirm that the voice memo was added as a ringtone, touch
>
> Settings >
Sound > Phone ringtone. The voice memo should be in the ringtone list and selected.
Rename Voice Memos
1. From the Home screen, touch
> Voice Recorder.
2. Touch
, touch and hold the voice memo you want to rename, and then touch
Rename.
3. Enter the new name and touch Save.
Erase Voice Memos
1. From the Home screen, touch
2. Touch
, and then touch
> Voice Recorder.
> Delete.
3. Do either of the following:
4. To erase one or more voice memos, select the check box at the right side of the voice
memo names, and then touch Delete.
5. To erase all voice memos, touch
> Select All > Delete.
Voice Input
You can dictate words to enter them in most text fields that let you use the onscreen keyboard.
Before you use voice input, make sure to select the language you’ll be using in the Voice input
& output settings.
Select the Voice Input Language
1. From the Home screen, touch
> Settings > Language & keyboard > Voice Search
2. Touch Language, and then choose the language you want.
Tools and Calendar
231
Available languages depend on the voice input languages supported by Google.
Enter Text Using Voice Input
Note: Because your device uses Google’s speech recognition service, you need to be
connected to the Internet to enter text using voice input.
1. Start an app that requires text or numbers.
2. Touch and hold the Voice input key (
or
) on the onscreen keyboard.
3. When your device cues you to “Speak now,” tell your device what you want to type.
Bluetooth
Bluetooth is a short-range communications technology that allows you to connect wirelessly to a
number of Bluetooth devices, such as headsets and hands-free car kits, and Bluetooth-enabled
handhelds, computers, printers, and wireless phones. The Bluetooth communication range is
usually approximately 30 feet.
Turn Bluetooth On or Off
1. From the Home screen, touch
> Settings.
2. Toggle the Bluetooth switch on or off.
An even easier way to turn Bluetooth on or off is with the Bluetooth widget on the Home screen.
For instructions on adding a widget to the Home screen, see Customize the Home Screen.
Note: Turn off Bluetooth when not in use to conserve battery power, or in places where using a
wireless device is prohibited, such as aboard an aircraft and in hospitals.
Change the Device Name
The device name identifies your device when using Bluetooth.
1. From the Home screen, touch
> Settings.
2. Touch Bluetooth.
Note: If the Bluetooth switch is not set to On, touch the switch to turn Bluetooth on.
3. Touch
> Rename phone.
4. Enter the name for your device in the dialog box, and then touch Rename.
Connect a Bluetooth Headset or Car Kit
You can listen to music over a Bluetooth stereo headset, or have hands-free conversations
using a compatible Bluetooth headset or car kit. Use the same procedure to set up stereo audio
or hands-free devices.
Tools and Calendar
232
Important:
For you to listen to music with your headset or car kit, the headset or car kit must
support the A2DP Bluetooth profile.
Note: Before you connect your headset, you need to make it discoverable so your device can
find it. You can find out how to do this by referring to your headset manual.
1. From the Home screen, touch
> Settings > Bluetooth.
Note: If the Bluetooth switch is not set to On, touch the switch to turn Bluetooth on.
2. Make sure that the headset is discoverable.
3. Touch
> Search for devices. Your device will start to scan for Bluetooth devices
within range.
4. When you see the name of your headset displayed in the Bluetooth devices section,
touch the name. Your device then automatically tries to pair with the headset.
5. If automatic pairing fails, enter the passcode supplied with your headset.
The pairing and connection status is displayed below the hands-free headset or car kit name in
the Bluetooth devices section. When the Bluetooth headset or car kit is connected to your
device, the Bluetooth connected icon
is displayed in the status bar. Depending on the type of
headset or car kit you have connected, you can then start using the headset or car kit to listen to
music and to make and or receive phone calls.
Note: Due to different specifications and features of other Bluetooth-compatible devices,
display and operations may be different, and functions such as transfer or exchange
may not be possible with all Bluetooth-compatible devices.
Reconnect a Headset or Car Kit
When you have paired a headset with your device, you should be able to reconnect it
automatically by turning on Bluetooth on your device and then turning on the headset. However,
might have to connect manually if your headset has been used with another Bluetooth device.
1. From the Home screen, touch
> Settings > Bluetooth.
Note: If the Bluetooth switch is not set to On, touch the switch to turn Bluetooth on.
2. Make sure that the headset is discoverable.
3. Touch the headset’s name in the Bluetooth devices section.
4. If prompted to enter a passcode, try 0000 or 1234, or consult the headset or car kit
documentation to find the passcode.
If you still cannot reconnect to the headset or car kit, follow the instructions in Disconnect or
Unpair From a Bluetooth Device, and then follow the steps in Connect a Bluetooth Headset or
Car Kit.
Tools and Calendar
233
Disconnect or Unpair From a Bluetooth Device
You can disconnect your device from another Bluetooth device, or make your device forget its
pairing connection with another Bluetooth device.
1. From the Home screen, touch
> Settings > Bluetooth.
2. In the Bluetooth devices section, touch and hold the device to disconnect or unpair.
3. Do one of the following:

Touch Disconnect.

Touch Disconnect & unpair or Unpair if the Bluetooth device is currently not
connected to your device. To connect to the other device again, you may need to
enter or confirm a passcode again.
Send Information Using Bluetooth
You can use Bluetooth to transfer information between your device and another Bluetoothenabled device such as a phone or notebook computer. The first time you transfer information
between your device and another device, you need to enter or confirm a security passcode.
After that, your device and the other device are paired, and you will not need to exchange
passcodes to transfer information in the future.
You can send the following types of information, depending on the device you are sending to:
●
Images and videos
●
Calendar events
●
Contacts
●
Audio files
Important:
Before you begin, set the receiving device to discoverable mode. You may also
need to set it to “Receive Beams” or “Receive Files.” Refer to the device’s
documentation for instructions on receiving information over Bluetooth.
1. On the device, open the application that contains the information or file you want to
send.
2. Follow the steps for the type of item you want to send:

Photo or video (in Camera). After capturing a photo, on the preview screen,
touch
> Bluetooth.

Photos and videos (in Gallery). On the Albums screen, touch an album.
Touch Share > Bluetooth, select the items you want to share, and then touch Next.
Tools and Calendar
234

Calendar event. In the Calendar’s Agenda, Day, or Week view, touch and hold the
event, and then touch Forward > Bluetooth.

Contact. On the All screen of the People application, touch and hold the contact,
and then touch Send contact as vCard. Touch the down arrow icon, and then select
Bluetooth from the displayed list. Touch Send.

Music track. With the track displayed on the Now playing screen, touch
Share > Bluetooth.

Voice recording. On the main Voice Recorder screen, touch
Bluetooth.
>
> Share >
3. If you’re prompted to turn on Bluetooth, touch Yes.
4. If you haven’t paired with the receiving device before, touch Search for devices.
Otherwise touch the name of the receiving device.
5. If prompted, accept the pairing request on your device and the receiving device. Also
enter the same passcode on both your device and the other device or confirm the autogenerated passcode.
6. On the receiving device, accept the file.
Where Sent Information is Saved
When you send information from your device using Bluetooth, the location where it’s saved
depends on the type of information and the receiving device.
If you send a calendar event or contact, it is normally added directly to the corresponding
application on the receiving device. For example, if you send a calendar event to a compatible
phone, the event is shown in that phone’s calendar application.
If you send another file type to a Windows computer, it is normally saved in the Bluetooth
Exchange folder within your personal document folders.
●
On Windows XP, the path may be:
C:\Documents and Settings\[your username]\My Documents\Bluetooth Exchange
●
On Windows Vista, the path may be:
C:\Users\[your username]\Documents
●
On Windows 7, the path may be:
C:\Users\[your username]\My Documents\Bluetooth Exchange Folder
If you send a file to another device, the saved location may depend on the file type. For
example, if you send an image file to another wireless phone, it may be saved in a folder named
“Images.”
Tools and Calendar
235
Receive Information From Another Device
Your device is capable of receiving a wide variety of file types with Bluetooth, including photos,
music tracks, and documents such as PDFs.
Before you receive files from another device:
●
a microSD card needs to be installed on your device.
●
you need to enter or confirm a security passcode if this is the first time you’ll transfer
information between your device and another device. After that, your device and the
other device are paired, and you will not need to exchange passcodes to transfer
information again.
1. From the Home screen, touch
> Settings > Bluetooth.
Note: If the Bluetooth switch is not set to On, touch the switch to turn Bluetooth on.
2. Touch the name of your device to make it discoverable.
3. On the sending device, send one or more files to your device. Refer to the device’s
documentation for instructions on sending information over Bluetooth.
4. If asked, accept the pairing request on your device and the receiving device.
5. Enter the same passcode on both your device and the other device, or confirm the autogenerated passcode.
6. A Bluetooth authorization request is then displayed on your device.
Tip:
If you want to automatically receive files from the sending device in future, select the
Always check box.
7. Touch Accept.
8. When your device receives a file transfer request notification, slide down the
Notifications panel, touch Bluetooth share and then touch Accept.
9. When a file is transferred, a download notification is displayed on the status bar. To
open the file immediately, slide down the Notifications panel, and then touch Bluetooth
share.
10. On the Inbound transfers screen, touch the received file. What happens next depends
on the file type:

Media files and documents are usually opened directly in a compatible application.
For example, if you open a music track, it starts playing in the Music application.
Tools and Calendar
236

For a vCalendar file, select the calendar where you want to save the event, and then
touch Import. The vCalendar is added to your Calendar events. (For more
information, see Calendar)

For a vCard contact file, if there are multiple vCard files on your microSD card, you
can choose to import one, several, or all of those contacts to your contacts list.
Use Bluetooth FTP Server
Bluetooth FTP Server allows other devices with Bluetooth FTP profiles to view, access, copy,
and delete files from your device’s microSD card. To use Bluetooth FTP Server, you need to
have a microSD card installed in your device.
1. From the Home screen, touch
2. Touch
> Settings > Bluetooth
> Advanced.
3. Select the FTP Server check box.
4. Pair your device with the other Bluetooth device that you will allow access to your
microSD card contents. For more information about Bluetooth pairing, see Connect a
Bluetooth Headset or Car Kit.
5. When the other device attempts to access your device’s microSD card, a Bluetooth
Authorization Request appears on the screen. Touch Accept.
Tip:
If you want to allow the connecting device to always access your device’s microSD card,
select the Always check box before you touch Accept.
The microSD card contents appear on the other device’s screen.
microSD Card
Your device comes with a preinstalled microSDTM (Secure Digital) memory card that allows you
to store images, videos, music, documents, and voice data on your device.
Important:
Make sure your battery is fully charged before using the microSD card. Your data
may become damaged or unusable if the battery runs out while using the
microSD card.
Important:
You can easily damage the microSD card by improper operation. Please be
careful when inserting, removing, or handling the microSD card.
Remove the microSD Card
1. Turn off the device.
2. Hold the device upside down and with the back of the device facing you.
Tools and Calendar
237
3. Push the battery compartment cover up with your thumbs and remove it from the device.
4. Gently pull the microSD card from the slot.
5. Replace the microSD card and the battery compartment cover.
Insert the microSD Card
1. Turn off the device.
2. Hold the device upside down and with the back of the device facing you.
3. Push the battery compartment cover up with your thumbs and remove it from the device.
Tools and Calendar
238
4. Insert the microSD card fully into the slot.
5. Replace the battery compartment cover.
6. Turn on the device.
Check the microSD Card Memory
1. Make sure the microSD card is inserted and the device turned on.
2. From the Home screen, touch
> Settings > Storage. The total and available
memory space will be displayed.
Erase the microSD Card
Erasing the microSD card permanently removes all files stored on it.
Note: When you erase the microSD card, the files CANNOT be retrieved. To prevent the loss
of important data, please check the contents before you erase the card.
1. From the Home screen, touch
> Settings > Storage.
2. Touch Unmount SD card > Erase SD card > Erase SD card > Erase everything.
Unmount the microSD Card
When you need to remove the microSD card while the device in on, you must first unmount the
microSD card. This prevents corrupting the data stored on it or damaging the microSD card.
Close all running applications on your device and save any data before you unmount the
microSD card.
1. From the Home screen, touch
> Settings > Storage > Unmount SD card.
2. Remove the microSD card. See Remove the microSD Card.
Use the microSD Card as a USB Drive
To transfer music, pictures, and other files from your computer to your device’s microSD card,
you need to set the device’s microSD card as a USB drive.
1. Connect the device to your computer using the supplied USB cable.
Tools and Calendar
239
2. When the Choose a connection type screen appears, touch Disk drive > Done.
3. On your computer, the connected device is recognized as a removable disk. Navigate to
this removable disk and open it.
4. Do one of the following:

Copy files from the computer to the root folder on the device’s storage card.

Copy files from the device’s storage card to a folder on your computer or computer
desktop.
5. After copying the files, unmount the removable disk (that is, the connected device) as
required by your computer’s operating system to safely remove your device, and do
either of the following:

Disconnect the device from the computer.

If you want to keep the device connected to the computer but want the device to be
able to access and use the storage card, open the Notifications panel, touch Disk
drive, select an option other than Disk drive, and then touch Done.
Note: The device will not recognize the microSD card when it is connected to a computer as a
disk drive. You will not be able to use some of the device’s applications such as the
camera or Music.
Update Your Device
From time to time, updates may become available for your device. You can download and apply
updates through the Settings > System updates menu.
Update Your Device Firmware
You can update your device’s software using the Firmware update option. Updating your
device firmware will erase all user data from your device. You must back up all critical
information before updating your device firmware.
Back Up All Data Prior to Update
To back up your Gmail information:
1. From the Home screen, touch
> Settings > Account & sync.
2. Do any of the following:

Select the Auto-sync checkbox, and then touch Sync all. When Auto-sync is
selected, Gmail email, Calendar, and Contacts automatically synchronize whenever
a change is made.

Touch Google, select the items you want to synchronize, and then touch Sync now.
Tools and Calendar
240
To back up your Exchange ActiveSync information:
1. From the Home screen, touch
> Settings > Account & sync.
2. Do either of the following:

Select the Auto-sync checkbox, and then touch Sync all. When Auto-sync is
selected, your Exchange ActiveSync email, contacts, and calendar automatically
synchronize whenever a change is made.

Touch Exchange ActiveSync, select the items you want to synchronize, and then
touch Sync now.
To back up stored text messages:
You can back up stored text messages by forwarding them to your own phone number. Open
the messages after you have updated your firmware.
1. From the Home screen, touch
> Messaging.
2. Touch and hold the conversation from the list.
3. Touch Forward.
4. Enter the recipient’s phone number and touch Send.
To back up your Google applications:
Applications you’ve purchased from Google Play are reloaded remotely and can be re-installed
after the update is applied.
1. After the update, add your Google Account on the device.
2. From the Home screen, touch
3. Touch
> Play Store.
> My Apps.
4. Scroll through the list of previously downloaded Google applications and choose the one
you wish to reinstall.
5. Follow onscreen instructions.
As an added precaution, to preserve any data on your microSD card, please remove it from
your device prior before you perform an update.
Update Your Device Firmware
Once you have backed up all your data, use the Firmware update option to update your device
firmware.
Tools and Calendar
241
1. From the Home screen, touch
> Settings > System updates.
2. Touch Firmware update. Your device automatically searches, downloads, and installs
any available updates.
3. Follow onscreen instructions.
Confirm Your Current Device Firmware
► From the Home screen, touch
> More.
> Settings > About phone > Software information
Update the Operating System
This option allows you to update the device’s operating system (OS) via an over-the-air
connection.
1. From the Home screen, touch
> Settings > System updates.
2. Touch HTC software update > Check now.
3. Follow onscreen instructions to download and install any available updates.
Update Your Profile
This option allows you to automatically update your online user profile information. If you choose
to change your user name and select a new one online, you must then update the user name on
your device.
1. From the Home screen, touch
> Settings > System updates.
2. Touch Update profile and follow onscreen instructions.
Note: If your data services or account syncing ever seems to go out unexpectedly, use this
feature to reconnect with the network.
Update Your PRL
This option allows you to automatically download and update the PRL (preferred roaming list).
1. From the Home screen, touch
> Settings > System updates.
2. Touch Update PRL and follow onscreen instructions.
Tools and Calendar
242
Sprint Worldwide Wireless Service
With your device and global roaming service from Sprint WorldwideSM Wireless Service, you can
make phone calls and use wireless data services around the globe on compatible CDMA and
GSM/UMTS networks.
Activate Sprint Worldwide Service on Your Account
Your SIM Card
Enable Global Roaming Mode
Make and Receive Worldwide Calls
Sprint Voicemail Service
International Data Roaming
Status Messages
Contact Sprint for Assistance
Activate Sprint Worldwide Service on Your Account
Before using your device in global roaming mode, you must activate Sprint Worldwide service.
To activate Sprint Worldwide service, do any of the following:
► Chat with or email an international support rep by visiting sprint.com/international and
clicking the Chat with us or Email us link on the right side of the screen.
► Call Sprint Worldwide Customer support at 1-888-226-7212, option 2.
Your SIM Card
Your device comes with a preinstalled SIM (Subscriber Identity Module) card to support roaming
on compatible GSM networks.
Note: Your SIM card should be preinstalled. If you need to reinstall your SIM card, see Install
the SIM card.
Note: The SIM included contains information specific to your device and should be retained
with the device for use on GSM networks.
Install the SIM card
1. Turn off the device.
Sprint Worldwide Wireless Service
243
2. Hold the device with its front panel facing down and the battery compartment cover on
top.
3. Push the battery compartment cover up with your thumbs and remove it from the device.
4. Open the battery compartment door, and then pull out the battery.
Sprint Worldwide Wireless Service
244
5. Insert the SIM card into the slot with its metal contacts facing down and its cut-off corner
facing the bottom-right corner of your device.
6. Slide the SIM card fully into the slot until it is seated.
7. Replace the battery, contacts side first and the printed side facing down.
8. Close the battery compartment door.
9. Replace the battery compartment cover.
Sprint Worldwide Wireless Service
245
Enable Global Roaming Mode
Your device is designed to enter global roaming mode automatically when you activate your
Sprint Worldwide service, meaning that it should automatically connect to an appropriate CDMA
network or GSM/UMTS network when you travel. You may also set global roaming options
through the Settings menu.
Manually Set Your Global Roaming Options for CDMA Networks
► From the Home screen, touch
> Settings > Mobile network > Roaming Mode.

Touch Sprint Only to allow connection to the Nationwide Sprint Network only.

Touch Any CDMA to allow connection to any CDMA network.

Touch Any GSM to allow connection to any GSM network.

Touch Automatic to allow automatic connection to any of the above three options.
Make and Receive Worldwide Calls
When traveling on international networks, you can place and answer calls as you would on the
Sprint network (see Make Phone Calls and Receive Phone Calls), although some additional
instructions may be required to place a call. Some features and services are not available in all
countries. For more information on services that are available while roaming, visit
sprint.com/sww.
Make Calls Using Plus (+) Code Dialing
Placing calls from one country to another country is simple with the Plus (+) Code Dialing
feature. When placing international calls, you can use Plus Code Dialing to enter the
appropriate international access code for your location (for example, 011 for international calls
placed from the United States).
Note: Plus Code Dialing is only available when roaming internationally on GSM networks and
on certain CDMA networks in the United States, Canada, and the Carribbean.
Note: International access codes and dialing information are available online at
sprint.com/sww.
To use Plus Code Dialing to place an international call:
1. Do either of the following:

If you are on a GSM network, touch and hold
to insert a “+” on the Phone’s
dialer screen. (The “+” symbol automatically inserts the international access code for
the country from which you are calling.)

If you are on a CDMA network outside Canada or the Caribbean, enter the
international access code for the country from which you are calling.
Sprint Worldwide Wireless Service
246
2. Touch
to insert the US country code, and then enter the area code and number.
3. Touch
to place the call.
Sprint Voicemail Service
Your Sprint voicemail will follow you as you travel. All of your unanswered calls will be
forwarded to your Sprint voicemail. You will need to be sure your voicemail box is already set up
and that you know your voicemail password.
Note: In India, Sprint voicemail is not available while roaming on the GSM network; it does
work while on the CDMA network.
Set Up Your Voicemail Access Number
To simplify accessing your Sprint Voicemail while travelling, you can set up your voicemail
access number as an entry in People. This will make it faster and easier to access your
messages while roaming internationally.
1. From the Home screen, touch
2. Touch
> People.
.
3. Enter “Voicemail” as the contact name.
4. In the Phone section, enter +1 (
number.
), your area code, and your wireless phone
5. Touch Save.
New Message Indicators
Your voicemail message indicators may be displayed differently when roaming internationally.
●
A “Message Waiting” indicator icon or a text message is displayed when a voicemail
message is received.
●
You may see “Missed Call” on your screen prior to receiving a message notification.
●
You must call voicemail in order to retrieve messages. See Set Up Your Voicemail
Access Number to store your voicemail number for easy access.
Retrieve Voicemail Messages
The voicemail retrieval process while travelling is the same as on the Sprint Network; however,
you will be required to enter your voicemail password.
1. From the Home screen, touch
> People
2. Touch the voicemail entry you’ve created and then touch the number to call it.
Sprint Worldwide Wireless Service
247
3. When your voicemail answers, follow the system prompts to access your voicemail.
Voicemail Troubleshooting
Please keep the following tips in mind when using Sprint voicemail while travelling:
●
Some carriers may not support voicemail indicators. It may be necessary to call your
voicemail to see if you have any new messages.
●
If you hear the message “Please enter the number of the subscriber you wish to call,”
enter your 10-digit wireless phone number.
International Data Roaming
Sprint Worldwide Wireless Service can also keep you connected via email and Web browsing
when travelling in countries in which Sprint offers data service. Data services are available on
both CDMA and GSM/UMTS networks; check sprint.com/sww to determine the services
available where you are travelling.
Note: Prior to using your Sprint Worldwide GSM/UMTS Data Services, you must establish and
utilize your CDMA data services domestically on the Sprint Network.
Get Started With International Data Services
To use Sprint Worldwide Data Services, you will need to have these services activated on your
account.
► To activate, call Sprint Worldwide Customer Support at 1-888-226-7212, option 2.
Representatives are available 24 hours a day, 7 days a week to assist you.
Once your services are activated, you may need to select a GSM data services provider for the
country you are in.
Access Email and Data Services on GSM/UMTS Networks
To access your email and browse the Web when travelling, you may need to manually select
the carrier that provides Sprint service in your location. You can find a list of carriers for each
country where GSM data service is offered at sprint.com/sww. Then, follow the instructions
below to select the appropriate carrier network on your device.
To select a GSM data service carrier for a specific country:
1. From the Home screen, touch
> Settings > Mobile network.
2. Select the check boxes for International Voice and International Data.
3. Select the check box for Allow GSM data.
4. Touch Access Point Names and enter the appropriate information provided to you by
Sprint.
Sprint Worldwide Wireless Service
248
5. Do any of the following:

Touch Available GSM networks > Select automatically.

To manually select a wireless network that supports Sprint International GSM Data
Roaming, touch Available GSM networks > Search networks, and then touch the
specific operator.
Access Email and Data Services on CDMA Networks
If data service is available on a CDMA network, then you only need to set the phone to CDMA;
you will not need to select the specific carrier. Selecting a specific carrier is only necessary for
providers on the GSM network. If your device has automatically selected a GSM network while
traveling, then you will need to set the phone to CDMA to access CDMA data services. (See
Enable Global Roaming Mode.) Visit sprint.com/sww for a list of services available in each
country.
Status Messages
You may receive status messages under certain conditions. Before contacting Sprint Worldwide
Customer Support, note the message, numeric code, and the conditions under which it
appeared. The following table lists and describes the status messages.
Status Messages
Number Not in Service
User Not Available
User Not Authorized
Please Try Later
Service Restricted
Service Not Available
Energency Calls Only
System Busy. Try Later
Service Conflict
Please Try Again
Self Check Error
Self Check Fail
Message Description
The number that you entered is not valid.
The phone that you called is either busy, out-of-range, or
turned off. Please try again later.
The phone that you called is either busy, out-of-range, or
turned off. Please try again later.
This service is temporarily not available. Please try again later.
Service may not be activated properly. Please contact Sprint
Customer Service to report the issue for resolution.
This feature is not available on the current network.
Either the service is not activated properly or the current
network is available for emergency calling only. Adjust your
network settings to check for other available networks. If
service is still not available after adjusting the settings, contact
Sprint Customer Service to report the issue for resolution
The system is experiencing heavy traffic. Please try again later.
This service cannot be enabled because an incompatible
service has already been turned on.
An error occurred. Note the error code and try again.
A fault was detected with your device. If this error recurs, note
the error and contact Sprint Customer Service.
An operational fault was detected with your device. Note the
numeric code, turn your device off, and contact Sprint
Sprint Worldwide Wireless Service
249
Wrong PIN
PIN Blocked. Call Your
Provider
Insert SIM
Check SIM Card
Customer Service.
You have entered an incorrect SIM PIN number. You have only
three attempts to enter your PIN. After a third unsuccessful
attempt, your device will be locked and you will have to call
Sprint Customer Service to have it unlocked. Sprint sets the
default to PIN off; if you elect to enable the PIN then you will
need to contact Sprint for the default PIN and PUK.
An incorrect SIM PIN was entered three consecutive times.
You will be unable to send or receive calls on your device.
Contact Sprint Customer Service to obtain the PIN Unblocked
Key (PUK) code. Sprint sets the default to PIN off; if you elect
to enable the PIN then you will need to contact Sprint for the
default PIN and PUK.
Your SIM card is not being detected. Please check to ensure
that you have inserted the SIM card.
Please check your SIM card to make sure it is properly
inserted.
Contact Sprint for Assistance
If you experience any issues with voice or data services while outside of the United States,
Sprint offers customer support 24 hours a day. In the event that you do experience an issue, try
the following actions:
●
First try powering your device off and then back on; this will force your device to register
again with the network.
●
Try manually selecting another network. Information for selecting networks can be found
in Access Email and Data Services on GSM/UMTS Networks.
If neither of these actions resolves your issue, you will need to contact customer service (see
below). When calling to report an issue, the following information will be helpful in trying to
resolve your issue as quickly as possible:
●
Your wireless phone number.
●
The city and country you are traveling in.
●
Any error message that displays on your device or that you heard when trying to place a
call.
●
If the issue is with data, were you able to place voice calls?
●
If the issue is with voice service, were you able to access data?
Please call the numbers below if you need assistance:
●
While in the United States: Call 1-888-226-7212, option 2.
Sprint Worldwide Wireless Service
250
While traveling outside the United States:
●
In GSM mode: touch
and then dial 1-817-698-4199, option 3.
●
In CDMA mode: enter the country code and then dial 1-817-698-4199, option 3.
There is no charge for this call from your wireless phone.
From a landline phone when outside the United States:
Sprint Worldwide Customer Support can be reached from a landline phone at 1-817-698-4199,
option 3. Access or connection fees may apply. The toll free numbers below can also be used
to contact Sprint Worldwide Customer Support in the following countries:
Country
Caribbean (Anguila, Barbados,
Cayman Islands, and Dominica)
France
Germany
Italy
Mexico
Trinidad and Tobago
United Kingdom
From Landline Phone
1-888-226-7212
0800-903200
0800-180-0951
800-787-986
001-877-294-9003
1-800-201-7545
0808-234-6616
Note: This toll free service is available on ordinary landline phones and some public pay
phones. This service does not cover any hotel access charges.
Sprint Worldwide Wireless Service
251
Index
3-way Calling, 57
4G Settings, 65
Accessory Jack, 24
Account Passwords, 19
Accounts, 97
Add new, 75
Manage, 75
Settings, 74
Activation, 17
Airplane Mode, 65
Alarm Clock, 213
Set Alarm, 214
Amazon MP3, 154
Answer a Call, 49
Applications, 130
Settings, 74
Automatic Speech Recognition (ASR), 235
Auto-rotate Screen, 70
Back Key, 23
Backing Up, 93
Battery
Charge, 16
Install, 14
Settings, 72
Bluetooth, 238
Car Kit, 238
Device Name, 238
FTP Server, 243
Headset, 238
Receive Information, 242
Send Information, 240
Sending Music, 151
Settings, 65
Turn On or Off, 238
Brightness, 70
Browser
Browser Menu, 171
Finding Text, 179
Select Links, 173
View Bookmarks, 177
Index
252
Zoom In or Out, 172
Calculator, 210
Calendar, 201
Add the Widget, 210
Create Event, 202
Erasing Events, 208
Event Alerts, 204
Manage Events, 207
Meeting Request, 203
Send Invites, 203
Settings, 210
Show or Hide, 209
Synchronize Exchange ActiveSync Calendar, 209
Synchronize Google Calendars, 209
Views, 204
Call Forwarding, 58
Call History, 47
Call Log. See Recent Calls
Call Waiting, 57
Caller ID, 57
Camcorder, 184
Camera
Close, 190
Camera, 184
Autofocus, 186
Camera Flash, 188
Effects, 186
Flash FAQ, 188
Front Camera, 23, 186
Launching, 184
Lens, 24
Review Screen, 189
Settings, 189
Take Pictures, 187
Videos, 188
Viewfinder Screen, 184
Zooming, 185
Car Kit, 238
Car Panel, 225
Close, 226
Making a Call, 226
Charge battery, 16
Charger/Accessory Jack, 24
Clock, 211
Index
253
Contacts
Make call from, 47
Credential Storage, 80
Data, 183
Data Services
FAQs, 169
Password, 19
Date & Time, 81
Desk Clock, 211
Device Layout (illustration), 22
Device Settings
Location Settings, 77
Security Settings, 80
Sound Settings, 69
Dock Mode, 226
Drag, 27
Earpiece, 23
eBook, 215
Editing Text, 45
Email
Account Settings, 108
Composing and Sending, 104
Deleting Accounts, 110
Deleting Messages, 104
Managing Email Messages, 103
Printing, 107
Reading and Replying, 106
Refreshing the Inbox, 103
Sorting Messages, 103
Email Message
Make call from, 48
Emergency Numbers, 48
Enhanced 911 (E911), 49
Enter Text, 37
Entertainment, 184
Event
Create, 202
Exchange ActiveSync
Features, 107
Meeting Request, 108
Out of the Office Reply, 108
Synchronization, 76, 108
Extended Home Screen, 30
Facebook
Index
254
Facebook, 121
Logging In, 77
Synchronizing, 77
Factory Data Reset, 71
Flash, 188
FAQ, 188
Flash, 24
Flick, 28
Flickr
Logging In, 77
FM Radio, 155
Adding Station Names, 156
Minimizing or Turning Off, 156
Folder, 31
Footprints, 142
Friend Stream, 123
Gallery
Print Photos, 196
View Pictures and Videos, 190
Gestures, 27
Global Roaming, 253
CDMA Networks, 253
Plus Code Dialing, 253
Voicemail Service, 254
Google Latitude, 139
Google Talk, 126
Headset Jack, 22
History
Erasing, 61
Prepending a Number, 61
Saving a Number, 60
Home Key, 22
Home Screen, 29
Add Items, 31
Customize, 31
Extended, 30
Move or Remove Items, 32
HTC Sync, 227
Install, 228
Install Apps, 233
Set Up Synchronization, 229
Sync Another Device, 233
What You Need, 227
Workspace, 229
Index
255
HTCSense.com, 234
Sign Up, 234
Importing Entries, 93
In-call Options, 58
Incoming Call
Answer, 49
Reject, 50
Incoming Calls
Ringtones, 69
International Data Roaming, 255
On CDMA Networks, 256
On GSM/UMTS Networks, 255
Keyboard
Touchscreen, 37
Kobo, 215
Language, 81
Location Settings, 77
Lock Screen, 26
Unlock, 26
Mail
Mail Widget, 110
Sorting Email Messages, 103
Menu Key, 22
Messaging, 97
microSD Card, 243
Check Capacity, 245
Erase Contents, 245
Insert, 244
Remove, 243
Unmount, 245
Use as USB Drive, 246
Music
MP3 Store, 154
Playing Music, 146
My Shelf Widget, 218
News, 223
Widget, 225
News Feeds, 223
Notification Icons, 34
Notifications Panel, 35
Quick Settings, 36
Onscreen Keyboard
Compact, 38
Entering Text, 38
Index
256
Phone, 38
Standard, 38
People
Adding a Number, 90
Adding an Entry, 87
Assigning a Picture, 90
Assigning Ringers, 90
Contact Details Screen, 88
Editing an Entry, 90
Finding Entries, 92
Friend Stream, 123
Importing Entries, 93
My Profile, 87
Saving a Phone Number, 87
Working with Groups, 93
People Widget, 95
Using, 95
Phone, 46
Dialer, 46
Phone Calls
Emergency numbers, 48
From email messages, 48
From text messages, 48
Make calls, 46
Receive, 49
Using contacts, 47
Using phone dialpad, 46
Using recent calls, 47
Using Speed Dial, 48
Phone Number
Saving, 87
Photos
Gallery, 190
Send, 197
Share, 198
View Pictures and Videos, 190
Pictures and Videos, 184
Pinch, 28
Playlists
Creating, 148
Plus Code Dialing, 253
Power Button, 23
Power Off, 25
Power On, 25
Index
257
Power Saving
Closing Applications, 73
Email Synchronization, 73
Predictive Text, 42
Add to Dictionary, 43
Edit or Delete, 43
Preset Messages, 111
Printing
Email, 107
Photos, 196
Proximity Sensor, 22
Quick Settings, 36
Quiet Ring on Pickup, 49
Reader, 215
Recent Calls, 59
Make call from, 47
View, 59
Reject Incoming Call, 50
Reset Phone, 71
Ringers
Assigning to contacts, 90
Rotate, 28
Saving a Phone Number, 87
Scenes
Deleting, 63
Renaming, 63
Screen Lock, 78, 80
Screen Timeout, 71
Screen Unlock Password, 80
Screen Unlock Pattern, 79
Screen Unlock PIN, 79
Search Key, 23
Security Lock Timer, 80
Security Settings, 78
Settings, 62
Camera, 189
Shortcut, 31
SIM Card, 250
Install, 250
Sleep Mode, 26
Slide, 27
Sound Feedback, 70
Sound Set, 64
Applying, 64
Index
258
Creating, 64
Speaker, 24
Speakerphone
Visual Voicemail, 54
Speed Dialing, 59
Spread, 28
Sprint 411, 20
Sprint Assistance, 257
Sprint Hotspot, 181
Set Up, 181
Settings, 66, 182
Sprint Operator Services, 20
Sprint Worldwide Service
Activate, 250
Status Bar, 32
Status Icons, 33
Status Messages, 256
Stocks, 218
Lock Screen Style, 220
Stock Widget, 220
Storage
Settings, 71
Swipe, 27
Swype Keyboard, 41
System Updates, 83
Tethering, 183
Text
Copy, Paste, 44
Select, 44
Text
Edit, 42
Text Editing, 45
Text Entry, 37
Text Message
Make call from, 48
Tools, 201
Touch, 27
Touch and Hold, 27
Touchscreen
Device layout, 23
Keyboard, 37
Navigation, 27
Swype Keyboard, 41
Turn Off, 25
Index
259
Turn On, 25
TTY Mode, 67
Turn Device Off, 25
Turn Device On, 25
TV
FAQs, 158
Twitter
Logging In, 77
Synchronizing, 77
Typing, 37
Update Device, 246
Upgrade, 246
USB Tethering, 183
Vibrate, 69
Videos
Record, 188
Send, 197
Share, 198
Viewing Map Layers, 136
Visual Voicemail, 50
Configure options, 52
Enable Speakerphone, 54
Listen to multiple messages, 52
Review, 51
Set up, 50
Settings, 53
Voice Commands, 235
Automatic Speech Recognition (ASR), 235
Voice Dialing, 235
Voice Input, 237
Voice Memos, 236
Voice Recorder, 236
Voicemail, 55
Notification, 55
Password, 19
Retrieve messages, 56
Set up, 55
Settings, 66
Setup, 18
Volume
Button, 24
VPN
Settings, 66
Weather, 221
Index
260
Widget, 223
Web, 164
Widget, 31
Wi-Fi
Settings, 65
Working with Groups, 93
World Clock, 212
Zoom, 28
Zooming, 185
Index
261