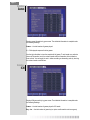
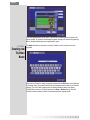
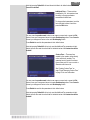
1
© Copyright JVL Corporation 2004
Manual revised January 2008 © JVL
JVL reserves the right to make changes to this manual and the product which it describes.
This Operator Manual generally describes the features and operation of JVL machines and iTouch9 for the North
American and international markets. Some of the features and operations described in this manual are not
available in all countries and locations. Please contact JVL concerning any questions you have about the availability
of features and operations for your location
Table of Contents
Page 1
Chapter 1 Introduction.........................................................................5
All Machines Features ............................................................................................ 6
Options ................................................................................................................... 7
Locking Devices ..................................................................................................... 7
Installation .............................................................................................................. 7
Powering Up ........................................................................................................... 7
Banknote Validator ................................................................................................. 7
Coin Box ................................................................................................................. 7
Chapter 2 Setup and Adjustments..........................................................9
General Settings ..............................................................................11
General ................................................................................................................. 11
Retro, Vortex and Orion ........................................................................................ 11
Show Mode ........................................................................................................... 12
Erotic .................................................................................................................... 13
Date/Time ............................................................................................................. 13
Volume ................................................................................................................. 14
International .......................................................................................................... 14
Retro Lights .......................................................................................................... 15
Games ...............................................................................................15
Statistics ...........................................................................................16
Usage ................................................................................................................... 16
Credits .................................................................................................................. 17
Games .................................................................................................................. 18
ICN ....................................................................................................................... 18
Hall of Fame ......................................................................................19
Hall of Fame ......................................................................................................... 19
Auto Clearing ........................................................................................................ 20
Credits ...............................................................................................20
Free Credits .......................................................................................................... 20
Devices ................................................................................................................. 21
Credits .................................................................................................................. 22
Format .................................................................................................................. 22
Games .................................................................................................................. 23
Advertisements ................................................................................23
Test ....................................................................................................27
System Information ............................................................................................... 27
Touchscreen Calibration ....................................................................................... 27
Event Log ............................................................................................................. 28
Coin/Bill ................................................................................................................ 28
Test Flash ............................................................................................................. 29
Power Pad ............................................................................................................ 29
Copyright .............................................................................................................. 31
Operator ............................................................................................32
Page 2
Operator ............................................................................................................... 32
Location ................................................................................................................ 33
Chapter 3 JVL Network Services: Communication Setup..........................35
Communication ................................................................................36
Contract Number .................................................................................................. 36
Modem Installation ............................................................................................... 36
Communication Setup .......................................................................................... 36
Location ................................................................................................................ 37
Schedule ............................................................................................................... 38
Connectivity .......................................................................................................... 38
Internet Connection Configuration ........................................................................ 39
Local Settings ....................................................................................................... 41
Wireless Networking ............................................................................................. 42
Connect Now ........................................................................................................ 43
Chapter 4 Local Offline Tournament Setup ............................................45
Tournament .......................................................................................................... 45
Games .................................................................................................................. 45
Schedule Folder ................................................................................................... 46
Prizes .................................................................................................................... 46
Name .................................................................................................................... 47
Activating Tournaments ........................................................................................ 47
Chapter 5 What is iTouchNET?.............................................................49
iTouchNET Features ............................................................................................ 49
TouchandWin™ .................................................................................................... 49
NET Challenge ..................................................................................................... 49
Playing JVL’s National Touch and Win™ Tournament ................50
Chapter 6 What is ICN? ......................................................................53
Interactive Challenge Network .............................................................................. 53
How to Play ICN Games ....................................................................................... 53
Setting Up ICN ...................................................................................................... 55
Peer-to-Peer ICN .................................................................................................. 55
Ethernet Switch/Hub ICN ...................................................................................... 56
Ethernet Router ICN Setup ................................................................................... 57
Chapter 7 Triathlon............................................................................59
Why JVL’s Triathlons are unique .......................................................................... 60
Other Important Features ..................................................................................... 60
Playing the Triathlon ........................................................................61
User Interface ....................................................................................................... 61
Hall of Fame ......................................................................................................... 62
Triathlon Setup .................................................................................63
Setup .................................................................................................................... 63
Creating new Triathlons ........................................................................................ 63
Creating new Triathlon Name ............................................................................... 64
Creating new Triathlon Hall of Fame .................................................................... 65
Page 3
Chapter 8 JVL Bookkeeping Application ................................................ 67
Bookkeeping Setup .............................................................................................. 67
Current Collection ................................................................................................. 68
Details Screen ...................................................................................................... 69
Collection History .................................................................................................. 69
Options ................................................................................................................. 70
Location Split ........................................................................................................ 70
Fees ...................................................................................................................... 70
Creating Custom Fees .......................................................................................... 72
Per Play Fees ....................................................................................................... 73
Managing Custom Fees ....................................................................................... 73
Chapter 9 Technical Support............................................................... 75
ITOUCH9™ Upgrading via External CD-ROM ..................................................... 75
Installation Instructions ......................................................................................... 75
Troubleshooting Guide: ..................................................................77
Common error messages with possible solutions ................................................ 77
Maintenance ......................................................................................................... 79
Technical Specifications .................................................................80
Retro: Countertop Model ...................................................................................... 82
Vortex: Countertop Model ..................................................................................... 86
ORION: Upright Model ......................................................................................... 90
Page 4
1. Introduction
Page 5
Congratulations – you have purchased one of the fastest and most innovative
touchscreen entertainment devices on the market today!
All JVL machines come preloaded with iTouch9 software. iTouch9 includes 145 great
games in multiple categories, including puzzle, quiz, action, cards, strategy, triathlon and
erotic games. High resolution graphics and fast response times take game play of
iTouch9 to new heights.
All JVL touchscreens feature iTouchNET - a system so rich in content, so powerful, and
yet, so easy to use.
iTouchNET gives you, the Operator, the ability to control your business how you want,
when you want and in the way you want - you have the power, control, and flexibility.
iTouchNET opens a whole new world of incredible online opportunities, allowing
participation in online tournaments on multiple levels and realtime gaming:
1.
TouchandWin™(TAW) Tournaments — JVL’s monthly online sweepstake
tournaments where players have a chance to win awesome prizes.
2.
NET Challenge Tournaments — where operators link their locations and run their
own customized tournaments.
3.
Interactive Challenge Network (ICN) — where operators link machines in their
locations allowing their patrons to game head-to-head.
iTouchNET also provides access to complete data management systems, including
location revenue, player usage, tournament results and game statistics — information
crucial to operating a successful route. For more information on iTouchNet, see “What is
iTouchNET?” on page 49.
For more information on additional JVL products and services, including iTouch9, visit
our web site at www.jvl-ent.com. To learn more about iTouchNET, visit
www.itouchnet.com.
Countertop
Flat Screen
RETRO
DIMENSIONS:
Height:
Width:
Depth:
Weight:
19.5”
19”
14.5”
40.5 lbs
Page 6
Countertop
Flat Screen
VORTEX
DIMENSIONS:
Height:
Width:
Depth:
Weight:
Upright
ORION
DIMENSIONS:
Height:
Width:
Depth:
Weight:
All Machines
Features
18.5”
19.5”
15”
39.4 lbs
63.14”
22.02”
26.99”
250 lbs
In order to provide photo-realistic images, digital music and sound effects, as well as
maximum security and minimal servicing, JVL machines and iTouch9 feature the
following parts and components:
Faster hardware with decreased game loading times and enhanced visual effects.
Large capacity Flash MemoryCard. No CD-ROM, hard drive or moving parts. All
games run from Flash.
Super VGA High-Color graphics.
Digital sound effects.
Touchscreen with easy calibration.
Customized “Adult” content with adjustable settings.
A “Continue” feature, allowing players to insert additional coins to keep playing.
(where allowed by law)
Highest score displayed at all times.
12 customizable advertising screens — no keyboard needed — graphics and text
ready.
Comprehensive statistics.
Water / splash-proof UL/CSA/CE.
Industrial grade electronics.
Easy service access.
Universal Power 110VAC/60 Hz or 220VAC/50 Hz.
Large capacity coin box.
USB Capability.
Page 7
Options
Multi-language: English, Spanish, German, French, Italian, Russian, Dutch and
Polish.
Wide choice of electronic and mechanical coin acceptors and bill validators.
Customized program disks available to comply with individual state requirements.
Locking
Devices
Installation
For the safety of both operators and players, and to avoid electrical shock, all panels and
doors should be locked when operating this machine. For maximum security, each door
has a separate lock and key. It is recommended that operators replace these standard
locks.
1.
Attach the power cord beside the on/off switch at the rear of the machine. Plug the
machine into a standard AC outlet.
2.
The machine must be grounded. Do not use a cheater plug.
3.
JVL recommends installing the machine with an external surge suppressor with a
built-in circuit breaker. Suitable surge suppressors are available at most hardware
and electrical supply stores.
The box and all packing materials should be stored in case the machine needs to be
returned to an authorized JVL service center at a later date.
Powering Up
The machine requires a few minutes to power up while the computer carries out an
extensive systems diagnostic check. If no problems are detected, the opening screen is
displayed. If problems are detected, please see “Troubleshooting Guide:” on page 77.
Although the machine has been preset and is ready for play, it is recommended that an
operator run the initial tests, calibrate the touch screen, and test the coin acceptor and
banknote validator. For more information, see “Setup and Adjustments” on page 9.
Banknote
Validator
Within the North American market, the Vortex and Retro Countertops are equipped with a
MARS validator and optionally with a Cashcode or MoneyControl validator. The Orion can
be equipped with either a Cashcode or MARS validator.
For international markets, the exporter installs the appropriate coin mechanism and/or
banknote validator.
Coin Box
All machines come equipped with a Coin Box. Capacities are:
Retro — small - 1000, large - 2000.
Vortex — small - 750, large - 2000.
Orion — large - 2500.
Note that capacity is based on the US 25 cent piece.
Page 8
Page 9
2. Setup and Adjustments
On the Retro and Vortex Countertop models, the setup button is located inside the Cash
Unit on the inner right-hand wall, adjacent to the Dallas key on the I/O Board. On the Orion
Upright Model, the setup button is located on the inside of the front door panel.
Setup Button
Page 10
Pressing the setup button once brings up 11 options:
General Settings — the basic settings for the machine: General, Erotic, Date / Time,
Volume, International and Lights (Retro only) operating parameters.
Games — allows for the selection of active games.
Statistics — data on games played, credit information and operating history.
Hall of Fame — allows the deletion of the hall of fame data completely or on a gameby-game basis. (where allowed by law)
Credits — controls the number of credits (pulses) bought for each coin and bill. It also
allows an operator to provide free credits and set specific game credits.
Advertisements — are messages an operator may program, for example: "Happy
Hour 4 - 7 pm - All drinks two for one."
Tournament / Triathlon — Local Offline Tournament setup, see “Local Offline
Tournament Setup” on page 45.
Test — allows testing and setup of touchscreen calibration, monitor, coin and bill
validator, compact flash, and power pad (Vortex and Retro only). It also contains
system information and an event log.
Operator — sets up security and access parameter for limiting control of features to
location operator and machine operators.
Communication — JVL Network Services Communication Setup: see
“Communication” on page 36.
Bookkeeping — allows setting and calculating important account parameters for the
machine, such as Location Split, Total Revenue, Total Fees, etc. See “JVL
Bookkeeping Application” on page 67.
Note: If for any reason the touchscreen calibration is not functioning properly,
adjustments are made by calling up the Setup menu. To access this, unlock the cash
door and press the setup button once for the setup screen or twice for screen
calibration.
Return to game play by touching Exit.
General Settings
General Settings:
General
Page 11
Retro, Vortex and Orion
Note that the LIGHTS tab is only available on the Retro machine.
Allow Bad Words — when disabled the program checks for obscene words when players
enter their names in the Hall of Fame.
Show Answers — enables/disables the displaying of the correct answer to the player if a
wrong choice is selected in Carnal Knowledge Trivia.
#1 Free Game — if enabled, a player will be awarded a free game for beating the existing
High Score in any game once the Hall of Fame is full (after 5 games).
Show $ in Games — allows you to show a dollar symbol in certain games (i.e., Texas
Series card games).
Show Mode — enables/disables a special mode for selected games, demonstrating of
different game stages and visual effects without having to complete the current level or the
entire game. For more information, see “Show Mode” on page 12.
Enable ICN — enables/disables Interactive Challenge Network. See “What is ICN?” on
page 53 for more details.
Cancel — exits the screen without saving any changes.
Exit — saves the changes and returns to the Setup screen.
Press Default to reset all values on the General tab to their system defaults.
Note that pressing Default All will not only reset the values on the General tab to their
system defaults, but will reset the entire General Settings folder to its default values.
Page 12
General Settings:
Show Mode
Show
When Show Mode is set to On in the General screen, operators can provide players the
opportunity to see certain levels and/or features within certain games without having to
complete the current level or entire game. The games with the Show Mode functionality
(when Show Mode is On) will display a question mark in the upper left corner of the
screen. Once the question mark is selected, a new screen with applicable level or game
options appears.
The following is a list of games with Show Mode functionality:
Game
Available events
Bingo Star
Next level, Bingo, Wild Ball, Final visual effect.
Candy Store
At the selection screen: Open bonus level. At any level: Complete level.
Taipei Towers
No more moves, Win, Final table, Select layout, Final effect.
MMM…Munchies
Complete level.
Gone Eggstreme
At practice level: Complete current level, Bonus level. At levels 1-6: Big
egg, Gone Bowling, Gone fishing.
Zoozzle
Complete current level, Show final effect, Tropical heavy shower effect,
Get bomb ball, Get wild ball, Get Time ball, Get Iron cage, Get mutant
ball.
Starbugs
Complete current level, Show final effect, Show goal dialog, Show final
dialog, Drop, Generate lure (bait).
Slap Shot
Complete period.
Realty Tycoon
Complete level.
Done Drinking Too
VIP walk.
Cash Hungry
Next level.
Page 13
General Settings:
Erotic
The Erotic tab allows the operator to set the level of nudity in all Erotic category games.
Glamour — Fully dressed, nonsexual.
Lingerie — Swimsuit, Boudoir.
Topless — No frontal nudity from the waist down.
Nudity — Sexually provocative, full frontal nudity.
Each level of nudity can be turned on or off for men and women. Each category can be set
to turn on and off at a particular time on a daily basis.
Erotic in demo — Allows the display of erotic demos when the machine is not being
played.
Note: By limiting the level of eroticism, certain games may not be available.
General Settings:
Date/Time
The system date/time can be changed or checked in this folder. The clock is set in 24 hour
format. The clock must be set accurately for proper operation of time controlled
features on the machine.
To change either the date or time when the machine is setup for online connection to JVL's
server, all communication settings must be disabled (see “Communication” on page 36).
The date/time will be updated by JVL's server for all connected machines.
Page 14
General Settings:
Volume
The volume can be adjusted by moving the volume control bar.
General Settings:
International
Setup Language is the language used on the setup screens. There are 7 languages for an
operator to select: English, German, French, Spanish, Italian, Russian and Polish. Game
Language is the language in which all the games will be played.
The same 7 languages are available for an operator to select in this mode.
Page 15
General Settings:
Retro Lights
The color of the lights on the Retro machine can be adjusted by moving the red, green or
blue sliders. For more detailed help on adjusting the lights, you can press the help button
(the question mark) to get some advice.
The default color of the lights, as indicated in the above screen, is solid blue.
Pressing the Test button will test the lights on your machine, cycling through the red color,
then the green and finally the blue.
Games
To see a complete listing of all available games, visit www.jvl-ent.com and select Game
Content under the Products menu.
The Games Menu allows the operator to control which games are enabled on the machine.
You can enable/disable games by pressing the On/Off button in the enable column.
Touch the tabs at the top of the screen to see games in other categories.
All On/All Off — By simply selecting either of these two buttons, you can enable/disable all
games in the current category with the touch of a button.
Cancel — Exits the Games menu without saving any changes.
Exit — Saves all changes and exits the Games menu.
Page 16
Statistics
The Statistics menu shows all the Usage, Credits, Games and ICN statistics gathered.
The Master column on each screen shows information gathered for the life of the machine,
or since the last time a factory reset was performed. The Period column on each screen
shows information gathered since the start of the current period.
The following buttons are common to all tabs in the Statistics folder:
Clear All — Clear all data without starting a new Period.
Period End — Clear all data and start a new Period.
Print — Prints data to a special external printer (contact JVL Technical Support for details).
Export — Downloads data to a special external USB storage device (contact JVL
Technical Support for details).
Cancel — Exits the menu without saving any changes.
Exit — Saves all changes and exits the menu.
Statistics:
Usage
On Time — the time that the game was powered on.
Off Time — the time that the game was powered off.
Play Time — actual time that games were being played on the machine.
Idle Time — the amount of time machine sat idle.
Power Ups — the number of times the machine was powered on.
Coin Jams — the total number of coin jam errors.
Screen Calibrated — the number of times that the touch screen was calibrated.
Page 17
Statistics:
Credits
Money In — the total dollar value of money that was accepted by the machine.
Credits In — the total number of credits issued by the machine. This includes actual
credits, free credits, and bonus credits.
Free Credits In — total number of free credits awarded through the Free Credits Setup
screen.
Bonus Credits In — extra credits awarded in the Credits Setup screen for customers
inserting larger denomination currency. Entirely based on the programming for each
individual denomination in the Credits Setup screen.
Credits Cancelled — credits cancelled off the machine from the Credits Setup screen.
Free Credits Cancelled — total number of free credits cancelled off the machine from the
Free Credits Setup screen.
Bonus Credits Cancelled — actual money credits accepted by the machine that were
cleared from the Credits Setup screen.
T&W Credits In — number of credits earned through Touch & Win Tournament.
Net Challenge Credits In — number of credits earned through the Net Challenge
Tournament.
In House Credits In — number of credits earned through the In House Tournament.
In House Credits Out — number of credits awarded through the In House Tournament.
ICN Credits In — number of credits earned through ICN.
Page 18
Statistics:
Games
Displays game information by game name. The statistical information is compiled under
the following headings:
Games — the total number of games played.
% — Ratio played compared to other games.
Use the right side slider to view the complete list of games. To sort based on a particular
column of information, touch the column header and the information will sort based on
those criteria. You can toggle the sort in either ascending or descending order by touching
the column header a second time.
Statistics:
ICN
Displays ICN game activity by game name. The statistical information is compiled under
the following headings:
Games — the total number of games played in ICN mode.
Buy—Ins — the total number of game buy-ins (extra credits used to continue a game).
Hall of Fame
Page 19
This setup screen allows the operator to clear any or all scores in the machine (where
allowed by law). Hall of Fames are game-specific.
Hall of Fame:
Hall of Fame
Touch the game Category field (displaying Cards in the diagram above) and a popup
menu is displayed where you can select a different game category. Touch the Game field
(displaying Taipei Towers in the diagram above) and a popup menu is displayed where
you can select a game in the current category who's Hall of Fame you would like to work
with.
To clear all game high scores at once, press the Clear All button. Once the button is
pressed a window asking Are you sure? is displayed. All of the high scores will be erased
by selecting the Yes button. Individual games can be cleared by touching the game in the
game list and then pressing the Clear button.
Obscene and derogatory words cannot be used as Hall of Fame names if Allow Bad
Words under the General Settings screen is set to Off (see “General Settings” on
page 11). Should you encounter objectionable entries, please notify JVL and we will add
the entries to our list.
Page 20
Hall of Fame:
Auto
Clearing
Auto Clearing allows the machine to automatically clear high scores after a preset number
of days.
Clear HOF every # days — to have the machine automatically clear the high scores, enter
the required number of days on the numeric keypad that is displayed when you touch this
field. If the value is set to zero, then the high scores will never be automatically cleared.
Last cleared date — shows the last time the Hall of Fame was cleared.
Credits
Credits:
Free Credits
Free Credits — the operator has the option to award free credits from this folder. Free
credits can be issued in increments of 1, 10 or 100. Free credits can also be cleared from
this menu by pressing the Clear button on the Free Credits side of the menu. Actual
Credits are also displayed on this screen and can also be cleared by pressing the Clear
button under the Credits side of the menu.
Free Play — allows free play for standard games only when set to On. To change this
setting, touch the On/Off button. There is NO free play for tournament games.
Page 21
Credits:
Devices
Coin — there are six different types of coin mechanisms available for use in the machine.
Press the type field (the button under Coin) to scroll through a list of coin mechanisms. If
an electronic coin mechanism is selected, you will be able to program up to three
denominations to be accepted by selecting the corresponding empty field beneath the
mechanism and entering the denomination on the numeric keypad.
Bill — the Retro and Vortex can be equipped with a MARS validator. The Orion can be
equipped with either a Cashcode or MARS validator. Press the type field (the button under
Bill) to scroll through a list of bill mechanisms. If an electronic bill mechanism is selected,
you will be able to program a single bill denomination to be accepted by selecting the
corresponding empty field beneath the validator and entering the denomination on the
numeric keypad.
Mech. Counter — the mechanical counter increases by a single numeric value for each
operator predefined monetary unit entered in the field.
Max Credits — this field defines the maximum number of credits accepted by the
machine.
Page 22
Credits:
Credits
Credits — Credits are assigned based on the monetary accumulation of total money fed
into the machine. This unique feature enables progressive conversion of incoming cash
into play credits. Regardless of the coin type, our system accumulates the currency value
and assigns it to play credits.
Credits:
Format
This tab allows an operator to format displayed monetary units.
Page 23
Credits:
Games
This tab allows operators to set individual game credits.
Advertisements
The advertising screen allows up to ten ad screens to be setup that are displayed when the
machine is displaying the attraction mode (no one is playing). The screens can be
enhanced with many different text fonts, text sizes, text colors, backgrounds, and images.
Screen 1/1 to 1/32 — selects which of the 32 advertising screens to edit or create.
Page 24
Full Screen — allows the ad screen to be viewed in actual size. You can reposition items
while viewing this screen.
Preview — displays all active advertising screens in programmed sequence in real time.
The screens display exactly as they will appear in attraction mode.
Casting — shows all the created advertising screens with the time they'll be displayed.
Touching an ad screen will turn it On/Off (red/green indicator). This allows ad screens to be
programmed. Any number of ad screens can be enabled for viewing in attraction mode.
Full screen/Preview — work as described above.
Set Wait — allows you to set the time in seconds each ad is displayed.
New — Adds a new advertising screen if the maximum number hasn't been reached yet.
Copy/Paste — Use these buttons to copy an existing ad and paste it into your rotation.
This saves you from having to create similar ads from scratch.
Move Up/Move Down — Use these buttons to reposition existing ads in your rotation.
Delete — Deletes an ad.
Undo/Redo — Undo or redo any changes you've made to your casting rotation.
All on/All off — Turns all of the existing ads on for display or off at once.
Cancel — Exit Casting without saving your changes.
OK — Save your changes and exit Casting.
Page 25
Exit — saves all advertising screens and exits back to the Setup screen.
New Picture — allows clip art images to be added to an advertising screen. The available
images are displayed in the lower portion of the screen. To change the size of the images,
use the right vertical slider. To reposition the image, select and drag the image with your
finger.
New Text — allows text to be added to an advertising screen. Use the on-screen keyboard
to enter a line of text. The Shift key (^) shifts between upper and lower case, and special
characters. Once a text message is entered, the text/style button will appear at the lower
right hand column of buttons. To reposition the text, select and drag the text with your
finger.
Page 26
Text/Style — allows the font, color and size of the text to be changed. Use the sliders on
the first two controls to see more options. Use the slider on the third control to change the
size of the text.
Backgrounds — allows you to set a background for your advertisement.
Tile/Full — allows you to choose whether your background selection should appear as is
or be tiled to fill the display.
Delete — removes the selected item from the advertising screen.
Clear Screen — removes all text and images from the currently displayed ad screen.
Test
Page 27
Test:
System
Information
System Information — lists machine component information including software version,
system hardware and other peripheral status/versions.
Calibrate — calibrates the touchscreen. This is the same functionality as opening the cash
box and pressing the Setup button twice.
Calibration Test — manual test for the touchscreen calibration. When completed, the
target with O.K. must be pressed.
Monitor — shows a set of screens which aid in the adjustment of the display, such as
brightness, contrast, vertical/horizontal picture centering, and size.
Test:
Touchscreen
Calibration
Touch all four targets that appear in the screen corners. Once completed successfully, the
target with O.K. must be pressed.
Page 28
Test:
Event Log
Event Log — displays system events and all critical errors that forced the machine to stop
operating. Should this happen, the screen turns red and a message flashes.
Note!
When a critical error occurs, the machine should reset automatically in 10 seconds.
If it doesn't, turn the Power OFF and wait 10 seconds before turning the Power back
ON again.
Test:
Coin/Bill
Coin/Bill — allows you to test the operation of the coin acceptor and the bill validator. To
test the coin or bill acceptor, insert money and the display should show the number of
pulses received by the game. This does not affect the number of credits on the machine.
Inhibit — press this button to check if the coin acceptor or the bill validator can be inhibited
(disabled by the system commands).
Page 29
Test:
Test Flash
Allows testing of the compact Flash.
Test:
Power Pad
Power Pad — allows calibration of the RETRO and VORTEX countertop Navigation
Controllers.
Note: Ensure the Power Pad is on by pressing the Power Pad On/Off button.
To test the Power Pad, move the Navigation Controller (center joystick) in a complete
clockwise circular motion. The status indicator should move into the appropriate quadrant
and return to the center position when released. If the status indicator does not correspond
to the navigation controller movements, then you must calibrate the navigation controller.
To calibrate the Navigation Controller:
1.
Press the Calibrate button.
2.
Move the Navigation Controller (center joystick) in a maximum complete clockwise
circular motion.
3.
Release the controller and allow the indicator to return close to the center.
4.
Select the Next button, the Next button should be highlighted.
Page 30
5.
A calibration message is displayed. DO NOT touch the Navigation Controller.
6.
A Calibration completed message should appear. Select OK.
Page 31
7.
Press the Exit button.
Test:
Copyright
Displays detailed JVL Copyright information.
Page 32
Operator
Operator:
Operator
Operator — allows the operator to restrict and control access to the setup of the machine.
Operator PINs — the operator can enter up to three PIN numbers for access to the
Operator Setup Screen. (1-4 digit pin #)
Lockup machine in — For security reasons such as theft, the operator may set the
machine to stop working after a specific number of days. This will lock the machine after
the set period. To unlock the machine the operator must enter their PIN number, go to the
Operator setup screen and reset the value.
Location PINs — up to three location PIN numbers can be setup for limited access to
selected setup screens.
Attendant PINs — up to five attendant PINs can be entered for use when players collect
their Tournament Prizes.
Machine Number — enter machine number to be printed on receipt printer.
Enforce Door Monitoring — track the number of times the cash door was opened.
You can also press Clear All to empty out any previously entered information.
Page 33
Operator:
Location
Location — the operator can give access to the following six setup screens by assigning
PIN numbers to the location.
Erotic — access to Erotic setup screen.
Calibration — access to the touchscreen calibration screen.
Volume — access to the volume control screen.
Hall of Fame — access to the Hall of Fame to clear high scores.
Free Credits — allows location to issue free credits to players, up to the maximum number
the operator has entered.
Ad Screens — allows access to an operator entered number of ad screens that the
location can create for themselves. (Max 32)
Communication — allows location to turn communication on/off.
Power Pad Test — access to the Power Pad Calibration Screen.
The location setup screen is accessed by tapping the iTouch9 logo (top center of the main
screen) 5 times. This will display a numeric keypad. A valid location PIN number must be
entered to access the setup screens.
You can also press Clear All to empty out any previously entered information.
Page 34
Page 35
3. JVL Network Services:
Communication Setup
JVL’s network allows subscribers to connect to iTouchNET, JVL’s online route
management system. One feature of iTouchNET is that it offers operators the ability to
access and set up online tournaments. Available online tournaments include Touch and
Win™ and NET Challenge. Each connected machine contains tournament software and
communication hardware that enables players to participate in exclusive NET Challenge
and Touch and Win™ tournaments.
What are
Online
Tournaments?
Touch and Win™ tournaments are scheduled on a monthly basis and are managed by
JVL. Registered players are automatically entered into random draws for fabulous prizes.
NET Challenge tournaments are run by the operator.
By unleashing the power of the Internet, online tournaments allow players to play against
others in the same location, the same city or anywhere in the world.
JVL’s Network Server updates all machines daily. Players scores are tabulated on JVL’s
server and all players are ranked. Scores and rankings are sent to every connected
machine.
For more information on iTouchNET, see “What is iTouchNET?” on page 49.
Page 36
Communication
The communications settings are used to connect your machine to a JVL server for
tournaments and online route management. They are also used to connect your machine
to other JVL machines for ICN (Interactive Challenge Network) game play.
Communication:
Contract
Number
A JVL Contract Number is required before you can access the JVL server. If you do not
have a contract number, contact JVL Technical Support at 1-800-296-6657. You can also
go online to http://www.itouchnet.com, choose the icon Register Now for iTN Office
and follow the prompts.
There are two methods available to connect to JVL servers: high speed or dial-up. JVL's
Retro and Vortex machines are equipped with Ethernet ports which are used for high
speed access.
If you plan to access the server
using dial-up, your machine
requires a modem. To ensure
your machine has a modem, go
to the Sys Info screen under the
Setup folder (see “Test” on
page 27) and look for "Modem"
in the left column of the
displayed information. A modem
is present if there is information
in the right column of the Modem
row of information, such as V.92.
A modem is NOT installed if
there is no information displayed.
JVL highly recommends performing a factory reset prior to installing a modem.
Communication:
Modem
Installation
Communication:
Communication
Setup
To install a modem:
1.
Connect the supplied phone line to the Black jack at the rear of the machine. Do not
connect the modem to a digital telephone line. A digital line will damage the
modem.
2.
Make sure the machine is plugged in and powered up with the modem and
software installed.
To setup communications:
1.
Once the machine is powered up, the games screen is displayed. Press the setup
button. (See “Setup and Adjustments” on page 9.)
The Setup screen is displayed.
2.
Press the Communication button on the screen.
The Location Folder is displayed.
Page 37
Communication:
Location
1.
Enter the JVL-supplied Contract Number by touching the Account field and using
the on-screen keyboard.
2.
Enter the JVL-supplied Password (the contract number) by touching the
Password field and using the on-screen keyboard.
*Please note that the large blank key on the keyboard is used as a space bar.
3.
Fill in the Name and Address of your location.
4.
Fill in the Country, State and City information using the drop down menu. Scroll
down the list until you find your information.
* Please note that the “<<” symbol is used to move up and the “>>” symbol is used to
move down in the drop-down menus.
5.
Touch your desired choice and hit OK.
Please ensure that all information entered is complete for correct ranking.
The Connect Now! button is enabled once you have entered your information in all the
fields. Do NOT attempt to use the Connect Now! function until you have confirmed the
Connectivity settings.
Page 38
Communication:
Schedule
The Start / End times determine when the machine will attempt to connect to the
server to transmit data. A dedicated phone line is not required.
The settings should be left at their defaults.
Make sure that Connect at power up is ON (default setting).
Communication:
Connectivity
Internet Connection — settings for connecting to JVL servers.
Local Settings — settings for connecting 2 or more JVL games together.
The settings have the following options:
On/Off — enables/disables the corresponding functionality.
Configure — shows the current configuration.
Test — tests the corresponding settings.
Page 39
Communication:
Internet
Connection
Configuration
Press the Configure button beside Internet Connection to display the Internet
Connection Settings List:
The Configure button at the bottom of the screen is used to identify the connection type as
either modem or local settings. Note that if you are using the Ethernet port, choose Local
Settings which are set later in this section.
Choose the modem connection and press the Configure button to display the ISP settings
screen.
Page 40
JVL uses Earthlink as their ISP. To connect your machine, a local dial-up telephone number
is required. These numbers can be found on the Earthlink website (www.earthlink.com)
or by contacting JVL Technical Support at 1-800-296-6657.
The Login and Passwords default to the JVL-supplied information and do not need to be
changed.
No changes should be made in this screen unless you need to enter a dialing prefix for the
ISP phone number, such as dialing 9 before the phone number in order to make an
outgoing call.
Page 41
Communication:
Local
Settings
Choose the Local Settings option and press the Configure button. A summary of the
current settings is displayed. (Note that the Local Settings can be configured either under
Internet Connection or under Local Settings.)
Press the Configure button and you can choose whether to have the machine’s
connectivity use Ethernet (hard-wired) or Wireless as its physical access method.
Choose Ethernet and press the Configure button to access the TCP/IP Settings screen.
Page 42
The default setting for Ethernet is Auto. This will cause the machine to automatically look
for a device on the network that can supply it with rules and IP addresses, such as a DHCP
server. This is the recommended setting.
You can manually supply these values by selecting Manual in the TCP/IP Settings screen
by pressing the Auto field. When Manual is selected, more fields are displayed, along with
an on-screen keyboard you can use to enter the values.
Communication:
Wireless
Networking
In order to use Wireless connectivity, you will need a wireless upgrade kit. Please contact
your distributor or JVL Technical Support at 1-800-296-6657 for more information.
With Wireless selected from the drop-down list, press the Configure button to display the
Wifi Settings screen.
Page 43
There are two options for Wireless networking: Peer-to-Peer and Access Point. If you
plan to use wireless networking, JVL recommends having a qualified networking
expert configure and maintain your network.
Communication:
Connect Now
You are now ready to connect the
machine and download the latest
tournament information.
At this point, you should hear
a dial tone and the machine
dialing out.
An installing message screen
will appear on the screen to let you
know the process is performing.
When the installation is
complete, a message will appear
on your screen verifying that the
connection is done.
Once it is completely installed (without any error screens) touch the Exit button at the
bottom of the screen. This will return you to the setup screen – press the Exit button again
and you will be at the games screen.
After the machine is installed successfully, a Touch And Win™ or iTouchNET button is
displayed on your main screen (depending on the number of tournaments on the machine).
*Note - when making a local call from your telephone, if you don’t need to dial an area code
to complete your call, then it will not need to be entered into the machine.
You have successfully completed the installation process.
If your installation was unsuccessful, follow the steps once again, double-checking that all
information is correct. If you are still unable to connect, contact JVL Technical Support at
1-800-296-6657 for assistance.
Page 44
Page 46
Tournament:
Schedule
Folder
The Schedule folder is where you
setup the start and end dates for the
tournament. Press the date and time
boxes to enter the start and end dates
with time.
You will also need to assign a close
date. This is the date where all
reference to the tournament will be
removed from the machine. This
includes players scores, tournament
details, etc.
Tournament:
Prizes
The Prizes screen is where you select
the type of prizes for the tournament.
No Prize – Top score is based on
score but displays names only. No
prize can be awarded if this mode is
used. Players play for competition
only.
Hi Score - Top score is based on
score with prizes available (through
the operator).
Mode - Cash and Credits – The
program calculates the prize pool based
on the minimum amount setting, and the
prize pool increments with every game
played based on the pool percentage.
1. Start: The starting prize for the
Tournament. The prize pool will
increase from the minimum pool setting
with every tournament game played.
This allows the operator to preset the
minimum prize pool.
2. Current: When the Tournament is
active you can view the current prize
pool.
3. Winner Paid - I, II, III: Assigns the
percentage of the prize pool to the three
winners. It can be adjusted as long as it
totals 100%.
Page 47
Enter the name of the new
Tournament. The first game selected
for the tournament will be displayed in
the name box. To change the name,
press the backspace key on the
keyboard to delete the existing name.
Enter the new Tournament name with
the keyboard provided. When
complete, press the OK button.
Tournament:
Name
Tournament:
After completing all the setup screens, return to the Tournament Folder.
Activating
Tournaments
Under Construction
Running
Starts scheduled event automatically
At the Tournament Folder press the “Under Construction” icon to change it to the
“Scheduled” icon.*
The Tournament will now be activated when the start date/time is reached.
Note that you will need to have setup an attendant’s PIN in the operator tab in order to
enable/disable tournaments.
Note: Once a tournament is “Running” no further changes can be made.
Page 48
5. What is iTouchNET?
iTouchNET:
iTouchNET
Features
Page 49
JVL’s iTouchNET — www.itouchnet.com — is your portal to complete online route
management, allowing you to:
Access valuable reports
machine earnings
machine status
player stats
game stats
Enable remote setup
adjusting pricing
controlling volume
enabling/disabling games
changing Erotic settings
clearing high scores
Enable route security and control
door monitoring
advertising screens
Enable route management features
All FREE of charge!
For a flat monthly fee you can access the most comprehensive, flexible tournament system
on the market today. And to help Operators not only earn more but keep more, if less than
50 tournament games are played in one month on a machine, JVL waives the monthly fee
for that machine! iTouchNET also allows Operators to enable TouchandWin™ and/or
Net Challenge tournaments.
iTouchNET:
TouchandWin™
iTouchNET:
NET Challenge
TouchandWin™, JVL’s national sweepstakesbased tournament, is the only one of its kind.
TouchandWin™, patented in the United States
and Canada, is a system of touchscreen video
games connected to JVL’s server via a local
phone line and the Internet.
Net Challenge gives Operators access to the
most flexible local tournament system available
on the touchscreen market. Operators select the
tournament game from the 145 games available;
set the credit settings; define the start and finish
dates; determine the prizes and prize payout
method (if any); and decide who on the route
should compete in each tournament (for online
machines). Tournaments can be sent to any
number of machines or to the entire route.
Only ONE tournament can be scheduled at a time. Once a tournament is finished,
you can then set up a new tournament.
Page 50
Playing JVL’s National Touch and
Win™ Tournament
In order for players to register and
play in a Touch and Win™
contest, they need to register.
Instructions are as follows:
Players need to select either
the iTouchNET (iTN) Button or the
Touch and Win™ Button on the
Main Game Category screen.
They are then presented with
the Touch and Win™ Tournament
Screen.
Select the Game to play (there
may be more than one) and press
the Play Button. You will be asked
to Sign In. Players can also select
the Sign In Button in the upper
right-hand corner.
The Ranks button shows the
ranking high scores at the present
time, along with the corresponding
location information.
The Current button shows all
Tournaments that are running at
the present time.
The Future button shows
information about upcoming
Tournaments.
The Past button shows all the
final ranking and scores for
completed Tournaments.
The Exit button returns you to the Main Game Category screen.
*NOTE – Touch and WinTM games can only be played with actual money credits and
not free credits.
After selecting the Play button the screen will change to the Registration selection
screen.
If the player has registered previously, select the Login button to proceed.
Page 51
If the player hasn’t registered before,
then the New Player button should be
selected.
On the Sign In screen, the
registered player only needs to enter
their Nickname and Password to begin
playing.
On the New Player Registration
screen, players need to enter their first
and last names, phone number (for
awarding prizes), nickname, and
password (twice for confirmation).
Once the nickname has been
verified as unique, the player is ready
to play Touch and Win™.
If the entered Nickname has
already been used, the machine will
suggest another Nickname. The player
can enter another Nickname of their
choice or select the machinesuggested nickname.
When the player has finished
playing each game, they are presented
with their personal High Score screen
which shows them their top five scores.
Tournament Scores are averaged to
calculate their Ranking Score.
The buttons on the lower right
portion of this screen shows the player
the different Location Rankings for the
Tournament and the position of the
player in each Location.
The Play Again button allows the
player to play another game without
having to sign in again.
Page 52
6. What is ICN?
ICN:
Interactive
Challenge
Network
Page 53
JVL’s Interactive Challenge Network (ICN)
allows users at different JVL machines within
the same location to play certain games headto-head in realtime. ICN games can be setup
so they’re open to anyone at a machine within
a location or kept private, so that only people
that share a self-created, secret PIN number
can join in on the fun.
ICN game play supports between
2 and 16 machines connected at
any one time. Connections can be
directly between 2 machines via a
cross-over Ethernet cable, or
between up to 16 machines
connected to either an Ethernet
Hub/Switch or Ethernet router
with a built-in DHCP server via
either Ethernet straight-thru
cables and/or using wireless
Ethernet.
Currently, there are 14 games which support ICN play, including Texas Hold’em No Limit,
Texas Hold’em Limit and Texas Kill’em.
Note that ICN games must be enabled in order to appear (see “General Settings” on
page 11).
ICN:
How to Play
ICN Games
When a player comes to a machine,
selects a game and sees the ICN
button, this means that there are other
machines at that location capable of
playing that game in ICN mode. If the
player wants to play in ICN mode, they
press the ICN button.
They can now initiate an ICN
multiplayer game, inviting other players
to join them.
As the game initiator, the player can
choose whether the game is open to
everyone or by invitation only.
Page 54
If Invitation Only mode is selected, the
player is asked to enter a four digit PIN
number which all invited players must
enter in order to join the game.
Once the game’s PIN number is
selected, the initiating player sends the
invitation to all ICN-capable machines
on the local network.
If the ICN-capable players are not
currently playing a game, they see the
invitation and can either accept or
decline to play. If they accept and
Invitation Mode has been selected,
they are asked for the game’s PIN
number.
Players can also choose Do Not
Disturb to prevent any further
invitations to their machine.
The game initiator’s screen shows
players who have joined their game.
They can either start the game (once
enough players have joined, if required)
or choose to cancel the ICN invitation.
If players have entered their names as
they accepted the invitation, they are
displayed beneath their selected
avatars, otherwise they appear as
Player1, Player2, etc.
If the game challenge is for a game that supports the Hall of Fame, the machines in the
game will have their Hall of Fames synchronized.
During the game, each player can quit
at any time.
At the end of the game, an official
results table is displayed, showing each
player’s standings in the completed
game.
Page 55
ICN:
There are three ways that ICN can be setup on JVL machines:
Setting Up
ICN
Using an Ethernet cross-over cable (between two machines)
Using an Ethernet Switch/Hub and straight-through Ethernet cable(s) or Wireless
connection(s) (between two or more machines)
Using an Ethernet router with a built-in DHCP server and straight-through Ethernet
cable(s) or Wireless connection(s) (between two or more machines)
Note that older machines may require an ICN upgrade kit. Please contact JVL Technical
Support at 1-800-296-6657 to determine if your machine(s) require an upgrade.
ICN:
Peer-to-Peer
ICN
There are two tasks involved in setting up peer-to-peer communication between two
machines: the physical connection and the communication configuration.
To physically connect two machines:
1.
Turn off both machines.
2.
Connect one end of the cross-over Ethernet cable to the Ethernet port on the back of
the first machine.
3.
Connect the other end of the cross-over Ethernet cable to the Ethernet port on the
back of the other machine.
4.
Turn both machines on.
To configure communications:
1.
Open the back door on the first machine.
2.
Press the Setup button in the back of the machine once.
The Setup screen is displayed on the machine.
3.
Press the Communication button on the screen.
The Location folder is displayed.
4.
Press the Connectivity tab.
The Connectivity folder is displayed.
5.
Enable the Local Settings by pressing the On/Off toggle button.
6.
Press the Configure button beside the Local Settings.
The Local Settings List is displayed.
7.
Setup your Local Settings as desired.
For complete information on setting up the Local Settings, see “Local Settings” on
page 41.
8.
Repeat steps 1 through 7 for the second machine.
Note that peer-to-peer configured machines can only connect to JVL servers for online
functionality via modem. If the machines were already configured for online functionality, no
further configuration is required. To configure your machines for JVL server online
functionality, see “Communication” on page 36.
Page 56
ICN:
Ethernet
Switch/Hub
ICN
There are two tasks involved in setting up Ethernet Switch/Hub communication between
two or more machines: the physical connection and the communication configuration.
To physically connect two or more machines:
1.
Turn off all machines.
2.
Connect one end of the straight-through Ethernet cable to the Ethernet port on the
back of the first machine.
3.
Connect the other end of the straight-through Ethernet cable to the Ethernet Switch/
Hub.
4.
Repeat steps 2-3 for all the machines you wish to connect.
5.
Turn all machines on.
To configure communications:
1.
Open the back door on the first machine.
2.
Press the Setup button in the back of the machine once.
The Setup screen is displayed on the machine.
3.
Press the Communication button on the screen.
The Location folder is displayed.
4.
Press the Connectivity tab.
The Connectivity folder is displayed.
5.
Enable the Local Settings by pressing the On/Off toggle button.
6.
Press the Configure button beside the Local Settings.
The Local Settings List is displayed.
7.
Setup your Local Settings as desired.
For information on setting up the Local Settings, see “Local Settings” on page 41.
8.
Repeat steps 1 through 7 for all machines you want connected to your Local Area
Network (LAN).
Note that Ethernet Switch/Hub configured machines can use either modem or Ethernet
functionality for online connection to JVL servers. For modem communication to JVL
servers, if the machines were already configured for online modem functionality, no further
configuration is required. To configure your machines for JVL server online modem
functionality, see “Communication” on page 36. To use Ethernet functionality to connect to
JVL servers, ensure your Ethernet Switch/Hub is configured for connection to the Internet
and then see “Internet Connection Configuration” on page 39. JVL recommends having a
Networking expert available to setup and maintain your Local Area Network (LAN) and
connection to the Internet.
Page 57
ICN:
Ethernet
Router ICN
Setup
There are two tasks involved in setting up Ethernet Router with built-in DHCP server
communication between two or more machines: the physical connection and the
communication configuration.
To physically connect two or more machines:
1.
Turn off all machines.
2.
Connect one end of the straight-through Ethernet cable to the Ethernet port on the
back of the first machine.
3.
Connect the other end of the straight-through Ethernet cable to the Ethernet Router.
4.
Repeat steps 2-3 for all the machines you wish to connect.
5.
Turn all machines on.
To configure communications:
1.
Open the back door on the first machine.
2.
Press the Setup button in the back of the machine once.
The Setup screen is displayed on the machine.
3.
Press the Communication button on the screen.
The Location folder is displayed.
4.
Press the Connectivity tab.
The Connectivity folder is displayed.
5.
Enable the Local Settings by pressing the On/Off toggle button.
6.
Press the Configure button beside the Local Settings.
The Local Settings List is displayed.
7.
Setup your Local Settings as desired.
For information on setting up the Local Settings, see “Local Settings” on page 41.
8.
Repeat steps 1 through 7 for all machines you want connected to your Local Network
(LAN).
Note that Ethernet Router configured machines can use either modem or Ethernet
functionality for online connection to JVL servers. For modem communication to JVL
servers, if the machines were already configured for online modem functionality, no further
configuration is required. To configure your machines for JVL server online modem
functionality, see “Communication” on page 36. To use Ethernet functionality to connect to
JVL servers, ensure your Ethernet Router is configured for connection to the Internet and
then see “Internet Connection Configuration” on page 39. JVL recommends having a
Networking expert available to setup and maintain your Local Area Network (LAN) and
connection to the Internet.
Page 58
7. Triathlon
Page 59
JVL has prepared a package of 18 pre-programmed Triathlon events in which a player can
experience a single round of 3 different games. Operators can also setup their own custom
triathlons, selecting and mixing from a roster of 36 exciting games.
The following are the preprogrammed Triathlon events JVL supplies:
Going, Going, Done (Gone Fishing, Gone Bowling, Done Drinking)
Smart Ass (Clock Teasers, At a Glance, Double Quiz)
Night Out (Crazy Quarters, Done Drinking, Hot Links)
Sport Nuts (Knock Out, Soccer, Magic Hoops)
Wild Words (Pig Latin, Word Builder, Magic Spell)
Treasure Island (Treasure Hunt, Hooked on Fishing, Pyramid Runs)
Bling-Bling (Monster Mash, Bonbon Factory, Gone Fishing)
Mexican Hearts (Loco 8's, Heart Attack, Elevens)
Sharp Shooter (Silver Cue, Darts, Magic Hoops)
Spell Bound (Magic Spell, Word Maze, Word Builder)
Triple Run (Triple Towers, Suits & Pairs, Pyramid Runs)
Einstein (Join 11, Sum Fun, Color Drops)
Memories of Taipei (What's the Difference, Fortune Taipei, At a Glance)
Mixed Bag (Pyramid Runs, At a Glance, Double Quiz)
Snake Eyes (Wild Dice, Treasure Hunt, 2Tacki)
Tacki Pirates (2Tacki, Pirate Madness, Rush Hour)
U-Pick (Pick 21, Pick 3, Flush 21)
The scoring has been adjusted to ensure that each game is appropriately weighted.
Page 60
Triathlon:
Why JVL’s
Triathlons
are unique
1.
The play value in a Triathlon is significantly higher than in traditional single play
games, allowing operators to maximize their revenue.
2.
JVL’s patent pending quick exit button encourages competitive players to exit the
game after completing one round if their results are unfavorable. As a result, the
player saves a credit and the operator optimizes their play revenue.
3.
JVL’s Triathlon allows players to choose the order in which the 3 games are played.
Once again, this increases the play value and encourages competitive play and early
exit.
Operators can setup their own Triathlon series, mixing and matching from a huge roster of
36 exciting games. This allows operators to customize the Triathlon experience to the
location’s clientele, once again increasing the opportunity to up-charge.
Triathlon:
Other
Important
Features
By combining 3 of our games, the skill factor becomes a significant reason for
success.
FYEO — Erotic Triathlon Series, featuring Triple Tease (Erotic Triple Towers), Erotic
Sum Fun and Erotic 2 Tacki.
Page 61
Playing the Triathlon
Triathlon:
User
Interface
Triathlon is a separate category, which can be found within the categorized list of games.
To find the list of categories it is necessary to select the All Games button, located on the
bottom-right of the screen.
A player must enter the Triathlon category to view all Triathlon games sets.
When a player selects a Triathlon game set, information is displayed about the game,
along with the credits required. Typically, the standard price for any Triathlon set is 2
credits.
A player should buy at least 2 credits to start, select the wanted Triathlon set, and touch the
2 Credits button. A player is then presented with the following menu:
The Help text is also available from this menu by touching the
player can find hints at the bottom of this screen.
button. As well, a
A player selects (this feature can be disabled in the Setup) any game to start and touches
the Round 1 button. After he has played the first game, a player returns to this menu
where he selects the second game to play, and so on, until all offered games are
completed.
Page 62
A player can also refuse to play the next (second or third) game by touching the
button, located on the right side of the screen.
The player is returned to the main menu. If a player decides to exit before starting the first
round (without playing) they save two credits. If they exit before the second round (after
completing round one), they save one credit. In the case where a player quits after
completing the second round, they will not save any credits.
Triathlon:
Hall of Fame
Players Scores and Hi Scores are shown separately for each game. The Hall of Fame
table reflects the overall player’s score. The overall player’s score is the sum of
multiplications of the player’s score for every game and the corresponding converting
coefficient.
Triathlon Setup
Triathlon:
Setup
Page 63
To change Triathlon settings, it is necessary to enter the machine’s Setup menu (open the
machine’s door and press the Setup button) and press the Tournament/Triathlon button.
The operator must then select the Triathlons tab:
This tab contains the complete list, composed of the 18 standard Triathlon sets. Operators
have the option to enable/disable any Triathlon set. The standard Triathlon can be viewed
(touch the wanted Triathlon and select the View button), but cannot be deleted. An
operator can also view or clear the Hall of Fame table (select the View button, go to the
Hall of Fame tab and select the Clear button).
Triathlons:
It is also possible to create personal Triathlon sets (select the New button).
Creating new
Triathlons
The Games tab allows an operator to set the price for Triathlon games (touch the Price
toggling), set the money refund after first round (touch the corresponding toggling), allow/
permit game choice option (select On or Off on the corresponding toggling) and – most
importantly – select the Triathlon games. To select a game, select an Empty string. The
popup window with games and categories will then appear:
Page 64
Only multi-legged games can be part of Triathlon sets (available games are listed in the
popup window). An operator should select the games category and choose the game they
desire. Already selected games are highlighted in green.
Triathlon:
Creating new
Triathlon
Name
The Name tab allows an operator to enter the Triathlon’s name using the on-screen
keyboard:
When the new Triathlon is ready, an operator should select the Exit button, which will save
all changes made. The created Triathlon should now appear among others in the Triathlon
category. The new Triathlon settings can be viewed or deleted (return to the Setup,
Triathlon Menu, mark your Triathlon and touch the View or Delete buttons). After the
Triathlon has been played, its Hall of Fame table reflects the highest results.
Page 65
Triathlon:
Creating new
Triathlon
Hall of Fame
An operator has the ability to view or clear the Hall of Fame table.
Page 66
8. JVL Bookkeeping
Application
Page 67
JVL's bookkeeping application is an easy to use tool that helps the operator simplify the
collection process by automating the record keeping, revenue divisions and fee tracking of
JVL machine/route collections. In the past, manually counting your collections was errorprone and labor-intensive. With the new JVL Bookkeeping Application, built-in to JVL’s
exciting new iTouch9 software, operators can now have the machines do the work for
them!
Accessible from JVL’s comprehensive Setup screen, the bookkeeping application provides
an automated summary of the period's collections less any standard or custom fees,
including automatically calculated location splits.
Bookkeeping:
Bookkeeping
Setup
Open the back door of the machine and press the Setup button once to display the Setup
screen. Press the Bookkeeping button on the Setup screen and the main Bookkeeping
screen is displayed.
You can press the question mark button to see some on-screen help or press the Exit
button to return to the Setup screen.
Page 68
Bookkeeping:
Press the Current Collection button to display the Current Collection screen.
Current
Collection
Start — Date and time the current collection was started (last time the collection data was
completed or cleared out of the machine).
Finish — Current date and time. This is the Finish date and time that is written to the
collection history when the Complete Collection button is pressed.
# Days — Length of collection period in days (days between the last time the collection
data was cleared out and the current date).
Total Revenue — Total amount of money the machine has taken in during the current
collection period.
Total Fee — Total amount of fees levied against (owed from) the current Total Revenue
(varies depending on what, if any, custom fees are setup).
Balance To Split — Total Revenue minus the Total Fees owed.
Location Split — Percent of the Balance To Split that the location gets.
Location Commission — Amount of the Balance to Split that the location gets.
Operator Profit — Amount the operator gets (Balance To Split minus the Location
Commission).
Complete Collection — Press this button to record the collection data to the Collection
History, clear out the collection data and reset the collection start date and time.
Detail — Displays the Details screen.
You can press the question mark button to see some on-screen help or press the Exit
button to return to the main Bookkeeping screen.
Page 69
Bookkeeping:
Details
Screen
The details screen shows a breakdown of all
the revenue (regular games and tournament
games), fees (predefined, additional and
custom) and summaries (balance to split,
location commission, and operator’s profit)
that make up the current collection. You can
use the sliders on the right and at the bottom
to view all of the information, since there is
so much detail it can’t be shown in a single
screen.
You can press the question mark button to see some on-screen help or press the Exit
button to return to the main Bookkeeping screen.
Bookkeeping:
Collection
History
Press the Collection History button on
the main Bookkeeping screen and the
Collection History screen is displayed.
Show — allows you to change the
amount of Collection History that is
displayed. Press the drop-down arrow
and you can select All History (every
existing collection history record), Period
(a date range to show collection history
records for), After (show only collection
history records after a selected date), or
Before (show only collection history
records before a selected date).
The view can be sorted by any column by clicking on that column’s header. The sorted
data can be arranged in ascending or descending order. To switch a column’s sort order
from ascending to descending (or vice-versa), click the column’s header again.
Detail — Touch a row in the displayed collection history list and you can press the Detail
button to see that collection’s information in a detailed view.
You can press the question mark button to see some on-screen help or press the Exit
button to return to the main Bookkeeping screen.
Page 70
Bookkeeping:
Options
Bookkeeping:
Location
Split
Press the Options button to access the Options folder where you can specify the
Location Split and work with the fees screens.
The Location Split screen allows you to
specify the percent of the machine’s profits
(collections minus any fees) that the location
will receive, as a percent. To set the
amount, press the Location Split % button
and enter the new value using the popup
keypad. The value can have up to two
decimal places (i.e. 5, 29.1 and 33.33 are all
valid values) and the value must be equal to
or less than 100%. Press OK when you’re
done to apply the change, or press Cancel
to discard the change.
You can press the question mark button to see some on-screen help or press the Exit
button to save your changes and return to the main Bookkeeping screen. Press Cancel to
discard your changes and return to the main Bookkeeping screen.
Press Default to reset the value to the system default of 50%.
Note that pressing Default All will not only reset the displayed value to the default, but will
reset the entire folder to its default values. All custom fees will be deleted!
Bookkeeping:
Fees
Fees are amounts (dollars or percentages) which are subtracted from a machine’s
collections before the profit and amount to be split is determined. There are three different
fee types, each with their own screen:
Predefined — These are fees
predefined by JVL. JVL has full control
over these fees and operators cannot
change any parameters associated with
them.
You can press the question mark
button to see some on-screen help or
press the Exit button to save your
changes and return to the main
Bookkeeping screen. Press Cancel to
discard your changes and return to the
main Bookkeeping screen.
Page 71
Note that pressing Default All will reset the entire folder to its default values. All custom
fees will be deleted!
Additional Fees — These are fees
predefined by JVL, but operators have
the ability to change parameters
associated with these fees.
To change a fee’s parameters, touch the
fee in the table to select it and then
press the Edit button.
You can press the question mark button to see some on-screen help or press the Exit
button to save your changes and return to the main Bookkeeping screen. Press Cancel to
discard your changes and return to the main Bookkeeping screen.
Press Default to reset the fee parameters to their default values.
Note that pressing Default All will not only reset the Additional Fee parameters to their
default, but will also reset the entire folder to its default values. All custom fees will be
deleted!
Custom Fees — These are fees
created by the operator, either directly
on the machine or remotely. The
operators have full control over these
types of fees and JVL has no control or
interaction with them at all.
See “Creating Custom Fees” on
page 72 and “Managing Custom Fees”
on page 73 for more information.
You can press the question mark button to see some on-screen help or press the Exit
button to save your changes and return to the main Bookkeeping screen. Press Cancel to
discard your changes and return to the main Bookkeeping screen.
Press Default to reset the fee parameters to their default values.
Note that pressing Default All will not only reset the Additional Fee parameters to their
default, but will also reset the entire folder to its default values. All custom fees will be
deleted!
Page 72
Bookkeeping:
Creating
Custom Fees
There are 2 types of custom fees that you can create: a fixed dollar amount charged at a
specified interval (monthly, weekly, daily or per play) and a percentage tax applied against
a machine’s collections.
Note that the per play fee can be applied to both regular and tournament play.
Fee Name — This is the unique name you want to assign to the fee you are creating. For
example, MONTHLY-FIXED. To enter this value, touch the Fee Name field and use the onscreen keyboard to enter the name. Note that the large, blank key acts as the spacebar.
Enable — This determines whether the fee is to be applied to the machine’s bookkeeping
or not. This is useful if you have machines in many locations where different fees would
apply, but you want to create a standard list of custom fees, only applying the applicable
ones based on the machine’s location. To enable/disable a fee, press the Yes/No button.
Type — This is the type of fee and determines, when the fee is enabled, how the charge is
levied. Possible types are Monthly, Weekly, Daily, and Per Play. For more information
about Per Play parameters, see “Per Play Fees” on page 73.
Payment Type — This is the payment type that will be used with this fee. There are two
possible payment types: Fixed and Tax. A Fixed fee payment type is a dollar amount that
is levied against a machine, regardless of the amount of collections. A Tax fee payment
type is a percent or rate which bases the fee on the amount of collections.
Value — This is the fee’s value. If the fee payment type is fixed, this is a dollar amount. If
the fee payment type is tax, then this is a percentage.
You can press the question mark button to see some on-screen help or press the Exit
button to save your changes and return to the Custom screen. Press Cancel to discard
your changes and return to the Custom screen.
Page 73
Per Play Fees
When adding a custom fee (see
“Creating Custom Fees” on page 72), if
you select Per Play as the Type, a new
field named Play Type appears on the
Add Fee screen. This field allows you
to control what type of play triggers the
per play fee. To select the Play Type,
press the drop-down arrow beside the
Play Type field and select the option
you want. Possible Play Types are
Regular, In House, Net Challenge,
Touch And Win, and Triathlon.
Note that when using Per Play as the Type, the Payment Type can only be Fixed. As a
result of this, the Value can only be a dollar amount.
Bookkeeping:
Managing
Custom Fees
The Custom screen shows all fees created by the operator. To work with these fees, touch
a row and then use one of the management buttons beneath the table.
Add — Press this button to add a new custom fee.
Edit — With a row selected, press this button to edit an existing fee’s parameters.
Delete — With a row selected, press this button to delete that custom fee.
You can press the question mark button to see some on-screen help or press the Exit
button to save your changes and return to the main Bookkeeping screen. Press Cancel to
discard your changes and return to the main Bookkeeping screen.
Press Default to reset the Custom fees to their default values. All custom fees will be
deleted!
Note that pressing Default All will not only reset the Custom fees to their default, but will
also reset the entire folder to its default values. All custom fees will be deleted!
Page 74
Page 75
9. Technical Support
For technical support and sales please call:
In the United States and Canada:
Outside the United States and Canada:
Tel: 1 (800) 296-6657
Tel: (905) 303-3360
Fax: 1 (800) 296-6681Fax: (905) 303-3361
ITOUCH9™ Upgrading via External CD-ROM
Installation
Instructions
Power off the machine.
Open the cash door located on the back of the machine.
Locate and remove the old security key located on the I/O board. The key is located
on the top right hand side in the cash compartment on the I/O board.
Insert the new security key with the white iT9 label facing out.
Connect the supplied external CD-ROM\Power Drive ribbon cable to the Centronics
connector located on the bottom right-hand side inside the cash box area.
Connect an ATAPI IDE CD-ROM Drive (not supplied) to the IDE data connector and
the power harness located on the other end of the upgrade cable.
Make sure that the jumper on the CD-ROM Drive is set to the Slave position.
Power up the machine and insert the iTouch9 upgrade game disk into the CD-ROM
Drive. Close drive door and cycle the machine’s power (turn it off and back on).
Upon start-up, the machine should automatically prompt with NEW VERSION
DETECTED. As instructed, press the Setup button to continue.
Setup Button
USB Port
To upgrade with a USB memory stick, follow the instructions above, except insert the USB
device into the USB Port. Ignore any reference to the CD cable.
Page 76
Upon Boot up, the machine should automatically prompt with NEW VERSION
DETECTED. Press the Setup button to continue. The Setup button is located on the
I/O board. (Black Button next to the Security Key.)
At 100% the machine will beep and report SUCCESS!
Remove the CD from the drive and store in a safe place. (Or remove the USB key.)
TURN OFF MACHINE.
Disconnect the external CD-ROM Drive and cable from the connector in the machine,
and close the back cash door.
Power On the machine and the machine will now have the new iTouch9 updated
software.
Enjoy!
Troubleshooting Guide:
Page 77
Common error messages with possible solutions
Possible
Problems
Possible Problems
Possible Causes
Possible Solutions
Start-Up –
No Boot –
No Video Display
A. Power cord not properly
connected to machine or A/C
outlet.
B. Blown Fuse(s).
C. Defective Power Supply.
D. Defective CPU Board.
E. Defective Memory or dirty
Memory Chip Contacts.
1) ) Ensure A/C power cord is securely
plugged in at Power Entry Module.
2) Check fuses (located to the right of
the Power Cord on the Power Entry
Module). If fuse is blown, replace.
3) Power machine on and listen for
one CPU beep. One beep indicates
that the CPU has successfully
started the BIOS and is ready for
loading. Multiple beeps indicate
memory problems. Try cleaning the
DIMM socket and the DIMM (tip –
a pencil eraser tends to work well,
but don’t rub too hard) and reseat
the DIMM module. If the problem
persists, replace the 64 MB DIMM
memory module.
Lockups/
Reboots
A. Location A/C power. (Voltage)
B. Dirty or defective System
and/or CPU Fan.
C. Defective Memory or dirty
Memory Chip Contacts.
D. Corrupted Flash Memory and/
or Defective Flash Card.
Please note JVL recommends
SAN DISK INDUSTRIAL only.
E. Defective CPU board.
F. Defective Power Supply.
G. Intermittent Power connectors and/or harnesses.
Location A/C Power. (Voltage)
1) Improper A/C outlet voltage. This
voltage usually sits around
120volts. Deviations of 10 A/C volts
are acceptable. Anything below 110
or above 130 A/C volts may cause
problems. Call local Electrician.
2) Improper house wiring\Reverse
Polarity. Call local Electrician.
3) Improper grounding also may result
in touchscreen problems. Call your
local Electrician.
4) Large Devices such as freezers,
fridges, stoves and heaters may
result in large voltage fluctuations.
JVL recommends that machines be
placed on an isolated A/C power
line with surge protectors.
Fans
1) Ensure that fans (system fan at
back and CPU fan under main
cover) are clean/spinning properly.
2) To Clean – remove excess dirt using
compressed air.
3) If the fans are still not spinning
after cleaning, replace the nonoperating fan.
Page 78
Possible Problems
Possible Causes
Possible Solutions
Touch Screen
Problems
A. Calibration is “off” on the
entire screen.
B. Calibration appears to be off
only in one section of the
screen.
C. Loses Calibration.
D. No response when touching
the touchscreen.
1) Recalibrate machine. (See Touchscreen Calibration Section.)
2) Perform calibration test. Drag your
finger across the screen in all
directions; the marking indicator
should follow your finger. If cursor
jumps or does not respond in certain regions of screen, you may
have a defective touchscreen.
3) Dirty Touchscreen Sensor, clean
only with mild glass cleaner and
soft cloth.
4) Defective Touchscreen Controller.
Check Touchscreen Controller
(green) LED for status. If LED is
off, check the touchscreen power
harness and check for +12volts.
5) Touching the screen should cause
the LED light to illuminate. If LED
appears to flash 1 to 5 times, the
controller’s diagnostics have
detected a fault. Replace the controller.
6) Ensure that the Touchscreen Controller is properly connected to the
serial port on the CPU board. Clean
connections and reseat.
7) Clean and reseat the controllers I/O
harness.
8) Defective Touch Sensor. Check for
nicks and scratches. Replace the
Touchscreen Senor.
Error Message
“Activation Key
not Present”
A. Displayed if the CPU Board
cannot detect the Activation
Key on the I/O Board.
B. Displayed if the CPU Board
cannot communicate with
the I/O Board.
1) Verify that the activation key is
installed.
2) Clean the key and the key socket.
3) Ensure that the tab on the key
socket is secure.
4) Verify that the CPU has detected
the Activation Key by entering the
System information folder in the
Setup. If it shows “Activation Key
N/A” then it can’t read any information from the activation key.
5) Ensure I/O cable has not been cut
or crimped.
Page 79
Maintenance
Possible Problems
Possible Causes
Possible Solutions
Error Message
“Machine
Locked…Invalid
Activation Key”
A. Activation key does not
comply with software
installed.
B. Corrupted SRAM memory.
1) Ensure the security activation key
complies with the installed software.
2) Reboot Machine.
3) If problem persists, proceed with
full factory reset. (See Factory
Reset Section.)
No credits issued
from Coin but Bill
still works OK
A. Defective coin sensor
board.
1) If no credits issued from Coin or
Bill – check coin/bill wire harness
connector at I/O Board.
2) Check for power to I/O board, red
light indicates +5 volts and yellow
light indicates +12 volts.
3) If OK, then check for signal pulses
in the Coin/Bill Test in the Setup
Menu.
4) If there are still no pulses, check
the I/O board and ribbon cable for
physical damage and make sure the
activation key is installed correctly.
5) Replace the Coin Sensor Board.
The cabinet and touchscreen monitor should be cleaned with a damp cloth and mild
detergent.
Do not use any abrasive solvents, acid or vinegar-based cleaners on the monitor.
Such cleaners could harm the touchscreen over time.
WARNING!
JVL Corporation warrants that its touchscreen entertainment devices match the highest
standards of performance. However, due to, but not limited to, criminal tampering or
electrical disruption, it is possible for this product to fail to perform as expected.
Page 80
Technical Specifications
RETRO
Countertop
Machine
POWER CONSUMPTION:
DIMENSIONS:
Height:
Width:
Depth:
Weight:
19.5”
19”
14.5”
40.5 lbs
Idle(Avrg): 115 VAC
Idle(Avrg): 220 VAC
1.17 Amps
0.69 Amps
VORTEX
Countertop
Machine
POWER CONSUMPTION:
DIMENSIONS:
Height:
Width:
Depth:
Weight:
18.5”
19.5”
15”
39.4 lbs
Idle(Avrg): 115 VAC 1.17 Amps
Idle(Avrg): 220 VAC 0.69 Amps
Page 81
ORION
Upright
Machine
DIMENSIONS:
Height:63.14” 1603.76 mm
Width:22.02” 559.31 mm
Depth:26.99” 685.55 mm
Weight:224 lb101.6 kg (boxed)
POWER CONSUMPTION:
Idle (Avrg): 115 VAC
Idle (Avrg): 220 VAC
0.70 Amps
0.40 Amps
Page 82
Specification Diagram
Retro: Countertop Model
RETRO Countertop: Block
Diagram
Page 83
RETRO Countertop: Main
DC Harness
Page 84
RETRO Countertop: AC
Harness
Page 85
RETRO Countertop: Block
Diagram
Page 86
Specification Diagram
Vortex: Countertop Model
VORTEX Countertop: Block
Diagram
Page 87
VORTEX Countertop: Main
DC Harness
Page 88
VORTEX Countertop: AC
Harness
Page 89
VORTEX Countertop: Cash
Box Harness
ORION Upright: Block
Diagram
B1
B6
AC-MARS
BILL
DOOR SW
GND
COIN
Backlight
GND
CASHDR HNS
Backlight
Door Switch
B3
AC-MARS
COIN/BILL
R DOOR
FRONT DOOR
BACKLIGHT
AC-MONTR
AC-MONITOR
P77
B4
B5
PHONE
SPKERS
TS POWER
TS Contr
GND
GND
TScreen
FILTER
P69
P76
P70
MODEM CABLE
TS PWR JMPR
B2
P74
SPEAKERS
POWER COR
Page 90
Specification Diagram
ORION: Upright Model
ORION Upright: Inner
Box
E
F3
F2
POWER ENTRY
L
N
SW1
POWER SOCKET
AC POWER
(MONITOR)
POWER SOCKET
P18
AC POWER
(BACKLIGHT)
P17
P6
USB BRD
OPTIONAL
N
G
L
N
G
L
RED
P2
LINK
CN4
N
L
NUT
WHT
GRN
BLK
M2
P15
SERIAL
CN15
USB CBL
P8
I/O CABLE
AUX
CN13
CT1
CNTR
DATAPRINT
P37
JP1
CON2
CN11
COUNTER
OPTIONAL
WHT
GRN
BLK
POWER FAN
CN3 CN9
I/O BOARD
MULTIKEY
U1
P1
COIN/BILL
COIN/BILL
ORG
NUT
M3
WHT
BLK
NUT
M4
GRN
TS CONTR
CN26
CN21
CN18
CN19
CN3
SPEAKERS
CN16
P16
CN5
P14
1
2
3
BLK
YEL
IDE CBL
JP2
1 GND
2 +12V
3 SPEED
U4
P10
CF MODULE
P7
370 CPU
FAN1
MDM CBL
VGA
RJ12_F_TH
JP6
P19
U2
U1
R-DOS
P9
MODEM
P13
U26
P3
CPU BOARD
SDRAM
P5
FANSINK
P1
CD-ROM
P12
F1
M S CS
JUMPER
G
JP4
BLK
P11
N WHT
L
FILTER
FAN
P20
BLK GND
RED +12V
JP5
AC POWER
(MARS)
POWER SUPPLY
P4
GRN
1
2
3
4
NUT
M5
JP3
Page 91
Page 92
ORION Upright: Rear
Door
ORION Upright: Speaker
Panel
Page 93
ORION Upright: Rear
Door
ORION Upright: Monitor
Page 94