Download PADRES User Guide

Transcript
PADRES User Guide
PADRES Development Team
July 11, 2012
1
Introduction
PADRES is a distributed content-based publish/subscribe system. It consists of a set of clients connected to
brokers organized in an overlay network. A client can be a publisher and/or a subscriber. Publishers produce information that subscribers are possibly interested in (publications), and subscribers consume them.
Initially, publishers broadcast their publication schemas by issuing advertisements. Subscribers register their
interest via issuing subscriptions, and these subscriptions are routed towards candidate publishers (whose
advertisements match the subscriptions.) When a new publication is published, it is matched against all the
registered subscriptions and routed to the subscribers who sent matching subscriptions.
A topic-based pub/sub system makes the routing decisions based on the “topic” attribute that classifies
publications into pre-defined classes. In contrast, the content-based routing used in PADRES can use any
attribute in the publications/subscriptions to make the matching/routing decision, providing a highly flexible
routing mechanism. PADRES is also different from many other content-based pub/sub systems, due to its
fully decentralized architecture: routing decisions are taken in a distributed broker overlay. This provides a
scalable solution that can span across a large enterprise or even throughout the Internet.
2
Installing PADRES
Follow the instructions from the PADRES download page.
3
Running PADRES
A PADRES overlay is deployed by instantiating a set of brokers and clients (Section 1). First, you have to
decide on the topology of the broker overlay and client-broker connections. You can additionally instantiate
a monitor in order to monitor the status of the brokers and clients. For this user guide, let us consider the
PADRES system topology shown in Figure 1.
Figure 1: A simple PADRES network.
PADRES system components are typically deployed on different physical machines. However, it may
also be advantageous to learn to run the whole system in a single physical machine for verification and
debugging purposes. We first describe how to instantiate the system shown in Figure 1, on a single physical
machine, and then in a distributed setting.
1
3.1
Running a PADRES System in a Single Physical Machine
The parameters of the PADRES system shown in Figure 1 running on a single machine is given in Table 1.
The port numbers are chosen arbitrarily. However, it is better to choose high port numbers to avoid conflicts
with the ports used by other services.
Broker A
ID:
Location:
Port A:
Client X
Location:
Broker:
BrokerA
localhost
1100
localhost
Broker A
Broker B
ID:
Location:
Port B
Client Y
Location:
Broker:
BrokerB
localhost
1101
Broker C
ID: BrokerC
Location: localhost
Port C 1102
localhost
Broker C
Table 1: PADRES system parameters.
When launching a PADRES system, the broker overlay has to be created before instantiating the clients.
The broker overlay can be created using the following commands:
$ startbroker -uri socket://localhost:1100/BrokerA -n socket://localhost:1101/BrokerB
$ startbroker -uri socket://localhost:1101/BrokerB
$ startbroker -uri socket://localhost:1102/BrokerC -n socket://localhost:1101/BrokerB
Notes:
• Option -uri is used to specify the URI of the broker and option -n is to specify the neighbors.
• A broker URI must have the format of <comm protocol>://<hostname>:<port#>/<broker id>.
The comm protocol can be either ‘rmi’ or ‘socket’; hostname can be the DNS name or the IP address
of the machine where the broker is instantiated; port# is the port number where the broker is listening
at for incoming connections; and broker id is the unique identifier of the broker.
• Only one broker can listen at a particular port of a host.
• Broker ID must be unique and should not contain the ‘-’ (hyphen) character.
• The neighbors are given in a comma separated (with no space) list of broker URIs.
• When two brokers are connected in the overlay, it is enough to specify the relation only at one side
(in the above example, only BrokerA and BrokerC use the -n option.)
• There is no stipulated order in which the brokers have to be started. Brokers will detect whether the
specified neighbors are alive by periodically sending connection requests.
• For detailed description of the options used with the startbroker command, run it with -help option
(Section 4.2.)
Now, start the clients:
$ startclient -i ClientX -b socket://localhost:1100/BrokerA
$ startclient -i ClientY -b socket://localhost:1102/BrokerC
2
The option -i specifies the unique ID for the client and -b is used to specify the broker it should connect
to.
The startclient command will bring up a GUI for each client which can be used to interact with the
client (Section 5.3.) The layout of the client GUI is shown in Figure 2.
Figure 2: PADRES RMI client GUI.
The client GUI provides a way to perform the basic operations in a PADRES network: advertise, subscribe, and publish. A client can publish only after it has sent out matching advertisements. For example, if
the Client X is going to publish temperature data from the Toronto area, it must first advertise by issuing an
advertisement as below (enter this command into the user interface area of Client X):
a [class,eq,’temp’],[area,eq,’tor’],[value,<,100]
Here, the client advertises that it is going to publish temperature data for Toronto area, with values less
than 100 degree Celsius. (Note that the interface is space sensitive.) If the Client Y wants to be informed
when the temperature in city of Toronto drops below zero, it can register a subscription via its GUI as below
(enter this command into the user interface area of Client Y):
s [class,eq,’temp’],[area,eq,’tor’],[value,<,0]
Now, Client X can publish new temperature data via its GUI (enter this command into the user interface
area of Client X):
p [class,’temp’],[area,’tor’],[value,-10]
This data will be routed through the broker overlay and the Client Y will be informed about it via the
output area of its GUI (this message should have appeared in the client output area of Client Y upon sending
of the previous publication):
Got Publication: [class,temp],[area,’’tor’’],[value,-10];Thu Jun 19 17:14:58 GMT 2008
Advertisements and subscriptions have an (attribute, operator, value) tuple format, whereas publications
are formatted as (attribute, value) pairs. More information on adv/sub/pub patterns and operators can be
found at http://www.msrg.org/projects/padres/features/language.php.
Note: currently the client GUI does not support “unadvertise” and “unsubscribe”.
A graphical representation of the PADRES overlay can be viewed using the PADRES monitor. To start
the monitor, use the following command:
$ startmonitor -b socket://localhost:1100/BrokerA
This will bring up the monitor GUI and automatically connect to BrokerA. After some time, the monitor
will show the current system layout as in Figure 3. You can also use Main → Refresh Federation or press
F5 to refresh the view.
Figure 3: PADRES monitor GUI.
Instructions on the basic usage of the monitor can be found in Section 7.
You can stop the clients and the monitor just by closing the GUIs. The brokers can be stopped using the
stopbroker command:
$ stopbroker BrokerA
$ stopbroker BrokerB
$ stopbroker BrokerC
3
3.2
Running a Distributed PADRES System
Using the same topology as in Figure 1 but running each process on a separate node, we have a slightly
different setup compared to the previous configuration, as shown in Table 2:
Broker A
ID:
Location:
Port A:
Neighbors:
Client X
Location:
Broker:
BrokerA
10.0.1.1
10000
Broker B
10.0.1.4
Broker A
Broker B
ID:
Location:
Port B:
Neighbors:
Client Y
Location:
Broker:
BrokerB
10.0.1.2
10001
Broker A, Broker C
Broker C
ID:
Location:
Port C:
Neighbors:
BrokerC
10.0.1.3
10002
Broker B
10.0.1.5
Broker C
Table 2: Distributed PADRES system parameters
You may start brokers and clients individually using the same technique above by logging into each node
separately. Be sure to update the broker URIs with the correct hostnames and ports.
4
PADRES Broker
The broker provides the core matching and routing capabilities in the PADRES overlay. It accepts messages
from clients (publishers and subscribers), performs content-based routing of those messages, and notifies
subscribers when the publications matching their subscriptions are found. A broker can service multiple
clients. Communications between broker and clients and between brokers are always achieved via a pub/sub
protocol.
4.1
Configuring PADRES Broker
By default, $PADRES HOME/etc/broker.properties is used to configure PADRES brokers. It has the
format of a standard Java property file. Users can specify their own configuration file using the -c command
line option (Section 4.2.) The followings are the available configuration parameters and their descriptions.
Instead to specifying these parameters in the configuration file, different command line options can be used
to specify the parameters with the startbroker command (Section 4.2.)
Configuration File: The property file to read to configuration options of the broker.
In configuration file: —
Command line option: -c
Available values: a file pathname
Default value: $PADRES HOME/etc/broker.properties
Broker ID: ID of the broker. (mandatory)
In configuration file: padres.brokerID
Command line option: given as the part of -uri option
Available values: An identifier string that does not include “-” (hyphen) or “ ” (underscore) characters.
Default value: —
Broker URI: unique URI of the broker
In configuration file: padres.uri
4
Command line option: -uri
Available values: A string in the format of <comm protocol>://<hostname>:<port#>/<broker id>
(see Section 3)
Default value: rmi://localhost:1099/Broker1
Neighbors: Lists of URIs of neighbor brokers. If broker A and B are neighbors, only one of them need to
specify the neighbor.
In configuration file: padres.remoteBrokers
Command line option: -n
Available values: Comma separated (without space in between) remote broker URIs.
Default value: —
Connection Retry Limit: The number of times a broker tries to connect to the specified neighbors.
In configuration file: padres.remoteBrokers.retry.limit
Command line option: -rl
Available values: An integer.
Default value: 30
Connection Retry Pause: The number of seconds a broker pauses between connection retries.
In configuration file: padres.remoteBrokers.retry.pauseTime
Command line option: -rp
Available values: An integer.
Default value: 10
Managers: Optional internal components to instantiate to provide additional features.
In configuration file: padres.managers
Command line option: -b
Available values: DB.
Default value: —
Matching Engine: Specifies the type of matching engine to be used.
In configuration file: padres.routerFactory
Command line option: None
Available values: NewRete, Jess
Default value: NewRete
Note: Due to licensing issues, the Jess library is not included in the release (choosing Jess for this
option will result in a run-time exception.) If you want to use the Jess engine, you have to download
the library yourself and place the jess.jar archive in the $PADRES HOME/lib/ directory. Note that
only version 6.0 of the Jess library is tested with PADRES and you might have to pay a licensing fee
for the Jess library.
Database property file: The property file that contains configurations for the database supporting historic
queries. Useful only when the historic query option is enabled.
In configuration file: padres.dbpropertyfile
Command line option: -d
Available values: a file pathname
Default value: $PADRES HOME/etc/db/db.properties
Cyclic Network: Specifies whether the PADRES topology allows cycles.
In configuration file: padres.cycles
5
Command line option: -cy
Available values: OFF, FIXED, DYNAMIC
Default value: OFF
Subscription Covering: To enable subscription covering.
In configuration file: padres.covering.subscription
Command line option: -s
Available values: OFF, LAZY, ACTIVE
Default value: OFF
Advertisement Covering: To enable advertisement covering.
In configuration file: padres.covering.advertisement
Command line option: -a
Available values: OFF, ACTIVE
Default value: OFF
Publication Conformation: With this enabled, publishers can publish only after issuing matching advertisements.
In configuration file: padres.pub.conformcheck
Command line option: -pubc
Available values: ON, OFF
Default value: ON
Publication Tracing: To enable tracing of publications by class name.
In configuration file: padres.traceall
Command line option: None
Available values: ON, OFF
Default value: OFF
Console Interface: Whether to enable a console interface to the broker. The command line option does not
accept any argument.
In configuration file: padres.consoleinterface
Command line option: -cli
Available values: ON, OFF
Default value: OFF
Heartbeat: Whether to exchange heartbeat messages periodically between neighbors.
In configuration file: padres.heartbeat
Command line option: -h
Available values: ON, OFF
Default value: OFF
Web Management Interface: Whether to enable a management interface to the broker.
In configuration file: padres.managementinterface
Command line option: -m
Available values: ON, OFF
Default value: OFF
Web Management Interface Configuration: Specifies property file to be used to setup the properties of
the management interface.
In configuration file: padres.mipropertyfile
6
Command line option: -mf
Available values: a file pathname
Default value: etc/mi.properties
Broker Info Messages: To turn on the auto publication of BrokerInfo messages. Even if it is OFF, PADRES
monitor can still force a broker to publish BrokerInfo messages.
In configuration file: padres.monitor.brokerinfo
Command line option: -mon.bi
Available values: ON or OFF
Default value: OFF
Broker Info Details: To control the amount of details conveyed in BrokerInfo messages.
In configuration file: padres.monitor.advsubinfo
Command line option: -mon.bi.advsubinfo
Available values: FULL (to include full list of advs/subs) or COUNT (just to include the counts of
advs/subs.)
Default value: FULL
The configuration options are set in the following order, with later options overwriting earlier ones:
• Default values hard-coded in the code.
• Values in default configuration file.
• Values in user-specified configuration file.
• Values specified as command line options.
For example, command line options would overwrite configurations in the user-specified configuration
file, which in turn overwrite those in the default configuration file.
4.2
The startbroker Command
startbroker is the shell script to invoke a PADRES broker. See Section 4.1 for the broker-specific options.
It can also accept JVM-specific options like -Xms and -Xmx.
4.3
Console Interface
The PADRES broker provides a console interface which can be used to interact with the broker and monitor its state. By default, the console interface is disabled, it can be activated at launch time with the -cli
command line option (Section 4.2) or with the padres.consoleinterface=ON property in the broker configuration file (Section 4.1.) If the console interface is to be activated, the broker should be started at a
shell prompt where stdin/stdout are available to the broker. With the console interface activated, the
broker will provide a “Broker >>>” prompt at which various commands can be entered to interact with
the broker. The followings are the commands available in the console interface.
• help [command]
Print all the available commands. If a command is specified print the description of that particular
command.
• exit or Ctrl+d
Exit the shell and terminates the broker.
7
• printsubs [nohead] [classonly]
Print all the subscriptions stored in the matcher. The nohead option will prevent the message headers
from printing and the classonly option will only print the subscription class predicates.
• printadvs [nohead] [classonly]
Print all the advertisements stored in the matcher. The nohead option will prevent the message headers
from printing and the classonly option will only print the advertisement class predicates.
• info
Print all the essential details about the Broker (broker ID, broker URI, JVM version, and platform
OS).
• sub <subscription string>
Inject a subscription directly into the broker. The broker itself will be the subscriber.
• adv <advertisement string>
Inject an advertisement directly into the broker. The broker itself will be the advertiser.
• pub <publication string>
Inject a publication directly into the broker. The broker itself will be the publisher.
• unsub <subscription ID> [<subscription ID> ...]
Unsubscribe the subscription(s) with the specified ID(s).
• unadv <advertisement ID> [<advertisement ID> ...]
Unadvertise the advertisement(s) with the specified ID(s).
• batch <filename>
Execute a batch of commands listed in the given plain text file. One command per line; the above
commands can be used.
If the broker is configured to use the Jess library for content based matching. the following additional
commands are available to interact with the Jess-based matching engine. If the Jess library is not available,
these commands will always print an error message.
• srt <command>
Runs the given command on the Jess SRT.
• prt <command>
Runs the given command on the Jess PRT.
• flush <class> [<class> ...]
Flush facts from Jess-based PRT.
4.4
Web Management Interface
In addition to the console interface (Section 4.3), a web management interface also can be enabled. It is
enabled using the padres.managementinterface property in the configuration file or the -m option in
the command line (Section 4.1.) The interface is configured through a configuration file, which is set to
etc/broker.mipropertyfile by default. The configuration options available are:
8
Server Port Number: The port number of the web server to be instantiated.
In configuration file: http.port
Available values: An integer
Default value: 9595
Monitor name: The identifier of the management interface.
In configuration file: monitor.name
Available values: A unique identifier
Default value: MyMonitor
When the web management interface is enabled, the interface can be accessed through a web browser
at the URL http://<hostname>:<port no> (e.g.: http://localhost:9595) The hostname should be
the hostname of the machine where the broker is instantiated. The interface can be accessed from any
machine using the correct URL, provided that the broker machine is reachable from the machine where the
web browser is running (i.e. the broker machine is not behind a firewall.) The web management provides
a similar interface like the console interface and accepts the same set of commands (Section 4.3.) However
the exit command is not applicable here.
5
PADRES Clients
PADRES provides a number of clients which provides the basic functionality of pub/sub operations. Only
the interface to these clients differs:
GUIClient This provides a GUI interface to the client commands. When you run the startclient script in
the bin/ directory, this is the client that gets invoked by default.
CLIClient This provides a command line interface to the client. Use the startclient script with the -cli
option to invoke this.
WebClient This provides a user interface via a web page. The default configuration and relevant data for
this client is found at etc/web/client. You can start this client using the startclient script with
-web option. However it accepts an additional command line option: -wport <port number>. The
port number has to be unique for a client. Once you start a WebClient, you can access its interface
via the URL: http://localhost:<port number>/. Note that each WebClient you start will require
separate port number and browser window for its interface.
SwingRMIDeployer It is similar to the GUIClient, but created mostly to be used in the PADRES demos.
The primary difference from the above is this client’s ability to launch a batch of pub/sub operations
listed in a text file. Each line in such a text file is a command recognized by the above SwingRMIClient.
5.1
Client Commands
All the clients accept the same set of pub/sub commands:
exit|quit
Exit the client.
setid <client id>
Set client identifier
Caution: Avoid using this command; if you do, use it before any other client operations.
9
help [<command>]
Output help on the specified command. If issued without a command, a list of all available commands
will be displayed.
info
Print information about the client.
brokerinfo
To print the information about the broker the client is connected to.
connect <broker uri>
Connect to a broker.
disconnect <broker uri>
Disconnect from a broker.
adv [class,eq,...],[...],...
Advertise. (The alias a also works.)
sub [class,eq,...],[...],...
Subscribe. (The alias s also works.)
csub {...}<op>{...}...
Produce a composite subscription. Each term inside a pair of braces ({...}) represents a normal
subscription. The operator op can be & (represents AND) or | (represents OR). (The alias cs also
works.)
pub [class,...],[...],...
Publish. (The alias p also works.)
unsub <id>
Unsubscribe. id is a valid ID of a previously disseminated subscription. See the printsubs command below.
unadv <id>
Similar to the above command, but used to un-advertise. See printadvs command below.
file <file path>
Process a batch of pub/sub commands from a text file. Each command in the file must be placed in
separate lines.
printsubs
Print the list of subscriptions that has been already disseminated from this client. The list will show
the subscription IDs which can be used to unsubscribe.
printadvs
Similar to the above command, but displays the list of advertisements.
5.2
Configuring PADRES Client
PADRES clients uses $PADRES HOME/etc/client.properties as their default configuration file. Like the
broker, you can use the -c command line option to specify your own configuration file.
10
Client ID: The identifier of the client. (Mandatory)
In configuration file: client.id
Command line option: -i
Available values: A unique identifier
Default value: “Client1”
Broker to connect: The URI of the broker to which the client is to conect. Even though it is an optional
parameter at the invocation of the client, it has to connect to a broker before it can function. An
initially unconnected client can make a connection to a broker using the connect command (Section
5.1)
In configuration file: client.remoteBrokers
Command line option: -b
Available values: An URI of a broker.
Default value: —
No. of connection retries: The number of times the client tries to connect to the assigned Broker before it
reports a failure and quits.
In configuration file: connection.retries
Command line option: -retry
Available values: An integer
Default value: 5
Pause between retries: The amount of time the client sleeps between the above retries.
In configuration file: connection.retry.pauseTime
Command line option: -pause
Available values: An integer
Default value: 1
Client States: Enabling this option will make the client to store all previously disseminated pub/sub/adv.
This option can quickly use a lot memory, and should only be used for testing purposes.
In configuration file: client.store detail state
Command line option: -state
Available values: ON, OFF
Default value: ON for interactive clients (e.g GUIClient), OFF otherwise.
Periodicity of Logging: The time between two logging events.
In configuration file: log.period
Command line option: None
Available values: An integer
Default value: 60
5.3
The startclient Command
This is a script to start a PADRES client. By default it starts GUIClient, but this script can be used to
invoke other clients such as the CLIClient as explained at the begining of this section. See Section 5.2 for
the available options when starting a client. It can also accept JVM-specific options like -Xms and -Xmx.
One other option available for this start script is the -host <hostname> option. You might have to use
this if the following two cases are applied to your client:
1. The client is connecting to a broker that is accepting connections via the RMI communication protocol.
11
2. The client is instantiated on a host (machine) that has more than one network interface (ethernet card.)
In this case, you have to explicitly specify (using this -host option) the IP address of the network interface
(of the client machine) through which the client reaches the broker.
6
PANDA
PADRES Automated Node Deployer and Administrator (PANDA) allows you to deploy and manage a network of brokers and clients. In addition to starting and terminating remote processes, PANDA also supports
installing/uninstalling of rpms and tarballs and fetching and cleaning of log files at remote nodes. The user
has complete freedom of the topology to deploy as all deployment details are captured in a user defined
topology file. Internally, PANDA consists of a Java program with many helper shell scripts that interact with
the remote nodes. With PANDA, you no longer need to manually log into every single node to do anything,
as everything is now automated.
The current version of PANDA is only available on the Linux platform, requires OpenSSH 3.9 or later
(with options ConnectTimeout and StrictHostKeyChecking), requires all remote machines to be accessible
via ssh (remote machines must host ssh servers), and have the screen application installed.
6.1
Running a Distributed PADRES System with PANDA
Before deploying any PADRES processes, you must make sure that the machines on which you wish to run
padres has Java 6 and screen installed, and both PADRES binaries and libraries. Installation of Java 6 and
screen on PlanetLab can be done via the install command in PANDA. By default, PANDA assumes that
Java is installed in the home directory under java/. Additionally, the script named javahome located in the
distribution’s etc/panda/setup must be present in the home directory of the remote nodes. Uploading of
the PADRES binaries and libraries can be done by using the upload command to upload and extract tarball
containing the required files. Please complete PANDA’s configuration (Section 6.2) before proceeding.
More help regarding PANDA commands can be found by typing help in the PANDA console.
Using the PADRES system configuration in Table 2, to deploy Broker A using PANDA, first start panda
by running the startpanda command. Once you get the PANDA console, type the following command
into PANDA’s console:
$ startpanda
Type ’help’ or ’?’ for help.
> 0.0 ADD BrokerA 10.0.1.1 bin/startbroker -uri socket://10.0.1.1:10000/BrokerA
The 0.0 value at the beginning of the line marks the time when the broker should be started (0.0 implies
an immediate action, also see below.) All node addresses must strictly be IP addresses. To stop the deployed
broker, issue the command below. Note that the ID of the process and IP address of the node must match
with the previous ADD command.
> 0.0 REMOVE BrokerA 10.0.1.1
Instead of typing ADD/REMOVE commands separately for each broker/client process, it is possible to
group all the console commands into a file (called a PANDA topology file) to be imported into PANDA.
Below is the PANDA topology file that captures the setup illustrated in Table 2. This topology file utilizes
PANDA’s 2-phase deployment where PANDA ensures all brokers marked with time 0.0 are fully up and
connected in phase-I before deploying clients with time > 0.0 in phase-II. Note: even though the commands
in the below example are shown broken into multiple lines, the actual topology file does not accept new
lines in the middle of a command line.
12
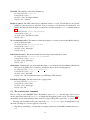
# Phase 1, deploy the 3 brokers
0.0 ADD BrokerA 10.0.1.1 bin/startbroker -uri socket://10.0.1.1:10000/BrokerA
0.0 ADD BrokerB 10.0.1.2 bin/startbroker -uri socket://10.0.1.2:10001/BrokerB
-n socket://10.0.1.1:10000/BrokerA
0.0 ADD BrokerC 10.0.1.3 bin/startbroker -uri socket://10.0.1.3:10002/BrokerC
-n socket://10.0.1.2:10001/BrokerB
# Phase 2, deploy Client X and Client Y.
# Client X is a publisher deployed at 1s after successful broker
# deployment that publishes stock quote publications of symbol
# ANTP at 60 msgs/min to BrokerA with 0 delay before initial
# publication. demo/stockquote/startSQpublisher.sh is the script that
# starts this
# automated stock quote publisher
1.01 ADD ClientX 10.0.1.4 demo/bin/stockquote/startSQpublisher.sh
-i ClientX -s ANTP -r 60 -d 0 -b socket://10.0.1.1:10000/BrokerA
# ClientY is a subscriber deployed at 10s after successful broker
# deployment that subscribes to [class,eq,’STOCK’],[volume,>,0] at
# BrokerC.
# demo/stockquote/startSQsubscriber.sh is the script that starts this
# automated stock quote subscriber
10 ADD ClientY 142.150.237.136 demo/bin/stockquote/startSQsubscriber.sh
-i ClientY -s "[class,eq,STOCK],[volume,>,0]" -b socket://10.0.1.3:10002/BrokerC
To deploy this topology using PANDA, run panda with the topology file, assume it is named topology.txt.
Note: You must configure PANDA before using it. See Section 6.2 on Configuring PANDA.
$ startpanda topology.txt
Alternatively, you may load the topology file after running panda without the command line parameter
by using the load command in panda’s console:
$ startpanda
> load topology.txt
Loading a topology file does not automatically start the broker/client processes. Once the topology file
is successfully loaded and panda has verified that all nodes referenced by the file is reachable, issue the
deploy command to deploy the processes:
$ startpanda topology.txt
Checking reachability of referenced nodes in topology file ...
10.0.1.1
OK
10.0.1.2
OK
10.0.1.3
OK
10.0.1.4
OK
10.0.1.5
OK
topology.txt successfully loaded
13
Type ’help’ or ’?’ for help.
> deploy
After issuing the deploy command, PANDA will ask if you want to skip PANDA’s automated 2-phase
deployment process. By skipping the 2-phase deployment process, you will be given a prompt to decide
whether or not to proceed with phase 2 deployment. Alternatively, if you choose not to skip the 2-phase
deployment process, PANDA will automatically deploy phase 2 once it sees that all brokers and links are
established in phase 1 using an internal monitoring client.
To stop the deployment at any time, use the stop command. Ignore any innocuous error messages.
The full list of PANDA commands, syntax, and descriptions can be found in Section 6.3.
6.2
Configuring PANDA
By default, all of PANDA’s configuration is contained in $PADRES HOME/etc/panda/panda.properties.
You may use -c config file path command line argument of the startpanda command to load your own
configuration file for PANDA.
Configure remote login name This is the login name used to log into all of the remote nodes.
scripts.env.SLICE=<login name>
Configure remote $PADRES HOME This is a relative path to the remote machines home’s directory.
remote.padres.path=<path to padres home directory>
Configure SSH keys Panda uses public/private ssh keys to log into remote nodes. See here1 or google
yourself on how to generate public/private ssh keys. Note that PANDA requires you to use an empty
paraphrase. Put the public key in $HOME/.ssh directory at all remote nodes. Then modify the line
illustrated below in panda.properties to reflect the path to your private key. Note, the private key
must only have read and write permission only to the user.
scripts.env.IDENTITY=<path to private ssh key>
Configure tarball package Essentially, the tarball is the complete PADRES package with 3rd party library
jar files. PANDA will download the tarball onto the remote nodes and extract the tarball in the $HOME
directory (not $PADRES HOME.) Therefore, it is recommended that a directory containing the contents
of PADRES be automatically created upon extraction. Note that the remote.padres.path property
value mentioned above should match this. To enable uploading of the PADRES tarball onto the remote
nodes, you should configure the line below in panda.properties to point to the URL of your tarball.
PANDA uses wget for this operation, and, therefore, the URL should be a valid HTTP address that
is prefixed with http://
scripts.env.TARBALL=<url to tarball>
6.3
PANDA Commands
You may enter any one of the commands below into the Deployer’s console.
help | ?
This screen
exit | quit | bye | ciao | cu
Exits the simulator
1 http://www.ece.uci.edu/
chou/ssh-key.html
14
load <file>
Loads the topology/input/workload file. Checks to see if all nodes in the topology file are reachable
by automatically running the sshtest command
sshtest <IP address list>
Returns the list of node IP addresses that it can and cannot reach via SSH. You will need to provide
the absolute path (i.e. path that starts with ‘/’ like /home/padres/iplist.txt). Results are stored
in build/panda/<date>/log/sshtest.[ok|failed].log.
The following commands can be invoked only after a topology file has been successfully loaded.
install
Install RPMs on all nodes you specified in the loaded input file, such as the Java SDK. It does not hurt
to run this command on nodes that already has the RPMs installed because nodes will not download
the rpm file again nor reinstall it.
uninstall
Removes RPMs sitting in /tmp of remote nodes specified in the loaded topology file. It does not hurt
to run this command on nodes that have already uninstalled its RPM files.
reinstall
Runs uninstall then install in sequence.
upload [URL ]
Deploys the padres code to all broker nodes you specified. It does this by downloaded the tarball and
extracting it by simply doing tar xzvf *.tar.gz, after which the tar ball is deleted. If you do
not specify a tar ball URL, then the default one specified in panda.properties will be used.
clean <all | log>
• all cleans the entire home directory
• log removes *.log files located under $HOME/build
deploy <auto>
Starts the 2-phase deployment process by first setting up a stabilized broker network before deploying
the clients. With the auto flag, panda will not give any prompts, deploy phase 1, and deploys phase 2
only after monitoring phase 1 deployment is complete.
stop [time(s) ]
Stops the experiment by killing all broker and client processes on their respective nodes after a certain
period of time from now. If time is not specified, then it means now.
get <logs | errors>
• logs Retrieves the log files from remote machines and store them into a local directory called
as LOGS-<current date>.
• errors Grep for ERROR messages in Exception* log files under the build directory. No log
files are retrieved in doing so.
auto [URL to tarball ]
Performs all steps in one shot so you can sit back and relax, drink a coffee and eat a bun while waiting.
These steps include:
15
1. install
2. upload
3. deploy
The following can be entered into both the console and the simulation file. If entered onto the console,
then PANDA assumes that the node on which the broker/client runs is already set up and contains the
desired PADRES build. In short, inputs entered onto the console are like loading an input from the file and
automatically calling the start command.
Note: Commands (i.e. ADD, etc.) are NOT case-sensitive.
Note: ADD addresses should take the form of IP address and port number(s). For example, 10.0.0.1:1099.
Or 10.0.0.2:45045/21979/1099
Tip: Start all your brokers at time 0s, then your clients ¿ 0s to allow PANDA to freeze your client
deployment time until all brokers have started and neighbor links estabilshed.
<time(s)> ADD <id> <nodeIPaddr> startbroker -uri <broker uri> -n <neighbor1,neighbo
...
• Adds a broker with the given broker ID at the indicated machine with limited JVM memory.
• e.g.: 0.0 ADD B1 10.0.1.2 bin/startbroker -uri socket://10.0.1.2:21979/B1 -n socket://10.0.1.1:
<time(s)> ADD <id> <nodeIPAddr> startSQpublisher.sh -i <id> -s <symbol1>/<symbol2>/
-r <rate1>/<rate2>/... -b <broker uri> -d <delay before first publish>
• Adds a publisher at the indicated machine’s IP address according to the following setup parameters.
If more than one symbol is provided, separated by /, then each symbol must have a corresponding
publishing rate. In this case, the publisher will publish more than one stockquote symbol publication
set.
• e.g.: 0.11 ADD P0 10.0.1.10 demo/bin/stockquote/startSQpublisher.sh -i P0 -s NXTL/JDSU/SCON
-r 43.8/24.8/14.6 -d 0 -b socket://10.0.1.1:21979/B1
<time(s)> ADD <id> <nodeIPAddr> startSQsubscriber.sh -i S0 -s "<subscription1>/<sub
-b <broker uri>
• Adds a subscriber at the indicated machine’s IP address according to the following setup parameters.
The subscriber can issue multiple subscriptions if provided with more than one subscription, each
separated by /.
• e.g.: 637.86 ADD S0 10.0.1.10 demo/bin/stockquote/startSQsubscriber.sh -i S0 -s "[class,eq,’STO
-b socket://10.0.1.2:21979/B1"
<time(s)> REMOVE <id> <nodeIPAddr> Removes a process with the given id by killing its process on the remote machine.
7
The PADRES Monitor
The PADRES Monitor is a specialized PADRES client capable of graphically displaying the overlay topology. More precisely, the monitor displays PADRES brokers, clients, and their interconnections. It develops
the view of a overlay by connecting to a broker in the federation and then subscribing to BROKER INFO messages published by individual brokers. It uses the information received in these publications to construct
and graphically display the network topology.
16
7.1
Basics – Getting Started
In order to view a PADRES federation, the client must first connect to a broker in the federation. This can
be done as follows.
Connecting to a Federation
1. In the PADRES menu bar, click Main → Connect to Federation...
2. In the ensuing pop-up window, enter the hostname (i.e. localhost) or IP address in the Hostname field,
and the port number in the Port field.
3. Click OK.
A PADRES federation should now appear on screen. Note that cyan nodes represent brokers and blue
nodes represent clients. Edges represent connections between brokers and clients, and between brokers.
To disconnect from the federation, click Main → Disconnect from Federation.
7.2
Advanced Features
The monitor supports certain operations on a broker or the entire federation. All features can be invoked
from the Monitor menu bar. Descriptions of each of the menu items are listed in Tables 3, 4, and 5.
Menu Item
Connect to Federation...
Disconnect Federation...
Refresh Federation
Apply Layout
Global Failure Detection
Show Edge Message Counter
Hide Edge Message Counter
Edge Throughput Indicator
[ON/OFF/RESET]
Exit
Description
Connect to a PADRES federation and graphically display the network topology.
Disconnect from PADRES federation without exiting the Monitor.
Refresh the graphical display to ensure it is up-to-date.
Execute one of seven algorithms on the graphical display to
change arrangement of nodes.
Enable/disable the global failure detection functionality of
PADRES. When enabled, the monitor graphically indicates halted
brokers and broken links in the federation.
Display a message counter per link. The counters increment as
messages traverse the links.
Hide all message counters.
Enable, disable, and reset the edge throughput indicator. When
enabled, edges in graphical display will increase in thickness as
messages traverse the links.
Exit the monitor
Table 3: Main menu items.
Note, most of the features in the Broker menu (Table 4) are only available when a broker is selected. A
broker can be selected by clicking on a cyan node in the graphical display.
7.3
Monitor Demos
Monitor features can be demonstrated by executing the Historic database and Failure Detection demos.
17
Menu Item
Stop Broker...
Resume Broker...
Trace PUB Message...
Trace SUB Message...
Untrace Message...
Set of Adv...
Set of Sub...
Properties...
Failure Detection...
Trace by ID...
Description
Manually stop selected broker.
Resume a stopped broker.
Trace specific publication messages as they traverse the federation.
Trace specific subscription messages as they traverse the federation.
Cancel tracing of messages.
View selected broker’s set of advertisements.
View selected broker’s set of subscriptions.
View selected broker’s system properties.
Set selected broker’s failure detection properties. In the popup
menu that appears, Heartbeat properties can be configured. Heartbeats are small messages sent between brokers that facilitate failure detection.
Trace publications as they traverse the network by entering the
application name of the deployment.
Table 4: Broker menu items.
Menu Item
Batch Message...
Batch Message Incremental...
Description
Inject publications, subscriptions, and advertisements as a batch
job from a text file.
Inject publications, subscriptions, and advertisements one-by-one
as a batch job from a text file.
Table 5: First Broker menu items.
8
PADRES Log Files
There is a detailed logging system in the PADRES design. By default, the system logs only the error and
exceptions. But the level of logging can be tuned by a configuration file.
8.1
Configuring PADRES Logs
PADRES uses the log4j.properties file to configure the logging of information from PADRES components. At present, there is no command line option available to specify a user-defined configuration file for
PADRES logging engine. Useful set of configuration options are as follows. Note that only the logging
directory parameter can be changed using a command line option and this command line option is to be
used with the startbroker (Section 4.2) and startclient (Section 5.3) commands. Other parameters do
not have any command line options.
Logging Directory: The directory path name where the log files are to be placed.
In configuration file: log.dir
Command line option: -ll
Available values: a directory pahtname
Default value: /.padres/logs/
Timestamp in log file name: This adds a time stamp to the log file names. It is only useful for testing the
18
system (see the PADRES developers guide.)
In configuration file: time.in.filename
Available values: ON, OFF
Default value: OFF
Basic log level: This parameter defines the basic log level of the system. Any classes (see below) requesting
logs below this level will not create any output.
In configuration file: log4j.rootLogger
Available values: ERROR, WARN, INFO, DEBUG (this is the order of priority.)
Default value: WARN
Log levels of the PADRES classes: The log levels of the PADRES classes. There is one line for each class
that requires logging. To enable the logging on one class, the log level in the line has to be greater or
equal to the log level of the basic log level (see above.)
In configuration file: log4j.logger.<ClassName>
Available values: ERROR, WARN, INFO, DEBUG
Default value: INFO
9
PADRES Language
In this section, we give a short description of the basics of PADRES messages, and leave the details of the
format of advertisements, subscriptions, and publications to subsequent sections. Predicates in padres are
in the form of [attributeName,op,arg] triples which define conditional statements. A predicate is evaluated
as true with an attribute value pair [attributeName,value], whenever the attributeNames are identical and
application of the operator on the (value,arg) is evaluated as true. Attribute names are strings, but attribute
values can have different data types. Currently, PADRES supports string, and numerical data types. Numerical values can either be integer, float, or double. The operators (op) that can be applied to these types are
listed in the table that follows:
Data type
String
Numerical
Supported operators
eq, str-lt, str-le, str-gt, str-ge, neq, str-prefix,
str-contains, str-postfix, and isPresent
=, <, <=, >, >= =, and isPresent
Table 6: PADRES language operators.
PADRES supports a special isPresent operator for all data types. This operator is used to say whether
an attribute has taken on any value or not. For example the following predicate will be matched with any
value associated with the attribute price, as long as that value is a number, i.e., the matched value should be
of the same type as the arg value in the predicate.
[price,isPresent,0]
On the other hand
[price,isPresent,’twenty’]
maches any associated value of type String for attribute price.
19
9.1
PADRES Message Format
Messages can have three different types:
• Advertisements
• Subscriptions
• Publications
Every message in PADRES should have a fixed attribute class, of type String.
Format of Advertisements
An advertisement is a list of comma-separated predicates. The advertisement defines all the attributes that
can possibly appear in future publications. In fact, valid publications use all or subset of the attributes
defined in an advertisement. An example is provided below:
a [class,eq,’stock’],[name,eq,’IBM’],[price,>,50]
Format of Subscriptions
The format of atomic subscription is the same as that of an advertisement:
s [class,eq,’stock’],[name,eq,’IBM’],[price,>,60]
However PADRES supports composite subscriptions as well. A composite subscription consists of
atomic subscriptions connected by logical operators (“&” or “||”). Variables are allowed as well. For
example:
(1) cs {{[class,eq,’stock’],[name,eq,’IBM’],[price,>,50]}&
{[class,eq,’stock’],[name,eq,’HP’],[price,>,40]}}
(2) cs {{[class,eq,’stock’],[name,eq,’IBM’],[price,>,50]}||
{[class,eq,’stock’],[name,eq,’HP’],[price,>,40]}}
The first composite subscription is satisfied when the price of IBM stock is greater than 50 AND the HP
stock price is greater than 40. The second subscription is satisfied when the stock price of IBM is greater
than 50 OR the price of HP stock is greater than 40.
Cross references between atomic portions of composite subscriptions is also supported. For example:
cs {{[class,eq,’stock’],[name,eq,$S$X],[price,<,50]}&
{[class,eq,’stock’],[name,eq,$S$X],[price,>,40]}}
is satisfied when a company’s stock is between (40,50). The $S indicates that the following variable $X
is of type string. Similarly, $I$Y means that variable $Y is an integer.
Format of Publication
A publication is conjunction of [attribute,value] pairs.
p [class,’stock’],[name,’IBM’],[price,45]
20
9.2
FAQ
Is the below publication example correct?
[class,stock],[name,’IBM’],[price,45].
No. “stock” should be quoted, since it is a string as [class,’stock’]
Can a value be non-existant in a publication?
No, each [attribute, value] pair must have a value. Hence, the following publication is invalid.
[class,’foot’],[product,’’],[price,],[color,’gree’]
What’s the syntax for the use of isPresent?
isPresent is an operator for subscriptions and advertisements. It is used exactly in the same way
normal operators are used. The arg element in the predicates identify the data type associated with
the attribute. isPresent does not care about the concrete value in a publication. The attribute could
be any value as long as the attribute appears in the publication with the right data type. For instance
[price,isPresent,’twenty’] will not be matched by an attribute price with an associated value
20, or any other numerical value, but will be matched by an attribute price with any value of type
string.
How do we then distinguish between a double and a float value?
We infer the type of an attribute from its value in a subscription or an advertisement. For numbers,
PADRES can distinguish integer (short, int) from (double, float). It cannot distinguish double from
float. Currently, all non-integer numbers are doubles.
21