1
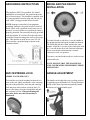
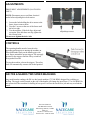
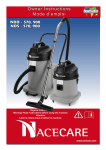
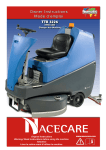
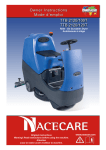
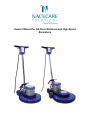
Owners Manual for NA Floor Machines and High Speed
Burnishers
SERVICE INFORMATION
To obtain consistent performance over the
lifetime of your NaceCare equipment, read
through these instructions and save them for
future reference.
Do not leave the floor machine when plugged in.
Make sure that the machine unplugged when not
in use, and before servicing or changing the
brushes or pads.
Do not allow the machine to be used by a child.
Close attention is necessary when used near
children. Do not leave the machine plugged in
while unattended.
Use only as described in this manual.
The model and serial number can be found
on the nameplate located on the side of the
handle. If you require service, or need to
make an inquiry about the machine, please
have this information ready when calling.
IMPORTANT SAFETY
INSTRUCTIONS
When using an electrical appliance, basic
precautions should always be followed, including
the following:
Warning: Electric shock
can cause serious injury
or be fatal. Please read
the following
instructions on the use
and operation of these
machines.
Your floor machine is equipped with a safety
switch lock and power switch triggers
designed for your safety. Do not attempt to
bypass or defeat the safety switch lock.
Never use any device to lock the power
switch in the “ON” position.
Do not use the machine with a damaged cord or
plug. If the machine is not operating as it should,
discontinue use immediately and contact a
service center.
When operating, pay close attention to the
location of the electrical cord. Do not let the
brush/pad driver come into contact with the
electrical cord.
Do not pull the cord around sharp corners or
edges. Keep the cord away from heated surfaces.
Connect to properly grounded outlet only.
Do not use extension cords or outlets with
inadequate current carrying capacity.
Turn off all controls before unplugging.
Do not unplug the machine by pulling on the
cord.
Do not handle the plug or floor machine with wet
hands.
Use extra care when working near stairs
Do not use with or near flammable or
combustible liquids or gasses.
Use indoors only
Always keep your work area well lighted.
GROUNDING INSTRUCTIONS
BRUSH AND PAD DRIVER
INSTALLATION
This appliance MUST be grounded. If it should
malfunction or break down, the ground reduces the
risk of electric shock. This machine is supplied with
a 3 prong grounded electrical plug and can only be
used with a 3 prong grounded electrical outlet.
NOTE: Improper connection of an equipment
grounding conductor can result in risk of electrical
shock. Check with a qualified electrician or service
person if you are in doubt as to whether the outlet is
properly grounded. Do not modify the plug provided
with the machine. If it will not fit in the outlet, have
a qualified electrician change the outlet to the proper
type. This machine is made for use on a 120 volt
circuit and has a grounded plug as shown in the
illustration below.
To install a brush or pad driver, leave the handle in
the upright position and tip the machine backwards.
The brush and pad driver both attach in the same
manner. Align the 3 cut-outs on the clutch plate with
the 3 cut-outs on the drive hub. Push the brush/pad
driver on to the drive hub and turn it counter
clockwise to lock it in position.
To remove, turn the brush/pad driver clockwise and
pull towards you.
NOTE: ENSURE THAT THE MACHINE IS
UNPLUGGED WHILE PERFORMING THESE
OPERATIONS
PAD CENTERING LOCK
HANDLE ADJUSTMENT
MODEL NA1520/2020 ONLY
To install the pad, tip the machine backwards so it
rests on the rear wheels and handle. After centering
the pad on the pad holder, insert the pad centering
lock and press until you hear it snap in place. To
remove the clamp, press the clip together and pull
the centering lock out. When performing this
operation, make sure that the machine is
unplugged.
The handle can be adjusted to any working position
by pushing up on the handle lock. Then position the
handle to the desired position and push the handle
lock down to lock the handle again.
ADJUSTMENTS
DRIVE BELT ADJUSTMENTS (NA1520/2020
ONLY)
NOTE: Disconnect power cord from electrical
outlet before adjusting drive belt tension
1. Loosen the bolts holding the drive motor to the
frame, do not remove them
2. Turn the 2 screws at the rear of the frame until
the belt is tight
3. Test the machine. If the belt slips, adjust and
test again. If the belt does not slip, tighten the
drive motor bolts.
Do not over tighten the drive belt.
CONTROLS
The operating handle must be lowered to the
operating position prior to turning the machine on.
Place both hands firmly on the handle grips with
your fingers around the power triggers. Do not apply
pressure to the triggers until the safety switch has
been pushed forward.
To stop the machine, release the triggers. The safety
lock will automatically return to the locked position
NA17DS & NA20DS TWO SPEED MACHINES
Any model number ending with DS is a dual speed machine (175/300 RPM) designed for scrubbing or
buffing. The toggle switch located on the side of the handle will change the speed from 175 to 300 RPM. Do
not operate this floor machine for buffing in low speed. It will not do an effective job and may overload the
motor.
NaceCare Solutions
1205 Britannia road east
Mississauga, Ontario, Canada
L4W 1C7
Toll Free: 1 800 387 3210
Toll Free Fax: 1 800 709 2896