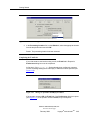
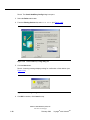
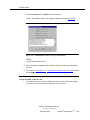
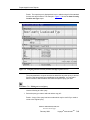
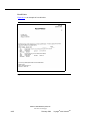
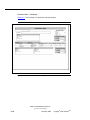
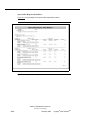
1
Voyager® with UnicodeTM
Reporter User’s Guide
Endeavor Information Systems, Inc.
This document contains proprietary information of
Endeavor Information Systems, Inc. and is not to be disclosed or used
except in accordance with applicable agreements.
Copyright © 2004 Endeavor Information Systems, Inc.
Unpublished and Not for Publication
All Rights Reserved
Copyright © 2004 Endeavor Information Systems, Inc.
This material is protected by the copyright laws of the United States and other countries. It may not be
reproduced, distributed, or altered in any fashion by any entity (either internal or external to Endeavor
Information Systems), except in accordance with applicable agreements, contracts or licensing.
Notice
Every effort was made to ensure that the information in this document was complete and accurate at the time
of printing. However, information is subject to change.
Trademarks
Voyager is a registered trademark of Endeavor Information Systems, Inc.
Endeavor eZConnect and WebVoyáge are trademarks of Endeavor Information Systems, Inc.
Oracle is a registered trademark of Oracle Corporation.
UNIX is a registered trademark in the United States and other countries, licensed exclusively through X/Open
Company Ltd.
WinZip is a registered trademark of Nico Mak Computing, Inc.
Microsoft, the Microsoft logo, MS, MS-DOS, Microsoft PowerPoint, Visual Basic, Visual C++, Win32, Microsoft
Windows, the Windows logo, Microsoft Notepad, Microsoft Windows Explorer, Microsoft Internet Explorer, and
Windows NT are registered trademarks and ActiveX is a trademark of the Microsoft corporation in the United
States and/or other countries.
Unicode is a registered trademark of Unicode, Inc.
Endeavor Information Systems, Inc.
See notice on first page
Contents
About This Document
•
•
•
•
•
•
•
•
•
1
Purpose
Intended Audience
Reason for Reissue
How to Use This Document
Conventions Used in This Document
Contact Information
Document Reproduction/Photocopying
How to Comment on This Document
To Submit Comments by E-mail
To Submit Comments by Fax
Customer Support Contact Information
Phone
E-mail
Fax
Customer Support Hours of Operation
xxi
xxi
xxii
xxii
xxiii
xxv
xxvi
xxvi
xxvi
xxvi
xxvi
xxvii
xxvii
xxvii
xxvii
Getting Started
•
•
•
•
•
Introduction
Prerequisite Skills and Knowledge
Before You Begin
Setting Up the Reporter Module
Installing the Reporter Module
Configuring the voyager.ini file
Messages received if the voyager.ini file is
not configured
Message received if e-mail server address
is invalid
Sites not Using E-mail for notices
First Log in to the Reporter Module
Setting the path to Access
Selecting the Processing Location
(Print Location)
1-1
1-2
1-2
1-2
1-3
1-3
1-5
1-6
1-7
1-7
1-8
1-10
Endeavor Information Systems, Inc.
See notice on first page
February 2004
Voyager® with UnicodeTM
iii
Contents
•
2
Completing the E-mail tab
Setting Up the Prepackaged Access Reports
LIBR and VGER Oracle Database Instance
(service name)
Access Report .mdb Files
Oracle client/SQL*Net
Updating the Character Set for Oracle
Configuring the Microsoft ODBC for Oracle Driver
Configuring the database links
Troubleshooting: Linking the Oracle Tables
Setting the ODBC Timeout Value
1-11
1-17
1-17
1-24
1-24
1-52
1-60
1-64
1-68
1-73
Generating Input Files to Create Reports and Notices
•
•
•
Introduction
Reporter Module Functionality Overview
Input and log files
Input files
Log files
Creating Input Files for Acquisitions
Creating Input File(s) from the Acquisitions
Module
Creating Input File(s) by Acquisitions batch
jobs - Acqjob
The Acqjob.log file
The Acquisitions Batch Jobs
Running Acquisitions Batch Jobs
Creating input files using WebAdmin Acquisitions Utilities
Creating Input Files for Cataloging
The Catjob.log File
The Cataloging batch jobs
Running cataloging batch jobs
Creating input files using WebAdmin Cataloging Utilities
Creating Input Files for Circulation
The Circjob.log file
The Circulation batch jobs
Running circulation batch jobs
2-1
2-1
2-2
2-2
2-3
2-3
2-4
2-5
2-6
2-6
2-8
2-12
2-15
2-17
2-17
2-24
2-28
2-31
2-34
2-34
2-43
Endeavor Information Systems, Inc.
See notice on first page
iv
February 2004
Voyager® with UnicodeTM
Contents
Creating input files using WebAdmin Circulation Utilities
Creating Input Files for Media Scheduling
Mediajob.log file
The Media Scheduling batch jobs
Running media scheduling batch jobs
3
2-47
2-51
2-52
2-52
2-53
Session Preferences in the Reporter Module
•
•
•
•
•
•
•
•
4
Introduction
Global Preferences
E-mail Preferences
Notices Preferences
Reports Preferences
Address Format Preferences
Forms Control Preferences
Application Forms Preferences for Acquisitions,
Cataloging, Circulation, and Media
3-1
3-2
3-7
3-9
3-11
3-15
3-17
3-18
Using Reporter
•
•
•
•
•
•
Introduction
Logging in to the Reporter Module
Building and Running Reports and Notices
Building Reports and Notices
Errors While Building Reports/Notices
Printing the Reports and Notices Processed lists
Exiting Reporter Without Running Reports
or Notices
No Reports or Notices for Selected Application
Running Reports and Notices
Processing Archive Files
Invalid Input File Version
Error Record Processing
Error file
Message file
4-1
4-1
4-3
4-7
4-7
4-10
4-10
4-11
4-11
4-13
4-16
4-17
4-18
4-18
Endeavor Information Systems, Inc.
See notice on first page
February 2004
Voyager® with UnicodeTM
v
Contents
5
Editing the Format of Reports and Notices
•
•
•
•
6
Introduction
Access names for the reports and notices
distributed with Reporter
Acquisitions Reports
Cataloging Reports
Circulation Reports
Media Booking Reports
Acquisitions Notices
Circulation Notices
Media Booking Notices
Editing the Formats of Reports and Notices
Editing Text for e-mail Notices
5-1
5-2
5-2
5-3
5-4
5-6
5-7
5-7
5-8
5-9
5-12
Common Reporter Errors
•
•
7
Introduction
Error Conditions
Failure Recovery Run
Unprocessed Report and/or Notice
Unprocessed e-mail Notices
Restoring the Server File to Run in Reporter
6-1
6-1
6-1
6-2
6-3
6-3
Prepackaged Access Reports
•
•
•
•
•
Introduction
Prepackaged Access Reports Overview
Before using Voyager’s Prepackaged Access
Reports
Voyager’s Prepackaged Access Reports
Reports and queries in the Prepackaged Access
Reports file
Using Prepackaged Access Reports
Editing Reports and Queries
Accessing the MARC "Blob"
Using the Expression Builder
7-1
7-1
7-3
7-3
7-5
7-24
7-24
7-26
7-26
Endeavor Information Systems, Inc.
See notice on first page
vi
February 2004
Voyager® with UnicodeTM
Contents
A
IN
Reports and Notices
A-1
•
A-1
A-1
A-1
A-8
A-16
A-17
A-17
A-28
A-37
A-53
Sample Reports and Notices
Sample Notices
Acquisitions Notices
Circulation Notices
Media Scheduling Notices
Sample Reports
Acquisitions Reports
Cataloging Reports
Circulation Reports
Media Booking Reports
Index
IN-1
Endeavor Information Systems, Inc.
See notice on first page
February 2004
Voyager® with UnicodeTM
vii
Contents
Endeavor Information Systems, Inc.
See notice on first page
viii
February 2004
Voyager® with UnicodeTM
Tables
1
Getting Started
1-1.
1-2.
2
Description of the keys in the E-mail stanza of the
voyager.ini file
Description of the E-mail tab
1-4
1-12
Generating Input Files to Create Reports and Notices
2-1.
Acquisition activities that create an input file on
the server
2-2. Acquisitions batch jobs
2-3. Acquisitions batch job options codes and description
2-4. Cataloging batch jobs
2-5. Cataloging batch job options codes and description
2-6. Circulation batch jobs
2-7. Exception Types and Descriptions
2-8. Circulation batch job options codes and description
2-9. Media Scheduling batch jobs
2-10. Media Scheduling batch job options codes and
description
3
2-54
Session Preferences in the Reporter Module
3-1.
3-2.
3-3.
3-4.
3-5.
3-6.
4
2-4
2-5
2-8
2-16
2-25
2-32
2-40
2-43
2-51
Description of the Global tab
Description of the E-mail tab
Description of the Notices tab
Description of the Reports tab
Description of the Address Format tab
Description of the Forms Control tab
3-2
3-8
3-10
3-12
3-15
3-17
Using Reporter
4-1.
Description of the tabs in Reporter
4-6
Endeavor Information Systems, Inc.
See notice on first page
February 2004
Voyager® with UnicodeTM
ix
Tables
5
Editing the Format of Reports and Notices
5-1.
5-2.
5-3.
5-4.
5-5.
5-6.
5-7.
Access reports contained in the acqrprts.mdb file
descriptions
Access reports contained in the catrprts.mdb file
descriptions
Access reports contained in the crcrprts.mdb file
descriptions
Access reports contained in the medrprts.mdb file
descriptions
Access reports contained in the acqnotes.mdb file
descriptions
Access reports contained in the crcnotes.mdb file
descriptions
Access reports contained in the mednotes.mdb file
descriptions
5-3
5-4
5-5
5-6
5-7
5-8
5-9
Endeavor Information Systems, Inc.
See notice on first page
x
February 2004
Voyager® with UnicodeTM
Figures
1
Getting Started
1-1.
1-2.
1-3.
1-4.
1-5.
1-6.
1-7.
1-8.
1-9.
1-10.
1-11.
1-12.
1-13.
1-14.
1-15.
1-16.
1-17.
1-18.
1-19.
1-20.
1-21.
1-22.
1-23.
1-24.
1-25.
1-26.
1-27.
1-28.
1-29.
1-30.
1-31.
1-32.
Example of the E-mail stanza in the voyager.ini file
Example of E-mail stanza
Missing E-mail server information message
No E-mail notices message
Unable to connect to e-mail server message
No E-mail notices message
Reporter’s Log in dialog box
Select Directory containing MSAccess dialog box
Preference dialog box
Message to specified E-mail Reply-To address
E-mail tab
Message to set up E-mail Reply-To address
E-mail tab
Completed E-mail tab
E-mail Address Test message
Example of the test message
E-mail send failure message
E-mail test message failed due to bad e-mail address
Unprocessed E-mail Notices message
Oracle Net8 Easy Config dialog box
Warning message
Oracle Net8 Easy Config after confirming deletion
Oracle Net 8 Easy Config dialog box
Networking Protocol list
TCP/IP Protocol list: Host Name and Port Number
The System Identifier page
Test Service Page
Connection Test dialog box
Oracle Installer
Software Asset Manager dialog box
All products selected to delete
Confirmation message to delete the Oracle products
1-4
1-5
1-5
1-6
1-6
1-7
1-9
1-9
1-11
1-11
1-12
1-13
1-14
1-14
1-15
1-15
1-15
1-16
1-16
1-18
1-18
1-19
1-20
1-20
1-21
1-22
1-22
1-23
1-25
1-25
1-26
1-27
Endeavor Information Systems, Inc.
See notice on first page
February 2004
Voyager® with UnicodeTM
xi
Figures
1-33. Oracle products being deleted
1-34. Software Asset Manager dialog box showing no
products installed
1-35. Confirmation message seen before exiting Oracle
Installer
1-36. Oracle9i Server - Autorun dialog box
1-37. Oracle Universal Installer: Welcome dialog box
1-38. Oracle Universal Installer: File Locations dialog box
1-39. Oracle Universal Installer: Available Locations dialog box
1-40. Oracle Universal Installer: Installation Types dialog box
1-41. Oracle Universal Installer: Available Product
Components dialog box
1-42. Oracle Universal Installer:Component Locations dialog
box
1-43. Oracle Universal Installer: Summary dialog box
1-44. Oracle Universal Installer: Install dialog box
1-45. Oracle Universal Installer: Configuration Tools dialog box
1-46. Oracle Net Configuration Assistant: Welcome dialog box
1-47. Oracle Net Configuration Assistant: Welcome dialog
box: Net Service Names
1-48. Oracle Net Configuration Assistant: Net Service Name
Configuration, Database Version dialog box
1-49. Oracle Net Configuration Assistant: Net Service Name
Configuration, Service Name dialog box
1-50. Oracle Net Configuration Assistant: Net Service Name
Configuration, Select Protocols dialog box
1-51. Oracle Net Configuration Assistant: Net Service Name
Configuration, TCP/IP Protocol dialog box
1-52. Oracle Net Configuration Assistant: Net Service Name
Configuration, Test dialog box
1-53. Oracle Net Configuration Assistant: Net Service Name
Configuration, Connecting dialog box
1-54. Change Login dialog box
1-55. Oracle Net Configuration Assistant: Net Service Name
Configuration, Net Service Name dialog box
1-56. Oracle Net Configuration Assistant: Net Service Name
Configuration, Another Net Service Name? dialog box
1-57. Oracle Net Configuration Assistant: Net Service Name
Configuration Done dialog box
1-58. Oracle Net Configuration Assistant: Done dialog box
1-27
1-28
1-28
1-29
1-30
1-31
1-32
1-33
1-34
1-35
1-36
1-37
1-38
1-39
1-40
1-41
1-42
1-43
1-44
1-45
1-46
1-46
1-47
1-48
1-49
1-50
Endeavor Information Systems, Inc.
See notice on first page
xii
February 2004
Voyager® with UnicodeTM
Figures
1-59.
1-60.
1-61.
1-62.
1-63.
1-64.
1-65.
1-66.
1-67.
1-68.
1-69.
1-70.
1-71.
1-72.
1-73.
1-74.
1-75.
1-76.
1-77.
1-78.
1-79.
1-80.
1-81.
1-82.
1-83.
1-84.
1-85.
1-86.
1-87.
1-88.
1-89.
1-90.
1-91.
1-92.
1-93.
Oracle Universal Installer: End of Installation dialog box
Confirm exiting the Oracle Universal Installer message
Run dialog box
Registry Edit dialog box
HKEY_LOCAL_MACHINE folder expanded
SOFTWARE folder expanded
ORACLE folder expanded
NLS_LANG display
Edit String dialog box with incorrect NLS_LANG data
Edit String dialog box with new NLS_LANG value
AMERICAN_AMERICA.US7ASCII
NLS_LANG edited to value
AMERICAN_AMERICA.US7ASCII
The ALL_HOMES folder expanded
ID0 folder is selected and right panel displays
NLS_LANG
ID0 folder, NLS_LANG value edited
ID1 folder expanded, NLS_LANG value displays
HOME0 subfolder expanded, NLS_LANG value displays
ODBC Data Source Administrator dialog box
Create New Data Source dialog box
Microsoft ODBC for Oracle Setup dialog box
Completed Microsoft ODBC for Oracle Setup dialog box
ODBC Data Source Administrator with driver set up
Access Reports: Database dialog box
Build database links to Voyager dialog box
Build database links box after tables have been linked
Build Database Links to Voyager process stopped
due to errors
File menu> Get External Data> Link Tables
Files of Type field options
Select Data Source dialog box
Machine Data Source tab with Voyager selected
Microsoft ODBC for Oracle Connect dialog box
Link Tables
Build Database Links to Voyager
Build Database Links to Voyager during linking
Selecting Properties from the menu
Query Properties dialog box
1-51
1-51
1-52
1-53
1-53
1-54
1-55
1-56
1-56
1-57
1-57
1-58
1-58
1-59
1-59
1-60
1-61
1-62
1-62
1-63
1-64
1-65
1-66
1-67
1-69
1-69
1-70
1-70
1-71
1-71
1-72
1-72
1-73
1-74
1-75
Endeavor Information Systems, Inc.
See notice on first page
February 2004
Voyager® with UnicodeTM
xiii
Figures
1-94. ODBC Timeout value at zero
2
Generating Input Files to Create Reports and Notices
2-1.
2-2.
2-3.
2-4.
2-5.
2-6.
2-7.
2-8.
2-9.
2-10.
2-11.
2-12.
2-13.
2-14.
2-15.
2-16.
2-17.
2-18.
2-19.
2-20.
3
1-75
Display when running Acquisitions batch job (Acqjob 2)
Prompt for the number of the batch job to run
Prompt for the location number
Prompt for the ledger number
The batch job is completed
WebAdmin Main Page
WebAdmin Acquisitions Reports and Notices page
Job options page
Job Scheduler Page after submitting Acquisitions job
number two using WebAdmin
Display when running Cataloging batch job (Catjob 5)
Catrprts.xxxx.inp file with record type 05 after running
Catjob 5
WebAdmin main page
WebAdmin Cataloging Reports and Processes page
Dialog boxes requesting start and end dates
Job Scheduler Page after submitting Catjob 9 using
WebAdmin
Display when running Circulation batch job (Circjob 12)
WebAdmin main page
WebAdmin Circulation Reports and Notices page
Job Scheduler Page after submitting Circjob 12 using
WebAdmin
Display when running Media Scheduling batch job
(Mediajob 2)
2-9
2-10
2-10
2-11
2-11
2-12
2-13
2-14
2-15
2-27
2-27
2-29
2-30
2-31
2-31
2-45
2-47
2-49
2-50
2-55
Session Preferences in the Reporter Module
3-1.
3-2.
3-3.
3-4.
Preferences dialog box - Global tab
Select Directory dialog box
No E-mail notices message
Preferences dialog box - E-mail tab
3-2
3-6
3-7
3-7
Endeavor Information Systems, Inc.
See notice on first page
xiv
February 2004
Voyager® with UnicodeTM
Figures
3-5.
3-6.
Preferences dialog box - Notices tab
Select Directory dialog box to change the Notices
Archive Path
3-7. Preferences dialog box - Reports tab
3-8. Select Directory dialog box to change the Reports
Archive Path
3-9. Address Format tab of the Preferences dialog box
3-10. Preferences dialog box - Forms Control tab
3-11. Preferences dialog box - Acquisitions Forms tab
3-12. Acquisitions form with drop down list of forms available
4
3-11
3-12
3-14
3-15
3-17
3-19
3-20
Using Reporter
4-1.
4-2.
4-3.
4-4.
4-5.
4-6.
4-7.
4-8.
4-9.
4-10.
4-11.
4-12.
4-13.
4-14.
4-15.
5
3-9
Voyager Reporter Login dialog Box
Voyager Reporter dialog box
Acquisitions tab
Cataloging tab
Circulation tab
Media Scheduling tab
The Circulation tab
Circulation tab after building reports and notices
No Reports or Notices for Selected Applications
Reporter dialog box after building Circulation reports
and notices
Running of Circulation reports and notices complete
Reporter dialog box - selecting Archives
Archives Selection List dialog box
Reporter ready to process archived overdue notice
Incorrect Input File Version message
4-2
4-3
4-4
4-4
4-5
4-5
4-8
4-9
4-11
4-12
4-13
4-14
4-15
4-16
4-17
Editing the Format of Reports and Notices
5-1.
5-2.
5-3.
Access reports contained in the acqrprts.mdb file
Access reports contained in the catrprts.mdb file
Access reports contained in the crcrprts.mdb file
5-2
5-4
5-5
Endeavor Information Systems, Inc.
See notice on first page
February 2004
Voyager® with UnicodeTM
xv
Figures
5-4.
5-5.
5-6.
5-7.
5-8.
5-9.
5-10.
5-11.
6
5-13
Failure Recovery Run message
Unprocessed Report and/or Notice Items message
Unprocessed E-Mail Notices message
6-2
6-2
6-3
Prepackaged Access Reports
7-1.
7-2.
7-3.
7-4.
7-5.
7-6.
7-7.
A
5-6
5-7
5-8
5-9
5-10
5-11
5-12
Common Reporter Errors
6-1.
6-2.
6-3.
7
Access reports contained in the medrprts.mdb file
Access reports contained in the acqnotes.mdb file
Access reports contained in the crcnotes.mdb file
Access reports contained in the mednotes.mdb file
Overdue Notice selected to be modified
Design view of the Overdue Notice
Common section of the NoticeEmail.cfg
Example of the O_D_Notice section of the
NoticeEmail.cfg
Sample of adding conversion function to an
Access query
Reports list in Access (not all reports shown)
Queries list in Access (not all queries shown)
Designing the Item Count by Location and Type report
in Access
Designing the Item Type by Location and Type query
in Access
Accessing the Expression Builder dialog box
The Expression Builder dialog box
7-2
7-4
7-5
7-25
7-26
7-27
7-27
Reports and Notices
A-1.
A-2.
A-3.
Purchase Order Cancellation Notice
Return Notice
Canceled Serial Claim Notice
A-2
A-3
A-4
Endeavor Information Systems, Inc.
See notice on first page
xvi
February 2004
Voyager® with UnicodeTM
Figures
A-4.
A-5.
A-6.
A-7.
A-8.
A-9.
A-10.
A-11.
A-12.
A-13.
A-14.
A-15.
A-16.
A-17.
A-18.
A-19.
A-20.
A-21.
A-22.
A-23.
A-24.
A-25.
A-26.
A-27.
A-28.
A-29.
A-30.
A-31.
A-32.
A-33.
A-34.
A-35.
A-36.
A-37.
A-38.
A-39.
A-40.
A-41.
Order Claim Notice
Serial Claim Notice
Voucher/Check Request
Cancellation of Recall Request
Fine and Fee Notice
Item Available Notice
Overdue Notice
Recall Notice
Recall Overdue Notice
Statement of Fines and Fees
Courtesy Notice
Overdue Notice
Purchase Order
Purchase Order - Landscape
Copy Rollover Status Report
Fund Rollover Status Report
Global Open Orders Report
Open Orders Report
Open Orders Report: Before Rollover
Open Orders Report After Rollover
Fund Snapshot Report
Fund Snapshot Report Before Rollover
Fund Snapshot Report After Rollover
Unauthorized Subject Headings
Unauthorized Name Headings
Unauthorized Title Headings
Unauthorized Name/Title Headings
856 Link Failure Report
Duplicate Authority Records
See References without Corresponding Authority Report
See References Authorized in Another Authority Record
See References with Linked Bibliographic Records
Circulation Statistics
Distribution Item Order List
Global Circulation Statistics
Hold Shelf Expired Report
Item Related Exceptions Report
Missing In Transit Report
A-5
A-6
A-7
A-8
A-9
A-10
A-11
A-12
A-13
A-14
A-15
A-16
A-17
A-18
A-19
A-20
A-21
A-22
A-23
A-24
A-25
A-26
A-27
A-28
A-29
A-30
A-31
A-32
A-33
A-34
A-35
A-36
A-37
A-38
A-39
A-40
A-41
A-42
Endeavor Information Systems, Inc.
See notice on first page
February 2004
Voyager® with UnicodeTM
xvii
Figures
A-42.
A-43.
A-44.
A-45.
A-46.
A-47.
A-48.
A-49.
A-50.
A-51.
A-52.
A-53.
A-54.
A-55.
Patron Related Exceptions
A-43
Reserve Items Active by Call Number
A-44
Reserve Items Active by Title
A-45
Reserve Items Active by Course Name and Call Number A-46
Reserve Items Active by Course Name and Title
A-47
Reserve Items Expired by Call Number
A-48
Reserve Items Expired by Title
A-49
Reserve Items Expired by Course Name and Call Number A-50
Reserve Items Expired by Course Name and Title
A-51
Transaction Related Exceptions
A-52
Media Booking Equipment Inventory
A-53
Media Booking Statistics
A-54
Media Booking Exceptions
A-55
Media Booking Charge Statistics
A-56
Endeavor Information Systems, Inc.
See notice on first page
xviii
February 2004
Voyager® with UnicodeTM
Procedures
1
Getting Started
1-1. Configuring the [E-mail] stanza in the voyager.ini file
1-2. Setting the path to Access
1-3. Selecting the Processing Location (Print Location)
1-4. Completing the E-mail tab in Reporter’s Preferences
1-5. Removing the LIBR Oracle Service Name
1-6. Adding your VGER Oracle Service Name
1-7. Uninstalling the Oracle8 client
1-8. Installing the Oracle9i client
1-9. Updating the Character Set for Oracle
1-10. Configuring ODBC Control Panel Settings
1-11. Configuring the database links in Access
1-12. Troubleshooting: Linking the Oracle Tables
1-13. Changing the ODBC Timeout value
2
Generating Input Files to Create Reports and Notices
2-1.
2-2.
2-3.
2-4.
2-5.
2-6.
2-7.
2-8.
3
1-4
1-8
1-10
1-13
1-17
1-19
1-24
1-29
1-52
1-61
1-64
1-68
1-74
Running acquisitions batch jobs at the command line
Running Pacqjob 2 in a step-by step manner
Running Acquisitions batch jobs using WebAdmin
Running cataloging batch jobs at the command line
Running cataloging batch jobs using WebAdmin
Running circulation batch jobs at the command line
Running circulation batch jobs using WebAdmin
Running media scheduling batch jobs at the command
line
2-9
2-10
2-13
2-26
2-29
2-44
2-48
2-54
Session Preferences in the Reporter Module
3-1.
3-2.
3-3.
3-4.
3-5.
Setting up Global preferences
Setting up e-mail preferences
Setting up Notices preferences
Setting up reports preferences
Setting up Address Formats preferences
3-6
3-8
3-10
3-14
3-16
Endeavor Information Systems, Inc.
See notice on first page
February 2004
Voyager® with UnicodeTM
xix
Procedures
3-6. Setting up Forms Control preferences
3-7. Changing the form on which a report or notice prints
4
Using Reporter
4-1.
4-2.
4-3.
4-4.
4-5.
5
Logging in to the Reporter module
Building reports and notices
Running reports and notices
Processing Archive Files
Correcting errors and running error record processing
5-9
5-13
Common Reporter Errors
6-1. Restoring the Server File to Run in Reporter
7
4-2
4-8
4-12
4-14
4-19
Editing the Format of Reports and Notices
5-1. Editing a report or notice format using Microsoft Access
5-2. Editing the text in the NoticeEmail.cfg
6
3-18
3-19
6-4
Prepackaged Access Reports
7-1. Editing an Access Report
7-2. Editing an Access Query
7-24
7-25
Endeavor Information Systems, Inc.
See notice on first page
xx
February 2004
Voyager® with UnicodeTM
About This Document
Purpose
This document provides information regarding Voyager’s® Reporter module and
Voyager’s Prepackaged Access Reports.
The Reporter module allows users to produce standard reports and notices, such
as overdue notices or circulation reports. Reporter works in conjunction with
server batch jobs and Microsoft® Access to produce these reports and notices.
Voyager’s Prepackaged Access Reports are additional statistical reports. They
are Access reports and are not created using the Reporter module.
Intended Audience
This document is intended for Voyager customers who want to use the Reporter
module and/or the Prepackaged Access Reports.
Endeavor Information Systems, Inc.
See notice on first page
February 2004
Voyager® with UnicodeTM
xxi
Reason for Reissue
The following changes in the functionality of the Reporter module are discussed in
this User’s Guide.
• UTF-8 encoded database columns are converted to the Latin-1 format
before being exported to a SIF file. Therefore, there are no changes to any
of the SIFs and the display of data in reports and notices is in Latin-1.
• Prepackaged access reports changes
• A function to convert UTF-8 data into UTF-16 data is included in the
various queries.
• When creating or modifying queries the user must include a function
to UTF-8 to UTF-16 for display in Microsoft Access.
• Added brief instructions on how to change the ODBC Timeout value.
• Instructions on how to configure the voyager.ini file to enable e-mailing
notices is included.
• The database instance name has been changed to VGER. The old name,
LIBR must be deleted, see Procedure 1-5, Removing the LIBR Oracle
Service Name. The new name must be added, see Procedure 1-6, Adding
your VGER Oracle Service Name, Procedure 1-10, Configuring ODBC
Control Panel Settings, and Procedure 1-11, Configuring the database
links in Access.
• The naming convention for the username has changed. See The naming
convention for the username is: ro_xxxdb, where xxxdb is the database
name. The password is not standard and is provided by EISI at the time of
the upgrade.
• To use the Prepackaged Access Reports users need to install the Oracle9i
client and configure the Microsoft ODBC for Oracle driver. See Oracle
client/SQL*Net and Configuring the Microsoft ODBC for Oracle Driver.
• For correct display users must update the character set for Oracle®. See
Updating the Character Set for Oracle.
• Added Table 2-7 to the Circulation batch job section, Circjob 24,
Transaction Exceptions, describing the exception types.
How to Use This Document
This document consists of the following chapters:
Chapter 1
“Getting Started.” This chapter describes how to install and
configure Voyager’s Reporter Module and Voyager’s
Prepackaged Access Reports.
Endeavor Information Systems, Inc.
See notice on first page
xxii
February 2004
Voyager® with UnicodeTM
About This Document
Chapter 2
“Generating Input Files to Create Reports and Notices.” This
chapter provides information on how the Reporter module works
and instructions on how to generate the input file to be used by
the Reporter module to the produce reports and notices
necessary for the functioning of your library.
Chapter 3
“Session Preferences in the Reporter Module.” This chapter
covers how to set up preferences in Reporter.
Chapter 4
“Using Reporter.” This chapter provides instructions on how to
use Reporter.
Chapter 5
“Editing the Format of Reports and Notices.” This chapter
provides instructions on how to edit the format of reports and
notices.
Chapter 6
“Common Reporter Errors.” This chapter covers common errors
experienced in the Reporter module and their resolutions.
Chapter 7
“Prepackaged Access Reports.” This chapter provides a list of
these reports.
Appendix A
“Reports and Notices.” This appendix contains samples of the
reports and notices.
Index
The Index is an alphabetical, detailed cross-reference of topics
about which this document contains information.
Conventions Used in This Document
The following conventions are used throughout this document:
• Names of commands, variables, stanzas, files, and paths (such as
/dev/tmp), as well as selectors and typed user input, are displayed in
constant width type.
• Commands or other keyboard input that must be typed exactly as
presented are displayed in constant width bold type.
• Commands or other keyboard input that must be supplied by the user are
displayed in constant width bold italic type.
• System-generated responses such as error messages are displayed in
constant width type.
• Variable portions of system-generated responses are displayed in
constant width italic type.
• Keyboard commands (such as Ctrl and Enter) are displayed in bold.
• Required keyboard input such as “Enter vi” is displayed in constant
width bold type.
Endeavor Information Systems, Inc.
See notice on first page
February 2004
Voyager® with UnicodeTM
xxiii
• Place holders for variable portions of user-defined input such as ls -l
filename are displayed in italicized constant width bold type.
• The names of menus or status display pages and required selections from
menus or status display pages such as “From the Applications drop-down
menu, select System,” are displayed in bold type.
• Object names on a window’s interface, such as the Description field, the
OK button, and the Metadata tab, are displayed in bold type.
• The titles of documents such as ENCompass Web Client User’s Guide are
displayed in italic type.
• Caution, warning, and important notices are displayed with a distinctive
label such as the following:
NOTE:
Extra information pertinent to the topic.
!
IMPORTANT:
Information you should consider before making a decision or configuration.
!
CAUTION:
Information you must consider before making a decision, due to potential
loss of data or system malfunction involved.
TIP:
Helpful hints you might want to consider before making a decision.
RECOMMENDED:
Preferred course of action.
OPTIONAL:
Indicates course of action which is not required, but may be taken to suit your
library’s preferences or requirements.
Endeavor Information Systems, Inc.
See notice on first page
xxiv
February 2004
Voyager® with UnicodeTM
About This Document
Contact Information
To contact Endeavor Information Systems, Inc. use the following numbers:
North America (Corporate Headquarters)
Endeavor Information Systems Inc.
1350 E. Touhy Avenue
Suite 200 East
Des Plaines, IL 60018
United States
800-762-6300 (toll free from within N. America only)
[email protected]
International Customers
Phone: 800-4444-3474
You must first dial the US access code (for example, 00 for the
United Kingdom and New Zealand, 0011 for Australia), then the
number listed above. You do not need to put a 1 in front of the 800
number.
European Office
Endeavor Information Systems Inc.
Harcourt Place
32 Jamestown Road,
Camden
London NW1 7BY
+44 (0)20 7424 4400 (Voice)
+44 (0)20 7424 4409 (Fax)
[email protected] (E-Mail)
Australian Office
Endeavor Information Systems Inc.
Suite 129, 85 Grattan Street
Carlton. Vic. 3053
Australia
08 8336 9474 (Voice- from within Australia)
+61 8 8336 9474 (Voice- from outside Australia)
+61 3 9349 4099 (Fax)
[email protected] (E-Mail)
Endeavor Information Systems, Inc.
See notice on first page
February 2004
Voyager® with UnicodeTM
xxv
Document Reproduction/Photocopying
Photocopying the documentation is allowed under your contract with Endeavor
Information Systems. It is stated below:
All documentation is subject to U.S. copyright protection. CUSTOMER may
copy the printed documentation only in reasonable quantities to aid the
employees in their use of the SOFTWARE. Limited portions of
documentation, relating only to the public access catalog, may be copied
for use in patron instruction.
How to Comment on This Document
Endeavor Information Systems, Inc. (EISI) has made every effort to ensure that
this information product meets your needs. EISI is interested in your comments
and suggestions to improve this information product. You may submit comments
and suggestions on this and other EISI information and training products by way
of:
• e-mail
• fax
To Submit Comments by E-mail
To submit comments by e-mail, please send your message to:
[email protected]
To Submit Comments by Fax
Please send feedback by fax (with cover) to the following:
From within the United States of America:
847-296-5636
Attn: Documentation Manager
Customer Support Contact Information
The Endeavor Information Systems, Inc. Customer Support department provides
technical assistance for all products. You may contact Customer Support by
phone, e-mail, or fax.
Endeavor Information Systems, Inc.
See notice on first page
xxvi
February 2004
Voyager® with UnicodeTM
About This Document
Phone
To contact Customer Support by telephone please call:
From the United States and Canada:
877-44-LLOYD (877-445-5693)
From all other countries:
800-4444-3474
You must first dial the US access code (for example, 00 for the United Kingdom
and New Zealand, 0011 for Australia), then the number listed above. You do not
need to put a 1 in front of the 800 number.
E-mail
To contact Customer Support by e-mail, please send your message to:
[email protected]
Fax
To send a fax (with cover) to Customer Support, dial (from within the United States
of America):
847-227-2676
Customer Support Hours of Operation
Monday - Friday
5am - 9pm, Central Daylight Time
Endeavor Information Systems, Inc.
See notice on first page
February 2004
Voyager® with UnicodeTM xxvii
Endeavor Information Systems, Inc.
See notice on first page
xxviii
February 2004
Voyager® with UnicodeTM
Getting Started
Contents
Introduction
Prerequisite Skills and Knowledge
Before You Begin
Setting Up the Reporter Module
• Installing the Reporter Module
• Configuring the voyager.ini file
1-1
1-2
1-2
1-2
Messages received if the voyager.ini file is not configured
Message received if e-mail server address is invalid
Sites not Using E-mail for notices
•
First Log in to the Reporter Module
• Setting the path to Access
• Selecting the Processing Location (Print Location)
• Completing the E-mail tab
Setting Up the Prepackaged Access Reports
• LIBR and VGER Oracle Database Instance (service name)
• Access Report .mdb Files
• Oracle client/SQL*Net
• Updating the Character Set for Oracle
• Configuring the Microsoft ODBC for Oracle Driver
• Configuring the database links
Troubleshooting: Linking the Oracle Tables
Setting the ODBC Timeout Value
1-3
1-3
1-5
1-6
1-7
1-7
1-8
1-10
1-11
1-17
1-17
1-24
1-24
1-52
1-60
1-64
1-68
1-73
Endeavor Information Systems, Inc.
See notice on first page
February 2004
Voyager® with UnicodeTM
1-i
Contents
Endeavor Information Systems, Inc.
See notice on first page
1-ii
February 2004
Voyager® with UnicodeTM
Getting Started
Introduction
This chapter describes how to install and/or configure Voyager’s Reporter Module
and Voyager’s Prepackaged Access Reports.
The Reporter module allows users to produce standard reports and notices, such
as overdue notices or acquisitions reports. Reporter works in conjunction with
Microsoft Access to produce these reports and notices.
Voyager’s Prepackaged Access Reports are additional statistical reports. They
are Access reports and are not created using the Reporter module.
This chapter contains two sections. The first provides
• Directions for setting up the Reporter module on user’s computers
• Additional configurations needed to use Reporter after its installation at the
first log in.
• Setting the path to Access
• Selecting a processing location
• Editing the voyager.ini file on user’s computers and completing
the E-mail tab in Reporter’s preferences, if sending notices by
e-mail.
Endeavor Information Systems, Inc.
See notice on first page
February 2004
Voyager® with UnicodeTM
1-1
The second section provides instructions for setting up Voyager’s Prepackaged
Access Reports including
•
•
•
•
•
Installing the Oracle 9i client
Configuring the Microsoft ODBC for Oracle® drivers on user’s computers
Setting the ODBC Timeout value to zero
Configuring the database links
Changing the Oracle service name from LIBR to VGER
Prerequisite Skills and Knowledge
To use this document effectively, you’ll need knowledge of the following:
• Basic Microsoft® Interface navigation
• Basic UNIX® commands and navigation
• Familiarity with Microsoft Windows and Microsoft Access
Before You Begin
Before you can use Reporter or the Prepackaged Access reports, you must have
the following items installed and configured on the user’s computers:
• Microsoft Windows® 2000 Professional (5.00.2195) or
Windows® XP Service Pack 1, version 5.1 (Build 2600.xpclient.010871148)
• Microsoft Access 2000 (Service Release 1) or MSAccess 2002
Setting Up the Reporter Module
Voyager’s Reporter module produces reports and notices. Reporter acts as a
coordinator between server input files which contain the raw data of the report or
notice, and the printed copy (or e-mail) of the report or notice, which is produced
using Access.
• In order to use the Reporter module you must have the Reporter module
installed on the user’s computers
• If you want to send notices using e-mail, you must configure the [E-Mail]
stanza of the voyager.ini file on the user’s computer.
Endeavor Information Systems, Inc.
See notice on first page
1-2
February 2004
Voyager® with UnicodeTM
Getting Started
Once installed, when first logging in to the module, the user must configure the
following to enable the use of Reporter
• Set the path to MSAccess because the reports and notices use .mdb files.
• Set the path to the Access databases (should occur during the installation
process, may not be necessary).
• Set the path for Notice and Reports archives (should occur during the
installation process, may not be necessary).
• Select a processing location (print location) that enables Reporter to find
the correct input file.
• Complete the E-mail tab in Reporter’s preferences (if sending notices by
e-mail).
Installing the Reporter Module
The Reporter module is typically located in the /m1/voyager/clients
directory on your server. The client file is named: VoyagerInstall.exe.
Typically the client file needs to be downloaded from the server to the user’s
computer, using File Transfer Protocol (FTP) and then the executable file should
be run to install the clients. Complete instructions on using FTP and installing the
clients can be found in the Voyager Technical User’s Guide.
NOTE:
Your system administrator may distribute the clients in a different manner.
Configuring the voyager.ini file
The Reporter module does not require an e-mail client to be installed on the
user’s computers, instead outgoing e-mails are sent directly through your SMTP
e-mail server.
In order to enable e-mail, an [E-mail] stanza must be added to the
voyager.ini file on the user’s computer and it must be configured. Also, the
E-mail tab in Reporter’s Preferences dialog box must be completed. See
Completing the E-mail tab on page 1-11.
This stanza configures the connection to the e-mail server. Figure 1-1 provides an
example of this stanza.
Endeavor Information Systems, Inc.
See notice on first page
February 2004
Voyager® with UnicodeTM
1-3
[E-MAIL]
Server=255.255.255.255
Port=25
Figure 1-1.
Example of the E-mail stanza in the voyager.ini file
This stanza must be added and configured (as well as the Patron Rules dialog
box and the Miscellaneous work space in the System Administration module)
before notices produced by Reporter can be sent using e-mail. However, you can
still use Reporter to print reports and notices.
Table 1-1 describes the keys in the [E-mail] stanza of the voyager.ini file.
Table 1-1.
Description of the keys in the E-mail stanza of the voyager.ini file
Key Name
Description
Required
Range
Server
This is the e-mail
server’s address.
Yes, if the site wants
to send notices
using
e-mail.
Valid IP address.
Port
This is the e-mail
server’s port.
Yes, if the site wants
to send notices
using
e-mail.
Numeric characters.
Set the default at port
25.
NOTE:
If the SMTP e-mail server requires authentication, e-mailing notices will not work
correctly.
Procedure 1-1. Configuring the [E-mail] stanza in the voyager.ini file
Use the following to configure the [E-mail] stanza found in the voyager.ini
file on the user’s computer.
1. Open the voyager.ini file. This file is typically found in the c:\voyager directory,
unless you have placed it elsewhere.
2. Add a stanza named [E-mail] to the end of this file.
3. Add a Server= key and enter the e-mail server address in the Server= key.
Endeavor Information Systems, Inc.
See notice on first page
1-4
February 2004
Voyager® with UnicodeTM
Getting Started
4. Add a Port= key and enter the e-mail server port at the Port= key. Port 25 is often
used (see Figure 1-2).
Figure 1-2.
Example of E-mail stanza
5. Save the changes to the voyager.ini file.
Result: The [E-mail] stanza has been added and configured.
For additional information regarding other stanzas in the voyager.ini file on the
user’s computer see the Voyager Technical User’s Guide.
Messages received if the voyager.ini file is not
configured
When the user logs in to Reporter, the system attempts to connect with the e-mail
server. If it cannot connect, a message describing the problem displays.
If the [E-mail] stanza is has not been configured, the operator receives a
message indicating that server information is missing (see Figure 1-3).
Figure 1-3.
Missing E-mail server information message
NOTE:
The default configuration is a blank Server= key and Port=25.
Endeavor Information Systems, Inc.
See notice on first page
February 2004
Voyager® with UnicodeTM
1-5
After clicking OK to this message the system provides an additional message
alerting the operator that all notices will be printed (see Figure 1-4).
Figure 1-4.
No E-mail notices message
The operator can click OK and continue working in the Reporter module, or if
e-mail is wanted, the operator must exit Reporter and configure the [E-mail]
stanza in the voyager.ini file.
NOTE:
This message is received at every log in until this condition is resolved. The only
way resolve this error is to create a valid [E-mail] stanza that points to a real
e-mail server.
Message received if e-mail server address is invalid
If the server address in the [E-mail] stanza is invalid, the operator receives a
message indicating that the system cannot connect (see Figure 1-5).
Figure 1-5.
Unable to connect to e-mail server message
NOTE:
The inability to connect may be caused by a wrong server IP address or an
incorrect Port number.
After clicking OK to this message the system provides an additional message
alerting the operator that all notices will be printed (see Figure 1-6).
Endeavor Information Systems, Inc.
See notice on first page
1-6
February 2004
Voyager® with UnicodeTM
Getting Started
Figure 1-6.
No E-mail notices message
The operator can click OK and continue working in the Reporter module, or if
e-mail is wanted, the operator must exit Reporter and correct the error in the
[E-mail] stanza in the voyager.ini file.
NOTE:
This message is received at every log in until this condition is resolved. The only
way resolve this error is to create a valid [E-mail] stanza that points to a real
e-mail server.
Sites not Using E-mail for notices
Sites where the e-mail options are not turned on in the System Administration
module, System Administration> Circulation> Miscellaneous and System
Administration> Circulation> Policy Definitions> Patron Rules dialog box, do
not receive these error messages.
Additionally, they do not have to add and configure an [E-mail] stanza in the
voyager.ini file.
First Log in to the Reporter Module
There are additional configurations that need to be set up at the first log in to
Reporter before users can run Reporter.
These are
• Set the path to Access
• Set the path to the Access databases (should occur during the installation
process, may not be necessary).
• Set the path for Notice and Reports archives (should occur during the
installation process, may not be necessary).
Endeavor Information Systems, Inc.
See notice on first page
February 2004
Voyager® with UnicodeTM
1-7
• Select a processing location (print location) that enables Reporter to find
the correct input file.
• Complete the E-mail tab in Reporter’s preferences (in order to e-mail
notices).
Setting the path to Access
Once Reporter is installed, since it uses Access databases as the formats for
reports and notices you must set the path to Access if is it other than
c:\Program Files\Microsoft Office\Office.
Setting the path occurs the first time the operator logs in, it specifies the path in
the Windows registry and will not need to be done again unless Access is moved.
Procedure 1-2. Setting the path to Access
Use the following to set the path to Access in the Windows registry.
1. Log in to the Reporter module, enter your operator ID and password, in the Log in
dialog box and click OK (see Figure 1-7).
NOTE:
Remember the operator ID and the password are case sensitive. Your system
administrator defined this security information in the System Administration
module. If you do not enter your operator ID and password correctly after three
attempts, Voyager will close the Reporter module.
!
IMPORTANT:
Reporter will accept combinations of Operator IDs and passwords that are
valid for any module, as listed in the System Administration module. This
means that in order to limit access to the Reporter module, you should only
install Reporter on the computers that will be running reports and notices.
Endeavor Information Systems, Inc.
See notice on first page
1-8
February 2004
Voyager® with UnicodeTM
Getting Started
Figure 1-7.
Reporter’s Log in dialog box
Result: You are logged in to the Reporter module and the Select Directory for
msaccess.exe dialog box opens (see Figure 1-8).
2. At the Select Directory containing msaccess.exe dialog box, navigate to the
correct drive and directory where Access is installed on that computer and highlight
it (see Figure 1-8). Notice that the OK button is disabled until the correct path has
been selected, then click OK to select it.
Figure 1-8.
Select Directory containing MSAccess dialog box
Result: This sets the path to Access. It is now specified in the Windows registry.
If it is necessary to set the path to the Access databases, or the path to the
Notices and Report archive the system will prompt the operator through the
appropriate steps to make these configurations.
Endeavor Information Systems, Inc.
See notice on first page
February 2004
Voyager® with UnicodeTM
1-9
Selecting the Processing Location (Print Location)
The Reporter module uses the processing location to determine which input file it
should process.
Input files reside on your Voyager server, their filenames contain a print location
code. Print locations must already be established in the System Administration
module including a name and code.
In Reporter users select a processing location (print location). This print location
has a corresponding print location code. Reporter finds the input filename on the
sever that matches this code. For a complete discussion on Print Locations see
the Voyager System Administration User’s Guide.
Operators choose from the various processing locations available to them at the
first log in to the Reporter module. The Global tab in the Preferences dialog box
opens and the location is defined. Once selected the processing location
preference is stored in the user’s Window’s registry.
For more information on the Processing Location field and the Global tab
preferences see Global Preferences on page 3-2.
!
IMPORTANT:
This allows changing the processing locations to occur very simply. If
reports or notices are not printing, you may want to check that the
processing location was not changed.
Procedure 1-3. Selecting the Processing Location (Print Location)
Use the following to select the processing location.
1. At first log in to the Reporter module, the Preference dialog box opens (see
Figure 1-9).
Endeavor Information Systems, Inc.
See notice on first page
1-10
February 2004
Voyager® with UnicodeTM
Getting Started
Figure 1-9.
Preference dialog box
2. In the Processing Location field, on the Global tab, select the appropriate location
from the drop down menu and click OK.
Result: The processing location has been selected.
Completing the E-mail tab
If your site wants to send notices using e-mail, the E-mail tab in Reporter’s
Preferences dialog box must be completed.
At first log in, if the voyager.ini file has already been configured, operators
receive a message stating the E-mail Reply-To Address must be specified (see
Figure 1-10).
Figure 1-10.
Message to specified E-mail Reply-To address
If the operator chooses OK, the E-mail tab of the Preferences dialog box opens
(see Figure 1-11). If the operator chooses Cancel, they exit Reporter.
Endeavor Information Systems, Inc.
See notice on first page
February 2004
Voyager® with UnicodeTM
1-11
NOTE:
The E-mail tab does need to be completed at the first log in if the voyager.ini
file is configured.
Figure 1-11.
E-mail tab
Table 1-2 describes E-mail tab.
Table 1-2.
Description of the E-mail tab
Name
Description
Required
Range
Maximum
number of items
per E-mail
message
This allows you to select how many
items will be included in an e-mail
message.
Yes
0-1000.
Selecting zero includes all items for
a given patron in one e-mail message.
The
default is
0.
NOTE:
System Administrators often limit
the size of an e-mail message that
can be delivered. Any e-mail
message exceeding this size will
not arrive at its destination, but will
be discarded by the server.
Therefore you may want to change
the default from zero to, for
example, ten.
Endeavor Information Systems, Inc.
See notice on first page
1-12
February 2004
Voyager® with UnicodeTM
Getting Started
Table 1-2.
Description of the E-mail tab
Name
Description
Required
Range
E-mail Reply-To
Address
The address to which replies will be
sent.
Yes, to
send
notices by
e-mail.
E-mail
address.
If this is the address of the local
machine users will get notification
of e-mail messages that fail.
The
default is
blank,
meaning
notices
will be
printed.
Once completed, the e-mail information is stored in the user’s Window’s registry.
Procedure 1-4. Completing the E-mail tab in Reporter’s Preferences
Use the following to complete the E-mail tab at first log in.
1. When the operator is prompted to set up the E-mail Reply-To Address field
(Figure 1-12) click the OK button.
Figure 1-12.
Message to set up E-mail Reply-To address
Result: The E-mail tab opens (see Figure 1-13).
Endeavor Information Systems, Inc.
See notice on first page
February 2004
Voyager® with UnicodeTM
1-13
Figure 1-13.
E-mail tab
2. Enter the Maximum Number of items per E-mail message in the corresponding field.
3. Enter an e-mail address in the E-mail Reply-To Address field (see Figure 1-14).
Figure 1-14.
Completed E-mail tab
4. Click the OK button, or click Cancel to return to Reporter.
Result: After clicking the OK button, the system sends a test message to the
E-mail Reply-To Address specified.
Endeavor Information Systems, Inc.
See notice on first page
1-14
February 2004
Voyager® with UnicodeTM
Getting Started
If the test was successful the message in Figure 1-15 displays.
Figure 1-15.
E-mail Address Test message
The test message that is received by the e-mail account is shown in Figure 1-16.
Figure 1-16.
!
Example of the test message
IMPORTANT:
There is no way to prevent the user from entering an E-mail Reply-To
address which is incorrect, but nonetheless, a valid address. Therefore,
operators should check to be sure they received the test e-mail as this may
be their only indication of a problem.
If the test message fails the operator is alerted by the message in Figure 1-17.
Figure 1-17.
E-mail send failure message
Endeavor Information Systems, Inc.
See notice on first page
February 2004
Voyager® with UnicodeTM
1-15
If a reason can be determined, the operator may see the message displayed in
Figure 1-18.
Figure 1-18.
E-mail test message failed due to bad e-mail address
Then clicking on the OK buttons returns to Reporter.
!
IMPORTANT:
The test e-mail is sent when the E-mail tab is first configured or when the
E-mail Reply-To address is changed. If the test e-mail message fails, and
the user chooses to ignore this, subsequent use of Reporter will not send
e-mails. The user will not be notified of this until the end of processing
where the message in Figure 1-19 informs them.
Figure 1-19.
Unprocessed E-mail Notices message
Endeavor Information Systems, Inc.
See notice on first page
1-16
February 2004
Voyager® with UnicodeTM
Getting Started
Setting Up the Prepackaged Access
Reports
To use the Prepackaged Access Reports the following items must be installed
and/or configured on the users’ computer
• Installed Access Report files (part of the client installation, if selected)
• Installed and configured Oracle9i client/SQL*Net (provided by EISI on a
CD)
• Configured Microsoft ODBC for Oracle driver (part of your Microsoft
Windows® operating system)
• Configured links to the database
!
IMPORTANT:
For the Voyager with UnicodeTM release, the Oracle database instance
(service name) has been changed from LIBR to VGER. Therefore, users
need to remove the old Oracle service name, LIBR, and add a new Oracle
service name of VGER. See Procedure 1-5, Removing the LIBR Oracle
Service Name and Procedure 1-6, Adding your VGER Oracle Service
Name.
LIBR and VGER Oracle Database Instance (service
name)
For the Voyager with UnicodeTM release your Voyager database instance is
named, VGER. In past releases it was LIBR. Therefore, you must remove the old
LIBR name and then add the VGER name. Adding this name defines where the
database resides.
See Procedure 1-5, Removing the LIBR Oracle Service Name and Procedure 1-6,
Adding your VGER Oracle Service Name.
Procedure 1-5. Removing the LIBR Oracle Service Name
Use the following to remove the LIBR Oracle Service name.
1. From the Windows Start menu, click Programs> Oracle for Windows NT> Oracle
Net8 Easy Config.
2. Click Yes on the Net8 Assistant Warning box (if it displays).
Endeavor Information Systems, Inc.
See notice on first page
February 2004
Voyager® with UnicodeTM
1-17
Result: The Oracle Net8 Easy Config dialog box opens.
3. Select the Delete radio button.
4. From the Existing Services list, select LIBR.WORLD (see Figure 1-20).
Figure 1-20.
Oracle Net8 Easy Config dialog box
5. Click the Next button.
Result: A warning message displays asking for confirmation of this deletion (see
Figure 1-21).
Figure 1-21.
Warning message
6. Click OK to continue, click Cancel to stop.
Endeavor Information Systems, Inc.
See notice on first page
1-18
February 2004
Voyager® with UnicodeTM
Getting Started
7. To complete the deletion click Finish (see Figure 1-22).
Figure 1-22.
Oracle Net8 Easy Config after confirming deletion
Result: The LIBR service name is deleted.
Procedure 1-6. Adding your VGER Oracle Service Name
Use the following to configure the VGER Oracle Service Name.
1. From the Windows Start menu, click Programs> Oracle for Windows NT> Oracle
Net8 Easy Config.
2. Click Yes on the Net8 Assistant Warning box (if it displays).
Result: The Oracle Net8 Easy Config dialog box opens (see Figure 1-23).
Endeavor Information Systems, Inc.
See notice on first page
February 2004
Voyager® with UnicodeTM
1-19
Figure 1-23.
Oracle Net 8 Easy Config dialog box
3. At the Oracle Net 8 Easy Config dialog box:
a. Click the radio button beside Add New Service.
b. In the New Service Name field Enter VGER.
c. Click the Next button at the bottom of the box.
Result: A list box of networking protocol types displays (see Figure 1-24).
Figure 1-24.
Networking Protocol list
Endeavor Information Systems, Inc.
See notice on first page
1-20
February 2004
Voyager® with UnicodeTM
Getting Started
4. From the Networking Protocol list:
a. Highlight TCP/IP (Internet Protocol).
b. Click the Next button.
Result: The TCP/IP protocol page displays two list box selection fields (see
Figure 1-25).
Figure 1-25.
TCP/IP Protocol list: Host Name and Port Number
5. On the TCP/IP Protocol page:
a. Enter the IP address of the computer where the Voyager database
resides in the Host Name field.
b. Enter 1521 in the Port Number field.
c. Click the Next button.
Result: The System Identifier page displays (see Figure 1-26).
Endeavor Information Systems, Inc.
See notice on first page
February 2004
Voyager® with UnicodeTM
1-21
Figure 1-26.
The System Identifier page
6. On the System Identifier page:
a. Enter VGER in the Database SID field.
b. Click the Next button.
Result: The Test Service page displays (see Figure 1-27).
Figure 1-27.
Test Service Page
Endeavor Information Systems, Inc.
See notice on first page
1-22
February 2004
Voyager® with UnicodeTM
Getting Started
7. Click the Test Service button.
Result: The Connection Test dialog box opens (see Figure 1-28).
Figure 1-28.
Connection Test dialog box
8. In the Connection Test dialog box, enter your username, then password, and press
the Test button to test the connection.
Result: If the connection succeeds, the message The connection test was
successful displays. If the connection succeeds, click Done.
If the connection fails, click Done, and go back to verify all of the configuration
information and repeat the test.
NOTE:
The naming convention for the username is: ro_xxxdb, where xxxdb is the
database name. The password is not standard and is provided by EISI at the time
of the upgrade.
9. Once the test is successful, click Next, then Finish to save the configuration.
Result: The Oracle connection is configured.
Endeavor Information Systems, Inc.
See notice on first page
February 2004
Voyager® with UnicodeTM
1-23
Access Report .mdb Files
The Access Report .mdb files are placed in the appropriate directory when you
run VoyagerInstall.exe and install Access Reports. Complete instructions on
installing the clients can be found in the Voyager Technical User’s Guide.
Oracle client/SQL*Net
SQL*Net provides the manner of transporting data from the database to your
computer. You must have an Oracle client, which includes SQL*Net, for the
Prepackaged Access reports to work.
On your PC, if you...
Then ...
Have not used Access Reports
Install and configure the Oracle9i client
distributed to your institution on CD-ROM.
Have used Access Reports and
you want to upgrade your Oracle client
Uninstall the old Oracle8 client, and Install
and configure the Oracle9i client
distributed to your institution on CD-ROM.
NOTE:
User’s who run Voyager with UnicodeTM on an AIX® server do not need to install
this client, as their server was not upgraded to Oracle9i.
!
IMPORTANT:
After installing the Oracle 9i clients, if you have other applications installed
on your system that use the Oracle client, you may need to reconfigure
those applications to use the new Oracle 9i client.
Procedure 1-7. Uninstalling the Oracle8 client
Use the following to uninstall the old Oracle8 client if you are going to install the
new Oracle9i client.
1. From the Start menu, navigate to the Oracle Installer, Start> Programs> Oracle for
Windows NT> Oracle Installer.
Result: The Oracle Installer dialog box displays (see Figure 1-29).
Endeavor Information Systems, Inc.
See notice on first page
1-24
February 2004
Voyager® with UnicodeTM
Getting Started
Figure 1-29.
Oracle Installer
Then, the Software Asset Manager dialog box opens (see Figure 1-30).
Figure 1-30.
Software Asset Manager dialog box
Endeavor Information Systems, Inc.
See notice on first page
February 2004
Voyager® with UnicodeTM
1-25
2. Select all of the products listed in the Products Installed at c:\orant list box (see
Figure 1-31).
Figure 1-31.
All products selected to delete
3. Click the Remove button.
Result: A message asking you to confirm the deletion of the products displays
(see Figure 1-32).
Endeavor Information Systems, Inc.
See notice on first page
1-26
February 2004
Voyager® with UnicodeTM
Getting Started
Figure 1-32.
Confirmation message to delete the Oracle products
4. Click the Yes button to delete.
Result: The deletion of products occurs (see Figure 1-33).
Figure 1-33.
Oracle products being deleted
5. When the Software Asset Manager dialog box displays, showing no products
installed (Figure 1-34), click the Exit button
Endeavor Information Systems, Inc.
See notice on first page
February 2004
Voyager® with UnicodeTM
1-27
Figure 1-34.
Software Asset Manager dialog box showing no products installed
Result: A confirmation message displays before exiting (see Figure 1-35).
Figure 1-35.
Confirmation message seen before exiting Oracle Installer
Endeavor Information Systems, Inc.
See notice on first page
1-28
February 2004
Voyager® with UnicodeTM
Getting Started
6. Click Yes to exit the Oracle Installer.
Result: The installer closes and the Oracle8 client is removed from the computer.
Procedure 1-8. Installing the Oracle9i client
Use the following to install the Oracle9i client from the CD-ROM provided by EISI.
!
IMPORTANT:
You must have Administrator rights on the computer in order to install the
Oracle9i client.
1. Place the CD-ROM in your disk drive. It will run automatically.
Result: The Oracle9i Server - Autorun dialog box displays (see Figure 1-36).
Figure 1-36.
Oracle9i Server - Autorun dialog box
Endeavor Information Systems, Inc.
See notice on first page
February 2004
Voyager® with UnicodeTM
1-29
2. Click the Install/Deinstall Products button.
Result: The Oracle Universal Installer launches and the Oracle Universal
Installer: Welcome dialog box displays (see Figure 1-37).
Figure 1-37.
Oracle Universal Installer: Welcome dialog box
3. Click the Next button.
Result: The Oracle Universal Installer: File Locations dialog box displays (see
Figure 1-38).
Endeavor Information Systems, Inc.
See notice on first page
1-30
February 2004
Voyager® with UnicodeTM
Getting Started
Figure 1-38.
Oracle Universal Installer: File Locations dialog box
4. At the Oracle Universal Installer: File Locations dialog box:
a. In the Name field, enter ORA920_HOME
b. In the Path filed, enter c:\oracle
c. Click the Next button
Result: Oracle products load, then the Oracle Universal Installer: Available
Locations dialog box displays (see Figure 1-39).
Endeavor Information Systems, Inc.
See notice on first page
February 2004
Voyager® with UnicodeTM
1-31
Figure 1-39.
Oracle Universal Installer: Available Locations dialog box
5. Select Oracle9i Client 9.2.0.1.0 and click the Next button.
Result: The Oracle Universal Installer: Installation Types dialog box displays
(see Figure 1-40).
Endeavor Information Systems, Inc.
See notice on first page
1-32
February 2004
Voyager® with UnicodeTM
Getting Started
Figure 1-40.
Oracle Universal Installer: Installation Types dialog box
6. Select the Custom radio button and click the Next button.
Result: The Oracle Universal Installer: Available Product Components dialog
box displays (see Figure 1-41).
Endeavor Information Systems, Inc.
See notice on first page
February 2004
Voyager® with UnicodeTM
1-33
Figure 1-41.
Oracle Universal Installer: Available Product Components dialog box
7. Select the following check boxes (you will need to scroll down to access some
products)
• Oracle Network Utilities 9.2.0.1.0 (this includes SQL*Net)
• Oracle9i Windows Documentation 9.2.0.1.0 (not required)
• Oracle9i Universal Installer 2.2.0.1.2.0, and click the Next button.
Result: The Oracle Universal Installer: Component Locations dialog box
displays (see Figure 1-42).
Endeavor Information Systems, Inc.
See notice on first page
1-34
February 2004
Voyager® with UnicodeTM
Getting Started
Figure 1-42.
Oracle Universal Installer:Component Locations dialog box
8. Click the Next button.
Result: The Oracle Universal Installer: Summary dialog box displays (see
Figure 1-43).
Endeavor Information Systems, Inc.
See notice on first page
February 2004
Voyager® with UnicodeTM
1-35
Figure 1-43.
Oracle Universal Installer: Summary dialog box
9. Click the Install button.
Result: The Oracle Universal Installer: Install dialog box displays and
installation occurs (see Figure 1-44).
NOTE:
Depending on your system resources, this can take several minutes.
Endeavor Information Systems, Inc.
See notice on first page
1-36
February 2004
Voyager® with UnicodeTM
Getting Started
Figure 1-44.
Oracle Universal Installer: Install dialog box
When the installation is complete the Oracle Universal Installer: Configuration
Tools dialog box displays (see Figure 1-45).
Endeavor Information Systems, Inc.
See notice on first page
February 2004
Voyager® with UnicodeTM
1-37
Figure 1-45.
Oracle Universal Installer: Configuration Tools dialog box
Following this the Oracle Net Configuration Assistant tool is automatically started
and the Oracle Net Configuration Assistant: Welcome dialog box displays (see
Figure 1-46).
Endeavor Information Systems, Inc.
See notice on first page
1-38
February 2004
Voyager® with UnicodeTM
Getting Started
Figure 1-46.
Oracle Net Configuration Assistant: Welcome dialog box
10. Check the Perform typical configuration check box and click the Next button.
Result: The Oracle Net Configuration Assistant: Welcome dialog box: Net
Service Names displays (see Figure 1-47).
Endeavor Information Systems, Inc.
See notice on first page
February 2004
Voyager® with UnicodeTM
1-39
Figure 1-47.
Oracle Net Configuration Assistant: Welcome dialog box: Net Service
Names
11. Select the No, I will create net service names myself. The Assistant will help me
create one now radio button and click the Next button.
Result: The Oracle Net Configuration Assistant: Net Service Name
Configuration, Database Version dialog box displays (see Figure 1-48).
Endeavor Information Systems, Inc.
See notice on first page
1-40
February 2004
Voyager® with UnicodeTM
Getting Started
Figure 1-48.
Oracle Net Configuration Assistant: Net Service Name Configuration,
Database Version dialog box
12. Select the Oracle8i or later database or service radio button and click the Next
button.
Result: The Oracle Net Configuration Assistant: Net Service Name
Configuration, Service Name dialog box displays (see Figure 1-49).
Endeavor Information Systems, Inc.
See notice on first page
February 2004
Voyager® with UnicodeTM
1-41
Figure 1-49.
Oracle Net Configuration Assistant: Net Service Name Configuration,
Service Name dialog box
13. Enter VGER in the Service Name field and click the Next button.
Result: The Oracle Net Configuration Assistant: Net Service Name
Configuration, Select Protocols dialog box displays (see Figure 1-50).
Endeavor Information Systems, Inc.
See notice on first page
1-42
February 2004
Voyager® with UnicodeTM
Getting Started
Figure 1-50.
Oracle Net Configuration Assistant: Net Service Name Configuration,
Select Protocols dialog box
14. Select TCP from the list and click the Next button.
Result: The Oracle Net Configuration Assistant: Net Service Name
Configuration, TCP/IP Protocol dialog box displays (see Figure 1-51).
Endeavor Information Systems, Inc.
See notice on first page
February 2004
Voyager® with UnicodeTM
1-43
Figure 1-51.
Oracle Net Configuration Assistant: Net Service Name Configuration,
TCP/IP Protocol dialog box
15. Enter your site’s IP address in the Hostname field, select Use the standard port
number of 1521 radio button, and click the Next button.
Result: The Oracle Net Configuration Assistant: Net Service Name
Configuration, Test dialog box displays (see Figure 1-52).
Endeavor Information Systems, Inc.
See notice on first page
1-44
February 2004
Voyager® with UnicodeTM
Getting Started
Figure 1-52.
Oracle Net Configuration Assistant: Net Service Name Configuration,
Test dialog box
16. Select the Yes, perform a test radio button.
NOTE:
This test is expected to fail because the default username used for this test is
incorrect. In the next step you will change the username.
Result: The Oracle Net Configuration Assistant: Net Service Name
Configuration, Connecting dialog box displays with the error message in the
Details text-box (see Figure 1-53).
Endeavor Information Systems, Inc.
See notice on first page
February 2004
Voyager® with UnicodeTM
1-45
Figure 1-53.
Oracle Net Configuration Assistant: Net Service Name Configuration,
Connecting dialog box
17. To change the username, click the Change Login button.
Result: The Change Login dialog box displays (see Figure 1-54).
Figure 1-54.
Change Login dialog box
18. Enter ro_xxxdb (where xxxdb is the database name) in the Username field and the
EISI-provided password in the Password field and click the OK button.
Result: This closes the Change Login dialog box.
Endeavor Information Systems, Inc.
See notice on first page
1-46
February 2004
Voyager® with UnicodeTM
Getting Started
19. To test the connection after changing the username, click the Back button.
Result: The Oracle Net Configuration Assistant: Net Service Name
Configuration, Connecting dialog box displays.
20. Select the Yes, perform test radio button and click the Next button.
Result: The test should succeed. If it does not, check the IP address.
21. After a successful test, click the Next button.
Result: The Oracle Net Configuration Assistant: Net Service Name
Configuration, Net Service Name dialog box displays with the message that the
net service name configuration is complete (see Figure 1-55).
Figure 1-55.
Oracle Net Configuration Assistant: Net Service Name Configuration,
Net Service Name dialog box
22. Enter VGER in the Net Service Name field and click the Next button.
Result: The Oracle Net Configuration Assistant: Net Service Name
Configuration, Another Net Service Name? dialog box displays with the
message that the oracle net configuration is complete (see Figure 1-56).
Endeavor Information Systems, Inc.
See notice on first page
February 2004
Voyager® with UnicodeTM
1-47
Figure 1-56.
Oracle Net Configuration Assistant: Net Service Name Configuration,
Another Net Service Name? dialog box
23. Since you do not need to provide another service name, select the No button and
click the Next button.
Result: The Oracle Net Configuration Assistant: Net Service Name
Configuration done dialog box displays alerting the user the installation was
successful (see Figure 1-57).
Endeavor Information Systems, Inc.
See notice on first page
1-48
February 2004
Voyager® with UnicodeTM
Getting Started
Figure 1-57.
Oracle Net Configuration Assistant: Net Service Name Configuration
Done dialog box
24. Click the Next button.
Result: The Oracle Net Configuration Assistant: Done dialog box displays (see
Figure 1-58).
Endeavor Information Systems, Inc.
See notice on first page
February 2004
Voyager® with UnicodeTM
1-49
Figure 1-58.
Oracle Net Configuration Assistant: Done dialog box
25. Click the Finish button.
Result: The Oracle Universal Installer: End of Installation dialog box displays
(see Figure 1-59).
Endeavor Information Systems, Inc.
See notice on first page
1-50
February 2004
Voyager® with UnicodeTM
Getting Started
Figure 1-59.
Oracle Universal Installer: End of Installation dialog box
26. Click the Exit button, when the confirmation message displays (Figure 1-60) click
the Yes button.
Figure 1-60.
Confirm exiting the Oracle Universal Installer message
Result: The Oracle9i client installation is complete.
Endeavor Information Systems, Inc.
See notice on first page
February 2004
Voyager® with UnicodeTM
1-51
Updating the Character Set for Oracle
User’s must update the character set for Oracle in the Registry Editor for correct
diacritic display. Basically, when an NLS_LANG value is other than
AMERICAN_AMERICA.US7ASCII, the value must be updated.
!
IMPORTANT:
Use extreme caution when working in the Registry Editor. Only individuals
experienced with Windows Registration Databases should make this
update. Further, to do this the user must be logged in as administrator.
Follow Procedure 1-9, Updating the Character Set for Oracle for the steps to
update the character set, editing the NLS_LANG value.
Procedure 1-9. Updating the Character Set for Oracle
Use the following to update the character set for Oracle.
1. From the Start menu, select Run, and enter regedit in the Open field (see
Figure 1-61), then click the OK button.
Figure 1-61.
Run dialog box
Result: The Registry Editor dialog box opens (see Figure 1-62).
Endeavor Information Systems, Inc.
See notice on first page
1-52
February 2004
Voyager® with UnicodeTM
Getting Started
Figure 1-62.
Registry Edit dialog box
2. Click the +(plus sign) in front of the HKEY_LOCAL_MACHINE folder.
Result: The folder expands (see Figure 1-63).
Figure 1-63.
HKEY_LOCAL_MACHINE folder expanded
3. Click the +(plus sign) in front of the SOFTWARE folder.
Result: The folder expands (see Figure 1-64).
Endeavor Information Systems, Inc.
See notice on first page
February 2004
Voyager® with UnicodeTM
1-53
Figure 1-64.
SOFTWARE folder expanded
4. Click the +(plus sign) in front of the ORACLE folder.
Result: The folder expands (see Figure 1-65).
NOTE:
The expanded ORACLE folder contains an ALL_HOMES folder and any number of
HOME# folders. The number of HOME# folders corresponds to the number of
Oracle instances on the computer. Most computers will only have the HOME0
folder.
Endeavor Information Systems, Inc.
See notice on first page
1-54
February 2004
Voyager® with UnicodeTM
Getting Started
Figure 1-65.
!
ORACLE folder expanded
IMPORTANT:
Only edit the NLS_LANG value under ORACLE folder and subfolders.
5. In the right panel, double-click NLS_LANG (Figure 1-66).
Endeavor Information Systems, Inc.
See notice on first page
February 2004
Voyager® with UnicodeTM
1-55
Figure 1-66.
NLS_LANG display
Result: The Edit String dialog box opens (see Figure 1-67) displaying the value
data.
Figure 1-67.
Edit String dialog box with incorrect NLS_LANG data
6. In the Edit String dialog box change the NLS_LANG value to
AMERICAN_AMERICA.US7ASCII (see Figure 1-68), where the last two characters
are upper-case letter i’s.
Endeavor Information Systems, Inc.
See notice on first page
1-56
February 2004
Voyager® with UnicodeTM
Getting Started
Figure 1-68.
Edit String dialog box with new NLS_LANG value
AMERICAN_AMERICA.US7ASCII
7. Click the OK button.
Result: The value is edited (see Figure 1-69).
Figure 1-69.
!
NLS_LANG edited to value AMERICAN_AMERICA.US7ASCII
IMPORTANT:
The NSL_LANG value under the ORACLE folder and subfolders must be
changed to AMERICAN_AMERICA.US7ASCII whenever the NSL_LANG
value appears. Therefore, you must continue through the subfolders and
wherever the NLS_LANG data value is NOT
AMERICAN_AMERICA.US7ASCII, it must be edited.
8. In the Left panel, click the +(plus sign) in front of the ALL_HOMES folder.
Result: The folder expands (see Figure 1-70). In this example, there are ID#
folders that correspond to the HOME# folders. Notice also that there is no
NLS_LANG entry in the right panel.
Endeavor Information Systems, Inc.
See notice on first page
February 2004
Voyager® with UnicodeTM
1-57
Figure 1-70.
The ALL_HOMES folder expanded
9. Continue to the next subfolder, select the ID0 folder.
Result: The folder is selected and the right panel displays (see Figure 1-71).
Figure 1-71.
ID0 folder is selected and right panel displays NLS_LANG
Endeavor Information Systems, Inc.
See notice on first page
1-58
February 2004
Voyager® with UnicodeTM
Getting Started
10. Edit the NLS-LANG value, using steps 5-7 above.
Result: The value is edited (see Figure 1-72).
Figure 1-72.
ID0 folder, NLS_LANG value edited
11. Move on to the next ORACLE subfolder, select the ID1 folder.
Result: The folder is selected and the right panel displays (see Figure 1-73). Note
that the NLS_LANG value is NOT US7ASCII, therefore it must be edited.
Figure 1-73.
ID1 folder expanded, NLS_LANG value displays
Endeavor Information Systems, Inc.
See notice on first page
February 2004
Voyager® with UnicodeTM
1-59
12. Edit the NLS-LANG value, using steps 5-7. Select the HOME0 subfolder (see
Figure 1-74).
Figure 1-74.
HOME0 subfolder expanded, NLS_LANG value displays
13. Edit the NLS_LANG value, using steps 5-7 above. Then select the next ORACLE
subfolder, repeat this process until all of the NLS_LANG values are changed to
AMERICAN_AMERICA.US7ASCII.
14. Close the Registry Editor dialog box.
Result: The character set for Oracle is updated.
Configuring the Microsoft ODBC for Oracle Driver
The connection between the Access software on your computer and a data
source is made using an ODBC driver. The Microsoft ODBC for Oracle driver is
part of your Windows operating system, however users must configure the
Microsoft ODBC for Oracle driver before running any Access Reports.
Endeavor Information Systems, Inc.
See notice on first page
1-60
February 2004
Voyager® with UnicodeTM
Getting Started
Procedure 1-10. Configuring ODBC Control Panel Settings
Use the following to configure the ODBC control panel settings.
1. Log on as the Administrator, then from the Windows Start menu, click Settings>
Control Panel> Administrative tools select Data Sources (ODBC).
Result: The ODBC Data Source Administrator dialog box opens (see Figure 175).
Figure 1-75.
2.
ODBC Data Source Administrator dialog box
Click the System DSN tab, then click the Add button.
Result: The Create New Data Source dialog box opens (see Figure 1-76).
Endeavor Information Systems, Inc.
See notice on first page
February 2004
Voyager® with UnicodeTM
1-61
Figure 1-76.
Create New Data Source dialog box
3. Highlight Microsoft ODBC for Oracle Driver and click the Finish button.
!
IMPORTANT:
Users must select the Microsoft ODBC for Oracle Driver, not the
previously used Oracle ODBC driver.
Result: The Microsoft OBDC for Oracle Setup dialog box opens (see Figure 177).
Figure 1-77.
Microsoft ODBC for Oracle Setup dialog box
Endeavor Information Systems, Inc.
See notice on first page
1-62
February 2004
Voyager® with UnicodeTM
Getting Started
4. In the Microsoft OBDC for Oracle Setup dialog box:
a. In the Data Source Name field, enter voyager
b. In the Description field, enter voyager tables
c. In the Server field, enter VGER
d. Click the OK button (see Figure 1-78).
NOTE:
You do not need to enter a User ID.
Figure 1-78.
Completed Microsoft ODBC for Oracle Setup dialog box
Result: The ODBC Data Source Administrator dialog box opens. A new entry is
listed, with the Name: voyager and Driver: Microsoft ODBC for Oracle on the
System DSN tab, click OK to save the settings and exit the configuration dialog
box (see Figure 1-79).
Endeavor Information Systems, Inc.
See notice on first page
February 2004
Voyager® with UnicodeTM
1-63
Figure 1-79.
ODBC Data Source Administrator with driver set up
Configuring the database links
After you have configured your ODBC driver, you must configure the database
links in Access. Basically this creates “virtual database tables” in Access,
following the ODBC links to the corresponding tables in your Oracle database to
allow running reports and queries against your database.
Procedure 1-11. Configuring the database links in Access
Use the following to configure the database links.
1. Navigate to c:\voyager and double-click the Access Reports folder, then
double-click the reports.mdb file.
Result: Access opens and the reports: Database dialog box opens (see
Figure 1-80).
Endeavor Information Systems, Inc.
See notice on first page
1-64
February 2004
Voyager® with UnicodeTM
Getting Started
i
Figure 1-80.
Access Reports: Database dialog box
2. In the reports: Database dialog box:
a. Click the Forms button.
b. Highlight Build database links to Voyager.
c. Click the Open button.
Result: The Build database links to Voyager dialog box opens (see Figure 181).
3. Enter the following information in each of the fields:
a. In the ODBC name field, enter voyager.
b. In the Connect String field, enter the same string that you entered
into the New Service Name field in the Oracle Net8 Easy Config
dialog box. See Adding your VGER Oracle Service Name on
page 1-19.
c. In the DB User ID field, enter your read only user name.
d. In the Password field, enter your password.
e. In the Tablespace field, enter the name of your database.
f. Click the Connect button to begin the building process.
Figure 1-81 displays this dialog box and fields.
Endeavor Information Systems, Inc.
See notice on first page
February 2004
Voyager® with UnicodeTM
1-65
Figure 1-81.
Build database links to Voyager dialog box
Result: Tables begin the linking process. Notice that the names of the tables
being linked display in the window.
NOTE:
This can take several minutes.
!
IMPORTANT:
If building the database links does not work, a message displays stating
Process stopped too many errors! If this is the case, see
Procedure 1-12, Troubleshooting: Linking the Oracle Tables.
Figure 1-82 shows the build database links box after the tables have been linked.
Endeavor Information Systems, Inc.
See notice on first page
1-66
February 2004
Voyager® with UnicodeTM
Getting Started
Figure 1-82.
!
Build database links box after tables have been linked
IMPORTANT:
For your initial installation, the Relink check box is not used.
If some of the tables do not link and you need to build the links again, leave
Relink unchecked during each subsequent linking attempt. This will keep
the links that have already succeeded without rechecking them and only
failed links will be rechecked each subsequent time.
Checking Relink will remove all of the links that have already been
established and completely restart the process.
Therefore, if you change any of your information and need to completely
rebuild the links, then you should place a check in the Relink box.
4. Check the links that were not successful:
a. Click the Queries tab.
b. Select System Access Tables NOT Linked.
c. Click the Open button.
Result: If there are any tables in the list that displays, then you need to rerun the
link builder again to try to link those tables again.
Endeavor Information Systems, Inc.
See notice on first page
February 2004
Voyager® with UnicodeTM
1-67
To rerun the link builder repeat Procedure 1-11, Configuring the database links in
Access, on page 1-64 keep the relink box unchecked. This makes the builder only
check the bad links.
!
IMPORTANT:
If Relink is turned on, this will erase all of the links already established and
repeat the entire process again.
Continue to link until there are no links listed in the System Access Tables NOT
Linked report. When this is the case the setup process is complete.
TIP:
If you are going to use the Prepackaged Access Reports on multiple
computers, and all of which will use the same settings in the Build
Database Links to Voyager dialog box, then you do not have to build links
individually for each computer. Once you have linked the database to the
reports.mdb file, you can simply copy the reports.mdb file to each computer
that needs to use it. The links are retained within the file.
NOTE:
If you have user-created queries and reports that you previously developed and
you want to use them with a new version of Voyager, you will need to update
them. Search Endeavor’s SupportWeb KnowledgeBase for a Resource Sharing
Record provided by Voyager customer Alan Manifold entitled “How to migrate
Access queries for a new Voyager release” for information on this process. All
custom or modified queries pulling data from UTF-8 encoded columns must
include a function to convert the data to UTF-16.
Troubleshooting: Linking the Oracle Tables
When linking the Oracle tables, users may get an error message indicating the
linking process has stopped due to too many errors. If this is the case use
Procedure 1-12, Troubleshooting: Linking the Oracle Tables.
Procedure 1-12. Troubleshooting: Linking the Oracle Tables
Use the following to troubleshoot problems with linking the Oracle tables. This
procedure assumes the user is at the Build Database Links to Voyager dialog
box and the process has stopped (see Figure 1-83).
Endeavor Information Systems, Inc.
See notice on first page
1-68
February 2004
Voyager® with UnicodeTM
Getting Started
Figure 1-83.
Build Database Links to Voyager process stopped due to errors
1. From the MS Access File menu, select Get External Data> Link Tables... (see
Figure 1-84)
Figure 1-84.
File menu> Get External Data> Link Tables
Endeavor Information Systems, Inc.
See notice on first page
February 2004
Voyager® with UnicodeTM
1-69
Result: The Link dialog box opens.
2. From the Files of Type field, select ODBC Databases() (see Figure 1-85).
Figure 1-85.
Files of Type field options
Result: The Select Data Source dialog box opens (see Figure 1-86).
Figure 1-86.
Select Data Source dialog box
Endeavor Information Systems, Inc.
See notice on first page
1-70
February 2004
Voyager® with UnicodeTM
Getting Started
3. Click the Machine Data Source tab, and select Voyager (see Figure 1-87).
Figure 1-87.
Machine Data Source tab with Voyager selected
4. Click the OK button.
Result: The Microsoft ODBC for Oracle Connect dialog box opens (see
Figure 1-88).
Figure 1-88.
Microsoft ODBC for Oracle Connect dialog box
5. Enter:
a. Your user name in the User Name field.
b. Your password in the Password field.
c. VGER in the Server field.
Endeavor Information Systems, Inc.
See notice on first page
February 2004
Voyager® with UnicodeTM
1-71
d. Click the OK button.
Result: After a few minutes the Link Tables dialog box displays. You can now link
the tables (see Figure 1-89).
Figure 1-89.
Link Tables
6. Click the OK button and return to the Build Database Links to Voyager dialog box
(see Figure 1-90).
Figure 1-90.
Build Database Links to Voyager
Endeavor Information Systems, Inc.
See notice on first page
1-72
February 2004
Voyager® with UnicodeTM
Getting Started
7. Click the Connect button. (Relink should be checked.)
Result: The database links to the Voyager database build (see Figure 1-91).
Figure 1-91.
Build Database Links to Voyager during linking
NOTE:
This will take several minutes.
8. When completed, the Close button activates, select this button to exit the linking
process.
9. Go to step 4 of Procedure 1-11, Configuring the database links in Access to check
the database links.
Setting the ODBC Timeout Value
The default timeout for queries in MSAccess is 60 seconds. User’s can change
this value for selected queries such that they will not timeout.
Endeavor Information Systems, Inc.
See notice on first page
February 2004
Voyager® with UnicodeTM
1-73
Procedure 1-13. Changing the ODBC Timeout value
Use the following to change the ODBC timeout value.
1. Select the query whose timeout value you want to change and click the Design
button.
Result: The query design view opens with the top portion showing the tables used
in the query and their associations.
2. With your cursor in the top portion, right-click and select Properties from the menu
(see Figure 1-92).
Figure 1-92.
Selecting Properties from the menu
Result: The Query Properties dialog box opens (Figure 1-93) notice the default
is 60 seconds.
Endeavor Information Systems, Inc.
See notice on first page
1-74
February 2004
Voyager® with UnicodeTM
Getting Started
Figure 1-93.
Query Properties dialog box
3. Place your cursor in the ODBC Timeout field and enter the timeout wanted. Setting
the value to zero means that the query will not timeout.
Result: The timeout value is changed (see Figure 1-94).
See your Microsoft Access documentation for additional information.
Figure 1-94.
ODBC Timeout value at zero
Endeavor Information Systems, Inc.
See notice on first page
February 2004
Voyager® with UnicodeTM
1-75
Endeavor Information Systems, Inc.
See notice on first page
1-76
February 2004
Voyager® with UnicodeTM
Generating Input Files to Create
Reports and Notices
Contents
Introduction
Reporter Module Functionality Overview
Input and log files
• Input files
• Log files
• Creating Input Files for Acquisitions
•
•
•
•
•
•
Creating Input File(s) from the Acquisitions Module
Creating Input File(s) by Acquisitions batch jobs - Acqjob
The Acqjob.log file
The Acquisitions Batch Jobs
Running Acquisitions Batch Jobs
Creating input files using WebAdmin - Acquisitions Utilities
Creating Input Files for Cataloging
The Catjob.log File
The Cataloging batch jobs
Running cataloging batch jobs
Creating input files using WebAdmin - Cataloging Utilities
Creating Input Files for Circulation
The Circjob.log file
The Circulation batch jobs
Running circulation batch jobs
Creating input files using WebAdmin - Circulation Utilities
Creating Input Files for Media Scheduling
Mediajob.log file
The Media Scheduling batch jobs
Running media scheduling batch jobs
2-1
2-1
2-2
2-2
2-3
2-3
2-4
2-5
2-6
2-6
2-8
2-12
2-15
2-17
2-17
2-24
2-28
2-31
2-34
2-34
2-43
2-47
2-51
2-52
2-52
2-53
Endeavor Information Systems, Inc.
See notice on first page
February 2004
Voyager® with UnicodeTM
2-i
Contents
Endeavor Information Systems, Inc.
See notice on first page
2-ii
February 2004
Voyager® with UnicodeTM
Generating Input Files to Create Reports
and Notices
Introduction
This chapter provides information on how the Reporter module works and
information about generating the input files to be used by the Reporter module to
the produce reports and notices necessary for the functioning of your library.
Reporter Module Functionality Overview
The Voyager Reporter module produces reports and notices that were generated
from batch jobs run on the server, jobs run from the web using the WebAdmin
program, as well as dynamically produced (in the module) reports or notices.
Therefore, before you can run the Voyager Reporter, you must create these
appropriate Reports and/or Notice input files on the server for the application you
want to process Acquisitions, Cataloging, Circulation, and Media Scheduling.
Creating reports and notices is a five-step process:
1. A transaction or event occurs in one of the Voyager module. For example,
a book becomes overdue, a fine is generated, a Purchase Order is
generated or a subject heading is corrected.
Endeavor Information Systems, Inc.
See notice on first page
February 2004
Voyager® with UnicodeTM
2-1
2. In most cases, a batch job is run. The batch job generates an input (.inp)
file which contains the content of the report or notice. In other cases, an
input file will be created dynamically when a particular activity takes place.
The format of the various .inp files generated are discussed in the
Voyager’s Technical User’s Guide.
3. The Reporter module takes the .inp file from the server and builds the
reports and/or notices.The .inp file from the server is archived on the
server with a date-time stamp. The client displays a list of reports or notices
built from the .inp file.
4. In the Reporter module the reports and notices are run. This begins the
printing out or e-mailing of the reports and/or notices.
5. In the Reporter module, the file is archived on the user’s computer.
Input and log files
The Reporter module looks to the server for an input file containing the
information it needs to produce the reports and notices. Those input files (.inp
files) are generated either by batch jobs run on the server or they can be
generated by particular activities that occur in the Voyager modules.
Input files
There are seven input files.
•
•
•
•
•
•
•
acqrprts.xxxx.inp, for Acquisitions reports
catrprts.xxxx.inp, for Cataloging reports
crcrprts.xxxx.inp, for Circulation reports
medrprts.xxxx.inp, for Media Scheduling reports
acqnotes.xxxx.inp, for Acquisitions notices
crcnotes.xxxx.inp, for Circulation notices
mednotes.xxxx.inp, for Media Scheduling notices
Where xxxx represents the appropriate print location code as defined in “Print
Locations” in the Voyager System Administration User’s Guide and in the Voyager
Media Scheduling System Administration User’s Guide.
Each file contains records of a specific type, following a specific format, that
contain the content for the reports and notices. For information regarding the
specific format of these input files see the Voyager Technical User’s Guide,
“Standard Interface File format (SIF).”
Endeavor Information Systems, Inc.
See notice on first page
2-2
February 2004
Voyager® with UnicodeTM
Generating Input Files to Create Reports and Notices
NOTE:
All of the SIFs remain in the Latin-1 character set. If elements in the SIF were
stored in the database using the UnicodeTM character set, they are converted to
Latin-1 before being exported to the SIF.
Once an input file has been created it is stored in the /m1/voyager/xxxdb/rpt
directory (where xxxdb represents the database name). If there is an existing
.inp file in the rpt directory, when you run another job the additional notices or
reports are added to the existing file. It does not overwrite the file. Therefore, you
do not have to run Reporter every time you run a job.
Log files
In addition to the input files, when running any batch job a log file is generated and
placed in the /m1/voyager/xxxdb/rpt directory. The log files are named
based on the module. For example, the log file created after running an
Acquisitions batch job is named acqjob.log, similarly for cataloging it is named
catjob.log.
The log files provide information about how the jobs were completed. It will
include information about the date, time, activity, results, and errors encountered
for each job run.
If there is a log file already in the /m1/voyager/xxxdb/rpt directory, the new
information will be added to the end of that log file.
Log files should be reviewed for archiving or deleting on a periodic basis.
Creating Input Files for Acquisitions
To create the reports and notices for Acquisitions you must either complete certain
activities in the Acquisitions module, and/or run acquisitions batch jobs on the
server.
There are three batch jobs that can be run on the server to generate report and
notice input files for Acquisitions.
Endeavor Information Systems, Inc.
See notice on first page
February 2004
Voyager® with UnicodeTM
2-3
Creating Input File(s) from the Acquisitions Module
Table 2-1 provides an overview of the Acquisition activities that create an input file
on the server. The table includes the activity, the name of the file created, the
name of the report or notice, and the record type.
Table 2-1.
Acquisition activities that create an input file on the server
Acquisitions Activity
Report or Notice
Name
Input File Name
Record Type
Number
Printing a purchase
order
Purchase Order
report
acqrprts.xxxx.inp
Type 00
Canceling a purchase order
Cancellation notice
acqnotes.xxxx.inp
Type 00
Generating a claim
for a monographic
item
Order claim notice
acqnotes.xxxx.inp
Type 02
Generating a claim
for a serial item
Serial Claim notice
acqnotes.xxxx.inp
Type 03
Approving an
invoice and printing
Voucher/check
request
acqnotes.xxxx.inp
Type 04
Generating a return
Return notice
acqnotes.xxxx.inp
Type 01
For information on how to complete the activities, see the Voyager Acquisitions
User’s Guide.
When any of these activities takes place a .inp file is created. For example, if a
purchase order is queued to print, the acqrprts.xxxx.inp file is generated. It
follows the Acquisitions Reports Standard Interface Format (SIF) containing a
record of type 00.
Endeavor Information Systems, Inc.
See notice on first page
2-4
February 2004
Voyager® with UnicodeTM
Generating Input Files to Create Reports and Notices
Creating Input File(s) by Acquisitions batch jobs Acqjob
There are three batch jobs that can be run to generate report and notice input files
for Acquisitions. Table 2-2 provides on overview of the job number, job name,
name of the file produced, the name of the report or notice, and the record type.
Table 2-2.
Acquisitions batch jobs
Acquisitions
Batch Job Number
Acquisitions Batch
Job Name
Report or
Notice Name
Input File Name
Record
Number
Type
Acqjob 1
Order Claim/Cancel Processing
Order Claim
Notice
Does not create a .inp file
until a claim or cancel is
generated from within the
acquisitions module.
Type 00
Serial Claim
Notice
Type 02
Type 03
acqnotes.xxxx.inp
Acqjob 2
Open Orders
Report
Open Orders
Report (when
a specific
location is
selected)
acqrprts.xxxx.inp
Type 01
Type 02
Global Open
Order Report
(all locations
are selected)
Acqjob 3
Fund Snapshot report
acqrprts.xxxx.inp
Type 03
Rollover Status
Report
Fund Rollover Status
acqrprts.xxxx.inp
Type 09
(Global report)
Copy Rollover Status
Fund Snapshot
Report
(Global report)
Acqjob 4
Type 11
See the Voyager Technical User’s Guide for information on Acqjob 5, Fix Exchange Rates.
The files created are named either acqrprts.xxxx.inp or
acqnotes.xxxx.inp. Where the xxxx in the filename corresponds to the print
location code as defined in the System Administration module’s Systems - Print
Locations work space, see the Voyager System Administration User’s Guide for
additional information.
The file is located in the in the /m1/voyager/xxxdb/rpt directory (where
xxxdb represents the database name).
Endeavor Information Systems, Inc.
See notice on first page
February 2004
Voyager® with UnicodeTM
2-5
The format of the acqrprts.xxxx.inp file follows the Acquisitions Reports
Standard Interface File format (SIF) as described in the Voyager Technical User’s
Guide. The format of the acqnotes.xxxx.inp file follows the Acquisitions
Notices Standard Interface File format (SIF) as described in the Voyager
Technical User’s Guide.
NOTE:
If an input file already exists, Acquisitions will add the current report record(s) to
the existing file.
The Acqjob.log file
In addition to the acqnotes.xxxx.inp and acqrprts.xxxx.inp files, when
running any acquisitions job an acqjob.log file is generated and placed in the
/m1/voyager/xxxdb/rpt directory.
The Acquisitions Batch Jobs
This section explains the purpose of each of the Acquisitions batch jobs and the
message expected in the acqjob.log file after the job is run
Order Claim/Cancel Processing (Acqjob 1)
This acquisitions batch job updates line item copies on purchase orders to System
Claim or System Cancel, if the Claim Interval or Cancel After date has been
surpassed.
!
IMPORTANT:
Acqjob 1 does not generate the input file. It marks a line item as System
Claim or System Cancel. After a line item has been marked it is sent to the
Problems list (Acquisitions> Order Maintenance> Problems) from which
a claim or cancellation notice can be generated. This is when the .inp file is
created on the server.
Therefore to create the .inp file you must go into the Acquisitions module to
generate the claim or cancellation.
For a detailed explanation of how Acqjob 1 determines whether items should be
marked with System Claim or System Cancel, see the Voyager Acquisitions
User’s Guide.
NOTE:
Acqjob 1 is a batch job that should be run daily. This job is added to a cron as part
of the installation process.
Endeavor Information Systems, Inc.
See notice on first page
2-6
February 2004
Voyager® with UnicodeTM
Generating Input Files to Create Reports and Notices
The acqjob.log should include the day, date, time entry, and possibly the
following messages.
Processing Monographic Claims... COMPLETED
Processing Serial Issues Not Received... COMPLETED
Processing Serial Claims... COMPLETED
Open Orders Report (Acqjob 2)
This acquisitions batch job lists all open orders for specific (or all) order locations
and specific (or all) ledgers.
An open order is determined by a looking at the line item copy status and its
invoice status. See the Voyager Acquisitions User’s Guide for more information.
It is a tool to identify where line items are in the order process. For example, if a
line item’s status is Received Complete but it has not been invoiced, a decision
can be made regarding paying for the item out of the current year's funds. In this
case, the Open Orders Report would alert you to the fact that this line item should
be invoiced prior to running Fiscal Period Close (see the Voyager Acquisitions
User’s Guide), or the line item be rolled over and the funds recommitted.
There are various statuses on the Open Orders Report. If the Open Orders
invoice status is Pending, it means that no invoice exists. If the Open Orders
invoice status is Invoice Pending, it means that there is a pending invoice. If the
Open Orders invoice status is Invoiced, there is an approved invoice.
The acqjob.log should include the day, date, time entry, and possibly the
following message.
Processing Open Order Report... COMPLETED
Fund Snapshot Report-Global Distribution (Acqjob 3)
This acquisitions batch job provides a fund snapshot report including information
on all Ledgers/Funds.
When running this report you must select one (or all) fiscal periods.
The acqjob.log should include the day, date, time entry, and possibly the
following message.
Processing Fund Snapshot Report... COMPLETED
Rollover Status Report-Global Distribution (Acqjob 4)
This acquisitions batch job produces two Rollover Status reports. One report is the
copy rollover status report, the other report the fund rollover status report.
Endeavor Information Systems, Inc.
See notice on first page
February 2004
Voyager® with UnicodeTM
2-7
When running this report you need to have the rollover date.
The acqjob.log should include the day, date, time entry, and possibly the
following messages.
Thu Jan 31 17:54:26 2002 Processing Rollover Status
Report...
Thu Jan 31 17:54:26 2002 ...COMPLETED
NOTE:
One additional batch job, Pfpc_run, may generate an acqrprts.xxxx.inp
file. This job runs the Fiscal Period Close program. If the site wants they can
generate reports when running this batch job. The reports are the open orders
before rollover report (record type 04), the open orders after rollover reports
(record type 05), the fund snapshot before rollover report (record type 06), and the
fund snapshot after rollover report (record 07). See the Voyager Acquisitions
User’s Guide for more information on Fiscal Period Close and this batch job.
Running Acquisitions Batch Jobs
To run these batch jobs on the server, the operator enters the appropriate
command line at the /m1/voyager/xxxdb/sbin prompt. To do this the
operator needs to know the job number and the specific options to use.
Table 2-3 provides a list of the options and their descriptions.
Table 2-3.
Acquisitions batch job options codes and description
Option Code
Description
-d<database>
Name of database with which to connect
-u<user/password>
User’s name and password: use the format
<user/password>. For example, for user name
Don and password Moose
Enter -uDon/Moose
-j<job #>
Number of the job you want to run (1 through 4)
-o<location>
Location name or number (for Job 2 only)
-e<ledger>
Ledger name or number (for Job 2 only)
-f<fiscal period #>
Fiscal period number (for Job 3 only)
-r<YYYY-MM-DD>
Roll date (for Job 4 only)
-n<run #>
Run number of the rollover
-l
List job options
Endeavor Information Systems, Inc.
See notice on first page
2-8
February 2004
Voyager® with UnicodeTM
Generating Input Files to Create Reports and Notices
Table 2-3.
Acquisitions batch job options codes and description
Option Code
Description
-v
Display version information
-h
Display usage/help statement
Procedure 2-1. Running acquisitions batch jobs at the command line
Use the following to run acquisitions batch jobs at the command line.
The example in this procedure illustrates how to run Acqjob 2 (Open Orders
report) for all order locations and the ledger named General.
1. At the /m1/voyager/xxxdb/sbin directory on your server, enter the command
line
Pacqjob -j2 -oALL -eGeneral
This command instructs the server to run Acqjob 2, for all order locations, for the
ledger named General.
Result: The job runs. The screen displays that it is processing the Open Order
Report, displays the completed message when done, then it returns to the
/m1/voyager/xxxdb/sbin directory (see Figure 2-1).
Figure 2-1.
Display when running Acquisitions batch job (Acqjob 2)
The acqjob.log should include the day, date, time entry, and possibly the
following message.
Processing Open Order Report... COMPLETED
Endeavor Information Systems, Inc.
See notice on first page
February 2004
Voyager® with UnicodeTM
2-9
Procedure 2-2. Running Pacqjob 2 in a step-by step manner
This procedure gives an example of how to run Pacqjob 2 in a step-by-step
manner using the system prompts to provide the additional information needed to
run the job.
1. At the sbin prompt enter Pacqjob
Result: The system prompts you to select the batch job you want to run, (see
Figure 2-2).
Figure 2-2.
Prompt for the number of the batch job to run
2. Enter the number of the job. In this example, enter 2
Result: Since this job requires location information, the location prompt appears,
with a list of locations and their corresponding numbers (see Figure 2-3).
Figure 2-3.
Prompt for the location number
3. Enter the number of the Location, for example, enter 0, for the Acquisitions location.
Result: Since this job requires ledger information, the ledger prompt appears,
with a list of ledgers and their corresponding numbers (see Figure 2-4).
Endeavor Information Systems, Inc.
See notice on first page
2-10
February 2004
Voyager® with UnicodeTM
Generating Input Files to Create Reports and Notices
Figure 2-4.
Prompt for the ledger number
4. Enter the ledger number. In this example, entering 14 would correspond to ALL the
ledgers.
Result: The system begins to run the job, when completed the system displays
the COMPLETED message (see Figure 2-5).
Figure 2-5.
The batch job is completed
If you want to run a server activity using a telnet session, and you do not want to
perform it interactively, you can use the following command line to make certain
that the activity continues, even if the telnet session is lost,
nohup <activity with parms> &
where <activity with parms> is the command followed by any required and
optional parameters. This command will not guarantee that the activity will be
completed if the server itself is not available.
After running these jobs the input files, acqrprts.xxxx.inp and/or
acqnotes.xxxx.inp, are placed in the /m1/voyager/xxxdb/rpt directory.
They are available to Reporter such that the Acquisitions reports and notices can
be printed or e-mailed.
Endeavor Information Systems, Inc.
See notice on first page
February 2004
Voyager® with UnicodeTM
2-11
Creating input files using WebAdmin - Acquisitions
Utilities
WebAdmin is a web-based program from which users can run server batch jobs.
For information on setting up and logging in to WebAdmin, see the Voyager
Technical User’s Guide.
Instead of starting a telnet session and entering the batch job commands at a
command line prompt, WebAdmin allows users to run batch jobs using a web
browser.
WebAdmin works in exactly the same way as the batch jobs because WebAdmin
uses the existing batch jobs in order to do the processing. You can also access
the log and report files that are created by the batch jobs through WebAdmin.
After logging in to WebAdmin, the WebAdmin main page displays (see Figure 26).
Figure 2-6.
WebAdmin Main Page
Endeavor Information Systems, Inc.
See notice on first page
2-12
February 2004
Voyager® with UnicodeTM
Generating Input Files to Create Reports and Notices
From this page users select the utilities corresponding to the specific modules and
can further choose specific batch jobs. Users can access the batch jobs by
clicking the appropriate link.
The Acquisitions Reports and Processes utility allows users to run the
Acquisitions reports and notices. Users can run Acquisitions batch jobs to
produce reports and notices. See Creating Input Files for Acquisitions on page 23.
Procedure 2-3. Running Acquisitions batch jobs using WebAdmin
Use the following to run the Acquisitions Reports and Processes Utility.
1. From the WebAdmin main page (Figure 2-6), Acquisitions section, click the Reports
and Processes link.
Result: The Acquisitions Reports and Notices page displays (see Figure 2-7).
Figure 2-7.
WebAdmin Acquisitions Reports and Notices page
2. From the drop-down menu
a. select the Acquisitions job that you want to run, by highlighting it.
b. enter your e-mail address in the E-Mail Address field.
Endeavor Information Systems, Inc.
See notice on first page
February 2004
Voyager® with UnicodeTM
2-13
NOTE:
Note: you must enter the entire email address (that is, [email protected]) in
order for the e-mail to be sent.
c. click the Submit Acqjob button.
NOTE:
The utility will prompt you for any additional information that it requires in order to
run that batch job.
For example, when choosing the open order report acquisitions job (number two),
the user must also define the location and the ledger. Because of this, a job
options page displays with drop down menus allowing the user to make the
selections.
Figure 2-8.
Job options page
After making the selections necessary for the job selected the user clicks the OK
button (see Figure 2-8).
Result: The job runs, the Job Scheduler page displays, and an e-mail is sent to
the user (see Figure 2-9).
Endeavor Information Systems, Inc.
See notice on first page
2-14
February 2004
Voyager® with UnicodeTM
Generating Input Files to Create Reports and Notices
Figure 2-9.
Job Scheduler Page after submitting Acquisitions job number two
using WebAdmin
Once the acqrprts.xxxx.inp and/or acqnotes.xxxx.inp are generated
and placed in the /m1/voyager/xxxdb/rpt directory, they are available for the
Reporter module to produce the report and/or notice.
Creating Input Files for Cataloging
To create the reports for Cataloging you must run cataloging batch jobs on the
server.
There are ten batch jobs that can be run on the server to generate report input
files for Cataloging.
There are three other cataloging batch jobs that do not produce input files,
therefore they are not run through Reporter. These jobs, Catjob 11 through Catjob
13 are discussed in the Voyager Technical User’s Guide, and the “Global
Headings Change” section of the Voyager Cataloging User’s Guide.
Table 2-4 provides on overview of these jobs, including the job number, job name,
the name of the report, and the record type.
For Cataloging batch jobs, the file that is created is always named
catrprts.xxxx.inp.
Endeavor Information Systems, Inc.
See notice on first page
February 2004
Voyager® with UnicodeTM
2-15
Since there are no cataloging notices, there is no catnotes.xxxx.inp file.
Table 2-4.
Cataloging batch jobs
Cataloging Batch
Job Number
Cataloging Batch
Job Name
Report Name
Record Type Number
Catjob 1
Unauthorized Subject Headings
Report
Unauthorized Subject Headings
Type 00
Catjob 2
Unauthorized Name
Headings Report
Unauthorized Name
Headings
Type 01
Catjob 3
Unauthorized Title
Headings Report
Unauthorized Title
Headings
Type 02
Catjob 4
Unauthorized
Name/Title Headings Report
Unauthorized
Name/Title Headings
Type 03
Catjob 5
Duplicate Authorized Headings
Report
Duplicate Authority
Records
Type 05
Catjob 6
’See’ References
With Linked Bib
Records Report
See Ref’s with
linked bib records
Type 06
Catjob 7
’See’ References
Authorized In
Another Authority
Record Report
See Refs authorized in another
record
Type 07
Catjob 8
’See Also’ Reference Without Corresponding Authority
Record Report
See Also Refs without an Authority
record
Type 08
Catjob 9
HTTP Verification Within Date Range
856 Link Failure
report
Type 09
Catjob 10
HTTP Verification All New Links
856 Link Failure
report
Type 09
After the job is run the input file catrprts.xxxx.inp is created. Where the xxxx
in the filename corresponds to the print location code as defined in the System
Administration module’s Systems - Print Locations work space, see the Voyager
System Administration User’s Guide for additional information.
It is located in the in the /m1/voyager/xxxdb/rpt directory (where xxxdb
represents the database username).
Endeavor Information Systems, Inc.
See notice on first page
2-16
February 2004
Voyager® with UnicodeTM
Generating Input Files to Create Reports and Notices
The format of the catrprts.xxxx.inp file follows the Cataloging Reports
Standard Interface File format (SIF) as described in the Voyager Technical User’s
Guide.
NOTE:
If an input file already exists, Catalog will add the current report record(s) to the
existing file.
The Catjob.log File
In addition to the catrprts.xxxx.inp, when running any Cataloging job a
catjob.log file is generated and placed in the /m1/voyager/xxxdb/rpt
directory.
The Cataloging batch jobs
This section explains the purpose of each of the Cataloging batch job and the
message expected in the catjob.log file after the job is run.
The Cataloging batch jobs primarily center around authority headings. Catjobs 1
through 4 produce reports of headings used in bibliographic records for which
there are no authority records in your database. Catjob 5 lists the authority
records in your database that are duplicates. Catjobs 6 through 8 also deal with
authorities, producing reports about your 'See' and 'See also' references. Catjobs
9 and 10 evaluate any hypertext links you may have in the 856 tags of your
bibliographic or holdings records. Finally, the 3 remaining catjobs 11 through 13
are for global headings changes. These are not run through Reporter, see the
Voyager Technical User’s Guide for information on how to run these jobs.
NOTE:
None of the cataloging batch jobs are required to be run.
!
IMPORTANT:
If your institution uses the unauthorized headings reports, these reports
should be run immediately before and immediately after an upgrade. This
will allow your institution to evaluate the headings from before and after the
index regeneration that is part of the Voyager upgrade. Also, please note
that the 'Create Date' associated with these headings will change to the
date of the upgrade. Therefore, using date ranges for the Catjob reports,
there will be a large number unauthorized headings if you include the date
of the upgrade.
Endeavor Information Systems, Inc.
See notice on first page
February 2004
Voyager® with UnicodeTM
2-17
Unauthorized Subject Headings Report (Catjob 1)
This batch job generates a report of all subject headings in use that do not have
an authority record. That is, when there is a subject heading in a bibliographic
record that does not link to an authority record in your database, it is considered
an unauthorized heading and goes on the report.
Additionally, this job also includes unauthorized subdivisions.
Sites can use this report as a tool for determining what authority work needs to be
done on their database.
This job requires start and end dates.
It processes all your bibliographic records in groups. The message Headings
processed in ##’s displays. Also hash marks display to indicate the job is
progressing.
It is recommended to wait until after hours when everyone is logged of the
cataloging module to run this job.
The catjob.log file should include the day, date, time entry, and possibly the
following messages.
Tue Jan 15 09:53:38 2002 Job execution begun
Tue Jan 15 09:53:38 2002 Connection to Voyager Database
successful...
Tue Jan 15 09:53:39 2002 Subject Report
Tue Jan 15 10:22:46 2002 processed 225 headings of type
Subject
Tue Jan 15 10:32:46 2002 Job execution complete
Unauthorized Name Headings Report (Catjob 2)
This batch job generates a report of all name headings in use that do not have an
authority record. That is, when there is a name heading in a bibliographic record
that does not link to an authority record in your database, it is considered an
unauthorized heading and goes on the report.
Additionally, this job also includes unauthorized subdivisions.
Sites can use this report as a tool for determining what authority work needs to be
done on their database.
This job requires start and end dates.
Endeavor Information Systems, Inc.
See notice on first page
2-18
February 2004
Voyager® with UnicodeTM
Generating Input Files to Create Reports and Notices
It processes all your bibliographic records in groups. The message Headings
processed in ##’s displays. Also hash marks display to indicate the job is
progressing.
It is recommended to wait until the evening when everyone is logged of the
cataloging module to run this job.
The catjob.log file should include the day, date, time entry, and possibly the
following messages.
Tue Jan 15 10:32:11 2002 Job execution begun
Tue Jan 15 10:32:11 2002 Connection to Voyager Database
successful...
Tue Jan 15 10:32:12 2002 Name Report
Tue Jan 15 10:44:32 2002 processed 0 headings of type
Name
Tue Jan 15 10:54:11 2002 Job execution complete
Unauthorized Title Headings Report (Catjob 3)
This batch job generates a report of all title headings in use that do not have an
authority record. That is, when there is a title heading in a bibliographic record that
does not link to an authority record in your database, it is considered an
unauthorized heading and goes on the report.
Additionally, this job also includes unauthorized subdivisions.
Sites can use this report as a tool for determining what authority work needs to be
done on their database.
This job requires start and end dates.
It processes all your bibliographic records in groups. The message Headings
processed in ##’s displays. Also hash marks display to indicate the job is
progressing.
The catjob.log file should include the day, date, time entry, and possibly the
following messages.
Tue Jan 15 11:00:45 2002 Job execution begun
Tue Jan 15 11:00:46 2002 Connection to Voyager Database
successful...
Tue Jan 15 11:00:48 2002 Title Report
Tue Jan 15 11:02:14 2002 processed 0 headings of type
Title
Endeavor Information Systems, Inc.
See notice on first page
February 2004
Voyager® with UnicodeTM
2-19
Tue Jan 15 11:04:14 2002 Job execution complete
Unauthorized Name/Title Headings Report (Catjob 4)
This batch job generates a report of all name/title headings in use that do not have
an authority record. That is, when there is a name/title heading in a bibliographic
record that does not link to an authority record in your database, it is considered
an unauthorized heading and goes on the report.
Additionally, this job also includes unauthorized subdivisions.
Sites can use this report as a tool for determining what authority work needs to be
done on their database.
This job requires start and end dates.
It processes all your bibliographic records in groups. The message Headings
processed in ##’s displays. Also hash marks display to indicate the job is
progressing.
The catjob.log file should include the day, date, time entry, and possibly the
following messages.
Tue Jan 15 11:06:10 2002 Job execution begun
Tue Jan 15 11:06:11 2002 Connection to Voyager Database
successful...
Tue Jan 15 11:06:12 2002 Name/Title Report
Tue Jan 15 11:13:33 2002 processed 0 headings of type
Name/Title
Tue Jan 15 11:15:45 2002 Job execution complete
NOTE:
These jobs can take several hours. The system might seem to be hanging but it is
not. Once the job brings back the first hundred records it will notify you. You can
verify that the job is working, you can open a second telnet session and do an ls
-l command from the /m1/voyager/xxxdb/report directory and look for the
catrpts.xxx.inp file that is being generated, note the file size, then look again
after a few moments and check the size again. The file size should be increasing.
Duplicate Authorized Headings Report (Catjob 5)
This batch job generates a report of headings, listed in alphabetical order, that are
authorized by multiple authority records. The report is generated by matching the
contents of the 008 and of the 1XX fields. When prompted for information, enter
the letter with which you want to begin or end the report as prompted.
Endeavor Information Systems, Inc.
See notice on first page
2-20
February 2004
Voyager® with UnicodeTM
Generating Input Files to Create Reports and Notices
Sites can use this report as a tool for determining what authority work needs to be
done on their database.
When prompted for information, enter the letter with which you want to begin and
also the letter you want to go to, that is from heading and to heading.
It processes all your authority records in groups. The message Headings
processed in ##’s displays. Also hash marks display to indicate the job is
progressing.
The catjob.log file should include the day, date, time entry, and possibly the
following messages.
Tue Jan 15 09:18:53 2002 Job execution begun
Tue Jan 15 09:18:55 2002 Connection to Voyager Database
successful...
Tue Jan 15 09:19:02 2002 duplicate authority report
Tue Jan 15 09:19:13 2002 In reporting routine duplicate authority
Tue Jan 15 09:28:53 2002 Job execution complete
‘See’ References With Linked Bib Records Report (Catjob 6)
This batch job generates a report of 4XX headings that have bibliographic records
attached to them.
Sites can use this report as a tool for determining what authority work needs to be
done on their database.
When prompted for information, enter the letter with which you want to begin and
also the letter you want to go to, that is from heading and to heading.
It processes all the records in groups. The message Headings processed in
##’s displays. Also hash marks display to indicate the job is progressing.
The catjob.log file should include the day, date, time entry, and possibly the
following messages.
Tue Jan 15 09:18:53 2002 Job execution begun
Tue Jan 15 09:18:55 2002 Connection to Voyager Database
successful...
Tue Jan 15 09:29:01 2002 reference with linked bib
report
Tue Jan 15 09:29:07 2002 In reporting routine - see
reference
Endeavor Information Systems, Inc.
See notice on first page
February 2004
Voyager® with UnicodeTM
2-21
Tue Jan 15 09:28:53 2002 Job execution complete
‘See’ References Authorized In Another Authority Record Report (Catjob 7)
This batch job generates a report of 4XX headings that match the 1XX field of
other Authority records.
Sites can use this report as a tool for determining what authority work needs to be
done on their database.
When prompted for information, enter the letter with which you want to begin and
also the letter you want to go to, that is from heading and to heading.
It processes all your authority records in groups. The message Headings
processed in ##’s displays. Also hash marks display to indicate the job is
progressing.
The catjob.log file should include the day, date, time entry, and possibly the
following messages.
Tue Jan 15 09:34:30 2002 Job execution begun
Tue Jan 15 09:34:31 2002 Connection to Voyager Database
successful...
Tue Jan 15 09:34:33 2002 reference authorized in
authority record report
Tue Jan 15 09:34:37 2002 In reporting routine - see
reference auth
Tue Jan 15 09:36:30 2002 Job execution complete
‘See Also’ Reference Without Corresponding Authority Record Report
(Catjob 8)
This batch job generates a report of Authority records that have a 5XX field that
does not match the 1XX field of any Authority records.
Sites can use this report as a tool for determining what authority work needs to be
done on their database.
When prompted for information, enter the letter with which you want to begin and
also the letter you want to go to, that is from heading and to heading.
It processes all your authority records in groups. The message Headings
processed in ##’s displays. Also hash marks display to indicate the job is
progressing.
Endeavor Information Systems, Inc.
See notice on first page
2-22
February 2004
Voyager® with UnicodeTM
Generating Input Files to Create Reports and Notices
The catjob.log file should include the day, date, time entry, and possibly the
following messages.
Tue Jan 15 09:40:39 2002 Job execution begun
Tue Jan 15 09:40:40 2002 Connection to Voyager Database
successful...
Tue Jan 15 09:40:46 2002 reference without
corresponding auth report
Tue Jan 15 09:40:48 2002 In reporting routine - see
reference
Tue Jan 15 09:42:39 2002 Job execution complete
HTTP Verification - Within Date Range (Catjob 9)
This batch job checks links in the 856 fields of the bibliographic and holdings
records that were last checked between the dates specified in the date range to
find out whether or not they are valid.
Sites should run this job to go back and re-check links that have previously been
checked.
This job requires a date range. The date range refers to the last time that specific
job was run for those links. This is targeted at large sites where they may have a
large amount of http links to verify and they don't need to re-verify those links
which were just checked a week or two ago.
It allows a site to select a smaller range instead of checking all the links. As an
example, if you had 5,000 links in the database, you would probably only want to
check the oldest 500 or so. It depends upon the number of links, how many
customers are using the system at the time and what type of accuracy the site
needs regarding valid links.
The catjob.log file should include the day, date, time entry, and possibly the
following messages.
Tue Jan 15 09:50:15 2002 Job execution begun
Tue Jan 15 09:50:15 2002 Connection to Voyager Database
successful...
Tue Jan 15 09:50:16 2002 HTTP Verify - Date Range
Tue Jan 15 09:50:37 2002 Opening report file...
Tue Jan 15 09:50:37 2002 Building HTTP Bad Link Date
Range Report...
Tue Jan 15 09:50:37 2002 Processed 0 Valid HTTP Links
Endeavor Information Systems, Inc.
See notice on first page
February 2004
Voyager® with UnicodeTM
2-23
Tue Jan 15 09:59:15 2002 Job execution complete
HTTP Verification - All New Links (Catjob 10)
This batch job checks every new 856 field link, for both the bibliographic and
holdings records, in the database to determine whether or not they are valid. That
is, catjob 10 is to check all new links.
The screen display will read Selecting and verifying HTTP links...
Please wait..., and hash marks display.
The catjob.log file should include the day, date, time entry, and possibly the
following messages.
Tue Jan 15 09:46:10 2002 Job execution begun.
Tue Jan 15 09:46:10 2002 Connection to Voyager Database
successful...
Tue Jan 15 09:46:11 2002 HTTP Verify - All
Tue Jan 15 09:46:11 2002 Opening report file...
Tue Jan 15 09:46:11 2002 Building HTTP Bad Link
Report...
Tue Jan 15 09:49:24 2002 Processed 24 Valid HTTP Links
Tue Jan 15 09:49:24 2002 Processed 44 Invalid HTTP
Links
Tue Jan 15 09:55:10 2002 Job execution complete
NOTE:
Catjob 10 does not revalidate links that have previously been validated, whereas
catjob 9 does revalidate links. As a result, you should run catjob 10 first to
validate all new links then run catjob 9 to revalidate links that were last checked
within the specified date range.
Running cataloging batch jobs
To run these batch jobs on the server, the operator enters the appropriate
command line at the /m1/voyager/xxxdb/sbin prompt. To do this the
operator needs to know the job number and the specific options to use.
Endeavor Information Systems, Inc.
See notice on first page
2-24
February 2004
Voyager® with UnicodeTM
Generating Input Files to Create Reports and Notices
Table 2-5 provides a list of the options and their descriptions
Table 2-5.
Cataloging batch job options codes and description
Option Code
Description
-d<database>
Name of database with which to connect
-u<user/password>
User’s name and password: use the format
<user/password>. For example, for user name
Don and password Moose
Enter -uDon/Moose
-j<job #>
Number of the job you want to run (1 through 4)
-s<YYYY-MM-DD>
Start date for jobs 1, 2, 3, 4, and 9
-e<YYYY-MM-DD>
End date for jobs 1, 2, 3, 4, and 9. The date
that you enter after -e will not be included in the
report.
Therefore enter the date one day after the end
date for which you want information.
For example, to get a report for the month of
January enter
-s YYYY-01-01 and -eYYYY-02-01.
To run a report for a single day, include the day
you want as the start and the following day as
the end date. For example, entering
-s 2002-02-10 -e2002-02-11 would
result in a report for 02-10-2002.
-f<from heading>
For jobs 5 through 8, the point in the alphabet
from which the job should start including
records. For example, if you want your headings list to begin at ch and include subsequent
records, you would enter -f ch.
To get only headings beginning with the letter
z, for the from parameter enter z and do not
enter any letter for the to parameter.
Digits are considered to be before the letter a in
the alphabet.
Endeavor Information Systems, Inc.
See notice on first page
February 2004
Voyager® with UnicodeTM
2-25
Table 2-5.
Cataloging batch job options codes and description
Option Code
Description
-t<to heading>
For jobs 5 through 8, the point in the alphabet
from which the job should stop including
records.
When a range of letters is used, the report will
run up to the -t (To) parameter letter. It doesn't
include that letter. Therefore, if you want your
headings list to end at q, you would enter -t r.
Digits are considered to be before the letter a in
the alphabet.
-l
List job options.
-v
Display version information.
-h
Display usage/help statement.
Procedure 2-4. Running cataloging batch jobs at the command line
Use the following to run Cataloging batch jobs at the command line.
The example in this procedure illustrates how to run Catjob 5, Duplicate
Authorized Headings Report from headings beginning with A to headings
beginning with F.
1. At the /m1/voyager/xxxdb/sbin directory on your server, enter the command
line
Pcatjob -j5 -fA -tF
This instructs the server run Pcatjob number 5, begin with headings that start with
A and end with headings that start with F.
Result: The job runs. The screen displays that it is processing headings in groups
of 50, then displays the disconnecting message when done, then it returns to the
/m1/voyager/xxxdb/sbin directory (see Figure 2-10).
Endeavor Information Systems, Inc.
See notice on first page
2-26
February 2004
Voyager® with UnicodeTM
Generating Input Files to Create Reports and Notices
Figure 2-10.
Display when running Cataloging batch job (Catjob 5)
The catjob.log file then displays:
Fri Dec 28 10:45:02 2001 Job execution begun.
Fri Dec 28 10:45:03 2001 Connection to Voyager Database
successful...
Fri Dec 28 10:45:03 2001 duplicate authority report
Fri Dec 28 10:45:03 2001 In reporting routine duplicate authority.
Fri Dec 28 10:49:13 2001 Job execution complete.
If you look at the catrprts.xxxx.inp file, there will be entries of record type
05. See Figure 2-11 which displays a portion of that file.
Figure 2-11.
Catrprts.xxxx.inp file with record type 05 after running Catjob 5
NOTE:
Batch jobs can be run in a step-by step manner by entering the command
Pcatjob at the sbin prompt and then following the system prompts to provide the
additional information needed to run the job.
Endeavor Information Systems, Inc.
See notice on first page
February 2004
Voyager® with UnicodeTM
2-27
If you want to run a server activity using a telnet session, and you do not want to
perform it interactively, you can use the following command line to make certain
that the activity continues, even if the telnet session is lost,
nohup <activity with parms> &
where <activity with parms> is the command followed by any required and
optional parameters. This command will not guarantee that the activity will be
completed if the server itself is not available.
After you run the command, which generates the catrprts.xxxx.inp, it is
placed in the /m1/voyager/xxxdb/rpt directory. You are now ready to run the
Voyager Reporter so that the Cataloging reports can be printed.
There are three other catjobs, numbers 11 through 13, that can be run on the
server to process global headings changes. These jobs do not create the
catrprts.xxxx.inp file, so they do not have to be processed in the Reporter
module. For information on these jobs see the Voyager Technical User’s Guide.
Creating input files using WebAdmin - Cataloging
Utilities
WebAdmin is a web-based program from which users can run server batch jobs.
For information on setting up and logging in to WebAdmin, see the Voyager
Technical User’s Guide.
Instead of starting a telnet session and entering the batch job commands at a
command line prompt, WebAdmin allows users to run batch jobs using a web
browser.
WebAdmin works in exactly the same way as the batch jobs because WebAdmin
uses the existing batch jobs in order to do the processing. You can also access
the log and report files that are created by the batch jobs through WebAdmin.
After logging in to WebAdmin, the WebAdmin main page displays (see Figure 212).
Endeavor Information Systems, Inc.
See notice on first page
2-28
February 2004
Voyager® with UnicodeTM
Generating Input Files to Create Reports and Notices
Figure 2-12.
WebAdmin main page
From this page users select the utilities corresponding to the specific modules and
can further choose specific batch jobs. Users can access the batch jobs by
clicking the appropriate link.
The Cataloging Reports utility allows users to run the Cataloging reports. Users
run Cataloging batch jobs to produce reports, see The Cataloging batch jobs on
page 2-17.
Procedure 2-5. Running cataloging batch jobs using WebAdmin
Use the following to run the Cataloging Reports Utility.
1. From the WebAdmin main page (Figure 2-12), Cataloging section, click the
Cataloging Reports link.
Result: The Cataloging Reports and Processes page displays (see Figure 213).
Endeavor Information Systems, Inc.
See notice on first page
February 2004
Voyager® with UnicodeTM
2-29
Figure 2-13.
WebAdmin Cataloging Reports and Processes page
2. From the drop-down menu
a. select the Cataloging job that you want to run by highlighting it
b. enter your e-mail address in the E-Mail Address field.
NOTE:
Note: you must enter the entire e-mail address (that is, [email protected]) in
order for the e-mail to be sent.
c. click the Submit Catjob button.
NOTE:
The utility will prompt you for any additional information that it requires in order to
run the batch job selected.
For example, when choosing catjob 9, the user must also define start and end
dates. Because of this, dialog boxes requesting this information display (see
Figure 2-14). Enter any necessary information and click the OK button.
Endeavor Information Systems, Inc.
See notice on first page
2-30
February 2004
Voyager® with UnicodeTM
Generating Input Files to Create Reports and Notices
Figure 2-14.
Dialog boxes requesting start and end dates
Result: The job runs, the Job Scheduler page displays (Figure 2-15), and an
e-mail is sent to the user.
Figure 2-15.
Job Scheduler Page after submitting Catjob 9 using WebAdmin
Once the catrprts.xxxx.inp file is generated and placed in the
/m1/voyager/xxxdb/rpt directory, it is available for the Reporter module such
that the reports can be printed.
Creating Input Files for Circulation
To create the Reports and Notices for Circulation you must run circulation batch
jobs on the server.
Endeavor Information Systems, Inc.
See notice on first page
February 2004
Voyager® with UnicodeTM
2-31
There are many circulation batch jobs that produce either a
crcrprts.xxxx.inp or a crcnotes.xxxx.inp input file to use with
Voyager’s Reporter module.
NOTE:
There are other circulation batch jobs that do not produce input files, therefore
they are not run through Reporter. These jobs Circjob 1 Update Shelving Status,
Circjob 8 Archive and Expire Call Slip Requests, Circjob 26 Export OPAC
Requests, Circjob 27 Archive Short Loans, and Circjob 31 Patron Suspension, are
discussed in the Voyager Technical User’s Guide.
Table 2-6 provides on overview of these jobs including the job number, job name,
name of the file produced, the name of the report or notice, and the record type.
Table 2-6.
Circulation batch jobs
Circulation
Batch Job Number
Circulation Batch
Job Name
Report or
Notice Name
Input File Name
Record
Number
Type
Circjob 2
Overdue Notices
Overdue
Notice
crcnotes.xxxx.inp
Type 02
Type 04
Recall-Overdue Notice
Circjob 3
Recall Notices
Recall Notice
crcnotes.xxxx.inp
Type 03
Circjob 4
Fine/Fee Notices
Fine/Fee
Notice
crcnotes.xxxx.inp
Type 05
Circjob 5
Hold Recall Available Notices
Item Available Notice
crcnotes.xxxx.inp
Type 01
Circjob 6
Hold Recall Canceled Notices
Cancellation
Notice
crcnotes.xxxx.inp
Type 00
Circjob 7
Courtesy (Due)
Notices
Courtesy
(due) Notice
crcnotes.xxxx.inp
Type 07
Circjob 12
All Daily Jobs
All of the output from jobs
1-8
crcnotes.xxxx.inp
Type 00
to Type
07
Circjob 14
Fine/Fee Statements
Statement of
Fines/Fees
crcnotes.xxxx.inp
Type 06
Reserved
Items Active
Report
crcrprts.xxxx.inp
Type 00
(all fines/fees)
Circjob 20
Reserved Items
Active Report
Endeavor Information Systems, Inc.
See notice on first page
2-32
February 2004
Voyager® with UnicodeTM
Generating Input Files to Create Reports and Notices
Table 2-6.
Circulation batch jobs
Circulation
Batch Job Number
Circulation Batch
Job Name
Report or
Notice Name
Input File Name
Record
Number
Type
Circjob 21
Reserved Items
Expired Report
Reserved
Items
Expired Rpt
crcrprts.xxxx.inp
Type 01
Circjob 22
Missing In Transit
Report
Missing In
Transit Rpt
crcrprts.xxxx.inp
Type 03
Circjob 23
Transaction Statistics Report
Circ Transaction Statistics Rpt
crcrprts.xxxx.inp
Type 04
Circjob 24
Transaction
Exceptions
Circ Itemrelated
Exceptions
Rpt
crcrprts.xxxx.inp
Type 05
Type 06
Circ Patronrelated
Exceptions
Rpt
Type 07
Circ Transactn-related
Exceptions
Rpt
Circjob 25
Global Transaction Statistics
Report
Global Circ
Transaction
Statistics Rpt
crcrprts.xxxx.inp
Type 08
Circjob 28
Automatic Orders
for Item Distribution
Distribution
Item Order
List Rpt
crcrprts.xxxx.inp
Type 09
The files created are named either crcrprts.xxxx.inp or
crcnotes.xxxx.inp. Where the xxxx in the filename corresponds to the print
location code as defined in the System Administration module’s Systems - Print
Locations work space, see the Voyager System Administration User’s Guide for
additional information.
The file is located in the in the /m1/voyager/xxxdb/rpt directory (where
xxxdb represents the database username).
Endeavor Information Systems, Inc.
See notice on first page
February 2004
Voyager® with UnicodeTM
2-33
The format of the crcrprts.xxxx.inp file follows the Circulation Reports
Standard Interface File format (SIF) as described in the Voyager Technical User’s
Guide. The format of the crcnotes.xxxx.inp file follows the Circulation
Notices Standard Interface File format (SIF) as described in the Voyager
Technical User’s Guide.
NOTE:
If an input file already exists, Circulation will add the current report record(s) to the
existing file.
The Circjob.log file
In addition to the circnotes.xxxx.inp and circrprts.xxxx.inp files,
when running any circulation batch job a circjob.log file is generated and
placed in the /m1/voyager/xxxdb/rpt directory.
The Circulation batch jobs
This section explains the purpose of each of the Circulation batch jobs and the
message expected in the circjob.log file after the job is run.
Overdue Notices (Circjob 2)
This batch job produces standard overdue and recall overdue notices, as well as
lost item processing (marks the item overdue or lost).
If a patron group in its Circulation Profile has the E-mail Overdue Notices or the
E-mail (Other) Overdue Notices dialog boxes checked, that type of notice will be
e-mailed and no notice will be printed. See "Circulation Policy Groups" in the
Voyager System Administration User’s Guide for more information.
It is recommended this job be run daily and can be set up as a cron.
The circjob.log file should include the day, date, time entry, and possibly the
following messages.
Fri Dec 28 12:25:55 2001 Overdue Notices...
Fri Dec 28 12:26:04 2001...COMPLETED
Endeavor Information Systems, Inc.
See notice on first page
2-34
February 2004
Voyager® with UnicodeTM
Generating Input Files to Create Reports and Notices
Recall Notices (Circjob 3)
This batch job produces recall notices.
If a patron group in its Circulation Profile has the E-mail Recall Notices or the Email (Other) Recall Notices dialog boxes checked, the notice will be e-mailed
and no notice will be printed. See "Circulation Policy Groups" in the Voyager
System Administration User’s Guide for more information.
It is recommended this job be run daily and can be set up as a cron.
The circjob.log file should include the day, date, time entry, and possibly the
following messages.
Fri Dec 28 12:33:59 2001 Recall Notices...
Fri Dec 28 12:33:59 2001...COMPLETED
Fine/Fee Notices - new fines/fees only (Circjob 4)
This circulation batch job produces fine/fee notices for new fines/fees since the
last execution of this job.
It is recommended this job be run daily and can be set up as a cron.
The circjob.log file should include the day, date, time entry, and possibly the
following messages.
Fri Dec 28 12:38:21 2001 Fine Fee Notices...
Fri Dec 28 12:38:39 2001...COMPLETED
Hold Recall Available Notices (Circjob 5)
This circulation batch job produces notices when a recalled item is made available
to the person who requested it.
If a patron group in its Circulation Profile has the E-mail Item Available Notices
dialog box checked, the notice will be e-mailed and no notice will be printed. See
"Circulation Policy Groups" in the Voyager System Administration User’s Guide
for more information.
It is recommended this job be run daily and can be set up as a cron.
The circjob.log file should include the day, date, time entry, and possibly the
following messages.
Fri Dec 28 12:40:37 2001 Hold Recall Available
Notices...
Fri Dec 28 12:40:37 2001...COMPLETED
Endeavor Information Systems, Inc.
See notice on first page
February 2004
Voyager® with UnicodeTM
2-35
Hold Recall Canceled Notices (Circjob 6)
This circulation batch job produces notices that inform patrons when their hold
request(s) have expired or been canceled without having been fulfilled.
If a patron group in its Circulation Profile has the E-mail Cancellation Notices
dialog box checked, the notice will be e-mailed and no notice will be printed. See
"Circulation Policy Groups" in the Voyager System Administration User’s Guide
for more information.
It is recommended this job be run daily and can be set up as a cron.
The circjob.log file should include the day, date, time entry, and possibly the
following messages.
Fri Dec 28 12:42:33 2001 Request Expired/Cancelled
Notices...
Fri Dec 28 12:42:34 2001...COMPLETED
Courtesy (Due) Notices (Circjob 7)
This circulation batch job produces notices to remind patrons that items in their
possession are due or due shortly.
If a patron group in its Circulation Profile has the E-mail Courtesy Notices dialog
box checked, the notice will be e-mailed and no notice will be printed. See
"Circulation Policy Groups" in the Voyager System Administration User’s Guide
for more information.
It is recommended this job be run daily and can be set up as a cron.
The circjob.log file should include the day, date, time entry, and possibly the
following messages.
Fri Dec 28 12:44:06 2001 Courtesy Notices...
No courtesy notice interval set. This is the message received
when the site does not use Courtesy Notices.
All Daily Jobs (Circjob 12)
This circulation batch job runs circulation batch jobs 1 through 7. It updates the
shelving status, runs the various notice producing jobs, and runs the accrued fine/
demerit batch job all in one big batch job. It also includes circjob numbers 27,
archive short loans, which should also be run each day for proper circulation
functioning.
Endeavor Information Systems, Inc.
See notice on first page
2-36
February 2004
Voyager® with UnicodeTM
Generating Input Files to Create Reports and Notices
NOTE:
Circjob 12 should be run daily. This job is added to a cron as part of the installation
process. Many sites run this in the early morning hours.
The circjob.log file should include the day, date, time entry, and possibly the
following messages.
Fri Dec 28 12:51:19 2001 All Daily Jobs...
Fri Dec 28 12:51:19 2001 Update Shelving Status...
Fri Dec 28 12:51:20 2001...COMPLETED
Fri Dec 28 12:51:20 2001 Overdue Notices...
Fri Dec 28 12:51:22 2001...COMPLETED
Fri Dec 28 12:51:22 2001 Recall Notices...
Fri Dec 28 12:51:22 2001...COMPLETED
Fri Dec 28 12:51:22 2001 Fine Fee Notices...
Fri Dec 28 12:51:23 2001...COMPLETED
Fri Dec 28 12:51:23 2001 Hold Recall Available
Notices...
Fri Dec 28 12:51:23 2001...COMPLETED
Fri Dec 28 12:51:23 2001 Request Expired/Cancelled
Notices...
Fri Dec 28 12:51:23 2001...COMPLETED
Fri Dec 28 12:51:23 2001 Courtesy Notices...
Fri Dec 28 12:51:23 2001...COMPLETED
Fri Dec 28 12:51:36 2001 Archive and Expire Call Slip
Requests...
Fri Dec 28 12:51:36 2001...COMPLETED
Fri Dec 28 12:51:36 2001 All Daily Jobs... COMPLETED
Fine/Fee Statements-all fines/fees (Circjob 14)
This batch job produces fine/fee statements which include all fines/fees owed.
The circjob.log file should include the day, date, time entry, and possibly the
following messages.
Fri Dec 28 13:04:13 2001 Fine Fee Statements...
Fri Dec 28 13:04:28 2001...COMPLETED
Endeavor Information Systems, Inc.
See notice on first page
February 2004
Voyager® with UnicodeTM
2-37
Reserved Items Active Report (Circjob 20)
This circulation batch job lists all items which should be On Reserve.
The Reserve Items Active report will only print those items that are currently on a
reserve list but not activated (that is On Reserve which is set by clicking
Reserve> Items> On Reserve from the main menu).
It is a list of all items that should be on reserve given the activity dates of the
reserve lists to which they are linked, but are not currently On Reserve. This is
structured in this manner so that the user will have a pick list with which to go to
the shelves and retrieve the items that need to be placed on reserve.
This job requires start and end dates.
The circjob.log file should include the day, date, time entry, and possibly the
following messages.
Fri. Dec 28 13:07:36 2001 Reserved Items Active
Report...
Fri Dec 28 13:07:58 2001...COMPLETED
Reserved Items Expired Report (Circjob 21)
This circulation batch job lists all items which should be removed from reserve.
The Reserve Items Expired report prints a list of all items that are currently on
reserve, but the reserve list activity dates for those items has lapsed and they
need to be removed from the reserve shelf. This acts as a pick list so that the user
can go to the reserve shelf and remove the items that should no longer be on
reserve.
This job requires start and end dates.
The circjob.log file should include the day, date, time entry, and possibly the
following messages.
Fri Dec 28 13:12:26 2001 Reserved Items Expired
Report...
Fri Dec 28 13:12:26 2001...COMPLETED
Missing in Transit Report (Circjob 22)
This batch job list all items that have not been received at the new location by the
end of the time interval. It includes the source location, title, call number, item ID,
target location, and transit date.
Endeavor Information Systems, Inc.
See notice on first page
2-38
February 2004
Voyager® with UnicodeTM
Generating Input Files to Create Reports and Notices
Voyager uses three different types of in transit. manually applied in-transit status,
in-transit discharged, and in-transit hold.
A manually applied in-transit status will always, regardless of the in transit interval,
be on the Missing in Transit Report and should show a destination location only.
This destination location is based on the item’s location.
The in-transit discharged uses the in-transit interval before showing up in the list.
It will use the last non-browse discharge location for the from location and the
item’s home location for the final destination.
The in-transit hold also uses the in-transit interval before showing up on the list.
The pick-up location of the queue position 1 hold/recall is used for pickup. The
from location is the last non-browse discharge location.
The circjob.log file should include the day, date, time entry, and possibly the
following messages.
Fri Feb
1 11:06:44 2002 Missing In Transit Report...
Fri Feb
1 11:06:46 2002 ...COMPLETED
Transaction Statistics Report (Circjob 23)
This batch job creates a report, that prints to each individual print location, a
compilation for each operator at that particular location, including charges,
renewals, discharges, and fines/fees collected.
The report is broken down and printed according to the Circulation Print
Locations policy group set up in the System Administration module. See the
Voyager System Administration User’s Guide for more information.
A circulation location is a location that has been checked as a circulation location
in Circulation - Policy Definitions> Locations tab. These locations are
designated by a (c) after the name of the location. Each circulation location is
connected to a print location. A report is produced for each print location.
This job requires start and end dates.
The circjob.log file should include the day, date, time entry, and possibly the
following messages.
Fri Dec 28 13:18:23 2001 Circulation Statistics
Report...
Fri Dec 28 13:18:28 2001...COMPLETED
Endeavor Information Systems, Inc.
See notice on first page
February 2004
Voyager® with UnicodeTM
2-39
Transaction Exceptions (Circjob 24)
This circulation batch job clears the exceptions table of patron and item links,
which removes blocks on deletion of patrons and items.
This circulation batch job produces three reports, the item related exceptions,
patron related exceptions and transaction related exceptions.
The item related exceptions report includes the location, exception description
(lost item discharged or in process item charged are examples of descriptions),
title, item ID, exception date, and operator ID.
The patron related exceptions report includes the location, exception description
(fine limit override or lost limit override are examples of descriptions), patron
name, patron barcode, exception date, and operator ID.
The transaction related exceptions report includes the location, exception
description (circulation review is an example of a description), patron name,
patron barcode, title, item ID, exception date, and operator ID.
NOTE:
Circjob 24 should be run daily. This job is added to a cron as part of the installation
process.
The circjob.log file should include the day, date, time entry, and possibly the
following messages.
Fri Dec 28 13:22:27 2001 Exceptions Report...
Fri Dec 28 13:22:29 2001...COMPLETED
Table 2-7 describes the exception type numbers (as listed in the
CIRC_TRANS_EXCEPT_TYPE table) and their descriptions.
Table 2-7.
Exception Types and Descriptions
Exception
Number
Description of Exception
1
Damaged item charged.
2
Withdrawn item charged.
3
Missing item charged.
4
Lost item charged.
5
Claims returned item charged.
6
Bindery item charged.
7
Foreign item charged.
Endeavor Information Systems, Inc.
See notice on first page
2-40
February 2004
Voyager® with UnicodeTM
Generating Input Files to Create Reports and Notices
Table 2-7.
Exception Types and Descriptions
Exception
Number
Description of Exception
8
Damaged item discharged.
9
Withdrawn item discharged.
10
Missing item discharged.
11
Lost item discharged.
12
Claims returned item discharged.
13
Bindery item discharged.
14
Foreign item discharged.
15
Patron expiration override.
16
Expired address override.
17
Address invalid override.
18
Charge limit override.
19
Fine limit override.
20
Overdue limit override.
21
Overdue recall limit override.
22
Recall limit override.
23
Claims returned limit override.
24
Lost limit override.
25
Self-shelve limit override.
26
Zero loan period override.
27
Non-Circulating item override.
28
Non-Renewable item override.
29
Renew limit override.
30
Overdue non-renew override.
31
Recalled non-renew override.
32
Hold non-renew override.
33
No courtesy discharge override.
34
Inactive item barcode.
35
Cataloging review
36
Circulation review
Endeavor Information Systems, Inc.
See notice on first page
February 2004
Voyager® with UnicodeTM
2-41
Table 2-7.
Exception Types and Descriptions
Exception
Number
Description of Exception
37
Scheduled item charged.
38
Scheduled item discharged.
39
In process item charged.
40
In process item discharged.
41
Short loan limit override.
42
Call slip limit override.
44
Out of phase term renewal.
45
Foreign distribution item charged.
46
Distribution item out of stock.
47
Distribution item not active.
48
Patron suspension override.
49
Call slip item charged.
Global Transaction Statistics Report (Circjob 25)
This batch job creates a report that prints a compilation of all counts for each
operator at each Circulation desk at all library locations, including charges,
renewals, discharges, and fines/fees collected.
The report is sent to the circulation global print location that you have defined in
System Administration> System - Print Locations. See the Voyager System
Administration User’s Guide for more information.
This job requires start and end dates.
The circjob.log file should include the day, date, time entry, and possibly the
following messages.
Fri Dec 28 13:26:35 2001 Circulation Statistics
Report...
Fri Dec 28 13:26:40 2001...COMPLETED
NOTE:
The circjob.log file information is the same as what is seen after running
Circjob 23.
Endeavor Information Systems, Inc.
See notice on first page
2-42
February 2004
Voyager® with UnicodeTM
Generating Input Files to Create Reports and Notices
Automatic Orders for Item Distribution (Circjob 28)
This circulation batch job produces a list of distributable items which have
Automatic Reordering activated AND have inventory levels below the reorder
point.
The report includes all the default ordering information, including the vendor name
and address, and the default order quantity.
The user is prompted to Create Orders. If operator selects Y (Yes), the circjob will
generate orders for automatically orderable distributable items. If operator selects
N (No), the circjob will run the report without creating any orders. See the Voyager
Circulation User’s Guide for more information.
The circjob.log file should include the day, date, time entry, and possibly the
following messages.
Fri Dec 28 13:33:53 2001 Distribution Item Orders...
There were no distribution items to be ordered
Fri Dec 28 13:33:53 2001...COMPLETED
Running circulation batch jobs
To run these batch jobs on the server, the operator enters the appropriate
command line at the /m1/voyager/xxxdb/sbin prompt. To do this the
operator needs to know the job number and the specific options to use.
Table 2-8 provides a list of the options and their descriptions.
Table 2-8.
Circulation batch job options codes and description
Option Code
Description
-d<database>
Name of database with which to connect
-u<user/password>
User’s name and password: use the format
<user/password>. For example, for user name
Don and password Moose
Enter -uDon/Moose
-j<job #>
Number of the job you want to run (1 through 4)
-s<YYYY-MM-DD>
Start date for jobs 20, 21, 23, and 25
Endeavor Information Systems, Inc.
See notice on first page
February 2004
Voyager® with UnicodeTM
2-43
Table 2-8.
Circulation batch job options codes and description
Option Code
Description
-e<YYYY-MM-DD>
End date for jobs 20, 21, 23, and 25. The date
that you enter after -e must be one day after
the end date in the date range for which you
want information. Therefore, to get reports
through the end of January, enter -e2000-0201.
-o<Y or N>
For job 28, entering Y specifies that you want
to automatically generate orders for distribution
items; entering N will run the report without creating orders for items.
-l
List job options.
-v
Display version information.
-h
Display usage/help statement.
NOTE:
When using start and end dates, you must span a day in order to run a report for a
single day. For example, using -s 1997-02-10 -e1997-02-11 would result in
statistics from 02-10-1997.
Procedure 2-6. Running circulation batch jobs at the command line
Use the following to run circulation batch jobs at the command line.
The example in this procedure illustrates how to run Circjob 12 All Daily Jobs.
1. At the /m1/voyager/xxxdb/sbin directory on your server, enter the command
line
Pcircjob -j12
This instructs the server run Circjob number 12, all daily jobs, which runs circjobs
1-7 and circjob 27 (archive short loans).
Result: The job runs. The screen displays that it is processing each of the various
jobs in this larger batch job, displays the disconnecting message when done, then
it returns to the /m1/voyager/xxxdb/sbin directory (see Figure 2-16).
Endeavor Information Systems, Inc.
See notice on first page
2-44
February 2004
Voyager® with UnicodeTM
Generating Input Files to Create Reports and Notices
Figure 2-16.
Display when running Circulation batch job (Circjob 12)
The circjob.log file should include the day, date, time entry, and possibly the
following messages.
Fri Dec 28 12:51:19 2001 All Daily Jobs...
Fri Dec 28 12:51:19 2001 Update Shelving Status...
Fri Dec 28 12:51:20 2001...COMPLETED
Fri Dec 28 12:51:20 2001 Overdue Notices...
Fri Dec 28 12:51:22 2001...COMPLETED
Fri Dec 28 12:51:22 2001 Recall Notices...
Fri Dec 28 12:51:22 2001...COMPLETED
Fri Dec 28 12:51:22 2001 Fine Fee Notices...
Fri Dec 28 12:51:23 2001...COMPLETED
Fri Dec 28 12:51:23 2001 Hold Recall Available
Notices...
Fri Dec 28 12:51:23 2001...COMPLETED
Fri Dec 28 12:51:23 2001 Request Expired/Cancelled
Notices...
Endeavor Information Systems, Inc.
See notice on first page
February 2004
Voyager® with UnicodeTM
2-45
Fri Dec 28 12:51:23 2001...COMPLETED
Fri Dec 28 12:51:23 2001 Courtesy Notices...
Fri Dec 28 12:51:23 2001...COMPLETED
Fri Dec 28 12:51:24 2001 Update Accrued Fines/
Demerits...
Fri Dec 28 12:51:36 2001...COMPLETED
Fri Dec 28 12:51:36 2001 Apply Suspensions routine
found.
Fri Dec 28 12:51:36 2001...COMPLETED
Fri Dec 28 12:51:36 2001 Archive and Expire Call Slip
Requests...
Fri Dec 28 12:51:36 2001...COMPLETED
Fri Dec 28 12:51:36 2001 All Daily Jobs... COMPLETED
NOTE:
Batch jobs can be run in a step-by step manner by entering the command
Pcircjob at the sbin prompt and then following the system prompts to provide
the additional information needed to run the job.
If you want to run a server activity using a telnet session, and you do not want to
perform it interactively, you can use the following command line to make certain
that the activity continues, even if the telnet session is lost,
nohup <activity with parms> &
where <activity with parms> is the command followed by any required and
optional parameters. This command will not guarantee that the activity will be
completed if the server itself is not available.
After you running these jobs the input files (crcrprts.xxxx.inp and/or
crcnotes.xxxx.inp) are placed in the /m1/voyager/xxxdb/rpt directory.
You are now ready to run the Voyager Reporter so that the Circulation notices can
be printed or e-mailed.
For information on the circulation batch jobs that do not create input files, but are
still necessary for efficient circulation usage see the Voyager Technical User’s
Guide.
Endeavor Information Systems, Inc.
See notice on first page
2-46
February 2004
Voyager® with UnicodeTM
Generating Input Files to Create Reports and Notices
Creating input files using WebAdmin - Circulation
Utilities
WebAdmin is a web-based program from which users can run server batch jobs.
For information on setting up and logging in to WebAdmin, see the Voyager
Technical User’s Guide.
Instead of starting a telnet session and entering the batch job commands at a
command line prompt, WebAdmin allows users to run batch jobs using a web
browser.
WebAdmin works in exactly the same way as the batch jobs because WebAdmin
uses the existing batch jobs in order to do the processing. You can also access
the log and report files that are created by the batch jobs through WebAdmin.
After logging in to WebAdmin, the WebAdmin main page displays (see Figure 217).
Figure 2-17.
WebAdmin main page
Endeavor Information Systems, Inc.
See notice on first page
February 2004
Voyager® with UnicodeTM
2-47
From this page users select the utilities corresponding to the specific modules and
can further choose specific batch jobs. Users can access the batch jobs by
clicking the appropriate link.
The Circulation Reports and Notices utility allows users to run the Circulation
Reports and Notices. Users can run Circulation batch jobs to produce reports and
notices, see The Circulation batch jobs on page 2-34.
Procedure 2-7. Running circulation batch jobs using WebAdmin
Use the following to run the Circulation Reports and Notices utility.
1. From the WebAdmin main page (Figure 2-17) Circulation section, click the link
Circulation Reports and Notices.
Result: The Circulation Reports and Notices page displays (see Figure 2-18).
Endeavor Information Systems, Inc.
See notice on first page
2-48
February 2004
Voyager® with UnicodeTM
Generating Input Files to Create Reports and Notices
Figure 2-18.
WebAdmin Circulation Reports and Notices page
Endeavor Information Systems, Inc.
See notice on first page
February 2004
Voyager® with UnicodeTM
2-49
2. From the Circulation Reports and Notices page:
a. select the Circulation job(s) that you want to run by clicking the
corresponding radio button.
If you are running the Reserved Items Active Report, Reserved
Items Expired Report, Transaction Statistics Report, or Global
Transaction Statistics Report, enter a date range (YYYY-MM-DD)
into the Date Range fields.
If you are running the Distribution Item Orders report, place a check
in the check box to both run the report and generate orders for
items. If no check is in the box, the report will be run without
generating any reports.
b. enter your e-mail address in the E-Mail Address field.
NOTE:
You must enter the entire e-mail address (that is, [email protected]) in order
for the e-mail to be sent.
c. click the Submit Circjob button.
Result: The job runs, the Job Scheduler page displays and an e-mail is sent to
the user (see Figure 2-19).
Figure 2-19.
Job Scheduler Page after submitting Circjob 12 using WebAdmin
Once the crcrprts.xxxx.inp and crcnotes.xxx.inp files are generated
and placed in the /m1/voyager/xxxdb/rpt directory, they are available for the
Reporter module such that the reports can be printed.
Endeavor Information Systems, Inc.
See notice on first page
2-50
February 2004
Voyager® with UnicodeTM
Generating Input Files to Create Reports and Notices
Creating Input Files for Media Scheduling
To create the Report and/or Notice files necessary for Media Scheduling you must
run media scheduling batch jobs on the server.
There are four media batch jobs that produce either a medrprts.xxxx.inp or a
mednotes.xxxx.inp input file to use with Voyager’s Reporter module.
Table 2-9 provides on overview of the media job number, job name, name of the
file produced, the name of the report or notice, and the record type.
Table 2-9.
Media Scheduling batch jobs
Media Scheduling Batch Job
Number
Media Scheduling
Batch Job Name
Input File Name
Report or
Notice Name
Record
Number
Type
Mediajob 1
Overdue Notices
mednotes.xxxx.inp
Overdue
Notice
Type 00
Mediajob 2
Inventory Reports
medrprts.xxxx.inp
Media Equipment Inventory Report
Type 00
Mediajob 3
Booking Statistics
medrprts.xxxx.inp
Media
Scheduling
Statistics
Report
Type 01
Mediajob 4
Charge Statistics
medrprts.xxxx.inp
Media
Scheduling
Charge Statistics Report
Type 03
The files created are named either medrprts.xxxx.inp or
mednotes.xxxx.inp. Where the xxxx in the filename corresponds to the print
location code as defined in the System Administration module’s System - Print
Locations work space, see the Voyager System Administration User’s Guide for
additional information.
The file is located in the in the /m1/voyager/xxxdb/rpt directory (where
xxxdb represents the database username).
The format of the medrprts.xxxx.inp file follows the Media Scheduling
Reports Standard Interface File format (SIF) as described in the Voyager
Technical User’s Guide. The format of the mednotes.xxxx.inp file follows the
Media Scheduling Notices Standard Interface File format (SIF) as described in the
Voyager Technical User’s Guide.
Endeavor Information Systems, Inc.
See notice on first page
February 2004
Voyager® with UnicodeTM
2-51
NOTE:
If an input file already exists, Media Scheduling will add the current report
record(s) to the existing file.
Mediajob.log file
In addition to the mednotes.xxxx.inp and medrprts.xxxx.inp files, when
running any media scheduling batch job a mediajob.log file is generated and
placed in the /m1/voyager/xxxdb/rpt directory.
The Media Scheduling batch jobs
This section explains the purpose of each of the Media Scheduling batch jobs and
the message expected in the mediajob.log file after the job is run.
Overdue Notices and Lost Processing (Mediajob 1)
This media batch job creates notices to send to patrons. The notices enumerate
what items are currently overdue or lost.
The mediajob.log file should include the day, date, time entry, and possibly the
following messages.
Fri Dec 28 14:46:35 2001 Building Media Scheduling
Overdue Notices...
Fri Dec 28 14:46:35 2001 0 Records Found...COMPLETED
Inventory Report (Mediajob 2)
This media batch job produces a report on what inventory items are encompassed
by which policy groups.
The mediajob.log file should include the day, date, time entry, and possibly the
following messages.
Fri Dec 28 14:22:11 2001 Building Inventory Report...
Fri Dec 28 14:23:11 2001 1808 Records Found...COMPLETED
Booking Statistics (Mediajob 3)
This media batch job generates a report on booking statistics.
Reports may be for:
• all booking desks, it routes the print job for each print location group to its
own print location.
Endeavor Information Systems, Inc.
See notice on first page
2-52
February 2004
Voyager® with UnicodeTM
Generating Input Files to Create Reports and Notices
• for the global booking desk, it routes statistics for all locations to the global
printing location.
• for specific desks, it sends a report on that location to its print location.
This job requires start and end dates.
The mediajob.log file should include the day, date, time entry, and possibly the
following messages.
Fri Dec 28 14:28:34 2001 Building Booking Statistics
Report...
Fri Dec 28 14:28:50 2001 2 Locations
Processed...COMPLETED
Charge Statistics (Mediajob 4)
This media batch job generates a report on charge statistics. It is similar to
Booking Statistics.
Reports may be for:
• all booking desks, it routes the print job for each print location group to its
own print location.
• for the global booking desk, it routes statistics for all locations to the global
printing location.
• for specific desks, it sends a report on that location to its print location.
This job requires start and end dates.
The mediajob.log file should include the day, date, time entry, and possibly the
following messages.
Fri Dec 28 14:43:02 2001 Building Charge Statistics
Report...
Fri Dec 28 14:43:17 2001 2 Locations
Processed...COMPLETED
Running media scheduling batch jobs
To run these batch jobs on the server, the operator enters the appropriate
command line at the /m1/voyager/xxxdb/sbin prompt. To do this the
operator needs to know the job number and the specific options to use.
Endeavor Information Systems, Inc.
See notice on first page
February 2004
Voyager® with UnicodeTM
2-53
Table 2-10 provides a list of the options and their descriptions.
Table 2-10.
Media Scheduling batch job options codes and description
Option Code
Description
-d<database>
Name of database with which to connect
-u<user/password>
User’s name and password: use the format
<user/password>. For example, for user name
Don and password Moose
Enter -uDon/Moose
-j<job #>
Number of the job you want to run (1 through 4)
-s<YYYY-MM-DD>
Start date for job 2-1 and all jobs 3 and 4
-e<YYYY-MM-DD>
End date for job 2-1 and all jobs 3 and 4. The
date that you enter after -e must be one day
after the end date in the date range for which
you want information. Therefore, to get reports
through the end of January, enter
-e2000-02-01.
-l
List job options
-v
Display version information
-h
Display usage/help statement
NOTE:
When using start and end dates, you must span a day in order to run a report for a
single day. For example, using -s 1997-02-10 -e1997-02-11 would result in
statistics from 02-10-1997.
Procedure 2-8. Running media scheduling batch jobs at the command line
Use the following to run Media Scheduling jobs at the command line.
The example in this procedure illustrates how to run Mediajob 2, Inventory
Reports, for the date range 10-01-2001 to 12-26-2001.
1. At the /m1/voyager/xxxdb/sbin directory on your server, enter the command
line
Pmediajob -j2 -s2001-10-01 -e2001-12-26
Endeavor Information Systems, Inc.
See notice on first page
2-54
February 2004
Voyager® with UnicodeTM
Generating Input Files to Create Reports and Notices
This tells the server run mediajob number 2, for the date range 10-01-2001
through 12-26-2001.
Result: The job runs. The screen displays that it is building the report, displays
the disconnecting message when done, and then it returns to the
/m1/voyager/xxxdb/sbin directory (see Figure 2-20).
Figure 2-20.
Display when running Media Scheduling batch job (Mediajob 2)
NOTE:
Batch jobs can be run in a step-by step manner by entering the command
Pmediajob at the sbin prompt and then following the system prompts to provide
the additional information needed to run the job.
If you want to run a server activity using a telnet session, and you do not want to
perform it interactively, you can use the following command line to make certain
that the activity continues, even if the telnet session is lost,
nohup <activity with parms> &
where <activity with parms> is the command followed by any required and
optional parameters. This command will not guarantee that the activity will be
completed if the server itself is not available.
Media batch jobs cannot be run using WebAdmin.
Endeavor Information Systems, Inc.
See notice on first page
February 2004
Voyager® with UnicodeTM
2-55
After running these jobs the input files, medrprts.xxxx.inp and/or
mednotes.xxxx.inp, are placed in the /m1/voyager/xxxdb/rpt directory.
They are available to Reporter such that the Media Scheduling reports and
notices can be printed or e-mailed.
Endeavor Information Systems, Inc.
See notice on first page
2-56
February 2004
Voyager® with UnicodeTM
Session Preferences in the Reporter
Module
Contents
Introduction
Global Preferences
E-mail Preferences
Notices Preferences
Reports Preferences
Address Format Preferences
Forms Control Preferences
Application Forms Preferences for Acquisitions,
Cataloging, Circulation, and Media
3-1
3-2
3-7
3-9
3-11
3-15
3-17
3-18
Endeavor Information Systems, Inc.
See notice on first page
February 2004
Voyager® with UnicodeTM
3-i
Contents
Endeavor Information Systems, Inc.
See notice on first page
3-ii
February 2004
Voyager® with UnicodeTM
Session Preferences in the Reporter
Module
Introduction
This chapter contains information on how user’s can set up their session
preferences in the Reporter module.
The Reporter session preferences contains the following tabs where users define
session preferences.
•
•
•
•
•
Global
E-mail
Notices
Reports
Address Format
Depending on the Global settings users can set up additional preferences for the
following.
•
•
•
•
•
Forms Control
Acquisitions Forms
Cataloging Forms
Circulation Forms
Media Booking Forms
Endeavor Information Systems, Inc.
See notice on first page
February 2004
Voyager® with UnicodeTM
3-1
The following sections describe the various session preference options that are
available and how to set up preferences for your Voyager Reporter session.
These options are found in the Preferences dialog box and are displayed as
several tabs in the dialog box (see Figure 3-1).
Figure 3-1.
Preferences dialog box - Global tab
Global Preferences
The Global tab includes file archive options, forms control, processing locations,
data file path, and save set up selection sections (see Figure 3-1).
Table 3-1 describes the sections, fields, check boxes and radio buttons on the
Global tab.
Table 3-1.
Description of the Global tab
Name of section,
field, check box, or
radio button
Description
Required
Range
Save set up selections as
Initialization
defaults
When checked this saves any
changes to the setup that you want to
be automatically established at
initialization.
No
Check box
The
default is
checked.
Endeavor Information Systems, Inc.
See notice on first page
3-2
February 2004
Voyager® with UnicodeTM
Session Preferences in the Reporter Module
Table 3-1.
Description of the Global tab
Name of section,
field, check box, or
radio button
Description
Required
Range
File Archive
Options
File archive options tell Reporter how
to handle archiving the input file it
retrieves from the server after processing has occurred.
Yes
Always,
Never, or
Query
radio buttons.
Selecting Always directs Reporter to
maintain a one month archive of all
processed Notice/Report files in
selected directories on the local hard
drive. This is in addition to the
archived file on your server.
The
default is
Query.
Selecting Never directs Reporter not
maintain any archive file(s) on the
local hard drive.
Selecting Query directs Reporter to
ask the user if an archive file should
be created at the end of processing
each application. Any files that you
choose to archive at this time will be
saved for one month.
Endeavor Information Systems, Inc.
See notice on first page
February 2004
Voyager® with UnicodeTM
3-3
Table 3-1.
Description of the Global tab
Name of section,
field, check box, or
radio button
Description
Required
Range
Forms Control
Forms control governs the paper on
which the reports and notices will print.
Yes
The
default
setup is
All
Notices/
Reports
print on
same
paper.
All Notices/Reports print on same
paper is used for most installations.
Even if you have different paper for
some reports, if that paper is mounted
on different printers, this is the selection to use. Then in the database,
select the correct printer (the one with
the proper forms mounted for each
report and notice).
NOTE:
Choosing this option disables the
Forms Control, Acquisitions Forms,
Cataloging Forms, Circulation Forms,
and Media Booking Forms tabs
because they will not be necessary.
Notices/Reports require paper
change(s) is used if there are multiple
forms on the same printer. This
prompts the user to change forms at
the appropriate times.
It also enables all forms control tabs
so that forms can be added or
changed and forms for individual
reports and notices can be assigned.
Endeavor Information Systems, Inc.
See notice on first page
3-4
February 2004
Voyager® with UnicodeTM
Session Preferences in the Reporter Module
Table 3-1.
Description of the Global tab
Name of section,
field, check box, or
radio button
Description
Required
Range
Processing
Locations
These are the print locations.
Yes
Drop
down
menu of
print
locations
(in alphabetical
order)
defined in
the
System
Administration
module.
Yes
The
default is
the
directory
into which
the
Reporter
module is
installed.
Select the print location whose
corresponding print location code is
part of the input filename. This is how
Reporter finds the correct file to print
from the server.
This print location information is stored
in the Window’s registry.
Data File Path
The Database Path File is the directory where all the database files are
stored during the execution. These
database files are the .mdb files that
Reporter uses to produce the reports
and notices.
This database path information is
stored in the Window’s registry.
If any or all of the database files are
missing from the selected directory, a
message box displays listing the missing database files. These files must be
found and placed in the proper directory, or you must select another directory which has these files, before
processing can continue.
Endeavor Information Systems, Inc.
See notice on first page
February 2004
Voyager® with UnicodeTM
3-5
Procedure 3-1. Setting up Global preferences
Use the following to set up preferences on the Global tab.
1. From the Reporter File menu, click Preferences.
Result: The Preferences dialog box opens with the Global tab available, (see
Figure 3-1 on page 3-2).
2. Select Save setup selections as Initialization defaults by clicking the check box if
wanted.
3. Select a Forms Control option by choosing either the All Notices/Reports print on
same paper or the Notices/Reports require paper change(s) radio buttons.
4. Select a File Archive Options by selecting either the Always, Never, or Query radio
buttons.
5. Select the processing location (print location) from the Processing Location field.
6. If the Data file path is other than the default, click on the ellipsis button which brings
up a Select Directory dialog box (see Figure 3-2). Select a different valid directory
for the Access databases, click the OK button when the correct directory is listed.
Figure 3-2.
Select Directory dialog box
7. When you have completed the Global tab of the Preferences dialog box, click OK
to accept your changes or click Cancel to exit without saving either of these choices.
Endeavor Information Systems, Inc.
See notice on first page
3-6
February 2004
Voyager® with UnicodeTM
Session Preferences in the Reporter Module
Result: Global preferences are set up.
NOTE:
If you selected OK and the address for your e-mail server is not valid, the
message alerting the operator that all notices will be printed displays (Figure 3-3).
Figure 3-3.
No E-mail notices message
E-mail Preferences
The E-mail tab is where operators provide the maximum number of items per
e-mail message and the e-mail reply-to address (see Figure 3-4).
Figure 3-4.
Preferences dialog box - E-mail tab
Endeavor Information Systems, Inc.
See notice on first page
February 2004
Voyager® with UnicodeTM
3-7
Table 3-2 describes the sections, fields, check boxes, and radio buttons on the
E-mail tab.
Table 3-2.
Description of the E-mail tab
Name
Description
Required
Range
Maximum
number of items
per E-mail
message
This allows you to select how many
items will be included in an e-mail
message.
Yes
0-1000.
The
default is
0.
Selecting zero includes all items for
a given patron in one e-mail message.
NOTE:
System Administrators often limit
the size of an e-mail message that
can be delivered. Any e-mail
message exceeding this size will
not arrive at its destination, but will
be discarded by the server.
Therefore you may want to change
the default from zero to, for
example, ten.
E-mail Reply-To
Address
Yes, to
send
notices by
e-mail.
The address to which replies will be
sent.
If this is the address of the local
machine users will get notification
of e-mail messages that fail.
E-mail
address.
The
default is
blank,
meaning
notices
will be
printed.
Procedure 3-2. Setting up e-mail preferences
Use the following to set up preferences on the E-mail tab.
1. From the Reporter File menu, click Preferences.
Result: The Preferences dialog box opens.
2.
Select the E-mail tab (see Figure 3-4).
Endeavor Information Systems, Inc.
See notice on first page
3-8
February 2004
Voyager® with UnicodeTM
Session Preferences in the Reporter Module
3. Enter the maximum number of items you want to include in an e-mail message in the
Maximum number if items per E-mail message field.
4. Enter the e-mail address to which reply e-mails should be sent in the E-mail ReplyTo Address field.
5. Click OK to save the changes, or click Cancel to close without saving.
Result: If the operator selected OK, a test e-mail message is sent to the reply-to
address specified. Then, a message indicating whether the test message was
successful or failed is displayed. If successful, the E-mail tab is set up.
See the section entitled Completing the E-mail tab on page 1-11 for a more
thorough discussion of this tab.
Notices Preferences
The Notices tab includes notice archive processing options and the notices
archive path (see Figure 3-5).
Figure 3-5.
Preferences dialog box - Notices tab
Endeavor Information Systems, Inc.
See notice on first page
February 2004
Voyager® with UnicodeTM
3-9
Table 3-3 describes the Notices tab.
Table 3-3.
Description of the Notices tab
Name of section,
field, check box,
or radio button
Description
Required
Range
Notice Archive
Processing
Options
The Notice Archive Processing
Options turns on or off e-mailing
when users process an archive
file.
Yes
Both, Print, or
E-mail radio
buttons.
Both.
Both directs Reporter to print
and e-mail the archive file.
Print directs Reporter to only
print, and not e-mail the archive
file.
E-mail directs Reporter to only email and not print the archive file.
This is only for Circulation and
Media Booking notices, since
there is no e-mailing of Acquisition or Cataloging reports/
notices.
Notices Archive
Path
The Notices Archive Path is the
directory where all processed
notice files are stored after execution if archiving is selected.
Yes
It is also where all notice error
(.err) and message files (.msg)
are stored when input file errors
occur.
The default is
the directory
into which the
Reporter module is installed.
The notice archive path is stored
in the Window’s registry.
Procedure 3-3. Setting up Notices preferences
Use the following to set up preferences on the Notices tab.
1.
From the Reporter File menu, click Preferences.
Result: The Preferences dialog box opens.
Endeavor Information Systems, Inc.
See notice on first page
3-10
February 2004
Voyager® with UnicodeTM
Session Preferences in the Reporter Module
2.
Select the Notices tab (see Figure 3-5).
3. Select the Notices Archive Processing option wanted.
4. If the Notices Archive Path is other than the default, click on the ellipsis button which
brings up a Select Directory dialog box (see Figure 3-6). Select a different valid
directory for notices, click the OK button when the correct directory is listed.
Figure 3-6.
Select Directory dialog box to change the Notices Archive Path
5. When you have completed the Notices tab of the Preferences dialog box, click OK
to accept your changes or click Cancel to exit without saving.
Result: Notices preferences are set up.
NOTE:
If you selected OK and the address for your e-mail server is not valid, the
message alerting the operator that all notices will be printed displays.
Reports Preferences
The Reports tab includes PO style, reserved item reports options, and the reports
archive path (see Figure 3-7).
Endeavor Information Systems, Inc.
See notice on first page
February 2004
Voyager® with UnicodeTM
3-11
Figure 3-7.
Preferences dialog box - Reports tab
Table 3-4 describes the Reports tab.
Table 3-4.
Description of the Reports tab
Name of section,
field, check box,
or radio button
Description
Required
Range
P.O. Style
This section allows the user to
set the print style for purchase
orders.
Either portrait or
landscape
is required.
The default
values for this
section are
Landscape.
The user can select their preferred print format, either portrait
or landscape for purchase
orders.
Also, Sort by Vendor sorts your
purchase orders by vendor.
The Blank Amounts check box
allows users to have blank purchase order amount fields when
purchase orders are printed
when the amount is $0.00.
Check or uncheck the Blank
Amounts field. When checked,
the P.O. amount of $0.00 will
print out as blank.
Endeavor Information Systems, Inc.
See notice on first page
3-12
February 2004
Voyager® with UnicodeTM
Session Preferences in the Reporter Module
Table 3-4.
Description of the Reports tab
Name of section,
field, check box,
or radio button
Description
Required
Range
Reserved Items
Reports Option
There are four formats that can
be used for the reserved items
reports. The Reserve Items
Active report (circulation batch
job 20) which lists all items that
are on a reserve list and should
be ‘On reserve.’ The Reserve
Item Expired report (circulation
batch job 21) lists those items
that should no longer be on a
reserve list.
Yes
The default is
By Location and
Title
and
By Location and
Call Number
The type of reports are:
• By Location and Title
• By Location and Call
Number
• By Location, Course
Name and Title
• By Location, Course
Name and Call Number
The user can select any of these
formats and there will be one
copy of each report for each formatting option selected.
Reports Archive
Path
The Reports Archive Path is the
directory where all processed
report files are stored after execution if archiving is selected.
It is also where all report error
(.err) and message files (.msg)
are stored when input file errors
occur.
Yes
The default is
the directory
into which the
Reporter module is installed.
The report archive path is stored
in the Window’s registry.
Endeavor Information Systems, Inc.
See notice on first page
February 2004
Voyager® with UnicodeTM
3-13
Procedure 3-4. Setting up reports preferences
Use the following to set up the reports preferences.
1. From the Reporter File menu, click Preferences.
Result: The Preferences dialog box opens.
2. Select the Reports tab (see Figure 3-7).
3. Select a P.O. Style by selecting the Portrait or Landscape format, and click the
Sort by Vendor and/or Blank Amounts if desired.
4. Choose the Reserved Items Report Options, select any or all of these options by
checking the box(es).
5. If the Reports Archive Path is other than the default, click on the ellipsis button which
brings up a Select Directory dialog box (see Figure 3-8). Select a different valid
directory for reports, click the OK button when the correct directory is listed.
Figure 3-8.
Select Directory dialog box to change the Reports Archive Path
6. When you have completed the Reports tab of the Preferences dialog box, click OK
to accept your changes or click Cancel to exit without saving.
Result: Reports preferences are set up.
Endeavor Information Systems, Inc.
See notice on first page
3-14
February 2004
Voyager® with UnicodeTM
Session Preferences in the Reporter Module
NOTE:
If you selected OK and the address for your e-mail server is not valid, the
message alerting the operator that all notices will be printed displays.
Address Format Preferences
The Address Format tab is where operators define the placement of the postal
code for each of the various types of addresses (see Figure 3-9). This code prints
either before or after the City.
Figure 3-9.
Address Format tab of the Preferences dialog box
Table 3-5 describes the sections, fields, check boxes, and radio buttons on the
Address Format tab.
Table 3-5.
Description of the Address Format tab
Name of radio
button
Description
Required
Range
Institution
Address
The place on the printed notice
where the postal code in the Institution address prints relative to
the City.
Yes
Radio button
After or Before
radio button
The default is
After.
Endeavor Information Systems, Inc.
See notice on first page
February 2004
Voyager® with UnicodeTM
3-15
Table 3-5.
Description of the Address Format tab
Name of radio
button
Description
Required
Range
Patron Address
The place on the printed notice
where the postal code in the
Patron address prints relative to
the City.
Yes
Radio button
The place on the printed notice
where the postal code in the Vendor address prints relative to the
City.
Yes
The place on the printed notice
where the postal code in the Ship
To address prints relative to the
City.
Yes
The place on the printed notice
where the postal code in the Bill
To address prints relative to the
City.
Yes
After or Before
radio button
Vendor Address
After or Before
radio button
Ship To Address
After or Before
radio button
Bill To Address
After or Before
radio button
The default is
After.
Radio button
The default is
After.
Radio button
The default is
After.
Radio button
The default is
After.
Procedure 3-5. Setting up Address Formats preferences
Use the following to set up preferences on the Address Format tab.
1.
From the Reporter File menu, click Preferences.
Result: The Preferences dialog box opens.
2.
Select the Address Format tab (see Figure 3-9).
3. For each type of address, select the appropriate radio button.
4. When you have completed the Address Format tab of the Preferences dialog box,
click OK to accept your changes or click Cancel to exit without saving.
Result: Address Format preferences are set up.
Endeavor Information Systems, Inc.
See notice on first page
3-16
February 2004
Voyager® with UnicodeTM
Session Preferences in the Reporter Module
NOTE:
If you selected OK and the address for your e-mail server is not valid, the
message alerting the operator that all notices will be printed displays.
Forms Control Preferences
This Forms Control preference tab is only available if the Notices/Reports
require paper change(s) option is selected in the Forms Control section on the
Global tab.
Forms control allows users to add, update, and delete forms (see Figure 3-10).
Figure 3-10.
Preferences dialog box - Forms Control tab
Table 3-6 describes the Forms Control tab.
Table 3-6.
Description of the Forms Control tab
Name of section,
field, check box,
or radio button
Description
Required
Range
Forms Types
section
The Forms Types section lists
all currently defined forms. From
within this section you can add,
update or delete forms.
No
A Generic
LaserJet form is
the default.
Endeavor Information Systems, Inc.
See notice on first page
February 2004
Voyager® with UnicodeTM
3-17
Procedure 3-6. Setting up Forms Control preferences
Use the following to set up preferences on the Forms Control tab.
1. From the Reporter File menu, click Preferences.
Result: The Preferences dialog box opens.
2. Select the Forms Control tab (see Figure 3-10 on page 3-17).
If the tab is not active that means that you must first set Notices/Reports require
paper change(s) in the Forms Control section of the Global tab, see Setting up
Global preferences on page 3-6.
3. To:
a. Add a new form, enter its description (up to 30 characters) in the box
to the right of the list, then click the Add Form button.
b. Update a form, highlight the form and enter over the old description,
then click the Update Form button.
c. Delete a form, highlight it, then click the Delete Form button.
NOTE:
If there is only one form on the list the user will not be able to delete it.
Result: Forms Control preferences are set up.
NOTE:
If you selected OK and the address for your e-mail server is not valid, the
message alerting the operator that all notices will be printed displays.
Application Forms Preferences for
Acquisitions, Cataloging, Circulation,
and Media
These application specific preference tabs will only be available if there is at least
one user-defined form in the Forms Control tab in addition to the system
supplied form.
Endeavor Information Systems, Inc.
See notice on first page
3-18
February 2004
Voyager® with UnicodeTM
Session Preferences in the Reporter Module
Application forms preferences allows users to select the form on which the
associated report or notice prints.
Each application tab displays a two column list of reports or notices and each form
that is associated with it (see Figure 3-11).
Users can view a list of the reports for the selected application by clicking the
Reports button, or a list of notices for the application by clicking the Notices
button.
Figure 3-11.
Preferences dialog box - Acquisitions Forms tab
Procedure 3-7. Changing the form on which a report or notice prints
Use the following to change the form on which a particular report or notice prints.
1. From the Reporter File menu, click Preferences.
2. Click the appropriate application form tab, the Acquisitions forms, Cataloging
forms, Circulation forms, or Media Sched. forms tab.
If these tabs are not active that means that you must add a user defined form in
forms control tab, see Setting up Forms Control preferences on page 3-18.
Result: The selected application tab opens.
Endeavor Information Systems, Inc.
See notice on first page
February 2004
Voyager® with UnicodeTM
3-19
In this example the Acquisitions Forms tab is selected and the fund snapshot
report form will be changed from the generic form to the New form.
3. Click the form from the Forms column next to the report you want to change.
Result: A drop down list of forms is available (see Figure 3-12).
Figure 3-12.
Acquisitions form with drop down list of forms available
4. Highlight the form desired to select it, then click the OK button.
Result: The form that the report (or notice) prints on is changed.
NOTE:
If you selected OK and the address for your e-mail server is not valid, the
message alerting the operator that all notices will be printed displays.
Endeavor Information Systems, Inc.
See notice on first page
3-20
February 2004
Voyager® with UnicodeTM
Using Reporter
Contents
Introduction
Logging in to the Reporter Module
Building and Running Reports and Notices
• Building Reports and Notices
•
Errors While Building Reports/Notices
Printing the Reports and Notices Processed lists
Exiting Reporter Without Running Reports or Notices
No Reports or Notices for Selected Application
Running Reports and Notices
Processing Archive Files
• Invalid Input File Version
Error Record Processing
• Error file
• Message file
4-1
4-1
4-3
4-7
4-7
4-10
4-10
4-11
4-11
4-13
4-16
4-17
4-18
4-18
Endeavor Information Systems, Inc.
See notice on first page
February 2004
Voyager® with UnicodeTM
4-i
Contents
Endeavor Information Systems, Inc.
See notice on first page
4-ii
February 2004
Voyager® with UnicodeTM
Using Reporter
Introduction
Once input files have been created and are on the server, Reporter can produce
the reports and notices.
Users
• Log in to Reporter.
• Build the reports and notices.
• Run the reports and notices.
This chapter contains the step-by-step procedures necessary to use the Reporter
module.
Logging in to the Reporter Module
This section provides the steps necessary for logging in to the Reporter module.
NOTE:
For information regarding the first log in to Reporter and the configuration that is
done at that time see the section entitled First Log in to the Reporter Module on
page 1-7.
Endeavor Information Systems, Inc.
See notice on first page
February 2004
Voyager® with UnicodeTM
4-1
Procedure 4-1. Logging in to the Reporter module
Use the following to log in to Reporter.
1. At the Log in dialog box (Figure 4-1) enter your operator ID and password and click
OK. (Remember that the operator ID and the password are case sensitive).
Figure 4-1.
Voyager Reporter Login dialog Box
If you do not enter your correct operator ID and password after three attempts,
Voyager will close the Reporter module.
NOTE:
Reporter will accept combinations of Operator IDs and passwords that are valid
for any module, as listed in the System Administration module. This means that in
order to limit access to the Reporter module, you should only install Reporter on
the machines that will be running reports and notices.
Result: The user is logged in to the Reporter module (see Figure 4-2).
Endeavor Information Systems, Inc.
See notice on first page
4-2
February 2004
Voyager® with UnicodeTM
Using Reporter
Figure 4-2.
Voyager Reporter dialog box
Building and Running Reports and
Notices
After successfully logging in to Reporter, the user can build the current reports
and/or notices for the Acquisitions, Cataloging, Circulation, Media Scheduling
applications, or a combination of the modules by selecting an application tab.
The following figures display the various tabs in the Reporter module (Figure 4-3,
Figure 4-4, Figure 4-5, and Figure 4-6).
Endeavor Information Systems, Inc.
See notice on first page
February 2004
Voyager® with UnicodeTM
4-3
Figure 4-3.
Acquisitions tab
Figure 4-4.
Cataloging tab
NOTE:
There is no notices section because there are no cataloging notices in Voyager.
Endeavor Information Systems, Inc.
See notice on first page
4-4
February 2004
Voyager® with UnicodeTM
Using Reporter
Figure 4-5.
Circulation tab
Figure 4-6.
Media Scheduling tab
Endeavor Information Systems, Inc.
See notice on first page
February 2004
Voyager® with UnicodeTM
4-5
Table 4-1 describes the fields and buttons on the various Reporter application
tabs. Each tab contains essentially the same buttons and fields.
Table 4-1.
Description of the tabs in Reporter
Name of field, check box, or radio
button
Description
Processing
Location
Non-editable field displaying the Processing
location. This location is selected in Preferences,
Global tab.
Application tabs
Select the tab that corresponds to the application
for which you want to process reports and/or
notices.
•
•
•
•
Acquisitions
Cataloging
Circulation
Media Scheduling
Process reports/notices check box
When checked reports and notices for that module
will be processed.
Process Reports
When checked only reports for that module will be
processed.
Process Notices
When checked only notices for that module will be
processed.
NOTE:
Not available for Cataloging as there are not
notices.
Reports:
Description column
Type of Report to process.
Reports:
Number of Items column
Number of items in the report.
Notices:
Description
Type of Notice to process.
Notices:
Print column
Number of Notices that will be printed.
Notices:
E-mail column
Number of Notices that will be e-mailed.
Reset button
Click this button to reset the reports and notices.
Build Reports/Notices button
Click this button to build the reports and notices.
Run Reports/Notices button
Click this button to run the reports and notices.
Exit button
Click this button to exit the Reporter module.
Endeavor Information Systems, Inc.
See notice on first page
4-6
February 2004
Voyager® with UnicodeTM
Using Reporter
Building Reports and Notices
When the user builds the reports and notices the following activities occur.
• The input file on the server that has the same print location code as the
processing location is accessed.
• The file is formatted using the Access database files (.mdb files) on the
users computer.
• The input file on the server is archived and the new name includes the date
and time that Reporter built the reports and/of notices. For example, the file
crcnotes.Circ.inp might change to
crcnotes.Circ.20021015.1011.
• A temporary (.tmp) file is created on the users computer.
• If there is a problem with the file where Reporter is unable to process it,
.err and .msg files are created.
• Reporter displays the type and number of reports and/or notices being
built.
Errors While Building Reports/Notices
Reporter checks each record to determine whether the contents of the record are
good or whether they contain errors. Good records are processed and added to
the archive file, but records with errors are not processed.
If errors are detected in records during the building of the reports and notices,
such as records with information missing in required fields, processing of that
record is skipped, and the next record is processed.
To keep track of any erroneous records, Reporter builds two files to record this
information an .err file, where the erroneous records are listed, and a .msg file,
which holds an error message for every erroneous record. The convention for
naming the files follows the format xxyymmdd.err and xxyymmdd.msg, where
xx stands for the first two letters of the file where the erroneous record was found,
and yy, mm, and dd standing for the year, month, and day that the archive file was
originally created. These files are stored in the appropriate archive directory. They
are text files that you can open and view in Notepad® or WordPad®.
See Error Record Processing on page 4-17 for additional information.
Endeavor Information Systems, Inc.
See notice on first page
February 2004
Voyager® with UnicodeTM
4-7
Procedure 4-2. Building reports and notices
Use the following to build reports and notices.
1. Select the tab for the desired application, Acquisitions, Cataloging, Circulation, or
Media Scheduling.
Result: The selected tab displays. In the example in Figure 4-7 the Circulation
tab was selected.
Figure 4-7.
The Circulation tab
2. The Process Circulation Reports/Notices check box should be checked by
default. If it is not, check the box.
3. Both the Process Reports and Process Notices check boxes should be checked
by default. If not, select the Process Reports check box to process the Circulation
reports. Check the Process Notices check box to process the Circulation notices.
Result: The Circulation Reports/Notices are ready to be processed.
Endeavor Information Systems, Inc.
See notice on first page
4-8
February 2004
Voyager® with UnicodeTM
Using Reporter
4. Click the Build Reports/Notices button.
Result: Reporter automatically begins the transfer of the input file(s) from the
server to your computer and builds the Access database records.
The input file(s) on the server is renamed to include the date and time processed.
In this example the two filenames are now crcnotes.Circ.20021015.1011
and crcrprts.Circ.20021015.1011.
The list of reports/notices processed display in a list including the report/notice
descriptive name and the number of items.
NOTE:
For Circulation Notices and Media Booking Notices the item count will be
separated into a print item count and an e-mail item count.
Figure 4-8 shows that the Item-Related Exceptions and the Transaction-Related
Exceptions reports were built, and one Overdue Notice will be printed.
Figure 4-8.
Circulation tab after building reports and notices
Endeavor Information Systems, Inc.
See notice on first page
February 2004
Voyager® with UnicodeTM
4-9
Printing the Reports and Notices Processed lists
Users can print the Reports and Notices Processed lists by selecting Print List(s)
from the File menu. Both lists will print if both the Process Reports and Process
Notices checkboxes are marked.
The list(s) printed include the names of the reports and/or notices, as well as the
number of notices of each notice type or the number of items on each report. The
list is sent to the printer configured for your system.
Exiting Reporter Without Running Reports or
Notices
Users can exit the Voyager Reporter module without running any reports or
notices by clicking the Cancel button.
!
IMPORTANT:
This causes Reporter to consider the current session a failure because
there are unprocessed notices/reports. Therefore, the next time that you
run the Reporter, you will be notified that the previous session failed and
the current execution will be a Failure Recovery Run.
Processing of the reports and/or notices from the session you canceled is
completed before you are allowed to transfer and process any new reports and/or
notices. The same events will occur if any other condition (for example, a power
failure) prevented Reporter from completing all tasks during the previous
execution.
Endeavor Information Systems, Inc.
See notice on first page
4-10
February 2004
Voyager® with UnicodeTM
Using Reporter
No Reports or Notices for Selected Application
Figure 4-9.
No Reports or Notices for Selected Applications
If there are no notices or reports for a selected application the No Reports to
Process or No Notices to Process messages display in the appropriate list
boxes (see Figure 4-9).
If there are no notices or reports for ALL selected applications, the message
There are no Reports or Notices for the selected
Application(s) displays in the status bar.
NOTE:
If the No Reports/Notices to Process message displays and there should
be something to process, this indicates that Reporter cannot find the correct file.
Reporter looks for a server file that has the same PrintLocCode that is defined
in the Processing Location of the Global tab in Reporter’s preferences, check that
the Processing Location is correct.
Running Reports and Notices
After building the reports/notices the operator runs them which produces either a
hard copy of the report/notice, or e-mails the notice.
Endeavor Information Systems, Inc.
See notice on first page
February 2004
Voyager® with UnicodeTM
4-11
Running reports and notices means that Reporter starts Access and directs the
printing or e-mailing the reports or notices. Figure 4-8 shows the Circulation tab
after the Circulation Reports and Notices have been built and are ready to run.
Figure 4-10.
Reporter dialog box after building Circulation reports and notices
Procedure 4-3. Running reports and notices
Use the following to run the Circulation reports and notices previously built.
1. Click the Run Reports/Notices button (see Figure 4-10).
NOTE:
You cannot select specific reports or notices to process from the displayed list(s).
These lists only specify information about the current file(s).
Result: Access opens and formats the reports and notices. Then the reports and
notices are printed. After all print records for a particular application have been
processed, any e-mail notices remaining are sent. The message All
processing complete displays in the bottom status bar (see Figure 4-11).
Endeavor Information Systems, Inc.
See notice on first page
4-12
February 2004
Voyager® with UnicodeTM
Using Reporter
Figure 4-11.
Running of Circulation reports and notices complete
NOTE:
The Reset button becomes available when all of the current reports and/or
notices have been run. The Reset button allows you to re-initialize the application
in preparation for beginning the process of transferring any current input files from
the server.
2. Click the Exit button.
Result: The Reporter module closes.
Processing Archive Files
Reporter allows users to process files that are archived on the users computer.
Files will be archived only if their preferences are set to archive reports and
notices.
Endeavor Information Systems, Inc.
See notice on first page
February 2004
Voyager® with UnicodeTM
4-13
Procedure 4-4. Processing Archive Files
Use the following to process archive files.
1. Select Archives from the File menu (see Figure 4-12).
Figure 4-12.
Reporter dialog box - selecting Archives
NOTE:
This option is only available if you have archived files on the users computer.
Result: The Archive Selection dialog box opens (see Figure 4-13). The tabs for
applications for which there are archive files display in bold.
Endeavor Information Systems, Inc.
See notice on first page
4-14
February 2004
Voyager® with UnicodeTM
Using Reporter
Figure 4-13.
Archives Selection List dialog box
2. Click the tab for the application and from the list select the report and/or notice file
you want to process, then click the OK button or click Cancel to close the window
without processing the file(s).
NOTE:
The files are identified by the date of original processing.
Result: The Reporter dialog box opens with the Run Reports/Notices button
available and the selected report or notice in the process reports or process
notices lists (see Figure 4-14).
Endeavor Information Systems, Inc.
See notice on first page
February 2004
Voyager® with UnicodeTM
4-15
Figure 4-14.
Reporter ready to process archived overdue notice
3. Process reports and notices as you would ordinarily by clicking the Run Reports/
Notices button.
Result: The archive file is processed.
Invalid Input File Version
The Invalid Input File version message (Figure 4-15) displays if you have selected
an archive file for processing that was created by a previous version of Reporter
and if the input file format has changed.
Endeavor Information Systems, Inc.
See notice on first page
4-16
February 2004
Voyager® with UnicodeTM
Using Reporter
Figure 4-15.
Incorrect Input File Version message
If this occurs you will not be able to process the archive file unless you process it
using the earlier version of Reporter.
Error Record Processing
If at the end of processing you receive a message indicating that one or more
reports or notices had errors, you need to perform Error Record Processing.
The files containing the information regarding error records for reports and notices
are found in the reports and notices archive directories on the users computer,
usually c:\voyager\Reporter\Notices or Reports.
The xxyymmdd.err file is the error file, and the xxyymmdd.msg file is the
message file.
The filename convention is xxyymmdd.err and xxyymmdd.msg, where xx is the
first two characters of the input file name, yy is the processing year, mm is the
processing month, and dd is the processing date.
The xxyymmdd.err file contains a list of the errors. The xxyymmdd.msg file
gives the record line number, the column number (the character position, counting
from the left end of the line) where the error occurred and a description of the
error.
Endeavor Information Systems, Inc.
See notice on first page
February 2004
Voyager® with UnicodeTM
4-17
These files can be opened as a text file using a text editor.
!
CAUTION:
Do not move either of these files.
Error file
The error file allows you to see where an error is. An example of a .err file
received after running circulation batch job 24 the transaction exceptions report
follows.
07|97.2|09/07/2000|CHECKOUT|Circulation Review|||Managing
organizational behavior. John R. Schermerhorn, Jr., James G.
Hunt, Richard N. Osborn.|39239000611276|09/06/2000|checkin
This example shows that there is no name in the sixth field and no barcode in the
seventh field as there should be based on the Circulation Reports Standard
Interface File (SIF) in the Voyager Technical User’s Guide.
Therefore to clear up this error the user can enter a fake name and barcode in the
appropriate fields. An example of the correction follows.
07|97.2|09/07/2000|CHECKOUT|Circulation Review|FAKE
NAME|FAKE ID|Managing organizational behavior. John R.
Schermerhorn, Jr., James G. Hunt, Richard N.
Osborn.|39239000611276|09/06/2000|checkin
Message file
The message file explains to the user what the error is. The following is the file
format.
Line:
1
Column:14
Column:134
Missing Last Name
Missing Description
Line:
2
Column:22
Missing First Name
This indicates that the first record in the error file has two errors, a missing last
name and a missing description. The second record in the error file has one error,
it is missing a first name.
Endeavor Information Systems, Inc.
See notice on first page
4-18
February 2004
Voyager® with UnicodeTM
Using Reporter
NOTE:
After describing all of the records with errors, all of the good records for the report
are added at the end of the error file and the message file contains an entry such
as, Beginning with Line: 3 The rest of the records in the file do NOT have errors.
Procedure 4-5. Correcting errors and running error record processing
Use the following to correct errors and run error record processing
1. Make the corrections in the error (.err) file.
a. Print the message (.msg) file to use as a reference while making
changes to the error file.
b. Open the error file in a text editor (such as WordPad) and make the
corrections indicated in the associated .msg file.
For example, if a last name is missing, simply type in the last name.
When editing the error file to make corrections, the user will
encounter a pipe character (|). The correct data item must be
entered in the error file immediately preceding this pipe and the file
must be saved.
Also, be certain that your text editor does not have word wrap
turned on.
c. When finished making corrections save and close the error file.
Result: You are now ready to reprocess the error file.
2. Restart (or reset) Reporter, from the File menu, select Error Record Processing.
Result: The Error Selection dialog box opens. It uses the same format as the
Archive Selection dialog box. It lists all of the error files in the appropriate list
(reports or notices) by application.
3. Select the error file(s) which you have corrected and click OK to begin processing
the file(s) you have selected, or click Cancel to close the window without processing
the file(s).
Result: If you were successful in correcting some or all of the errors, the records
will be processed and then appended to the correct archive file (if you are
archiving).
Endeavor Information Systems, Inc.
See notice on first page
February 2004
Voyager® with UnicodeTM
4-19
If there are still some errors in the file, a new error file and message file pair will be
created and stored in the appropriate archive directory (reports or notices) and
you will be notified again that there are errors to process.
Endeavor Information Systems, Inc.
See notice on first page
4-20
February 2004
Voyager® with UnicodeTM
Editing the Format of Reports and
Notices
Contents
Introduction
Access names for the reports and notices distributed
with Reporter
• Acquisitions Reports
• Cataloging Reports
• Circulation Reports
• Media Booking Reports
• Acquisitions Notices
• Circulation Notices
• Media Booking Notices
Editing the Formats of Reports and Notices
Editing Text for e-mail Notices
5-1
5-2
5-2
5-3
5-4
5-6
5-7
5-7
5-8
5-9
5-12
Endeavor Information Systems, Inc.
See notice on first page
February 2004
Voyager® with UnicodeTM
5-i
Contents
Endeavor Information Systems, Inc.
See notice on first page
5-ii
February 2004
Voyager® with UnicodeTM
Editing the Format of Reports and
Notices
Introduction
This chapter contains information on how sites can edit the format of the reports
and notices that they produce.
The Reporter module acts as a coordinator between the raw data (input file) on
the server and the printed or e-mailed report or notice. The input file follows a
specified format Standard Interface File (SIF) and contains specific pieces of
information. For information about the various SIF formats see the Voyager
Technical User’s Guide. The Reporter module takes that input file and formats it
using a Microsoft Access database file (.mdb) to format it for printing or e-mailing.
With Reporter you can print (or e-mail if applicable) reports and notices using the
provided formats, or you can modify these formats.
NOTE:
Users cannot add new variables to these reports or notices since the data comes
from the corresponding SIF. Users can modify what will print on the report or
notice.
An example of this might be on a circulation overdue notice, although the data for
the item ID is available (in the SIF, therefore in the input file), the site may choose
not to print it on the notice.
Endeavor Information Systems, Inc.
See notice on first page
February 2004
Voyager® with UnicodeTM
5-1
The Notices/Reports database files are located in the c:\voyager\Reports
directory. The names are as follows:
•
•
•
•
•
•
•
acqnotes.mdb (Acquisitions Notices)
crcnotes.mdb (Circulation Notices)
mednotes.mdb (Media Booking Notices)
medrprts.mdb (Media Booking Reports)
acqrprts.mdb (Acquisitions Reports)
catrprts.mdb (Cataloging Reports)
crcrprts.mdb (Circulation Reports)
Each of these database files contains an Access report that is the format for the
report or notice.
Access names for the reports and notices
distributed with Reporter
This section covers the reports for each module first, then the notices for each
module.
Acquisitions Reports
Figure 5-1 displays the Access reports contained in the acqrprts.mdb file.
Figure 5-1.
Access reports contained in the acqrprts.mdb file
Endeavor Information Systems, Inc.
See notice on first page
5-2
February 2004
Voyager® with UnicodeTM
Editing the Format of Reports and Notices
Table 5-1 describes the acquisitions reports.
Table 5-1.
Access reports contained in the acqrprts.mdb file descriptions
Microsoft Access Report
Name
Report Description
Copy_Rollover_Status
Copy Rollover Status
Fund_Rollover_Status
Fund Rollover Status
Fund_Snap
Fund Snapshot
Fund_Snap_AR
Fund Snap Shot After Rollover
Fund_Snap_BR
Fund Snap Shot Before Rollover
Global_Open_Orders
Global Open Orders
Global_Open_Orders_Sub
Part of Global Open Orders
Open_Orders
Open Orders
Open_Orders_AR
Open Orders After Rollover
Open _Orders_BR
Open Orders Before Rollover
Open _Orders_Sub
Part of Open Orders
Open _Orders_Sub_AR
Part of Open Orders after
Open _Orders_Sub_BR
Part of Open Orders before
P_Order-L
Purchase Order in Landscape format
P_Order-P
Purchase Order in Portrait format
Cataloging Reports
Figure 5-2 displays the Access reports contained in the catrprts.mdb file.
Endeavor Information Systems, Inc.
See notice on first page
February 2004
Voyager® with UnicodeTM
5-3
Figure 5-2.
Access reports contained in the catrprts.mdb file
Table 5-2 describes the cataloging reports.
Table 5-2.
Access reports contained in the catrprts.mdb file descriptions
Microsoft Access
Report Name
Report Description
856_Link_Failure
856 Link Failure
Dup_Authority
Duplicate Authority Records
S_A_No_Authority
’See Also’ References w/o Corresponding
Auth Record
S_R_Auth_in_Other
’See’ References authorized in another
Auth Record
S_R_Linked_Bib
’See’ Reference w/linked Bibs
U_A_Name
Unauthorized Name Heading
U_A_Name_Title
Unauthorized Name Title
U_A_Subdivision
Unauthorized Subdivisions
U_A_Subject
Unauthorized Subject Heading
U_A_Title
Unauthorized Title Heading
Circulation Reports
Figure 5-3 displays the Access reports contained in the crcrprts.mdb file.
Endeavor Information Systems, Inc.
See notice on first page
5-4
February 2004
Voyager® with UnicodeTM
Editing the Format of Reports and Notices
Figure 5-3.
Access reports contained in the crcrprts.mdb file
Table 5-3 describes the circulation reports.
Table 5-3.
Access reports contained in the crcrprts.mdb file descriptions
Microsoft Access
Report Name
Report Description
C_S_Rprt
Circulation Statistics
DIO_Rprt
Distribution Item Order List
GCS_Rprt
Global Circulation Statistics
H_S_Xprd
Hold Shelf Expired
I_R_Excp
Item Related Exceptions
M_I_Tran
Missing in Transit
P_R_Excp
Patron Related Exceptions
R_I_Actv_1
Reserve Items Active (by Call Number)
R_I_Actv_2
Reserved Items Active (by Title)
R_I_Actv_4
Reserved Items Active (by Course Name &
Call Number)
R_I_Actv_8
Reserved Items Active (by Course Name &
Title)
R_I_Xprd_1
Reserved Items Expired (by Call Number)
R_I_Xprd_2
Reserved Items Expired (by Title)
Endeavor Information Systems, Inc.
See notice on first page
February 2004
Voyager® with UnicodeTM
5-5
Table 5-3.
Access reports contained in the crcrprts.mdb file descriptions
Microsoft Access
Report Name
Report Description
R_I_Xprd_4
Reserved Items Expired (by Course Name &
Call Number)
R_I_Xprd_8
Reserved Items Expired (by Course Name &
Title)
T_R_Excp
Transactions Exceptions
Media Booking Reports
Figure 5-4 displays the Access reports contained in the medrprts.mdb file.
.
Figure 5-4.
Access reports contained in the medrprts.mdb file
Table 5-4 describes the media scheduling reports.
Table 5-4.
Access reports contained in the medrprts.mdb file descriptions
Microsoft Access Report
Name
Report Description
B_Charge_Stats
Booking Charge Statistics
B_Exceptions
Booking Exceptions
B_Statistics
Booking Statistics
M_E_Inventory
Media Equipment Inventory
Endeavor Information Systems, Inc.
See notice on first page
5-6
February 2004
Voyager® with UnicodeTM
Editing the Format of Reports and Notices
Acquisitions Notices
Figure 5-5 displays the Access reports contained in the acqnotes.mdb file.
Figure 5-5.
Access reports contained in the acqnotes.mdb file
Table 5-5 describes the acquisition notices reports.
Table 5-5.
Access reports contained in the acqnotes.mdb file descriptions
Microsoft Access Report
Name
Notice Description
C_N_Notice
Canceled Purchase Order Notice
C_S_C_Notice
Canceled Serial Claim Notice
O_C_Notice
Order Claim Notice
R_T_Notice
Return Notice
S_C_Notice
Serial Claim Notice
V_C_Notice
Voucher/Check Request Notice
Circulation Notices
Figure 5-6 displays the Access reports contained in the crcnotes.mdb file.
Endeavor Information Systems, Inc.
See notice on first page
February 2004
Voyager® with UnicodeTM
5-7
.
Figure 5-6.
Access reports contained in the crcnotes.mdb file
Table 5-6 describes the circulation notices reports.
Table 5-6.
Access reports contained in the crcnotes.mdb file descriptions
Microsoft Access Report
Name
Notice Description
C_D_Notice
Courtesy Due Notice
C_N_Notice
Canceled Hold/Recall Notice
F_F_Notice
Fines/Fees Notice
I_A_Notice
Item Available Notice
O_D_Notice
Overdue Item Notice
R_C_Notice
Recall Notice
R_O_Notice
Recall Overdue Notice
Statement_F_F
Fine/Fee Statement Notice
Media Booking Notices
Figure 5-7 displays the Access reports contained in the mednotes.mdb file.
Endeavor Information Systems, Inc.
See notice on first page
5-8
February 2004
Voyager® with UnicodeTM
Editing the Format of Reports and Notices
Figure 5-7.
Access reports contained in the mednotes.mdb file
Table 5-7 describes the media scheduling notice reports.
Table 5-7.
Access reports contained in the mednotes.mdb file descriptions
Microsoft Access
Report Name
Notice Description
O_D_Notice
Overdue Item/Equipment Notice
Editing the Formats of Reports and
Notices
This section provides instructions on how to edit the report or notice format.
Procedure 5-1. Editing a report or notice format using Microsoft Access
Use the following to change, add text, or remove data fields from these Access
database file reports. Remember that you cannot add new data fields to these
formats or to the tables.
!
IMPORTANT:
Only those persons with knowledge of Microsoft Access attempt to change
these formats.
Endeavor Information Systems, Inc.
See notice on first page
February 2004
Voyager® with UnicodeTM
5-9
1. Before you edit a report or notice, copy the file, and place the copy in another
directory. This way, if there are any problems using the modified .mdb files, you can
go back to the original .mdb file.
2. Open the database file you want to edit.
a. Open Access.
b. From the File menu, select Open....
c. Change to the directory where your report databases are located
(usually c:\voyager\Reporter).
d. Select and open the database file you want to edit (the
acqnotes.mdb, crcnotes.mdb, mednotes.mdb,
acqrprts.mdb, catrprts.mdb, crcrprts.mdb, or
medrprts.mdb).
Result: The database file you want to edit is available.
3. Access the report or notice you want to modify.
a. Click the Report tab.
b. Highlight the report or notice that you want to modify, (in the
example in Figure 5-8 the crcnotes.mdb, overdue notice will be
modified).
Figure 5-8.
Overdue Notice selected to be modified
c. Click the Design button.
Result: The report or notice is available to make changes to the format (see
Figure 5-9).
Endeavor Information Systems, Inc.
See notice on first page
5-10
February 2004
Voyager® with UnicodeTM
Editing the Format of Reports and Notices
Figure 5-9.
Design view of the Overdue Notice
4. Use standard Access tools and commands to edit the report or notice, then save the
report or notice under the same name.
Result: The Access database file and its selected report/notice has been
modified.
NOTE:
If Voyager is reinstalled customized Access reports will be overwritten. If you have
made customizations, save your files in a different directory.
Endeavor Information Systems, Inc.
See notice on first page
February 2004
Voyager® with UnicodeTM
5-11
Editing Text for e-mail Notices
Notices can be sent to patrons using e-mail instead of sending a printed copy.
Users can customize the text of the e-mail notices that Reporter sends.
The NoticeEmail.cfg file usually located in c:\voyager\Reporter contains
the text of the e-mail message.
This file is divided into various sections, a common section, and a section for each
notice which can be sent by e-mail.
The common section contains information such as a salutation, the phone
number, location, and an item called LastLine. The location is the Circulation
happening location of the last circulation transaction for the item in question. The
LastLine is printed immediately before the library name and address at the end of
every notice (see Figure 5-10).
[Common]
Salutation=Dear
Title=Title:
Author=Author:
ID=Item ID:
Call#=Call #:
ExpDate=Expiration Date:
DueDate=Due Date:
Sequence=Notification Number:
Location=Location:
Phone=Phone:
EqType=Equipment Type:
EqNum=Equipment No.:
EqID=Equipment ID:
EqBarcode=Barcode:
Manu=Manufacturer:
Model= Model:
SN=Serial Number:
CN=Confirmation No.:
BS=Booking Start:
BE=Booking End:
LastLine=If you have questions or need assistance contact us at:
Figure 5-10.
Common section of the NoticeEmail.cfg
Endeavor Information Systems, Inc.
See notice on first page
5-12
February 2004
Voyager® with UnicodeTM
Editing the Format of Reports and Notices
In each notice section you find the items FirstLine, Header1, and Header2.
These items (if not blank) are printed in this order before the notice detail. Also,
each notice section contains the items Trailer1, Trailer2, and Trailer3. These
items are printed in this order (if not blank) after the notice detail. See Figure 5-11
for an example of the overdue notice section.
[O_D_Notice]
Subject=Overdue Notice
FirstLine=The following item(s) must be returned to the
location(s) indicated below as soon as possible.
Header1=
Header2=
Trailer1=If you are liable for overdue fines remember that the
fine increases the longer you keep the item. You may
also be charged for the replacement cost if the item is
not returned.
Trailer2=
Trailer3=
Figure 5-11.
Example of the O_D_Notice section of the NoticeEmail.cfg
NOTE:
The user can only edit the text to the right of the = symbol. If you want to have
nothing printed for a given item, then have nothing after the = symbol.
!
CAUTION:
You must not remove any of these items, nor can you add any items to this
file, to do so will cause a program failure.
Procedure 5-2. Editing the text in the NoticeEmail.cfg
Use the following to edit the text in the NoticeEmail.cfg file.
1. Copy the NoticeEmail.cfg file into another directory before any changes are
made to the existing file.
Result: This creates a copy to be used if there are problems with the modified file.
2. Change to c:\voyager\Reporter.
Endeavor Information Systems, Inc.
See notice on first page
February 2004
Voyager® with UnicodeTM
5-13
a. Open the NoticeEmail.cfg file in any word processing program
or text editor.
b. Edit, add, or remove any text the to left of the = symbol using
standard editing commands.
c. Save the file under the same name.
Result: The NoticeEmail.cfg is edited.
NOTE:
Each of the items comprise a single continuous paragraph in the notice.
Therefore, when changing these items, make sure that your editor has word wrap
turned off. Do not try to create your own paragraphs by pressing enter. Each item
must be one continuous string. Anything typed after pressing enter is ignored.
Endeavor Information Systems, Inc.
See notice on first page
5-14
February 2004
Voyager® with UnicodeTM
Common Reporter Errors
Contents
Introduction
Error Conditions
• Failure Recovery Run
• Unprocessed Report and/or Notice
• Unprocessed e-mail Notices
• Restoring the Server File to Run in Reporter
6-1
6-1
6-1
6-2
6-3
6-3
Endeavor Information Systems, Inc.
See notice on first page
February 2004
Voyager® with UnicodeTM
6-i
Contents
Endeavor Information Systems, Inc.
See notice on first page
6-ii
February 2004
Voyager® with UnicodeTM
Common Reporter Errors
Introduction
This chapter contains information on some typical error conditions and their
resolutions.
Error Conditions
The following typical error conditions are discussed.
• Failure Recovery Run
• Error Records
• Unprocessed e-mail notices
Failure Recovery Run
If your prior session of Reporter terminated without completely processing all of
the reports and/or notices, Reporter displays the following message (Figure 6-1)
at the beginning of your next Reporter session. This may be necessary, for
example, if there was a printer or e-mail problem.
In the situation where not all of the reports or notices are processed (that is
produced), the user must process these reports before processing the current
ones.
Endeavor Information Systems, Inc.
See notice on first page
February 2004
Voyager® with UnicodeTM
6-1
Figure 6-1.
Failure Recovery Run message
This processing occurs automatically. When the user clicks the OK button in the
message, Reporter restarts and processes the previous session’s report/notices
files. At the end of this process, the Reset button becomes available. You can
then click the Reset button and process any current files on the server.
Unprocessed Report and/or Notice
If, during processing, Reporter found errors in any of the input file records, you will
receive the message shown in Figure 6-2.
Figure 6-2.
Unprocessed Report and/or Notice Items message
Endeavor Information Systems, Inc.
See notice on first page
6-2
February 2004
Voyager® with UnicodeTM
Common Reporter Errors
The user must correct the errors in the input file, see Procedure 4-5, Correcting
errors and running error record processing, on page 4-19.
Unprocessed e-mail Notices
The message in Figure 6-3 displays at the end of processing, listing the notices
which had unprocessed e-mail items. That is when sending the e-mails failed.
Figure 6-3.
Unprocessed E-Mail Notices message
Restoring the Server File to Run in Reporter
Occasionally it may be necessary to restore the archived date-stamped server file
to an input (.inp) to re-run in Reporter. Your System Administrator can do this if
file is not archived on the local computer, due to not being archived in the first
place, or if the 30-day life span of the archived file on the computer has past.
!
CAUTION:
Use caution at all times when working on your Voyager server.
Endeavor Information Systems, Inc.
See notice on first page
February 2004
Voyager® with UnicodeTM
6-3
Procedure 6-1. Restoring the Server File to Run in Reporter
Use the following procedure to restore an archived file on the server.
1. On your Voyager server, in the /m1/voyager/xxxdb/rpt directory find the file
you want to restore. This is a file with a specific print location code and specific date
and time stamp.
2. To append the file use the cat >> command, changing the date-time stamp to
.inp. If there already is an .inp file, the contents of the archive will be appended to
it. If there is not already an .inp file, one will be created.
For example:
/m1/voyager/xxxdb/rpt $
cat nameofreport.printloccode.datetimestamp >>
nameofreport.printloccode.inp
If you were trying to restore a circulation notices archive from March 1, 2002 at
12:39 pm (the time when Reporter was run and the archive created), with the print
location code of Circ in the training database, then you would type the following:
/m1/voyager/traindb/rpt $
cat crcnotes.Circ.20020301.1239 >> crcnotes.Circ.inp
Result: The file is restored and available to Reporter.
Endeavor Information Systems, Inc.
See notice on first page
6-4
February 2004
Voyager® with UnicodeTM
Prepackaged Access Reports
Contents
Introduction
Prepackaged Access Reports Overview
Before using Voyager’s Prepackaged Access Reports
Voyager’s Prepackaged Access Reports
• Reports and queries in the Prepackaged Access Reports file
Using Prepackaged Access Reports
• Editing Reports and Queries
• Accessing the MARC "Blob"
Using the Expression Builder
7-1
7-1
7-3
7-3
7-5
7-24
7-24
7-26
7-26
Endeavor Information Systems, Inc.
See notice on first page
February 2004
Voyager® with UnicodeTM
7-i
Contents
Endeavor Information Systems, Inc.
See notice on first page
7-ii
February 2004
Voyager® with UnicodeTM
Prepackaged Access Reports
Introduction
This chapter contains descriptions of Voyager’s Prepackaged Access reports.
Libraries can use these reports for additional statistical reporting. Additionally,
they can be used as the foundation for other access queries the user may want to
create.
The first part of this section lists the various reports that are available and a brief
description. The second part contains brief information on the blobs.
Prepackaged Access Reports Overview
The Prepackaged Access reports allow for a great deal of flexibility and power
through mining information from your Voyager database. The reports are
predefined reports that cover a huge number of different kinds of information, that
can be easily modified to provide the type and level of information that you need.
However, you may still find that the reports do not provide you with the exact
information that you need. You can use Microsoft Access to customize any of the
reports included here to present you with the information that you need in the
appropriate format. The Prepackaged Access reports allow you two important
ways to change the information. You can completely change the layout and the
format of each of the reports. Secondly, you can specify which tables in the
Endeavor Information Systems, Inc.
See notice on first page
February 2004
Voyager® with UnicodeTM
7-1
database you want to draw information from. You can use the tables, the queries,
and the reports provided to come up with reports that get you the information that
you need.
The Oracle client returns UTF-8 or Latin-1 encoded data to Access. However,
Access cannot properly display UTF-8 data, therefore an internal conversion
function is used to convert the UTF-8 encoded data into UTF-16 encoded data.
Latin-1 displays appropriately with no conversion.
Some examples of queries that convert UTF-8 data to UTF-16 data are:
• Bib Records Created by operator, data from bib_text.title_brief
• Item Status - Damaged, data from bib_text.title
• MFHD Count - Library of Congress classification, data from
lcclass_vw.class
• all the Title List reports
!
IMPORTANT:
Customers creating new queries or modifying existing queries must
determine if the column they are referencing is UTF-8 encoded. If this is
the case, they must include a conversion function (UTF-8 to UTF-16) to
appropriately display or print the data.
For example, users can convert author and title in the bib_text table, using the
following function in the SQL view directly:
SELECT bib_id,
UTF8TO16(author),
UTF8TO16(title)
FROM
bib_text;
Or, users can access the query to which they must add the conversion function
and using the Design view, add the function (utf8to16) in the field (see Figure 7-1).
Figure 7-1.
Sample of adding conversion function to an Access query
Endeavor Information Systems, Inc.
See notice on first page
7-2
February 2004
Voyager® with UnicodeTM
Prepackaged Access Reports
For a complete list of UTF-8 columns in the Voyager database see the Voyager
Technical User’s Guide.
NOTE:
The default font is Arial Unicode MS. User’s wanting to change this font may do so
however, for accurate display you must use a Unicode font.
Before using Voyager’s Prepackaged
Access Reports
Before you have access to these reports users must follow the set up instructions
in Setting Up the Prepackaged Access Reports on page 1-17 of the Voyager
Reporter User’s Guide.
Voyager’s Prepackaged Access Reports
Most of the reports have a query with an identical name. Unless otherwise noted,
all names listed represent identically named reports and queries. Queries that
have no matching reports are noted with a single asterisk (*). Reports without
matching queries are noted with two asterisks (**).
Figure 7-2 on page 7-4 and Figure 7-3 on page 7-5 provide examples of the
reports and queries available.
Endeavor Information Systems, Inc.
See notice on first page
February 2004
Voyager® with UnicodeTM
7-3
Figure 7-2.
Reports list in Access (not all reports shown)
Endeavor Information Systems, Inc.
See notice on first page
7-4
February 2004
Voyager® with UnicodeTM
Prepackaged Access Reports
Figure 7-3.
Queries list in Access (not all queries shown)
Reports and queries in the Prepackaged Access
Reports file
The following are the reports and queries distributed in Voyager’s Prepackaged
Access reports file.
Acq - Issues Received by Component and Date Range
A list of journals for which issues have been received, including how many
issues have been received for each journal, within the specified date
range.
Acq - Issues Received by Component and Date Range (no serials)
Items created for non-serial bibliographic records in a specific date range.
AuthBlob*
A list of the contents of the blobs in each authority record in the database.
Listed by Auth ID.
Endeavor Information Systems, Inc.
See notice on first page
February 2004
Voyager® with UnicodeTM
7-5
Bib Records Created by Operator
A list of all of the bibliographic records created within the specified date
range and the operator that created each.
BibBlob*
A list of the contents of the blobs in each bibliographic record in the
database. Listed by Bib ID.
Bibs by Pub Decade and Country
For each decade, lists the number of bibs for each country. Also lists the
sum and the average of all countries per decade and the grand total of all
of the bibs.
Call Slip Unfilled Requests
Title and item details of unfilled Call Slip and UB requests for a specified
date range.
Call Slip Processing by Date Range*
Lists the status, no fill reason, start and end dates, Call Slip print group,
average Call Slips processed, request time, and archive date for all of the
Call Slips within the specified date range.
Circulation Transactions (Charges)*
A list of all current and archived circulation transactions (charges).
Circulation Transactions by Dewey Decimal Classification
Lists total numbers of transactions for each category of Dewey Decimal
classification.
Circulation Transactions by Item Statistical Categories
Lists total numbers of transactions for each item statistical category.
Circulation Transactions by Library of Congress Classification
Lists total numbers of transactions for each category of Library of Congress
classification.
Circulation Transactions by National Library of Medicine
Lists total numbers of transactions for each category of National Library of
Medicine classification.
Endeavor Information Systems, Inc.
See notice on first page
7-6
February 2004
Voyager® with UnicodeTM
Prepackaged Access Reports
Circulation Transactions by Patron Group and Item Type
Lists total numbers of transactions for each combination of patron group
and item type.
Circulation Transactions by Patron Statistical Categories
Lists total numbers of transactions for each patron statistical category,
listed per location.
Circulation Transactions by SuDoc Classification
Lists total numbers of transactions for each category of SuDoc
classification.
Circulation Transactions Titles by Date Range, Minimum Charges
Lists the titles within the specified date range that have been charged at
least the specified number of times.
Circulation Transactions Titles by Minimum Charges
Lists the titles that have been charged at least the specified number of
times.
NOTE:
For Circulation reports that include Circulation Transaction Type data, N
corresponds to Normal and O corresponds to Override.
Decode Searchparm*
Lists indexes in the search parameters table. This query is used by various
OPAC reports.
Dewey10*
Lists the Dewey classifications that are multiples of 10.
Dewey100*
Lists the Dewey classifications that are multiples of 100.
Donor List
A list of donors and the items that have been donated by each one,
including title, location and call number of each item.
Duplicate Item Barcodes
Lists each item barcode and the number of duplicate barcodes for each
item.
Endeavor Information Systems, Inc.
See notice on first page
February 2004
Voyager® with UnicodeTM
7-7
Duplicate Patron Barcode (active)
Lists each active patron barcode and the number of duplicate barcodes for
each active patron.
Duplicate Patron Barcode (all statuses)
Lists each patron barcode of any status and the number of duplicate
barcodes for each patron.
Expired Patron Records
Lists all of the patron records that expired between the specified dates.
Fine and Fee Transactions
Lists all of the Fine and Fee payment transactions that occurred between
the specified dates.
Fines and Fees
Lists all of the Fines and Fees incurred between the specified dates.
Fund Snapshot Report**
Provides a quick view of some of the pertinent information regarding the
fund.
Fund Snapshot Report - All Transactions**
Provides a quick view of some of the pertinent information regarding the
fund, including a list of all transactions conducted on the fund.
Fund Snapshot Report - without Commitments**
Provides a quick view of some of the pertinent information regarding the
fund, including a list of uncommitted money in the fund.
Fund Transactions - All*
Provides pertinent information regarding the fund, including a list of all
transactions conducted on the fund.
Fund Transactions - without Commitments*
Provides pertinent information regarding the fund, including a list of
uncommitted money in the fund.
Funds by Ledger Name*
Lists the names of all the funds that are part of the specified ledger and
fiscal period.
Endeavor Information Systems, Inc.
See notice on first page
7-8
February 2004
Voyager® with UnicodeTM
Prepackaged Access Reports
Get_price_adjustments (sub)**
Query used by the Invoice Receiving report.
Inter-cluster active charges (local database only) by home patron id
This report lists current outstanding inter-cluster charges for all home
patrons cluster.
Inter-cluster active request by home patron id (x days)
This report lists the total number of current inter-cluster requests for home
patrons that have not been filled for any reason.
Inter-cluster charges (local database only)
This report lists current outstanding charges for stub patron records in the
local cluster.
Inter-cluster fines/fees (local database only)
This report lists all stub patron records in the local database with
outstanding fines and fees. Fine details (for example, overdue or lost) are
included.
Inter-cluster fines/fees by home patron id (local database only)
This report lists current inter-cluster fee and demerit balances at any
holding library for home patrons, sorted by patron.
Inter-cluster fines/fees by home patron id grouped by database**
This report lists current inter-cluster fine/fee balances and demerit
balances at any holding library for local patrons, sorted by holding library. It
is essentially the inter-cluster Home Patrons With Fees and Demerits
report grouped by database instead of patron.
Inter-cluster historical charges by cluster (local database only)
This report counts total number of inter-cluster historical charges by cluster
at the local database.
Inter-cluster historical charges by stub patron group (local database only)
This report counts total number of inter-cluster historical charges by stub
patron group at the local database.
Inter-cluster historical charges by home patron group and holding cluster*
This report counts total number of historical inter-cluster charges to home
patrons by home patron group.
Endeavor Information Systems, Inc.
See notice on first page
February 2004
Voyager® with UnicodeTM
7-9
Inter-cluster historical charges by home patron id and holding cluster
This report counts total number of historical inter-cluster charges to home
patrons by Holding cluster. If the patron id is purged this report will not
work.
Inter-cluster historical requests by home patron group and holding cluster
This report counts the total number of historical inter-cluster requests made
by home patrons listed by home patron group.
Inter-cluster historical requests by home patron id and holding cluster
This report counts the total number of historical inter-cluster requests made
by home patrons listed by Holding cluster.
Inter-cluster historical requests by cluster (local database only)
This report counts total number of inter-cluster historical requests at the
local database. Its call slips should be reporter.)
Inter-cluster historical request by stub patron group (local database only)
This report counts total number of inter-cluster historical requests at the
local database by the stub patron group.
Inter-cluster items in transit (local database only)(all)
This report lists all inter-cluster items currently with an In Transit status.
Inter-cluster items in transit (local database only) (over x days)
This report lists all inter-cluster items with an In Transit status for a specific
time period to identify missing items.
Inter-cluster shipping statistics (local database only)
This report calculates the average and maximum shipping times (in days)
between clusters for a specific time period. This covers both inbound and
outbound shipping.
Inter-cluster stub patrons (local database only)
This report lists all stub patron records in the local database, sorted by the
stub patron’s Home cluster.
Invoice_receiving_report
Provides invoice data including a breakdown by federal tax ID.
Endeavor Information Systems, Inc.
See notice on first page
7-10
February 2004
Voyager® with UnicodeTM
Prepackaged Access Reports
Item Count - Dewey Decimal Classification
Lists the number of items of each category under Dewey Decimal
Classification.
Item Count - Library of Congress Classification
Lists the number of items of each category under Library of Congress
Classification.
Item Count - National Library of Medicine Classification
Lists the number of items of each category under National Library of
Medicine Classification.
Item Count - SuDoc Classification
Lists the number of items of each category under SuDoc Classification.
Item Count by Location and Type
Lists the number of items of each type at each location.
Item Count by Location, Type and Create Date
Lists the number of items of each type at each location that were created
between the specified dates.
Item Location*
Lists location, item type, historical browses, holds and recalls placed,
create and modify dates, operators, and location for every item in the
database.
Item Most Recent Charge Date*
Lists the most recent date that every item in the database was charged.
Item Note Search
Lists all of the items that have notes attached to them, including Barcode,
Item ID, and Note information.
Item Stati, Lost, missing etc.*
Lists the status, status date and other item information for every item in the
database.
Item Status - At Bindery
Lists all of the items that have a status of At bindery.
Endeavor Information Systems, Inc.
See notice on first page
February 2004
Voyager® with UnicodeTM
7-11
Item Status - Cataloging Review
Lists all of the items that have a status of Cataloging Review.
Item Status - Circulation Review
Lists all of the items that have a status of Circulation Review.
Item Status - Claims Returned
Lists all of the items that have a status of Claims Returned.
Item Status - Damaged
Lists all of the items that have a status of Damaged.
Item Status - In Process
Lists all of the items that have a status of In Process.
Item Status - In Transit
Lists all of the items that have a status of In Transit.
Item Status - Lost Library Applied
Lists all items that have a status of Lost - Library Applied.
Item Status - Lost System Applied
Lists all items that have a status of Lost - System Applied.
Item Status - Missing
Lists all of the items that have a status of Missing.
Item Status - Withdrawn
Lists all of the items that have a status of Withdrawn.
Items Browsed
Lists items that have been browsed a certain number of times above the
specified threshold.
Last Charged (All Time)
Lists the latest charge date for records at each location.
Last Charged (Range)
Lists the date of the last charge for records at each location within the
specified date range.
Endeavor Information Systems, Inc.
See notice on first page
7-12
February 2004
Voyager® with UnicodeTM
Prepackaged Access Reports
LCClassFull*
Lists class letters for all of the categories under Library of Congress
classification.
Map_i_currency_conversion (sub)*
Query used by the Invoice Receiving report.
Map_i_line_item_fund (sub)*
Query used by the Invoice Receiving report.
Map_i_line_item_PO_bib (sub)*
Query used by the Invoice Receiving report.
Map_price_adjustments (sub)*
Query used by the Invoice Receiving report.
Map_vendor_address (sub)*
Query used by the Invoice Receiving report.
MFHD Count - Dewey Decimal Classification
Lists the number of holdings records of each category of the Dewey
Decimal Classification.
MFHD Count - Library of Congress Classification
Lists the number of holdings records of each category of the Library of
Congress Classification.
MFHD Count - National Library of Medicine Classification
Lists the number of holdings records of each category of the National
Library of Medicine Classification.
MFHD Count - SuDoc Classification
Lists the number of holdings records of each category of the SuDoc
Classification.
MFHDBlob*
A list of the contents of the blobs in each holdings record in the database.
Listed by MFHD ID.
Endeavor Information Systems, Inc.
See notice on first page
February 2004
Voyager® with UnicodeTM
7-13
New Bib Count
Lists how many new bibs were created at each location by each operator
within the specified date range.
OPAC - Local Z3950 Mappings to Voyager Indexes
For each use attribute, lists the position attribute, search code, and search
name.
OPAC and Staff Composite Left-Anchored Indexes
Lists all composite left-anchored indexes and whether each is available for
staff and/or OPAC searching.
OPAC and Staff Keyword Indexes
Lists all keyword indexes and whether each is available for staff and/or
OPAC searching.
OPAC and Staff Left-Anchored Indexes
Lists all left-anchored indexes and whether each is available for staff and/or
OPAC searching.
OPAC Search Log: Total Searches by Day
Lists total number of searches performed on each day within the specified
date range and summarizes search totals for each month and each year,
including the total, the average, the lowest count for a single day, and the
highest count for a single day for each period.
OPAC Suppressed Records
Lists the number of records that are suppressed from being displayed in
OPAC, listed by item location.
Patron Fines and Fees
Lists all of the fines and fees accrued by all patrons.
Patron Fines and Fees - UB Stub Patrons
This report lists all stub patron records in the local database with
outstanding fines and fees. Fine details (for example, overdue or lost) are
included.
Patrons Created By Operator
Lists the number of patron records created by each operator within the
specified date range.
Endeavor Information Systems, Inc.
See notice on first page
7-14
February 2004
Voyager® with UnicodeTM
Prepackaged Access Reports
Patrons with Overdue Items
Lists the patrons who have items that are overdue the specified number of
days.
Patrons with Paid Lost Items to Discharge
Lists the patrons who have paid for lost items which now need to be
discharged.
Patrons with Unpaid Lost Items
Lists the patrons with lost items that have not been paid for.
Proxy Patron - Active
Lists all patrons with active proxies and their active proxies.
Proxy Patron - Expired
Lists all of the patrons that have expired proxies and all of their expired
proxies.
Publications Patterns with Components
For each pattern name, lists all components and the frequency associated
with that pattern.
Requestor List
A list of people who have requested items and the items that they
requested, including title, location, and call number of each item.
Routing List Locations
Lists routing list locations sorted by title and component name, including
the date that the list was added.
Routing List Locations (sub)*
Query used by the Routing List Locations report.
Routing List Members (sub)*
Query used by the Routing Lists report.
Routing List Patrons
Lists patrons on routing list and the titles that they receive, including title,
component name, routing list name, and the date that the list was added.
Endeavor Information Systems, Inc.
See notice on first page
February 2004
Voyager® with UnicodeTM
7-15
Routing List Patrons (sub)*
Query used by the Routing List Patrons report.
Routing Lists
Lists for each title and component each routing list and all of the patrons to
whom each item should be delivered in turn.
searchfields2*
Query that divides the tag from the subfield for purposes of reporting.
Security: All Profiles (sub)*
Query used by the Security: All Profiles and Operators report.
Security: All Profiles and Operators
Lists for every operator all of the security profiles for every module that the
operator is allowed.
Short Loans
Lists the number of short loans of each status of which the status was
incurred between the specified dates. The following dispositions are
included in the report: a count for each of the following dispositions:
cancelled, charged, item indefinitely unavailable, item temporarily
unavailable, unclaimed.
Item temporarily unavailable means that the item, at the time charge or
scheduling, was not able to be charged or scheduled. That is someone
else had it charged out and so the system couldn't fulfill the request.
Item indefinitely unavailable refers to a more permanent status. For
example the item could be lost or withdrawn.
Subscription Payment History
Lists all of the invoices for each title by title and invoice date, including the
line item price and type.
Subtotals (sub)*
Query used by the Invoice Receiving report.
Subtotals_sub (sub)**
Query used by the Invoice Receiving report.
Endeavor Information Systems, Inc.
See notice on first page
7-16
February 2004
Voyager® with UnicodeTM
Prepackaged Access Reports
System Access Tables NOT Linked*
Lists all of the tables in the reports.mdb file that are not linked to the
database.
System Linked Tables*
Lists all of the tables in the reports.mdb file that are linked to the
database.
System Query List*
Lists all of the queries available in the reports.mdb file.
System Reports Available**
Lists all of the available prepackaged reports in the current release of this
reports.mdb file.
System Report List*
Lists all of the reports available in the reports.mdb file.
Title List - Bib Level = s
Lists all of the titles with Bib Level = s (serial items).
Title List - Medium Computer File
Lists all of the titles that have a medium type in the 007 of Computer File.
Title List - Medium Globe
Lists all of the titles that have a medium type in the 007 of Globe.
Title List - Medium Map
Lists all of the titles that have a medium type in the 007 of Map.
Title List - Medium Microform
Lists all of the titles that have a medium type in the 007 of Microform.
Title List - Medium Motion Picture
Lists all of the titles that have a medium type in the 007 of Motion Picture.
Title List - Medium Non-Projected Medium
Lists all of the titles that have a medium type in the 007 of Non-Projected
Medium.
Endeavor Information Systems, Inc.
See notice on first page
February 2004
Voyager® with UnicodeTM
7-17
Title List - Medium Projected Medium
Lists all of the titles that have a medium type in the 007 of Projected
Medium.
Title List - Medium Remote Sensing Image
Lists all of the titles that have a medium type in the 007 of Remote Sensing
Image.
Title List - Medium Sound Recording
Lists all of the titles that have a medium type in the 007 of Sound
Recording.
Title List - Medium Text
Lists all of the titles that have a medium type in the 007 of Text.
Title List - Medium Unspecified
Lists all of the titles that have a medium type in the 007 of Unspecified.
Title List - Medium Video recording
Lists all of the titles that have a medium type in the 007 of Video recording.
Title List - Type Computer File
Lists all of the titles that have a Record Type in the leader of Computer File.
Title List - Type Kit
Lists all of the titles that have a Record Type in the leader of Kit.
Title List - Type Language Material
Lists all of the titles that have a Record Type in the leader of Language
Material.
Title List - Type Manuscript Language Material
Lists all of the titles that have a Record Type in the leader of Manuscript
Language Material.
Title List - Type Manuscript Map
Lists all of the titles that have a Record Type in the leader of Manuscript
Map.
Endeavor Information Systems, Inc.
See notice on first page
7-18
February 2004
Voyager® with UnicodeTM
Prepackaged Access Reports
Title List - Type Manuscript Music
Lists all of the titles that have a Record Type in the leader of Manuscript
Music.
Title List - Type Mixed Material
Lists all of the titles that have a Record Type in the leader of Mixed
Material.
Title List - Type Musical Sound Recording
Lists all of the titles that have a Record Type in the leader of Musical Sound
Recording.
Title List - Type Non-musical Sound Recording
Lists all of the titles that have a Record Type in the leader of Non-musical
Sound Recording.
Title List - Type Printed Map
Lists all of the titles that have a Record Type in the leader of Printed Map.
Title List - Type Printed Music
Lists all of the titles that have a Record Type in the leader of Printed Music.
Title List - Type Projected Medium
Lists all of the titles that have a Record Type in the leader of Projected
Medium.
Title List - Type Three-Dimensional Artifact
Lists all of the titles that have a Record Type in the leader of ThreeDimensional Artifact.
Title List - Type Two-Dimensional Nonprojectable Graphic
Lists all of the titles that have a Record Type in the leader of TwoDimensional Nonprojectable Graphic.
UB Average Receiving Time by Day (warehouse)
Aggregate report which averages the in transit period between shipping
and receiving libraries for all participating libraries
It will also include routings inside the local database from locations in one
cluster to locations in another.
Endeavor Information Systems, Inc.
See notice on first page
February 2004
Voyager® with UnicodeTM
7-19
UB Call Slip Processing Statistics by Date Range
This report counts and averages fill and no-fill times (in hours) for UB
requests at the Holding library.
UB Call Slip Processing Statistics by Day (warehouse)
Aggregate report with counts and averages fill and no-fill times (in hours)
for UB requests for the Holding libraries for all participating libraries.
This report will return inter-cluster requests for items in the local database
according to the item’s cluster. The patron’s cluster will not be returned
because it is not available for patrons outside the database. This query will
include requests by a patron in the local database for an item in the local
database in another cluster.
UB Charges by Day (warehouse)
Aggregate report which counts UB by day for the Holding library and Home
library for all participating libraries.
This report will return inter-cluster charges for local items. This report will
include charges by a patron in the local database for an item in another
cluster.
UB Historical Charges by Patron Home Database
This report counts total number of historical charges at the local library by
the patron home library.
UB Historical Charges by Stub Patron Group
This report counts total number of historical charges at the local library by
the local patron group to which remote patron groups are mapped.
UB Historical Requests by Patron Home Database
This report counts total number of historical requests at the local library by
the patron home library.
UB Historical Requests by Stub Patron Group
This report counts total number of historical requests at the local library by
the stub patron group.
UB Holding Library Items in Transit (all)
This report lists all UB items currently with an In Transit status.
Endeavor Information Systems, Inc.
See notice on first page
7-20
February 2004
Voyager® with UnicodeTM
Prepackaged Access Reports
UB Holding Library Items in Transit (over x days)
This report lists all UB items with an In Transit status for a specific time
period to identify missing items.
UB Home Patrons With Demerits (Grouped by Db) - Sub **
See UB Home Patrons With Fees and Demerits (Grouped by Db)**.
UB Home Patrons With Demerits - Sub**
See UB Home Patrons With Fees and Demerits**.
UB Home Patrons With Fees (Grouped by Db) - Sub**
See UB Home Patrons With Fees and Demerits (Grouped by Db)**.
UB Home Patrons With Fees - Sub**
See UB Home Patrons With Fees and Demerits**.
UB Home Patrons With Fees and Demerits**
This report lists current fee and demerit balances at any holding library for
home patrons, sorted by patron.
UB Home Patrons With Fees and Demerits (Grouped by Db)**
This report lists current fine/fee balances and demerit balances at any
holding library for local patrons, sorted by holding library. It is essentially
the UB Home Patrons With Fees and Demerits report grouped by database
instead of patron
UB Home Patrons - Historical Charges by Holding Library
This report counts total number of historical UB charges to home patrons
by Holding library.
UB Home Patrons - Historical Charges by Home Patron Group
This report counts total number of historical UB charges to home patrons
by home patron group.
UB Home Patrons - Historical Requests by Holding Library
This report counts the total number of historical UB requests made by
home patrons listed by Holding Library.
UB Home Patrons - Historical Requests by Home Patron Group
This report counts the total number of historical UB requests made by
home patrons listed by home patron group.
Endeavor Information Systems, Inc.
See notice on first page
February 2004
Voyager® with UnicodeTM
7-21
UB Home Patrons - with Active UB Charges
This report lists current outstanding UB charges for all home patrons by
holding library.
UB Home Patrons with Demerits*
This report lists all home patrons in the local database with demerits.
UB Home Patrons with Fees*
This report lists all home patrons in the local database with fees.
UB Home Patrons - with Outstanding Requests (x days)
This report lists the total number of current requests for home patrons that
have not been filled for any reason.
UB Home Patrons with UB Fees and Demerits*
This lists current fee and demerit balances at any holding library for home
patrons, sorted by patron.
UB Home Patrons with UB Fees and Demerits (grouped by database)
This lists current fine/fee and demerit balances at any holding library for
home patrons, sorted by database.
UB Home Patrons - with UB Fines and Fees
This report lists current fine and fee balances at Holding library for home
patrons, sorted by patron.
UB Home Patrons - UB Fines and Fees (grouped by db)**
This reports lists current fine and fee balances at Holding library for home
patrons, sorted by Holding library.
UB Inbound Shipping Statistics
This report calculates the average and maximum shipping times (in days)
between libraries for a specific time period.
UB Outbound Shipping Statistics
This report calculates the average and maximum shipping times (in days)
between libraries for a specific time period.
UB Stub Patrons
This report lists all stub patron records in the local database, sorted by the
stub patron’s Home library.
Endeavor Information Systems, Inc.
See notice on first page
7-22
February 2004
Voyager® with UnicodeTM
Prepackaged Access Reports
UB Stub Patrons with Active Charges
This report lists current outstanding charges for stub patron records in the
local database.
UB Stub Patrons with Demerits
This report lists all stub patrons in the local database with outstanding
demerits.
UB Stub Patrons with Demerits (Grouped by Stub Patrons)**
This report lists all stub patron records in the local database with
outstanding demerits.
UB Stub Patrons with Fines and Fees
This report lists all stub patron records in the local database with
outstanding fines and fees. Fine details (for example, overdue or lost) are
included.
URL Host Links
Lists the number of times a URL appears in each type of record in the
database, including a total value for each URL.
user_tab_columns*
A data dictionary query.
Vendor Copy Order/Receipt Dates*
Lists all of the order and receipt dates for each order placed.
Vendor Performance - Days to Receipt
Lists, for each vendor, the average, minimum and maximum days between
placing an order for items and receipt of those items ordered between the
specified dates.
Vendor Type Performance - Days to Receipt
Lists, for each type of vendor, the average, minimum and maximum days
between placing an order for items and receipt of those items ordered
between the specified dates.
Voyager databases (local=0)*
A sub query for many UB reports.
Endeavor Information Systems, Inc.
See notice on first page
February 2004
Voyager® with UnicodeTM
7-23
Voyager Data Dictionary**
Lists all of the data types for all of the fields in each table in the database.
Voyager Record Counts**
Lists the total count of different types of records that are contained in your
database.
Using Prepackaged Access Reports
Using prepackaged reports can be as easy as opening a file. Simply double-click
any of the reports displayed on the Reports tab of the file in Access and that report
will be automatically run. If it is being run for the first time during this Access
session, you will be prompted to supply a username and password before the
report will be run.
If a query requires any information before it can be processed, a dialog box opens
asking for a specific piece of information. For example, if you run Acq - Issues
Received by Component and Date Range, you must enter the starting date for
issues to be received into the start dialog box and the ending date into the end
dialog box.
NOTE:
Depending on the report, your server connection and your computer, processing
the report may take a considerable amount of time and your computer’s
processing power.
Editing Reports and Queries
If a report does not provide exactly the type of information that you require, you
can edit the reports and queries to get different information.
Procedure 7-1. Editing an Access Report
Use the following to edit the format of the report.
1. Select the report you want to edit and make a copy of it.
Result: A copy of the report has been made which may be useful if you need to
return to the original report.
2. Select the report you want to edit and click the Design button.
Endeavor Information Systems, Inc.
See notice on first page
7-24
February 2004
Voyager® with UnicodeTM
Prepackaged Access Reports
Result: The report layout is displayed and can be edited using all of the standard
Access tools and functions. The example in Figure 7-4 shows the Item Count by
Location and Type report.
Figure 7-4.
Designing the Item Count by Location and Type report in Access
The query attached to a report can also be edited like any other query in Access.
Since the link has already been established to the database, you can select
different fields in different tables and create the specific query you need.
Procedure 7-2. Editing an Access Query
Use the following to edit a query.
1. Select the query you want to edit and make a copy of it.
Result: A copy of the query has been made which may be useful if you need to
return to the original query.
Endeavor Information Systems, Inc.
See notice on first page
February 2004
Voyager® with UnicodeTM
7-25
2. Select the query you want to edit and click the Design button.
Result: The query displays and can be edited using all of the standard Access
tools and functions. Figure 7-5 shows the Item Count by Location and Type
Query.
Figure 7-5.
Designing the Item Type by Location and Type query in Access
See your Access documentation for more information on editing reports and
queries.
Accessing the MARC "Blob"
The three queries that can read the MARC "blob" within each file are AuthBlob,
BibBlob, and MfhdBlob. You can use these three queries to extract various parts
of the MARC blob.
When necessary, an internal conversion function has been applied to convert
UTF-8 encoded data to UTF-16 encoded data for display in Access.
Using the Expression Builder
In order to support these queries, new functions have been added to the
Expression Builder dialog box. The Expression Builder is available when
creating or editing reports or queries.
When editing a query, you can open the Expression Builder dialog box by
selecting the query in design view, then place your cursor in one of the fields,
right-mouse click, and selecting Build from the menu. See Figure 7-6 on
page 7-27 and Figure 7-7 on page 7-27.
Endeavor Information Systems, Inc.
See notice on first page
7-26
February 2004
Voyager® with UnicodeTM
Prepackaged Access Reports
Figure 7-6.
Accessing the Expression Builder dialog box
Figure 7-7.
The Expression Builder dialog box
Once you are in the Expression Builder dialog box, you can display the list of
functions by selecting Functions> reports> Marc Code. You can use these
functions to access different parts of the MARC blob.
These functions may also be used to create your own queries to extract different
types of information from the blob.
The following functions have been added. Note that the arguments specified
between each set of parenthesis are outlined in the following.
Endeavor Information Systems, Inc.
See notice on first page
February 2004
Voyager® with UnicodeTM
7-27
GetAuthBlob
Extracts raw authority blob information for a specific record. GetAuthBlob
requires the following arguments:
• InAuthId must be the record ID number of the authority record.
The argument must be entered in quotations.
For example, if you wanted to retrieve the raw authority blob for authority
record #389, you would enter GetAuthBlob (“389”).
GetBibBlob
Extracts raw bibliographic blob information for a specific record.
GetBibBlob requires the following arguments:
• InBibId must be the record ID number of the bibliographic record.
The argument must be entered in quotations.
For example, if you wanted to retrieve the raw bibliographic blob for
bibliographic record #54565, you would enter GetBibBlob (“54565”).
GetMFHDBlob
Extracts raw holdings blob information for a specific record. GetMFHDBlob
requires the following arguments:
• InMFHDID must be the record ID number of the holdings record.
The argument must be entered in quotations.
For example, if you wanted to retrieve the raw holdings blob for holdings
record #54565, you would enter GetMFHDBlob (“54565”).
GetFieldRaw
Extracts the raw blob information for a specific field in a specific record.
Requires the use of either GetAuthBlob, GetBibBlob, or GetMFHDBlob
in the marcrec position. GetFieldRaw requires the following arguments:
• marcrec specifies the record where the field is to come from. The
marcrec argument must be one of the following functions nested
into the GetFieldRaw function: GetAuthBlob, GetBibBlob, or
GetMFHDBlob. You must also include the arguments required by
the nested function into the GetFieldRaw function.
• DTag must be the number of the tag that you want to retrieve. The
argument must be entered in quotations.
• which specifies which tag in the record should be used. If there are
multiple matching tags (or subfields) listed in the record, which one
should be pulled. "1" (in quotations) pulls the first one, "2" pulls the
second one and so on. The argument must be entered in
quotations.
Endeavor Information Systems, Inc.
See notice on first page
7-28
February 2004
Voyager® with UnicodeTM
Prepackaged Access Reports
For example, if you wanted to get the first 360 field as raw blob data from
the bibliographic blob for bibliographic record #998, you would enter
GetFieldRaw (GetBibBlob ("998"), "360", "1").
GetField
Extracts a specific field from a specific record. Requires the use of either
GetAuthBlob, GetBibBlob, or GetMFHDBlob in the marcrec position.
GetField requires the following arguments:
• marcrec specifies the record where the field is to come from. The
marcrec argument must be one of the following functions nested
into the GetField function: GetAuthBlob, GetBibBlob, or
GetMFHDBlob. You must also include the arguments required by
the nested function into the GetField function.
• DTag must be the number of the tag that you want to retrieve. The
argument must be entered in quotations.
• which specifies which tag in the record should be used. If there are
multiple matching tags (or subfields) listed in the record, which one
should be pulled. "1" (in quotations) pulls the first one, "2" pulls the
second one and so on. The argument must be entered in
quotations.
For example, if you wanted to get the first 100 field from the holdings blob
for holdings record #2284, you would enter GetField (GetMFHDBlob
("2284"), "100", "1").
GetFieldAll
Extracts all matching fields from a specific record. Requires the use of
either GetAuthBlob, GetBibBlob, or GetMFHDBlob in the marcrec
position. GetFieldAll requires the following arguments:
• marcrec specifies the record where the fields are to come from.
The marcrec argument must be one of the following functions
nested into the GetFieldAll function: GetAuthBlob,
GetBibBlob, or GetMFHDBlob. You must also include the
arguments required by the nested function into the GetFieldAll
function.
• DTag must be the number of the tag that you want to retrieve. The
argument must be entered in quotations.
For example, if you wanted to get any fields with the 500 tag from the
authority blob for authority record #2284, you would enter GetFieldAll
(GetAuthBlob ("2284"), "500").
Endeavor Information Systems, Inc.
See notice on first page
February 2004
Voyager® with UnicodeTM
7-29
GetSubField
Extracts a specific subfield from a specific record. Requires the use of
GetFieldRaw in the fld position. GetSubField requires the following
arguments:
• fld specifies the field where the information is to come from. The
marcrec argument must be the GetFieldRaw function nested into
the GetSubField function. You must also include the arguments
required by the nested GetFieldRaw function into the
GetSubField function. (This also requires nesting GetAuthBlob,
GetBibBlob, or GetMFHDBlob into the GetFieldRaw function,
which is all part of the GetSubField function.)
• sfcode specifies the subfield to be found. The argument must be
entered in quotations.
• which specifies which tag in the record should be used. If there are
multiple matching tags (or subfields) listed in the record, which one
should be pulled. "1" (in quotations) pulls the first one, "2" pulls the
second one and so on. The argument must be entered in
quotations.
For example, to retrieve the first ‡a from the second 856 field in
bibliographic record #34098, you would enter GetSubField
(GetFieldRaw (GetBibBlob ("34098"), "856", "2"), "a", "1").
Endeavor Information Systems, Inc.
See notice on first page
7-30
February 2004
Voyager® with UnicodeTM
Reports and Notices
Sample Reports and Notices
This section provides samples of the reports and notices produced by Reporter.
Sample Notices
This section contains examples the various notices that can be produced by
Voyager’s Reporter module.
Acquisitions Notices
This section provides examples of the Acquisitions notices.
Endeavor Information Systems, Inc.
See notice on first page
February 2004
Voyager® with UnicodeTM
A-1
Purchase Order Cancellation Notice
Figure A-1 is an example of a purchase order cancellation notice.
Figure A-1.
Purchase Order Cancellation Notice
Endeavor Information Systems, Inc.
See notice on first page
A-2
February 2004
Voyager® with UnicodeTM
Reports and Notices
Return Notice
Figure A-2 is an example of a return notice.
Figure A-2.
Return Notice
Endeavor Information Systems, Inc.
See notice on first page
February 2004
Voyager® with UnicodeTM
A-3
Canceled Serial Claim Notice
Figure A-3 is an example of canceled serial claim notice.
Figure A-3.
Canceled Serial Claim Notice
Endeavor Information Systems, Inc.
See notice on first page
A-4
February 2004
Voyager® with UnicodeTM
Reports and Notices
Order Claim Notice
Figure A-4 is an example of an order notice.
Figure A-4.
Order Claim Notice
Endeavor Information Systems, Inc.
See notice on first page
February 2004
Voyager® with UnicodeTM
A-5
Serial Claim Notice
Figure A-5 is an example of a serial claim notice.
Figure A-5.
Serial Claim Notice
Endeavor Information Systems, Inc.
See notice on first page
A-6
February 2004
Voyager® with UnicodeTM
Reports and Notices
Voucher/Check Request
Figure A-6 is an example of a voucher/check request.
Figure A-6.
Voucher/Check Request
Endeavor Information Systems, Inc.
See notice on first page
February 2004
Voyager® with UnicodeTM
A-7
Circulation Notices
This section provides examples of the circulation notices.
Cancellation of Recall Request
Figure A-7 is an example of a cancellation of recall request.
Figure A-7.
Cancellation of Recall Request
Endeavor Information Systems, Inc.
See notice on first page
A-8
February 2004
Voyager® with UnicodeTM
Reports and Notices
Fine/Fee Notice
Figure A-8 is an example of a fine/fee notice.
Figure A-8.
Fine and Fee Notice
Endeavor Information Systems, Inc.
See notice on first page
February 2004
Voyager® with UnicodeTM
A-9
Item Available Notice
Figure A-9 is an example of an item available notice.
Figure A-9.
Item Available Notice
Endeavor Information Systems, Inc.
See notice on first page
A-10
February 2004
Voyager® with UnicodeTM
Reports and Notices
Overdue Notice
Figure A-10 is an example of an overdue notice.
Figure A-10.
Overdue Notice
Endeavor Information Systems, Inc.
See notice on first page
February 2004
Voyager® with UnicodeTM A-11
Recall Notice
Figure A-11 is an example of a recall notice.
Figure A-11.
Recall Notice
Endeavor Information Systems, Inc.
See notice on first page
A-12
February 2004
Voyager® with UnicodeTM
Reports and Notices
Recall Overdue Notice
Figure A-12 is an example of a recall overdue notice.
Figure A-12.
Recall Overdue Notice
Endeavor Information Systems, Inc.
See notice on first page
February 2004
Voyager® with UnicodeTM A-13
Statement of Fines and Fees
Figure A-13 is an example of a statement of fines and fees.
Figure A-13.
Statement of Fines and Fees
Endeavor Information Systems, Inc.
See notice on first page
A-14
February 2004
Voyager® with UnicodeTM
Reports and Notices
Courtesy Due Notice
Figure A-14 is an example of a courtesy due notice.
Figure A-14.
Courtesy Notice
Endeavor Information Systems, Inc.
See notice on first page
February 2004
Voyager® with UnicodeTM A-15
Media Scheduling Notices
This section provides examples of Media Scheduling notices.
Overdue Notice
Figure A-15 is an example of an overdue notice.
Figure A-15.
Overdue Notice
Endeavor Information Systems, Inc.
See notice on first page
A-16
February 2004
Voyager® with UnicodeTM
Reports and Notices
Sample Reports
This section contains examples the various reports that can be produced by
Voyager’s Reporter module.
Acquisitions Reports
This section provides examples of acquisitions reports.
Purchase Order
Figure A-16 is an example of a purchase order.
Figure A-16.
Purchase Order
Endeavor Information Systems, Inc.
See notice on first page
February 2004
Voyager® with UnicodeTM A-17
Purchase Order - Landscape
Figure A-17 is an example of a purchase order (landscape).
Figure A-17.
Purchase Order - Landscape
Endeavor Information Systems, Inc.
See notice on first page
A-18
February 2004
Voyager® with UnicodeTM
Reports and Notices
Copy Rollover Status Report
Figure A-18 is an example of a copy rollover status report.
Figure A-18.
Copy Rollover Status Report
Endeavor Information Systems, Inc.
See notice on first page
February 2004
Voyager® with UnicodeTM A-19
Fund Rollover Status Report
Figure A-19 is an example of a fund rollover status report.
Figure A-19.
Fund Rollover Status Report
Endeavor Information Systems, Inc.
See notice on first page
A-20
February 2004
Voyager® with UnicodeTM
Reports and Notices
Global Open Orders Report
Figure A-20 is an example of a global open order report.
Figure A-20.
Global Open Orders Report
Endeavor Information Systems, Inc.
See notice on first page
February 2004
Voyager® with UnicodeTM A-21
Open Orders Report
Figure A-21 is an example of an open orders report.
Figure A-21.
Open Orders Report
Endeavor Information Systems, Inc.
See notice on first page
A-22
February 2004
Voyager® with UnicodeTM
Reports and Notices
Open Orders Report Before Rollover
Figure A-22 is an example of an open orders report before rollover.
Figure A-22.
Open Orders Report: Before Rollover
Endeavor Information Systems, Inc.
See notice on first page
February 2004
Voyager® with UnicodeTM A-23
Open Orders Report After Rollover
Figure A-23 is an example of an open orders report after rollover.
Figure A-23.
Open Orders Report After Rollover
Endeavor Information Systems, Inc.
See notice on first page
A-24
February 2004
Voyager® with UnicodeTM
Reports and Notices
Fund Snapshot Report
Figure A-24 is an example of a fund snapshot report.
Figure A-24.
Fund Snapshot Report
Endeavor Information Systems, Inc.
See notice on first page
February 2004
Voyager® with UnicodeTM A-25
Fund Snapshot Report Before Rollover
Figure A-25 is an example of a fund snapshot report before rollover.
Figure A-25.
Fund Snapshot Report Before Rollover
Endeavor Information Systems, Inc.
See notice on first page
A-26
February 2004
Voyager® with UnicodeTM
Reports and Notices
Fund Snapshot Report After Rollover
Figure A-26 is an example of a fund snapshot report after rollover.
Figure A-26.
Fund Snapshot Report After Rollover
Endeavor Information Systems, Inc.
See notice on first page
February 2004
Voyager® with UnicodeTM A-27
Cataloging Reports
This section provides examples of the cataloging reports.
Unauthorized Subject Headings
Figure A-27 is an example of an unauthorized subject headings report.
Figure A-27.
Unauthorized Subject Headings
Endeavor Information Systems, Inc.
See notice on first page
A-28
February 2004
Voyager® with UnicodeTM
Reports and Notices
Unauthorized Name Headings
Figure A-28 on page A-29 is an example of an unauthorized name headings
report.
Figure A-28.
Unauthorized Name Headings
Endeavor Information Systems, Inc.
See notice on first page
February 2004
Voyager® with UnicodeTM A-29
Unauthorized Title Headings
Figure A-29 is an example of an unauthorized title headings report.
Figure A-29.
Unauthorized Title Headings
Endeavor Information Systems, Inc.
See notice on first page
A-30
February 2004
Voyager® with UnicodeTM
Reports and Notices
Unauthorized Name/Title Headings
Figure A-30 is an example of an unauthorized name/title headings report.
Figure A-30.
Unauthorized Name/Title Headings
Endeavor Information Systems, Inc.
See notice on first page
February 2004
Voyager® with UnicodeTM A-31
856 Link Failure Report
Figure A-31 is an example of an 856 link failure report.
Figure A-31.
856 Link Failure Report
Endeavor Information Systems, Inc.
See notice on first page
A-32
February 2004
Voyager® with UnicodeTM
Reports and Notices
Duplicate Authority Records Report
Figure A-32 is an example of a duplicate authority records report.
Figure A-32.
Duplicate Authority Records
Endeavor Information Systems, Inc.
See notice on first page
February 2004
Voyager® with UnicodeTM A-33
See References without Corresponding Authority Record Report
Figure A-33 is an example of a see references without corresponding authority
record report.
Figure A-33.
See References without Corresponding Authority Report
Endeavor Information Systems, Inc.
See notice on first page
A-34
February 2004
Voyager® with UnicodeTM
Reports and Notices
See References Authorized in Another Authority Record Report
Figure A-34 is an example of a see references authorized in another authority
record report.
Figure A-34.
See References Authorized in Another Authority Record
Endeavor Information Systems, Inc.
See notice on first page
February 2004
Voyager® with UnicodeTM A-35
See References with Linked Bib Records Report
Figure A-35 is an example of a see references with linked bib records report.
Figure A-35.
See References with Linked Bibliographic Records
Endeavor Information Systems, Inc.
See notice on first page
A-36
February 2004
Voyager® with UnicodeTM
Reports and Notices
Circulation Reports
This section provides examples of circulation reports.
Circulation Statistics Report
Figure A-36 is an example of a circulation statistics report.
Figure A-36.
Circulation Statistics
Endeavor Information Systems, Inc.
See notice on first page
February 2004
Voyager® with UnicodeTM A-37
Distribution Item Order List Report
Figure A-37 is an example of a distribution item order report.
Figure A-37.
Distribution Item Order List
Endeavor Information Systems, Inc.
See notice on first page
A-38
February 2004
Voyager® with UnicodeTM
Reports and Notices
Global Circulation Statistics Report
Figure A-38 on page A-39 is an example of a global circulation statistics report.
Figure A-38.
Global Circulation Statistics
Endeavor Information Systems, Inc.
See notice on first page
February 2004
Voyager® with UnicodeTM A-39
Hold Shelf Expired Report
Figure A-39 is an example of a hold shelf expired report.
Figure A-39.
Hold Shelf Expired Report
Endeavor Information Systems, Inc.
See notice on first page
A-40
February 2004
Voyager® with UnicodeTM
Reports and Notices
Item Related Exceptions Report
Figure A-40 is an example of an item related exceptions report.
Figure A-40.
Item Related Exceptions Report
Endeavor Information Systems, Inc.
See notice on first page
February 2004
Voyager® with UnicodeTM A-41
Missing in Transit
Figure A-41 is an example of a missing in transit report.
Figure A-41.
Missing In Transit Report
Endeavor Information Systems, Inc.
See notice on first page
A-42
February 2004
Voyager® with UnicodeTM
Reports and Notices
Patron Related Exceptions
Figure A-42 is an example of a patron related exceptions report.
Figure A-42.
Patron Related Exceptions
Endeavor Information Systems, Inc.
See notice on first page
February 2004
Voyager® with UnicodeTM A-43
Reserve Items Active by Call Number
Figure A-43 is an example of a reserve items active by call number report.
Figure A-43.
Reserve Items Active by Call Number
Endeavor Information Systems, Inc.
See notice on first page
A-44
February 2004
Voyager® with UnicodeTM
Reports and Notices
Reserve Items Active by Title
Figure A-44 is an example of a reserve items active by title report.
Figure A-44.
Reserve Items Active by Title
Endeavor Information Systems, Inc.
See notice on first page
February 2004
Voyager® with UnicodeTM A-45
Reserve Items Active by Course Name and Call Number
Figure A-45 is an example of a reserve items active by course name and call
number report.
Figure A-45.
Reserve Items Active by Course Name and Call Number
Endeavor Information Systems, Inc.
See notice on first page
A-46
February 2004
Voyager® with UnicodeTM
Reports and Notices
Reserve Items Active by Course Name and Title
Figure A-46 is an example of a reserve items active by course name and title
report.
Figure A-46.
Reserve Items Active by Course Name and Title
Endeavor Information Systems, Inc.
See notice on first page
February 2004
Voyager® with UnicodeTM A-47
Reserve Items Expired by Call Number
Figure A-47 is an example of a reserve items expired by call number report.
Figure A-47.
Reserve Items Expired by Call Number
Endeavor Information Systems, Inc.
See notice on first page
A-48
February 2004
Voyager® with UnicodeTM
Reports and Notices
Reserve Items Expired by Title
Figure A-48 is an example of a reserve items expired by title report.
Figure A-48.
Reserve Items Expired by Title
Endeavor Information Systems, Inc.
See notice on first page
February 2004
Voyager® with UnicodeTM A-49
Reserve Items Expired by Course Name and Call Number
Figure A-49 is an example of a reserve items expired by course name and call
number report.
Figure A-49.
Reserve Items Expired by Course Name and Call Number
Endeavor Information Systems, Inc.
See notice on first page
A-50
February 2004
Voyager® with UnicodeTM
Reports and Notices
Reserve Items Expired by Course Name and Title
Figure A-50 is an example of a reserve items expired by course name and title
report.
Figure A-50.
Reserve Items Expired by Course Name and Title
Endeavor Information Systems, Inc.
See notice on first page
February 2004
Voyager® with UnicodeTM A-51
Transaction Related Exceptions
Figure A-51 is an example of a transaction related exceptions report.
Figure A-51.
Transaction Related Exceptions
Endeavor Information Systems, Inc.
See notice on first page
A-52
February 2004
Voyager® with UnicodeTM
Reports and Notices
Media Booking Reports
This section provides examples of the media booking reports.
Media Booking Equipment Inventory
Figure A-52 is an example of a media booking equipment inventory report.
Figure A-52.
Media Booking Equipment Inventory
Endeavor Information Systems, Inc.
See notice on first page
February 2004
Voyager® with UnicodeTM A-53
Media Booking Statistics
Figure A-53 is an example of a media booking statistics report.
Figure A-53.
Media Booking Statistics
Endeavor Information Systems, Inc.
See notice on first page
A-54
February 2004
Voyager® with UnicodeTM
Reports and Notices
Media Booking Exceptions
Figure A-54 is an example of a media booking exceptions report.
Figure A-54.
Media Booking Exceptions
Endeavor Information Systems, Inc.
See notice on first page
February 2004
Voyager® with UnicodeTM A-55
Media Booking Charge Statistics
Figure A-55 is an example of a media booking charge statistics report.
Figure A-55.
Media Booking Charge Statistics
Endeavor Information Systems, Inc.
See notice on first page
A-56
February 2004
Voyager® with UnicodeTM
Index
Index
Numerics
856 link failure report, 2-16, A-32
A
About this document, xxi
audience, xxi
comments, xxvi
contacting Customer Support, xxvi
contacting Endeavor Information Systems, Inc.,
xxv
conventions used, xxiii
how to use, xxii
purpose, xxi
reason for reissue, xxii
Access
adapting queries after new release, 1-68
configuring the database links, 1-64
setting the path to Access, 1-8
setting the path to Access Databases, 1-9
Access database file
acquisitions notice
acqnotes.mdb, 5-2, 5-7, 5-10
acquisitions report
acqrprts.mdb, 5-2, 5-10
cataloging report
catrprts.mdb, 5-2, 5-3, 5-10
circulation notice
crcnotes.mdb, 5-2, 5-7, 5-10
circulation report
crcrprts.mdb, 5-2, 5-4, 5-10
media scheduling notice
mednotes.mdb, 5-2, 5-8, 5-10
media scheduling report
medrprts.mdb, 5-2, 5-6, 5-10
Access reports and notices, 5-2
accessing the MARC Blob, 7-26
Acq - Issues Received by Component and Date
Range, 7-5
Acq - Issues Received by Component and Date
Range (no serials), 7-5
acqjob 1, 2-5, 2-6
acqjob 2, 2-5, 2-7
acqjob 3, 2-5, 2-7
acqjob 4, 2-5, 2-7
acqjob 5, 2-5
acqjob.log file, 2-6, 2-7, 2-9
acqnotes.mdb file, 5-2, 5-7, 5-10
acqnotes.xxxx.inp file, 2-2, 2-4, 2-5, 2-6, 2-15
acqrprts.mdb file, 5-2, 5-10
acqrprts.xxxx.inp file, 2-2, 2-4, 2-6, 2-8, 2-15
acquisitions
activity
approving an invoice and printing, 2-4
canceling a purchase order, 2-4
generating a claim for a monographic item, 2-4
generating a claim for a serial item, 2-4
generating a return, 2-4
printing a purchase order, 2-4
batch job
fix exchange rates, 2-5
fund snapshot report-global, 2-5, 2-7
open orders report, 2-5, 2-7
order claim/cancel processing, 2-5, 2-6
rollover status report-global, 2-5, 2-7
batch job number
acqjob 1, 2-5
acqjob 2, 2-5
acqjob 3, 2-5
acqjob 4, 2-5
acqjob 5, 2-5
creating input files
batch job, 2-5
module activity, 2-4
job option codes
-d database, 2-8, 2-25, 2-43, 2-54
-e ledger, 2-8
-f fiscal period, 2-8, 2-25
-h display usage/help statement, 2-9
-j job #, 2-8, 2-25, 2-43, 2-54
-l list job options, 2-8
-n run number, 2-8
-o location, 2-8
-r roll date, 2-8
-u user/password, 2-8, 2-25, 2-43, 2-54
-v display version information, 2-9
Endeavor Information Systems, Inc.
See notice on first page
February 2004
Voyager® with UnicodeTM
IN-1
notice
canceled serial claim, A-4
cancellation, 2-4
input file, 2-2, 2-4, 2-5, 2-6, 2-15
order claim, 2-4, 2-5, A-5
purchase order cancellation, A-2
return, 2-4, A-3
serial claim, 2-4, 2-5, A-6
standard information file format (SIF), 2-6
voucher/check request, 2-4, A-7
report
copy rollover status, 2-5, 2-7, A-19
fund rollover status, 2-5, 2-7, A-20
fund snapshot report after rollover, 2-8, A-27
fund snapshot report before rollover, 2-8, A-26
fund snapshot-global, 2-5, A-25
global open orders, 2-5, A-21
input file, 2-2, 2-4, 2-6, 2-15
open orders, 2-5, 2-7, A-22
open orders report after rollover, 2-8, A-24
open orders report before rollover, 2-8, A-23
purchase order, 2-4, A-17
purchase order - landscape, A-18
standard information file format (SIF), 2-6
report input file, 2-8
running batch jobs, 2-8
Acquisitions Forms preferences, 3-1
acquisitions notice
Access database file
acqnotes.mdb, 5-2, 5-7, 5-10
acquisitions report
Access database file
acqrprts.mdb, 5-2, 5-10
Acquisitions Reports and Notices page, 2-13
Acquisitions Reports and Processes utility, 2-13
adding
Oracle service name, 1-19
Address Format preferences, 3-15
setting up, 3-16
Address format preferences, 3-1
Address Format tab, 3-15
all daily jobs, 2-32, 2-36
Application Forms Preferences
Acquisitions, 3-18
Cataloging, 3-18
changing the form on which a report or notice
prints, 3-19
Circulation, 3-18
Media, 3-18
approving an invoice and printing, 2-4
Archive Selection dialog box, 4-14
AuthBlob, 7-5, 7-26
automatic orders for item distribution, 2-33, 2-43
B
batch job
acquisitions
fund snapshot report-global, 2-7
open orders report, 2-7
order claim processing, 2-6
rollover status report-global, 2-7
cataloging
duplicate authorized headings report, 2-20
http verification all new links, 2-24
http verification within date range, 2-23
see also reference without authority record,
2-22
see references authorized other authority
record, 2-22
see references with linked bib records, 2-21
unauthorized name headings report, 2-18
unauthorized name/title headings report, 2-20
unauthorized subject headings report, 2-18
unauthorized title headings report, 2-19
circulation
all daily jobs, 2-36
automatic orders for item distribution, 2-43
courtesy (due) notice, 2-36
fine/fee notice, 2-35
fine/fee statement, 2-37
global transaction statistics report, 2-42
hold recall available notice, 2-35
hold recall canceled notice, 2-36
missing in transit report, 2-38
overdue notice, 2-34
recall notice, 2-35
reserved items active report, 2-38
reserved items expired report, 2-38
transaction exceptions, 2-40
transaction statistics report, 2-39
media scheduling
booking statistics, 2-52
charge statistics, 2-53
inventory report, 2-52
overdue notice and lost processing, 2-52
running batch jobs, 2-54
Endeavor Information Systems, Inc.
See notice on first page
IN-2
February 2004
Voyager® with UnicodeTM
Index
running acquisitions batch jobs, 2-8
running cataloging batch jobs, 2-24
running circulation batch jobs, 2-43
running media scheduling batch jobs, 2-53
Bib Records Created by Operator, 7-6
BibBlob, 7-6, 7-26
Bibs by Pub Decade and Country, 7-6
booking statistics, 2-51, 2-52
Build database links to Voyager dialog box, 1-65
building
reports/notices
errors, 4-7
building reports and notices, 4-3
C
Call Slip Processing by Date Range, 7-6
Call Slip Unfilled Requests, 7-6
canceled serial claim notice, A-4
canceling a purchase order, 2-4
cancellation notice, 2-4, 2-32
cancellation of recall request, A-8
cataloging
batch job
duplicate authorized headings, 2-16
duplicate authorized headings report, 2-20
http verification all new links, 2-16, 2-24
http verification within date range, 2-16, 2-23
see also reference without authority record,
2-22
see also reference without corresponding authority record, 2-16
see references authorized in another authority
record, 2-16
see references authorized other authority
record, 2-22
see references with linked bib records, 2-16,
2-21
unauthorized name headings, 2-16, 2-18
unauthorized name/title headings, 2-16, 2-20
unauthorized subject headings, 2-16, 2-18
unauthorized title headings, 2-16, 2-19
batch job number
catjob 1, 2-16
catjob 10, 2-16
catjob 2, 2-16
catjob 3, 2-16
catjob 4, 2-16
catjob 5, 2-16
catjob 6, 2-16
catjob 7, 2-16
catjob 8, 2-16
catjob 9, 2-16
creating input files
batch job, 2-15
job option codes
-e end date, 2-25
-f from heading, 2-25
-h display usage/help statement, 2-26
-l list job options, 2-26
-s start date, 2-25
-t to heading, 2-26
-v display version information, 2-26
report
856 link failure, 2-16, A-32
duplicate authority records, 2-16, A-33
input file, 2-2, 2-15, 2-16, 2-17, 2-27, 2-31
see also reference without an authority record,
2-16
see references authorized in another authority
record, A-35
see references authorized in another record,
2-16
see references with linked bib records, 2-16,
A-36
see references without corresponding authority
record, A-34
standard information file format (SIF), 2-17
unauthorized name headings, 2-16, A-29
unauthorized name/title headings, 2-16, A-31
unauthorized subject headings, 2-16, A-28
unauthorized title headings, 2-16, A-30
running batch jobs, 2-24
Cataloging Forms preferences, 3-1
cataloging report
Access database file
catrprts.mdb, 5-2, 5-3, 5-10
Cataloging Reports and Processes page, 2-29
Cataloging Reports utility, 2-29
catjob 1, 2-16, 2-18
catjob 10, 2-16, 2-24
catjob 2, 2-16, 2-18
catjob 3, 2-16, 2-19
catjob 4, 2-16, 2-20
catjob 5, 2-16, 2-20
catjob 6, 2-16, 2-21
catjob 7, 2-16, 2-22
Endeavor Information Systems, Inc.
See notice on first page
February 2004
Voyager® with UnicodeTM
IN-3
catjob 8, 2-16, 2-22
catjob 9, 2-16, 2-23
catjob.log file, 2-17, 2-18, 2-20, 2-22, 2-23, 2-24,
2-27
catrprts.mdb file, 5-2, 5-3, 5-10
catrprts.xxxx.inp file, 2-2, 2-15, 2-16, 2-17, 2-27,
2-31
changing the form on which a report or notice prints,
3-19
character set, 1-52
charge statistics, 2-51, 2-53
check box
Relink, 1-73
circ item related exceptions report, 2-33
circ patron related exceptions report, 2-33
circ transaction related exceptions report, 2-33
circ transaction statistics report, 2-33
circjob 12, 2-32, 2-36
circjob 14, 2-32, 2-37
circjob 2, 2-32, 2-34
circjob 20, 2-32, 2-38
circjob 21, 2-33, 2-38
circjob 22, 2-33, 2-38
circjob 23, 2-33, 2-39
circjob 24, 2-33, 2-40
circjob 25, 2-33, 2-42
circjob 28, 2-33, 2-43
circjob 3, 2-32, 2-35
circjob 4, 2-32, 2-35
circjob 5, 2-32, 2-35
circjob 6, 2-32, 2-36
circjob 7, 2-32, 2-36
circjob.log file, 2-34, 2-35, 2-36, 2-37, 2-38, 2-39,
2-42, 2-45
circulation
batch job
all daily jobs, 2-32, 2-36
automatic orders for item distribution, 2-33,
2-43
courtesy (due) notice, 2-32, 2-36
fine/fee notice, 2-32, 2-35
fine/fee statement, 2-32, 2-37
global transaction statistics report, 2-33, 2-42
hold recall available notice, 2-32, 2-35
hold recall canceled notice, 2-32, 2-36
missing in transit report, 2-33
missing in transit report report, 2-38
overdue notice, 2-32, 2-34
recall notice, 2-32, 2-35
reserved items active report, 2-32, 2-38
reserved items expired report, 2-33, 2-38
transaction exceptions, 2-33, 2-40
transaction statistics report, 2-33, 2-39
batch job number
circjob 12, 2-32
circjob 14, 2-32
circjob 2, 2-32
circjob 20, 2-32
circjob 21, 2-33
circjob 22, 2-33
circjob 23, 2-33
circjob 24, 2-33
circjob 25, 2-33
circjob 28, 2-33
circjob 3, 2-32
circjob 4, 2-32
circjob 5, 2-32
circjob 6, 2-32
circjob 7, 2-32
creating input files
batch job, 2-31
job option codes
-e end date, 2-44
-h display usage/help statement, 2-44
-l list job options, 2-44
-o generate orders, 2-44
-s start date, 2-43
-v display version information, 2-44
notice
cancellation, 2-32
cancellation of recall request, A-8
courtesy (due), 2-32, A-15
fine/fee, 2-32, A-9
input file, 2-2, 2-32, 2-33, 2-46
item available, 2-32, A-10
overdue, 2-32, A-11
recall, 2-32, A-12
recall overdue, 2-32, A-13
standard information file format (SIF), 2-34
statement of fines/fees, 2-32, A-14
report
circ item related exceptions, 2-33
circ patron related exceptions, 2-33
circ transaction related exceptions, 2-33
circ transaction statistics, 2-33
circulation statistics, A-37
distribution item order list, 2-33, A-38
global circulation statistics, A-39
hold shelf expired, A-40
input file, 2-2, 2-32, 2-46
Endeavor Information Systems, Inc.
See notice on first page
IN-4
February 2004
Voyager® with UnicodeTM
Index
item related exceptions, A-41
missing in transit, 2-33, A-42
patron related exceptions, A-43
reserve items active by call number, A-44
reserve items active by course name and call
number, A-46
reserve items active by course name and title,
A-47
reserve items active by title, A-45
reserve items expired by call number, A-48
reserve items expired by course name and call
number, A-50
reserve items expired by course name and title,
A-51
reserve items expired by title, A-49
reserved items active, 2-32
reserved items active report, 3-13
reserved items expired, 2-33
reserved items expired report, 3-13
standard information file format (SIF), 2-34
transaction related exceptions, A-52
report global circulation transaction statistics,
2-33
running batch jobs, 2-43
Circulation Forms preferences, 3-1
circulation global print location, 2-42
circulation notice
Access database file
crcnotes.mdb, 5-2, 5-7, 5-10
circulation report
Access database file
crcrprts.mdb, 5-2, 5-4, 5-10
Circulation Reports and Notices page, 2-50
Circulation Reports and Notices utility, 2-48
circulation statistics report, A-37
Circulation Transactions (Charges), 7-6
Circulation Transactions by Dewey Decimal Classification, 7-6
Circulation Transactions by Item Statistical Categories, 7-6
Circulation Transactions by Library of Congress Classification, 7-6
Circulation Transactions by National Library of Medicine, 7-6
Circulation Transactions by Patron Group and Item
Type, 7-7
Circulation Transactions by Patron Statistical Categories, 7-7
Circulation Transactions by SuDoc Classification, 7-7
Circulation Transactions Titles by Date Range, Minimum Charges, 7-7
Circulation Transactions Titles by Minimum Charges,
7-7
clients directory, 1-3
command
Pacqjob, 2-9
Pcatjob, 2-26
Pcircjob, 2-44
Pfpc_run, 2-8
Pmediajob, 2-54
configuration file
noticeEmail.cfg, 5-12, 5-13
configuring
database links in Access, 1-64
Microsoft ODBC for Oracle driver, 1-60
ODBC control panel settings, 1-61
ODBC timeout value, 1-73
voyager.ini file, 1-3
Connect String field, 1-65
Connection Test dialog box, 1-23
copy rollover status report, 2-5, 2-7, A-19
correcting errors and error record processing, 4-19
courtesy (due) notice, 2-32, 2-36, A-15
crcnotes.mdb file, 5-2, 5-7, 5-10
crcnotes.xxxx.inp file, 2-2, 2-32, 2-33, 2-46
crcrprts.mdb file, 5-2, 5-4, 5-10
crcrprts.xxxx.inp file, 2-2, 2-32, 2-46
Create New Data Source dialog box, 1-61
creating input files
acquisitions batch job, 2-5
acquisitions module activity, 2-4
cataloging batch job, 2-15
circulation batch job, 2-31
media scheduling batch job, 2-51
webadmin
acquisitions batch job, 2-12
cataloging batch job, 2-28
circulation batch job, 2-47
D
Data File Path, 3-5
database file
notice, 5-2
report, 5-2
database instance, 1-17
Endeavor Information Systems, Inc.
See notice on first page
February 2004
Voyager® with UnicodeTM
IN-5
Database Path File, 3-6, 3-8, 3-10, 3-16, 3-18
DB User ID field, 1-65
Decode Searchparm, 7-7
Dewey10, 7-7
Dewey100, 7-7
diacritic, 1-52
dialog bo
Registry Editor, 1-52
dialog box
Archive Selection, 4-14
Build database links to Voyager, 1-65
Connection Test, 1-23
Create New Data Source, 1-61
Edit String, 1-56
E-mail (Other) Overdue Notices, 2-34
E-mail (Other) Recall Notices, 2-35
E-mail Cancellation Notices, 2-36
E-mail Courtesy Notices, 2-36
E-mail Item Available Notices, 2-35
E-mail Overdue Notices, 2-34
E-mail Recall Notices, 2-35
Error Selection, 4-19
Expression Builder, 7-26
Link, 1-70
Link Tables, 1-72
Log in, 1-8, 4-2
ODBC Data Source Administrator, 1-61, 1-63
Oracle Net8 Easy Config, 1-18, 1-19, 1-65
Oracle8 OBDC Driver Setup, 1-62, 1-63
Preferences, 3-2, 3-6, 3-8, 3-10, 3-14, 3-16, 3-18
reports Database, 1-64, 1-65
Select Directory, 3-6
Select Directory for msaccess.exe, 1-9
Software Asset Manager, 1-25
directory
clients, 1-3
distribution item order list report, 2-33, A-38
Donor List, 7-7
driver
configuring Microsoft ODBC for Oracle driver,
1-60
Microsoft ODBC for Oracle, 1-17
duplicate authority records report, 2-16, A-33
duplicate authorized headings report, 2-16, 2-20
Duplicate Item Barcodes, 7-7
Duplicate Patron Barcode (active), 7-8
Duplicate Patron Barcode (all statuses), 7-8
E
Edit String dialog box, 1-56
editing
prepackaged Access query, 7-25
prepackaged Access report, 7-24
report or notice in Microsoft Access, 5-9
reports and notices, 5-9
text for e-mail notices, 5-12
e-mail
test message, 1-14
E-mail (Other) Overdue Notices dialog box, 2-34
E-mail (Other) Recall Notices dialog box, 2-35
E-Mail Address field, 2-13, 2-30, 2-50
E-mail Cancellation Notices dialog box, 2-36
E-mail Courtesy Notices dialog box, 2-36
E-mail Item Available Notices dialog box, 2-35
E-mail Overdue Notices dialog box, 2-34
E-mail preferences, 3-1, 3-7
E-mail Recall Notices dialog box, 2-35
E-mail Reply-To Address, 1-11, 1-13, 3-7
e-mail server, 1-3, 1-4
[E-mail] stanza, 1-3, 1-4
E-mail tab, 1-11
e-mail test message, 1-16
error
Incorrect File Version, 4-16
No Reports of Notices for Selected Application,
4-11
when building reports/notices, 4-7
error conditions, 6-1
error file, 4-7, 4-18, 4-19
error message, 1-5, 1-6
Process stopped too many errors, 1-66, 1-68
error record processing, 4-17
Error Selection dialog box, 4-19
executable file
VoyagerInstall.exe, 1-3
Expired Patron Records, 7-8
Expression Builder dialog box, 7-26
Endeavor Information Systems, Inc.
See notice on first page
IN-6
February 2004
Voyager® with UnicodeTM
Index
F
Failure Recover Run, 6-1
field
Connect String, 1-65
DB User ID, 1-65
E-Mail Address, 2-13, 2-30, 2-50
New Service Name, 1-20, 1-65
ODBC name, 1-65
Password, 1-65
Processing Location, 1-10
Tablespace, 1-65
file
configuration
noticeEmail.cfg, 5-12, 5-13
error, 4-7, 4-18, 4-19
executable
VoyagerInstall.exe, 1-3
initilization
voyager.ini, 1-3, 1-4, 1-5, 1-11
input, 2-2
acqnotes.xxxx.inp, 2-2, 2-4, 2-5, 2-6, 2-15
acqrprts.xxxx.inp, 2-2, 2-4, 2-6, 2-8, 2-15
catrprts.xxxx.inp, 2-2, 2-15, 2-16, 2-17, 2-27,
2-31
crcnotes.xxxx.inp, 2-2, 2-32, 2-33, 2-46
crcrprts.xxxx.inp, 2-2, 2-32, 2-46
mednotes.xxxx.inp, 2-2, 2-51
medrprts.xxxx.inp, 2-2, 2-51
log, 2-3
acqjob.log, 2-6, 2-7, 2-9
catjob.log, 2-17, 2-18, 2-20, 2-22, 2-23, 2-24,
2-27
circjob.log, 2-34, 2-35, 2-36, 2-37, 2-38, 2-39,
2-42, 2-45
mediajob.log, 2-52, 2-53
message, 4-7, 4-18, 4-19
File Archive Options
Always, 3-3
Global preferences, 3-3
Never, 3-3
Query, 3-3
Fine and Fee Transactions, 7-8
fine/fee notice, 2-32, 2-35, A-9
fine/fee statement, 2-32, 2-37
Fines and Fees, 7-8
Fiscal Period Close program, 2-8
fix exchange rates, 2-5
Forms Control
All Notices/Reports on same paper, 3-4
Forms Types, 3-17
Global preferences, 3-4, 3-17, 3-18
Notices/Reports require paper changes, 3-4
preferences, 3-1
Forms Control preferences, 3-17
Forms Control tab, 3-17
Forms Types
Forms Control, 3-17
fund rollover status report, 2-5, 2-7, A-20
Fund Snapshot Report, 7-8
Fund Snapshot Report - All Transactions, 7-8
Fund Snapshot Report - without Commitments, 7-8
fund snapshot report after rollover, 2-8, A-27
fund snapshot report before rollover, 2-8, A-26
fund snapshot report-global, 2-5, 2-7, A-25
Fund Transactions - All, 7-8
Fund Transactions - without Commitments, 7-8
Funds by Ledger Name, 7-8
G
generating
claim for a monographic item, 2-4
claim for a serial item, 2-4
input files to create reports and notices, 2-1
return, 2-4
Get_price_adjustments (sub), 7-9
GetAuthBlob, 7-28
GetBibBlob, 7-28
GetField, 7-29
GetFieldAll, 7-29
GetFieldRaw, 7-28
GetMFHDBlob, 7-28
GetSubField, 7-30
Getting Started, 1-1
before you begin, 1-2
prerequisite skills and knowledge, 1-2
global circulation statistics report, A-39
global circulation transaction statistics report, 2-33
global open orders report, 2-5, A-21
Global preferences, 3-1, 3-2
Data File Path, 3-5
Database Path file, 3-6, 3-8, 3-10, 3-16, 3-18
File Archive Options, 3-3
Endeavor Information Systems, Inc.
See notice on first page
February 2004
Voyager® with UnicodeTM
IN-7
Forms Control, 3-4, 3-17, 3-18
Processing Locations, 3-5
Save setup selections as Initialization defaults,
3-2
setting up, 3-6, 3-8, 3-10, 3-18
Global tab, 1-10
global transaction statistics report, 2-33, 2-42
H
hold recall available notice, 2-32, 2-35
hold recall canceled notice, 2-32, 2-36
hold shelf expired report, A-40
http verification all new links, 2-16, 2-24
http verification within date range, 2-16, 2-23
I
Incorrect File Version, 4-16
initilization file
voyager.ini, 1-3, 1-4, 1-5, 1-11
input file, 2-2
acqnotes.xxxx.inp, 2-2, 2-4, 2-5, 2-6, 2-15
acqrprts.xxxx.inp, 2-2, 2-4, 2-6, 2-8, 2-15
catrprts.xxxx.inp, 2-2, 2-15, 2-16, 2-17, 2-27,
2-31
crcnotes.xxxx.inp, 2-2, 2-32, 2-33, 2-46
crcrprts.xxxx.inp, 2-2, 2-32, 2-46
mednotes.xxxx.inp, 2-2, 2-51
medrprts.xxxx.inp, 2-2, 2-51
restore, 6-3
installing
Oracle client, 1-29
the prepackaged Access report .mdb files, 1-24
Inter-cluster active charges (local database only) by
home patron id, 7-9
Inter-cluster active request by home patron id (x days),
7-9
Inter-cluster charges (local database only), 7-9
Inter-cluster fines/fees (local database only), 7-9
Inter-cluster fines/fees by home patron id (local database only), 7-9
Inter-cluster fines/fees by home patron id grouped by
database, 7-9
Inter-cluster historical charges by cluster (local database only, 7-9
Inter-cluster historical charges by home patron group
and holding cluster, 7-9
Inter-cluster historical charges by home patron id and
holding cluster, 7-10
Inter-cluster historical charges by stub patron group
(local database only), 7-9
Inter-cluster historical request by stub patron group
(local database only), 7-10
Inter-cluster historical requests by cluster (local database only), 7-10
Inter-cluster historical requests by home patron group
and holding cluster, 7-10
Inter-cluster historical requests by home patron id and
holding cluster, 7-10
Inter-cluster items in transit (local database only) (over
x days), 7-10
Inter-cluster items in transit (local database only)(all),
7-10
Inter-cluster shipping statistics (local database only),
7-10
Inter-cluster stub patrons (local database only), 7-10
inventory report, 2-51, 2-52
Invoice_receiving_report, 7-10
item available notice, 2-32, A-10
Item Count - Dewey Decimal Classification, 7-11
Item Count - Library of Congress Classification, 7-11
Item Count - National Library of Medicine Classification, 7-11
Item Count - SuDoc Classification, 7-11
Item Count by Location and Type, 7-11
Item Count by Location, Type and Create Date, 7-11
Item Location, 7-11
Item Most Recent Charge Date, 7-11
Item Note Search, 7-11
item related exceptions report, A-41
Item Stati, Lost, missing etc., 7-11
Item Status - At Bindery, 7-11
Item Status - Cataloging Review, 7-12
Item Status - Circulation Review, 7-12
Item Status - Claims Returned, 7-12
Item Status - Damaged, 7-12
Item Status - In Process, 7-12
Item Status - In Transit, 7-12
Item Status - Lost Library Applied, 7-12
Item Status - Lost System Applied, 7-12
Item Status - Missing, 7-12
Endeavor Information Systems, Inc.
See notice on first page
IN-8
February 2004
Voyager® with UnicodeTM
Index
Item Status - Withdrawn, 7-12
Items Browsed, 7-12
K
Key
Port, 1-4
Server, 1-4
J
job option codes
acquisitions
-d database, 2-8, 2-25, 2-43, 2-54
-e ledger, 2-8
-f fiscal period, 2-8, 2-25
-h display usage/help statement, 2-9
-j job #, 2-8, 2-25, 2-43, 2-54
-l list job options, 2-8
-n run number, 2-8
-o location, 2-8
-r roll date, 2-8
-u user/password, 2-8, 2-25, 2-43, 2-54
-v display version information, 2-9
cataloging
-e end date, 2-25
-f from heading, 2-25
-h display usage/help statement, 2-26
-l list job options, 2-26
-s start date, 2-25
-t to heading, 2-26
-v display version information, 2-26
circulation
-e end date, 2-44
-h display usage/help statement, 2-44
-l list job options, 2-44
-o generate orders, 2-44
-s start date, 2-43
-v display version information, 2-44
media scheduling
-e end date, 2-54
-h display help/usage information, 2-54
-l list job options, 2-54
-s start date, 2-54
-v display version information, 2-54
Job Scheduler page, 2-15, 2-31, 2-50
L
Last Charged (All Time), 7-12
Last Charged (Range), 7-12
LCClassFull, 7-13
Link dialog box, 1-70
Link Tables dialog box, 1-72
log file, 2-3
acquisitions, 2-6, 2-7, 2-9
cataloging, 2-17, 2-18, 2-20, 2-22, 2-23, 2-24,
2-27
circulation, 2-34, 2-35, 2-36, 2-37, 2-38, 2-39,
2-42, 2-45
media scheduling, 2-52, 2-53
log in
first, 1-7, 1-12
Log in dialog box, 1-8, 4-2
logging in to Reporter, 4-1
M
Map_i_currency_conversion, 7-13
Map_i_line_item_fund (sub), 7-13
Map_i_line_item_PO_bib (sub), 7-13
Map_price_adjustments (sub), 7-13
Map_vendor_address (sub), 7-13
Maximum Number of Items Per E-Mail Message,
1-12
Maximum Number of Items per E-mail Message, 3-7
media booking charge statistics report, A-56
media booking equipment inventory report, A-53
media booking exceptions report, A-55
Media Booking Forms preferences, 3-1
media booking statistics report, A-54
media equipment inventory report, 2-51
Endeavor Information Systems, Inc.
See notice on first page
February 2004
Voyager® with UnicodeTM
IN-9
media scheduling
batch job
booking statistics, 2-51, 2-52
charge statistics, 2-51, 2-53
inventory report, 2-51, 2-52
overdue notice, 2-51
overdue notice and lost processing, 2-52
running batch jobs, 2-54
batch job number
mediajob 1, 2-51
mediajob 2, 2-51
mediajob 3, 2-51
mediajob 4, 2-51
creating input files
batch job, 2-51
job option codes
-e end date, 2-54
-h display help/usage information, 2-54
-l list job options, 2-54
-s start date, 2-54
-v display version information, 2-54
notice
input file, 2-2, 2-51
overdue, 2-51, A-16
notice standard information file format (SIF), 2-51
report
input file, 2-2, 2-51
media booking charge statistics, A-56
media booking equipment inventory, A-53
media booking exceptions, A-55
media booking statistics, A-54
media equipment inventory, 2-51
media scheduling charge statistics, 2-51
media scheduling statistics, 2-51
standard information file format (SIF), 2-51
running batch jobs, 2-53
media scheduling charge statistics report, 2-51
media scheduling notice
Access database file
mednotes.mdb, 5-2, 5-8, 5-10
media scheduling report
Access database file
medrprts.mdb, 5-2, 5-6, 5-10
media statistics report, 2-51
mediajob 1, 2-51, 2-52
mediajob 2, 2-51, 2-52
mediajob 3, 2-51, 2-52
mediajob 4, 2-51, 2-53
mediajob.log file, 2-52, 2-53
mednotes.mdb file, 5-2, 5-8, 5-10
mednotes.xxxx.inp file, 2-2, 2-51
medrprts.mdb file, 5-2, 5-6, 5-10
medrprts.xxxx.inp file, 2-2, 2-51
message file, 4-7, 4-18, 4-19
MFHD Count - Library of Congress Classification,
7-13
MFHD Count - National Library of Medicine Classification, 7-13
MFHD Count - SuDoc Classification, 7-13
MFHD Count-Dewey Decimal Classification, 7-13
MFHDBlob, 7-13
MfhdBlob, 7-26
Microsoft ODBC for Oracle driver, 1-17
missing in transit report, 2-33, 2-38, A-42
N
New Bib Count, 7-14
New Service Name field, 1-20, 1-65
No Reports of Notices for Selected Application, 4-11
Notice Archive Processing Options
Both, 3-10
E-mail, 3-10
Notices preferences, 3-10
Print, 3-10
notice database file, 5-2
notice name
cancellation, 2-4
cancellation notice, 2-32
courtesy (due) notice, 2-32
fine/fee notice, 2-32
item available notice, 2-32
order claim notice, 2-4, 2-5
overdue notice, 2-32
overdue notice-media, 2-51
recall notice, 2-32
recall overdue notice, 2-32
return notice, 2-4
serial claim notice, 2-4, 2-5
statement of fines/fees, 2-32
voucher/check request, 2-4
noticeEmail.cfg file, 5-12, 5-13
Notices Archive
setting path, 1-9
Notices Archive Path, 3-10
Notices preferences, 3-1, 3-9
Endeavor Information Systems, Inc.
See notice on first page
IN-10
February 2004
Voyager® with UnicodeTM
Index
Maximum Number of Items Per E-Mail Message,
1-12
Notice Archive Processing Options, 3-10
Notices Archive Path, 3-10
O
ODBC Data Source Administrator dialog box, 1-61,
1-63
ODBC drivers
configuring control panel settings, 1-61
ODBC name field, 1-65
OPAC - Local Z3950 Mappings to Voyager Indexes,
7-14
OPAC and Staff Composite Left-Anchored Indexes,
7-14
OPAC and Staff Keyword Indexes, 7-14
OPAC and Staff Left-Anchored Indexes, 7-14
OPAC Search Log Total Searches by Day, 7-14
OPAC Suppressed Record, 7-14
open orders report, 2-5, 2-7, A-22
open orders report after rollover, 2-8, A-24
open orders report before rollover, 2-8, A-23
Options
File Archive, 3-3
Oracle
client, 1-24
database instance, 1-17
Oracle9i client, 1-24
Oracle9i client install, 1-29
service name, 1-17
SQL*Net, 1-24
uninstalling old client, 1-24
updating the character set, 1-52
Oracle Net8 Easy Config dialog box, 1-18, 1-19, 1-65
Oracle8 OBDC Driver Setup dialog box, 1-62, 1-63
Oracle9i client, 1-17
order claim notice, 2-4, 2-5, A-5
order claim/cancel processing, 2-5, 2-6
overdue notice, 2-32, 2-34, A-11
overdue notice and lost processing, 2-52
overdue notice-media, 2-51, A-16
P
P.O. Style
Blank Amounts, 3-12
landscape, 3-12
portrait, 3-12
Reports preferences, 3-12
Sort by Vendor, 3-12
Pacqjob command, 2-9
page
Acquisitions Reports and Notices, 2-13
Cataloging Reports and Processes, 2-29
Circulation Reports and Notices, 2-50
Job Scheduler, 2-15, 2-31, 2-50
webadmin main page, 2-12, 2-13, 2-28, 2-47
Password field, 1-65
Patron Fines and Fees, 7-14
Patron Fines and Fees - UB Stub Patrons, 7-14
patron related exceptions report, A-43
Patrons Created By Operator, 7-14
Patrons with Overdue Items, 7-15
Patrons with Paid Lost Items to Discharge, 7-15
Patrons with Unpaid Lost Items, 7-15
Pcatjob command, 2-26
Pcircjob command, 2-44
Pfpc_run command, 2-8
photocopying
documentation, xxvi
Pmediajob command, 2-54
postal code, 3-15
Preferences dialog box, 3-2, 3-6, 3-8, 3-10, 3-14,
3-16, 3-18
prepackaged Access reports, 1-1, 7-1, 7-3
accessing the MARC Blob, 7-26
installing the .mdb files, 1-24
report name
Acq - Issues Received by Component and Date
Range, 7-5
Acq - Issues Received by Component and Date
Range (no serials), 7-5
AuthBlob, 7-5
Bib Records Created by Operator, 7-6
BibBlob, 7-6
Bibs by Pub Decade and Country, 7-6
Call Slip Processing by Date Range, 7-6
Call Slip Unfilled Requests, 7-6
Circulation Transactions (Charges), 7-6
Endeavor Information Systems, Inc.
See notice on first page
February 2004
Voyager® with UnicodeTM
IN-11
Circulation Transactions by Dewey Decimal
Classification, 7-6
Circulation Transactions by Item Statistical Categories, 7-6
Circulation Transactions by Library of Congress
Classification, 7-6
Circulation Transactions by National Library of
Medicine, 7-6
Circulation Transactions by Patron Group and
Item Type, 7-7
Circulation Transactions by Patron Statistical
Categories, 7-7
Circulation Transactions by SuDoc Classification, 7-7
Circulation Transactions Titles by Date Range,
Minimum Charges, 7-7
Circulation Transactions Titles by Minimum
Charges, 7-7
Decode Searchparm, 7-7
Dewey10, 7-7
Dewey100, 7-7
Donor List, 7-7
Duplicate Item Barcodes, 7-7
Duplicate Patron Barcode (active), 7-8
Duplicate Patron Barcode (all statuses), 7-8
Expired Patron Records, 7-8
Fine and Fee Transactions, 7-8
Fines and Fees, 7-8
Fund Snapshot Report, 7-8
Fund Snapshot Report - All Transactions, 7-8
Fund Snapshot Report - without Commitments,
7-8
Fund Transactions - All, 7-8
Fund Transactions - without Commitments,
7-8
Funds by Ledger Name, 7-8
Get_price_adjustments (sub), 7-9
Inter-cluster active charges (local database
only) by home patron id, 7-9
Inter-cluster active request by home patron id (x
days), 7-9
Inter-cluster charges (local database only), 7-9
Inter-cluster fines/fees (local database only),
7-9
Inter-cluster fines/fees by home patron id (local
database only), 7-9
Inter-cluster fines/fees by home patron id
grouped by database, 7-9
Inter-cluster historical charges by cluster (local
database only, 7-9
Inter-cluster historical charges by home patron
group and holding cluster, 7-9
Inter-cluster historical charges by home patron
id and holding cluster, 7-10
Inter-cluster historical charges by stub patron
group (local database only), 7-9
Inter-cluster historical request by stub patron
group (local database only), 7-10
Inter-cluster historical requests by cluster (local
database only), 7-10
Inter-cluster historical requests by home patron
group and holding cluster, 7-10
Inter-cluster historical requests by home patron
id and holding cluster, 7-10
Inter-cluster items in transit (local database
only) (over x days), 7-10
Inter-cluster items in transit (local database
only)(all), 7-10
Inter-cluster shipping statistics (local database
only), 7-10
Inter-cluster stub patrons (local database only),
7-10
Invoice_receiving_report, 7-10
Item Count - Dewey Decimal Classification,
7-11
Item Count - Library of Congress Classification,
7-11
Item Count - National Library of Medicine Classification, 7-11
Item Count - SuDoc Classification, 7-11
Item Count by Location and Type, 7-11
Item Count by Location, Type and Create Date,
7-11
Item Location, 7-11
Item Most Recent Charge Date, 7-11
Item Note Search, 7-11
Item Stati, Lost, missing etc., 7-11
Item Status - At Bindery, 7-11
Item Status - Cataloging Review, 7-12
Item Status - Circulation Review, 7-12
Item Status - Claims Returned, 7-12
Item Status - Damaged, 7-12
Item Status - In Process, 7-12
Item Status - In Transit, 7-12
Item Status - Lost Library Applied, 7-12
Item Status - Lost System Applied, 7-12
Item Status - Missing, 7-12
Item Status - Withdrawn, 7-12
Items Browsed, 7-12
Last Charged (All Time), 7-12
Endeavor Information Systems, Inc.
See notice on first page
IN-12
February 2004
Voyager® with UnicodeTM
Index
Last Charged (Range), 7-12
LCClassFull, 7-13
Map_i_currency_conversion, 7-13
Map_i_line_item_fund (sub), 7-13
Map_i_line_item_PO_bib (sub), 7-13
Map_price_adjustments (sub), 7-13
Map_vendor_address (sub), 7-13
MFHD Count - Library of Congress Classification, 7-13
MFHD Count - National Library of Medicine
Classification, 7-13
MFHD Count - SuDoc Classification, 7-13
MFHD Count-Dewey Decimal Classification,
7-13
MFHDBlob, 7-13
New Bib Count, 7-14
OPAC - Local Z3950 Mappings to Voyager Indexes, 7-14
OPAC and Staff Composite Left-Anchored Indexes, 7-14
OPAC and Staff Keyword Indexes, 7-14
OPAC and Staff Left-Anchored Indexes, 7-14
OPAC Search Log Total Searches by Day,
7-14
OPAC Suppressed Record, 7-14
Patron Fines and Fees, 7-14
Patron Fines and Fees - UB Stub Patrons,
7-14
Patrons Created By Operator, 7-14
Patrons with Overdue Items, 7-15
Patrons with Paid Lost Items to Discharge,
7-15
Patrons with Unpaid Lost Items, 7-15
Proxy Patron - Active, 7-15
Proxy Patron - Expired, 7-15
Publications Patterns with Components, 7-15
Requestor List, 7-15
Routing List Locations, 7-15
Routing List Locations (sub), 7-15
Routing List Members (sub), 7-15
Routing List Patrons, 7-15
Routing List Patrons (sub), 7-16
Routing Lists, 7-16
searchfields2, 7-16
Security
All Profiles (sub), 7-16
All Profiles and Operators, 7-16
Short Loans, 7-16
Subscription Payment History, 7-16
Subtotals (sub), 7-16
Subtotals_sub (sub), 7-16
System Access Tables NOT Linked, 1-68,
7-17
System Linked Tables, 7-17
System Query List, 7-17
System Report List, 7-17
System Reports Available, 7-17
Title List - Medium Computer File, 7-17
Title List - Medium Globe, 7-17
Title List - Medium Map, 7-17
Title List - Medium Microform, 7-17
Title List - Medium Motion Picture, 7-17
Title List - Medium Non-Projected Medium,
7-17
Title List - Medium Projected Medium, 7-18
Title List - Medium Remote Sensing Image,
7-18
Title List - Medium Sound Recording, 7-18
Title List - Medium Text, 7-18
Title List - Medium Unspecified, 7-18
Title List - Medium Video recording, 7-18
Title List - Type Computer File, 7-18
Title List - Type Kit, 7-18
Title List - Type Language Material, 7-18
Title List - Type Manuscript Language Material,
7-18
Title List - Type Manuscript Map, 7-18
Title List - Type Manuscript Music, 7-19
Title List - Type Mixed Material, 7-19
Title List - Type Musical Sound Recording,
7-19
Title List - Type Non-musical Sound Recording,
7-19
Title List - Type Printed Map, 7-19
Title List - Type Printed Music, 7-19
Title List - Type Projected Medium, 7-19
Title List - Type Three-Dimensional Artifact,
7-19
Title List - Type Two-Dimensional Nonprojectable Graphic, 7-19
Title List-Bib Level= s, 7-17
UB Average Receiving Time by Day (warehouse), 7-19
UB Call Slip Processing Statistics by Date
Range, 7-20
UB Call Slip Processing Statistics by Day (warehouse), 7-20
UB Charges by Day (warehouse), 7-20
UB Historical Charges by Patron Home Database, 7-20
Endeavor Information Systems, Inc.
See notice on first page
February 2004
Voyager® with UnicodeTM
IN-13
UB Historical Charges by Stub Patron Group,
7-20
UB Historical Requests by Patron Home Database, 7-20
UB Historical Requests by Stub Patron Group,
7-20
UB Holding Library Items in Transit (all), 7-20
UB Holding Library Items in Transit (over x
days), 7-21
UB Home Patrons - Historical Requests by
Holding Library, 7-21
UB Home Patrons - Historical Requests by
Home Patron Group, 7-21
UB Home Patrons - UB Fines and Fees
(grouped by db), 7-22
UB Home Patrons - with Active UB Charges,
7-22
UB Home Patrons - with Fees and Demerits,
7-22
UB Home Patrons - with Fees and Demerits
(grouped by db), 7-22
UB Home Patrons - with Outstanding Requests
(x days), 7-22
UB Home Patrons - with UB Fines and Fees,
7-22
UB Home Patrons with Demerits, 7-22
UB Home Patrons with Demerits - Sub, 7-21
UB Home Patrons with Demerits (Grouped by
Db) - Sub, 7-21
UB Home Patrons with Fees, 7-22
UB Home Patrons with Fees - Sub, 7-21
UB Home Patrons with Fees (Grouped by Db) Sub, 7-21
UB Home Patrons with Fees and Demerits,
7-21
UB Home Patrons with Fees and Demerits
(Grouped by Db), 7-21
UB Home Patrons-Historical Charges by Holding Library, 7-21
UB Home Patrons-Historical Charges by Home
Patron Group, 7-21
UB Inbound Shipping Statistics, 7-22
UB Outbound Shipping Statistics, 7-22
UB Stub Patrons, 7-22
UB Stub Patrons with Active Charges, 7-23
UB Stub Patrons with Demerits, 7-23
UB Stub Patrons with Demerits (Grouped by
Patron), 7-23
UB Stub Patrons with Fines and Fees, 7-23
URL Host Links, 7-23
user_tab_columns, 7-23
Vendor Copy Order-Receipt Dates, 7-23
Vendor Performance - Days to Receipt, 7-23
Vendor Type Performance - Days to Receipt,
7-23
Voyager Data Dictionary, 7-24
Voyager databases (local=0), 7-23
Voyager Record Counts, 7-24
reports and queries, 7-5
setting up, 1-17
using, 7-24
using the expression builder, 7-26
Print (Processing) Locations
Global preferences, 3-5
print location
selecting, 1-10
printing a purchase order, 2-4
processing archive files, 4-13
processing location
selecting, 1-10
Processing Location field, 1-10
Processing Locations, 3-5
program
Fiscal Period Close, 2-8
Proxy Patron - Active, 7-15
Proxy Patron - Expired, 7-15
Publications Patterns with Components, 7-15
purchase order, A-17
purchase order - landscape, A-18
purchase order cancellation notice, A-2
purchase order report, 2-4
Q
queries
access
adapting after new release, 1-68
R
recall notice, 2-32, 2-35, A-12
recall overdue notice, 2-32, A-13
registry, 3-5
Endeavor Information Systems, Inc.
See notice on first page
IN-14
February 2004
Voyager® with UnicodeTM
Index
Registry Editor dialog box, 1-52
Relink check box, 1-73
removing
Oracle service name, 1-17
Report Archive
setting path, 1-9
report database file, 5-2
report name
856 link failure report, 2-16
circ item related exceptions report, 2-33
circ patron related exceptions report, 2-33
circ transaction related exceptions report, 2-33
circ transaction statistics, 2-33
copy rollover status, 2-7
copy rollover status report, 2-5
distribution item order list report, 2-33
duplicate authority records, 2-16
fund rollover status, 2-7
fund rollover status report, 2-5
fund snapshot report after rollover, 2-8
fund snapshot report before rollover, 2-8
fund snapshot report-global, 2-5
global circulation transaction statistics, 2-33
global open orders report, 2-5
media equipment inventory, 2-51
media scheduling charge statistics, 2-51
media statistics, 2-51
missing in transit report, 2-33
open orders, 2-7
open orders report, 2-5
open orders report after rollover, 2-8
open orders report before rollover, 2-8
purchase order, 2-4
reserved items active report, 2-32, 3-13
reserved items expired report, 2-33, 3-13
see also reference without an authority record,
2-16
see references authorized in another record, 2-16
see references with linked bib records, 2-16
unauthorized name headings report, 2-16
unauthorized name/title headings report, 2-16
unauthorized subject headings report, 2-16
unauthorized title headings report, 2-16
Reporter
Access reports and notices, 5-2
building reports and notices, 4-3
correcting errors and error record processing,
4-19
editing reports and notices, 5-9
error conditions, 6-1
Failure Recovery Run, 6-1
Unprocessed E-Mail Notices, 6-3
Unprocessed Report and/or Notice, 6-2
error record processing, 4-17
logging in, 4-1
module, 1-1, 2-1
processing archive files, 4-13
running reports and notices, 4-11
session preferences, 3-1
setting up, 1-2
reports and queries in prepackaged Access reports,
7-5
Reports Archive Path
Reports preferences, 3-13
reports Database dialog box, 1-64, 1-65
Reports preferences, 3-1, 3-11
P.O. Style, 3-12
Reports Archive Path, 3-13
Reserved Items Reports Option, 3-13
setting up, 3-14
reproduction, of documentation, xxvi
Requestor List, 7-15
reserve items active by call number report, A-44
reserve items active by course name and call number
report, A-46
reserve items active by course name and title report,
A-47
reserve items active by title report, A-45
reserve items expired by call number report, A-48
reserve items expired by course name and call number report, A-50
reserve items expired by course name and title report,
A-51
reserve items expired by title report, A-49
reserved items active report, 2-32, 2-38, 3-13
reserved items expired report, 2-33, 2-38, 3-13
Reserved Items Reports Option
by Location and Call Number, 3-13
by Location and Title, 3-13
by Location, Course Name and Call #, 3-13
by Location, Course Name and Title, 3-13
Reports preferences, 3-13
restoring
server file, 6-3
return notice, 2-4, A-3
rollover status report-global, 2-5, 2-7
Routing List Locations, 7-15
Routing List Locations (sub), 7-15
Routing List Members (sub), 7-15
Routing List Patrons, 7-15
Endeavor Information Systems, Inc.
See notice on first page
February 2004
Voyager® with UnicodeTM
IN-15
Routing List Patrons (sub), 7-16
Routing Lists, 7-16
running acquisitions batch jobs, 2-8
webadmin, 2-13
running cataloging batch jobs, 2-24
webadmin, 2-29
running circulation batch jobs, 2-43
webadmin, 2-48
running media scheduling batch jobs, 2-53, 2-54
running reports and notices, 4-11
S
sample notices, A-1
acquisitions notices, A-1
circulation notices, A-8
media scheduling notices, A-16
sample reports, A-17
acquisitions reports, A-17
cataloging reports, A-28
circulation reports, A-37
media reports, A-53
Save setup selections as Initialization defaults, 3-2
searchfields2, 7-16
Security
All Profiles (sub), 7-16
All Profiles and Operators, 7-16
see also reference without an authority record report,
2-16
see also reference without corresponding authority
record report, 2-16, 2-22
see references authorized in another authority record
report, 2-16, 2-22, A-35
see references authorized in another record report,
2-16
see references with linked bib records report, 2-16,
2-21, A-36
see references without corresponding authority record
report, A-34
Select Directory dialog box, 3-6
Select Directory for msaccess.exe dialog box, 1-9
selecting
print location, 1-10
processing location, 1-10
serial claim notice, 2-4, 2-5, A-6
session preferences
Acquisitions Forms, 3-1
Address Format, 3-15
Address format, 3-1
Cataloging Forms, 3-1
Circulation Forms, 3-1
E-mail, 3-1, 3-7
Forms Control, 3-1, 3-17
Global, 3-1, 3-2
Media Booking Forms, 3-1
Notices, 3-1, 3-9
Reports, 3-1, 3-11
setting up
preferences
Address Format, 3-16
Global, 3-6, 3-8, 3-10, 3-18
Reports, 3-14
prepackaged Access reports, 1-17
Reporter module, 1-2
Short Loans, 7-16
SMTP e-mail server, 1-3, 1-4
Software Asset Manager dialog box, 1-25
standard information file format
acquisitions notice, 2-6
acquisitions report, 2-6
cataloging report, 2-17
circulation notice, 2-34
circulation report, 2-34
media scheduling notice, 2-51
media scheduling report, 2-51
stanza
[E-mail], 1-3, 1-4
statement of fines/fees, 2-32, A-14
Subscription Payment History, 7-16
Subtotals (sub), 7-16
Subtotals_sub (sub), 7-16
System Access Tables NOT Linked, 1-68, 7-17
System Identifier page, 1-21
System Linked Tables, 7-17
System Query List, 7-17
System Report List, 7-17
System Reports Available, 7-17
T
tab
Address Format, 3-15
E-mail, 1-11
Forms Control, 3-17
Endeavor Information Systems, Inc.
See notice on first page
IN-16
February 2004
Voyager® with UnicodeTM
Index
Global, 1-10
Tablespace field, 1-65
TCP/IP protocol page, 1-21
test message
e-mail, 1-14
failed, 1-15
successful, 1-15
Test Service page, 1-22
Title List - Medium Computer File, 7-17
Title List - Medium Globe, 7-17
Title List - Medium Map, 7-17
Title List - Medium Microform, 7-17
Title List - Medium Motion Picture, 7-17
Title List - Medium Non-Projected Medium, 7-17
Title List - Medium Projected Medium, 7-18
Title List - Medium Remote Sensing Image, 7-18
Title List - Medium Sound Recording, 7-18
Title List - Medium Text, 7-18
Title List - Medium Unspecified, 7-18
Title List - Medium Video recording, 7-18
Title List - Type Computer File, 7-18
Title List - Type Kit, 7-18
Title List - Type Language Material, 7-18
Title List - Type Manuscript Language Material, 7-18
Title List - Type Manuscript Map, 7-18
Title List - Type Manuscript Music, 7-19
Title List - Type Mixed Material, 7-19
Title List - Type Musical Sound Recording, 7-19
Title List - Type Non-musical Sound Recording, 7-19
Title List - Type Printed Map, 7-19
Title List - Type Printed Music, 7-19
Title List - Type Projected Medium, 7-19
Title List - Type Three-Dimensional Artifact, 7-19
Title List - Type Two-Dimensional Nonprojectable
Graphic, 7-19
Title List-Bib Level= s, 7-17
transaction exceptions, 2-33, 2-40
transaction related exceptions report, A-52
transaction statistics report, 2-33, 2-39
troubleshooting
linking the Oracle tables, 1-68
U
UB Average Receiving Time by Day (warehouse),
7-19
UB Call Slip Processing Statistics by Date Range,
7-20
UB Call Slip Processing Statistics by Day (warehouse), 7-20
UB Charges by Day (warehouse), 7-20
UB Historical Charges by Patron Home Database,
7-20
UB Historical Charges by Stub Patron Group, 7-20
UB Historical Requests by Patron Home Database,
7-20
UB Historical Requests by Stub Patron Group, 7-20
UB Holding Library Items in Transit (all), 7-20
UB Holding Library Items in Transit (over x days),
7-21
UB Home Patrons - Historical Requests by Holding
Library, 7-21
UB Home Patrons - Historical Requests by Home
Patron Group, 7-21
UB Home Patrons - UB Fines and Fees (grouped by
db), 7-22
UB Home Patrons - with Active UB Charges, 7-22
UB Home Patrons - with Outstanding Requests (x
days), 7-22
UB Home Patrons - with UB Fees and Demerits,
7-22
UB Home Patrons - with UB Fees and Demerits
(grouped by db), 7-22
UB Home Patrons - with UB Fines and Fees, 7-22
UB Home Patrons with Demerits, 7-22
UB Home Patrons with Demerits - Sub, 7-21
UB Home Patrons with Demerits (Grouped by Db) Sub, 7-21
UB Home Patrons with Fees, 7-22
UB Home Patrons with Fees - Sub, 7-21
UB Home Patrons with Fees (Grouped by Db) - Sub,
7-21
UB Home Patrons with Fees and Demerits, 7-21
UB Home Patrons with Fees and Demerits (Grouped
by Db), 7-21
UB Home Patrons-Historical Charges by Holding
Library, 7-21
UB Home Patrons-Historical Charges by Home Patron
Group, 7-21
UB Inbound Shipping Statistics, 7-22
UB Outbound Shipping Statistics, 7-22
UB Stub Patrons, 7-22
UB Stub Patrons with Active Charges, 7-23
UB Stub Patrons with Demerits, 7-23
UB Stub Patrons with Demerits (Grouped by Patron),
7-23
Endeavor Information Systems, Inc.
See notice on first page
February 2004
Voyager® with UnicodeTM
IN-17
UB Stub Patrons with Fines and Fees, 7-23
unauthorized name headings report, 2-16, 2-18,
A-29
unauthorized name/title headings report, 2-16, 2-20,
A-31
unauthorized subject headings report, 2-16, 2-18,
A-28
unauthorized title headings report, 2-16, 2-19, A-30
Unprocessed E-Mail Notices, 6-3
Unprocessed Report and/or Notice, 6-2
URL Host Links, 7-23
user_tab_columns, 7-23
using prepackaged Access reports, 7-24
using the expression builder, 7-26
webadmin main page, 2-12, 2-13, 2-28, 2-47
V
Vendor Copy Order-Receipt Dates, 7-23
Vendor Performance - Days to Receipt, 7-23
Vendor Type Performance - Days to Receipt, 7-23
voucher/check request notice, 2-4, A-7
Voyager Data Dictionary, 7-24
Voyager databases (local=0), 7-23
Voyager Record Counts, 7-24
voyager.ini file, 1-3, 1-4, 1-5, 1-11
configuring, 1-3
VoyagerInstall.exe file, 1-3
W
webadmin
acquisitions batch job
creating input files, 2-12
Acquisitions Reports and Processes utility, 2-13
cataloging batch job
creating input files, 2-28
Cataloging Reports utility, 2-29
circulation batch job
creating input files, 2-47
Circulation Reports and Notices utility, 2-48
running acquisitions reports and notices, 2-13
running cataloging reports, 2-29
running circulation reports, 2-48
Endeavor Information Systems, Inc.
See notice on first page
IN-18
February 2004
Voyager® with UnicodeTM