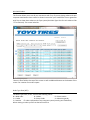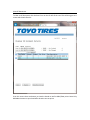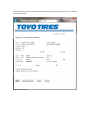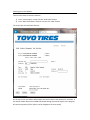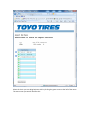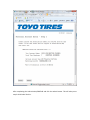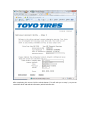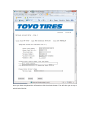
1
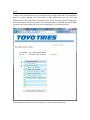
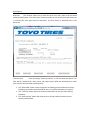
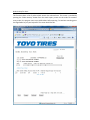
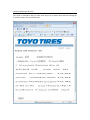
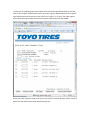
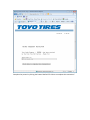
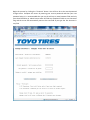
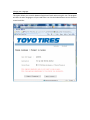
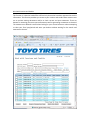
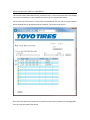
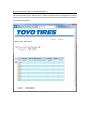
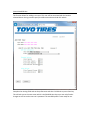
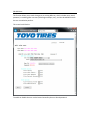
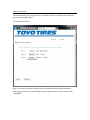
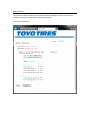
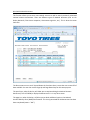
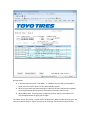
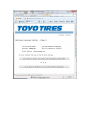
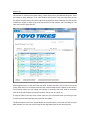
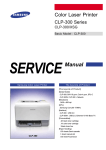
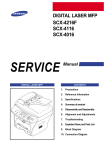
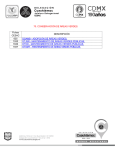
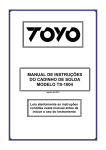
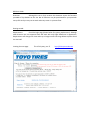
B2B User Guide: Overview: Although this site is fairly intuitive this document covers the functions provided to Toyo dealers on this site. Not all functions may be provisioned for your particular user profile and you may not see each and every screen in a process flow. Getting started: Requirements: Check the login page (shown below for system requirements). Although other browsers are not supported most will work with only slight differences in appearance. Requirements will change over time and may no longer match the image below so please check the site itself. Locating the start page: This is fairly easy, use http://b2b.toyocanada.com Log In: In order to use the B2B functions you will need to log in using a valid user ID and password, which you obtain through your head Office or B2B Administrator (or your local B2B Administrator if your head office has appointed one). If your password requires changing you will be prompted as required. Once your user ID and password are accepted you will be shown the main screen, which shows you all of your available options. This screen looks like: Click the green arrow, to the left of each function, in order to start that function. Stock Inquiry: Overview: This function allows you to check the stock of an item, order items and check technical specifications. The “Select Item” button provides an item search tools that assists you in retrieving the item code based on description. The Item Search is explained later in the document. To check stock: Enter the six digit Toyo item number, or click the select item button. The item search is explained in a later section and it does exactly what you would expect (it takes your search criteria and finds matching items). The “Order Now” button serves the purpose of ordering the item code most recently looked up (you need to be authorized for this or you will be blocked by the system). The “Tech Info” button shows the technical information for the item most recently looked up. The “Order Activity” button will show you a list of orders which contain the most recently selected item. Order Activity for item: This function shows a list of orders which contain the selected item. This screen is reached by pressing the “Order Activity” button from the stock inquiry screen. As the order file contains many orders, the program scans up to 1000 orders before pausing. To continue searching press the Page Down key on your keyboard. The screen looks like this: Technical Information for Item: This screen is reached by doing an item stock inquiry for a specific item and then clicking the `Tech Info` button. This screen looks like: Work with Orders: This function allows you to see all your transaction with Toyo. If you are placing orders with your corporate warehouses these cannot be shown here unless your head office has an agreement with Toyo to show these orders on the Toyo system (the Order Type Class for such orders will be “S” for statistics). This screen looks like: There are filter fields at the top of this screen as well as additional buttons at the bottom of this screen. For creation of an order request Order Type Class (OTC): The Order Type Class, or OTC, is one of the following values: W = Web order O = Orders D = Direct Invoice C = Credits R = Direct Credit A = Advertising order S = Statistics orders replicated on Toyo computer system (sent by your head office) When viewing an order you will see the item level first. View OE Document: To view an OE Document click the Pencil icon on the far left of the row. This will bring you to a screen which looks like this: From this screen there are buttons to view the header as well as Hide/Show prices. Note: Only B2B Administrators at your head office location can see prices. The header screen also has buttons which will show you totals, prices and notes. The header screen looks like this: Creating your order Request: There are two ways to reach this function. 1) From “ Stock Inquiry” screen click the “Order Now” button 2) From “Work with Orders” function click the click “New” button. The screen you will reach looks like this: On the next screen you will be able to adjust the items as well as the quantity for each item. In the sample shown above item 111600 was passed through from Stock Inquiry so the program will assume a quantity of four (which can be changed on the next screen). To assist you in completing your order request there are buttons provided to allow you to add items to your request, add and edit notes for the order request, add and edit notes for a specific item and also two ways to exit this screen, which are “Confirm” or “Cancel” the order request. Here is what the order request screen looks like when a few items have been added: When your order request is ready to be sent to Toyo click the `Confirm & Order` button. This will take you to the confirmation screen which looks like this: Complete the process by clicking the button labelled “Click here to complete this transaction”. Changing your Password: When you want to change your password, or when it is required, you will use this function. Begin the process by clicking the “Continue” button. You will then be at the actual password change screen. Complete this screen by entering your current password and then your new password twice. It is recommended that you use the tab key to move between fields and only press then ENTER key or submit button when all fields are completed. Fields are ten characters long and the cursor will automatically move to the next field as you type the 10th character in any field. Change your Language: This option allows you to switch between English and French when using this site. The program will offer the other language so all you need to do is to click the Submit button. Here is what this screen looks like: Work with Invoices and Credits: This function is limited to head office staff and only those who have been approved to see this information. This function provides you access to your invoices and credits. Most common uses are to retrieve missing documents and/or to check current and past statements. There are buttons for accessing your most recent statement as well as generating a statement on demand. The statement on demand is useful when looking for your current balance or when attempting to close your fiscal year/period and want your balance without waiting for the month end statement to be sent. Administer B2B Users (Sold-To or Head Office): This function allows B2B administrators to add new users, remove unwanted users and change user access as necessary at your head office as well as all your registered locations. You can also use this function to reset profiles and passwords. The first step is to your locations where the B2B Users to be administered at located at. This screen looks like this: Once you have chosen your location then continue with the same procedure for managing B2B users at a ship-to location (see below). Administer B2B Users (Ship-To or NON-Head Office): This function allows you to add new users, remove unwanted users and change user access as necessary for the location shown. You can also use this function to reset profiles and passwords. This screen looks like this: Create New B2B User: This function allows for adding a new user. This user will be associated with the location selected above. During creation specify the B2B services desired and click submit. Complete the missing fields and set the preferences and then click Submit or press Enter key. This will take you to the next screen which is the Edit B2B User where you can make further changes as well as see the new user’s password. The new B2B profile is now ready for use. Edit B2B User: This function allows you to make changes to an existing B2B user, which includes name, email, password, re-enabling (after too many failed login attempts, etc.), and also what B2B functions the user is entitled to perform. This screen looks like this: To enable or disable the user use the button located by the user ID and password. Reset User Account: This function allows you to change the user’s password as well as change the user’s ability to gain access to the B2B system. This screen looks like this: Note: If you want to block an employee from using the B2B system without permanently removing their profile it is recommended that you change the status of their account to be “*DISABLED” Delete B2B User: This function provides the ability to permanently remove a B2B user profile. This function is suitable for use when an employee is leaving you company. This screen looks like this: Work with National Accounts: This function allows you to enter new national accounts as well as search previously submitted national account transactions. There are different types of National Accounts (such as: Car Dealer Networks, Fleet Lease companies, Government agencies, etc.). This is what the screen looks like: The blue arrows serve to scroll Up and Down the list when there is more than one screen full of data available. You can also use the Page Up and Page Down keys for this same purpose. The pencil icon, when clicked on, will allow you to continue editing the National Account document (if it is still OPEN) or display the document if it is in any other status. The page icon, when clicked on, will allow you to obtain additional copies o the National Account Delivery Form (NADF) Confirmation. This is only permitted for NA documents that have been completed (status = “INV”). National Account – Process Flow: I am showing the national account process for Fleet Lease as this demonstrates almost every feature of the national account process. Other National Account types will differ in both the screens shown for the process flow as well as the features and function allowed during entry. From the “Review National Accounts Processed” screen click the “New” button. You will then see this screen: Select your NA Chain type and the date on which the sales occurred and then click the submit button. The next screen you see will look like this: Select the chain you are doing business with by clicking the green arrow to the left of the name. The next screen you see will look like this: After completing the Authorization/PO# field and click the submit button. This will take you to step 2 which looks like this: After completing this screen click the submit button. This will take you to step 3, so you can record the driver and vehicle information, which looks like this: Once you have completed this information click the submit button. This will take you to step 4 which looks like this: Did you know? 1) If the item code starts with is “NA MISC” or “LABOUR” then you will be prompted for notes, which the FLEET requires or they will withhold payment. 2) When using the item search do not forget to switch to the Parts and Services catalogue by clicking the button with that title at the bottom of the item search screen. 3) When adding items, removing items or adjusting quantity and/or price make sure to click the Submit button to apply your changes. The above screen shot shows a typical FLEET NA document. When finished entering your NA click the “Continue (Step 5)” button to move to the final step. The next screen looks like this: Select Item: This function is accessed from Stock Inquiry, Order request entry and National Accounts. There are button to switch between “Tires” and “Products and services”. Also, there are filters to help you quickly find the item(s) of interest. When using the filters you will need to vary the amount of detail you supply in order to get a few entries that are the matches you are looking for. The item search screen looks like this: Click the green arrow, to the left of the item code, to select the item. This will return you to the screen from which you arrived here and the item code selected will then appear on that screen. This functions means you can lookup item code(s) as necessary and never need to remember them or be forced to look them up from another source, such as a price list. If using the filters at the top of the screen make sure you click submit after you have type your choices into each field otherwise the screen will not update. The blue arrows serve to scroll Up and Down the list when there is more than one full screen of data available. You can also use the Page Up and Page Down keys for this same purpose. Updates & Technical Support: Updates for this document will be available, via hyperlink, on the login page. For Technical support you have the following choices: - Contact your Toyo sales rep for training Contact your head office administrator To report technical problems please contact Toyo IT department