1
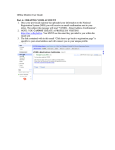
Offline Member User Guide:
Part A: CREATING YOUR ACCOUNT
1. Once your provincial registrar has uploaded your information to the National
Registration System (NRS) you will receive an email confirmation sent to your
inbox. The subject the message will read “VCNRS – Email Address Confirmation”.
2. NOTE: YOU CANNOT CREATE A PROFILE BY VISITING
https://nrs.volleyball.ca. You MUST use the email key provided to you within the
email sent
3. The link contained with in this email “Click here to go back to registration page” is
specific to your email address and will connect you to your unique profile.
4. When viewing your profile be sure to fill in/confirm all profile information, set your
username and password, set your security question and answer, select your region,
designate your emergency contact.
5. Once all this information has been properly confirmed/filled in accept the terms and
conditions and click “Register”
6. You have now successfully completed and registered your profile with the National
Registration system.
7. You may now log in and out of the system at your leisure.
PART B: SETTING UP YOUR TEAM(S)
1. After completing your registration you will be taken to your homepage.
2. On the left hand side of the page you will see an area called “QuickLinks”. Under
“QuickLinks” click on “Clubs”
3. The Clubs page will show a grid with only one club in it. The club should read
“<<Province>> Offline Club” (ex. PEI Offline Club)
4. Click on the club and then click the “Register Team” button located right about the
club
5. On the next screen you will be asked to select a Team Contact.
6. Click “Select Member” and use the search fields to find the member you would like
to select as your team contact. Ideally, you should select yourself to be the team
contact.
7. Once you have found yourself (or another member) using the search feature select the
appropriate name (it will become highlighted in blue) and click on the green “Select
Member” button at the top of the search grid.
8. You will be returned to the previous screen with the name of your selected team
contact filled in the correct box
9. Fill in the name of your team next to “Team Name:” And select the division in which
your team will play at National Championships
10. Do not check the box which says “Pay later”; your member has already been paid for,
you will not be charged.
11. When finished click “Add Team”
12. You will next be presented with a payment screen, your payment should be for $0.00.
Click “Checkout”. If your payment is for more than $0.00 please contact your
Provincial/Territorial Association
13. You will then be presented with a receipt, you have the option to print this receipt or
not. After you have or have not printed the receipt click “Continue”
14. Once your team has been successfully created you will be re-directed to the roster
editing page. You can complete your team roster now or return at any point prior to
registration to complete it. Please note that you must have a completed and valid
roster in order to register for any events. (If you had not selected yourself to be the
team contact you will be re-directed to the home page. Your team contact will then
have to return to the system on their own to complete the roster)
15. Please follow the steps below to complete your roster
PART C: COMPLETING YOUR ROSTER
1. If you are not already signed, please sign in
2. On your home page you will see the name of your team. Click on it.
3. You will be re-directed to the Team Information Page
4. To add players to your team click on the “Add Member” button
5. You will be presented with a Search Members box. All the registered members of
your team will already be in the system. Use this box to search the database to find
them. Be sure you enter as many details as possible to ensure you select the correct
player.
6. Once you have found the member you wish to add to your team click on the name.
Once it is highlighted in blue click on the green “Add Member” button at the top of
the search grid. DO NOT click on the red “Create New Member” button at the
bottom of the page.
7. If you cannot find the member you wish to add to your team please select the
“Dummy” members from the list to act as place holders on your team. These
members can be chosen by searching first name “Dummy”.
8. Once properly selected you will be prompted to choose a role for the member. Please
choose Indoor Player, Head Coach, Assistant Coach, Secondary Team Contact or
Trainer. Please note that each team must have a minimum of 8 indoor and exactly 1
head coach. Any person who will be sitting on your bench at National Championships
must be listed on your roster.
9. Select the role(s) by checking the appropriate box(es) and clicking submit.
10. Once correctly submitted you will see the name of the player you have added on the
“Add Member” screen.
11. You can continue to add members as you did in steps 4 through 10.
12. RECALL: Your team MUST have a minimum of 8 players of the correct gender and
age category and exactly one Head Coach to be considered valid at the time of
registration.
13. Once you have added all the members you wish proceed to the payment screen by
clicking SUBMIT on the “Add Member” screen.
Click here to remove a member
from your roster PRIOR to payment
Click here to submit
roster for processing
for roster.
***Note***: No payment is required, all roles have been previously paid for. If the
system requests you to pay more than $0.00 for a role please contact your
Provincial/Territorial Association.
14. After clicking “Submit” you will be brought to a “payment” screen. The dollar
amount in all boxes should be zero. Click on “Checkout” to finalize your team roster.
15. A copy of the receipt will be emailed to the team contact, to print additional copies
click “Print”
16. Click “Continue” to be directed back to the Team Details page to review your roster.
17. You are now ready to register for an event
PART D: REGISTERING YOUR TEAM
Once you have successfully created your team(s) you can register them for a Canadian
Indoor Championships event.
1. Go to the “Event Calendar”
Event Calendar:
Month and Year
drop down boxes
2. Using drop down boxes navigate to May 2013. Within the calendar you will see VC
National Events, separated by age category.
3. Click on the bolded name of the event in which you wish to register. You will be
redirected to the events details page. At the bottom of the page you will see the
name(s) of your team(s). Underneath the name(s) of your team(s) you will see a line
of text indicating whether your team is valid for the event or not. If your team is valid
you will see a red “Register” button. Click this button. (You will also see if any
documents have been attached to this event. Please download all attached documents
as they may contain important event information)
Attachments
Your teams
4. You will be redirected to a screen to select the team you wish to register for the event.
Once you have selected the correct team click on the “Select Team” button at the top
of the grid. If you have more than one team please be sure you select the correct one.
Administration fees may be charged to users who select the wrong team and
subsequently need a refund.
5. Next you will be taken to a roster information screen. You must enter roster
information (Jersey Number, Height and Position) for each player in order to make
your team valid for registration. Each field in the grid must be filled. Once the
information has been entered be sure to hit “Save” at the bottom of the grid. If you are
unsure as to the details of your team roster enter zeros in to the fields, this
information must be entered correctly and verified by the Roster Lock Date, Friday,
April 5th, 2013.
6. Next you will be taken to a payment screen to pay the Event Registration Fee. Visa or
Mastercard are accepted. Please enter the required information accordingly and click
“Register”
7. Once you are successfully registered you will be taken to a receipt screen from which
you can print the receipt for your records.
8. Finally, you will be returned to your home screen. You should see the listing of your
registration at the bottom of your home screen under “Upcoming Registered Events”
PART F: EDITING YOUR ROSTER INFORMATION
***NOTE***: Roster lock date is Friday, April 5th, 2013. You MUST enter correct roster
information before Friday, April 5th, 2013 to validate your registration. Changes to roster
after the roster lock date WILL NOT be accepted.
a) Adding a Team Member
1. Log in to the NRS.
2. Under “Organizations” you will see a list of your team(s). Click on the Team
Name whose roster you wish to edit.
3. Click the “Add Member” button
4. You will be presented with a Search Members box. All the registered members of
your team will already be in the system. Use this box to search the database to
find them. Be sure you enter as many details as possible to ensure you select the
correct player.
5. Once you have found the member you wish to add to your team click on the
name. Once it is highlighted in blue click on the green “Add Member” button at
the top of the search grid. DO NOT click on the red “Create New Member”
button at the bottom of the page.
6. Once properly selected you will be prompted to choose a role for the member.
Please choose Indoor Player, Head Coach, Assistant Coach, Secondary Team
Contact or Trainer. Please note that each team must have a minimum of 8 indoor
players and exactly 1 head coach. Any person who will be sitting on your bench at
National Championships must be listed on your roster.
7. Select the role(s) by checking the appropriate box(es) and clicking submit.
8. Once correctly submitted you will see the name of the player you have added on
the “Add Member” screen.
9. You can continue to add members as you did in steps 4 through 10.
10. RECALL: Your team MUST have a minimum of 8 players of the correct gender
and age category and exactly one Head Coach to be considered valid at the time
of registration
11. Once you have added all the members you wish proceed to the payment screen by
clicking SUBMIT on the “Add Member” screen.
Click here to remove a member
from your roster PRIOR to payment
Click here to submit
roster for processing
for roster.
***Note***: No payment is required, all roles have been previously paid for. If the
system requests you to pay more than $0.00 for a role please contact your
Provincial/Territorial Association.
12. After clicking “Submit” you will be brought to a “payment” screen. The dollar
amount in all boxes should be zero. Click on “Checkout” to finalize your team
roster.
13. A copy of the receipt will be emailed to the team contact, to print additional
copies click “Print”
14. Click “Continue” to be directed back to the Team Details page to review your
roster.
b) How to Remove a Player (To be added later)
1. If you wish to remove a member from your team you must contact your
Provincial/Territorial Association (PTA).
2. Send the PTA a list of the members you wish to remove (including Dummy
members). Please include your name and email address; name of your team; the
first and last names, date of birth and email address of all members to be
removed. Date of birth and email address not required for Dummy members.
3. Please allow for a turn around of 2 business days.
c) How to Edit Roster Details (Jersey #, Height, Position)
1. Log in.
2. Under “Upcoming Registered Events” you will see a list of events you have
registered your team(s) in. Click on the event for which you want to edit the roster
details.
3. You will be presented with the event details, scroll to the bottom of the page and
click “Edit Roster”
Name of team(s) registered
in this event
4. You will be re-directed to your team’s roster details page
5. Edit any information you wish. ***NOTE*** Changes must be completed before
the Roster Lock Date on Friday, April 5th, 2013.
6. Click “Save”.
7. Once completed you will be redirected back to your homepage.