1
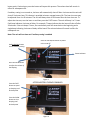
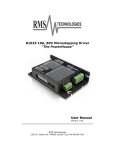
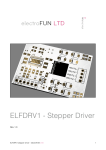
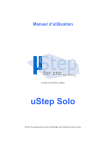
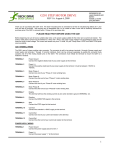
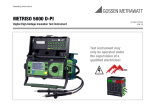
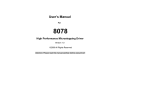
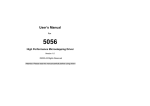
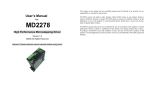
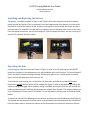
U-STEP Cueing Module User Guide
In-Step Mobility Products
www.Ustep.com
Installing and Replacing the Battery
The battery is installed as shown in Figure 1 and Figure 2. Note that the positive end of the battery
points towards the center of the circuit board. Insert the negative end of the battery first, then press
the positive end into the battery holder. A plastic retaining clip is also provided that snaps into place
once the battery is installed. Once the battery is installed, the unit will beep either three or five times.
If the unit beeps three times, the unit is shutting off. If the unit beeps five times, the unit is turning on
and the LED indicator will start to blink.
Figure 1
Figure 2
Operating the Unit
Control the unit using the front panel shown in Figure 3. If the unit is off, pressing the red ON/OFF
button on the panel or the red button on the right handlebar will turn the unit on. The unit will beep 5
times, the power indicator will begin blinking, and the laser will turn on. If either button is pushed
again, the unit will beep three times and turn off.
To activate the sound cueing, turn on the laser and then press and hold the top black ON button
beneath the AUDIO label on the left of the module (See Figure 3). After a few seconds of holding, the
auditory cueing will engage. When auditory cueing is enabled, pressing the FAST key will increase the
cadence and pressing the SLOW key will decrease the cadence (See Figure 4). The cadence varies from
59 to 130 beats per minute over 15 increments. To turn off auditory cueing, press and hold the SLOW
button.
To adjust the volume of the beeping, turn on the laser and then press the SLOW button (See Figure 3).
The volume will decrease each time the button is pushed and the unit will beep with the new volume.
Once the lowest value is reached, the volume will be increased to the maximum volume on the next
button push. Continuing to press the button will repeat this process. The volume level will remain in
effect for subsequent use.
If auditory cueing is not turned on, the laser will automatically shut off after 4 minutes and the unit will
shut off 4 minutes later. This feature is provided to better manage battery life. The laser time-out may
be adjusted from 4 to 28 minutes. The unit will always shut off 4 minutes after the laser time out. To
adjust the time out, turn the laser on and then press the FAST button. The unit will beep 1 to 7 times.
Each beep indicates 4 minutes of delay. For example, 7 beeps indicate that the laser will shut off after
28 minutes. If the unit beeps 7 times, the next button push will rotate back to the beginning and a
single beep indicating 4 minutes of delay will be heard. The selected value will remain in effect for
subsequent use.
Note: The unit will not time out if auditory cueing is enabled
Hold AUDIO ON button
to start auditory cueing
Press the red ON/OFF button to power
unit on and off
Power Indicator
Press the SLOW button
to adjust the volume of
the beeping
Figure 3
Press the FAST
button to speed
up beeping until
desired speed
AFTER AUDITORY CUEING IS ENABLED
Press the SLOW
button to slow
beeping until
desired speed
Figure 4