1
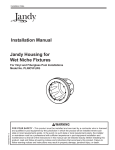
Installation Data
Installation Manual
Jandy Housing for
Wet Niche Fixtures
For Gunite Pool and Spa Installations Plastic Model Nos. PLNICLRG and PLNICSM
and Stainless Steel Model Nos. SSNICLRG and
SSNICSM
SSNICLRG
SSNICSM
PLNICLRG
PLNICSM
H0284400A
WARNING
FOR YOUR SAFETY - This product must be installed and serviced by a professional pool/spa
service technician. The procedures in this manual must be followed exactly. Failure to follow
warning notices and instructions may result in property damage, serious injury, or death.
Page 2
IMPORTANT SAFETY INSTRUCTIONS PERTAINING TO A RISK OF
FIRE, ELECTRIC SHOCK, OR INJURY TO PERSONS
READ AND FOLLOW ALL INSTRUCTIONS
When installing and using this equipment, basic safety precautions should always be followed, including the
following:
.WARNING
RISK OF ELECTRICAL SHOCK OR ELECTROCUTION. This underwater niche must be installed by
a licensed or certified electrician in accordance with the National Electrical Code and applicable local
codes and ordinances. Improper installation will create an electrical hazard, which could result in death
or serious injury to pool or spa users, installers, or others due to electrical shock, and may also cause
damage to property. Read and follow the specific instructions below.
WARNING
Before installing this underwater niche, read and follow all warning notices and instructions
accompanying this niche. Failure to follow safety warnings and instructions can result in severe injury,
death, or property damage. Call (707) 776-8200 or visit our website www.jandy.com for additional free
copies of these instructions.
ATTENTION INSTALLER: This manual contains important information about the
installation and safe use of this product. This information should be given to the owner/
operator of this equipment.
NOTICE
The Jandy Pool and Spa niches are intended for installation in fresh water and salt water swimming
pools and spas. It is important to ensure that the lights in which the niches are installed are intended for
their appropriate application, either fresh water or salt water.
Jandy Compatible Light Fixture Part Numbers
Use the large niches (SSNICLRG and PLNICLRG) with the following Jandy Lights:
P/N JPL120XXX
P/N JPL12XXX
P/N CPHVXXXXXXXX
P/N CPLVXXXXXXXX
P/N WPHVXXXXXXXX
P/N WPLVXXXXXXXX
Use the small niches (SSNICSM AND PLNICSM) with the following Jandy Lights:
P/N JSL120XXX
P/N JSL12XXX
P/N WSHVXXXXXXX
P/N WSLVXXXXXXXX
SAVE THESE INSTRUCTIONS
Page 3
This document gives instructions for installing the
Jandy Niche for gunite pool and spa installations. The
instructions must be followed exactly. Read through the
instructions completely before starting the procedure.
d.
The wet niche must be properly installed so that
the top edge of the underwater light’s lens is at
least 18 inches below (not more than 48 inches
below in Canada) the surface of the water in the
pool or spa. See Figure 1.
e.
The wet niche must be properly electrically
bonded and grounded via the No. 8 AWG ground
connector located at the rear of the niche. See
Figure 1.
2.
Installation Instructions for Plastic Niches
(PLNICLRG AND PLNICSM)
a.
Locate a position for the installation of the niche
and light fixture so that the top of the lens will
be a minimum of 18” below normal water level.
Position niche between adjacent rebars so that the
niche is held on four sides by sections of rebar. It
may be necessary to add sections of rebar or to
move existing sections in order to secure niche in
place.
b.
Attach conduit to the back of niche using the
proper PVC/CPVC primer and glue. See Figure
2. A 1” PVC 45 degree sweep elbow is included
with the niche to direct the conduit pipe upwards
toward the junction box. A ¾” reducer is also
included with the niche to permit the use of ¾”
conduit pipe. Make sure to follow the primer and
glue manufacturer's instructions for the preparation
procedures and curing times.
The Jandy Niche is designed to be installed in the pool
or spa walls.
1.
Installation During New Construction
Ensure that the pool or spa meets the requirements
of the current National Electrical Code and all local
codes and ordinances. A licensed or certified electrician
must install the electrical system to meet or exceed
those requirements before the Niche (fixture housing)
is installed. Some of the requirements of the National
Electrical Code, which the pool and spa electrical
systems must meet, are as follows:
a.
The lighting circuit must have a Ground Fault
Circuit Interrupter (GFCI) for 120 volt models,
and must have an appropriately rated circuit
breaker.
b.
The Junction Box (or, for 12 volt models, the
low voltage transformer) must be located at least
eight (8) inches above water level, at least four (4)
inches above ground level, and at least four (4)
feet from the edge of the pool or spa. See Figure 1.
c.
The light fixture and all metal items within five (5)
feet of the pool or spa must be properly electrically
bonded to a reliable point of grounding. Seal the
wire/lug connection with a listed sealant.
#8 AWG Ground
Connector bonded
Figure 1. Pool Niche Installation
Page 4
c.
Using tie wire, attach the niche housing to the
rebar. Jandy models PLNICLRG and PLNICSM
have four (4) outer flanges with ¼” holes which
should be used to route the tie wire through to
secure the niche to the rebar. Ensure that the niche
is the proper forward distance from the rebar so
that the top surface of the niche will be flush with
the finish surface.
1" - 3/4" Reducer
(Included in Kit)
1" 45 Degrees
Sweep Elbow
(Included in kit)
NOTE: Be sure to orient the niche so that the ‘TOP’
marking of the niche is in the 12 o’clock
position.
d.
e.
f.
g.
Connect #8 AWG bonding wire from rebar to rear
grounding lug of niche (outside of the niche).
If nonmetallic conduit is used, a #8 AWG bonding
wire is required to run through conduit from the
junction box to the bonding/grounding lug inside
of niche. Seal the wire/lug connection with a listed
sealant. See Figure 3.
The outside bonding connection must be inspected
before the concrete pouring/shooting operation. It
is also necessary to keep concrete or gunite from
hardening on the outer edge and flange of the
niche during pouring/shooting.
Remove the nylon screw and attach plastic
niche cover to opening of niche prior to the
concrete/gunite pouring/shooting operation. See
Figure 4. The cover prevents concrete or gunite
from entering the inside of the niche, during the
pouring/shooting operation.
h.
Once the concrete/gunite has completely dried and
prior to plastering, tear outer portion away from
cover. Plaster up to the top edge of niche.
i.
A PVC 1” Plug is provided with niche for pressure
testing of conduit line before installation of light
fixture.
Bonding Lug
Figure 2.
Plastic Niche Installation
Top
Rebar Mounting
Flange (4 places)
#8 AWG
Bonding
Wire
Bonding/
Grounding
Lug
Figure 3.
Plastic Niche Bonding Wire Installation
Nylon Screw
(Included in Kit)
Top
Plastic Cover
(Included in Kit)
Figure 4.
Plastic Niche Cover and Nylon Screw
for Plastic Niche
Page 5
3.
a.
b.
c.
Installation Instructions for Stainless Steel
Niches (SSNICLRG AND SSNICSM)
Locate a position for the installation of the niche
and light fixture so that the top of the lens will
be a minimum of 18” below normal water level.
Position niche between adjacent rebars so that the
niche is held on four sides by sections of rebar. It
may be necessary to add sections of rebar or to
move existing sections in order to secure niche in
place.
Attach conduit to the back of niche using the
proper thread sealant. A threaded 1” NPT
connection is attached to the back of the niche. A
threaded 1”- ½” NPT reducer is included with the
niche to permit the use of ½” metallic conduit.
If nonmetallic conduit is used, then a threaded
bushing will be required (not included with niche).
Connect bonding wire from rebar to rear bonding
lug of niche (outside of the niche).
e.
If rigid nonmetallic conduit is used, a #8 AWG
bonding wire is required to run through conduit
from the junction box to the bonding/grounding
lug inside of niche. Seal the wire/lug connection
with a listed sealant. See Figure 6. If metallic
conduit is used a #8 AWG bonding wire is not
required.
f.
The outside bonding connection must be inspected
before the concrete pouring/shooting operation. It
is also necessary to keep concrete or gunite from
hardening on the outer edge and flange of the
niche during pouring/shooting.
g.
h.
Bonding
Lug
Figure 5.
Stainless Steel Niche Kit Components
Rebar Mounting
Holes
(8 places)
#8 AWG
Bonding
Wire
Using tie wire, attach the niche housing to the
rebar. Ensure that the niche is the proper forward
distance from the rebar so that the top surface of
the niche will be flush with the finish surface.
NOTE: Be sure to orient the niche so that the ‘TOP’
marking of the niche is in the 12 o’clock
position.
d.
1" - 1/2" Reducer
(Included in Kit)
Remove the nylon screw and attach plastic
niche cover to opening of niche prior to the
concrete/gunite pouring/shooting operation. See
Figure 7. The cover prevents concrete or gunite
from entering the inside of the niche, during the
pouring/shooting operation.
Once the concrete/gunite has completely dried and
prior to plastering, tear outer portion away from
Bonding/
Grounding
Lug
Figure 6.
Stainless Steel Niche Bonding Wire
Installation
Top Marking
Nylon Screw
(Included in
Kit)
Plastic Cover
(Included in Kit)
Figure 7.
Plastic Niche Cover and Nylon Screw for
Stainless Steel Niche
cover. Plaster up to the top edge of niche.
4.
Part Lists
The Parts Lists and Exploded View are shown on the
next page.
Page 6
Table 1.
Parts List - Plastic Pool and Spa Niche (PLNICLRG and PLNICSM)
Item No.
Part Number
Description
1
R0460800
Niche Misc, Kit, Plastic, Pool and Spa
2
R0461000
Qty.
10-24 Screws (Grounding Lug)
2
10-24 Nylon Screws (Gunite Protection)
1
1" Threaded Plug
1
1" 45° Sweep Elbow
1
1" to 3/4" Reducer
1
Niche Cover R-Kit, Pool
Niche Cover, Pool
3
R0461100
1
Niche Cover R-Kit, Spa
Niche Cover, Spa
1
1
2, 3
1
Figure 8. Plastic Pool and Spa Niche (PLNICLRG and PLNICSM) Exploded View
Table 2.
Parts List - Stainless Steel Pool and Spa Niche (SSNICLRG and SSNICSM)
Item No.
Part Number
Description
1
R0460900
Niche Misc, Kit, Stainless Steel, Pool and Spa
2
R0461000
Qty.
10-24 Screws (Grounding Lug)
2
10-24 Nylon Screws (Gunite Protection)
1
1" to 1/2" Threaded Reducer
1
Niche Cover R-Kit, Pool
Niche Cover, Pool
3
R0461100
1
Niche Cover R-Kit, Spa
Niche Cover, Spa
1
1
1
2, 3
Figure 9. Stainless Steel Pool and Spa Niche (SSNICLRG and SSNICSM) Exploded View
Page 7
NOTES
LIMITED WARRANTY
Thank you for purchasing Jandy® pool and spa products. Jandy Pool Products, Inc. (manufacturer of Jandy
products), warrants all parts to be free from manufacturing defects in materials and workmanship for a period of
one year from the date of retail purchase, with the following exceptions:
• AquaLink® RS units installed with Jandy Surge Protection Kits will be covered for two years.
• NeverLube® valves are warranted for the life of pool and/or spa on which they were originally installed.
This warranty is limited to the first retail purchaser, is not transferable, and does not apply to products that have
been moved from their original installation sites. The liability of Jandy Pool Products, Inc. shall not exceed the
repair or replacement of defective parts and does not include any costs for labor to remove and reinstall the
defective part, transportation to or from the factory, and any other materials required to make the repair. This
warranty does not cover failures or malfunctions resulting from the following:
1. Failure to properly install, operate or maintain the product(s) in accordance with our published Installation,
Operation and Maintenance Manuals provided with the product(s).
2. The workmanship of any installer of the product(s).
3. Not maintaining a proper chemical balance in your pool and/or spa [pH level between 7.2 and 7.8, Total
Alkalinity (TA) between 80 to 120 ppm, Total Dissolved Solids (TDS) less than 2000].
4. Abuse, alteration, accident, fire, flood, lightning, rodents, insects, negligence or acts of God.
5. Scaling, freezing, or other conditions causing inadequate water circulation.
6. Operating the product(s) at water flow rates outside the published minimum and maximum specifications.
7. Use of non-factory authorized parts or accessories in conjunction with the product(s).
8. Chemical contamination of combustion air or improper use of sanitizing chemicals, such as introducing
sanitizing chemicals upstream of the heater and cleaner hose or through the skimmer.
9. Overheating; incorrect wire runs; improper electrical supply; collateral damage caused by failure of ORings, DE grids, or cartridge elements; or damage caused by running the pump with insufficient quantities
of water.
LIMITATION OF LIABILITY:
This is the only warranty given by Jandy Pool Products, Inc. No one is authorized to make any other warranties
on Jandy Pool Products, Inc.’s behalf. THIS WARRANTY IS IN LIEU OF ALL OTHER WARRANTIES,
EXPRESSED OR IMPLIED, INCLUDING BUT NOT LIMITED TO ANY IMPLIED WARRANTIES OF FITNESS
FOR A PARTICULAR PURPOSE AND MERCHANTABILITY. JANDY POOL PRODUCTS, INC., EXPRESSLY
DISCLAIMS AND EXCLUDES ANY LIABILITY FOR CONSEQUENTIAL, INCIDENTAL, INDIRECT OR PUNITIVE
DAMAGES FOR BREACH OF ANY EXPRESSED OR IMPLIED WARRANTY. This warranty gives you specific
legal rights. You may also have other rights which vary by state or province.
WARRANTY CLAIMS:
H0284400A
For prompt warranty consideration, contact your dealer and provide the following information: proof of purchase,
model number, serial number and date of installation. The installer will contact the factory for instructions regarding
the claim and to determine the location of the nearest designated service center. If the dealer is not available, you
can locate a service center in your area by visiting www.jandy.com or by calling our technical support department
at (707) 776-8200 extension 260. All returned parts must have a Returned Material Authorization number to be
evaluated under the terms of this warranty.
6000 Condor Drive, Moorpark, CA, USA 93021
•
Jandy Pool Products, Inc.
707.776.8200 FAX 707.763.7785
Litho in U.S.A. © Jandy Pool Products, Inc. 0701