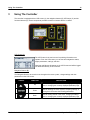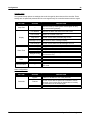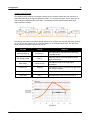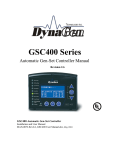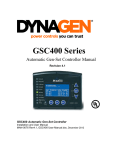
1
TG350AMF User Manual
Manual Revision: 1.0
Software Revision: 1.2
Date Released: 7/24/2012
© 2012 DynaGen Technologies Inc.
TOUGH Series User Manual
Table of Contents
1 Introduction
1.1 Specifications
................................................................................................................................... 4
1.2 Accessories
................................................................................................................................... 5
2 Installation
2.1 Main I/O
...................................................................................................................................
Starter Harness
8
2.2 Advanced
...................................................................................................................................
I/O Harness
9
2.3 3-Phase
...................................................................................................................................
AC Volts Harness
10
2.4 Magnetic
...................................................................................................................................
Pickup / J1939 Interface Harness
11
2.5 Relay...................................................................................................................................
Pak (RP100)
12
2.6 AMF /...................................................................................................................................
ATS Wiring
13
2.7 Typical
...................................................................................................................................
Wiring Diagram
14
3 Using The Controller
3.1 Using...................................................................................................................................
the Menu System
17
3.2 Warnings,
...................................................................................................................................
Failures and Events History
18
3.3 Starting,
...................................................................................................................................
Stopping and Controller Modes
19
3.3.1 Emergency Stop
..........................................................................................................................................................
and Failures
20
4 Configuration
4.1 Engine
...................................................................................................................................
Logic
23
4.2 Switched
...................................................................................................................................
Inputs
25
4.2.1 Voltage Select .......................................................................................................................................................... 27
4.2.2 Configurable Inputs
.......................................................................................................................................................... 28
4.2.3 Start / Stop (Momentary
..........................................................................................................................................................
Function)
28
4.3 Switched
...................................................................................................................................
Outputs
29
4.3.1 Pull and Hold Coil
.......................................................................................................................................................... 30
4.4 Sensors
................................................................................................................................... 31
4.4.1 Auxiliary Sensors
.......................................................................................................................................................... 33
4.4.2 Custom Sensor..........................................................................................................................................................
Tables
36
4.4.3 Speed Sensing..........................................................................................................................................................
and Battery
37
4.5 AC Monitoring
................................................................................................................................... 38
4.5.1 AMF / ATS
.......................................................................................................................................................... 39
4.6 Exerciser
...................................................................................................................................
and Maintenance
41
4.7 CAN Bus
...................................................................................................................................
(J1939)
42
4.7.1
4.7.2
4.7.3
4.7.4
Diagnostic Trouble
..........................................................................................................................................................
Codes
44
DM1 Messages.......................................................................................................................................................... 45
DM2 Messages.......................................................................................................................................................... 46
DTC Conversion..........................................................................................................................................................
Methods
47
© 2012 DynaGen Technologies Inc.
TOUGH Series User Manual
5 Troubleshooting and Contact Information
© 2012 DynaGen Technologies Inc.
Introduction
1
3
Introduction
The TOUGH series controllers are designed to provide complete control, protection, AC volts metering,
and engine instrumentation for both standard and electronic engines. The module is easily configured
using either the front panel buttons or our PC Configurator software. TOUGH series controllers are ideally
suited for severe duty applications where reliability is critical such as mobile and stationary generators.
Features and Functions:
5 Year Warranty
SAE J1939 CANbus Protocol
RPM via J1939, Magnetic Pickup, or Generator
Speed control offset for electronic engines
Autostart on low battery and other sensors
Trim feature for AC voltage inputs and sensors
Maintenance counter
Exerciser Clock
100 Event Log
Conformally coated for protection against
moisture and contaminants
Gasket for water ingress protection IP65
Free PC Configurator Software
Fast and rugged installation clips
Passcode protected
Automatic shutdowns and warnings
Manual and remote start
Momentary start/stop inputs
Pre-heat and many configurable timers
Accepts common senders (VDO, Datcon,
Murphy, and more)
Custom senders configurable with PC software
Displays:
Oil Pressure
Engine Temperature
Fuel Level
Real Time Clock
AC Volts and Hz
Battery Voltage
Oil Level
Hour Meter
RPM
FEATURE
J1939 DTC codes with
custom text
2 Custom Sensors
INCLUDED
J1939 CANbus
Magnetic Pickup Input
100 Event Log
Clock / Exerciser
Generator Metering
3-Phase
Mains Metering (AMF + ATS)
3-Phase
Configurable Switched Inputs
5
Resistive Sensors
3
Universal Sensor (Resistive, 0-5V, 4-20mA)
1
User Configurable Switched Outputs (+Fuel and Crank)
4
TOUGH Series User Manual
© 2012 DynaGen Technologies Inc.
Introduction
1.1
4
Specifications
Testing Specifications:
The TOUGH Series controllers were rigorously tested to ensure durability, reliability and functionality.
The following specifications are a brief summary of the standards to which the controller has been
tested. For complete details on the testing performed please contact DynaGen.
SPECIFICATION
RATING
Electrical Transients
SAE1113-11
Thermal Shock and Cycling
SAE1455
Vibration Profiles
SAE1455
Electric Static Discharge
SAE1113-13
Physical Specifications:
SPECIFICATION
RATING
Operating Temperature
-40 to +158°F (-40 to +70°C)
LCD Viewing Temperature
-4 to +158°F (-20 to +70°C )
Weight (With Relay Pak)
1.32lb (0.6kg)
Dimensions (With Relay Pak)
(Height x Width x Depth)
4.41" x 6.79" x 3.33"
11.20cm x 17.25cm x 8.46cm
Electrical Specifications:
SPECIFICATION
RATING
Operating Voltage
5.5 - 36VDC
Standby Current
50mA
Switched Inputs
+Battery, Ground, Open, Closed
Switched Outputs
+Battery @ 1A Max
Low Resistance Sensor (Ports B and C)
0 - 750Ω
High Resistance Sensors (Port A)
0 - 7,500Ω
Universal Sensor (Port D)
0 - 750Ω, 0 - 7,500Ω, 0 - 5VDC, 4 - 20mA
Magnetic Pickup
10 - 10,000Hz at 1 - 50VAC
AC Voltage (Line-To-Line)
50 - 575VAC True RMS
Accuracy: 1% Full Scale
Communications
SAE J1939 (Tier II, III, IV) and USB
TOUGH Series User Manual
© 2012 DynaGen Technologies Inc.
Introduction
1.2
5
Accessories
The following items are available to be purchased from DynaGen to be used with the TOUGH Series
controllers.
ACCESSORY
PART NUMBER
DESCRIPTION
Relay Pak
RP100
Enclosure (NMEA 1)
ENC0080
Steel enclosure with cutout and vibration mounts
Silicon Gasket
ENC0059
Replacement Silicon Gasket
Mounting Clip
ENC0068
Replacement Mounting Clip
12V Relays
RLY0053
Replacement 12V Relays
24V Relays
RLY0054
Replacement 24V Relays
USB Cable
ACC0084
Programming and firmware update cable
Temperature Sensor
ACC0027
Datcon 100-280C, 1/8”- 27 NPTF
Temperature Sensor
ACC0098
Datcon 100-280C, 3/8” – 18 NPTF
Temperature Sensor
ACC0099
Datcon 100-280C, 1/2” – 14 NPTF
Oil Pressure Sensor
ACC0108
S & W (2798) 100 PSI, 240 ohm, 1/8”- 27 NPTF
Snap-on Relay Pak with 3 x 12V @ 40A relays
Pre-assembled Harnesses
The following DynaGen's harnesses are pre-assembled and sold separately. Each wire on the harness is
4 feet in length unless otherwise specified in the harness drawings.
HARNESS
PART NUMBER
Main I/O Starter Harness
DWG1475
Battery, ground, 3 switched inputs, 3 switched
outputs, and 3 resistive sensors.
Main I/O Starter Harness for
Relay Pak
DWG1476
Battery, ground, 3 switched inputs, 3 resistive
sensors, and connections from the switched
outputs to the external Relay Pak connector.
Advanced I/O Harness
DWG1477
2 Switched Inputs, 3 Switched Outputs, and 1
Universal Sensor.
Magnetic Pickup / J1939
Interface Harness
DWG1478
J1939 and Magnetic Pickup
3-Phase AC Volts Harness
(Genset or Mains)
DWG1479
AC Voltage Sensing. Two of these harnesses are
required for genset and mains monitoring.
4 - 20mA
DWG1496
Required for universal sensor (Port D) to function
as a 4 - 20mA input.
TOUGH Series User Manual
DESCRIPTION
© 2012 DynaGen Technologies Inc.
Introduction
6
Custom Harness Component List
If DynaGen harnesses are not suitable for your application, custom harnesses can be created using the
following part list:
COMPONENT
PART NUMBER
Molex 2x3 Connector
39-01-2060
Used with Relay Pak harness.
Molex 2x4 Connector
39-01-2080
Used with Advanced I/O Harness.
Molex 2x5 Connector
39-01-2100
Used with Magnetic Pickup / J1939 Interface
Harness.
Molex 2x7 Connector
39-01-2140
Used with Main I/O Starter Harness.
Molex Crimp Pins
39-00-0039
Used with all Molex connectors.
Molex Crimp Tool
63819-0900
Used with all Molex connectors.
Tyco 1x4 Connector
1-480702-0
Used with 3-Phase AC Volts Harness.
Tyco Crimp Pins
350536-1
Used with 3-Phase AC Volts Harness.
Tyco Crimp Tool
90546-1
Used with 3-Phase AC Volts Harness.
18 AWG Wire
N/A
TOUGH Series User Manual
NOTES
Used with every harness.
© 2012 DynaGen Technologies Inc.
Installation
2
7
Installation
Safety Precautions
Generator systems contain high voltage circuitry and precautions to protect against it should be taken.
Failing to power down and lock out equipment can cause damage, injury or death.
WARNING: Wiring of this controller should be performed by qualified electricians only.
The following general electrical safety precaution should be followed:
Do a thorough inspection of the area before performing any maintenance.
Keep fluids away from electrical equipment.
Unplug connectors by pulling on the plug and not the cord.
Use fuses where appropriate.
Ensure all equipment is properly grounded.
Provide support to wires to prevent stress on terminals.
Mounting the Controller
To ensure proper and safe operation, caution must be taken at the installation site to make sure it is free
from excessive moisture, fluctuating temperature, dust and corrosive materials. Choose a mounting
surface with the least amount of vibration and not more than 0.125" thick.
To mount the controller follow these instructions.
1) Choose a suitable mounting location based on the criteria above.
2) Create a rectangular cutout in the panel that is 3.9" high and 6.2" wide.
3) If applicable, snap the Relay Pak (RP100) to the back of the controller. Place one side of the
RP100s tabs into the slot on the back of the controller and without pushing on the relays, snap
the other tab into place.
4) Place the controller into the panel cutout so that the LCD screen and buttons are facing out.
5) Place the mounting clips into the designated slots on the top and bottom of the controller.
6) Tighten the screws on the clips until controller is snug against the panel. Do not over tighten, the
bottom of the screws should angle very slightly away from the controller.
TOUGH Series User Manual
© 2012 DynaGen Technologies Inc.
Installation
2.1
8
Main I/O Starter Harness
The Main I/O Starter Harness (or equivalent) is required to provide power to the controller. It also has
inputs and outputs that can be interfaced to outside devices / components. There are 2 versions of this
harness offered:
1. Standard - This version does not have the pre-wired connections to an external connector that
plugs into the Relay Pak.
2. Relay Pak - This version has Ground and Switched Outputs A, B, and C wired to an external
connector that plugs into the Relay Pak.
TERMINAL
FUNCTION
DESCRIPTION
J4-1
+Battery
J4-2
+Battery
These connections connect battery power to the controller.
The second +Battery connection can be used to power
external devices of up to 1A.
J4-3
-Battery
J4-4
-Battery
J4-5
Switched Input A
J4-6
Switched Input B
J4-7
Switched Input C
J4-8
Switched Output A
J4-9
Switched Output C
J4-10
Switched Output B
J4-11
Sensor Ground
Provides ground for 2-wire sensors.
J4-12
Sensor Input A
High resistance sensor (0 - 7,500Ω)
J4-13
Sensor Input B
Low resistance sensor (0 - 750Ω)
J4-14
Sensor Input C
Low resistance sensor (0 - 750Ω)
These connections provide a ground return line from the
controller. The second -Battery connection can be tp
provide ground for external devices of up to 1A.
Switched inputs are configurable to detect battery voltage,
ground, closed, or open. See Switched Inputs 25 for more
information.
Each switched output provides +Battery voltage when active
and can supply up to 1A of current.
Switched Output A is locked to Fuel Relay
Switched Output B is configurable.
Switched Output C is locked to Crank Relay.
Looking at rear of controller
TOUGH Series User Manual
© 2012 DynaGen Technologies Inc.
Installation
2.2
9
Advanced I/O Harness
The Advanced I/O Harness is only required if the number of inputs and outputs on the Main I/O Starter
Harness are not sufficient to meet the requirements of your application.
TERMINAL
FUNCTION
J3-1
Switched Input D
J3-2
Switched Input E
J3-3
Switched Output D
J3-4
Switched Output E
J3-5
Switched Output F
J3-6
No Connection
This terminal is currently not used.
J3-7
Sensor Ground
Provides ground for 2-wire sensors.
J3-8
DESCRIPTION
Switched inputs are configurable to detect battery voltage,
ground, closed, or open. See Switched Inputs 25 for more
information.
Each switched output provides +Battery voltage when active
and can supply up to 1A of current. They can be
configurable to functions listed in Switched Outputs 29 .
Can be configured using the PC Configurator to sense low
Sensor Input D
resistance, high resistance, 0 - 5V, or 4 - 20mA. The 4(Universal Sensor Input)
20mA options requires harness DWG1496.
Looking at rear of controoller
Universal Sensor Input (Port D)
The Universal Sensor Input has the ability to sense low resistance, high resistance, 0 - 5V and 4 - 20mA
sensors. In order to configure this input you must use the PC Configurator. See for more information.
To use the sensor as 4 - 20mA it requires wiring harness DWG1496. The following directions describe
how to install the harness:
1.
2.
3.
4.
Place the crimp side of the 4 - 20mA wire into connector position J3-7.
Place Sensor Input D wire into the 'Run' channel of the Scotchlok connector.
Place the other side of the 4 - 20mA wire into the 'Stop' channel of the Scotchlok connector.
Drive the U-Contact down and latch the top cover.
TOUGH Series User Manual
© 2012 DynaGen Technologies Inc.
Installation
2.3
10
3-Phase AC Volts Harness
The 3-Phase AC Volts Harness is used for AC metering of the generator and mains voltages. A second
harness is required if mains sensing is desired (AMF).
TERMINAL
FUNCTION
J5-1
Generator Phase A
J5-2
Generator Phase B
J5-3
Generator Phase C
J5-4
Generator Neutral
TERMINAL
FUNCTION
J7-1
Mains Phase A
J7-2
Mains Phase B
J7-3
Mains Phase C
J7-4
Mains Neutral
DESCRIPTION
The controller can be configured in AC Monitoring 38 to
accommodate various voltage configurations. See below for
more information.
DESCRIPTION
AMF versions only. The controller can be configured in AC
Monitoring 38 to accommodate various voltage
configurations. See below for more information.
Looking at rear of controller
Voltage Configurations
The controller can be configured in the settings for a variety of different voltages and setups. The
diagrams below indicate the configurations and the necessary wiring connections for each one.
NOTE: If using a 2-Wire Single configuration you must use Phase A terminal. If using 3-Wire
Single configuration you must use Phase A and B terminals.
TOUGH Series User Manual
© 2012 DynaGen Technologies Inc.
Installation
2.4
11
Magnetic Pickup / J1939 Interface Harness
The Magnetic Pickup / J1939 Interface Harness is only required if you are using an electronic engine or
acquiring your speed signal from a magnetic pickup sensor.
TERMINAL
FUNCTION
J6-4
CAN Bus High
J6-5
CAN Bus Low
J6-6
CAN Bus Shield
J6-7
Speed Input A
J6-8
Speed Input B
DESCRIPTION
CAN Bus (J1939) is used for electronic engines that have
an ECM.
The speed sensing terminals are not sensitive to polarity.
Magnetic pickups, tachometers, or a flywheel alternator can
be used to provide signal. These inputs are not required if
AC voltage is being used. See Speed Sensing and Battery
37 for more information.
NOTE: Terminals J6-1, J6-2, J6-3, J6-9 and J6-10 are unused. These are left open for future
expansion.
Looking at rear of controller
CAN Bus (J1939) Wiring Considerations
CAN Bus (J1939) is for use with electronic engines. There are some special precautions that need to be
taken when wiring to the electronic control module (ECM).
If controller is not the last device on the bus, connect to the existing bus and ensure that there are
120Ω terminating resistors at each end of the bus.
If controller is the last device on the bus, you must install a 120Ω terminating resistor across the
CAN High and CAN Low lines as shown in the figure below.
If running the cable over a long distance, use Beldan 7895A cable or equivalent cable.
For the ECM to function, it must first receive power for a short time before cranking to allow it to boot. It
is common practice to use the fuel relay to turn the ECM on and off. There are two ways to configure
this:
The fuel relay is on during 'Preheat'. Increasing the 'Preheat' time in the Engine Logic
will allow longer time for the ECM to power up before cranking.
23
menu
Turning on the 'Auto Power ECM' setting in the J1939 menu enables the fuel relay to be on when
controller is in Auto mode. This way the ECM will be always be on except wen in OFF mode.
TOUGH Series User Manual
© 2012 DynaGen Technologies Inc.
Installation
2.5
12
Relay Pak (RP100)
The Relay Pak (RP100) can be used to control DC devices. Be sure to select relays based on your
system voltage (12 or 24V). Listed below are the wiring connections and their functions.
TERMINAL
FUNCTION
J1-2
J1-5
-Battery
J1-6
J1-4
J1-3
J1-1
J2
J5
J4
J7
Relay
Relay
Relay
Relay
Relay
Relay
Relay
Relay
A (Coil)
B (Coil)
C (Coil)
D (Coil)
A (Contact)
B (Contact)
C (Contact)
D (Contact)
DESCRIPTION
This connection provides a ground return line from the RP100 to
the controller.
Activated by applying 12 / 24V to the terminal. These are
intended to be connection to switched outputs on the controller.
Connect to high current auxiliary devices. Wire gauge is
dependent upon current requirements.
Pilot Duty Rating: 5.83A per relay
Resistive Rating: 10A per relay (40A Momentary)
J3
A/C Common
(Contact)
Relays A and C share a common contact point. Connect this
terminal to +Battery or -Battery. Wire gauge is dependent upon
amperage requirements.
J6
B/D Common
(Contact)
Relays B and D share a common contact point. Connect this
terminal to +Battery or -Battery. Wire gauge is dependent upon
amperage requirements.
The following is a sample wiring diagram using the RP100. Keep in mind that the wires from connector
J1 are connected to the controllers switched outputs and ground.
TOUGH Series User Manual
© 2012 DynaGen Technologies Inc.
Installation
2.6
13
AMF / ATS Wiring
When wiring to a transfer switch there are two main items to take into account:
Wire the transfer switch so that it defaults to the mains position if the controller fails by using a
normally closed relay to the Mains coil.
Use limit switches (if applicable) to disengage the AC voltage to the coil when the switch is in that
position. This prevents the coil from burning out.
The following is an example wiring diagram for a transfer switch. Keep in mind that there are some items
omitted (fuses, connections to controller, etc.) and that not all configurations will be the same.
TOUGH Series User Manual
© 2012 DynaGen Technologies Inc.
Installation
2.7
14
Typical Wiring Diagram
TOUGH Series User Manual
© 2012 DynaGen Technologies Inc.
Using The Controller
3
15
Using The Controller
The controller is equipped with an LCD screen (A), the navigation buttons (B), LED lamps (C) and the
functional buttons (D). These components provide the means to interact with the controller.
LCD Screen (A)
The LCD Screen is the main source for providing information to an
operator. From the LCD screen you can view and navigate the status,
engine parameters, settings, and time.
Warnings and failures will appear on the LCD Screen and will be logged
into the Events History of the controller.
Navigation Buttons (B)
The Navigation Buttons are used to move throughout the menu system, change settings and view
parameters on the LCD screen.
SYMBOL
TOUGH Series User Manual
FUNCTION
DESCRIPTION
Up
Used for moving around in the menu, changing a settings
value, or changing the currently displayed parameter page.
Enter
Used for entering the menu system, accepting settings, or
locking the LCD screen when viewing parameters.
Down
Used for moving around in the menu, changing a settings
value, or changing the currently displayed parameter page.
© 2012 DynaGen Technologies Inc.
Using The Controller
16
LED Indicators (C)
The LED indicators are used to display the current status of the system. Different versions of the
TOUGH series controllers have different LED combinations therefore some symbols may not appear on
your controller. The following table shows the meanings of each symbol and LED color.
SYMBOL
FUNCTION
LED STATUS
DESCRIPTION
Solid Green
Engine Running
Solid Amber
Warning
Solid Red
Failure
Solid Green
Mains Available
Solid Red
Mains Unavailable
Load
Symbol Only
Symbol Only
Switch Position
Solid Green
Switch Active
Generator Status
Mains Status
Functional Buttons (D)
The following table describes the function of the Functional Buttons. Keep in mind that some buttons
may have multiple purposes depending on the status of the controller.
SYMBOL
TOUGH Series User Manual
FUNCTION
DESCRIPTION
Off
Used for turning off the engine or exiting out of AUTO mode.
All automatic methods of starting the engine are disabled.
Auto
Places the controller in AUTO mode which allows it to start
or stop based on conditions (Exerciser, Low Battery
Recharge, Failure, Remote Start, Loss of Mains).
Run
Starts the engine manually and will continue to run until the
off button is pressed, emergency stop input is activated, or
a failure occurs.
© 2012 DynaGen Technologies Inc.
Using The Controller
3.1
17
Using the Menu System
Switching Between Menus
Press the ENTER button to navigate into the configuration menu of the controller. If the controller is in
AUTO or RUNNING mode you must first enter OFF mode by pressing the OFF button.
NOTE: Entering the OFF mode while the generator is running will shut it down.
Use the UP and DOWN buttons located next to the LCD screen to
scroll through menus. The current position on the screen is indicated by
the HIGHLIGHTED TEXT. A scroll bar may be displayed on the right
hand side of the screen. This indicates the current position in the menu
and pressing the UP or DOWN buttons will reveal more options.
To move into the currently highlighted menu item you must press ENTER. If you wish to move to a
previous menu, scroll up and select 'Back' by pressing the ENTER button.
Changing a Setting
To change a setting on the controller you must first navigate to it. Once you have the setting you wish to
change highlighted, press enter to view the options menu for that setting.
There are generally 2 types of settings. One is a list setting that you
must scroll up and down to select the option that you want. The other
type is a numerical setting. To change this setting you must use the
up and down buttons to scroll to the value you want. To change the
value quickly, press and hold the directional arrow.
Once you have changed your setting to the desired value, you must
press the enter button to accept the change. Upon pressing enter a check mark will appear, press enter
again to return to the previous menu.
Viewing Engine Parameters
While the controller is in AUTO or RUNNING mode you can view the current status of the engine (fuel
level, engine temperature, etc). By default the controller will automatically scroll through the parameters
for you to view.
To manually change the parameters you are viewing, scroll to it using
the UP and DOWN buttons. You can lock the screen from scrolling
by pressing the ENTER button. Upon being locked a small icon of a
lock will appear in the top right corner. You can still manually scroll
through the parameters while the screen is locked.
TOUGH Series User Manual
© 2012 DynaGen Technologies Inc.
Using The Controller
3.2
18
Warnings, Failures and Events History
Warnings and Failures
Warnings and failures occur when certain parameters (fuel level, oil pressure, etc.) are outside of
specified limits. These settings can be set using the front panel or the PC Configurator. All warnings and
failures are recorded in the Events History section of the menu.
Events History
Every time an event of significance occurs, the time and date as well as a description of the event is
placed as an entry in the Events History. Examples of events are: 'Successful Start', 'Over Speed
Warning' or 'Low Oil Failure.'
To view the Events History :
1.
2.
3.
4.
Place the controller in OFF mode.
Press enter to bring up the Main Menu and then select Events History.
Press the up or down buttons to browse through the events.
Press enter to exit out of the Events History.
From this menu you can scroll up to 150 events using the up and down arrows. Keep in mind the events
are recorded in order so Event 1 is the most recent event and Event 150 is the oldest event.
NOTE: If a new event is recorded and there are already 150 events in the history, the oldest
recorded event will be deleted.
Device Information
You can find out information about the controller by navigating to the 'Device Info.' menu. From inside this
menu you can see the following information.
FUNCTION
About Controller
DESCRIPTION
Gives the hardware version, software version and serial number.
Gives the amount of time remaining before maintenance is required.
Maintenance
TOUGH Series User Manual
If '----' is displayed maintenance is disabled. A negative number
indicates the amount of time since maintenance timer expired.
© 2012 DynaGen Technologies Inc.
Using The Controller
3.3
19
Starting, Stopping and Controller Modes
Controller States
The following table contains the states the controller can be in and their descriptions.. Each mode has a
different purpose and changes the way the controller interacts with the engine logic, inputs, outputs and
sensors.
STATE
DESCRIPTION
Off
While in OFF state, the user can change settings through the menu
system. Automatic starting is disabled.
Auto
While in AUTO state, automatic starting is armed and certain engine
parameters are monitored.
Running
Failure
While in RUNNING state, the controller waits to be stopped and
monitors engine parameters.
The controller shuts down the engine and reason for failure is
displayed on screen.
Start and Stopping Methods
The controller can be started and stopped in a variety of different methods. The following section
briefly outlines these methods:
NOTE: The LCD backlight will turn off during the first 2 seconds of cranking to limit
voltage dip during cranking.
Manual Start and Stop
Manual starting and stopping of the generator can be done through the front panel buttons. Pressing
the RUN button will start the engine and pressing the OFF button will stop the engine.
NOTE: Cool down time is bypassed when engine is started manually.
Start / Stop Input
Starting and stopping can be completed through use of switched input 'Start / Stop.' If you do not
have the AMF version of the controller, this input can be used as a 'Remote Start' contact for
connecting to pre-existing Automatic Transfer Switch infrastructure or other switch.
Switched input 'Start / Stop' also has a feature that allows it to be used as a momentary input. See
Start / Stop (Momentary Function) 28 for more information.
Momentary Inputs
Switched inputs 'Momentary Start' and 'Momentary Stop' can be used for starting and stopping of
the engine. Unlike other inputs, they only have to be activated for a short period of time to perform
their function.
TOUGH Series User Manual
© 2012 DynaGen Technologies Inc.
Using The Controller
20
Battery Recharge Start
The controller has the ability to monitor the battery voltage and start the engine to charge the battery
based on voltage level settings. See Speed Sensing and Battery 37 for more information.
Exerciser Start
The controller can start the engine at predetermined intervals to allow the engine to be exercised.
See Exerciser and Maintenace 41 for more information.
Auxiliary Sensors
The controller can be configured to cause the engine to start and stop based on sensor levels. See
Auxiliary Sensors 33 for more information.
Example: A generator is required to start in order to heat a building when the ambient temperature
drops below a certain point. The controller can be configured to monitor the temperature, start the
generator and run until it reaches a certain temperature.
Auto Mains Failure
Te AMF version of the controller, it can be configured to automatically start the engine if a loss of
mains power is detected. It can can also be used to control Automatic Transfer Switch functions to
allow fully automated power restoration. See AMF / ATS 39 for more information.
3.3.1
Emergency Stop and Failures
Emergency Stop
A switched input can be configured to 'Emergency Stop.' When this input becomes active the
controller will immediately turn off the Fuel Relay and turn on the Energize-to-Stop output (if
applicable).
WARNING: It is mandatory to wire your Emergency Stop button or switch in a way that it
physically disconnects the fuel solenoid in conjunction with feeding the emergency stop
input on the controller.
Failures
Failures occur on the controller when a parameter that is being monitored goes outside its desired
range. The controller will immediately turn off the Fuel Relay and turn on the Energize-to-Stop output
(if applicable). It will also display the cause of the failure and record it into the Events History.
If you notice that the engine is shutting down immediately after start up, verify that the 'Bypass Time'
in the Sensors 31 menu is set to a high enough value to allow the readings to settle to their normal
ranges.
TOUGH Series User Manual
© 2012 DynaGen Technologies Inc.
Configuration
4
21
Configuration
Changing the following settings can alter the way the engine is started and stopped and how the
controller reads inputs, control outputs, and interprets and act on sensor data. When configuring
settings be sure to thoroughly read their descriptions to understand how they will affect the controller.
The following list is a breakdown of the settings menu structure inside the controller.
· Operator Setup
a. Lamp Test
b. Display
i. LCD Reverse
ii. LCD Contrast
iii. Page Scroll
iv. Message Pop-Up
v. LCD Backlight
c. Date/Time
i. Date Change
ii. Time Change
iii. Daylight Saving
d. Units
i. Temp. Unit
ii. Pressure Unit
e. Run from OFF
i. Run from OFF
· Device Info.
a. About Controller
b. Maintenance
· Events History
· Sw itched I/O
a. Sw itched IN
i. X Function
ii. X Active Modes
iii. X Trigger
b. Sw itched OUT
i. X Function
· Sensors
a. Battery
i. Batt Recharge
ii. Recharge Setup
iii. Setpoints
iv. Crank Low Batt
b. Engine Speed
i. Signal Source
ii. Speed Settings
iii. Setpoints
c. Engine Temp.
i. Signal Source
ii. Sensor Type
iii. Trim Offset
iv. Setpoints
TOUGH Series User Manual
a. Oil Pressure
i. Signal Source
ii. Sensor Type
iii. Trim Offset
iv. Setpoints
b. Fuel Level
i. Signal Source
ii. Sensor Type
iii. Trim Offset
iv. Setpoints
c. Aux Sensor 1
i. Signal Source
ii. Mode Select
iii. Trim Offset
iv. Mode Settings
v. Setpoints
d. Aux Sensor 2
i. Signal Source
ii. Mode Select
iii. Trim Offset
iv. Mode Settings
v. Setpoints
· Timers
a. Engine Logic
i. Delay To Start
ii. Preheat Time
iii. Crank Time
iv. Midheat Time
v. Crank Rest Time
vi. Crank Attempts
vii.Fuel Crank Rest
viii.RPM Disconnect
ix. Postheat Time
x. Warm-up Time
xi. Cooldow n Delay
xii.ETS On Duration
b. Exerciser
i. Enable
ii. Delays
iii. Schedule
c. Maintenance
i. Reset Counter
ii. Enable Counter
iii. Count Interval
d. Trigger Delays
i. Config Inputs
· AC Monitor
a. Genset Voltage
i. Voltage Source
ii. Scaling Factor
iii. Nominal Volts
iv. Volt Sel Inputs
v. V Setpoints
vi. H Setpoints
b. Mains Voltage
i. Mains Source
ii. Scaling Factor
iii. Nominal Volts
iv. AMF/ATS Mode
v. AC Stable Time
vi. V Setpoints
c. ATS Outputs
i. Genset Drive
ii. Genset Trigger
iii. Genset ATS Dly
iv. Mains Drive
v. Mains Trigger
vi. Mains ATS Dly
vii.Mains Open
· Communications
a. J1939 Bus
i. ECM Model
ii. Loss of ECM
iii. DTC Display
iv. Active DTC Log
v. Read Stored DTC
vi. Auto Pow er ECM
vii.ECM Pow er Delay
viii.Cummins Idle
ix. SPN Conversion
x. EMS2B Freq Sel
xi. EMS2B Acc Pedal
2. Other Config
a. Passcode
i. Bypass
ii. Timeout
iii. Number
© 2012 DynaGen Technologies Inc.
Configuration
22
Operator Setup
The Operator Setup options are settings that can be changed by the end-user of the controller. These
settings are not passcode protected and do not change the way the controller interacts with the engine.
SETTING
SETTING
Lamp Test
---
Display
Tests the LED's by flashing them red and green to verify
they are functioning properly.
LCD Reverse
Reverses the black and white of the LCD screen.
LCD Contrast
Adjusts the contrast of the LCD.
Page Scroll
Message Pop-up
LCD Backlight
Date / Time
DESCRIPTION
Amount of time before parameter page scrolls.
Rate at which status messages display.
Amount of time before the LCD backlight turns off.
Date Change
Changes the day, month and year.
Time Change
Changes the second, minute and hour.
Daylight Saving
Temperature Units
Determines if daylight savings time is enabled or disabled.
North America only.
Select between Celsius and Fahrenheit.
Units
Pressure Units
Run from OFF
---
Select between PSI and kPa.
Determines if controller can be manually started while in
OFF mode.
Other Configurations
SETTING
Passcode
TOUGH Series User Manual
SETTING
DESCRIPTION
Bypass
Enables or disables the use of the passcode.
Timeout
Amount of time after the passcode is entered to remain
unlocked. Once timeout limit is reached due to inactivity
the passcode must be entered again.
Number
The desired passcode digits.
© 2012 DynaGen Technologies Inc.
Configuration
4.1
23
Engine Logic
The Engine Logic settings determine how the controller starts and stops the generator. It gives the user
the functionality to add delays and timers to the sequences. Listed below some of the items are
switched outputs that are affected by Engine Logic functions. These must be configured in the Switched
Outputs 29 menu in order to function.
NOTE: To disable a delay or timer set it to 0 seconds.
FUNCTION
Delay To Start
Preheat
(Glowplug Output)
Crank Time
(Crank Output)
Mid Heat Time
(Glowplug Output)
DESCRIPTION
Amount of time to delay before starting the engine after the controller
receives a start signal.
The glow plug output will turn on for this amount of time before
cranking occurs. During this time the fuel output is also turned on.
Amount of time the engine will crank before resting.
Keeps glow plug output turned on while cranking but not during crank
rest. Output will turn off upon cranking failure, crank success or mid
heat time expiration.
Crank Rest Time
Duration to rest before the next crank attempt.
Crank Attempts
Number of attempts the engine will try to crank before going into a
overcrank failure.
Fuel Crank Rest
(Fuel Output)
Determines if the fuel output is on or off during crank rest.
RPM Disconnect
(Crank Output)
The speed at which to disconnect the crank output because the
engine has started successfully.
Post Heat Time
(Glowplug Output)
Amount of time the glow plug output remains on after crank success
and the engine is running.
Warm Up Time
(Warmup Output)
Period of time after engine starts to warmup the engine. The Warmup
output becomes active after the Warm Up Time expires.
Cool Down Delay
(Cooldown Output)
Amount of time the cool down output is active after the controller
receives a shutdown signal. A switched output can be configured to be
active during 'Cool Down.' If the engine is shutdown by using the 'OFF'
button, 'Cool Down' will be bypassed.
ETS On Duration
(ETS Output)
Energize-To-Stop (ETS) will be turned on for a set amount of time after
'Cool Down' delay expires and before engine shut down. This is used
to shutdown certain types of engines.
The flowchart on the following page depicts the way the controller uses some of the the engine logic
settings to start and stop the engine.
TOUGH Series User Manual
© 2012 DynaGen Technologies Inc.
Configuration
24
The following flowchart shows a typical start up and shutdown sequences for a controller. Some items
from the Engine Logic section have been omitted / included for illustration purposes and may not be
used in your application.
TOUGH Series User Manual
© 2012 DynaGen Technologies Inc.
Configuration
4.2
25
Switched Inputs
The controller is equipped with inputs that respond to contact openings and closures. Each switched
input has the following the options associated with it.
Trigger Modes
Trigger modes signify the conditions that will activate an input.
TRIGGER
Close to +Battery
Close to Ground
Close to +Battery / Ground
Open
DESCRIPTION
Input active when +Battery is applied.
Input active when ground is applied.
Input active when +Battery or ground is applied.
Input active when open (neither +Battery or ground is applied).
Active Modes
Actives modes are the modes in which an input is capable of being triggered.
ACTIVE
DESCRIPTION
Disable
Input is not active and cannot be triggered.
Global
Input active in every mode with the exception of menu system.
Not In Auto
Auto
Input active when controller is not in Auto mode.
Input active when controller is in Auto mode.
Running
Input active from start signal to engine shutdown.
Cranking
Input active from start signal to engine started.
After Cranking
Input active from engine started to engine shutdown.
NOTE: All switched inputs with the exception of the the Configurable Inputs
modes that are fixed and cannot be changed.
TOUGH Series User Manual
28
have actives
© 2012 DynaGen Technologies Inc.
Configuration
26
Functions
The function of the input is how the controller responds to that input being triggered. Read the
descriptions in the tables below for the meaning of each function.
FUNCTION
ACTIVE MODE
Disable
N/A
Start / Stop
Auto / Running
DESCRIPTION
Disables the input regardless of condition.
Starts engine when activated and stops engine
when de-activated. Special 'momentary' mode
can also be used, see Start / Stop (Momentary
Function) 28 for more information.
Emergency Stop
Global
Shuts down the engine immediately. Required to
be wired to cut fuel to the engine. See
Emergency Stop and Failures 20 for more
information.
Idle Mode
Running
All failures associated with under voltage, under
frequency and under speed are ignored.
Volt Select 1
OFF / Auto
Volt Select 2
Used for selecting different voltage configurations.
See Voltage Select 27 for more information.
Charger Fault
Global
Displays a warning that there is a charger fault.
Momentary Start
Auto
Starts the engine when momentarily activated.
Momentary Stop
Running
Stops the engine when momentarily activated.
Configurable
Displays a warning with custom user text. See
Configurable Inputs 28 for more information.
Configurable
Enters a failure mode and displays custom user
text. See Configurable Inputs 28 for more
information.
Configurable Warning 1
Configurable Warning 2
Configurable Failure 1
Configurable Failure 2
Air Pressure Failure
Cranking
Enters a failure mode and displays that there is a
low air pressure failure.
Hydraulic Pressure
Failure
Cranking
Enters a failure mode and displays that there is a
low hydraulic pressure failure.
Low Oil Pres Warn
Running
Displays a warning that there is low oil pressure.
Coolant Level Failure
Global
Enters a failure mode and displays that there is a
low coolant failure.
High Fuel Warning
Global
Displays a warning that the fuel level is too high.
Lamp Test
Global
Performs a 'Lamp Test' for the LED's.
Fuel In Basin
Global
Displays a warning that there is fuel in the basin.
Battle Mode
Running
TOUGH Series User Manual
Ignores all warnings and failures while running.
© 2012 DynaGen Technologies Inc.
Configuration
27
AMF / ATS Inputs
The following inputs are only available in the TG350AMF version of the controller. See AMF / ATS
more information on how these inputs function.
FUNCTION
for
ACTIVE MODE
DESCRIPTION
Global
Indicates the current position of the user operated
transfer switch. See AMF / ATS 39 for more
information.
Generator Position
Mains Position
4.2.1
39
Transfer to Generator
Running
Causes the ATS to change to the generator
position when in Manual ATS mode. See AMF /
ATS 39 for more information.
Transfer to Mains
Auto / Running
Causes the ATS to change to the mains position
when in Manual ATS mode. See AMF / ATS 39
for more information.
Test Mains Failure
Auto
Simulates loss of mains to test AMF features.
Voltage Select
The controller can be configured to display different AC voltages depending on the status of the 'Volt
Select' switched inputs. In order for this feature to function properly, the 'Genset Voltage Source' setting
must be set to 'Auto Selection' and the 'Voltage Select Inputs' settings found in AC Monitoring 38 must
be configured. The following table demonstrates the relationship between the switched inputs and the
monitored voltage source.
NOTE: Changing the voltage select inputs while the generator is running will have no effect.
They must be changed prior to starting up.
VOLT SELECT 1
VOLT SELECT 2
VOLTAGE SOURCE
Inactive
Inactive
3-Wire Single Phase
Inactive
Active
4-Wire 3-Phase
Active
Inactive
4-Wire 3-Phase
Active
Active
4-Wire Delta
This application is generally used with rental generators that have the ability to use a CAM switch to
change the voltage configuration.
TOUGH Series User Manual
© 2012 DynaGen Technologies Inc.
Configuration
4.2.2
28
Configurable Inputs
The configurable inputs are used to create custom warnings and failures that are viewed on screen and
in the Event History. To change this text, the PC Configurator must be used. If you select these inputs
without changing the custom text using the PC Configurator, the text will default to 'Config Warn 1',
'Config Fail 1', etc.
There are also timer features associated with the configurable inputs called 'Trigger Delays' that can be
found in the Timers Setting menu. The timers add a delay to the amount of time it takes before that
warning, failure, and switched output (if required) becomes active.
NOTE: If the switched input becomes inactive before the trigger delay time expires, the
warning or failure will not occur.
Configurable Input Example:
The user wants the controller to display 'High Water Warn' and turn on a pump 45 seconds after a level
sensor connected to a switched input becomes active.
1. Using the PC Configurator, set a switched input to 'Config Warn 1' and custom text to 'High Water
Warn.' Wire the level sensor switch to the switched input.
2. Set 'Input Warn 1' under the 'Trigger Delay' menu to 45 seconds.
3. Set a switched output to 'Config Warn 1' and wire that output to a slave relay controlling a pump.
4.2.3
Start / Stop (Momentary Function)
When a switched input is configured to 'Start / Stop' the trigger modes have different meanings than
other inputs. The following table describes the trigger mode functionality.
TRIGGER
Close to +Battery
Close to Ground
Close to +Battery / Ground
Open
DESCRIPTION
Input active when +Battery is applied.
Input active when ground is applied.
Input active when +Battery or ground is applied for 3-5 seconds.
Input active when neither +Battery or ground is applied for 3-5
seconds.
The reason for changing these trigger mode is to allow the user to wire a single push button to be used
for both starting and stopping the engine. Holding the button for too long will cause the engine to
shutdown immediately after starting and vice versa.
TOUGH Series User Manual
© 2012 DynaGen Technologies Inc.
Configuration
4.3
29
Switched Outputs
The controller is equipped with switched outputs that can be configured to activate under certain
conditions. When activated, the switched outputs are switched to battery voltage. The following is a
description of each switched outputs function and the condition that triggers it.
FUNCTION
ACTIVE MODE
DESCRIPTION
Disable
---
Fuel Relay
Auto / Running
Turns on to provide fuel to the engine. This is
fixed to switched output A.
Crank Relay
Cranking
Turns on to crank the engine. This is fixed to
switched output C.
Not In Auto
Off
Turns on when the controller is not in 'Auto.'
System Ready
Auto
Backlight
Global
Turns on when the LCD backlight is on.
Failure
Global
Turns on when any failure occurs.
Maintenance
Global
Turns on when the maintenance clock reaches
zero.
Voltage Regulator
Running
Turns on when controller is not in idle mode.
Warm-Up
Running
Turns on after the 'Warmup Up' time has expired
as defined in Engine Logic 23 .
Energy to Stop
Running
Turns on during 'ETS On Duration' as defined in
Engine Logic.
Glow Plug
Preheat / Midheat /
Postheat
Cool Down
Running
Turns on during 'Cool Down Delay' as defined in
Engine Logic 23 .
Aux Sensors 1 and 2
Running
Turns on as defined in Auxiliary Sensors
Overcrank
Failure
Turns on when engine fails to start after the
amount of cranks attempts as defined in Engine
Logic.
Engine Running
Running
Turns on from the beginning of cranking, through
engine running until shutdown.
Exercising
Running
Turns on when the controller is performing the
exerciser function. See Exerciser and
Maintenace 41 for more information.
Disables the output regardless of condition.
Turns on when in 'Auto' mode and no warnings or
failures are present.
Turns on during 'Preheat, Midheat, and Postheat'
times as defined in Engine Logic 23 .
33
.
Switched Outputs continued on next page...
TOUGH Series User Manual
© 2012 DynaGen Technologies Inc.
Configuration
30
FUNCTION
ACTIVE MODE
Recharging
Running
Configurable Warnings
and Failures
Configurable
Pull Coil
Running
DESCRIPTION
Turns on when the controller is performing a
battery recharge. See Speed Sensing and
Battery 37 for more information.
Turns on when corresponding switched input
becomes active. See Configurable Inputs 28 for
more information.
See Pull and Hold Coil
30
for more information.
The following outputs turn on during the event in which they describe. Example: 'High Temp Warn' output
only comes on if there is a warning due to high engine temperature.
OTHER OUTPUTS
High Fuel Warn
Low Oil Pres Warn
Low Fuel Fail
AC Hz Warning
Low Temp Warn
Under RPM Fail
Low Fuel Warn
Under Volt Warn
High Temp Fail
Under RPM Warn
Battery Warn
Over Volt Warn
High Temp Warn
Over RPM Fail
Battery Fail
AC Hz Failure
Low Oil Pres Fail
Over RPM Warn
Coolant Lv Fail
Fuel In Basin
AMF / ATS Outputs
4.3.1
FUNCTION
ACTIVE MODE
DESCRIPTION
Generator Coil
Global
Turns on to move the transfer switch into the
generator position. See AMF / ATS 39 for more
information.
Mains Coil
Global
Turns on to move the transfer switch into the
utility position. See AMF / ATS 39 for more
information..
Pull and Hold Coil
On some engine systems the fuel pump has two solenoids. The reason for this is that the initial power
on of the fuel solenoid requires substantial current (Pull Coil), but only needs a small amount of current
to hold it in place (Hold Coil).
1. Pull coil is energized when fuel is first turned on.
2. Hold coil is energized after pull coil has fully activated.
3. Pull coil is de-energized while Hold coil remains on while the engine is running.
Configuring a switched output to Pull Coil automatically configures the engine logic necessary for a Pull
Coil system.
TOUGH Series User Manual
© 2012 DynaGen Technologies Inc.
Configuration
4.4
31
Sensors
The controller is equipped with 4 analog sensor inputs for reading information such as oil pressure and
engine temperature. The following table lists the different types of sensors that can be monitored.
PARAMETER
NOTES
Engine Temperature
Failures can only occur on high temperature. Warnings occur on both
low and high temperature.
Oil Pressure
Fuel Level
Auxiliary Sensor 1
Auxiliary Sensor 2
Warnings and failures can only occur on low oil pressure.
Warnings and failures can only occur on low fuel level.
Must have a Custom Sensor Tables
Configurator. See Auxiliary Sensors
on functionality.
36
33
created using the PC
section for more information
Preloaded Sensor Tables
The following table is the default sensors that are preloaded onto the controller and do not require a
custom sensor table.
SENSOR NAME
TYPE
RESISTANCE RANGE
UNIT RANGE
DAT DAH
(Datcon 02022-00)
Temperature
4220 - 54Ω
32 - 325°F
VDO 250F
(VDO 323-420)
Temperature
1578 - 38Ω
32 - 325°F
DAT 100P/R240
(Stewart 289B-F)
Oil Pressure
240 - 33Ω
0 - 100PSI
VDO 150P/R180
(VDO 360-004)
Oil Pressure
10 - 180Ω
0 - 150PSI
DAT R/33-240
Fuel Level
240 - 33Ω
0 - 100%
VDO R/0-180
Fuel Level
10 - 180Ω
0 - 100%
NOTE: The temperature sensors shown here are for use with high resistance ports (0 7,500Ω). Using a low resistance port will limit the lower temperature readings.
TOUGH Series User Manual
© 2012 DynaGen Technologies Inc.
Configuration
32
Sensor Settings
When configuring each sensor, the following settings must be set in order for the sensor to function
properly. If the signal source is set to 'Disabled', it is not required to adjust the other settings.
SETTING
DESCRIPTION
Signal Source
Choose one of the ports available. Verify it is compatible with the
sensor by checking the harness data in Installation 7 .
Sensor Type
Choose one of the available defined sensors. See Custom Sensor
Tables 36 if your sensor is not listed.
Trim Offset
Use this setting to add or subtract units from the reading of the sensor
in the case that there are errors in the readings.
Fault Set Points
Configures the points at which the controller will detect a warning or
failure based on the sensor reading. The Bypass time is the number of
seconds to ignore warnings and failures for that sensor after the
engine has started.
Trim Offset
This feature is used to calibrate your sensor in the case there are discrepancies between the reading
and the actual value. When setting the Trim Offset for temperature or oil pressure, remember that the
units are in Fahrenheit and PSI.
Example: The controller is reading an engine temperature of 210.4°F when in fact we know the engine
temperature is 200°F. Setting the Trim Offset to -10.4°F would correct the error.
Sensor as a Switch
The sensor inputs have a feature that allow them to functions as switched inputs. When selecting a
'Sensor Type,' selecting one of the following options will make it function in switch mode.
CLOSE = Warning
OPEN = Warning
CLOSE = Failure
OPEN = Failure
NOTE: CLOSE is equivalent to a short to ground and OPEN is equivalent to no connection.
TOUGH Series User Manual
© 2012 DynaGen Technologies Inc.
Configuration
4.4.1
33
Auxiliary Sensors
The following section relates to the functionality of Auxiliary Sensors 1 and 2. These sensors have
advanced functions and customization.
SETTING
Signal Source
DESCRIPTION
Determines the port the sensor is connected to.
Mode Select
Determines how the controller will act depending on the reading of the
sensor. See below for more information.
Trim Offset
Use this setting to add or subtract units from the reading of the sensor
in the case that there are errors in the readings.
Mode Settings
Setpoints
Settings that relate to the specific mode. See below.
Configures the points at which the controller will detect a warning or
failure based on the sensor reading.
Mode Select Options
Mode Select determines how the controller will interpret and act upon the Aux Sensor data. The
controller can monitor for faults, turn on outputs, or start the engine. Refer to the 'Scenarios' section on
the next page for further information on how these settings function.
SETTING
Fault Monitor
DESCRIPTION
Monitors for warnings and failures.
Output on Low
If readings drops below Start Level, turn on switched output.
Output on High
If readings rises above Start Level, turn on switched output.
Start on Low
If readings drops below Start Level, auto start the engine.
Start on High
If readings rises above Start Level, auto start the engine.
WARNING: When using a mode other than 'Fault Monitor' , the controller will not detect
warnings and failures for this sensor.
TOUGH Series User Manual
© 2012 DynaGen Technologies Inc.
Configuration
34
Mode Settings
Mode Settings are used to change the way the selected Aux Sensor mode functions. Active Time, Start
Level, and Stop Level do not apply to the 'Fault Monitor' mode.
SETTINGS
DESCRIPTION
Bypass Time
The number of seconds to ignore warnings and failures for that sensor
after the engine has started.
Active Time
The amount of time to turn on the output or engine. See the
'Scenarios' below for more information.
Start Level
The level at which the auxiliary switched output or generator turns on.
Stop Level
The level at which the auxiliary switched output or generator turns off.
Scenarios
The Aux Sensor settings can be configured in such a way that it can provide different 'Scenarios' based
on what the Stop Level and Active time are set to. Refer to the table below to choose the scenario best
suited for your application.
STOP LEVEL
ACTIVE TIME
DESCRIPTION
Disabled
Disabled
Once the Start Level is reached, the output or engine will
turn on indefinitely.
Disabled
Enabled
Once the Start Level is reached, the output or engine will
turn on until Active time expires.
Enabled
Disabled
Once the Start Level is reached, the output or engine will
turn on until the Stop Level is reached.
Enabled
Enabled
Once the Start Level is reached, the output or engine will
turn on until the Stop Level is reached or Active Time
expires.
NOTE: Once the output or engine turns off, the controller will continue to monitor the levels
and will restart the output or engine if the Stop Level still has not been met.
TOUGH Series User Manual
© 2012 DynaGen Technologies Inc.
Configuration
35
Auxiliary Analog Example
The following section outlines an example of setting up the controller to work with a fan that turns on
(Switched Output B) at an engine temperature of 325°F to cool down the engine. The fan won't turn off
until the engine temperature falls below 200°F. The following flowchart depicts the simplified logic
sequence of the controller.
The settings and graph below gives a general idea of how to configure the controller and how it functions.
As you can see the output turns on at 325°F and stays on until it drops below 200°F. The 'Run Time'
shown here is the amount of time the fan was on.
SETTING
VALUE
Switched Output B
Aux Sensor 1
This output will be connected to the slave relay
controlling the fan.
Aux Signal Source
Port D
This is the port the engine temperature sensor
will be connected to.
Mode Select
Output on High
Active Time
Disabled
Start Level
325°F
The temperature at which to turn the fan on.
Stop Level
200°F
The temperature at which to turn the fan off.
TOUGH Series User Manual
REASON
The output is to turn on at a high engine
temperature.
The output is to stay on as long as the Stop Level
has not been reached.
© 2012 DynaGen Technologies Inc.
Configuration
4.4.2
36
Custom Sensor Tables
Using the , you are able to create a custom sensor table for a sensor that is not supported by the
controller. From inside the sensor table utility the following settings must be set in order to create your
table.
PARAMETER
DESCRIPTION
Name
Usually the manufacturer and part number of the sensor.
Input Type
Choose resistance, voltage or current based on the sensor type.
Unit Type
Choose temperature, pressure, voltage, current or percentage based
on the sensor. This defines what unit of measurement will be
displayed on the front panel when monitoring the sensor.
Table Values
These values are what creates the sensor table and allows the
controller to display and monitor the sensor. The more values that are
entered the more accurate the readings will be.
NOTE: For detailed information about using the sensor table utility please refer to the PC
Configurator Manual.
Example Custom Sensor Table
Below is an example sensor table for engine temperature sensor DATCON 02025-00.
TEMP.
VALUE
129°F
491Ω
140.1°F
406Ω
149.2°F
330Ω
160°F
263Ω
175°F
202Ω
189.7°F
147Ω
221°F
96Ω
275°F
49Ω
330°F
7Ω
TOUGH Series User Manual
Nam e: Engine Temp
Input Type: Resistance
Unit Type: Temperature
© 2012 DynaGen Technologies Inc.
Configuration
4.4.3
37
Speed Sensing and Battery
Speed Sensing
The controller monitors the revolutions per minute (RPM) of the engine. It uses the speed data to
determine when the engine has started and if it is running at the correct speed. The following table
outlines the settings associated with speed sensing:
SETTING
Signal Source
DESCRIPTION
Choose between J1939, Magnetic Pickup, or Genset Signal (AC
Voltage) as a speed source.
Speed Settings
Sets the values for generator RPM, AC frequency and flywheel teeth.
Fault Set Points
Configures the points at which the controller will detect a warning or
failure based on the speed reading.
NOTE: When using J1939 or Genset Signal as a signal source, connections to the speed
sensing terminals are not required.
Battery Settings
The controller has the ability to monitor the battery voltage supplying the controller. While monitoring,
the controller can go into a failure mode if the voltage gets too low or too high, as well as start the engine
to recharge the battery.
SETTING
Battery Recharge
DESCRIPTION
Enables or disables the battery recharge function.
Recharge Setup
Determines the recharge voltage level, pre-alarm time, and run duration
for the battery recharge feature.
Fault Set Points
Configures the points at which the controller will detect a warning or
failure based on the battery voltage.
Cranking Battery
Screen displays 'Low Voltage During Cranking' warning if voltage falls
below this level during cranking.
NOTE: When the generator is running, the battery voltage will equal the alternator charging
voltage. The actual open-circuit battery voltage may be lower than displayed.
Battery Recharge Sequence
TOUGH Series User Manual
© 2012 DynaGen Technologies Inc.
Configuration
4.5
38
AC Monitoring
The controller is equipped with the ability to monitor and display generator voltage. For information on
configuring the controller to monitor mains voltage, refer to AMF / ATS 39 .
PARAMETER
DESCRIPTION
Voltage Source
The wiring configuration of the generator. Selecting 'Auto Selection' will
use the Voltage Select 27 switched inputs for which wiring
configuration is implemented and displayed.
Scaling Factor
Multiplier at which the voltage is read into the controller. See below for
more information.
Nominal Voltage
Voltage Select Inputs
Voltage Setpoints
Frequency Setpoints
Nominal voltage of the generator under normal operating conditions.
Nominal voltages that can be selected by use of Voltage Select 27
input. Used with mobile gensets to select the voltage configuration to
be displayed on screen.
Warning and failure set points for generator AC voltage.
Warning and failure set points for generator AC frequency.
AC Voltage Calibration
The Scaling Factor setting can be used to calibrate the AC voltage if there is discrepancies between the
reading and the actual value. It can also be used if potential transformers are used to step down the
voltage. This setting differs from the 'Trim Offset' in Sensors 31 in that it multiplies by the scaling ratio
instead of adding / subtracting.
Example: The voltage source is a 3-Wire 3-Phase system with a nominal voltage of 208V. The controller
is reading 206.3V but a calibrated multimeter gives 208.3V so the Scaling Factor must be set to
compensate. There are two ways to do this.
1. Trial and Error - Keep adjusting the scaling factor until it gives you a correct reading.
2. Calculate - Use the following equation to determine the scaling factor:
Scaling Factor = Multimeter Reading / Controller Reading
Scaling Factor = 208.4V / 206.3V
Scaling Factor = 1.010
NOTE: Scaling Factor applies to all phases in the system.
Step-Up / Down Transformers
The Scaling Factor setting can also be used to scale up or down readings if they are fed into a
transformer before being read by the controller.
Example: Voltages about 575VAC are being monitored using the controller and there are 2:1 step down
transformers between the generator and the controller. A sensing ratio of 2.00 is required to scale the
voltage back up to the appropriate value.
TOUGH Series User Manual
© 2012 DynaGen Technologies Inc.
Configuration
4.5.1
39
AMF / ATS
The Auto Mains Failure (AMF) and Automatic Transfer Switch (ATS) features of the controller are very
powerful. There are 3 different AMF / ATS modes.
TERM
Disabled
AMF
AMF + ATS
DESCRIPTION
All AMF / ATS functions are disabled and controller functions as a
standalone genset controller.
Upon loss of mains the generator will automatically start but no
transferring will take place.
Upon loss of mains the generator will automatically start and the ATS
will automatically transfer to generator power. Manual ATS is a
secondary function of AMF + ATS, see below for details.
The following drawing shows a basic diagram of how Auto Mains Failure and Automatic Transfer Switch
work together.
Manual ATS
Manual ATS mode is a way to manually start the generator and change the ATS position. It can only be
used when the AMF / ATS Mode is set to AMF + ATS.
To run the controller in Manual ATS you must first start the generator manually by pressing the RUN
button. Once started you can use the switched inputs 'Transfer to Gen' and 'Transfer to Mains' to
manually change the ATS position.
NOTE: During Manual ATS mode you can move back to the regular ATS functionality by
pressing the AUTO button. Moving back to regular ATS functionality will disable the 'Transfer
to...' inputs.
TOUGH Series User Manual
© 2012 DynaGen Technologies Inc.
Configuration
40
Mains Voltage
The Mains Voltage settings are used to configure the monitoring of mains voltage.
PARAMETER
DESCRIPTION
Mains Source
The wiring configuration of the mains.
Scaling Factor
Ratio at which the voltage is read into the controller. See AC
Monitoring 38 for more information.
Nominal Voltage
Nominal voltage of the mains under normal conditions.
AMF / ATS Mode
Select between Disabled, AMF, AMF+ATS modes.
AC Stable Time
Voltage Setpoints
Amount of time the voltage levels have to be within or outside the
limits of the 'Voltage Setpoints' before being considered stable /
unstable.
Voltage level settings that determine whether the mains has dropped
out or picked up.
ATS Outputs
The ATS Outputs must be configured if using the controller in conjunction with a transfer switch. Read
the descriptions in the tables below for the meaning of each parameter.
PARAMETER
DESCRIPTION
Genset Drive
'Gen Coil' output is constantly on when transferring to generator.
Genset Trigger
'Gen Coil' output is connected to a normally open or closed relay.
Genset ATS Delay
Mains Drive
Time to wait before transferring to generator after 'Gen Pickup' time.
'Mains Coil' output is constantly on when transferring to mains.
Mains Trigger
'Mains Coil' output is connected to a normally open or closed relay.
Mains ATS Delay
Time to wait before transferring to mains after 'Mains Pickup' time.
Mains Open
Sets whether the transfer switch disconnects from mains upon loss of
mains or genset ready.
Generator and Mains Position Switched Inputs
These inputs are only used when the AMF / ATS Mode is set to AMF. Their only function is for turning
on and off the switch LED's on the controllers front panel. They must be wired to switches that indicate
the position of a user operated switch controlling the load position.
TOUGH Series User Manual
© 2012 DynaGen Technologies Inc.
Configuration
4.6
41
Exerciser and Maintenance
Exerciser
The controller has a feature that allows it to automatically start and stop the engine periodically. In order
for this feature to function properly, the controller must be in AUTO mode and have the following settings
configured.
SETTING
SETTING
Enable
---
Enables or disables the exerciser function.
Pre-Alarm
Amount of time switched output 'Exercising' is active
before starting the engine.
Run Time
Amount of time to run the engine.
Delays
Schedule
DESCRIPTION
---
Sets the time and date for the first exercise of the
engine and then the interval at which it will exercise
after that.
Maintenance
The controller has the ability to count down the time between scheduled maintenance by a technician.
Once maintenance is required, the controller will alert the operator by the LCD screen or a switched
output (if enabled) wired to a lamp / horn / buzzer. The following table describes the settings associated
with the maintenance function.
SETTING
Enable Counter
DESCRIPTION
Enables or disables the maintenance function.
Count Interval
Determines the number of hours between required maintenance. A
switched output can be configured to turn on once the count interval
expires.
Reset Counter
Once the maintenance count interval expires, use this setting to reset
the time and turn off the switched output (if enabled).
To find out the amount of time until next maintenance, follow these menu steps:
Main Menu -> Device Info. -> Maintenance
If '----' is displayed maintenance is disabled. A negative number indicates the amount of time since
maintenance timer expired.
TOUGH Series User Manual
© 2012 DynaGen Technologies Inc.
Configuration
4.7
42
CAN Bus (J1939)
The controller is able to communicate with electronic control modules (ECMs) on engines that follow the
SAE J1939 specification. Examples of standard messages are oil pressure, engine temperature and
engine speed. Some engines may have proprietary messages that will not function with the controller.
The following ECMs are confirmed to be supported by the controller.
Generic J1939
John Deere JDEC
Volvo EMS
Cummins CM850
Yanmar ECO
Detroit Diesel
Volvo EMS2B
Izuzu 4H
GM PSI E-Control
SETTING
DESCRIPTION
ECM Module
Choose the one of the available ECM modules from the list.
Loss of ECM
If no CAN messages are received for more than 6 seconds, the
controller shuts down the generator.
DTC Display
Enables or disables active fault messages (DM1) monitoring. See
Diagnostic Trouble Codes 44 for more information.
Active DTC Log
Enables or disables the storing of active faults (DM1). See Diagnostic
Trouble Codes 44 for more information.
Read Stored DTC
Enables or disables the ability to request stored fault codes from the
ECM (DM2). See Diagnostic Trouble Codes 44 for more information.
Auto Power ECM
When enabled, the fuel relay is enabled in Auto mode so that the
ECM is already powered up and initialized before the user decides to
start the generator.
ECM Power Delay
Used in conjunction with 'Auto Power ECM', on generator shutdown
the controller waits the ECM Power Delay before turning on the fuel
relay again. This is to prevent unwanted start ups due to the generator
not being completely shut down.
Cummins Idle
SPN Conversion
When enabled, the controller tells the Cummins generator which
speed to run at. GC1 is the newest protocol and GCP is for older
engines. A switched input must be programmed to 'Idle Mode' for
feature to function correctly.
Select the SPN conversion method. See 'DTC Conversion Methods'
for more information.
EMS2B Frequency Select
For Volvo EMS2B Engine Control Modules only.
EMS2B Accelerator Pedal
For Volvo EMS2B Engine Control Modules only.
47
WARNING: If using 'Cummins Idle Speed' and powering the ECM externally you may get the
error message 'J1939 Erratic'. The ECM expects the speed update to be sent continuously
and if it is not the ECM thinks there is a problem with the J1939 communications.
TOUGH Series User Manual
© 2012 DynaGen Technologies Inc.
Configuration
43
Parameters
The controller will work with any generator as long as it supports the standard messages listed in the
SAE J1939 specification. Standard messages include oil pressure, engine temperature, and engine
speed. Some engine control modules have proprietary messages that are intended for specialized
devices and are not displayed by the controller.
The following is a list of parameters that can be accessed through use of the J1939 bus. In order to for
each one to function properly, J1939 must be selected as the 'Signal Source' under each individual
parameter.
1.
2.
3.
4.
5.
6.
Engine Speed
Engine Temperature
Oil Pressure
Oil Level
Fuel Level
Fuel In Basin
WARNING: There is a special case where parameters show N/A in place of the value. This
means that the engine may still be starting up and controller has not yet accessed that
information. If controller displays N/A during running and has not shut down on 'Loss of ECM',
it means that the controller and ECM are communicating but not receiving those parameters.
Troubleshooting
The following section outlines some common issues seen when wiring and configuring the controller for
J1939.
ISSUE
SOLUTION
Check for Communications
Set 'Engine Temperature' to J1939 and go into 'Auto' mode. Verify that
the 'N/A' is not displayed for engine temperature.
Generator Not Starting
Check wiring to the ECM. Most have multiple power and ignition inputs
that must be connected for it to operate properly.
Generator Restarts on
Shutdown
Change 'ECM Power Delay' to a higher value.
The ECM should start and run the engine – even if there are no CAN communications with controller –
when the controller turns on the fuel and crank outputs. If there are no communications between the
ECM and controller, the controller will not stop the crank cycle when the engine is running as it is not
receiving the engine speed.
TOUGH Series User Manual
© 2012 DynaGen Technologies Inc.
Configuration
4.7.1
44
Diagnostic Trouble Codes
The controller has a DTC feature that, when enabled, allows the controller to receive currently active
DTCs (DM1) messages and display then on the screen as well as optionally store them to the Event
History. The controller can also receive previously active (DM2) messages and display them on
command. DM2 messages are intended for technician troubleshooting and are not stored to Event
History.
J1939 Standards Supported (DM1)
1.
2.
Single package frame J1939-71
Multi-packages frame J1939-21
a. BAM
b. TP.DP
J1939 Standards Supported (DM2)
1.
2.
DM2 Single package frame J1939-71
Multi-package frame J1939-21
a. BAM
b. RTS/CTS
c. TP.DP
DTC Display
This setting enables or disables active fault messages (DM1) monitoring. When the DTC DISPLAY
feature is enabled the controller can receive active faults in the RUNNING, OFF and AUTO modes on the
J1939 bus. Any new received active faults will trigger a message "NEW ACTIVE DTC" and the user can
read the message on the controller front panel display. This new message will also be stored into the
controller’s event log if this feature was enabled.
Active Log DTC
The setting enables/disables the storing of active faults (DM1) in controller Event Log. The Event Log
reserves 30 storage locations for DM1 messages.
Read Stored DTC
The setting enables/disables the ability to request stored fault codes from the ECM (DM2). When this
setting is enabled the controller will allow manually triggered requests of stored faults from the ECM’s
memory (DM2).
TOUGH Series User Manual
© 2012 DynaGen Technologies Inc.
Configuration
4.7.2
45
DM1 Messages
When the engine’s ECM detects a fault, it will send an Active Diagnostic Trouble Code, DM1, message.
The DM1 message sent by the ECU will also contain information on the type of fault as well as the
number of occurrences for the fault. If multiple DTCs are present, each will be transmitted over the J1939
network. When the DM1 messages are received by the controller controller there are 3 important pieces
of information that are captured and displayed:
INFORMATION
Failure Mode Indicator (FMI)
Occurrence Count (OC)
Suspect Parameter
Number (SPN)
DESCRIPTION
The type of failure. You must refer to the engine manufacturer’s
documentation to identify the meaning of the failure mode indicator
number.
Identifies the number of times the failure has occurred.
The parameter number.
If one of these DTCs appears, please consult your engine manufacture for the definition of this fault. With
some engine manufacturers, the text of the message can also vary slightly between engine types.
When active DTC messages are being received this will cause the controller display to lock and display
the messages. If multiple active DTCs are received the controller will scroll and display each DTC
message.
The user can also manually cycle through the DTC messages by activating either the UP or DOWN key
after the screen has been locked. If the user stops at a specific DTC message the display screen will
remain on that message for a period of 10 seconds before it begins scrolling again. Once the last DTC
message is displayed, the display will begin scrolling though other controller parameters as normal.
The DTC messages are no longer available for viewing.
DM1 Event Log
The controller Event History can store up to 30 DM1 messages (DM2 messages are not stored). Once
the 30 limit has been reached the oldest message is removed from the log to be replaced by the
incoming DM1
TOUGH Series User Manual
© 2012 DynaGen Technologies Inc.
Configuration
4.7.3
46
DM2 Messages
DM2 messages are previously active fault messages which are stored to permanent memory on the
engine ECM. These stored messages can be retrieved by the host controller controller and displayed on
the controller when a request is initiated by the user. The DM2 messages display the same type of
information as the DM1 messages.
The controller can support a maximum of 32 messages. When previously active DTC messages are
requested and received, the controller will display the stored messages on the controller front panel LCD
screen. If multiple stored messages are received the user can either manually scroll through each stored
message or the screen will scroll between each DTC stored message.
To Trigger a DM2 Request, simultaneously press the UP and DOWN keys for a period of 3 seconds in
either the AUTO, OFF, or RUNNING modes. The UP and DOWN keys can also be pressed to remove
the DM2 message screen.
If the controller is in the OFF or AUTO mode when the request is triggered, the ECM may not be
powered on, so the controller will energize the fuel relay output and wait for the ECM to power on. The
controller then sends out the DM2 request. In the event there is no response from the ECM, the
controller will re-attempt an additional 3 times. It will then display 'Requesting Fail' and turn off the fuel
output if there is no valid response on the fourth try. The default ECM address for DM2 request is 0 and
the ECM address can only be changed by using the PC Configurator. The controller may also show
'Reading Abort' if communication is unsuccessful. If the request was successful, the controller will show
'Read DTC Success' and start to display the messages.
TOUGH Series User Manual
© 2012 DynaGen Technologies Inc.
Configuration
4.7.4
47
DTC Conversion Methods
This section is used to decode the information contained in the Modbus DTC (DM1 and DM2) registers if
the ECM does not support the newest DTC conversion method. The DTC's for J1939 are specified in a
specific format. Older J1939 specifications had three conversion methods and is impossible to tell them
apart without contacting the engine manufacturer.
Newer J1939 specifications follow SPN method (Version 4) and can be determined by looking at the CM
bit. It will be set to 1 for Version 4 and set to 0 for Versions 1, 2, and 3. If the CM bit is 0, use
conversion methods listed below. Byte 1 to Byte 4 refers to the individual bytes in the controllers DTC
Modbus registers..
DTC Conversion Method (Version) 1
BYTE
CONVERSION
Byte 1
8 most significant bits of 16 most significant bits of SPN
Byte 2
8 least significant bits of 16 most significant bits of SPN
Byte 3
3 most significant bits of byte contain the 3 least significant bits of SPN 5 least
significant bits of byte contain the FMI
Byte 4
Most significant bit of byte contains CM 7 least significant bits of byte contains OC
DTC Conversion Method (Version) 2
BYTE
CONVERSION
Byte 1
8 least significant bits of 16 most significant bits of SPN
Byte 2
8 most significant bits of 16 most significant bits of SPN
Byte 3
3 most significant bits of byte contain the 3 least significant bits of SPN 5 least
significant bits of byte contain the FMI
Byte 4
Most significant bit of byte contains CM 7 least significant bits of byte contains OC
DTC Conversion Method (Version) 3
BYTE
CONVERSION
Byte 1
8 least significant bits of SPN
Byte 2
8 second byte of SPN
Byte 3
3 most significant bits of byte contain the 3 most significant bits of SPN 5 least
significant bits of byte contain the FMI
Byte 4
Most significant bit of byte contains CM 7 least significant bits of byte contains OC
DTC conversion method 3 is the same as DTC conversion Method 4 except that the CM bit is 1 so it is
impossible to tell it apart from versions 1 and 2. Version 4 has the bit set to 0 which allows the user to
know the conversion format without consulting the engine manufacturer.
TOUGH Series User Manual
© 2012 DynaGen Technologies Inc.
Troubleshooting and Contact Information
5
48
Troubleshooting and Contact Information
Troubleshooting
If you are having issues with your controller, please refer to the solutions in the table below or contact
your distributor for assistance. If the problem persists then contact DynaGen technical support.
NOTE: Always check the DynaGen website for the most up software, firmware and user
manuals.
ISSUE
SOLUTION
Insert issue here.
Insert solution here.
Insert issue here.
Insert solution here.
Insert issue here.
Insert solution here.
Insert issue here.
Insert solution here.
Insert issue here.
Insert solution here.
Insert issue here.
Insert solution here.
Insert issue here.
Insert solution here.
Contact Information
Contacting DynaGen can be done by any of the methods below. Technical support is offered Monday Friday, 8:00am - 4:00pm (EST).
TYPE
INFORMATION
Website
www.dynagen.ca/support
Email
[email protected]
Phone Number
(902) 406-0133
Twitter
@DynaGenTech
Address
3 Spectacle Lake Drive, Unit B105
Dartmouth, NS B3B1W8, Canada
TOUGH Series User Manual
© 2012 DynaGen Technologies Inc.