1
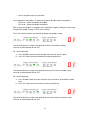
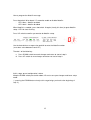
FCB1010 UnO v.1.0.4 User Guide
How to upgrade to UnO v.1.0.4
Before doing the upgrade, it is advisable to store a patch dump of your current setup on
PC. Current patch data should not be influenced by the upgrade, but it is always wise to
have a backup.
Open the unit and replace the stock PROM with the new one. Switch on the floorboard
to ensure the PROM is installed correctly. (detailed upgrade instructions in a separate
document on our website)
First time you start up the floorboard with the new firmware installed, a memory
initialization is needed in order to clear the extra memory, used by the UnO firmware but
not by the original firmware (and therefore in a random state at the moment of upgrade)
Extended memory is initialized as follows:
Switch off the board, and keep the 1 and 9 keys pressed while switching it on again.
Keep the 2 switches pressed until the display turns black. After releasing the 2 switches,
a countdown from 9 to 0 starts. After that, the board is ready to use.
1
Stompbox mode
Through global setup, stompbox mode can be enabled or disabled.
In stompbox mode, 5 of the 10 switches are dedicated to act as 5 different stomp boxes.
These 5 stomp boxes are available for all banks, this means when switching banks
(using the up/down key) the 5 stomp boxes stay available on the same 5 switches, and
their ON/OFF state is still displayed.
The 5 stomp boxes are always aligned in 1 row. Through global setup, you can choose
whether you use the upper row or lower row of 5 switches for the stomp boxes.
The 5 remaining switches are still used to select patches, just as before. These presets
are now available in 19 banks of 5 (instead of the original 10 banks of 10).
Stomp boxes come in 2 flavors:
- You can have a “real” 2-state stomp box, which toggles between an ON and an OFF
state at each click, hereby sending a different CC value each time (typically 127 for ON
and 0 for OFF) Whenever CC1 or CC2 “toggling” is enabled in the preset setup, the
stomp box will show this ON/OFF behavior (see the “CC toggling” topic in the preset
setup reference later on)
- A “momentary effect” is a different type of stomp box. It sends its ON CC message at
switch press, and its OFF CC message at switch release. To obtain this behavior, some
specific programming is required (see the “CC momentary toggling” topic in the preset
setup reference later on).
Some attention is needed during preset programming in order to get the stomp boxes
behaving the way you want it. When using the FCB/UnO ControlCenter (our Mac or PC
editor) the 2-state or momentary toggling is configured with a single click.
Important remark:
With regards to MIDI messages, a stomp box behaves exactly the same as a regular
preset. It can send 5 PC messages, 2 CC messages and a NoteOn / NoteOff message.
Only the LED behavior is different: the LED always shows the current ON/OFF state of a
stomp box, while with regular presets the LED shows the currently selected preset,
which can be only one preset at a time.
In most cases you will want the stomp boxes to send CC messages only, no PC
messages. This is not automatically the case; you need to program it this way explicitly
in the preset content.
2
How to link patches and stomp boxes:
For each patch, the patch setup lets you define the behavior of each of the 5 stomp
boxes. Three possibilities exist:
- Leave the stomp box unchanged: nothing happens with this stomp box when
selecting the patch.
- Switch the stomp box ON: when selecting the patch, all messages (PC / CC /
NoteOn) of the stomp box are also sent. For toggling CC’s, the “primary” value is
sent.
- Switch the stomp box OFF: when selecting the patch, all messages (PC / CC /
NoteOn) of the stomp box are also sent. For toggling CC’s, the “secondary” value
is sent.
Remark that, when a stomp box does not have 2 different states (is not toggling), it
makes no difference if the patch is programmed to switch it ON or OFF. In both cases,
the same messages will be sent.
Order of messages being sent:
When clicking a patch switch:
1. All its PC/CC/Note messages are sent
2. All the PC/CC/Note messages for those stomp boxes, enabled for this patch, are
sent, in ascending order (stomp box 1 to 5 = left to right)
When releasing the patch switch:
1. Its Note Off message and TapTempo message is sent
2. All Note Off messages for those stomp boxes, enabled for this patch, are sent, in
ascending order (stomp box 1 to 5 = left to right)
Also relay and expression pedal behavior is modified in the same order (patch, active
stomp box 1 -> 5), so the last patch or stomp box in this sequence which activates a
relay or expression pedal, will be in control.
(in a logical real life configuration, the relays will only be controlled by dedicated stomp
boxes, and expression pedals will be left unchanged by all stomp boxes and controlled
by each patch, or reversely, controlled by dedicated stomp boxes and left unchanged by
each patch.)
The CC’s are not the only stomp box settings which toggle between 2 values: also the 2
switches toggle between open and closed when activated in a stomp box.
One last important remark: stompbox mode is not compatible with Direct Select mode
(which always requires 2 key presses to switch patches). Therefore, Direct Select should
always be disabled (through global configuration) when using stomp box mode.
3
Configurable settings: an overview
There are 2 types of settings: global settings, which apply to the floorboard in general,
and patch settings, which can be programmed differently for each of the 100 available
patches.
Global settings:
1. DIRECT SELECT mode
When DIRECT SELECT mode is activated, a patch is selected by entering its 2-digit
number (00 – 99) using the footswitches – so exactly 2 clicks are necessary to select
each of the 100 patches. In this mode, the UP/DOWN keys are used to toggle relay 1
and 2 respectively (see below).
When DIRECT SELECT mode is disabled, the UP/DOWN keys are used to scroll
through the 10 banks (0-9), the other footswitches (1-10) are used to select 1 of the 10
patches in the current bank.
2. SWITCH 1 / 2 mode
The FCB contains 2 switches; each switch can have 2 working modes : LATCHED, or
MOMENTARY. This global “switch mode” setting is combined with the patch setting
“switch 1/2 on/off”.
- LATCHED means that the relay contact is closed when you select a patch, which has
the “switch” setting programmed to “on”, and the contact is opened when you select a
patch, which has the “switch” setting programmed to “off” .
- MOMENTARY means that the relay contact is closed when you depress the footswitch
of a patch, which has the “switch” setting programmed to “on”, and the contact is opened
again when you release the same footswitch. The relay does not change state when you
select a patch, which has the “switch” setting programmed to “off”.
The behavior described above is ONLY valid when DIRECT SELECT mode is disabled.
With DIRECT SELECT mode is enabled, the patch-specific switch settings are ignored.
In that case, only the UP/DOWN keys can be used to change the state of the relay
contacts: The UP key toggles switch 1 (i.e. the contact closes when you click the UP key
once, and opens again when you click the UP key once more), In the same way, the
DOWN key toggles switch 2.
4
3. SWITCH 1 / 2 INVERSION
It is possible to completely inverse the way each of the 2 switches behaves: when
SWITCH INVERSION is enabled, the switch is closed when it was opened before, and
opened when it was closed before. The behavior described above is kept unchanged,
except that when a relay contact is said to be “activated”, this time it means that the
switch is opened instead of closed. The orange LEDs on the FCB still show “relay
activation” in an identical way – independent of the INVERSION settting.
This mode is needed for simulating “normally-closed” sustain pedals, which have an
open contact when depressed, and a closed contact when released.
4. MIDI MERGE
When MIDI MERGE is enabled, all MIDI messages, coming in through the MIDI IN port
of the FCB are merged with the MIDI messages generated by the FCB itself. The
combined MIDI stream is sent to the MIDI OUT port of the board.
When MIDI MERGE is disabled; the incoming MIDI messages are ignored, and only the
messages generated by the FCB itself are sent to the MIDI OUT port.
5. RUNNING STATUS
Running Status Mode is a MIDI transmission mode, in which status bytes are only sent,
if they differ from the previously sent status byte. The MIDI receiver needs to add the
missing status bytes again to the MIDI stream. This mode is especially useful when
sending continuous CC values for a certain control (e.g. volume, pitch bend,…) , as it
reduces the amount of data being sent over the MIDI cable.
When RUNNING STATUS mode is activated, the 2 FCB expression pedals use the
running-status mode as described above.
6. TAPTEMPO
TAPTEMPO functionality is explained briefly in the patch settings section below. The
global TAPTEMPO setting lets you enable or disable taptempo messages globally for all
patches.
5
7. MIDI CHANNEL for the different messages
Each patch in the FCB can generate 10 different MIDI messages : PC1..5, CC1..2, EXP
A/B, NOTE. The MIDI channel, used for transmitting those 10 messages, can be set
globally.
8. NoteOn velocity
Each patch can be programmed to send a NoteOn message with a patch-specific note
value. The note velocity can be defined globally for all NoteOn messages.
9. Blocking repeated Program Changes
When activating this mode, a ProgramChange message is only sent once, when clicking
the same patch repeatedly. This can be interesting when a patch contains toggling CC
messages, so the same switch is pressed several times to enable or disable a certain
effect – re-sending the PC message each time in this case could disturb the active
sound.
* Remark: There are 5 available PC messages. This mode compares the value of each
of these 5 PC values separately with its previous value – and this for all patches. This
means that, if selecting patch 1 causes a PC1 message to be sent, and after that,
selecting patch 2 would cause the same PC1 message to be sent, this message will be
blocked. If however, patch 1 has a certain PC1 message, and patch 2 has a PC2
message with the same value, this second message will not be blocked.
10. Stompbox mode / Stompbox Upper/Lower row
This mode is explained in detail in a previous chapter.
6
Patch settings:
1. SWITCH 1 / SWITCH 2
Each patch can choose between 3 actions for each of the 2 switches : it can set the
switch in its “on” state , set it in its “off” state, or leave the switch unchanged.
The behaviour of the switches is described in detail in the Global Settings chapter
above.
* Remark:
The difference between “off state” and “unchanged” is only relevant when using the
switch in “latched” mode (see global settings). In “momentary” mode, the switch is
deactivated when releasing each patch pedal, so the next patch will not influence its
state, even if it is programmed to switch to the “off” state.
2. PC 1 ... 5
Each patch can send up to 5 Program Change messages. Each message consists of a
PC command byte followed by a PC number with value between 1 and 128.
* Remark: the actual number being sent is in the range 0 – 127, but it is common
practice to mention the value+1 in the user interface – so does the FCB
3. CC 1 ... 2
Each patch can send up to 2 Controller Change messages. Each message consists of a
CC command byte, followed by a CC number between 0 and 127, and a value, also
between 0 and 127.
4. CC TOGGLING
It is possible to define 2 different CC values for each of the 2 CC messages, and enable
a TOGGLING mode for CC1 and/or CC2 separately.
When toggling mode is enabled, the patch will send alternating CC values: the first time
a patch is selected, it sends a CC message with its “primary value”; if the patch
footswitch is clicked a second time, it sends the same CC message, but this time with its
“alternate value” (see also the setup description).
5. CC “MOMENTARY” TOGGLING
A special case of “momentary toggling’ is implemented: in this mode, a CC message
with programmed value is sent when clicking a footswitch, and the same CC message,
this time with value 0, is sent when releasing the footswitch. This mode is enabled in a
very specific way: by setting the alternate CC value to 1 and disabling the CC toggling.
7
6. EXPRESSION A / B
Each patch can define which Controller number is used for expression pedal A, and for
expression pedal B. Also the range of the Controller value can be set (minimum and
maximum value, sent when the pedal is moved from fully up to fully down)
As for the switches, also each expression pedal can be programmed in 1 of 3 possible
modes: “ON” causing CC messages to be sent, “OFF” causing the pedal to be disabled,
or “no change”, which leaves the pedal behavior as it was before selecting the patch.
7. NOTE ON
Each patch can be programmed to send a single Note On message, with programmable
note value, and globally programmable note velocity (see global settings). The NoteOn
message is sent when depressing the patch footswitch. When the footswitch is released,
a NoteOff message for the same note is sent.
8. TAPTEMPO
When clicking the same footswitch several times, on every second click, a CC1
message is sent, with a value proportional to the time elapsed between the last 2 clicks.
Details about the way this value is calculated can be found in the official FCB1010
User’s manual. For this calculation, apart from the elapsed time, also the programmed
CC1 value and NoteOn value are used.
* Remark: Taptempo is a Behringer specific feature which can be enabled or disabled on
a global level.
9. STOMPBOX ENABLE
Stompbox mode is explained in detail in a previous chapter. When in stompbox mode,
preset configuration lets you define the behavior of each of the 5 stomp boxes for the
current patch. Each stomp box can be switched on, switched off, or left unchanged,
when selecting the patch.
8
GLOBAL CONFIGURATION step by step
Overview of the different steps, and the relevant switches :
Step 1 :
Step 2 :
Step 3 :
9
Step 0:
Keep the DOWN switch pressed during power-up for about 2.5 sec to enter global
configuration.
( * At any time during the global configuration, keep the DOWN switch pressed for about
2.5 sec to save your changes and leave setup mode. )
Step 1:
You are now ready to program a few settings, like DIRECT SELECT mode :
DIRECT SELECT:
Press footswitch 10 to toggle between 2 settings:
-
LED 10 on = DIRECT SELECT enabled
LED 10 off = DIRECT SELECT disabled
STOMPBOX MODE :
Press footswitch 9 to toggle between 2 settings :
-
LED 9 on = STOMPBOX MODE enabled
LED 9 off = STOMPBOX MODE disabled
STOMPBOX UPPER/LOWER ROW :
Press footswitch 8 to toggle between 2 settings :
- LED 8 on = switches 6 to 10 are used as stomp boxes
- LED 8 off = switches 1 to 5 are used as stomp boxes
(only relevant when stompbox mode is on)
BLOCK REPEATING PC’s
Press footswitch 5 to toggle between 2 settings :
-
LED 5 on = repeating PC’s with same value are blocked
LED 5 off = no messages are blocked
10
NOTE ON VELOCITY :
Press footswitch 2 to enter the global NoteOn velocity :
Use the footswitches or expression pedal A to enter the value
(must be a decimal value between 0 and 127)
Do 1 of the following :
a. Press DOWN switch to cancel changes and return to start of step 1.
b. Press UP switch to confirm NoteOn value. The changes are saved.
This brings you back to the start of step 1.
Press the UP switch to go to step 2.
11
Step 2 :
You are now ready to program the MIDI channel for each message that can be sent :
How to set MIDI channel for PC 1 :
Press footswitch 1 to select PC1 channel setup – LED 1 starts flashing.
Press UP switch to confirm you want to do PC1 channel setup.
LED 1 turns off.
Use the footswitches or expression pedal A to enter a value between 1 and 16
Then do 1 of the following :
a. Press DOWN switch to cancel changes and return to start of step 2.
b. Press UP switch to save changes and return to start of step 2.
Follow exactly the same procedure to program the MIDI channel for all messages, using
following footswitches :
Footswitch 1 : PC1
Footswitch 2 : PC2
Footswitch 3 : PC3
Footswitch 4 : PC4
Footswitch 5 : PC5
Footswitch 6 : CC1
Footswitch 7 : CC2
Footswitch 8 : expr. pedal A
Footswitch 9 : expr. pedal B
Footswitch 10 : NoteOn
After this, press UP to go to step 3.
( * Pressing DOWN at this time brings you back to step 1 )
12
Step 3 :
You are now ready to do the rest of global configuration :
Press footswitch 1 to set mode for SWITCH 1 :
-
LED 1 on = LATCHED mode
LED 1 off = MOMENTARY mode
Press footswitch 2 to set mode for SWITCH 2 :
-
LED 2 on = LATCHED mode
LED 2 off = MOMENTARY mode
Press footswitch 3 to set INVERSION mode for switch 1:
-
LED 3 on = switch 1 inverted
LED 3 off = switch 1 not inverted
Press footswitch 4 to set INVERSION mode for switch 2 :
-
LED 4 on = switch 2 inverted
LED 4 off = switch 2 not inverted
Press footswitch 8 to set MIDI MERGE :
-
LED 8 on = MIDI MERGE enabled
LED 8 off = MIDI MERGE disabled
Press footswitch 9 to set RUNNING STATUS :
-
LED 9 on = RUNNING STATUS enabled
LED 9 off = RUNNING STATUS disabled
Press footswitch 10 to set TAPTEMPO activation :
- LED 10 on = TAPTEMPO DISabled
- LED 10 off = TAPTEMPO ENabled
* Notice the “inverse” logic of this setting –
implemented this way for backward compatibility
13
Apart from these 7 global configuration settings, stored in the FCB, it is also possible to
execute some “actions” during this step of the setup :
SYSEX SEND :
Press footswitch 6, to send the full memory content to the MIDI out port as a sysex
message. LED 6 lights up while sending the message (+/- 0.5 sec) , and turns off when
completed.
COPY PATCH :
Press footswitch 5 to start the copy procedure. LED 5 starts blinking :
Use the footswitches to enter the source patch number (between 00 and 99)
Press UP to confirm.
Use the footswitches to enter the target patch number (between 00 and 99)
Press UP to confirm.
The patch data is copied, and you return to the beginning of step 3.
( *pressing the DOWN button during this procedure cancels the copy action, and brings
you back to beginning of step 3 )
At this stage, global configuration is done.
Keep the DOWN switch pressed for about 2.5 sec to save your changes and leave setup
mode.
( * pressing the UP button at this stage brings you back to the beginning of step 1 )
14
PRESET CONFIGURATION step by step
Overview of the different steps, and the relevant switches :
Step 1 :
Step 2 :
Step 3 :
15
Step 0 :
Select the patch you want to configure. Its footswitch LED is turned on. Now keep the
DOWN switch pressed for about 2.5 sec to enter preset configuration.
If the patch is defined as a “stomp box”, the patch cannot be “selected” (the previously
selected patch stays selected). To enter patch setup for a stomp box, keep BOTH the
stomp box footswitch and the DOWN switch depressed for about 2.5 sec.
( * At any time during the preset configuration, keep the DOWN switch pressed for
about 2.5 sec to save your changes and leave setup mode. )
Step 1 :
You are now ready to program SWITCH, PEDAL and STOMPBOX settings.
Press footswitch 1 for about 1.5 second to enable or disable SWITCH 1 :
-
LED 1 on = SWITCH 1 will be set or reset
LED 1 off = SWITCH 1 will not be changed
•
remark : notice the difference with previous firmware versions : when the LED is
on, the switch will be set ON or OFF (setup in the next step). When the LED is
off, the switch state will not be influenced when selecting thiis patch.
When SWITCH 1 is enabled, press footswitch 1 again (shortly this time) to go to
SWITCH 1 value setup (1 = “on” or 0 = “off” ) - LED 1 starts flashing and the current
switch value is shown :
Press UP switch to confirm you want to do SWITCH 1value setup.
16
Now again use footswitch 1 to toggle the value between 0 and 1
Notice how the orange SWITCH1 LED toggles on and off together with the value 0 or 1.
Then do 1 of the following :
a. Press DOWN switch to cancel changes and return to start of step 1.
b. Press UP switch to save changes and return to start of step 1.
In exactly the same way, use footswitch 2 to program SWITCH 2 to “no change”, “on” or
“off”.
STOMPBOX SETUP
* remark : stompbox setup described below is not available when stompbox mode is not
enabled (see global setup). When stompbox mode is enabled, stompbox setup is only
available for the 95 patches, not for the 5 stomp boxes.
Use footswitches 6 to 10 to set the desired state for each of the 5 stomp boxes when
selecting the current patch : “leave unchanged”, “set on (=1)”, “set off (=0)”
Press footswitch 6 for about 1.5 second to enable or disable STOMP BOX 1 :
-
LED 6 on = STOMP BOX 1 will be set or reset
LED 6 off = STOMP BOX 1 will not be changed
When STOMP BOX 1 is enabled, press footswitch 6 again (shortly this time) to go to
STOMP BOX 1 value setup (1 = “on” or 0 = “off” ) - LED 6 starts flashing and the current
stomp box value is shown :
Press UP switch to confirm you want to do STOMP BOX 1 value setup.
Now again use footswitch 6 to toggle the value between 0 and 1
17
Then do 1 of the following :
a. Press DOWN switch to cancel changes and return to start of step 1.
b. Press UP switch to save changes and return to start of step 1.
* remark : when a stompbox does not contain any toggling message, it does not have an
On or Off state. In this case, the value entered in this step is irrelevant. Only the first step
(“stomp box will be set/reset” versus “stomp box will not be changed”) is relevant.
Do exactly the same to do the setup for stomp boxes 2 to 5, using footswitches 7 to 10.
PEDAL A / PEDAL B enable :
Press footswitch 4 for about 1.5 second to enable or disable EXPRESSION PEDAL A :
-
LED 4 on = EXPRESSION PEDAL A CC value will be changed
LED 4 off = EXPRESSION PEDAL A CC value will not be changed
Press footswitch 5 for about 1.5 second to enable or disable EXPRESSION PEDAL B :
-
LED 5 on = EXPRESSION PEDAL B CC value will be changed
LED 5 off = EXPRESSION PEDAL B CC value will not be changed
* remark : although this setting can be called “Pedal A/B enable”, the term “enabled”
may be very confusing here. In fact, only choice made here is whether the current patch
will change the expression pedal behavior or not.. Once the expression pedal value is
set to “will be changed”, the next step of the setup can define whether the pedal actually
should be disabled, or enabled and sending a certain CC number.
This second part of the expression pedal setup is done in step 3 below – exactly the
same way it was done in previous firmware releases.
Press the UP switch to go to step 2.
18
Step 2 :
You are now ready to program “toggle” mode.
Press footswitch 8 to set TOGGLE mode for CC1 :
- LED 8 on = TOGGLE mode enabled for CC1
- LED 8 off = TOGGLE mode disabled for CC1
Press footswitch 9 to set TOGGLE mode for CC2 :
- LED 9 on = TOGGLE mode enabled for CC2
- LED 9 off = TOGGLE mode disabled for CC2
Press UP key to go to step 3.
Step 3 :
You are now ready to program each of the messages that will be sent by this patch :
(PC1..5, CC1..2, expression pedal A/B, NoteOn)
19
How to program PC1 (program change message 1) :
Press footswitch 1 for about 1.5 second to enable or disable PC1 :
- LED 1 on = PC1 enabled
- LED 1 off = PC1 disabled
When PC1 is enabled, press footswitch 1 again (shortly this time) to go to PC1 setup LED 1 starts flashing.
Press UP switch to confirm you want to do PC1 setup.
Use the footswitches or expression pedal A to enter the ProgramChange number
( must be a value between 1 and 128 )
Then do 1 of the following :
a. Press DOWN switch to cancel changes and return to start of step 3.
b. Press UP switch to save changes and return to start of step 3.
Follow exactly the same procedure to program the remaining PC messages using
following footswitches :
Footswitch 1 : PC1
Footswitch 2 : PC2
Footswitch 3 : PC3
Footswitch 4 : PC4
Footswitch 5 : PC5
20
How to program CC1 (controller change message 1) :
Press footswitch 6 for about 1.5 second to enable or disable CC1 :
- LED 6 on = CC1 enabled
- LED 6 off = CC1 disabled
When CC1 is enabled, press footswitch 6 again (shortly this time) to go to CC1 setup LED 6 starts flashing.
Press UP switch to confirm you want to do CC1 setup.
Use the footswitches or expression pedal A to enter the controller number
(must be a value between 0 and 127)
Do 1 of the following :
a. Press DOWN switch to cancel changes and return to start of step 3.
b. Press UP switch to confirm controller number and continue.
Use the footswitches or expression pedal A to enter the primary controller value
(must be a value between 0 and 127)
Do 1 of the following :
a. Press DOWN switch to cancel primary controller value and return to controller
number entry.
b. Press UP switch to confirm primary controller value and continue.
Use the footswitches or expression pedal A to enter the alternate controller value
(must be a value between 0 and 127) ;
21
( * when in TOGGLE mode, the CC message sends “primary value” and “alternate
value” alternately. )
Do 1 of the following :
a. Press DOWN switch to cancel alternate value and return to primary value entry.
b. Press UP switch to confirm alternate value. The changes are saved. This brings
you back to the start of step 3.
Follow exactly the same procedure to program CC2, this time using footswitch 7 instead
of 6.
22
•
How to program expression pedal A :
Press footswitch 8 for about 1.5 second to enable or disable expression pedal A :
- LED 8 on = expression pedal A enabled
- LED 8 off = expression pedal A disabled
When expression pedal A is enabled, press footswitch 8 again (shortly this time) to go
to expression pedal A setup - LED 8 starts flashing.
Press UP switch to confirm you want to do expression pedal A setup.
Use the footswitches or expression pedal A to enter the controller number
(must be a value between 0 and 127)
Do 1 of the following :
a. Press DOWN switch to cancel changes and return to start of step 4.
b. Press UP switch to confirm controller number and continue.
Use the footswitches or expression pedal A to enter the minimum controller value
(must be a value between 0 and 127)
Do 1 of the following :
a. Press DOWN switch to cancel minimum value and return to controller number
entry.
b. Press UP switch to confirm minimum value and continue
Use the footswitches or expression pedal A to enter the maximum controller value
(must be a value between 0 and 127)
23
Do 1 of the following :
a. Press DOWN switch to cancel value and return to minimum value entry.
b. Press UP switch to confirm maximum value. The changes are saved and you go
back to the start of step 3.
Follow exactly the same procedure to program expression pedal B, this time using
footswitch 9 instead of 8.
* in order to program TOGGLE mode for Expression Pedal A, first enable CC2, then
goto setup of the CC2 values : enter a random number as CC number, enter the first
required PedalA CC number as “primary value”, and the second required PedalA CC
number as “secondary value”. Then disable CC2 again.
The CC number, entered during Pedal A setup is ignored. Only the value range is used.
24
How to program the NoteOn message
Press footswitch 10 for about 1.5 second to enable or disable NoteOn :
- LED 10 on = NoteOn enabled
- LED 10 off = NoteOn disabled
When NoteOn is enabled, press footswitch 10 again (shortly this time) to go to NoteOn
setup - LED 10 starts flashing.
Press UP switch to confirm you want to do NoteOn setup.
Use the footswitches or expression pedal A to enter the NoteOn number
( must be a value between 0 and 127 )
Then do 1 of the following :
c. Press DOWN switch to cancel changes and return to start of step 3.
d. Press UP switch to save changes and return to start of step 3.
At this stage, preset configuration is done.
Keep the DOWN switch pressed for about 2.5 sec to save your changes and leave setup
mode.
( * pressing the DOWN button shortly at this stage brings you back to the beginning of
step 2 )
25