1
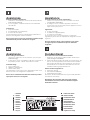
Istruzioni per l’uso Frigorifero Operating Instructions Fridge Mode d’emploi Refrigerateur Gebrauchsanleitungen Kühlschrank Manual de instrucciones Frigorífico Instruções para a utilização Frigorífico Gebruiksaanwijzingen Koelkast Brugervejledning Køleskab med Bruksanvisning Kylskåp med Руководство по эксплуатации Xолодильник FR 320 P Français Mode d’emploi REFRIGERATEUR Sommaire Mode d’emploi, 1 Assistance, 4 Description de l’appareil, 7 Installation, 19 Accessoires, 19 Mise en marche et utilisation, 19 Entretien et soin, 20 Précautions et conseils, 21 Anomalies et remèdes, 22 Italiano Deutsch Istruzioni per l’uso Gebrauchsanleitungen Sommario Inhaltsverzeichnis Istruzioni per l’uso, 1 Assistenza, 4 Descrizione dell’apparecchio, 6 Installazione, 11 Accessori, 11 Avvio e utilizzo, 11 Manutenzione e cura, 12 Precauzioni e consigli, 13 Anomalie e rimedi, 14 Gebrauch sanleitungen, 1 Kundendienst, 4 Beschreibung Ihres Gerätes, 7 Installation, 23 Zubehör, 23 Inbetriebsetzung und Gebrauch, 23 Wartung und Pflege, 24 Vorsichtsmaßregeln und Hinweise, 25 Störungen und Abhilfe, 26 FRIGORIFERO English Operating Instructions FRIDGE Contents Operating Instructions, 1 Assistance, 4 Description of the appliance, 6 Installation, 15 Accessories, 15 Start-up and use, 15 Maintenance and care, 16 Precautions and tips, 17 Troubleshooting, 18 KÜHLSCHRANK Español Dansk Manual de instrucciones Brugervejledning Sumario Oversigt Manual de instrucciones, 2 Asistencia, 4 Descripción del aparato, 8 Instalación,31 Accesorios, 31 Puesta en funcionamiento y uso, 31 Mantenimiento y cuidados, 32 Precauciones y consejos, 33 Anomalías y soluciones,34 Brugervejledning, 1 Servicecenter, 5 Beskrivelse af apparatet, 9 Installation, 39 Tilbehør, 39 Start og brug, 39 Vedligeholdelse, 40 Forholdsregler og gode råd, 41 Fejlfinding og afhjælpning, 42 FRIGORÍFICO Portuges KØLESKAB MED Svenska Instruções para a utilização Bruksanvisning Índice Innehållsförteckning FRIGORÍFICO Instruções para a utilização, 2 Assistência, 5 Descrição do aparelho, 9 Instalação, 35 Acessórios, 35 Início e utilização, 35 Manutenção e cuidados, 36 Precauções e conselhos, 37 Anomalias e soluções, 38 Nederlands KYLSKÅP MED Bruksanvisning, 1 Kundservice, 5 Beskrivning av apparaten,10 Installation, 43 Tillbehör, 43 Start och användning, 43 Underhåll och skötsel, 44 Säkerhetsföreskrifter och råd, 45 Fel och åtgärder, 46 Gebruiksaanwijzingen Руководство по эксплуатации Inhoud Содержание KOELKAST Gebruiksaanwijzingen, 1 Service, 4 Beschrijving van het apparaat, 8 Installatie, 27 Toebehoren, 27 Starten en gebruik, 27 Onderhoud en verzorging, 28 Voorzorgsmaatregelen en advies, 29 Storingen en oplossingen, 30 холодильник Инструкция по применению Техническое обслуживание 6 Описание изделия 10 Установка 47 Aкceccyapы, 47 47 48 49 50 Assistenza Prima di contattare l’Assistenza: • Verificare se l’anomalia può essere risolta autonomamente (vedi Anomalie e Rimedi). • In caso negativo, contattare il Numero Unico Nazionale 199.199.199. Comunicare: • il tipo di anomalia • il modello della macchina (Mod.) • il numero di serie (S/N) Queste informazioni si trovano sulla targhetta caratteristiche posta nel vano frigorifero in basso a sinistra. Non ricorrete mai a tecnici non autorizzati e rifiutate sempre l’installazione di pezzi di ricambio non originali. Assistance Avant de contacter le centre d’Assistance : • Vérifiez si vous pouvez résoudre l’anomalie vous-même (voir Anomalies et Remèdes). • Si, malgré tous ces contrôles, l’appareil ne fonctionne toujours pas et si l’inconvénient persiste, appelez le service après-vente le plus proche. Signalez-lui : • le type d’anomalie • le modèle de l’appareil (Mod.) • le numéro de série (S/N) Vous trouverez tous ces renseignements sur l’étiquette signalétique placée dans le compartiment réfrigérateur en bas à gauche. Ne vous adressez jamais à des techniciens non agréés et exigez toujours l’installation de pièces détachées originales. Assistance Before calling for Assistance: • Check if the malfunction can be solved on your own (see Troubleshooting). • If after all the checks, the appliance still does not operate or the problem persists, call the nearest Service Centre Communicating: • type of malfunction • appliance model (Mod.) • serial number (S/N) This information can be found on the data plate located on the bottom left side of the refrigerator compartment. Never call on unauthorized technicians and always refuse spare parts which are not originals. Kundendienst Bevor Sie sich an den Kundendienst wenden: • Prüfen Sie, ob die Störung selbst behoben werden kann (siehe Störungen und Abhilfe). • Sollte trotz aller Kontrollen das Gerät nicht funktionieren und der von Ihnen festgestellte Fehler weiter bestehen bleiben, dann fordern Sie bitte den nächstgelegenen technischen Kundendienst an und teilen Sie dort zusammen mit Ihrer Fehlerbeschreibung folgende Daten mit: Geben Sie bitte Folgendes an: • die Art der Störung • das Gerätemodell (Mod.) • die Modellnummer (S/N). Entnehmen Sie diese Daten bitte dem Typenschild (befindlich im Kühlraum unten links). Beauftragen Sie auf keinen Fall einen nicht befugten Kundendienst und lassen Sie ausschließlich OriginalErsatzteile einbauen. - modello - model - modèle - modell - model - modelo - modelo - model - modell - модель - numero di serie - serial number - numéro de série - modellnummer - serienummer - número de serie - número de série - serienummer - serienummer 3 Service Assistência U moet doorgeven: • het type storing • het model apparaat (Mod.) • het serienummer (S/N) Deze informatie bevindt zich op het typeplaatje links onderin het koelgedeelte. Comunique: • o tipo de anomalia • o modelo da máquina (Mod.) • o número de série (S/N) Estas informações encontram-se na placa de identificação situada no compartimento frigorífico embaixo à esquerda. Wendt u zich nooit tot onbevoegde installateurs en weiger altijd de installatie van niet originele onderdelen. Nunca recorrer a técnicos não autorizados e negar sempre a instalação de peças sobresselentes não originais para reposição. Asistencia Servicecenter Voordat u de Servicedienst belt: • Controleer of u de storing niet zelf kunt oplossen (zie Storingen en oplossingen). • Indien, ondanks alle controles, het apparaat niet goed werkt en de storing blijft bestaan, kunt u zich tot de dichtstbijzijnde Technische Dienst wenden. Antes de llamar al Servicio de Asistencia Técnica: • Verifique si la anomalía puede ser resuelta por Ud. mismo (ver Anomalías y Soluciones). • Si, no obstante todos los controles, el aparato no funciona y el inconveniente por Ud detectado continúa, llame al Centro de Asistencia Técnico más cercano. Comunique: • el tipo de anomalía • el modelo de la máquina (Mod.) • el número de serie (S/N) Esta información se encuentra en la placa de características ubicada en el compartimento frigorífico abajo a la izquierda. No recurra nunca a técnicos no autorizados y rechace siempre la instalación de repuestos que no sean originales. - modello - model - modèle - modell - model - modelo - modelo - model - modell - модель 4 Antes de contactar a Assistência técnica: • Verifique se pode resolver sozinho a anomalia (veja as Anomalias e Soluções). • Se, apesar de todos os controlos, o aparelho não funcionar e o inconveniente detectado continuar, contactar o Centro de Assistência mais próximo. Inden Servicecentret kontaktes: • Kontrollér, om du selv kan løse fejlen (se Fejlfinding og afhjælpning). • Hvis apparatet stadig ikke fungerer, og hvis fejlen stadig findes, skal man kontakte nærmeste Servicecenter. Man skal oplyse: • Fejlens art • Apparatets model (Mod.) • Serienummer (S/N) Disse oplysninger findes på skiltet inden i køleskabet nederst til venstre. Ret aldrig henvendelse til ikke-autoriserede teknikere, og benyt ikke uoriginale reservedele. - numero di serie - serial number - numéro de série - modellnummer - serienummer - número de serie - número de série - serienummer - serienummer Kundservice Innan du kontaktar kundservice: • Kontrollera om du kan åtgärda felet på egen hand (se Fel och åtgärder). • Om apparaten inte fungerar och felet inte kan åtgärdas trots alla kontroller kan du ringa till närmaste servicecenter. Uppge: • typ av fel • maskinmodell (Mod.) • serienummer (S/N) Denna information anges på märkskylten som sitter i kylutrymmet nedan till vänster. Vänd dig aldrig till ej auktoriserade tekniker och tillåt inte att reservdelar som inte är original monteras. Техническое Перед тем как обратиться в Центр Технического обслуживания: • проверьте, можно ли устранить неисправность самостоятельно (см. Неисправности и методы их устранения). • Если неисправность не устраняется, позвоните по единому национальному телефону 199.199.199. При обращении в Центр Технического Обслуживания необходимо сообщить: • тип неисправности • модель изделия (Мод.) • номер тех. паспорта (серийный №) Все эти данные вы найдете на табличке с техническими характеристиками, расположенной в левом нижнем углу холодильной камеры. Никогда не прибегайте к услугам не уполномоченных мастеров и не разрешайте устанавливать на вашу машину не оригинальные запчасти. - modello - model - modèle - modell - model - modelo - modelo - model - modell - модель - numero di serie - serial number - numéro de série - modellnummer - serienummer - número de serie - número de série - serienummer - serienummer 5 Descrizione dell’apparecchio Description of the appliance Vista d’insieme Overall view Le istruzioni sull’uso valgono per diversi modelli per cui è possibile che la figura presenti particolari differenti rispetto a quelli dell’apparecchio acquistato. La descrizione degli oggetti più complessi si trova nelle pagine seguenti. The instructions contained in this manual are applicable to different model refrigerators. The diagrams may not directly represent the appliance purchased. For more complex features, consult the following pages. 1 PURE WIND *. 2 Manopola REGOLAZIONE DELLA TEMPERATURA. 3 RIPIANO*. 4Cassetto FRUTTA e VERDURA 5 Balconcino estraibile con coperchio e PORTAUOVA. 6 Balconcino estraibile PORTAOGGETTI*. 7 vano per BOTTIGLIA da 2 LITRI*. 8 Balconcino BOTTIGLIE. 1 PURE WIND*. 2 TEMPERATURE REGULATING Knob 3 SHELVES*. 4 FRUIT and VEGETABLE bin 5 Removable lidded shelf with EGG TRAY 6 Removable multipurpose SHELVES*. 7 Compartment for a 2 LITRE BOTTLE 8 BOTTLE shelf * Variabili per numero e/o per posizione, presente solo in alcuni * Varies by number and/or position, available only on certain modelli. models. 1 2 3 5 6 7 8 4 6 Description de l’appareil Beschreibung Ihres Gerätes Vue d’ensemble Geräteansicht Ces instructions d’utilisation s’appliquent à plusieurs modèles, il se peut donc que les composants illustrés présentent des différences par rapport à ceux de l’appareil que vous avez acheté. Vous trouverez dans les pages suivantes la description des objets plus complexes. Die Gebrauchsanleitungen gelten für mehrere Gerätemodelle. Demnach ist es möglich, dass die Abbildung Details enthält, über die Ihr Gerät nicht verfügt. Die Beschreibung weiterer Komponenten ersehen Sie auf nachfolgender Seite. 1 PURE WIND*. 2 Commande pour RÉGLER LA TEMPÉRATURE 3 CLAYETTE*. 4Bac FRUITS et LEGUMES 5 Balconnet amovible à abattant, contenant un SUPPORT A OEUFS 6 Balconnet amovible PORTE-OBJETS*. 7 Compartiment pour BOUTEILLE 2 LITRES 8 Balconnet BOUTEILLES 1 PURE WIND*. 2 TEMPERATURREGLER 3 ABLAGE*. 4 Schale für OBST und GEMÜSE 5 Abnehmbare Ablagen mit Deckel und EIERFACH 6 Abnehmbare Ablage für TUBEN UND DOSEN*. 7 Fach zum GEFRIEREN und LAGERN 8 Ablage für FLASCHEN * Leur nombre et/ou leur emplacement peut varier, n’existe que * Unterschiedliche Anzahl und Platzierung, nicht bei allen sur certains modèles. 1 2 3 Modellen. 5 6 7 8 4 7 Beschrijving van het apparaat Descripción del aparato Algemeen aanzicht Vista en conjunto Deze gebruiksaanwijzingen gelden voor verscheidene modellen en het is daarom mogelijk dat de figuur andere details afbeeldt dan het door u aangeschafte apparaat. De beschrijving van de meest complexe elementen vind u terug in de volgende pagina’s. Las instrucciones sobre el uso son válidas para distintos modelos y por lo tanto es posible que la figura presente detalles diferentes a los del aparato que Ud. ha adquirido. La descripción de las piezas más complejas se encuentra en las páginas sucesivas. 1 PURE WIND*. 2 TEMPERATUURKNOP. 3 DRAAGPLATEAU* 4 GROENTE- en FRUITLADE 5 Uitneembaar vak met deksel, voor EIERREK •. 6 Uitneembaar vak voor VARIA*. 7 Ruimte voor een 2 LITER FLES. 8 Vak voor FLESSEN. 1 PURE WIND*. 2 Mando para la REGULACIÓN DE LA TEMPERATURA 3 BANDEJAS* 4Recipiente FRUTA y VERDURA 5 Balconcito extraíble con tapa y con HUEVERA 6 Balconcito extraíble PORTAOBJETOS*. 7 Espacio para una BOTELLA de 2 LITROS 8Balconcito BOTELLAS * Deze kunnen variëren voor wat betreft aantal of positie, alleen * La cantidad y/o su ubicación pueden variar, se encuentra op enkele modellen aanwezig. 1 2 3 solo en algunos modelos. 5 6 7 8 4 8 Descrição do aparelho Beskrivelse af apparatet Visão geral Komplet oversigt Estas instruções sobre a utilização são válidas para vários modelos, portanto é possível que na figura haja pormenores diferentes do aparelho que adquiriu. Há uma descrição dos assuntos mais complexos nas páginas seguintes. Brugervejledningen gælder for de forskellige modeller og derfor er det muligt, at visse funktioner på figuren er anderledes end på det købte apparat. Der findes en mere omfattende beskrivelse af de enkelte funktioner på de efterfølgende sider. 1 PURE WIND*. 2 Manípulo para a REGULAÇÃO DA TEMPERATURA 3 PRATELEIRA*. 4 Gaveta para FRUTAS e HORTALIÇAS 5 Prateleira extraível da porta com tampa e PORTA OVOS 6 Prateleira extraível da porta VÃO PARA GUARDAR OBJECTOS* 7 Vão ara GARAFFA de 2 LITROS 8 Prateleira para GARRAFAS 1 PURE WIND * 2 Knappen til REGULERING AF TEMPERATUREN. 3 HYLDE*. 4 Skuffe til FRUGT og GRØNT 5 Udtrækkeligt hylderum med låg til æg. 6 Udtrækkeligt hylderum TIL DIVERSE* 7 Rum til en FLASKE på 2 LITER. 8 Hylderum til FLASKER. * Variáveis em número e/ou na posição, presente somente em * Kan varieres i antal og/eller placering.Findes kun på nogle alguns modelos. 1 2 3 modeller. 5 6 7 8 4 9 Beskrivning av apparaten Översiktsvy Anvisningarna angående användning gäller för flera olika modeller och därför kan delar i figuren skilja sig åt i förhållande till din inköpta apparat. Beskrivning av mer komplicerade delar finns på följande sidor. 1 PURE WIND * 2 TEMPERATURVREDET 3 HYLLAS* 4 Låda för FRUKT och GRÖNSAKER 5 Utdragbar hylla med lock med ÄGGHÅLLARE 6 Utdragbar HYLLA FÖR VAROR* 7 Plats för en 2 LITRES FLASKA 8 FLASKHYLLA * Variabler för nummer och/eller position. Finns endast på vissa modeller. 1 2 3 1 2 3 4 5 6 7 8 PURE WIND BЗона для бутылок объемом 2 литра 5 6 7 8 4 10 Installation * TEMPERATURE Indicator light: to identify the coldest area in the refrigerator. ! Before placing your new appliance into operation please read these operating instructions carefully. They contain important information for safe use, for installation and for care of the appliance. ! Please keep these operating instructions for future reference. Pass them on to possible new owners of the appliance. Positioning and connection Positioning 1. Place the appliance in a well-ventilated humidity-free room. 2. Do not obstruct the rear fan grills. The compressor and condenser give off heat and require good ventilation to operate correctly and save energy. 3. Ensure the appliance is away from any sources of heat (direct sunlight, electric stove, etc.). Electrical connections After the appliance has been transported, carefully place it vertically and wait at least 3 hours before connecting it to the electricity mains. Before inserting the plug into the electrical socket ensure the following: • The appliance is earthed and the plug is compliant with the law. • The socket can withstand the maximum power of the appliance, which is indicated on the data plate located on the bottom left side of the fridge (e.g. 150 W). • The voltage must be in the range between the values indicated on the data plate located on the bottom left side (e.g. 220-240V). • The socket is compatible with the plug of the appliance. If the socket is incompatible with the plug, ask an authorised technician to replace it (see Assistance). Do not use extension cords or multiple sockets. ! Once the appliance has been installed, the power supply cable and the electrical socket must be easily accessible. ! The cable must not be bent or compressed. ! The cable must be checked regularly and replaced by authorised technicians only (see Assistance). ! The manufacturer declines any liability should these safety measures not be observed. Accessories * SHELVES : with or without grill. Due to the special guides the shelves are removable and the height is adjustable (see diagram), allowing easy storage of large containers and food. Height can be adjusted without complete removal of the shelf. 1. Check that OK appears clearly on the indicator light (see diagram). 2. If the word “OK” does not appear it means that the temperature is too high: adjust the REFRIGERATOR OPERATION knob to a higher (colder) position and wait approximately 10 hours until the temperature has stabilised. 3. Check the indicator light again: if necessary, readjust it following the initial process. If large quantities of food have been added or if the refrigerator door has been opened frequently, it is normal for the indicator not to show OK. Wait at least 10 hours before adjusting the REFRIGERATOR OPERATION knob to a higher setting. Start-up and use Starting the appliance ! Before starting the appliance, follow the installation instructions (see Installation). ! Before connecting the appliance, clean the compartments and accessories well with lukewarm water and bicarbonate. 1. Insert the plug into the socket and ensure that the internal light illuminates. 2. Turn the TEMPERATURE ADJUSTMENT knob to an average value. After a few hours you will be able to put food in the refrigerator. Setting the temperature The temperature inside the refrigerator compartment automatically adjusts itself according to the position of the thermostat knob. 1 = warmest MAX = coldest We recommend, however, a medium position. The cooling section of the refrigerator is located inside the back wall of the refrigerator compartment for increased space and improved aesthetics. During operation, the back wall will be covered in frost or water droplets depending on whether the compressor is operating or paused. Do not worry, the refrigerator is functioning normally. Chiller system The appliance comes with one of the chiller systems described below: take note of your system in order to determine the most efficient food storage method. * Varies by number and/or position, available only on certain models. 15 GB GB PURE WIND * It is recognizable due to the presence of the mechanism on the top part of the refrigerator compartment (see diagram). B B A A B Pure Wind maximises air circulation, improving the efficiency of the evaporator and helping to achieve the optimal temperature inside the refrigerator as quickly as possible each time it has been opened. The blown air (A) is cooled when it comes into contact with the cold wall, whereas the hotter air (B) is sucked up (see diagram). Static Models without the Aircooler have the cooling section in the internal back wall of the compartments. The wall will be covered in frost or water droplets depending on whether the compressor is operating or paused: both cases are normal. If the TEMPERATURE ADJUSTMENT knob has been set on high values with large quantities of food and with a high ambient temperature, the appliance can operate continuously, resulting in excessive frost formation and excessive energy consumption: compensate for this by shifting the knob towards lower values (defrosting will occur automatically). In static appliances, the air circulates in a natural way: the colder air tends to move downwards as it is heavier. The food should be stored as follows: Food Arrangement inside the refrigerator Above the fruit and vegetable bins Above the fruit and vegetable bins On any shelf Fresh fish and meat Fresh cheese Cooked food Salami, loaves of bread, On any shelf chocolate In the fruit and vegetable Fruit and vegetables compartment bins Eggs On the shelf provided Butter and margarine On the shelf provided Bottles, drinks, milk On the shelves provided Using the refrigerator to its full potential • Place only cold or lukewarm foods in the compartment, not hot foods (see Precautions and tips). • Remember that cooked foods do not last longer than raw foods. • Do not store liquids in open containers. They will increase humidity in the refrigerator and cause condensation to form. Food hygiene 1. Once you have bought your food, remove all external packaging made of paper/cardboard or other wrappers, which could introduce bacteria or dirt inside your refrigerator. 2. Protect the food, (especially easily perishable items and those that have a strong smell), in order to avoid contact between them, thereby removing both the possibility of germ/bacteria contamination as well as the diffusion of strong odours inside the fridge. 3. Store all food in such a way as to ensure air can circulate freely between different items. 4. Keep the inside of your fridge clean, taking care not to use oxidiser or abrasive products. 5. Remove all food past its expiry date from the refrigerator. 6. For the correct preservation of food, all easily perishable items (soft cheeses, raw fish, meat, etc.) should be stored in the coldest zone of the fridge compartment, i.e. just above the salad crisper where the temperature indicator is situated. Maintenance and care Switching the appliance off During cleaning and maintenance it is necessary to disconnect the appliance from the electricity supply. It is not sufficient to set the temperature adjustment knobs on (appliance off) to eliminate all electrical contact. Cleaning the appliance • The external and internal parts, as well as the rubber seals may be cleaned using a sponge that has been soaked in lukewarm water and bicarbonate of soda or neutral soap. Do not use solvents, abrasive products, bleach or ammonia. • The removable accessories may be soaked in warm water and soap or dishwashing liquid. Rinse and dry them carefully. Avoiding mould and unpleasant odours • The appliance is manufactured with hygienic materials which are odour free. In order to maintain an odour free refrigerator and to prevent the formation of stains, food must always be covered or sealed properly. • If you want to switch the appliance off for an extended period of time, clean the inside and leave the doors open. Defrosting the appliance ! Follow the instructions below. Do not speed up the defrosting process by using any devices or tools other than the scraper provided, you may damage the refrigeration circuit. * Varies by number and/or position, available only on certain models. 16 Defrosting the refrigerator compartment The refrigerator has an automatic defrosting function: water is ducted to the back of the appliance by a special discharge outlet (see diagram) where the heat produced by the compressor causes it to evaporate. It is necessary to clean the discharge hole regularly so that the water can flow out easily. Replacing the light bulb To replace the light bulb in the refrigerator compartment, pull out the plug from the electrical socket. Follow the instructions below. Access the light bulb by removing the cover as indicated in the diagram. Replace it with a similar light bulb within the power range indicated on the cover (10 W o 15 W). General safety GB • The appliance was designed for domestic use inside the home and is not intended for commercial or industrial use. • The appliance must be used to store and freeze food products by adults only and according to the instructions in this manual. • The appliance must not be installed outdoors, even in covered areas. It is extremely dangerous to leave the appliance exposed to rain and storms. • Do not touch the appliance with bare feet or with wet or moist hands and feet. • Do not touch the internal cooling elements: this could cause skin abrasions or frost/freezer burns. • When unplugging the appliance always pull the plug from the mains socket, do not pull on the cable. • Before cleaning and maintenance, always switch off the appliance and disconnect it from the electrical supply. It is not sufficient to set the temperature adjustment knobs on (appliance off) to eliminate all electrical contact. • In the case of a malfunction, under no circumstances should you attempt to repair the appliance yourself. Repairs carried out by inexperienced persons may cause injury or further malfunctioning of the appliance. • Do not use any sharp or pointed utensils or electrical equipment - other than the type recommended by the manufacturer - inside the frozen food storage compartments. • This appliance is not intended for use by persons (including children) with reduced physical, sensory or lack of experience and knowledge unless they have been given supervision or instruction concerning use of the appliance by a person responsible for their safety. Children should be supervised to ensure that they do not play with the appliance. • Keep packaging material out of the reach of children! It can become a choking or suffocation hazard. Disposal Precautions and tips ! The appliance was designed and manufactured in compliance with international safety standards. The following warnings are provided for safety reasons and must be read carefully. This appliance complies with the following Community Directives: - 73/23/EEC of 19/02/73 (Low Voltage) and subsequent amendments; -89/336/EEC of 03.05.89 (Electromagnetic Compatibility) and subsequent amendments; - 2002/96/CE.. • Observe local environmental standards when disposing packaging material for recycling purposes. • The European Directive 2002/96/EC on Waste Electrical and Electronic Equipment (WEEE), requires that old household electrical appliances must not be disposed of in the normal unsorted municipal waste stream. Old appliances must be collected separately in order to optimise the recovery and recycling of the materials they contain and reduce the impact on human health and the environment. The crossed out “wheeled bin” symbol on the product reminds you of your obligation, that when you dispose of the appliance it must be separately collected. Consumers should contact their local authority or retailer for information concerning the correct disposal of their old appliance. Respecting and conserving the environment • Install the appliance in a fresh and well-ventilated room. Ensure that it is protected from direct sunlight and do not place it near heat sources. • Try to avoid keeping the door open for long periods or opening the door too frequently in order to conserve energy. • Do not fill the appliance with too much food: cold air must circulate freely for food to be preserved properly. If circulation is impeded, the compressor will work continuously. • Do not place hot food directly into the refrigerator. The internal temperature will increase and force the compressor to work harder and will consume more energy. • Defrost the appliance if ice forms (see Maintenance). A thick layer of ice makes cold transference to food products more difficult and results in increased energy consumption. 17 GB Troubleshooting If the appliance does not work, before calling for Assistance (see Assistance), check for a solution from the following list. The internal light does not illuminate. • The plug has not been inserted into the electrical socket, or not far enough to make contact, or there is no power in the house. The refrigerator do not cool well. • The door do not close properly or the seals are damaged. • The door are opened too frequently. • The TEMPERATURE ADJUSTMENT knob is not in the correct position • The refrigerator have been over-filled. The food inside the refrigerator is beginning to freeze. • The TEMPERATURE ADJUSTMENT knob is not in the correct position. • The food is in contact with the back inside wall of the refrigerator. The PURE WIND fan does not rotate • The refrigerator door is open. • The PURE WIND system is only activated automatically when it becomes necessary to restore perfect operational conditions inside the refrigerator compartment. The motor runs continuously. • The door is not closed properly or is continuously opened. • The outside ambient temperature is very high. • The thickness of the frost exceeds 2-3 mm (see Maintenance). The appliance makes a lot of noise. • The appliance has not been installed on a level surface (see Installation). • The appliance has been installed between cabinets that vibrate and make noise. • The internal refrigerant makes a slight noise even when the compressor is off. This is not a defect, it is normal. Some of the external parts of the refrigerator become hot. • These raised temperatures are necessary in order to avoid the formation of condensation on certain parts of the product. The back wall of the refrigerator unit is covered in frost or droplets of water • This shows the appliance is operating normally. There is water at the bottom of the refrigerator. • The water discharge hole is blocked (see Maintenance). 18