1
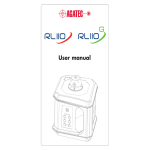
User manual
User Manual
English
Introduction
Purchase
Congratulations on the purchase of a new Rotating Laser from Agatec.
Product
This manual contains important safety directions as well
as instructions for setting up the product and operating it.
Refer to "Safety Directions" for further
information.
Read carefully through the User Manual before you switch on the product.
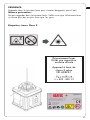
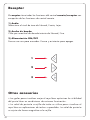
Symbols
The symbols used in this manual have the following meanings:
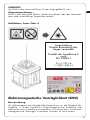
DANGER
Indicates an imminently hazardous situation which, if not avoided, will
result in death or serious injury.
WARNING
Indicates a potentially hazardous situation or an unintended use which, if
not avoided, could result in death or serious injury.
CAUTION
Indicates a potentially hazardous situation or an unintended use which, if
not avoided, may result in minor or moderate injury and / or appreciable
material, financial and environmental damage.
2
Contents
Introduction............................................................................
Features................................................................................
Laser Overview {A} ..............................................................
Keypad Overview {B} ...........................................................
Basic Operation ....................................................................
How to use your Agatec RL110 ..............................................
Button Functions.....................................................................
Automatic / Manual modes ...................................................
H.I. Alert mode......................................................................
Rotation mode ………………………….....................................
Scanning mode …………………………....................................
Wall Mount ………………………………...................................
Set-up manual slopes……………………...................................
Accessories ............................................................................
Remote Control .....................................................................
Receiver/Remote Control …....................................................
Receiver …...........................................................................
Other accessories .................................................................
Batteries .................................................................................
Low battery Indicator ............................................................
Replacing alkaline batteries ...................................................
Check and Adjust .................................................................
Notes and Responsibilities .....................................................
Checking level accuracy ........................................................
Checking vertical accuracy ....................................................
Adjusting level accuracy ………………....................................
Troubleshooting ....................................................................
Care and Transport................................................................
Transport..............................................................................
Storage ...............................................................................
Cleaning and Drying ............................................................
Safety Directions ...................................................................
General ...............................................................................
Intended Use.........................................................................
Limits of Use .........................................................................
Responsibilities .....................................................................
Hazards of Use ....................................................................
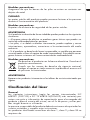
Laser Classification ...............................................................
Electromagnetic Compatibility (EMC) ......................................
FCC Statement, Applicable in U.S. .........................................
International Limited Warranty ...........................................
Technical Data .......................................................................
EN
2
4
4
4
6
6
6
7
7
8
8
8
9
9
9
10
10
11
11
11
11
11
11
12
12
12
13
14
14
14
15
15
15
15
16
16
17
19
22
22
23
24
3
Features
The Agatec RL110 laser offers the interior contractor many great features
to make work easier and more accurate.
A complete laser, with all needed functions, a bright beam for
high visibility, with very compact dimensions.
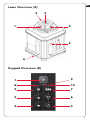
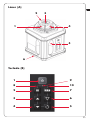
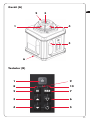
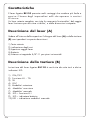
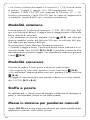
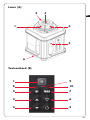
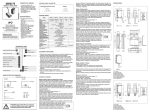
Laser Overview {A}
See the inside front cover for a diagram of the laser {A} and keypad {B}
corresponding to these callouts.
1)
2)
3)
4)
5)
6)
Rotating head
Axes indications
Plumb or square beam laser beam aperture
Rotating laser beam aperture
Batteries
5/8"-11 Tripod mount for horizontal setup
Keypad Overview {B}
The keypad for the Agatec RL110 laser has seven buttons and three LED
indicators.
1)
2)
3)
4)
5)
6)
7)
8)
9)
10)
4
On / Off
H.I. (Elevation) Alert
UP
DOWN
Rotation Mode
Scan
Manual Mode
LED – H I indication
LED – Level Status / Battery
LED – Manual mode indication
EN
Laser Overview {A}
2
1
3
4
5
6
Keypad Overview {B}
1
9
8
10
2
7
3
6
4
5
5
Basic Operation
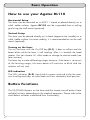
How to use your Agatec RL110
Horizontal Setup
The laser can be mounted on a 5/8"-11 tripod or placed directly on a
solid, stable surface. Agatec RL110 can be suspended from a ceiling
grid using the wall mount (optional).
Vertical Setup
The laser can be placed directly on its back (opposite the handle) on a
solid, stable surface. For more stability, it is recommended to use the wall
mount (optional).
Turning on the laser
Turn on the laser with the On/Off key {B-1}. It does a self-test and the
beam blinks while the laser is self- leveling. After it is leveled, the head
rotates. You can choose H.I. Alert mode or change to manual mode (see
later sections).
The laser has a wide self-leveling range; however, if the laser is set up out
of the leveling range, the laser beam will continue to blink and the
rotation will not start.
LED indication
The LED indicator {B-9} slowly blinks green and red while the axes
are leveling and stays on when both axis has reached a level position.
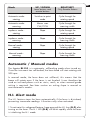
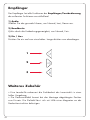
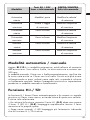
Button Functions
The UP/DOWN buttons on the laser and the remote control buttons have
multiple functions depending on the mode of operation. Please refer to the
chart below to better understand their functionality.
6
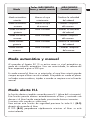
Mode
UP / DOWN
Laser buttons and
remote buttons
RIGHT/LEFT
Only Remote Buttons
Automatic mode rotating
Switches to point
mode
Cycle through the
rotating speed
Automatic mode scanning
Moves scan
CW/CCW
Cycle through the
scanning width
Laydown mode rotating
Slope
Cycle through the
rotating speed
Laydown mode scanning
Slope
Cycle through the
scanning width
Manual mode rotating
Slope
Cycle through the
rotating speed
Slope
Cycle through the
scanning width
Manual mode scanning
EN
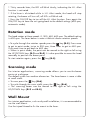
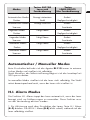
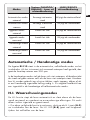
Automatic / Manual modes
The Agatec RL110 is in automatic, self-leveling mode when turned on.
Once the instrument has self-leveled, the laser head will start rotating with
300 rpm.
In manual mode, the laser does not self-level; this means that the
beam will rotate even if the laser is not leveled. It can therefore be
used on inclined planes such as stairs, roofs, or when manual grade
setting is required. See later section on setting slope in manual or
semi-automatic modes.
H.I. Alert mode
The H.I. feature stops the laser automatically if the laser is disturbed,
preventing inaccurate readings. It functions only when activated.
• To activate this safeguard feature, keep pressed the H.I. key {B-2} after
turning on the laser. The H.I. LED {B-8} will blink rapidly while the laser
is initializing the H.I. mode.
7
• Thirty seconds later, the LED will blink slowly, indicating the H.I. Alert
function is activated.
•
If the laser is disturbed while in H.I. Alert mode, the head will stop
rotating, the beam will turn off, all LEDs will blink red.
• Press the ON/Off key to turn off the H.I. Alert function. Press again the
ON/OFF key to have the unit going back to the default settings (600 rpm,
automatic mode).
Rotation mode
The head rotates at three speeds: 0, 300, 450, 600 rpm. The default setting
is 600 rpm. The laser beam is more visible at slower rotation speeds.
• To cycle through the rotation speeds press the
key {B-5}. Press once
to get to point mode, twice to 300 rpm, three times to get to 450 rpm.
One more time to get back to 600 rpm.
• When in point mode, the point can be moved to the right or left using
the UP/DOWN keys {B-3 and B-4}. It is also possible to move the head
manually to position the beam point.
To start rotation again, press the
key {B-5}.
Scanning mode
For interior applications, scanning mode allows you to see the beam
easier at a distance.
The default width has medium dimension. The laser beam is more visible
at small width.
• To scan press the
key {B-6}.
• To cycle through the scan width, press the
key {B-6}.
• The scanning beam can be moved to the right or left using the
UP/DOWN keys {B-3 and B-4}.
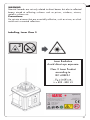
Wall Mount
For interior application, such as drywall installation, it is recommended to
use the wall mount.
Use the tripod thread to fix the mount to the laser.
8
EN
Set-up for manual slopes
The Agatec RL110 can be used to manually create slopes for special
applications, stairways, sloped ceilings, etc.
For slopes up to 10%, set up the laser in horizontal mode and use the
keypad or remote to set the slope following the instructions below.
In full manual mode, the unit will not self-level on both axis, meanwhile
the head will continue to rotate. The plane of laser light can be tilted in
either one or both planes.
To use the laser in full manual mode:
• After turning the laser on and allowing it to self-level, press the Manual
button {B-7}. The LED {B-10} indicates that the laser is in manual mode
and you can set slope in the X-axis.
• Press UP/DOWN keys to adjust the slope of the X-axis.
Press the Manual key {B-7} once more to set slope on Y-axis. The LED
{B-10} blinks to indicate that the laser is in manual mode and you can
set slope in the Y-axis.
Keep pressed the MAN key to exit the manual mode and return to the
automatic mode.
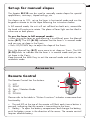
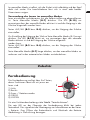
Accessories
4
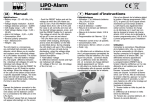
Remote Control
The Remote Control has five buttons.
1)
2)
3)
4)
5)
LEFT
RIGHT
Scan / Rotation Mode
UP
DOWN
1
2
5
3
Please refer to the table in "Button Functions" to better understand their
functionality.
• The red LED at the top of the remote will flash each time a button is
pressed, indicating that the remote is transmitting to the laser.
• Battery - To open the battery compartment and change the battery,
push the battery cover in the direction of the arrow. The remote control
requires alkaline battery.
9
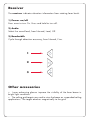
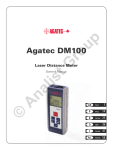
Receiver
The receiver indicates elevation information from rotating laser levels.
1) Power on/off
Press once to turn On. Press and hold to turn off.
2) Audio
Select the sound level, from Normal, Loud, Off.
3) Bandwidth
Cycle through detection accuracy, from Normal, Fine.
1
2
3
Other accessories
• Laser enhancing glasses improve the visibility of the laser beam in
bright light conditions.
• The ceiling grid targets are used to view the beam on suspended ceiling
applications. The target attaches magnetically to the grid.
10
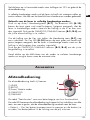
Batteries
EN
Low battery Indicator
When the battery power is low, the LED {B-9} will blink red during
operation. Batteries have to be replaced as soon as possible. When
battery is empty, the laser head will stop rotating and the low battery
LED {B-9} will stay on.
Replacing alkaline batteries
Follow the steps below to replace the alkaline batteries in your laser.
• To access the battery compartment, loosen the knobs connecting the
laser to the wall mount.
• Use a coin or small screwdriver to remove the cover of the battery
compartment at the back of the laser.
• Insert two fresh alkaline batteries (D size or LR20), following the
polarization indicated at the bottom of the battery compartment. The plus
contact is rounded and raised. When replacing batteries, change both at
the same time.
• Replace the compartment and tighten with a coin or screwdriver.
Check and Adjust
Notes and Responsibilities
• It is the responsibility of the user to follow operating instructions and
to periodically check the accuracy of the instrument and work as it
progresses.
• The laser is adjusted to the defined accuracy specifications at the
factory. It is recommended to check your laser for accuracy upon receipt
and periodically thereafter to ensure accuracy is maintained. If your laser
requires adjustment, contact the nearest authorized service center.
11
• Accuracy adjustment should only be performed by a qualified
individual that understands basic adjustment principles.
Checking level accuracy
To check the level accuracy of your laser, place the unit on a flat, level
surface or tripod approximately 30 meters (100 ft.) from a wall.
• Align the X-axis so that it is square to the wall. Allow the laser to selflevel completely (approximately one minute after the laser begins to
rotate). Then mark the position of the beam (Position 1).
• Rotate the laser 180°, allow it to self level and mark the opposite side
of the first axis (Position 2).
• Align the Y-axis by rotating the laser 90° so that this axis is now square
to the wall. Allow the laser to self- level completely, and then mark the
position of the beam (Position 3).
• Rotate the laser 180°, allow it to self level and mark the opposite side
of the Y-axis (Position 4).
• The laser is within its accuracy specification if the four marks are
within ± 3 mm (± 1/8") from the center.
Checking vertical accuracy
To check the vertical accuracy of your laser, place the unit in the laydown
position on a flat, level surface approximately 15-30 meters (50-100 ft.)
from a wall.
• Hang a plumb line on the wall.
• Move the laser until the vertical, rotating beam is aligned to the plumb line.
• If the rotating beam is not plumb, adjustment is necessary.
Adjusting level accuracy
If the accuracy checks may lead to a necessity of re-adjusting the unit, a
corresponding description of how to adjust the level accuracy can be
found online at www.agatec.com.
12
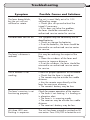
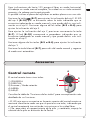
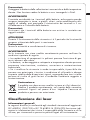
Troubleshooting
Symptom
EN
Possible Causes and Solutions
The laser beam blinks,
but the unit will not
self-level or rotate.
The unit is most likely out of its 10%
self-leveling range.
• Check your set up and re-level the
tripod if necessary.
• If this does not solve the problem,
the laser should be returned to an
authorized service center for service.
The laser does not turn on.
The symptom may be caused by low or
dead batteries.
• Check or change the batteries.
• If not the batteries, the laser should be
returned to an authorized service center
for service.
The laser’s distance is
reduced.
Dirt may be reducing the output of the
laser.
• Clean the windows of the laser and
receiver to improve distance.
• If not the windows, the laser should be
returned to an authorized service center
for service.
The IR Remote is not
working.
Check for proper operation of the remote.
• Check that the laser is turned on.
• The remote may be outside the usable
distance.
• Aim the remote more directly at the
laser for maximum distance.
• The remote’s battery may be low.
The laser’s receiver is not
functioning properly.
Check for proper operation of the receiver.
• The laser is not rotating. It is leveling or
in elevation alert.
• The laser is in scanning mode.
• The receiver may be outside the usable
distance.
• The receiver’s battery may be low.
ALL three LED's are
flashing in sequence.
The unit has been moved or pushed as HI
was active. Press ON/OFF to restart the unit.
13
Care and Transport
Transport
Transport in the field
When transporting the equipment in the field, always make sure that you
• either carry the product in its original transport container,
• or carry the tripod with its legs splayed across your shoulder, keeping
the attached product upright.
Transport in a road vehicle
Never carry the product loose in a road vehicle, as it can be affected by
shock and vibration. Always carry the product in its transport container
and secure it.
Shipping
When transporting the product by rail, air or sea, always use the
complete original Agatec packaging, transport container and cardboard
box, or its equivalent, to protect against shock and vibration.
Shipping, transport of batteries
When transporting or shipping batteries, the person in charge of the
product must ensure that the applicable national and international rules
and regulations are observed. Before transportation or shipping, contact
your local passenger or freight transport company.
Field Adjustment
After transport inspect the field adjustment parameters given in this user
manual before using the product.
Storage
Product
Respect the temperature limits when storing the equipment, particularly in
summer if the equipment is inside a vehicle. Refer to "Technical Data" for
information about temperature limits.
Field Adjustment
After long periods of storage inspect the field adjustment parameters
given in this user manual before using the product.
Alkaline Batteries
If the equipment is to be stored for a long time, remove the alkaline
batteries from the product in order to avoid the danger of leakage.
14
EN
Cleaning and Drying
Product and Accessories
• Blow dust off optical parts.
• Never touch the glass with your fingers.
• Use only a clean, soft, lint-free cloth for cleaning. If necessary, moisten
the cloth with water or pure alcohol.
• Do not use other liquids; these may attack the polymer components.
Damp Products
• Dry the product, the transport container, the foam inserts and the
accessories at a temperature not greater than 40°C / 104°F and clean
them.
• Do not repack until everything is completely dry.
Damp Products
• Dry the product, the transport container, the foam inserts and the
accessories at a temperature not greater than 40°C / 104°F and clean
them.
• Do not repack until everything is completely dry.
Safety Directions
General
Description
The following directions should enable the person responsible for the
product, and the person who actually uses the equipment, to anticipate
and avoid operational hazards.
The person responsible for the product must ensure that all users
understand these directions and adhere to them.
Intended Use
Permitted Use
• The instrument casts a horizontal laser plane for the purposes of
alignment.
• The unit can be set up on its own base plate, wall- mount or on a
tripod.
• The laser beam can be detected by means of a laser detector.
• This product is intended for indoor use and applica- tions.
15
Adverse Use
• Use of the product without instruction.
• Use outside of the intended limits.
• Disabling safety systems.
• Removal of hazard notices.
• Opening the product using tools, for example screw- driver, unless
this is specifically permitted for certain functions.
• Modification or conversion of the product.
• Use after misappropriation.
• Use of products with obviously recognizable damages or defects.
• Use with accessories from other manufacturers without the prior
explicit approval of Agatec.
• Inadequate safeguards at the work site, for example when using on
or near roads.
• Deliberate dazzling of third parties.
• Controlling of machines, moving objects or similar monitoring application
without additional control and safety installations.
WARNING
Adverse use can lead to injury, malfunction and damage. It is the task
of the person responsible for the equipment to inform the user about
hazards and how to counteract them. The product is not to be operated
until the user has been instructed on how to work with it.
Limits of Use
Environment
Suitable for use in an atmosphere appropriate for permanent human
habitation: not suitable for use in aggressive or explosive environments.
DANGER
Local safety authorities and safety experts must be contacted before
working in hazardous areas, or in close proximity to electrical installations
or similar situations by the person in charge of the product.
Responsibilities
Manufacturer of the product
Agatec SAS, 21, boulevard Littré, F-78600 Le Mesnil Le Roi, hereinafter
referred to as Agatec, is responsible for supplying the product, including
the user manual and original accessories, in a completely safe condition.
16
EN
Manufacturers of non Agatec accessories
The manufacturers of non Agatec accessories for the product are
responsible for developing, implementing and communicating safety concepts
for their products, and are also responsible for the effective- ness of those
safety concepts in combination with the Agatec product.
Person in charge of the product
The person in charge of the product has the following duties
• To understand the safety instructions on the product and the instructions
in the user manual.
• To be familiar with local regulations relating to safety and accident
prevention.
• To inform Agatec immediately if the product and the application
becomes unsafe.
WARNING
The person responsible for the product must ensure that it is used in accordance with the instructions. This person is also accountable for the training
and the deployment of personnel who use the product and for the safety
of the equipment in use.
Hazards of Use
WARNING
The absence of instruction, or the inadequate imparting of instruction, can
lead to incorrect or adverse use, and can give rise to accidents with
far-reaching human, material, financial and environmental conse- quences.
Precautions:
All users must follow the safety directions given by the manufacturer and
the directions of the person respon- sible for the product.
CAUTION
Watch out for erroneous measurement results if the product has been
dropped or has been misused, modified, stored for long periods or
transported.
Precautions:
Periodically carry out test measurements and perform the field
adjustments indicated in the user manual, particularly after the product
has been subjected to abnormal use and before and after important
measurements.
17
DANGER
Because of the risk of electrocution, it is
very dangerous to use grade rods and
staffs in the vicinity of electrical installations such as power cables or
electrical railways.
Precautions:
Keep at a safe distance from electrical installations. If it is essential to
work in this environment, first contact the safety authorities responsible for
the electrical installa- tions and follow their instructions.
WARNING
If the product is used with accessories, for example masts, staffs, poles,
you may increase the risk of being struck by lightning.
Precautions:
Do not use the product in a thunderstorm.
WARNING
Inadequate securing of the working site can lead to dangerous situations,
for example in traffic, on building sites, and at industrial installations.
Precautions:
Always ensure that the working site is adequately secured. Adhere to the
regulations governing safety and accident prevention and road traffic.
CAUTION
If the accessories used with the product are not properly secured and the
product is subjected to mechanical shock, for example blows or falling,
the product may be damaged or people may sustain injury.
Precautions:
When setting-up the product, make sure that the accessories are correctly
adapted, fitted, secured, and locked in position. Avoid subjecting the
product to mechanical stress.
CAUTION
During the transport, shipping or disposal of batteries it is possible for
inappropriate mechanical influ- ences to constitute a fire hazard.
Precautions:
Before shipping the product or disposing of it, discharge the batteries by
running the product until they are flat. When transporting or shipping batteries, the person in charge of the product must ensure that the applicable national and international rules and regulations are observed. Before
transportation or shipping contact your local passenger or freight
transport company.
WARNING
High mechanical stress, high ambient tempera- tures or immersion
into fluids can cause leackage, fire or explosions of the batteries.
18
EN
Precautions:
Protect the batteries from mechanical influences and high ambient
temperatures. Do not drop or immerse batteries into fluids.
WARNING
Short circuited battery terminals can overheat and cause injury or fire, for
example by storing or transporting in pockets if battery terminals come in
contact with jewellery, keys, metallized paper or other metals.
Precautions:
Make sure that the battery terminals do not come into contact with
metallic objects.
CAUTION
During the operation of the product there is a hazard of squeezing
extremities by moving parts.
Precautions:
Keep extremities in a safe distance from the moving parts.
WARNING
If the product is improperly disposed of, the following can happen:
• If polymer parts are burnt, poisonous gases are produced which may
impair health.
• If batteries are damaged or are heated strongly, they can explode and
cause poisoning, burning, corrosion or environmental contamination.
• By disposing of the product irresponsibly you may enable unauthorized
persons to use it in contravention of the regulations, exposing themselves
and third parties to the risk of severe injury and rendering the environment
liable to contamination.
Precautions:
The product must not be disposed with household waste.
Dispose of the product appropriately in accordance with the
national regulations in force in your country.
WARNING
Only Agatec authorized service workshops are entitled to repair these
products.
Laser Classification
General
The following directions (in accordance with the state of the art international standard IEC 60825-1 (2007-03) and IEC TR 60825-14
(2004-02)) provide instruction and training information to the person
responsible for the product and the person who actually uses the equipment,
to anticipate and avoid operational hazards.
19
The person responsible for the product must ensure that all users understand
these directions and adhere to them.
Products classified as laser class 1, class 2 and class 3R do not require
• laser safety officer involvement,
• protective clothes and eyewear,
• special warning signs in the laser working area if used and operated
as defined in this user manual due to the low eye hazard level.
Products classified as laser class 2 or class 3R may cause dazzle, flash
blindness and afterimages, particularly under low ambient light conditions.
Agatec RL110 is a Class 2 laser product in accordance with:
• IEC60825-1 : 2007 "Radiation safety of laser products"
Laser Class 2 products:
Do not stare into the laser beam or direct it towards other people
unnecessarily. Eye protection is normally afforded by aversion
responses including the blink reflex.
WARNING:
Looking directly into the beam with optical aids
(e.g. binoculars, telescopes) can be hazardous.
Precautions:
Do not look directly into the beam with optical aids.
CAUTION:
Looking into the laser beam may be hazardous to the eyes.
Precautions:
Do not look into the laser beam. Make sure the laser is aimed above or
below eye level. (particularly with fixed installations, in machines, etc.)
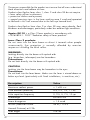
Description
Value
Maximum radiant power
< 1 mW c.w.
Pulse duration (effective)
4.5, 2.2, 1.5, 1.1 ms
Pulse repetition frequency
0, 2.5, 5, 7.5, 10 rps
Wavelength
620-690 nm
Beam divergence
< 1.5 mrad
NOHD (Nominal Ocular
35 m / 115 ft
Hazard Distance) at 0.25s
Scan angle
20
2 to 36°
EN
WARNING
Potential hazards are not only related to direct beams but also to reflected
beams aimed at reflecting surfaces such as prisms, windows, mirrors,
metallic surfaces etc.
Precautions:
Do not aim at areas that are essentially reflective, such as mirror, or which
could emit unwanted reflections.
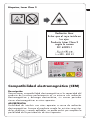
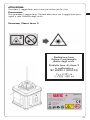
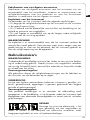
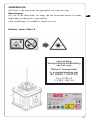
Labelling, Laser Class 2
Laser Radiation
Avoid direct eye exposure
Class 2 Laser Product
according to
IEC 60825-1
21
Electromagnetic Compatibility (EMC)
Description
The term Electromagnetic Compatability is taken to mean the capability
of theproduct to function smoothly in an environment where electromagnetic radiation and electrostatic discharges are present, and without
causing electromagnetic disturbances to other equip- ment.
WARNING
Electromagnetic radiation can cause disturbances in other equipment.
Although the product meets the strict regulations and standards
which are in force in this respect, Agatec cannot completely exclude
the possibility that other equipment may be disturbed.
CAUTION
There is a risk that disturbances may be caused in other equipment
if the product is used in conjunction with accessories from other manufacturers, for example field computers, personal computers, two-way
radios, non- standard cables or external batteries.
Precautions:
Use only the equipment and accessories recommended by Agatec.
When combined with the product, they meet the strict requirements
stipulated by the guide- lines and standards. When using computers
and two- way radios, pay attention to the information about electromagnetic
compatibility provided by the manufacturer.
CAUTION
Disturbances caused by electromagnetic radia- tion can result in erroneous
measurements.
Although the product meets the strict regulations and standards whichin
this respect, Agatec cannot completely exclude the possibility product
may be disturbed by very intense electromagnetic radiation, near radio
transmitters, two-way radios or diesel gener- ators.
Precautions:
Check the plausibility of results obtained under these conditions.
FCC Statement, Applicable in U.S.
WARNING
This equipment has been tested and found to comply with the limits for a
Class B digital device, pursuant to part 15 of the FCC rules.
These limits are designed to provide reasonable protection against harmful
interference in a residential installation.
This equipment generates, uses and can radiate frequency energy and, if
not installed and used in accordance with the instructions, may cause
harmful interference to radio communication.
22
EN
However, there is no guarantee that interference will not occur in a particular
installation.
If this equipment does cause harmful interference to radio or television
reception, which can be determined by turning the equipment off and on,
the user is encour- aged to try to correct the interference by one or more of
the following measures:
• Reorient or relocate the receiving antenna.
• Increase the separation between the equipment and the receiver.
• Connect the equipment into an outlet on a circuit different from that to which
the receiver is connected.
• Consult the dealer or an experienced radio/TV techni-cian for help.
WARNING
Changes or modifications not expressly approved by Agatec for compliance
could void the user's authority to operate the equipment.
REMOTE CONTROL
IR Remote range
Batteries
up to 30 m (100 ft)
one AA alkaline battery
REMOTE RECEIVER CONTROL
Batteries
a 9-volt type alkaline battery
RECEIVER
Batteries
a 9-volt type alkaline battery
AGATEC SAS
21, boulevard Littré - F- 78600 Le Mesnil le Roi
Phone +33 1 34 93 35 80 - www.agatec.com
International Limited Warranty
This product is subject to the terms and conditions set out in the
International Limited Warranty which you can download from the Agatec
home page at www.agatec.com or collect from your Agatec distributor.
The foregoing warranty is exclusive and is in lieu of all other warranties,
terms or conditions, express or implied, either in fact or by operation of
law, statutory or otherwise, including warranties, terms or conditions of
merchantability, fitness for a particular purpose, satisfactory quality and
non-infringement, all of which are expressly disclaimed.
23
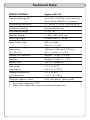
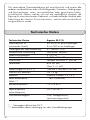
Technical Data
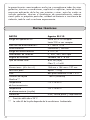
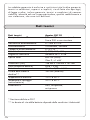
SPECIFICATIONS
Agatec RL110
Operating Range Ø
up to 60 m (200 ft) w/out receiver
up to 200m (656 ft) w/ receiver
Self-leveling Accuracy*
± 1 mm at 10 m (± 0.04”at 33 ft)
Automatic Leveling
Horizontal/Vertical
Self-leveling Range
± 10%; 6°
Rotation Speeds
0, 300, 450, 600 rpm
Scanning Angle
variable from 2° to 36°
Laser Diode Type
635 nm (red)
Class 2, < 1 mW
Dimensions
(H x W x D)
156 mm x 154 mm x 197 mm
(6.1“ x 6.06“ x 7.75“)
Weight with Batteries
Approx 1.5 kg ( 3.3 lbs)
Batteries
Alkaline D-cells 2 x 1.5 V
Battery life**
160 hrs. (Alkaline)
Operating
temperature
-10°C to 50°C
(14°F to +122°F)
Storage temperature
(w/o batteries)
-20°C to 80°C
( -4° F to 176°F)
Protection against water
IP54, dust-proof, splash-proof
* Accuracy is defined at 25°C
** Battery life is dependent upon environmental condi- tions
24
Manuel de l'utilisateur
Manual d’utilisation
Français
Introduction
Acquisition
Nous vous félicitons pour l'achat de ce laser rotatif Agatec
Produit
Le présent mode d'emploi contient d'importantes recommandations de sécurité de même que des instructions
concernant l'installation et l'utilisation de l'équipement.
Reportez-vous au chapitre "Consignes de sécurité" pour
de plus amples informations.
Lisez attentivement ce manuel avant d'utiliser le produit
Symboles
Les symboles utilisés dans ce manuel ont les significations suivantes:
DANGER
Indique une situation dangereuse qui, si elle n'est pas évitée, entraînera
de graves blessures voire la mort.
AVERTISSEMENT
Indique une situation potentiellement dangereuse ou une utilisation non
conforme qui, si elle n'est pas évitée, peut entraîner de graves blessures
voire la mort.
ATTENTION
Indique une situation potentiellement dangereuse qui, si elle n'est pas
évitée, peut entraîner des blessures légères ou moyennement graves
et/ou causer des dommages matériels conséquents, des atteintes sensibles à l'environnement ou un préjudice financier important.
26
Contient
F
Introduction ...........................................................................
Caractéristiques ....................................................................
Vue du laser {A} ...................................................................
Vue du laser {B} ...................................................................
Fonctionnement de base ......................................................
Comment utiliser le Agatec RL110 ..........................................
Fonctions des touches ...........................................................
Mode Automatique/Mode Manuel .........................................
Alarme H.I. ..........................................................................
Mode Rotation ………………………….....................................
Mode Balayage …………………….........................................
Fixation murale ……………………….......................................
Pente manuelle …………………..............................................
Accessoires ............................................................................
Télécommande .....................................................................
Détecteur/télécommande .......................................................
Détecteur laser .....................................................................
Autres accessoires ................................................................
Batteries .................................................................................
Indicateur Faible charge ........................................................
Remplacement des piles alcalines ...........................................
Ajustage de la précision ......................................................
Remarques et responsabilités ..................................................
Contrôle de la précision de nivellement ...................................
Contrôle de la précision verticale ...........................................
Réglage du niveau de précision ………...................................
Dépannage ............................................................................
Entretien et transport ...........................................................
Transport .............................................................................
Stockage .............................................................................
Nettoyage et séchage ...........................................................
Consignes de sécurité ...........................................................
Informations générales ..........................................................
Utilisation conforme ..............................................................
Limites d'utilisation ................................................................
Responsabilités .....................................................................
Risques liés à l'utilisation .......................................................
Classification laser ................................................................
Compatibilité électromagnétique (CEM) ...................................
Déclaration FCC, applicable aux Etats-Unis .............................
Garantie internationale limitée ...........................................
Caractéristiques techniques .................................................
26
28
29
29
30
30
30
31
31
32
32
32
33
33
33
34
34
35
35
35
35
35
35
36
36
36
37
38
38
38
39
39
39
39
40
40
41
43
46
46
47
48
27
Caractéristiques
Le laser Agatec RL110 fournit aux spécialistes des travaux d'intérieur de
nombreux avantages qui rendent le travail plus facile et plus précis.
Un laser complet avec de nombreuses fonctions, un laser très lumineux
pour une plus grande visibilité.
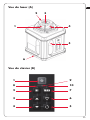
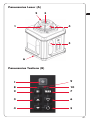
Vue du laser {A}
Voir le verso de la page de couverture, où figure une illustration du laser
{A} et du clavier {B}.
1)
2)
3)
4)
5)
6)
Tête rotative
Indications d'axe
Sortie du faisceau laser pour équerrage ou alignement vertical
Sortie du faisceau laser rotatif
Batteries
Insert horizontal pour trépied standard 5/8"
Vue du clavier {B}
Le clavier du laser Agatec RL110 comprend sept touches et trois
témoins LED.
1)
2)
3)
4)
5)
6)
7)
8)
9)
10)
28
ON/OFF
Alarme H.I
HAUT
BAS
Mode rotation
Mode balayage
Mode manuel
LED - Alarme HI
LED - Faible charge Batterie
LED - Indication mode manuel
Vue du laser {A}
F
2
1
3
4
5
6
Vue du clavier {B}
1
9
8
10
2
7
3
6
4
5
29
Fonctionnement de base
Comment utiliser le Agatec RL110
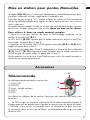
Mise en station horizontale
Le laser peut être posé directement sur une surface stable et ferme ou peut
être fixé sur un trépied standard 5/8‘’. On peut suspendre les lasers
Agatec RL110 à une ossature de plafond grâce au support mural (en
option).
Mise en station verticale
Le laser peut être posé directement sur une surface stable et ferme (face
arrière opposée à la poignée) ou sur un trépied standard 5/8".Pour une
stabilité optimale il est recommandé d'employer la fixation murale.
Mise sous tension du laser
Allumer le laser avec la touche Marche/Arrêt {B-1}. L'instrument effectue
un autotest, et le faisceau clignote pendant l'autocalage du laser. A la fin
du calage, la tête tourne. On peut activer l'alarme H.I. ou commuter en
mode manuel (voir plus loin).
Le laser a une grande plage d'autocalage, mais s'il se trouve hors plage,
le faisceau va clignoter et la rotation ne se fera pas.
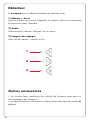
Témoins LED sur le clavier
Le témoin LED {B-9} clignote lentement en vert et rouge pendant le calage
des axes et émettent une lumière continue après le calage.
Fonctions des touches
Les touches Haut/Bas du laser et des télécommandes ont des fonctions
qui varient selon le mode opératoire.
30
Mode
Mode automatique rotation
Mode automatique balayage
Mode horizontal rotation
Mode horizontal balayage
Mode manuel rotation
Mode manuel balayage
Mode support motorisé
Mode Boutons
Haut / Bas
Boutons
Plus et Moins
telecommande
Déplace le faisceau fixe
sens antihoraire/horaire
Déplace le faisceau
de balayage
sens antihoraire/horaire
Déplace le plan verticale
gauche/droite
Déplace le faisceau
de balayage
sens antihoraire/horaire
Modifie la pente
manuelle - incline le plan
Déplace le faisceau
de balayage
sens antihoraire/horaire
Sans fonction
Change la vitesse
de la tête
Change la largeur
de balayage
F
Change la vitesse
de la tête
Change la largeur
de balayage
Change la vitesse
de la tête
Change la largeur
de balayage
Déplace le laser en haut/en bas
Mode Automatique/Mode Manuel
Le Agatec RL110 est par défaut en mode automatique avec autocalage
lorsqu’on le met en marche. Après le calage de l'instrument, la tête se met
à tourner a 300 tr/min.
En mode manuel, il n'y a pas d'autocalage du laser: le faisceau tourne
même si le laser n'est pas calé. Le mode manuel peut donc s'utiliser pour
réaliser des plans inclinés comme des escaliers, des toits ou pour établir
des pentes manuelles. Voir les sections sur le réglage d'une pente en
mode manuel ou semi-automatique.
Alarme H.I.
L'alarme H.I. arrêtera le laser et émettra une alarme si la hauteur du
laser change, pour éviter des lectures incorrectes. Cette fonction n’est
fonctionnelle que si elle est activée.
• Pour activer cette fonction de sécurité, appuyer sur la touche H.I. {B-2}
après la mise sous tension du laser. La LED {B-8} clignotera rapidement
pendant l'autocalage du laser.
31
• Trente secondes après le début de rotation de la tête, la LED clignotera
lentement pour signaler que l'alarme H.I. est activée.
• Si le laser se déplace en mode Alarme H.I., la tête s'arrêtera de tourner,
le faisceau laser sera désactivé, toutes les LEDs clognote rouge.
• Appuyer sur la touche H.I. pour désactiver l'alarme.
Appuyer une nouvelle fois sur la touché ON/OFF pour revenir aux
valeurs par défaut (600 m, mode automatique).
Mode Rotation
Il y a 3 vitesses de rotation de la tête: 300, 450, 600 rpm. Par défaut, la vitesse
est réglée sur 600 rpm. La visibilité du laser est plus forte à de faibles vitesses.
• Pour augmenter la vitesse de rotation {B-5}, appuyer une fois sur la
touche
, pour avoir le mode point, deux fois pour 300 rpm, et 3 fois
pour 450 rpm. Enfin si vous souhaitez revenir à 600 rpm appuyer une
fois de plus.
• Lorsque vous êtes en mode point, ce dernier peut être déplacé à droite
ou a gauche en utilisant les flèches sur le clavier {B-3 et B-4}. Il est
également possible de régler la tête manuellement pour positionner
le point du faisceau.
Pour redemarrer la rotation, appuyer sur la touche
{B-5}.
Mode Balayage
Le mode Balayage est conseillé pour les applications intérieures. Il
permet de voir le faisceau laser à une certaine distance.
La valeur par défaut est la largeur “medium”. Le faisceau laser est
plus visible sur des petites dimensions.
• Pour effectuer un balayage, appuyer sur la touche
{B-6}.
• On peut déplacer le faisceau de balayage à droite ou à gauche au
moyen des touches HAUT/BAS.
Fixation murale
Pour les applications en intérieur, pour la réalisation de murs ou de cloisons
par exemple, il est recommandé d’utiliser la fixation murale.
32
Mise en station pour pentes Manuelles
F
Le Agatec RL110 peut s'utiliser pour la réalisation manuelle de pentes pour
escaliers, plafonds inclinés, applications spéciales, etc.
Pour des pentes jusqu'à 10%, mettre le laser en station à l'horizontale et
utiliser la télécommande pour régler la pente conformément aux instructions ci-dessous.
En mode manuel complet, l'unité ne se cale pas toute seule et la tête continue
de tourner. Le plan laser peut être incliné dans un axe ou les deux.
Pour utiliser le laser en mode manuel complet:
• Après la mise sous tension du laser et l'autocalage, appuyer sur la
touche Auto/Manuel {B-7}.
La LED Axe X {B-10} signale que le mode manuel est activé et que l'on
peut régler la pente dans l'axe X.
• Appuyer sur la touche HAUT/BAS (pente manuelle) {B-3 ou B-4} pour
régler la pente dans l'axe X.
Pour ajuster la pente dans l'axe Y, réappuyer sur la touche Auto/Manuel
{B-7}. La LED {B-10} clignotera pour signaler que le mode manuel est
activé et que l'on peut régler la pente dans l'axe Y.
Rester appuyé sur la touche Auto/Manuel pour sortir du mode manuel et
retourner au mode automatique.
Accessoires
4
Télécommande
La télécommande possède cinq touches :
1) GAUCHE
2) DROITE
3) Scan - Mode rotation
4) HAUT
5) BAS
1
2
5
3
Se référer au tableau de la section Fonctions des touches qui décrit ces
fonctions.
• La LED rouge sur la partie supérieure de la télécommande clignote à
chaque pression de bouton pour signaler la transmission du signal au laser.
• Batterie - Pour ouvrir le compartiment et remplacer la pile, pousser
le couvercle dans le sens de la flèche. La télécommande exige une pile
alcaline AA.
33
Détecteur
Le recepteur vous indique la hauteur du faisceau laser.
1) Marche / Arret
Pressez une fois pour mettre l'appareil en marche. Pressez et maintenez
le la pression pour l'éteindre.
2) Audio
Selectionnez le volume - Normal, fort ou eteint.
3) Largeur de réglage:
Précision de mesure : normal, ou fin
1
2
3
Autres accessoires
• Les lunettes laser améliorent la visibilité du faisceau laser dans un
environnement très lumineux.
• La cible d'ossature s'utilise pour visualiser le faisceau lors de travaux de
plafond.
34
Batteries
F
Indicateur Faible charge
Quand la charge des piles est faible, la LED rouge {B-9} clignote
pendant l’opération. Les piles doivent alors être remplacées ou
rechargées dès que possible. Lorsque les piles sont déchargées le laser
arretera de tourner et La LED faible charge restera allumée.
Remplacement des piles alcalines
Effectuer les opérations suivantes pour remplacer les piles alcalines du
laser.
• Utiliser une pièce de monnaie ou un petit tournevis pour enlever le couvercle du compartiment situé au dos du laser fermé à l’aide d’une vis.
• Insérer deux piles alcalines neuves (type D ou LR20) en respectant la
polarité (+ et -) comme indiqué dans le fond du compartiment. Toujours
changer les deux piles en même temps.
• Remettre le couvercle du compartiment en place et le fermer avec une
pièce de monnaie ou un tournevis.
Ajustage de la précision
Remarques et responsabilités
• Il revient à l'utilisateur de suivre les instructions suivantes et de vérifier
régulièrement la précision de l'instrument et du travail.
• Le laser est réglé en usine sur la précision donnée. Il est recommandé
de contrôler la précision du laser à la réception du laser et à des intervalles réguliers par la suite en vue de la maintenir. Si le laser exige un
ajustage, contacter le centre SAV le plus proche.
35
• L'ajustage de la précision devrait être exclusivement effectué par une
personne qualifiée connaissant les principes de base d'une telle opération.
Contrôle de la précision de nivellement
Pour vérifier le niveau de précision du laser, placer l'instrument sur une
surface plane, horizontale ou sur un trépied à environ 30 mètres d'un mur.
• Régler l'axe X de façon qu'il soit perpendiculaire au mur. Attendre la
fin de l'autocalage (approximativement une minute après le début de
rotation du laser).
Marquer ensuite la position du faisceau (position 1).
• Tourner le laser de 180°. Attendre la fin de l'autocalage et marquer le
côté opposé au premier axe (position 2).
• Régler l'axe Y en tournant le laser de 90° de façon que cet axe soit perpendiculaire au mur. Attendre la fin de l'autocalage, puis marquer la
position du faisceau (position 3).
• Tourner le laser de 180°. Attendre la fin de l'autocalage et marquer le
côté opposé à l'axe Y (position 4).
• Le laser se situe dans sa plage de précision si les quatre repères se trouvent à ± 3 mm du centre.
Contrôle de la précision verticale
Pour vérifier la précision verticale du laser, placer l'instrument en position
couchée sur une surface plane, horizontale à environ 15 -30 mètres
d'un mur.
• Accrocher un fil à plomb au mur.
• Déplacer le laser jusqu'à ce que le faisceau rotatif vertical soit aligné
sur le fil à plomb.
• Si le faisceau rotatif n'est pas d'aplomb, il faut l'ajuster.
Réglage du niveau de précision
Si le contrôle nécessite d’être réajuster, une aide en ligne peut être
trouvée sur le site Agatec www.agatec.com
36
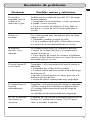
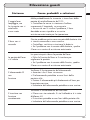
Dépannage
F
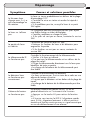
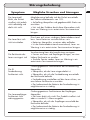
Symptôme
Causes et solutions possibles
Le faisceau laser
clignote mais il n’y a
pas d’autocalage ou
de rotation.
Le laser se trouve probablement en dehors de la plage
d’autocalage 10%
• Contrôler la mise en station et recaler le trépied si
nécessaire.
• Si le problème persiste, envoyé le laser à un point
SAV agrée.
Le laser ne s’allume
pas.
La portée du laser
est réduite.
La télécommande IR
ne fonctionne pas.
Le détecteur laser
ne fonctionne pas
correctement.
L’alarme de hauteur
ne fonctionne pas.
Ce symptôme peut être provoqué par des piles ayant
une faible charge ou étant déchargées.
• Contrôler, remplacer ou charger les piles.
• Si les piles ne sont pas en cause, contacter le service
SAV.
L’ouverture de sortie du laser est sale.
• Nettoyer les fenêtres du laser et du détecteur pour
augmenter la portée.
• Si les fenêtres ne sont pas en cause, contacter le
service SAV.
Contrôler le fonctionnement de la télécommande.
• Vérifier si le laser est allumé.
• Il se peut que la télécommande soit en dehors de la
plage de travail.
• Diriger la télécommande directement vers le laser pour
bénéficier de toute sa portée.
• La charge de la batterie de la télécommande peut
être faible.
Contrôler le fonctionnement du détecteur
• Le laser ne tourne pas. Il est en train de se caler ou une
alarme de hauteur est active.
• Il se peut que le détecteur soit en dehors de la plage de
travail.
• La charge de la batterie de la télécommande peut être
faible.
La fonction Alarme de Hauteur du RL110 est en
général désactivée sur l’instrument à la livraison.
• Appuyer sur la touche H.I pour activer la fonction
H.I.
• A la mise sous tension la LED H.I clignotera rapidement (5 Hz), clignotera lentement si elle est active et
émettra une lumière continue avec un signal acoustique
en cas de déclenchement d’une alarme.
37
Entretien et transport
Transport
Transport sur le terrain
Lors du transport sur le terrain, s'assurer toujours de
• transporter le produit dans son coffret d'origine
• transporter le trépied en travers de l'épaule, le produit monté dessus
restant à la verticale.
Transport dans un véhicule automobile
Ne jamais transporter le produit dans un véhicule sans le fixer, car
il pourrait s'abîmer gravement en raison des chocs et des vibrations.
Toujours le transporter dans le coffret et le fixer.
Expédition
Pour tout transport par train, avion ou bateau, utiliser l'emballage
intégral d'origine d’Agatec composé du coffret de transport et du
carton d'expédition ou un emballage équivalent. Le produit sera
ainsi protégé des chocs et vibrations.
Expédition, transport des batteries
Pour l'expédition ou le transport des batteries, le responsable du produit
doit s'assurer que les réglementations nationale et internationale en
vigueur sont appliquées.
Avant le transport ou l'expédition, contacter la société chargée du transport.
Ajustage de terrain
Après le transport, vérifier les paramètres d'ajustage de terrain indiqués
dans ce manuel d'utilisation avant d'utiliser le produit.
Stockage
Produit
Respecter les valeurs limites de température de stockage, particulièrement
en été si l'équipement se trouve dans un véhicule. Se reporter au chapitre
caractéristiques techniques pour de plus amples informations sur les
températures limites.
Ajustage de terrain
Après de longues périodes de stockage, vérifier les paramètres d'ajustement de terrain indiqués dans ce manuel d'utilisation avant d'utiliser le
produit.
Batteries alcalines
En cas de stockage prolongé de l'équipement, sortir les piles alcalines
du produit pour éviter tout risque de fuite.
38
Nettoyage et séchage
F
Produit et accessoires
• Souffler la poussière des pièces optiques.
• Ne jamais toucher le verre avec les doigts.
• Utiliser un chiffon propre et doux, sans peluche, pour le nettoyage.
Au besoin, imbiber légèrement le chiffon d'eau ou d'alcool pur.
• Ne pas utiliser d'autres liquides qui pourraient abîmer les composants
en polymère.
Eléments embués
• Sécher le produit, le coffret de transport, la mousse et les accessoires à
une température maximale de 40°C et les nettoyer.
• Ne les remballer que s'ils sont complètement secs.
Câbles et connecteurs
• Les connecteurs doivent être propres et secs.
• Souffler pour enlever toutes les impuretés logées dans les connecteurs
des câbles de liaison.
Consignes de sécurité
Informations générales
Description
Les consignes suivantes ont pour but de permettre au responsable du
produit et à l'opérateur d'anticiper les risques liés à l'utilisation du
produit afin de les éviter.
Le responsable du produit doit s'assurer que tous les utilisateurs comprennent et respectent les consignes qui suivent.
Utilisation conforme
Utilisation autorisée
• Le produit génère un plan laser horizontal pour les applications
d'alignement.
• Le produit peut être mis en station sur son propre socle, sur un support mural ou sur un trépied.
• Le faisceau laser peut être détecté au moyen d'un détecteur laser.
• Ce produit se destine à des travaux d'intérieur.
39
Utilisation non conforme
• Utilisation du produit sans instruction préalable.
• Utilisation hors des limites d'application.
• Désactivation des systèmes de sécurité.
• Retrait des avertissements.
• Ouverture du produit à l'aide d'outils, comme par exemple un
tournevis, interdite sauf mention expresse pour certaines fonctions.
• Modification ou transformation du produit
• Utilisation du produit après vol.
• Utilisation de produits présentant des défauts ou dégâts éminemment reconnaissables.
• Utilisation d'accessoires d'autres fabricants non agréés expressément par Agatec.
• Mesures de sécurité inappropriées dans la zone de travail, par
exemple lors de mesures sur des routes ou à proximité.
• Aveuglement intentionnel de tiers.
• Commande de machines, d'objets en mouvement ou application de surveillance similaire sans installation de contrôle et de sécurité supplémentaire.
AVERTISSEMENT
Une utilisation non conforme peut entraîner des blessures, des dysfonctionnements et des dommages matériels. Le responsable du produit est
tenu d'informer l'utilisateur sur les dangers et sur les mesures préventives.
L'utilisateur est seulement autorisé à se servir du produit s'il a été
formé au préalable.
Limites d'utilisation
Environnement
Adapté à une utilisation dans des milieux habitables par l'être humain. Non
adapté à une utilisation dans des environnements agressifs ou explosifs.
DANGER
Le responsable du produit doit se renseigner auprès des autorités
locales compétentes et des experts en sécurité avant d'effectuer des
travaux dans des zones à risques, à proximité d'installations électriques ou dans des situations similaires.
Responsabilités
Fabricant du produit
Agatec SAS, 21, boulevard Littré, F-78600 Le Mesnil Le Roi, ci-après
dénommé Agatec, est responsable de la fourniture du produit, incluant les
notices techniques et les accessoires d'origine, en parfait état de
fonctionnement.
40
Fabricants d'accessoires autres que la societé Agatec
Les fabricants d'accessoires autres que la societé Agatec utilisés avec le
produit sont responsables de l'élaboration, de la mise en pratique et de
la diffusion de concepts de sécurité relatifs à leurs produits ainsi que de
l'efficacité de ces concepts en combinaison avec le matériel d’Agatec.
Responsable du produit
Obligations incombant au responsable du produit:
• comprendre les consignes de sécurité du produit et les instructions du
manuel d'utilisation.
• être familiarisé avec la législation locale en matière de sécurité et
prévention des accidents.
• informer Agatec dès que le produit et son application présentent des
défauts de sécurité.
F
AVERTISSEMENT
Le responsable du produit doit s'assurer que celui-ci est utilisé conformément
aux instructions. Cette personne est également responsable de la formation
du personnel utilisant le produit et de la sécurité de l'équipement utilisé.
Risques liés à l'utilisation
AVERTISSEMENT
L'absence d'instruction, ou une instruction incomplète, peut donner lieu à
une manipulation incorrecte ou à une utilisation non conforme de
l'équipement. Il peut en résulter des accidents entraînant des dommages
corporels, matériels, financiers et écologiques importants.
Précautions:
Tous les utilisateurs doivent suivre les consignes de sécurité indiquées par
le fabricant et les directives du responsable du produit.
ATTENTION
Attention aux mesures incorrectes prises par un produit défectueux suite
à une chute ou une utilisation non conforme, une modification, un long
stockage ou un transport.
Précautions:
Effectuer régulièrement des mesures d'essai et les ajustages de terrain mentionnés dans le manuel d'utilisation, surtout si le produit a été soumis à
une utilisation anormale de même qu'avant et après des mesures importantes.
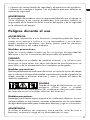
DANGER
En raison du risque d’électrocution, il est
très dangereux d’utiliser des cannes et
mires à proximité d’installations électriques telles que des câbles électriques ou des lignes de chemin de fer électrifiées.
41
Précautions:
Se tenir à bonne distance des installations électriques. S’il est indispensable de
travailler dans cet environnement, prendre d’abord contact avec les autorités
responsables de la sécurité des installations électriques et suivre leurs instructions.
AVERTISSEMENT
En cas d'utilisation de ce produit avec des accessoires, par exemple des
mâts, mires et cannes, il y a un risque de foudroiement.
Précautions:
Ne pas utiliser ce produit par temps d'orage.
AVERTISSEMENT
Des mesures de sécurité inadéquates sur le lieu de travail peuvent conduire
à des situations dangereuses, par exemple en relation avec la circulation,
des chantiers et des installations industrielles.
Précautions:
S'assurer que le lieu de travail présente toujours de bonnes conditions de
sécurité. Respecter les réglementations officielles en matière de sécurité,
de prévention des accidents et de la circulation routière.
ATTENTION
Si les accessoires utilisés avec le produit ne sont pas correctement fixés et
que le produit est soumis à un choc mécanique, par exemple une chute
ou des coups, il peut s'abîmer ou provoquer des blessures.
Précautions:
Lors de la mise en station du produit, veiller à ce que les accessoires soient
bien adaptés, montés, fixés et calés. Protéger le produit des chocs
mécaniques.
ATTENTION
Lors du transport, de l'expédition ou de l'élimination des batteries, il y a
un risque d'incendie dû aux influences mécaniques non compatibles.
Précautions:
Avant d'expédier le produit, décharger les batteries en laissant le produit
sous tension jusqu'à ce que les batteries soient à plat. Pour l'expédition
ou le transport des batteries, le responsable du produit doit s'assurer que
les réglementations nationale et internationale en vigueur sont
appliquées. Avant le transport ou l'expédition, contacter la société
chargée du transport.
AVERTISSEMENT
Des contraintes mécaniques fortes, des températures ambiantes
élevées ou une immersion dans des liquides peuvent entraîner des
fuites, incendies ou explosions des batteries.
42
Précautions:
Protéger les batteries des chocs et des températures ambiantes trop
élevées. Ne pas laisser tomber les batteries et ne pas les plonger dans
des liquides.
F
AVERTISSEMENT
S'assurer que les bornes des piles n'entrent pas en contact avec des
objets métalliques.
ATTENTION
Pendant le fonctionnement du produit, on peut se coincer les doigts avec
les pièces mobiles.
Précautions:
Se tenir à distance des pièces en mouvement.
AVERTISSEMENT
Une élimination non conforme du produit présente les dangers suivants:
• La combustion d’éléments en polymère produit un dégagement de gaz
toxiques nocifs pour la santé.
• Il existe un risque d’explosion des batteries si elles sont endommagées
ou exposées à de fortes températures; elles peuvent alors provoquer des
brûlures, des intoxications, une corrosion ou libérer des substances
polluantes.
• Une destruction inadéquate accroît le risque d'une utilisation non conforme du produit par une personne non autorisée. Il peut en résulter des
blessures graves pour l'utilisateur et pour des tiers de même que la
libération de substances polluantes.
Précautions:
Ne vous débarrassez pas du produit en le jetant avec les
ordures ménagères. Eliminer le produit selon la réglementation
nationale en vigueur dans le pays concerné. Seul le personnel
autorisé peut avoir accès au produit.
AVERTISSEMENT
Seuls les ateliers SAV agréés par Agatec sont autorisés à réparer ces produits.
Classification laser
Informations générales
Les consignes suivantes (conformément aux normes internationales CEI
60825-1 (2007-03) et CEI TR 60825-14 (2004-02)) fournissent des
instructions d'emploi et de sécurité au responsable du produit et à l'opérateur effectif afin de leur permettre d'anticiper et d'éviter les risques liés à
l'utilisation.
43
Le responsable du produit doit s'assurer que tous les utilisateurs comprennent
et respectent les consignes qui suivent.
En raison des faibles risques de lésions oculaires, les produits faisant partie
des classes laser 1, 2 et 3R n'exigent pas
• l'intervention d'un chargé de sécurité laser
• de vêtements de protection ni de protection oculaire
• d'avertissements spéciaux dans la zone de travail du laser si leur utilisation
et leur fonctionnement sont conformes aux indications de ce mode d'emploi.
Les produits faisant partie de la classe laser 2 ou de la classe 3R peuvent
produire un éblouissement, un aveuglement et des images rémanentes,
notamment dans des conditions de faible luminosité.
Agatec RL110 répond aux normes de sécurité de lasers de catégorie 2:
• IEC60825-1 : 2007 "Sécurité d'appareils à laser"
Produits laser catégorie 2 :
Ne pas regarder dans le faisceau laser et ne pas le projeter inutilement
sur des personnes. La protection de l'oeil est en général assurée par des
mouvements réflexes tels que fermer les paupières, tourner la tête.
ATTENTION:
Une observation directe du faisceau laser avec des instruments optiques
(par ex. jumelles, lunettes) peut s'avérer dangereuse.
Mesure préventive:
Ne pas regarder dans le faisceau laser avec des instruments optiques.
Description
Valeur
Puissance de rayonnement maximale
< 1 mW c.w.
Durée d'impulsion (effective)
4.5, 2.2, 1.5, 1.1 ms
Fréquence de répétition de l'impulsion
0, 2.5, 5, 7.5, 10 rps
Longueur d'onde
620-690 nm
Divergence du rayon
< 1,5 mrad
NOHD (distance nominale
35 m
de sécurité oculaire) à 0,25 s
Angle de balayage
44
de 2° à 36°
PRUDENCE:
Regarder dans le faisceau laser peut s'avérer dangereux pour l'oeil.
Mesure préventive:
Ne pas regarder dans le faisceau laser. Veiller à ce que le faisceau laser
se trouve plus bas ou plus haut que les yeux.
F
Etiquettes, Laser Class 2
Rayonnement laser
Eviter une exposition
oculaire directe
Appareil à laser de
classe 2 selon
CEI 60825-1
45
Compatibilité électromagnétique (CEM)
Description
Le terme de compatibilité électromagnétique désigne la capacité du produit à fonctionner impeccablement dans un environnement à rayonnement électromagnétique et à décharges électrostatiques et ce, sans
causer des interférences électromagnétiques avec un autre équipement.
AVERTISSEMENT
Un rayonnement électromagnétique peut interférer avec d'autres instruments. Bien que le produit remplisse les sévères directives et normes en
vigueur dans ce domaine, Agatec ne peut entièrement exclure la possibilité d''interférences électromagnétiques avec d'autres équipements.
ATTENTION
Un risque d'interférence demeure en utilisant des accessoires fabriqués par des
tiers, comme par exemple des ordinateurs de terrain, PC, talkies-walkies,
câbles non standard ou batteries externes.
Précautions:
Utiliser seulement l'équipement et les accessoires recommandés par
Agatec. Combinés au produit, ils remplissent les strictes dispositions des
directives et normes. Tenir compte des informations sur la compatibilité électromagnétique communiquées par le fabricant lorsqu'on utilise
des ordinateurs et talkieswalkies.
ATTENTION
Les interférences dues au rayonnement électromagnétique peuvent entraîner
des mesures erronées.
Bien que le produit remplisse les strictes directives et normes en vigueur dans
ce domaine, Agatec ne peut entièrement exclure la possibilité d'interférences
électromagnétiques à proximité d'émetteurs radio, de talkies-walkies ou de
groupes électrogènes diesel.
Précautions:
Vérifier la plausibilité des résultats obtenus dans ces conditions.
AVERTISSEMENT
Si le produit est utilisé avec des câbles de connexion dont une seule extrémité
est raccordée (des câbles d’alimentation extérieure, d’interface, etc.), le rayonnement électromagnétique peut dépasser les tolérances fixées et perturber
le fonctionnement d’autres appareils.
Précautions:
Les câbles de connexion (reliant le produit à la batterie externe, à
l’ordinateur, etc.) doivent être raccordés à leurs deux extrémités
durant l’utilisation du produit.
Déclaration FCC, applicable aux Etats-Unis
AVERTISSEMENT
Cet équipement a été testé et ses limites ont été jugées conformes à celles
46
prescrites pour les dispositifs numériques de classe B, décrites dans le
paragraphe 15 des règles FCC.
Ces limites ont pour but de fournir une protection raisonnable contre des
interférences nocives dans une installation résidentielle.
Cet équipement génère, utilise et peut rayonner de l'énergie
radiofréquence; s'il n'est pas installé et utilisé conformément aux instructions, il
peut gravement perturber les systèmes de communication radio.
Même en cas de respect des instructions, l'absence d'interférences dans
une installation particulière ne peut cependant être garantie.
Si cet équipement cause des interférences néfastes dans la réception
radio ou d'émissions télévisuelles, ce que l'on constate en éteignant puis
en rallumant l'équipement, l'utilisateur peut tenter de corriger ces interférences en appliquant les mesures suivantes:
• Réorienter ou repositionner l'antenne de réception.
• Augmenter la distance entre l'équipement et le récepteur.
• Connecter l'équipement à un autre circuit que celui du récepteur.
• Consulter le revendeur ou un technicien expérimenté dans le domaine radio/TV.
F
AVERTISSEMENT
Les changements ou modifications n'ayant pas été expressément approuvés
par Agatec dans le cadre de la conformité peuvent restreindre les
droits d'utilisation de l'équipement.
TÉLÉCOMMANDE
Portée infrarouge de
la télécommande
Piles
Jusqu’à 30 mètres
1 pile alcaline AA
TÉLÉCOMMANDE/RECEPTEUR
Piles
1 pile alcaline de 9 Volts
RECEPTEUR
Piles
1 pile alcaline de 9 Volts
AGATEC SAS
21, boulevard Littré - F- 78600 Le Mesnil le Roi
Tél. +33 1 34 93 35 80 - www.agatec.com
Garantie internationale limitée
Ce produit est régi par les dispositions de la garantie internationale limitée qu'il est possible de télécharger sur le site Internet Agatec, à l'adresse
www.agatec.com ou de demander auprès du revendeur local de produits
Agatec. Cette garantie est exclusive et remplace toutes les garanties,
47
clauses ou conditions, explicites ou implicites, de fait ou imposées par la
loi, réglementaires ou autres, y compris les garanties, clauses ou conditions ayan trait à la valeur commerciale, à l'adéquation du produit à une
application particulière, à la qualité satisfaisante et à la non-violation.
Toutes ces garanties, clauses ou conditions sont expressément exclues.
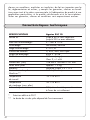
Caractéristiques techniques
SPECIFICATIONS
Portée Ø
Précision d'autocalage*
Autocalage
Plage d'autocalage
Vitesse de rotation
Angle de balayage
Diode laser
Dimensions (HLP)
Poids avec piles
Batteries
Durée de vie des piles
Alcalines**
Température
de travail
Température
de stockage (sans piles)
Indice de protection
Agatec RL110
jusqu'à 60 m sans détecteur
jusqu'à 200 m avec détecteur
± 1 mm à 10 m
Horizontal/Vertical
± 10%; 6°
0, 300, 450, 600 rpm
entre 2° et 36°
635 nm (rouge)
Class 2, <1 mW
156 mm x 154 mm x 197 mm
Approx. 1.5 kg
Alcaline D-cells 2 x 1.5 V
160 h (Alcaline)
-10°C à 50°C
-20°C à 80°C
IP54, étanche à la poussière et
à l'eau de ruissellement
*
Précision définie à 25°C
** La durée de vie des piles dépend de l'environnement
48
Manual de uso
Instrucciones de uso
Español
Introducción
Compra
Felicitaciones por su adquisición del nuevo láser rotativo de Agatec.
Producto
Este manual incluye, junto a las instrucciones relativas
a su utilización, una serie de importantes normas de
seguridad. Para mayor información, consultar
"Instrucciones de seguridad".
Lea atentamente las instrucciones de uso antes de empezar a trabajar
con el producto.
Símbolos
Los símbolos empleados en este manual tienen los siguientes significados:
PELIGRO
Indica una situación de riesgo inminente que, en caso de no evitarse,
puede ocasionar lesiones graves o incluso la muerte.
ADVERTENCIA
Indica una situación de riesgo potencial o de uso inadecuado que, en
caso de no evitarse, puede ocasionar lesiones graves o incluso la muerte.
CUIDADO
Indica una situación de riesgo potencial o de uso inadecuado que, en
caso de no evitarse, puede ocasionar lesiones de leves a moderados y/o
daños materiales, económicos o medioambientales.
50
Contenido
E
Introducción ...........................................................................
Características ......................................................................
Láser en general {A} .............................................................
Conjunto de teclado {B} ........................................................
Principios básicos de operación ..........................................
Cómo utilizar su Agatec RL110 ..............................................
Funciones de las teclas ..........................................................
Modo automático y manual ...................................................
Modo alerta H.I. ..................................................................
Velocidad …………………………............................................
Modo escaneo ……………………...........................................
Soporte para muros………………………..................................
Disposicion para inclinación manual .......................................
Accesorios ..............................................................................
Control remoto .....................................................................
Control remoto/receptor ........................................................
Receptor .............................................................................
Otros accesorios ...................................................................
Pilas .......................................................................................
Indicador de pila baja ..........................................................
Sustitución de las pilas alcalinas ............................................
Ajustamiento de la precisión ...............................................
Notas y responsabilidades.....................................................
Control de la precisión de nivel...............................................
Control de la precisión vertical...............................................
Ajuste de precisión de nivel ……….........................................
Resolución de problemas......................................................
Cuidados y Transporte ..........................................................
Transporte ............................................................................
Almacenamiento ...................................................................
Limpieza y secado ................................................................
Instrucciones de seguridad ..................................................
General ...............................................................................
Utilización.............................................................................
Límites de utilización..............................................................
Ámbitos de responsabilidad....................................................
Peligros durante el uso ..........................................................
Clasificación del láser ...........................................................
Compatibilidad electromagnética (CEM) .................................
Normativa FCC (aplicable en EE UU)......................................
Garantía Internacional Limitada .........................................
Datos técnicos .......................................................................
50
52
52
52
54
54
54
55
55
56
56
56
56
57
57
58
58
58
59
59
59
59
59
60
60
60
61
62
62
62
63
63
63
63
64
64
65
67
69
70
71
72
51
Características
El láser Agatec RL110 ofrece al contratista diversas características que
facilitan y hacen más preciso su trabajo.
Un laser completo, con todas la funcionalidades necesarias, un laser
luminoso para una mejor visibilidad y sus dimensiones compactas.
Láser en general {A}
Observe la cubierta frontal para consultar el diagrama del láser {A} y del
teclado {B} correspondientes a estas referencias.
1)
2)
3)
4)
5)
6)
Cabezal de rotación
Señales para alineación
Plomada o escuadra con apertura rayo láser
Apertura rayo láser
Pilas
Montaje 5/8"-11 para trípode modo horizontal
Conjunto de teclado {B}
El teclado del láser Agatec RL110 cuenta con nueve teclas y cinco
indicadores LED.
1)
2)
3)
4)
5)
6)
7)
8)
9)
10)
52
ON/OFF
H.I. Alerta (Elevación)
MÁS
MENOS
Modo automático
Modo Escaneo
Modo manual
LED: Alerta altura (H.I.)
LED: indicador de pila
LEDs: 2 Indicadores de nivelación manual
Láser {A}
E
2
1
3
4
5
6
Teclado {B}
1
9
8
10
2
7
3
6
4
5
53
Principios básicos de operación
Cómo utilizar su Agatec RL110
Montaje horizontal
El láser puede montarse sobre un trípode de rosca 5/8” o dejarlo sobre
una base sólida.
Agatec RL110 puede ser suspendido sobre el soporte de techos
(optional).
Montaje vertical
El láser puede dejarlo directamente sobre sí mismo (opuesto al asidero)
o sobre una superficie sólida y estable. Para mayor estabilidad, se
recomienda utilizar el soporte para muros (optional).
Encender el láser
Ponga el láser en posición de encendido con la tecla On/Off {B-1}. Se
efectúa una prueba automática del láser y el rayo parpadeará mientras
el láser se nivela automáticamente.
Una vez nivelado, la cabeza girará. Usted puede elegir la tecla H.I.
Modo alerta o cambiar a modo manual.
El láser tiene un amplio rango de nivelación automática.
Sin embargo, si el láser queda estacionado fuera del rango de
nivelación, el rayo láser continuará parpadeando y el cabezal no
comenzará a girar.
Indicadores LED
Los indicadores LED {B-9} parpadean lentamente en verde y rojo
mientras la nivelación de los ejes y emiten una luz continua después
del nivelamiento.
Funciones de las teclas
Las teclas MÁS/MENOS que se encuentran en la unidad láser y en
el control remoto tienen diversas funciones según el modo de operación.
Consultar la siguiente tabla para una mejor explicación de sus funciones.
54
Modo
Teclas MÁS/MENOS
Laser y control remoto
MÁS/MENOS
Control remoto
Modo automático -
Mueven el rayo
rotación
estacionario
del cabezal
Modo automático -
Mueven el rayo
Cambian l’amplitud
escaneo
de escaneo
del escaneo
Modo horizontal -
Plano inclinado
Cambian la velocidad
Cambian la velocidad
Plano inclinado
Cambian l’amplitud
giratorio
Modo horizontal -
del cabezal
escaneo
Modo manual -
del escaneo
Plano inclinado
Cambian la velocidad
Plano inclinado
Cambian l’amplitud
giratorio
Modo manual -
E
del cabezal
escaneo
del escaneo
Modo automático y manual
Al encender el Agatec RL110 se activa como un nivel automático en
modo de nivelación automática. Una vez autonivelado, la cabeza del
láser empezará a girar a 300 rpm.
En modo manual el láser no se autonivela, el rayo láser estará girando
siempre aunque el láser no esté nivelado. Esto puede ser usado en planos
inclinados como escaleras, tejados o cuando se requiera una inclinación
manual.
Modo alerta H.I.
La función alerta es también conocida como H.I. (altura del instrumento).
Esta función permite detener automáticamente el láser y enciende una
alarma si el láser hasido manipulado, previniendo lecturas inexactas.
Funciona sólo cuando se selecciona.
Para activar esta función de seguridad presionar la tecla H.I. {B-2}
después de encender el láser.
El LED {B-8} parpadeara rápidamente mientras el láser se está
autonivelando.
55
Después de 30 segundos de que la cabeza empiece a girar, la luz brillará
más despacio indicado que la alerta H.I. está activada.
Si el láser es manipulado durante el modo de alerta H.I., la cabeza se
detendrá, el rayo láser dejará de emitir, todo les indicadores luminosos
parpadeará rojo.
Pulsar la tecla ON/OFF para apagar la funciónde alerta H.I. Pulsar
nuevamente la tecla ON/OFF para activer le laser (600 rpm, modo
automática.
Velocidad
El cabezal tiene cuatro velocidades de rotación: 0, 300, 450, 600 rpm.
El valor por defecto es de 600 rpm.
El rayo láser es más visible cuando la velocidad de rotación es más lenta.
• Para incrementar la velocidad de rotación, presione la tecla
{B-5}.
• Cuando el láser se detiene, es posible mover el punto a la derecha o
la izquierda usando las teclas de rotación en sentido antihorario o en
sentido de la manecillas del reloj.
Para iniciar nuevamente la rotación, presione la tecla
{B-5}.
Modo escaneo
Para aplicaciones en interior, el modo escaneo permite visualizar fácilmente
el rayo a distancia.
Para escanear, presione la tecla Escaneo / Rotación
{B-6}.
Para incrementar la amplitud del escaneo, presione la tecla
{B-6}.
Soporte para muros
Para aplicaciones en interior, por ejemplo para la realización de muros
o de compartimentaciones, esta recomendado de utilizar el soporte para
muros.
Estacionamiento para inclinación Manual
Agatec RL110 se puede utilizar para definir inclinaciones de forma
manual para aplicaciones especiales, construcción de escaleras, techos
inclinados, etc.
56
Para inclinaciones de hasta 10% ponga el láser en modo horizontal.
Al trabajar en modo manual completo, la unidad no se nivela automáticamente y la cabeza continuará girando.
Es posible inclinar el plano del rayo láser en ambos planos o en uno solo.
E
Presionar la tecla
{B-7} para ajustar la inclinación del eje X. El LED
del eje X {B-10} que se encuentra sobre la tecla indicando que se
encuentra trabajando en modo manual y que puede definir una inclinación en el eje X. Presionar alguna de las teclas {B-3 o B-4} para
ajustar la inclinación del eje X.
Para ajustar la inclinación del eje Y, presionar nuevamente la tecla
{B-7}. El led {B-10} comenzará a parpadear indicando que se
encuentra trabajando en modo manual y que puede definir una inclinación en el eje Y.
Presionar alguna de las teclas {B-3 o B-4} para ajustar la inclinación
del eje Y.
Presionar la tecla Manual {B-7} para salir del modo manual y regresar
al modo semi automático.
Accessorios
4
Control remote
El control remoto tiene cinco teclas:
1)
2)
3)
4)
5)
IZQUIERDA
DERECHA
Escaneo / Modo rotación
ARRIBA
ABAJO
1
2
5
3
Consultar la tabla de "Funciones de las teclas" para una explicación más
detallada de sus funciones.
• El LED rojo que se encuentra en la parte superior del control remoto se
mostrará intermitente cada vez que se presione una tecla, indicando que
el control remotoestá transmitiendo instrucciones a la unidad láser.
• Pila: para abrir el compartimiento de la pila y cambiarla, empuje la
cubierta de la pila en dirección de la flecha.
57
Receptor
El receptor tiene todas las funciones del control remoto/receptor con
excepción de las funciones de control remoto.
1) Audio
Seleccione el nivel de tono de Normal, Fuerte, Lejos.
2) Ancho de banda
Ciclo por exactitud de descubrimiento de Normal, Fino.
3) Alimentación ON/OFF
Prensa una vez para encender. Prensa y asimiento para apagar.
1
2
3
Otros accesorios
• Las gafas para visualizar mejor el rayo láser optimizan la visibilidad
del punto láser en condiciones de extrema iluminación.
• La señal de puntería a rejilla de techo se utiliza para visualizar el
rayo láser en aplicaciones de techos suspendidos. La señal de puntería
se ajusta de forma magnética a la rejilla.
58
Pilas
E
Indicador de pila baja
Cuando el nivel de la pila es bajo, el LED rojo {B-10} parpadea durante
la operación. Las pilas deben ser cambiadas rapidamente.
Cuando el nivel de la pila está completamente bajo, el cabezal del láser
deja de girar y el LED de pila baja {B-10} permanece encendido.
Sustitución de las pilas alcalinas
Siga las instrucciones que se indican para reemplazar las pilas alcalinas
de la unidad láser.
• Utilice una moneda o un destornillador pequeño para quitar la tapa del
compartimiento de las baterías en la parte posterior del láser.
• Inserte dos pilas alcalinas (tipo D o LR20), siguiendo la polaridad indicada
en el compartimiento de las pilas. El polo positivo es redondo y está resaltado.
Cuando tenga que reemplazar las pilas, cambie las dos simultáneamente.
Ajustamiento de la precisión
Notas y responsabilidades
• Es responsabilidad del usuario seguir las instrucciones de funcionamiento
y revisar periódicamente la precisión del instrumento.
• El láser está calibrado en fábrica según las especificaciones de
precisión definidas. Se recomienda revisar la precisión del láser en el
momento de recibirlo y posteriormente de forma periódica para mantener
la precisión. Si es necesario ajustar el láser, póngase en contacto con el
centro de servicio autorizado más cercano.
59
• Sólo aquellos usuarios convenientemente capacitados y que
comprendan los principios básicos del ajuste deberán efectuar el
procedimiento para el ajuste de precisión.
Control de la precisión de nivel
Para comprobar la precisión de nivel de su láser, coloque la unidad
sobre una superficie nivelada y plana o un trípode a aproximadamente
30 m de una pared.
• Alinear el eje X de modo que quede perpendicular a la pared. Permita
que el láser complete s u autonivelación (aproximadamente un minuto
después de que el láser comienza a girar). Marque la posición del rayo
(Posición 1).
• Girar 180°el láser, dejar que se autonivele y marcar el lado opuesto
del primer eje (Posición 2).
• Alinear el eje Y girando 90° el láser, de modo que dicho eje quede
ahora perpendicular a la pared. Dejar que el láser complete su
autonivelación y marcar la posición del rayo (Posición 3).
• Girar el láser 180°, dejar que se autonivele y marcar el lado opuesto
del eje Y (Posición 4).
• El láser está dentro de la especificación de precisión si sus cuatro marcas están a menos de ±3 mm del centro.
Control de la precisión vertical
Para comprobar la precisión vertical de su láser, colocar la unidad sobre
una superficie nivelada y plana a aproximadamente 15-30 m. de una
pared.
• Colgar una plomada en la pared.
• Mover el láser hasta que el rayo giratorio vertical esté alineado respecto a la línea de plomada.
• Si el rayo giratorio no coincide con la plomada, es necesario efectuar
un ajuste.
Ajuste de precisión de nivel
Si el control de la precisión necesita ser re ajustado, una ayuda esta a
disposicion en la página web de Agatec www.agatec.com.
60
Resolución de problemas
Síntomas
E
Posibles causas y soluciones
El rayo láser
parpadea, pero la
unidad no se
autonivela ni gira.
Posiblemente la unidad está fuera del 10% del rango
de autonivelación.
• Compruebe el estacionamiento y nivele nuevamente
el trípode si fuera necesario.
• Si esto no resuelve el problema, el láser debe ser
enviado a un centro de servicio autorizado para su
revisión.
El láser no
enciende.
Este síntoma puede estar causado por pilas con baja
carga o vacías.
• Comprobar, cambiar o cargar las pilas.
• Si no es problema de las pilas, el láser debe enviarse
a un centro de servicio autorizado para su revisión.
La distancia
del láser se ha
reducido.
La suciedad puede reducir el rendimiento del láser.
• Limpiar las ventanas del láser y el receptor para
mejorar la distancia.
• Si aún después de limpiar las ventanas el problema
continúa, el láser debe enviarse a un centro de servicio
autorizado para su revisión.
El control remoto IR
no funcciona.
Comprobar si el funcionamiento del control remoto es
adecuado.
• Comprobar que el láser está encendido.
• El control remoto podría encontrarse fuera del rango
de distancia útil.
• Apuntar el control remoto con mayor precisión a la
distancia máxima del láser.
• La pila del control remoto puede tener carga baja.
El receptor láser no
funciona
adecuadamente.
Comprobar si el funcionamiento del receptor es adecuado.
• El láser no gira. Está nivelando o en alerta de altura.
• El receptor podría encontrarse fuera del rango de
distancia útil.
• La pila del control remoto puede tener carga baja.
Los LED se muestran
intermitentes en
secuencia.
El aparato ha sido movido o empujado mientras que la
funccion H.I. estaba activa. Apuye ON/OFF para
volver a encender el aparato.
61
Cuidados y Transporte
Transporte
Transporte en el campo
Cuando se transporte el equipo en el campo hay que procurar siempre
• llevar el instrumento en su maletín original,
• o llevar al hombro el trípode con las patas abiertas, con el instrumento
colocado y atornillado, todo ello en posición vertical.
Transporte en un vehículo por carretera
No se debe transportar nunca el instrumento suelto en el vehículo ya que
podría resultar dañado por golpes o vibraciones. Siempre ha de
transportarse dentro de su estuche y bien asegurado.
Envío
Para transportar en tren, avión o barco utilizar siempre el embalaje
original de Agatec (contenedor de transporte y caja de cartón, u otro
embalaje equivalente para proteger contra los choques y vibraciones).
Envío y transporte de las baterías
Cuando se transporten o envíen pilas la persona encargada del producto debe asegurarse de que se observan las leyes y regulaciones
nacionales e internacionales aplicables. Antes de efectuar el transporte o
el envío, hay que contactar con la compañía de transporte de pasajeros
o mercancías.
Control en campo
Antes de utilizar el instrumento después del transporte hay que controlar
los parámetros de ajuste en el campo indicados en este manual.
Almacenamiento
Producto
Observar los valores límite de temperatura para el almacenamiento del
equipo, especialmente en verano si se transporta dentro de un vehículo.
Consultar los "Datos técnicos" para mayor información acerca de los
límites de temperatura.
Control en campo
Antes de utilizar el instrumento después de un tiempo de almacenamiento prolongado hay que controlar los parámetros de ajuste en el campo
indicados en este manual.
Pilas alcalinas
Si el equipo permanecerá guardado durante periodos largos, retirar
las pilas alcalinas del producto para evitar daños o fugas.
62
Limpieza y secado
E
Producto y accesorios
• Eliminar el polvo de las partes ópticas.
• No tocar el cristal con los dedos.
• Limpiar únicamente con un paño limpio, suave y que no suelte pelusas.
Si es necesario, humedecer un poco el paño con alcohol puro.
• No utilizar ningún otro líquido ya que podría dañar las piezas de plástico.
Productos humedecidos
• Secar el producto, el maletín de transporte, sus interiores de espuma y los
accesorios a una temperatura máxima de 40°Cy limpiarlo todo.
• Volver a guardarlo sólo cuando todo esté completamente seco.
Cables y enchufes
• Mantener los enchufes limpios y secos.
• Limpiar soplando cualquier suciedad depositada en los enchufes de los
cables de conexión.
Instrucciones de seguridad
General
Descripción
Con estas instrucciones se trata de que el responsable del producto y
la persona que lo está utilizando estén en condiciones de detectar a
tiempo eventuales riesgos que se producen durante el uso, es decir,
que a ser posible los eviten.
La persona responsable del producto deberá cerciorarse de que
todos los usuarios entienden y cumplen estas instrucciones.
Utilización
Uso improcedente
• Utilización del equipo sin instrucciones o formación adecuada.
• Uso fuera de los límites de aplicación.
• Anulación de los dispositivos de seguridad.
• Retirada de los rótulos de advertencia. Abrir el producto utilizando
herramientas (p.ej. destornilladores) salvo que esté expresamente
permitido en determinados casos.
• Realización de modificaciones o transformaciones en el producto.
• Utilización después de hurto.
• Utilización de productos con daños o defectos claramente reconocibles.
63
• Utilización con accesorios de otros fabricantes sin contar con la
autorización previa y explícita de Agatec.
• Protección insuficiente del lugar de trabajo, por ejemplo al utilizarlos
en carreteras o cerca de ellas.
• Deslumbrar intencionadamente a terceros.
• Control de máquinas, movimiento de objetos o aplicación de vigilancia
similar sin control adicional ni instalaciones de seguridad.
ADVERTENCIA
El uso improcedente puede producir lesiones, un error en el funcionamiento
o daños materiales. La persona responsable del equipo informará al
usuario sobre los peligros en el uso del mismo y sobre las medidas de
protección necesarias. El producto sólo se pondrá en funcionamiento
cuando el usuario haya recibido la correspondiente formación sobre su uso.
Límites de utilización
Entorno
Apto para el empleo en ambientes permanentemente habitados; sin
embargo, no integra dispositivos de protección que garanticen un empleo
seguro en entornos agresivos o con peligro de explosión.
PELIGRO
Al trabajar en las proximidades de áreas con peligro de explosión o
de instalaciones eléctricas, la persona encargada del producto debe
ponerse en contacto con las autoridades locales de seguridad y con
expertos en seguridad.
Ámbitos de responsabilidad
Fabricante del producto
Agatec SAS, 21, boulevard Littré, F-78600 Le Mesnil Le Roi, (en adelante
Agatec) asume la responsabilidad del suministro del producto en perfectas
condiciones técnicas de seguridad, inclusive su manual de empleo y los
accesorios originales.
Fabricantes de accesorios que no sean Agatec
Los fabricantes de accesorios de otras marcas tienen la responsabilidad
del desarrollo, aplicación y comunicación de los conceptos de seguridad
correspondientes a sus productos y al efecto de los mismos, en combinación con el producto de Agatec.
Persona encargada del producto
La persona encargada del producto tiene las siguientes obligaciones:
• Entender la información de seguridad que figura en el producto así
como las correspondientes al Manual de empleo.
64
• Conocer las normas locales de seguridad y de prevención de accidentes.
• Informar de inmediato a Agatec si en el producto aparecen defectos en
materia de seguridad.
E
ADVERTENCIA
El encargado del producto tiene la responsabilidad de que el equipo se
utilice conforme a las normas establecidas. Esta persona también es
responsable de la formación de los usuarios del equipo y de la seguridad
en la utilización del equipo.
Peligros durante el uso
ADVERTENCIA
La falta de información o una formación incompleta puede dar lugar a
errores en el manejo o incluso a un uso improcedente y, en ese caso,
pueden producirse accidentes con daños graves para las personas,
daños materiales y del medio ambiente.
Medidas preventivas:
Todos los usuarios deben cumplir con las instrucciones de seguridad del
fabricante y con las instrucciones del responsable del producto.
CUIDADO
Pueden producirse resultados de medición erróneos si se utiliza un producto que se haya caído, que haya sido objeto de transformaciones no
permitidas o de un almacenamiento o transporte prolongados.
Medidas preventivas:
Realizar periódicamente mediciones de control, así como los ajustes de campo
que se indican en el Manual de empleo, especialmente cuando el producto ha
estado sometido a esfuerzos excesivos y antes y después de tareas de
medición importantes.
PELIGRO
Debido al riesgo de electrocución es muy
peligroso utilizar miras o escalas
telescópicas en las inmediaciones de instalaciones eléctricas tales como
las líneas de tensión o tendidos eléctricos del ferrocarril.
Medidas preventivas:
Mantenga una distancia segura respecto a las instalaciones eléctricas. Es esencial para trabajar en este entorno, contactar primeramente con las autoridades
de seguridad responsables para instalaciones eléctricas y siga sus instrucciones.
ADVERTENCIA
Al utilizar el producto con accesorios (como mástiles, miras de nivel o
bastones), aumenta el riesgo de ser alcanzado por un rayo.
65
Medidas preventivas:
No utilizar el producto durante tormentas.
ADVERTENCIA
La protección o señalización insuficiente del emplazamiento del instrumento
puede causar situaciones peligrosas en el tráfico, en obras, instalaciones
industriales, etc.
Medidas preventivas:
Procurar siempre que el emplazamiento esté suficientementeprotegido.
Tener en cuenta los reglamentoespecíficos de cada país para la prevención de accidentes, así como las normas del Código de la Circulación.
CUIDADO
Si los accesorios utilizados con el equipo no se fijan correctamente y el
producto se somete a acciones mecánicas, por ejemplo caídas o golpes,
existe la posibilidad de que el producto quede dañado o haya riesgo
para las personas.
Medidas preventivas:
Al instalar el producto, comprobar que los accesorios están correctamente
adaptados, fijados, asegurados y bloqueados en posición. Proteger el producto contra acciones mecánicas.
CUIDADO
Durante el transporte, el envío o la extracción de pilas existe el riesgo de
incendio en caso de que la pila se vea expuesta a acciones mecánicas
indebidas.
Medidas preventivas:
Antes de enviar el producto o de desecharlo hacer que se descarguen
completamente las pilas utilizando el equipo. Cuando se transporten o
envíen pilas la persona encargada del producto debe asegurarse de que
se observan las leyes y regulaciones nacionales e internacionales aplicables. Antes de efectuar el transporte o el envío, contactar con la compañía de transporte de pasajeros o mercancías.
ADVERTENCIA
Las pilas pueden resultar dañadas si utiliza un cargador para pilas que no
sea el recomendado por Agatec. Esto puede causar fuego o explosiones.
ADVERTENCIA
Una tensión mecánica elevada, las temperaturas ambientales altas o la inmersión en líquidos pueden causar escapes, fuego o explosiones de las pilas.
Medidas preventivas:
Proteger las pilas de influencias mecánicas y de las altas temperaturas
ambientales. No introducir ni sumergir las pilas en líquidos.
ADVERTENCIA
Los cortocircuitos en los bornes de las pilas producen recalentamiento
que puede causar lesiones o fuego, por ejemplo si al almacenar o transportar en los bolsillos, los bornes de las pilas se ponen en contacto con
joyas, llaves, papeles metalizados u otros objetos metálicos.
66
Medidas preventivas:
Asegurarse de que los bornes de las pilas no entran en contacto con
objetos de metal
E
CUIDADO
Las partes móviles del producto pueden provocar lesiones a las personas
durante el funcionamiento del producto.
Medidas preventivas:
Respetar una distancia de seguridad de las partes móviles.
ADVERTENCIA
Si el producto se desecha de forma indebida pueden producirse las siguientes
situaciones:
• Al quemar piezas de plástico se producen gases tóxicos que pueden ser
motivo de enfermedad para las personas.
• Las pilas, si se dañan o alientan intensamente, pueden explotar y causar
intoxicaciones, quemaduras, corrosiones o la contaminación del medio
ambiente.
• Si el producto se desecha de forma irresponsable, es posible que personas
no autorizadas utilicen el equipo de modo improcedente. Esto podría causar
graves lesiones a terceros así como contaminación medioambiental.
Medidas preventivas:
No desechar el producto con la basura doméstica. Desechar el
producto correctamente.
Cumplir con las normas de desecho de vigencia nacional.
Proteger el equipo en todo momento impidiendo el acceso a él
de personas no autorizadas.
ADVERTENCIA
Reparar estos productos únicamente en los talleres de servicio autorizados por
Agatec.
Clasificación del láser
General
Las siguientes instrucciones (según las normas internacionales IEC
60825-1 (2007-03) e IEC TR 60825-14(2004-02) más recientes) presentan una guía e información de capacitación para el encargado del
producto y para el usuario del mismo, con el fin de prever y evitar posibles riesgos durante su utilización.
La persona responsable del producto deberá cerciorarse de que todos los
usuarios entienden y cumplen estas instrucciones.
Los productos clasificados como láser de clase 1, clase 2 y clase 3R no
requieren de:
67
• un encargado especial para la seguridad en el manejo de láser,
• uso de trajes o anteojos de protección,
• señalización especial de advertencia en el emplazamiento de medición
con láser al utilizarlos y manejarlos como se indica en el presente manual de empleo debido al bajo riesgo que representan para los ojos.
Los productos de tipo láser clase 2 o clase 3R pueden provocar deslumbramiento, ceguera por destello e imágenes retardadas, sobre todo al
trabajar en condiciones de escasa iluminación natural.
Agatec RL110 corresponde a la Clase de láser 2 según:
• IEC60825-1 : 2007 "Seguridad de equipos láser"
Productos de láser clase 2:
Absténgase de mirar directamente al rayo láser y no dirija éste a otras
personas. La protección del ojo queda garantizada mediante reflejos naturales como es el desviar la vista del rayo o cerrar los ojos.
ADVERTENCIA:
Puede ser peligroso mirar directamente al rayo con medios ópticos auxiliares (p.ej. prismáticos, telescopios).
Medidas preventivas:
No mirar hacia el rayo con medios ópticos auxiliares
CUIDADO:
Mirar directamente al rayo láser puede ser peligroso para los ojos.
Medidas preventivas:
No mirar directamente al rayo láser. Procurar que la trayectoria del rayo
láser vaya más arriba o más abajo de la altura de los ojos. (especialmente en instalaciones fijas en máquinas u otros dispositivos).
Descripción
Valor
Potencia máxima de radiación
< 1 mW c.w.
Duración de los impulsos (efectiva)
4.5, 2.2, 1.5, 1.1 ms
Frecuencia de repetición de impulsos
0, 2.5, 5, 7.5, 10 rps
Longitud de onda
620-690 nm
Divergencia del haz
< 1,5 mrad
NOHD (Nominal Ocular
35 m
Hazard Distance) à 0.25s
Ángulo de escaneo
68
de 2° a 36°
Etiquetas, Laser Class 2
E
Radiación láser
Evitar que el rayo incida en
los ojos.
Producto Láser Clase 2
según la norma
IEC 60825-1
Compatibilidad electromagnética (CEM)
Descripción
Denominamos compatibilidad electromagnética a la capacidad del
producto de funcionar perfectamente en un entorno con radiación
electromagnética y descarga electrostática, sin causar perturbaciones electromagnéticas en otros aparatos.
ADVERTENCIA
Posibilidad de interferir con otros aparatos a causa de radiación
electromagnética. Aunque el producto cumple los estrictos requisitos
de las directivas y normas aplicables, no puede excluir por completo la
posibilidad de la perturbación de otros aparatos.
69
CUIDADO
Posibilidad de perturbación de otros aparatos cuando el producto se utilice en
combinación con accesorios de terceros, por ejemplo, ordenadores de
campo, PCs, radiotransmisores, cables diversos o pilas externas.
Medidas preventivas:
Utilizar únicamente el equipo y los accesorios recomendados por
Agatec. Ellos cumplen en combinación con el producto los estrictos requisitos de las directivas y normas aplicables. Cuando utilice ordenadores
y radiotransmisores preste atención a las especificaciones del fabricante
respecto a su compatibilidad electromagnética.
CUIDADO
Las interferencias causadas por radiación electromagnética pueden producir
mediciones erróneas.
Aunque el producto cumple con los estrictos requisitos de las directivas y normas aplicables, no puede excluir del todo la posibilidad de que una
radiación electromagnética muy intensa llegue a perturbar el producto, por
ejemplo, en la proximidad de emisoras de radio, radiotransmisores o generadores diesel.
Medidas preventivas:
Cuando se efectúen mediciones en estas condiciones hay que comprobar
la calidad de los resultados de la medición.
ADVERTENCIA
Si el producto funciona con cables de conexión unidos a uno de los dos
extremos, por ejemplo, cables de suministro externo, cables de interfaz, el
nivel permitido de radiación electromagnética puede excederse y el correcto funcionamiento de otros productos puede verse afectado negativamente.
Medidas preventivas:
Mientras el producto está en uso, los cables de conexión, por ejemplo de
producto a pila externa o de producto a ordenador, deben estar conectados a ambos extremos.
Normativa FCC (aplicable en EE UU)
ADVERTENCIA
Las pruebas efectuadas han puesto de manifiesto que este equipo se
atiene a los valores límite, determinados en la sección 15 de la normativa FCC, para instrumentos digitales de la clase B.
Esto significa que el instrumento puede emplearse en las proximidades de
lugares habitados, sin que su radiación resulte molesta.
70
Los equipos de este tipo generan, utilizan y emiten una frecuencia de
radio alta y, en caso de no ser instalados conforme a las instrucciones,
pueden causar perturbaciones en la recepción radiofónica.
En todo caso, no es posible excluir la posibilidad de que se produzcan
perturbaciones en determinadas instalaciones.
Si este equipo causa perturbaciones en la recepción radiofónica o televisiva, lo que puede determinarse al apagar y volver a encender el
equipo, el operador puede intentar corregir estas interferencias de la
forma siguiente:
• cambiando la orientación o la ubicación de la antena receptora.
• aumentando la distancia entre el instrumento y el receptor.
• conectando el instrumento a un circuito distinto al del receptor.
• asesorándose por el vendedor o algún técnico de radio-televisión.
E
ADVERTENCIA
Si en el instrumento se efectúan modificaciones que no estén explícitamente
autorizadas Agatec, el derecho de uso del mismo por parte del usuario
puede verse limitado.
CONTROL REMOTO
IR Remoto rango
Pilas
hasta 30 m
una AA pila alcalina
RECEPTOR/CONTROL REMOTO
Pilas
a 9-volt tipo pilas alcalinas
RECEPTOR
Pilas
a 9-volt tipo pilas alcalinas
AGATEC SAS
21, boulevard Littré - F- 78600 Le Mesnil le Roi
Tél. +33 1 34 93 35 80 - www.agatec.com
Garantía Internacional Limitada
Este producto está sujeto a los términos y condiciones establecidos en la
Garantía Internacional Limitada que se puede descargar de la página
web de Agatec www.agatec.com.
71
La garantía antes mencionada es exclusiva y reemplaza a todas las otras
garantías, términos o condiciones, explícitas o implícitas, tanto de hecho
como por aplicación de la ley, por estatutos u otros, entre los cuales se
incluyen garantías, términos o condiciones de comercialización, adecuaciones para un propósito particular, calidad satisfactoria e inexistencia de
violación, todo lo cual se rechaza expresamente.
Datos técnicos
DATOS
Agatec RL110
Rango de operación Ø
hasta 60 m sin receptor
hasta 200 m con receptor
Precisión de autonivelación*
± 1 mm a 10 m
Autonivelación
Horizontal / Vertical
Rango de autonivelación
± 10%; 6°
Velocidades de rotación
0, 300, 450, 600 rpm
Ángulo de escaneo
variable, de 2° a 36°
Tipo de diodo láser
635 nm (rojo)
Class 2, <1 mW
Dimensiones (Al x An x L)
156 mm x 154 mm x 197 mm
Peso con pilas
aprox. 1.5 kg
Pilas
dos pilas alcalinas D de 1.5 V
Duración de la pila
160 h (Alcalina)
Alcalina**
Temperatura
-10°C à 50°C
de funcionamiento
Temperatura
-20°C à 80°C
de almacenamiento (sin pilas)
Protección
IP54, contra polvo y salpicaduras
*
Precisión definida a 25°C
** La vida útil de la pila depende de la condiciones Ambientales
72
Bedienungsanleitung
Bedienungsanleitung
Deutsch
Einführung
Erwerb
Herzlichen Glückwunsch zum Kauf Ihres neuen Rotationslasers von
Agatec.
Produkt
Diese Gebrauchsanweisung enthält neben den
Hinweisen zur Verwendung des Produkts auch wichtige
Sicherheitshinweise. Siehe Abschnitt Sicherheitshinweise
für weitere Informationen.
Lesen Sie die Gebrauchsanweisung vor der Inbetriebnahme des Produkts
sorgfältig durch.
Symbole
Die in dieser Gebrauchsanweisung verwendeten Symbole haben folgende Bedeutung:
GEFAHR
Unmittelbare Gebrauchsgefahr, die zwingend schwere Personenschäden
oder den Tod zur Folge hat.
WARNUNG
Gebrauchsgefahr oder sachwidrige Verwendung,
Personenschäden oder den Tod bewirken kann.
die
schwere
VORSICHT
Gebrauchsgefahr oder sachwidrige Verwendung, die nur geringe
Personenschäden, aber erhebliche Sach-, Vermögens- oder
Umweltschäden bewirken kann.
74
Inhalt
Einführung ...........................................................................
Merkmale .............................................................…………..
Lasereinheit - Überblick {A} ..................................………….....
Tasten - Überblick {B} ...........................................…………….
Grundfunktionen ....................................................………….
Verwendung der Agatec RL110..............................................
Tastenfunktionen ...................................................…………....
Automatischer/ Manueller Modus .........................…………......
H.I. Alarm Modus .....................................................………..
Rotationsmodus ..................………………………………………..
Scanmodus .………………………………………………………...
Wandhalterung ………………………………………………….......
Einrichtung für manuelle Neigung .........……………………….....
Zubehör .................................................................................
Fernbedienung .....................................................................
Empfänger/Fernbedienung.....................................................
Empfänger ...........................................................................
Weiteres Zubehör .................................................................
Batterien ................................................................................
LED Niedriger Batteriestand ...................................................
Austausch der Alkalibatterien .................................................
Genauigkeitsjustierung ........................................................
Hinweise und Zuständigkeiten ................................................
Überprüfung der Nivelliergenauigkeit ......................................
Überprüfung der vertikalen Genauigkeit ..................................
Eistellung der Nivelliergenauigkeit ..........................................
Störungsbehebung ...............................................................
Wartung und Transport .......................................................
Transport .............................................................................
Lagerung .............................................................................
Reinigen und Trocknen ..........................................................
Sicherheitshinweise ..............................................................
Allgemeines .........................................................................
Verwendungszweck ..............................................................
Einsatzgrenzen .....................................................................
Verantwortungsbereiche ........................................................
Gebrauchsgefahren ..............................................................
Laserklassifizierung ...............................................................
Elektromagnetische Verträglichkeit (EMV) .................................
FCC Hinweis, gültig in den USA .............................................
Internationale Herstellergarantie ........................................
Technische Daten ...................................................................
D
74
76
76
76
78
78
78
79
79
80
80
80
80
81
81
82
82
83
83
83
83
83
83
84
84
84
85
86
86
86
87
87
87
87
88
88
89
92
93
94
95
96
75
Merkmale
Der Agatec RL110 bietet zahlreiche nützliche Funktionen für
Innenanwendungen, die die Arbeit vereinfachen und die Präzision
steigern:
Lasereinheit - Überblick {A}
Beachten Sie Abbildung {A} auf der vorderen, inneren Umschlagseite,
die einen Überblick über die Lasereinheit enthält, bzw. Abbildung {B} mit
einem Überblick über die Tasten.
1)
2)
3)
4)
5)
6)
Rotorkopf
Indexmarkierungen
Lot- oder Fluchtstrahlaustritt
Laserstrahlaustritt
Batterien
5/8"-11 Stativgewinde für horizontale Aufstellung
Tasten - Überblick {B}
Das Bedienfeld des Agatec RL110 besteht aus sieben Tasten und drei
LED-Anzeigen.
1)
2)
3)
4)
5)
6)
7)
8)
9)
10)
76
EIN/AUS
H.I. / Tilt
AUF
AB
Rotation
Scanning
Manuell
LED - H.I. Alarm
LED - Niedriger Batteriestand
LED - Manuell
Gerät {A}
2
1
D
3
4
5
6
Tastatur {B}
1
9
8
10
2
7
3
6
4
5
77
Grundfunktionen
Verwendung des Agatec RL110
Horizontale Aufstellung
Der Laser kann auf ein 5/8"-11 Stativ gesetzt oder auf eine fixe, stabile
Oberfläche gestellt werden.
Der Agatec RL110 lässt sich mit Hilfe der Wandhalterung (optional) an
der Deckenkonstruktion befestigen.
Vertikale Aufstellung
Der Laser kann mit dem Rücken (gegenüber des Griffs) auf eine fixe,
stabile Oberfläche gelegt werden. Für erhöhte Stabilität Wandhalterung
(optional) verwenden.
Einschalten des Lasers
Laser mit der Taste Ein/Aus {B-1} einschalten. Nach dem Einschalten
führt der Laser einen Selbsttest durch.
Der Strahl blinkt, während sich der Laser selbsttätig nivelliert. Danach
beginnt sich der Rotorkopf zu drehen. Wählen Sie nun zwischen H.I.
Alarm und manuellem Modus (siehe entsprechenden Abschnitt).
Der Laser verfügt über einen grossen Selbstnivellierbereich. Wird dieser
dennoch überschritten, blinkt der Laser und der Rotorkopf dreht sich nicht.
LED-Neigungsanzeiger
Die LED-Neigungsanzeiger für die X- und Y-Achse {B-9} blinken langsam
grün und rot, während sich die Achsen Nivellieren und bleibt grün wenn
die Achsen nivelliert sind.
Tastenfunktionen
Die Tasten AUF/AB sind je nach Betriebsmodus mit unterschiedlichen
Funktionen belegt. Die untenstehende Tabelle erläutert die einzelnen
Tastenfunktionen im jeweiligen Betriebsmodus.
78
Modus
Automatischer Modus
Drehen
Automatischer Modus
Tasten AUF/AB
Laser und
Fernbedienung
Bewegt stationären
Ändert
Strahl
Kopfgeschwindigkeit
Bewegt Scanlinie
Ändert
Scannen
Liegender Modus
Ändert
Scanbreite
Neigt Ebene
Drehen
Manueller Modus
Ändert
Kopfgeschwindigkeit
Neigt Ebene
Scannen
Manueller Modus
D
Scanbreite
Neigt Ebene
Drehen
Liegender Modus
Tasten
LINKS-RECHTS
Nur Fernbedienung
Ändert
Kopfgeschwindigkeit
Neigt Ebene
Scannen
Ändert
Scanbreite
Automatischer / Manueller Modus
Beim Einschalten befindet sich der Agatec RL110 immer im automatischen Modus und nivelliert sich selbsttätig.
Nach Abschluss der Selbstnivellierung beginnt sich der Laserkopf mit
300 rpm zu drehen.
Im manuellen Modus nivelliert sich der Laser nicht selbsttätig. Der Strahl
rotiert dementsprechend auch, wenn der Laser nicht nivelliert ist.
H.I. Alarm Modus
Die Funktion H.I. Alarm stoppt den Laser automatisch, wenn der Laser
bewegt wird, um Fehlmessungen zu vermeiden. Diese Funktion muss
vor der Verwendung aktiviert werden.
•
Zur Aktivierung nach dem Einschalten des Lasers Taste H.I. Alarm
{B-2} drücken. Die LED H.I. Alarm {B-8} blinkt schnell, während sich der
Laser selbsttätig nivelliert.
79
•
30 Sekunden nach dem Beginn der Kopfdrehung blinkt die LED
langsam und zeigt damit an, dass die Funktion H.I. Alarm aktiviert ist.
Wird der Laser bei aktiviertem H.I. Alarm bewegt, stoppt die
Kopfdrehung und der Laserstrahl erlischt, die ganzen LEDs wird rot
blinken.
Schalten Sie den Laser durch Betätigen der EIN/AUS Taste aus, und
unmittelbar danach wieder ein (600 rpm).
Rotationsmodus
Der Laserkopf kann auf drei verschiedene Drehgeschwindigkeiten
eingestellt werden: 0, 300, 450, 600 rpm. Die Standardeinstellung liegt
bei 600 rpm. Der Laserstrahl ist bei niedrigeren Drehzahlen besser sichtbar.
• Um die Rotationsgeschwindigkeit zu verändern, Taste
{B-6} drücken.
• Wird der Strahl gestoppt, kann der Laserpunkt mit Hilfe der Tasten
Auf & Ab bewegt werden.
Scanmodus
Bei Innenanwendungen erlaubt der Scanmodus eine bessere
Sichtbarkeit des Strahls.
• Zur Aktivierung des Scanmodus Taste Scan
{B-6} drücken.
Der Strahl blinkt, bis sich der Laser selbsttätig nivelliert hat.
• Um die Scanlinie zu verlängern, Taste Scan
{B-6} drücken.
Wandhalterung
Für den Innengebrauch, bezüglich des Beispiels die Installierung von
Wand, wird es empfohlen, um ein Wandhalterung zu verwenden.
Einrichtung für manuelle Neigung
Mit dem Agatec RL110 können manuell Neigungen für spezielle
Anwendungen, z. B. Treppen, geneigte Decken etc. erstellt werden.
Neigungen bis 10%: Laser in horizontalen Modus versetzen und Neigung
mit Hilfe der Fernbedienung anhand der folgenden Anweisungen einstellen.
80
Im manuellen Modus nivelliert sich die Einheit nicht selbsttätig und der Kopf
dreht sich weiter. Die Laserlichtebene lässt sich in einer oder beiden
Dimensionen neigen.
D
Verwendung des Lasers im manuellen Modus:
Laser einschalten und abwarten, bis die Selbstnivellierung abgeschlossen
ist. Taste Manueller Modus {B-7} drücken. Die LED {B-10} um
anzuzeigen dass der manuelle Modus aktiviert ist und die Neigung in der
X-Achse eingestellt warden kann.
Tasten AUF/AB {B-3 bzw. B-4} drücken, um die Neigung der X-Achse
einzustellen.
Zur Einstellung der Neigung der Y-Achse Taste Manueller Modus {B-1} erneut
drücken. Die LED {B-10} blinkt rot, um anzuzeigen dass der manuelle
Modus aktiviert ist und die Neigung der Y-Achse eingestellt
werden kann.
Tasten AUF/AB {B-3 bzw. B-4} drücken, um die Neigung der Y-Achse
einzustellen.
Taste Manueller Modus {B-7} lange drücken, um den manuellen Modus zu
verlassen und in den automatischen Modus zurückzukehren.
Zubehör
Fernbedienung
Die Fernbedienung verfügt über fünf Tasten,
deren Funktionen identisch mit jenen am
Laser sind.
1)
2)
3)
4)
5)
Links
Rechts
Scan- / Rotationsmodus
OBEN
UNTEN
4
1
2
5
3
Für eine Funktionsbeschreibung siehe Tabelle "Tastenfunktionen".
Die rote LED an der Oberseite der Fernbedienung blinkt bei jedem
Tastendruck. Dies signalisiert die Übertragung von Informationen an den Laser.
• Batterie: Zum Öffnen des Batteriefachs und Wechseln der Batterie
Abdeckung in Pfeilrichtung bewegen.
81
Empfänger
Der Empfänger hat alle Funktionen des Empfänger/Fernbedienung,
der entfernten Funktionen ausschließend.
1) Audio
Wählen Sie das gesunde Niveau, von Normal, Laut, Davon aus.
2) Bandbreite
Zyklus durch die Entdeckungsgenauigkeit, von Normal, Fein.
3) Ein / Aus
Drücken Sie ein mal zum einschalten. Lange drücken zum abzubiegen.
1
2
3
Weiteres Zubehör
• Eine Laserbrille verbessert die Sichtbarkeit des Laserstrahls in einer
hellen Umgebung.
• Die Deckenzieltafel kommt bei der Montage abgehängter Decken
zum Einsatz. Die Zieltafel lässt sich mit Hilfe eines Magneten an der
Deckenkonstruktion befestigen.
82
Batterien
D
LED Niedriger Batteriestand
Wenn der Ladezustand der Batterien niedrig ist, fängt die LED {B-9} an
zu blinken. Wenn die Batterie leer ist, wird die Rotation des Laserkopfes
stoppen, und die LED {B-9} leuchtet kontinuierlich.
Austausch der Alkalibatterien
Zum Austausch der Alkalibatterien des Lasers folgendermassen vorgehen:
• Batteriefach auf der Rückseite des Lasers mit Hilfe einer Münze oder
eines kleinen Schraubendrehers entnehmen.
• Zwei neue Alkalibatterien (D oder LR20) polrichtig laut Angabe auf dem
Boden des Batteriefachs einsetzen. Der Plus-Kontakt ist abgerundet und
erhöht. Beim Batterieaustausch immer beide Batterien gleichzeitig ersetzen.
Genauigkeitsjustierung
Hinweise und Zuständigkeiten
• Es ist Aufgabe des Anwenders, die Gebrauchsanweisung zu befolgen
und die Genauigkeit des Instruments und der durchgeführten Arbeiten
regelmässig zu überprüfen.
• Der Laser wird im Werk nach einer festgelegten Genauigkeitsspezifikation justiert. Es wird empfohlen, die Genauigkeit Ihres Lasers
beim Erhalt sowie regelmässig beim Gebrauch zu prüfen, um
sicherzustellen, dass die Genauigkeit beibehalten wird. Wenn Ihr Laser
justiert werden muss, setzen Sie sich mit Ihrem autorisierten
Servicezentrum in Verbindung.
• Die Genauigkeitsjustierung darf nur von einem qualifizierten Fachmann
durchgeführt werden, der die Grundprinzipien der Justierung versteht.
83
Überprüfung der Nivelliergenauigkeit
Um die Nivelliergenauigkeit des Lasers zu kontrollieren, Produkt ca. 30 m
von einer Wand entfernt auf eine ebene, horizontale Fläche oder ein
Stativ stellen.
• X-Achse so ausrichten, dass sie rechtwinklig zur Wand steht. Dem Laser
Zeit geben, sich vollständig selbst zu nivellieren (ca. eine Minute ab
Drehbeginn). Position des Strahls (Position 1) markieren.
• Laser um 180° drehen. Geben Sie dem Laser Zeit, sich selbst zu nivellieren und markieren Sie die entgegengesetzte Seite der ersten Achse
(Position 2).
• Y-Achse des Lasers durch Drehen um 90° so ausrichten, dass diese
Achse rechtwinklig zur Wand steht. Geben Sie dem Laser Zeit, sich vollständig selbst zu nivellieren und markieren Sie die Strahlposition (Position 3).
• Laser um 180° drehen. Geben Sie dem Laser Zeit, sich selbst zu nivellieren und markieren Sie die entgegengesetzte Seite der Y-Achse (Position 4).
• Der Laser befindet sich innerhalb seiner Genauigkeitsspezifikation,
wenn die vier Markierungen innerhalb von ±3 mm vom Mittelpunkt
liegen.
Überprüfung der vertikalen Genauigkeit
Zur Kontrolle der vertikalen Genauigkeit des Lasers, Einheit in liegender
Position ca. 15-30 m von einer Wand entfernt auf eine ebene, horizontale
Fläche legen. Siehe Abbildung auf der hinteren, inneren Umschlagseite
dieser Gebrauchsanweisung.
• Schnurlot an der Wand befestigen.
• Laser bewegen, bis der vertikale rotierende Strahl am Schnurlot ausgerichtet ist.
• Befindet sich der rotierende Strahl nicht im Lot, ist eine Justierung
erforderlich.
Einstellung der Nivelliergenauigkeit
Eine genauere Beschreibung des Justiervorganges finden Sie auch online
auf der Agatec Homepage unter www.agatec.com
84
Störungsbehebung
Symptom
Mögliche Ursachen und Lösungen
Der Laserstrahl
blinkt, die Einheit
nivelliert sich jedoch
nicht selbsttätig und
dreht sich nicht.
Möglicherweise befindet sich die Einheit ausserhalb
des Selbstnivellierbereichs von 10%.
• Aufstellung überprüfen und gegebenenfalls Stativ neu
einrichten.
• Löst sich das Problem durch diese Massnahme nicht,
Laser zur Wartung in ein autorisiertes Servicezentrum
bringen.
Der Laser lässt sich
nicht einschalten.
Die Reichweite des
Lasers verringert sich
Die IRFernbedienung
funktioniert nicht.
Der Laserempfänger
funktioniert nicht
ordnungsgemäss.
D
Dies kann auf einen niedrigen Batterieladezustand
bzw. leere Batterien zurückzuführen sein.
• Batterien überprüfen, ersetzen oder aufladen.
• Ist der Batterieladezustand ausreichend, Laser zur
Wartung in ein autorisiertes Servicezentrum bringen.
Verschmutzung kann die Laserleistung verringern.
• Fenster von Laser und Empfänger reinigen, um eine
höhere Reichweite zu erzielen.
• Sind die Fenster sauber, Laser zur Wartung in ein
autorisiertes Servicezentrum bringen.
Ordnungsgemässes Funktionieren der Fernbedienung
überprüfen.
• Überprüfen, ob der Laser eingeschaltet ist.
• Überprüfen, ob sich die Fernbedienung ausserhalb
der Reichweite befindet.
• Fernbedienung unmittelbar auf den Laser richten, um
eine höhere Reichweite zu erzielen.
• Der Ladezustand der Batterie der Fernbedienung ist
möglicherweise zu niedrig.
Ordnungsgemässes Funktionieren des Empfängers
überprüfen.
• Der Laser dreht sich nicht. Das Produkt nivelliert sich
oder es wurde H.I. Alarm ausgelöst.
• Überprüfen, ob sich der Empfänger ausserhalb der
Reichweite befindet.
• Der Ladezustand der Batterie der Fernbedienung ist
möglicherweise zu niedrig.
85
Wartung und Transport
Transport
Transport im Feld
Achten Sie beim Transport Ihrer Ausrüstung im Feld immer darauf, dass Sie
• das Produkt entweder im Originaltransportbehälter transportieren,
• oder das Stativ mit aufgesetztem und angeschraubtem Produkt aufrecht
zwischen den Stativbeinen über der Schulter tragen.
Transport im Auto
Transportieren Sie das Produkt niemals lose im Auto. Das Produkt kann
durch Schläge und Vibrationen stark beeinträchtigt werden. Es muss
daher immer im Transportbehälter transportiert und entsprechend
gesichert werden.
Versand
Verwenden Sie für den Transport des Produkts per Bahn, Flugzeug
oder Seefracht immer die Originalverpackung von Agatec
(Transportbehälter und Versandkarton) bzw. einen entsprechenden
Ersatz. Die Verpackung sichert das Produkt gegen Schläge und
Vibrationen.
Versand, Transport Batterien
Beim Transport oder Versand von Batterien ist der Betreiber dafür verantwortlich, die national und international gültigen Vorschriften und
Bestimmungen einzuhalten. Kontaktieren Sie vor dem Transport oder
Versand Ihr lokales Personen- oder Frachttransportunternehmen.
Feldjustierung
Kontrollieren Sie nach längerem Transport Ihrer Ausrüstung vor Gebrauch
die in dieser Gebrauchsanweisung angegebenen Feldjustierparameter.
Lagerung
Produkt
Beachten Sie bei der Lagerung Ihrer Ausrüstung den
Lagertemperaturbereich, speziell im Sommer, wenn Sie Ihre Ausrüstung
im Fahrzeuginnenraum aufbewahren. Die einzuhaltenden Temperaturgrenzwerte finden Sie im Abschnitt "Technische Daten".
Feldjustierung
Kontrollieren Sie nach längerer Lagerung Ihrer Ausrüstung vor Gebrauch
die in dieser Gebrauchsanweisung angegebenen Feldjustierparameter.
Alkalibatterien
Entfernen Sie bei längerer Lagerung die Alkalibatterien aus dem
Produkt, um ein Auslaufen zu verhindern.
86
Reinigen und Trocknen
D
Produkt und Zubehör
• Staub von optischen Teilen abblasen.
• Glas nicht mit den Fingern berühren.
• Nur mit einem sauberen und weichen Lappen reinigen. Falls nötig mit
Wasser oder reinem Alkohol etwas befeuchten.
• Keine anderen Flüssigkeiten verwenden, da diese die Kunststoffteile
angreifen können.
Nass gewordene Produkte
• Produkt, Transportbehälter, Schaumstoffeinsätze und Zubehör bei
höchstens 40°C abtrocknen und reinigen.
• Ausrüstung erst wieder einpacken, wenn sie völlig trocken ist.
Kabel und Stecker
• Stecker dürfen nicht verschmutzen und sind vor Nässe zu schützen.
• Verschmutzte Stecker der Verbindungskabel ausblasen.
Sicherheitshinweise
Allgemeines
Beschreibung
Die folgenden Anweisungen sollen sowohl den Betreiber als auch den
Benutzer des Produktes in die Lage versetzen, Gefahren beim Betrieb
vorauszusehen und zu vermeiden.
Der Betreiber hat sicherzustellen, dass alle Benutzer diese Hinweise
verstehen und befolgen.
Verwendungszweck
Bestimmungsgemässe Verwendung
• Das Instrument emittiert zu Ausrichtzwecken eine horizontale oder
vertikale Laserebene.
• Das Gerät kann auf seiner Bodenplatte, der Wandhalterung oder
auf einem Stativ aufgestellt werden.
• Der Laserstrahl lässt sich mit Hilfe eines Laserempfängers erfassen.
• Dieses Produkt wurde für den Einsatz in Innenräumen konzipiert.
87
Sachwidrige Verwendung
• Verwendung des Produkts ohne Instruktion.
• Verwendung ausserhalb der Einsatzgrenzen.
• Unwirksammachen von Sicherheitseinrichtungen.
• Entfernen von Hinweis- oder Warnschildern.
• Öffnen des Produktes mit Werkzeugen, z.B. Schraubenzieher, sofern
nicht ausdrücklich für bestimmte Fälle erlaubt.
Durchführung von Umbauten oder Veränderungen am Produkt.
•Inbetriebnahme nach Zweckentfremdung.
• Verwendung des Produkts mit offensichtlich erkennbaren Mängeln
oder Schäden.
• Verwendung von Zubehör anderer Hersteller, das von Agatec nicht
ausdrücklich genehmigt ist.
• Ungenügende Absicherung der Arbeitsumgebung, z.B. bei der
Verwendung auf oder in der Nähe von Strassen.
• Absichtliche Blendung Dritter.
• Steuerung von Maschinen, bewegten Objekten oder Überwachungsanwendungen ohne zusätzliche Kontroll- und Sicherheitseinrichtungen.
WARNUNG
Möglichkeit einer Verletzung, einer Fehlfunktion und Entstehung von
Sachschaden bei sachwidriger Verwendung. Der Betreiber informiert den
Benutzer über Gebrauchsgefahren des Produkts und schützende
Gegenmassnahmen. Das Produkt darf erst dann in Betrieb genommen
werden, wenn der Benutzer instruiert ist.
Einsatzgrenzen
Umwelt
Für den Einsatz in dauernd für Menschen bewohnbarer Atmosphäre
geeignet; nicht einsetzbar in aggressiver oder explosiver Umgebung.
GEFAHR
Lokale Sicherheitsbehörden und Sicherheitsverantwortliche sind durch den
Betreiber zu kontaktieren, bevor in gefährdeter Umgebung, in der Nähe
von elektrischen Anlagen oder in ähnlichen Situationen gearbeitet wird.
Verantwortungsbereiche
Hersteller des Produkts
Die Agatec SAS, 21, boulevard Littré, F-78600 Le Mesnil Le Roi, kurz
Agatec, ist verantwortlich für die sicherheitstechnisch einwandfreie
Lieferung des Produktes inklusive Gebrauchsanweisung und
Originalzubehör.
88
Hersteller von Fremdzubehör für Produkte von Agatec
Hersteller von Fremdzubehör für das Produkt sind verantwortlich für die
Entwicklung, Umsetzung und Kommunikation von Sicherheitskonzepten
für ihre Produkte und deren Wirkung in Kombination mit dem Produkt
von Agatec.
Betreiber
Für den Betreiber gelten folgende Pflichten:
• Er versteht die Schutzinformationen auf dem Produkt und die
Instruktionen in der Gebrauchsanweisung.
• Er kennt die ortsüblichen, betrieblichen Sicherheitsund Unfallverhütungsvorschriften.
• Er benachrichtigt Agatec umgehend, wenn am Produkt und bei dessen
Anwendung Sicherheitsmängel auftreten.
D
WARNUNG
Der Betreiber ist verantwortlich für die bestimmungsgemässe Verwendung
des Produkts, den Einsatz seiner Mitarbeiter, deren Instruktion und die
Betriebssicherheit des Produkts.
Gebrauchsgefahren
WARNUNG
Fehlende oder unvollständige Instruktion können zu Fehlbedienung oder
sachwidriger Verwendung führen. Dabei können Unfälle mit schweren
Personen-, Sach-, Vermögens- und Umweltschäden entstehen.
Gegenmassnahmen:
Alle Benutzer befolgen die Sicherheitshinweise des Herstellers und die
Weisungen des Betreibers.
VORSICHT
Vorsicht vor fehlerhaften Messergebnissen beim Verwenden eines
Produktes, nach einem Sturz oder anderen unerlaubten Beanspruchungen, Veränderungen des Produktes, längerer Lagerung oder Transport.
Gegenmassnahmen:
Führen Sie periodisch Kontrollmessungen und die in der Gebrauchsanweisung
angegebenen Feldjustierungen durch. Besonders nach übermässiger
Beanspruchung des Produkts, und vor und nach wichtigen Messaufgaben.
GEFAHR
Beim Arbeiten mit Messlatten und Stöcken
in unmittelbarer Umgebung von elektrischen Anlagen wie Freileitungen oder
Eisenbahnen besteht akute Lebensgefahr
aufgrund eines elektrischen Schlages.
89
Gegenmassnahmen:
Halten Sie einen ausreichenden Sicherheitsabstand zu elektrischen Anlagen ein.
Ist das Arbeiten in solchen Anlagen zwingend notwendig, so sind vor der
Durchführung dieser Arbeiten die für diese Anlage zuständigen Stellen oder
Behörden zu benachrichtigen und deren Anweisungen zu befolgen.
WARNUNG
Wenn das Produkt mit Zubehör wie zum Beispiel Mast, Messlatte oder
Lotstock verwendet wird, erhöht sich die Gefahr von Blitzeinschlag.
Gegenmassnahmen:
Verwenden Sie das Produkt nicht bei Gewitter.
WARNUNG
Ungenügende Absicherung bzw. Markierung Ihrer Baustelle kann zu
gefährlichen Situationen im Strassenverkehr, auf Baustellen, in
Industrieanlagen usw. führen
Gegenmassnahmen:
Achten Sie immer auf ausreichende Absicherung Ihrer Baustelle. Beachten
Sie die länderspezifischen gesetzlichen Sicherheits- und Unfallverhütungsvorschriften und Strassenverkehrsverordnungen.
VORSICHT
Bei nicht fachgerechter Anwendung des Produktes besteht die
Möglichkeit, dass durch mechanische Einwirkungen, z.B. Sturz oder
Schlag, oder durch nicht fachgerechte Adaption von Zubehör Ihr Produkt
beschädigt, Schutzvorrichtungen unwirksam oder Personen gefährdet
werden.
Gegenmassnahmen:
Achten Sie bei der Aufstellung Ihres Produkts darauf, dass das Zubehör
fachgerecht adaptiert, montiert, fixiert und verriegelt ist. Schützen Sie Ihr
Produkt vor mechanischen Einwirkungen.
VORSICHT
Beim Transport, Versand oder bei der Entsorgung von Batterien kann bei
unsachgemässen, mechanischen Einwirkungen auf die Batterie
Brandgefahr entstehen.
Gegenmassnahmen:
Versenden oder entsorgen Sie Ihr Produkt nur mit entladenen Batterien.
Betreiben Sie dazu das Produkt, bis die Batterien entladen sind. Beim
Transport oder Versand von Batterien ist der Betreiber dafür verantwortlich, die national und international gültigen Vorschriften und
Bestimmungen einzuhalten. Kontaktieren Sie vor dem Transport oder
Versand Ihr lokales Personen- oder Frachttransportunternehmen.
90
WARNUNG
Starke mechanische Belastungen, hohe Umgebungstemperaturen oder
das Eintauchen in Flüssigkeiten können zum Auslaufen, Brand oder
zur Explosion der Batterien führen.
Gegenmassnahmen:
Schützen Sie die Batterien vor mechanischen Einwirkungen und hohen
Umgebungstemperaturen. Batterien nicht in Flüssigkeiten werfen oder eintauchen.
D
WARNUNG
Beim Kurzschluss der Batteriekontakte, z.B. beim Aufbewahren und
Transportieren von Batterien in der Tasche von Kleidungsstücken, wenn
die Batteriekontakte mit Schmuck, Schlüsseln, metallisiertem Papier oder
anderen Metallgegenständen in Berührung kommen, können Batterien
überhitzen und es besteht Verletzungs- oder Brandgefahr.
Gegenmassnahmen:
Stellen Sie sicher, dass die Batteriekontakte nicht mit metallischen
Gegenständen in Berührung kommen.
VORSICHT
Beim Betrieb des Produkts können Gliedmassen von beweglichen Teilen
eingeklemmt werden.
Gegenmassnahmen:
Halten Sie einen entsprechenden Sicherheitsabstand zu den beweglichen
Teilen.
WARNUNG
Bei unsachgemässer Entsorgung des Produkts können folgende Ereignisse
eintreten:
• Beim Verbrennen von Kunststoffteilen entstehen giftige Abgase, an
denen Personen erkranken können.
• Batterien können explodieren und dabei Vergiftungen, Verbrennungen,
Verätzungen oder Umweltverschmutzung verursachen, wenn sie
beschädigt oder stark erwärmt werden.
• Bei leichtfertigem Entsorgen ermöglichen Sie unberechtigten Personen,
das Produkt sachwidrig zu verwenden. Dabei können Sie sich und Dritte
schwer verletzen sowie die Umwelt verschmutzen.
Gegenmassnahmen:
Das Produkt darf nicht im Hausmüll entsorgt werden. Entsorgen
Sie das Produkt sachgemäss. Befolgen Sie die länderspezifischen Entsorgungsvorschriften.
WARNUNG
Lassen Sie die Produkte nur von einer von Agatec autorisierten Servicestelle
reparieren.
91
Laserklassifizierung
Allgemeines
Die folgenden Anweisungen, die den aktuellen internationalen Normen
IEC 60825-1 (2007-03) und IEC TR 60825-14 (2004-02) entsprechen,
enthalten Hinweise und Informationen, welche die Betreiber und Benutzer
des Produkts in die Lage versetzen, allfällige Gebrauchsgefahren
rechtzeitig zu erkennen und zu vermeiden.
Der Betreiber hat sicherzustellen, dass alle Benutzer diese Hinweise verstehen und befolgen. Produkte, die als Laserklasse 1, Laserklasse 2 oder
Laserklasse 3R eingestuft sind, erfordern aufgrund der niedrigen
Gefährdung für die Augen keine
• Hinzuziehung eines Laserschutzbeauftragten,
• Schutzbekleidung und Augenschutz,
• besonderen Warntafeln im Arbeitsbereich, wenn sie entsprechend den
Hinweisen in dieser Gebrauchsanweisung verwendet werden. Produkte,
die als Laserklasse 2 oder Laserklasse 3R eingestuft sind, können - insbesondere bei geringem Umgebungslicht
• Blendeffekte und Nachbilder hervorrufen.
Agatec RL110 entspricht der Laserklasse 2 gemäss:
• IEC60825-1 : 2007 "Sicherheit von Lasereinrichtungen"
Beschreibung
Maximale Strahlungsleistung
Impulsdauer (effektiv)
Impulswiederholfrequenz
Wellenlänge
Strahldivergenz
Sicherheitsabstand
(NOHD - Nominal Ocular
Hazard Distance) bei 0.25 s
Wert
< 1 mW c.w.
4.5, 2.2, 1.5, 1.1 ms
0, 2.5, 5, 7.5, 10 rps
620-690 nm
< 1,5 mrad
35 m
2° bis 36°
Laserklasse 2 Produkte:
Blicken Sie nicht in den Laserstrahl und richten Sie ihn nicht unnötig auf
andere Personen. Der Schutz des Auges wird üblicherweise durch
Abwendungsreaktionen einschliesslich des Lidschlussreflexes bewirkt.
WARNUNG:
Direkter Blick in den Laserstrahl mit optischen Hilfsmitteln (wie z.B.
Ferngläser, Fernrohre) kann gefährlich sein.
Gegenmassnahmen:
Mit optischen Hilfsmitteln nicht in den Laserstrahl blicken.
92
VORSICHT:
Der Blick in den Laserstrahl kann für das Auge gefährlich sein.
Gegenmassnahmen:
Nicht in den Laserstrahl blicken. Achten Sie darauf, dass der Laserstrahl
ober- oder unterhalb der Augenhöhe verläuft.
D
Aufklebers, Laser Class 2
Laserstrahlung
Direkte Bestrahlung der
Augen vermeiden
Produkt der Laserklasse 2
nach
IEC 60825-1
Elektromagnetische Verträglichkeit (EMV)
Beschreibung
Als elektromagnetische Verträglichkeit bezeichnen wir die Fähigkeit der
Produkte, in einem Umfeld mit elektromagnetischer Strahlung und
elektrostatischer Entladung einwandfrei zu funktionieren, ohne elektromagnetische Störungen in anderen Geräten zu verursachen.
93
WARNUNG
Möglichkeit einer Störung anderer Geräte durch elektromagnetische
Strahlung. Obwohl die Produkte die strengen Anforderungen der einschlägigen Richtlinien und Normen erfüllen, kann Agatec die Möglichkeit
einer Störung anderer Geräte nicht ganz ausschliessen.
VORSICHT
Möglichkeit einer Störung anderer Geräte, wenn Sie das Produkt in
Kombination mit Fremdgeräten verwenden, z.B. Feldcomputer, PC,
Funkgeräte, diverse Kabel oder externe Batterien.
Gegenmassnahmen:
Verwenden Sie nur von Agatec empfohlene Ausrüstung bzw. Zubehör.
Nur empfohlene Ausrüstung bzw. Zubehör erfüllt in Kombination mit dem
Produkt die strengen Anforderungen der einschlägigen Richtlinien und
Normen. Achten Sie bei Verwendung von Computern und Funkgeräten
auf die herstellerspezifischen Angaben über die elektromagnetische
Verträglichkeit.
VORSICHT
Möglichkeit von fehlerhaften Messergebnissen bei Störungen durch
elektromagnetische Strahlung. Obwohl das Produkt die strengen
Anforderungen der einschlägigen Richtlinien und Normen erfüllt, kann
Agatec die Möglichkeit nicht ganz ausschliessen, dass intensive elektromagnetische Strahlung das Produkt stört; z.B. die Strahlung in unmittelbarer Nähe von Rundfunksendern, Funksprechgeräten, DieselGeneratoren usw.
Gegenmassnahmen:
Bei Messungen unter diesen Bedingungen, Messergebnisse auf
Plausibilität überprüfen.
WARNUNG
Bei Betreiben des Produkts mit einseitig am Instrument eingesteckten
Kabeln (z.B. externes Speisekabel, Schnittstellenkabel etc.) kann eine
Überschreitung der zulässigen elektromagnetischen Strahlungswerte
auftreten. Dadurch können andere Geräte gestört werden.
Gegenmassnahmen:
Während dem Gebrauch des Produkts müssen Kabel beidseitig (z.B.
Instrument / externe Batterie, Instrument / Computer etc.) eingesteckt sein.
FCC Hinweis, gültig in den USA
WARNUNG
Dieses Produkt hat in Tests die Grenzwerte eingehalten, die in
Abschnitt 15 der FCC-Bestimmungen für digitale Geräte der Klasse B
festgeschrieben sind.
94
Diese Grenzwerte sehen für die Installation in Wohngebieten einen ausreichenden Schutz vor störenden Abstrahlungen vor.
Geräte dieser Art erzeugen und verwenden Hochfrequenzen und können
diese auch ausstrahlen. Sie können daher, wenn sie nicht den
Anweisungen entsprechend installiert und betrieben werden, Störungen
des Rundfunkempfanges verursachen.
Es kann aber nicht garantiert werden, dass bei bestimmten Installationen
nicht doch Störungen auftreten können.
Falls dieses Gerät Störungen des Radio- oder Fernsehempfangs verursacht, was durch Aus- und Wiedereinschalten des Gerätes festgestellt
werden kann, ist der Benutzer angehalten, die Störungen mit Hilfe folgender Massnahmen zu beheben:
• Die Empfangsantenne neu ausrichten oder versetzen.
• Den Abstand zwischen Gerät und Empfänger vergrössern.
• Das Gerät an die Steckdose eines Stromkreises anschliessen, der unterschiedlich ist zu dem des Empfängers.
• Lassen Sie sich von Ihrem Händler oder einem erfahrenen Radio- und
Fernsehtechniker beraten.
D
WARNUNG
Änderungen oder Modifikationen, die nicht ausdrücklich von Agatec
genehmigt wurden, können das Recht des Anwenders einschränken, das
Gerät in Betrieb zu nehmen.
FERNBEDIENUNG
Reichweite IR
Batterien
bis zu 30 m
une AA batterie alkaline
EMPFÄNGER-/FERNBEDIENUNGS-KOMBO
Batterien
1 St. 9V Blockbatterie
EMPFÄNGER
Batterien
1 St. 9V Blockbatterie
AGATEC SAS
21, boulevard Littré - F- 78600 Le Mesnil le Roi
Tél. +33 1 34 93 35 80 - www.agatec.com
Internationale Herstellergarantie
Dieses Produkt unterliegt den in der internationalen Herstellergarantie festgelegten Bedingungen. Die internationale Herstellergarantie steht auf der
Homepage von Agatec unter www.agatec.com Download bereit.
95
Die vorerwähnte Garantieerklärung gilt ausschliesslich und ersetzt alle
anderen ausdrücklichen oder stillschweigenden Garantien, Bedingungen
und Bestimmungen, seien sie tatsächlicher oder gesetzlicher Natur,
einschliesslich solcher, welche sich auf die marktübliche Qualität, die
Eignung für einen bestimmten Gebrauch, zufriedenstellende Qualität oder
Beachtung der Rechte Dritter beziehen, welche alle ausdrücklich
ausgeschlossen werde.
Technische Daten
Technische Daten
Agatec RL110
Arbeitsbereich Ø
Bis zu 60 m ohne Empfänger
(rotierender Strahl)
Bis zu 200 m mit Empfänger
Genauigkeit der Selbstnivellierung*
± 1 mm bis 10 m
Automatische Nivellierung
Horizontal, Vertikal
Selbstnivellierbereich
± 10%; 6°
Rotationsdrehzahlen
0, 300, 450, 600 rpm
Scanwinkel
variabel zwischen 2° und 36°
Laserdiode
635 nm (rot)
Class 2, <1 mW
Abmessungen (H x B x T)
156 mm x 154 mm x 197 mm
Gewicht mit Batterien
Ca.1.5 kg
Batterien
Alkaline D-Zellen 2 x 1.5 V
Batterielebensdauer -
160 h (Alkaline)
Alkali **
Betriebstemperatur
-10°C à 50°C
Lagertemperatur
-20°C bis 80°C
(ohne Batterien)
Wasserbeständigkeit
IP54, staubgeschützt,
spritzwassergeschützt
*
Genauigkeit definiert bei 25°C
** Batterielebensdauer abhängig von den Umweltbedingungen
96
Manuale d'uso
Manuale d'uso
Italiano
Introduzione
Acquisto
Congratulazioni per aver acquistato un nuovo Laser Rotante Agatec.
Apparecchio
Il presente manuale contiene delle importanti indicazioni
per la sicurezza, oltre ad istruzioni relative all'installazione e all'utilizzo del prodotto. Per ulteriori informazioni consultare il capitolo "Norme di sicurezza".
Prima di utilizzare lo strumento, leggere attentamente il Manuale d'uso.
I simboli
I simboli usati in questo manuale hanno il seguente significato:
PERICOLO
Indica un'imminente situazione di pericolo che, se non evitata, causerà
morte o gravi danni fisici.
AVVERTIMENTO
Indica una situazione potenzialmente pericolosa o un uso improprio che,
se non evitati, potrebbero causare morte o danni fisici gravi.
ATTENZIONE
Indica una situazione potenzialmente pericolosa o un uso improprio che,
se non evitati, potrebbero causare danni fisici di entità minore o moderata e/o gravi danni materiali, economici e ambientali.
98
Contenuti
Introduzione ........................................................................
Caratteristiche ....................................................................
Descrizione del laser {A} ....................................................
Descrizione della tastiera {B} ...............................................
Funzionamento di base .....................…............................
Come utilizzare Agatec .......................................................
Funzioni dei tasti ................................................................
Modalità automatica / Manuale ...........................................
Funzione H.I./ Tilt ..............................................................
Modalità rotazione .............................................................
Modalità scansione ............................................................
Staffa a parete ...................................................................
Messa in stazione per pendenze manuali .............................
Accessori ..............................................................................
Telecomando ......................................................................
Telecomando/Ricevitore ......................................................
Ricevitore ...........................................................................
Altri accessori ....................................................................
Batterie ................................................................................
Indicatore batterie scariche ..................................................
Sostituzione delle batterie alcaline ........................................
Regolazione della precisione ............................................
Avvertenze e responsabilità .................................................
Verifica del livello di precisione ............................................
Verifica delle precisione verticale .........................................
Regolazione del livello di precisione .....................................
Rilevazione guasti ..............................................................
Cura e trasporto .................................................................
Trasporto ...........................................................................
Stoccaggio ........................................................................
Pulizia e asciugatura ...........................................................
Norme di sicurezza ............................................................
Informazioni generali ..........................................................
Uso dell'apparecchio ..........................................................
Limiti all'uso .......................................................................
Responsabilità ....................................................................
Pericoli insiti nell'uso ...........................................................
Classificazione dei laser ......................................................
Compatibilità Elettromagnetica (EMC) ...................................
Dichiarazione FCC, valida negli USA ...................................
Garanzia internazionale ....................................................
Dati tecnici ...........................................................................
98
100
100
100
102
102
102
103
103
104
104
104
104
105
105
106
106
106
107
107
107
107
107
108
108
108
109
110
110
110
111
111
111
111
112
112
113
115
118
119
119
120
I
99
Caratteristiche
Il laser Agatec RL110 presenta molti vantaggi che rendono più facile e
preciso il lavoro degli imprenditori edili che operano in cantieri
d’interno.
Un laser rotante completo, con tutte le necessarie funzionalita’, dal raggio
laser luminoso per altissima visibilita’, e dalle dimensioni compatte.
Descrizione del laser {A}
Vedere all'interno della copertina il disegno del laser {A} e della tastiera
{B} corrispondenti a queste descrizioni.
1)
2)
3)
5)
6)
Testa rotante
indicazione degli assi
Apertura raggio laser
Batterie
Attacco a treppiede 5/8"-11 per piani orizzontali
Descrizione della tastiera {B}
La tastiera del laser Agatec RL110 è costituita da sette tasti e da tre
indicatori LED.
1) ON/OFF
2) Funzione H.I. - Tilt
3) SU
4) GIU'
5) Modalita’ rotazione
6) Modalita’ scansione
7) Modalita’ manuale
8) LED – funzione H.I.
9) LED – indicatore batterie
10) LED – indicatione modalita’ manuale
100
Panoramica Laser {A}
2
1
3
I
4
5
6
Panoramica Tastiera {B}
1
9
8
10
2
7
3
6
4
5
101
Funzionamento di base
Come utilizzare l’Agatec RL110
Messa in stazione orizzontale
Agatec RL110 può essere utilizzato con un treppiede oppure posizionato su una superficie stabile, solida.
L’apparecchio puo’ essere appeso alle griglie di un controsoffitto usando
la staffa a parete (optional).
Messa in stazione verticale
Il laser può essere posato direttamente al suolo appoggiato sul lato posteriore (lato opposto alla maniglia). Per maggiore stabilità si consiglia di
usare la staffa a parete (optional).
Accensione del laser
Accendere il laser utilizzando il tasto On/Off {B-1}. Esegue un test automatico e il raggio lampeggia mentre il laser si autolivella. Quando è a
livello, la testa comincia a ruotare. È possibile scegliere tra funzione
Hl/Tilt o modalità manuale (vedere di seguito).
Il laser possiede un ampio campo di autolivellamento; tuttavia, se il laser
viene posizionato fuori dal campo di livellamento, il raggio laser continua
a lampeggiare e la rotazione non inizia.
Indicatori LED
L’indicatore LED {B-9} lampeggera’ lentamente con luce verde e rossa
mentre gli assi si stanno livellando e diventa fisso quando ogni asse ha
raggiunto una posizione livellata.
Funzione dei tasti
I tasti SU/GIU’ sul laser e sul telecomando hanno funzioni multiple in
base alla modalità di funzionamento.
Consultare la tabella sottostante per comprendere meglio la loro
funzionalità.
102
Modalità
Tasti SU / GIU’
laser e telecomando
DESTRA/SINISTRA
Solo telecomando
I
Automatica
Modalita’ punto
Modifica la velocita’
Muove il raggio
Modifica l’ampiezza
rotante
Automatica
di rotazione
scansione
di scansione
di scansione
Orizzontale
Piano inclinato
Modifica la velocita’
Piano inclinato
Modifica l’ampiezza
Piano inclinato
Modifica la velocita’
Piano inclinato
Modifica l’ampiezza
rotante
Orizzontale
di rotazione
scansione
Manuale
di scansione
rotante
Manuale
di rotazione
scansione
di scansione
Modalità automatica / manuale
Agatec RL110 è in modalità automatica, autolivellante al momento
dell'accensione. Una volta a livello, la testa comincia a ruotare con
300 rpm.
In modalità manuale, il laser non si livella automaticamente; significa che
la testa ruota anche se il laser non è a livello. Perciò esso può essere
utilizzato anche su piani inclinati come scale, tetti, o quando è richiesto
un livellamento manuale. Vedere il paragrafo successivo su impostazione
pendenza in modalità manuale o semiautomatic.
Funzione H.I./ Tilt
La funzione H.I. ferma il laser automaticamente e fa suonare un segnale
acustico se il laser viene mosso, evitando letture di quote non corrette.
È attiva solo selezionata.
• Per attivare la funzione, premere il tasto H.I. {B-2} dopo aver acceso
il laser. Il LED H.I. {B-8} lampeggia rapidamente mentre il laser
memorizza la propria quota.
• Dopo trenta secondi, il LED lampeggia più lentamente indicando
che la funzione H.I./Tilt è attiva.
103
• Se il laser risultasse disturbato in Funzione H.I. / Tilt, la testa smette
di ruotare, il raggio si spegne, tutti i LED lampeggiano rosso.
• Premere il tasto ON/OFF per spegnere la funzione H.I. / Tilt.
Premere nuovamente il tasto ON/OFF per far ripartire l’apparecchio
in modalita’ standard (600 rpm, rotazione automatica).
Modalità rotazione
La testa presenta 3 velocità di rotazione: 0, 300, 450, 600 rpm. 600
rpm è la velocità di default. Il raggio laser è maggiormente visibile alle
basse velocità di rotazione.
• Per aumentare la velocità, premere il tasto
{B-5} una volta per
avere la modalita' punto, due volte per 300 rpm, tre volte per 450 rpm.
Una volta in piu’ per tornare a 600 rpm.
Tenere premuto il tasto Meno per fermare la rotazione.
• Quando il raggio è fermo, il punto può essere mosso a destra o a sinistra utilizzando i tasti SU/GIU {B-3 e B-4}. È possibile muovere la testa
manualmente per puntare il raggio. Per riprendere la rotazione, premere
il tasto
{B-6}.
Modalità scansione
Permette di vedere il laser anche a distanze molto lunghe.
• Per eseguire la scansione, premere il tasto Scansione
{B-6}.
• Per aumentare l'ampiezza della scansione, premere il tasto scansione
{B-6}.
• Il raggio di scansione può essere spostato a destra o a sinistra usando i
tasti SU/GIU {B-3 e B-4}.
Staffa a parete
Per applicazione in interno, come ad esempio installazione di cartongessi e
pareti, e’ raccomandato l’utilizzo di una staffa a parete.
Messa in stazione per pendenze manuali
Agatec RL110 può essere usato manualmente per creare pendenze per
applicazioni speciali, scale, soffitti inclinati.
104
Per pendenze fino a 10%, posizionare il laser in orizzontale e usare il
telecomando per impostare la pendenza come sottoindicato.
Nella modalità completamente manuale, lo strumento non si autolivella e la
testa continua a ruotare. Il piano della luce laser può essere inclinato su uno
o su entrambi i piani.
I
Per utilizzare il laser in modalita’ manuale competa:
Dopo aver acceso il laser ed aver atteso che sia livellato, premere il tasto
MAN {B-7}. Il led {B-10} indica che il laser e’ in modalita’ manuale, e
che è quindi possibile impostare la pendenza sull'asse X.
Premere il tasto SU/GIU’ per regolare la pendenza dell’asse X. premere
nuovamente il tasto MAN {B-7} per impostare la pendenza sull’asse Y.
Il led {B-10} lampeggia per indicare che il laser e’ in modalita’ manuale,
e che è quindi possibile impostare la pendenza sull'asse Y.
Tenere premuto il tasto MAN per uscire dalla modalita’ manuale e tornare
alla modalita’ automatica.
Accessori
4
Telecomando
Il telecomando è dotato di cinque tasti :
1.
2.
3.
4.
5.
sinistra
destra
scansione/rotazione
su
giu’
1
2
5
3
Vedere la tabella in "Funzioni dei tasti" a pagina 109 per comprendere
meglio la loro funzione.
Il LED rosso in cima al telecomando lampeggia ogni volta che un tasto
viene premuto, segnalando che il telecomando sta trasmettendo al laser.
• Batteria - Per aprire il vano batterie e sostituire la batteria, spingere il
coperchio del vano in direzione della freccia. Per il telecomando è
necessaria una batteria alcalina AA.
105
Ricevitore
Il ricevitore, usato con il laser rotativo, indica le quote.
1) Audio
Permette di scegliere tra livello audio normale, alto, silenzioso.
2) Regolazione banda
Permette la regolazione della larghezza di banda, tra normale e
fine.
3) ON/OFF
Premere una volta per accendere. Tenere premuto per spegnere.
1
2
3
Altri accessori
• Occhiali per laser che migliorano la visibilità del raggio laser in
condizioni di luce intensa.
• Il target per il controsoffitto è usato per visualizzare il raggio sulle
applicazioni dei controsoffitti. Il target si attacca in modo magnetico
alla struttura.
106
Batterie
Indicatore batterie scariche
I
Quando le batterie sono scariche, il LED {B-9} lampeggia durante il
funzionamento, segnalando che le batterie vanno sostituite il prima possibile. Quando le batterie sono scariche, la testa del laser cessa di
ruotare e il LED batteria rimane acceso.
Sostituzione delle batterie alcaline
Seguire le fasi sotto indicate per sostituire le batterie alcaline nel laser.
• Utilizzare un cacciavite o una moneta per rimuovere il coperchio del
vano sul retro del laser.
• Inserire due batterie alcaline nuove (tipo D o LR20), seguendo la polarità
indicata sul fondo del vano batterie. Il contatto più è arrotondato e rialzato.
Quando le batterie vengono sostituite, è fondamentale sostituirle
entrambe contemporaneamente.
Regolazione della precisione
Avvertenze e responsabilità
• È una precisa responsabilità dell'utente seguire scrupolosamente le
istruzioni di funzionamento e verificare periodicamente la precisione
dello strumento e del lavoro progressivamente svolto.
• Il laser viene regolato in fabbrica alla precisione indicata. Si
raccomanda di controllare la precisione del proprio laser al momento
del ricevimento dello strumento e poi periodicamente, per garantirne una
precisione costante nel tempo. In caso di necessità di regolazione del
laser, rivolgersi al centro assistenza.
107
• La regolazione della precisione deve essere eseguita esclusivamente
da personale qualificato consapevole dei principi di regolazione di
base.
Verifica del livello di precisione
Per controllare il livello di precisione del laser, posizionare lo strumento
ad una distanza di circa 30 m da una parete, su una superficie piana
orizzontale o su un treppiede.
• Allineare l'asse X in modo che sia perpendicolare alla parete.
Consentire al laser di autolivellarsi completamente (circa un minuto dopo
che il laser comincia a ruotare). Poi contrassegnare la posizione del
raggio (posizione 1).
• Ruotare il laser di 180°, lasciare che si autolivelli e contrassegnare il
lato opposto al primo asse (posizione 2).
• Allineare l'asse Y ruotando il laser di 90° in modo che questo asse sia
perpendicolare alla parete. Lasciare che il laser si autolivelli completamente e contrassegnare la posizione del raggio (posizione 3).
• Ruotare il laser di 180°, lasciare che si autolivelli e contrassegnare il
lato opposto all'asse Y (posizione 4).
• Il laser rientra nella specifica quando i quattro punti contrassegnati si
trovano nell’ambito di ± 3 mm dal centro.
Verifica delle precisione verticale
Per controllare la precisione verticale del laser, posizionare lo strumento
ad una distanza di circa 15 -30 m da una parete, su una superficie piana
orizzontale o su un treppiede.
• Appendere un filo a piombo alla parete.
• Spostare il laser fino ad allineare il raggio rotante verticale alla linea
a piombo.
• Se il raggio rotante non è a piombo è necessario regolarlo.
Regolazione del livello di precisione
Se la verifica del livello di precisione dovesse portare alla necessita’ di
ricalibrare il prodotto, una descrizione su come regolare il livello di
precisione puo’ essere trovato online su www.agatec.com.
108
Rilevazione guasti
Sintomo
Il raggio laser
lampeggia, ma
lo strumento non si
autolivella
o non ruota
Il laser non si
accende
La portata del laser
si è ridotta
Il telecomando IR
non
funziona
Il ricevitore non
funziona
correttamente
Cause probabili e soluzioni
I
Molto probabilmente lo strumento si trova fuori dalla
portata di autolivellamento del 10%.
• Controllare la messa in stazione e livellare
nuovamente il treppiede, se necessario.
• Se con ciò non si risolve il problema, il laser
dovrebbe essere rispedito a un centro
assistenza autorizzato per la riparazione.
Questo problema può essere causato dalle batterie che
si stanno esaurendo o sono scariche.
• Controllare, sostituire o ricaricare le batterie.
• Se il problema non è causato dalle batterie, spedire
il laser a un centro di assistenza autorizzato.
La sporcizia può ridurre la portata del laser.
• Pulire le finestre del laser e il ricevitore per
migliorare la portata.
• Se il problema non è causato dalle finestre, spedire
il laser a un centro di assistenza autorizzato.
Verificare il funzionamento del telecomando
• Accertarsi che il laser sia acceso.
• Il telecomando potrebbe essere fuori dalla
portata utile.
• Puntare il telecomando più direttamente al laser per
la portata massima.
• La batteria del telecomando potrebbe essere scarica.
Verificare il funzionamento del ricevitore
• Il laser non sta ruotando. Si sta livellando o è in stato
d'allarme H.I.
• Il ricevitore potrebbe essere fuori dalla portata utile.
• La batteria del telecomando potrebbe essere scarica.
109
Cura e trasporto
Transporto
Trasporto sul campo
Per il trasporto dell'apparecchiatura sul campo assicurarsi sempre di
• effettuare il trasporto del prodotto nella sua custodia originale,
• trasportare il treppiede appoggiandolo sulla spalla con le gambe
divaricate e tenendo lo strumento in posizione eretta.
Trasporto in un veicolo
Non trasportare mai lo strumento senza imballo all'interno di un veicolo
perché potrebbe essere danneggiato da colpi e vibrazioni. Per il trasporto
del prodotto utilizzare sempre l'apposita custodia fissandola bene.
Spedizione
Quando si spedisce lo strumento in treno, aereo o nave, usare l'imballaggio
originale completo, il contenitore o il cartone per il trasporto Agatec
o un altro imballaggio idoneo che protegga lo strumento da colpi e
vibrazioni.
Spedizione e trasporto delle batterie
Per il trasporto o la spedizione delle batterie, la persona responsabile del
prodotto deve verificare il rispetto delle leggi e dei regolamenti nazionali
e internazionali applicabili.
Prima di trasportare o spedire le batterie, chiedere informazioni al proprio spedizioniere o alla società per il trasporto passeggeri.
Regolazione sul campo
Dopo il trasporto, prima di utilizzare il prodotto controllare i parametri di
regolazione riportati in questo manuale d'uso.
Stoccaggio
Apparecchio
Quando si ripone lo strumento, soprattutto in estate e all'interno di un'auto, tenere sempre presenti i limiti della temperatura di stoccaggio.
Consultare il capitolo "Dati tecnici" per informazioni circa i limiti di
temperatura.
Regolazione sul campo
Dopo una permanenza prolungata in magazzino, prima di utilizzare il
prodotto controllare i parametri di regolazione riportati in questo
manuale d'uso.
Batterie alcaline
Se lo strumento deve essere immagazzinato per un lungo periodo,
rimuovere le batterie alcaline onde evitare danni dovuti a perdite di
liquido.
110
Pulizia e asciugatura
Prodotto e accessori
• Soffiare via la polvere dai componenti ottici.
• Non toccare mai il vetro con le dita.
• Per la pulizia utilizzare un panno morbido e pulito, che non lasci pelucchi. Se necessario inumidire il panno con acqua o alcol puro.
• Non utilizzare altri liquidi, perché potrebbero corrodere i componenti
dei polimeri.
I
Strumenti umidi
• Asciugare lo strumento, la custodia di trasporto, gli inserti in
spugna e gli accessori ad una temperatura non superiore ai 40°C e
pulirli.
• Reimballare lo strumento solo quando è perfettamente asciutto.
Cavi e connettori
• Mantenere i connettori puliti e asciutti.
• Soffiare via la sporcizia eventualmente depositata all'interno dei
connettori.
Norme di sicurezza
Informazioni generali
Descrizione
Le presenti avvertenze hanno lo scopo di aiutare la persona responsabile del prodotto e chi lo utilizza a riconoscere e prevenire pericoli
legati al funzionamento.
La persona responsabile dello strumento è tenuta ad assicurarsi che
tutti gli operatori comprendano e rispettino le seguenti norme.
Uso dell'apparecchio
Uso consentito
• Lo strumento proietta un piano laser orizzontale da utilizzare per il
livellamento.
• L'unità può essere montata sulla sua base, sulla staffa a parete o su
un treppiede.
• Il raggio laser può essere rilevato mediante un ricevitore del laser.
• Questo strumento è stato progettato per essere utilizzato all'interno.
111
Usi vietati
• Uso del prodotto senza preventiva istruzione.
• Uso eccedente i limiti consentiti.
• Manomissione dei dispositivi di sicurezza.
• Rimozione delle targhette con le segnalazioni di pericolo.
• Apertura del prodotto con utensili vari, come ad es. cacciaviti, ecc.,
a meno che ciò non sia espressamente previsto per determinate funzioni.
• Modifica o conversione dello strumento.
• Uso di uno strumento rubato.
• Uso di strumenti con danni o difetti chiaramente riconoscibili.
• Uso con accessori di altre marche senza previa espressa autorizzazione di Agatec.
• Misure di sicurezza insufficienti nel cantiere, ad es. in caso di utilizzo
su o nei pressi di strade.
• Abbagliamento intenzionale di terze persone.
• Controllo di macchine, oggetti in movimento o simile applicazione
di monitoraggio senza ulteriori sistemi di controllo e protezione.
AVVERTIMENTO
Un impiego non corretto può causare ferite, cattivo funzionamento e
danni materiali. È compito della persona responsabile dello strumento
informare l'operatore circa i possibili pericoli e i mezzi per prevenirli.
Non azionare il prodotto fino a quando l'utente non sia stato istruito sul
suo impiego.
Limiti all'uso
Ambiente
Adatto all'impiego in ambienti idonei a insediamenti abitativi umani permanenti (da non usare in ambienti aggressivi o a rischio di esplosione).
PERICOLO
La persona responsabile del prodotto deve mettersi in contatto con le
autorità locali addette alla sicurezza e con gli esperti di sicurezza prima di
lavorare in aree pericolose o in prossimità di installazioni elettriche o in
situazioni simili.
Responsabilità
Produttore dell'apparecchiatura
Agatec SAS: 21, boulevard Littré - 78600 Le Mesnil Le Roi - FRANCE, di
seguito denominata Agatec, è responsabile della fornitura del
prodotto, compreso il manuale d'uso e gli accessori originali, in condizioni di assoluta sicurezza.
112
Produttori di accessori non Agatec
I produttori di accessori non Agatec sono responsabili dello sviluppo,
dell'implementazione e della comunicazione delle norme di sicurezza
relative ai propri prodotti e sono altresì responsabili dell'efficacia
dei relativi concetti di sicurezza in abbinamento al prodotto Agatec.
Responsabilità della persona responsabile del prodotto
La persona incaricata del prodotto ha i seguenti doveri:
• Comprendere le norme di sicurezza relative al prodotto e le istruzioni
contenute nel manuale d'uso.
• Conoscere le normative locali sulla sicurezza e la prevenzione degli
infortuni.
• Informare Agatec non appena si verificano difetti che pregiudicano la
sicurezza dell'apparecchiatura.
I
AVVERTIMENTO
La persona responsabile del prodotto deve assicurarsi che venga usato nell'osservanza delle istruzioni. Inoltre è responsabile dell'istruzione e dell'impiego del personale che usa lo strumento e della sicurezza dell'attrezzatura utilizzata.
Pericoli insiti nell'uso
AVVERTIMENTO
La mancanza di istruzioni o istruzioni impartite in modo inadeguato possono portare a un utilizzo scorretto o non consentito del prodotto e provocare incidenti con gravi conseguenze per le persone o danni materiali,
economici ed ambientali.
Precauzioni:
Tutti gli operatori devono seguire le norme di sicurezza indicate dal
produttore e le indicazioni della persona responsabile del prodotto.
ATTENZIONE
Se il prodotto è caduto o se è stato utilizzato in modo scorretto, modificato, tenuto in magazzino per lungo tempo o trasportato, possono verificarsi errori di misurazione.
Precauzioni:
Effettuare periodicamente delle misure di controllo e le rettifiche sul
campo indicate nelle istruzioni per l'uso, soprattutto se lo strumento è
stato utilizzato in un modo non regolare e prima e dopo misurazioni di
particolare importanza.
PERICOLO
A causa del rischio di folgorazione è
molto pericoloso usare aste e righe
graduate telescopiche nelle vicinanze di
installazioni elettriche (ad es. cavi di alimentazione o linee elettriche ferroviarie).
113
Precauzioni:
mantenere una distanza di sicurezza sufficiente dagli impianti elettrici. Nel caso
in cui sia assolutamente necessario lavorare in tali impianti, prima di effettuare
i lavori informare le autorità competenti dell'impianto e seguirne le direttive.
AVVERTIMENTO
Se lo strumento è usato con accessori, ad esempio supporti, stadie,
paline, può aumentare il rischio di essere colpiti da un fulmine.
Precauzioni:
Non usare lo strumento durante i temporali.
AVVERTIMENTO
La mancanza di protezioni adeguate nel luogo di lavoro può creare situazioni di pericolo, come ad es. in presenza di traffico, nei cantieri edili o
nelle installazioni industriali.
Precauzioni:
Assicurarsi sempre che il luogo di lavoro sia adeguatamente protetto.
Rispettare scrupolosamente la normativa vigente in merito alla sicurezza,
alla prevenzione degli infortuni e al traffico stradale.
ATTENZIONE
Se gli accessori usati con lo strumento non sono perfettamente fissati e l'equipaggiamento subisce sollecitazioni meccaniche (colpi, cadute, ecc.),
lo strumento può danneggiarsi e causare lesioni alle persone.
Precauzioni:
Durante il montaggio assicurarsi che gli accessori siano correttamente
accoppiati, montati, fissati e bloccati in posizione. Non sottoporre lo
strumento a sollecitazioni meccaniche.
ATTENZIONE
Durante il trasporto, la spedizione o lo smaltimento delle batterie è
possibile che condizioni meccaniche inappropriate creino un rischio di
incendio.
Precauzioni:
Prima di spedire o smaltire lo strumento, fare funzionare l'apparecchio
fino a quando le batterie sono scariche.
Per il trasporto o la spedizione delle batterie, la persona responsabile del
prodotto deve verificare il rispetto delle leggi e dei regolamenti nazionali
e internazionali applicabili.
Prima di trasportare o spedire le batterie, chiedere informazioni al proprio
spedizioniere o alla società per il trasporto passeggeri.
AVVERTIMENTO
Sollecitazioni meccaniche notevoli, temperature ambiente elevate o
l'immersione in fluidi possono provocare perdite nelle batterie o
causarne l'incendio o l'esplosione.
114
Precauzioni:
Proteggere le batterie dalle sollecitazioni meccaniche e dalle temperature
elevate. Non lasciare cadere le batterie e non immergerle in fluidi.
I
AVVERTIMENTO
Il contatto accidentale tra i terminali delle batterie, ad esempio quando
vengono trasportate in tasca, e gioielli, chiavi, carta metallizzata o altri
oggetti di metallo, può provocare il cortocircuito dei terminali e il surriscaldamento o l'incendio delle batterie.
Precauzioni:
Assicurarsi che i terminali della batteria non entrino in contatto con
oggetti metallici.
ATTENZIONE
Durante il funzionamento dello strumento vi è il pericolo che le estremità
vengano schiacciate dalle parti in movimento.
Precauzioni:
Tenere le estremità a una distanza di sicurezza.
AVVERTIMENTO
Se lo strumento non viene smaltito correttamente possono verificarsi le
condizioni riportate di seguito.
• La combustione di componenti in polimeri provoca l'emissione di gas
tossici dannosi alla salute.
• Le batterie, se danneggiate o sottoposte a temperature elevate possono
provocare intossicazione, scottature, corrosione o contaminazione
ambientale.
• Se si smaltisce lo strumento in modo irresponsabile, è possibile che
persone non autorizzate si trovino in condizione di utilizzarlo in deroga
a quanto stabilito dalle disposizioni vigenti, esponendo loro stessi e terze
persone al rischio di gravi lesioni e rendendo l'ambiente soggetto a
contaminazione.
Contromisure:
Il prodotto non deve essere smaltito insieme ai rifiuti domestici.
Smaltire il prodotto correttamente, nel rispetto delle normative
nazionali vigenti nel paese d'uso. Impedire l'accesso al
prodotto a persone non autorizzate.
Classificazione dei laser
Informazioni generali
Le seguenti direttive (in conformità agli standard internazionali aggiornati
IEC 60825-1 (2007-03) e IEC TR 60825-14 (2004-02)) forniscono indicazioni e informazioni per istruire il responsabile dello strumento e chi lo
utilizza, per riconoscere e prevenire pericoli legati al funzionamento.
115
La persona responsabile dello strumento è tenuta ad assicurarsi che tutti
gli operatori comprendano e rispettino le seguenti norme.
Per i prodotti che rientrano nella classe 1, classe 2 e classe 3R degli
strumenti laser non sono richiesti:
• coinvolgimento di un addetto alla sicurezza per il laser,
• indumenti e occhiali protettivi,
• speciali segnali di pericolo nella zona in cui si utilizza il laser se tali
prodotti sono usati e messi in funzione come descritto nel presente manuale d'uso, a causa del basso livello di pericolosità per gli occhi.
I prodotti che rientrano nella classe 2 o nella classe 3R degli strumenti
laser possono provocare abbagliamento, accecamento da lampo e
immagini residue, soprattutto in condizioni di scarsa illuminazione.
Agatec RL110 e' un prodotto laser della classe 2 in conformità a:
• IEC60825-1 : 2007 "Sicurezza dei dispositivi laser"
Uso dei prodotti laser della classe 2:
Non fissare il raggio laser né dirigerlo direttamente su altre persone. La
protezione degli occhi è normalmente fornita da azioni di contrasto, compresa l'istintiva chiusura delle palpebre.
AVVERTIMENTO:
Osservare direttamente il raggio laser mediante dispositivi ottici (come ad
es. binocoli, cannocchiali) può essere pericoloso.
Precauzioni:
Non osservare direttamente il raggio laser con dispositivi ottici.
Descrizione
Valore
Potenza radiante massima
< 1 mW c.w.
Durata impulso (effettiva)
4.5, 2.2, 1.5, 1.1 ms
Frequenza di ripetizione dell'impulso
0, 2.5, 5, 7.5, 10 rps
Lunghezza d’onda
620-690 nm
Divergenza del raggio
< 1,5 mrad
NOHD (Distanza nominale
35 m
di pericolo oculare) a 0.25 s
Angolo di scansione
116
2° a 36°
ATTENZIONE:
Guardare il raggio laser può essere pericoloso per la vista.
Precauzioni:
Non guardare il raggio laser. Prestare attenzione che il raggio laser passi
sopra o sotto l'altezza degli occhi.
I
Sicurezza, Classe Laser 2
Radiazione laser
Evitare il puntamento
diretto negli occhi.
Prodotto laser di classe 2
in conformità a
IEC 60825-1 (2007-03)
117
Compatibilità Elettromagnetica (EMC)
Descrizione
Il termine compatibilità elettromagnetica si usa per indicare la capacità
dello strumento di funzionare senza problemi in un ambiente in cui sono
presenti radiazioni elettromagnetiche e scariche elettrostatiche e senza
causare disturbi elettromagnetici ad altre apparecchiature.
AVVERTIMENTO
Le radiazioni elettromagnetiche possono causare disturbi ad altre
apparecchiature. Benché questo prodotto soddisfi le norme e gli standard
più rigidi in materia, Agatec non può escludere del tutto la possibilità di
disturbi ad altri apparecchi.
ATTENZIONE
Esiste il rischio di disturbi causati ad altri apparecchi se il prodotto viene utilizzato insieme ad accessori di altri costruttori come, ad esempio, computer per
operazioni sul campo, PC, radiotelefoni portatili, cavi non standard o batterie
esterne.
Precauzioni:
Usare solo apparecchi e accessori raccomandati da Agatec che, se utilizzati insieme allo strumento, rispondono ai rigidi requisiti definiti dalle
linee guide e dagli standard. Se si usano computer e radio ricetrasmittenti, fare attenzione alle informazioni sulla compatibilità elettromagnetica fornite dal produttore.
ATTENZIONE
I disturbi provocati dalle radiazioni elettromagnetiche possono comportare errori di misurazione. Benché il prodotto sia conforme alle normative e agli standard più rigidi vigenti in materia, non può escludere
completamente la possibilità che lo strumento venga disturbato da
radiazioni elettromagnetiche molto intense quali, ad esempio, quelle
prodotte da radiotrasmettitori, radio ricetrasmittenti o generatori
diesel.
Precauzioni:
In caso di misurazioni effettuate in queste condizioni, verificare la
plausibilità dei risultati ottenuti.
AVVERTIMENTO
Se si utilizza il prodotto con cavi di connessione, collegandolo a una
delle loro due estremità (ad es. cavi di alimentazione esterna, cavi di
interfaccia) si potrebbe superare il livello di radiazioni elettromagnetiche consentito compromettendo il corretto funzionamento del
prodotto.
Precauzioni:
durante l'uso collegare i cavi che, ad esempio, connettono il prodotto con la batteria esterna o il PC, da entrambe le estremità.
118
Dichiarazione FCC, valida negli USA
AVVERTIMENTO
Questo strumento è stato collaudato ed è risultato conforme ai limiti stabiliti per i dispositivi digitali di classe B, ai sensi della sezione 15 delle
normative FCC. Questi limiti sono stati concepiti per garantire una
ragionevole protezione dalle interferenze dannose in caso di
installazione in zone residenziali.
Questo strumento genera, utilizza e può irradiare energia in
radiofrequenza e, qualora non venga installato e utilizzato secondo le
istruzioni, può causare interferenze dannose alle comunicazioni radio.
Tuttavia, non vi è alcuna garanzia che non si verifichino interferenze in
una particolare installazione. Qualora lo strumento causi interferenze
dannose alla ricezione radiofonica o televisiva, il che può essere accertato
spegnendo o riaccendendo lo strumento, l’utente potrà tentare di eliminare
l’interferenza nei modi seguenti:
• Riorientando o riposizionando l’antenna di ricezione.
• Aumentando la distanza tra lo strumento e il ricevitore.
• Collegando lo strumento a una presa di corrente appartenente a un
circuito diverso da quello a cui è collegato il ricevitore.
• Consultando il fornitore o un tecnico radiotelevisivo qualificato.
I
AVVERTIMENTO
Qualsiasi modifica o variazione non espressamente autorizzata da Agatec
può invalidare il diritto dell'utilizzatore ad utilizzare lo strumento.
TELECOMANDO
IR Remote range
Batterie
fino a 30 m
AA alcaline
TELECOMANDO/RICEVITORE
Ricevitore
9V alcaline
RICEVITORE
Batterie
9V alcaline
AGATEC SAS
21, boulevard Littré - F- 78600 Le Mesnil le Roi
Tél. +33 1 34 93 35 80 - www.agatec.com
Garanzia internazionale
Il presente strumento è soggetto ai termini e alle condizioni indicati
nella garanzia internazionale che può essere scaricata dalla homepage
di Agatec all'indirizzo www.agatec.com.
119
La suddetta garanzia è esclusiva e sostituisce tutte le altre garanzie,
termini o condizioni, espressi o impliciti, sia di fatto che ope legis,
di legge o altro, incluse garanzie, termini o condizioni di commerciabilità, idoneità ad uno scopo particolare, qualità soddisfacente e
non violazione, che sono tutti declinati.
Dati tecnici
Dati tecnici
Campo d'azione Ø
Precisione di autolivellamento*
Autolivellamento
Campo di autolivellamento
Velocità di rotazione
Angolo di scansione
Tipo di laser
Dimensioni (HLP)
Peso (comprese batterie)
Batterie
Durata delle batterie
alcaline**
Temperatura di esercizio
Temperatura di stoccaggio
(senza batterie)
Protezione IP
Agatec RL110
Fino a 60 m senza ricevitore
Fino a 200 m con ricevitore
± 1 mm a 10 m
Orizzontale, Verticale
± 10%; 6°
0, 300, 450, 600 rpm
variabile tra 2° e 36°
635 nm (rosso)
Class 2, <1 mW
156 mm x 154 mm x 197 mm
circa 1.5 kg
Alcaline D, 2 x 1.5 V
160 ore (alcaline)
-10°C a 50°C
-20°C a 80°C
IP54, antipolvere,
antispruzzo
* Precisione definita a 25°C
** La durata di vita della batteria dipende dalle condizioni Ambientali
120
Gebruiksaanwijzing
Handleiding
Dutch
Introductie
Aanschaf
Gefeliciteerd met de aanschaf van een nieuwe roterende laser van
Agatec.
Instrument
Deze gebruiksaanwijzing bevat belangrijke veiligheidsaanwijzingen, evenals aanwijzingen voor het opstellen
en het gebruik van het instrument. Zie hoofdstuk
Veiligheidsvoorschriften voor verdere informatie.
Lees de gebruiksaanwijzing zorgvuldig door, voor u het instrument in
gebruik neemt.
Symbolen
De symbolen, die in dit handboek worden gebruikt, hebben de volgende
betekenis:
GEVAAR
Direct gevaar bij gebruik, dat beslist leidt tot ernstig lichamelijk letsel of
overlijden.
WAARSCHUWING
Gevaar bij gebruik of onjuist gebruik, dat kan leiden tot ernstig
lichamelijk letsel of overlijden.
VOORZICHTIG
Gevaar bij gebruik of onjuist gebruik, dat kan leiden tot licht of matig
lichamelijk letsel en/of aanzienlijke materiële, financiële of milieuschade.
Belangrijke informatie, die de gebruiker helpt om het instrument technisch
juist en efficiënt toe te passen.
122
Inhoud
Introductie ........................................................................... 122
Kenmerken ......................................................................... 124
Laser Overzicht {A} ............................................................. 124
Toetsenbord Overzicht {B} .................................................... 124
Bediening ............................................................................ 126
Gebruik van de Agatec RL110 .............................................. 126
Toetsfuncties ........................................................................ 126
Automatische / Handmatige modus ...................................... 127
H.I. Waarschuwingsmodus ................................................... 127
Rotatiemodus ...................................................................... 128
Scanmodus ......................................................................... 128
Wandmodule ..................................................................... 128
Opstellen voor handmatige hellingen .................................... 128
Accessoires .......................................................................... 129
Afstandbediening ................................................................ 129
Ontvanger/Afstandbediening ............................................... 130
Ontvanger .......................................................................... 130
Overige accessoires ............................................................ 130
Batterijen ............................................................................. 131
Batterijindicatie ................................................................... 131
Vervangen van Alkaline batterijen ......................................... 131
Instellen nauwkeurigheid .................................................. 131
Opmerkingen en verantwoordelijkheden ................................ 131
Controle Vlakstelnauwkeurigheid ........................................... 132
Verticale kalibratie controleren .............................................. 132
Instellen van de waterpasnauwkeurigheid .............................. 132
Storingzoeken ..................................................................... 133
Verzorging en vervoer ....................................................... 134
Vervoer .............................................................................. 134
Opslag .............................................................................. 134
Onderhoud en drogen ........................................................ 135
Veiligheidsvoorschriften ..................................................... 135
Algemeen ........................................................................... 135
Gebruiksdoel ...................................................................... 135
Beperkingen in het gebruik ................................................... 136
Verantwoordelijkheden ........................................................ 136
Gebruiksrisico's ................................................................... 137
Laserclassificatie .................................................................. 139
Elektromagnetische compatibiliteit (EMC) ............................... 142
FCC-verklaring, geldig in de V.S ........................................... 143
Internationale Beperkte Garantie ..................................... 144
Technische gegevens ........................................................... 144
NL
123
Kenmerken
De laser van Agatec RL110 biedt de binnenhuis aannemer veel nuttige
kenmerken om de eenvoud en nauwkeurigheid van het werk te verbeteren.
Een complete laser, met alle benodigde functies, een heldere lichtstraal
voor hoge zichtbaarheid, met zeer compacte afmetingen.
Laser Overzicht {A}
Zie de binnenzijde van de voorpagina voor een illustratie van de laser
{A} en toetsenbord {B} overeenkomstig deze verwijzingen.
1)
2)
3)
4)
5)
6)
Roterende kop
Indexmarkeringen
Opening voor verticale laserstraal
Opening roterende laserstraal
Batterijen
5/8"-11 Statiefbevestiging voor horizontale opstellingen
Toetsenbord Overzicht {B}
Het toetsenbord voor de Agatec RL110-laser heeft negen toetsen en
vijf LED statuslampjes.
1)
2)
3)
4)
5)
6)
7)
8)
9)
10)
124
AAN/ UIT
H.I.-(Hoogte) waarschuwing
OMHOOG
OMLAAG
Automatische modus
Scan modus
Handmatige modus
LED – H.I.-Waarschuwing
LED – Batterijstatus
LED’s - rood (handmatig)
Laser {A}
2
3
NL
1
4
5
6
Toetsenbord {B}
1
9
8
10
2
7
3
6
4
5
125
Bediening
Gebruik van de Agatec RL110
Horizontale opstelling
De laser kan op een statief met 5/8"-11 schroefdraad worden bevestigd
of direct op een solide stabiele ondergrond worden geplaatst. De Agatec
RL110 kan aan een plafondrooster worden opgehangen met behulp van
de wandmodule (optional).
Verticale opstelling
De laser direct op een solide stabiele ondergrond worden geplaatst. Voor
betere stabiliteit wordt aangeraden de wandmodule (optional) te
gebruiken.
De laser inschakelen
Schakel de laser in met de Aan/ Uit toets {B-1}. Hij voert een zelftest uit
en de straal knippert tijdens het zelfstellen.
Nadat de waterpasstand is bereikt, gaat de kop draaien. U kunt kiezen
voor de H.I.-waarschuwingsmodus of wisselen naar handmatige modus
(zie volgende hoofdstukken).
De laser heeft een ruim zelfstellend bereik; echter, als de laser buiten het
bereik is opgesteld, dan zal de laserstraal blijven knipperen en het
roteren zal niet starten.
LED-statuslampjes
De LED-statuslampjes {B-9} knipperen langzaam groen en rood tijdens
het waterpas stellen van de assen en gaan continu branden als de
betreffende as de waterpaspositie heeft bereikt.
Toetsfuncties
D OMHOOG/OMLAAG toetsen op de laser en de afstandbediening
hebben meerdere functies afhankelijk van de modus.
Zie onderstaande overzicht om hun functie beter te kunnen begrijpen.
126
Modus
Automatische modus
roterend
Automatische modus
Toetsen OMHOOG/
OMLAAG - Laser ed
afstandbediening
LINKS/RECHTS
afstandbediening
Beweegt stationaire
Wijzigt de rotatiesnelheid
NL
straal
Beweegt scannende
Wijzigt de scanbreedte
scannen
straal
Liggende modus
kantelt het vlak
Wijzigt de rotatiesnelheid
kantelt het vlak
Wijzigt de scanbreedte
kantelt het vlak
Wijzigt de rotatiesnelheid
kantelt het vlak
Wijzigt de scanbreedte
roterend
Liggende modus
scannend
Handmatige modus
roterend
Handmatige modus
scannend
Automatische / Handmatige modus
De Agatec RL110 staat in de automatische, zelfstellende modus na het
inschakelen. Als het instrument zich eenmaal waterpas heeft gesteld, dan
gaat de laserkop roteren aan 300 rpm.
In de handmatige modus stelt de laser zich niet waterpas; dit betekent dat
de straal zal gaan roteren zelfs als de laser niet waterpas staat. Hierdoor
kan hij worden gebruikt op schuine vlakken, zoals trappen, daken of als
er een handmatig ingestelde helling nodig is. Zir volgend hoofdstuk hoe
een ingesteld in de handmatige of halfautomatische modus.
H.I. Waarschuwingsmodus
De H.I.-functie stopt de laser automatisch en slaat alarm als de laser
wordt verstoord, en voorkomt zo onnauwkeurige aflezingen. Dit werkt
alleen indien ingesteld en geactiveerd.
• Om deze veiligheidsfunctie te activeren, druk op de H.I.-toets {B-2}
na inschakelen van de laser. De H.I. LED {B-8} gaat snel knipperen
tijdens het zelfstellen van de laser.
127
• Dertig seconden nadat de kop is gaan roteren, zal de LED langzaam gaan knipperen, hetgeen aangeeft dat de H.I.-waarschuwingsfunctie is geactiveerd.
• Als de laser wordt verstoord tijdens de H.I.-waarschuwingsmodus,
dan zal de kop stoppen met roteren, de laserstraal schakelt uit, alle
LED knipperen rood. Druk op de ON/OFF toets om de H.I.waarschuwingsfunctie uit te schakelen.
Druk nogmaals op de ON / OFF toets om de modus hebben het toestel
terug te gaan naar de standaardinstellingen (600 rpm, automatisch).
Rotatiemodus
De kop roteert op 3 snelheden: 0, 300, 450, 600 rpm. De standaard instelling
is 600 rpm. De laserstraal is beter zichtbaar bij lagere rotatiesnelheden.
Om de rotatiesnelheid te verhogen, de
{B-6} indrukken.
• Om door de rotatiesnelheden te gaan druk op detoets (B-5). Druk eenmaal om tot punt-modus, tweemaal tot 300 rpm, drie keer om 450 rpm.
Druk nogmals om terug te gaan naar 600 rpm.
Als het roteren is gestopt kan de laserspot naar rechts of links worden
bewogen met behulp van de Linksom/ Rechtsom) rotatietoetsen {B-3 / B-4}.
De kop kan ook handmatig in een specifieke richting worden gezet.
Scanmodus
Voor toepassingen binnenshuis maakt de scanmodus het mogelijk om
de laserstraal beter te zien op een afstand.
Om te scannen, de Scan-toets
{B-5} indrukken. De laserstraal zal
knipperen totdat de laser waterpas staat.
• Om de scanlengte te verhogen, de Scan-toets
{B-5} indrukken.
• De scannende straal kan naar rechts of links worden bewogen met
behulp van de OMHOOG/OMLAAG rotatietoetsen {B-3 / B-4}.
Wandmodule
Voor het interieur toepassing, zoals gipsplaten installatie is het aangeraden om gebruik maken van de muur-te monteren. Gebruik de statiefschroefdraad vast te stellen de zuignap op de laser.
Opstellen voor handmatige hellingen
De Agatec RL110 kan worden gebruikt om handmatig hellingen te creëren
voor speciale toepassingen, trappen, schuine plafonds, etc.
128
Stel de laser op in horizontale modus voor hellingen tot 10% en gebruik de
afstandbediening.
In volledig handmatige modus zal de laser zichzelf niet waterpas stellen en
continu roteren. Het vlak van het laserlicht kan in beide assen worden gekanteld.
NL
Gebruik van de laser in volledig handmatige modus:
Druk nu op Auto/ Handmatig-toets {B-7}. De dwarsas LED {B-10}
boven de toets gaat snel rood knippere, hetgeen aangeeft, dat de
laser in handmatige modus staat en de helling in de X- as kan worden ingesteld. Druk op de OMHOOG/OMLAAG toetsen {B-3 /B-4} om
de juiste dwarshelling in te stellen.
Om de helling van de Y-as inte stellen, de Handmatig toets {B-7} nog
eens indrukken. De Y-as LED {B-10} boven de toets gaat snel rood knipperen,hetgeen aangeeft, dat de laser in handmatige modus staat en de
helling in de lengteas kan worden ingesteld.
Druk op de OMHOOG/OMLAAG toetsen {B-3 /B-4} om de juiste
lengtehelling in testellen.
Houd drukte op de MAN-toets om de modus te verlaten handmatige
modus en terug te keren naar de automatische.
Accessoires
4
Afstandbediening
De afstandbediening heeft vijf toetsen
1)
2)
3)
4)
5)
LINKS
RECHT
Scan/ Rotatie modus
OMHOOG
OMLAAG
1
2
5
3
Zie tabel "Toetsfuncties" voor een beter begrip van hun functionaliteit.
De rode LED bovenop de afstandbediening knippert bij het indrukken van elke
toets, om aan te geven, dat de afstandbediening verzendt naar de laser.
• Batterij – Om het batterijcompartiment te openen en de batterij te
wisselen, het batterijdeksel in de richting van de pijl schuiven.
129
Ontvanger
De ontvanger heeft alle ontvangerfuncties van de ontvanger/
afstandbediening maar niet de functies van de afstandbediening.
1) AAN/UIT
Druk eenmaal aan te zetten. Ingedrukt houden om uit te schakelen
2) Audio
Selecteer het geluidsniveau, Normaal, Levendig, Off
3) Doorloop
Detectienauwkeurigheid van Normaal, Fijn
1
2
3
Overige accessoires
• Een laserbril verbetert de zichtbaarheid van de laserstraal bij
helder omgevingslicht.
• Het plafondroosterrichtmerk wordt gebruikt om de laser te kunnen zien
bij constructies van verlaagde plafonds. Het richtmerk kan magnetisch
aan het rooster worden bevestigd.
130
Batterijen
Batterijindicatie
NL
Wanneer de batterij bijna leeg is, de LED {B-9} zal rood knipperen tijdens het gebruik. Batterijen moeten zo spoedig mogelijk worden vervangen. Als de batterij bijna leeg is, de laser hoofd zal stoppen met draaien
en de lage batterij LED {B-9} zal blijven.
Vervangen van Alkaline batterijen
Volg onderstaande stappen om de alkaline batterijen in de laser te
wisselen.
Gebruik een munt of schroevendraaier om het deksel van het batterijcompartiment aan de achterzijde van de laser te openen.
• Plaats twee nieuwe alkaline batterijen (type D of LR20), let op de juiste
polariteit; deze staat aangegeven in het batterijcompartiment. Het
plus-contact is rond en verhoogd. Bij wisselen van de batterijen altijd
beide tegelijkertijd vervangen.
Instellen nauwkeurigheid
Opmerkingen en verantwoordelijkheden
Het is de verantwoordelijkheid van de eindgebruiker om onderstaande
instructies op te volgen en om periodiek de nauwkeurigheid van het
instrument en het werk te controleren.
• De laser wordt ingesteld volgens de nauwkeurigheidspecificaties van
de fabriek. U wordt aangeraden om de nauwkeurigheid van het instrument te controleren bij aflevering en regelmatig daarna om vast te stellen
of het instrument zijn nauwkeurigheid behoudt. Als uw laser moet worden
ingesteld, neem dan contact op met een bevoegde servicewerkplaats.
• Instelling van de nauwkeurigheid dient alleen te worden uitgevoerd
door gekwalificeerde personen, die de basisprincipes van het instellen
begrijpen.
131
Controle Vlakstelnauwkeurigheid
Om de nauwkeurigheid van het zelfstellende vermogen van de laser te
controleren, deze op een vlakke, horizontale ondergrond of statief plaatsen op circa 30 meter van een wand.
• Lijn de X-as zodanig uit, dat deze lood recht op de wand staat. Laat de
laser zichzelf volledig waterpas stellen (circa een minuut nadat de laser
begint te roteren). Markeer de positie van de straal (Positie 1).
• Draai de laser 180°, laat de laser zich weer stellen en markeer de
tegenoverliggende zijde van de eerste as (Positie 2).
• Lijn de Y-as uit door de laser 90° te draaien zodat deze as nu loodrecht
op de wand staat. Laat de laser zich opnieuw volledig waterpas stellen
en markeer de positie van de straal (Positie 3).
• Draai de laser 180°, laat de laser zich weer stellen en markeer de
tegenoverliggende zijde van de eerste (Positie 4).
• De lasernauwkeurigheid ligt binnen de specificaties als de vier merktekens binnen ± 3 mm vanaf het midden liggen.
Verticale kalibratie controleren
Om de verticale nauwkeurigheid van het zelfstellende vermogen van de
laser te controleren, deze in verticale stand op een vlakke, horizontale
ondergrond of statief plaatsen op circa 15-30 meter van een wand.
• Hang een schietlood aan de wand.
• Verplaats de laser totdat de verticale, roterende straal is uitgelijnd met
het schietlood.
• Als de roterende straal niet loodrecht is, dan moet hij worden ingesteld.
Instellen van de
Waterpasnauwkeurigheid
Als de nauwkeurigheid van de controles kan leiden tot een noodzaak
van aanpassing van de re-eenheid, een overeenkomstige beschrijving
van hoe het niveau nauwkeurigheid aan te passen kan online worden
gevonden op www.agatec.com.
132
Storingzoeken
Symptoom
Mogelijke oorzaken en oplossingen
NL
De laserstraal
knippert, maar
het apparaat
stelt zichzelf
niet waterpas
of roteert niet.
De laser staat schuin buiten haar 10% zelfstellende
bereik.
• Controleer de opstelling en stel het statief zonodig
opnieuw in.
• Als dit het probleem niet verdwijnt, dan dient de
laser te worden opgestuurd naar een geautoriseerde
servicewerkplaats voor reparatie.
De laser schakelt
niet in.
Dit kan worden veroorzaakt door lege batterijen.
• Controleer en wissel eventueel de batterijen of laadt
de accu op.
• Als het geen voedingsprobleem is, dan moet de laser
worden geretourneerd naar
een geautoriseerde servicewerkplaats voor reparatie.
De werkafstand
van de laser
is te klein.
Vuil kan het licht van de laser reduceren.
• Reinig het venster van de laser en de ontvanger om
de prestaties te verbeteren.
• Als het geen vuil venster is, dan moet de laser worden geretourneerd naar een
geautoriseerde servicewerkplaats voor reparatie.
De IRafstandbediening
doet het niet
Controleer de werking van de afstandbediening
• Controleer of de laser is ingeschakeld.
• De afstandbediening is mogelijk te ver verwijderd
van de laser.
• Richt de afstandbediening direct op de laser voor de
maximale afstand.
• De batterij van de afstandbediening is mogelijk leeg.
Hoogtewaarschuwin
gsfunctie
werkt niet
De hoogtewaarschuwingsfunctie voor de Agatec
RL100/RL110G staat normaal uit totdat deze wordt
geactiveerd.
• Druk op de H.I.-toets om de H.I.-functie te activeren.
• Na inschakelen zal de H.I.-LED snel knipperen
(5 Hz), langzaam knipperen indien actief en continu
branden met een audio-alarm, als een waarschuwing
optreedt.
133
Verzorging en vervoer
Vervoer
Vervoer in het veld
Bij vervoer van de apparatuur in het veld, er altijd voor zorgen dat u:
• het instrument draagt in de originele transportkoffer;
• of het statief draagt met de benen gespreid over uw schouders, terwijl het
instrument rechtop wordt gehouden.
Vervoer in een voertuig op de weg
Vervoer het instrument nooit losliggend in een auto; het kan dan
onderhevig zijn aan schokken en trillingen.
Vervoer het instrument altijd in de transportkoffer en zet deze vast.
Verschepen
Als het instrument per spoor, vliegtuig of schip wordt vervoerd, gebruik dan
steeds de originele of gelijkwaardige verpakking om het te beschermen
tegen schokken en trillingen.
Verschepen, vervoer van accu's
Als accu's worden verscheept of vervoerd, moet de beheerder van het
instrument er voor zorgen, dat aan de van toepassing zijnde nationale en
internationale regels en voorschriften wordt voldaan. Neem vooraf contact op met uw plaatselijke agent of vrachtvervoersbedrijf.
Instellen in het veld
Inspecteer de veldkalibratieparameters, zoals vermeld in de handleiding,
voordat u het instrument in gebruik neemt na transport.
Opslag
Instrument
Bij opslag van uw uitrusting de temperatuurgrenswaarden in acht nemen;
vooral in de zomer wanneer u uw uitrusting in uw auto bewaart. Zie
hoofdstuk "Technische Specificaties" voor informatie over temperatuurgrenswaarden.
Instellen in het veld
Inspecteer de veldkalibratieparameters, zoals vermeld in de handleiding,
voordat u het instrument in gebruik neemt na een langere periode in
opslag.
Alkaline Batterijen
Als de apparatuur langere tijd wordt opgeslagen moeten de alkaline
batterijen worden verwijderd om het risico van lekkage te vermijden.
134
Onderhoud en drogen
Instrument en accessoires
Blaas stof van optische onderdelen.
• Raak het glas nooit met de vingers aan.
• Gebruik alleen een schone, zachte, pluisvrije doek om schoon te maken.
Maak de doek zonodig vochtig met wat schoon water of pure alcohol.
• Gebruik geen andere vloeistoffen; deze kunnen de polymeren componenten aantasten.
NL
Vochtige instrumenten
Droog het instrument, de transportkoffer, de schuimrubberen
inzetstukken en de accessoires bij een temperatuur niet hoger dan
40°C / 104°F en maak ze schoon.
• Niet opnieuw inpakken voordat alles goed droog is.
Kabels en Stekkers
• Houd stekkers altijd schoon en droog.
• Vuil in de stekkers van de aansluitsnoeren eruit blazen.
Veiligheidsvoorschriften
Algemeen
Beschrijving
Deze aanwijzingen dienen om exploitanten en gebruikers van het
instrument in staat te stellen om tijdig op eventuele gebruiksgevaren
in te spelen en indien mogelijk te vermijden.
De exploitant moet er op toezien, dat alle gebruikers deze aanwijzingen
begrijpen en opvolgen.
Gebruiksdoel
Toegestaan gebruik
• Het instrument projecteert een horizontaal laservlak met als doel uit
te kunnen lijnen.
• De eenheid kan worden opgesteld op de eigen basis, aan een
wandmodule of op een statief.
• De laserstraal kan worden gedetecteerd door het te meten object of
met een laserdetector.
• Het product is bedoeld voor gebruik en toepassing binnenhuis.
135
Onjuist Gebruik
• Gebruik van het instrument zonder de noodzakelijke instructie;
• Toepassing buiten de gebruiksgrenzen;
• Het uitschakelen van veiligheidsvoorzieningen;
• Het verwijderen van aanwijzings- en waarschuwingsstickers;
• Openen van het instrument met gereedschap (schroevendraaier, enz.),
tenzij dit nadrukkelijk is toegestaan voor bepaalde functies;
• Modificatie of aanpassing van het instrument;
• Gebruik na ontvreemding;
• Gebruik van instrumenten met duidelijk zichtbare schade of
defecten;
• Gebruik van accessoires van andere fabrikanten zonder de
nadrukkelijke voorafgaande toestemming van Agatec;
• Onvoldoende veiligheidsmaatregelen op de meetlocatie, bijvoorbeeld
bij metingen op of langs wegen.
• Andere personen met opzet verblinden;
• Het besturen van machines, bewegende objecten en dergelijke
monitoring toepassen zonder aanvullende controle- en veiligheidsvoorzieningen.
WAARSCHUWING
Bij ondeskundig gebruik bestaat gevaar voor letsel, het niet functioneren
of het ontstaan van materiële schade. Het is de taak van de exploitant om
de gebruiker te informeren over gevaren en hoe deze te vermijden.
Het instrument mag pas in gebruik worden genomen, nadat de gebruiker de betreffende instructies heeft ontvangen.
Beperkingen in het gebruik
Omgeving
Geschikt voor gebruik in atmosferen bestemd voor permanente menselijke
bewoning; niet geschikt voor gebruik in een corrosiegevoelige of explosieve
omgeving.
GEVAAR
Alvorens te gaan werken in een gevaarlijke explosieve omgeving, of vlak
bij elektrische installaties of dergelijke situaties, moet de exploitant de plaatselijke veiligheidsautoriteiten en experts raadplegen.
Verantwoordelijkheden
Fabrikant van het instrument
Agatec SAS: 21, boulevard Littré - 78600 Le Mesnil Le Roi - FRANCE
hierna genoemd Agatec, is verantwoordelijk voor de veiligheidstechnisch onberispelijke levering van het instrument inclusief gebruiksaanwijzing en originele accessoires.
136
Fabrikanten van niet-Agatec accessoires
Fabrikanten van niet-Agatec accessoires voor het instrument zijn verantwoordelijk voor het ontwikkelen, invoeren en communiceren van
veiligheidsconcepten voor hun producten en voor het functioneren
daarvan in combinatie met het Agatec instrument.
Exploitant van het instrument
De beheerder van het instrument heeft de volgende verplichtingen:
• Hij begrijpt de veiligheidsinformatie op het instrument en de instructies
in de gebruiksaanwijzing;
• Hij is bekend met de plaatselijke voorschriften met betrekking tot veiligheid en preventie van ongelukken;
• Hij stelt Agatec er onmiddellijk van op de hoogte, zodra veiligheidsgebreken aan de uitrusting optreden.
NL
WAARSCHUWING
De exploitant is er verantwoordelijk voor, dat het instrument conform de
voorschriften wordt gebruikt. Deze persoon moet tevens zorgen voor een
goede training en inzet van het personeel, dat het instrument gebruikt en
voor de veilige toepassing van de apparatuur.
Gebruiksrisico's
WAARSCHUWING
Ontbrekende of onvolledige instructie kan leiden tot een onjuiste bediening of ondeskundig gebruik. Daarbij kunnen zich ongelukken voordoen
met ernstig lichamelijk letsel, aanzienlijke materiële en financiële schade
en schade aan het milieu.
Voorzorgsmaatregelen:
Alle gebruikers dienen de veiligheidsaanwijzingen van de fabrikant en
de instructies van de beheerder op te volgen.
VOORZICHTIG
Pas op voor foutieve meetresultaten nadat een instrument is gevallen, misbruikt, gemodificeerd, opgeslagen is geweest gedurende een langere
periode of getransporteerd.
Voorzorgsmaatregelen:
Voer periodiek testmetingen uit en controleer de veldinstelling zoals
aangegeven in de handleiding, in het bijzonder nadat het instrument heeft
blootgestaan aan abnormale omstandigheden en zowel voor als na belangrijke metingen.
GEVAAR
Vanwege het risico op elektrocutie, is het
zeer gevaarlijk om met meetstokken en
baken te werken in de nabijheid van elektrische installaties, zoals
hoogspanningskabels en trein- of trambovenleidingen.
137
Voorzorgsmaatregelen:
Blijf op een veilige afstand van elektrische installaties. Als het essentieel
is om in een dergelijke omgeving te werken, neem dan contact op met de
veiligheidsautoriteiten, die voor de elektrische installatie verantwoordelijk
zijn en volg hun instructies op.
WAARSCHUWING
Als het instrument wordt gebruikt met accessoires, bijvoorbeeld masten,
baken, meetstokken, kan het risico van blikseminslag worden vergroot.
Voorzorgsmaatregelen:
Gebruik het instrument niet tijdens onweer.
WAARSCHUWING
Onvoldoende beveiliging van de werklocatie kan leiden tot gevaarlijke
situaties, bijvoorbeeld in het verkeer, op bouwlocaties en op industriële
installaties.
Voorzorgsmaatregelen:
Zorg er altijd voor, dat de werklocatie voldoende veilig is. Volg de
voorschriften betreffende veiligheid en ter voorkoming van ongelukken en
voor wegverkeer strikt op.
VOORZICHTIG
Als de met het instrument gebruikte accessoires onvoldoende worden
vastgezet en het instrument bloot wordt gesteld aan mechanische
schokken, bijvoorbeeld stoten of vallen, dan kan het instrument
beschadigd raken of kunnen mensen worden verwond.
Voorzorgsmaatregelen:
Zorg er bij het opstellen van het instrument voor, dat accessoires correct
worden bevestigd, aangesloten en CN vastgezet. Vermijd het blootstellen
van het instrument aan mechanische belasting.
VOORZICHTIG
Tijdens vervoer, verschepen of verwijderen van accu's bestaat de
mogelijkheid dat onvoorziene mechanische invloeden brandgevaar
veroorzaken.
Voorzorgsmaatregelen:
Voor verscheping of verwijdering van het instrument de accu's eerst ontladen door het instrument aan te laten staan tot de accu's leeg zijn. Als
accu's worden verscheept of vervoerd, moet de exploitant van het instrument er voor zorgen, dat aan de van toepassing zijnde nationale en internationale regels en voorschriften wordt voldaan. Neem vooraf contact op
met uw plaatselijke agent of vrachtvervoersbedrijf.
WAARSCHUWING
Hoge mechanische belasting, hoge omgevingstemperaturen of
onderdompeling in vloeistoffen kan lekkage, brand of explosie van
de accu's veroorzaken.
138
Voorzorgsmaatregelen:
Bescherm accu's tegen mechanische invloeden en hoge omgevingstemperaturen. Laat accu's niet in vloeistoffen vallen of onderdompelen ze
daarin onder.
NL
WAARSCHUWING
Kortsluiten van accupolen kan oververhitting, brand of verwondingen
veroorzaken, bijvoorbeeld tijdens bewaren of vervoer in (jas)zakken kunnen de accupolen in contact komen met sieraden, sleutels, gemetalliseerd
papier of andere metalen voorwerpen.
Voorzorgsmaatregelen:
Zorg er voor, dat accupolen niet in contact komen met metalen voorwerpen.
VOORZICHTIG
Tijdens de werking van het instrument bestaat het gevaar voor beknellen
van vingers door bewegende delen.
Voorzorgsmaatregelen:
Houd een veilige afstand aan naar bewegende delen.
WAARSCHUWING
Bij het ondeskundig verwijderen van het product kan het volgende zich
voordoen.
• Verbranden van polymere onderdelen kan giftige gassen produceren,
die de gezondheid kunnen schaden.
• Als batterijen of accu's beschadigd raken of sterk worden verwarmd,
dan kunnen zij exploderen en vergiftiging, brand, corrosie of milieuvervuiling veroorzaken.
• Verwijdering van het instrument op een onverantwoorde wijze kan er
voor zorgen, dat onbevoegden door incorrect gebruik de wet overtreden.
Hierdoor kunnen zij zichzelf en derden blootstellen aan ernstige
ver wondingen en het milieu vervuilen;
Voorzorgsmaatregelen:
Het product mag niet samen met het huisvuil worden weggegooid. Het verwijderen van het instrument moet in overeenstemming zijn met de geldende regels in uw land.
Bescherm het product te allen tijde tegen het gebruik door
onbevoegden.
Laserclassificatie
Algemeen
De onderstaande richtlijnen (in overeenstemming met de geldende internationale normen IEC 60825-1 (2007- 03) en IEC TR 60825-14 (200402)) bieden instructie en trainingsinformatie voor de exploitant van het
instrument en de persoon die de apparatuur werkelijk gebruikt, ten einde
op werkrisico's te anticiperen en deze te vermijden.
139
De beheerder moet er op toezien, dat alle gebruikers deze aanwijzingen
begrijpen en opvolgen. Instrumenten geclassificeerd als laser Klasse 1,
Klasse 2 en Klasse 3R vereisen geen.
• betrokkenheid van een laserveiligheidspersoon,
• beschermende kleding en veiligheidsbril,
• speciale waarschuwingsborden binnen het werkgebied van de laser,
indien gebruikt en bediend zoals beschreven in deze gebruiksaanwijzing
vanwege het lage risiconiveau voor oogletsel.
Instrumenten geclassificeerd als laser Klasse 2 of Klasse 3R kunnen
verblinding, flitsblindheid en nabeelden veroorzaken, vooral indien
gebruikt bij weinig omgevingslicht.
Agatec RL110 komt overeen met de laserklasse 2 volgens:
• IEC60825-1 : 2007 "Veiligheid van laserinrichtingen"
Laser Klasse 2 producten:
Kijk niet in de laserstraal en richt niet onnodig op andere personen. De
bescherming van het oog wordt gewoonlijk bewerkstelligd door
afwendingreacties inclusief knipperreflex.
WAARSCHUWING:
Direct in de laserstraal kijken met optische hulpmiddelen (zoals bijv.
verrekijkers, telescopen) kan gevaarlijk zijn.
Voorzorgen:
Kijk niet in de laserstraal met optische hulpmiddelen.
Beschrijving
Waarde
Maximaal uitgezonden vermogen
< 1 mW c.w.
Pulsduur (effectief)
4.5, 2.2, 1.5, 1.1 ms
Puls herhaalfrequentie
0, 2.5, 5, 7.5, 10 rps
Golflengte
620-690 nm
Straal divergentie
< 1,5 mrad
NOHD (Nominale Oog
35 m
Gevarenafstand) bij 0,25 s
Scanhoek
140
2° tot 36°
VOORZICHTIG:
Het kijken in de laserstraal kan gevaarlijk zijn voor het oog.
Voorzorgen:
Kijk niet in de laserstraal. Let erop, dat de laserstraal boven of onder
ooghoogte wordt gericht. (speciaal bij
vaste opstellingen in installaties, machines e.d.)
NL
Stickers, Laser Class 2
Laserstraling
Vermijd directe blootstelling
van het oog.
Klasse 2 Laserproduct
in overeenstemming met
IEC 60825-1 (2007-03)
141
Elektromagnetische compatibiliteit (EMC)
Beschrijving
Onder elektromagnetische compatibiliteit wordt verstaan de mogelijkheid
van het instrument om zonder problemen te functioneren in een omgeving
met elektromagnetische straling en elektrostatische ontladingen, zonder
daarbij storingen in andere apparaten te veroorzaken.
WAARSCHUWING
Elektromagnetische straling kan storingen veroorzaken in andere apparatuur. Hoewel het product voldoet aan strenge normen en richtlijnen op
dit gebied, kan Agatec de mogelijkheid van storing in andere apparatuur niet volledig uitsluiten.
VOORZICHTIG
Er bestaat een risico, dat storingen kunnen worden veroorzaakt in andere
apparatuur, als het instrument wordt gebruikt in combinatie met accessoires
van andere fabrikanten, bijvoorbeeld veld-computers, personal computers,
twee-weg radio’s, niet-standaard kabels of externe accu's.
Voorzorgsmaatregelen:
Gebruik alleen de apparatuur en accessoires aanbevolen door Agatec.
Indien gebruikt in combinatie met het instrument, voldoen deze aan de
strengste voorschriften en normen. Let bij gebruik van computers en
twee-weg radio's goed op de informatie betreffende elektromagnetische
compatibiliteit, zoals verstrekt door de fabrikant.
VOORZICHTIG
Storingen, veroorzaakt door elektromagnetische straling, kunnen
meetfouten veroorzaken.
Hoewel het instrument voldoet aan de strengste regelgeving en normen
op dit gebied, kan nooit de mogelijkheid worden uitgesloten, dat het
instrument kan worden gestoord door sterke elektromagnetische straling,
bijvoorbeeld vlak bij radiozenders, twee-weg radio's of dieselgeneratoren.
Voorzorgsmaatregelen:
Controleer onder deze omstandigheden of de verkregen meetresultaten binnen de grenzen van redelijkheid liggen.
WAARSCHUWING
Als het instrument wordt gebruikt terwijl verbindingskabels, zoals snoeren voor externe voedingen of interfacekabels, slechts aan één zijde
zijn aangesloten, dan bestaat de mogelijkheid, dat de toegestane
stralingsniveaus worden overschreden en het correct functioneren van
het instrument negatief wordt beïnvloed.
Voorzorgsmaatregelen:
Terwijl het instrument in gebruik is, dienen de gebruikte verbindingskabels, bijvoorbeeld instrument naar externe voeding, instrument
naar computer, aan beide zijden te zijn aangesloten.
142
FCC-verklaring, geldig in de V.S.
WAARSCHUWING
Dit apparaat heeft in tests de grenswaarden aangehouden voor digitale
apparaten uit de klasse B, die zijn vastgelegd in paragraaf 15 van de
FCC-bepalingen.
Deze eisen zijn ontworpen om bescherming te bieden tegen schadelijke
invloeden van installatie in de woonomgeving.
Dit instrument genereert en gebruikt stralingsenergie en kan deze uitzenden, indien niet geïnstalleerd en gebruikt volgens de voorschriften. Dit
kan schadelijke storingen veroorzaken bij radiocommunicatie.
Er wordt echter geen garantie gegeven dat storingen niet zullen
voorkomen in een bepaalde installatie.
Als dit instrument schadelijke storingen veroorzaakt in radio of
televisieontvangst, hetgeen kan worden vastgesteld door het uit en in te
schakelen, wordt de gebruiker de onderstaande maatregelen aanbevolen
om te proberen de storing te elimineren:
• De ontvangstantenne opnieuw richten of verplaatsen.
• De afstand tussen apparaat en ontvanger vergroten.
• Het apparaat aansluiten op een stopcontact van een andere
stroomkring, dan die waarop de ontvanger is aangesloten.
• Raadpleeg uw dealer of een ervaren radio/tv-technicus.
NL
WAARSCHUWING
Wijzigingen of modificaties die niet uitdrukkelijk door Agatec zijn toegestaan,
kunnen het recht van de gebruiker beëindigen om het apparaat te gebruiken.
IR-AFSTANDBEDIENING
IR-bereik afstandbediening
Batterijen
tot 30 m
1 AA alkaline batterij
ONTVANGER-AFSTANDBEDIENING
Batterijen
1 9-volt type alkaline batterij
ONTVANGER
Batterijen
1 9-volt type alkaline batterij
AGATEC SAS
21, boulevard Littré - F- 78600 Le Mesnil le Roi
Tél. +33 1 34 93 35 80 - www.agatec.com
143
Internationale Beperkte Garantie
Dit product valt onder de regels en voorwaarden zoals beschreven in de
Internationale Beperkte Garantie, die kan worden gedownload van de
Agatec home page op www.agatec.com. Bovengenoemde garantie is
exclusief en komt in plaats van alle andere garanties, regels of voorwaarden, uitgesproken of geïmpliceerd, feitelijk of voortvloeiend uit wetgeving, regelgeving of anderszins, met inbegrip van garanties, regels of
voorwaarden van verhandelbaarheid, geschiktheid voor specifieke
toepassingen, bevredigende kwaliteit en het niet maken van inbreuk, die
alle nadrukkelijk worden afgewezen.
Technische gegevens
Technische gegevens
Werkbereik Ø
(roterende straal)
Zelfstelnauwkeurig-heid*
Automatische nivellering
Zelfstellend bereik
Rotatiesnelheid
Scanhoek
Laserdiode type
Afmetingen (HBD)
Gewicht met batterijen
Batterijen
Gebruiksduur alkaline **
Werktemperatuur
Opslagtemperatuur
(zonder batterijen)
Bescherming IP
Agatec RL110
tot 60 m zonder ontvanger
tot 200 m met ontvanger
± 1 mm tot 10 m
horizontaal, verticaal
± 10%; 6°
0, 300, 450, 600 rpm
instelbaar van 2° tot 36°
635 nm (red)
Class 2, <1 mW
156 mm x 154 mm x 197 mm
Ongeveer 1.5 kg
Alkaline D-cells 2 x 1.5 V
160 h (Alkaline)
-10°C tot 150°C
-20°C tot 180°C
IP54, stofdicht, spatwaterdicht
Nauwkeurigheid is opgegeven bij 25°C
* Levensduur van de accu is afhankelijk van externe factoren
144
EN
AGATEC
21 boulevard Littré
78600 Le Mesnil le Roi - France
Tel: +33 1 34 93 35 80
Fax: +33 1 34 93 35 89
[email protected]
www.agatec.com
AGATEC Construction Lasers
2202 Redmond Rd.,
Jacksonville, AR 72076 -USA
Tel: (800) 643-9696; (501) 982-4433
Fax: (501) 982-0880
[email protected]
www.agatec-na.com
RL110- 2011 - V 2.0
Your dealer/Votre revendeur/Su revendedor/Ihr Händler/
Vostro rivenditore/uw wederverkoper