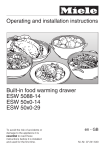
1
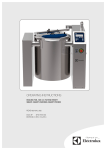
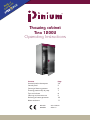
in y
e
d nb
a
M de
e
Sw
Thawing cabinet
Tina 1200U
Operating Instructions
ContentsPage
General product description
3-4
Control panel
5
Starting of thawing process
6
Thawing process step by step
7
Tips and advises
8
Cleaning and maintenance
9
Deliming of steam generator
10
Alarm conditions
11
DOC.NO EDITION 1 1
STO 9190-02
2014.10
Producer: SteelTech i Alingsås AB. Lärkvägen 4. SE-441 40 Alingsås. Sweden
Phone: +46 322 668930 . Fax: +46 322 10870
E-mail: [email protected] .www steeltech.se
2
General product description
These operating instructions apply to the Thawing cabinet Tina 1200U.
General instructions
• The safety of the product can be jeopardize and
the supplier’s warranty and product responsibility
invalid if the directives in the equipment and other
documentation are not followed.
• Study the instructions in this document carefully as
they contain important information regarding installation, operating safety, use and maintenance
of the product. Keep the document available to all
users.
• All service, maintenance and repairs must be carried out by a trained technician. Only genuine
Please notice! Only use the specially designed baskets or perforated containers available as accessories. If the wrong kinds of baskets/perforated containers are used the result may be completely different
to the one intended. The wire basket is designed for
larger pieces of produce such as; steaks, fillets of
meat and fish etc. The perforated container is designed for smaller pieces of produce such as prawns,
berries, diced and sliced meat etc.
spare parts may be used for replacement. Refer to
the Service instructions* and the Spare part catalogue*.
• Operating and maintenance of this product
have to be carried out by trained personnel.
* Not supplied. Can be ordered from the supplier
or the supplier’s representative.
Tina1200U is manufactured in accordance with the
directives, LVD2006/95/EG, EMC 2004/108/EG and is
CE marked.
Application area
Safety instructions
The thawing cabinet is intended for thawing of different kinds of produce, it may under no circumstances
be used in any other way or for any other purpose
than described in these operating instructions. Using
the Tina 1200U you can thaw different kinds of produce in a lenient process. this means that the produce will always keep their succulence and retains
the quality of the produce, and the weight reduction
will be minimal. The cabinets are easy to keep clean
and rational to work with and all significant components are manufactured of stainless steel.
The cabinet can be used as refrigerator during a limited period of time ( max. 4 days).
Switch off the power before faults or breakdowns
are rectified.
• Set the Selector switch on 0.
• Wait approximately 3 minutes to give the electrical cooling valve time to close completely.
• Switch off the Main circuit breaker (Not on the cabinet).
Maximum food weight per thawing occasion:
Tina 1200U 150 kilos
Tina 1200 can be used with a GN 2/1 rack trolley that
holds 13 GN 2/1 baskets/containers or 2pcs. GN 1/1
rack trolleys that holds 13 GN 1/1 baskets/containers
each.
3
CE-directive
Warning! Electricity!
The warning sign identifies the electrical control unit
of the machine. Doors to electrical cabinets as well as
other cover plates may only be opened by a suitably
trained technician.
Warning!
• The thawing cabinet may not be flushed or cleaned
in the corresponding way exteriorly.
• Water coming into contact with live components
results in direct mortal danger. Always exercise
care when cleaning, especially close to electrical
connections.
• Use a dampened cloth when cleaning.
Warning!
Note that the walls inside the cabinet can become
extremely hot during the bactericidal/cleaning process and could cause injury if touched. Be careful
when opening the cabinet door. Hot currents of escaping air could result in burns.
Technical data
Rating plate.
Rating plates stating the machine’s serial number are
attached at the bottom of the thawing cabinet’s left
side and the rear of the electrical cabinet, as well as
on the EU declaration which accompanies the machine on delivery.
Noise level: < 70 dB
Water protection class: IP X4
Operator information
Before starting work the operator should:
• Obtain good knowledge in handling and care.
• Localize each warning sign and understand its
purpose.
• Carefully read through the safety instructions and
warning texts.
• Read the General instructions.
Cleaning
Cleaning agent
The cabinet should always be cleaned after use.
There are cleaning agents available on the market
for cleaning equipment used in large kitchen. Follow
the manufacturer’s instructions carefully and observe
prescribed safety recommendations.
Cleaning the casing
• Clean the external stainless surfaces using warm
water, combined with a neutral detergent/cleaning agent and a soft brush or sponge if necessary.
• Panels and knobs are wiped with damp cloth.
Cleaning the inside
See instructions on page 9.
NOTE!
Do not use wire wool or abrasive agents on the
stainless steel surfaces. Do not use cleaning agents
containing chlorine. Chlorine and chlorine compounds
that come into contact with stainless steel can result
in corrosion.
Follow the instructions below when the cabinet is
not used for long periods
• Set the Selector switch on 0.
• Wait approximately 3 minutes to give the electrical cooling valve time to close completely.
• Switch off the Main circuit breaker (Not on the
cabinet).
• Clean the cabinet inside and out, as well as its
removable parts. See Cleaning.
• Switch off the water supply
• Open the door so that air can circulate in order to
prevent mould and bad odors developing in the
closed space.
Supplementary equipment and accessories
• Rack trolley GN2/1
• Rack trolley GN1/1
• Guide rail for trolley GN2/1
• Guide rail for trolley GN1/1
• Basket GN 2/1
• Basket GN1/1
• Perforated container GN 2/1
• Perforated container GN 1/1
Other documentation
Manufacturer’s declaration
Installation instructions
Service instructions*
Spare parts catalogue*
* Not supplied. Can be ordered from the supplier or
the supplier’s representative.
4
Control panel
1= THAWING
Turn the Selector switch to 1.
The steam generator is then emptied of water and refilled with fresh new water. The
refrigeration compressor and the fans now start to decrease the cabinet temperature
to 36ºF (+2ºC). The cabinet is now ready to use.
Note! The Selector switch should be allowed to stand for at least 3 min. in one position before being changed to the other.
= DISINFECTING/CLEANING
Turn the Selector switch to
The bactericidal/cleaning process starts with low temperature steam spreading
throughout the Tina cabinet. The temperature increases to 176ºF (+80ºC), this procedure takes approximately 30 minutes. When the cabinet temperature is at 176ºF
(+80ºC) a five minute bactericidal/cleaning cycle begins. After five minutes a buzzer
sounds and the indication Er4 flashes on the right hand side display (the display that
indicates the cabinet temperature). The buzzer will sound and Er4 will flash until the
cabinet temperature has decreased to 104ºF (+40ºC), or below, or until the button
PRG/mute on the right hand side display is pressed. If the cabinet is to be used immediately after the disinfecting/cleaning open the door and let the cabinet temperature
decrease to 104ºF (+40ºC). Thereafter turn the Selector switch to 1. If the cabinet is
not to be used immediately turn it to 0.
DISPLAY THAT INDICATES THE CABINET TEMPERATURE.
Please observe that the buttons on this display are blocked and are only to
be used by service and maintenance personnel.
DISPLAY FOR SETTING OF THE TARGET TEMPERATURE.
This display is used for setting the target temperature (required value) and
it indicates the surface temperature ( actual value) of the produce.
5
Starting of the thawing process
Put the produce in the baskets/containers that are specially designed for the Tina
cabinet. Place the baskets into the rack trolley. Put the rack trolley into the cabinet.
SETTING OF TARGET TEMPERATURE (REQUIRED VALUE)
Set the required target temperature somewhere between the interval of 30ºF (–1ºC) and 36ºF (+2ºC). Please notice that the target temperature of the cabinet is factory preset at 34ºF (1ºC) as
this is the recommended target temperature in most cases. See
table of recommended temperatures on page 7.
Press the button SEL and keep it pressed for two seconds. The
display will then show the last set target temperature. To change
the setting press one of the buttons labeled with an arrow:
= Increase temperature, = decrease temperature
When the required target temperature is set press the button labeled SEL twice.
APERTURE FOR SURFACE PROBE
The surface probe controls the thawing process. To be able to
insert it into the frozen produce one has to make an aperture
with the help of the enclosed specially designed drilling tool. The
depth of the aperture must be equivalent to the threads on the
drilling tool and should be made in the thickest part of the produce.
Note! To obtain direct contact between the temperature probe
and the produce, it is necessary to make a opening in the plastic
package when using plastic pre-packed produce.
PLACEMENT OF THE SURFACE PROBE/STARTING OF THE THAWING PROCESS
Insert the needle of the probe into the aperture and press it
down gently to fixating and making sure that the probe is correctly in place. As the surface probe swiftly feels the temperature
of the frozen produce and as the temperature of the produce is
much below the preset target temperature the thawing process
will start automatically. Close the door.
6
The thawing process step-by-step
The temperature increases step by step to approximately 60ºF (+15ºC), this will take approximately 15 minutes. The Tina cabinet will maintain
this temperature until the Surface temp. (actual
value) of the produce is 6ºF (3ºC) less than Target temp. ( required value). Then the cabinet
temperature will reduce to 45ºF (+7ºC), the cabinet temperature can be seen on the display during the whole process. When the temperature of
the produce equals the set target temperature
and it has stayed stable for five minutes the cabinet automatically switches from thawing mode
to refrigeration mode and the cabinet temperature will decrease to 36ºF (+2ºC). The thawed
produce can now be stored cold in the cabinet,
just as in a refrigerator, until it is to be used.
Restart the thawing process by refilling the
baskets/containers and repeat the procedure
previously described. See page 6
Target temperatures and thawing times
Produce
Tenderloin
Target temperature
ºF (C)
34(+1.0)
Approx. thawing time
Hour(s)
3.5
Rump-steak piece
35(+1.5)
8
Pork neck
35(+1.5)
6
Diced beef
34(+1.0)
5.5
Fillet of veal
34(+1.0)
3
Fillet of chicken
34(+1.0)
2.5
Chicken, whole, 1 kilo/piece
35(+1.5)
6
Fillet of Codfish, water glazed, single frozen 34(+1.0)
1.5
Halibut, approx. 30 kilos/piece
36(+2,0)
8
Fillet of Salmon
34(+1.0)
3
Salmon, whole, 4–5 kilos/piece
35(+1.5)
6
Catfish, whole
35(+1.5)
6
Prawns, single frozen
34(+1.0)
1.5
Crayfish, single frozen
34(+1.0)
2.5
Scallops
34(+1.0)
1.5
Vegetables
34(+1.0)
0,5
Examples of freezing points of different provisions:
The required target temperature varies as different kinds of
produce have different freezing
points.
Beef meat
29ºF(–1.7ºC)
Pork
28ºF(–2.2ºC)
Fish
27,5ºF(–2.5ºC)
Vegetables
7
30ºF(–1.1ºC)
Tips and advises:
In achieving the absolutely best result in the kitchen one
has to consider two of the most important components in
cooking; carefulness and prime produce. Fresh produce
has always been considered the only alternative in the
strive to achieve high quality cooking. However due to
today’s freezing technique frozen produce is an excellent
alternative and sometimes the only one. With the unique
thawing process of the Tina cabinet we have succeeded in retaining the freshness of pre-frozen produce whose
quality is quite comparable to the one of fresh produce.
In order to achieve a good result when using the Tina
cabinet, we have listed a number of advises worth considering. These are based on two years of testing and
developing of the Tina cabinet.
Only use the specially designed baskets or perforated containers available as accessories. If using the
wrong kinds of baskets/perforated containers the result may be completely different to the one intended.
The wire basket is designed for larger pieces of produce such as; roasts, fillets of meat and fish etc. The
perforated container is designed for smaller pieces
of produce such as prawns, berries, diced and sliced
meat etc.
Packed produce
Placement of the surface probe
In order to get the best results, always insert the surface probe in to the thickest part of the thinnest of
the pieces that you wish to thaw. Sometimes there
can be a great difference in thickness of different
pieces of produce and, naturally, the thinnest piece
will be the first to thaw. When this happens the thawing process will automatically stop and the cabinet
will switch to refrigeration mode. Remove the thawed
piece(s) and transfer the surface probe in to the remaining unthawed produce. The thawing process will
restart and the rest of the produce will thaw.
Spreading of the produce in the basket /container/
cabinet
The spreading of the produce in the basket/container/
cabinet is of outmost importance in order to get an
optimal air flow around the goods resulting in a perfectly thawed produce. Therefore spread the produce in an even layer and do not fill up the basket/
container completely. Leave at least 20 mm from the
upper rim of the basket/container free. Larger pieces
of produce must be spread so that there are always a
few millimeters in between each piece. Always leave
approximately 20 millimeters of space between the
baskets/containers in the rack.
Produce packed in vacuum bags, plastic bags or other kinds of plastic packing can with advantage be
thawed in its packing. They are to be thawed in exactly the same way as previously described in this
manual.
N.B. Do not thaw a produce in it´s external packing of,
for example, cardboard or similar.
N.B. To avoiding of establishment of an isolating gas
surrounding the produce pre-packed with food gas,
make a opening in the package to exhaust the gas.
Ready made food
Ready made food can with advantage be thawed in
its packing. Thaw the ready made food in the same
way as previously described in this manual.
Thawing of different kinds of produce at the same
time
Produce of meat such as beef meat, veal and pork
may be thawed at the same time in the Tina cabinet.
Dripping of meat juice from baskets containing different kinds of produce can be avoided by placing
a drip tray between them . Fish always have to be
thawed separately and must not be mixed with other
kinds of produce. Poultry and fowl have also to be
thawed separately. Please notice that the only possible way to thaw two different produce at the same
time, for instance fowl and meat, is to pack at least
one of the produces in a hermetically sealed packing.
Important! Always check with the local authorities and
make sure what rules and regulations applys to the
thawing process of produce in your particular country/area.
8
Cleaning and maintenance
Hygienic treatment of frozen and thawed produce is
as important as the way the food is prepared and
cooked. Which is why the Tina cabinet is designed
for maximum hygiene and minimum effort. By using
the steam generator for the bactericidal/cleaning
process we have taken full advantage of the technical design of the Tina cabinet.
• Turn the Selector switch to 0 = off.
• Use a mild cleaning agent and sponge.
• Start by removing and cleaning the interior of the cabinet as illustrated in item 1–8.
• Clean the cabinet’s walls, door, floor and ceiling.
• Rinse with hot water.
• Put all clean equipment back into the cabinet, the rack
trolley/container rack with the baskets/containers as
well. Close the door.
• Cutting boards and knives can also be disinfected in
the cabinet, just place them in one of the baskets and
put the basket inside the cabinet.
• Turn the Selector switch to to start the bactericidal/cleaning process.
• Further description of the bactericidal/cleaning process
can be found on page 5
1. Remove and clean the
guide rail by lifting it straight
up (Can be cleaned in a pot
and pan washer).
2. Remove the air-flow guide
panel placed at the back of the
cabinet by pressing the protective hood of the ceiling fan until
the air-flow guide panel detaches from it. Lift out the panel and
clean it.
6. Clean the cabinet’s walls,
door, floor and ceiling.
4. Remove the protective hood
of the ceiling fan by unscrewing the two screws located
on the edge at the front of
the protective hood.
3. Remove and clean the access ramp by
lifting it straight up.
7. Rinse with hot water.
9
5. Let down the protective
hood from the hooks. Clean it
on both sides (Can be cleaned
in a pot and pan washer).
8. Remove the baskets/containers
and clean them in a pot and pan
washer or by hand. Clean the trolley
and do not forget the wheels.
Deliming of steam generator
It is necessary to delime the steam generator regularly in order to avoid lime deposit inside the steam
generator and tube lines. How frequently, depends on hardness of the water.
• Turn the selector switch to position 0 = Off.
• Shut off the water supply to the cabinet by turning the key on the panel
to the right side.
• Remove the baskets/containers and other removable fittings. see cleaning and maintenance at pages 9.
• Turn the selector switch to position 1 = Thawing.
• Wait approximately 3 minutes for drain off the steam generator.
• Turn the selector switch to position 0 = Off.
• Prepare the deliming agent as per the supplier`s recommendations.
• Requested volume for Tina 1200U is 0.7 liters.
• Remove the plug from the descaling tube.
• Fill deliming agent in to the descaling tube on the front right of the
cabinet.
• Fill the agent very slowly in order to avoid overflow.
• Wait approximately 20 minutes.
• Turn on the water supply to the cabinet by turning the Key on the panel A
B
C
•
•
•
to the left side.
Turn the selector switch to position 1 = Thawing.
Wait approximately 3 minutes, the steam generator will fill up.
Turn the selector switch to position 0 = Off.
Repeat points A,B and C, FIVE times.
Clean inside the cabinet.
Start the disinfection/cleaning program by turning the selector switch to position
.
• Check that the program runs completely.
• NB. Do not forget to put the plug back on the descaling tube.
10
Alarm conditions
Message Description
Cause
Er0
sensor error
Consequences on
control action
faulty sensor
depends on C10
Reset
R: automatic check connections
V: manual
Er1
sensor like Er0
NTC2 error
Remedies
check sensor signal
eg.: NTC=10k Ù 25ºC
if C19=1 and mode
like Er0
like Er0
1, 2 see Er0
viceversa control
action goes on normally
Er2
memory error
voltage drop during Interrupt
programming stage
R: automatic reset factory-set values
V: manual
turn off the controller.
memory damaged turn it on again by electromagnetic hold in down PRG.
interferences
Er3
larm via
external contact
on digital input
the main power
depending on C31
supply has been
interrupted** OR
the contact linked
to the digital input
is open
R. depends check C29, C30, C31
on C29 and and P28; check the
C30
external contact Er4
V= manual
Er4
HIGH temp-
P26 has been
control action goes
R: automatic* check P26, P27, P28
rature alarm
exceeded for a
on regularly
V: manual
time-interval
>P28 uncharged OR
cleaning program
Finished see page 5
Er5
LOW temperature P25 has been
control action goes
R: automatic* check P26, P27, P28
alarm
on regularly
V: manual
below P28 for
a time-interval
>P28 uncharged
R= Control action
Resetting the instrument means to restore normal operating conditions after the cause that determined the alarm has
disappeared.
V= Display
Display reset means that normal display of usual values is restored.
(*) = To get a manual alarm reset, just give P27 (alarm differential) a high value.
(**)= Only on display for target temperature (the display on the left ).
11
iPinium AB
Box 2105, S-612 22 Finspång, Sweden
Tel: +46-122-135 84 Fax: +46-122-444 001
E-post: [email protected]
www.iPinium.se
12