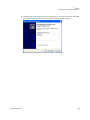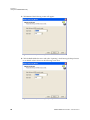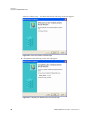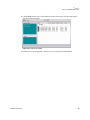
1
ForceWare Software
NVIDIA RAID User’s
Guide
Version 2.0 A
NVIDIA Corporation
September 3, 2004
NVIDIA Applications
NVIDIA RAID User’s Guide Version 2.0
Published by
NVIDIA Corporation
2701 San Tomas Expressway
Santa Clara, CA 95050
Notice
ALL NVIDIA DESIGN SPECIFICATIONS, REFERENCE BOARDS, FILES, DRAWINGS, DIAGNOSTICS,
LISTS, AND OTHER DOCUMENTS (TOGETHER AND SEPARATELY, “MATERIALS”) ARE BEING
PROVIDED “AS IS.” NVIDIA MAKES NO WARRANTIES, EXPRESSED, IMPLIED, STATUTORY, OR
OTHERWISE WITH RESPECT TO THE MATERIALS, AND EXPRESSLY DISCLAIMS ALL IMPLIED
WARRANTIES OF NONINFRINGEMENT, MERCHANTABILITY, AND FITNESS FOR A PARTICULAR
PURPOSE.
Information furnished is believed to be accurate and reliable. However, NVIDIA Corporation assumes no
responsibility for the consequences of use of such information or for any infringement of patents or other rights of
third parties that may result from its use. No license is granted by implication or otherwise under any patent or patent
rights of NVIDIA Corporation. Specifications mentioned in this publication are subject to change without notice.
This publication supersedes and replaces all information previously supplied. NVIDIA Corporation products are not
authorized for use as critical components in life support devices or systems without express written approval of
NVIDIA Corporation.
Trademarks
NVIDIA, the NVIDIA logo, 3DFX, 3DFX INTERACTIVE, the 3dfx Logo, STB, STB Systems and Design, the STB
Logo, the StarBox Logo, NVIDIA nForce, GeForce, NVIDIA Quadro, NVDVD, NVIDIA Personal Cinema,
NVIDIA Soundstorm, Vanta, TNT2, TNT, RIVA, RIVA TNT, VOODOO, VOODOO GRAPHICS, WAVEBAY,
Accuview Antialiasing, the Audio & Nth Superscript Design Logo, CineFX, the Communications & Nth Superscript
Design Logo, Detonator, Digital Vibrance Control, DualNet, FlowFX, ForceWare, GIGADUDE, Glide, GOFORCE,
the Graphics & Nth Superscript Design Logo, Intellisample, M-BUFFER, nfiniteFX, NV, NVChess, nView,
NVKeystone, NVOptimizer, NVPinball, NVRotate, NVSensor, NVSync, the Platform & Nth Superscript Design
Logo, PowerMizer, Quincunx Antialiasing, Sceneshare, See What You've Been Missing, StreamThru, SuperStability,
T-BUFFER, The Way It's Meant to be Played Logo, TwinBank, TwinView and the Video & Nth Superscript Design
Logo are registered trademarks or trademarks of NVIDIA Corporation in the United States and/or other countries.
Other company and product names may be trademarks or registered trademarks of the respective owners with which
they are associated.
Intel, Indeo, and Pentium are registered trademarks of Intel Corporation. Microsoft, Windows, Windows NT,
Direct3D, DirectDraw, and DirectX are trademarks or registered trademarks of Microsoft Corporation. OpenGL is a
registered trademark of Silicon Graphics Inc.
Other company and product names may be trademarks or registered trademarks of the respective owners with which
they are associated.
Copyright
© 2004 by NVIDIA Corporation. All rights reserved.
NVIDIA Applications
NVIDIA RAID User’s Guide v2.0 A
Table of Contents
1.About NVIDIA RAID . . . . . . . . . . . . . . . . . . . . . . . . . . . . . . . . . . . . . . . . . . . . . . . . . 1
System Requirements . . . . . . . .
Hardware Support . . . . . . . .
Operating System Support . . . .
RAID Arrays . . . . . . . . . . . . .
RAID 0 . . . . . . . . . . . . . .
RAID 1 . . . . . . . . . . . . . .
RAID 0+1. . . . . . . . . . . . .
Spanning (JBOD). . . . . . . . .
Summary of RAID Configurations
NVIDIA RAID Features . . . . . . .
Additional RAID Features . . . .
Features and Benefits Summary .
.
.
.
.
.
.
.
.
.
.
.
.
.
.
.
.
.
.
.
.
.
.
.
.
.
.
.
.
.
.
.
.
.
.
.
.
.
.
.
.
.
.
.
.
.
.
.
.
.
.
.
.
.
.
.
.
.
.
.
.
.
.
.
.
.
.
.
.
.
.
.
.
.
.
.
.
.
.
.
.
.
.
.
.
.
.
.
.
.
.
.
.
.
.
.
.
.
.
.
.
.
.
.
.
.
.
.
.
.
.
.
.
.
.
.
.
.
.
.
.
.
.
.
.
.
.
.
.
.
.
.
.
.
.
.
.
.
.
.
.
.
.
.
.
.
.
.
.
.
.
.
.
.
.
.
.
.
.
.
.
.
.
.
.
.
.
.
.
.
.
.
.
.
.
.
.
.
.
.
.
.
.
.
.
.
.
.
.
.
.
.
.
.
.
.
.
.
.
.
.
.
.
.
.
.
.
.
.
.
.
.
.
.
.
.
.
.
.
.
.
.
.
.
.
.
.
.
.
.
.
.
.
.
.
.
.
.
.
.
.
.
.
.
.
.
.
.
.
.
.
.
.
.
.
.
.
.
.
.
.
.
.
.
.
.
.
.
.
.
.
.
.
.
.
.
.
.
.
.
.
.
.
.
.
.
.
.
.
.
.
.
.
.
.
.
.
.
.
.
.
.
.
.
.
.
.
.
.
.
.
.
.
.
.
.
.
.
.
.
.
.
.
.
.
.
.
.
.
.
.
.
.
.
.
.
.
.
.
.
.
.
.
.
.
.
.
.
.
.
.
.
.
.
.
.
.
.
.
.
.
.
.
.
.
.
.
.
.
.
.
.
.
.
.
.
.
.
.
.
.
.
.
.
.
.
.
.
.
.
.
.
.
.
.
.
.
.
.
.
.
.
.
.
.
.
.
.
.
.
.
.
.
.
.
.
.
.
.
.
.
.
.
.
.
.
.
.
.
.
.
.
.
.
.
.
.
.
.
.
.
.
.
.
.
.
.
.
.
.
.
.
.
.
.
.
.
. 2
. 2
. 2
. 3
. 4
. 5
. 6
. 7
. 8
. 9
. 9
.10
2.Setting Up Your RAID Configuration . . . . . . . . . . . . . . . . . . . . . . . . . . . . . . . . . . 11
Basic Configuration Instructions. . . . . . . . . . . . . .
Non-Bootable RAID Array . . . . . . . . . . . . . . .
Bootable RAID Array . . . . . . . . . . . . . . . . . .
Setting Up a Non-Bootable NVIDIA RAID Array . . . . .
Setup Used in This Section . . . . . . . . . . . . . .
Setting Up the BIOS . . . . . . . . . . . . . . . . . .
Configuring the NVIDIA RAID BIOS . . . . . . . . . .
Installing the NVIDIA RAID Software Under Windows .
Setting Up a Bootable NVIDIA RAID Array . . . . . . . .
Setup Used in This Section . . . . . . . . . . . . . .
Setting Up the BIOS . . . . . . . . . . . . . . . . . .
Configuring the NVIDIA RAID BIOS . . . . . . . . . .
Installing the RAID Drivers . . . . . . . . . . . . . . .
Initializing and Using the Disk Array. . . . . . . . . . . .
.
.
.
.
.
.
.
.
.
.
.
.
.
.
.
.
.
.
.
.
.
.
.
.
.
.
.
.
.
.
.
.
.
.
.
.
.
.
.
.
.
.
.
.
.
.
.
.
.
.
.
.
.
.
.
.
.
.
.
.
.
.
.
.
.
.
.
.
.
.
.
.
.
.
.
.
.
.
.
.
.
.
.
.
.
.
.
.
.
.
.
.
.
.
.
.
.
.
.
.
.
.
.
.
.
.
.
.
.
.
.
.
.
.
.
.
.
.
.
.
.
.
.
.
.
.
.
.
.
.
.
.
.
.
.
.
.
.
.
.
.
.
.
.
.
.
.
.
.
.
.
.
.
.
.
.
.
.
.
.
.
.
.
.
.
.
.
.
.
.
.
.
.
.
.
.
.
.
.
.
.
.
.
.
.
.
.
.
.
.
.
.
.
.
.
.
.
.
.
.
.
.
.
.
.
.
.
.
.
.
.
.
.
.
.
.
.
.
.
.
.
.
.
.
.
.
.
.
.
.
.
.
.
.
.
.
.
.
.
.
.
.
.
.
.
.
.
.
.
.
.
.
.
.
.
.
.
.
.
.
.
.
.
.
.
.
.
.
.
.
.
.
.
.
.
.
.
.
.
.
.
.
.
.
.
.
.
.
.
.
.
.
.
.
.
.
.
.
.
.
.
.
.
.
.
.
.
.
.
.
.
.
.
.
.
.
.
.
.
.
.
.
.
.
.
.
.
.
.
.
.
.
.
.
.
.
.
.
.
.
.
.
.
.
.
.
.
.
.
.
.
.
.
.
.
.
.
.
.
.
.
.
.
.
.
.
.
.
.
.
.
.
.
.
.
.
.
.
. 11
. 11
. 11
.12
.12
.13
.15
.21
.22
.22
.23
.25
.31
.33
3.Using the NVRAIDMAN Utility . . . . . . . . . . . . . . . . . . . . . . . . . . . . . . . . . . . . . . . 37
About the NVIDIA RAID Management Utility
Viewing RAID Array Configurations . . . . .
Setting Up a Spare RAID Disk . . . . . . .
Assigning a Free Disk . . . . . . . . . .
Assigning a Dedicated Disk . . . . . . .
Rebuilding a RAID Array . . . . . . . . . .
Rebuilding Instructions . . . . . . . . . .
More About Rebuilding Arrays . . . . . .
Creating RAID Arrays . . . . . . . . . . . .
Creating a Striped Array . . . . . . . . .
Creating a Mirrored Array . . . . . . . .
Creating a Stripe Mirroring Array . . . . .
Creating a Spanning Array . . . . . . . .
Deleting a RAID Array . . . . . . . . . . . .
Morphing From One RAID Array to Another
General Morphing Principles . . . . . . .
Morphing Instructions . . . . . . . . . .
Hot Plug Array . . . . . . . . . . . . . . . .
.
.
.
.
.
.
.
.
.
.
.
.
.
.
.
.
.
.
.
.
.
.
.
.
.
.
.
.
.
.
.
.
.
.
.
.
.
.
.
.
.
.
.
.
.
.
.
.
.
.
.
.
.
.
.
.
.
.
.
.
.
.
.
.
.
.
.
.
.
.
.
.
.
.
.
.
.
.
.
.
.
.
.
.
.
.
.
.
.
.
.
.
.
.
.
.
.
.
.
.
.
.
.
.
.
.
.
.
.
.
.
.
.
.
.
.
.
.
.
.
.
.
.
.
.
.
.
.
.
.
.
.
.
.
.
.
.
.
.
.
.
.
.
.
.
.
.
.
.
.
.
.
.
.
.
.
.
.
.
.
.
.
.
.
.
.
.
.
.
.
.
.
.
.
.
.
.
.
.
.
.
.
.
.
.
.
.
.
.
.
.
.
.
.
.
.
.
.
.
.
.
.
.
.
.
.
.
.
.
.
.
.
.
.
.
.
.
.
.
.
.
.
.
.
.
.
.
.
.
.
.
.
.
.
.
.
.
.
.
.
.
.
.
.
.
.
.
.
.
.
.
.
.
.
.
.
.
.
.
.
.
.
.
.
.
.
.
.
.
.
.
.
.
.
.
.
.
.
.
.
.
.
.
.
.
.
.
.
.
.
.
.
.
.
.
.
.
.
.
.
.
.
.
.
.
.
.
.
.
.
.
.
.
.
.
.
.
.
.
.
.
.
.
.
.
.
.
.
.
.
.
.
.
.
.
.
.
.
.
.
.
.
.
.
.
.
.
.
.
.
.
.
.
.
.
.
.
.
.
.
.
.
.
.
.
.
.
.
.
.
.
.
.
.
.
.
.
.
.
.
.
.
.
.
.
.
.
.
.
.
.
.
.
.
.
.
.
.
.
.
.
.
.
.
.
.
.
.
.
.
.
.
.
.
.
.
.
.
.
.
.
.
.
.
.
.
.
.
.
.
.
.
.
.
.
.
.
.
.
.
.
.
.
.
.
.
.
.
.
.
.
.
.
.
.
.
.
.
.
.
.
.
.
.
.
.
.
.
.
.
.
.
.
.
.
.
.
.
.
.
.
.
.
.
.
.
.
.
.
.
.
.
.
.
.
.
.
.
.
.
.
.
.
.
.
.
.
.
.
.
.
.
.
.
.
.
.
.
.
.
.
.
.
.
.
.
.
.
.
.
.
.
.
.
.
.
.
.
.
.
.
.
.
.
.
.
.
.
.
.
.
.
.
.
.
.
.
.
.
.
.
.
.
.
.
.
.
.
.
.
.
.
.
.
.
.
.
.
.
.
.
.
.
.
.
.
.
.
.
.
.
.
.
.
.
.
.
.
.
.
.
.
.
.
.
.
.
.
.
.
.
.
.37
.38
.41
.42
.43
.47
.47
.51
.52
.52
.57
.61
.65
.69
.72
.72
.74
104
4.NVIDIA RAID Frequently Asked Questions . . . . . . . . . . . . . . . . . . . . . . . . . . . . 107
Basic RAID Questions . . . . . . . . . . . . . . . . . . . . . . . . . . . . . . . . . . . . . . . . . . . . 107
NVIDIA Corporation
i
NVIDIA Applications
RAID ROM Setup Questions .
Rebuilding Arrays Questions .
Dedicated Disk Questions . .
Windows RAID Application. .
NVIDIA RAID User’s Guide v2.0 A
.
.
.
.
.
.
.
.
.
.
.
.
.
.
.
.
.
.
.
.
.
.
.
.
.
.
.
.
.
.
.
.
.
.
.
.
.
.
.
.
.
.
.
.
.
.
.
.
.
.
.
.
.
.
.
.
.
.
.
.
.
.
.
.
.
.
.
.
.
.
.
.
.
.
.
.
.
.
.
.
.
.
.
.
.
.
.
.
.
.
.
.
.
.
.
.
.
.
.
.
.
.
.
.
.
.
.
.
.
.
.
.
.
.
.
.
.
.
.
.
.
.
.
.
.
.
.
.
.
.
.
.
.
.
.
.
.
.
.
.
.
.
.
.
.
.
.
.
.
.
.
.
.
.
.
.
.
.
.
.
109
109
110
110
5.NVIDIA RAID Application Notes . . . . . . . . . . . . . . . . . . . . . . . . . . . . . . . . . . . . . 111
Installing NVIDIA RAID on a New Windows XP Operating System .
Problem . . . . . . . . . . . . . . . . . . . . . . . . . . . . .
Solution . . . . . . . . . . . . . . . . . . . . . . . . . . . . .
Windows 2000 Limitation with Bootable RAID . . . . . . . . . . .
Problem . . . . . . . . . . . . . . . . . . . . . . . . . . . . .
Solution . . . . . . . . . . . . . . . . . . . . . . . . . . . . .
Installing the NVIDIA IDE Driver in Windows 2000 . . . . . . . . .
Problem . . . . . . . . . . . . . . . . . . . . . . . . . . . . .
Solution . . . . . . . . . . . . . . . . . . . . . . . . . . . . .
Using GHOST with NVIDIA RAID . . . . . . . . . . . . . . . . . .
Problem . . . . . . . . . . . . . . . . . . . . . . . . . . . . .
Solution . . . . . . . . . . . . . . . . . . . . . . . . . . . . .
NVIDIA Corporation
ii
.
.
.
.
.
.
.
.
.
.
.
.
.
.
.
.
.
.
.
.
.
.
.
.
.
.
.
.
.
.
.
.
.
.
.
.
.
.
.
.
.
.
.
.
.
.
.
.
.
.
.
.
.
.
.
.
.
.
.
.
.
.
.
.
.
.
.
.
.
.
.
.
.
.
.
.
.
.
.
.
.
.
.
.
.
.
.
.
.
.
.
.
.
.
.
.
.
.
.
.
.
.
.
.
.
.
.
.
.
.
.
.
.
.
.
.
.
.
.
.
.
.
.
.
.
.
.
.
.
.
.
.
.
.
.
.
.
.
.
.
.
.
.
.
.
.
.
.
.
.
.
.
.
.
.
.
.
.
.
.
.
.
.
.
.
.
.
.
.
.
.
.
.
.
.
.
.
.
.
.
.
.
.
.
.
.
.
.
.
.
.
.
.
.
.
.
.
.
.
.
.
.
.
.
.
.
.
.
.
.
.
.
.
.
.
.
.
.
.
.
.
.
.
.
.
.
.
.
.
.
.
.
.
.
.
.
.
.
.
.
.
.
.
.
.
.
.
.
.
.
.
.
.
.
.
.
.
.
.
.
.
.
.
.
112
112
112
113
113
113
115
115
115
116
116
116
C
H A P T E R
ABOUT NVIDIA RAID
NVIDIA brings Redundant Array of Independent Disks (RAID) technology—which is
used by the world’s leading businesses—to the common PC desktop. This technology
uses multiple drives to either increase total disk space or to offer data protection.
RAID techniques were first published in 1988 by a multivendor consortium—the RAID
Advisory Board. RAID techniques were divided into different categories or levels.
Originally, RAID levels focused on improving resiliency or data availability. As
additional RAID levels were defined, one was introduced for improving performance. For
all levels, RAID techniques optimize storage solutions by using multiple disks grouped
together and treating them as a single storage resource.
This chapter describes NVIDIA RAID in the following sections:
• “System Requirements” on page 2.
• “RAID Arrays” on page 3 describes the RAID levels supported by NVIDIA RAID.
• “NVIDIA RAID Features” on page 9 describes additional features offered by NVIDIA
RAID.
NVIDIA Corporation
1
CHAPTER 1
About NVIDIA RAID
System Requirements
Hardware Support
NVIDIA RAID supports the following NVIDIA® nForce™ versions:
• nForce™4
• nForce4 Ultra
• nForce4 SLI
• nForce3 Pro250
• nForce3 250Gb
• nForce3 Ultra
• nForce3 250
• nForce3 150
• nForce2 MCP2S
Operating System Support
NVIDIA RAID supports the following operating systems:
• Windows® XP Home Edition
• Windows XP Professional Edition
• Windows 2000 Professional
• Windows 2003 Server
2
NVIDIA RAID User’s Guide – Version 2.0 A
CHAPTER 1
About NVIDIA RAID
RAID Arrays
This section describes the following types of RAID arrays that NVIDIA RAID supports:
• RAID 0
RAID 0 defines a disk striping scheme that improves the disk read and write times for
many applications.
• RAID 1
RAID 1 defines techniques for mirroring data.
• RAID 0+1
RAID 0+1 combines the techniques used in RAID 0 and RAID 1 arrays.
• Spanning (JBOD)
JBOD provides a method for combining drives of different sizes into one large disk.
NVIDIA Corporation
3
CHAPTER 1
About NVIDIA RAID
RAID 0
How RAID 0 Works
In a RAID 0 array, the controller “stripes” data across multiple drives in the RAID
subsystem. RAID 0 breaks up a large file into smaller blocks and then performs disk reads
and writes across multiple drives in parallel. The size of each block is determined by the
stripe size parameter, which you set during the creation of the RAID set based on the
system environment. This technique reduces overall disk access time and offers high
bandwidth.
Figure 1.1
RAID 0 Array Diagram
RAID 0 involves no parity calculations to complicate the write operation. This makes
RAID 0 ideal for applications that require high bandwidth but do not require fault
tolerance. RAID 0 has the best performance and capacity of any RAID level, but the lowest
availability (no fault tolerance). If one drive fails, the entire array fails because part of the
data is missing with no way to recover it other than restoring from a backup.
Summary of Features and Benefits
• Benefits: Provides increased data throughput, especially for large files.
• Drawbacks: Does not deliver any fault tolerance. If any drive in the array fails, all data
is lost.
• Uses: Intended for non-critical data requiring high data throughput, or any
environment that does not require fault tolerance.
• Drives: Minimum: 1. Maximum: Up to 6 or 8, depending on the platform.
• Fault Tolerance: No.
4
NVIDIA RAID User’s Guide – Version 2.0 A
CHAPTER 1
About NVIDIA RAID
RAID 1
How RAID 1 Works
In a RAID 1 array, every read and write is carried out in parallel across two disk drives.
The mirrored—or backup—copy of the data can reside on the same disk or on a second
redundant drive in the array. RAID 1 provides a hot-standby copy of data if the active
volume or drive is corrupted or becomes unavailable due to a hardware failure. RAID 1
techniques can be applied for high-availability solutions, or as a form of automatic backup
that eliminates tedious manual backups to more expensive and less reliable media.
Figure 1.2
RAID 1 Array Diagram
RAID 1 provides complete data redundancy, but at the cost of doubling the required data
storage capacity, resulting in 50% capacity utilization. Performance is roughly the same as
for a single drive, although in some instances the dual write may be somewhat slower.
Summary of Features and Benefits
• Benefits: Provides 100% data redundancy. Should one drive fail, the controller
switches to the other drive.
• Drawbacks: Requires two drives for the storage space of one drive. Performance is
impaired during drive rebuilds.
• Uses: RAID 1 is ideal for small databases or any other application that requires fault
tolerance and minimal capacity.
• Drives: Minimum, 2. Maximum, 2.
• Fault Tolerance: Yes
NVIDIA Corporation
5
CHAPTER 1
About NVIDIA RAID
RAID 0+1
How RAID 0+1 Works
RAID 0 drives can be mirrored using RAID 1 techniques, resulting in a RAID 0+1 solution
for improved performance plus resiliency.
Figure 1.3
RAID 0+1 Array Diagram
The controller combines the performance of data striping (RAID 0) and the fault tolerance
of disk mirroring (RAID 1). Data is striped across multiple drives and duplicated on
another set of drives.
Summary of Features and Benefits
• Benefits: Optimizes for both fault tolerance and performance, allowing for automatic
redundancy. May be simultaneously used with other RAID levels in an array, and
allows for spare disks.
• Drawbacks: Requires twice the available disk space for data redundancy, the same as
RAID level 1.
• Drives: Minimum: 4. Maximum: 6 or 8, depending on the platform.
• Fault Tolerance: Yes
6
NVIDIA RAID User’s Guide – Version 2.0 A
CHAPTER 1
About NVIDIA RAID
Spanning (JBOD)
How JBOD Works
JBOD stands for “Just a Bunch of Disks”. Each drive is accessed as if it were on a standard
SCSI host bus adapter. This is useful when a single drive configuration is needed, but it
offers no speed improvement or fault tolerance.
Figure 1.4
JBOD Array Diagram
Summary of Features and Benefits
• Benefits: JBOD provides the ability to combine odd size drives using all of the capacity
of the drives.
• Drawbacks: Decreases performance because of the difficulty in using drives
concurrently.
• Uses: JBOD works best if you have odd sized drives and you want to combine them to
make one big drive.
• Fault Tolerance: No
NVIDIA Corporation
7
CHAPTER 1
About NVIDIA RAID
Summary of RAID Configurations
Table 1.1
RAID Configuration Summary
Array
Uses
Advantages
Drawbacks
# Hard
Disks
Fault
Tolerance
RAID 0
Non-critical data
requiring high
performance.
Small databases or any
other small capacity
environment requiring
fault tolerance.
Critical data requiring
high performance.
High data throughput.
No fault tolerance.
multiple
None
100% data
redundancy.
Requires two drives
for the storage space
of one drive.
2
Yes
Optimized for both
100% data redundancy
and performance.
Allows spare disks.
Combines and uses the
capacity of odd size
drives.
Requires two drives
for the storage space
of one drive—the
same as RAID level 1.
4+
Yes
Decreases
performance because
of the difficulty in
using drives
concurrently or to
optimize drives for
different uses.
multiple
No
RAID 1
RAID
0+1
JBOD
8
Combining odd size
drives into one big
drive.
NVIDIA RAID User’s Guide – Version 2.0 A
CHAPTER 1
About NVIDIA RAID
NVIDIA RAID Features
Additional RAID Features
NVIDIA RAID offers the following additional features:
• Free Disk and Dedicated Spare Disk
A Free Disk or Dedicated Disk can be automatically used in case one drive of a faulttolerant array fails. NVIDIA RAID defines a fault-tolerant array as either RAID 1 or
RAID 0+1. A free disk can be used by any available fault-tolerant array, while a
dedicated disk can be used only by the array to which it is assigned.
• RAID Across PATA and SATA
NVIDIA RAID can span across both Parallel ATA as well as Serial ATA controllers.
RAID operations can be performed on Parallel ATA hard drives, Serial ATA hard
drives, or both Parallel and Serial ATA hard drives.
• Bootable RAID
NVIDIA RAID can be configured in a way to make it bootable. For example, two hard
drives can be configured as a bootable mirrored RAID array.
• RAID on Multiple Disk Controllers
Unlike other RAID solutions that limits the user to a dedicated RAID controller,
NVIDIA RAID software can use a drive on one RAID controller and another drive on a
second RAID controller.
• Morphing
Morphing is the ability to convert from one RAID mode to another RAID mode. This
allows the user to upgrade their current disk or array for better performance, higher
security, and increased capacity. More importantly, this is accomplished without
having to go through multiple steps. The morphing feature gives the user an
upgradeable option to manage storage easily.
• Hot Plug Array
Hot plug, with respect to RAID, is the ability to add a disk to a system safely and
without causing problems for the RAID software. For example, when a drive in a
mirrored array fails, a user can launch the Hot Plug Array Wizard which instructs the
user as to when a drive can be added safely to the system. As soon as the drive is
added, the user can then finish running the RAID wizard and the drive becomes
useable by the system.
NVIDIA Corporation
9
CHAPTER 1
About NVIDIA RAID
Features and Benefits Summary
Features
Benefits
RAID across PATA and SATA
• Supports both Serial ATA and Parallel ATA disk
devices within a single RAID Array.
• Single set up procedure applies to all drives.
• Allows the user to dedicate a "spare" disk as a hot
standby in the event of a array failure.
• Offers additional protection in case of a failure in a
mirrored array.
• Supports the use of a RAID drive for loading the
operating system at power up for optimal performance
Spare Drive and Dedicated Drive
Support
Bootable RAID
Morphing
Disk Failure Identification
10
• Allows the user to upgrade for more performance,
security, and capacity.
• Allows the user to change the current state of a disk/
array to another array with a one step process called
"morphing", without losing any data during the
configuration change.
• Notifies the user when a disk fails and instructs you on
which one to replace
NVIDIA RAID User’s Guide – Version 2.0 A
C
H A P T E R
SETTING UP YOUR RAID CONFIGURATION
Basic Configuration Instructions
The following are the basic steps for configuring NVIDIA RAID:
Non-Bootable RAID Array
1 Choose the hard disks that are to be RAID enabled in the system BIOS.
2 Specify the RAID level, either Mirroring (RAID 1), Striping (RAID 0), Mirrored Striping
(RAID 0+1), or Spanning (JBOD) and create the desired RAID array.
3 Run the Windows nForce Setup application and install the RAID software.
4 Initialize the NVRAID Array Disks
See “Initializing and Using the Disk Array” on page 33.
Bootable RAID Array
1 Choose the hard disks that are to be RAID enabled in the system BIOS.
2 Specify the RAID level, either Mirroring (RAID 1), Striping (RAID 0), Mirrored Striping
(RAID 0+1), or Spanning (JBOD) and create the desired RAID array.
3 Boot from the Windows CD and install the nForce RAID software.
4 Initialize the NVRAID Array Disks
See “Initializing and Using the Disk Array” on page 33.
NVIDIA Corporation
11
CHAPTER 2
Setting Up Your RAID Configuration
Setting Up a Non-Bootable NVIDIA RAID Array
All of the tasks that are related to a non-bootable NVIDIA RAID Array can be performed
from Windows using the NVRAIDMAN utility.
Setup Used in This Section
This section assumes the following setup:
• Boot Disk
One hard disk connected to the Primary IDE channel, and set to Master or Slave.
• RAID Array Disks
• RAID0
Two hard disks connected to the secondary IDE channel, where one is set to Master
and the other set to Slave.
This example shows how to enable RAID 0 on the two hard disks.
• RAID1
Two hard disks connected to the secondary IDE channel, where one is set to Master
and the other set to Slave.
This example shows how to enable RAID 1 on the two hard disks.
• JBOD/Spanning
Two hard disks connected to the secondary IDE channel, where one is set to Master
and the other set to Slave.
This example shows how to enable a JBOD/Spanning array on the two hard disks.
• RAID0+1
Two hard disks connected to the secondary IDE channel, where one is set to Master
and the other set to Slave
Two SATA hard disks
Two hard disks will be used for striping and two hard disks will be used for
mirroring.
12
NVIDIA RAID User’s Guide – Version 2.0 A
CHAPTER 2
Setting Up Your RAID Configuration
Setting Up the BIOS
1 Start your computer, then press Delete to enter the BIOS setup.
The BIOS CMOS Setup Utility window appears.
Phoenix - Award BIOS CMOS Setup Utility
Standard CMOS Features
Load Fail-Safe Defaults
Advanced BIOS Features
Load Optimized Defaults
Advanced Chipset Features
Set Supervisor Password
Integrated Peripherals
Set User Pasword
Power Management Setup
Save & Exit Setup
PnP / PCI Configurations
Exit Without Saving
Esc : Quit
F10 : Save & Exit Setup
: Select Item
Onboard IO, IRQ, DMA Assigment ...
^
Figure 2.1
BIOS CMOS Setup Utility Main Window
2 Use the arrow keys to select Integrated Peripherals (see Figure 2.1), then press Enter.
The Integrated Peripherals window appears.
Phoenix - Award BIOS CMOS Setup Utility
Integrated Peripherals
RAID Config
OnChip IDE Channel0
Primary Master PIO
Primary Slave
PIO
Primary Master UDMA
Primary Slave
UDMA
OnChip IDE Channel1
Secondary Master PIO
Secondary Slave PIO
Secondary Master UDMA
Secondary Slave UDMA
IDE Prefetch Mode
Init Display First
OnChip USB
USB Keyboard Support
USB Mouse Support
Serial - ATA
SATA Spread Spectrum
AC97 Audio
[Press Enter]
[Enabled]
[Auto]
[Auto]
[Auto]
[Auto]
[Enabled]
[Auto]
[Auto]
[Auto]
[Auto]
[Enabled]
[PCI Slot]
[V1.1 - V2.0]
[Disabled]
[Disabled]
[Enabled]
[Disabled]
[Auto]
Item Help
Menu Level
:Move Enter:Select +/-/PU/PD:Value F10:Save ESC:Exit F1:General Help
F5: Previous Values F6: Fail-Safe Defaults F7: Optimized Defaults
Figure 2.2
NVIDIA Corporation
Integrated Peripherals Window
13
CHAPTER 2
Setting Up Your RAID Configuration
3 Use the arrow keys to select the RAID Config (see Figure 2.2), then press Enter.
The RAID Config window appears..
Phoenix - Award BIOS CMOS Setup Utility
RAID Config
RAID Enable
IDE Primary Master
IDE Primary Slave
IDE Secndry Master
IDE Secndry Slave
Ext SATA Phy Primary
Ext SATA Phy Secndry
Int SATA Phy Primary
Int SATA Phy Secndry
[Enable]
RAID [Disabled]
RAID [Disabled]
RAID [Enabled]
RAID [Enabled]
RAID [Disabled]
RAID [Disabled]
RAID [Disabled]
RAID [Disabled]
Item Help
Menu Level
:Move Enter:Select +/-/PU/PD:Value F10:Save ESC:Exit F1:General Help
F5: Previous Values F6: Fail-Safe Defaults F7: Optimized Defaults
Figure 2.3
RAID Config Window
4 From the RAID Config window, enable RAID, then enable the disks that you want to
use as RAID disks.
In Figure 2.3, the master and slave drives on the secondary IDE port are enabled as
RAID disks.
Make sure to enable the SATA drives also if you are setting up a RAID 0+1 array.
5 Press F10 to save the configuration and exit.
The PC reboots.
6 Enter the RAID BIOS Setup by pressing F10 when prompted, and proceed to set up the
NVIDIA RAID BIOS as described in the next section.
14
NVIDIA RAID User’s Guide – Version 2.0 A
CHAPTER 2
Setting Up Your RAID Configuration
Configuring the NVIDIA RAID BIOS
The NVIDIA RAID BIOS setup lets you choose the RAID array type and which hard
drives you want to make part of the array.
Entering the RAID BIOS Setup
1 After rebooting your computer, wait until you see the RAID software prompting you to
press F10.
The RAID prompt appears as part of the system POST and boot process prior to
loading the OS. You have a few seconds to press F10 before the window disappears.
2 Press F10.
The NVIDIA RAID Utility—Define a New Array window appears (Figure 2.4).
NVIDIA RAID Utility
- Define a New Array Optimal
RAID Mode: Mirroring
Striping Block:
Free Disks
Loc
Disk Model Name
Array Disks
Loc
Disk Model Name
1.0.M
1.1.M
ST380023AS
ST380023AS
[ ] Add
[ ] Del
[F6] Back [F7] Finish [TAB] Navigate [
Figure 2.4
] Select [ENTER] Popup
NVIDIA RAID Utility
By default, RAID Mode is set to Mirroring and Striping Block is set to Optimal.
NVIDIA Corporation
15
CHAPTER 2
Setting Up Your RAID Configuration
Understanding the Define a New Array Window
Use the Define a New Array window to
• Select the RAID Mode
• Set up the Striping Block
• Specify which disks to use for the RAID Array
Depending on the platform used, the system can have one or more channels. In a
typical system there is usually one adapter and multiple channels, and each channel
has a slave and a master.
The adapter/channel/master/slave status of each hard disk is given in the Loc (location)
columns of the Free Disks and Array Disks lists.
1.0.M
M: Master
S: Slave
Channel
Adapter - 0 is used for PATA drives
1 and above is used for SATA drives
Figure 2.5
Loc Column Information
In Figure 2.5, 1.0.M means the hard drive is attached to Adapter 1, Channel 0, and the
drive is set to Master. The following is a list of all possible combinations:
Parallel ATA
0.0.M
Adapter 0, Channel 0, Master
0.0.S
Adapter 0, Channel 0, Slave
0.1.M
Adapter 0, Channel 1, Master
0.1.S
Adapter 0, Channel 1, Slave
Serial ATA
1.0.M
Adapter 1, Channel 0, Master
1.1.M
Adapter 1, Channel 1, Master
2.0.M
Adapter 2, Channel 0, Master
2.1.M
Adapter 2, Channel 1, Master
Note: There is no such thing as Slave drive in Serial ATA. All drives are considered to
be Master since there is a one-to-one connection between the drive and the
adapter.
16
NVIDIA RAID User’s Guide – Version 2.0 A
CHAPTER 2
Setting Up Your RAID Configuration
Using the Define a New Array Window
If necessary, press the tab key to move from field to field until the appropriate field is
highlighted.
• Selecting the RAID Mode
By default, this is set to Mirroring. To change to a different RAID mode, press the down
arrow key until the mode that you want appears in the RAID Mode box—either
Mirroring, Striping, Spanning, or Stripe Mirroring.
• Selecting the Striping Block Size
Striping block size is given in kilobytes, and affects how data is arranged on the disk. It
is recommended to leave this value at the default Optimal, which is 64KB, but the
values can be between 4 KB and 128 KB (4, 8, 16, 32, 64, and 128 KB).
• Assigning the Disks
The disks that you enabled from the RAID Config BIOS setup page appear in the Free
Disks block. These are the drives that are available for use as RAID array disks.
To designate a free disk to be used as a RAID array disk,
1 Tab to the Free Disks section.
The first disk in the list is selected
2 Move it from the Free Disks block to the Array Disks block by pressing the rightarrow key (Æ).
The first disk in the list is moved, and the next disk in the list is selected and ready to
be moved.
3 Continue pressing the right-arrow key (Æ) until all the disks that you want to use as
RAID array disks appear in the Array Disks block.
NVIDIA Corporation
17
CHAPTER 2
Setting Up Your RAID Configuration
Figure 2.6 illustrates the Define a New Array window after two disks have been
assigned as RAID 1 array disks.
NVIDIA RAID Utility
- Define a New Array -
Optimal
RAID Mode: Mirroring
Striping Block:
Free Disks
Loc
Disk Model Name
Array Disks
Loc
Disk Model Name
[ ] Add
1.0.M
1.1.M
ST380023AS
ST380023AS
[ ] Del
[F6] Back [F7] Finish [TAB] Navigate [
Figure 2.6
18
] Select [ENTER] Popup
NVIDIA RAID Utility—Array Disks Assigned
NVIDIA RAID User’s Guide – Version 2.0 A
CHAPTER 2
Setting Up Your RAID Configuration
Completing the RAID BIOS Setup
1 After assigning your RAID array disks, press F7.
The Clear disk data prompt appears.
NVIDIA RAID Utility
- Define a New Array -
Optimal
RAID Mode: Mirroring
Striping Block:
Free Disks
Loc
Disk Model Name
Array Disks
Loc
Disk Model Name
Clear disk data?
1.0.M
[->] Add 1.1.M
[Y] YES [N] NO
ST380023AS
ST380023AS
[ ] Del
[F6] Back [F7] Finish [TAB] Navigate [
Figure 2.7
] Select [ENTER] Popup
Clear Disk Data Prompt
2 Press Y to clear all drive data.
The Array List window appears, where you can review the RAID arrays that you have
set up.
NVIDIA RAID Utility
- Array List Boot
No
Id Status
2
[Ctrl-X] Exit [
Figure 2.8
NVIDIA Corporation
Healthy
Vendor
Array Model Name
NVIDIA
MIRROR 74.53G
] Select [B] Set Boot [N] New Array [ENTER] Detail
Array List Window
19
CHAPTER 2
Setting Up Your RAID Configuration
3 Use the arrow keys to select the array that you want to set up, then press Enter.
The Array Detail window appears.
Array 2 : NVIDIA MIRROR 74.56G
- Array Detail RAID Mode: Mirroring
Striping Width : 1
Adapt
1
1
Channel M/S
0
1
Master
Master
Striping Block 32K
Index Disk Model Name
Capacity
0
1
74.56GB
74.56GB
ST380023AS
ST380023AS
[R] Rebuid [D] Delete [C] Clear Disk [Enter] Return
Figure 2.9
Array Detail Window
The Array Detail window shows information about the array that you selected, such as
Striping Block used, RAID Mode, Striping Width, Disk Model Name, and disk
capacity.
4 If you want to mark this disk as empty and wipe out all its contents then press C.
5 At the prompt, press Y to wipe out all the data, otherwise press N.
6 Press Enter again to go back to the previous window and then press F10 to exit the
RAID setup.
Now that the RAID setup has been configured from the RAID BIOS, the next step is to
configure and load NVIDIA RAID drivers under Windows, as explained in “Installing the
NVIDIA RAID Software Under Windows” on page 21.
20
NVIDIA RAID User’s Guide – Version 2.0 A
CHAPTER 2
Setting Up Your RAID Configuration
Installing the NVIDIA RAID Software Under Windows
The existing Windows IDE Parallel ATA driver (as well as the Serial ATA driver if SATA
is enabled) must be upgraded to use the NVIDIA IDE Parallel ATA driver (as well as the
NVIDIA Serial ATA driver if SATA is enabled).
This section describes how to run the setup application and install the RAID software
which will upgrade the Windows IDE driver and install the RAID software1.
1 Start the nForce Setup program to open the NVIDIA Windows nForce Drivers page.
Figure 2.10 nForce Driver Installation Window
2 Select the modules that you want to install.
Make sure that the “NVIDIA IDE Driver” is selected.
You must install the NVIDIA IDE driver in order to enable NVIDIA RAID. If you do
not install the NVIDIA IDE driver, NVIDIA RAID will not be enabled.
3 Click Next and then follow the instructions.
4 After the installation is completed, be sure to reboot the PC.
5 After the reboot, initialize the newly created array.
See “Initializing and Using the Disk Array” on page 33.
1. See the application note “Installing the NVIDIA IDE Driver in Windows 2000” on page 115 for information on how to install the NVIDIA IDE Driver under Windows 2000.
NVIDIA Corporation
21
CHAPTER 2
Setting Up Your RAID Configuration
Setting Up a Bootable NVIDIA RAID Array
This section explains how to configure a bootable NVIDIA RAID array.
Setup Used in This Section
This section assumes the following setup:
• Boot Disk
An IDE CD-ROM is connected to the Primary IDE channel, and set to Master or Slave.
Make sure to have a bootable Windows XP/Windows 20002 CD inserted into the CDROM so you can boot from it.
• RAID Array Disks
• RAID 0
Two hard disks connected to the secondary IDE channel, where one is set to Master
and the other set to Slave.
A fresh copy of Windows XP will be installed on the 2 striped hard disks.
• RAID 1
Two hard disks connected to the secondary IDE channel, where one is set to Master
and the other set to Slave.
A fresh copy of Windows XP will be installed on the 2 mirrored hard disks.
• RAID 0+1
Two hard disks connected to the secondary IDE channel, where one is set to Master
and the other set to Slave
Two SATA hard disks
A fresh copy of Windows XP will be installed on the mirrored-striped hard disks.
2. For Windows 2000 bootable RAID installation, see the application note “Windows 2000 Limitation
with Bootable RAID” on page 113.
22
NVIDIA RAID User’s Guide – Version 2.0 A
CHAPTER 2
Setting Up Your RAID Configuration
Setting Up the BIOS
1 Start your computer, then press Delete to enter the BIOS setup.
The BIOS CMOS Setup Utility screen appears.
Phoenix - Award BIOS CMOS Setup Utility
Standard CMOS Features
Load Fail-Safe Defaults
Advanced BIOS Features
Load Optimized Defaults
Advanced Chipset Features
Set Supervisor Password
Integrated Peripherals
Set User Pasword
Power Management Setup
Save & Exit Setup
PnP / PCI Configurations
Exit Without Saving
Esc : Quit
F10 : Save & Exit Setup
: Select Item
Onboard IO, IRQ, DMA Assigment ...
^
Figure 2.11 BIOS CMOS Setup Utility Main Screen
2 Use the arrow keys to select Integrated Peripherals (see Figure 2.11), then press Enter.
The Integrated Peripherals screen (or a screen similar to it) appears.
Phoenix - Award BIOS CMOS Setup Utility
Integrated Peripherals
RAID Config
OnChip IDE Channel0
Primary Master PIO
Primary Slave
PIO
Primary Master UDMA
Primary Slave
UDMA
OnChip IDE Channel1
Secondary Master PIO
Secondary Slave PIO
Secondary Master UDMA
Secondary Slave UDMA
IDE Prefetch Mode
Init Display First
OnChip USB
USB Keyboard Support
USB Mouse Support
Serial - ATA
SATA Spread Spectrum
AC97 Audio
[Press Enter]
[Enabled]
[Auto]
[Auto]
[Auto]
[Auto]
[Enabled]
[Auto]
[Auto]
[Auto]
[Auto]
[Enabled]
[PCI Slot]
[V1.1 - V2.0]
[Disabled]
[Disabled]
[Enabled]
[Disabled]
[Auto]
Item Help
Menu Level
:Move Enter:Select +/-/PU/PD:Value F10:Save ESC:Exit F1:General Help
F5: Previous Values F6: Fail-Safe Defaults F7: Optimized Defaults
Figure 2.12 Integrated Peripherals Screen
NVIDIA Corporation
23
CHAPTER 2
Setting Up Your RAID Configuration
3 Use the arrow keys to select the RAID Config (see Figure 2.12).
4 Press Enter.
The RAID Config screen appears.
Phoenix - Award BIOS CMOS Setup Utility
RAID Config
RAID Enable
IDE Primary Master
IDE Primary Slave
IDE Secndry Master
IDE Secndry Slave
Ext SATA Phy Primary
Ext SATA Phy Secndary
Int SATA Phy Primary
Int SATA Phy Secndry
[Enable]
RAID [Disabled]
RAID [Disabled]
RAID [Enabled]
RAID [Enabled]
RAID [Disabled]
RAID [Disabled]
RAID [Disabled]
RAID [Disabled]
Item Help
Menu Level
:Move Enter:Select +/-/PU/PD:Value F10:Save ESC:Exit F1:General Help
F5: Previous Values F6: Fail-Safe Defaults F7: Optimized Defaults
Figure 2.13 RAID Config Screen
5 From the RAID Config screen, enable RAID, then enable any of the disks that you want
to use as RAID disks.
In Figure 2.13, the master and slave drives on the secondary IDE port are enabled as
RAID disks.
Make sure to enable the SATA drives also if you are setting up a RAID0+1 array.
6 Press F10 to save the configuration and exit.
The PC reboots.
7 Enter the RAID BIOS Setup by pressing F10 when prompted, and proceed to set up the
NVIDIA RAID BIOS as described in the next section.
24
NVIDIA RAID User’s Guide – Version 2.0 A
CHAPTER 2
Setting Up Your RAID Configuration
Configuring the NVIDIA RAID BIOS
The NVIDIA RAID BIOS set up lets you choose the RAID type and which hard drives you
want to make part of the array.
Entering the RAID BIOS Setup:
1 Wait until you see the RAID software prompting you to press F10.
The RAID prompt appears as part of the system POST and boot process prior to
loading of the OS. You have a few seconds to press F10 before the screen disappears.
2 Press F10.
The NVIDIA RAID Utility—Define a New Array screen appears (Figure 2.14).
NVIDIA RAID Utility
- Define a New Array Optimal
RAID Mode: Mirroring
Striping Block:
Free Disks
Loc
Disk Model Name
Array Disks
Loc
Disk Model Name
1.0.M
1.1.M
ST380023AS
ST380023AS
[ ] Add
[ ] Del
[F6] Back [F7] Finish [TAB] Navigate [
] Select [ENTER] Popup
Figure 2.14 NVIDIA RAID Utility
By default, RAID Mode is set to Mirroring and Striping Block is set to Optimal.
NVIDIA Corporation
25
CHAPTER 2
Setting Up Your RAID Configuration
Understanding the Define a New Array Window
Use the Define a New Array window to
• Select the RAID Mode
• Set up the Striping Block
• Specify which disks to use for the RAID Array
Depending on the platform used, the system can have one or more channels. In a
typical system there is usually one adapter and multiple channels, and each channel
has a slave and a master.
The adapter/channel/master/slave status of each hard disk is given in the Loc (location)
columns of the Free Disks and Array Disks lists.
1.0.M
M: Master
S: Slave
Channel
Adapter 0 is used for PATA drives
1 and above is used for SATA drives
Figure 2.15 Loc Column Information
In Figure 2.15, 1.0.M means the hard drive is attached to Adapter 1, Channel 0, and the
drive is set to Master. The following is a list of all possible combinations:
Parallel ATA
0.0.M
Adapter 0, Channel 0, Master
0.0.S
Adapter 0, Channel 0, Slave
0.1.M
Adapter 0, Channel 1, Master
0.1.S
Adapter 0, Channel 1, Slave
Serial ATA
1.0.M
Adapter 1, Channel 0, Master
1.1.M
Adapter 1, Channel 1, Master
2.0.M
Adapter 2, Channel 0, Master
2.1.M
Adapter 2, Channel 1, Master
Note: There is no such thing as Slave drive in Serial ATA. All drives are considered to
be Master since there is a one to one connection between the drive and the
adapter.
26
NVIDIA RAID User’s Guide – Version 2.0 A
CHAPTER 2
Setting Up Your RAID Configuration
Using the Define a New Array Screen
If necessary, press the tab key to move from field to field until the appropriate field is
highlighted.
• Selecting the RAID Mode
By default, this is set to Mirroring. To change to a different RAID mode, press the down
arrow key until the mode that you want appears in the RAID Mode box—either
Mirroring, Striping, Spanning, or Stripe Mirroring.
• Selecting the Striping Block Size
Striping block size is given in kilobytes, and affects how data is arranged on the disk. It
is recommended to leave this value at the default Optimal, which is 64KB, but the
values can be between 4 KB and 128 KB (4, 8, 16, 32, 64, and 128 KB)
Assigning the Disks
The disks that you enabled from the RAID Config BIOS setup page appear in the Free
Disks block. These are the drives that are available for use as RAID array disks.
To designate a free disk to be used as a RAID array disk,
1 Tab to the Free Disks section.
The first disk in the list is selected
2 Move it from the Free Disks block to the Array Disks block by pressing the rightarrow key (Æ).
The first disk in the list is moved, and the next disk in the list is selected and ready to
be moved.
3 Continue pressing the right-arrow key (Æ) until all the disks that you want to use as
RAID array disks appear in the Array Disks block.
NVIDIA Corporation
27
CHAPTER 2
Setting Up Your RAID Configuration
Figure 2.16 illustrates the Define a New Array screen after two disks have been
assigned as RAID1 array disks.
NVIDIA RAID Utility
- Define a New Array Optimal
RAID Mode: Mirroring
Striping Block:
Free Disks
Loc
Disk Model Name
Array Disks
Loc
Disk Model Name
[ ] Add
ST380023AS
ST380023AS
1.0.M
1.1.M
[ ] Del
[F6] Back [F7] Finish [TAB] Navigate [
] Select [ENTER] Popup
Figure 2.16 NVIDIA RAID Utility—Array Disks Assigned
28
NVIDIA RAID User’s Guide – Version 2.0 A
CHAPTER 2
Setting Up Your RAID Configuration
Completing the RAID BIOS Setup
1 After assigning your RAID array disks, press F7.
The Clear disk array prompt appears.
NVIDIA RAID Utility
- Define a New Array -
Optimal
RAID Mode: Mirroring
Striping Block:
Free Disks
Loc
Disk Model Name
Array Disks
Loc
Disk Model Name
Clear disk data?
1.0.M
[->] Add 1.1.M
[Y] YES [N] NO
ST380023AS
ST380023AS
[ ] Del
[F6] Back [F7] Finish [TAB] Navigate [
] Select [ENTER] Popup
Figure 2.17 Clear Disk Data Prompt
2 Press Y to clear the disk data.
The Array List screen appears, where you can review the RAID arrays that you have
set up.
NVIDIA RAID Utility
- Array List Boot
Id Status
Vendor
Array Model Name
Yes
2
NVIDIA
MIRROR 74.53G
[Ctrl-X] Exit [
Healthy
] Select [B] Set Boot [N] New Array [ENTER] Detail
Figure 2.18 Array List Window
NVIDIA Corporation
29
CHAPTER 2
Setting Up Your RAID Configuration
3 Use the arrow keys to select the array that you want to set up, then press B to specify
the array as bootable.
4 Press Enter to view and verify details.
The Array Detail screen appears.
Array 2 : NVIDIA MIRROR 74.56G
- Array Detail RAID Mode: Mirroring
Striping Width : 1
Adapt
1
1
Channel M/S
0
1
Master
Master
Striping Block 32K
Index Disk Model Name
Capacity
0
1
74.56GB
74.56GB
ST380023AS
ST380023AS
[R] Rebuid [D] Delete [C] Clear Diskt [Enter] Return
Figure 2.19 Array Detail Screen
The Array Detail screen shows various information about the array that you selected,
such as Striping Block used, RAID Mode, Striping Width, Disk Model Name, and disk
capacity.
5 If you want to mark this disk as empty and wipe out all its contents, press C.
6 At the prompt, press Y to wipe out all the data, otherwise press N.
7 Press Enter again to go back to the previous screen and then press F10 to exit the RAID
setup.
30
NVIDIA RAID User’s Guide – Version 2.0 A
CHAPTER 2
Setting Up Your RAID Configuration
Installing the RAID Drivers
1 After you complete the RAID BIOS setup, boot from the Windows CD.
The Windows Setup program starts.
2 Press F6 and wait a few moments for the Windows Setup screen to appear.
Windows Setup
Setup could not determine the type of one or more mass storage devices
installed in your system, or you have chosen to manually specify an adapter.
Currently, Setup will load support for the following mass storage device(s):
<none>
* To specify additional SCSI adapters, CD-ROM drives, or special
disk controllers for use with Windows, including those for
which you have a device support disk from a mass storage device
manufacturer, press S.
* If you do not have any device support disks from a mass storage
device manufaturer, or do not want to specify additional
mass storage devices for use with Windows, press ENTER.
S=Specify Additional Devices
ENTER=Continue
Figure 2.20 Windows Setup—Specify Devices
F3=Exit
3 Specify the NVIDIA drivers.
a Insert the floppy that has the RAID driver, press S, then press Enter.
The following Windows Setup screen appears::
Windows Setup
You have chosen to configure a SCSI Adapter for use with Windows,
using a device support disk provided by an adapter manufacturer.
Select the SCSI Adapter you want from the following list, or press ESC
to resutrn to the previous screen.
NVIDIA RAID CLASS DRIVER (required)
NVIDIA NForce Storage Controller (required)
Enter=Select
F3=Exit
Figure 2.21 Windows Setup—Select SCSI Adapter
NVIDIA Corporation
31
CHAPTER 2
Setting Up Your RAID Configuration
b Select “NVIDIA RAID CLASS DRIVER (required)” and then press Enter.
c Press S again at the Specify Devices screen, then press Enter.
d Select “NVIDIA NForce Storage Controller (required)” and then press Enter.
The following Windows Setup screen appears listing both drivers:.
Windows Setup
Setup will load support for the following mass storage device:
NVIDIA RAID CLASS DRIVER
NVIDIA NForce Storage Controller
* To specify additional SCSI adapters, CD-ROM drives, or special
disk controllers for use with Windows, including those for
which you have a device support disk from a mass storage device
manufacturer, press S.
* If you do not have any device support disks from a mass storage
device manufaturer, or do not want to specify additional
mass storage devices for use with Windows, press ENTER.
S=Specify Additional Devices
ENTER=Continue
F3=Exit
Figure 2.22 Windows Setup—NVIDIA drivers listed
4 Press Enter to continue with Windows XP Installation.
Be sure to leave the floppy disk inserted in the floppy drive until the blue screen
portion of Windows XP installation is completed, then take out the floppy.
5 Follow the instructions on how to install Windows XP.
After Windows XP is completely installed, it is recommended that you install the
ForceWare software in order to access NVRAIDMAN—the RAID management tool.
Note: Each time you add a new hard drive to a RAID array, the RAID driver will have to
be installed under Windows once for that hard drive. After that, the driver will not
have to be installed.
32
NVIDIA RAID User’s Guide – Version 2.0 A
CHAPTER 2
Setting Up Your RAID Configuration
Initializing and Using the Disk Array
The RAID array is now ready to be initialized under Windows.
1 Launch Computer Management by clicking Start Æ Settings Æ Control Panel then
open the Administrative Tools folder and double click on Computer Management.
2 Click Disk Management (under the Storage section).
The Initialize and Convert Disk Wizards appears.
Figure 2.23 Initialize and Convet Wizard
NVIDIA Corporation
33
CHAPTER 2
Setting Up Your RAID Configuration
3 Click Next.
The Select Disks to Initialize window appears.
Figure 2.24 Select Disks to Initialize Page
The disks listed depend on how many arrays you have configured
4 Click Next.
The Select Disks to Convert window appears.
Figure 2.25 Select Disks to Convert Page
34
NVIDIA RAID User’s Guide – Version 2.0 A
CHAPTER 2
Setting Up Your RAID Configuration
5 Check the disk in the list if you want to make the array a dynamic disk, then click Next.
The Completing the Initialize and Convert Disk Wizard window appears.
Figure 2.26 Completing the Initialize and Convert Disk Wizard Page
NVIDIA Corporation
35
CHAPTER 2
Setting Up Your RAID Configuration
6 Click Finish.
The Computer Management window appears.
Figure 2.27 Computer Management Window
The actual disks listed will depend on your system. In Figure 2.27, there is a 111 GB
unallocated partition (which is the total combined storage of two 60 GB HD). You must
format the unallocated disk space in order to use it.
7 Format the unallocated disk space.
Right click “Unallocated space”, select “New Partition…” and follow the Wizard
instrucrtions.
After the drive has been formatted, it is ready for use.
36
NVIDIA RAID User’s Guide – Version 2.0 A
C
H A P T E R
USING THE NVRAIDMAN UTILITY
About the NVIDIA RAID Management Utility
The NVIDIA RAID software ships with an application called NVRAIDMAN. This chapter
describes the NVRAIDMAN tasks in the following sections:
• Viewing RAID Array Configurations
View an array configuration (mirrored, striped, mirrored-striped, JBOD, or any
supported combination)
• Setting Up a Spare RAID Disk
• View free and/or dedicated free disks
• Designate a free disk to a particular array
• Rebuilding a RAID Array
• Rebuild a broken mirrored array
• Watch the progress of rebuilding of an array
• Only applies to RAID 1 or RAID 0+1 arrays
• Creating RAID Arrays
• Deleting a RAID Array
• Morphing From One RAID Array to Another
• Hot Plug Array
NVIDIA Corporation
37
CHAPTER 3
Using the NVRAIDMAN Utility
Viewing RAID Array Configurations
To view your RAID configuration from Windows, launch the NVIDIA RAID
Management utility by double-clicking NVRAIDMAN.
The RAID configuration information appears in the right-side pane, as shown in Figure
3.1.
Figure 3.1
NVRAID Management Utility Window
The following are examples of the information displayed for the various RAID levels.
While the details of your own configuration will likely vary from what is shown, the
examples serve to illustrate the basic differences between the RAID levels.
NVIDIA RAID Mirrored Array
Figure 3.2 shows an example of a two hard drive mirrored array using identical 34.4 GB1
SATA hard drives (WD360GB), where one drive is configured as Primary and the other
drive is configured as Secondary.The total hard disk space used is 34.4 GB.
Figure 3.2
NVRAIDMAN Mirrored Array Information
1. 1 GB = 1,073,741,824 bytes
38
NVIDIA RAID User’s Guide – Version 2.0 A
CHAPTER 3
Using the NVRAIDMAN Utility
NVIDIA RAID Striped Array
Figure 3.3 shows an example of a two hard drive striped array using identical 34.48 GB
SATA hard drives (WD360GB), where one drive is configured as Primary and the other
drive is configured as Secondary. The total disk space used is 68.95GB.
Figure 3.3
NVRAIDMAN Striped Array Information
NVIDIA RAID Mirrored-Stripe Array
Figure 3.4 shows an example of a four hard drive mirrored-stripe array. The total disk
space used is 68.95 GB.
The total storage space is 68.95 GB because the two upper drives (the drives with the 34.48
GB size) are first striped, and then they are mirrored onto the 69.25 GB drives.
Figure 3.4
NVRAIDMAN Stripe Mirroring Array Information
NVIDIA RAID Spanning (JBOD) Array
Figure 3.5 shows an example of a two hard drive spanning array. The total disk space
used is 68.95 GB.
Figure 3.5
NVIDIA Corporation
NVRAIDMAN Spanning Array Information
39
CHAPTER 3
Using the NVRAIDMAN Utility
NVIDIA RAID Mirrored Array and Striped Array
Figure 3.6 shows an example of a two hard drive mirrored array as well as a two hard
drive striped array.
Figure 3.6
40
NVRAIDMAN Mirrored Array and Striped Array Information
NVIDIA RAID User’s Guide – Version 2.0 A
CHAPTER 3
Using the NVRAIDMAN Utility
Setting Up a Spare RAID Disk
You can designate a hard drive to be used as a spare drive for a RAID 1 or RAID 0+1
array2. The spare drive can take over for a failed disk. NVIDIA RAID supports two types
of spare drives:
• Free Disk
A free disk is a disk that is not part of any RAID array, but can be used by any available
RAID 1 or RAID 0+1 array that requires a particular disk when one of its disks crashes
or becomes unusable. The process is automatic and doesn’t require any user
interaction.
For example, if you have a system with four hard disks where one disk is used to boot
the OS, two hard drives are set up in a mirrored array, and a fourth hard disk is set up
as a free disk, then if one of the mirrored array drives fails, the free disk will be
automatically assigned to the mirrored array to be used instead of the failed disk.
• Dedicated Disk
A dedicated free disk is a disk that is assigned to a RAID 1 or RAID 0+1 array and that
disk is used by that array only when needed, for example during a system crash where
a RAID mirrored drive is broken. The dedicated disk can be used only by the array that
it is assigned to and not by any other array, unlike a free disk which can be used by any
available RAID 1 or RAID 0+1 array.
Note: You must have at least two RAID arrays to use this feature.
2. Spare disks cannot be used for RAID0 or JBOD arrays.
NVIDIA Corporation
41
CHAPTER 3
Using the NVRAIDMAN Utility
Assigning a Free Disk
To mark a disk as free, or not a part of any array,
1 Enter the system BIOS setup and make sure that the drive that you want to mark as free
is RAID enabled.
2 Enter the RAID BIOS and make sure that the drive is not part of any array (if one
exists).
3 Boot into Windows and run the NVRAIDMAN program.
The drive appears under the Free Disk section.
Figure 3.7 shows an example of the NVRAIDMAN display if you have a mirror array and
two free disks.
Figure 3.7
42
NVRAIDMAN Free Disk Information
NVIDIA RAID User’s Guide – Version 2.0 A
CHAPTER 3
Using the NVRAIDMAN Utility
Assigning a Dedicated Disk
To mark a disk as dedicated, or reserve it for use by a specific array, you must have at
least one free disk and you must also have at least two RAID 1 or RAID 0+1 arrays
created. In this example, there are four SATA drives and two PATA drives which are
RAID enabled. Four SATA drives are used to create two mirrored arrays, while two
PATA drives are used as free disks.
Step 1: Mark the Disk as a Free Disk
1 Enter the system BIOS setup and make sure that the drive that you want to mark as free
is RAID enabled.
2 Boot into Windows and run the NVRAIDMAN program.
If the disk is not part of any RAID array, then it will appear under the Free Disk section
of the RAID GUI.
Step 2: Dedicate the Free Disk to an Array
While running NVRAIDMAN, dedicate a free disk to an array by doing the following:
1 Right click one of the available free disks under the Free Disk section.
Figure 3.8
NVIDIA Corporation
Designate Spare Pop-up Menu
43
CHAPTER 3
Using the NVRAIDMAN Utility
2 Select Designate Spare from the menu to launch the Spare Disk Allocation Wizard.
Figure 3.9
Spare Disk Allocation Wizard
3 Click Next.
The RAID Array Selection page appears.
Figure 3.10 RAID Array Selection Page
44
NVIDIA RAID User’s Guide – Version 2.0 A
CHAPTER 3
Using the NVRAIDMAN Utility
4 From the RAID Array Selection page, select one of the arrays from the list.
This is the array to which you want to allocate the dedicated free disk.
Note: In Figure 3.10 there are two arrays available.
5 Click Next.
The Completing the NVIDIA Spare Disk Allocation page appears.
Figure 3.11 Completing Spare Disk Allocation Wizard Page
NVIDIA Corporation
45
CHAPTER 3
Using the NVRAIDMAN Utility
6 Click Finish.
As shown in Figure 3.12, the ST380011A drive is now a dedicated free disk in the
mirrored array.
Figure 3.12 Designated Spare Disk
If a system crash occurs that causes any of the two WD360GD drives to fail, the
ST380011A hard drive will take over and be used in the newly formed mirrored array.
Removing a Dedicated Disk
Once a dedicated disk has been assigned to a particular array, it can be removed at any
time. To remove the disk, right click on the dedicated disk and select the option to remove
it.
For example, right click on the ST380011A drive and select Remove Disk as shown in
Figure 3.13.
Figure 3.13 Removing a Dedicated Disk
46
NVIDIA RAID User’s Guide – Version 2.0 A
CHAPTER 3
Using the NVRAIDMAN Utility
Rebuilding a RAID Array
Rebuilding is the process of recovering data from one hard drive to another. All data is
copied from one hard drive to another and then the data is synchronized between the two
hard drives. This applies only to RAID 1 as well as a RAID 0+1 arrays.
Rebuilding Instructions
After creating a mirrored array, you can rebuild the array using the following steps:
1 Go to Windows and run the NVIDIA RAID Management utility.
Figure 3.14 shows an example of a system with one mirrored array and two free disks.
Figure 3.14 Mirrored Array
NVIDIA Corporation
47
CHAPTER 3
Using the NVRAIDMAN Utility
2 Right-click on Mirroring.
The popup menu appears.
Figure 3.15 Array Pop-up Menu
3 From the popup menu, click Rebuild Array.
The NVIDIA Rebuild Array Wizard appears.
Figure 3.16 NVIDIA Rebuild Array Wizard
48
NVIDIA RAID User’s Guide – Version 2.0 A
CHAPTER 3
Using the NVRAIDMAN Utility
4 Click Next.
The Disk Selection page appears.
Figure 3.17 Disk Selection Page
5 Select the drive that you want to rebuild by clicking it from the list, then click Next.
The Completing the NVIDIA Rebuild Array page appears.
Figure 3.18 Completing the NVIDIA Rebuild Array Wizard Page
NVIDIA Corporation
49
CHAPTER 3
Using the NVRAIDMAN Utility
6 Click Finish.
The array rebuilding starts after a few seconds, and a small pop-up message appears
towards the bottom right corner of the screen as shown in Figure 3.19.
Figure 3.19 Rebuild Bubble Message
When the rebuilding process is finished you will see the pop up box shown inFigure
3.20.
Figure 3.20 Rebuild Finished Bubble Message
During the rebuilding process, the NVIDIA RAID Management utility screen shows the
status under the System Tasks and Details sections.
Figure 3.21 Array Rebuilding Status Detail
50
NVIDIA RAID User’s Guide – Version 2.0 A
CHAPTER 3
Using the NVRAIDMAN Utility
More About Rebuilding Arrays
• Rebuilding Occurs in the Background
The rebuilding process takes some time to complete, and occurs in the background so
as not to affect the performance of the system.
• Rebuilding Applies Only to RAID 1 or RAID 0+1 Arrays
Rebuilding an array works only when using RAID 1 and/or RAID 0+1. Rebuilding does
not apply to RAID 0 and JBOD arrays.
• Rebuilding applies to a degraded fault tolerant array
You can rebuild a degraded mirrored array using any available Free Disk or Dedicated
Disk.
For example, Figure 3.22 shows a mirrored array using two 34.48 GB drives while
having two Free Disks each 55.90 GB large.
Figure 3.22 Free Disks Available for Rebuilding
To use one of these available free disks to rebuild your array, follow the same steps as
explained in “Rebuilding a RAID Array” on page 47, except when prompted to select a
disk, choose one of the two available free disks.
NVIDIA Corporation
51
CHAPTER 3
Using the NVRAIDMAN Utility
Creating RAID Arrays
This section includes examples of using NVRAIDMAN for
• Creating a Striped Array
• Creating a Mirrored Array
• Creating a Stripe Mirroring Array
• Creating a Spanning Array
In these examples, the system is configured with four SATA hard disks.
Creating a Striped Array
NVRAIDMAN can be used to create a striped array from one disk up to the maximum
supported number of disks in the system.
To create a two-disk Striped Array do the following:
1 Go to the system BIOS and make sure that the drives that you want to use are RAID
enabled.
2 Boot to Windows and launch the NVRAIDMAN application.
52
NVIDIA RAID User’s Guide – Version 2.0 A
CHAPTER 3
Using the NVRAIDMAN Utility
3 Create Array and the following screen will appear
Figure 3.23 Create Array Wizard—Welcome Screen
4 :Click Next and the following screen shot will appear:
Figure 3.24 RAID Array Selection Page
NVIDIA Corporation
53
CHAPTER 3
Using the NVRAIDMAN Utility
5 Click the RAID Mode list arrow and select Striping, and leave the “Stripe Size” with its
default value as shown in the following screen shot:
Figure 3.25 RAID Array Selection—Striping
6 Click Next, and the following screen shot will appear:
Figure 3.26 Free Disk Selection Page
54
NVIDIA RAID User’s Guide – Version 2.0 A
CHAPTER 3
Using the NVRAIDMAN Utility
7 Select the two disks that you want to include in the stripe set.
In this example the upper two disks were selected as shown in Figure 3.27.
Figure 3.27 Free Disk Selection Page—Selecting Disks
To create a striped array with more disks, select additional disks from the list.
8 Click Next and the following screen shot will appear:
Figure 3.28 Completing the NVIDIA Create Array Wizard
NVIDIA Corporation
55
CHAPTER 3
Using the NVRAIDMAN Utility
9 Click Finish and the following screen shot will appear:
Figure 3.29 Stripe RAID Array Created
As you can see from the above screen shot a striped array with two SATA disks has
been created, while the other two disks are allocated as Free Disks.
Similarly, to create an array with three or more disks, simply make sure to add the
number of disks that you want to use in the array during creation.
You can also “extend” the size of an existing striped array but that requires that you
use morphing— the ability to convert from one RAID array to another as described in
“Morphing From One RAID Array to Another” on page 72.
56
NVIDIA RAID User’s Guide – Version 2.0 A
CHAPTER 3
Using the NVRAIDMAN Utility
Creating a Mirrored Array
The NVRAIDMAN application can be used to create a Mirrored Array. By definition, a
mirrored array consists of two drives. Data is written to both drives, and if one drive fails
then data can be recovered from the other drive.
To create a Mirrored Array, do the following:
1 Go to the system BIOS and make sure that the drives that you want to use are RAID
enabled.
2 Boot to Windows and launch the NVRAIDMAN application, then click on Create
Array and the following screen will appear
Figure 3.30 Create Array Wizard—Welcome Screen
NVIDIA Corporation
57
CHAPTER 3
Using the NVRAIDMAN Utility
3 Click Next and the following screen will appear:
Figure 3.31 RAID Array Selection Page
4 Click Next and the following screen will appear:
Figure 3.32 Free Disk Selection Page
58
NVIDIA RAID User’s Guide – Version 2.0 A
CHAPTER 3
Using the NVRAIDMAN Utility
5 Select the two drives that you want to use in the Mirrored array.
In this example the upper two disks were selected as shown in Figure 3.33.
Figure 3.33 Free Disk Selection Page—Selecting Disks
6 Click Next and the following screen shot will appear:
Figure 3.34 Data Disk Selection Page
NVIDIA Corporation
59
CHAPTER 3
Using the NVRAIDMAN Utility
7 If you want to start rebuilding the array right away (copy data from one disk to the
other), select the disk that you wish to preserve.
Do not select a disk if you do not want to rebuild the array at this time.
8 Click Next and the following screen shot appears:
Figure 3.35 Completing the NVIDIA Create Array Wizard Page
9 Click Finish.
If you selected a disk to preserve in step 7, the rebuilding process begins.
Figure 3.36 Mirrored RAID Array Created
A mirrored array has been created, while the other two disks are set to free disks.
60
NVIDIA RAID User’s Guide – Version 2.0 A
CHAPTER 3
Using the NVRAIDMAN Utility
Creating a Stripe Mirroring Array
NVRAIDMAN can be used to create a Stripe Mirroring array which requires at least four
disks to start such an array.
To create a Stripe Mirror Array do the following:
1 Go to the system BIOS and make sure that the drives that you want to use are RAID
enabled.
2 Boot to Windows, launch the NVRAIDMAN application, then click on Create Array
and the following screen will appear
Figure 3.37 Create Array Wizard—Welcome Page
NVIDIA Corporation
61
CHAPTER 3
Using the NVRAIDMAN Utility
3 Click on Next and the following screen will appear:
Figure 3.38 RAID Array Selection
4 Click on “RAID Mode:” and select “Stripe Mirroring” while leaving the Stripe Size set
to its default value as shown in the following screen shot:
Figure 3.39 RAID Array Selection—Stripe Mirroring
62
NVIDIA RAID User’s Guide – Version 2.0 A
CHAPTER 3
Using the NVRAIDMAN Utility
5 Click Next and the following screen will appear:
Figure 3.40 Free Disk Selection Page
6 Select the four drives that you want to use in the Stripe Mirroring array.
In this example all of the drives are selected as shown in the following screen shot:
Figure 3.41 Free Disk Selection Page—Selecting Disks
NVIDIA Corporation
63
CHAPTER 3
Using the NVRAIDMAN Utility
7 Click Next and the following screen shot will eventually appear:
Figure 3.42 Completing the NVIDIA Create Array Wizard Page
8 Click Finish and the following screen shot will appear:
Figure 3.43 RAID Stripe Array Created
A Stripe Mirroring array has been created.
64
NVIDIA RAID User’s Guide – Version 2.0 A
CHAPTER 3
Using the NVRAIDMAN Utility
Creating a Spanning Array
NVRAIDMAN can be used to create a Spanning Array which requires at least one disk to
start such an array.
To create a Spanning Array do the following:
1 Go to the system BIOS and make sure that the drives that you want to use are RAID
enabled.
2 Boot to Windows and launch the NVRAIDMAN application, then click on Create
Array and the following screen will appear
Figure 3.44 Create Array Wizard—Welcome Page
NVIDIA Corporation
65
CHAPTER 3
Using the NVRAIDMAN Utility
3 Click Next and the following screen will appear:
Figure 3.45 RAID Array Selection Page
4 Click the RAID Mode list arrow and select “Spanning” while leaving the Stripe Size set
to its default value as shown in the following screen shot:
Figure 3.46 RAID Array Selection Page—Spanning
66
NVIDIA RAID User’s Guide – Version 2.0 A
CHAPTER 3
Using the NVRAIDMAN Utility
5 Click Next and the following screen shot will appear:
Figure 3.47 Free Disk Selection Page
6 Select the two drives that you want to use in the Spanned array.
In this example the upper two disks were selected as shown in the following screen
shot:
Figure 3.48 Free Disk Selection Page—Selecting Disks
NVIDIA Corporation
67
CHAPTER 3
Using the NVRAIDMAN Utility
7 Click Next and the following screen shot will appear:
Figure 3.49 Completing the NVIDIA Create Array Wizard Page
8 Click Finish and the following screen shot will appear:
Figure 3.50 RAID Spanned Array Created
A Spanned Array has been created.
68
NVIDIA RAID User’s Guide – Version 2.0 A
CHAPTER 3
Using the NVRAIDMAN Utility
Deleting a RAID Array
NVRAIDMAN can be used to delete an Array.
To delete an Array do the following:
1 Launch the NVRAIDMAN application and right click on the RAID array that you want
to delete (assuming that you have a RAID array already created) as shown in the
following screen shot:
Figure 3.51 Selecting “Delete Array” from the Pop Up Menu
The above screen shot shows that there is a Mirrored array that will be deleted.
NVIDIA Corporation
69
CHAPTER 3
Using the NVRAIDMAN Utility
After the “Delete Array...” has been selected, the following screen shot appear:
Figure 3.52 Delete Array Wizard—Welcome Page
2 Click Next and the following screen shot will appear:
Figure 3.53 Completing the NVIDIA Delete Array Wizard Page
70
NVIDIA RAID User’s Guide – Version 2.0 A
CHAPTER 3
Using the NVRAIDMAN Utility
3 Click Finish and the array will be deleted and the following screen shot will appear
showing all the free disks:
Figure 3.54 RAID Array Deleted
A similar process can be applied to delete any array created by NVIDIA RAID.
NVIDIA Corporation
71
CHAPTER 3
Using the NVRAIDMAN Utility
Morphing From One RAID Array to Another
In a traditional RAID environment, when a user wants to change the current state of a
disk or a current array to a new RAID configuration, the process of reconfiguring the new
array involves multiple steps. The user must back up the data, delete the array, re-boot the
PC, and then reconfigure the new array.
NVIDIA RAID allows the end user to change the current state of the disk or array to
another with a one-step process called ʺMorphingʺ. This section describes the NVIDIA
Morphing process and explains how to use Morphing to convert from one RAID array
type to another.
General Morphing Principles
NVIDIA RAID includes extensive support for morphing, a process of converting from one
RAID mode to another RAID mode.
General Requirements and Limitations
• The new array capacity must be equal to or greater than the previous array.
For example, it is possible to morph from a RAID 1 array to a RAID 0 array as long as
the RAID 0 array is the same size as (or larger than) the RAID 1 array.
• You can’t morph
• To or from a JBOD (Spanning) array
• From RAID 1 to RAID 1
• From RAID 0+1 to RAID 1
72
NVIDIA RAID User’s Guide – Version 2.0 A
CHAPTER 3
Using the NVRAIDMAN Utility
Specific Morphing Requirements
The following table lists the disk requirements for a new RAID array for various
morphing combinations.
Table 3.1
RAID Array Disk Requirements for Morphing
From
To
New Array Disk Requirementsi
RAID 0
RAID 0
RAID 0
m>n
Number of disks in the new array must be greater than the original array.
m=2, n=1
RAID 1 array must include two disks, converted from a one disk RAID 0
array.
m >= 2 x n
Number of RAID 0+1 disks must be equal to or greater than twice the
number of RAID 0 disks.
No additional restrictions.
RAID 1
** Not a valid combination **
RAID 0+1
No additional restrictions.
RAID 0
m >= n/2
Number of RAID 0 disks must be equal to or greater than half the number
of RAID 0+1 disks.
** Not a valid combination **
RAID 1
RAID 0+1
RAID 1
RAID 0+1
RAID 1
RAID 0+1
m >= n + 2 ; where m must be an even number of disks.
The new array must include at least two more disks than the original
array, and can include any even number of disks beyond that.
i. m = quantity of disks in the new array. n = quantity of disks in the original array.
NVIDIA Corporation
73
CHAPTER 3
Using the NVRAIDMAN Utility
Morphing Instructions
This sections includes specific instructions for the following RAID morphing
combinations:
• “Morphing from RAID 0 to RAID 0—Adding a Disk to a Stripe Set” on page 74
• “Morphing from RAID 0 (with One Disk) to RAID 1 (with Two Disks)” on page 79
• “Morphing from RAID 0 to RAID 0+1” on page 83
• “Morphing from RAID 1 to RAID 0” on page 88
• “Morphing from RAID 1 to RAID 0+1” on page 92
• “Morphing from RAID 0+1 to RAID 0” on page 97
• “Morphing from RAID 0+1 to RAID 0+1” on page 101
Morphing from RAID 0 to RAID 0—Adding a Disk to a Stripe Set
The following example shows you how to expand a RAID 0 array with two disks to
include an additional disk.
1 Go to the system BIOS and make sure that the drives that you want to use are RAID
enabled.
2 Boot to Windows, launch the NVRAIDMAN application, then follow the steps outlined
in “Creating a Striped Array” on page 52 to create a two disk stripe array.
When that is done, you should see a screen shot similar to the following:
Figure 3.55 RAID Array Created
74
NVIDIA RAID User’s Guide – Version 2.0 A
CHAPTER 3
Using the NVRAIDMAN Utility
Now that a two disk stripe array has been created, you can use the NVRAIDMAN
convert feature to morph the array from a two-disk RAID 0 into a three-disk RAID 0
array.
3 Right click on the newly created striped array (or existing striped array) and a select
“Convert Array...” as shown from the following screen shot:
Figure 3.56 Selecting “Convert Array” from the Pop Up Menu
4 After selecting “Convert Array...” the following screen shot will appear:
Figure 3.57 Convert Array Wizard—Welcome Screen
NVIDIA Corporation
75
CHAPTER 3
Using the NVRAIDMAN Utility
5 Click Next and the following screen shot will appear:
Figure 3.58 RAID Mode Selection Page
6 Click Next and the following screen shot will appear:
Figure 3.59 Free Disk Selection Page
76
NVIDIA RAID User’s Guide – Version 2.0 A
CHAPTER 3
Using the NVRAIDMAN Utility
7 Select the disk (or disks) that you want to add to the existing striped array.
In this example, we are adding one disk (which is the upper disk) to the existing twodisk striped array. So, select the first disk and click Next and the following screen shot
will appear:
Figure 3.60 Completing the NVIDIA Convert Array Wizard Screen
8 Click Finish then click on the newly created three disk striped array and the following
screen shot will appear:
Figure 3.61 New Morphed RAID Array
NVIDIA Corporation
77
CHAPTER 3
Using the NVRAIDMAN Utility
The Morphing Process
As you can see from the screen shot above, a three disk stripe array has been created and
the morphing process has begun. A pop up window similar to the following will appear:
followed by the following pop up window:
It will take some time before the entire process is completed. The time is takes to convert
an array is dependent on several factors such as the speed of the CPU, the size and type of
hard drive being used, the operating system, etc.
More About This Example
In the example above, we started with an identical two-disk (each disk had a size of 34.48
GB) striped array that had a total disk space of 68.95 GB. We then added a 69.25 GB disk to
this array and the newly converted array had a size of 103.43 GB. The reason is that when
creating a striped array with several disks of various size, the disk with the smallest size
will be used as the base stripe disk size for the array. In this example 34.48 GB is the
smallest size common to all three disks. Therefore, if you multiply 34.48 by three, the total
will be 103.43 GB.The remainder of the disk space on the 69.25 GB disk cannot be used in
the newly created array. That is why it is recommended to use identical disks (type and
size) when creating a striped array.
78
NVIDIA RAID User’s Guide – Version 2.0 A
CHAPTER 3
Using the NVRAIDMAN Utility
Morphing from RAID 0 (with One Disk) to RAID 1 (with Two Disks)
The following example shows you how to convert a RAID 0 array with one disk to a RAID
1 array (with two disks)
1 Go to the system BIOS and make sure that the drives that you want to use are RAID
enabled.
2 Boot to Windows, launch the NVRAIDMAN application, then follow the steps outlined
in “Creating a Striped Array” on page 52 with the exception that you need to select one
disk instead of two disks.
When that is done, you should see a screen shot similar to the following:
Figure 3.62 RAID Array Created
3 Click click on Striping and select “Convert Array...” as shown in the following screen
shot:
Figure 3.63 Selecting “Convert Array” from the Pop Up Menu
NVIDIA Corporation
79
CHAPTER 3
Using the NVRAIDMAN Utility
After selecting “Convert Array...” the following screen shot will appear:
Figure 3.64 Convert Array Wizard—Welcome Screen
4 Click Next and the following screen shot will appear:
Figure 3.65 RAID Mode Selection Page
80
NVIDIA RAID User’s Guide – Version 2.0 A
CHAPTER 3
Using the NVRAIDMAN Utility
5 For the “New RAID Mode:” entry select Mirror as shown in the following screen shot:
Figure 3.66 RAID Mode Selection Page—Selecting Mirroring
6 Click Next and the following screen shot will appear:
Figure 3.67 Free Disk Selection Page
NVIDIA Corporation
81
CHAPTER 3
Using the NVRAIDMAN Utility
7 Select one of the disks and click Next, then Finish.
In this example, the WD360GD was chosen as shown in Figure 3.68.
Figure 3.68 New Morphed RAID Array
The Morphing Process
As soon as the new three-disk striped array has been created, a pop up window similar to
the following will appear:
followed by the following pop up window:
It will take some time before the entire process is completed. The time it takes to convert
an array is dependent on several factors such as the speed of the CPU, the size and type of
hard drive being used, the operating system, etc.
82
NVIDIA RAID User’s Guide – Version 2.0 A
CHAPTER 3
Using the NVRAIDMAN Utility
Morphing from RAID 0 to RAID 0+1
The following example shows you how to convert from a RAID 0 array with two disks to
a four disk RAID 0+1 array.
1 Go to the system BIOS and make sure that the drives that you want to use are RAID
enabled.
2 Boot to Windows, launch the NVRAIDMAN application, then follow the steps outlined
in “Creating a Striped Array” on page 52 to create a two-disk striped array.
When that is done, you should see a screen shot similar to the following:
Figure 3.69 RAID Array Created
Now that a two-disk striped array has been created, you can use the NVRAIDMAN
convert feature to morph the array from a two-disk RAID 0 into a four-disk RAID 0+1
array.
NVIDIA Corporation
83
CHAPTER 3
Using the NVRAIDMAN Utility
3 Right click on the newly created striped array (or existing striped array) and a select
“Convert Array...” as shown from the following screen shot:
Figure 3.70 Selecting “Convert Array” from the Pop Up Menu
After selecting “Convert Array...” the following screen shot will appear:
Figure 3.71 Convert Array Wizard—Welcome Screen
84
NVIDIA RAID User’s Guide – Version 2.0 A
CHAPTER 3
Using the NVRAIDMAN Utility
4 Click Next and the following screen shot will appear:
Figure 3.72 RAID Mode Selection Page
5 Change the “New RAID Mode:” to Stripe Mirroring as shown in the following screen
shot:
Figure 3.73 RAID Mode Selection Page—Selecting Stripe Mirroring
NVIDIA Corporation
85
CHAPTER 3
Using the NVRAIDMAN Utility
6 Click Next and the following screen shot will appear:
Figure 3.74 Free Disk Selection Page
7 Select the two disks that you want to add to the new stripe mirror array.
In this example, we are adding two disks (which are both of the upper disks) to the
existing two-disk mirrored array. So, select both disks and click Next and the following
screen shot will appear:
Figure 3.75 Convert Array Wizard—Welcome Screen
86
NVIDIA RAID User’s Guide – Version 2.0 A
CHAPTER 3
Using the NVRAIDMAN Utility
8 Click Finish, then click the newly created four-disk mirrored stripe array and the
following screen shot will appear:
Figure 3.76 New Morphed RAID Array
The Morphing Process
As soon as the new four-disk mirrored stripe array has been created, a pop up window
similar to the following will appear:
followed by the following pop up window:
It will take some time before the entire process is completed. The time it takes to convert
an array is dependent on several factors such as the speed of the CPU, the size and type of
hard drive being used, the operating system, etc.
NVIDIA Corporation
87
CHAPTER 3
Using the NVRAIDMAN Utility
Morphing from RAID 1 to RAID 0
The following example shows you how to convert from a RAID 1 array with two disks to
a RAID 0 array with two disks.
1 Goto the system BIOS and make sure that the drives that you want to use are RAID
enabled.
2 Boot to Windows and launch the NVRAIDMAN application then follow the steps
outlined in “Creating a Mirrored Array” on page 57 to create a two-disk mirror array.
When that is done, you should see a screen shot similar to the following:
Figure 3.77 RAID Array Created
Now that a two disk mirrored array has been created, you can use the NVRAIDMAN
convert feature to morph the array from a two-disk RAID 1 into a two-disk RAID 0
array.
88
NVIDIA RAID User’s Guide – Version 2.0 A
CHAPTER 3
Using the NVRAIDMAN Utility
3 Right click on Mirroring and select “Convert Array...” as shown in the following screen
shot:
Figure 3.78 Selecting “Convert Array” from the Pop Up Menu
4 After selecting “Convert Array...” the following screen shot will appear:
Figure 3.79 Convert Array Wizard—Welcome Screen
NVIDIA Corporation
89
CHAPTER 3
Using the NVRAIDMAN Utility
5 Click Next and the following screen shot will appear:
Figure 3.80 RAID Mode Selection Page
6 Click Next and the following screen shot will appear:
Figure 3.81 Free Disk Selection Page
90
NVIDIA RAID User’s Guide – Version 2.0 A
CHAPTER 3
Using the NVRAIDMAN Utility
7 Click Next, then click Finish to complete the process.
• If you want to convert the existing two-disk mirrored array into a three-disk (or
more) striped array, then you need to select the number of disk(s) that you want to
add to the newly created striped array and click Next.
• In this example, there is no need to select any additional disks since we are simply
convert the existing two-disk mirrored array into a two-disk striped array.
8 Click on Striping and the following screen shot will appear:
Figure 3.82 New Morphed RAID Array
The Morphing Process
As soon as the new array has been created, a pop up window similar to the following will
appear:
It will take some time before the entire process is completed. The time it takes to convert
an array is dependent on several factors such as the speed of the CPU, the size and type of
hard drive being used, the operating system, etc.
NVIDIA Corporation
91
CHAPTER 3
Using the NVRAIDMAN Utility
Morphing from RAID 1 to RAID 0+1
The following example shows you how to convert from a RAID 1 array with two disks to
a RAID 0+1 array with four disks.
1 Goto the system BIOS and make sure that the drives that you want to use are RAID
enabled.
2 Boot to Windows, launch the NVRAIDMAN application, then follow the steps outlined
in “Creating a Mirrored Array” on page 57 to create a two-disk mirrored array. When
that is done, you should see a screen shot similar to the following:
Figure 3.83 RAID Array Created
Now that a two-disk mirrored array has been created, you can use the NVRAIDMAN
convert feature to morph the array from a two-disk RAID 1 into a four-disk RAID 0+1
array.
92
NVIDIA RAID User’s Guide – Version 2.0 A
CHAPTER 3
Using the NVRAIDMAN Utility
3 Right click on Mirroring and select “Convert Array...” as shown in the following screen
shot:
Figure 3.84 Selecting “Convert Array” from the Pop Up Menu
4 After selecting “Convert Array...” the following screen shot will appear:
Figure 3.85 Convert Array Wizard—Welcome Screen
NVIDIA Corporation
93
CHAPTER 3
Using the NVRAIDMAN Utility
5 Click Next and the following screen shot will appear:
Figure 3.86 RAID Mode Selection Page
6 From the “New RAID Mode:” entry select “Stripe Mirroring” as shown in the
following screen shot:
Figure 3.87 RAID Mode Selection Page—Selecting Stripe Mirroring
94
NVIDIA RAID User’s Guide – Version 2.0 A
CHAPTER 3
Using the NVRAIDMAN Utility
7 Click Next and the following screen shot will appear:
Figure 3.88 Free Disk Selection Page
8 Select both of the disks and click Next, then click Finish.
9 Click on Stripe Mirroring and the following screen shot will appear:
Figure 3.89 New Morphed RAID Array
NVIDIA Corporation
95
CHAPTER 3
Using the NVRAIDMAN Utility
The Morphing Process
As soon as the new four-disk mirrored stripe array has been created, a pop up window
similar to the following will appear:
followed by the following pop up window:
It will take some time before the entire process is completed. The time it takes to convert
an array is dependent on several factors such as the speed of the CPU, the size and type of
hard drive being used, the operating system, etc.
96
NVIDIA RAID User’s Guide – Version 2.0 A
CHAPTER 3
Using the NVRAIDMAN Utility
Morphing from RAID 0+1 to RAID 0
The following example shows you how to convert from a RAID 0+1 array with four disks
to a RAID 0 array with four disks.
1 Go to the system BIOS and make sure that the drives that you want to use are RAID
enabled.
2 Boot to Windows, launch the NVRAIDMAN application, then follow the steps outlined
in “Creating a Stripe Mirroring Array” on page 61 to create a four-disk mirrored stripe
array. When that is done, you should see a screen shot similar to the following:
Figure 3.90 RAID Array Created
Now that a four-disk mirrored stripe array has been created, you can use the
NVRAIDMAN convert feature to morph the array from a four-disk RAID 0+1 into a
four-disk RAID 0 array.
NVIDIA Corporation
97
CHAPTER 3
Using the NVRAIDMAN Utility
3 Right click on Stripe Mirroring and select “Convert Array...” as shown in the following
screen shot:
Figure 3.91 Selecting “Convert Array” from the Pop Up Menu
4 After selecting “Convert Array...” the following screen shot will appear:
Figure 3.92 Convert Array Wizard—Welcome Screen
98
NVIDIA RAID User’s Guide – Version 2.0 A
CHAPTER 3
Using the NVRAIDMAN Utility
5 Click Next and the following screen shot will appear:
Figure 3.93 RAID Mode Selection Page
6 From the “New RAID Mode:” entry select “Striping” as shown in the following screen
shot:
Figure 3.94 RAID Array Selection Page—Selecting Striping
NVIDIA Corporation
99
CHAPTER 3
Using the NVRAIDMAN Utility
7 Click Next, then click Finish.
8 Click on Striping and the following screen shot will appear:
Figure 3.95 New Morphed RAID Array
The Morphing Process
As soon as the new four-disk striped array has been created, a pop up window similar to
the following will appear:
It will take some time before the entire process is completed. The time it takes to convert
an array is dependent on several factors such as the speed of the CPU, the size and type of
hard drive being used, the operating system, etc.
100
NVIDIA RAID User’s Guide – Version 2.0 A
CHAPTER 3
Using the NVRAIDMAN Utility
Morphing from RAID 0+1 to RAID 0+1
The following example shows you how to convert from a RAID 0+1 array with four disks
to a RAID 0+1 array with six disks.
Note: To Morph from a RAID 0+1 array with four disks to a RAID 0+1 array with six
disks, you must have at least six hard drives in the system. In this example, the
system has six free RAID enabled disks.
1 Goto the system BIOS and make sure that the drives that you want to use are RAID
enabled.
2 Boot to Windows, launch the NVRAIDMAN application, then follow the steps outlined
in “Creating a Stripe Mirroring Array” on page 61 to create a four-disk mirrored stripe
array.
When that is done, you should see a screen shot similar to the following:
Figure 3.96 RAID Array Created
Now that a four-disk stripe mirror array has been created, you can use the
NVRAIDMAN convert feature to morph the array from a four-disk RAID 0+1 into a
six-disk RAID 0+1 array.
NVIDIA Corporation
101
CHAPTER 3
Using the NVRAIDMAN Utility
3 Right click on Stripe Mirroring and select “Convert Array...” as shown in the following
screen shot:
Figure 3.97 Selecting “Convert Array” from the Pop Up Menu
4 After selecting “Convert Array...” the following screen shot will appear:
Figure 3.98 Convert Array Wizard—Welcome Screen
102
NVIDIA RAID User’s Guide – Version 2.0 A
CHAPTER 3
Using the NVRAIDMAN Utility
5 Click Next and the following screen shot will appear:
Figure 3.99 RAID Mode Selection Page
6 From the “New RAID Mode:” entry select “Stripe Mirror”, then click Next and the
following screen shot will appear:
Figure 3.100 Free Disk Selection Page
7 Select the disks that you want to Morph (in increments of two), then click Next and
Finish.
NVIDIA Corporation
103
CHAPTER 3
Using the NVRAIDMAN Utility
Hot Plug Array
With respect to RAID, hot plugging is the ability to add a disk to a system safely and
without causing problems for the RAID software. For example, when a drive in a
mirrored array fails, the user can launch the Hot Plug Array Wizard which instructs the
user as to when a drive can be safely added to the system. As soon as the drive is added,
the user can then finish running the RAID wizard and the drive becomes usable by the
system. Hot Plug Array allows the user to add or remove an entire array without
degrading the array in the process.
NVRAIDMAN can be used to hot plug a RAID disk. To hot plug a disk, simply do the
following:
1 Launch NVRAIDMAN and click on “Hot Plug Array” and the following screen shot
will appear:
Figure 3.101 NVIDIA Hot Plug Array Wizard—Welcome Screen
104
NVIDIA RAID User’s Guide – Version 2.0 A
CHAPTER 3
Using the NVRAIDMAN Utility
2 Click Next and the following screen shot will appear:
Figure 3.102 Hard Disk Insertion Screen
3 Connect the RAID disk that you want to use with any given RAID array.
4 Click Next and the following screen shot will appear:
Figure 3.103 Completing the NVIDIA Hot Plug Array Wizard Page
5 Click Finish.
NVIDIA Corporation
105
CHAPTER 3
Using the NVRAIDMAN Utility
106
NVIDIA RAID User’s Guide – Version 2.0 A
C
H A P T E R
NVIDIA RAID FREQUENTLY ASKED
QUESTIONS
The FAQ in this chapter are organized by the following categories:
• “Basic RAID Questions” on page 107
• “RAID ROM Setup Questions” on page 109
• “Rebuilding Arrays Questions” on page 109
• “Dedicated Disk Questions” on page 110
• “Windows RAID Application” on page 110
Basic RAID Questions
• What is RAID?
RAID stands for Redundant Array of Independent Disks, and refers to the grouping of 2 or
more disk drives that the system views as a single drive. Different groupings have
difference advantages that include better performance and data fault tolerance.
See “About NVIDIA RAID” on page 1 for detailed descriptions of the different types
of RAID arrays.
• What type of RAID array is right for me?
In general, for better throughput of non-critical data, use RAID 0; for fault tolerance,
use RAID1, and for better throughput as well as fault tolerance use RAID 0+1.
See “About NVIDIA RAID” on page 1 for detailed descriptions of the different types
of RAID arrays.
NVIDIA Corporation
107
CHAPTER 4
NVIDIA RAID Frequently Asked Questions
• What is the difference between a bootable and a non-bootable RAID array?
A system with a non-bootable RAID array includes a separate hard disk that contains
the OS and is not part of the RAID array.
See “Non-Bootable RAID Array” on page 9 for more information.
In a bootable RAID array, the OS is installed on the RAID array disks.
See “Bootable RAID Array” on page 9 for more information.
• I just configured a RAID 1 array—why is the array size one-half the total cumulative
size of the drives?
RAID 1 uses one-half the total disk space for data redundancy.
See “RAID 1” on page 4 for more information on RAID1 arrays.
• What is the optimal hard drive configuration for RAID 1 (mirror)?
In a mirrored array, a mirror is created using the maximum drive size of the smaller of
the two drives. Ideal configuration is achieved using drives of identical size.
• How do I configure a multiple array system?
Two different arrays can be configured and active at the same time. For example, a
mirrored array with two hard drives, as well as a striped array using three hard drives
can exist at the same time. You need to configure each array separately in the RAID
BIOS as well as initialize the arrays in Windows as described in “Setting Up Your RAID
Configuration” on page 9.
• Why is the cumulative size of a RAID 0 (Stripe) or RAID 0+1 (Stripe-Mirror) not equal
to the sum of the drives?
The drive size is controlled by stripe blocks. If you have mis-matched drive sizes, the
size of the array is approximately the size of the smaller drive multiplied by two. This is
done because there must be corresponding data locations between the drives in the
array. Any space beyond the corresponding points is not usable.
• Why can I not get into Windows after adding a non-bootable array?
Possible cause would be adding the boot drive to the array and then clearing the array.
108
NVIDIA RAID User’s Guide – Version 2.0 A
CHAPTER 4
NVIDIA RAID Frequently Asked Questions
RAID ROM Setup Questions
• Why can I not get into the RAID ROM Setup?
You must enable RAID functionality in the system BIOS as explained in “Setting Up
the BIOS” on page 11.
• Why do my hard drives not appear in the RAID ROM Setup?
From the RAID Config window, you must enable RAID and then enable the disks that
you want to use as RAID disks. See “Setting Up the BIOS” on page 11 for more
information.
• What is the Optimal Striping Block Size in the RAID ROM Setup?
The default optimal striping block size is 64KB. NVIDIA recommends using the
optimal block size.
• What does BBS stand for in the RAID ROM [F10] setup?
BBS stands for BIOS Boot Specification. This indicates that the boot device is defined in
the BIOS.
• What does “Clear Disk” mean in the RAID ROM Setup?
Clear Disk clears the MBR (Master Boot Record). This is needed to prevent invalid data
from appearing in the MBR space on any of the drives included in the array. Not doing
so could render the system unstable.
Rebuilding Arrays Questions
• Why does the RAID rebuilding process take so long to complete?
In the rebuilding process, all data is copied from one hard drive to another and then the
data is synchronized between the two hard drives. Because the rebuilding process
occurs in the background in a way that does not affect system performance, the process
can be very slow.
See “Rebuilding a RAID Mirrored Array” on page 47 for more information.
NVIDIA Corporation
109
CHAPTER 4
NVIDIA RAID Frequently Asked Questions
Dedicated Disk Questions
• Can I assign a dedicated disk to a striped array/JBOD or use a free disk with striped
array/JBOD?
No, free disks and dedicated disks can be only used with a mirrored array or a stripedmirrored array.
• Once a dedicated disk has been assigned to a RAID 1 or RAID 0+1 array can I remove
it?
Yes, a dedicated disk can be removed from a RAID 1 or a RAID 0+1 array.
Windows RAID Application
• What functions can be performed using the NVRAIDMAN application?
The following tasks can be performed:
• View information about RAID 0, 1, 0+1 and JBOD (as well as any supported
configuration if you have more than one RAID array active)
• Assign a dedicated disk to RAID 1 and RAID 0+1
• Remove a dedicated disk from a RAID 1 or RAID 0+1 array
• View Free Disks
• Rebuild a RAID 1 or RAID 0+1 array
• View the status of the rebuilding process
• Create a RAID Array
• Delete a RAID Array
• Morph/Convert RAID Arrays
• Hot Plug Array
110
NVIDIA RAID User’s Guide – Version 2.0 A
C
H A P T E R
NVIDIA RAID APPLICATION NOTES
This chapter includes several application notes that address specific issues that may be
encountered when trying to install the NVIDIA RAID software or other software required
to run NVIDIA RAID.
• “Installing NVIDIA RAID on a New Windows XP Operating System” on page 112
describes how to create a floppy disk to install NVIDIA RAID on a fresh Windows
operating system.
• “Windows 2000 Limitation with Bootable RAID” on page 113
describes how to create a bootable RAID volume with Windows 2000 via the morphing
method.
• “Installing the NVIDIA IDE Driver in Windows 2000” on page 115
describes how to install Windows 2000 Service Pack 4, which required for installing the
NVIDAI IDE driver.
• “Using GHOST with NVIDIA RAID” on page 116
describes how to use disk cloning software with a RAID array.
NVIDIA Corporation
111
CHAPTER 5
NVIDIA RAID Application Notes
Installing NVIDIA RAID on a New Windows XP Operating
System
Problem
To install NVIDIA® RAID technology on a new Windows XP operating system, a floppy
disk with the NVIDIA IDE drivers must be created to enable installation of NVIDIA
RAID.
Solution
To create the NVIDIA IDE drivers floppy disk, the end user must:
1 Copy these files from the NVIDIA nForce™ driver directory (IDE/WinXP or
Win2K) onto a formatted floppy disk:
• Disk1
• Txtsetup.oem
• Nvraid.sys
• NvAtaBus.sys
2 Go into the BIOS setup menu and enable RAID
a In the BIOS menu, specify which disks should be dedicated to RAID
b Exit the BIOS menu and reboot
3 At the RAID ROM screen, press F10 to enter RAID setup
a Create a RAID array and add disks to it
b Select “Yes” when asked to clear disk data
c Reboot system
4 Select F6 when prompted
5 Install the NVIDIA RAID drivers created on the floppy disk.
Select both the RAID and IDE drivers from the floppy to enable RAID functionality.
6 Continue with the driver installation process
112
NVIDIA RAID User’s Guide – Version 2.0 A
CHAPTER 5
NVIDIA RAID Application Notes
Windows 2000 Limitation with Bootable RAID
Problem
In Windows 2000 (Service Pack 2 or previous versions), the end user cannot install this
operating system to a bootable RAID volume.
Solution
There are two solutions to resolve this issue, described as follows:
Use the NVRAIDMAN Tool
Use the NVRAID Tool (nForce Driver Version 5.xx) to convert the boot volume to a RAID
array. The following are step by step instructions:
1 Install Windows 2000 on a selected hard drive.
2 Download and install Windows 2000 Service Pack 4 from Microsoft’s website.
3 Reboot the system
4 Press the DEL key as the system is rebooting to enter into the system BIOS.
5 Select Integrated Peripherals menu.
6 Select the RAID Config menu.
7 Enable RAID for the selected drive (the one containing the Windows 2000 operating
system).
8 Press F10 to exit and save settings in the system BIOS.
This action reboots the System.
9 Press F10 as the system is rebooting to go into the RAID ROM.
The system directs you into the NVIDIA RAID Utility.
10 Select Striping under RAID Mode.
11 Press TAB to go into the Free Disk menu.
12 Use the Right Arrow key to add the desired disk.
NVIDIA Corporation
113
CHAPTER 5
NVIDIA RAID Application Notes
13 Press F7 to finish.
14 Select N (NO) when asked to Clear Disk Data.
15 Press Ctrl-X to exit.
The system reboots into Windows 2000.
16 Install the NVIDIA nForce Driver Package while in Windows 2000.
17 Reboot the system.
18 Go to START>Programs>Nvidia Corporation and select NVRAID Manager.
You should see the single disk RAID array (in striping mode) that was created from the
boot disk.
19 Select the single boot disk RAID Array by clicking on it.
20 Select Convert Array under the System Tasks.
The Convert Array wizard is displayed.
21 Select Next.
22 Select the desired type of RAID array you want to convert.
23 Select Next.
You are prompted to select the desired Free Disk(s) to add to the bootable RAID array.
24 Click Finish.
At this point, NVRAID starts converting the single disk RAID array into a multi-disk
RAID array in a bootable format.
Note: Conversion may take 1–2 hours depending on disk size.
Create a Combination CD
The user must create a combination installation CD that includes Windows 2000 and SP3
or SP4 fixes integrated in. To create the combination installation CD, refer to the following
website:
http://www.microsoft.com/windows2000/downloads/servicepacks/sp4/HFdeploy.htm
Note: If the end user chooses not to install Windows 2000 Service Pack 3 or 4, RAID is still
supported on Windows 2000. However, the end user will not be able to create a
bootable RAID volume.
114
NVIDIA RAID User’s Guide – Version 2.0 A
CHAPTER 5
NVIDIA RAID Application Notes
Installing the NVIDIA IDE Driver in Windows 2000
Problem
In Windows 2000 (Service Pack 2 or previous versions), the end user cannot install the
NVIDIA IDE Driver without upgrading Windows 2000 with Service Pack 4.
Solution
In order to upgrade Windows 2000 with Service Pack 4:
1 Install Windows 2000 on a selected hard drive.
2 Download and install Windows 2000 Service Pack 4 from the Microsoft website.
3 Reboot the system.
4 When in Windows 2000, install the NVIDIA nForce Driver Package
The user will have an option to install the NVIDIA IDE driver during the installation
process.
5 Reboot the system.
NVIDIA Corporation
115
CHAPTER 5
NVIDIA RAID Application Notes
Using GHOST with NVIDIA RAID
Problem
GHOST can interface with hard disk controllers by accessing the appropriate memory and
hardware locations directly. However, in doing so, this can bypass the RAID
enhancements that are provided by the system BIOS. The system BIOS understands the
underlying disk and RAID array structures and formats. In order to properly use GHOST
to interact with a RAID volume, the user should ensure that the tool is operating in a
mode where it does not talk directly to the hardware resources, but rather communicates
using the system BIOS.
Solution
In order to use GHOST in a RAID volume, the user must:
• Disable the GHOST Direct Disk Access
• Force it to rely on Extended INT13 to access the disk
To set GHOST to use Extended Interrupt 13h (INT13) access:
a Start GHOST from the DOS prompt. (Not the Windows Command Prompt session)
b Select the “Options” (ALT+O) menu
c Scroll to the “HDD Access” Tab
d Select the “Use Extended Interrupt 13h disk access” (ALT+E)
e Select the “Disable direct IDE access support” (ALT+B)
f Select the “Disable direct ASPI/SCSI access support” (ALT+B)
g Press (ALT+A) to activate the “Accept” button to use the new settings
h Proceed to run GHOST as normal
These steps will then allow the user to use GHOST to copy the disk image through the
RAID array.
Note: Typically, disk cloning software accelerates data transfer through direct disk access,
which also allows for overlapping read and write calls, further accelerating the
process. Because INT13 calls cannot “overlap”, read and write operations must be
performed in series, which causes the disk cloning process to perform slower when
RAID is enabled.
116
NVIDIA RAID User’s Guide – Version 2.0 A