1
VirtualClassTM
Version 5.0
Windows 2000/XP
User’s Manual
Copyright Notice
No part of this publication may be copied, transmitted, stored in a retrieval system, or translated into any
language in any form or by any means without the expressed written permission of FarStone Technology, Inc.
FarStone grants you the right to use one copy of the enclosed software program ("SOFTWARE") on a single
computer. If the SOFTWARE is installed on a network, or more than one user can run the SOFTWARE at the
same time, you must purchase an additional license for each additional user or computer.
Trademarks
FarStone™ and VirtualClass™ are trademarks of FarStone Technology, Inc. Microsoft®, Windows® and
MS-DOS® are registered trademarks of Microsoft Corporation. Other product names mentioned in this User’s
Guide might be trademarks or registered trademarks of their respective companies.
FarStone Technology, Inc.
6 Morgan., Suite 160,
Irvine, CA 92618
Phone: (949) 458-3666
Fax: (949) 458-3633
Technical Support:
Please contact your retailer or use our online support system at www.farstone.com.
For your convenience, you will find answers to frequently asked questions on our website at www.farstone.com.
Follow the links to the support section: http://www.farstone.com/home/en/shtml/contactus.shtml
Copyright© 2002-2006 FarStone Technology, Inc. All rights reserved.
2
Contents
CHAPTER 1 INTRODUCTION TO VIRTUALCLASS................................................................................................. 6
1-1 WHAT IS VIRTUALCLASS? ........................................................................................................................................... 6
1-2 GLOSSARY ................................................................................................................................................................... 6
1-3 MAIN FEATURES .......................................................................................................................................................... 6
1-3.1 teaching function ................................................................................................................................................. 6
1-3.2 Classroom Management ...................................................................................................................................... 7
CHAPTER 2 INSTALLATION ....................................................................................................................................... 10
2-1 SYSTEM REQUIREMENTS ........................................................................................................................................... 10
2-2 INSTALLING VIRTUALCLASS ..................................................................................................................................... 10
2-2.1 Installing VirtualClass........................................................................................................................................ 10
2-2.2 Silent Setup........................................................................................................................................................ 11
2-2.3 Remote Setup..................................................................................................................................................... 11
2-2.4 Uninstalling VirtualClass ................................................................................................................................... 13
CHAPTER 3 USING VIRTUALCLASS--TEACHER .................................................................................................. 16
3-1 OVERVIEW OF COMMON MENUS OF VIRTUALCLASS TEACHER.................................................................................. 16
3-1.1 Main Interface.................................................................................................................................................... 16
3-1.2 Right-button Menu............................................................................................................................................. 16
3-1.3 Menu Bar ........................................................................................................................................................... 17
3-1.4 Tool Bar ............................................................................................................................................................. 17
3-1.5 VirtualClass Lit Interface................................................................................................................................... 18
3-2 START VIRTUALCLASS TEACHER .............................................................................................................................. 18
3-2.1 Launch VirtualClass Teacher ............................................................................................................................. 18
3-2.2 Hide the Main Interface ..................................................................................................................................... 20
3-2.3 Exit VirtualClass Teacher................................................................................................................................... 20
3-3 TEACHING MANAGEMENT ......................................................................................................................................... 20
3-3.1 Students Management........................................................................................................................................ 20
3-3.2 Save Classroom Layout ..................................................................................................................................... 20
3-3.3 System Preference ............................................................................................................................................. 21
3-4 BROADCAST .............................................................................................................................................................. 21
3-5 MONITOR STUDENT SCREEN ..................................................................................................................................... 22
3-5.1 Monitor .............................................................................................................................................................. 22
3-5.2 Multi-View......................................................................................................................................................... 22
3-6 REFLECT STUDENT SCREEN....................................................................................................................................... 22
3-7 CONTROL STUDENT COMPUTER ................................................................................................................................ 23
3-8 LECTURE ................................................................................................................................................................... 23
3-9 TALK TO STUDENT ..................................................................................................................................................... 24
3-10 SEND MESSAGE TO STUDENT .................................................................................................................................. 24
3-11 TEXT COMMUNICATE IN CHATROOM ....................................................................................................................... 24
3-12 SEND AND RECEIVE FILES ....................................................................................................................................... 25
3-12.1 Distribute File to student.................................................................................................................................. 25
3-12.2 Collect Files from Student ............................................................................................................................... 26
3-13 VIRTUALCLASS E-TABLET ....................................................................................................................................... 26
3-13.1 Open e-Tablet................................................................................................................................................... 27
3-13.2 Use e-Tablet drawing tools .............................................................................................................................. 27
3-14 RAISE HAND ............................................................................................................................................................ 27
3-15 REMOTE POWER ON/OFF......................................................................................................................................... 28
3-16 LOCK/UNLOCK STUDENT COMPUTER ..................................................................................................................... 28
3-16.1 Lock student computer..................................................................................................................................... 28
3-16.2 Unlock Student Computer ............................................................................................................................... 28
3-17 REMOTE RUN APPLICATION ON STUDENT COMPUTER ............................................................................................ 28
3
3-17.1 Edit Applications List ...................................................................................................................................... 29
3-17.2 Remotely Launch Applications Student Computer.......................................................................................... 29
3-18 APPLICATION CONTROL ON STUDENT COMPUTER ................................................................................................... 29
3-18.1 Edit Application Control List........................................................................................................................... 29
3-17.2 Application Control Policy .............................................................................................................................. 30
CHAPTER 4
USING VIRTUALCLASS--STUDENT ................................................................................................ 33
4-1 START VIRTUALCLASS--STUDENT AND STUDENT MENU .......................................................................................... 33
4-1.1 Start VirtualClass ............................................................................................................................................... 33
4-1.2 Student Menu..................................................................................................................................................... 33
4-2 RAISE HAND .............................................................................................................................................................. 34
4-3 SEND MESSAGE ......................................................................................................................................................... 34
4-4 SELECT A CLASSROOM .............................................................................................................................................. 34
4-5 MANUAL LOGON ....................................................................................................................................................... 34
4-6 VIEW RECEIVED FILES .............................................................................................................................................. 35
4-7 RECEIVE AND REPLY TO A MESSAGE ......................................................................................................................... 35
4-8 EXIT CLASSROOM...................................................................................................................................................... 36
CHAPTER 5 VIRTUALCLASS NETMOVIE ............................................................................................................... 38
5-1 VIRTUALCLASS NETMOVIE - INTRODUCTION ........................................................................................................... 38
5-2 NETMOVIE MANAGER - TEACHER ............................................................................................................................ 38
5-2.1 Activate NetMovie............................................................................................................................................. 38
5-2.2 Using NetMovie Manager ................................................................................................................................. 38
5-3 NETMOVIE - STUDENT .............................................................................................................................................. 41
CHAPTER 6 VIRTUALCLASS KEYPAD..................................................................................................................... 43
6-1 VIRTUALCLASS KEYPAD INTRODUCTION .................................................................................................................. 43
6-2 INSTALL VIRTUALCLASS KEYPAD ............................................................................................................................. 43
6-3 VIRTUALCLASS KEYPAD FUNCTIONS ......................................................................................................................... 43
CHAPTER 7 NETWORK TEST ............................................................................................................................................ 46
CHAPTER 8 APPENDIX........................................................................................................................................... 48
8-1 FREQUENTLY ASKED QUESTIONS (FAQ) ................................................................................................................... 48
8-2 LICENSE AGREEMENT................................................................................................................................................ 51
8-3 TECHNOLOGY SUPPORT AND PRODUCT UPDATE ....................................................................................................... 52
4
Chapter 1
Introduction
5
Chapter 1 Introduction to VirtualClass
1-1 What is VirtualClass?
VirtualClass 5.0 is a real-time, interactive multimedia broadcast system that emulates a classroom situation
over a network. It incorporates a revolutionary design combining hardware and software to establish a more
efficient and stable framework for education.
VirtualClass offers teachers a highly effective and versatile tool that enables them to fully achieve the potential
of multimedia teaching and learning. An external keypad makes class management much easier and enhances
the operation of VirtualClass by providing direct access to its primary functions.
VirtualClass handles all of the teaching needs in a classroom: a teacher can monitor, broadcast, control, or shut
down specific student workstations or for an entire computer lab simply by clicking the buttons on the
VirtualClass keypad.
1-2 Glossary
Student Number
The student number is assigned based on the order that the student is logged in. For example, if four students
have already logged in to VirtualClass, the next student to log in will be assigned Student Number 5. The
Student Number is set only after logging into the class for the first time. If VirtualClass is reinstalled, the
student number will be redefined according to the new login sequence.
Student Name
The name of the student’s computer.
Teacher Name
The name of the teacher’s computer.
Classroom ID
When VirtualClass Teacher is launched for the first time, there will be a pop-up window for you to select which
classroom you would like to enter. The number you select will be the classroom number.
Student List
A file used for saving the information of all students who previously logged in to a specific classroom. The default
path for saving the file is: %WindowsDire (Windows system location, e.g. C:) % \Program
Files\FarStone\VirtualClass\vclass.vcm. If you back up this file during the VirtualClass uninstallation process,
the student list will be restored when the program is reinstalled.
Classroom Layout
The seat sequence of the students in the classroom. VirtualClass automatically saves the classroom layout
when the teacher changes the student seat. The correspondence between student name and seat position
will not be changed the next time when they loglog in. It canwill only be refreshed upon the reinstallation
of the program.
1-3 Main Features
1-3.1 teaching function
z Monitor
Enables the teacher to view the current screen of a specific student’s computer. The teacher can monitor a
single student’s computer or the computers of all students in succession.
z Broadcast
6
Enables the teacher to broadcast what is displayed on his/her screen, or what is displayed on a model
student’s screen, to all students logged in to the class.
z Control
Enables the teacher to take full control of a specific student’s computer. You can remotely run the keyboard,
mouse and applications on a student’s computer.
z Application Control
Enables the teacher to manage the student’s right to run certain applications. The teacher can configure an
application control list and then enable the approved list or the restricted list.
z Internet Control
Enables the teacher to manage the student’s right to visit certain webpage. Teachers can restrict student from
visiting specified websites, allow them to visit approved websites only, or completely disable the Internet
access on student computers.
z NetMovie
NetMovie provides a convenient way of managing and running multimedia files on CD, hard disk or a local
network from within VirtualClass.
z Distribute File
Enables the teacher to distribute files, pictures or applications needed in teaching to a specified student or all
students in the class.
z Collect File
Enables the teacher to collect students’ work into his/her own computer for checking.
z Chatroom
Chatroom provides an environment for the teacher and students to discuss and interact. The teacher can
invite a certain student in to or drop him out of the chatroom.
z Send Message
The teacher can send a message to a specified student or to all students simultaneously. He/She can enable
or disable the students’ ability to send a message back.
z Raise Hand
Students can “raise their hand” to call the teacher’s attention when he/she wants to ask a question. The
teacher can enable or disable this function on the student’s computer.
z e-Tablet
Enables the teacher to highlight important areas of the screen to be broadcast.
z Lock
Enables the teacher to lock a single student’s computer or the computers of all students.
z Power On/Off Student Computer
Enables the teacher to power on/off student’s computer.
z Voice Broadcast
Enables the teacher to broadcast a voice message from either student or teacher to the class. This function
can be enabled or disabled in the VirtualClass configuration.
z Esc
Enables the teacher to cancel the current process.
pressing Esc will stop the broadcasting.
1-3.2 Classroom Management
7
For example, if the user is currently broadcasting,
z Select a classroom
Enables the teacher to select another classroom when the application is running. And the teacher can allow a
specific student or all students to select a classroom.
zSave Classroom Layout
This function enables the teacher to configure each student’s position in accordance with the actual seat in the
classroom. It automatically saves the classroom layout when you drag a student to another position.
zSet functions of student’s computer
Enables the teacher to set the functional ability of a student’s computer. For example, he/she can enable or disable
students’ ability to raise their hand or exit the classroom.
z Live Update
When a new version of VirtualClass is released, the teacher can update the application with the configured
upgrading package sent by FarStone. Then the application on the student’s computer would be upgraded
automatically the next time he/she logs in.
z Student logon
The student can log on in two ways: auto logon or manually logon by selecting a classroom.
z Set Teacher Computer’s IP address
When the teacher computer has more than one IP address, he/she can select one as the bundled IP address.
8
Chapter 2
Installation
9
Chapter 2 Installation
2-1 System Requirements
Teacher Computer
VirtualClass keypad (optional)
Microsoft Windows 2000/XP
450 MHz Pentium III processor (or compatible) or better
30 MB of free hard disk drive
24X CD-ROM
256 MB of RAM
Microsoft Internet Explorer 4.0 or higher
10/100Mbps Network Adaptor
TCP/IP Internet Protocol
(Optional) Multimedia System: sound adapter, microphone and earphone
Student Computer
Microsoft Windows 2000/XPr
433 MHz Celeron processor (or compatible) or better
20 MB of free hard disk space
64 MB of RAM
24X CD-ROM
10/100Mbps Network Adaptor
TCP/IP Internet Protocol
Microsoft Internet Explorer 5.5 or higher
(Optional) Multimedia system: sound adapter, microphone and earphone.
Notice: When operating on a Windows NT4 system, it is suggested to install VirtualClass under Service Pack 6.
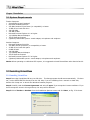
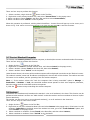
2-2 Installing VirtualClass
2-2.1 Installing VirtualClass
Step 1 Insert the VirtualClass CD into your CD drive. The Setup program should start automatically. If it does
not, run the SETUP.EXE file directly from the CD. Also, if you are installing from a network or hard disk,
double-click 'setup.exe' to launch the Windows Installer program.
Step 2 Carefully read the License Agreement and select 'I agree' if you accept the License conditions. If you
do not accept the terms in this agreement, the setup will be aborted.
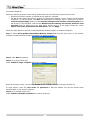
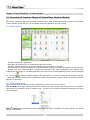
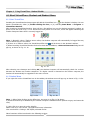
Step 3 Select Teacher or Student from the Installation Options screen and click Next, as Fig. 2-2b shows.
10
Fig. 2-2b
Step 4 Enter your required information, as Fig. 2-2a shows.
Fig. 2-2a
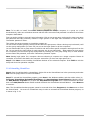
Step 5 Enter a location for VirtualClass to load its program files.
Step 6 Click Next to confirm the selections and to start installing VirtualClass on your computer.
Step 7 Click Finish to end the installation of the VirtualClass program files. After the installation is complete,
you can launch VirtualClass and/or show the Readme file by selecting the appropriate checkboxes, as Fig. 2-2c
shows.
Fig. 2-2c
2-2.2 Silent Setup
With the silent installation feature, the network administrator can install this software onto all of the systems
through a command line. VirtualClass will install on its own, without any end-user intervention.
The default installation path is: %WindowsDir%(Windows system location, e.g. C: )\Program
Files\FarStone\VirtualClass.
If you would like to install the teacher portion silently, please insert the VirtualClass CD into your CD drive (e.g.
E: ) first. Then select Start->Run and type ”E:\setup.exe /s /t” and press enter to start the installation.
If you wish to install the student portion silently, please insert the VirtualClass CD into your CD drive (e.g. E:),
then select Start->Run and type “E:\setup.exe /s /s” and press enter to start the installation.
2-2.3 Remote Setup
VirtaulClass Remote Setup feature provides a continuing easy way for the teacher to deploy the client program
11
on student computers.
Before the teacher performs remote setup, please make sure the following requirements are met:
• VirtualClass Teacher program is installed on the teacher’s computer.
• The Net access: sharing and security module in Local Security Settings is set to “Classic” on the student
computers. (To set this option, click Run from Start Menu on windows, type in “secpol.msc” to launch
Local Security Settings window. Locate Security Settings>Local Policies> Security Option from
the directory in the left panel. Find the item Network access: sharing and security model for local
accounts from the policy list in the right panel, double click it. In the popup dialog box, select
Classic-local users authenticate as themselves, and click Apply.
Follow the steps below to remotely install VirtualClass Student program on student computers.
Step 1. Select All Programs>VirtualClass>Remote Install Tool from the start menu on the teacher
computer. FarStone Remote Install Tool should run (shown as below).
Step 2. Click Next to continue.
Step 3. (For single setup only)
Select Install to single computer tab (shown as below).
Enter the computer name. You can click Browse button to locate from the local area network list.
In Login options, enter the user name and password so that the installer can get the remote setup
authentication on the student computer.
Step 4. (For multiple setups only)
Select Install to multiple computers tab (shown as below).
12
Note: To be able to install VirtualClass Student program on multiple computer in a group on a LAN
simultaneously, make sure a Windows account with the same user name and password is created on all of these
computers beforehand.
First you need to configure a group’s login information. Click on one group name, and enter the same user name
and password that was previously created in Login options on the right side. Remember to check the box
“Remember password” below.
Then select the target computer to install the program on.
You can choose a whole group by clicking the box before the group name. When a whole group is selected, it will
use the group configuration you have set just now as the login option for all the computers.
You can also double click a group name to unfold it and select some specific computers among them from the
list. You can specify the login option for each computer one by one individually. When setting the login option
for a computer, you can use the group configuration by checking the “Use group config” box, or enter another
account name and password, and check “Remember password” option.
Note: Setting login option for a computer does not selecting it computer as a target computer. Please do
remember to check the box before the computer name after you have set login option for it.
Step 5. Click Next to start installing VirtualClass Student on the selected computer. Click Finish to exit the
setup tool when the operation complete.
2-2.4 Uninstalling VirtualClass
Step 1 Close VirtualClass before uninstalling it. Right-click on the VirtualClass icon in the system tray and select
Exit from the popup menu to close VirtualClass.
Step 2 To uninstall the VirtualClass program, press Start in the Windows taskbar, and then either select (a)
Programs/ VirtualClass/Uninstall VirtualClass or (b) Start/Settings/ Control Panel and double-click on
the Add/Remove Programs icon to open the Add/Remove Programs menu. Select VirtualClass and then
click on the Add/Remove button. Either method will launch the VirtualClass Uninstall Wizard. Select Remove
to continue.
Note: The VirtualClass Student program cannot be removed either from Programs in the Start menu or from
the Control Panel. You must run VirtualClass setup in order to uninstall the VirtualClass Student program, as
is shown in fig. 2-3a.
13
Fig. 2-3a
Step 3 Click Next in Fig. 2-3a. A message will display asking the user if he/she would like to keep the student
list. If yes, the student list will remain the same next time VirtualClass is installed on the computer.
Step 4 Selecting either Yes or No will start the uninstallation process. After successfully removing VirtualClass
from your computer, click OK.
14
Chapter 3
Using
VirtualClass Teacher
Module
15
Chapter 3 Using VirtualClass—Teacher Module
3-1 Overview of Common Menus of VirtualClass Teacher Module
This section introduces the main interface, common menus, bars, buttons and quick-keys on the VirtualClass
Teacher Module so that the user can be familiar with this application and use it easily.
3-1.1 Main Interface
Fig. 3-1a
Title Bar: Name of the application.
Menu Bar: All functions can be accessed through these menus.
Tool Bar: Common functions can be accessed through the buttons on this bar.
Information area: Shows information of a selected student; displays messages the teacher sent and received.
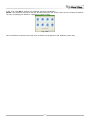
Student icon area: Shows whether a student has enrolled in this class. Highlighted icons indicate those
students who are logged on. The little application icon is the current running application on the student computer.
i.e. The icon
shows the Office program “Microsoft Word” is currently running on this student computer.
Status bar: Lists the total number of students enrolled in this classroom, and the number of students currently
logged in to this class.
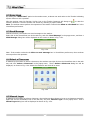
3-1.2 Right-button Menu
There are two different right-click menus, depending on where the arrow key stays.
The 1st case: When right-clicking the mouse in a blank part of the student icon area, the menu is as follows.
The teacher can change the order of student icons. He/She can run common functions through the sub-menu
“To all students”.
The 2nd case: When right-clicking on the student icon, the menu is as follows. The gray indicates you cannot
perform this function.
16
Note: When the Teacher is using the Broadcast, Multi-View, NetMovie, Lecture, Chatroom or Lock
functions on selected student PC(s), right-clicking on any target student icon and then selecting Halt all
operations will stop current operations for all selected student(s), not just the one that was right-clicked on.
3-1.3 Menu Bar
In the menu bar, the following sub-menus are included:
Manage: (see detailed introduction in a later chapter)
Teach: (see detailed introduction in a later chapter)
View: Selecting appropriate items, you can show/hide the tool bar, status bar and information area. You can
also change the display of student icons.
Help: Entries for registration, entering serial number to upgrade an evaluation version to full version, version,
“Online help” and “About” (version, copyright, and license information, etc.)
3-1.4 Tool Bar
Buttons in this bar enable the teacher to perform some common functions.
:Single-click it to broadcast the teacher’s screen and voice message to a student or students.
: Single-click it to play and broadcast digital media such as video clips, VCDs or MP3s to students’
computers.
: Single-click it to view a selected student’s screen.
: Single-click it to broadcast a student's screen to others.
: Single-click it to control a student’s computer remotely.
: Single-click it to display multiple students’ screens.
: Single-click it to broadcast the teacher's voice message to student(s).
17
: Single-click it to chat with a selected student.
: Single-click it to send a text message to student(s)
: Single-click it to communicate with specified student(s) in text.
: Single-click it to stop the current operation. This function is somewhat like the ESC button.
: Single-click it to lock a student’s computer.
: Single-click it to unlock a student’s computer.
: Block all Internet access on the all student computers.
: Click the triangle beside it to select a view mode from the dropdown list.
3-1.5 VirtualClass Lit Interface
The lit interface is a floating bar containing some common function buttons. It appears on the upper screen
when the teacher hides the main interface.
The bar is as follows:
Two of these buttons need to be introduced:
E-Tablet: It enables the teacher to highlight important areas of the screen to be broadcast.
Back: Single-click it to go back to the main interface.
3-2 Start VirtualClass Teacher
3-2.1 Launch VirtualClass Teacher Module
Installing the VirtualClass Teacher program will add the VirtualClass icon
to the Teacher's desktop. You can
launch VirtualClass by either (a) double-clicking the icon, or (b) selecting Start Menu -> Program ->
VirtualClass Teacher.
When VirtualClass is started, the teacher will be asked to select an empty classroom to start the class, as shown
18
in Fig. 3-2a. Click OK to confirm your selection and start VirtualClass.
Notice: The classroom selected in the first launching would be the default room until you change the default.
The way of changing the default is explained in a later section.
Fig. 3-2a
Once VirtualClass is started, two small icons as follows will be placed in the Windows system tray.
19
VirtualClass
VirtualClass Live-Update Service
3-2.2 Hide the Main Interface
When the teacher minimizes the main interface, it is hidden, and the lit interface will appear. There are two ways
to turn back to the main interface.
1. Click the “Back” button
on the lit interface bar.
2. Right-click the “VirtualClass” icon
in the Windows system tray, and select “Show” in the popup menu.
3-2.3 Exit VirtualClass Teacher
You can either select Manage -> Exit in the Menu Bar of the main interface, (if in lit interface, turn back to
main interface first) or right-click the “VirtualClass” icon
pop-up menu.
in the Windows system tray, and select “Exit” in the
Note: Even if the VirtualClass Teacher has already exited, the VirtualClass Student application is still running. In
this case, the icon on the student computer will change to
.
3-3 Teaching Management
3-3.1 Students Management
z Rename a student
The teacher can change a student’s name by using one of these two options:
1. Select one student, Manage in Menu Bar, and then select Rename;
2. Select one student, and then press F2 on the keyboard.
Drop a student
The teacher can drop a student out of the class by using one of these two options:
1. Select one student, select Manage -> Drop student;
2. Right-click this icon and select Drop student in the popup menu.
Note: When this function is performed, the dropped student’s icon still exits in the classroom, but in the offline
status.
z
z Delete a student
The teacher can delete a selected student by selecting Manage -> Delete student in the Menu Bar. When this
function is performed, the deleted student’s icon will be deleted from this classroom. It will appear only when he
logs in to this classroom again.
z View a student’s properties
There are two ways to perform this function:
1. Select student(s), click Manage in the Menu Bar, then select Student’s Properties in the popup menu.
2. Right-click on a student icon, and select Student’s Properties in the popup menu.
Note: The teacher can view a selected student’s name, account, computer name, IP address and status. If more
than one student is selected, the teacher can view the number of selected students and online students.
3-3.2 Save Classroom Layout
VirtualClass automatically saves the classroom layout when you change a student’s position through
drag-and-drop. The teacher can change the number of the column according to his/her need.
Right-click on any space in the student icon area and select Classroom Layout to specify the number of the
columns and rows in this classroom.
20
3-3.3 System Preference
Select Manage -> Preference to display the preference dialog, as is shown in Fig. 3-3.2a.
Fig. 3-3.2a
z
Preference—Teacher (Fig 3-3.2a)
Classroom management:
Select a classroom: The teacher can re-select a classroom in this list.
Select a bundled IP address: When there is more than one network adapter and IP address on the teacher
computer, he/she can select one as the default address bundled to the VirtualClass application.
Multi-view:
Screens viewed at a time: The teacher can decide on the number of student screens viewed at a time.
Refresh interval: The teacher can decide to refresh the multi-view on an interval between 5 to 30 seconds.
Other:
The teacher can set the image quality by moving the slide bar.
From left to right, the transfer speed decreases, but image quality increases.
z
Preference – Student (Fig. 3-3.2b)
The teacher can enable/disable the student’s ability to perform certain operations, or remotely set the
configuration of student computers by properly selecting the checkboxes, as shown in Fig. 3-3.2b
Fig. 3-3.2b
3-4 Broadcast
Screen broadcast mode broadcasts exactly what is displayed on the Teacher’s screen to all students logged on
for the Class.
Note: 1) When the “Lock the computers that are receiving broadcasts” option is selected in the
Preference--Student dialog (Fig 3-3.2b), the students’ controls are disabled while this mode is active.
21
2) While the broadcasting mode is active, the main interface will turn into the lit interface automatically.
3) The teacher can broadcast to a selected student or to all students in the classroom.
After student(s) is/are selected (if none are selected, the default is all students), there are four ways to activate
this mode:
1. Single-click the
icon in the Tool Bar;
2. Right-click on one of the selected student icons and select Broadcast in the popup menu; if broadcasting to all
students, right-click on the blank space of the student icon area, go to “To all students” option, and select
Broadcast in the popup menu.
3. Select a student/students, then select Teach in the Menu Bar, and choose Broadcast in the dropdown menu;
4. To select a student/students, simply press “Ctrl+B” on the keyboard.
3-5 Monitor Student Screen
VirtualClass provides a monitoring mode for the teacher to know exactly what the students are doing. The
teacher can even take full control of a student computer if needed. There are two modes: Monitor and
Multi-View.
3-5.1 Monitor
It is a one-one-view mode. The teacher can monitor a selected student. When this mode is activated, the selected
student’s screen is shown in a window on the teacher’s computer. The title of the monitoring window displays the
number and name of the student, and its IP address. Clicking the
button can stop this operation.
There are four ways to activate this mode:
1.
2.
3.
4.
Select a student. Single-click the
icon in the Tool Bar;
Right-click on the selected student icon, and select Monitor in the popup menu;
Select Teach in the Menu Bar, and then select Monitor in the dropdown menu;
Simply press “Ctrl+V” on the keyboard.
3-5.2 Multi-View
In the Multi-View mode, the teacher can view up to 16 screens at the same time. When more than 16 screens need
to be viewed, then VirtualClass will Cycle through, viewing each group of 16 computer screens for a set cycle
interval.
Note: To set the cycle interval, go to Manage on the Menu Bar and select Preference from the dropdown menu
to open the Preference window. Select the Teacher page, and then edit the 'Refresh interval'.
After one or more students are selected (if none are selected, the default is all students), there are four methods
to activate this Multi-View mode:
1.
2.
3.
4.
Single-click the
button in the Tool Bar;
Right-click on one of the selected student icons, and select Multi-View in the popup menu; if broadcasting to all
students, right-click on the blank area of the student icon area, go to “To all students” option, and select
Multi-View in the popup menu.
Select a student or students. Choose Teach in the Menu Bar, and then select Multi-View;
Select a student or students. Press “Ctrl+H” on the keyboard.
Note: 1) If clicking the Multi-View button
in the lit interface, all students are chosen to be viewed by default.
2) When multi-view mode is activated, the multi-view window is displayed on a full screen mode on the teacher screen.
In this window, the teacher can control, lock/unlock or send a message to one of the student computers.
3) Clicking the
button can stop this mode and return you to the main interface.
3-6 Share Student Screen
Screen Share allows the Teacher to relay a selected Student's screen to all other students logged on to the Class.
22
There are four ways to perform this function:
1.
2.
3.
4.
button in the Tool Bar;
Select a student, single-click the
Right-click on the selected student icon, and select “Screen Share” in the popup menu.
Select a student. Choose Teach in the Menu Bar, and then select Screen Share;
Select a student. Press “Ctrl+R” on the keyboard.
When this operation is performed, a dialog titled VirtualClass - Screen Share will pop up on the screen, as is
shown in Fig. 3-6a. Select receivers from the list in the lower box and click OK to start Screen Share.
Fig. 3-6a
3-7 Control Student Computer
The teacher can remotely control a student computer, so that he/she can tutor a selected student if necessary.
There are four ways to perform this function:
1.
2.
3.
4.
button in the Tool Bar;
Single-click the
Right-click on one of the selected student icons, and choose Control in the popup menu;
Select a student. Choose Teach in the Menu Bar, then select Control;
Select a student. Press “Ctrl+C” on the keyboard.
Under Remote Control, the screen of the student computer will be displayed in a window on the Teacher’s screen.
The student’s number, name and IP address are displayed in the title bar of this window. The teacher can take
full control in this window just like operating from the student computer.
Note: 1) If the teacher selects the “Lock the computer that is being controlled” option in Manage ->
Preference -> Student -> Lock, the controlled student cannot operate on their own computer; otherwise,
both the teacher and the controlled student can operate.
2) Click the
button to stop controlling the student computer.
3-8 Lecture
VirtualClass can simultaneously broadcast the teacher’s voice to all students in the class. This function can be
performed when student’s screens are “black locked” so that the teacher can force students to listen to his/her
lecture attentively.
The teacher can lecture to one or more selected student(s), or to all students in the classroom.
There are four ways to enter lecture mode:
1. Single-click the
button in the Tool Bar;
2. Right-click on one of the selected student icons and select Lecture in the popup menu; if the lecture is to all
students, right-click on the blank area of the student icon area, go to the “To all students” option, and
select Lecture in the popup menu.
3. Select a student or students. Choose Teach in the Menu Bar, and then select Lecture;
4. Select a student or students. Press “Ctrl+N” on the keyboard.
23
Note: 1) If clicking the Lecture button
in the lit interface, the default target student is the whole class.
2) When a student is receiving the lecture, his/her icon changes to
.
3-9 Talk to Student
The teacher can talk to a selected student privately. There are four ways to perform this function:
1.
2.
3.
4.
Single-click the
button in the Tool Bar;
Right-click on one of the selected student icons and choose Talk in the popup menu;
Select a student. Choose Teach in the Menu Bar and select Talk;
Select a student. Press “Ctrl+T” on the keyboard.
Note: When a student is under the talk mode, his/her icon changes into
3-10 Send Message to Student
The teacher can send a message to one or several student(s), or to all students in class. If no student is selected,
the default is to all students. There are four ways to perform this function:
1. Single-click the
button in the Tool Bar;
2. Right-click on one of the selected student icons, and select Message in the popup menu; if sending a
message to all students, right-click on the blank area of the student icon area, go to the “To all students”
option, and select Message in the popup menu.
3. Select a student or students. Choose Teach in the Menu Bar, and then select Talk;
4. Select a student or students. Press “Ctrl+S” on the keyboard.
A Send Message dialog box will pop out (Shown below). Type in any text in the box and clik Send.
Upon receiving the text, a dialog box will pop out on student computer displaying the message. The student can click
Reply button on the dialog box to interact with the teacher.
Note: 1) The teacher can enable/disable the ability of students to send messages to him/her.
2) Students cannot send messages to each other.
3) Typing message in the text frame of the Message Area, and clicking the send button
the message to all students in class.
on the right can also send
3-11 Text Communicate in Chatroom
The teacher can communicate with a selected student or with all students in the class using text. There are fours
ways to enter the chatroom mode:
24
1. Single-click the
button in the Tool Bar;
2. Right-click on one of the selected student icons, and select Chatroom in the popup menu; If all students
are supposed to enter the chatroom, right-click on the blank area of the student icon area, go to
the “To all students” option, and select Chatroom in the popup menu.
3.
4.
Select a student or students. Choose Teach in the Menu Bar, and then select Chatroom;
Select a student or students. Press “Ctrl+O” on the keyboard.
Note: If you click the Chatroom button
default.
in the lit interface, all students will enter the Chatroom by
After the Chatroom is activated, a Chatroom window will appear on the screen, as shown in Fig. 3-11a.
①
③
②
Fig. 3-11a.
• Message area: All messages displayed in the frame.
• Typing area: Type your message in this frame, and click the Send button on the right to display it in the
Message area.
• Function Bar:
to change the color of the word you typed out;
Click
to insert a face expression icon;
Click
, and the “Add student list” dialog box will pop up on the screen, as shown in Fig. 3-11b.
Click
Fig. 3-11b
Student Name, Computer Name and IP address of all online students will appear in this box.
invite selected student(s) into, or drop selected student(s) out of the Chatroom.
The teacher can
3-12 Send and Receive Files
With this function, the teacher can distribute files, pictures or applications needed in teaching a specified student
or to all students in the class. He/She can also collect students’ work in his/her own computer for checking.
3-12.1 Distribute File to student
The teacher can distribute files to a selected student or to all students.
25
If none is selected, the default is to all
students in class.
After selection, there are two ways to perform this function:
1. Select “Teach -> Distribute file” in the Menu Bar;
2. Press “Ctrl+P” on the keyboard.
After this operation, a “Distribute files” dialog box will appear on screen, as shown in Fig. 3-12a.
Fig. 3-12a
Select the file to be distributed from the teacher’s computer and click the Send button.
The teacher can stop distributing during the operation by clicking the Close button below.
3-12.2 Collect Files from Student
The teacher can collect files from a selected student or from all students. If none is selected, the default is all
students in the class.
After selection, there are two ways to perform this function:
1. Select “Teach -> Collect file” in the Menu Bar;
2. Press “Ctrl+D” on the keyboard.
After this operation, a “Collect files” dialog box will appear on screen, as shown in Fig. 3-12b.
Fig. 3-12b
In Save to box, select a path on the local computer to save the collected file.
Click the drop down button beside File to be collected box to display the list of files previously sent to students.
Select the file to be collected from the list and click Collect button.
3-13 VirtualClass e-Tablet
E-Tablet is designed to complement VirtualClass while it is in 'Screen Broadcast' mode. E-Tablet provides a wide
range of drawing functionality that can be used to assist the teacher in directing the students' attention toward
a point of interest and/or highlighting important areas of the screen to be broadcast.
VirtualClass e-tablet can only be opened in the lit interface.
26
3-13.1 Open e-Tablet
To open VirtualClass e-Tablet, click the e-Tablet button
on the lit interface. Then an e-Tablet tool box will
appear on the upper right screen, as shown in Fig. 3-13.1a.
Fig. 3-13.1a
3-13.2 Use e-Tablet drawing tools
To use the e-Tablet drawing tools:
Step 1 Single-click on the chosen tool (the active tool will be highlighted).
Step 2 Move the mouse cursor to the point where you want to begin drawing on the screen and single-click to
set the 'start draw' point.
Step 3 Move the cursor to where you want the drawing to end and single-click again to set the 'end draw' point.
Step 4 The image you created can be saved on the hard disk by selecting Save on the drawing tools box. You
can open an existing image by selecting Open as well.
Note: (1) Right-clicking on any part of the screen will hide the drawing tool.
(2) The tools in this box are used in the same way as other drawing tools, such as the Paint function in
Windows accessories.
3-14 Raise Hand
With the ‘Raise Hand’ function, a student can send a notice to the Teacher indicating he/she wishes to ask a
question. After the student uses this function, his/her icon will change to
. Then the teacher can answer
the student by giving a lecture, sending a message, or inviting him into the chatroom.
The teacher can clear the hand mark in one of three ways:
1. Right-click the
icon, and choose “Clear Mark”;
2. Select the hand-raised student, click Teach in the Menu Bar, and choose “Clear Mark”;
3. Select the hand-raised student, press “Ctrl+E” on the keyboard.
27
After the Clear Mark action, the student icon will turn back to
.
3-15 Remote Power On/Off
The teacher can remotely remotely start up or shut down a selected student’s computer using one of two
methods:
1. Select student(s), choose “Manage -> Power On/Power Off” from the Menu Bar;
2. Right-click on the selected student(s), choose Power On/Power Off in the popup menu.
At a system power off, you will see a notice dialog as shown in Fig. 3-15a.
Fig. 3-15a
Click “Yes” to shut down. After this operation, the student icon will change into offline status (gray colored).
Click “No” to abandon the shutdown operation.
3-16 Lock/Unlock Student Computer
3-16.1 Lock student computer
The teacher can ‘black lock’ a selected student’s computer or lock all student computers. After selection, there
are four ways to lock a student’s computer: (If none is selected, the default is to all students in the class.)
button in the Tool Bar;
1. Single-click the
2. Right-click on one of the selected student icons, and select Lock in the popup menu. If all students are
supposed to be locked, right-click on the blank area of student icon area, go to the “To all students” option,
and select Lock in the popup menu.
3. Select a student or students. Choose Teach in the Menu Bar, and then select Lock;
4. Select a student or students. Press “Ctrl+L” on the keyboard.
Note: 1) If clicking the Lock button
in lit interface, the default target is all students in the class.
2) When a student computer is locked, his/her icon will change to
.
3-16.2 Unlock Student Computer
When the teacher would like to unlock student computers, it can be done using one of the following three
methods:
in the
1. Select locked student(s) (if none are selected, default is all locked students.). Click unlock button
Tool Bar;
2. Select locked student(s). Right-click on one of selected icons, and choose Unlock in the popup menu;
3. Select locked student(s) (if none is selected, default is all locked students.). Choose Teach in the Menu Bar,
then select Unlock;
4. Select locked student(s) (if none is selected, default is all locked students.). Press “Ctrl+U” on the keyboard.
Note: 1) If clicking the Unlock button
in the lit interface, the default is to unlock all locked students.
3-17 Remotely Run Application on Student Computer
28
3-17.1 Edit Applications List
VirtaulClassVirtualClass allows the teacher to remotely run applications on student computers. The teacher
should first edit the Launch Application list from which he/she can choose to run later on during the teaching
process.
Select Teach from menu bar, then Launch Application to open the Launch Application list. (shown in Fig
3-17a)
Fig. 3-17a
To add an application to the list, click Add button on the right. Then click Browse to select the execute file of the
program from your local hard disk. (Note: The application should be installed to the same directory on both
teacher computer and the student computer. The teacher specifies the application from his/her local computer.)
Enter any description for it and click OK.
To edit the program path or description, select the application and click Edit button.
To delete the program from the list, select the application and click Delete.
3-17.2 Remotely Launch Applications Student Computer
Select one or more target student computer(s) on which to launch the application. Use one of the following
methods to start this operation:
1. selectSelect Teach from menu bar, then Launch Application;
2. right Right-click on the selected student(s) and choose Launch Application from the popup menu.
The application list should appear. Select the application to run from the list and click Execute.
Note: The application should be installinstalled to the same diretorydirectory both on the teacher computer and
the student computer.
3-18 Application Control on Student Computer
3-18.1 Edit Application Control List
The teacher can control student’s rights to execute applications on local computers.
rightrights to students or allow them to run specified applications only.
He/she can give full
To control application execute rightrights on a student computer, the teacher must first edit the application
control list.
Select View from the menu bar, then Application Control. You will see Application Control panel appears at the
bottom of the program interface. (Shown in Fig. 3-18a)
29
Fig. 3-18a
The left part is the approved list. The right part is the restricted list. Below is description on how to operate in the
approved list. Operating in the restricted list follows the same procedures.
on the upper right. Click Browse to select
To add an application to the approved list, click the Add button
an application from your local computer and add any descriptions to it. Click OK to return.
Note: Application Control is ineffective if the specified application is not installed on the student computer. The
installation path on the student computer needs NOT to be the same with that on the teacher computer.
There is another convenient way to add applications to both lists. In Detail View mode, all running applications
are listed under Running applications item. You can right click on the application icon and select Add to
Approved List or Add to Restricted List. (shown below)
3-18.2 Application Control Policy
Once the approved and restricted lists are configured, the teacher can choose a policy to enforce the application
control on student computers.
Select one or more student computer(s) to apply the application control policy on. Then right -click on the
selected students and choose Application Control from the popup menu, than chose one policy from the three:
Allow All: Do not apply any restriction on application execution. All applications on the student computer can
run normally.
Enable Approved List: Only allow the application on the approved list to run.
Enable Restricted List: Applications on the restricted list cannot run student computer. All others can run
normally.
3-19 Internet Control on Student Computer
3-19.1 Edit Internet Control List
The teacher can control student’s internet access privilege.
allow them to visit specific websites only.
He/she can disable all access to all websites or
To control internet access on student’s computer, the teacher must first edit the website list.
Select View from the menu bar, then Internet Control. You will see the website control panel appears at the
bottom of the program interface. (shown in Fig. 3-19a)
Fig. 3-19a
30
The left part is the approved list. The right part is the restricted list.
Operations to the approved list are introduced below. Operations to the restricted list are the same.
on the upper right, the Add/Edit Website dialog
To add a website to the approved list, click the Add button
box appears (Fig. 3-19b). Enter the address in the URL box and enter any description in the Description box. You
can also enter some keywords to identify the website when the program tries to restrict or approve it. Click OK
to finish and return.
Fig. 3-19b
There is another convenient way to add applications to both lists. In Detail View mode, all running applications
are listed under Running applications item. You can right click on the application icon and select Add to
Approved List or Add to Restricted List. (shown below)
3-19.2 Internet Control Policy
Once the approved and restricted lists are configured, the teacher can choose a policy to enforce the internet
control on student computers.
Select one or more student computer(s) to apply the internet control policy on. Then right -click on the selected
students and choose Internet Control from the popup menu, than chose one policy from the four: (see Fig.
3-19c)
Allow All: Do not apply any restrictions on website access.
Enable Approved List: Only allows access to the websites in the approved list.
Enable Restricted List: Websites in the restricted list cannot be accessed on student computers. All others can
be accessed normally.
Block All: If this policy is enabled, the student cannot visit any website on their computer.
Fig 3-19c
31
Chapter 4
Using
VirtualClass Student
Module
32
Chapter 4
Using VirtualClass—Student Module
4-1 Start VirtualClass--Student and Student Menu
4-1.1 Start VirtualClass
Installing the VirtualClass Student program will add the VirtualClass icon
to the Student's desktop. You can
launch VirtualClass by either (a) double-clicking the icon, or (b) selecting Start Menu -> Program ->
VirtualClass Student.
After launching VirtualClass Student, there will be a VirtualClass icon on the Student computer’s taskbar, as
shown in the red circle in Fig. 4-1.1a. When the mouse passes over the icon, a note will appear indicating the
Teacher Computer Name that is currently logged on.
Fig. 4-1.1a.
Note: 1) Normally, when a Teacher comes online, the Student computer will automatically be logged into any
Class of which they are a member.
will be shown in the Student’s taskbar.
2) If there is no Teacher online, the VirtualClass offline icon
3) When launching VirtualClass Student for the first time after installation, a Select a Classroom dialog box will
pop up, as shown in Fig. 4-1.1b.
Fig. 4-1.1b
After selecting one classroom and clicking OK, the Student Computer will automatically check the versions
between the Student and Teacher computers. If a higher version is detected on the Teacher computer, the
Student will automatically be upgraded to the same version.
4-1.2 Student Menu
If you right-click on the VirtualClass icon in the taskbar, the student menu will pop up, as shown in Fig. 4-1.2a.
Fig. 4-1.2a
Fig. 4-1.2b
Note: 1) When Right-clicking on the offline icon, the menu is as Fig.4-1.2b shows;
2) Some functions may be disabled by the Teacher Computer. Disabled function options are gray and cannot be
used;
3) Help: Click it to open the online help file.
About: Click it to view version, copyright and license information.
View received file: Clicking it will display collected file list.
Other functions will be introduced in the following sections.
33
4-2 Raise Hand
By clicking the “Raise Hand” option in the student menu, students can send notice to the Teacher indicating
he/she wishes to ask a question.
to raise the
After the student uses this function, his/her icon on the Teacher Computer will change to
teacher's attention. Then the teacher can answer by choosing a proper method.
Note: The student cannot perform this operation if the teacher unchecks the Allow to raise hand box in the
VirtualClass preferences.
4-3 Send Message
With this function, the student can send messages to the teacher.
Right-click on the VirtualClass icon in the task tray, and click "Send Message" in the popup menu, and then a
Send Message dialog box will be displayed on the screen as shown in Fig. 4-3a.
Fig. 4-3a.
Note: If the teacher unchecks the Allow to send message box in VirtualClass preferences, then students
cannot perform this operation.
4-4 Select a Classroom
If allowed by the teacher to select a classroom, the students can right-click on the VirtualClass icon in the task
tray and click "Select a Classroom" in the popup menu. Then a Select a Classroom dialog box will be
displayed, as shown in Fig. 4-4a. Select the classroom and click OK to enter.
Fig. 4-4a
4-5 Manual Logon
If allowed by the teacher to select a classroom, the student can also choose to log on to a classroom manually.
Right-click on the VirtualClass icon in the task tray and click "Manual Logon" in the popup menu. Then a
Manual logon dialog box will be displayed as shown in Fig. 4-5a.
34
Fig. 4-5a
The student can type in the IP address or name of the Teacher Computer, and click OK to log on to that Teacher
Computer.
4-6 View Received Files
When the teacher sends a file to a student, a notice window (Fig. 4-6a) will instantly appear on the bottom right.
Clicking the file name in the collected file list will open this file.
Fig. 4-6a
4-7 Receive and Reply to a Message
When the teacher sends a message to a student, a Message dialog box will instantly pop up on student screen,
as shown in Fig. 4-7a.
Fig. 4-7a
Click Reply to show Fig. 4-7b. Type message in the dialog box and send it back to the teacher.
35
Fig. 4-7b
4-8 Exit Classroom
To Exit the VirtualClass Student program, right-click on the small icon on the taskbar, and then select Exit from
the dropdown menu.
Note: The students themselves cannot close the VirtualClass student program if the teacher has checked
Prevent students from exiting VirtualClass box.
36
Chapter 5
Using
VirtualClass NetMovie
37
Chapter 5 VirtualClass NetMovie
5-1 VirtualClass NetMovie - Introduction
The NetMovie Manager provides a convenient way of managing and running multimedia files on CD, hard disk
and on LAN. It also enables you to broadcast live and/or play live recordings, from within VirtualClass. NetMovie
adapts a Client/Server mode; supports most multimedia formats such as ASF, WMV, WAV, MPEG, DAT, and MP3,
etc. NetMovie is also an excellent tool for creating, classifying, adding and organizing your multimedia
resources.
Note: Beside files types mentioned above, other type of multimedia files can also run if DirectShow Filter is
installed on both Teacher and Student computers.
5-2 NetMovie Manager - Teacher
NetMovie Manager will appear on the Teacher's screen when activated, as shown in Fig. 5-2a.
Fig. 5-2a
Note: Before the teacher plays a multimedia in NetMovie, he/she must make sure the file also exits on the
Student computer. Virtual would automatically locate the file in "My Documents/VirtualClass" on Student
computer. The teacher can use Distribute File function to send the file to this directory before he/she play it
using NetMovie.
.
5-2.1 Activate NetMovie
Select the student(s) you want to receive NetMovie (if none is selected, the default is to all students). Then the
teacher can show NetMovie using one of the following four methods:
in the Tool Bar;
1. Click the NetMovie button
2. Right-click on one of the selected student icons, and select Show Movie in the popup menu; If all students
are supposed to see the movie, right-click on the blank area of student icon area, then choose the “To all
students” option, and select Show Movie in the popup menu.
3. Select a student or students, then select Teach in the Menu Bar, and choose Show Movie in the dropdown
menu;
4. Select a student/students and press “Ctrl+M” on the keyboard.
Note: If clicking the NetMovie button
movie.
in the lit interface, by default all students are chosen to see the
5-2.2 Working Around in NetMovie Manager
All of the functions introduced below can be accessed in the right-click menu. The menu will be displayed when
38
you right-click the mouse on any part of the NetMovie Manager. As shown in Fig. 5-2.2a.
Fig. 5-2.2a
z Play Multimedia Files
There are three methods to play a file:
1. Click on the open file button
below the play screen;
2. Right-click on any part of the NetMovie Manager and select Open in popup menu to open a file;
3. Press "Ctrl+O" on the keyboard to open a file.
In Open window, the teacher can enter a network path to display a video on the Internet, or select a file from
his/her local computer.
Note: If the teacher chooses a multimedia file from his/her local computer, he/she must make sure the file is
also exit on computer. He/she can use Distribute File function to send the file to Student computer before
he/she play it using NetMovie.
z
Play list
1) Single-click on the Play List button
, or 2) Select Play List in the right popup menu, or 3) Simply
pressing "Ctrl+L" can show the Play List dialog box shown in Fig. 5-2.2b.
Fig. 5-2.2b
The NetMovie player will play files on the list in sequence. The teacher can add, delete and change the
sequence of files on the list. He/She can also view the properties of selected files by clicking the Properties
button and displaying the Properties window, as shown in Fig. 5-2.2c.
39
Fig. 5-2.2c
z
Play Control
Play Mode
Button
Description
Play
Play a file after it is paused or stopped
Pause
Pause a file that is currently playing
Stop
Stop a file that is currently playing
Previous
Go back to the beginning of this file
Rewind
Skip backward when playing a file
Skip Forward
Skip Forward when playing a file
Next
Play the next file on file list
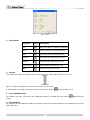
z Volume
The Teacher can adjust the playing volume by dragging the volume bar shown in Fig. 5-2.2d.
Fig. 5-2.2d
Note: 1) From top to bottom, the volume decreases to mute mode.
2) The teacher can directly enter mute mode by clicking the button
z
below the play screen.
Close Multimedia File
The Teacher can close a file during the displaying process by clicking the close button
screen.
below the play
z Exit NetMovie
The Teacher can exit NetMovie Manager by clicking on the close window button or by selecting Exit from the
right-click menu.
40
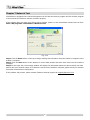
5-3 NetMovie - Student
Starting the NetMovie on the Teacher's computer will launch the NetMovie display on the student computer
automatically to receive the movie simultaneously. The NetMovie display that is visible on the student
computers is shown in Fig. 5-3a.
Fig. 5-3a
While receiving NetMovie, students can perform the following operation:
z Adjust the display window to full screen by clicking the button
.
.
z Hide the display window by clicking the button
z Return to normal size by right-clicking the mouse under full screen mode.
Note: these functions cannot be performed if the Teacher has checked the Full Screen box in the
VirtualClass preferences.
z Adjust the playing volume by dragging the volume bar
.
41
Chapter 6
Using
VirtualClass Keypad
42
Chapter 6 VirtualClass Keypad
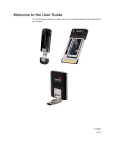
6-1 VirtualClass Keypad Introduction
VirtualClass Keypad is an external hardware device, shown in Fig. 6-2b. The teacher can perform the most
commonly used functions by simply pressing a key on this pad. The keypad makes teaching much easier and
more convenient.
6-2 Install VirtualClass Keypad
Connect the VirtualClass keypad to the PS/2 port on the teacher computer and connect the standard keyboard
to another port on the VirtualClass keypad, as shown in Fig. 6-2a.
PS/2
Standard Keyboard
Fig. 6-2a
6-3 VirtualClass keypad functions
The VirtualClass keypad (Fig. 6-2b) provides direct access to all of the main functions available in VirtualClass.
•
Fig 6-2b
Number Keys (1-9)
These keys are used to select a specific computer. For example, if you want to control student 112, you
should type the number 112 first before executing any actions.
43
•
List
Displays the name and number of all students who are online. If all of the students cannot be displayed on
one page, then press List again to scroll to the next page.
•
Broadcast
Broadcasts the teacher’s screen, a model student’s screen or a voice message.
Press Broadcast to broadcast the teacher’s screen to the screens of all students. To broadcast an individual
student’s screen to other students, first enter the student number and then press Broadcast.
•
Voice
Pressing this key will broadcast the teacher’s voice message to all students. The teacher can also have a
one-on-one chat with a student by selecting the number of the student before pressing the Voice key.
•
Adv.
Launches VirtualClass advanced functions. There are two options in the Advanced window: e-Tablet and
NetMovie. E-Tablet is designed to complement the VirtualClass Screen Broadcast. E-Tablet provides a wide
range of drawing functionality that can be used to assist the teacher in directing the students' attention
toward a point of interest and/or highlighting significant areas of the screen to be broadcast. NetMovie
provides a convenient way of managing and running all of your multimedia files on CD, hard disk or server
from within VirtualClass.
•
Monitor
Displays the current screen of a selected student’s computer. To monitor one student computer, first enter
the student computer number and then press Monitor. If you want to monitor all of the students’ computers,
just press Monitor. The screens of all the students who logged into the classroom will be displayed in a
“slideshow”.
•
Control
Takes full control of a specific student's computer. You can remotely control the keyboard, mouse and other
applications on a student’s computer. To control a system, first enter the student’s number and then press
Control. Only one student computer can be controlled at one time.
•
Shutdown
Turns off a specific student’s computer or the computers of all students. To turn off an individual student’s
computer, enter the student number and then press the Shutdown key for 3 seconds. To turn off all
student computers, just press the Shutdown key directly for 3 seconds.
•
Lock
Disables the system, keyboard and mouse of one or all students. To lock only one computer, first enter the
student's number on the keypad and then press Lock. If no student number is entered prior to pressing
Lock, then all of the systems will be locked.
•
Esc
Cancel the current process. For example, if the user is currently broadcasting, pressing Esc will stop the
broadcasting.
44
Chapter 7
Network Test
45
Chapter 7 Network Test
VirtualClass is equipped with a network diagnostic tool for both the teacher program and the student program
to ensure that the classroom network functions properly.
If the program does not seem to be able to find a network, please run the VirtualClass network test tool from
Start->All programs->VirtualClass->Network Test.
Fig. 4-1a
Step 1 Click the Start button on the top to begin sending test information from the teacher’s computer to the
student’s computer.
Step 2 Click the Start button at the bottom to receive data packets that have been sent from the teacher’s
computer.
Step 3 On the right side, the message window will display the information about the data received, lost data
packets and your network quality. If no data are received on the student’s computer, please check your network
connection and hardware configuration.
If the problem still persists, please contact FarStone technical support at [email protected].
46
Chapter 8
Appendix
47
Chapter 8 Appendix
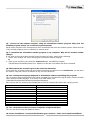
8-1 Frequently Asked Questions (FAQ)
Q1. Why can’t I remotely install VirtualClass Client from the teacher side?
If you cannot install the client program through Remote Install tool, please check the following tow conditions to
solve this problem:
1. make sure the following ports on the target computer is opened:
ICMP port 0-Incoming echo request;
TCP ports 139, 445 and UDP ports 137, 138;
TCP port 135 and UDP port 135;
TCP port 6150
2. If the operating system of the target computer is Windows XP, log on it as system administrator to check
following: Start > Settings (Classic start menu) > Control Panel > Administrative Tools > Local
Security Policy > Security Settings > Security Options > Network Access: sharing and security
model for local accounts. Make sure the option “Classic-Local users authenticate as themselves” is
chosen.
Q2. Why can’t I turn off (or restart) the student computer using the VirtualClass teacher program?
If the student computer stops responding when you try to turn it off (or restart it), select Power Options from
the control panel, and then select “Shut Down” from the “When I press…” dropdown menu in the Advanced tab.
Or check Enable Advanced Power Management support on the APM tab.
48
Q3. I turned off the student computer using the VirtualClass teacher program. Why does the
Scandisk program always run on the next system startup?
Not all of the programs were closed properly when VirtualClass shut down the student systems. Please close all
of the running programs prior to restarting or shutting down.
Q4. I reinstalled the VirtualClass teacher program on my computer. Why did the student number
change?
If you want to keep the student number listing the same as before, please do the following:
1. Select “Save student list” when removing the VirtualClass teacher program.
OR
2. Back up the student list by saving the vclass.vcm from %InstallDir% Program
Files/FarStone/VirtualClass/vclass.vcm. Replace this file after VirtualClass has been reinstalled.
Q5. When should the student log in to the classroom manually?
If the classroom is already online but the student cannot find the classroom in the teacher list, you can enter
the teacher computer name or IP address to log in to this classroom.
Q6. Can I change the language displayed in VirtualClass without reinstalling the program?
Yes. You need to copy the ResXXXX.ini file, which is located in the VirtualClass program folder (number in folder
name indicates certain language, as is shown in the table below) into
%InstallDir%ProgramFiles\FarStone\VirtualClass\Language.
After copying the file, please restart VirtualClass to have the changes take effect after copying the file.
Language
Traditional CHINESE
Simplify CHINESE
ENGLISH
FRENCH
GERMAN
ITALIAN
SPANISH
DUTCH
KOREAN
JAPANESE
Folder for language
404
804
409
40c
407
410
40a
413
412
411
Q7. Can I broadcast movies to student computers using VirtualClass?
Yes. You can do this using the NetMovie feature.
Q8. During installation, I received the following error message “1607: Can’t install InstallShield
49
Scripting Runtime.” What should I do?
Make sure that you have the administrator privileges to run the setup on the machine and then run IsScript.msi
from the original installation packet. Run the file InstmsiA.exe on Windows 9x or Me or InstmsiW.exe on
Windows NT, 2000 or XP to install and configure the Windows Installer Service on the machine. These files can
be found in the same path as Setup.exe. If the issue persists, then register the Msiexec.exe file on the machine
manually. To do this, run the following command line options in the Start > Run command or command prompt
of the operating system:
Windows NT, 2000:
C:\Winnt\System32\Msiexec.exe /REGSERVER
Windows 9x, Me or XP:
C:\Windows\System\Msiexec.exe /REGSERVER
Make sure that the Installer folder in the Windows directory on the machine is not read-only. The path to the
installer folder is typically C:\Winnt\Installer on Windows NT, 2000 and XP machines and C:\Windows\Installer
on Windows 9x and Me machines. Right-click on the Installer folder and make sure that it is not read-only. On
some machines, the installer folder may be hidden. Before searching for this folder in the above path, make sure
to check the option “Show hidden files and folders” in the Windows Explorer options. Launch the Task Manager
to see if multiple instances of Msiexec.exe or IDriver.exe are running on the machine. You can launch the Task
Manager by pressing Ctrl+Alt+Delete. You should have at least one instance of these files running.
But if you see more than one instance of Msiexec.exe or IDriver.exe, it could be the cause of the issue. If this is
the case, please restart your system and try again.
Q9. How can I optimize the performance of VirtualClass?
You can try the following to improve your VirtualClass performance:
1. Reduce your screen resolution (e.g. reduce 1024 X 768 to 800 X 600).
2. Reduce the color quality (e.g. reduce 32-bit to 16-bit).
3. Do not set up a background picture
4. For Windows XP users, please select Appearance in Display properties, and then set Windows and
buttons as Windows classic style.
5. Upgrade the display adapter driver.
Q10. Why can’t some student computers receive the screen broadcast in a network?
Please check whether the connection of the student computers is working properly. We provided a tool for
testing the network connection for both the teacher and student computers. Start this tool from
Start->Programs->VirtualClass->Network Test and check whether the computers can send or receive
data.
Q11. Why can’t the teacher and students hear from or talk to each other?
The following functions will use audio: when using the Monitor, Control and Talk. the teacher and students
can communicate with each other; when using the Broadcast and Lecture functions, students can only hear
from the teacher.
If audio does not work properly, please check the system’s volume Configuration from “Control Panel ->
Sounds and Audio Devices -> Audio -> Volume -> Options -> Properties -> Recording” or by
double-clicking the Volume icon
the Volume Control window.
in the task tray and selecting Options -> Properties -> Recording from
Check the status of all options in the Show the following volume controls screen:
A) To send audio from Teacher to Student, make sure “Mono Mix” is selected on the teacher computer, and
“Microphone” and “Stereo Mix” are not selected. Also make sure that “Microphone” is selected on the Student
computer.
B) To send audio to Student, make sure that “Microphone” is selected on the Teacher’s computer and “Mono Mix”
is selected on the student computer.
After configuration, exit and restart VirtualClass to have the changes take effect.
50
8-2 License Agreement
FARSTONE TECHNOLOGY, INC. (FARSTONE) END USER LICENSE AGREEMENT FOR VIRTUALCLASS, HEREAFTER REFERRED TO AS
THE "SOFTWARE"
PLEASE READ CAREFULLY: THE USE OF THIS "SOFTWARE" IS SUBJECT TO THE "SOFTWARE" LICENSE TERMS OF FARSTONE AND
OTHER LICENSORS WHOSE SOFTWARE MAY BE BUNDLED WITH THIS PRODUCT.
BY YOUR USE OF THE "SOFTWARE" INCLUDED WITH THIS PRODUCT YOU AGREE TO THE LICENSE TERMS REQUIRED BY THE
LICENSOR OF THE "SOFTWARE", AS SET FORTH BELOW. IF YOU DO NOT AGREE TO THE LICENSE TERMS APPLICABLE TO THE
"SOFTWARE", YOU MAY RETURN THE ENTIRE UNUSED PRODUCT FOR A FULL REFUND.
LICENSE AND WARRANTY:
The software which accompanies this license (the "Software") is the property of
FARSTONE or its licensors and is protected by copyright law. While FARSTONE continues to own the Software, you will have certain
rights to use the Software after your acceptance of this license. Except as may be modified by a license addendum which accompanies
this license, your rights and obligations with respect to the use of this Software are as follows:
A. Single User License:
(a) Use the "Software" on a single computer system or network, and only by a single user at a time. If you wish to use the "Software"
for more users, you will need an additional License for each user.
(b) Make one copy of the "Software" in machine-readable form solely for back-up purposes, provided you reproduce FarStone's
copyright proprietary legends. Notwithstanding the foregoing, the "Software" may be used on the home, laptop or other secondary
computer of the principal user of the "Software", and an additional copy of the "Software" may be made to support such use. As used
in this License, the "Software" is "in use" when it is either loaded into RAM or installed on a hard disk or other permanent memory
device. The "Software" may be "in use" on only one computer at any given time. (Different License terms and fees are applicable
for networked or multiple user applications.) As a specific condition of this License, you agree to use the "Software" in compliance
with all applicable laws, including copyright laws, and that you will not copy, transmit, perform or distribute any audio or other content
using the "Software" without obtaining all necessary Licenses or permissions from the owner of the content.
B. Multiple User License:
Make one copy of the "Software" in machine-readable form solely for back-up purposes, provided you reproduce FarStone's copyright
proprietary legends.
You must acquire and dedicate a License for each separate computer on which any part or portion of the "Software" is installed or run
As used in this License, the "Software" or any part or portion of the "Software" is "in use" when it is either loaded into RAM or installed
on a hard disk or other permanent memory device including any networked or shared environment where either direct or indirect
connections are made through software or hardware which pools or aggregates connections.
As a specific condition of this License, you agree to use the "Software" in compliance with all applicable laws, including copyright laws,
and that you will not copy, transmit, perform or distribute any audio or other content using the "Software" without obtaining all
necessary Licenses or permissions from the owner of the content.
C. Restrictions: You may not distribute copies of the "Software" to others or electronically transfer the "Software" from one
computer to another over a network. You may not post or otherwise make available the "Software", or any portion thereof, in any
form, on the Internet. You may not use the "Software" in a computer service business, including in time-sharing applications. The
"Software" contains trade secrets and, in order to protect them, you may not decompile, reverse engineer, disassemble, or otherwise
reduce the "Software" to a human-perceivable form. YOU MAY NOT MODIFY, ADAPT, TRANSLATE, RENT, LEASE, LOAN, RESELL FOR
PROFIT, DISTRIBUTE, NETWORK OR CREATE DERIVATIVE WORKS BASED UPON THE "SOFTWARE" OR ANY PART THEREOF.
D. Limited Warranty:
Farstone warrants that the media on which the Software is distributed will be free from defects for a period of thirty (30) days from
the date of delivery of the Software to you. Your sole remedy in the event of a breach of this warranty will be that Farstone will, at
its option, replace any defective media returned to Farstone within the warranty period or refund the money you paid for the Software.
Farstone does not warrant that the Software will meet your requirements or that operation of the Software will be uninterrupted or
that the Software will be error-free.
THE ABOVE WARRANTY IS EXCLUSIVE AND IN LIEU OF ALL OTHER WARRANTIES, WHETHER EXPRESS OR IMPLIED, INCLUDING THE
IMPLIED WARRANTIES OF MERCHANTABILITY, FITNESS FOR A PARTICULAR PURPOSE AND NONINFRINGEMENT. THIS WARRANTY
GIVES YOU SPECIFIC LEGAL RIGHTS. YOU MAY HAVE OTHER RIGHTS, WHICH VARY FROM STATE TO STATE.
E. Limitation of Liability: IN NO EVENT WILL FARSTONE OR ITS LICENSORS BE LIABLE TO YOU FOR ANY INCIDENTAL,
CONSEQUENTIAL OR INDIRECT DAMAGES, INCLUDING ANY LOST PROFITS, LOST SAVINGS, OR LOSS OF DATA, EVEN IF FARSTONE
OR A LICENSOR HAS BEEN ADVISED OF THE POSSIBILITY OF SUCH DAMAGES, OR FOR ANY CLAIM BY ANY OTHER PARTY. Some
states do not allow the exclusion or limitation of special, incidental, or consequential damages, so the above limitation or exclusion
may not apply to you.
F. General: You acknowledge that you have read this Agreement, understand it, and that by using the "Software" you agree to be
bound by its terms and conditions. You further agree that it is the complete and exclusive statement of the agreement between
FarStone and you, and supersedes any proposal or prior agreement, oral or written, and any other communication between FarStone
51
and you relating to the subject matter of this Agreement. No additional or any different terms will be enforceable against FarStone
unless FarStone gives its express consent, including an express waiver of the terms of this Agreement, in writing signed by an officer
of FarStone. You assume full responsibility for the use of the "Software" and agree to use the "Software" legally and responsibly.
Should any provision of this Agreement be declared unenforceable in any jurisdiction, then such provision shall be deemed severable
from this Agreement and shall not affect the remainder hereof. FarStone reserves all rights in the “Software” not specifically granted
in this Agreement.
Should you have any questions concerning this Agreement, you may contact FarStone by writing to:
FarStone Technology, Inc.
Legal Department
6 Morgan, Suite 160
Irvine, CA 92618
8-3 Technology Support and Product Update
Please contact your retailer or use our online support system at www.farstone.com,
For your convenience, you will also find answers to frequently asked questions (FAQ) on our website at
www.farstone.com.
Website: http://www.farstone.com/
For Technical Support, follow the links to the support section:
http://www.farstone.com/home/en/shtml/contactus.shtml
52