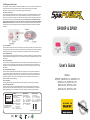
1
8 Self-Diagnostic Error Codes
The Spa Power controller has extensive self diagnostic capabilities. In the event of a problem it will indicate an error
number according to the nature of the problem. The error numbers and their meanings are listed below.
Note:When in an error state the alarm can be muted by pushing the AIR/AUX button.
Error 1 (H20) - Prime Failed
This is not necessarily a problem with the controller itself, but indicates that no water is being detected in the heater
housing. Prime failed is a special case in that it can be recovered from by pushing a button.A push of the pump
button will run the pump for 10 seconds to try to get water to the heater.If successful normal operation will resume.
If unsuccessful, Error 1(H20) will be indicated on the display again. With any Error 3-8, spa operation will stop
and not continue until the controller is reset. The controller can only be reset by pushing the UP, DOWN and
PUMP buttons simultaneously. The controller will remain in an error condition even when reset at mains power,
controller will only continue normal operation after the UP, DOWN and PUMP buttons are pushed simultaneously
(see below).
SP400P & SP601
Error 3 - Stuck Button
This error indicates that one of the buttons in the touchpad is stuck or has been held down for more than one minute.
This may be caused by the pool cover pressing on the touchpad or by water getting into the touchpad or by damage
to the touchpad or its cable. Try to reset the spa. If there is still a problem then contact your spa pool supplier.
Error 4 - No Water Sensor
This error indicates a problem with the optical water sensor in the heater. The problem may by caused by the sensor
being disconnected or by damage to the sensor. Try to reset the spa. If there is still a problem then contact your spa
pool supplier.
Error 5 - Overtemperature
This error indicates that the digital temperature sensor in the heater or pool has detected a temperature of 45oC or
more.This may not be a problem with the controller, it may be caused by excessive pump use in hot weather, or
pump failure. Turn off the spa and allow time for the water to cool. If there is still a problem then contact your spa
pool supplier.
Error 6 - Thermal Cut Out Tripped
This error indicates that the safety electromechanical over temperature cut out on the heater has operated. This
is not necessarily a problem with the controller. It may have occurred from an air lock around the element, high
temperatures during shipping, or failure of the pump. This automatic cut out will only reset once the element has
cooled below about 38 C. The unit must then be reset before it will resume operation. Manually push the UP,
DOWN and PUMP buttons simultaneously.
Error 7- Stuck Relay
This error indicates a problem with the heater control circuitry inside the unit. Contact your spa pool supplier.
Error 8 - No Temperature Data
This error indicates a problem with the digital temperature sensor in the heater or pool wall or that both the in
heater and in pool sensors are connected. Check that only one sensor is connected and that it has not become
disconnected or damaged. Try to reset the spa. If there is still a problem then contact your spa pool supplier.
Customer Service Centre
Ph:
1300 2 DAVEY
(1300 232 839)
Fax:
1300 369 119
E-mail:[email protected]
Customer Service Centre
Ph: 0800 654 333
REST OF WORLD
6 Lakeview Drive,
Scoresby, Australia 3179
Ph:
+61 3 9730 9121
Fax:
+61 3 9753 4248
E-mail: [email protected]
Website:davey.com.au
Quality
ISO 9001
H/O & MFG SCORESBY
NEW ZEALAND
7 Rockridge Avenue,
Penrose, Auckland 1061
Ph: +64 9 570 9135
Fax: +64 9 527 7654
E-mail: [email protected]
Website:daveynz.co.nz
H/O & MFG SCORESBY
Davey Water Products Pty Ltd
Member of the GUD Group
ABN 18 066 327 517
AUSTRALIA
Head Office and Manufacturing
6 Lakeview Drive,
Scoresby, Australia 3179
Ph:
+61 3 9730 9222
Fax: +61 3 9753 4100
Website:davey.com.au
Environment
ISO 14001
P/N Q916321-3 supersedes P/N Q916321-2
N2401
Pb RoHSCOMPLIANT
User’s Guide
Models:
SP400P, Q400PAU-10, Q400PAU-15
SP601AU-15, SP601AU-15T
Q601AU-20, SP601AU-20T
Q601AU-30, SP601AU-30T
Congratulations on choosing the latest Spa Power control system. This
controller makes use of the latest technology, including innovative optical and
digital sensor designs.The greater variety of optional accessories, user-friendly
touchpad and reliable components provide you with the most sophisticated
controller in its class.
Installation & Safety Notes
1. When installing this spa pool control system, refer to the appropriate local wiring rules. In particular
refer to AS/NZS 3000:2007 (AS /NZ) and EN60364 (EU). Follow the wiring rules to ensure
equipment is located in the correct zones for water protection. This spa pool control system must
be protected from water in an IPX5 enclosure or cabinet.
2. It is recommended that the steel reinforcing in any concrete base on which the pool is sitting be
equipotential bonded to the earth conductor in the supply to the spa. This is to protect against the
possibility of low voltage shocks caused by differential earth voltages. Refer to the appropriate
local wiring rules, e.g. AS/NZS3000:2007 Sections 5.6 & 6.3 or EN 60364.
7 Sleep Timer (Optional Timeclock)
If the optional time clock has been fitted, sleep mode is used to disable
automatic temperature maintenance and filtration in order to silence
the spa pool during your hours of sleep.The sleep time setting is done
using the digital time clock on the front of the control box (See below
for setting instructions). If the spa is in use it will not enter sleep mode
until 30 minutes after the last manual button push, even if the clock is
calling for sleep mode. The spa can still be used manually within sleep
mode times as normal. On wake up from sleep the system will run the
blower for 15 seconds to purge the blower plumbing. This prevents any
stagnant water from collecting in the pipes if the pool is not used for an
extended period.
7.1 To Set Current Time and Day
4. Parts incorporating electrical components, except remote control devices, must be
located or fixed so that they cannot fall into the spa. Portable appliances must not be located
above the spa during use.
1.Press the RESET button before use. NOTE:This is optional. It will clear the current time and
program settings.
2.Hold down the CLOCK button and press the DAY button until the correct day is selected.Release
both buttons.
3.Hold down the CLOCK button and press the HOUR button until the correct hour is set.Release both
buttons.
4.Hold down the CLOCK button and press the MIN button until the correct minute is set.Release both
buttons.
5.After setting the weekday and time,the seconds will reset automatically and the clock will begin
keeping time.
5. The appliance must be supplied through a residual current device (RCD) having a rated residual
current not exceeding 30mA.
7.2 To Set Programs
3. Parts containing live parts must be inaccessible to a person in the spa, except parts supplied with
safety extra-low voltage not exceeding 12V (e.g. touch pads and LED lights).
6. If a supply plug is not fitted or if the system is installed in Europe then the system must be
permanently connected to fixed wiring. Means for all pole disconnection must be provided in the
fixed wiring in accordance with the wiring rules.
7. If the supply cord is damaged, it must be replaced by the manufacturer, its service agent or
similarly qualified persons in order to avoid a hazard.
8. This appliance is not intended for use by persons (including children) with reduced physical,
sensory or mental capabilities, or lack of experience and knowledge, unless they have been given
supervision or instruction concerning use of the appliance by a person responsible for their safety.
Children should be supervised to ensure that they do not play with the appliance.
9. In order to avoid the possibility of hyperthermia (heat stress) occurring, it is recommended that the
average temperature of spa pool water should not exceed 40°C.
10. For proper operation the spa pool must be fitted with an effective thermally insulating cover when
not in use.
1.Press the TIMER button. “1ON” will appear at the left side of the display. This is the start time of the
first programmed sleep block (the time you want the spa to enter the sleep mode).
2.Press the DAY button to select the days on which this sleep program will operate.There are15
settings to choose from.
3. Press the HOUR button to set the hour of the desired time to enter sleep mode.
4. Press the MIN button to set the minutes of the desired time to enter sleep mode.
5. Now the start time has been set, press the TIMER button again. “1OFF” will appear on the display.
This is the end time of the first programmed sleep block (the time you want the spa to resume
normal operation).
6. Repeat the same procedure (2 to 4 above) until the “1OFF” time is set. (Becareful to set the same
days as used in the “1ON” time).
7. Your timer gives you upto 8 different programmable periods.You can use all 8 settings,or as few as
you like.
8. To Review your set programs press the TIMER button and keep pressing it to advancet hrough
each setting.
IMPORTANT NOTE: The “MANUAL” button on the clock can be used to override the programmed
sleep settings. It is very important to ensure that the clock is set to “AUTO” so that the programmed
times can operate. If the clock is manually set to ON then the pool will stay in sleep mode and THE
WATER WILLGO COLD. If it is left in “OFF” then the pool will not enter the sleep mode. The clock
does not return to “AUTO” byitself.
NOTE: If the “MANUAL” button on the clock is used the spa will not return to the programmed settings
until thenextprogrammedtimeafterbeingreturnedtoAuto.
Page 2
Page 11
6 Auto Sanitising (Filtration)
Installation & Safety Notes (cont’d)
6.1 No 24hr Circulation Pump Fitted
11. The floor or base on which the pool is installed has to be capable of supporting the expected load.
The Spa Power controller automatically maintains the filtration/sanitising of the spa pool water. The
minimum amount of filtration time is programmable by the user and can be adjusted between 0 and
15 minutes per hour (0 to 6 hours per day). In order to maintain correct filtration of the pool water, the
controller monitors the time for which the pump runs in normal pool operation. If the pump has only run for
a short time, the system will automatically run the pump for an additional period every hour to reach the
minimum filtration time set by the user.
6.1.1 Adjusting Minimum Filtration Time (No 24hr circulation pump fitted)
First push the Down
andAir/Aux
12. Precautions should be taken to ensure that spa pool water is disposed of appropriately.
13. An adequate drainage system should be provided to deal with overflow water.
14. Precautions should be taken to avoid damage due to water freezing in the pipes and fittings.
15. Precautions should be taken to avoid damage when the pool is left empty for an extended period.
buttons together to display the filtration time setting on the digital readout
Spa Water Treatment
Press both buttons
simultaneously
The default setting is 10 minutes per hour (= 4 hours per day). Holding down the Up Button
Button
Recommended Chemical Values
Press both buttons
simultaneously
Chlorine.........................1.5-3.0PPM(Parts Per Million)
pH..................................7.2-7.6
Total alkalinity................80-120PPM
or Down
will adjust the filtration time setting between 0 and 15 minutes per hour. (= 0 to 6 hrs per day).
6.1.2 Clean Up Cycle
If desired, a clean up cycle can be initiated to filter the water after the spa pool has been used.This is
to leave auto mode and switch on the pump. This will
done by simply pushing the Pump Button
circulate the water through the filter for 90 minutes.After 90 minutes the system will return to auto mode
and maintain the temperature ready for the next time the spa pool is used.
6.2 24hr Circulation Pump Fitted
The Spa Power controller continuously filters the spa pool to ensure the water is clean and crystal clear
for each and every spa use. A near silent energy efficient circulation pump constantly passes water
through the filter and since the circulation pump runs all the time (except for when the time clock has
been set to sleep or in an error condition) and the heater is controlled automatically there is no need for
any user controls for these features. With a 24hr circulation pump fitted there is no need to program any
filtration cycles,and the noise of a large jet pump running during filtration has bee nremoved.
6.3 My Spa Is Too Hot In Summer!
It is important to maintain your spa water chemistry to the above values to ensure a healthy
experience both for you as bathers and for your spa pool equipment.
PH
This is a measure of how acid or alkaline the spa water is (below7.0 is acid, above7.0 isalkaline).Low
pH will cause corrosion of any metalwork in the water (element, thermostat pockets). High pH will
cause scale formation and cloudywater.
Total Alkalinity
This is ameasure of how resistant your spa water is to change of pH. A low TA (0-80ppm)will allow the
pH to fluctuate rapidly normally to the acid end and will make it very hard to correct the pH back to the
ideal range.
Chlorine
Levels of sanitiser are important to prevent the build up of bacteria,and algae in the pool water.
Chlorineis not the only sanitiser available to do this. Other sanitisers are Bromine,Ozone.
Damage to the element, thermostat pockets and associated metalwork due to the poor
maintenance of water chemistry is not covered by warranty.
During warm periods of the year there may be times when the actual water temperature exceeds
the desired temperature set by the user. E.g. If the spa is set to heat to 35oC , but the actual water
temperature is hotter than 35oC. Please consider this - In the winter your spa gets cold because the air
temperature is cold. To combat this we heat the water and keep the spa covered when not in use. If the
spa is turned off and the ambient temperature is 15oC, eventually the spa water will lose heat until it too
is 15oC. In the summer the same applies but in reverse - you can turn the heater down, even turn the
pump off, but if the ambient daytime temperature is 35oC - 42oC then the spa water will also remain at
that temperature. Manufacturers make no attempt to supply a system that cools water. The quickest
way to combat the problem is to change the water, but even this new water will eventually heat up to the
air temperature.Turn the set temperature down so the heater does not come on. Reduce the minimum
filtration time (non circ pump models only) so the pump runs less.The less the pump runs the more the
water will cool. If the night time temperature is low, leave the cover off the spa to let heat escape, but
put it back on during the day to keep heat out. If the optional time clock is fitted increase the sleep time
period otherwise turn the spa off overnight. Also make sure the spa is shaded from direct sunlight.
Page 10
Page 3
1 Touch Pads
5 Light Operation
Your spa may have been fitted with either of two different LED lights; a Spa Power Coloured Light
(SPCL) or a Spa Power Variable Coloured Light (SPVCL). The Spa Power Coloured Light is a single
coloured light that is either on or off. The Spa Power Variable Coloured light is a light that has the
ability to change between 12 different colours and white (see below for user instructions).
The multi-function Light Button
is used to turn the light on and off (SPCL) and select through
the different operating modes of the Spa Power Variable Colour Light. Two short presses of the button
will turn the Spa Power Coloured Light on and off or five short presses of the button will cycle the Spa
PowerVariableColouredLight asfollows:
Light Button
Auto LED (No 24hr circulation pump fitted)
The yellow Auto indicator light will appear on the touch pad whenever the system is in full
automatic control mode. In this mode the system automatically activates the pump and heater
to filter the water and maintain the set water temperature. If this light is flashing the water
sensor is not detectinganywater.
H20 LED (24hr circulation pump fitted)
Theyellow H20lightindicatesifwaterispresentintheheater.IfnowaterisdetectedthentheLED will
flash and the unit will not operate except to run the circulation pump to try to get water to
the heater. If no water reaches the heater for one minute then an H20 error will occur. If this
happens thenpushingthepumpbuttonwillrunthecirculationpumpforanotherminute.
Pump LED
The green Pump indicator light will appear on the touch pad whenever the pump is running, in
both autoandmanualusemode.Ifthislightisflashing,thespaisinSleepMode.
Push 1 - Light ON Push 2 - Light ADJUST Push 3 - Light CYCLE SLOW Push 4 - Light CYCLE FAST Push 5 - Light OFF (SPCL - On) (SPVCL Colour - White)
(SPCL - Off) (SPVCL Adjustable Colour Mode)
(SPVCL Cycle through colours - slowly)
(SPVCL Cycle through colours - quickly)
(Default State)
Note: This is a multi-function button which performs the following 1) Short presses of this button activate the light functions as detailed above.
2) Holding this button will begin to increase the set temperature of the spa.
3) When a Spa Power Variable Speed Blower is fitted and is turned on this button increases the
blowerspeed.
5.1 Adjustable Colour Mode (SPVCL only)
When the light is on, short presses of the Down button
will put the light into adjustable colour
mode and then sequentially select through all the available colours. The last colour set in this mode
will be remembered the next time the light is used.
5.2 Indicator Light
A small red dot in the bottom corner of the digital readout indicates when the light is turned on. If left
on the light will automatically switch off after 30 minutes.
Heat LED
The red Heater indicator light will appear on the touchpad whenever the heater element is on,
in both auto and manual use mode. For safety the heater is always automatically controlled.
Usuallyswitchingontheairbloweraccessorywillcausetheheater to switch off (loadshedding). This
is in order to keep the total power load to a safe level. If this light is flashing the system has an
error (see section 8).
ON
Aux/Air LED
The Aux/Air indicator LED will appear on the touchpad whenever the Aux/Air button is pushed
and conversly will disapear when the button is pushed again. Note: If the spa does not have a
load connected to the controller the LED will still operate as described above.
Page 4
Page 9
4 Auxiliary Air Button
2 Temperature Control
The Air Button controls anauxiliary air blower. It is used to turn the blower on and off, and select
different operating modes if a Spa Power Variable-Speed Blower (SPVSB) has been fitted. 2 pushes
(STD) or 4 pushes (SPVSB) of the air button cycles the blower as follows: Note:In some spas an
additional jet pump or pool light etc may be fitted instead of a standard air blower.
The Spa Power controller automatically controls the pump and heater to filter the water and maintain it
at the desired temperature set by the user (see below). The user can leave the system to look after the
spa and know it will be at the correct temperature when ever he or she wants to use it.
2.1 Adjusting Set Temperature
Standard Air Blower (STD)
The Spa Power controller gives the user direct control of the pool temperature from the poolside
control panel. Holding down the Up or Down button will adjust the temperature set point as shown on
the digital readout. There is a slight delay before the buttons operate to reduce the risk of accidental
adjustment. The pool temperature will be maintained very close to the set temperature.
Push 1 - Blower ON
Push 2 - Blower OFF
Spa Power Variable-Speed Blower (SPVSB) (if fitted)
AIR
Red
Light
AIR
Orange
Light
Push 3 - Blower OSCILLATING (Oscillating Speed)
AIR
Green
Light
Push 4 - Blower OFF (Default State)
AIR
No
Light
Push 1 - Blower ON (Full Speed)
UP Increase the set temperature by 0.5oC per beep (Max = 41.5oC)
DOWN Decrease the set temperature by 0.5oC per beep (Min = 10.0oC)
Default Display
Push 2 - Blower ADJUSTABLE (Adjustable Speed)
Note: If left on, this accessory will automatically switch off after 20 minutes. If the heater
element is on, switching on this accessory may cause the heater to loadshed and switch off.
This is to keep the total power load to a safe level.
4.1 Adjustable Speed Mode (SPVSB only)
If a Spa Power Variable-Speed Blower is fitted, the spa user has the ability to adjust the blower speed to any desired setting.
The Up and Down buttons are used to set the desired blower speed. Note: If the blower is in Full Speed or Oscillating modes
then pushing the Up or Down button will put it into Adjustable Speed mode and then adjust the speed.
Step 1) Press Air Button twice to set Adjustable Speed Mode
Step 2) Press Up
Step 3) Press Down
Page 8
to increase speed of blower
AIR
Light turns
to orange
The display normally shows the temperature set point, unless the optional in pool temperature sensor
is fitted in which case the sensed water temperature is displayed. In either case the temperature set
point will be displayed while being adjusted as describe dabove.
2.2 Non-Default Display Value
The non-default display value (either sensed water temperature
or temperature set point) can be checked if necessary by
pressing the Up &Down buttons simultaneously.
2.3 Heating Mode Selection (24hr circ pump not fitted)
In addition to the temperature setting the user can select the preferred heating mode. The two
available heating modesare...
1.Demand Heating (displayed as Ht.d).This is the default setting in which the pump and heater will
come on automaticallywheneverthetemperaturedropsslightlybelowthesetpoint.
2.FiltrationOnlyHeating(displayedasHt.F).In this mode the pump and heater will come on
automatically no more than once per hour to filter and heat the water. This mode is provided as an
option for those who prefer to limit the natural cycling of the system.
To select the heating mode first press the Pump and Down buttons simultaneously to display the
current heating mode, then press and hold the Up or Down buttons to change modes.
to decrease speed of blower
Page 5
3 Pump Operation
3.3 Pump 1 (Two speed, no 24HR circulation pump fitted)
There are four possible variations of pump 1 that may have been fitted to your spa, this user guide
covers all variations of pump 1 that could have been fitted. Please read sections 3.1 through to 3.4
then follow the section which matches your spa operation.
Note: Even if a 24hr circulation pump is fitted there is no button to control it. The 24hr circulation pump
operation is completely automatic, It only turns off in sleep mode (if optional time clock is fitted) or in
an error condition.
Pump 1 is controlled by just one touch pad button pushing the pump button 4 times cycles its
operation through 4 modes Automatic, Manual Low Speed, Manual High Speed and Standby. When
the spa is running in automatic mode, pressing the pump 1 button will deactivate auto mode and set
the pump running in Manual low speed. The auto LED is orange when auto mode is enabled and off
when in manual low speed or manual high speed. When the pump is in standby mode all indicator
LED’s are off.
3.1 Pump 1 (Single speed pump, no 24hr circulation pump fitted)
Push 1 (Manual Low Speed) Pump 1 is controlled by just one touch pad button pushing the pump button three times cycles its
operation through three modes Automatic, Manual and Standby. When the spa is running in automatic
mode, pressing the pump button will deactivate auto mode and set the pump running in Manual Mode.
The auto LED is orange when auto mode is enabled and off when in Manual Mode. When the pump is
in standby mode all indicator LED’s are off.
Push 1 (Manual Mode)
Push 2 (Standby Mode)
Push 3 (Auto Mode)
Notes:
1) If Pump 1 is left in ”Manual or “Standby” modes it will automatically revert to “Auto” mode after 90
minutes.
2) There is no direct user control over the heater. The heater may come on automatically whenever
Pump 1 is on.
3.2 Pump 1 (Single speed pump, 24hr circulation pump fitted)
Pushing the pump button two times turns the pump on and then off. The pump LED is green when the
pump is running and off when the pump is off.
Push 1 (Pump on)
Push 2 (Pump off)
Notes:
1) If Pump 1 is left on, it will automatically switch off after 20 minutes.
2) There is no direct user control over the heater. The heater may come on automatically whenever
the 24hr circulation pump is on.
3) If the heater element is on, running the pump may cause the heater to load shed and switch off. If
this occurs the heater will come back on approximately 5 seconds after the pump is deselected.
Page 6
Push 2 (Manual High Speed) Push 3 (Standby Mode) Push 4 (Auto Mode) Notes:
1)If Pump 1 is left in ”Manual or “Standby” modes, it will automatically revert to “Auto” mode after 90
minutes.
2) There is no direct user control over the heater. The heater may come on automatically whenever
Pump 1 is on.
3) If the heater element is on, running the pump in high speed may cause the heater to load shed and
switch off.
3.4 Pump 1 (Two speed, 24HR circulation pump fitted)
Pushing the pump button three times cycles the pump through its two speeds then off. The pump LED
is green when the pump is running in low or high speed and off when pump is off.
Push 1 (Low Speed) Push 2 (High Speed) Push 3 (Pump off) Notes:
1) If Pump 1 is left on, it will automatically switch off after 20 minutes.
2) There is no direct user control over the heater. The heater may come on automatically whenever
the 24hr circulation pump is on.
3) If the heater element is on, running the pump in high speed may cause the heater to load shed
and switch off. If this occurs the heater will come back on approximately 5 seconds after the pump
is deselected.
Page 7