1
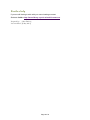
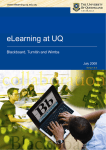
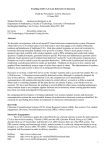
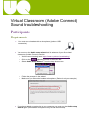
Virtual Classroom (Adobe Connect) Sound troubleshooting Participants Requirements You must use a headset with a microphone (jacks or USB connection). You must run the Audio setup wizard well in advance of your first virtual classroom (Adobe Connect) session. o Visit the sound testing room https://meet.uq.edu.au/soundtesting/ o o Click on the (Meeting) button in the menu bar. Select Audio Setup Wizard… from the drop down menu. o o Follow the prompts in the wizard. Make sure you select the headset microphone. (Below is only an example) If you have added a new device to your computer you must run the Audio setup wizard again (the headset microphone may not still be selected). Headset If the headset with microphone has a switch halfway along the cord, check that it is not switch off. If using a headset with microphone that has jack connection, make sure the jacks are plugged into the correct outlet on your computer. Computer settings Check that the volume on the computer is not muted. Check that the computer master volume is up at an acceptable level. Check the microphone volume is up at an acceptable level. Control Panel > Sound > Recording. Adobe Connect room settings Turn on your microphone (The room Host must have given your rights) o o Click on the (Audio) button in the menu bar. Select Connect My Audio from the drop down menu. Check your microphone volume in the room. o o Click on the (Audio) button in the menu bar. Select Adjust Microphone Volume from the drop down menu. Page 2 of 3 Further help If you are still having trouble with your sound settings contact: Students: AskIt > http://www.library.uq.edu.au/ask-it/contact-us Prepared by: [Ailsa Dickie] Last modified: [8 May 2012] Page 3 of 3