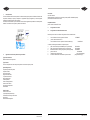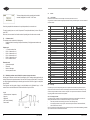
1
TECHNICAL INFORMATION
OPERATING INSTRUCTIONS
BITZER AUSTRALIA
CSH CONTROLLER
- Screw Compressors -
IMPORTANT NOTICE ABOUT MODE OF OPERATION
From version 1.4 significant changes have been made to this operation
There are two modes of operation of this CSH Compressor;
4 step mode
- the capacity is in 4 steps and is directly proportional to the demand input.
Stepless mode
- the capacity is determined by a “neutral zone” control logic and IS NOT DIRECTLY PROPORTIONAL TO THE
DEMAND INPUT.
Due to this logic, the demand signal used for Stepless must be from a controller that measures leaving water or coil Air
off temperature and CANNOT BE DIRECTLY CONTROLLED FROM ROOM TEMPERATURE.
Stepless mode – suction (new)
- the capacity is determined by a “neutral zone” control logic from the suction pressure.
Stepless mode – variable suction (new)
- the capacity is determined by a “neutral zone” control logic from the suction pressure sensor and a variable setpoint
from an external demand signal
Economiser
Built-in driver version
1
BAO-102-1 AUS
We wish to save you time and money!
We can assure you that the thorough reading of this manual will guarantee correct installation and safe use of the product
described.
Contents
IMPORTANT WARNINGS
1.
General features4
2.
Applications and functions performed by the software
4
3.
Configurations and codes5
3.1
Configurations and software/hardware codes5
4.
Hardware features of the dedicated pCO5+
6
4.1
pCO5+ general features6
5.
List of pCO inputs/outputs11
6.
General diagram of the electrical connections12
7.
The user terminal13
7.1
Operation and type13
7.2
General features of the pGD1 user terminal
13
7.3
Operation of the buttons16
7.4
LEDs lighting the buttons16
8.
pLAN network management17
8.1
pLAN network diagram17
8.2
How to assign the pLAN addresses17
9.
Installing and restoring the default values19
9.1
Initial installation of the default values19
9.2
Restoring the default values19
10.
User interface19
11.
Screens20
11.1
Password-protected screens20
12.
List of parameters22
13.
Selecting the unit of measure28
14.
Compressor management28
14.1
Switching the compressor On/Off28
14.2
Stepped capacity control29
14.3
Continuous capacity control30
14.4 Calculating the active capacity in the refrigerant circuit
30
15.
Economizer solenoid valve / EEV control32
16.
Compressor safety control32
16.1
Safety capacity control32
16.2 Envelope control algorithm for Bitzer CSH screw compressors
33
16.3
Safety times35
17.
Hour counter35
17.1
Display operating hours35
17.2 Setting the operating hour alarm threshold for maintenance
35
18.
Condenser control36
18.1 Modulating condenser control linked to the pressure or temperature sensor
36
19.
Alarms37
19.1
List of alarms37
19.2
Alarm log37
20.
Supervisor38
Software updates
38
21.
Glossary42
22.
Manufacturer43
23.
Service Address43
CAREL bases the development of its products on decades of experience in HVAC, on the continuous investments in technological
innovations to products, procedures and strict quality processes with in-circuit and functional testing on 100% of its products,
and on the most innovative production technology available on the market. CAREL and its subsidiaries nonetheless cannot
guarantee that all the aspects of the product and the software included with the product respond to the requirements of the
final application, despite the product being developed according to start-of-the-art techniques. The customer (manufacturer,
developer or installer of the final equipment) accepts all liability and risk relating to the configuration of the product in order
to reach the expected results in relation to the specific final installation and/or equipment. CAREL may, based on specific
agreements, acts as a consultant for the positive commissioning of the final unit/application, however in no case does it accept
liability for the correct operation of the final equipment/system.
The CAREL product is a state-of-the-art product, whose operation is specified in the technical documentation supplied with the
product or can be downloaded, even prior to purchase, from the website www.carel.com.
Each CAREL product, in relation to its advanced level of technology, requires setup/configuration/programming/commissioning
to be able to operate in the best possible way for the specific application. The failure to complete such operations, which are
required/indicated in the user manual, may cause the final product to malfunction; CAREL accepts no liability in such cases.
Only qualified personnel may install or carry out technical service on the product.
The customer must only use the product in the manner described in the documentation relating to the product.
In addition to observing any further warnings described in this manual, the following warnings must be heeded for all CAREL
products:
• Prevent the electronic circuits from getting wet. Rain, humidity and all types of liquids or condensate contain corrosive
minerals that may damage the electronic circuits. In any case, the product should be used or stored in environments that
comply with the temperature and humidity limits specified in the manual.
• Do not install the device in particularly hot environments. Too high temperatures may reduce the life of electronic devices,
damage them and deform or melt the plastic parts. In any case, the product should be used or stored in environments that
comply with the temperature and humidity limits specified in the manual.
• Do not attempt to open the device in any way other than described in the manual.
• Do not drop, hit or shake the device, as the internal circuits and mechanisms may be irreparably damaged.
• Do not use corrosive chemicals, solvents or aggressive detergents to clean the device.
• Do not use the product for applications other than those specified in the technical manual.
All of the above suggestions likewise apply to the controllers, serial boards, programming keys or any other accessory in the
CAREL product portfolio.
CAREL adopts a policy of continual development. Consequently, CAREL reserves the right to make changes and improvements
to any product described in this document without prior warning.
The technical specifications shown in the manual may be changed without prior warning.
The liability of CAREL in relation to its products is specified in the CAREL general contract conditions, available on the website
www.carel.com and/or by specific agreements with customers; specifically, to the extent where allowed by applicable legislation,
in no case will CAREL, its employees or subsidiaries be liable for any lost earnings or sales, losses of data and information,
costs of replacement goods or services, damage to things or people, downtime or any direct, indirect, incidental, actual,
punitive, exemplary, special or consequential damage of any kind whatsoever, whether contractual, extra-contractual or due
to negligence, or any other liabilities deriving from the installation, use or impossibility to use the product, even if CAREL or its
subsidiaries are warned of the possibility of such damage.
In reference to European Union directive 2002/96/EC issued on 27 January 2003 and the related national legislation, please
note that:
1.
WEEE cannot be disposed of as municipal waste and such waste must be collected and disposed of separately;
2.
The public or private waste collection systems defined by local legislation must be used. In addition, the equipment can
be returned to the distributor at the end of its working life when buying new equipment.
3.
The equipment may contain hazardous substances: the improper use or incorrect disposal of such may have negative
effects on human health and on the environment;
4. The symbol (crossed-out wheeled bin) shown on the product or on the packaging and on the instruction sheet indicates
that the equipment has been introduced onto the market after 13 August 2005 and that it must be disposed of separately;
5. n the event of illegal disposal of electrical and electronic waste, the penalties are specified by local waste disposal legislation.
2
BAO-102-1 AUS
3
BAO-102-1 AUS
1.
General features
The “Driver FOR Bitzer CSH screw compressors” is software that manages the operation of a Bitzer CSH series screw
compressor, modulating the capacity in response to a proportional input signal supplied by an external regulator,
guaranteeing the total protection of the compressor.
The software can be installed on pCO5+ with built-in driver software supplied already installed on dedicated pCO5+
hardware. The interface with a supervisory network is also featured.
Accessories
User PGD1 terminal.
RS485 serial board for interfacing to a supervisory network (CAREL or MODBUS protocol).
pCOweb interface board for Bacnet / web
Compatible hardware
pCO5+ medium with built-in EEV driver
3.
Configurations and codes
3.1
Configurations and software/hardware codes
Below are product codes for the different configurations of driver available for sale:
1.
2.
In addition, the following are available to complete the system:
3.
pGD1 user terminal for panel installation (8 rows by 20 columns)
4.
pGD1 user terminal for wall-mounting (8 rows by 20 columns)
5.
RS485 serial board for interfacing to supervisory network (optional)
6.
pCO web / Bacnet
7.
Temperature and pressure probes
8.
Connection cable between user terminal and pCO controller
Figure 1a
2.
“Driver for Bitzer CSH screw compressors” software
FLSTMBSDE
pCO5+ medium with built in EEV +
“Driver for Bitzer CSH screw compressors” software installed (kit)
PCO5BZ010K
Applications and functions performed by the software
PGD1000F00
PGD1000W00
PCOS004850
PCO1000WB0
(see general catalogue)
(see general catalogue)
Type of units controlled
Bitzer CSH series screw compressor.
Type of control
Control of compressors with 4 load steps or compressors with continuous capacity control.
System safety devices
Compressor operation safety times;
low pressure switch;
High pressure switch;
High pressure transducer;
Low pressure transducer;
Oil level management;
Thermal protection;
Phase monitoring protection;
Condenser fan overload;
High discharge temperature.
General alarm
Other functions
Condenser fan control
Liquid temperature measurement
Economiser Heat Exchanger EEV control
Alarm logging;
Built-in terminal management.
4
BAO-102-1 AUS
5
BAO-102-1 AUS
4.
Hardware features of the dedicated pCO5+
The information contained in this chapter is a summary of dedicated hardware, pCO5+ MEDIUM with built-in driver
For further information, refer to the general pCO5+ user manual (code +0300020EN).
4.1
pCO5+ general features
4.1.1 Hardware architecture
pCO5+ with built-in driver is used to run the control program and is fitted with the set of terminals required for connection
to the devices controlled.
The program and the parameters set are saved permanently on FLASH MEMORY and E2prom, meaning they are
stored even in the event of power failures (without requiring a backup battery).
The program can be loaded by PC (28.8 kbps and 115.2 kbps) or using the special programming key.
pCO5+ with built-in driver can also be connected to pLAN local networks (pCO Local Area Network). The pLAN network
is made up of a series of controllers and terminals that interact with one another. Each controller in the pLAN network
can exchange information (digital or analogue variables) at high transmission speed. Up to 32 units can be connected,
including pCO5+ and terminals.
The connection to the supervision/telemaintenance serial line, using the CAREL or Modbus™ communication protocol
over the RS485 standard, is made by fitting the pCO5+ with an optional serial board.
Other optional boards can be used for connection to the supervisor over standards other than RS485. Finally, the serial
field bus, using an optional board, offers connection to controlled field devices (for example: valves, I/O expansions
pCOe, electronic valve driver..).
The pCO5+ with built-in driver user terminal, PGD1 display, keypad and LEDs, is used to program the control parameters
(set point, differential, alarm thresholds) and the fundamental operations (ON/OFF, display the controlled values, optional
printouts).
6
BAO-102-1 AUS
Figure 4.b
Key
1.
Power connector [G (+), G0 (-)];
2. +Vterm: power to additional terminal
+5 VREF power to ratiometric probes
3. Universal inputs/outputs
4. +VDC: power to active probes
5. Button for setting pLAN address, secondary display, LEDs
6. VG: voltage A(*) to optically-isolated analogue output
VG0: power to optically-isolated analogue output, 0 Vac/Vdc
7. Analogue outputs
8. ID: digital inputs at voltage A(*)
9.
ID..: digital inputs at voltage A (*)
IDH...: digital inputs at voltage B (**)
10.
pLAN telephone connector for terminal/downloading application program
11. pLAN plug-in connector
12.Reserved
13. Reserved
14. Reserved
15. Relay digital outputs
16. BMS2 connector
17. Fieldbus 2 connector
18. Fieldbus/BMS selector microswitch
20. Electronic valve A connector
21. External Ultracap module (accessory) connector
22. Valve driver analogue and digital inputs
23. Valve status LEDs
7
BAO-102-1 AUS
Digital inputs
type optically-isolated
pCO5+ MEDIUM with built-in driver power supply.
A class 2, 100 VA safety transformer is recommended for supplying one controller pCO5+ with built-in driver only. The
power supply to the pCO5+ controller and the terminal (or series of pCO5+ and terminals) should be separated from the
power supply to other electrical devices (contactors and other electromechanical components) inside the electrical panel.
The transformer secondary must be earthed and make sure that the earth wire is connected to terminal G0. The same
is true for all the devices connected to the pCO5+. If more than one pCO5+ controller is connected in a pLAN network,
make sure that the references G and G0 are maintained (reference G0 must be maintained for all the controllers).
4.1.2
pCO5+ Technical specifications
Dimensions
Plastic case
Can be mounted on DIN rail in accordance with DIN 43880 and IEC EN 50022
Technopolymer
Flame retardant
V2 (Standard UL94) and 850 °C (IEC 60695)
Ball pressure test
125 °C
Creeping current resistance
≥ 250 V
Colour
12 optically-isolated inputs, 24 Vac 50/60 Hz or 24 Vdc
2 optically-isolated inputs, 230 Vac 50/60 Hz or 24 Vac / Vdc
WARNINGS:
- 230 Vac 50/60 Hz (10/-15%);
- the two 230/24 Vac inputs available at J8 and J12 have the same common pole and thus will both be 24 Vac/Vdc or 230 Vac. There
is primary insulation between the two inputs;
- in the event of DC inputs, connect the negative pole to the common terminal.
Note: separate the probe signal ands digital input cables as much as possible from the cables carrying inductive loads and the
power cables, to avoid possible electromagnetic disturbance.
built in driver: 18 DIN modules 110 X 315 X 75 mm
Mounting
Material
maximum number (on medium vers.)
Analogue outputs
type
optically-isolated 0 to 10 Vdc
maximum number (on
medium vers.)
power supply
external 24 Vac/Vdc
White RAL 9016
resolution
8 bit
Built- in terminal
PGD1 (132x64pixel) with backlit keypad
maximum load
1 kW precision ± 2 % of the full scale on outputs: Y1, Y2,
Y3 and Y4
Electrical specifications
power supply (controller with terminal
connected)
28 to 36 Vdc +10/-20% and 24 Vac +10/-15% 50…60 Hz;
Digital outputs
type
terminal block
CPU
program memory (on FLASH MEMORY)
maximum current P= 15 W (Vdc power supply), P= 40 VA (Vac)
with male/female plug-in connectors, max voltage 250 Vac cable cross-section: min. 0.5 mm 2 - max 2.5
mm2
H8S2320 to 16 bit and 14 MHz
512 kB, 16 bit (296 kB Bios; 216 kB application)
parameter data memory
13 kB, 16 bit (max limit: 400,000 writes per memory location) and further 32 kB E2prom (not visible from
the pLAN)
Analogue inputs
analogue conversion
type
Makeup of the groups (on medium vers.)
Changeover contacts (on medium vers.)
Switchable power
standard
10 bit A/D converter CPU built-in
time constant for each input
0.5 s
precision
± 0.3 % of the full scale
Note: the relays in the same group with basic insulation must have the same power supply (24 or 230
Vac).
relays with the same insulation | 1 to 7 | 8 | 9 to 13
relay 8, 12, 13
warning: the relay outputs have different features according to the model of pCO3
type of relay: SPDT, 2000 VA, 250 Vac, 8 A resistive
approval pCO3: UL873: 2.5 A resistive, 2 A FLA, 12 A LRA, 250 Vac, C300 pilot duty
(30000
cycles)
EN
60730-1:
2 A resistive, 2 A inductive, cosj= 0.6, 2(2) A (100000 cycles)
relay f type B
type of relay: SPDT, 1250 VA, 250 Vac, 5 A resistive
approval pCO3: UL873: 1 A resistive, 1 A FLA, 6 A LRA, 250 Vac, D300 pilot duty
(30000
cycles)
EN
60730-1:
1 A resistive, 1 A inductive, cosj= 0.6, 1(1) A (100000 cycles)
relay type C
type of relay: SPDT, 1250 VA, 250 Vac, 5 A resistive
approval pCO3: UL873: 1 A resistive, 1 A FLA, 6 A LRA, 250 Vac, D300 pilot duty
(30000
cycles)
EN
60730-1:
1 A resistive, 1 A inductive, cosj= 0.6, 1(1) A (100000 cycles)
Mechanical specifications
Correspondence between AWG and cable
cross-section
Table 4.d
WARNINGS:
- for the power supply of any active probes, 21 Vdc available at the +Vdc terminal (J2) can be used; the maximum current
is 150 mA, protected against short-circuits. To supply the 0 to 5 V ratiometric probes, use the +5VREF (Imax: 60 mA)
available at terminal J24.
- separate the probe signal ands digital input cables as much as possible from the cables carrying inductive loads and
the power cables, to avoid possible electromagnetic disturbance.
8
the outputs can be divided into groups. Between groups (cell-cell) there is double insulation.
relay type A
passive: (inputs B4, B5) CAREL NTC temp. sensor (see universal), PT1000 (-100T200 °C; R/T 1000W at
0°C) or voltage-free digital input (5 mA), can be selected via software;
universal: (inputs B1, B2, B3, B6, B7, B8) CAREL NTC temperature sensor (-50T90 °C; R/T 10 kW
25 °C), HT NTC 0T150 °C, voltage: 0 to 1 Vdc, 0 to 5 V ratiometric or 0 to 10 Vdc, current: 0 to 20 mA or
4 to 20 mA, can be selected via software. Input resistance of 0 to 20 mA= 100W
8
(CEI EN 61010-1)
Insulation distance
0.2 s (typical)
maximum number (on medium vers.)
classification of the measuring circuits
relay
maximum number (on
13
medium vers.)
Table 4.e
Make sure that the current running through the common terminals does not exceed the rated current for an individual terminal, that
is, 8 A.
2+2 MB; in the extended versions further memory of 32 MB or higher
data memory (static RAM)
working cycle duration (applications of
average complexity)
clock with battery
4
BAO-102-1 AUS
AWG
Cross-section (mm )
Current
20
0.5
2
15
1.5
6
14
2.5
8
2
groups:
1, 2, 3, 4, 5, 6 - 7 - 8 (alarm relay) - 9, 10, 11, 12, 13
switchable power:
2000 VA, 250 Vac, 8 A resistive, 2 A FLA, 12 A LRA to UL873, (30,000 cycles) 2 A resistive, 2 A
inductive, cosj= 0.4, 2(2) A to EN 60730-1, (100,000 cycles)
Table 4.f
9
BAO-102-1 AUS
5.
pLAN network/user terminal connectionTable 4.g
type
asynchronous half duplex RS485
transmission speed
62.5 Kbps or 115.2 Kbps, selected via software
terminal connector
6-pin telephone connector (J10)
pLAN network/graphic
terminal/ARIA terminal
connector
3-pin plug-in connector (J11)
Below is a list of the inputs and outputs, separated by type of hardware:
ANALOGUE INPUTS
The maximum distances allowed between the pCO³ and user terminal are shown in the following table:
type of cable
telephone
power supply
distance
50 m
List of pCO inputs/outputs
power supply
taken from pCO (150 mA)
AWG24 shielded
200 m
taken from pCO (150 mA)
cable
AWG20/22 shielded 500 m
separate power supply from
cable
TCONN6J000
The maximum distance between two pCO5 with AWG20/22 shielded cable is 500 m.
pCO5 MEDIUM
n.
Type of input
Description
U1
4/20mA – 0/5V – 0/10V
Capacity control input
U2
4/20mA – 0/5V
Low pressure transducer
U3
4/20mA – 0/5V
High pressure transducer
U4
NTC HT – PT1000
Compressor gas discharge temperature
U5
NTC
Liquid temperature
S1
4/20mA
Economiser PHEX suction pressure
S2
NTC
Economiser PHEX suction temperature
TABLE 5.a
Note:
•
J10 can be used to connect a maximum of one terminal (pCOT, pCOI, pGD0, pGD1) or two terminals but without using the
backlighting for the display. One version of the pCO5 features an optically-isolated connection to the pLAN network.
•
the graphic terminal and ARIA terminal should be always have separate power supplies.
•
the 21 Vdc present at +Vterm (J24) can be used to power an external terminal with a maximum power input of 2W. Only
one terminal can be connected (for example PLD terminal or ARIA terminal) in addition to the one connected to terminal
J10.
DIGITAL INPUTS
pCO5 MEDIUM
n.
Type of input
Description
ID1
24 V digital input
Oil pressure switch
ID2
24 V digital input
Compressor thermal cutout
ID3
24 V digital input
Phase sequence monitor
Other featuresTable 4.h
storage conditions
-40T70 °C, 90% RH non-condensing
ID4
24 V digital input
High pressure switch
ID5
24 V digital input
Low pressure switch
operating conditions
-25T70 °C, 90% RH non-condensing
ID6
24 V digital input
General alarm
index of protection
IP20, IP40 on the front panel only
ID7
24 V digital input
Fan thermal cutout alarm (contact open)
environmental pollution
normal
ID8
24 V digital input
Remote On / Off
class according to protection against electric shock
to be integrated into Class 1 and/or 2 appliances
PTI of the insulating materials
250 V
period of stress across the insulating parts
long
type of action
1C
type of disconnection or microswitching
microswitching
category of resistance to heat and fire
category D (UL94 - V0)
immunity against voltage surges
category 1
ageing characteristics (operating hours)
80,000
no. of automatic operating cycles
100,000 (EN 60730-1); 30,000 (UL 873)
software class and structure
Class A
category of immunity to voltage surges (CEI EN 61000-4-5)
Category 3
TABLE 5.b
ANALOGUE OUTPUTS
pCO5 MEDIUM
n.
Type of output
Description
Y1
0 - 10 V analogue output
Condenser fan control
TABLE 5.c
DIGITAL OUTPUTS
pCO5 MEDIUM
n.
Type of output
Description
NO1
NO
CR1 – 75%
The application program can be downloaded to the flash memory using the key code PCOCS00AKY0” or a PC, as described in the
chapter ”Installing the software”.
NO2
NO
CR2 – 50%
NO3
NO
Part-winding contactor 1
WARNINGS:
-
the device is not designed to be hand-held.
-
for applications subject to considerable vibrations (1.5 mm pk-pk 10/55 Hz), secure the cables connected to the pCO
around 3 cm from the connectors using clamps.
-
if the product is installed in industrial environments (application of the EN 61000-6-2 standard), the length of the connections
must be less than 30m;
-
installation must be performed according to the standards and legislation in force in the country where the appliance is
used;
-
for safety reasons the appliance must be housed inside an electrical panel, so that the only accessible part is the display
and the control keypad;
-
all the very low voltage connections (analogue and digital inputs at 24 Vac/24Vdc, analogue outputs, serial bus connections,
power) must have reinforced or double insulation from the mains;
-
in the event of malfunctions do not attempt to repair the appliance, but rather contact the CAREL service centre.
-
in residential environments, the connection cable between the pCO3 and the terminal must be shielded.
NO4
NO
Part-winding contactor 2
NO5
NO
Economizer
NO6
NO
General alarm
NO7
NO
CR4 - Increase
NO8
CO
CR3 - Decrease
NO9
NO
Condenser fan 5
NO10
NO
Condenser fan 4
NO11
NO
Condenser fan 3
NO12
CO
Condenser fan 2
NO13
CO
Condenser fan 1
TABLE 5.d
For further information see the specific manual for the device.
10
BAO-102-1 AUS
11
BAO-102-1 AUS
6. General diagram of the electrical connections
7.
Below is an example of the the electrical connections from the pCO5 to the devices involved in the application.
7.1
Operation and type
The user terminal can be used to perform all the operations allowed by the application program installed. It also
displays the operating conditions of the unit.
The user terminal can be used to set all the operating parameters of the unit in real time.
The correct operation of the unit does not require the user terminal to be connected.
The following user terminals can be used with or connected to the dedicated pCO* controller:
1.
pGD1: semi-graphic, 6 buttons – 8 row by 20 column display – connection with telephone cable.
7.2
General features of the pGD1 user terminal
The following information refers to the pGD1 user terminal.
For further information, refer to the technical sheet (code +050001040)
Condenser fan 1
Condenser fan 2
Condenser fan 3
Condenser fan 4
Condenser fan 5
CR3
CR4
General alarm
Part winding 2
Economiser
Part winding 1
CR2
CR1
Figure 6.a
The user terminal
7.2.1 Introduction to the pGD1 user terminal
The pGD graphic display is an electronic device that allows complete graphic management using the icon-based
display, plus the management of international fonts in two sizes: 5x7 and 11x15 pixel.
The application program is only resident on the pCO* controller, the terminal does not require additional software when
used. It can be supplied in two different versions, according to the type of assembly, either panel or wall-mounted.
1 - Green
3 - Brown
2 - Yellow
4 - White
7.2.2 Electrical connection and power supply
For the electrical connection, use the telephone cable (code S90CONN00) from the pCO* controller, connecting it to
the special connector (RJ12) located on the rear of the terminal.
This electrical connection both supplies power (18/30 Vdc) directly from the pCO* and carries the communication data.
Fan overload
Remote on / off
(NTC)
Economiser PHEX
LP switch
General Alarm
Figure 7a
To install the device, proceed as follows:
Suction temp + press.
Command signal 0-10V
probe (option)
(NTC)
(NTC HT)
(option)
Liquid Temperature
Discharge Temp. probe
Discharge sensor
Suction sensor
Control demand input
12
Condenser fan control output
- +
+ -
HP switch
230/24 Vac
Phase fail
G
G0
Oil switch
L
N
Comp overload
7.2.3 Assembling the pGD1 terminal, panel version (code PGD1000F00)
To assemble this version, the panel must have first been drilled as per the template shown in the figure:
•
•
•
BAO-102-1 AUS
13
connect the telephone cable;
insert the terminal, without the faceplate, in the opening made on the panel, and fasten it using the countersunk
screws contained inside the packaging;
apply the faceplate and click it into place.
BAO-102-1 AUS
7.2.4
Assembling the pGD1 terminal, wall-mounted version (code PGD1000F00)
7.2.5
pGD1 terminal technical specifications
Display
Type:
Backlighting:
Graphic resolution:
Text modes:
Character height:
FSTN graphic
green LED (managed by “application program”)
122x64 pixel
8 rows x 20 columns (font size 5x7 and 11x15 pixels)
4 rows x 10 columns (font size 11x15 pixels)
or alternatively mixed modes
4.5 mm (font 5x7 pixel)
9 mm (font 11x15 pixel)
Keypad LEDs
2 programmable by “application program”, red and orange (
4 green, associated with the backlighting of the LCD (
Power supply
Voltage:
Figure 7.b
This version is installed on the wall in a standard three-gang switch box. To install the device, proceed as follows:
•
•
•
•
fasten the rear of the case to the box in the wall using the round head screws contained inside the packaging;
connect the telephone cable;
insert the terminal, without the faceplate, in the rear of the box and fasten it using the countersunk screws
contained inside the packaging;
apply the faceplate and click it into place.
Maximum power input:
Maximum distance
Maximum length of the pLAN network:
Distance from pCO* to terminal:
and
and
= Alarm buttons)
buttons)
power supply from pCO* via telephone connector or alternatively from external 18/30 Vdc source
protected by external 250 mAT fuse
0.8 W
500 m with AWG22 shielded twisted pair cable
50 m with telephone cable
500 m with AWG22 shielded twisted pair cable and TCONN6J000
Note: to reach the maximum length, use a bus with branches that do not exceed 5 m.
Materials
Transparent front panel:
transparent polycarbonate
Charcoal grey rear case (wall/panel):
polycarbonate +ABS
Keypad:
silicone rubber
Transparent glass/frame:
transparent polycarbonate
Flame retardant:
V0 on front panel transparent and rear case
HB on silicone keypad and parts remaining
General
Index of protection:
IP65 with panel installation
IP40 with wall-mounting
UL type 1
Operating conditions:
-20T60 °C, 90% RH non-condensing
Storage conditions:
-20T70 °C, 90% RH non-condensing
Software class and structure:
A
Classification according to the index of
To be integrated into class 1 or 2 appliances
protection against electric shock:
PTI of the insulating materials:
250 V
Period of electrical stress:
long
Category of resistance to heat and fire:
D
Category (immunity against voltage surges):
I
Environmental pollution:
normal
Table 7.a
Note: if the terminal remains inactive (no button is pressed) for more than 30 seconds, any procedure in progress
is automatically terminated without saving the changes. For further information, see the specific manual for the
device.
14
BAO-102-1 AUS
15
BAO-102-1 AUS
7.3
Operation of the buttons
The buttons on the user terminal provide access to all the “screens” for setting and displaying the information.
pGD1 terminal
8.
pLAN network management
pLAN stands for: pCO Local Area Network.
The pLAN network identifies a physical connection between the controller (pCO*) and the external terminals.
The purpose of the pLAN network connection between the controllers is to exchange variables, according to the logic
decided by the application program, so as the units can operate together.
The variables exchanged between the controllers are established by the application program, as is the direction of
exchange, and therefore there are no user settings.
8.1
pLAN network diagram
A maximum of 32 devices can be connected to a single pLAN network.
Each device connected to the same pLAN network must have a unique address, between 1 and 32.
Below is a diagram of the specific pLAN network.
Figure 7.d
Button
(Alarm)
(Up)
8.2
Description
8.2.1 Assigning the address on the pGD1 terminal
The pGD1 terminal has a default address of 32. To assign a unique address, proceed as follows:
displays the alarms, mutes the buzzer and deletes the active alarms
if the cursor is in the home position (top left corner), scrolls the screens in the same group upwards; if the cursor is in a
setting field, increases the value
(Down)
if the cursor is in the home position (top left corner), scrolls the screens in the same group downwards; if the cursor is in a
setting field, decreases the value
(Enter)
moves the cursor from the home position (top left corner) to the setting fields, while in the setting fields confirms the set value
and moves to the next parameter
(Prg)
(Esc)
accesses the sliding menu for selecting the group of parameters to be displayed/set; access to the parameters is confirmed
by pressing [Enter])
Returns to the previous menu level or main screen
7.4
LEDs lighting the buttons
The buttons on the user terminal are illuminated, and based on the colour, a series of information can be identified
relating to the operating status of the system.
7.4.1 pGD1 terminal - 6 buttons
Meanings of the colours and status of the LEDs on the buttons:
Button
(Alarm)
(Prg)
Colour LED
Red
Yellow
Green
(Esc)
(backlit)
(Up)
(backlit)
(Down)
(backlit)
(Enter)
(backlit)
Green
Green
Green
How to assign the pLAN addresses
1.
2.
3.
4.
5.
6.
7.
Connect and power up the terminal.
Press the Up + Down + ENTER buttons until the “display address setting” screen is displayed
In the “display address setting” screen, enter the numeric pLAN address with the Up and Down buttons and
then confirm by pressing Enter
The “No link” screen will be displayed
If the “No Link” screen is not displayed, press Up + Down + Enter again
Once the “display address setting” screen is displayed, press Enter 3 times
When the “adr Priv/shard” screen is displayed, set the correct values with the Up and Down buttons and
confirm with “YES” and Enter.
8.2.2 Setting the address on the pCO5+
Procedure:
1. Press button A for 5 seconds. The pLAN address starts flashing;
2. Press repeatedly or hold the button until reaching the desired address (e.g. 7); remove the screwdriver;
3. Wait until the address starts flashing quickly. The address is now saved but is not yet active for the application
program
4. Power down the controller;
5. Power up the controller again. The address is now used by the application.
Description
On – One or more active alarms
On – Operating parameters being displayed/set
Flashing – Unit off from supervisor or digital input
On (5 minutes*) – button lighting (correct power supply to the terminal)
On (5 minutes*) – button lighting (correct power supply to the terminal)
On (5 minutes*) – button lighting (correct power supply to the terminal)
On (5 minutes*) – button lighting (correct power supply to the terminal)
(*): the illumination of the buttons that do not represent operating conditions or alarms and the backlighting of the
display go off 5 minutes after the last button was pressed.
7.4.2 Adjusting the contrast of the LCD
Holding the + buttons and pressing or increases or decreases the contrast.
16
BAO-102-1 AUS
17
BAO-102-1 AUS
8.2.3
Displaying the network status and firmware version from the pGD1 terminal
In pLAN mode only, on the pDG1 terminal, when holding the
address setting” screen and then the “NetSTAT” screen is displayed.
9.
buttons for 10 seconds, first the “display
In the “NetSTAT” screen, the 4 rows show the 32 addresses of the pLAN network, with symbols that represent the type
of device connected.
The
and
buttons can be used to display the version of the firmware resident in the pGD1 terminal.
To exit the “NetSTAT” procedure press
.
If the pGD1 terminal detects the off-line status of the associated pCO* controller, it cancels the display and shows the
message: “I/O Board xx fault”.
If the terminal receives no network signal, it cancels the display and shows the message: “NO LINK”.
Installing and restoring the default values
9.1
Initial installation of the default values
When the system is first started, the application program automatically installs the “default” values of all the
configuration parameters set by CAREL.
Subsequently, a number of values can then be customised, as shown in the list of parameters.
To start the system, power up the pCO* controller, after having checked the correct connection of the devices.
9.2
Restoring the default values
If needed, the initial “default” values can be restored following the procedure indicated below, valid for all the pCO*
controllers.
WARNING! The following procedure irreversibly deletes any custom values.
Procedure for resetting the “default” values:
From the main menu:
1)
press the Prg button
2)
scroll down with the Down button until highlighting the Manufacturer sub-menu,
3)
select the Manufacturer menu by pressing the Enter button,
4)
type the password(default 1234) and confirm by pressing Enter,
5)
scroll the sub-menus with the Up/Down buttons until highlighting Initialisation,
6)
select Initialisation and press the Enter button,
7)
scroll the screens with the Up/Down buttons until highlighting “Install default values”,
8)
select “Install default values” by pressing Enter,
9)
press the Enter button again to apply the default values;
operation completed.
10.
18
BAO-102-1 AUS
19
User Interface
BAO-102-1 AUS
11.Screens
3.
From the user terminal, pressing the Prg button accesses the main structure of the functions managed by the application
program:
•IN/OUT;
•SYSON;
•MAINTENANCE;
•USER;
and following, pressing the DOWN button:
•CLOCK;
•MANUFACTURER.
Selecting one of these main functions (Up and Down buttons), accesses the corresponding screen for displaying/
setting the values (Enter button).
Within the main functions, the screens can be displayed in sequence by pressing the Up and Down buttons. To change
the values allowed by the application program, within a screen, press the Enter button, if the cursor is highlighting a
value, use the Up and Down buttons until showing the desired value, to confirm press Enter again.
Configurations and codes
3.1
Configurations and software/hardware codes
Below are product codes for the different configurations of driver available for sale:
1.
“Driver for Bitzer CSH screw compressors” software
2.
pCO5+ medium with built in EEV +
“Driver for Bitzer CSH screw compressors” software installed (kit)
FLSTMBSDE
PCO5BZ010K
In addition, the following are available to complete the system:
3.
pGD1 user terminal for panel installation (8 rows by 20 columns)
PGD1000F00
4.
pGD1 user terminal for wall-mounting (8 rows by 20 columns)
PGD1000W00
5.
RS485 serial board for interfacing to supervisory network (optional)
PCOS004850
6.
pCO web / Bacnet
PCO1000WB0
7.
Temperature and pressure probes
(see general catalogue)
8.
Connection cable between user terminal and pCO controller
(see general catalogue)
Below is the tree for accessing the screens managed by the application program:
11.1
Figure 11a
Password-protected screens
The MAINTENANCE, USER and MANUFACTURER functions have all or some of the screens that are protected by
password. The password set by “default” is 1234. To enter the password when required, access the screen, press the
Enter button and use the Up and Down buttons to scroll the values from 0000 to 9999. Once having reached the correct
value, confirm by pressing Enter. If the wrong password is entered, repeat the procedure.
One or more custom passwords can be set, by entering the new value in the specific screen, this too protected by the
corresponding access password.
If the custom password is forgotten, the initial “default” values can be restored, including the password, remembering
however that this procedure also irreversible deletes any other custom values (see the procedure “Restoring the
default values”)
20
BAO-102-1 AUS
21
BAO-102-1 AUS
12.
List of parameters
The buttons on the user terminal can be used to display and/or change the values of the parameters set and saved in
the application program, resident on the pCO* controller. The screens generally have an alphanumeric code (two digits
at the end of the first row) that simplifies the association between the values that can be displayed/set on the screens
and the values described in the table of parameters. The table below lists the parameters managed by the application
program, and that can be displayed/set on the corresponding screens.
Description on the user terminal
Description of the function
Screen Default
Index
value
User
value
Range
Unit of
measure
INPUT/OUTPUT menu
Description on the user terminal
Description of the function
Screen
Index
Default
value
Compressor operating hours
Shows the log of alarm events
A3
-
Insert Maintenance password
A4
1234
0 to 9999
A5
10
0 to 999
Req.reset
Enter maintenance password
Compressor maintenance operating hour threshold at which a
maintenance alarm is generated.
Set compressor operating hours to zero
Input probe offset Demand ctrl.
Probe B1 offset (demand)
A6
0
-9 to +9
%
Low Press.
Probe B2 offset (low pressure)
A6
0.0
-9.9 to 9.9
bar/PSI
Probe B3 offset (high pressure)
A7
0
-9.9 to 9.9
bar/PSI
Disch.temp.
Probe B4 offset (gas discharge temperature)
A7
0
-9.9 to 9.9
°C/°F
Supply temp.
Probe B5 offset (supply air temperature)
Aa
0
-9.9 to 9.9
°C/°F
S1 offset
Ab
-
-99.9 to 99.9
S1 probe
Ab
-
-99.9 to 99.9
No
Yes/No
High press.
A5
0 to 999999
Unit of
measure
Alarms Logs
Input probe offset
-
Range
Hour counter Compressor
Compressor hour counter threshold
A2
User
value
H
Hours x 1000
Y/N
Demand ctrl.
Compressor capacity demand input
I0
-
0 to 100
%
Low press.
Low pressure sensor value
I0
-
000.0 to
Bar
High press.
High pressure sensor value
I1
-
000.0 to
Bar
S2 offset
Ac
Disch. temp.
Discharge temperature sensor value
I1
-
000.0 to
°C
S2 probe
Ac
Liquid Temp.
Liquid temperature
Ia
-
000.0 to
°C
Enable manual position
Ad
Oil pressure
Oil pressure switch input
I2
-
O or C
Manual valve position
Ad
Comp. Overload
Motor thermal cutout input
I2
-
O or C
Erase alarms history memory
A8
No
Yes/No
Phase sequence
Phase sequence / fail safety input
I2
-
O or C
New maintenance password
A9
1234
0 to 9999
Insert user password
Password to access the menu
P0
1234
0
Type of unit measurement
Unit of measure
P1
0000 to 9999
Standard(C/BAR)Angl
o/saxon
9.0
0.0 to 99.9
Bar
174.0
0.0 to 999.9
PSI
High pressure
High pressure switch input
I3
-
O or C
Low pressure
Low pressure switch input
I3
-
O or C
General Alarm
General alarm signal
lb
-
O or C
Cond.fan overload
Condenser fan overload
Ib
-
O or C
Digital on/off
Remote on / off command signal
Ib
-
O or C
Y1
0 to 10 Vdc fan speed output
I4
-
0 to 10
Relay Cr1
Compressor valve CR1
I5
-
O or C
Relay Cr2
Compressor valve CR2
I5
-
O or C
PW-k1 switch
Part-winding contactor 1
I6
-
O or C
PW-k2 switch
Part-winding contactor 2
I6
-
O or C
Economiser
Insert new maintenance psw
Bar
Bar
0-9999
Bar
Steps
User Menu
(F/PSI)
Condensation
Vdc
Number of fan speed
I7
-
O or C
Alarm relay
Alarm relay
I7
-
O or C
Relay Cr3
Compressor valve CR3
I8
-
O or C
Relay Cr4
Compressor valve CR4
I8
-
O or C
Cond.fan1
Condenser fan stage 1
Id
-
O or C
Cond.fan2
Condenser fan stage 2
Id
-
O or C
Cond.fan3
Condenser fan stage 3
Ic
-
O or C
Cond.fan4
Condenser fan stage 4
Ic
-
O or C
Cond.fan5
Condenser fan stage 5
Ic
-
O or C
Valve status
le
-
Close/Open
Valve opening
le
-
000.0 to
%
Valve position
le
-
0000 to
Steps
Cool. Capacity
lf
-
000 to
%
Superheat
S1 probe
Evaporation pressure
lf
li
-
K
Bar
S1 probe
Evaporation temp.
S2 probe
Suction temp.
lj
-
°C
lk
-
°C
Setpoint
P3
Diff
P3
Number on condenser fan speed stages
Pe
2.0
0.0 to 99.9
Bar
87.0
0.0 to 999.9
PSI
5
1-May
Oil pressure
Oil pressure switch digital input logic
Pa
NC
NO
NC / NO
Comp.overload
Compressor overload digital input logic
Pa
NC
NO
NC / NO
Phase sequence
Phase failure digital input logic
Pa
NC
NO
NC / NO
High pressure
High pressure switch digital input logic
Pb
NC
NO
NC / NO
Low pressure
Low pressure switch digital input logic
Pb
NC
NO
NC / NO
Pc
NO
NC
NC / NO
General Alarm
Cond.fan ol
Condenser fan overload digital input logic
Pc
NC
NO
NC / NO
Digital on/off
Remote on / off digital input logic
Pc
NO
NC
NC / NO
Alarm relay logic
Alarm relay operating logic
P4
NO
NC
ANALOG INPUT
No / Yes
*Note*
Software
version 2.3
and higher
alarm logic as
per black
background.
Any software
version lower
will be as per
second
column.
NC / NO
Demand control Resour.from
Selection origin of capacity control signal
P5
Analog
Input
Digital remote on/off
Enable remote on off digital input
Pf
Yes
Supervisor remote on/off
Enable ON/OFF from supervisor
Pf
NO
No / Yes
Setpoint SH
Superheat setpoint
Pg
10.0K
0 to 324.0
SUPERV.
S1 probe
ll
-
Bar
LSH thresh.
Low superheat alarm setting
Ph
2.0
-72.0 to 324.0
K
S1 extend
S2 probe
ll
Bar
LOP thresh.
Low operating pressure alarm setting
Ph
-8.0
-60.0 to 392.0
°C
°C
MOP thresh.
Maximum operating setting
Ph
55
-60.0 to 392.0
°C
Ident. number
Serial address
P6
1
0 to 200
baud_rate
Serial communication speed
P6
19200
1200 (RS485/RS422)
ll
-
D11
Digital input status
lm
-
D12
Digital input status
lm
-
On / Off unit Menu
2400 (RS485/RS422)
To switch the unit on and off
Maintenance Menu
22
4800 (RS485/RS422)
For information on the software version
Information on the software version, date and author
A0
-
Information on the BIOS version, BIOSversion and the manual
A1
-
Information on the EVO firmware version
Ae
-
9600 (RS485/RS422)
19200 (SOLO RS485)
BAO-102-1 AUS
Protocol
Select type of communication protocol
P6
0
CAREL/ MODBUS
Insert new user password
Edit new password to access the user menu
P7
1234
0000 to 9999
23
BAO-102-1 AUS
Description on the user terminal
Description of the function
Clock Menu
Clock config.
Screen
Index
Time
K0
Date
K0
Password to access the manufacturer menu
C0
Default
value
User
value
Range
Unit of
measure
Condenser Fan
1234
0000 to 9999
Configuration Menu
compressor_type
Type of control
C1
BITZER Step
Type of gas managed
C1
Min speed
Max speed
No / Yes
0.0 to 99.9
°C/°F
Diff.
Differential
G2
2.0
0.0 to 99.9
°C/°F
BITZER Stepless
Setpoint
Setpoint
G3
120.0
0.0 to 999.9
°C/°F
R134a
R134a
Diff.
Differential
G3
5.0
0.0 to 99.9
°C/°F
R407C
Transducer high pressure alarm
Setpoint
High gas discharge temperature alarm hysteresis
No / Yes
Setpoint
High pressure alarm set point
G4
16.0
0.0 to 99.9
bar/PSI
Suction /
Diff.
Differential
G4
02.0
0.0 to 99.9
bar/PSI
Setpoint
Low pressure alarm set point
G5
0.5
0.0 to 99.9
bar/PSI
Diff.
Differential
G5
0.5
0.0 to 99.9
bar/PSI
G6
NO
No / Yes
G6
6.0
0.0 to 9.9
bar/PSI
Suction set point
G8
2.0
0.0 to 99.9
bar/PSI
Neutral zone / dead band
G8
0.5
0.0 to 9.9
bar/PSI
Band
proportional band
G8
0.5
0.0 to 9.9
bar/PSI
0-5V
Max setpoint
Variable suction highest set point
Ga
3.0
0.0 to 99.9
bar/PSI
4/20mA
Min setpoint
Variable suction lowest set point
Ga
1.0
0.0 to 99.9
bar/PSI
0-5V
Pumpdown
Enable pumpdown
Gb
Yes
Yes/No
Pumpdown setpoint
Pumpdown set point
Gc
1.0
0.0 to 999.9
bar/PSI
Yes
Demand ctrl.
Enable capacity control input
C2
No
Variable suction
No / Yes
Low Pressure
Enable probe low pressure
C2
Yes
No / Yes
High pressure
Enable probe high pressure
C3
Yes
No / Yes
Disch.temp.
Enable discharge temperature probe
C3
Yes
No / Yes
Low differential pressure alarm
Supply temp
Enable liquid temperature probe
Cm
Yes
No / Yes
Setpoint
Low differential setpoint
Pumpdown enable
Enable the pump down routine
Cn
Yes
No / Yes
Suction control
(only if suction control is selected in screen Co)
0-10V
0-10V
Setpoint
Type of demand control
Type of demand control signal
C4
0-5V
Neutral zone
Minimum value
Cp
Demand input probe
Maximum value
Cp
Transducer low
pressure alarm
4/20mA
4/20mA
4/20mA
0.0
V
Timings Menu
10.0
V
Low pressure alarm
NTC HT
NTC HT
start up delay
LP alarm delay when starting
T0
40
0 to 999
sec
PT1000
run_delay
LP alarm delay in steady operation
T0
10
0 to 999
sec
T1
120
0 to 9999
sec
Type of discharge temperature probe
Type of input for discharge temperature probe
High pressure probe configuration
Min value
Configuration of high pressure probe
Minimum pressure value (4mA or 0V)
C8
0.0
0.0 to 99.9
bar/PSI
Max value
Maximum full scale value (20mA or 5V)
C8
30.0
0.0 to 99.9
bar/PSI
Low pressure probe configuration
Configuration of low pressure probe
Min value
Minimum pressure value (4mA or 0V)
C9
Max value
Maximum full scale value (20mA or 5V)
C9
Electrovalve configuration
Select compressor control solenoid valve (relay 5)
E.E.V. Driver
C7
0.0
10.0
Cb
Econ
Cq
Yes
Baud rate
19200
Stage 1
Cr1 valve relay
(Step mode only)
Cr2 valve relay
OFF
Cd
Cr3 valve relay
ON
Cr1 valve relay
OFF
(Step mode only)
Cr2 valve relay
Stage 3
(Step mode only)
OFF
Cr1 valve relay
ON
Cf
OFF
Stage 4
Cr1 valve relay
OFF
(Step mode only)
Cr2 valve relay
OFF
Standby config.
Relay 3 (CR3)
OFF
(Stepless mode only)
Relay 4 (CR4)
Decrement config.
Relay 3 (CR3)
(Stepless mode only)
Relay 4 (CR4)
Increment config.
Relay 3 (CR3)
(stepless mode only)
Relay 4 (CR4)
Compressor safety unloader step
configuration
Ci
Cj
Ck
Economizer
Yes/No
19200/9600/4800/
2400/1200
Display only
Display only
Display only
Display only
Display only
Display only
OFF
OFF
Display only
ON
MINIMUM
POWER
Oil level alarm
Startup _delay
Oil level alarm delay when starting
T2
120
0 to 999
sec
run_delay
Low differential pressure alarm start up
delay
Minimum comp power-on time
Oil level alarm delay in steady operation
T2
90
0 to 999
sec
Low differential pressure alarm start up delay, if enabled
T3
20
0 to 999
sec
Minimum compressor run time
T4
300
300 to 999
sec
Minimum comp power-off time
Minimum compressor off time
T4
60
60 to 999
sec
Min time between comp. starts
Delay between successive starts of the compressor
T5
480
480 to 999
sec
sec
CR timing (step mode only)
T6
TIME CR3
Minimum operating time at 25%
T6
10
0 to 999
TIME CR2
Minimum operating time at 50%
T6
0
0 to 999
sec
TIME CR1
Minimum operating time at 75%
T6
0
0 to 999
sec
Comp. over. limit delay
Compressor envelope limits exceeded alarm delay
T7
60
Display only
sec
Bypass T. hot evap. from start
High suction T bypass time when starting
T7
300
0 to 9999
sec
Comp config.
Select compressor start mode
T8
Part w
Display only
T8
500
Display only
ms
Time PW
modulation_conf
Pulse period
(stepless mode only)
min_pulse_Dec.
OFF
ON
L P probe alarm delay from compressor on Ignore transducer fault signal for this delay when starting
T9
(stepless mode only)
OFF
Cr3 valve relay
Ch
bar/PSI
None
OFF
Cr3 valve relay
Cg
bar/PSI
0.0 to 99.9
ON
Cr3 valve relay
Cr2 valve relay
0.0 to 99.9
OFF
Stage 2
Ce
Volts
Yes
Suction
Demand input probe
0.0 to 10.0
14.0
Co
C6
10
G2
Co
Type of input for high pressure probe
No / Yes
0.0 to 10.0
G2
Type of suction control
Type of high pressure probe
Yes
03.0
Unit of
measure
Prevent set point
Enable control from suction pressure
C5
Range
Enable high condensing pressure prevention
Control type
Type of input for low pressure probe
G1
User
value
Setpoint
Suction control
Type of low pressure probe
G0
Default
value
High pressure prevent enable
Discharge temp. alarm
4-20mA
Minimum /
Maximum
(stepless mode only)
max_pulse_Dec.
(stepless mode only)
T9
6
0 to 20
sec
Minimum duration of decrease capacity impulse
T9
0.5
0 to
max_p_period
sec
Maximum duration of decrease capacity impulse
T9
1.0
0 to pulse period
sec
2 to pulse_period
sec
Ta
(stepless mode only)
derivation_time
(stepless mode only)
min_pulse_inc.
max_pulse_inc.
(stepless mode only)
BAO-102-1 AUS
Decrease capacity control signal cycle time
modulation_conf
(stepless mode only)
24
Enable phase monitor alarm input
Screen
Index
BITZER
Stepless
R22
refrig_type
Description of the function
Parameters Menu
Enable phase failure alarm
Manufacturer Menu
Insert manufacturer password
Description on the user terminal
25
Capacity control signal derivation time
Ta
5
Minmum duration of increase capacity impulse
Ta
0.5
Maximum duration of increase capacity impulse
Ta
1.0
0 to
max_p_period
0 to
max_pulse_incr
sec
sec
BAO-102-1 AUS
Description on the user terminal
Description of the function
modulation conf.
Screen
Index
Default
value
User
value
Range
Unit of
measure
Description on the user
terminal
Probe S2 Alarm
Description of the function
Screen
Index
EC6
Default
value
Enabled
User
value
(stepless mode only)
time force dec. for start comp.
(stepless mode only)
time to reach the min power
(stepless mode only)
time to reach the max power
(stepless mode only)
Act./Deact. time
Forced CR3 time at compressor start
Tb
20
0 to 999
sec
Time to reach minimum capacity
Tc
120
0 to 999
sec
Time to reach maximum capacity
Tc
120
0 to 999
sec
Pulse period for CR4 when in 4 step mode
Td
010
0 to 999
sec
CR4 cycle time
Type
Probe S2
Alarm Min.
Alarm Max.
EC7
-50.0
105
Enabled/disabled
NTC Carel, 0-10V
Signal, NTC
SKP**T0, Carel
NTC-HT
-76.0 to 392.0
-76.0 to 392.0
Disabled,
EC8
Alarm Relay
Te
000
0 to 999
sec
Valve + Alarm relay
Fan delay between stages
Te
005
0 to 999
sec
Solenoid Valve relay
Max pumpdown time
Maximum time for pumpdown before stop
Tf
060
0 to 999
sec
Disabled
Initilisation Menu
Install default values
Install default values (see warnings!)
V0
No
Yes/No
Insert new manufacturer psw
New manufacturer password
V1
1234
0 to 9999
Reg. Safety,
Reg. Backup,
EVO Management
Configuration Menu
EVD Config
EEV Selection
EC1
CAREL
EXV
°C
°C
Valve position,
Reversed Alarm
relay,
Fan start at full power for this time period before reverting to normal
control
Time delay between condenser fan stages
Speed up time for condenser fan
Unit of
measure
Alarm relay
Relay Configuration
(step mode only)
NTC Carel
Range
Carel EXV
SporlanSER.(1).
G.J.K
(2)Carel
ExVs Danfoss
ETS400 ETS250
ETS100B
ETS50B
ETS12.5-25B
Sporlan
SEH175
SEH100
SE150
SE130
SER
1.5-20 SEI 0.5-11
Alco
EX8
500Hz
EX8
330Hz
EX7
EX6, EX5, EX4
ID1 configuration
EC9
Disabled
ID2 configuration
ECa
Disabled
Start/Stop reg.
Valve force100%
open,
Battery Alarm
management,
Valve regulation opt.
after defrost
As per ID1
Backup Digital input
ECb
No
No/Yes
ECc
Valve
forced
closed
S1 Probe alarm management
Valve at fixed
position,
Valve forced closed,
No Action,
Use backup S3
S2 Probe alarm management
ECd
Valve
forced
closed
Valve at fixed
position,
Valve forced closed,
No Action,
Use backup S3
DC power supply
ECe
YES
Yes / No
Regulation Menu
Main regulation
Application type
Auxiliary regulation
EC2
EC3
AC or
Chiller with
plate
evaporator
Disabled
AC or Chiller with
plate evaporator,
R404a Condenser
for subcritical CO2,
subcritical CO2
cabinet/cold room,
self contained
cabinet/cold room
Valve opening at startup
EG1
50
0-100
Valve opened in stand-by
EG2
NO
No/Yes
Start up delay after defrost
EG3
00
0 to 60
Minutes
Valve preposition delay
EG4
00006
0 to 990
Seconds
PID parameters
EG5
Proportional gain
3.0
0 to 800
Integral time:
40
0 to 1000
Seconds
Derivat. time
1.0
0 to 800
Seconds
Low SH protect
2.5
0 to 800
Seconds
LOP protect
4.0
0 to 800
Seconds
MOP protect
10.0
0 to 800
Seconds
Alarm Delay – Low SH
300
0 to 18000
Seconds
Alarm Delay – LOP
300
0 to 18000
Seconds
Alarm Delay – MOP
300
0 to 18000
Seconds
5.0
15
-76.0 to 392.0
0 to 18000
°C
Seconds
Integral
Disabled, User
defined, Backup
probes on S3 & S4,
Modulating
thermostat on S4
probe, High
condensing temp
protection on S3
EG6
Alarm Delay
EGa
Alarm low suction temperature
Probe S1 alarm
Probe S1 Alarm:
Enable the S1 probe and its alarm
EC4
Enable
EC4
Enable
4-20mA
Type:
Type of probe connected to S1
Disabled/enabled
Custom Menu
4-20mA Remote
Valve custom
0-5v Ratiometric
4-20mA, Raz.0-5V, 420mA external, 420mA remote
Type
Min.
S1 Max:
Maximum scaling point for Active Sensor
S1 Max
26
0
-290.0 to 10
EGb
Threshold
Timeout
4-20mA external
EC4
%
Bar
EC5
10
0.0 to 999.9
Bar
A1 Min.
0
-290.0 to 10.0
Bar
A1 Max.
10
0.0 to 999.9
Bar
BAO-102-1 AUS
EP1
Min. steps
EP1
50
0 to 9999
Max. steps
EP1
480
0 to 9999
Closing steps
EP1
500
0 to 9999
Nom. Step rate
EP2
50
1 to 2000
Closing rate
EP2
150
1 to 2000
Hz
Move Current:
EP3
450
0 to 800
mA
Holding Current:
EP3
100
0 to 800
mA
Duty cycle
EP4
30
0 to 100
%
Opening Synchr:
EP4
YES
Yes/No
Closing Synchr:
EP4
YES
Yes/No
Hz
Note: the values described in the “range” column may change if the unit of measure selected is modified.
27
BAO-102-1 AUS
13.
Selecting the unit of measure
The unit of measure used for the temperature and pressure values can be set on the user interface, selecting between
standard (°C / Bar) or Anglo-Saxon (°F / Psi ) units of measure.
The type of unit of measure is selected as follows:
1.
press the PRG button, select “USER” and access screen P0, which requires the password;
2.
once having entered and confirmed the correct password, access screen P1 for selecting unit of measure;
3.
select between the options “STANDARD(°C/bar)” or “ANGLO-SAXON(°F/PSI)” and confirm.
After the selection, all the parameters are converted to the new unit of measure.
14.
Compressor management
The “Driver for Bitzer CSH screw compressors” application program has been developed specifically to manage Bitzer
CSH series compressors, including the following possible types of control:
•
stepped capacity control;
•
continuous (stepless) capacity control,
•
suction pressure with continuous (stepless) capacity control
•
variable suction pressure with continuous (stepless) capacity control
while managing all the safety devices recommended and certified by Bitzer, in two different modes:
•
safety capacity control
•
envelope control (using an algorithm developed by Carel, based on Bitzer specifications)
Management from a supervisory system is also available.
14.1 Switching the compressor On/Off
The compressor is started in different ways for stepped or continuous capacity control:
•
stepped capacity control - the compressor starts when the activation of the first stage is requested.
•
continuous capacity control - the compressor starts as soon as the input signal exceeds the capacity standby
zone.
•
Suction control – the compressor is cycled to maintain the suction pressure set point.
Inputs used:
•
B1 - Capacity control input
•
B2 - Low pressure transducer
•
B3 - High pressure transducer
•
ID1 – Oil pressure switch
•
ID2 – Compressor thermal cutout
•
ID3 – Phase sequence monitor
•
ID4 – High pressure switch
•
ID5 – Low pressure switch
•
ID8 – remote on / off
Outputs used:
•
NO3 - Part-winding contactor 1
•
NO4 - Part-winding contactor 2
Starting conditions:
A compressor can only be started if there are no alarms that prevent operation. These alarms may be:
•
oil pressure switch;
•
phase sequence monitor;
•
high pressure switch;
•
low pressure switch.
Or alternatively, if the corresponding refrigerant circuit is in potentially dangerous operating conditions for the device,
according to the specific envelope diagram:
•
high pressure transducer;
•
low pressure transducer;
•
high discharge temperature.
PW1
PW2
PWT
t
Part-winding 1 Start (Relay 3)
Part-winding 2 Start (Relay 4)
part-winding delay (500ms fixed)
Time (second).
Figure 14.a
Stopping sequence
The compressor is stopped in a number of different ways depending on which mode, stepped or continuous
capacity control:
•
stepped capacity control - the compressor stops when the de-activation of the first stage is
requested, this occurs when the demand signal falls below 10%.
•
continuous capacity control - the compressor stops when the input signal is below the capacity
neutral zone for the time to minimum power delay
Pump down
The compressor stopping can be done utilizing the digital input for remote on / off. If pump down
is enabled, then the compressor will continue to run until the “Pump down” set point (Gb) is reached. If
the set point is not reached within the maximum pump down time (Tf) the compressor will be stopped.
Control of compressor capacity
Compressor capacity is controlled, either in steps or continuously, using 4 digital outputs.
Inputs used:
•
B1 - Capacity control input
•
B2 - Low pressure transducer
•
B3 - High pressure transducer
Outputs used:
•
NO1 - CR1 (75% limit)
•
NO2 - CR2 (50% limit)
•
NO7 - CR4 (Increase)
•
NO8 - CR3 (Decrease)
14.2 Stepped capacity control
A Bitzer CSH series screw compressor is managed with preset 4 load steps.
The values can be displayed and operation monitored from the user interface.
The activation of the different levels of capacity occurs with a preset delay time, according to the indications
provided by the manufacturer, and in any case visible on the user interface (see the timings menu).
Bitzer relay start-up sequence, stepped capacity control:
Legend:
1. Capacity control input;
2. Solenoid status;
3. CR4 pulsing function according
to pattern on screen Td.
All start modes are subject to any time delay that may still be active, i.e. time between starts or minimum off time.
If remote on / off is enabled, the compressor cannot start unless the digital input is in the run condition.
The digital outputs associated with the part-winding are activated in sequence with a fixed delay defined by Bitzer.
28
BAO-102-1 AUS
Figure 14b
29
BAO-102-1 AUS
14.3 Continuous capacity control
A Bitzer CSH series screw compressor with continuous capacity control is managed by the application program by
controlling the capacity relays CR3 and CR4 parameters. This control mode is suitable for fast response control loops
such as chilled water leaving temperature control or supply air control. For installations that require Room temperature
control, cascade control must be utilized. Cascade control is when the Room temperature / setpoint deviation is used
to reset the setpoint of the Supply Air (leaving water) controller. The output from the supply air / leaving water controller
is used as the demand signal for the CSH module.
The activation/deactivation thresholds for the load steps, according to the proportional input signal, are as follows:
Load step:
Increase capacity
0-24%
25-49%
B1
PWR
0%
Decrease capacity
100-76%
Bitzer relay start-up sequence, continuous capacity control:
B1
Legend:
1. capacity request;
2. relay output status;
3. start/stop;
4. increase capacity;
5. Decrease capacity;
6. stand-by or Neutral zone;
7. Pulsing of relay according to
times set on screen Ta;
8. Pulsing of relay according to
times set on screen T9 ;
9. capacity over ride due to
operational limits being exceeded.
PWR
25%
75-51%
100%
75%
50-74%
50%
50-26%
50%
75-99%
75%
25-10%
25%
100%
100%
10-0%
0%
14.4.2 Compressor with continuous capacity control
A compressor with continuous capacity control modulates the capacity in 3 phases:
•
increase - the capacity is increased by a series of impulses with variable amplitude; a maximum time limit is
established, after which the compressor is considered to be operating at full load;
•
Neutral zone - the capacity reached is maintained;
•
decrease - the capacity is decreased from a series of impulses with variable amplitude; a maximum time limit is
established, after which the compressor is considered to be operating at minimum load, after which it is turned off.
The operation of the compressor cannot be enabled with the reduced capacity field, consequently the compressor will
always work across the range of the capacities available, 25-100%.
The effective value of active capacity is not available on the user interface, as there is no feedback from the compressor.
Without feedback, having to start the compressor at minimum capacity, a forcing function is applied when starting for
a set time, managed directly by the Bitzer compressor management macroblock.
This time can be set on the user interface on screen Tb
14.4 Calculating the active capacity in the refrigerant circuit
The capacity is controlled based on an analogue input signal, generated by any external controller, used for the unit
control strategies.
Inputs used:
•
B1 - Capacity control input
Given the different types of compressor capacity control managed (stepped or step less), there are two different ways
to interpret the input signal, based on the type of compressor controlled.
14.4.1 Compressor with stepped capacity control
The analogue input signal is interpreted as a pure proportional signal, in the range 4-20mA / 0-10V, and is divided into
4 equal steps.
Figure 14e
14.4.3 Compressor Suction pressure with continuous capacity control
A compressor with continuous capacity control modulates the capacity in 3 phases:
•
increase - the capacity is increased by a series of impulses with variable amplitude; a maximum time limit is
established, after which the compressor is considered to be operating at full load;
•
Neutral zone - the capacity reached is maintained;
•
decrease - the capacity is decreased from a series of impulses with variable amplitude; a maximum time limit is
established, after which the compressor is considered to be operating at minimum load, after which it is turned off.
Figure 14f
Figure 14.d
30
BAO-102-1 AUS
31
BAO-102-1 AUS
14.4.4 Compressor Variable Suction pressure with continuous capacity control
The compressor is managed in the same method as the suction pressure method above with the variation that the
suction set point is not fixed. The desired suction set point is varied up and down in relation to the demand input
(B1). As the demand signal is raised, the desired set point is lowered. The amount of variation is determined by the
Maximum and Minimum set points set on screen Ga. If the demand signal is 0% then the desired set point will be the
“Maximum setpoint”, if the demand input is 100% then the desired set point will be the “Minimum set point”
15.
Economizer solenoid valve / EEV control
The operation of the economizer valve is also managed:
•economizer
the valve control output is managed by the macroblock, according to the compressor set point
Inputs used:
•
B2 - Low pressure transducer
•
B3 - High pressure transducer
•
S1 – suction pressure transducer for PHEX
•
S2 – suction temperature sensor for PHEX
Outputs used:
•
NO5 – Economizer
•
J27 – output for Bi-Polar EEV
16.2
Envelope control algorithm for Bitzer CSH screw compressors
Carel has developed an algorithm according to Bitzer specifications for the
management and protection of their compressors.
Setting the “Compressor type” parameter to “Bitzer CHS Steps” or “Bitzer CHS
Stepless”, the compressor control algorithm automatically uses the fixed operating
limits defined by the Bitzer specifications.
The management of Bitzer compressors is incorporated into the application program and controls the suction pressure (input “B2”) and discharge pressure (input “B3”), optimising the cooling capacity of the compressor, both through the management of the control valves in step mode (STEP) and continuous (STEPLESS) control.
When the various operating thresholds are exceeded, the compressor operates under forced capacity control or is shut down.
The type of refrigerant used in the compressor circuit can be set, using parameter “Refrig.type” and selecting between
R407c, R22 and R134a.
Depending on the type of gas selected, the Bitzer compressor management procedure varies the operating limits of the
compressor, as shown in the following:
The user interface enables you to select if an economiser is fitted or not. If selected, the output will enable the
economiser when the suction / discharge pressures are suitable. See application envelope.
The controller can now be fitted with a CAREL Electronic Expansion Valve to control the super heat of the economiser
heat exchanger.
In manufacture menu you can select if EEV is fitted or not.
If the EEV is selected and “economiser” operation is permitted, then the valve will be positioned to maintain Super Heat
as measured by the Economiser temperature and pressure sensors.
16.
Compressor safety control
The safety of the Bitzer CSH series screw compressor is managed in two different ways:
•
safety capacity control
•
envelope control
Inputs used:
•
B2 - Low pressure transducer
•
B3 - High pressure transducer
•
B4 - Compressor gas discharge temperature
Outputs used:
•
NO1 - CR1
•
NO2 - CR2
•
NO5 - Economizer
•
NO6 - General alarm
•
NO7 - CR4
•
NO8 - CR3
16.1 Safety capacity control
Safety capacity control involves forcing the compressor to operate at minimum or maximum capacity, according to the
operating pressure/temperature conditions; the value is defined by the manufacturer of the compressor, and can be
displayed on the user interface.
Safety capacity control is activated for:
-
gas discharge temperature control based on the reading of the temperature probe located on the compressor
discharge;
Figure 17.a
The safety control status is displayed on the user interface, indicating, as well as the general activation status, also the
status of the special condition that is active.
32
BAO-102-1 AUS
33
BAO-102-1 AUS
Below is a table of the pressure values, expressed in BAR, found at the points represented on the envelope diagram,
divided by type of gas.
Key values in the table:
to
evaporation temperature
po
evaporation pressure
tc
condensing temperature
pc
condensing pressure
•
Zone G
above max o
If the limit is reached when already on, the compressor is stopped immediately. Vice-versa, only at start-up, above this
limit the maximum compressor capacity is restricted to 50% and this condition is allowed for a maximum of 5 minutes. If 5
minutes after starting, the pressure value is still not inside the polygon, the compressor is stopped immediately, otherwise
all of the above-mentioned protectors are considered.
(pressure=BAR – temperature = °C)
Points on theR22
R134a ECO
polygon
With or without ECO
With or without ECO
to
po
tc
to
R407C
With or without ECO
po
Tc
pc
to
po
tc
pc
1
12.5
6.3
60
23
12.5
3.5
60
15.7
12.5
6
60
24.2
2
-10
2.5
60
23
-13
0.8
60
15.7
-8
2.5
60
24.2
3
-15
1.9
55
20.8
-15
0.6
58
15
-15
1.6
55
21.5
4
-15
1.9
20
8.1
-15
0.6
20
4.8
-15
1.6
20
7.8
5
-3
3.5
20
8.1
-10
1
20
4.8
0
3.6
20
7.8
6
12.5
6.3
32.5
11.7
12.5
3.5
35
8
12.5
6
32.5
11.6
7
15
6.9
34
12.2
15.5
4
37
8.5
15
6.5
34
12.1
8
17.5
7.5
35.8
12.8
20
4.8
40
9.2
17.5
7.2
35.8
12.8
9
17.5
7.5
60
23
20
4.8
60
15.7
17.5
7.2
60
24.2
10
15
6.9
60
23
15.5
4
60
15.7
15
6.5
60
24.2
60
23
65
18
60
24.2
17.5
7.5
20
4.8
17.5
7.2
max c
max o
pc
•
Zone F
The maximum compressor capacity is not limited (available up to 100%), but this condition is only allowed for a maximum
of one minute; if after one minute the pressure value is still not inside the polygon, the condenser fans are stopped and
the compressor is stopped immediately.
Only three starts are allowed.
16.2.1Protectors
As well as the standard protection, such as low and high pressure switches, the thermal cutouts on the windings, the
oil differential pressure switch, the Bitzer management algorithm protects the compressor against dangerous pressure
conditions. In addition, the Bitzer management algorithm checks the frequency of compressor starts, even in the event
of power failures, and the minimum on and off times.
The envelope diagram shows 7 different operating zones, in each of which the Bitzer management algorithm controls
the compressor capacity control to bring the unit set point within the envelope polygon:
•
Zone A
Above the maximum condensing pressure limit (max c)
The compressor is stopped immediately.
•
Zone B
The maximum capacity achievable by the compressor is limited to 75%; the compressor can operate for a maximum of
one minute; if after one minute the pressure value is still not inside the polygon, the compressor is stopped immediately.
•
Zone C
Polygon between points 1-2-3-4-5-6
Inside of this zone the compressor capacity is not limited and is managed solely according to demand.
•
Zone D
Polygon between the points 6-7-10-1
The maximum compressor capacity is limited to 75% without any time restrictions. In this case, the compressor is not
endangered. If fitted, the economiser is forced off.
•
Zone E
Polygon between points 7-8-9-10
The maximum compressor capacity is limited to 50%, and the condition is allowed for a maximum of 10
minutes; if after 10 minutes the pressure value is still not inside the polygon, the compressor is stopped
immediately. If fitted, the economiser is forced off.
16.3 Safety times
The Bitzer management algorithm controls all the compressor safety times:
•
minimum compressor operating time;
•
minimum compressor off time;
•
delay between successive starts of the same compressor.
The values cannot be changed as they are set by the manufacturer of the compressor, however they are displayed on
the user interface.
Outputs used:
•
NO3 - Part-winding contactor 1
•
NO4 - Part-winding contactor 2
17.
Hour counter
The “hour counter” function is used to save the compressor operating hours in the permanent memory on the pCO*
controller.
To manage compressor maintenance, an operating hour threshold can be set, after which a message is displayed on
user interface or an audible signal is emitted.
The “hour counter” function requires the clock board (optional on pCO1, standard on pCO3) and is enabled by parameter.
Outputs used:
•
NO4 - Part-winding contactor 2
17.1 Display operating hours
To access the screen displaying the compressor operating hours, proceed as follows:
•
press the PRG button, select “MAINTENANCE” and access the
“hour counter
A2” screen.
The compressor operating hours cannot be reset from the user interface.
17.2 Setting the operating hour alarm threshold for maintenance
To access the screens for setting the operating hour alarm threshold and displaying the operating hour alarm, proceed
as follows:
1.
2.
press the PRG button, select “MAINTENANCE” and access the “Compressor
A5” screen in the password protected branch;
on the “Compressor A5” screen, under the item “Threshold ”,
set the alarm threshold, expressed in thousands of operating hours;
NOTE: setting the value 000 as the alarm threshold disables the operating hour count and maintenance alarm.
Exceeding the set operating hour threshold activates an alarm, without affecting the operation of the system, signalled
by the activation of the red LED
on the ALARM button and an audible signal, where featured.
34
BAO-102-1 AUS
35
BAO-102-1 AUS
The alarm, displayed only when the operating hour threshold is exceeded, is displayed on the “AL001 U:00” screen.
Once having completed the maintenance or the required operations, the count can be rest.
19.1 List of alarms
Below the list of all the alarms, with the description of the consequent actions on the unit.
The generation of an alarm activates the digital input associated with the general alarm signal, for the entire duration of
the alarm condition.
No. Event
To reset the operating hour count, on the “Compressor A5” screen (described above) in the row “Req.reset”
select “YES”.
When reset, the count restarts from 0 and the number of operating hours from the reset are recorded.
18.
Condenser control
The condenser can be controlled in the following way:
•
Modulating linked to the reading of the pressure transducer (if the high pressure transducers are enabled)
Outputs used:
•
Y1 - Enable condenser fans
•
NO13 – Condenser fan out 1
•
NO12 – Condenser fan out 2
•
NO11 – Condenser fan out 3
•
NO10 – Condenser fan out 4
•
NO9 – Condenser fan out 5
Parameters used:
•
Condensation setpoint
•Differential
•
Number of fan stages
•
Also see parameters menu.
18.1 Modulating condenser control linked to the pressure or temperature sensor
With this type of condenser control the fans will be managed by a 0/10 V analogue output proportional to the
reading of the pressure / temperature sensors. If the lower limit of the ramp is greater than 0 V, there will not
be a straight proportional relationship, but rather the type shown in the first section of graph, one step below
the set point-diff.
If fan stages are used, the number of stages is evenly distributed over the “differential” range. i.e. if the
number of fans is 4 and the Differential is 2.0 Bar then each fan will cycle at 0.5 Bar.
Legend
1. condenser pressure / temperature;
2. set point;
3. differential;
4. HP Prevent (if enabled);
5. sensor alarm.
1
2
3
4
5
6
7
8
9
10
11
12
13
14
15
16
17
18
19
20
21
22
23
24
25
26
27
28
29
30
31
19.2
Compressor maintenance alarm
Phase sequence alarm
Oil differential alarm
High pressure alarm from pressure switch
Low pressure alarm from pressure switch
Compressor thermal cutout alarm
Differential pressure alarm
High pressure alarm from transducer
Low pressure alarm from transducer
High gas discharge temperature alarm
Clock board alarm
Future use
Analogue input B1 alarm
Analogue input B2 alarm
Analogue input B3 alarm
Analogue input B4 alarm
Operating limits exceeded alarm
Condenser Fan O/load alarm
General Alarm
EEV probe S1 alarm
EEV probe S2 alarm
EEV low SuperHeat alarm
EEV Low evaporation temperature (LOP)
EEV High evaporation temperature (MOP)
EEV Hi Condensing Temperature (HiTcond)
EEV EEPROM alarm
EEV motor alarm (open / short circuit wire)
EEV Driver offline
EEV low suction temperature
EEV backup voltage alarm
EEV Autotune error
Input
Compressor
Fans System
ID3
ID1
ID4
ID5
ID2
B2-B3
B3
B2
B4
OFF
OFF
OFF
OFF
OFF
OFF
OFF
OFF
OFF
OFF
OFF
B1
B2
B3
B4
OFF
OFF
OFF
OFF
OFF
OFF
OFF
ID7
ID6
S1
S2
S1/S2
S1
S1
OFF
-
Delay
Start
0
0
Bitzer
0
Variable
0
Variable
0
Variable
Variable
0
Steady
0
0
Bitzer
0
Variable
0
Variable
0
Variable
Variable
0
0
0
0
0
Bitzer
0
30
30
30
30
Bitzer
0
Reset
Automatic
Manual
Manual
Manual
Manual
Manual
Manual
Manual
Manual
Manual
Manual
Manual
Manual
Manual
Manual
Manual
Auto
-
Alarm log
The alarm log is used to save the operating status of the compressor when the alarms are generated or at other
specific moments. Each record is an event that can be displayed, with all the events saved in the memory. The log
is useful in solving anomalies and faults, as it takes a “snapshot” of the system at the time the alarm was activated,
suggesting possible causes and solutions to the problems.
19.2.1 Recording the alarms
If the alarm log function is activated, when the application program measures a value identified as an alarm, the
following data associated with such event are saved in the memory on the pCO* controller:
•
alarm code (each alarm has an identifying code. See the “list of alarm log codes”)
•
the analogue input values, read by the pCO* controller at the precise moment the alarm was activated;
•
date and time the event occurred.
Note: if the clock board is not fitted (optional on pCO1, standard on pCO3) or the clock board is disabled by parameter,
only the alarm codes and the values measured are saved.
Figure 18a
36
19.Alarms
BAO-102-1 AUS
37
BAO-102-1 AUS
To access the screen for displaying the alarms saved, proceed as follows:
1.
press the PRG button, select “Maintenance” and access the “Alarms log A3” screen;
2.
select the alarm code (ENTER button) and scroll the alarms saved (UP and DOWN buttons).
Up to a maximum of 100 alarms can be saved in chronological order (after the 100th alarm, each new alarm will replace
the oldest event).
19.2.2 Deleting the alarm log
The alarms saved can be deleted in 2 ways:
20.1.1 Table of communication parameters with the supervisory system
Below is the table of the parameters sent, preceded by the key to the table:
Key to the types of variable:
A
Analogue variable
D
Digital variable
I
Integer variable
Key to variable communication direction:
W = WRITE
Input variable pCO* ← Supervisor
R = READ
Output variable pCO* → Supervisor
W/R = WRITE/READ Input/output variable pCO
↔Supervisor
1.
using the “Restore default value” procedure, used only when needing to reset all the initial values, remembering that this will also irreversibly delete any custom settings and values saved (see the chapter “Restoring the default values”)
2.
accessing the “Erase alarms A8” screen, password protected, and pressing enter to select the N. press the up button and press enter to erase alarm log
WARNING! deleting the alarms means ignoring them, and consequently before proceeding, carefully make sure
that the system will not be damaged or malfunction or become unreliable.
20.Supervisor
The device can interface with a local or remote supervisory/telemaintenance network, allowing the possibility to monitor
the operating status and interact with some of the functions.
Serial communication with the supervisory system is available on installing and connecting the RS485 serial board,
optional, supplied separately from the pCO* controller.
For the installation of the serial communication boards, see the installation manual for the specific pCO* controller.
A user parameter can be set that defines the priority of the compressor capacity control signal to the supervisor.
The following can be set on the user terminal:
•
enable compressor ON/OFF from the supervisor (YES or NO);
•
the origin of the capacity control signal (PROBE or SUPERV.).
Enabling one of these functions has priority over the normal functions performed from the keypad
In addition, the following can be set:
•
the serial identification number (variable from 0 to 200, to ….);
•
the communication speed (variable from 1200 Baud, in multiples up to 19200 Baud);
•
the communication protocol (CAREL or MODBUS).
To modify the settings from the user interface, proceed as follows:
1.
press the PRG button, select “USER” and access the P0 screen, password-
protected;
2.
once having entered and confirmed the correct password, access the
“Supervisor
P4” screen or the following “Supervisor system P5” screen; the screens will show the default values.
3.
Select the desired value from the options available for each parameter and confirm.
Setting the “Ident number” parameter relating to the serial identification number to the value “000” disables communication
with the supervisory system.
If the serial communication values are correctly set, such as serial address and communication speed, the parameters
sent by the unit will be as shown in the following table.
38
BAO-102-1 AUS
39
BAO-102-1 AUS
Table of parameters transmitted between the pCO* controller and the supervisor:
Type
Direction
Address
Description of the signal
Type
Direction
Address
Description of the signal
D
R
1
Status of digital input 1
D
R
35
Differential pressure alarm
D
R
2
Status of digital input 2
D
R
36
High gas discharge temperature alarm
D
R
3
Status of digital input 3
D
R
37
Clock board alarm
D
R
4
Status of digital input 4
D
W/R
38
Reset alarms
D
R
5
Status of digital input 5
D
W/R
39
Supervisor on/off
D
R
6
Status of digital output 1
D
R
40
Controller Status (on / Off)
D
R
7
Status of digital output 2
D
R
60
EVD Battery alarm
D
R
8
Status of digital output 3
D
R
61
EVD low Suction Alarm
D
R
9
Status of digital output 4
D
R
62
EVD Probe S1 alarm
D
R
10
Status of digital output 5
D
R
63
EVD Probe S2 alarm
D
R
11
Status of digital output 6
D
R
64
EVD Low Super Heat alarm
D
R
12
Status of digital output 7
D
R
65
EVD LOP Alarm
D
R
13
Status of digital output 8
D
R
66
EVD MOP Alarm
D
R
14
Compressor with stepped capacity control selected
D
R
67
EVD Hi Condensing Alarm
D
R
15
Compressor with continuous capacity control selected
D
R
68
EVD EEprom Alarm
D
R
16
Status of capacity stage 1
D
R
69
EEV Motor alarm
D
R
17
Status of capacity stage 2
D
R
70
EVD Offline alarm
D
R
18
Status of capacity stage 3
D
R
71
EVD Auto tune alarm
D
R
19
Status of capacity stage 4
I
W/R
1
Percentage of capacity requested
D
R
20
Status of the condenser fans
I
R
2
Type of gas used
D
R
21
Safety capacity control active
I
R
3
Analogue output 1 value
D
R
22
Analogue input B1 alarm
A
R
1
Read analogue input 1 (demand signal)
D
R
23
Analogue input B2 alarm
A
R
2
Read analogue input 2 (low pressure transducer)
D
R
24
Analogue input B3 alarm
A
R
3
Read analogue input 3 (high pressure transducer)
D
R
25
Analogue input B4 alarm
A
R
4
Read analogue input 4 (discharge gas sensor)
D
R
26
Oil differential alarm
A
R
5
Read analogue output 1 ( condenser fan)
D
R
27
Compressor thermal cutout alarm
A
R/W
6
Pressure Setpoint
D
R
28
Phase sequence alarm
A
R/W
7
Maximum Pressure setpoint
D
R
29
High pressure alarm from pressure switch
A
R/W
8
Minimum Pressure setpoint
D
R
30
Low pressure alarm from pressure switch
A
R/W
9
Condenser Setpoint
D
R
31
High pressure alarm from transducer
A
R
10
EVD S1 Probe Value
D
R
32
Low pressure alarm from transducer
A
R
11
EVD S2 Probe Value
D
R
33
Operating limits exceeded alarm
A
R
12
EVD superheat value
D
R
34
Compressor maintenance alarm
A
R
13
EVD valve position (percent)
40
BAO-102-1 AUS
41
21.Glossary
Suction: pressure or temperature measured at the compressor intake. This is an analogue value.
Proportional band: this defines a temperature (or pressure) zone of a few degrees starting from the set point, inside
which the system manages the control devices.
Buzzer: buzzer fitted on the external terminals; this sounds in the event of alarms or the limits set for the parameters
are exceeded. The Built-in and pGD0 terminals do not have a buzzer.
Differential: defines a pressure (or temperature) difference from the corresponding set point.
Step: defines an area of the proportional band (pressure or temperature) inside which a device is on, and at the same
time also defines the device on/off values.
HP: high pressure
Screen index: alphanumeric index located in the top right of every screen.
LP : low pressure
22.MANUFACTURER
•
Our products are manufactured in compliance with applicable international standards and
regulations. If you have any questions about how to use our products or if you are planning special
applications please contact:
BITZER Australia Pty Ltd
Please contact us via email and visit our website:
134-136 Dunheved [email protected]
St Marys NSW 2760 www.bitzeravp.com.au
Tel.: +61 (0)2 8801 9300
Fax: +61 (0)2 9673 4698
23.
SERVICE ADDRESS
•
For local support please refer to our website www.bitzeravp.com.au for a list of our nearest branch
office.
Discharge: pressure or temperature measured in at the compressor outlet. This is an analogue value.
Screen: defines the screen that is displayed on the terminal.
Branch – loop: series of screens on the same subject. These can be accessed simply by pressing the arrow buttons;
the branches are accessed by pressing one of the buttons on the terminal, which displays the first screen in the loop.
Range: range of values available for a parameter.
Set point: defines a pressure (or temperature) value to be satisfied; the system activates or deactivates the devices so
that the value measured reaches the set point.
Buffer (memory): memory on the controller used to save the default values selected by CAREL for all the parameters.
Permanent memory, saves the values even when power is disconnected.
Upload: the operation used to copy the application software from the computer or programming key to the pCO*
controller
Analogue value: integer value with sign and decimal point.
Digital value: value with just two states.
Integer value: integer value without decimal point.
Built-in: built-in display.
pLAN: acronym for - p.CO L.ocal A.rea N.etwork.
Part-winding: start
CR: capacity valve
HP: high pressure
Macroblock: functional software block
Hysteresis: differentiation
Envelope: field of operation
Stepless: continuous/infinite control
Steps: control by steps
Set point: set point
Backlight: backlighting
42
43
HXO-508-1 AUS
In the interest of continuous improvement BITZER reserves the right to change the specifications or design of any
of its products without notice. The BITZER Symbol, Name BITZER and model numbers are registered trade marks.
All products manufactured are pending design and specification registration and must not be copied or duplicated in
any way.
Please note: The ISO Certification applies to New South Wales and Victoria branches only.
NSW
tel +61 (2) 8801 9300
fax +61 (2) 9673 4698
44
Victoria
tel +61 (3) 8326 8200
fax +61 (3) 9310 2520
SA
tel +61 (8) 8345 6110
fax +61 (8) 8268 4555
WA tel +61 (8) 6350 6297
fax +61 (8) 9359 2077
QLD
tel +61 (7) 3725 1360
fax +61 (7) 3274 3621
NZ
tel +64 9 415 2030