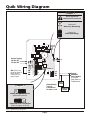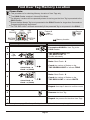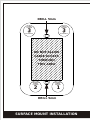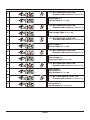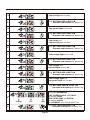
1
SOLO Installation manual
STAND-ALONE
PROXIMITY ACCESS
CONTROL SYSTEM
Company Profile
Centurion Systems (Pty) Ltd, South Africa, has been manufacturing automatic gate systems since 1986,
and is committed to providing reliable, cost effective solutions in the field of gate and access
automation.
We offer a diverse range of products including gate motors, GSM-based products, garage door motors,
remote controls, keypads, traffic barriers, proximity access control and intercom systems.
Our products are developed by an in-house team of talented engineers that are constantly researching
new and innovative technologies to improve our existing products and expand our product range.
Our production facility in Johannesburg is ISO:9001 quality assurance certified, and all our products are
manufactured to the highest level of quality with a 100% test to specification.
Through a team of dedicated technicians and sales personnel, together with a fully fledged in-house
training facility, we are committed to providing unmatched service to our customers and support for our
products.
A worldwide network of distributors and installers ensure that our products remain The Automatic
Choice in access automation .
Further information is available on our website www.centsys.com.au
Centurion Systems (Pty) Ltd reserves the right to make changes to the products described in this document without notice and without
obligation of Centurion Systems (Pty) Ltd to notify any persons of any such revisions or changes. Additionally, Centurion Systems (Pty) Ltd
makes no representations or warranties with respect to this document.
No part of this document may be copied, stored in a retrieval system or transmitted in any form or by any means electronic, mechanical,
optical or photographic, without the express prior written consent of Centurion Systems (Pty) Ltd.
Table of Contents
Product Overview . . . . . . . . . . . . . . . . . . . . . . . . . . . . . . . . . . . . . . . . . . . . . . . . . . . . . . . . . . . . . . . . . 5
Specifications . . . . . . . . . . . . . . . . . . . . . . . . . . . . . . . . . . . . . . . . . . . . . . . . . . . . . . . . . . . . . . . . . . . . 6
Tools and Equipment Required . . . . . . . . . . . . . . . . . . . . . . . . . . . . . . . . . . . . . . . . . . . . . . . . . . . . . . . 7
QUIK Installation
QUIK WIRING DIAGRAM . . . . . . . . . . . . . . . . . . . . . . . . . . . . . . . . . . . . . . . . . . . . . . . . . . . . . . . . . . . 8
QUIK ADD: New Installation . . . . . . . . . . . . . . . . . . . . . . . . . . . . . . . . . . . . . . . . . . . . . . . . . . . . . . . . . 9
QUIK ADD: Existing Installation. . . . . . . . . . . . . . . . . . . . . . . . . . . . . . . . . . . . . . . . . . . . . . . . . . . . . . 10
QUIK DELETE . . . . . . . . . . . . . . . . . . . . . . . . . . . . . . . . . . . . . . . . . . . . . . . . . . . . . . . . . . . . . . . . . . . 11
QUIK PARAMETER FACTORY DEFAULT . . . . . . . . . . . . . . . . . . . . . . . . . . . . . . . . . . . . . . . . . . . . . 12
Installation of SOLO Reader . . . . . . . . . . . . . . . . . . . . . . . . . . . . . . . . . . . . . . . . . . . . . . . . . . . . . . . . 13
Wiring Diagrams . . . . . . . . . . . . . . . . . . . . . . . . . . . . . . . . . . . . . . . . . . . . . . . . . . . . . . . . . . . . . . . . . 16
Overview of User Interface . . . . . . . . . . . . . . . . . . . . . . . . . . . . . . . . . . . . . . . . . . . . . . . . . . . . . . . . . 20
Identification of Tags . . . . . . . . . . . . . . . . . . . . . . . . . . . . . . . . . . . . . . . . . . . . . . . . . . . . . . . . . . . . . . 20
Find Master Tags . . . . . . . . . . . . . . . . . . . . . . . . . . . . . . . . . . . . . . . . . . . . . . . . . . . . . . . . . . . . . . . . . 21
Find User Tag Memory Location . . . . . . . . . . . . . . . . . . . . . . . . . . . . . . . . . . . . . . . . . . . . . . . . . . . . . 22
Example: How to find User Tag Memory Location. . . . . . . . . . . . . . . . . . . . . . . . . . . . . . . . . . . . . . . . 23
HOW TO ADD A TAG
Overview
. . . . . . . . . . . . . . . . . . . . . . . . . . . . . . . . . . . . . . . . . . . . . . . . . . . . . . . . . . . . . . . . . . . . . 24
ADD Tag: SOLO Specified Memory Location . . . . . . . . . . . . . . . . . . . . . . . . . . . . . . . . . . . . . . . . . . . 25
Example: How to use the LED's to select Memory Locations . . . . . . . . . . . . . . . . . . . . . . . . . . . . . . 27
ADD Tag: User Specified Memory Location . . . . . . . . . . . . . . . . . . . . . . . . . . . . . . . . . . . . . . . . . . . . 28
HOW TO DELETE A TAG
Overview
. . . . . . . . . . . . . . . . . . . . . . . . . . . . . . . . . . . . . . . . . . . . . . . . . . . . . . . . . . . . . . . . . . . . . 31
DELETE Tag: Tag not available . . . . . . . . . . . . . . . . . . . . . . . . . . . . . . . . . . . . . . . . . . . . . . . . . . . . . . 32
Example: How to use the LED's to select Memory Locations . . . . . . . . . . . . . . . . . . . . . . . . . . . . . . 34
DELETE Tag: Tag available . . . . . . . . . . . . . . . . . . . . . . . . . . . . . . . . . . . . . . . . . . . . . . . . . . . . . . . . . 35
REPLACE a Secondary Master Tag (Tag in Memory Location 01) . . . . . . . . . . . . . . . . . . . . . . . . . . . 37
REPLACE a Primary Master Tag (Tag in Memory Location 00) . . . . . . . . . . . . . . . . . . . . . . . . . . . . . 39
COMPLETE DELETE: Restore Factory Defaults and Clear Memory . . . . . . . . . . . . . . . . . . . . . . . . 41
Page 3
HOW TO CONFIGURE THE DIFFERENT OPERATING PARAMETERS
Overview
. . . . . . . . . . . . . . . . . . . . . . . . . . . . . . . . . . . . . . . . . . . . . . . . . . . . . . . . . . . . . . . . . . . . . 43
Turning the TAG BUZZER on or off . . . . . . . . . . . . . . . . . . . . . . . . . . . . . . . . . . . . . . . . . . . . . . . . . . . 45
Turning the FREE EXIT on or off. . . . . . . . . . . . . . . . . . . . . . . . . . . . . . . . . . . . . . . . . . . . . . . . . . . . . 47
Turning the DOOR FORCED ALARM OUTPUT on or off . . . . . . . . . . . . . . . . . . . . . . . . . . . . . . . . . . 49
Turning the DOOR FORCED ALARM LOCAL BUZZER on or off . . . . . . . . . . . . . . . . . . . . . . . . . . . . 51
Turning the DOOR OPEN ALARM OUTPUT on or off . . . . . . . . . . . . . . . . . . . . . . . . . . . . . . . . . . . . 53
Turning the DOOR OPEN ALARM LOCAL BUZZER on or off . . . . . . . . . . . . . . . . . . . . . . . . . . . . . . 56
Turning the SMARTSWITCH II on or off . . . . . . . . . . . . . . . . . . . . . . . . . . . . . . . . . . . . . . . . . . . . . . . 59
HOW TO SET VARIOUS TIMERS
Overview
. . . . . . . . . . . . . . . . . . . . . . . . . . . . . . . . . . . . . . . . . . . . . . . . . . . . . . . . . . . . . . . . . . . . . 62
Example: How to use the LED's to set the various Timers . . . . . . . . . . . . . . . . . . . . . . . . . . . . . . . . . 64
Change Relay Time . . . . . . . . . . . . . . . . . . . . . . . . . . . . . . . . . . . . . . . . . . . . . . . . . . . . . . . . . . . . . . . 65
Change Door Open Time. . . . . . . . . . . . . . . . . . . . . . . . . . . . . . . . . . . . . . . . . . . . . . . . . . . . . . . . . . . 68
Change Door Open Pre-Warn Time . . . . . . . . . . . . . . . . . . . . . . . . . . . . . . . . . . . . . . . . . . . . . . . . . . 71
Change Door Open Alarm Time . . . . . . . . . . . . . . . . . . . . . . . . . . . . . . . . . . . . . . . . . . . . . . . . . . . . . 74
Change Door Forced Alarm Time . . . . . . . . . . . . . . . . . . . . . . . . . . . . . . . . . . . . . . . . . . . . . . . . . . . . 77
Change Hold Off Time . . . . . . . . . . . . . . . . . . . . . . . . . . . . . . . . . . . . . . . . . . . . . . . . . . . . . . . . . . . . 81
SPECIAL FUNCTIONS
Turbo Mode . . . . . . . . . . . . . . . . . . . . . . . . . . . . . . . . . . . . . . . . . . . . . . . . . . . . . . . . . . . . . . . . . . . . . 85
Autolearn Overview . . . . . . . . . . . . . . . . . . . . . . . . . . . . . . . . . . . . . . . . . . . . . . . . . . . . . . . . . . . . . . . 86
Autolearn: LIMITED TIME . . . . . . . . . . . . . . . . . . . . . . . . . . . . . . . . . . . . . . . . . . . . . . . . . . . . . . . . . . 87
Autolearn: UNLIMITED TIME . . . . . . . . . . . . . . . . . . . . . . . . . . . . . . . . . . . . . . . . . . . . . . . . . . . . . . . 88
Autolearn: DISABLE . . . . . . . . . . . . . . . . . . . . . . . . . . . . . . . . . . . . . . . . . . . . . . . . . . . . . . . . . . . . . . 89
MEMORY ALLOCATION AND PARAMETER SETTINGS FORM . . . . . . . . . . . . . . . . . . . . . . . . . . . 90
NOTES
. . . . . . . . . . . . . . . . . . . . . . . . . . . . . . . . . . . . . . . . . . . . . . . . . . . . . . . . . . . . . . . . . . . . . 92
ADVANCED USER MAP . . . . . . . . . . . . . . . . . . . . . . . . . . . . . . . . . .
can be found between 46 & 47
SURFACE MOUNT DRILLING TEMPLATE . . . . . . . . . . . . . . . . . . .
can be found between 46 & 47
Page 4
Product Overview
The SOLO is a cost effective entry level stand-alone proximity access control system for single access
point applications. By presenting a valid CENTSYS proximity tag to the SOLO Reader it will activate or
release the access point door lock or operator and allow access.
The SOLO Reader is a robust weatherproof unit that is mounted adjacent to the door or access point. It is a
fully integrated unit with the controller, read coil and output drives all contained inside the unit.
The SOLO model 50 can store up to 51 unique proximity Tags of which two are Master Tags. Tags are
stored on the units non-volatile memory in separate Memory Locations. The use of Memory Locations
allows for selective addition and deletion of Tags as required.
Programming of the system is done using either of the Master Tags and the indicator lights on the front of
the Reader. To further simplify the installation of the SOLO Reader all parameters are pre-programmed
according to most application requirements.
Both audible and visual feedback is provided if a valid Tag is presented. In addition, visual feedback is
given if the presented Tag is invalid.
The SOLO's single output channel provides a potential free Normally-Open or Normally-Closed contact
and can be configured as latching or pulsed. The pulsed time is adjustable in one second increments from
one second to four minutes.
The output can also be configured to operate with a CENTSYS SMARTSWITCH II.
The Smartswitch II is mounted directly at the door lock or gate motor to provide an even higher level of
security by preventing a would-be intruder from tampering with the door lock/gate trigger lines to gain
entry.
The SOLO provides a free-exit facility. This is typically where a pushbutton mounted on the inside of the
door or gate entrance is required to operate the access point. For added security, this feature can be
inhibited if not being used.
The SOLO provides an input for door/gate sensor that can be used to detect whether the access point has
been forced open or left open. The unit in turn provides an open collector output with pulse or latching
facility so that either or both of these alarm conditions can be relayed to a "third party" alarm system.
In addition an optional tamper alert switch is available that can be connected to a "third party" alarm to
provide an early warning if the SOLO Reader is being forced open.
The access point left open alarm will only activate after the pre-warn time (internal buzzer) followed by the
access point left open time have expired. The pre-warn and access point left open times are programmable in one second increments from one second to four minutes.
Mounting of the SOLO is very simple as it can be flush mounted into a 100mm x 50mm light switch box or
surface mounted directly onto the wall. In addition, the unit can be purchased with an anti-knock shield,
providing better protection when surface mounting the unit externally or to a gooseneck.
Page 5
Specifications
Physical
Physical
Supply Voltage
10 - 12V AC 12-15V DC
Standby Current
50mA
Maximum Current
180mA
Operating Temperature
-20°C to 50°C
Operating Humidity
0-90% non condensing
Tag Frequency
13.56 MHz
Housing Material
ABS UV Stabilised
Degree of Protection
IP 55
Dimensions
Surface Mount
129H x 90W x 29D
Flush Mount
125H x 85W x 16D
Outputs/Inputs
Output channel
Single output selectable as relay (NC or NO) or open collector
Relay rating
50V @ 3A non inductive (N/C, COM, N/O)
Open collector rating (CHD)
Maximum 50mA (positive connected to CHD+)
Door open/forced output (ALARM)
Maximum 50mA (positive connected to CHD+)
SmartSwitch II power output
Maximum 200mA (CHD+)
Free exit input
Potential free normally-open contact (FRX)
Door sense input
Potential free normally-closed contact (DOOR SEN)
Anti-tamper switch
Potential free normally-closed contact (Optional extra)
Operational
Tag capacity
51 tags including Master/Admin
Tag read range
80 - 100mm
Output relay pulse time (s)
0 - 254 Adjustable in 1 second increments or Latch
Door open alarm delay time (s)
0 - 254 Adjustable in 1 second increments or Infinite
Door open pre-warn delay time (s)
0 - 254 Adjustable in 1 second increments or Infinite
Local Buzzer activation time (s)
door open alarm
0 - 254 Adjustable in 1 second increments or Infinite
Hold off time (s)
0 - 255 Adjustable in 1 second increments
Page 6
Tools and Equipment Required
Star Screwdriver
0 and 1 point
Long Nose Pliers
Flat Screwdriver
- 2.5mm point
Jewellers Type
Side Cutters
Tape Measure
ON
SILIC
Silicon
Cable: 0.20mm²
0.50mm²
0.75mm²
Level
5mm
Masonry Bit
Drilling Machine
(hammer action)
Multi-Meter
Page 7
Quik Wiring Diagram
Jumper 2
Read range will be
affected if not correctly set
Jumper Off
Masonry Mounting
Jumper On
Steel Mounting
470R
470R
200
85
102
Power Supply
10-12V AC
12-15V DC
102
Jumper 2
DC
M7
Jumper 1
DC
M7
NB: Wire Link
must be fitted if
Door Sense
Facility is not
being used.
Jumper 1
Typical
Potential
Free Contact
to operate
Gate Motor or
Traffic Barrier.
Alternatively
Typical
Connection
for Door Lock
Relay Output Enabled
(Standard Systems)
Smartswitch II Enabled
(Refer to pages 18 & 59)
Fig 1. Quik Wiring Diagram
Page 8
Door
Strike
PSU for
Strike
Quik Add - New Installation
Please Note:
! On power up the TOP ROW LIGHTS appear to chase each other. This indicates a Blank
Memory.
! Tags will be added to the SOLO Reader sequentially from Memory Locations 00 to 50.
! The first two Tags presented to the SOLO Reader will become the Master Tags in Memory
Locations 00 and 01.
! It is recommended that the first Master Tag be kept in a safe and secure location.
! The Master Tags should only be issued to those responsible for maintaining the SOLO Reader.
! To ABORT wait for ± 60 seconds for the SOLO to RESET
TOP
ORANGE
TOP
GREEN
TOP
RED
Present &
Remove
New Tag
BOTTOM
GREEN
x x
BOTTOM
RED
Graphical Instructions
Tag added
to Memory
Location
xx
Written Instructions
Connect power to Reader
Power On
1
2
Present &
Remove
Master Tag
Observe
Top
Lights
TOP ROW LIGHTS flash in sequence
3
Present and REMOVE each New Tag to
the SOLO Reader
4
TOP GREEN LIGHT will flash
BUZZER will sound to indicate a successful
addition
5
Max
0 0
0 1
0 2
0 3
1 0
Repeat from step 3 as required
5 0
Present and REMOVE the Master Tag
6
The SOLO Reader will enter normal RUN MODE
It is recommended that the attached Memory Location allocation and Parameter settings form be
updated.
Page 9
Quik Add - Existing Installation
Please Note:
! Tags will be added sequentially to the empty Memory Locations of the SOLO Reader. Previous
Memory Locations will not be overwritten.
! To ABORT wait for ± 60 seconds for the SOLO to RESET
TOP
ORANGE
TOP
GREEN
BOTTOM
GREEN
Present &
Hold
Master Tag
TOP
RED
Remove
Master Tag
Present &
Remove
New Tag
BOTTOM
RED
Graphical Instructions
x x
Present &
Remove
Master Tag
Tag added
to Memory
Location xx
Written Instructions
Present and HOLD either Master Tag until
all lights turn ON
1
Observe
Lights
Remove the Master Tag
2
3
Observe
Top
Lights
Top green light will remain on
4
Present and remove each new Tag
to the SOLO Reader
5
TOP GREEN LIGHT will flash and the
BUZZER will sound to indicate a successful
addition.
6
Max
0 0
0 1
0 2
0 3
1 0
Repeat from step 3 as required
5 0
Present and REMOVE the Master Tag
7
The SOLO Reader will enter normal RUN MODE
It is recommended that the attached Memory Location allocation and Parameter settings form be
updated.
Page 10
Quik Delete - All Tags
Please Note:
! This option will remove all Tags from the SOLO Reader's memory but will not change any of
the Configuration Settings or Timer Values.
! To ABORT wait for ± 60 seconds for the SOLO to RESET
TOP
ORANGE
TOP
GREEN
TOP
RED
Present &
Hold
Master Tag
BOTTOM
GREEN
Remove
Master Tag
Present &
Remove
Master Tag
BOTTOM
RED
Graphical Instructions
Written Instructions
Present and HOLD either Master Tag until
all lights turn ON
1
Observe
Lights
Remove the Master Tag
2
3
Observe
Top
Lights
Top green light will remain on
4
Observe
Bottom
Lights
Only BOTTOM RED LIGHT ON
Present and remove the Master Tag
5
Top red light will turn on
6
Only BOTTOM GREEN LIGHT ON
Present and HOLD the Master Tag
7
Continue HOLDING
All the LIGHTS will begin to flash
Continue HOLDING
8
Continue HOLDING
Wait for the buzzer to bleep three times
9
Remove the Master Tag
The TOP ROW LIGHTS appear to chase
each other, this indicates a Blank Memory.
10
It is recommended that the attached Memory Location allocation and Parameter settings form be
updated.
Page 11
Quik Parameter - Factory Default
Please Note:
! All Configuration Settings and Timer Values will be defaulted to factory settings.
! No Tags will be remove from the SOLO Reader memory.
! To ABORT wait for ± 60 seconds for the SOLO to RESET
TOP
ORANGE
TOP
GREEN
TOP
RED
Present &
Hold
Master Tag
BOTTOM
GREEN
Remove
Master Tag
BOTTOM
RED
Graphical Instructions
Written Instructions
Present and HOLD either Master Tag until
all lights turn ON
1
Observe
Lights
2
Observe
Top
Lights
Continue HOLDING
Until ONLY the TOP RED LIGHT turns ON
Remove the Master Tag
3
The SOLO Reader will enter normal RUN MODE
It is recommended that the attached Memory Location allocation and Parameter settings form be
updated.
Page 12
Installation of the Solo
Positioning the Reader
1C
1B
1A
1100mm
320mm
pave
men
t
road
way
1300mm
!
1300mm
Position SOLO reader on wall ! Alternatively mount the Solo reader ! Position the SOLO reader on wall
adjacent to entrance gate. Mount at a
adjacent to door. Mount at a height onto a gooseneck ensuring that:
that allows for the comfortable • The reader does not protrude too height that allows for the comfortable
far into the driveway
presentation of access tags. A
presenting of access tags. A height
• The reader is not set too far back height of 1300mm is recommended.
of 1300mm is recommended.
and cannot easily be accessed
from a vehicle.
• The height allows for the presenting
of the tag to be comfortable from a
vehicle.
An anti-knock shield is available from
CENTSYS to provide extra
protection to the SOLO reader.
Mounting the Reader
The SOLO Prox reader is available in a flush mount kit and a surface mount kit.
When flush mounting, the reader adapts directly to a standard 100mm x 50mm (4" x 2") light switch
backing box which allows the unit to sit flat against the wall.
Alternatively, if no backing box has been provided the unit can be very simply surface mounted.
When mounting the reader onto a gooseneck with, or without, an anti-knock shield, the surface mount kit
will be used.
Flush Mount
1F
2F
100mm
! Insert the reader mounting frame into ! It is recommended that the cabling to
position in the backing box and
the reader extends at least 100mm
secure using the standard fixing
through the frame.
screws provided with the backing
box.
Page 13
Surface Mount
1S
2S
3S
! Clip the plastic spacers onto the ! Place the mounting template located ! Using the slots provided in the
in the centre of this document at the
mounting holes, adjust the reader
back of the mounting frame ensuring
required height ensuring that it is
base to be perfectly vertical.
that they are correctly orientated to
vertical
align with the mounting holes.
! Using a 5mm masonry bit, drill holes ! Screw the frame firmly into position.
into the wall for the rawlplugs
provided in the kit.
! Screw the frame lightly into position.
Installation of the Reader (Flush or Surface Mount)
4
5
6
A
! Slide apart the front and back of the ! Make the necessary terminations ! Route the cable over the cable entry
onto the controller. Refer to wiring b u l k h e a d ( A ) i n t h e h o u s i n g .
reader controller housing.
Additional slots can be cut out to
diagram on page 16.
accommodate further cables if
necessary.
7
8
8
B Optional cable tie
B
! Fit a cable tie around the cable as ! Tighten cable tie.
shown. When tightened this holds
the cable in position and prevents it
from being pulled out of the housing.
Page 14
! An additional cable-tie can be fitted
to better secure the cable.
8B
B Optional cable tie 8C
9
B
Jumper 2
Jumper 1
! If the additional cable tie was used, ! Ensure Jumpers 1 and 2 are ! Slide the back cover onto the
make certain that it is also tightened.
correctly positioned - refer to
controller housing.
page 19.
10
11
A
12
B
! Ensure that it sits neatly against the ! Clip the top of the controller front ! Fasten controller housing into
position using the 2 x M4 PT screws
housing into the top lip of the
cable entry bulkhead securing the
provided in the kit.
mounting frame (A), and fold down
cable. To prevent insect ingress use
into position ensuring the cable is not
either a grommet or a dab of silicon
caught (B).
to seal the cable entry point.
13
14
! Clip the outer cover into position ! To remove the outer cover, carefully
insert a screwdriver between the
making sure that it seats correctly
cover and the wall from the
and is secure.
underneath and unclip.
Page 15
Wiring Diagrams
Identification of Terminals
The following figure shows the location of the terminal block on the SOLO controller, as well the
position of Jumper 1 and Jumper 2. Refer to page 19 for an explanation of these jumpers. The table
below details each terminal. In addition wiring diagrams have been provided showing how to connect
all configurations of components to the SOLO system.
Terminal
Details of Terminals
Cabling Description
Supply to the SOLO reader can be AC or DC, Min 12V DC or 10V AC.
0.5mm² Input is not polarity sensitive.
0.2mm² Free-Exit, normally-open contact. Common connected to CHD0.2mm² Input to indicate door/access point forced or left open. Normally-open contact.
Common connected to CHD0.2mm² External alarm output (open collector)
0.2mm² SmartSwitch II or remote relay - Positive (+V)
0.2mm² SmartSwitch II or remote relay - Negative (-V)
0.2mm² SmartSwitch II or remote relay - Control Signal selected by Jumper 1 in position 1
Potential free output relay for door release/access point trigger selected by
0.75mm² Jumper 1 in position 2
Table 1. Details of Terminals
Jumper 2
Read range will be
affected if not correctly set
470R
470R
Jumper Off
Masonry Mounting
200
85
Jumper On
Steel Mounting
102
102
Power Supply
10-12V AC
12-15V DC
Jumper 2
DC
M7
DC
M7
Jumper 1
NB: Wire Link
must be fitted if
Door Sense
Facility is not
being used.
Alternatively
Typical
Door
Connection
for Door Lock Strike
Jumper 1
Jumper 1 in Position 1
Smartswitch II Enabled
(Refer to page 18 & 59)
Jumper 1 in Position 2
Relay Output Enabled
(Standard Systems)
PSU for
Strike
Fig 2. Identification of Terminals and Jumper Positions
Page 16
Typical
Potential
Free Contact
to operate
Gate Motor or
Traffic Barrier.
Solenoid - Electric Door Lock
Jumper 2
Wire power to lock separately from the reader
Read range will be
affected if not correctly set
Jumper Off
Masonry Mounting
CP84SM
102
102
EN
L
BLK
RED
470R
AC
Mains
Jumper On
Steel Mounting
470R
85
Entrance/exit
Door *
0.5mm²
cable
Jumper 2
200
12V
Batte
ry
0.75mm²
cable
Jumper 1
DC
M7
Jumper 1
DC
M7
NB: Wire Link
must be fitted if
door sense
facility is not
being used.
Fig 3. Wiring Diagram for Door Lock Type 1
Mag-Lock; Magnetic Door Lock
Jumper 2
Wire power to lock separately from the reader
Read range will be
affected if not correctly set
Jumper Off
Masonry Mounting
CP84SM
EN
L
BLK
RED
Jumper On
Steel Mounting
470R
AC
Mains
470R
102
Jumper 2
200
102
Entrance/exit
Door *
0.5mm²
cable
85
12V
Batte
ry
Jumper 1
0.75mm²
cable
DC
M7
Jumper 1
DC
M7
NB: Wire Link
must be fitted if
door sense
facility is not
being used.
Fig 4. Wiring Diagram for Door Lock Type 2
NB: All types of locks can be interfaced via SmartSwitch II for anti-tampering security.
NB: * Fit appropriate emergency/fire exit measures where applicable.
Page 17
Gate Operator / Traffic Barrier
Jumper 2
Read range will be
affected if not correctly set
Jumper Off
Masonry Mounting
470R
470R
Jumper On
Steel Mounting
Jumper 1
102
Jumper 2
200
85
102
to
Power Supply
and/or
Battery Back-Up
DC
M7
DC
M7
Jumper 1
NB: Wire Link
must be fitted if
Door Sense
Facility is not
being used.
COM
TRG
Fig 5. Gate Operator/ Traffic Barrier
Gate Operator / Traffic Barrier via SmartSwitch II
Jumper 2
Read range will be
affected if not correctly set
Jumper Off
Masonry Mounting
Jumper On
Steel Mounting
470R
Jumper 1
470R
200
85
TX RX
*
471
TRG
DC
M7
8C628
2101 V1.0
G D
470
M7
Jumper 2
DC
M7
470
102
18
CA
102
470
18
CA
COM
*Normally open pushbutton
Fig 6. Gate Operator/ Traffic Barrier via SmartSwitch II with secure free exit connection
Page 18
Jumper 1
Free-Exit, Door Contact and External Alarm Wiring
Alarm
Buzzer
470R
Door Switch
(N/O
Contact)
Entrance/exit
Door
470R
200
85
102
102
Free Exit
push button
(N/O)
DC
M7
DC
M7
Fig 7. Typical wiring for Free-Exit Pushbutton, Door Contact and External Alarm buzzer
Explanation of Jumpers
Jumper 1 - Relay or Smartswitch II enabled
The single channel output of the SOLO can be configured to provide a potential free contact either
normally-open or normally-closed to operate a door release or activate a gate motor or traffic barrier.
Alternatively the output can be configured to operate with a CENTSYS SMARTSWITCH II. The
SMARTSWITCH II is mounted directly at the door lock or gate motor to provide an even higher level of
security by preventing a would-be intruder from tampering with the doorlock/gate trigger lines to gain entry.
JUMPER 1 is used to determine which facility is enabled.
Jumper 2 - Wall or Steel Mounting
The read range of the SOLO reader the unit can be optimised whether it is being mounted onto a steel
surface (ie. inside the SOLO anti-knock shield or directly onto a steel post or pedestal) or wood / masonry
surface (wooden door frame or plastered/plain brick/stone wall*)
*flush mounting into a 4" x 2" light switch box would be regarded as mounting onto a masonry surface.
Jumper 2 is used to select between the two types of surface.
Page 19
Overview of User Interface
On the front face of the SOLO Reader there are two
rows of indicator lights. These lights are used to
communicate/interface with the system user.
Orange
Green
Red
Top Row
The top row consists of an Orange, Green and Red
light. The bottom row consists of a Green and Red light
only.
Bottom Row
Green
Red
During normal operation the five lights indicate various
conditions, for example:
A flashing bottom Red light indicates that the SOLO
Reader is in normal run mode and providing access
control. A flashing bottom Green light indicates that the
SOLO Reader is in Autolearn Mode, etc.
For a detailed explanation of the various light Fig 8 LED Indicators
indications status please refer to Table 2 below.
In Programming Mode the five lights indicate Programming Menu Levels, Configuration Settings,
Timer Values, etc.
Table 2. Explanation of Indicator Lights During Normal Run Mode
Flashing bottom Red light
Normal Run Mode - Red light acts as a Beacon
Flashing bottom Green light
Autolearn Mode - Green light acts as a Beacon
Flashing top Green light
Relay configured as latching output
Flashing top Red light (1x)
Power supply too low
Flashing top Red light (2x)
Power supply within warning range
Flashing top Red light (3x)
Power supply too high
Flashing top Orange light
Solo Reader faulty - return to Authorised Distributor
Flashing top Orange and Red light
Solo Reader faulty - return to Authorised Distributor
Identification of Tags
Find Master Tags
It is important to note that the SOLO system can accommodate two MASTER tags used for administering
the unit. The primary MASTER tag is stored in memory location 00 and the secondary in 01.
If the MASTER tags have not been clearly marked it is very easy to identify them by presenting the tags
momentarily to the reader. Refer to the detailed instructions below.
Find User Tag Memory Location
If a user tag has not been recorded in the Memory Allocation and Parameter Settings form provided with
the kit, then it is very easy to identify this tag's memory location.
See the menu on page 23 for detailed instructions.
Page 20
Find Master Tags
Please Note:
! SOLO Reader remains in Normal Run Mode.
! If either Master Tag is presented to the SOLO Reader for longer for than 5 seconds,
PROGRAM MODE will be entered.
TOP
ORANGE
TOP
GREEN
TOP
RED
0 0
BOTTOM
GREEN
BOTTOM
RED
Graphical Instructions
2
3
0 1
Present &
Remove
Master Tag
in Memory
Location 01
Written Instructions
Present and REMOVE the Master Tag in
Memory Location 00
0 0
1
Present &
Remove
Master Tag
in Memory
Location 00
BOTTOM GREEN LIGHT and
BOTTOM RED LIGHT will turn
ON briefly
Observe
Bottom
Lights
Present and REMOVE the Master Tag in
Memory Location 01
0 1
BOTTOM GREEN LIGHT will turn
ON briefly
4
The SOLO Reader will remain in Normal RUN MODE if Master Tags are presented for less than 5
seconds.
Page 21
Find User Tag Memory Location
Please Note:
! This procedure is for checking Memory Location of User Tags only
! The SOLO Reader remains in Normal Run Mode
! The Memory Location will be repeatedly shown for as long as the User Tag is presented to the
SOLO Reader.
! Ensure that the Master Tag is not presented to the SOLO Reader for longer than 5 seconds or
Programme Mode will be entered.
! The TOP RED LIGHT will flash momentarily if the presented Tag is not present in the SOLO
TOP
ORANGE
BOTTOM
GREEN
TOP
GREEN
TOP
RED
BOTTOM
RED
x x
Graphical Instructions
1
2
Remove
USER
TAG
Present &
Hold
USER TAG
Memory Location
Written Instructions
Present and HOLD a User Tag to the
SOLO Reader
x x
Observe
Top
Lights
TOP GREEN LIGHT and
TOP RED LIGHT will
FLASH individually
Note: Short Flash = 0
3
Count the number of flashes on the
TOP GREEN LIGHT to indicate TENS
x
Short Flash = 0
Flash = x (TENS)
Note: Short Flash = 0
4
Count the number of flashes on the
TOP RED LIGHT to indicate UNITS
x
Short Flash = 0
Flash = x (TENS)
5
Repeat from step 3 above to confirm counts
6
Remove the User Tag
x
Repeat the process for the other User Tags
The examples on page 22 refer specifically to how Step 3 and 4 above may be applied.
Page 22
EXAMPLE
How to find User Tag Memory Location
Graphical Instructions
Written Instructions
Example: User Tag in Memory Location 03
TOP GREEN LIGHT will SHORT FLASH
to indicate 0 TENS
1
TOP RED LIGHT will FLASH 3 TIMES
to indicate 3 UNITS
0 3
Short Flash = 0
(TENS)
Flash x 3
(UNITS)
Example: User Tag in Memory Location 30
TOP GREEN LIGHT will FLASH 3 TIMES
to indicate 30
2
TOP RED LIGHT will SHORT FLASH
to indicate 0 UNITS
3 0
Flash x 3
(TENS)
Short Flash=0
(UNITS)
Example: User Tag in Memory Location 36
TOP GREEN LIGHT will FLASH 3 TIMES
to indicate 30
3
TOP RED LIGHT will FLASH 6 TIMES
to indicate 6 UNITS
3 6
Flash x 3
(TENS)
Flash x 6
(UNITS)
Example: User Tag in Memory Location 49
TOP GREEN LIGHT will FLASH 4 TIMES
to indicate 40
4
TOP RED LIGHT will FLASH 9 TIMES
to indicate 9 UNITS
4 9
Flash x 4
(TENS)
Flash x 9
(UNITS)
Page 23
Add Tag Menu
Overview
The SOLO Reader is capable of storing a total of 51 Zap Tags in Memory Locations 00 to 50. Memory
Locations 00 and 01 are reserved for the two Master Tags, either of which is required for adding and
deleting Tags, and configuring the SOLO Reader.
It is important to note that the primary Master Tag (memory location 00) has greater access rights than the
secondary Master Tag (memory location 01). Only the primary Master Tag is capable of clearing the entire
memory back to factory defaults as well as clearing all memory locations. This is NOT possible with the
secondary Master Tag.
For this reason it is recommended that the primary MASTER Tag is kept in a safe and secure place, while
the secondary Master Tag is used for day to day administration and operation of the system.
The SOLO Reader allows tags to be added to the system in three ways:
1. Quik Add
This option will add new tags to the available Memory Locations sequentially, without displaying the actual
Memory Location. Refer to pages 9 and 10 for Quik Add Instructions.
2. Add Tag - SOLO Reader specified Memory Location
This option will add tags to available Memory Locations sequentially, while displaying the actual Memory
Location.
3. Add Tag - User Specified Memory Location
This option will add tags to available Memory Locations selected by the user.
To fully exploit the features of the SOLO system, it is necessary to keep an up-to-date record of each user,
and the Memory Location in which his/her tag is stored. The Memory Allocation and Parameter Setting
form included with this product, should be used to maintain this information. (Refer to the back of the QUIK
Installation Manual - pg 16 or print out page 84 of this electronic manual when you need to update the
form).
Some of the benefits of having this information available are:
• If a user loses a tag, it can be selectively deleted from the memory.
• If a lost tag is found. its Memory Location can be determined*, and it can be returned to the correct user.
* See Page 20.
Page 24
Add Tag - SOLO Specified Memory Locations
Please Note:
! Tags will be added sequentially to the empty Memory Locations of the SOLO Reader. Previous
Memory Locations will not be overwritten.
! To ABORT wait for ± 60 seconds for the SOLO to RESET
TOP
ORANGE
BOTTOM
GREEN
TOP
GREEN
TOP
RED
Present &
Hold
Master Tag
Remove
Master Tag
Present &
Remove
Master Tag
Present &
Remove
New Tag
BOTTOM
RED
Graphical Instructions
Written Instructions
Present and HOLD either Master Tag until
all lights turn ON
1
Observe
Lights
Remove the Master Tag
2
3
Observe
Top
Lights
Top green light will remain on
4
Observe
Bottom
Lights
Only BOTTOM GREEN LIGHT ON
Present and remove the Master Tag
TOP GREEN LIGHT and
TOP RED LIGHT will FLASH individually to
indicate next available memory location
5
Note: Short Flash = 0
6
Count the number of flashes on the
TOP GREEN LIGHT to indicate TENS
x
Short Flash = 0
Flash = x (TENS)
Note: Short Flash = 0
7
Count the number of flashes on the
TOP RED LIGHT to indicate UNITS
x
Short Flash = 0
Flash = x (TENS)
Present and Remove New Tag to the
SOLO Reader
8
Page 25
The buzzer will sound to indicate a successful
addition
9
Repeat from Step 5 above for further Tags
10
To Exit
11
Both BOTTOM GREEN LIGHT ON and
BOTTOM RED LIGHT ON
Present and remove the Master Tag
12
Both BOTTOM GREEN LIGHT ON and
BOTTOM RED LIGHT ON
Present and remove the Master Tag
The SOLO Reader will enter normal RUN MODE
It is recommended that the attached Memory Location allocation and Parameter settings form be
updated.
Counting examples for Memory Locations may be found on page 25
Page 26
EXAMPLE
How to use the LED's to select Memory Locations
Graphical Instructions
Written Instructions
Example: Value set to 03
TOP GREEN LIGHT will SHORT FLASH
to indicate 0 TENS
1
TOP RED LIGHT will FLASH 3 TIMES
to indicate 3 UNITS
0 3
Short Flash = 0
(TENS)
Flash x 3
(UNITS)
Example: Value set to 30
TOP GREEN LIGHT will FLASH 3 TIMES
to indicate 30
2
TOP RED LIGHT will SHORT FLASH
to indicate 0 UNITS
3 0
Flash x 3
(TENS)
Short Flash=0
(UNITS)
Example: Value set to 36
TOP GREEN LIGHT will FLASH 3 TIMES
to indicate 30
3
TOP RED LIGHT will FLASH 6 TIMES
to indicate 6 UNITS
3 6
Flash x 3
(TENS)
Flash x 6
(UNITS)
Example: Value set to 49
TOP GREEN LIGHT will FLASH 4 TIMES
to indicate 40
4
TOP RED LIGHT will FLASH 9 TIMES
to indicate 9 UNITS
4 9
Flash x 4
(TENS)
Flash x 9
(UNITS)
Page 27
Add Tag - USER Specified Memory Locations
Please Note:
! Previous Memory Locations will not be overwritten.
! To ABORT wait for ± 60 seconds for the SOLO to RESET
TOP
ORANGE
BOTTOM
GREEN
TOP
GREEN
TOP
RED
Present &
Hold
Master Tag
Remove
Master Tag
Present &
Remove
Master Tag
Present &
Remove
New Tag
BOTTOM
RED
Graphical Instructions
Written Instructions
Present and HOLD either Master Tag until
all lights turn ON
1
Observe
Lights
Remove the Master Tag
2
3
Observe
Top
Lights
Top green light will remain on
4
Observe
Bottom
Lights
Only BOTTOM GREEN LIGHT ON
Present and remove the Master Tag
TOP GREEN LIGHT and
TOP RED LIGHT will FLASH individually to
indicate next available memory location
5
Note: Short Flash = 0
6
Count the number of flashes on the
TOP GREEN LIGHT to indicate TENS
x
Short Flash = 0
Flash = x (TENS)
Note: Short Flash = 0
7
Count the number of flashes on the
TOP RED LIGHT to indicate UNITS
x
Short Flash = 0
Flash = x (TENS)
Page 28
To select
Memory Location
To move forward to next
available Memory Location
Only BOTTOM RED LIGHT ON
Present and HOLD the Master Tag
On TOP RED LIGHT count number of
flashes required for UNITS value.
Short Flash=0
Remove Master Tag when required UNITS
value reached.
8
Only TOP RED LIGHT will remain ON
Present and HOLD the Master Tag
On TOP GREEN LIGHT count number of
flashes required for TENS value.
Short Flash=0
Remove Master Tag when required TENS
value reached.
Page 29
Only BOTTOM GREEN LIGHT ON
Present and remove the Master Tag
Confirm the Memory Location you have selected is Correct
9
(TENS)
To ACCEPT Memory Location
(UNITS)
To CHANGE Memory Location
Repeat from step 8 above
10
Present and remove New Tag
To add more tags repeat from step 8
above
To Exit
11
Both BOTTOM GREEN LIGHT ON and
BOTTOM RED LIGHT ON
Present and remove the Master Tag
12
Both BOTTOM GREEN LIGHT ON and
BOTTOM RED LIGHT ON
Present and remove the Master Tag
The SOLO Reader will enter normal RUN MODE
It is recommended that the attached Memory Location allocation and Parameter settings form be
updated.
Counting examples for Memory Locations may be found on page 25
Page 30
Delete Tag Menu
Overview
The SOLO Reader allows tags to be deleted from the system in four ways.
1. Quik Delete
This option erases all tags in memory. Please refer to QUIK Delete Menu on page 11 of this manual.
2. Delete Tag - via Memory Location
A benefit of the SOLO Reader is the ability to selectively delete user tags from the system. Provided that a
record has been kept of the memory location of the user whose tag is required to be deleted, by following
this procedure, this tag can be deleted without affecting any of the other tags in the system.
3. Delete Tag - via Tag
This option allows the user to remove specific tags from the system by presenting the tag itself.
4. Replacing a Master Tag
It is possible to replace a Master Tag provided that the other MASTER Tag is available.
The procedure that follows shows how to replace the secondary MASTER tag (memory location 01) if this
is lost. Apply the same procedure to replace the primary MASTER Tag (memory location 00) except at
STEP 11. Set the memory location to 00.
5. Complete Delete
This option erases all tags in memory, and resets the SOLO Reader to factory defaults.
Page 31
Delete Tag via Memory Location
(Tag not available)
Please Note:
! Memory Location of Tag is required for this process
! To ABORT wait for ± 60 seconds for the SOLO to RESET
TOP
ORANGE
TOP
GREEN
TOP
RED
Present &
Hold
Master Tag
BOTTOM
GREEN
Remove
Master Tag
Present &
Remove
Master Tag
BOTTOM
RED
Graphical Instructions
Written Instructions
Present and HOLD either Master Tag until
all lights turn ON
1
Observe
Lights
Remove the Master Tag
2
3
Observe
Top
Lights
Top green light will remain on
4
Observe
Bottom
Lights
Only BOTTOM RED LIGHT ON
Present and remove the Master Tag
5
Top red light will turn on
6
Only BOTTOM GREEN LIGHT ON
Present and remove the Master Tag
7
Top red light will turn on
8
Present and HOLD the Master Tag
9
TOP RED LIGHT will flash
Count the required number of UNITS
Short Flash = 0
Page 32
10
Remove the Master Tag
11
Present and HOLD the Master Tag
12
TOP GREEN LIGHT will flash
Count the required number of TENS
Short Flash = 0
13
Remove the Master Tag
14
Selected Memory Location indicated by
TOP GREEN LIGHT (TENS) and
TOP RED LIGHT (UNITS)
x x
(TENS)
(UNITS)
To DELETE Memory Location
To CHANGE Memory Location
Repeat from Step 8 above for further Tags
15
Only BOTTOM GREEN LIGHT ON
Present and remove the Master Tag
Repeat from Step 8 above for further Tags
To EXIT
16
Both BOTTOM GREEN LIGHT ON and
BOTTOM RED LIGHT ON
Present and remove the Master Tag
17
Both BOTTOM GREEN LIGHT ON and
BOTTOM RED LIGHT ON
Present and remove the Master Tag
The SOLO Reader will enter normal RUN MODE
It is recommended that the attached Memory Location allocation and Parameter settings form be
updated.
Counting examples for Memory Locations may be found on page 32
Page 33
EXAMPLE
How to use the LED's to select Memory Locations
Graphical Instructions
Written Instructions
Example: Value set to 03
TOP GREEN LIGHT will SHORT FLASH
to indicate 0 TENS
1
TOP RED LIGHT will FLASH 3 TIMES
to indicate 3 UNITS
0 3
Short Flash = 0
(TENS)
Flash x 3
(UNITS)
Example: Value set to 30
TOP GREEN LIGHT will FLASH 3 TIMES
to indicate 30
2
TOP RED LIGHT will SHORT FLASH
to indicate 0 UNITS
3 0
Flash x 3
(TENS)
Short Flash=0
(UNITS)
Example: Value set to 36
TOP GREEN LIGHT will FLASH 3 TIMES
to indicate 30
3
TOP RED LIGHT will FLASH 6 TIMES
to indicate 6 UNITS
3 6
Flash x 3
(TENS)
Flash x 6
(UNITS)
Example: Value set to 49
TOP GREEN LIGHT will FLASH 4 TIMES
to indicate 40
4
TOP RED LIGHT will FLASH 9 TIMES
to indicate 9 UNITS
4 9
Flash x 4
(TENS)
Flash x 9
(UNITS)
Page 34
Delete Tag
(Tag available)
Please Note:
! To ABORT wait for ± 60 seconds for the SOLO to RESET
TOP
ORANGE
TOP
GREEN
BOTTOM
GREEN
TOP
RED
Present &
Hold
Master Tag
Remove
Master Tag
Present &
Remove
Master Tag
Present &
Remove
Existing User Tag
BOTTOM
RED
Graphical Instructions
Written Instructions
Present and HOLD either Master Tag until
all lights turn ON
1
Observe
Lights
Remove the Master Tag
2
3
Observe
Top
Lights
Top green light will remain on
4
Observe
Bottom
Lights
Only BOTTOM RED LIGHT ON
Present and remove the Master Tag
5
Top red light will turn on
6
Only BOTTOM GREEN LIGHT ON
Present and remove the Master Tag
7
Top red light will turn on
8
Present and remove User Tag
to be deleted.
9
Memory Location of deleted USER Tag
indicated by
TOP GREEN LIGHT (TENS) and
TOP RED LIGHT (UNITS)
(TENS)
(UNITS)
Page 35
10
Repeat from Step 8 above for other Tags
as required
11
Present and remove the Master Tag
The SOLO Reader will enter normal RUN MODE
It is recommended that the attached Memory Location allocation and Parameter settings form be
updated.
Counting examples for Memory Locations may be found on page 32
Page 36
Replacing Master Tag in Memory Location 01
(Secondary Master Tag)
Please Note:
! Master Tag in Memory Location 00 must be used for this procedure.
! To ABORT wait for ± 60 seconds for the SOLO to RESET
TOP
ORANGE
BOTTOM
GREEN
TOP
GREEN
TOP
RED
Present &
Hold
Master Tag
BOTTOM
RED
0
Remove
Master Tag
0 0
Graphical Instructions
Present &
Remove
Master Tag
Master Tag
in Memory Location
00 (Primary)
Written Instructions
Present and HOLD Master Tag in
Memory Location 00 until
all lights turn ON
0 0
1
Observe
Lights
Remove the Master Tag
0 0
2
3
Observe
Top
Lights
4
Observe
Bottom
Lights
Top green light will remain on
Only BOTTOM RED LIGHT ON
Present and remove the Master Tag
0 0
Top red light will turn on
5
6
Only BOTTOM GREEN LIGHT ON
Present and remove the Master Tag
0 0
Top red light will turn on
7
8
9
10
Present and HOLD the Master Tag
0 0
0
TOP RED LIGHT will flash
Count the required number of UNITS (1)
Short Flash = 0
Remove the Master Tag
0 0
Page 37
Present and remove the Master Tag
0 0
11
Selected Memory Location 01 indicated by
TOP GREEN LIGHT Single Flash and
TOP RED LIGHT Short Flash
12
Short Flash = 0
(TENS)
0 1
Flash = 1
(UNITS)
13
0 0
Only BOTTOM GREEN LIGHT ON
Present and remove the Master Tag
14
0 0
Both BOTTOM GREEN LIGHT ON and
BOTTOM RED LIGHT ON
Present and remove the Master Tag
15
0 0
Both BOTTOM GREEN LIGHT ON and
BOTTOM RED LIGHT ON
Present and remove the Master Tag
0 0
Present and HOLD Master Tag in
Memory Location 00 until
all lights turn ON
16
17
Remove the Master Tag
0 0
18
Top green light will remain on
19
Present and remove the NEW Master Tag
20
TOP GREEN LIGHT will flash and the
BUZZER will sound to indicate a successful
addition.
21
Present and REMOVE either Master Tag
The SOLO Reader will enter normal RUN MODE
It is recommended that the attached Memory Location allocation and Parameter settings form be
updated.
Please note that the primary Master Tag (memory location 00) has greater access rights than the
secondary Master Tag (memory location 01). Only the primary Master Tag is capable of clearing the
entire memory back to factory defaults as well as clearing all memory locations. This is NOT possible
with the secondary Master Tag.
Counting examples for Memory Locations may be found on page 32
Page 38
Replacing Master Tag in Memory Location 00
(Primary Master Tag)
Please Note:
! Master Tag in Memory Location 01 must be used for this procedure.
! To ABORT wait for ± 60 seconds for the SOLO to RESET
TOP
ORANGE
BOTTOM
GREEN
TOP
GREEN
TOP
RED
Present &
Hold
Master Tag
Remove
Master Tag
0 1
BOTTOM
RED
Graphical Instructions
Present &
Remove
Master Tag
Master Tag
in Memory Location
01 (Secondary)
Written Instructions
Present and HOLD Master Tag in
Memory Location 01 until
all lights turn ON
0 1
1
Observe
Lights
Remove the Master Tag
0 1
2
3
Observe
Top
Lights
4
Observe
Bottom
Lights
Top green light will remain on
Only BOTTOM RED LIGHT ON
Present and remove the Master Tag
0 1
Top red light will turn on
5
6
Only BOTTOM GREEN LIGHT ON
Present and remove the Master Tag
0 1
Top red light will turn on
7
8
Present and remove the Master Tag
0 1
Top red light will remain on
9
10
Present and remove the Master Tag
0 1
Page 39
Selected Memory Location 00 indicated by
TOP GREEN LIGHT Short Flash and
TOP RED LIGHT Short Flash
11
Short Flash = 0
(TENS)
12
0 0
Short Flash = 0
(UNITS)
Only BOTTOM GREEN LIGHT ON
Present and remove the Master Tag
0 1
13
Top lights will FLASH
14
Present and remove the NEW Master Tag
The SOLO Reader will enter normal RUN MODE
It is recommended that the attached Memory Location allocation and Parameter settings form be
updated.
Page 40
Complete Delete
Please Note:
! Master Tag in Memory Location 00 must be used for this procedure.
!All Tags will be deleted from the SOLO Reader.
!All parameters will be restored to the Factory Default Settings.
! To ABORT wait for ± 60 seconds for the SOLO to RESET
TOP
ORANGE
BOTTOM
GREEN
TOP
GREEN
TOP
RED
Present &
Hold
Master Tag
Remove
Master Tag
0 0
BOTTOM
RED
Graphical Instructions
Present &
Remove
Master Tag
Master Tag
in Memory Location
00 (Primary)
Written Instructions
Present and HOLD Master Tag in
Memory Location 00 until
all lights turn ON
0 0
1
Observe
Lights
Remove the Master Tag
0 0
2
3
Observe
Top
Lights
4
Observe
Bottom
Lights
Top green light will remain on
Only BOTTOM RED LIGHT ON
Present and remove the Master Tag
0 0
Top red light will turn on
5
6
Only BOTTOM GREEN LIGHT ON
Present and remove the Master Tag
0 0
Top red light will turn on
7
8
Present and remove the Master Tag
0 0
Top red light will remain on
9
Page 41
Present and remove the Master Tag
0 0
10
Selected Memory Location 00 indicated by
TOP GREEN LIGHT Short Flash and
TOP RED LIGHT Short Flash
11
Short Flash = 0
(TENS)
12
0 0
Short Flash = 0
(UNITS)
Only BOTTOM GREEN LIGHT ON
Present and HOLD the Master Tag
0 0
13
All the lights begin to Flash
Continue to HOLD the Master Tag
14
WAIT for all the lights to turn OFF
15
Remove the Master Tag
All Tags are deleted. Top row lights will chase
each other.
0 0
Page 42
Configuration Menu
Overview
The Configuration Menu of the SOLO Reader allows for seven configuration options to be turned ON
or OFF individually as required for each installation. The Configuration Options have been Factory
preset to the most common settings.
CONFIGURATION FACTORY SETTINGS
Tag Buzzer
ON
Free-Exit Input
ON
Door Forced Alarm Output
OFF
Door Forced Alarm Buzzer
OFF
Door Open Alarm Output
OFF
Door Open Alarm Buzzer
OFF
Smartswitch II
OFF
Table 3. Configuration Factory Settings
1. Configuration Option 1 - TAG BUZZER
(Factory Default ON)
When a valid* Zap Tag is presented, the Tag Buzzer provides a brief audible indication that access has
been granted. The Tag Buzzer can be turned OFF if no audible indication is required.
2. Configuration Option 2 - FREE EXIT (FRX)
(Factory Default ON)
The FREE-EXIT (FRX) input allows activation of the reader without using a valid* Zap Tag. With the FRX
option turned ON, activating a "Push to Make" contact connected to the FRX input will cause the reader to
activate as if a valid* Zap Tag has been presented. (Refer to Figure 7 on page 19 for connection method.)
NOTE: In order to prevent unauthorised access, it is recommended that FRX be turned OFF if not
required.
3. Configuration Option 3 - DOOR FORCED ALARM OUTPUT
(Factory Default OFF)
If turned ON, the DOOR FORCED ALARM OUTPUT option activates the ALARM output immediately
when the access point being controlled by the SOLO Reader has been forced open†. The ALARM terminal
provides a common ground Open Collector output capable of sinking a MAXIMUM current of 50mA at 17
volt DC, and can be connected to a third party alarm system, external siren, etc.
Please read the Timer Menu options relevant to Door Forced Alarm Time.
*A working Zap Tag that has been previously added to a Memory Location of the SOLO Reader
Page 43
4. Configuration Option 4 - DOOR FORCED ALARM BUZZER
(Factory Default OFF)
If turned ON, the DOOR FORCED ALARM BUZZER option activates the built in buzzer when the access
point being controlled by the SOLO Reader has been forced open†.
Please read the Timer Menu options relevant to Door Forced Alarm Time.
5. Configuration Option 5 - DOOR OPEN ALARM OUTPUT
(Factory Default OFF)
If turned ON, the Door Open Alarm Output option activates the ALARM output when the access point being
controlled by the SOLO Reader has been left open longer than the configurable door open time†. The
ALARM terminal provides a common ground Open Collector output capable of sinking a MAXIMUM
current of 50mA at 17V DC, and can be connected to a third party alarm system, external siren, etc.
Please read the Timer Menu options relevant to Door Forced Open Alarm Time.
6. Configuration Option 6 - DOOR OPEN ALARM BUZZER
(Factory Default OFF)
If turned ON, the Door Open Alarm Buzzer option activates the built-in buzzer when the access point being
controlled by the SOLO Reader has been left open for longer than the configurable door open time†.
Please read the Timer Menu options relevant to Door Open Time and Door Open Alarm Time.
7. Configuration Option 7 - SMARTSWITCH II
(Factory Default OFF)
Use of an optional SMARTWITCH II is recommended where extra security is needed to prevent unauthorized operation of the access point. The SMARTSWITCH II will only operate correctly if the
SMARTSWITCH II option is turned on AND the relay selection jumper on the SOLO Reader is fitted to the
correct pins. Refer to Figure 1 on page 8 for the connection method.
†
For the various alarm options to function correctly, the SOLO Reader must be powered, in proper
working order and have a normally open switch connected. Refer to Fig 7 on page 19 for the
connection method.
Tips & Tricks
To change multiple options in the Configuration Menu DO NOT perform the last two instructions in the
various Configuration Menu Options.
Once you have performed the first instruction after turning ON or OFF the various options, you may
continue from step 9 for the next configurable option by matching up the light display.
Page 44
Turning the TAG BUZZER ON or OFF
Please Note:
! To ABORT wait for ± 60 seconds for the SOLO to RESET
TOP
ORANGE
TOP
GREEN
TOP
RED
Present &
Hold
Master Tag
BOTTOM
GREEN
Remove
Master Tag
Present &
Remove
Master Tag
BOTTOM
RED
Graphical Instructions
Written Instructions
Present and HOLD either Master Tag until
all lights turn ON
1
Observe
Lights
Remove the Master Tag
2
3
Observe
Top
Lights
Top green light will remain on
4
Observe
Bottom
Lights
Only BOTTOM RED LIGHT ON
Present and remove the Master Tag
5
Top red light will turn on
6
Only BOTTOM RED LIGHT ON
Present and remove the Master Tag
7
Top orange light will turn on
8
Only BOTTOM GREEN LIGHT ON
Present and remove the Master Tag
9
Top red light will turn on
10
Only BOTTOM GREEN LIGHT ON
Present and remove the Master Tag
11
Top red light will remain on
Page 45
12
To turn the BUZZER ON
To turn the BUZZER OFF
Only BOTTOM GREEN LIGHT ON
Present and remove the Master Tag
Only BOTTOM RED LIGHT ON
Present and remove the Master Tag
Bottom green light will flash
to indicate the TAG BUZZER is ON
Bottom red light will flash
to indicate the TAG BUZZER is OFF
13
Both BOTTOM GREEN LIGHT ON and
BOTTOM RED LIGHT ON
Present and remove the Master Tag
14
Both BOTTOM GREEN LIGHT ON and
BOTTOM RED LIGHT ON
Present and remove the Master Tag
15
Both BOTTOM GREEN LIGHT ON and
BOTTOM RED LIGHT ON
Present and remove the Master Tag
The SOLO Reader will enter normal RUN MODE
It is recommended that the attached Memory Location allocation and Parameter settings form be
updated.
Tips and tricks for SOLO Configuration Menu on page 44
Page 46
NORMAL MODE
For Tag Location, present & HOLD Tag
for ± 3 seconds
enter PROGRAMMING
MODE
NORMAL
PROGRAMMING
MODE
QUIK FACTORY
PARAMETER
DEFAULT
TURBO
PROGRAMMING
MODE
AUTO-LEARN
LIMITED
TIME
AUTO-LEARN
UNLIMITED
TIME
ADVANCED USER MENU MAP
DRILL 5mm
CONDUIT
LOCATION
CONDUIT
LOCATION
3
3
NOT
RECOMMENDED
NOT
RECOMMENDED
DO NOT ALLOW
CABLE ACCESS
THROUGH
THIS AREA
PREFERRED
CONDUIT
LOCATION
PREFERRED
CONDUIT
LOCATION
2
1
DRILL 5mm
SURFACE MOUNT INSTALLATION
This mounting template is to be used when
performing a surface mount installation.
(Remove template from book)
! When planning where to locate the unit, it is
important to consider the cable entry position. Do
not allow cables to enter the unit through the centre
area as this will interfere with assembly of the unit
after installation.
! Place the template in such a manner that conduit,
where provided, will be behind one of the four
preferred conduit locations shown alongside. If
conduit is not provided, surface mounted cabling
should be planned to enter the unit through one of
the 4 preferred locations indicated.
! The conduit locations are indicated in order of
preference. Location 1 being the most preferable
cable entry location and location 3 being the least
preferable cable entry location.
MOUNTING TEMPLATE
QUIK ADD
SOLO SPECIFIED
MEMORY LOCATION
ADD TAG
USER SPECIFIED
MEMORY LOCATION
QUIK DELETE
TAGS ONLY
USER SPECIFIED
MEMORY LOCATION
DELETE TAG
DELETE TAG
COMPLETE DELETE
TAG & FACTORY DEFAULT
CONFIG
TAG BUZZER
FRX
EXTERNAL ALARM
DOOR FORCED
LOCAL ALARM
DOOR FORCED
EXTERNAL ALARM
DOOR OPEN
LOCAL ALARM
DOOR OPEN
SMARTSWITCH II
ON or OFF
TIMERS
RELAY
DOOR OPEN
PRE-WARN
DOOR OPEN ALARM
DOOR FORCED
ALARM
HOLD OFF
TIME
Turning the FREE EXIT ON or OFF
Please Note:
! To ABORT wait for ± 60 seconds for the SOLO to RESET
TOP
ORANGE
TOP
GREEN
TOP
RED
Present &
Hold
Master Tag
BOTTOM
GREEN
Remove
Master Tag
Present &
Remove
Master Tag
BOTTOM
RED
Graphical Instructions
Written Instructions
Present and HOLD either Master Tag until
all lights turn ON
1
Observe
Lights
Remove the Master Tag
2
3
Observe
Top
Lights
Top green light will remain on
4
Observe
Bottom
Lights
Only BOTTOM RED LIGHT ON
Present and remove the Master Tag
5
Top red light will turn on
6
Only BOTTOM RED LIGHT ON
Present and remove the Master Tag
7
Top orange light will turn on
8
Only BOTTOM GREEN LIGHT ON
Present and remove the Master Tag
9
Top red light will turn on
10
Only BOTTOM RED LIGHT ON
Present and remove the Master Tag
11
Top green light will turn on
Page 47
12
Only BOTTOM GREEN LIGHT ON
Present and remove the Master Tag
13
Top green light will remain on
14
To turn FREE EXIT (FRX) ON
To turn FREE EXIT (FRX) OFF
Only BOTTOM GREEN LIGHT ON
Present and remove the Master Tag
Only BOTTOM RED LIGHT ON
Present and remove the Master Tag
Bottom green light will flash
to indicate the FREE EXIT is ON
Bottom red light will flash
to indicate the FREE-EXIT is OFF
15
Both BOTTOM GREEN LIGHT ON and
BOTTOM RED LIGHT ON
Present and remove the Master Tag
16
Both BOTTOM GREEN LIGHT ON and
BOTTOM RED LIGHT ON
Present and remove the Master Tag
17
Both BOTTOM GREEN LIGHT ON and
BOTTOM RED LIGHT ON
Present and remove the Master Tag
The SOLO Reader will enter normal RUN MODE
It is recommended that the attached Memory Location allocation and Parameter settings form be
updated.
Tips and tricks for SOLO Configuration Menu on page 44
Page 48
Turning DOOR FORCED ALARM OUTPUT ON or OFF
Please Note:
! To ABORT wait for ± 60 seconds for the SOLO to RESET
TOP
ORANGE
TOP
GREEN
TOP
RED
Present &
Hold
Master Tag
BOTTOM
GREEN
Remove
Master Tag
Present &
Remove
Master Tag
BOTTOM
RED
Graphical Instructions
Written Instructions
Present and HOLD either Master Tag until
all lights turn ON
1
Observe
Lights
Remove the Master Tag
2
3
Observe
Top
Lights
Top green light will remain on
4
Observe
Bottom
Lights
Only BOTTOM RED LIGHT ON
Present and remove the Master Tag
5
Top red light will turn on
6
Only BOTTOM RED LIGHT ON
Present and remove the Master Tag
7
Top orange light will turn on
8
Only BOTTOM GREEN LIGHT ON
Present and remove the Master Tag
9
Top red light will turn on
10
Only BOTTOM RED LIGHT ON
Present and remove the Master Tag
11
Top green light will turn on
Page 49
12
Only BOTTOM RED LIGHT ON
Present and remove the Master Tag
13
Top green and
top red light will turn on
14
Only BOTTOM GREEN LIGHT ON
Present and remove the Master Tag
15
Top green and
top red light will remain on
16
To turn DOOR
FORCED ALARM OUTPUT ON
To turn DOOR
FORCED ALARM OUTPUT OFF
Only BOTTOM GREEN LIGHT ON
Present and remove the Master Tag
Only BOTTOM RED LIGHT ON
Present and remove the Master Tag
Bottom green light will flash
to indicate DOOR FORCED ALARM OUTPUT
is ON
Bottom red light will flash
to indicate DOOR FORCED ALARM OUTPUT
is OFF
17
Both BOTTOM GREEN LIGHT ON and
BOTTOM RED LIGHT ON
Present and remove the Master Tag
18
Both BOTTOM GREEN LIGHT ON and
BOTTOM RED LIGHT ON
Present and remove the Master Tag
19
Both BOTTOM GREEN LIGHT ON and
BOTTOM RED LIGHT ON
Present and remove the Master Tag
The SOLO Reader will enter normal RUN MODE
It is recommended that the attached Memory Location allocation and Parameter settings form be
updated.
Tips and tricks for SOLO Configuration Menu on page 44
Page 50
Turning DOOR FORCED ALARM BUZZER ON or OFF
Please Note:
! To ABORT wait for ± 60 seconds for the SOLO to RESET
TOP
ORANGE
TOP
GREEN
TOP
RED
Present &
Hold
Master Tag
BOTTOM
GREEN
Remove
Master Tag
Present &
Remove
Master Tag
BOTTOM
RED
Graphical Instructions
Written Instructions
Present and HOLD either Master Tag until
all lights turn ON
1
Observe
Lights
Remove the Master Tag
2
3
Observe
Top
Lights
Top green light will remain on
4
Observe
Bottom
Lights
Only BOTTOM RED LIGHT ON
Present and remove the Master Tag
5
Top red light will turn on
6
Only BOTTOM RED LIGHT ON
Present and remove the Master Tag
7
Top orange light will turn on
8
Only BOTTOM GREEN LIGHT ON
Present and remove the Master Tag
9
Top red light will turn on
10
Only BOTTOM RED LIGHT ON
Present and remove the Master Tag
11
Top green light will turn on
Page 51
12
Only BOTTOM RED LIGHT ON
Present and remove the Master Tag
13
Top green and
top red light will turn on
14
Only BOTTOM RED LIGHT ON
Present and remove the Master Tag
15
Top orange light will turn on
16
Only BOTTOM GREEN LIGHT ON
Present and remove the Master Tag
17
Top orange light will remain on
18
To turn DOOR
FORCED ALARM BUZZER ON
To turn DOOR
FORCED ALARM BUZZER OFF
Only BOTTOM GREEN LIGHT ON
Present and remove the Master Tag
Only BOTTOM RED LIGHT ON
Present and remove the Master Tag
Bottom green light will flash
to indicate DOOR FORCED ALARM BUZZER
is ON
Bottom red light will flash
to indicate DOOR FORCED ALARM BUZZER
is OFF
19
Both BOTTOM GREEN LIGHT ON and
BOTTOM RED LIGHT ON
Present and remove the Master Tag
20
Both BOTTOM GREEN LIGHT ON and
BOTTOM RED LIGHT ON
Present and remove the Master Tag
21
Both BOTTOM GREEN LIGHT ON and
BOTTOM RED LIGHT ON
Present and remove the Master Tag
The SOLO Reader will enter normal RUN MODE
It is recommended that the attached Memory Location allocation and Parameter settings form be
updated.
Tips and tricks for SOLO Configuration Menu on page 44
Page 52
Turning DOOR OPEN ALARM OUTPUT ON or OFF
Please Note:
! To ABORT wait for ± 60 seconds for the SOLO to RESET
TOP
ORANGE
TOP
GREEN
TOP
RED
Present &
Hold
Master Tag
BOTTOM
GREEN
Remove
Master Tag
Present &
Remove
Master Tag
BOTTOM
RED
Graphical Instructions
Written Instructions
Present and HOLD either Master Tag until
all lights turn ON
1
Observe
Lights
Remove the Master Tag
2
3
Observe
Top
Lights
Top green light will remain on
4
Observe
Bottom
Lights
Only BOTTOM RED LIGHT ON
Present and remove the Master Tag
5
Top red light will turn on
6
Only BOTTOM RED LIGHT ON
Present and remove the Master Tag
7
Top orange light will turn on
8
Only BOTTOM GREEN LIGHT ON
Present and remove the Master Tag
9
Top red light will turn on
10
Only BOTTOM RED LIGHT ON
Present and remove the Master Tag
11
Top green light will turn on
Page 53
12
Only BOTTOM RED LIGHT ON
Present and remove the Master Tag
13
Top green and
top red light will turn on
14
Only BOTTOM RED LIGHT ON
Present and remove the Master Tag
15
Top orange light will turn on
16
Only BOTTOM RED LIGHT ON
Present and remove the Master Tag
17
Top orange and
top red light will turn on
18
Only BOTTOM GREEN LIGHT ON
Present and remove the Master Tag
19
Top orange and
top red light will remain on
20
To turn DOOR
OPEN ALARM OUTPUT ON
To turn DOOR
OPEN ALARM OUTPUT OFF
Only BOTTOM GREEN LIGHT ON
Present and remove the Master Tag
Only BOTTOM RED LIGHT ON
Present and remove the Master Tag
Bottom green light will flash
to indicate DOOR OPEN ALARM OUTPUT
is ON
Bottom red light will flash
to indicate DOOR OPEN ALARM OUTPUT
is OFF
21
Both BOTTOM GREEN LIGHT ON and
BOTTOM RED LIGHT ON
Present and remove the Master Tag
22
Both BOTTOM GREEN LIGHT ON and
BOTTOM RED LIGHT ON
Present and remove the Master Tag
Page 54
BOTTOM RED LIGHT ON
Present and remove the Master Tag
23
The SOLO Reader will enter normal RUN MODE
It is recommended that the attached Memory Location allocation and Parameter settings form be
updated.
Tips and tricks for SOLO Configuration Menu on page 44
Page 55
Turning DOOR OPEN ALARM BUZZER ON or OFF
Please Note:
! To ABORT wait for ± 60 seconds for the SOLO to RESET
TOP
ORANGE
TOP
GREEN
TOP
RED
Present &
Hold
Master Tag
BOTTOM
GREEN
Remove
Master Tag
Present &
Remove
Master Tag
BOTTOM
RED
Graphical Instructions
Written Instructions
Present and HOLD either Master Tag until
all lights turn ON
1
Observe
Lights
Remove the Master Tag
2
3
Observe
Top
Lights
Top green light will remain on
4
Observe
Bottom
Lights
Only BOTTOM RED LIGHT ON
Present and remove the Master Tag
5
Top red light will turn on
6
Only BOTTOM RED LIGHT ON
Present and remove the Master Tag
7
Top orange light will turn on
8
Only BOTTOM GREEN LIGHT ON
Present and remove the Master Tag
9
Top red light will turn on
10
Only BOTTOM RED LIGHT ON
Present and remove the Master Tag
11
Top green light will turn on
Page 56
12
Only BOTTOM RED LIGHT ON
Present and remove the Master Tag
13
Top green and
top red light will turn on
14
Only BOTTOM RED LIGHT ON
Present and remove the Master Tag
15
Top orange light will turn on
16
Only BOTTOM RED LIGHT ON
Present and remove the Master Tag
17
Top orange and
top red light will turn on
18
Only BOTTOM RED LIGHT ON
Present and remove the Master Tag
19
Top orange light and
top green light will turn on
20
Only BOTTOM GREEN LIGHT ON
Present and remove the Master Tag
21
Top orange light and
top green light will remain on
22
To turn DOOR
OPEN ALARM BUZZER ON
To turn DOOR
OPEN ALARM BUZZER OFF
Only BOTTOM GREEN LIGHT ON
Present and remove the Master Tag
Only BOTTOM RED LIGHT OFF
Present and remove the Master Tag
Bottom green light will flash
to indicate DOOR OPEN ALARM BUZZER
is ON
Bottom red light will flash
to indicate DOOR OPEN ALARM BUZZER
is OFF
Page 57
23
Both BOTTOM GREEN LIGHT ON and
BOTTOM RED LIGHT ON
Present and remove the Master Tag
24
Both BOTTOM GREEN LIGHT ON and
BOTTOM RED LIGHT ON
Present and remove the Master Tag
25
Both BOTTOM GREEN LIGHT ON and
BOTTOM RED LIGHT ON
Present and remove the Master Tag
The SOLO Reader will enter normal RUN MODE
It is recommended that the attached Memory Location allocation and Parameter settings form be
updated.
Tips and tricks for SOLO Configuration Menu on page 44
Page 58
Turning SMARTSWITCH II ON or OFF
Please Note:
! To ABORT wait for ± 60 seconds for the SOLO to RESET
TOP
ORANGE
TOP
GREEN
TOP
RED
Present &
Hold
Master Tag
BOTTOM
GREEN
Remove
Master Tag
Present &
Remove
Master Tag
BOTTOM
RED
Graphical Instructions
Written Instructions
Present and HOLD either Master Tag until
all lights turn ON
1
Observe
Lights
Remove the Master Tag
2
3
Observe
Top
Lights
Top green light will remain on
4
Observe
Bottom
Lights
Only BOTTOM RED LIGHT ON
Present and remove the Master Tag
5
Top red light will turn on
6
Only BOTTOM RED LIGHT ON
Present and remove the Master Tag
7
Top orange light will turn on
8
Only BOTTOM GREEN LIGHT ON
Present and remove the Master Tag
9
Top red light will turn on
10
Only BOTTOM RED LIGHT ON
Present and remove the Master Tag
11
Top green light will turn on
Page 59
12
Only BOTTOM RED LIGHT ON
Present and remove the Master Tag
13
Top green and
top red light will turn on
14
Only BOTTOM RED LIGHT ON
Present and remove the Master Tag
15
Top orange light will turn on
16
Only BOTTOM RED LIGHT ON
Present and remove the Master Tag
17
Top orange and
top red light will turn on
18
Only BOTTOM RED LIGHT ON
Present and remove the Master Tag
19
Top orange and
top green light will turn on
20
Only BOTTOM RED LIGHT ON
Present and remove the Master Tag
21
Top orange,
top green and
top red light will turn on
22
Only BOTTOM GREEN LIGHT ON
Present and remove the Master Tag
23
Top orange,
top green and
top red light will remain on
Page 60
24
To turn SMARTSWITCH II ON
To turn SMARTSWITCH II OFF
Only BOTTOM GREEN LIGHT ON
Present and remove the Master Tag
Only BOTTOM RED LIGHT ON
Present and remove the Master Tag
Bottom green light will flash
to indicate SMARTSWITCH II is ON
Bottom red light will flash
to indicate SMARTSWITCH II is OFF
25
Both BOTTOM GREEN LIGHT ON and
BOTTOM RED LIGHT ON
Present and remove the Master Tag
26
Both BOTTOM GREEN LIGHT ON and
BOTTOM RED LIGHT ON
Present and remove the Master Tag
27
Both BOTTOM GREEN LIGHT ON and
BOTTOM RED LIGHT ON
Present and remove the Master Tag
The SOLO Reader will enter normal RUN MODE
It is recommended that the attached Memory Location allocation and Parameter settings form be
updated.
Tips and tricks for SOLO Configuration Menu on page 44
Page 61
Timers Menu
Overview
The Timers Menu of the SOLO Reader allows 5 timer values to be changed individually as required for
each installation. The various Timer values have been factory preset to the most commonly used values.
FACTORY DEFAULT TIMER VALUES
Relay Time
1 Second
Door Open Time
5 Seconds
Door Open Pre-warn Time
0 Seconds
Door Open Alarm Time
30 Seconds
Door Forced Alarm Time
Continuous/Latched
Hold Off Time
0 Seconds
Table 4. Factory Default Timer Values
1. Timer Option 1 - Relay Time
(Factory Default - 1 Second )
This is the time for which the onboard Relay, remote relay or Smartswitch II will activate when a valid Tag
is presented. The timer can be set to Pulsed, Latching or OFF, depending on its value.
See Table 5 for various settings.
2. Timer Option 2 - Door Open Time
(Factory Default - 5 Seconds)
This is the length of time for which the door is allowed to stay open BEFORE any warnings or alarms
occur†.
See Table 5 for various settings.
3. Timer Option 3 - Door Open Pre-Warn Time
(Factory Default - 0 Seconds)
This is the length of time for which a warning will be issued BEFORE the Door Open Alarm is activated†.
See Table 5 for various settings.
4. Timer Option 4 - Door Open Alarm
(Factory Default - 30 Seconds)
This is the length of time for which the Door Open Alarm will be active†.
See Table 5 for various settings.
†
After a valid Tag is presented and the door is opened, the Door Open Timer begins to count down. If the
door remains open after the Door Open Time has expired, the buzzer will begin to sound a warning tone for
the duration of the Door Open Pre-Warn Time. If the door still remains open after the Door Open Pre-Warn
Time has expired, the Door Open Alarm will activate. The alarm condition will remain activated for the
duration of the Door Open Alarm Time or reset if the door is closed.
Page 62
5. Timer Option 5 - Door Forced Alarm
(Factory Default - Latched)
The Door Forced Alarm time controls the length of time for which the Door Forced Alarm activates.
See Table 5 below for various settings.
6. Timer Option 6 - Hold Off Time
(Factory Default - 0 Seconds)
The Hold Off time is only used when door status monitoring is required in conjuction with a pre-impulse
strike lock.
The Hold Off time is the time during which the door can be opened without triggering a door forced alarm.
Should the door be opened after the Hold off time expires then a door forced alarm will be generated.
Due to the characteristics of pre-impulse strikers this allows for a measure of security to be maintained.
TIMER VALUE SETTINGS
Timer
Timer Range
1 second
increments
Effect of 0
Effect of 1-254
Effect of 255
Relay
0 - 255
No relay action
Pulse duration
Latched
Door Open
0 - 255
Instantaneous progression
to door open pre-warn
Length of
door open time
Continuous
door open
no progression to
door open pre-warn
Door Open Pre-Warn
0 - 255
Instantaneous progression Length of pre-warn
to door open alarm
time
Door Open Alarm
0 - 255
No alarm
Pulse duration
Continuous alarm/
latched
Door Forced Alarm
0 - 255
No alarm
Pulse duration
Continuous alarm/
latched
Hold Off Time
0 - 255
No hold off
Hold off duration
Hold off duration
Table 5. Timer Value Settings
Page 63
Continuous
pre-warn
no progression to
door open alarm
EXAMPLE
How to use the LED's to set the various Timers
Graphical Instructions
Written Instructions
Example: Timer Value set to 5 Seconds
TOP ORANGE LIGHT will SHORT FLASH
to indicate 0 HUNDREDS
TOP GREEN LIGHT will SHORT FLASH
to indicate 0 TENS
1
0 0 5
Short Flash = 0 Short Flash = 0
(HUNDREDS)
(TENS)
Flash x5
(UNITS)
TOP RED LIGHT will FLASH 5 TIMES
to indicate 5 UNITS
Example: Timer Value set to 50 Seconds
TOP ORANGE LIGHT will SHORT FLASH
to indicate 0 HUNDREDS
TOP GREEN LIGHT will FLASH 5 TIMES
to indicate 5 TENS
2
0 5 0
Short Flash = 0
(HUNDREDS)
Flash x 5
(TENS)
Short Flash = 0
(UNITS)
TOP RED LIGHT will SHORT FLASH
to indicate 0 UNITS
Example: Timer Value set to 250 Seconds
TOP ORANGE LIGHT will FLASH 2 TIMES
to indicate 2 HUNDREDS
TOP GREEN LIGHT will FLASH 5 TIMES
to indicate 5 TENS
3
2 5 0
Flash x 2
(HUNDREDS)
Flash x 5
(TENS)
Short Flash = 0
(UNITS)
TOP RED LIGHT will SHORT FLASH
to indicate 0 UNITS
Example: Timer Value set to 18 Seconds
TOP ORANGE LIGHT will SHORT FLASH
to indicate 0 HUNDREDS
TOP GREEN LIGHT will FLASH 1 TIME
to indicate 1 TEN
4
0 1 8
Short Flash = 0
(HUNDREDS)
Flash x 1
(TENS)
Flash x 8
(UNITS)
TOP RED LIGHT will FLASH 8 TIMES
to indicate 8 UNITS
Example: Timer Value set to 193 Seconds
TOP ORANGE LIGHT will FLASH 1 TIME
to indicate 1 HUNDRED
TOP GREEN LIGHT will FLASH 9 TIMES
to indicate 9 TENS
5
1 9 3
Flash x 1
(HUNDREDS)
Flash x 9
(TENS)
Flash X 3
(UNITS)
Page 64
TOP RED LIGHT will FLASH 3 TIMES
to indicate 3 UNITS
Change Relay Time
Please Note:
! Time selectable in 1 second increments from 1 to 255 seconds.
! For LATCHING RELAY select 255
! To ABORT wait for ± 60 seconds for the SOLO to RESET
TOP
ORANGE
TOP
GREEN
TOP
RED
Present &
Hold
Master Tag
BOTTOM
GREEN
Remove
Master Tag
Present &
Remove
Master Tag
BOTTOM
RED
Graphical Instructions
Written Instructions
Present and HOLD either Master Tag until
all lights turn ON
1
Observe
Lights
Remove the Master Tag
2
3
Observe
Top
Lights
Top green light will remain on
4
Observe
Bottom
Lights
Only BOTTOM RED LIGHT ON
Present and remove the Master Tag
5
Top red light will turn on
6
Only BOTTOM RED LIGHT ON
Present and remove the Master Tag
7
Top orange light will turn on
8
Only BOTTOM RED LIGHT ON
Present and remove the Master Tag
9
Top orange and
top red light will turn on
Only BOTTOM GREEN LIGHT ON
Present and remove the Master Tag
10
Page 65
11
Top red light will turn on
12
Only BOTTOM GREEN LIGHT ON
Present and remove the Master Tag
13
TOP ORANGE LIGHT will FLASH
to indicate HUNDREDS
TOP GREEN LIGHT will FLASH
to indicate TENS
TOP RED LIGHT will FLASH
to indicate UNITS
of CURRENT Relay Time
0 0
Hundreds
Tens
Units
Only BOTTOM RED LIGHT ON
Present and HOLD the Master Tag
14
15
Units
Short Flash=0
Remove Master Tag when required UNITS
value reached
16
Only the TOP RED LIGHT will remain ON
17
Present and HOLD Master Tag
18
19
On TOP RED LIGHT count number of
flashes required for UNITS value.
Short Flash=0
Tens
Short Flash=0
On TOP GREEN LIGHT count number of
flashes required for TENS value.
Short Flash=0
20
Remove Master Tag when required
TENS value reached.
21
The TOP GREEN LIGHT and
TOP RED LIGHT will remain ON
22
Present and HOLD Master Tag
23
Hundreds
Short Flash=0
On TOP ORANGE LIGHT count number of
flashes required for HUNDREDS value.
Short Flash=0
Remove Master Tag when required
HUNDREDS reached.
24
Page 66
Confirm time you have selected is correct.
TOP ORANGE LIGHT indicates HUNDREDS
TOP GREEN LIGHT indicates TENS
TOP RED LIGHT indicates UNITS
25
x x x
(HUNDREDS)
(TENS)
(UNITS)
To ACCEPT NEW TIME
To CHANGE VALUE
Repeat from step 14 above
26
Only BOTTOM GREEN LIGHT ON
Present and remove the Master Tag
27
Both BOTTOM GREEN LIGHT ON and
BOTTOM RED LIGHT ON
Present and remove the Master Tag
28
Both BOTTOM GREEN LIGHT ON and
BOTTOM RED LIGHT ON
Present and remove the Master Tag
The SOLO Reader will enter normal RUN MODE
It is recommended that the attached Memory Location allocation and Parameter settings form be
updated.
Examples for setting timer values may be found on page 64
Page 67
Change Door Open Time
Please Note:
! Time selectable in 1 second increments from 1 to 255 seconds.
! For INFINITE DOOR OPEN TIME select 255
! To ABORT wait for ± 60 seconds for the SOLO to RESET
TOP
ORANGE
TOP
GREEN
TOP
RED
Present &
Hold
Master Tag
BOTTOM
GREEN
Remove
Master Tag
Present &
Remove
Master Tag
BOTTOM
RED
Graphical Instructions
Written Instructions
Present and HOLD either Master Tag until
all lights turn ON
1
Observe
Lights
Remove the Master Tag
2
3
Observe
Top
Lights
Top green light will remain on
4
Observe
Bottom
Lights
Only BOTTOM RED LIGHT ON
Present and remove the Master Tag
5
Top red light will turn on
6
Only BOTTOM RED LIGHT ON
Present and remove the Master Tag
7
Top orange light will turn on
8
Only BOTTOM RED LIGHT ON
Present and remove the Master Tag
9
Top orange and
top red light will turn on
Only BOTTOM GREEN LIGHT ON
Present and remove the Master Tag
10
Page 68
11
Top red light will turn on
12
Only BOTTOM RED LIGHT ON
Present and remove the Master Tag
13
Top green light will turn on
14
Only BOTTOM GREEN LIGHT ON
Present and remove the Master Tag
15
TOP ORANGE LIGHT will FLASH
to indicate HUNDREDS
TOP GREEN LIGHT will FLASH
to indicate TENS
TOP RED LIGHT will FLASH
to indicate UNITS
of CURRENT Relay Time
0 0
Hundreds
Tens
Units
Only BOTTOM RED LIGHT ON
Present and HOLD the Master Tag
16
17
Units
Short Flash=0
Remove Master Tag when required UNITS
value reached
18
Only the TOP RED LIGHT will remain ON
19
Present and HOLD Master Tag
20
21
On TOP RED LIGHT count number of
flashes required for UNITS value.
Short Flash=0
Tens
Short Flash=0
On TOP GREEN LIGHT count number of
flashes required for TENS value.
Short Flash=0
22
Remove Master Tag when required
TENS value reached.
23
The TOP GREEN LIGHT and
TOP RED LIGHT will remain ON
24
Present and HOLD Master Tag
Page 69
Hundreds
Short Flash=0
25
On TOP ORANGE LIGHT count number of
flashes required for HUNDREDS value.
Short Flash=0
Remove Master Tag when required
HUNDREDS reached.
26
Confirm time you have selected is correct.
TOP ORANGE LIGHT indicates HUNDREDS
TOP GREEN LIGHT indicates TENS
TOP RED LIGHT indicates UNITS
27
x x x
(HUNDREDS)
(TENS)
(UNITS)
To ACCEPT NEW TIME
To CHANGE VALUE
Repeat from step 16 above
28
Only BOTTOM GREEN LIGHT ON
Present and remove the Master Tag
29
Both BOTTOM GREEN LIGHT ON and
BOTTOM RED LIGHT ON
Present and remove the Master Tag
30
Both BOTTOM GREEN LIGHT ON and
BOTTOM RED LIGHT ON
Present and remove the Master Tag
The SOLO Reader will enter normal RUN MODE
It is recommended that the attached Memory Location allocation and Parameter settings form be
updated.
Examples for setting timer values may be found on page 64
Page 70
Change Door Open Pre-Warn Time
Please Note:
! Time selectable in 1 second increments from 1 to 255 seconds.
! For INFINITE DOOR OPEN PRE-WARN TIME select 255
! To ABORT wait for ± 60 seconds for the SOLO to RESET
TOP
ORANGE
TOP
GREEN
TOP
RED
Present &
Hold
Master Tag
BOTTOM
GREEN
Remove
Master Tag
Present &
Remove
Master Tag
BOTTOM
RED
Graphical Instructions
Written Instructions
Present and HOLD either Master Tag until
all lights turn ON
1
Observe
Lights
Remove the Master Tag
2
3
Observe
Top
Lights
Top green light will remain on
4
Observe
Bottom
Lights
Only BOTTOM RED LIGHT ON
Present and remove the Master Tag
5
Top red light will turn on
6
Only BOTTOM RED LIGHT ON
Present and remove the Master Tag
7
Top orange light will turn on
8
Only BOTTOM RED LIGHT ON
Present and remove the Master Tag
9
Top orange and
top red light will turn on
Only BOTTOM GREEN LIGHT ON
Present and remove the Master Tag
10
Page 71
11
Top red light will turn on
12
Only BOTTOM RED LIGHT ON
Present and remove the Master Tag
13
Top green light will turn on
14
Only BOTTOM RED LIGHT ON
Present and remove the Master Tag
15
Top green and
Top red light will turn on
16
Only BOTTOM GREEN LIGHT ON
Present and remove the Master Tag
17
TOP ORANGE LIGHT will FLASH
to indicate HUNDREDS
TOP GREEN LIGHT will FLASH
to indicate TENS
TOP RED LIGHT will FLASH
to indicate UNITS
of CURRENT Door Open Pre-Warn Time
0 0
Hundreds
Tens
Units
Only BOTTOM RED LIGHT ON
Present and HOLD the Master Tag
18
19
Units
Short Flash=0
Remove Master Tag when required UNITS
value reached
20
Only the TOP RED LIGHT will remain ON
21
Present and HOLD Master Tag
22
23
On TOP RED LIGHT count number of
flashes required for UNITS value.
Short Flash=0
Tens
Short Flash=0
On TOP GREEN LIGHT count number of
flashes required for TENS value.
Short Flash=0
Remove Master Tag when required
TENS value reached.
24
Page 72
25
The TOP GREEN LIGHT and
TOP RED LIGHT will remain ON
26
Present and HOLD Master Tag
Hundreds
Short Flash=0
27
On TOP ORANGE LIGHT count number of
flashes required for HUNDREDS value.
Short Flash=0
Remove Master Tag when required
HUNDREDS reached.
28
Confirm time you have selected is correct.
TOP ORANGE LIGHT indicates HUNDREDS
TOP GREEN LIGHT indicates TENS
TOP RED LIGHT indicates UNITS
29
x x x
(HUNDREDS)
(TENS)
(UNITS)
To ACCEPT NEW TIME
To CHANGE VALUE
Repeat from step 18 above
30
Only BOTTOM GREEN LIGHT ON
Present and remove the Master Tag
31
Both BOTTOM GREEN LIGHT ON and
BOTTOM RED LIGHT ON
Present and remove the Master Tag
32
Both BOTTOM GREEN LIGHT ON and
BOTTOM RED LIGHT ON
Present and remove the Master Tag
The SOLO Reader will enter normal RUN MODE
It is recommended that the attached Memory Location allocation and Parameter settings form be
updated.
Examples for setting timer values may be found on page 64
Page 73
Change Door Open Alarm Time
Please Note:
! Time selectable in 1 second increments from 1 to 255 seconds.
! For LATCHED DOOR OPEN ALARM select 255
! To ABORT wait for ± 60 seconds for the SOLO to RESET
TOP
ORANGE
TOP
GREEN
TOP
RED
Present &
Hold
Master Tag
BOTTOM
GREEN
Remove
Master Tag
Present &
Remove
Master Tag
BOTTOM
RED
Graphical Instructions
Written Instructions
Present and HOLD either Master Tag until
all lights turn ON
1
Observe
Lights
Remove the Master Tag
2
3
Observe
Top
Lights
Top green light will remain on
4
Observe
Bottom
Lights
Only BOTTOM RED LIGHT ON
Present and remove the Master Tag
5
Top red light will turn on
6
Only BOTTOM RED LIGHT ON
Present and remove the Master Tag
7
Top orange light will turn on
8
Only BOTTOM RED LIGHT ON
Present and remove the Master Tag
9
Top orange and
top red light will turn on
Only BOTTOM GREEN LIGHT ON
Present and remove the Master Tag
10
Page 74
11
Top red light will turn on
12
Only BOTTOM RED LIGHT ON
Present and remove the Master Tag
13
Top green light will turn on
14
Only BOTTOM RED LIGHT ON
Present and remove the Master Tag
15
Top green and
Top red light will turn on
16
Only BOTTOM RED LIGHT ON
Present and remove the Master Tag
17
Top orange light will turn on
18
Only BOTTOM GREEN LIGHT ON
Present and remove the Master Tag
19
TOP ORANGE LIGHT will FLASH
to indicate HUNDREDS
TOP GREEN LIGHT will FLASH
to indicate TENS
TOP RED LIGHT will FLASH
to indicate UNITS
of CURRENT Door Open Alarm Time
0 0
Hundreds
Tens
Units
Only BOTTOM RED LIGHT ON
Present and HOLD the Master Tag
20
21
Units
Short Flash=0
On TOP RED LIGHT count number of
flashes required for UNITS value.
Short Flash=0
Remove Master Tag when required UNITS
value reached
22
Only the TOP RED LIGHT will remain ON
23
Present and HOLD Master Tag
24
Page 75
Tens
Short Flash=0
25
On TOP GREEN LIGHT count number of
flashes required for TENS value.
Short Flash=0
26
Remove Master Tag when required
TENS value reached.
27
The TOP GREEN LIGHT and
TOP RED LIGHT will remain ON
28
Present and HOLD Master Tag
Hundreds
Short Flash=0
29
On TOP ORANGE LIGHT count number of
flashes required for HUNDREDS value.
Short Flash=0
Remove Master Tag when required
HUNDREDS reached.
30
Confirm time you have selected is correct.
TOP ORANGE LIGHT indicates HUNDREDS
TOP GREEN LIGHT indicates TENS
TOP RED LIGHT indicates UNITS
31
x x x
(HUNDREDS)
(TENS)
(UNITS)
To ACCEPT NEW TIME
To CHANGE VALUE
Repeat from step 20 above
32
Only BOTTOM GREEN LIGHT ON
Present and remove the Master Tag
33
Both BOTTOM GREEN LIGHT ON and
BOTTOM RED LIGHT ON
Present and remove the Master Tag
34
Both BOTTOM GREEN LIGHT ON and
BOTTOM RED LIGHT ON
Present and remove the Master Tag
The SOLO Reader will enter normal RUN MODE
It is recommended that the attached Memory Location allocation and Parameter settings form be
updated.
Examples for setting Timer Values may be found on page 64
Page 76
Change Door Forced Alarm Time
Please Note:
! Time selectable in 1 second increments from 1 to 255 seconds.
! For LATCHED DOOR FORCED ALARM select 255
TOP
ORANGE
TOP
GREEN
TOP
RED
Present &
Hold
Master Tag
BOTTOM
GREEN
Remove
Master Tag
Present &
Remove
Master Tag
BOTTOM
RED
Graphical Instructions
Written Instructions
Present and HOLD either Master Tag until
all lights turn ON
1
Observe
Lights
Remove the Master Tag
2
3
Observe
Top
Lights
Top green light will remain on
4
Observe
Bottom
Lights
Only BOTTOM RED LIGHT ON
Present and remove the Master Tag
5
Top red light will turn on
6
Only BOTTOM RED LIGHT ON
Present and remove the Master Tag
7
Top orange light will turn on
8
Only BOTTOM RED LIGHT ON
Present and remove the Master Tag
9
Top orange and
top red light will turn on
Only BOTTOM GREEN LIGHT ON
Present and remove the Master Tag
10
Page 77
11
Top red light will turn on
12
Only BOTTOM RED LIGHT ON
Present and remove the Master Tag
13
Top green light will turn on
14
Only BOTTOM RED LIGHT ON
Present and remove the Master Tag
15
Top green and
Top red light will turn on
16
Only BOTTOM RED LIGHT ON
Present and remove the Master Tag
17
Top orange light will turn on
18
Only BOTTOM RED LIGHT ON
Present and remove the Master Tag
19
Top orange and
top red light will turn on
20
Only BOTTOM GREEN LIGHT ON
Present and remove the Master Tag
21
TOP ORANGE LIGHT will FLASH
to indicate HUNDREDS
TOP GREEN LIGHT will FLASH
to indicate TENS
TOP RED LIGHT will FLASH
to indicate UNITS
of CURRENT Door Forced Alarm Time
0 0
Hundreds
Tens
Units
Only BOTTOM RED LIGHT ON
Present and HOLD the Master Tag
22
23
Units
Short Flash=0
On TOP RED LIGHT count number of
flashes required for UNITS value.
Short Flash=0
Remove Master Tag when required UNITS
value reached
24
Page 78
Only the TOP RED LIGHT will remain ON
25
Present and HOLD Master Tag
26
Tens
Short Flash=0
27
On TOP GREEN LIGHT count number of
flashes required for TENS value.
Short Flash=0
28
Remove Master Tag when required
TENS value reached.
29
The TOP GREEN LIGHT and
TOP RED LIGHT will remain ON
30
Present and HOLD Master Tag
Hundreds
Short Flash=0
31
On TOP ORANGE LIGHT count number of
flashes required for HUNDREDS value.
Short Flash=0
Remove Master Tag when required
HUNDREDS reached.
32
Confirm time you have selected is correct.
TOP ORANGE LIGHT indicates HUNDREDS
TOP GREEN LIGHT indicates TENS
TOP RED LIGHT indicates UNITS
33
x x x
(HUNDREDS)
(TENS)
(UNITS)
To ACCEPT NEW TIME
To CHANGE VALUE
Repeat from step 22 above
34
Only BOTTOM GREEN LIGHT ON
Present and remove the Master Tag
Page 79
Change Hold Off Time
Please Note:
! Time selectable in 1 second increments from 1 to 255 seconds.
TOP
ORANGE
TOP
GREEN
TOP
RED
Present &
Hold
Master Tag
BOTTOM
GREEN
Remove
Master Tag
Present &
Remove
Master Tag
BOTTOM
RED
Graphical Instructions
Written Instructions
Present and HOLD either Master Tag until
all lights turn ON
1
Observe
Lights
Remove the Master Tag
2
3
Observe
Top
Lights
Top green light will remain on
4
Observe
Bottom
Lights
Only BOTTOM RED LIGHT ON
Present and remove the Master Tag
5
Top red light will turn on
6
Only BOTTOM RED LIGHT ON
Present and remove the Master Tag
7
Top orange light will turn on
8
Only BOTTOM RED LIGHT ON
Present and remove the Master Tag
9
Top orange and
top red light will turn on
Only BOTTOM GREEN LIGHT ON
Present and remove the Master Tag
10
Page 81
11
Top red light will turn on
12
Only BOTTOM RED LIGHT ON
Present and remove the Master Tag
13
Top green light will turn on
14
Only BOTTOM RED LIGHT ON
Present and remove the Master Tag
15
Top green and
Top red light will turn on
16
Only BOTTOM RED LIGHT ON
Present and remove the Master Tag
17
Top orange light will turn on
18
Only BOTTOM RED LIGHT ON
Present and remove the Master Tag
19
Top orange and
top red light will turn on
20
Only BOTTOM RED LIGHT ON
Present and remove the Master Tag
21
Top orange light and
top green light will turn on
22
Only BOTTOM GREEN LIGHT ON
Present and remove the Master Tag
23
TOP ORANGE LIGHT will FLASH
to indicate HUNDREDS
TOP GREEN LIGHT will FLASH
to indicate TENS
TOP RED LIGHT will FLASH
to indicate UNITS
of CURRENT Door Forced Alarm Time
0 0
Hundreds
Tens
Units
Only BOTTOM RED LIGHT ON
Present and HOLD the Master Tag
24
Page 82
Units
Short Flash=0
25
On TOP RED LIGHT count number of
flashes required for UNITS value.
Short Flash=0
Remove Master Tag when required UNITS
value reached
26
Only the TOP RED LIGHT will remain ON
27
Present and HOLD Master Tag
28
Tens
Short Flash=0
29
On TOP GREEN LIGHT count number of
flashes required for TENS value.
Short Flash=0
30
Remove Master Tag when required
TENS value reached.
31
The TOP GREEN LIGHT and
TOP RED LIGHT will remain ON
32
Present and HOLD Master Tag
Hundreds
Short Flash=0
33
On TOP ORANGE LIGHT count number of
flashes required for HUNDREDS value.
Short Flash=0
Remove Master Tag when required
HUNDREDS reached.
34
Confirm time you have selected is correct.
TOP ORANGE LIGHT indicates HUNDREDS
TOP GREEN LIGHT indicates TENS
TOP RED LIGHT indicates UNITS
35
x x x
(HUNDREDS)
(TENS)
(UNITS)
To CHANGE VALUE
To ACCEPT NEW TIME
Repeat from step 24 above
36
Only BOTTOM GREEN LIGHT ON
Present and remove the Master Tag
Page 83
37
Both BOTTOM GREEN LIGHT ON and
BOTTOM RED LIGHT ON
Present and remove the Master Tag
38
Both BOTTOM GREEN LIGHT ON and
BOTTOM RED LIGHT ON
Present and remove the Master Tag
The SOLO Reader will enter normal RUN MODE
It is recommended that the attached Memory Location allocation and Parameter settings form be
updated.
Examples for setting timer values may be found on page 64
Page 84
Special Functions
TURBO MODE
Overview
The rate at which the system steps from one menu to the next while programming can be increased
selecting TURBO MODE. This is recommended for the installers that are familiar with the system and
would like to work more quickly through the programming process.
When exiting from programme mode the TURBO MORE rate is reset back to the standard rate.
TURBO MODE
Please Note:
! To ABORT wait for ± 60 seconds for the SOLO to RESET
TOP
ORANGE
TOP
GREEN
TOP
RED
Present &
Hold
Master Tag
BOTTOM
GREEN
Remove
Master Tag
Present &
Remove
Master Tag
BOTTOM
RED
Graphical Instructions
Written Instructions
Present and HOLD either Master Tag until
all lights turn ON
1
Observe
Lights
2
Observe
Top
Lights
Continue HOLDING
Top red light will turn on
3
Continue HOLDING
Top green light will turn on
4
Remove the Master Tag
The SOLO Reader is in Turbo Mode. Continue with Programming as required.
Page 85
AUTOLEARN
Overview
Should it be necessary to learn user tags, which are in circulation but not available in the system, the unit
can be programmed for AUTOLEARN. When an unlearned tag is presented to the Reader, it will be
automatically learned into the next available memory location and simultaneously the associated door
lock or gate motor etc. operated.
For example if the memory has been erased, AUTOLEARN is the simplest way of relearning all the tags in
circulation without having to get the tags back from the users.
The AUTOLEARN function ensures that once a tag has been learned into the system it cannot be relearned, however the access point will be activated with the presentation of the tag.
To check the memory location of any particular tag that has been learned into the system use the
procedure explained on page 22 of this manual.
There are two modes of AUTOLEARN
1. Limited Time:
The AUTOLEARN will only remain in operation for a limited period of time (± 7 days) after which it will
become automatically DISABLED.
2. Unlimited Time:
The AUTOLEARN function will remain in operation until disabled.
WARNING: Please note that during Autolearn operation any Zap Tag presented to the Solo
Reader will be learned into memory. It is possible therefore that while in this mode,
an unauthorized user could gain access.
Page 86
Autolearn: LIMITED TIME (± 7 days)
Please Note:
! THIS PROCESS MUST BE COMPLETED IN FULL. DO NOT ABORT THIS
PROCEDURE.
! Both Master Tags must be present in the SOLO Reader Memory.
TOP
ORANGE
TOP
GREEN
TOP
RED
Present &
Hold
Master Tag
BOTTOM
GREEN
Remove
Master Tag
BOTTOM
RED
Graphical Instructions
Written Instructions
Present and HOLD either Master Tag until
all lights turn ON
1
Observe
Lights
2
Observe
Top
Lights
Continue HOLDING
Top Red Light will turn ON
Continue HOLDING
Top Green Light will turn ON
3
4
Continue HOLDING
Top Green Light will remain ON
Bottom Green Light will turn ON
Observe
Bottom
Lights
Remove the Master Tag
5
The BOTTOM GREEN LIGHT will flash to indicate that the SOLO Reader is in Autolearn Mode.
Page 87
Autolearn: UNLIMITED TIME
Please Note:
! THIS PROCESS MUST BE COMPLETED IN FULL. DO NOT ABORT THIS
PROCEDURE.
! Both Master Tags must be present in the SOLO Reader Memory.
TOP
ORANGE
TOP
GREEN
TOP
RED
Present &
Hold
Master Tag
BOTTOM
GREEN
Remove
Master Tag
BOTTOM
RED
Graphical Instructions
Written Instructions
Present and HOLD either Master Tag until
all lights turn ON
1
Observe
Lights
2
Observe
Top
Lights
Continue HOLDING
Top Red Light will turn ON
Continue HOLDING
Top Green Light will turn ON
3
3
Continue HOLDING
Top Green Light will remain ON
Bottom Green Light will turn ON
Observe
Bottom
Lights
4
Continue HOLDING
Top Green Light will remain ON
Bottom Green Light will remain ON
Bottom Red Light will turn ON
5
Remove the Master Tag
The BOTTOM GREEN LIGHT will flash to indicate that the SOLO Reader is in Autolearn Mode.
Page 88
Autolearn: DISABLE
Graphical Instructions
Written Instructions
Present and HOLD either Master Tag until
all TOP lights turn ON
1
Observe
Lights
Remove the Master Tag
2
The BOTTOM RED LIGHT will flash to indicate that the SOLO Reader is now in Normal Run Mode
Page 89
Memory Allocation &
Parameter Settings Form
Memory
Location
Relevant Information: Name, etc.
00
01
02
03
04
05
06
07
08
09
10
11
12
13
14
15
16
17
18
19
20
21
22
23
24
25
26
27
28
29
30
Page 90
Memory
Location
31
Relevant Information: Name, etc.
32
33
34
35
36
37
38
39
40
41
42
43
44
45
46
47
48
49
50
Configuration Label
Factory Defaults
Tag Buzzer
ON
Free-Exit
ON
External Door Forced Alarm
OFF
Local Door Forced Alarm
OFF
External Door Open Alarm
OFF
Local Door Forced Alarm
OFF
Smartswitch II
OFF
Timer Label
Factory Defaults
Relay Time
1
Door Open Time
5
Pre-Warn Time
0
Door Open Alarm Time
30
255 Latched
Door Forced Alarm Time
0
Hold Off Time
Page 91
User Settings
User Settings
0.07.B.0028 Solo
Installation Manual-10Jul2012
www.centsys.com.au