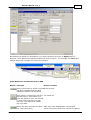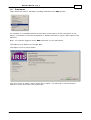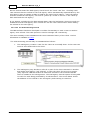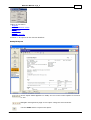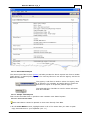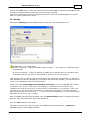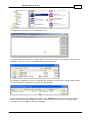
1
IRIS Project
Collection System Support Unit
Information Management & Technology Branch
Corporate Services Division
IRIS User Guide
Version 1_8_0
Save Date: 30/01/2013
This document details the features and use of the Integrated Reports & Information
System (IRIS).
Department of Human Services 2012
All rights reserved. No part of this publication may be reprinted, reproduced, stored in a
retrieval system or transmitted, in any form or by any means, without the prior permission
in writing from the Department of Human Services.
Table of Contents
................................................................................................................................... 4
1 Introduction
1.1
1.2
1.3
1.4
What is IRIS
................................................................................................................................... 5
Navigation
................................................................................................................................... 7
Using the
Keyboard
...................................................................................................................................
10
Licensing
Requirements
...................................................................................................................................
11
...................................................................................................................................12
2 Main Window
2.1
2.2
2.3
2.4
2.5
Starting...................................................................................................................................
IRIS
Projects...................................................................................................................................
Non-Sub
Cases
...................................................................................................................................
Clients ...................................................................................................................................
Groups ...................................................................................................................................
12
13
13
14
14
...................................................................................................................................14
3 Menu Reference
3.1 File Menu
................................................................................................................................... 14
3.1.1 Login
......................................................................................................................................................... 15
3.1.2 Logoff
......................................................................................................................................................... 15
3.1.3 Change Passw ord ......................................................................................................................................................... 16
3.1.4 Client Merge
......................................................................................................................................................... 16
3.1.5 Quarterly Data Export
......................................................................................................................................................... 17
3.1.6 Track-back All Referrals
......................................................................................................................................................... 20
3.1.7 Data Im port
......................................................................................................................................................... 24
3.1.8 Backup Database ......................................................................................................................................................... 26
3.1.9 Configure
3.1.10 Close
......................................................................................................................................................... 26
......................................................................................................................................................... 26
3.2 Lists Menu
................................................................................................................................... 27
3.2.1 Projects
......................................................................................................................................................... 27
Adding a New Project .................................................................................................................................................. 27
Adding Activities
.................................................................................................................................................. 30
3.2.2 Non-Substantive Cases
......................................................................................................................................................... 31
Adding a New NS Case .................................................................................................................................................. 32
Changing NS Case Details.................................................................................................................................................. 33
Attaching Clients to NS Cases
.................................................................................................................................................. 34
3.2.3 Clients
......................................................................................................................................................... 35
Managing Client Lists
.................................................................................................................................................. 35
Managing Client Information
.................................................................................................................................................. 37
Cases
.................................................................................................................................................. 39
Definition of a case
........................................................................................................................................... 43
Case Management Tools
........................................................................................................................................... 43
Merging Cases
........................................................................................................................................... 44
Subcontracting and Referrals
........................................................................................................................................... 45
Definition of Subcontracting ...................................................................................................................................... 45
The Subcontracting Process ...................................................................................................................................... 47
Creating a referral
...................................................................................................................................... 49
Receiving Referrals
...................................................................................................................................... 53
Case Closure w ith referrals ...................................................................................................................................... 53
3.2.4 Groups
......................................................................................................................................................... 53
Working w ith Groups
Group Details Report
.................................................................................................................................................. 54
.................................................................................................................................................. 55
3.3 Report Menu
................................................................................................................................... 55
3.3.1 Projects
......................................................................................................................................................... 57
Sample Project Statistics ..................................................................................................................................................
Report
57
3.3.2 Non-Sub Cases
......................................................................................................................................................... 58
Sample NSC Summary Report
.................................................................................................................................................. 59
Sample NSC Statistics Report
.................................................................................................................................................. 59
3.3.3 Clients
......................................................................................................................................................... 60
Client Summary Report .................................................................................................................................................. 61
Client Details Report
.................................................................................................................................................. 62
Client Statistics Report .................................................................................................................................................. 62
Sample Client Reports .................................................................................................................................................. 63
Create a client summary extract
...........................................................................................................................................
for a mail merge.
63
Print out reports about subgroups
...........................................................................................................................................
of your clients.
64
Print statistical demographic information about one or a group of
clients
........................................................................................................................................... 64
Print complete details of an ...........................................................................................................................................
individual client
64
Print a list of clients
3.3.4 Cases
........................................................................................................................................... 64
......................................................................................................................................................... 65
Case Summary Report
Case Detail Report
Case Statistics Report
Referal Based Report
Sample Cases Reports
Print out case notes
Print a list of cases
.................................................................................................................................................. 66
.................................................................................................................................................. 67
.................................................................................................................................................. 67
.................................................................................................................................................. 68
.................................................................................................................................................. 68
........................................................................................................................................... 68
........................................................................................................................................... 69
Complete details of an individual
...........................................................................................................................................
case
69
Work that a particular staff ...........................................................................................................................................
member has done
69
Work done for a client
........................................................................................................................................... 70
List the issues of the cases...........................................................................................................................................
from your agency
70
Total w ork your agency has done for all cases in a particular time
period
........................................................................................................................................... 70
Work your agency has done for a particular time period based on
case code filter
........................................................................................................................................... 70
Summary history of services
...........................................................................................................................................
provided to a particular case
71
Print out subgroups of your...........................................................................................................................................
case type
71
Finding current & dormant cases
........................................................................................................................................... 72
3.3.5 Throughput
......................................................................................................................................................... 72
Exported Data
.................................................................................................................................................. 73
3.3.6 Program Specific ......................................................................................................................................................... 73
Menu (Adminstrators only)
3.4 Agency...................................................................................................................................
73
3.4.1 Staff Maintenance ......................................................................................................................................................... 74
Create a New Staff
.................................................................................................................................................. 74
Change Staff Settings .................................................................................................................................................. 76
Deleting Staff
.................................................................................................................................................. 76
3.4.2 Case Type Maintenance
......................................................................................................................................................... 77
Adding a New Case Type.................................................................................................................................................. 78
Changing Case Details .................................................................................................................................................. 80
Deleting a Case
.................................................................................................................................................. 81
3.4.3 Agency Maintenance
......................................................................................................................................................... 81
General Options
Outlets
.................................................................................................................................................. 82
.................................................................................................................................................. 84
3.5 Help Menu
................................................................................................................................... 86
3.5.1 Contents
......................................................................................................................................................... 86
3.5.2 About...
......................................................................................................................................................... 87
...................................................................................................................................87
4 Using Notes
© 2003-12 Department of Human Services
Timestamps
4.1 Adding ...................................................................................................................................
88
4.2 Templates
................................................................................................................................... 88
4.3 Spell Checker
................................................................................................................................... 89
...................................................................................................................................
5 Utilities (Advanced
Users)
90
5.1
5.2
5.3
5.4
Configure
...................................................................................................................................
Backup...................................................................................................................................
Client Transfer
...................................................................................................................................
Deploy ...................................................................................................................................
90
94
95
97
...................................................................................................................................99
6 Troubleshooting
6.1
6.2
6.3
6.4
Log In Problems
................................................................................................................................... 99
Installation
Issues
...................................................................................................................................
99
Screen ...................................................................................................................................
Identifiers
99
Frequently
Asked Questions
...................................................................................................................................
101
Index
105
IRIS User Manual V1_8_0
1 Introduction
IRIS - Integrated Reports and Information System
Welcome to IRIS!
We are pleased to present this software to
aid you in your Human Services Agency.
A great deal of effort and consideration of your
needs has gone into this program - and into this guide.
Please let us know how it helps in your day-to-day
case management, where you see improvements could
be made, or any other comments you may have.
IRIS support is available by either telephone or email and is offered at no cost to
your organization.
Please make sure that you contact the correct support for your state.
Victoria
Helpdesk: (03) 9096 6919
Email: [email protected]
Tasmania
Helpdesk: (03) 6233 2085
Email: [email protected]
Copyright ©2012 DHS
© 2003-12 Department of Human Services
4
5
IRIS User Manual V1_8_0
1.1 What is IRIS
IRIS stands for Integrated Reports and Information System.
IRIS is a software tool developed for funded agencies to use for the collection and
electronic reporting of data to the Department of Human Services (DHS). IRIS provides the
following functionality:
Client details.
Simple case management tools for both DHS funded and privately funded (if desired)
casework.
Client and case notes
Integrated reporting tools
Group management
Project Tracking to record community development and community education project
work.
Automatic data transfer to DHS
The development of IRIS is on going and new functionality will be provided as it is
developed.
IRIS was originally designed to conform with the Children Youth & Families Division's (CYF)
Information Management Strategy. The strategy is directed, across time, to placing, as
appropriate, the entire range of CYF data collections on a consistent conceptual framework
using consistently defined data items and collection of data on a case unit record basis.
The past few years has seen IRIS being used in other Departments and States which has
meant that it must also comply with the data requirements from these clients.
IRIS has been carefully designed so that new service programs can be incorporated easily
and speedily.
IRIS currently collects data for the following program areas:
Problem Gambling (Gambler's Help)
Financial Counseling
Family Services
Early Childhood Intervention Services EI/SCS
ECIS Flexible Support Packages
Indigenous In-Home Support
MCH Enhanced Home Visiting Service
Pre School Field Officer (PSFO)
Sexual Assault Service (SAS)
Family Violence
Literacy, Numeracy & Special Learning Needs (LNSLN)
Forgotten Australians
Parenting Assessment & Skills Development Service (PASDS)
General (Brief)
Cradle to Kinder (C2K)
Early Parenting Centers (EPC)
Agencies can tailor IRIS to record client and case management information for cases funded
by sources other than DHS.
IRIS reports electronically DHS data collection requirements as a fully automatic push button
by-product of recording the client and case details agencies need for their purposes.
In accordance with the provisions of the Information Privacy Act 2000 the software deidentifies the data sent to DHS.
IRIS primarily consists of the IRIS computer program and IRIS database. Great care has
Saved Date: 30/01/2013
IRIS User Manual V1_8_0
6
been taken to ensure that IRIS will not interfere with any other Windows based software
(including MS Office and Internet Explorer). IRIS will not cause any corruption of any other
software or any operating system. The software is based on Borland Delphi and installs into
a single directory.
IRIS will run as a standalone system or as a fully networked system.
IRIS is provided free of charge to agencies.
DHS provides technical support to install IRIS at no charge. The first line service is a
telephone help desk.
Security has been carefully designed and agencies can allow staff access to IRIS at any of
five security levels.
IRIS provides agencies with a small range of press button reports on their own data.
General Notes
IRIS can be used on computers running Windows 98/NT/2000/XP/Vista/W7
can operate as stand alone, LAN, or WAN
complies with Y2K requirements
restricts access to sensitive data based on user's login
This Guide may be opened by pressing the F1 key, at the top-left of your keyboard, from
within IRIS.
If you have one of the main forms open in IRIS, pressing the F1 key will open this Guide to
the Help topic relevant to the form you have open.
This Guide includes details on all the forms in IRIS and links to online resources and contact
information for technical support.
© 2003-12 Department of Human Services
7
IRIS User Manual V1_8_0
1.2 Navigation
This is the main screen as it would appear immediately after logging in. Note that this
manual shows all screen shots using Windows XP and they will appear slightly different for
other versions.
Note the reference to the screen identifier (eg. sy00). As indicated, all screens have their
own unique code. When reporting errors involving screen activity to the Help Desk,
this code should always be included. It is of valuable assistance in resolving
problems. For example, if you report problems with the client details screen, your feedback
should include the code: cl02. A complete list is provided in Screen Identifiers. Reports
also have an identifier positioned in the footer.
Let's take a look at a window that has been opened as a result of performing some action,
and in particular to the buttons in the top right-hand corner: Refresh, Apply, OK and
Cancel.
Saved Date: 30/01/2013
IRIS User Manual V1_8_0
8
Not all buttons appear on all windows (eg. Client List does not have an Apply button).
However, what buttons are shown perform the same function. For example, the OK button
always saves any changes and closes the window.
Quick Reference for Buttons used in IRIS
Button Function
Screen Location
This is used where a search criteria On all screens.
has been changed and the data
displayed needs to be refreshed.
This works in conjunction with the The Client list
refresh button. Its purpose is to
clear the filters to save you having
to clear each one that you may
have set. Use Refresh to obtain
the new data.
Saves the data entered, but does Staff List, Case Management, Groups and
not close the screen.
Clients once they have been opened for editing.
© 2003-12 Department of Human Services
9
IRIS User Manual V1_8_0
Saves the data entered and closes On all screens.
the screen.
This is a Cancel button. Will close On all screens.
the screen without saving.
Creates a new client, case, staff orAgency Case Maintenance, Staff, Nongroup
Substantive Case, Client and Group lists
Opens document
The Client and Staff list
Create a new case.
The Cases folder in the Client's Details screen
Open the case that is selected.
The Cases folder in the Client's Details screen
by clicking on the case list.
Delete a case.
The Cases folder in the Clients Details screen by
clicking on the case list.
Merges the information from one
The Cases folder in the Clients Details screen by
case to another case of the same clicking on the case list, then highlighting the
type. The duplicate case is then duplicate case.
deleted automatically. Only
administrators can perform this
function.
Creates a referral for the selected The Cases folder in the Clients Details screen by
case. The case is added to the
clicking on the case list.
owner case (shell).
Exports the referral data back to
the lead agency.
The Cases folder in the Clients Details screen by
clicking on the case list.
Transfers client data to another
agency
The Client list
A button is enabled when it can
be clicked (or 'pressed').
On all screens.
A button is disabled when it
On all screens.
appears dimmed, and can not be
clicked or pressed.
The term focus is used to indicate On all screens.
that the item in question is ready
to respond to your keyboard. For
example, in the case of a text box,
the I-beam is the small vertical line
to the right of the letter c in this
snapshot:
So, if the I-beam is flashing in the
text box, then the text box has the
keyboard's focus.
Saved Date: 30/01/2013
IRIS User Manual V1_8_0
10
1.3 Using the Keyboard
Common Windows Keyboard Techniques
TAB
Moves to the next field or button.
SHIFT-TAB is the reverse of TAB.
ENTER
An alternative to clicking a button when it has a
darker outline (referred to as the default
button).
ESC
Same as pressing Cancel (if present).
SPACE BAR
Pressing the SPACE BAR while focused on a
button is the same as clicking the button with
the mouse.
ALT+DOWNARROW
Opens a drop-down calendar (on a date field) or
drop-down list. This is the same as clicking the
small button next to the field with the mouse.
ALT
Access the menu of the current window.
ALT+[key]
Directly access a menu option.
For example, ALT+F = File menu
CTRL+TAB
Moves through the pages of a Page Control.
For example, the partial view of the Clients
Form below shows the Details page with focus:
In this example, the CTRL+TAB keys will move
throught Details, Cases, Notes pages, then back
to the Details page, and so on.
Taking Control of Text Fields
Use the TAB key to move from one text field to the next. As you do so, the whole field is
highlighted. If you just start typing, the first key you press will delete the previous contents
of the field.
However, if you only need to correct a few of the first or last characters, once the field is
highlighted, press the HOME or END key to position the cursor at the start or end of the
field.
You can also highlight individual characters by holding the SHIFT key while using the arrow
© 2003-12 Department of Human Services
11
IRIS User Manual V1_8_0
keys. Holding the CTRL key while using the left or right arrow keys moves the cursor a word
at a time.
What about the mouse?
If you use the mouse to set the text cursor (I-beam) to a field, you will most often have to
delete the contents of the field either by using the DELETE or BACKSPACE keys to remove
the contents. You should only choose to use the mouse when you have to change a few
fields at random.
Drop-down List Boxes
Most list boxes have an 'auto-complete' feature that will select the nearest entry as you
type. If you reach the required entry, press TAB to continue.
Or, you can use the ALT+DOWNARROW keys to drop the list down and quickly access the
required entry (using the up and down arrows). With the list box open, press ENTER to
complete the selection.
Date Fields
Date fields usually include a forward slash (/) to separate the numbers, but you don't enter
these slashes.
Just typing the digits will jump from field to field. Although not always required, it is a good
idea to enter all digits to ensure the date will be valid.
The plus and minus (+/-) keys change the date a day at a time.
Click the small button next to the field (or use ALT-DOWNARROW) to display a pop-up
calendar. From this, you can use the arrow keys to select a date, and quickly change the
month using PAGE UP/PAGE DOWN or year using CTRL UP/CTRL DOWN).
1.4 Licensing Requirements
The software is available free of charge to DHS business partners and licensing is not
required. However when setting up IRIS to collect data, each installation must have a
unique agency code for data identification purposes. This code is obtained from the IRIS
Helpdesk.
Note that if you elect to use a different database to that shipped (Firebird) then you may
have to obtain a license for that product; ie. MS SQL Server . Note also that this version of
IRIS uses an updated version of Firebird.
Saved Date: 30/01/2013
IRIS User Manual V1_8_0
12
2 Main Window
This section details the Quick-Access buttons on the left of the main IRIS window. These
buttons perform the same action as the options in the List Menu.
Topics on this menu:
-
Projects
Non-Sub Cases
Clients
Groups
2.1 Starting IRIS
To start using IRIS, do one of the following:
1. Double-click the IRIS icon on your desktop
2. Click the Windows Start button, move to Programs > IRIS, then click the IRIS menu
item.
If neither of these items are installed on your computer, it is likely that the IRIS installation
did not fully succeed on this computer. See your Supervisor for assistance.
Once IRIS has started, the main screen will appear as shown below. The current version of
the software is shown at the top left of the screen. Throughout this manual some screen
shots will show seemingly obsolete screens based on the version number. This is not the
case and it shows when the screen was last modified.
The centre of the screen displays the login screen ready to sign you on.
© 2003-12 Department of Human Services
13
IRIS User Manual V1_8_0
This version of IRIS requires all outlets to be identified and when IRIS is first started after
this upgrade the following screen will be displayed before the above login screen is shown.
2.2 Projects
This button is provided as a shortcut to the Lists > Projects menu item.
The projects section allows you to record details about your non client-specific activities.
More information about Projects
2.3 Non-Sub Cases
This button is provided as a shortcut to the Lists > Non-Sub Cases menu item.
Non-substantive cases are cases of service to clients that are short (ie. < 2 hours) and no
detailed information is recorded about the client or the service provided.
More information about Non-Substantive Cases
Saved Date: 30/01/2013
IRIS User Manual V1_8_0
14
2.4 Clients
This button is provided as a shortcut to the Lists > Clients menu item.
The clients section allows you to record details about your clients and to attach cases and
assign workers to clients. In the case part of the client record you can record not only case
details but also related persons, issues, services, case closure and case outcomes.
More information about Clients
2.5 Groups
This button is provided as a shortcut to the Lists > Groups menu item.
The groups button allows you to establish groups and record all the services delivered by
your agency in group settings. Group service activities are automatically attached to the
clients that participate in the group.
More information about Groups
3 Menu Reference
This section provides a detailed reference to all the IRIS menu items.
The image below represents the main IRIS menu.
Topics on this menu:
-
File menu
Lists menu
Report menu
Agency menu
Help menu
3.1 File Menu
The File menu contains:
Topics on this menu:
- Log in
- Log off
- Change Password
- Client Merge
- Quarterly Data Export
© 2003-12 Department of Human Services
15
-
IRIS User Manual V1_8_0
Track-back All Referrals
Data Import...
Backup Database...
Configure...
- Close
3.1.1 Login
IRIS is security-conscious. You must use a valid login to use this software.
Select File > Login (or F2) to open the Login window (sy01):
1. Enter your User Id where indicated. If you have logged in before then the Outlet box will
be automatically filled in with the outlet.
2. Press TAB and enter your Password.
3. Enter the Outlet as required.
4. Click OK to complete the login.
In most cases there will be a user account for each user plus another account at
administrator status. You should only log in at administrator level if you intend to perform
operations that require administrator status.
PLEASE NOTE: It is most important that every user logs in with their own User Id.
See also
Troubleshooting Your Login
3.1.2 Logoff
When you have finished using IRIS, select File > Log Off (or F3) to end your IRIS session.
If you have any open windows, you will be asked to confirm whether these should be closed.
Saved Date: 30/01/2013
IRIS User Manual V1_8_0
16
While it is safe to continue if you are just browsing information (eg. have a list open), any
unsaved changes will be lost. If you are unsure, press Cancel and close each window
individually.
IRIS will remain open, ready for another Login.
3.1.3 Change Password
The File > Change Password item lets you change your Login Password - that is, the
password for the currently logged-in user.
After clicking this option the Change Password window (ad07) opens:
1. Enter your current Login password in the Current Password box.
2. Enter the new password in the New Password box.
3. Re-enter the new password in the Confirm New Password box.
4. Click the OK button to accept your changes, or Cancel to keep your previous password.
3.1.4 Client Merge
The File > Client Merge item provides the facility to merge clients together. This is useful
where a duplicate client has been created and the duplicate is to be removed but the data,
such as casework is still required.
Selecting the above menu option will start the client merging process.
© 2003-12 Department of Human Services
17
IRIS User Manual V1_8_0
When the duplicate casework, group activity and NSCs have been transferred to the correct
client, the unwanted client may be deleted. Note that the merge cannot be undone.
Note:
1.
2.
Clients can only be deleted when there is no connection to other data. For
example, a client cannot be deleted if it references a case.
The Client Merge operation cannot be undone.
3.1.5 Quarterly Data Export
This is the facility your agency will use to report to Department of Human Services as well
as other agencies as selected by your agency. The data includes tracked referral cases.
Note: You must be logged in as an IRIS Supervisor or higher (eg; Administrator) to use this
feature.
The Quarterly Data Export tool is used to transfer data to both DHS and other agencies
as setup in the Case Maintenance options (Case Type Maintenance). Note that the data
may consist of agency created data as well as referred (tracked) data. This process does
not update the referral shells in the Lead agency, this is done with the Trackback_All_Referrals menu option.
In version 1_8 and on the Quarterly Data Export also includes the option to send further
data back to DHS. The data contains information on how large your database is. This data is
required by DHS so that future upgrades on IRIS can take into account possible performance
issues for large databases. The option can be disabled by the user.
Saved Date: 30/01/2013
IRIS User Manual V1_8_0
18
Note that ALL of the data is de identified.
The quarterly export tool is normally run through IRIS as shown below:
The data export screen sequence is shown below
The first screen provides useful information on what the program will be doing.
Selecting Next will display the second screen. This screen is used to select what date range
is to be used. In most cases the default (Rolling 6 months) option is used.
© 2003-12 Department of Human Services
19
IRIS User Manual V1_8_0
Selecting Next will display the third screen. This screen summarizes what data will be
exported. The summary includes
Cases (Agency created)
Cases (Referred from another agency)
Projects, and
Non substantive cases.
The check boxes on the left allow for selection of individual case types. Note that from
version 1_8 there is an option to send database statistics as well.
Selecting Next will display the fourth screen. This screen summarizes where a copy of the
exported data files will be stored.
The data is normally encrypted but if the training mode is being used by a software
developer there is an option that allows the data to be saved unencrypted.
Saved Date: 30/01/2013
IRIS User Manual V1_8_0
20
Selecting Next will display the fifth screen. This screen summarizes what actions are to be
initiated with the options selected previously.
The final two screens provide feedback on the export file creation process.
A detailed description of referrals is located in the section Subcontracting and Referrals
3.1.6 Track-back All Referrals
This selection is used to send referral data that has been set to be tracked back to the
referring (lead) agency between IRIS systems.
© 2003-12 Department of Human Services
21
IRIS User Manual V1_8_0
Note:
1. The data is de-identified and encrypted for privacy and security.
2. You must be logged in as an IRIS Supervisor or higher (eg; Administrator) to use this
feature.
The referral tool is run either from the main menu as shown above, or directly (Managing
Client Information) from the individual case. The main menu option will send all referrals
whilst the direct option sends only the selected case. The two options are shown below:
The data export screen sequence is shown below
The first screen provides useful information on what the program will be doing.
Selecting Next will display the second screen. This screen is used to select what date range
is to be used. In most cases the default (Rolling 6 months) option is used. The exporter
normally sends open cases only, checking the option box will include closed cases.
Saved Date: 30/01/2013
IRIS User Manual V1_8_0
22
Selecting Next will display the third screen. This screen summarizes what data will be
exported. The summary includes
Tracked Cases (Referred from another agency)
The check boxes on the left allow for selection of individual case types.
Selecting Next will display the fourth screen. This screen summarizes where a copy of the
exported data files will be stored.
The data is normally encrypted but if the training mode is being used by a software
developer there is an option that allows the data to be saved unencrypted.
© 2003-12 Department of Human Services
23
IRIS User Manual V1_8_0
Selecting Next will display the fifth screen. This screen summarizes what actions are to be
initiated with the options selected previously.
The final two screens provide feedback on the export file creation process.
A detailed description of referrals is located in the section Subcontracting and Referrals
Saved Date: 30/01/2013
IRIS User Manual V1_8_0
24
3.1.7 Data Import
This selection is used to add data, including referrals to this IRIS system.
For example, to consolidate data from all outlets of an agency at the head office of the
agency. It will also be used by Department of Human Services to capture data reports from
agencies.
Note: You must be logged in as an IRIS Supervisor to use this feature.
The import tool is always run through IRIS.
The import screen is shown below.
The next screen is used to select which file to import. You will need to use the browse
button to locate and select the required file.
© 2003-12 Department of Human Services
25
IRIS User Manual V1_8_0
If the following screen is displayed then it is most likely due to a version mismatch between
the source and the destination system.
The third screen will summarize the incoming data. The top panel shows the total data
content that will be imported. The lower screen shows the referral data that will be
imported.
Pressing Next will bring up the fourth screen which summarizes the actions about to be
done.
Saved Date: 30/01/2013
IRIS User Manual V1_8_0
26
The final screens (not shown) show the import status when proceeding with the import.
A detailed description of referrals is located in the section Subcontracting and Referrals.
3.1.8 Backup Database
To use the Backup feature, click the Backup Database item on the File menu.
(This feature may also be started from the Windows Start menu by browsing to Programs
> IRIS > IRIS Backup.)
Notes:
1. This feature is available only to systems using the default Firebird database.
2. You must be an IRIS Supervisor or higher (eg; Administrator) to use this feature.
3. Although a backup may be done at any time, it is preferable to perform this when all
users are logged out.
For more information see Backup.
3.1.9 Configure
This selection is used to configure IRIS and would be run when converting the training
version of IRIS to the full operational system. The utility uses a key code supplied by DHS
that does the following for you:
1.
Sets up IRIS with its correct DHS agency code
2.
Disables existing DHS funded case types and adds the DHS cases applicable for your
agency.
Note: You must be an IRIS Administrator to use this feature.
Refer to Configure for details.
3.1.10 Close
Select File > Close to close IRIS. Although you don't need to Log Off first, it is good
practice to log out before closing any database application.
© 2003-12 Department of Human Services
27
IRIS User Manual V1_8_0
3.2 Lists Menu
The Lists menu contains:
Topics on this menu:
-
Projects
Non-Sub Cases
Clients
Groups
3.2.1 Projects
The Project button allows you to establish a project to record the work your agency does
that does not involve working with individual or groups of registered clients. This project
work is variously described as community education, community development, community
support or community participation but is not restricted to these descriptions.
Some examples of project work brought to the attention of DHS include:
Staff member gives a talk to students at a local school;
Staff member gives a presentation at a local community meeting held after hours;
Agency participates in and provides its facilities for community fund-raising following a
natural disaster; and
Staff member participates in a community committee to plan for establishment of a new
community-based service in the local area.
The Project function has been designed with great flexibility. It is a powerful tool that
agencies can use for any type of work it does outside the scope of its service to registered
clients.
Adding a New Project
Adding Activities
3.2.1.1 Adding a New Project
Access to the Projects screen, can be made by either by clicking on the Projects button
from the left panel menu or from the main menu by clicking on Lists to display the drop
down list, and then selecting Projects. The Projects List will be empty when you first start
to use IRIS. The following screen will be displayed.
Note that the checkbox "Show Active Only" will limit the projects displayed depending on
whether they have been marked as "inactive".
Saved Date: 30/01/2013
IRIS User Manual V1_8_0
28
Click on the New button. The following Select Case dialogue box will be displayed.
Select the case type and click on the OK button.
Note: You should not use DHS funded case types if the projects to be created are not
funded by DHS. For further information see CaseTypeMaintenance . An administrator can
change the source of funding with the "Edit" button.
The following New Project screen is displayed. Type in the name of the project in the
Name field. Click on the Apply button to save. Note the name of the project must be saved
before you record any activities or notes.
© 2003-12 Department of Human Services
29
IRIS User Manual V1_8_0
The three tabs, located below the Name field contain the details of the project, activities
of the project and any notes you would like to record. The tab that is active will be
displayed in blue, e.g. The Details tab displayed below is active. Note that the tab is yellow
which indicates that mandatory data is not entered.
The Project Type field has a drop down list of all the types of projects available. Click on
the downward arrow to display the list and select the appropriate one.
The User Code field is for your own use.
The Start Date field automatically defaults to the date the project was created. To change
the start date, click on the downward arrow to bring up the calendar and select the
appropriate date.
The End Date field is not mandatory and can be left blank until the project has been
completed.
Saved Date: 30/01/2013
IRIS User Manual V1_8_0
30
3.2.1.2 Adding Activities
To record the activities of your project, click on the Activities tab to display the screen
below and then the New button to create the activity.
The following screen will then be displayed. Note the mandatory fields.
The Date field automatically defaults to the date the activity was created. To change the
date, click on the downward arrow to bring up the calendar and select the appropriate date.
The Activity Type field has a drop down list of all the types of activities available. Click on
the downward arrow to display the list and select the appropriate activity.
Information can be recorded on:
·
The number of staff members involved in the activity;
·
The number of males or females who attended;
·
The time spent to do the activity;
·
Travel time; and
·
Expenditure incurred.
The Activity Suburb is the location where the service is delivered. In most instances it will
be the same as the Outlet suburb. Note that the suburb list can be filtered by State if
desired.
Activity notes may be entered in the section at the bottom of the form. Further information
is available in the section Using Notes.
© 2003-12 Department of Human Services
31
IRIS User Manual V1_8_0
Adding Notes to a Project
Click on the Notes tab to display the notes screen. Further information is available in the
section Using Notes
3.2.2 Non-Substantive Cases
Definition of Non-Substantive Cases
IRIS designates two types of cases of service: non-substantive cases and substantive
cases. These case types are defined as:
A non-substantive case is a case where:
Insufficient information is known/obtained about the client to officially register the client
with the agency and establish an official agency file; and
The client is assisted by a one-off intervention, ie. service activities are not ongoing
beyond one day; and
The agency does not make a comprehensive assessment to identify the client's issues;
and
The client receives not more than two staff-hours of service (from all staff combined).
Non-substantive cases would always be restricted to information, advice and resourcing.
Select Lists > Non-Sub Cases from the main menu to open the Non-Substantive Cases
(nc01) window:
Saved Date: 30/01/2013
IRIS User Manual V1_8_0
32
Filters have been provided so that you can quickly find any required sub-set of the nonsubstantive cases list.
Filtering Non-Substantive Cases
The number of Cases displayed depends on two levels of filtering:
1. The Staff List box by default will display all NSCs that belong to the logged in user. To
display everyone's NSCs scroll to the blank (top line).
2. The display is then further limited to those cases which fall into the date range you
specify, either by choosing a preset filter from the Date drop-down list box, or by manually
choosing From and To dates.
Note: If you manually choose a From and To date range, any Date drop-down range
previously selected will be ignored.
Tip: The Refresh button
can also be used to refresh the list.
Related Topics:
- Adding a New Case
- Changing Case Details
- Case Maintenance
3.2.2.1 Adding a New NS Case
- Select Lists > Non-Sub Cases from the main menu to open the Non-Substantive Cases
form.
1. To add a New Case, click the New button at the lower right of the form.
Note: All new non-substantive cases must be assigned a Case Type. These case types are
set by the case types list. After clicking the New Case button, the Select Case Type
dialogue (ca11) is displayed. In the screen shot below this copy of IRIS has nine cases
available. (The source of funding is not applicable.)
2. Select the appropriate Case Type, then click OK:
© 2003-12 Department of Human Services
33
IRIS User Manual V1_8_0
3. Enter the details related to this non-substantive case as required.
4. Click the Apply button.
Tip: Selecting an area outside of the details panel (eg. clicking another NSC in the list) will
perform an Apply automatically for you.
Related Topics:
- Changing Case Details
- Attaching Clients
- Case Maintenance
3.2.2.2 Changing NS Case Details
- Select Lists > Non-Sub Cases from the main menu to open the Non-Substantive Cases
form.
- Specify the Range of NSC's you wish to display.
1. Click any NSC listed to display the Details of that Case, as in the example below:
2. Change the details related to this non-substantive case as required.
3. Click the Apply button.
Tip: Selecting an area outside of the details panel (eg. clicking another NSC in the list) will
perform an Apply automatically for you.
Related Topics:
-
Attaching a Client
Changing Case Details
Case Maintenance
Using Notes
Saved Date: 30/01/2013
IRIS User Manual V1_8_0
34
3.2.2.3 Attaching Clients to NS Cases
IRIS provides the capability to attach non-substantive cases to a client. The client can
either be one already in the client list or can be entered as an unregistered client. The latter
instance could occur when a new client enquires about a particular service. The following
steps allow you to attach the non-substantive case to a registered client.
Preparation:
- Select Lists > Non-Sub Cases (NSC) from the main menu to open the Non-Substantive
Cases form.
- Specify the Range of NSC's you wish to display.
- Click the desired NSC for which you want to Attach a Client.
1. Click the Attach Client button.
The Client List window (cl01) opens:
2. Click the Client you want to attach to the NSC, then click the Attach button.
3. Control will return to the NSC list with the client attached to the current nonsubstantive case.
4. Click the Apply button.
Tip: Selecting an area outside of the details panel (eg. clicking another NSC in the list) will
perform an Apply automatically for you.
© 2003-12 Department of Human Services
35
IRIS User Manual V1_8_0
Related Topics:
- Adding a New Case
- Changing Case Details
- Case Maintenance
3.2.3 Clients
- Select Lists > Clients from the main menu to open the Client List form:
The two fields, "Client Code" and "User Code" are available for your own agency use.
Typically:
Client Code: would be used to uniquely identify clients, and
User Code:
could be used to reference other client systems.
Note:
1. When a client is saved IRIS will check that the Client Code is not already being used
and a prompt will appear until it is changed.
2. You can delete clients that you have created only if there are no cases or references
to the client. These will need to be erased first. This is because the client may be
connected to casework that would be lost. A client may also be set as inactive (from
within the client details) indicating that the client is no longer attending the agency.
When the required client has been located the record is opened by the Open button or
double clicking the mouse. This is where most of your work will be entered Managing Client
Information
3.2.3.1 Managing Client Lists
Searching for a Client
The text boxes shown in the image above can assist you in searching for a client, or for
clients who have common details. The following examples will help you learn how to quickly
find any client.
Example 1: Finding Clients by Client Code
Saved Date: 30/01/2013
IRIS User Manual V1_8_0
36
- Click the Clear Filters button to prepare for a fresh search.
- Enter the Client Code for which you are searching and press one of the Refresh buttons.
or
All clients with the Client Code you entered will be displayed.
Example 2: Finding Clients by Surname
- Click the Clear Filters button
- Enter the letter 'w' in the Surname box and press one of the Refresh buttons.
All clients whose surname starts with the letter 'w' will be displayed. To display all names
with a 'w' in them enter a '*' befor the 'w'.
Example 3: Finding Clients by User Code that have open cases.
- Click the Clear button
- Enter the User Code for which you are searching
- Select the Current Only checkbox and press one of the Refresh buttons.
All all clients with open cases with a user code containing the text you entered will be
displayed.
Tip: The Open Clients Only option can help reduce the number of entries found by
restricting the selection to clients that have currently open cases. However, this
option may take longer to process.
Example 4: Finding Clients who have a Child or Related Person of a particular name.
- Check the "Search Case Names" box.
The search will now include clients, related persons and children that meet the client search
criteria.
Example 5: Listing Clients with Similar Names.
The option 'Find Similar if checked will include all clients that have a similar sounding
surname or first name.
Adding New Clients
© 2003-12 Department of Human Services
37
IRIS User Manual V1_8_0
To Add a New Client, click the the New button
.
A New Client Detail Sheet will open:
Enter the information for the new client. Use the TAB key to move from item to item.
Required items are highlighted in yellow.
Deleting Clients
The Delete button is used to delete clients. This would be done normally when a client has
mistakenly been entered more than once.
Note: Clients can only be deleted when there is no connection to other data. For
example, a client cannot be deleted if it references a case.
3.2.3.2 Managing Client Information
When a chosen client record is opened the following client Details screen will be displayed.
Note that in version 1-8 onwards, the client name is locked to prevent accidental
modification. The 'Edit' button is used to allow the client name to be changed.
Saved Date: 30/01/2013
IRIS User Manual V1_8_0
38
Case History
Selecting the Cases tab will display the non-substantive (top panel) and substantive
(bottom panel) case history.
The case title comprises of five pieces of information as shown below:
The information is:
1. Referral date
2. Is the case a referral (Ref:)
3. The agency code of the source of the case
4. The case type
5. The source of funding
6. Is the case being tracked back (referrals only).
On the right hand side of the case summary panel is a panel of options available for the user
to select. For further information refer to Case Management Tools
Client Notes
Selecting the Clients Notes tab will display the client notes. The notes are not formatted.
Note that the client record is common to all users and hence the notes should not
include sensitive information.
When creating notes the user has the option of adding a timestamp (name & date), spelling
© 2003-12 Department of Human Services
39
IRIS User Manual V1_8_0
checker, as well as loading a template. For further information refer to the section Using
Notes.
3.2.3.3 Cases
Cases are the area where most work is done for a client and hence the most data will be
recorded here.
The basic structure of all cases is shown below. The blue shaded boxes represent the extra
data that is collected according to the case type being captured.
The case details are shown on separate panels for each data table.
Note that the case detail information displayed is dependant upon the case type being
used. The case type being used will define:
the Case Details panel
what panels will be visible
what information is required to complete a service record (if applicable), and
the content of some lookup lists (for example available Issues).
Case Details
The case details sheet is shown below. Mandatory fields are colored yellow until the item is
entered. The tab will also stay yellow until all mandatory fields have been resolved.
Saved Date: 30/01/2013
IRIS User Manual V1_8_0
40
Related Persons
The related persons screen is shown below.
Note that the age of the person can be entered as a date or a number.
When creating notes the user has the option of adding a timestamp (name & date) as well
as a spelling checker. For further information refer to the section Using Notes.
Issues
The issues for the case are shown below.
© 2003-12 Department of Human Services
41
IRIS User Manual V1_8_0
Services
The services page is shown below.
Closure
The Closure page is used to close the case, the final step in case management. A case can
be closed only when:
All mandatory fields are valid
All tracked referrals (applies to lead agency only) have been closed.
Closure details have been entered.
The top right hand corner of the page reflects the Status of the case. It can only be closed
when the status is Open(Complete). A case with the status Exported means that the case
has been closed and the data sent to DHS; this case cannot be reopened.
Saved Date: 30/01/2013
IRIS User Manual V1_8_0
42
To close the case click on the Update Case Status button. The following screen will be
displayed.
Case Notes
The Case notes page is used to enter any case specific notes that you may wish to be
recorded. When creating notes the user has the option of adding a timestamp (name &
date), spelling checker, as well as loading a template. For further information refer to the
section Using Notes.
© 2003-12 Department of Human Services
43
IRIS User Manual V1_8_0
3.2.3.3.1 Definition of a case
Definition of Substantive Cases
IRIS designates two types of cases of service: non-substantive cases and substantive
cases. A substantive case is a case that does not meet all the criteria to be classed as a
non-substantive case.
In a case where the client is placed on a waiting list, it should be reported as a substantive
case. These clients should be officially registered with your agency and have official agency
files established. Maintenance services provided to the client while waiting should be
reported (whether or not the client ultimately receives a full service).
A client that participates in a special purpose group should have substantive case reported.
Examples of cases
The following examples can be used by agencies to assist making decisions whether to
report a case as a non-substantive or substantive case:
A referral that is not accepted because it is does not satisfy the criteria for the program
should not be reported as a case.
A verbal referral made by a professional that does not provide sufficient information to
commence a case, should not be reported as a case.
Where a client self refers and the service that the agency provides is restricted to giving
advice briefly about how to address the client's issue(s) and information about other
services in the community in most instances would be a non-substantive case.
A referral is accepted from child protection service and preliminary work occurs by means
of attendance at a case planning meeting and follow-up with other agencies and
professionals. However, circumstances change and the referral is withdrawn. This should
be reported as a substantive case.
The agency accepts a referral and makes many attempts to contact and meet with the
client. Unfortunately the client is uncontactable and the case is closed. This should be
reported as a substantive case.
The agency accepts a referral and holds an initial meeting to assess the client's issues.
At the meeting the client declines the service. Report this case as a substantive case.
The agency accepts a referral and holds an initial meeting to assess the client's issues.
The meeting identifies that the client's needs would be better met by referral to another
agency. A referral is made subsequently and follow-up occurs with the client to ensure
the client has been able to access the service. If access has not been gained the
agency, further assists the client to gain access. Report this case as a substantive case.
If agencies require clarification about whether a case should be reported as a substantive or
non-substantive one, a short outline of the scenario should be emailed to your regional
liaison officer. The scenario will be referred to DHS head office for advice.
3.2.3.3.2 Case Management Tools
The case management tools are listed below.
Button
Function
Saved Date: 30/01/2013
IRIS User Manual V1_8_0
44
Create a new case. Only one case of the same type &
funding source can be open at the same time.
Open the case that is selected.
Delete a case. This operation cannot be undone.
Merges the information from one case to another case of
the same type. The duplicate case is then deleted
automatically. Only administrators can perform this
function. For further information see Merging Cases.
Creates a Subcontracting and Referrals for the selected
case. The case is added to the owner case (shell).
Exports the Subcontracting and Referrals data back to the
lead agency. For further information also see Track-back All
Referrals
3.2.3.3.3 Merging Cases
Two cases of the same case type may be merged if required. The case to be merged into is
selected and the Merge Case button pressed.
This action will open up the Merge Cases screen as shown below. The screen provides
assistance with the process.
© 2003-12 Department of Human Services
45
IRIS User Manual V1_8_0
Administrator access is required for this action and the merge cannot be undone.
3.2.3.3.4 Subcontracting and Referrals
The IRIS software has been developed to include functionality to send a client and the
associated case to another agency as a referral. The same process is used to manage subcontracting.
The following sections use the Family Services Child First project as an example of a referral
from a lead agency to a sub agency. The tracking back of the work done (sub-contracting)
is a part of the Child First process management.
3.2.3.3.4.1 Definition of Subcontracting
These notes describe and recommend the use of subcontracting in IRIS. The notes are
intended to provide background information to assist in the process.
What is subcontracting?
Subcontracting occurs when an agency with a contract to provide services to clients pays
another agency to deliver the service to the client on its behalf. In the DHS context this
means DHS has a contract (ie, a service agreement) to fund the lead agency and that lead
agency subcontracts some or all of the service delivery to a sub-agency. The lead agency
pays the sub-agency for delivering the service.
The important feature of subcontracting is that the sub-agency does not have a contract
with DHS to deliver the service to clients and that it is paid by a lead agency for doing so.
This is not to be confused with the situation where two (or more) agencies with service
agreements with DHS in the one service program, say Family Services, refer clients to one
another such as for balancing workloads or because one agency but not the other has a
specialist expertise. In these instances each of the agencies services the client from its
own funding provided by DHS. No payment is made between the agencies.
It should be recognized that agencies, whether or not funded by DHS, could have a
Saved Date: 30/01/2013
IRIS User Manual V1_8_0
46
subcontracting arrangement that is paid for with funding from sources other than DHS; eg,
local government, federal government or an agency’s own funding. While these
arrangements are not of interest to DHS they can also be recorded using IRIS.
Subcontracting funded by DHS
The parties to a subcontracting arrangement funded by DHS should liaise closely with their
DHS regional PASA when establishing the arrangement. Both agencies must use IRIS and if
either party is not it should, through its DHS regional PASA, contact the IRIS helpdesk to
have IRIS installed. The participating agencies and the PASA should all be certain about
what reporting accountability is required.
DHS needs to know about all service provided to clients that has been funded by DHS.
Consequently both the lead and sub- agencies are required to record the service they have
delivered to the client and report this directly to DHS using relevant export facilities in IRIS.
Note that the sub-agency reports directly to DHS, not via the lead agency.
DHS also strenuously recommends to lead agencies that they receive reports, at least once
per quarter, from sub-agencies about their services delivered to clients. If the set-up steps
described below are exactly followed reporting to the lead agency will happen simultaneously
at the time of the sub agency’s reporting to DHS and can be uploaded into the lead
agency’s IRIS.
In the first instance the lead agency should generate a referral from its IRIS system to the
sub-agency and use the Source of Funding of “DHS - subcontracting”. The Case Reference
Code will be common across both agencies and that enables the total service provided to a
client to be tabulated by DHS.
On the referral wizard the lead agency should check the “track case” box. Checking track
case ensures that the referral to the sub-agency will be automatically reported back by the
sub-agency when it exports its data to DHS at the end of each quarter. Using the import
features in IRIS the lead agency can form a “joined-up” record of service to the client by
both itself and the sub-agency.
If it is agreed, including by the DHS regional PASA, that the lead agency does not need any
feedback from the sub-agency then it need not use the track case function when making
the referral to the sub-agency.
Subcontracting Not funded by DHS
DHS needs to know about all service provided to clients that has been funded by DHS.
Consequently both the lead and sub- agencies are required to record the service they have
delivered to the client and report this directly to DHS using relevant export facilities in IRIS.
Note that the sub-agency reports directly to DHS, not via the lead agency. The
participating agencies and the PASA should all be certain about what reporting
accountability is required.
DHS also strenuously recommends to lead agencies that they receive reports, at least once
per quarter, from sub-agencies about their services delivered to clients. If the set-up steps
described below are exactly followed reporting to the lead agency will happen simultaneously
at the time of the sub-agency’s reporting to DHS and can be uploaded into the lead
agency’s IRIS.
In the first instance the lead agency should generate a referral from its IRIS system to the
sub-agency and use the Source of Funding of “Subcontracting -non DHS” . The Case
Reference Code will be common across both agencies and that enables the total service
provided to a client to be tabulated by DHS.
© 2003-12 Department of Human Services
IRIS User Manual V1_8_0
47
On the referral wizard the lead agency should check the ‘track case’ box. Checking track
case ensures that the referral to the sub-agency will be automatically reported back by the
sub-agency when it exports its data to DHS at the end of each quarter. Using the import
features in IRIS the lead agency can form a “joined-up” record of service to the client by
both itself and the sub-agency.
If it is agreed, including by the DHS regional PASA, that the lead agency does not need any
feedback from the sub-agency then it need not use the track case function when making
the referral to the sub-agency.
3.2.3.3.4.2 The Subcontracting Process
The IRIS software has been developed to include functionality to send a case to another
agency as a referral. The same process is used to manage sub-contracting.
The case summary screen summarizes the case treatment history of the client. Further
information is available in Cases.
The subcontracting process may be summarized as follows:
1.
The lead agency creates a case for the client as is normally done. In this case two
services were delivered to the client.
2.
The lead agency may decide to refer all or part of the client casework to another
area within their agency (self referral), or refer the client for service to partner
(sub) agencies. IRIS will create an electronic referral for the external referrals
which is emailed to the sub agencies. The lead agency has the option of being able
to track the work being performed by a subcontractor. The screen below shows
the addition of the referral to the sub agency and tracking is turned on.
Saved Date: 30/01/2013
IRIS User Manual V1_8_0
48
3.
Each sub agency imports the referral into their IRIS system. This creates a new
client and case for the subcontractor to record their service delivery to the client.
The graphic below shows how the referral has been added to the sub agency case
list to which they have added their own services to the case. Note that the case
code is the same for all casework referred.
4.
The subcontractor regularly exports their data, which if tracking has been
activated will send a copy of the work done back to the lead agency. In this way
the lead agency can better manage the entire global service being supplied to the
client.
© 2003-12 Department of Human Services
49
IRIS User Manual V1_8_0
To refer a case from the intake agency, highlight the case with the cursor and click on the
Refer Case button on the right side of the screen.
3.2.3.3.4.3 Creating a referral
After creating a ‘Family Services - Child First’ case the intake agency can refer the case to
a partner Family Services agency. Intake can also refer a case to itself. Case referral can
be done by a member of staff in the intake agency. However, the intake agency may
decide that this role should be undertaken by an IRIS user with aadministrator or
supervisor status.
To refer a case from the intake agency, highlight the case with the cursor and click on the
Refer Case button on the right side of the screen.
Note that the Refer Case button will be enabled only if the selected case is not a referred
case.
Two options will be available to choose from: ‘To Self . . .’ and ‘To Other Agency . . .’
A. CASE REFERRAL TO A PARTNER AGENCY
Saved Date: 30/01/2013
IRIS User Manual V1_8_0
50
1. To refer to a partner agency click on the ‘To Other Agency . . .’ option.
2. The Refer IRIS Case wizard will appear. Click on the Next button to get to the next
screen.
IRIS will search the database for the case that is being referred. (Client name and case
type will show near the top of the screen).
3. In the “Referred as” field, choose DHS (as the Source of Funding).
4. IRIS has the ability to ‘track’ progress of a case. Place a tick in the Track progress box if
data on the case is to be returned (exported) back to the intake agency from the partner
agency(ies). Note: - if ‘track’ progress is selected then the intake agency will be unable
to close this case until the partner agency exports back a closed referral case.
No tick should be placed in the box if the intake agency is making a referral and does not
want information sent back. The intake agency can then close the Family Services –
Child First case on their database at any time.
5. Place a tick in the box next to the consent acknowledgement notice. (It is not possible
to move to the next screen until this is done).
6. Enter the agency code of the partner agency to which the case is being referred in the
“Full Agency code” field. The email address of the person/agency who will receive the
referral is entered in the “Email address” field. Then click on the Next button.
7. Enter the Date of Allocation if you wish to not use the default of today.
© 2003-12 Department of Human Services
51
IRIS User Manual V1_8_0
In the third screen, IRIS shows the referral file will be created and a copy stored in the
Export Files folder. It is possible to click on the Browse button and select another folder to
store the file copy. Click on the Next button.
When the referral is completed, click on the Done button on screen 5.
The case created by the intake agency shows in the client’s cases screen (cl02). This
entry displays the intake agency’s code and the unique case reference code. Beneath this
Saved Date: 30/01/2013
IRIS User Manual V1_8_0
52
entry is a referral ‘shell’ or copy of the case that has been referred out, including the date
and the code of the agency to which it was sent. This shell can be opened and viewed, but
no changes made to it.
Note: - More than one referral per case can be made by the intake agency. The referrals
will show, in order, under the original case.
B. CASE REFERRAL TO SELF
1. When a case is being referred by the intake agency to itself, click on the Refer Case
button and then click on the ‘To Self . . .’ option
2. Choose DHS as the Source of Funding for the referral case and click on the OK button.
3. In the client’s case screen a referral ‘shell’ will be created under the case.
Note: - Administrator level access is required to disable the tracking option.
4. The referral case can be opened, assigned to a member of staff in the intake agency
(case owner) and work entered (services, issues, etc.).
Note: - Entries and changes made to the referral case will automatically show in the
referral shell. The referral case does not need to be exported back to the intake agency.
5. When the referral case is closed, the referral ‘shell’ will automatically show as being
closed. The referring case can then be closed manually by the intake agency.
© 2003-12 Department of Human Services
53
IRIS User Manual V1_8_0
3.2.3.3.4.4 Receiving Referrals
A referral case will arrive as an attachment to an incoming email. The attachment file will
need to be detached and stored in a convenient location. To avoid losing files, create a
new folder and label it appropriately (eg; create a folder called "Referrals").
Referral cases must be imported into partner agencies and this is a function that only an
IRIS Supervisor or higher (eg; Administrator) can perform:
Click on File and Data Import. For details refer to Data Import
3.2.3.3.4.5 Case Closure with referrals
A case with tracked referrals must have all referred cases closed before it can be closed. To
close a case refer to the case closure section in Cases.
3.2.4 Groups
What is Group Work?
Group work takes one of two forms. The first is as a community service, eg. a staff member
gives a lecture/presentation/seminar on an area of interest or concern at a local school,
interest group or public forum.
Reporting of activities for community service groups should be undertaken using the Projects
button. The project may be ongoing or have a fixed duration, eg. six weeks.
The second type of group work activity is generally referred to as special purpose, eg. an
anger management or parenting group. The group may also be ongoing or have a fixed
duration.
Participation in these groups tends to take three forms:
Clients who are registered and are currently receiving services, eg. family counselling
Clients who are registered clients, but who do not have a case open at the time of
attending the group.
Clients who are not registered.
Reporting of participation in special purpose groups should be undertaken for each client by
using the Group button. If a client attends at least one session of these groups and has in
the past been a client but does not have a case open, then IRIS automatically opens a new
case for that client. Where a client attends at least one session of one of these groups and
is not registered as a client, then a new client should be registered and a new case will need
to be opened.
- Select Lists > Groups from the main menu to open the Group List form:
The Group List will be empty when you first start to use IRIS. The screen above shows four
groups.
To Add a New Group, click the the New button.
Saved Date: 30/01/2013
IRIS User Manual V1_8_0
54
Each Group you create must be attached to an existing Case. (See Creating a New Case)
The Select Case dialog will open:
The group screen is shown below.
3.2.4.1 Working with Groups
The group screen is shown below. Clients may be added, removed and also marked as
inactive. The latter option is usefull if the group is large and a 'roll call' would be a useful
tool.
Groups may also be deleted. The 'Print' button generates a preview of the Group Details
Report
© 2003-12 Department of Human Services
55
IRIS User Manual V1_8_0
3.2.4.2 Group Details Report
The group details report is shown below and summarises the service activity for the group.
This report is useful for tracking client attendances.
3.3 Report Menu
The IRIS program offers many reports. The reports are designed to assist in the case
management of clients, the day to day operational management of the agency and also to
provide demographic analysis for research purposes.
The following report categories are available in IRIS:
Projects,
Non-substantive cases (NSC),
Cases,
Throughput,
Clients.
Most reports are accessed by clicking on Reports and then the category of the report. For
example, Report > Clients.
Client reports and case reports are the most frequently used reports in IRIS. The Report
menu contains:
Saved Date: 30/01/2013
IRIS User Manual V1_8_0
56
Topics on this menu:
- Projects
- Non Substantive Cases
- Cases
- Throughput
- Clients
- Program_Specific
Common to all reports is the Preview Window:
Example Report
If the report detail appears too small, use one of the resize options to zoom in
or out.
Navigate through each page of the report using the arrow buttons.
Use the Print button to print the report.
© 2003-12 Department of Human Services
57
IRIS User Manual V1_8_0
Use the Save button to save the report as text. The reports can be saved in
pdf, csv and txt.
The pdf file is useful for printing and emailing.
The csv is a format that can be loaded into MS Excel. This would be
useful if the data was to be inserted into a spreadsheet for further
refinement or customization. Note that the formatting in some cases
requires some work as some reports are complex and column information
may be misaligned.
The txt option creates a text file which can be useful for loading sub
sections into a text editor for further publication.
3.3.1 Projects
Select Report > Projects from the main menu to open the Project Report Selection (pr50)
window:
The above screen shows the filters that are available to customize the selection criteria.
There are two reports available; Details and Statistics. The Details report lists the
selected projects in detail. The Statistics report provides some basic statistical information
on the data selected.
3.3.1.1 Sample Project Statistics Report
1. Select Report then Projects from the drop down menu at the top of the screen.
2. Click on the Refresh button.
3. Select either Details or Statistics button. The report will appear on the screen like a
Print Preview. To print, select the printer icon from the top of the screen and the report
will print to your default printer.
Saved Date: 30/01/2013
IRIS User Manual V1_8_0
58
A sample Statistics report is shown below.
3.3.2 Non-Sub Cases
Select Report > Non Sub Cases from the main menu to open the Non Sub Case Report
Selection (nc50) window:
The above screen shows the filters that are available to customize the selection criteria.
There are two reports available; Summary and Statistics.
The Summary Report lists the selected non-sub cases in detail, including notes.
The Statistics Report provides some basic statistical information on the data selected.
© 2003-12 Department of Human Services
59
IRIS User Manual V1_8_0
3.3.2.1 Sample NSC Summary Report
1. Select Report then Non-Sub Cases from the drop down menu at the top of the screen.
2. Click on the Refresh button.
3. Select the Summary button. The report will appear on the screen like a Print Preview.
To print, select the printer icon from the top of the screen and the report will print to
your default printer.
A sample NSC Summary report is shown below.
3.3.2.2 Sample NSC Statistics Report
1. Select Report then Non-Sub Cases from the drop down menu at the top of the screen.
2. Click on the Refresh button.
3. Select the Statistics button. The report will appear on the screen like a Print Preview. To
print, select the printer icon from the top of the screen and the report will print to your
default printer.
A sample NSC Statistics report is shown below.
Saved Date: 30/01/2013
IRIS User Manual V1_8_0
60
3.3.3 Clients
Select Reports > Clients from the main menu to open the Client Report Selection (cl50)
window:
Clients can be queried to provide summary, detailed and statistical reports.
1.
2.
Select one or more items (eg. Agency, Staff, Sex, etc) to filter the list of clients you
require.
Press the Refresh button. The list will be reloaded with clients that meet your selection
criterion.
© 2003-12 Department of Human Services
61
3.
IRIS User Manual V1_8_0
Select one of the three report options:
Client Summary Report
Client Details Report
Client Statistics Report
Data extract. The data Extract' option will produce a CSV file which can be
directly imported into a spreadsheet application.
4.
Press Clear to start over
3.3.3.1 Client Summary Report
The Client Summary Report (rp01) provides a single line entry for each of the selected
clients.
Saved Date: 30/01/2013
IRIS User Manual V1_8_0
3.3.3.2 Client Details Report
The Client Details Report (rp02) provides a detailed description of each of the selected
clients and a listing of their cases.
3.3.3.3 Client Statistics Report
The Client Statistics Report (rp03) provides a totals of a number of client properties and
demographics:
Sex
Language other than English
How well speaks English
Country of Birth
Bilingual Worker
Indigenous Status
Suburb
LGA
Case Type
Age Group
© 2003-12 Department of Human Services
62
63
IRIS User Manual V1_8_0
3.3.3.4 Sample Client Reports
This section describes how to produce some common client-based reports.
3.3.3.4.1 Create a client summary extract for a mail merge.
1. Select Reports then Clients from drop down menu at the top of the screen.
Note: Reports on one or a group of clients can be obtained using the filter fields above the
list of clients.
2. Click on Refresh button.
3. Select the Extract… button. The “Save As” dialog box will appear.
4. Select where you would like to save the document and give your document a meaningful
name. Click on the Save button.
5. Confirmation message appears asking if you would like to view the document you just
created. The document will be saved and will open as a spreadsheet. If you would like to
view the document, select the Yes button. If not, select the No button then the
document will be saved and not opened. You may now use this document in a mail
merge. (For assistance with Mail Merge in your word processing package, go to the
online help and do a search for “mail merge” then follow the detailed instructions).
Saved Date: 30/01/2013
IRIS User Manual V1_8_0
64
3.3.3.4.2 Print out reports about subgroups of your clients.
1. Determine acronyms for your subgroups. For example, if you wanted to run reports on
“Teen Mums”, your acronym might be TM.
2. One at a time, open your clients that are in this subgroup (refer to “Clients & Cases Step by Step” if you need assistance).
3. In User Code field on Client Details screen, type in your acronym, eg. TM (for Teen
Mum).
4. Select OK button.
5. Repeat this for all your clients that fit this subgroup.
6. Select Report then Clients.
7. In User Code field, type your acronym as per above (eg. TM).
8. Select Refresh button.
9. Select Statistics button. The report will appear on your screen in print preview mode.
To print to your printer, select the print icon at the top of the screen. The report will
print to your default printer.
3.3.3.4.3 Print statistical demographic information about one or a group of clients
1. Select Reports then Clients from drop down menu at the top of the screen.
Note: Reports on one or a group of clients can be obtained using the filter fields above the
list of clients.
2. Click on Refresh button.
3. Select the Statistics button. The Clients Statistics Report will appear on the screen.
To print, select the printer icon at the top of the screen and the report will print to your
default printer.
3.3.3.4.4 Print complete details of an individual client
1. Select Reports then Clients from drop down menu at the top of the screen.
Note: Reports on one or a group of clients can be obtained using the filter fields above the
list of clients.
2. Click on Refresh button.
3. Select the Details button. The Clients Details Report will appear on the screen. To
print, select the print icon at the top of the screen and the report will print to your
default printer.
3.3.3.4.5 Print a list of clients
1. Select Reports then Clients from drop down menu at the top of the screen.
Note: Reports on one or a group of clients can be obtained using the filter fields above the
list of clients.
2. Click on Refresh button.
© 2003-12 Department of Human Services
IRIS User Manual V1_8_0
65
3. Select the Summary button. The Clients Summary Report will appear on the screen.
To print, select the printer icon at the top of the screen and the report will print to your
default printer.
3.3.4 Cases
Select Reports > Cases from the main menu to open the Case Report Selection (ca50)
window:
Cases can be queried to provide summary, detailed and statistical reports.
Tip: When the Service Activities range is used, the reports will only analyse the
services applicable for the window selected. If it is blank then all services for the cases
selected will be presented.
1.
2.
3.
Select one or more items (eg. Agency, Case Type, etc) to filter the list of cases
required.
Press the Refresh button. The list will be reloaded with cases that meet the selection
criterion.
Select one of the three report options:
Case Summary Report
Case Details Report
4.
Case Statistics (Basic & Full) Report
Press Clear to start over
The Extract to CSV option is used to produce a spreadsheet based on the
case summary information.
Tip: When the Case Type filter is selected for a particular case type, the extra case
Saved Date: 30/01/2013
IRIS User Manual V1_8_0
66
specific data items (if any) are included in the report.
3.3.4.1 Case Summary Report
The Case Summary Report (rp11) provides a short summary of each of the selected cases.
This report contains a data subset of the CSV report described above in Cases.
© 2003-12 Department of Human Services
67
IRIS User Manual V1_8_0
3.3.4.2 Case Detail Report
The Case Details Report (rp12) provides a detailed description (one to a page) of each of
the selected cases.
3.3.4.3 Case Statistics Report
The Case Statistics Reports (rp13) are available in basic and full statistics reports.
The basic stats report summarizes and catalogues a number of cases properties:
Case Type
Referral Source
Point of Closure
Reason for Closure
Case Outcome
Issue
Service Activity
The full stats provides the above as well as information on service delivery performance. The
full stats report is shown below.
Saved Date: 30/01/2013
IRIS User Manual V1_8_0
68
3.3.4.4 Referal Based Report
The cases report filter screen (Cases) will also provide the above reports but from an intake
(lead) agency or partner(sub) agency. The two key filters to use are the Agency and the Is
Referrals checkbox.
The agency code filter is used to select the agency that
is of interest. For example, an intake agency would use
this filter to report on a specific partner agency.
The Referrals Only checkbox is used to select all cases
that are referrals.
3.3.4.5 Sample Cases Reports
This section describes how to produce some common case-based reports.
3.3.4.5.1 Print out case notes
Note:Case Notes cannot be printed on their own directly from IRIS.
1. On the Case Notes screen, highlight some or all of the notes that you want to print.
Copy this selection to your clipboard (Ctrl + c).
© 2003-12 Department of Human Services
69
IRIS User Manual V1_8_0
2. Open a new Word document and paste the notes (Ctrl + v). The notes can be printed by
clicking on the print button (or Ctrl + p). The file will print to your default printer.
3.3.4.5.2 Print a list of cases
1. Select Reports then Cases from drop down menu at the top of the screen.
Note: Reports on one or a group of cases can be obtained using the filter fields above
the list of cases.
2. Click on Refresh button.
3. Select the Summary button. The Case Summary Report will appear on the screen.
To print, select the printer icon at the top of the screen and the report will print to your
default printer.
3.3.4.5.3 Complete details of an individual case
1. Select Reports then Cases from drop down menu at the top of the screen.
Note: Reports on one or a group of cases can be obtained using the filter fields above the
list of cases.
2. Click on Refresh button.
3. Select the Details button. The Case Details Report will appear on the screen. To
print, select the printer icon at the top of the screen and the report will print to your
default printer.
3.3.4.5.4 Work that a particular staff member has done
1. Select Reports then Cases from drop down menu at the top of the screen.
2. Select Name from Service Provider field (Service Provider is the person who provided
the service to the client.)
Note:
When a service is being keyed into the Service screens, the Service Provider field
defaults to the person’s name who is keying the information in, based on their IRIS
login ID).
3. Select the Refresh button.
4. Select Statistics button.
5. Go to the end of the report using the Last page icon at the top of the IRIS screen (it
looks like a right pointing triangle with a line next to it).
6. Look for the last line of the report that says “Service Activity – Summary of Total Time”.
Across to the right there is “Total Time”, “Total Travel” and “Total Hours”.
Saved Date: 30/01/2013
IRIS User Manual V1_8_0
70
3.3.4.5.5 Work done for a client
1. Select Report then Cases.
2. In Client Code field, type the unique code for your client
3. Select Refresh button.
4. Select Statistics button.
5. Go to the end of the report using the Last page icon at the top of the IRIS screen (it
looks like a right pointing triangle with a line next to it).
6. Look for the last line of the report that says “Service Activity – Summary of Total Time”.
Across to the right there is “Total Time”, “Total Travel” and “Total Hours”.
3.3.4.5.6 List the issues of the cases from your agency
1. Select Report then Case.
2. Select Refresh button.
3. Select Statistics button.
4. Arrow through Case Statistics Report screen using the Next Page button at the top of
the IRIS screen until you see the heading “Issue”. This section shows the types of
issues and a count of each issue type.
3.3.4.5.7 Total work your agency has done for all cases in a particular time period
1. Select Report then Cases.
2. Change Date Range or From and To fields in Include Only Cases with Service
Activities in the Period field.
3. Select Refresh button.
4. Select Statistics button.
5. Go to the end of the report using the last page icon at the top of the IRIS screen (it
looks like a right pointing triangle with a line next to it).
6. Look for the last line of the report that says “Service Activity – Summary of Total Time”.
Across to the right there is “Total Time”, “Total Travel” and “Total Hours”.
3.3.4.5.8 Work your agency has done for a particular time period based on case code filter
1. Open the case for your client (refer to “Clients & Cases - Step by Step” if you need
assistance).
2. In Case Code field on Case Details screen, type in a unique code (eg client’s name,
today’s date, etc).
3. Select OK button twice.
4. Select Report then Cases.
© 2003-12 Department of Human Services
71
IRIS User Manual V1_8_0
5. In Case Code field, type your unique code as per above.
6. Change Date Range or From and To fields in Include Only Cases with Service
Activities in the Period field.
7. Select Refresh button.
8. Select Statistics button.
9. Go to the end of the report using the Last page icon at the top of the IRIS screen (it
looks like a right pointing triangle with a line next to it).
10. Look for the last line of the report that says “Service Activity – Summary of Total Time”.
Across to the right there is “Total Time”, “Total Travel” and “Total Hours”.
3.3.4.5.9 Summary history of services provided to a particular case
1. Select Report then Case. The Report Selection screen will appear.
2. To produce a full summary history of services you must enter a date range in the field
Include only Cases with Service Activities in the period.
3. Select Refresh button.
4. Select Details button.
5. To view summary history information, scroll to bottom of client’s case page. It will show
the following information:
Total hours of service for both Duration and Travel Time for selected time period; and
Total hours of service for both Duration and Travel time for selected time period PLUS
total hours of service the client received for time prior to selected time period; and
Total time that client received for this case regardless of the time period selected.
3.3.4.5.10 Print out subgroups of your case type
1. Determine acronyms for your subgroups. For example, if you wanted to run reports on
“Teen Mums”, your acronym might be TM.
2. One at a time, open the case for your clients that are in this subgroup (refer to “Clients
& Cases - Step by Step” if you need assistance).
3. In Case Code field on Case Details screen, type in your acronym, eg. TM (for Teen
Mum).
4. Select OK button twice.
5. Repeat this for all your clients that fit this subgroup.
6. Select Report then Cases.
7. In Case Code field, type your acronym as per above (eg. TM).
8. Select Refresh button.
9. Select Statistics button. The report will appear on your screen in print preview mode.
To print, select the printer icon at the top of the screen. The report will print to your
default printer.
Saved Date: 30/01/2013
IRIS User Manual V1_8_0
72
3.3.4.5.11 Finding current & dormant cases
This report is used to check which currently open cases have had/had NO services over a
certain period. It is particularly useful for locating open cases that are dormant.
1. Select Reports then Cases from drop down menu at the top of the screen. Select the
'Case Type', 'Open Only' checkbox, and 'Include only Cases 'withNO' Service Activities in
the period' and the period of interest as shown below.
The selection illustrated below will find all currently open Family Service cases that have
had no services added for the past 6 months.
2. Click on Refresh button.
3. Select the Summary button. The Case Summary Report will appear on the screen. To
print, select the printer icon at the top of the screen and the report will print to your
default printer.
3.3.5 Throughput
The Throughput report is used to create a report that shows what cases have been opened
and closed during a selected period of time.
1. Select Report then Case Throughput from the drop down menu.
2. Select Refresh button. All cases on your database will be displayed that were open,
opened or closed in the last quarter.
3. If you wish, you can select the case type and/or change the date range you are
interested in. Select Refresh button again.
4. Select Throughput button. Throughput report will appear on screen.
5. Note: the Throughput report also shows information about Projects and Non-Substantive
Cases for the selected date range.
© 2003-12 Department of Human Services
73
IRIS User Manual V1_8_0
A sample report is shown below.
3.3.5.1 Exported Data
The Throughput report is also useful to print the activities exported at the end of the
quarter.
Tip: Use this report immediately after exporting data as it will then accurately reflect the
database and hence the exported data at that time.
3.3.6 Program Specific
IRIS has the capacity to generate reports specifically for each program. At present there
are no reports.
3.4 Agency Menu (Adminstrators only)
The Agency menu is accessible by users logged in at administrator level and contains:
Saved Date: 30/01/2013
IRIS User Manual V1_8_0
74
Topics on this menu:
- Staff Maintenance
- Case Maintenance
- Agency Maintenance
3.4.1 Staff Maintenance
Note: You must be an IRIS Administrator to use this feature.
Use this window to Add or Update Staff details.
Related Topics:
- Create Staff
- Update Staff
- Deleting Staff
3.4.1.1 Create a New Staff
Preparation:
- Select Agency > Staff Maintenance from the main menu to open the Staff List (ad02):
To create a New Staff, click the New button.
The Staff Details window (ad03) will open:
© 2003-12 Department of Human Services
75
IRIS User Manual V1_8_0
User ID
Enter a unique reference name to identify this staff entry.
Display Name
Various display name options are constructed, based on the name details provided. The
selection made will be used on all of the screens to identify this staff entry.
Access Group
The following access groups are provided in IRIS:
Guest - currently has no access. Reserved for future use.
Data Entry - can add clients and cases for which they are permitted to access.
Staff - No Deletions - This is the same as Staff but deletions are not allowed. This level is
recommended for inexperienced users.
Staff - can maintain clients and cases for which they are permitted to access, and perform
reporting functions.
Supervisor – can see all clients and their casework and perform some administration
functions (eg. Backup)
Administrator – has the authority to do all tasks, including staff, case and agency
maintenance.
Password Expired
This option will prompt the staff member to change their password when they next log in.
Enabled
Indicates whether this staff entry can be used. If a staff member leaves your organisation,
clearing this checkbox is synonymous to deleting the entry. Staff entries cannot be
physically deleted, since they may be referenced by client and case records.
Reset Password
Pressing this button resets the user's password to "password" and sets it as expired. This is
for the administrator's convenience if a staff member has forgotten their password.
When done, click the OK button.
Related Topics:
- Update Staff
Saved Date: 30/01/2013
IRIS User Manual V1_8_0
76
3.4.1.2 Change Staff Settings
Preparation:
- Select Agency > Staff Maintenance from the main menu to open the Staff List (ad02).
To change the Login Settings for a Staff member:
1. Select the Staff you want to change, so it becomes selected (highlighted).
2. Click the Open button above the list.
The Staff Details window (ad03) will be shown.
Change the details for the selected User as required. Note that for security reasons some
fields (ie; User ID) cannot be modified.
Refer to Create a New Staff for field details.
3.4.1.3 Deleting Staff
In some circumstances it may be desirable to remove old staff members from the staff list.
This is done by selecting the staff row and then clicking on the Delete button.
Note that only staff who have no data associated with them can be deleted. In the
example below IRIS will not allow deletion of the staff member because there are 38 data
items already attached.
© 2003-12 Department of Human Services
77
IRIS User Manual V1_8_0
3.4.2 Case Type Maintenance
Note: You must be an IRIS Administrator to use this feature.
All case types consist of the case or program type (eg; financial counselling, family services)
in combination with a source of funding. The combination of these two define the case type.
The case types are preset for department-funded types and you cannot alter them.
However if you wish to add or alter your agency's own case-funding types then the
following procedure is used.
Preparation:
Select Agency > Case Maintenance from the main menu to open the Case Maintenance
window (ad04).
Related Topics:
- Adding a New Case Type
- Changing Case Details
- Deleting a Case
Saved Date: 30/01/2013
IRIS User Manual V1_8_0
3.4.2.1 Adding a New Case Type
Preparation:
- Select Agency > Case Maintenance from the main menu to open the Case
Maintenance window (ad04).
To Add a New Case Type:
1. Click the New button.
The Select Type for New Case dialogue opens:
2. Select a Case Type from the drop-down list.
3. Select the Source of Funding from the drop-down list:
Note:- There are many sources of funding available so that an agency may create their own
types independently of the Department of Human Services ones.
© 2003-12 Department of Human Services
78
79
IRIS User Manual V1_8_0
- Case type / Source of Funding combinations can only be defined once.
3. Click OK to add the new Case Type and close the dialogue.
4. Control returns to the previous screen. Complete the remaining details in the lower
section of the window.
Description
The default description is a combination of the Case Type and Source of Funding
descriptions. You may alter this (eg. to abbreviate) as required.
Active
Uncheck this box to disable this entry for use. It can be set again at any time.
Reset Desc
This button resets the description to the default.
Transfer to
These options determine whether cases of this type are exported to either DHS or another
agency.
Last Exported
This section is used to monitor what data has been sent and when. Data not exported by
the reminder date causes promting to occur at start up. If the case type is DHS funded then
the available options are limited. If the case type is funded by another source then the
reminder system can be turned off. The reset button resets the date to the next quarter.
Related Topics:
Saved Date: 30/01/2013
IRIS User Manual V1_8_0
80
- Changing Case Details
- Deleting a Case
3.4.2.2 Changing Case Details
Preparation:
- Select Agency > Case Maintenance from the main menu to open the Case
Maintenance window (ad04):
To change the Details related to a Case:
1. Click the Case you want to change in the list. (No Case Details are available until a Case
is highlighted.)
2. Change the Details as required.
3. Press the Apply button
Related Topics:
- Adding a New Case
- Deleting a Case
© 2003-12 Department of Human Services
81
IRIS User Manual V1_8_0
3.4.2.3 Deleting a Case
Preparation:
- Select Agency > Case Maintenance from the main menu to open the Case
Maintenance form.
To Delete an existing Case:
1. Click the Case you want to delete in the list. (the Delete button is not enabled until a
Case is highlighted.)
2. Click the Delete button
3.
Respond Yes to the confirmation request
Note: You will not be able to delete a case-funding type that was pre-set by DHS.
Related Topics:
- Adding a New Case Type
- Changing Case Details
3.4.3 Agency Maintenance
Note: You must be an IRIS Administrator to use this feature.
This screen is used to maintain your agency name, export email addresses, general options
and outlets.
Export Agency names and emails correlate with the checkbox selections on the case details
screen (ad04).
Press OK to save your changes.
Saved Date: 30/01/2013
IRIS User Manual V1_8_0
82
3.4.3.1 General Options
These settings are on the Agency Maintenance screen (ad01) and apply to all users of this
database.
Email Available
This option is accessed when data is exported.
When checked, the user's email program will be launched to create an email with the
export files as attachments.
© 2003-12 Department of Human Services
83
IRIS User Manual V1_8_0
When unchecked, the files are saved in the export folder, available for manual transfer.
Protect Notes
This option alters how client and case notes are added.
If checked, a window will be displayed, prompting for the entry of new notes. Existing text
cannot be changed. A user/timestamp is added by the system.
If unchecked, all notes can be modified. A user/timestamp button is available to manually
add this information.
Local Data Copy
This option is primarily for the benefit of users at remote (dial-up) locations.
Static data, such as the list of suburbs, country codes, etc., is loaded from the database
into memory when IRIS starts.
Checking this option indicates that a local copy of this data should be saved to reduce the
delay at startup. Data is retrieved from the central database the first time, and whenever
the code lists are updated. A delay is to be expected at this time, but subsequent runs
will access the local copy and therefore should be considerably faster. Actual
performance will vary depending on the size of the data, transmission speed and frequency
of updates.
Unchecking this option is recommended for systems exclusively on a local area network.
Note: This option is ignored if the database is local to this computer (stand-alone
installation).
The local cache file is named in the format IRISCache_V-R-M.TMP (eg. IRISCache_1-20.TMP) and stored in the folder specified under Store data in folder. All users must have
write access to this folder.
User's temp - select this option if users normally have a computer to themselves (ie.
single Windows login ID). Programs always have write access to this folder and is
therefore the safest to use. However, multiple copies of the cache file will be created
unnecessarily if multiple Windows login IDs are used.
Program - select this option if users generally share a computer (ie. multiple Windows
logins) - and - the IRIS folder is writeable. This is normally safe to use as well.
Other - specify a common (writeable) folder that will be recognised on all computers. Eg.
Shared Documents (C:\Documents and Settings\All Users\Documents). If this folder does
not exist when IRIS starts, this option will revert to the User's Temp folder. Select this
option only if users generally share a computer (ie. multiple Windows logins) - and security has been applied to the IRIS folder.
Apply only to computers with a name starting with
If you have a mixture of local and remote users, you will want the local cache facility to be
active only for the remotely connected computers. By specifying a list of computer names
here the local cache will activate on a subset of your network. Enter the starting
characters of computers on your WAN, separated by commas.
For example, if some computers are located in Broken Hill and Mildura, and they all start with
a common prefix (eg. BH001, BH103, ML024, ML051), you would enter BH,ML in this field. If
this field is left blank, the local cache (if enabled) will apply to all computers.
Saved Date: 30/01/2013
IRIS User Manual V1_8_0
84
3.4.3.2 Outlets
These settings are on the Agency Maintenance screen (ad01) and apply to all users of this
database.
Outlets identify the location where the staff members are operating from. In many
agencies, there will be just one outlet. However, particularly in wide area networks, staff
may be located in another suburb or country town many kilometres from the central office.
A requirement for data entry is to know the outlet location (suburb) applicable for each
case.
The outlet suburb is not the same as the client suburb or the service suburb.
Entries are added here to determine what selections are available:
when the user logs on (sy01)
on the case details screen (ca00)
When the user logs on, they select the outlet representing their current location. This will
default to that of the previous session and will be used, by default, when cases are created.
© 2003-12 Department of Human Services
85
IRIS User Manual V1_8_0
Re-assigning Case Outlets
The outlet suburb is a mandatory field, but may be blank on your existing case records since
it was added after the first release of IRIS. Also, in Version 1.1, it was possible to enter any
suburb in this field. From Version 1.2 onwards, the selection is restricted to the specified
outlets. The [Analyze] and [Re-assign] options allow the administrator to quickly identify all
the suburbs used in the case outlet field, and re-assign them to the correct outlet if
required. To do this:
IMPORTANT:
Make a backup of your database before proceeding
and ensure no other users are logged on. Reassigning case suburbs cannot be reversed.
1. Press [Analyze]. This will retrieve a list of all the suburbs currently referenced in the
case outlet field, along with the number of cases.
2. Use this list as a guide to add the required outlets (see the examples below)
3. For suburb entries that require re-assigning to another outlet:
a) Click the checkbox next to the suburb(s)
b) Select to highlight the required outlet in the list above.
c) Press [Re-assign] and confirm when prompted.
4. All cases with the selected suburb will now point to the required outlet. The suburb list
should eventually match the outlets.
You can perform a Case Summary Report to assist in identifying where outlets have been
specified.
Example 1 - Few suburbs retrieved with heavy bias in numbers. Outlets are Footscray and
Heidelberg.
Suburb
Not Known
Footscray VIC 3011
Forest Hill VIC 3131
Heidelberg VIC 3084
Eaglemont VIC 3084
West Footscray VIC 3012
Cases
45
192
1
78
2
3
Saved Date: 30/01/2013
IRIS User Manual V1_8_0
86
Analysis: West Footscray belongs with Footscray; Eaglemont is near Heidelberg. Forest Hill
probably should have been Footscray (typo). Blank entries are unknown (pre-date IRIS
Version 1.1)
Action: In separate steps:
1) Tick West Footscray and Forest Hill; Select Footscray outlet (top list); Press [Re-assign].
2) Tick Eaglemont; Select Heidelberg outlet (top list); Press [Re-assign].
3) The Not Known suburb entries could be re-assigned altogether to one of the outlets, but
may need manual attention before proceeding.
Example 2 - Many suburbs retrieved, with a scattered case count. Outlets are in North
Melbourne and Ivanhoe.
Suburb
Not Known
Footscray VIC 3011
West Footscray VIC 3012
Heidelberg VIC 3084
Eaglemont VIC 3084
Watsonia VIC 3087
Greensborough VIC 3088
North Melbourne VIC 3051
Fawkner VIC 3006
Cases
54
6
3
5
2
3
7
8
9
Action: It appears that the client suburb was entered in the case outlet suburb field and so
this data does not represent your outlet geography. If you only have one outlet, you can
re-assign them all here. Otherwise, cases will need individual attention.
3.5 Help Menu
The Help menu contains 2 items:
Topics on this menu:
- Table of Contents (this document)
- About IRIS
3.5.1 Contents
Opens the Online Help at the Welcome Topic.
© 2003-12 Department of Human Services
87
IRIS User Manual V1_8_0
3.5.2 About...
The Help > About item displays information about this software (sy02).
The Version Number in the bottom left-hand area is important information to include when
reporting a problem to the Help Desk.
Click the OK button to close this window.
4 Using Notes
IRIS offers many plain text fields for users to store comments or notes as required. Note
that some fields, such as the services notes have a set length whilst others are not limited.
Several tools to assist in managing any notes stored have been incorporated into IRIS. The
tools are:
- Add Timestamps
- Load Template
- Spell Checker
Notes are stored as plain text and hence do not have embedded formatting. Graphics
cannot be stored in stored in notes fields.
The text editor offers the following options:
Sometimes accidental deletion of notes can occur when editing text. The Undo option
will restore the text to the saved copy.
Saved Date: 30/01/2013
IRIS User Manual V1_8_0
88
4.1 Adding Timestamps
Click on the 'Add Timestamp' button. The date, time and your logon ID will appear. You can
also begin typing a note by positioning the cursor in the notes panel and just typing.
4.2 Templates
Templates are a feature that is provided for notes in IRIS. They can be used to standardize
meeting notes etc.
To set up templates on your system:
1) Create a local folder under the IRIS program directory called "IRISTemplates"
and/or
2) Create a shortcut under the IRIS program directory called "IRISTemplates" that
points to an alternative location (such as a shared folder on your network)
3) Within either of these two locations, create your templates as plain text
(.TXT extension) files.
The filename will be used as the reference in the left hand column.
© 2003-12 Department of Human Services
89
IRIS User Manual V1_8_0
4.3 Spell Checker
A spelling checker has been incorporated into most notes fields and is invoked either
automatically or manually as configured by the user. The menu options are shown below.
The last menu option is used to set the default properties for the spell checker. The
standard dictionaries supplied are for UK or USA and there is a custom dictionary where
users may save words not listed in the supplied dictionaries. The dictionaries are located in
the 'Dictionaries' folder within the 'IRIS' folder. Note that the IRIS Helpdesk can supply a
medical dictionary if required.
The spell checker is configurable to 'Live Spell Check' (checking as you type) or on demand,
the latter being activated with the 'Check Spelling' menu option. Spelling errors are
Saved Date: 30/01/2013
IRIS User Manual V1_8_0
90
underlined in red as shown below.
To correct the spelling place the mouse over the word and right-click. The following dropdown list of suggestions is displayed.
5 Utilities (Advanced Users)
IRIS is supplied with several utilities that are capable of either running under IRIS or as
stand alone executables.
5.1 Configure
Database Platform
The IRIS server as default offers two choices of database platform from which to operate.
These are currently Firebird (default) and Microsoft SQL server. Firebird is a relational
database offering many ANSI SQL-92 features that runs on Linux, Windows, and a variety of
Unix platforms. Firebird offers excellent concurrency, high performance, and powerful
language support for stored procedures and triggers. It has been used in production
systems, under a variety of names since 1981.
Firebird is a commercially independent project of C and C++ programmers, technical advisors
and supporters developing and enhancing a multi-platform relational database management
system based on the source code released by Inprise Corp (now known as Borland Software
Corp) under the InterBase Public License v.1.0 on 25 July 2000.
The platforms
o
o
o
o
o
o
supported include:
Windows - all versions including W2K terminal server/ Citrix
Linux
AIX
Solaris – Sparc, x86,
HPUX
. Net Server (alpha)
As Firebird is open licensed, development of client components has provided several powerful
graphical interfaces to the database for developers to use. If access to the database is
desired then you need to contact the IRIS Helpdesk for the passwords.
Note that if you elect to use a different database to that shipped (Firebird) then you may
have to obtain a license for that product; ie. MS SQL Server . If SQL server is required,
contact the IRIS Helpdesk who will be able to assist with the installation and provide all the
SQL scripts to build the system.
© 2003-12 Department of Human Services
91
IRIS User Manual V1_8_0
Configuring the Database
When your agency is ready to use the IRIS production copy, contact the IRIS Helpdesk who
will send you a setup key to activate the production copy. This key will set the agency code
and create the case types that your agency is funded for. If your agency is using more than
one production database you will be given a setup key for each database.
The key(s) will be sent to your agency by email. Copy the key from the email that was
provided by the IRIS Helpdesk into the clipboard by highlighting the key and right-click with
your mouse and clicking onto 'copy'.
The registration of IRIS for the agency is part of the IRIS configuration process. The
'Production' database is the live version that will be used to manage clients and cases, and
will be the database from which the IRIS data will be exported to the DHS.
The production database is activated via the IRIS Configuration program as shown below:
Select Production in the Select Mode screen and click OK as shown below:
When the IRIS Configuration screen is displayed
Server
Saved Date: 30/01/2013
IRIS User Manual V1_8_0
92
The server panel is used to set the network requirements if any. If the installation is to
operate as stand alone then "Local" is selected.
Database
The database panel details where Firebird server will find the database(s). Note that the
path must be local to the server and must not use virtual addresses. The default address is
"C:\IRIS\Data\IRIS.IB".
Test Connection
The test Connection button will make a test call to Firebird and return an "OK" if the
connection could be made.
Registration
Click on Open in the Register Agency box. The following login page will be displayed.
Click on OK and the following screen will be displayed. The key will be automatically loaded
from the clipboard. The key information includes the agency number as well as the DHS
funded case types determined previously. If new DHS funded case types are required then a
new key will be issued which will set up the case types automatically.
© 2003-12 Department of Human Services
93
IRIS User Manual V1_8_0
The register button will finish up the configuration process.
NOTE: You must only ever use one setup key per database.
To complete the setup process you need to enter the agency name. Open the production
database by double clicking on the production IRIS icon on the desktop and login as an
administrator. Start up the Agency Maintenance screen and enter your agency name as
shown below.
The "Export Agencies" panel is used to enter email addresses for other agencies that you
may wish to send data to. Note that the data is deidentified. Export files generated are
saved in the IRIS\ExportFiles directory. The export files can be sent manually when the
agency is ready to send them.
For more information on "General Options" see General Options
For more information on "Outlets" see Outlets
Saved Date: 30/01/2013
IRIS User Manual V1_8_0
94
Click on the OK button to save the input and then restart IRIS to refresh the database with
the agency and database names that were previously entered.
When the configuration has been completed, please contact the IRIS Helpdesk to confirm
that our agency details are correct.
5.2 Backup
Running the Backup program (IRISBackup.exe) will show the following screen:
IMPORTANT: You should either:
a) prior to backup - change the default path (C:\Iris\...) to a folder on a different drive,
or preferrably
b) after the backup - copy the backed up (GBK) file to another drive or otherwise save
to another medium (eg. burn to CD) and save off site in a secure location.
This ensures that in a worst-case scenario where the computer (or hard disk) on which the
main database is stored is damaged (or otherwise becomes inaccessible), you will be able to
recover your database from the other location.
Please note that the backup is performed by the server, and so the To GBK file location
is relative to the server. When you are working in a stand-alone environment, your
computer also acts as the server, so the location corresponds to your system. This is not
the case if you are attached to the server in a network environment. The path will most
likely be pointing to the C-Drive (C:\...), even if the server appears to you as a shared drive
attached to the server (eg. F:\Data).
With a suitable backup folder specified, click the Start Backup button to begin the backup
process. This will usually take just a few moments.
Click the Close button when done.
This utility can also be used to restore the database from a backup file. To Restore a
database please call the IRIS Helpdesk.
© 2003-12 Department of Human Services
95
IRIS User Manual V1_8_0
5.3 Client Transfer
Clients , including all notes, may be copied to other IRIS databases using the IRISExportOne
program. This program is used for transferring a client to another system as shown below;
for example, when a client moves to a new district and they wish to have their IRIS client
data transferred to the new agency.
This is done from the Client List screen by selecting the client and clicking on the 'Transfer'
button.
This will start the above process with the exception that the client only will be transferred.
Note: The Transfer button must not be used for referrals.
To transfer a client, select the client as shown below. The 'Transfer' button will be active
for valid transfers. Click on this button.
The process screens are shown below.
Saved Date: 30/01/2013
IRIS User Manual V1_8_0
Enter the agency code of the agency to which the client is being transferred in the “Full
Agency code” field. The email address of the person/agency who will receive the file is
entered in the “Email address” field. Then click on the Next button.
The next screen is used to locate where a copy of the data file is to be stored.
© 2003-12 Department of Human Services
96
97
IRIS User Manual V1_8_0
To protect the information enclosed, the data is encrypted and compressed. The encryption
is 128 bit with the seed for the encryption key being calculated from the destination agency
code. This means that only the agency with an IRIS agency code specified will be able to
read the data.
5.4 Deploy
An application, IRISDeploy.exe has been developed for Administrators who want to centralise
the deployment of future IRIS upgrades within their organisation.
This utility will not work with old IRIS versions (Build 456 or below). Once all the copies
of IRIS in your organisation are upgraded to the latest version, this utility can be used to
deploy any future upgrades.
How the Deploy System Works
The Deploy software is used to load a copy of the upgrade software into the IRIS database
itself. When a workstation is started it firstly checks its build number against what the
database it is connecting to has. If the version is later than the workstation it will receive
the upgrade program and automatically run it. (Versions of IRIS later than 456 have this
capability to automatically run these upgrades on themselves without user intervention.)
The end result is that any workstation that is not running the current version of IRIS will be
upgraded as soon as it connects to the database.
Deploying Updates Automatically
Before you start this process make sure you have the correct IRIS update file handy.
Contact the IRIS Helpdesk to confirm this.
To automate the process of latest IRIS Deployment, locate the IRISDeploy.exe file in your
IRIS installation folder of your IRIS Server (or the computer acting as IRIS Server) and start
the application by double clicking on it.
Saved Date: 30/01/2013
IRIS User Manual V1_8_0
98
The application will bring up the following screen.
In the file dialog box locate the update file for the latest version. The filename describes the
database version as well as the build number of the software.
The filename information is used to describe the software version that is being loaded. When
the file is loaded the following file details will be available.
At this stage select the program and click on the "Enable" button to activate the upgrade
system. In the following example an earlier version was loaded than that currently being
used and hence the update cannot be Enabled.
© 2003-12 Department of Human Services
IRIS User Manual V1_8_0
99
Once the upgrade is loaded into the deployment system the program may be closed.
6 Troubleshooting
Please select a sub-heading at the left to read Troubleshooting topics. If you are having any
difficulties with IRIS, the first point of call is the IRIS Helpdesk in your state.
6.1 Log In Problems
My password is not letting me log in.
If you have forgotten your password and/or your User ID, contact your Agency
Administrator.
The IRIS password is case sensitive. Check that the caps lock key is off.
6.2 Installation Issues
Use the IRIS Installation Guide to help with installing or un-installing the database and/or
IRIS.
To open the IRIS Installation Guide, click the Windows Start button, then move to
Programs > IRIS > Installation Guide.
This Guide is also available on the IRIS CD.
Insert your IRIS CD, allow it to AutoPlay, then click the Installation Guide button on the
opening page.
6.3 Screen Identifiers
This is a list of all of the IRIS screens and report identifiers. These codes should be used
when reporting problems to the Help Desk.
Scrn Id
sy00
sy01
sy02
sy03
sy04
Description
Main Window
Login
About
Database Update In Progress
Login for MS SQL Upgrade
Saved Date: 30/01/2013
IRIS User Manual V1_8_0
ad01
ad02
ad03
ad04
ad05
ad07
Agency Details
Staff List
Staff Details
Agency Case Maintenance
Agency Case/Source of Funding Select
Change Password
cf01
cf02
Configuration Main Window
Configuration Registration
cl01
cl02
cl50
Client list
Client details
Client Report Selection
ca00
ca00-1
ca01
ca02
ca03
ca04
ca05
ca06
ca07
ca08
ca10
ca11
Case
Case
Case
Case
Case
Case
Case
Case
Case
Case
Case
Case
ca00-2
ca00-3
ca00-4
ca00-5
ca00-6
ca50
ca51
ca90
ca91
ca92
ca93
ca94
ca95
Case - Related Persons
Case - Issues
Case - Services
Case - Closure
Case - Notes
Case Report Selection
Export Case Report Selection
Issue Type Selection
Case Type Selection
General Text Selection (eg. Child's first name)
General Code Selection (eg. Relationship Type)
Case Merge Selection
Case Close Details
nc01
nc50
Non-Substantive Case List
Non-Sub. Case Report Selection
nt01
Add Note
gp01
gp02
gp03
Group List
Group Details
Add Service to Group Confirmation
pr01
pr02
pr50
Project List
Project Details
Project Report Selection
sv01
sv02
sv03
sv04
sv05
Service
Service
Service
Service
Service
Details
- Case
Details
Details
Details
Details
Details
Details
Details
Details
Details
Details
Details (top section)
- Family Support
- Financial Counselling
- Sexual Assault Services
- MCH
- Problem Gambling
- EI/SCS
- Family Violence Services
- General
- LN&SLN
- PSFO
Details
Details
Details
Details
Details
© 2003-12 Department of Human Services
-
Family Support
Financial Counselling
Sexual Assault Services
MCH
Problem Gambling
100
IRIS User Manual V1_8_0
101
sv06
sv07
sv08
sv09
Service
Service
Service
Service
sv90
sv91
Service Details (Add in Group)
Service Type Selection (Add in Case)
rp01
rp02
rp03
Client Summary Report
Client Details Report
Client Stats Report
rp11
rp12
rp13
Case Summary Report
Case Details Report
Case Stats Report
rp21
rp23
Non-Sub. Case Summary Report
Non-Sub. Case Stats Report
rp32
Project Details Report
rp42
Details
Details
Details
Details
-
EI/SCS
Family Violence Services
General
PSFO
Group Activity Report
6.4 Frequently Asked Questions
Here is a list of most commonly asked questions regarding errors/problems in IRIS.
Q1. How do I Lock/Disable/Delete a User Account?
Administrators can lock, disable and delete (if there are no records attached to the user).
For example, to disable users:
1.
Login as Administrator
2.
Go to Agency menu - Staff Maintenance
3.
Select the staff member and Open
4.
Uncheck the "Enabled" check box
5.
Click OK
Q2. How do I change/reset user password?
To change a user password:
1.
Login as the User
2.
Click on File menu - Change Password.
3.
Enter the old/existing password in the Current Password text box.
4.
Enter a new password (5 – 10 characters) in the New Password text box.
5.
Repeat the above password in the Confirm New Password text box.
To reset a user password:
1.
Login as Administrator
2.
Click Agency menu - Staff Maintenance
3.
Select the Staff member - Open
4.
Click "Reset Password" button. This will reset the password to "password". The
account password will be rest to "password" and the user will be prompted to change the
password on next login.
Q3. I have entered my password but I can't use IRIS. Every thing is greyed out?
By default, IRIS locks the account if the user enters the wrong password for the account
3 times in a row. This means, when the user tries to login the 4th time, the Log In dialog
box disappears and all the buttons and menus are disabled. To resolve this problem:
1.
Login as Administrator
2.
Go to Agency menu - Staff Maintenance
3.
Select the staff member and Open
Saved Date: 30/01/2013
IRIS User Manual V1_8_0
4.
102
Check the "Enabled" check box
Q4. What port does the Firebird Server use?
By default the Firebird Server uses port 3050. You might need to amend the firewall (if
present) settings to allow Firebird / Port 3050.
Q5. I am getting an error message "An error occurred accessing the server. Please
run IRIS Configuration to test your connection"
OR
I am getting an error message "Cannot connect to the password database file"
Possible Cause
No Connectivity to the
server
Solution
Check your network cables for unplugged connections and
check if the server is up and running
Wrong IP Address for the
server
Run IRIS Configuration - Production and check the IP
Address of the server (if the server is using the same IP
address).
Wrong name of the Server
Run IRIS Configuration - Production and check the
name of the Server. Replace the name of the server with
the correct IP Address of the server to resolve any issues
with WINS service.
Firebird Server not running
Check if the Firebird Server is running. With administrator
rights open the Administrator Management Tool and check
that 'Firebird Server-Default Instance' has started as a
service.
Wrong path to the IRIS.IB
database
Check the location of the IRIS.IB file in the IRIS
Configuration. If IRIS is running in a client Server mode
make sure that the address in the IRIS configuration in
the Client IRIS installation is LOCAL TO THE SERVER. This
means if on the server, IRIS directory is D:
\Data\IRIS\IRIS.IB and D:\Data is a mapped network drive
X, then on the Client IRIS Configuration, use the path D:
\Data\IRIS\IRIS.IB and NOT X:\IRIS… or \
\Servername\IRIS\…
Q6. I am running a Novell Server; can I install IRIS on it?
IRIS will NOT work on a NOVELL server because NetWare does not allow services to be
created and run.
Q7. Can I use SQL Server instead of Firebird ?
Yes you can. To convert your existing firebird database to SQL format you will have to do
the following:1.
Send your firebird database file to us (Usually located in C:\IRIS\DATA\IRIS.IB).
2.
We will convert the file to SQL for you and send a full SQL backup file.
3.
Restore the backup file we send on an empty database in your SQL Server.
4.
IRIS Supports both SQL Server and Windows Authentication.
a. If you wish to use SQL Server Authentication then you will have to create a user
called ‘irisuser’ with password ‘irisuser’ having full rights (db_owner) on IRIS database.
b. If you wish to use Windows Authentication then you will have to give the user
(or group) full rights on IRIS database.
5.
Configure IRIS (using the IRISConfig.exe program in IRIS folder) to use SQL Server.
Enter the appropriate Server name, database name and select authentication method.
6.
Start IRIS. (All done).
© 2003-12 Department of Human Services
103
IRIS User Manual V1_8_0
Q8.Which platforms and operating systems does IRIS support?
IRIS supports the following Operating Systems and environments:- MS Windows XP, Vista and 7 (32 bit and 64 bit versions).
- MS Windows Server 2000, 2003 and 2008 (32 bit and 64 bit versions).
- Citrix.
- Terminal Server.
The IRIS database can be run on the following DBMS software:- Firebird (opensource free software; 1.5.2 version is the default provided with IRIS). No
license is required.
- MS SQL Server 2000, 2005, 2008 (requires license from Microsoft).
IRIS is not supported on Mac O/S X and Linux systems although both have been tested to
work on OS X v 10.6.4 and Ubuntu v9 using software called 'Wine'. Wine is a translation
layer program that emulates Windows on Linux and Mac OS X systems. These options are
not recommended for commercial operations.
Q9. How to setup a newer Firebird version(2.0, 2.1 or 2.5) installation with IRIS?
In some circumstances some installations will be running newer versions of the Firebird
server. If you wish to run the one Firebird server then follow these steps after you have
installed your version of Firebird 2.0 or later.
1. Rename the file called gds32.dll (in the folder where the IRIS client executables
reside) to oldgds32.dll.
2. In Firebird’s bin folder, copy the file fbclient.dll to the above IRIS folder and rename it
to gds32.dll. This change needs to be done in every IRIS client folder.
3. Create the user account ‘irisuser’ in the new Firebird server (2.0 or above versions).
The process is slightly different depending on the Windows version:
a. For Windows XP and earlier versions, go to -> Start -> All Programs->
Accessories-> Left click on the Command Prompt
b. For Windows 7 and Server versions, go to -> Start -> All Programs->
Accessories-> Right click on the Command Prompt and select the ‘Run as administrator’
option.
4. Change the directory to the newly installed Firebird’s bin folder. (e.g. C:\>cd c:
\Program Files\Firebird\bin).
5. Enter the following command and press enter: “gsec –user sysdba –password
masterkey”
6. The prompt will change to gsec e.g. GSEC>
7. Type the following command and press enter : “add irisuser –pw irisuser”
8. Type the following command and press enter : “di” -> This will display list of users on
the Firebird server. Make sure IRISUSER is in the list.
9. Type quit and press enter to complete the process.
10. Re-configure IRIS to connect to new Server if required.
If you have moved the IRIS database and/or changed the name/IP address of the server
on which Firebird runs then you will have to re-configure IRIS.
1. Run IRISConfig.exe from the IRIS folder.
2. In the text box inside the server section put the new server name or IP address.
3. In the database section put the complete path of IRIS database (e.g. c:
\IRIS\Data\IRIS.IB)
4. Press Test and the Status should be OK.
Troubleshooting:
If at any stage you are having difficulties call the IRIS Helpdesk and we should be able to
assist.
- Firebird by default uses port 3050; make sure it is open through your firewall for
inbound TCP connections.
- For a 64 bit Firebird installation, you will have to send us that database so that
we can convert it to a 64 bit version for you.
Q10. Error Message “Cannot attach to Services Manager”
Saved Date: 30/01/2013
IRIS User Manual V1_8_0
104
If you received the above error message, it means the program is unable to connect to
the server running the IRIS database. The instructions below are required to be done by
an authorized person or IT administrator.
1.
Check if the Firebird Service is running through the Startup or Services Manager. If
not, you are required to start the Firebird Service. Run IRIS Configuration to test the
connection.
2.
If the Firebird Service is running, you might have to stop and start the Firebird
Service. Run IRIS Configuration to test the connection.
3.
Through IRISConfig.exe in the IRIS Configuration, change the Server from ‘Local’ to
‘Remote’ and then put in the name or IP address of the computer on which Firebird is
running (even though it might be the same computer). Press the test button in IRIS
Configuration to test the connection.
Q11. How do I access the Nursery Equipment Program in a Maternal & Child Health
Enhanced Home Visiting case?
The Nursery Equipment Program can be accessed in any MCH Enhanced Home Visiting
case in IRIS. To access this area in IRIS:
1. Search for the client (who is to receive equipment) in the Client List. Highlight the
client with your cursor and click the Open button.
2. When the client screen opens, click on the Cases tab and highlight the MCH Enhanced
Home Visiting case and click the Open Case button on the right.
3. When the case screen opens, click on the Services tab:• If there is already one service showing in the Services screen, highlight the
service and the Service Details will appear underneath.
• If there is no service showing in the Services screen, click on the New button on
the right. Select ‘Indirect service – other’ from the list in the box. Click OK at the bottom
of the box and the Service Details will appear.
4. In the Service Details screen, click on the Nursery Equipment Program button under
the Immunization field.
5. In the MCH Nursery Equipment Program screen, follow the steps given in the Nursery
Equipment Program Guidelines for Ordering (pages 9 - 10) issued by Department of
Education and Early Childhood Development (DEECD). Queries regarding the program can
be directed to the MCH team on 1300 791 423.
6. Click OK at the bottom of the screen to return to the Service Details screen. The
statement above the Nursery Equipment Program button gives the status of the program
for that service.
© 2003-12 Department of Human Services
105
IRIS User Manual V1_8_0
Exporting
35
Maintaining
35
Searching
35
Index
-AAdding project activities
30
Agency - lead
47
Agency - sub
47
Attaching a Client to NSC
34
-D73
Data Backup
26
Data de-identified
17
Data export
17
Data Import
24, 53
Database connection problems
101
Definition of Subcontracting
45
Dictionary
89
26
-CCase
Create
43
Definition
43
Delete
43
Maintain
43
Merge
43
Refer
43
Structure
43
Tranfer
43
Case merge
44
Cases
Closure
39
Creating
39
Definition
39
Details
39
Issues
39
Maintaining
39
Related persons
Services
39
5
Data
24
Exported Data Report
-BBackup database
Closing IRIS
26
Configuring IRIS
26
Current data collections
-FFAQs
101
-GGroup
Details Report
55
Groups
14, 53
Roll call
54
Working with Groups
54
-I39
Cases closed
53
Casework Definitions
Groups
12
Non-Substantive Cases
12
Projects
12
Substantive Cases
12
Changing DBMS platforms
Changing servers
101
Checking spelling
89
Client
35
case history
37
details data
37
notes
37
Client attach to NSC
32
Client Lists
35
Client Management
35
Client merge
16
Clients
14, 35
Creating
35
Deleting
35
101
Importing data
24
Impoting referrals
24
Information Privacy
5
IRIS backup
26
IRIS closing
26
IRIS Configure
26
-LLicensing
11
Login
15
Login troubleshooting
Logoff 15
15
-MMain Window
7
Maintenance
73
Agency
81
Agency - Options
82
Agency - Outlets
84
Case
77
Case - Deleting
81
© 2003-12 Department of Human Services
106
Maintenance
73
Case - Modifying
80
Case - New Case
78
Staff 74
Staff - Adding
74
Staff - Changing
76
Managing Client Lists
Merging cases
44
35
-NNon-sub cases
13
Non-substantive case definition
Non-substantive Cases
31
Attaching a Client
34
clients
32
creating
32
Maintaining
33
Note template
88
Notes
87
NSC
31
Nursery Equipment Program
31
Reports Program Specific
Reports throughput
72
73
-S101
-PPassword
16
Project
27
Project activities
30
Project Creating
27
Project Definition
27
Project notes
30
Project user code
27
Projects
13
Saving comments
87
Saving notes
87
Spelling
89
Subcontracting
45, 47
Subcontracting Definition
45
-T-
-QQuarterly data export
Referrals
20
Referrals encryption
20
Referrals importing
24
Reporting to DHS
17
Reports
55
Case Details
67
Case Statistics
67
Case Summary
66
Cases
65
Client Details
62
Client Statistics
62
Client Summary
61
Clients
60
Non Sub Cases
58
Projects
57
17
Templates for notes
88
Text
87
The Subcontracting Process
Timestamp
88
Timestamp notes
88
tracked referrals
53
Tracking referrals
20
Transferring Client Data
95
Troubleshooting
99
47
-RReceiving Referrals
Referral
45
lead
47
partner
47
shell
47
sub
47
53
referral close
53
Referral create
other agency
49
self 49
sending
49
tracking
49
Referral receiving
import
53
Referral tracking
20
© 2003-12 Department of Human Services
-UUser code
30
User code - NSC
32
User code - projects
27
Utilities
90, 95
Backup
94
Configure
90
Configure - Database
90
Configure - Database Connection
Configure - Registration
90
Configure - Setup Key
90
Deploy
97
Deploying Upgrades
97
Restore
94
90