1
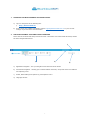
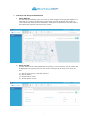
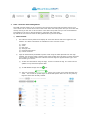
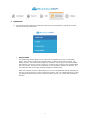
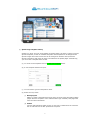
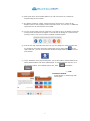
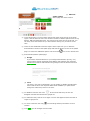
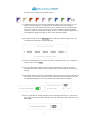
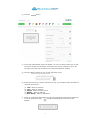
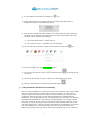
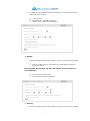
BLUECLOUDWIFI CUSTOMER PORTAL USER MANUAL
- Document v2.2
1
INTRODUCTION
This document outlines the features of the BlueCloudWiFi Customer Portal.
OVERVIEW
It is designed to allow end users free WiFi access in return for data capture via social media or form
submission. This method enables an enhanced marketing focus for venue owners, whilst giving the
end user a free WiFi service.
The intention of the Customer Portal is to give you the ability to utilise personal data gathered when
visitors access your WiFi network.
2
1.
ACCESSING THE BLUECLOUDWIFI CUSTOMER PORTAL
a)
Log in to the portal via the following link:
i)
b)
2.
http://bluecloudwifi.me
Access using your supplied credentials. Contact [email protected] or your account
manager if you don’t have this information.
THE BLUECLOUDWIFI CUSTOMER PORTAL OVERVIEW
Some areas of the Portal will always remain the same. The header area of the Portal will always contain
the same navigational features:
c)
d)
a)
b)
a)
Application navigation - how you navigate around the areas of the Portal.
b)
Hierarchical navigation - allowing you to switch between Customer, Group and Venue level features
and reporting views.
c)
Profile, Portal Settings and system log out dropdown menu.
d)
Language selector.
3
3.
HIERARCHICAL NAVIGATION
The Customer Portal is built using a hierarchical access and privilege structure. Both users and
features within the Customer Portal are hierarchy-specific. The hierarchical structure of the
Customer Portal is built in the following way:
a)
Customer
The customer level is the highest level within the Customer Portal, allowing management of all
users and levels that are created within it.
b)
Group
Groups work like folders. You can use them to group your venues into manageable folders.
c)
Venue
Venues are any location or area that you can assigned hardware to.
d)
Hardware
Pieces of hardware are the routers or access points you have within your venue.
Users are assigned at a hierarchical level and will have access to the level they have been assigned
to, as well as any levels (groups and venues) below. For example, a user assigned at ‘Customer’
level will have access to any users, groups, venues and pieces of hardware associated with that
customer. Alternatively, a user assigned to a ‘Venue’ level will only have access to users and
hardware associated to that specific venue.
4.
LANGUAGE SELECTOR
The portal has been translated into numerous different languages, and these can be selected using
the drop down menu at the top of the portal. The portal will pick up the default language of the
browser in which the portal is opened and will automatically translate to that language if it is
available.
4
1.
DASHBOARD
The home of the portal is the dashboard, the dashboard will differ depending on your login credentials.
The view can be changed by clicking the top right drop down and selecting the relevant view.
a)
b)
c)
a)
Customer level dashboard
This view will show a map with all their venues that have been added to the portal. Any reports
will be a accumulative value for all venues.
b)
Group level dashboard
This view will again show a map but only the venues that have been assigned to that this group
will show. Any reports will be a accumulative value of the venues in that group.
c)
Venue level dashboard
This view will only show their specific venue information. All reports will only be on this venue.
5
a)
Customer and Group level dashboard
i)
Venue Map tab
The map will automatically zoom to a venue or show multiple venues grouped together. If
more than one venue is located close to each other the map will display the number of
venue rather than showing them individually. Clicking the numbered icon will then zoom in
and expand the selection and show all the venues.
ii)
Venue List tab
This will display all the venues applicable to the login, so if at customer level all venues will
be displayed or if at group level only the venues in that group will show. From here you
can:
(1)
(2)
(3)
(4)
See the users online in the past 24 hours.
See the Status.
Impersonate a venue.
Access specific venues.
6
b)
Venue level dashboard
This view will only show specific venue information. All reporting information will only be for that
venue.
7
i)
The Dashboard consists of elements of data, giving you an overview and snapshot of each
of the major areas of the WiFi Module. Upon logging into the system, you will see the
following elements:
(1) Overview
(a) Exposure during the last week
Number of new likes or follows over the past week, with a percentage to show the
increase/decrease in relation to the total number of likes recorded from one week
previous to the total number of likes currently received for the page/account being
linked.
(b) Total WiFi users to date
This shows the total number of users which have authenticated onto the WiFi since
the venue was signed up. This is a unique number of visitors based on the
registration method - it does not take into account multiple visits by the same user.
(c) Users Currently Online
This is the current number of users right now at your venue. Thie figure is based on
the current number oflive authenticated RADUIS databse sessions and will be
dependent on your network idle time out setting.
(d) Data Usage
Shows the amount of data upload and download in Megabytes (MB) on your WiFi
network over a 24 hour period during the last 8 days.
(2) Reports snapshot
(a) WiFi users
A column chart depicting the age range of the visitors to your venue. Within each
age range the gender is broken down into male and female visitors, showing the
ratio of male to female visitors at a glance. Hovering over the gender specific colour
for each age range will give you the figure in terms of visitors.
(b) Demographics
Two pie charts show the breakdown of age on a per gender basis. This will give you
an overview of the age ranges within each gender, as opposed to the bar chart
which is a gender breakdown within age ranges. Hovering over a particular
segment will give you a percentage of visitors within that age range.
(c) Visitor by Browser
Set by the device accessing the WiFi, these bar charts offer an insight into the
range of different devices connecting to the WiFi. Each time a device connects to
the network it 0passes certain parameters which we can use to check against the
most common devices on the market. Some lesser known devices will be grouped
together under “other”. The drill down will give an indication of the users using this
browser to gain access to the WiFi.
(d) Visitors by Operating System
Details the Operating System used by the connecting device, this bar chart depicts
the different types of browsers detected for browsing on the WiFi. Each device may
have multiple browsers associated with it. Each time a new browser is loaded from
the same device we record an entry into this section of the report, which displays
the most popular browsers used. Only the more well known browsers will be
displayed in this section, any browsers that are less known will appear as
8
categories under “other”. The drill down will give an indication of the users using
this Operating System to access the WiFi.
d)
Download option
You can now download a PDF report of all the above data ahown on the page. It will open
another window with the data displayed, this can then be printed if required.
e)
Page tours
Page tours is avialable in all areas of the portal, it gives you an explanation of what is
available onscreen. Page tours will either explain all that is available or a specific
section.
TIP! Some of the graphs within the Customer Portal hold additional information. If you mouse over a
graph or pie chart and see a
up that data set.
you can click on the information and see a list of users that have made
9
2.
REPORTS
Reporting is broken down into different areas and these can be accessed on the left of the screen. Each
section contains relevant information, a breakdown will appear at the tope of the screen. Clicking any of
these sections will take you to that part of the reporting page.
a)
The three different areas are as follows:
i)
Overview
(1) Users by day
This area graph shows the unique authenticated users per day for the past 28 days,
split by gender. It does not take into account multiple visits by the same user on a
single day.
(2) Cumulative users and sessions
This line graph shows the cumulative number of users and sessions over the past 12
months. Each month is the total number of users to that month. Users are unique and
sessions are the number of authenticated sessions. (ie any visit by any user)
(3) Users by month
This area graph shows the number of unique authenticated users per month for the
past twelve months, split by gender. It does not display repeat visits in a month.
(4) Users by month (new vs repeat)
This area graph shows the number of unique authenticated users per month for the
past twelve months, split by new vs repeat users. It does not display repeat visits in a
month, or repeat visits by a new user within the same month.
(5) Top venues by daily average (last 28 days)
This column graph shows which of your venues have been busiest (looking at the daily
average of unique visitors) in the past 28 days, split by gender. It only considers users
per day and doesn't include repeat visits in the same day.
(6) User demographics
This column graph shows the age/gender breakdown of your entire user database.
10
ii)
Visitor Reports
(1) Total WiFi Users
A table showing total WiFi users in this time period. A new user who visits again will
appear as both a new and repeat user, so the total of new and repeat users may not be
the same as the total unique users.
(2) WiFi Users by Day
A column graph showing WiFi unique users by day. Repeat visitors will only be counted
once. Clicking a column will display the users behind the number.
(3) Gender
A column chart depicting the age range of the visitors to your venue, Within each age
range the gender is broken down into male and female visitors, showing the ratio of
male to female visitors at a glance. Hovering over the gender specific colour for each
age range will give you the figure in terms of visitors.
(4) Age
Two pie charts to show the breakdown of age on a per gender basis. This will give you
an overview of the age ranges within each gender, as opposed to the bar chart which is
a gender breakdown within age ranges. Hovering over a particular segment will give
you a percentage of visitors within that age range.
(5) Visitor Locations
This column graph shows the most common locations of your WiFi users. It doesn't
display repeat visits by the same users.
(6) Visitor Sources
This column graph shows which social media network each user has used for
authentication. It doesn't include repeat visits by the same users.
iii) Network Reports
(1) Operating System
This column graph shows devices that have associated to the venue's WiFi, and is
calculated from the User Agent of the device.
(2) Browser
This column graph shows browsers used by devices associated to the venue's WiFi, and
is calculated from the User Agent of the device.
(3) Data Usage
This line graph shows daily total data usage in MBs by clients associated to the venue's
WiFi.
11
(4) WiFi Usage Duration
This shows the daily usage average length of usage in minutes for each client
associated to the venue's WiFi. It is calculated per session.
(5) Top Requested Domains
This shows the top requested domains for requests made through the venue’s WiFi.
(6) Top Requested Categories
This shows the top requested categories grouped by requests made through the
venue’s WiFi.
(7) Most Blocked Domains
This shows blocked domains for the requests that were made through the venue’s WiFi.
(8) Most Block Categories
This shows categories based on blocked requests that were made through the venue’s
WiFi.
iv) Social
(1) Social Trends
This will show you what your users are interested in.
(a) Facebook Likes Percentage
12
(b) Facebook Likes Count
(2) Facebook Reports
This will show how much social exposure you’ve achieved over a certain period.
(a) Number of Likes and UnLikes
A scatter graph of the number of likes received over a specified time period, broken
down by. This is accompanied by a bar chart showing negative values for each
unlike a page has received.
(b) Recent Social Exposure
This table demonstrates the social awareness of your Facebook page. It gives you
the total number of friends your page has received, the number of posts made
within the date range and the maximum (estimated) number of people your post
may have reached. This is extracted from the Recent Social Exposure table on the
reports dashboard.
(c) Page Impression by Users
This column chart offers a daily breakdown of the total number of impressions seen
of any content associated with the linked Facebook Page. The impressions can be
described as the number of people that have seen any content which is associated
with the currently connected page. This is the total number.
13
(d) Page Impressions by Gender/Age
A breakdown of the page impressions over the time period, for Facebook, broken
down into age groups and then separated by gender. This can give easy access to
information about the most popular age range and gender to which the page
appeals.
(e) Impressions by Age for Gender
A breakdown of the page impressions over the time period, for Facebook, separated
into two pie charts showing different genders. Each pie chart breaks these gender
specific figures down into age range segments to show the most popular age group
within each gender.
(f) Top 5 Cities
This chart uses the page impressions data to calculate the most popular five cities
from which the visitors viewing have come from. This data has been unique so that
multiple visits to your page by the same user are only counted as one.
(g) Impressions by Source
A pie chart representation of the split of how your page impressions have been
sourced. This has been broken down into three main sections:
Organic - The number of people who visited your Page, or saw your Page or one of
its posts in a new feed, ticker or similar. The impressions are made up of both fans
and non-fans of the page.
Viral - The number of impressions of a story published by a friend about your Page.
These stories include liking, posting, commenting on or sharing one of your Page
posts, answering a Question you posted, RSVP’ing to one of your events, or in any
way interacting with your page or post.
Paid - The number of impressions of a Sponsored Story or Ad pointing to your
Page.
TIP!
You can specify the date range of reports within the Reports area using the date filter options. Reports
can be filtered by the last 7, 14 and 30 days. You can also filter reports according to a specific date
range by clicking on the calendar icon and selecting the ‘to’ and ‘from’ date range you wish to view.
14
2.
CAM – Customer Asset Management
The CAM overview shows you an overview of the devices and users that have been seen at your
venue. Each user or device has its own ‘Profile card’ within the CAM system and you can launch this
card by clicking on the user or device name. From within the profile card you can access detailed
information on the user or device behaviour, add notes and create tags.
By default the overview will show all data gathered during the last 30 days.
a)
CAM overview
i)
The CAM overview by default will display all users and devices that have logged into the
network. The follow information is available from the overview screen:
(1)
(2)
(3)
(4)
(5)
(6)
ii)
Visitor.
Visits.
Last seen.
Average Visit.
Favoured Connection.
E-shots received.
Tags will automatically be added to profile cards using the data captured from the login
method. You can also create customer tags within profiles and use these to search and filter
your visitors. By default within the CAM overview two tags are applied ‘Profile type: User’
and ‘Profile type: Device’.
(1) To filter the information using the tags, click the X within the tag. The visitor list will
update to only show that specific data.
(2) To add additional tags click the
icon.
(3) The icon will change
allowing you to enter a tag name and then the
value. . The screen will update again to show that specific data. You can only filter by
tags that have been already created.
15
b)
Accessing profile card
i)
To access a user or device profile card click the relevant visitor from the list.
ii)
The profile card will open and the details will be displayed, the data that is shown is
dependent on the authentication method used to log into the network. It is also specific to
whether they are a user or device.
iii) The profile cards open will be displayed on the left hand side of the screen, you can click
between the profiles and the CAM over screen. To close profile click the x next to each
profile.
iv) The profile card will display the following information:
(1) User Profile
Shows information captured from the social login and the venues visited.
(2) Visitor Tags
Tags allow you to associate pieces of information to a user or device within CAM.
(3) Venues visited
A lists of venues visited by the user / device with information of the number of times
the venue has been visited, the date of the last visit and the time spent at the venue.
(4) Visitor notes
Shows any notes you have saved against this user or device.
16
(5) Devices used
Lists all the devices associated with this user, showing the device type, the MAC
address associated to the device, the OS installed on the device and the number of
times we have seen the user using the device.
You can launch the profile card for any devices listed by clicking on the MAC address
link for that particular device.
(6) Connection methods
This area lists the various ways this user or device has connected to the WiFi service.
Showing the connection type (Facebook, Google, registration form etc.), and the
number of times that connection type has been used.
v)
c)
You can click the view all button next to each area, this will open up additional tabs at the
top of the profile card displaying all the information captured for this profile.
Visitor Tags
Certain tags will be created automatically by the portal using the information captured for the
user login details. If it is a device profile card it will use the information captured from the
device to create tags. But you can create your own tags to assign information to profiles, this
then allows you to filter your customer by the information you enter.
i)
Creating Tags
(1) To create a tag click the
icon.
(2) You will need to add the Keyword for the tag.
(3) When you enter your keyword click the tick icon to confirm or to delete click the x icon.
(4) Now enter the value and again click either the tick or x.
(5) The Tag will now appear with the other tag already created. This information can now
be used to filter the data on the CAM overview screen.
17
3.
MARKETING
a)
The marketing tab contains four different areas, these are accessible by clicking the relevant
option from the right hand side.
i)
SPLASH PAGE
The Splash Page facility allows you to customise the appearance of your venue splash
pages. There are two versions of the splash page, an offline and an online version. The
offline version is the authentication page your customer uses to login to the BlueCloudWiFi
WiFi network. The online version is what your customer sees once they have authenticated
onto the network. The pages can be identical or look completely different. If identical, the
only difference will be the login methods changing to website links.
When the customer views the splash page, the view will automatically change depending on
the type of device they are using to access the network. There is a desktop browser version
(for laptop and tablet devices) and a mobile browser version. (for mobile and smartphone
devices)
18
(1) Splash Page template Library
Similar to e-shots, we now use templates for splash pages. We have a number of sector
specific templates, as well as a default template. Each template will be designed with
specific images and colours but these can be changed or deleted. Venue/customer
specific information and logos will have to be added to the splash pages. Alternatively,
you can create a template from scratch.
(a) To create a new template click the create new template button.
(b) A new template window will open.
(c) You will need to give this template a name.
(d) Select the Use, either:
(i)
Multi-purpose
Ability to create a template that will be active for both online and offline splash
pages. With the exception of the authentication login methods, both pages will
have the same information.
(ii) Offline
Just the Authentication splash screen, if only this is created then the customer
will be redirected to the URL specified in the portal.
19
(iii) Online
If you want content to be completely different to the offline version, you need
to create an online splash page. You would still have to create an offline version
to go with this version but you have the ability to make them completely
different. When this template is used you do not get an option to publish the
splash page. To assign the online version of the splash page you need to set
this in the setting area (Please see Splash page settings area of the manual)
(e) Select the Ownership scope.
This is specific to the user’s login credentials and will determine what is available in
this drop-down. The selection here will also determine the “Owned by” area drop
down. It can be set to Customer level, Group level or Venue level.
(f) Select the Owned by.
This is specific on what was selected on the previous drop-down.
(g) Click Create new when all the details have been entered.
(h) The template creation screen will load, it is split into two areas for ease:
(i)
Header Management Tab
Here you can add your header information such as venue details, logo,
background images and login methods. If multi-purpose was selected you can
also switch between the offline and online pages.
(ii) Content Management Tab
Here you can enter content to appear below the header information and you
have the ability to add content such as social feeds, weather, images and text.
If multi-purpose was selected the content you add here will appear on both
offline and online pages.
(i)
The Header Management area will load first by default.
20
(j) From here you will first need to add your company/venue logo - the required
settings for the logo are within the element.
(k) Click the Upload your header logo button. The load window will open; navigate to
where your logo is saved, selected it and then click Open.
(l)
Below the logo is an area to add content about the venue/company, some default
text will already have been added. You can delete this and enter your own
information. There is a limited number of characters you can use in this text box.
(m) You can change the font colour by click the
icon in the bottom left of the
box. The following option will appear and you can now enter your required colour.
21
(n) Now select which social media platform you will have active as a method of
authenticating to the network.
(o) By default, Facebook, Twitter, Google and Form will be active. These will be
displayed next to the company/venue information area. You can turn on additional
logins and turn off ones that are not needed.
(p) To turn on/off a login click the circled icon. Any that are grey are already turned off.
Clicking these will make them appear in the list and will change to a coloured icon.
Clicking a colour icon will turn off this method of authentication.
(q) Once all the login methods have been set you can change the order in which they
are located on the page. Each login method will have a drag handle
on the
right hand side - you can click onto this handle and drag and drop the icon into its
new position.
(r) If you selected a multi-purpose template, you are also able to switch between the
offline/authentication and online splash pages. To change between the two, click
the relevant button. The available options are: Auth
and Online
.
(i) Edit
Connection method
Authentication or offline page with
social logins.
22
(ii) Edit user
online options
Online page with links to URL’s.
(s) In the Online page you have similar options but rather than turning on/off social
logins it will be URL links. We have created a number of default options such as Trip
Advisor, BBC and Huffington Post. The process is the same as the social side, you
can add, move and remove but you are limited to having only six active at one
time.
(t) There are two additional boxes that require some input from you on both the
Authentication version of the splash page and also the Online version of the splash
page. To access the additional options click the Pencil
icon on the relevant box.
(u) Authentication/offline splash page:
(i)
Google
If you add a restricted domain to your Google authentication journey, only
visitors with a Google registered email address that matches the restricted
domain will be able to authenticate using Google. Enter the domain and click
Save updates.
(ii) Form
The form is now fully customisable, you can enable or disable all fields apart
from Email as this is still required. Make fields mandatory or optional and
change the orders they show on the form.
(v) To disable a field click the circle
at the end of that field, the tick will
disappear and the field will become greyed out.
(w) To enable the field, click the circle again. The tick will appear and the field will no
longer be greyed out.
(x) To move a field click the drag
icon and drag and drop the field to its new
location.
(y) Click Save once all changes have be made.
23
(z) Online Splash page:
(i)
Website
Here you can enter your company/venue website URL and then click ‘Save’.
(ii) Useful Info
Here you can add a contact line or content box, useful for adding contact
names and telephone numbers and adding text like travel instructions, policy
information etc. To add, click the relevant option at the bottom of the window.
You can add as many as required of either.
(aa) You can change the layout of the header area by clicking the move
icon.
This will allow you to change the order in which the header content is displayed,
you can reposition any of the boxes. This means the information will be displayed
differently when accessed on a mobile device for example, you might want the
social logins to appear before the company logo.
(bb) You can apply a colour scheme by clicking the palette at the top of the screen.
There is the primary fill which is the heading colours and the background fill that
will give the page a background colour.
Clicking the colour dropper icon
24
will allow you to specify the required colours.
(cc) Towards the bottom of the header management page is the area where you can
select a header image(s). The image(s) will sit behind the venue/company
information and social logins/URL links. You can change this into an image slider
when more than one image is selected and it will periodically change the image
when the customer is accessing the page. If this is a multi-purpose template then
the background image will apply for both online and offline pages.
(dd) To add an image, click the Add image button within the header image area. (the
required picture settings are also displayed)
(ee) The last accessed folder on your PC will open; navigate to where your images are
saved, select and click Open.
(ff) You can add further images if required and as mentioned, if more than one is
uploaded, the header will become an image slider and the image will periodically
change.
(gg) The header height will be set automatically but this option can be set to No, this will
then allow you to specify to height in pixels manually. If left to automatic the size
will adjust depending on where you position the boxes within the header.
(hh) If you would like the header image(s) as a full background image you can now do
this; switch the option button within the ‘One full size background image’ box from
No to Yes.
25
(ii) You have now created the header and we can now add the content. Click the
Content Management tab.
(jj) The screen will change and you will have one module by default, a Multi-purpose
content box. You can add further modules if required by selecting one from the
library drop-down menu.
(kk) Available options are:
(i) Multi-purpose content box
This is the main module you will use within
the splash pages. You can turn off elements
not needed and reposition sections as
required. To enter content, click into the
relevant section and either type your content
or click the add image button to upload an
image(s).
There are three elements to this module:
Heading Section.
Image Section.
Text Section.
You can turn off an element by clicking the relevant icon at the top of the
module.To move a section use the handle
icon within each section and
drag and drop into its new position.
(ii) Twitter/Facebook Feed
This will drag through the venue’s selected live social feeds and will update
automatically. You can click the “Load Next” button to load more content.
(iii) Local Weather
This weather widget is Geo-specific, it will
use the information supplied in the portal
(venue address) to pick up the location. The
venue can specify a location within the portal
if required. As with the social feed, you can
click the “Further ahead” button to see
additional content.
26
(ll) As you start adding the modules to the page they will start to appear on the left
hand side of the page. You can reposition these modules to anywhere on the page.
The page is set up into two columns so you have the option to drag and drop onto
either the left or right hand side of the page.
(mm) To move the module click the
its new location on the page.
icon, then drag and drop the element to
(nn)
On the weather module you have an additional icon
, this allows you to
change the weather location. The following window will open, where you should
type in the new location and click search. The system will find the location
specified, then click update to save.
(oo)
Now you have completed the Content management area you can preview the
splash page. You have the option to preview the page as a mobile phone user or a
laptop user. The view will change depending on what is selected.
(pp)
Click either the laptop icon
or mobile icon
at the top of the screen.
An additional webpage will open displaying the splash screen. The same icons will
be at the top of the screen, allowing you to easily swap between the two views.
(qq)
You can select the Header Management tab and change from Offline to online
and preview again to see how both pages will look.
(rr) Once you are happy with the content on both pages, you will need to publish the
pages to make them live for your venue or click the X icon and this will take you
back to the splash page management screen. The new Splash page will be
displayed in the You template area.
(ss) Click the
Publish button and a “Public Setting” window will open.
(tt) Clicking the drop down will display the available options for your login. As
mentioned, your login will determine where you can publish the splash pages.
When a selection is made, an additional drop down will appear, giving additional
options dependent on the first selection.
27
(uu)
All available levels for assigning splash pages are:
(i) Customer Level
This will assign the splash page(s) to all the venues belonging to this customer.
(ii) Group Level
This will assign the splash page(s) to the specific group selected, a group can
contain multiple venues or just one.
(iii) Venue Level
This will assign the splash page(s) to a specific venue, you can have different
splash pages for different venues if required.
(vv)Once published it will appear on the main page below the heading ‘Your Templates’.
It will display:
(i) Template name
The name you gave the template when first created, this can be change even
after being published by selecting the
icon and updating the name.
(ii) Owned by
Who created the template.
(iii) Date created
The date it was created.
(iv) Use
The type of template - multi-purpose, offline or online.
(v) Published
If it is published or not.
28
(vi) Applied to
Where splash page is assigned to and to what level.
(ww)
(i)
There will also be a number of options available to this template, these are:
Update details
Ability to update the Publish details, including the template name, Use and
Ownership.
(ii)
Duplicate
Use this template content for a new template.
(iii)
Preview
Will open a webpage displaying the splash page.
(iv)
Delete
Will delete the template from the system completely.
(2) Splash Page Templates
(a) You can use one of the sector specific templates or the BlueCloudWiFi default
template. These templates will have images and colours specific to the template
theme and will require less input from you. The system templates are located at the
top of the Splash page screen under the heading ‘System template’.
(b) To preview the template click the
icon, this will open a new browser window
and display the sector specific splash page.
(c) To use a template click the
duplicate icon next to the template required.
(d) The process is now the same as creating a new template, please follow the above
instructions to complete this splash page(s).
(3) Splash Page Settings/Redirects
Within the settings area you can set up the splash page redirects (if required).
Redirects work differently depending on the template you selected originally when
creating the splash page. If a redirect is needed and one is not set at Venue level then
the system will revert to the Customer level redirect, as a default the redirect set at
customer level is always http://www.BlueCloudWiFi.net/sectors/. This can be changed
to any URL address. The following template options are available:
(a) Multi-purpose
If when creating your splash pages you selected only a Multi-purpose template you
will have no option to use custom URL redirect. A multi-purpose template is an
offline and online splash page created at the same time. The portal sees this and so
knows a custom redirect is not needed.
29
(b) Offline
If only an offline template was created then a drop down menu will appear, clicking
this will display any offline templates. Select the relevant template, an empty field
box will appear allowing for a URL address to be entered. Click Save customer
redirect when complete. The redirect is now set and all customer to that venue will
be redirected to the specified URL address once authenticated. Click the Delete
button to delete the custom URL redirect.
(c) Online
You cannot create just an online version of the splash page you must create an
offline version also. You create an online version of a splash page when you want it
to look different to the offline version. If it is to look the same you would use the
multi-purpose template. When both the offline and online splash pages have been
created the drop down menu will display 2 options, selecting:
(i)
URL redirect
Users will be redirected to a specified URL. (see previous instructions)
(ii) Online template
Users will be redirected to the created online splash page. Selecting this option
will give you an additional drop down menu, this menu will display any created
online splash pages. Once selected, click Save customer redirect to save the
details. If the redirect is no longer needed click the Delete button.
30
ii)
E-SHOTS
The e-shots facility allows you to create e-shot offers that can run from and to a specified
date range, and be issued to visitors of your venue based on predefined parameters.
So, for example; a venue owner could create an e-shot that would entitle recipients to a
‘buy 1 bottle of wine, get 1 free’ offer. The venue owner could then specify that the e-shot
would only be eligible to males and females who are aged between 20 and 25, who have
visited a particular venue five times in the last seven days.
All e-shots are distributed to recipients in the form of an email, with the e-shot offer
embedded within the body of the email.
(1) Creating a new e-shot
(a) To create a new e-shot, click the create new button located in the top of the right
hand corner of the e-shot module.
(b) You will now be presented with a Create your e-shot window.
(c) Enter the name of the e-shot.
(d) Select the e-shot type (see E-shot parameters and Historic User Matching
section for explanation) this can be either:
(i) Visit Based.
(ii) Birthday.
(iii) Top Customers.
31
(e) Click the proceed button.
(f) The e-shot management screen will appear, you can now start to build your e-shot.
The screen is split into two areas, on the left is the area to create the e-shot. On
the right is the area you can define the e-shot parameters for sending.
(g) Click the Add an element to your e-shot drop-down menu.
(h) Select the element you want to add from the list, you can add as many elements as
required. Select either:
(i)
(ii)
(iii)
(iv)
(v)
(i)
Title - ability to add text.
Text - ability to add text.
Image - ability to add a picture.
Ribbon - ability to add text.
Date Range - ability to add dates.
When an element has been added you can then reposition this anywhere within the
e-shot by clicking the drag
handle and dropping the field into its new
position.
32
(j) You can delete the element by pressing the
icon.
(k) If you add an image to the image element, the required size and format is
displayed to help when formatting the picture.
(l)
Once all the elements have been added you can then select the colour scheme by
choosing from a selection of pre-defined colour themes located above the e-shot
elements. Colour schemes are defined by:
(i)
The e-shot border colour - Primary colours.
(ii) The e-shot ‘fill’ colour - Secondary is for the elements.
(m) You are also able to specify a custom colour scheme by clicking the
icon.
(n) Once all complete, click the Save changes button.
(o) You can now preview the e-shot, click the Preview button
in the top right of
the screen.
(p) The e-shot will change on screen to show how it will appear in the email.
(q) If further amendments are required click the Edit button
.
(2) e-shot parameters and Historic User Matching
Once you have populated your e-shot and chosen a colour scheme, you’ll need to define
who the e-shot is issued to by specifying the e-shot parameters. You can specify a
range of criteria that must be met in order for a user to receive the e-shot you have
created. By selecting the type of e-shot and then selecting the available defining
parameters, you can target exactly who is rewarded with the e-shot offer. For example,
parameters can be based on a user’s gender, age demographic, the number of times
they have visited one of your venues in a given time frame and their birthday, as well
as the top 10, top 25 and top 50 customers. Historic User Matching allows you to see
how many people your e-shot will currently reach based on the parameters you specify.
It is only available in the ‘Visit based’ e-shot type, you can turn off Historic User
Matching by selecting ‘First time visitor’ option in the parameter type. Your e-shot will
33
only be issued to users who meet the criteria you have set going forward, and historical
matches in the systems database will be ignored.
(a) Now define your parameters using the options to the right.
The type of e-shot selected initially will determine the defining parameters criteria.
However, you can select alternatives from the drop down menu at the top of the
screen.
(b) Click the Type of e-shot drop-down and select a different type if required.
Visit Based
Ability to define recipients gender,
age range, venues visited, previous
or first time visitor, number of visits
and during the last amount of
days/weeks/months/ years.
Top Customers
Can send e-shot to the top 10, top
25 and top 50 customers. you still
have the options to specify gender,
age range, venues visited and
during last number of times. The list
of recipients will be displayed at the
bottom of the screen. You can
exclude names if required.
Birthday
Uses available dates of birth
(customer would need to have
provided their date of birth when
authenticating on the system) and
can specify if e-shot will go out 1
34
day, 1 week or 2 weeks before their birthday. There is also an option to send a standard e-shot on the
actual birthday.
(c) Enter the required defining criteria.
(d) Once completely finished click the Save Changes button again.
(e) You now have 2 options:
(i)
Return to Library
This will not publish the e-shot but take you back to the e-shot template
screen. As long as you saved the e-shot it will now appear under the ‘Your Eshot’ template area with an ‘In Development’ status. Clicking back on the eshot name will re-open the e-shot.
(ii) Publish
Will publish the e-shot and send out now or at a later date depending on the
defining criteria selected.
(3) E-shot statuses and publishing your e-shots
(a) By default, new e-shots will have an In Development status. This means you can
build and tweak your e-shots content and parameters before committing to your
settings and sending the e-shot to any recipients.
(b) Click the Publish button in the top right hand corner; this will publish your e-shot
live and change its status to published. At this point the e-shot you have created
is locked and you will no longer have the ability to edit details or change
parameters.
(c) The following message will appear on screen advising of the above, click the
OK
button to proceed.
(d) Once published, if Historic User Matching is enabled, the e-shot will automatically
be emailed to any user matches currently in the database. The number of issued eshots is displayed on the main screen on the right of the published e-shot.
(h) You can click on the number of issued e-shots and it will break down and list all the
recipients.
35
(i)
Published e-shots can be cancelled at any point by clicking into the e-shot and
clicking the Delete button. A window will open advising that once deleted, it will no
longer be available. Once deleted, the e-shot will be removed from the ‘Your Eshots’ area but you can duplicate the template beforehand to use content again for
future e-shots.
(4) Editing ‘In Development’ e-shots
In development e-shots are listed at the bottom of the e-shots module below the
system templates. To amend an e-shot, click on the title in the left hand panel and the
chosen e-shot will be loaded.
(a) You can now make amendments. You can delete an image by clicking the delete
icon. Once an image is deleted, it will be replaced with an ‘upload’ button that
will allow you upload a new image.
(5) Using an existing template
(a) There is only one system template existing (Birthday venue invite) but you are able
to use any created e-shots as a template.
(b) To use a system template or an existing e-shot as a template, click the duplicate
icon to the right of the required template/e-shot.
(c) A create your e-shot box will appear.
(d) Enter a name for this e-shot.
(e) Select the e-shot type and click proceed.
36
(f) The e-shot template will load with the content already created. You can now either
alter, delete or add further content if required.
(g) You can also change the colour scheme for the primary and secondary colours.
(h) If you selected the ‘Birthday venue invite’ template, the e-shot will be created with
a birthday theme and only the parameters would need adding. Please refer to
Creating a new e-shot.
iii) ACCESS POSTS
(1) Posting frequency
(a) The Access Posts functionality allows you to choose whether or not customers
logging onto the BlueCloudWiFi WiFi network are asked to post a promotional
message to the wall of their preferred social network channel. The customer will be
granted access to the WiFi network whether they agree to post the message or not.
Should you choose to ask a customer to post this message to their social network
wall, you can also specify how many times in a given time period a customer will be
asked to do this.
(b) For example, a customer may visit ‘John’s Coffee Shop’ 4 or 5 times in the space of
a week and may not want to be asked to post a message every time they enter the
venue. In this case, you are able to specify that you would like to ‘limit posting to
their timeline once every:’ by using the drop down menu.
(i)
1 day.
37
(ii) 3 days.
(iii) 1 Week.
(iv) 1 Month.
(c) Alternatively, you may not wish to ask a customer to post a promotional message
to their social timeline. In this case, you can turn this functionality off completely
by sliding the ‘Enable social posts (user decides to post or skip): Yes / No slider to
No.
(2) Saving your changes
(a) To update the changes to the system, you must click the Save button located just
below the drop down menu.
(3) Access post content & scheduling
(a) In addition to controlling if and how often a customer is asked to post to their social
network wall, you can also specify the content of the message that the customer is
asked to post and if / when you’d like this content to change.
(b) When updating your access post, you have two additional options:
(i)
The image embed icon allows you to attach an image to the status update
you are creating. Clicking the camera icon allows you to navigate to an image
on your computer hard drive and insert the image into the post you are
creating.
(ii)
The calendar icon allows you to schedule your status updates. For more
information on scheduling, refer to ‘Scheduling your message content’.
(c) You can also specify which social media platform this will post to. By default any
accounts set up within the system will be active. To turn off a social media
platform, click the relevant icon
in the top right of the screen. The
icon will become grey and this means it is now inactive.
(4) Scheduling your message content
(a) By default, the scheduling module will show you a list of your current schedule
status updates.
38
(b) From within this list you can edit
or delete
your current scheduled
entries. You can also see which of your social media networks the scheduled status
is set to post to
.
(c) By clicking the scheduling icon within the status update window
, you will initiate
the status schedule module which will replace the schedule lists view.
(d) You can switch between the schedule lists and status schedule modules using the
button switchers:
(e) When scheduling a new status, you have four options to choose from:
(i)
Just once
Setting a scheduled post to post ‘just once’ will give you the ability to specify
the time frame and date range you want the schedule access post to run from.
(ii) Daily
1.
Setting a scheduled post to ‘daily’ will give you the ability to specify:
a.
The active date range you would like the scheduled access post to
apply from and to.
b.
A time frame to apply to each day.
NB if left blank, the schedule will start immediately and will continue to
run. Indefinitely
39
2.
In addition to the standard scheduling options, you can also specify if the
daily post will be posted:
a.
b.
c.
7 days a week.
Weekdays only. (Monday to Friday)
Weekend only. (Saturday and Sunday)
(iii) Weekly
1.
Setting a scheduled post to post ‘weekly’ will give you the ability to specify:
a.
The active date range you would like the scheduled access post to
apply from and to.
NB if left blank, the schedule will start immediately and will continue to
run indefinitely.
b.
c.
The chosen day of the week.
A time frame to apply to each day.
(iv) Monthly
1.
Setting a scheduled post to post ‘weekly’ will give you the ability to specify:
40
a.
The active date range you would like the scheduled access post to
apply from and to.
NB if left blank, the schedule start immediately and will continue run indefinitely.
b.
c.
The chosen date of the month.
A time frame to apply to each day.
iv) SOCIAL UPDATES & SCHEDULING
The Status Updates facility gives you the ability to compose and schedule a status update
from within the Verizon Portal. By turning on or off the Facebook, LinkedIn and Twitter
icons in the upper right hand corner of the Status Update module, you can define which of
your social networks it gets posted to: 1, 2, or all.
(1) When updating your status, you have two additional options:
(a)
(b)
The image embed icon allows you to attach an image to the status update you
are creating. Clicking the camera icon allows you to navigate to an image on your
computer hard drive and insert the image into the post you are creating.
The calendar icon allows you to schedule your status updates.
(2) Scheduling your status updates
(a) For more information please refer back to Access Post – Scheduling your status
updates.
41
TIP! You need to link your social network accounts to the Verizon Portal in order to benefit from the
‘social’ features. Linking your social network accounts is easy and straightforward. Instructions on how
to do this can be found in the LINKING YOUR SOCIAL MEDIA ACCOUNTS (SETTINGS > LINKING SOCIAL
NETWORKS) section of this document.
5.
SETTINGS
a)
Linking Your Social Media Accounts
i)
To fully benefit from all the features within the WiFi Customer Portal, you will need to link
your social media account(s) to the system.
ii)
Once your social networks are linked, this enables us to populate reports, grant you access
to your social network inboxes from within the Portal, allow you to view your social network
timelines and also update your social network statuses (where applicable).
NOTE. If you use the Customer Portal to manage multiple venues for your
business, you will need to link your social network accounts for each venue you
have within the system.
This venue based linking approach means that venues with their own social
network accounts (or social network business pages) can view and manage their
own reports and social network activity, independently of other venues within the
system.
iii) To link a social network account to the Portal, click the ‘Settings’ tab.
iv) Click the ‘Link this account’ button associated with the social network you wish to link.
TIP! When linking Facebook and LinkedIn accounts, the system will prompt you to link the
business account you have associated with that particular social network. With these social
networks, only the information from the business pages you have linked will be displayed
within the Verizon Portal - none of your personal data, messages or wall posts will be
linked.
v)
If the computer you are using is already logged into the social network you are trying to
link, the system will recognise this and auto-link the account with the Verizon Portal.
vi) If the computer you are using is not currently logged into the social network you are linking,
you’ll be asked to supply a username and password for the social network account in
question, and you will then be prompted to authorise the Verizon Portal to use that
network.
42
b)
Associating a social network business page (Facebook and LinkedIn)
i)
To link Facebook and LinkedIn social network accounts to the Verizon Portal, you are
required to have a business page associated with these accounts.
NOTE. If you do not have a business page associated within these account(s), you
will be unable to link them to the Portal.
ii)
Upon linking your social network account, you will be prompted to set the business page
you wish to associate with the Verizon Portal. If your social network account has more than
one business page attached to it, you can select the business page you wish to associate
from a drop down menu of available pages.
NOTE. When changing an associated business page, this will affect the data
linked from this page throughout the Portal.
c)
Unlinking social network account
i)
To unlink a social network account from the Portal, click the ‘unlink’ button associated with
the social network account you wish to unlink.
ii)
Unlinking a social network account will only unlink the account from the venue the social
network account is linked to within the Portal.
43
Should you have any questions regarding the Portal and its features, please contact:
[email protected]
support.bluecloudwifi.com.au
Or get in touch with your account manager
……… | ……
44