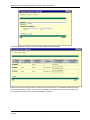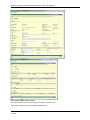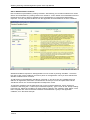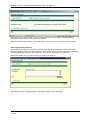
1
User Manual Version 2.2 15 August 2003 Statutory Planning Case Management System User Help Manual Table of Contents 1 2 System Overview (Understanding the System) ........................................................................................ 4 1.1 Background..................................................................................................................................... 4 1.2 Statutory Planning Case Management System.................................................................................. 5 1.2.1 Operating Environment ............................................................................................................. 5 1.2.2 Components of the System ....................................................................................................... 5 1.2.3 Data Storage.......................................................................................................................... 11 1.2.4 Electronic Notification.............................................................................................................. 12 1.2.5 Case Details........................................................................................................................... 12 System Administration.......................................................................................................................... 14 2.1 How to Register............................................................................................................................. 14 2.1.1 DSE Staff Currently registered to DSE Network ........................................................................ 14 2.1.2 Non DSE Staff (ie Staff at Parks Victoria) ................................ ................................ ................. 14 2.1.3 Notification of Registration....................................................................................................... 14 2.1.4 What can I see without a Password?........................................................................................ 14 2.2 System Security ............................................................................................................................ 14 2.2.1 Statutory Planning Coordinator ................................................................................................ 14 2.2.2 Case Manager ........................................................................................................................ 14 2.2.3 Action Officer.......................................................................................................................... 14 2.2.4 Administration Officer.............................................................................................................. 15 2.2.5 View ...................................................................................................................................... 15 2.2.6 Accredited Native Vegetation Assessor (NVA).......................................................................... 15 2.3 Logging In / Logging Out ................................................................................................................ 15 2.3.1 Statutory Planning Case Management System Home Page....................................................... 15 2.3.2 Logging In .............................................................................................................................. 16 2.3.3 Logging Out ........................................................................................................................... 17 2.4 Change Personal Details ............................................................................................................... 17 Change Password ................................................................................................................................... 18 3 Using the System................................ ................................ ................................ ................................ . 19 3.1 The Portfolio Manager ................................................................................................................... 19 3.1.1 Features of the Portfolio Manager............................................................................................ 20 3.1.2 Viewing Case Details .............................................................................................................. 22 3.1.3 Actioning a Case .................................................................................................................... 29 3.1.4 Case re-assignment ................................................................................................................ 29 3.2 The Workflow Manager.................................................................................................................. 30 3.2.1 Electronic Document Management .......................................................................................... 30 3.2.2 Creating and Actioning Cases.................................................................................................. 31 Version 2.2 15-08-03 Page 2 of 156 Statutory Planning Case Management System User Help Manual 3.2.3 Variations in the process associated with Mining Cases ............................................................ 63 3.2.4 Variations in the process associated with native vegetation removal .......................................... 68 3.2.5 Non Referred Clearing ............................................................................................................ 89 3.3 Managing your Case Load in SPCMS ............................................................................................. 92 3.3.1 Definitions .............................................................................................................................. 92 3.3.2 Portfolio Menu Options ............................................................................................................ 92 3.3.3 Reassigning Cases using the Portfolio Manager. ...................................................................... 94 3.3.4 The Reassign SP Coordinator Option ....................................................................................... 95 3.3.5 The Reassign Case Manager Option ....................................................................................... 98 3.3.6 The Reassign Case Owner Option ........................................................................................... 98 3.4 SPCMS Mapping ........................................................................................................................... 99 3.4.1 General information ................................................................................................................ 99 Spatial data layers ............................................................................................................................. 101 3.4.3 Searching for Statutory Planning Cases ................................................................................. 101 3.4.4 Toolbox................................................................................................................................ 101 3.4.5 Legend ................................................................................................................................ 112 3.4.6 Metadata.............................................................................................................................. 112 3.4.7 Record the Spatial Extent of the Application ........................................................................... 113 3.4.8 Add Zone ............................................................................................................................. 115 3.5 4 Reporting Module ........................................................................................................................ 117 3.5.1 Ad Hoc Case Reports ........................................................................................................... 117 3.5.2 Ad Hoc Zone Reports............................................................................................................ 122 3.5.3 Case Reports ................................ ................................ ................................ ....................... 124 3.5.4 Standard Reports ................................................................................................................. 126 3.5.5 Locate Similar Cases (Text) .................................................................................................. 128 3.5.6 Locate Similar Cases (Spatial) ................................ ................................ ............................... 129 3.5.7 Map Report .......................................................................................................................... 132 Reference Information........................................................................................................................ 133 4.1 Process Maps ............................................................................................................................. 133 4.2 Contacts ..................................................................................................................................... 133 4.3 General Information ..................................................................................................................... 134 5 Frequently Asked Questions ................................ ................................ ................................ ............... 135 6 Glossary of Terms .............................................................................................................................. 145 Appendix A - Scanning Documents............................................................................................................ 145 Appendix B-1 - DSE Spreg form.doc .......................................................................................................... 146 Appendix B-2 - non DSE Spreg form.doc.................................................................................................... 147 Index ................................ ................................ ................................ ................................ ....................... 149 Version 2.2 15-08-03 Page 3 of 156 Statutory Planning Case Management System User Help Manual 1 1.1 System Overview (Understanding the System) Background The Department of Sustainability and Environment (DSE) is a major referral body under several planning instruments including the Planning and Environment Act 1987, Flora and Fauna Guarantee Act 1988, Catchment and Land Protection Act 1994, Extractive Industry Development Act 1995, Alpine Resorts Act 1983, and the Coastal Management Act 1995. As a referral authority, the Department has a statutory responsibility to provide responses to all planning application referrals from Responsible Authorities (mainly local government). There is a time imperative associated with many planning applications - the Department has 28 days in which to respond to planning referrals under S 55 of the Planning and Environment Act and only 14 days under S 52. Land Victoria is responsible for coordinating the Department's response to referrals in a timely manner. Responses from DSE businesses (viz. Parks Flora & Fauna, Catchment & Agricultural Services, Forests, Minerals & Petroleum, and Aboriginal Affairs) and Parks Victoria are coordinated by statutory planning officers within the Land Victoria/Crown Land Management group of DSE. These officers are located in regional areas throughout Victoria and are the contact points for Responsible Authorities in respect to planning matters. Fig. 1. Flow of a typical referral case Application Applicant Responsible Authority Response Referral Authority (Land Vic on behalf of DSE) Register Case in Database DSE INTERNAL PROCESS Internal Consultation Response Consolidation Version 2.2 Page 4 of 156 15/08/03 Response Preparation Statutory Planning Case Management System User Help Manual 1.2 Statutory Planning Case Management System This system is the result of a regional initiative to solve an operational problem - to improve the internal coordination, management, and processing efficiencies of the Department's responses to land use planning referrals. By establishing a system that can facilitate efficient processing, and track and monitor cases referred to the Department, corporate risk can be reduced and service to clients (Responsible Authorities and applicants) can be improved. 1.2.1 1.2.1.1 Operating Environment Intranet The SPCMS is principally an operational tool for internal Departmental use on the Intranet web environment. Therefore no special software is required on individual PC's in order for it to work. This environment trades-off some performance and functionality for the advantage of being server based and easy to maintain. The application is accessed via the Land Victoria home page through a standard Web Browser such as Netscape 4.7 or higher which is available as part of the Department's Standard Operating Environment (SOE). SOE applications such as MS WordTM, MS ExcelTM, Adobe Acrobat TM, etc. should open automatically when E Documents of these types are selected from the case e-file. If the files do not open automatically you may have to associate them with an application. For instructions on associating files refer to Associating Applications on page 122 Documents requiring non-SOE software to open and run should not be attached to case e-files because they cannot be opened and hence viewed by anyone without that specialised software installed on their PC. 1.2.1.2 Extranet The system has been designed with Extranet capability (ie. the ability to operate concurrently over the Internet , outside of the Department's Intranet environment). System features provided on the Extranet include: § Full system access to Parks Victoria officers as parties in the operational use of the system, and § A facility where Responsible Authorities can login to view the progress of their cases through the Department’s internal process and make direct email contact with the case manager. The system design provides for use on both Netscape 4.7 and Internet Explorer 5.0 or later versions . 1.2.2 Components of the System The system comprises 6 main components described in the following text and architecture diagram. Fig. 3 shows the SPCMS Home Page and where these components “map” onto it. 1.2.2.1 Workflow Manager The workflow manager is a step-by-step structure that manages the movement of each case through the statutory planning business process. This component works in the background, showing itself in the step list of the portfolio manager and the "action work" facility. The system uses workflow management processes based on business rules associated with different types of referrals. It tracks the different stages a case moves through in the business process and allows case owners to effectively manage their case portfolios and move work through the process. Version 2.2 Page 5 of 156 15/08/03 Statutory Planning Case Management System User Help Manual The strengths of the workflow manager include: • It facilitates a consistent approach to the application of business processes. • It minimises the possibility of steps in the business process being overlooked. • An individual's role and responsibility in the business process is clearly defined and evident in respect to each case at all times. • The workflow manager interacts with the portfolio manager allowing users to see at a glance the current status of a case and the urgency of the response required. • Each individual's contribution to the Departmental response is recorded for each case. • Officers working on a case can easily see the current step that the case is at in any point in time. • Electronic documents can be easily attached to a case, stored centrally, and readily available to everyone thereby eliminating delays due to documents in transit or lost documents. One of the key considerations of the workflow manager is to guide each case along a predefined path in order to achieve a quality response within the allocated time frame. Business rules associated with each type of referral define which pathway a case will take through the workflow manager, the sequence of steps, time allowed to respond to the case, involvement of other referral authorities (e.g. Minerals Petroleum Victoria), etc. By using the workflow manager driven by well defined business rules and processes, the SPCMS effectively eliminates the need for you to be familiar with the steps required to deal which each referral type. An examination of the rules governing each referral type is beyond the scope of this manual, however, specifications can be found in the SPCMS Technical Manual. Refer to Section 3.2 for detailed instructions on using the Workflow Manager. Fig. 2. The Home Page of the SPCMS Screen is the entry point into the system and provides a high level menu structure for easy access to system features. Version 2.2 Page 6 of 156 15/08/03 Statutory Planning Case Management System User Help Manual Fig. 3 Architecture of the Statutory Planning Case Management System INPUT INTERFACE OUTPUT INTERFACE INTRANET (Land Victoria Home Page) Statutory Planning Home Page Secure Password Required for Access The Portfolio Manager Create Case View/Edit Case SPCMS Mapping Process Maps General Information (with mouse-overs to procedure statement) SPCMS Mapping Text data entry screens structured to reflect process Document capture facility notification to nominated officers Case Details Ad hoc & Standard Reports System Administration Contacts LEGEND Pathway linking pages DATA STORAGE Text Data server Image / Document file server (EDMS) Path of data capture Source of data used for output Security wall WORKFLOW ENGINE Version 2.2 15/08/03 Page 7 of 1 Statutory Planning Case Management System User Help Manual 1.2.2.2 Portfolio Manager The portfolio manager is the core feature of the system. It is the interface where you manage your workload and action case work. Cases listed in the portfolio manager are the equivalent of work in the "IN Tray" in the hard-copy world. Depending on their stat planning role, users can carry out work on their personal portfolio of cases (ie. cases sitting in their own IN Tray), create new case records, and re-assign cases to others. See Section 2.2 for role descriptions and permissions. The portfolio manager allows you to easily find cases you are looking for, identify the urgency and risk status of individual cases, action work required on a case, and identify the stage of the business process where each case currently sits. As work on cases is carried out the system automatically updates at each screen refresh to reflect in real-time, an accurate status of your portfolio. When you have activated the current step the workflow manager determines the next step in the process and who the case owner should be for that step. If case ownership changes the case will be removed from your portfolio. When you have actioned the current step, the Workflow Manager determines the next step in the process and who the case owner should be for that step. If case ownership changes the case will be removed from your portfolio. 1.2.2.3 Reporting Facility Standard Reports Standard reports are preset reports that any user can access via the ‘Reports’ tab from the Home Page. See Section 3.5.4 for further details on standard reports. Ad Hoc Reports The ad hoc reporting facility is a simple, yet powerful tool that allows you to interrogate the database and extract tabular reports for a wide range of operational and management purposes. Ad hoc reports are linked to user ID, allowing you to setup and then save reports that are useful for your own specific purposes. Saved reports can then be re-run at any time using the most current data. Report output is available in three different format types: HTML The html output displays directly to the screen. By clicking on the SP number, the user can drill-down to view case details. This will generally be view only access unless the user's role and security status allows them to edit case details. Note that this facility will only allow case detail editing by the SP Coordinator or Case Manager associated with the selected case, ie admin support role and other SPC's and CM's will not have edit capability. PDF The PDF output produces a non-editable image of the report. This format is particularly useful if the report is to be sent to someone as an electronic file. Clicking on the file label after the report has been generated will automatically open the report in the Adobe TM Acrobat viewer. CSV This is an MS Excel format that imports data directly an excel workbook where it can be manipulated to produce summary information, statistical reports, charts and graphs, etc. Provided the browser is setup to associate the CSV file type with the Excel application, the file will open automatically into Excel when you double-click on it. If the file type is not associated with the application, you will need to navigate through the C: drive directories to Version 2.2 15/08/03 TM Page 9 of 1 Statutory Planning Case Management System User Help Manual the "excel.exe" file. This is located on the Department SOE at C:\program files/microsoft office/office/excel.exe For information on ad hoc reports, refer Section 3.5.1. 1.2.2.4 Electronic Document Management (EDM) Components The SPCMS has some basic EDM components built into it. These include the capture, storage and retrieval of documents that pre-exist in an electronic format. Document routing, electronic signatures, and sophisticated data streaming technologies have not been included in this version of the product, but will be incorporated into a later version. Electronic document features are accessed manually via the “E Documents” tab on the case details pages. In this facility you can view documents attached to the case, or add new documents to the case. Note that, in the current ve rsion of SPCMS, once attached, documents cannot be removed or deleted. EDM features are also included in the workflow manager, allowing people working on a case to manually attach documents at all steps through the process. In addition, at certain points in the workflow the EDM capture facility is automatically engaged to request the capture of key mandatory documents. Note that all documents to be attached to a case in the SPCMS must already exist in an electronic format compatible with the Department’s SOE . It is not possible (from a technical point of view) to activate and run scanning software directly from a web application. Procedures for scanning documents and creating electronic documents are provided in Appendix A. 1.2.2.5 Security Management The security management facility in the SPCMS allows you to maintain your own personal details such as office location, business unit, etc. This information is reflected in the “Contacts” tab on the home page and, in the case of SP Coordinators/Case Managers, is also used to fill merge fields in the letters generated from the workflow manager. The responsibility for maintaining this information now rests with each individual and, given the way the information is used, it is important that users fulfil this responsibility diligently. As a system user you can also maintain your own password via this facility. The System Administrator has additional capabilities in this facility, being able to add new users, maintain user roles, add/remove web links under the “General Info” tab, maintain reference tables, etc. For further information on system security, refer to Section 2.1. 1.2.2.6 Decision Support Information Process Map The process maps that display in the system represent the Department's statutory planning business process as a sequence of decisional and action steps. This facility is useful as a reference tool for operational planners or as a training tool for new recruits to the statutory planning function. It is important to note however that, whilst the SPCMS follows this business process, it deals with many aspects differently - automating some steps and providing features and in-built logic that effectively vary the process slightly, making it a little more flexible. For example, the dispute resolution mechanism is managed in the system via the discussion thread. This facility is specific for each case TM and behaves like a "team room" for the case in Lotus Notes . Version 2.2 15/08/03 Page 10 of 1 Statutory Planning Case Management System User Help Manual For more details on the Process Maps refer to Section 4.1. Contacts The ‘Contacts’ tab on the home page provides a list of all registered system users including information such as office location and address, phone and fax numbers, postal and DX addresses, email addresses, business unit, etc. By clicking on the e-mail link you can also send an e-mail note direct to the selected person from within the SPCMS. For further information see Section 4.2 General Information The ‘General Info’ tab on the home page provides fast, easy access to related web sites. These sites are grouped into 3 main categories: 1. Policy and Procedure Sites providing information on statutory planning policy, procedures, planning reforms, etc. 2. Decision Support Information Sites providing information about land, water, vegetation, national parks, planning data, etc. to assist Action Officers and Case Managers in determining their recommendations in respect to proposed uses. 3. System Maintenance & Enhancement A service request facility through which all users can notify the System Administrator of problems encountered with the system, and/or log requests for enhancements to the system. Users are actively encouraged to use this facility to value-add and improve the system. For further information see Section 4.3 1.2.3 Data Storage The SPCMS minimises the requirement to maintain paper files for a case. The main documents to which Action Officers will need to refer are stored electronically, either as scanned image documents or as linked MS Office™ documents. Action officers responding to each case respond electronically within the system and the "whole of department response" is also compiled within the system by the Case Manager. The Departmental response to the Application is then generated by the system as a standard letter, which is linked manually back to the case (see section 1.2.3). Once the Case is completed documents are stored and archived in perpetuity. Note that Version 1.0 of SPCMS does not allow captured documents to be removed. There are two types of data captured and stored in the system: Structured data: Text data stored as attributes in a Sybase database. To ensure consistent data quality standards, these have a variety of field validations, or use look -up tables to populate fields. Unstructured data: These are electronic documents (E Documents) associated with a case and can be any type of file. Typical file types will include images (PDF, JPEG, GIF), MS Office ™ documents (DOC, XLS, PPT, PPM, etc.), or vector graphic files such as CAD drawings. Whilst capturing any file type is possible, only file types supported by the Department's SOE can be opened and viewed unless the user has the appropriate software installed on their client PC. To minimise upload/download times and storage space requirements, care should be taken to save files in Version 2.2 15/08/03 Page 11 of 1 Statutory Planning Case Management System User Help Manual formats that minimise file size. Appendix A provides information on how to achieve this. Together these two types of data make up the electronic file (e-File) for each case. 1.2.4 Electronic Notification Whenever a case changes ownership (ie. the person responsible for carrying out the next action on the case), the system will automatically generate an email advising the new owner that they have a new case to work on. This email contains a hyperlink that will open the browser at the login panel to the new owner's portfolio manager. This facility has been provided to ensure that anyone needing to work on a case is made aware of it as soon as possible via their most commonly used communication medium and that they can action that work as quickly and hassle-free as possible. 1.2.5 Case Details Data on a case is built up as it moves through each step in the workflow manager and includes both the structured and unstructured data elements. This data is organised into a set of "Case Detail View Screens" that can be accessed at any time by anyone involved in a case by simply clicking on the case number (SPxxxxxx) wherever it occurs in a case list in the system. Case data is organised into logically similar groupings that generally represent the major phases of the business process. Each grouping of data elements is displayed on a separate page (screen) in the case details view which are accessible as TABS across the top of the screen. Tabs are defined as follows: Main This includes all of the basic information about the case - reference numbers, critical dates, applicant details, proposed use details, location information, planning information, etc. Site This includes all of the natural resource information for the site. The full Site Assessment workflow is only made available when native vegetation is proposed to be cleared from the site. Instructions This page provides information to Action Officers regarding assessment instructions or considerations; the nature, location, etc. of hard copy attachments to the case; and who else is involved in the case. AO (Action Officer) Recommendations This page lists each of the Action Officer responses including their comments and conditions and whether they are still working on it or not (ie. draft/final status). AOs can use this facility to collaborate on their respective responses and streamline their individual response. Dept. Reply This page comprises the consolidated whole-of-Department response to the application. Authority Decision This page displays information about the Responsible Authority's decision on the case. Appeal This page displays information in respect to appeals lodged against the Responsible Authority's decision. Action Log This page displays a log of actions carried out on the case. It is useful to the Case Manager in monitoring the progress of the case. It also provides Version 2.2 15/08/03 Page 12 of 1 Statutory Planning Case Management System User Help Manual information which can be aggregated and statistically analysed for business performance monitoring. E-Documents This is the area where electronic documents associated with the case can be opened for viewing or printing and additional e-documents attached to the case. Notes This is a facility for recording file notes, collaborating on decisions, resolving disputes, coordinating on-site visits, etc. When items have been recorded in this facility a small document icon appears alongside the tab, otherwise it remains blank. Note that the tab highlighted in bold is the current page being viewed. Case managers can edit some data elements in the ‘Case Detail’ view screens while the case is active and they are responsible for it. However, when a case is completed or withdrawn, no further editing can occur - though details are still viewable and printable. If a case manager transfers their role ownership on a case (via the re-assignment facility), their edit privileges on that case are removed. Similarly people with other role privileges and those not involved in a particular case will have no edit capabilities via this facility. Note While it is possible to enter case details via the detail view screen (provided you have the appropriate permission), users are strongly encouraged to use the workflow manager for this. Using the workflow manager will avoid any potential confusion. Edit functionality in the detail view screens should only be used to edit existing data. Version 2.2 15/08/03 Page 13 of 1 Statutory Planning Case Management System User Help Manual 2 System Administration 2.1 How to Register The local Statutory Planning Coordinator approves all requests for registration as a user. The SP Coordinator will allocate the appropriate role(s). 2.1.1 DSE/DPI Staff Currently registered to DSE/DPI Network Fill in form ‘DSE SP reg form.doc’ and send to local Statutory Planning Coordinator 2.1.2 Non DSE Staff (ie Staff at Parks Victoria) Fill in form ‘non DSE sp reg form.doc’ and send to local Statutory Planning Coordinator 2.1.3 Notification of Registration The SP Coordinator will forward the registration form to the System Administrator who will register the new user and allocate a password. The Administrator will e-mail the new user and courtesy copy the approving SP coordinator with the user id and initial password. The new user will be requested by the System Administrator to change their password when they first login to the application. 2.1.4 What can I see without a Password? Security requires that no option will be available without a valid user ID and password. 2.2 System Security System access and privileges are based on the role or roles allocated to the user. All registered users will be able to access reports, change their personal details (not role) and change their password, but the availability of other features such as re-assignment, case detail edit, case create, etc. are restricted to certain roles. The different access levels are listed below: 2.2.1 Statutory Planning Coordinator The Statutory Planning Coordinator (SPC) is responsible for coordinating the timely “whole of department” response to the statutory planning case. This role provides ‘create access’ to record new statutory planning cases. Re-assignment, case detail edit, and case withdraw functions are also available to this role. 2.2.2 Case Manager A Case Manager is the person responsible for the day-to-day management of a case. In most cases this will be the SPC, but the system provides the capability for someone else to manage this function. Where the user is assigned to a statutory planning case as the Case Manager, edit and withdraw case access is provided, but create capability has been removed. 2.2.3 Action Officer An Action Officer (AO) is any person responsible for providing input to the “whole of department” response to the case. These people typically represent the various business units of the Department, including Parks Victoria, Floodplain Management Unit, and potentially Catchment Management Authorities. Version 2.2 15/08/03 Page 14 of 1 Statutory Planning Case Management System User Help Manual Action officers assigned to a case they can edit their own responses (prior to marking them as "Final"), view all details and attach additional documents. Action officers can not create a case. 2.2.4 Administration Officer An Admin Officer is a person who provides administrative support during the pre-referral stage of a case. This user can create a new case through the workflow to the assigning of the Statutory Planning Coordinator. Edit access to a case is provided where the case is assigned back to the admin officer by the Case Manager. 2.2.5 View The ‘View’ role allows users to access and view any case in the system throughout the state via the reporting facility. This allows managers to monitor stat planning activity on a statewide basis and access information about how precedent cases have been dealt with. This role also allows access to case information to users who have no direct operational input to case processing. 2.2.6 Accredited Native Vegetation Assessor (NVA) The NVA must be an accredited person who has the skills to carry out habitat hectare assessments. Only one person can be the NVA on the case at time. A NVA must be assigned to the case if native vegetation is to be cleared, otherwise these steps will be bypassed. 2.3 Logging In / Logging Out 2.3.1 Statutory Planning Case Management System Home Page The Home Page is available from the following URL address: Internet: statpl.nre.vic.gov.au/stat_planning/sta_plan_home.cfm To find this page on Resource Web, go to; Organisation/Land Victoria/Crown Land Management/Statutory Planning. This address is accessible to both intra and Extranet access points. Users may wish to bookmark the Home Page. There are 2 ways to bookmark: 1. Add to bookmarks To add a bookmark have the Statutory Planning Case Management System home page open, select bookmarks, add bookmark. 2. Add to personal toolbar To add to your personal toolbar have the home page open. Go to bookmarks, place mouse arrow on File Bookmarks, new window will open place mouse arrow on Personal Toolbar folder, left mouse click on Personal Toolbar Folder. Version 2.2 15/08/03 Page 15 of 1 Statutory Planning Case Management System User Help Manual This will place the bookmark in your personal toolbar 2.3.2 Logging In As the SPCMS is web based, anyone can open the Home page, but to enter the system the user must select where they wish to go (e.g. left mouse click on Portfolio). They will then be prompted to enter their user ID and password. To enter text into a field, the user must left mouse click in the field then type. User Ids and Passwords are case sensitive and must be entered in lower case. Once their user ID and password are entered the user must left mouse click on LOGIN. Version 2.2 15/08/03 Page 16 of 1 Statutory Planning Case Management System User Help Manual 2.3.3 Logging Out All users must log out when finished. The logout facility is available on all window headers in the blue coloured area of the header bar. See example below. Note Users will be timed out of system if inactive for 60 minutes and any details that have not been saved will be lost. 2.4 Change Personal Details Personal details are used in standard letters generated by the SPCMS and must be kept up to date by each user. If a user’s personal details change (i.e. office or phone number), the user can change the details themselves. To do this the user will need to be logged in and have selected ‘Administration’ from the Home page then select ‘Personal Details’. A window will open displaying the current details stored for the user. The user can alter any field with a white background. The Office and Business fields are amended by selection from reference file by clicking on the arrow and by making a selection from the list. To save changes the user must select ‘SAVE’ from bottom of the window and then close. If the user selects ‘CLOSE’ any new information will be lost. Version 2.2 15/08/03 Page 17 of 1 Statutory Planning Case Management System User Help Manual 2.5 Change Password Users will be required to change the password provided at registration. To do this you will need to be logged in and have selected Administration from the Home page. Once in ‘Administration’ select option ‘Change Password’ a new window will open and you will be required to verify your existing password. Enter your password, remember that passwords are case sensitive and should be entered in lower case. Once your existing password is entered you must select ‘VERIFY’ to continue. ‘CLOSE’ will return you to the Administration window. Providing that your original password is verified, a new window will open and the user must enter the new password and then confirm the new password. Select ‘SAVE’ to complete the change password function. Version 2.2 15/08/03 Page 18 of 1 Statutory Planning Case Management System User Help Manual 3 Using the System In this section we look at how to use the SPCMS to complete Statutory Planning cases and manage your portfolio of cases. The chapter is divided into three sections: the portfolio manager; registering and completing a case; and managing your case load. 3.1 The Portfolio Manager As mentioned in the first chapter the Portfolio Manager is the equivalent of your "IN Tray" in the hardcopy world and it is through here that you can view the cases in your workload and access them for information and response. The Portfolio Manager screen shows all cases for which you are the Case Owner. The purpose of this screen is to display your cases, identify the stage of the business process where each case sits, identify the risk status and priority of your cases, and allow you to drill down in to the cases themselves so that you can action them and move them along to the next step in the SP process. You may also create cases from this screen if you have the appropriate privilege. Actioning and creating cases is discussed in more detail in Section 3.2.2. As work on a case is carried out the status (current step) is automatically updated in real time at each screen refresh. Some of the features of the Portfolio Manager screen are; Logout To Logout of SPCMS click on the blue Logout User bar. SPCMS Home To return to the SPCMS home page click on the "Portfolio Manager" page title. Case Status List The Case Status List provides you with a summary of the status of cases of which you are the owner with a count of the number of cases against each. You may not have a full list of all the statuses as shown on the sample screen - if you have no cases at a certain status nothing will not appear on the list. Create Case Click on Create Case to create a new SP case. Note that this will only appear on the Portfolio Manager screen if you have authority to create new cases. This is discussed in more detail in Section 3.2.2. LGA Registered Cases Click on LGA Registered Cases to view all the cases currently registered with local government. Case list - All Cases When you initially enter Portfolio Manager the heading in the case list area will show Status: All Cases and will list all cases you own and selected case details. Case list - status If you click on a status type in the Case Status List it will: (1) change the heading on the case list and (2) provide you with a list of cases at that step. You can action the step by clicking on the chevrons (>>>>) in the Action column (See section 3.2.2 on Actioning steps). If you have the authority you will also be able to reassign officers to the case in this screen (See section 3.3 on Managing your Case load). You can get to any of the other ‘Case list – status’ screens by clicking on the status in the ‘Case Status List.’ You can return to the ‘Case list - All Cases’ screen by clicking on ‘All Active Cases’ at the bottom of the ‘Case Status List’. Version 2.2 15/08/03 Page 19 of 1 Statutory Planning Case Management System User Help Manual 3.1.1 3.1.1.1 Features of the Portfolio Manager Bi-directional sorting of Cases You can sort cases in the case list screen by clicking within a circle on the column title. An arrow appears pointing up or down identifying that cases will be sorted by that field in an descending or ascending order. Figure 3.1: Diagram showing bi directional sorting using the reply by date in descending order. 3.1.1.2 Escalation of case priority. In the case list screen you will see that the case number can be one of three colours: blue, orange, or red. The colour is determined by the priority of the case, that is, its closeness to the end of the 14-day or 28-day response period. This is described in Figure 3.2 below. Figure 3.2: Diagram showing the automatic escalation of case priority in SPCMS Number of days since the case was registered 0 7 28-day response case s Action Officer SP coordinator/Case manager 14-day response cases Action Officer SP coordinator/Case manager Version 2.2 15/08/03 Page 20 of 1 14 16 21 28 >28 Statutory Planning Case Management System User Help Manual When you initially display the Case list screen the cases will be sorted by their priority. 3.1.1.3 Finding a Case There are a couple of ways of doing this. You can sort in one of the case list screens (See Section 3.1.1.1). You can also search for text strings on the screen by using the Web browser's search function. Press Ctrl+F to start up the browser's text search dialogue box. If you are having trouble getting a result click inside the case list screen to make sure that it is the active screen. Version 2.2 15/08/03 Page 21 of 1 Statutory Planning Case Management System User Help Manual 3.1.2 Viewing Case Details You can view the details of any case in your portfolio by clicking on the case number with your mouse. This will open the case's Main Details screen. The Main Details screen is split into two sections; one with information on the applicant, the other with information on the application. Other case details screens can be accessed by clicking on the tabs at the top of each details screen. The tab highlighted in bold letters is the current screen being viewed. Editing Case details Editing capabilities within the Detail Screens are available to nominated officers at certain stages in the process. Action Officers can only edit a response to a case when it is DRAFT status. Case Managers and SP Coordinators can edit most fields prior to the Departmental Response. When the Departmental response is finalised it can no longer be edited by the Case Manager or SP Coordinator. Key fields such as the ‘Department Received Date’ and the ‘Reply By Date’ cannot be edited. For more information about the individual fields on the ‘Case Details’ screens see Section 3.2.2. Version 2.2 15/08/03 Page 22 of 1 Statutory Planning Case Management System User Help Manual Main Details Screen This includes all of the basic information about the case - reference numbers, critical dates, applicant details, proposed use details, location information, planning information, etc. Site Screen This includes all of the natural resource information for the site. The full Site Assessment workflow is only made available when native vegetation is proposed to be cleared from the site. Only Accredited Native Vegetation Assessors are able to enter vegetation related information. See 3.4.2 for more information on this workflow. Version 2.2 15/08/03 Page 23 of 1 Statutory Planning Case Management System User Help Manual Version 2.2 15/08/03 Page 24 of 1 Statutory Planning Case Management System User Help Manual Instructions Screen This page provides information to Action Officers regarding assessment instructions or considerations; the nature, location, etc. of hard copy attachments to the case; and who else is involved in the case. AO Recommendations This screen lists each of the Action Officer responses including their comments and conditions and whether they are still working on the case or not (ie. draft/final status). AOs can use this facility to collaborate on their respective responses and streamline their individual response. Version 2.2 15/08/03 Page 25 of 1 Statutory Planning Case Management System User Help Manual Dept Reply This page comprises the consolidated whole-of-Department response to the application. Authority Decision This page displays information about the Responsible Authority's decision on the case. Version 2.2 15/08/03 Page 26 of 1 Statutory Planning Case Management System User Help Manual Appeal This page displays information in respect to appeals lodged against the Responsible Authority's decision. Version 2.2 15/08/03 Page 27 of 1 Statutory Planning Case Management System User Help Manual Action Log This page displays a log of actions carried out on the case. It is useful to the Case Manager in monitoring the progress of the case. It also provides information which can be aggregated and statistically analysed for business performance monitoring E Documents This is the area where electronic documents associated with the case can be opened for viewing or printing and additional e-documents attached to the case. Note You can not delete e-documents once you have attached them. Version 2.2 15/08/03 Page 28 of 1 Statutory Planning Case Management System User Help Manual Notes This is a facility for recording file notes, collaborating on decisions, resolving disputes, coordinating onsite visits, etc. When items have been recorded in this facility a small document icon appears alongside the tab, otherwise it remains blank. 3.1.3 Actioning a Case You cannot action a case from the ‘All Active Cases’ screen - you must be in the ‘Case list status’ screen to action the next step. Beside each case in the list you will see a series of chevrons (>>>>). There are a number of potential actions, depending on the stage of the workflow the case is at. You may be required to type in a response, attach documents to the case, assign an officer, choose a response from drop down menus. See Section 3.2 for a description of the screens you might encounter at this point. 3.1.4 Case re-assignment Owners of any case can reassign them, that is change the ownership of the case. To reassign a case go to the ‘Case list status’ screen: Check the boxes in the ‘Reassign’ column for the cases you wish to reassign. You can select or deselect all the cases by clicking [DE]SELECT ALL CASES. Click REASSIGN to bring up the Portfolio Reassign screen, a drop-down list of all the officers to whom you are able to reassign the case. Version 2.2 15/08/03 Page 29 of 1 Statutory Planning Case Management System User Help Manual Select one of the officers from the list. Choose CLOSE to exit the screen without reasigning, or SAVE to reassign the officer selected. Reassigning cases is discussed in more detail in the Section 3.3. 3.2 The Workflow Manager The workflow manager manages the steps involved in registering and actioning cases in the SPCMS. The workflow manager is a step-by-step process that manages the movement of each case through the statutory planning business process. The process works in the background of the SPCMS manifesting itself in the step list of the portfolio manager and the ‘Action Work’ facility. The workflow management processes are based on business rules relating to the different types of referrals, so the actual steps undertaken are governed by the referral type and the actions of the responsible authorities and applicants at steps where they interact with the process. This section is divided into three sub-sections: 1. Electronic document management within the workflow manager 2. Creating new cases within the workflow manager. 3. Actioning cases within the workflow manager. Although for the purposes of this manual they are treated separately they should all be seen as part of a continuous process within the workflow manager. Electronic document management is an intrinsic part of creating and actioning cases. The process involved in actioning cases is a continuation of the process that initially set-up the case. Using the workflow manager, driven by well-defined business rules, effectively eliminates the need to you to be familiar with the steps required to deal with each referral type. 3.2.1 Electronic Document Management The workflow manager requires that documents associated with the case be captured in electronic formats. This ensures that essential documents for the case are readily available to all DSE officers involved with the case. At certain steps in the workflow you will be required to attach a document to the case before you can proceed to the next step. These steps are known as "Mandatory Document Capture Points" and are discussed in more detail below. As well as the mandatory document capture points, you can add other relevant documents at most steps in the process. Electronic document features are accessed manually via the "E Documents" Tab on the case details screen (See Section 3.1.2). From this facility you can view documents attached to the case or add new documents to the case. Note that once a document has been attached to the case it cannot be removed or deleted. Version 2.2 15/08/03 Page 30 of 1 Statutory Planning Case Management System User Help Manual All documents to be attached to a case in the SPCMS must already exist in an electronic format compatible with the Department's SOE. It is not possible to activate and run scanning software from a Web environment. Documents will need to be scanned "off-line" and initially stored in an appropriate location that can be accessed by staff that will attach the document to the case. Once the document has been attached to the case, SPCMS manages storage, retrieval and archiving automatically. Tips on scanning documents for attachment to cases are provided in Appendix A. Document formats for E-documents The Department's SOE determines which document formats are suitable for storing e-documents. Text documents .doc or .pdf Spreadsheets .xls or .pdf Images and scanned documents .gif, .jpg or .pdf Mandatory Document Capture Points. The workflow manager allows documents in electronic formats to be attached to the electronic case file at defined stages in the process. These documents are essential to the audit of the case. Some of these stages require the mandatory capture or referencing of documents in electronic formats. Some examples of mandatory document capture points are: • • Registering a Case - Appliation Form must be attached. Attaching the Landowner Consent Letter - Consent letter must be attached if the Application is on Crown Land Attaching the Departmental Reply • Note If the document is received externally from an outside source (as an MS Word™ or similar format document) it should be scanned for viruses before being uploaded to SPCMS. Naming conventions for Attaching Electronic Documents When naming files for attaching to the wokflow manager use the following convention SPxxxxxxABCy Where x = the case's SP number, ABC = abreviation of file type, and y = document version number 3.2.2 Creating and Actioning Cases This section takes you through the steps involved with creating a new Statutory Planning case in SPCMS. Users registered with a role of SP Coordinator or Admin Support Officer will have the authority to create a case. If the ‘Create Case’ button does not appear on your Portfolio Manager screen you will not be able to add a new case. You will need a copy of the application from the referral authority in order to create a new case and the application will need to be available in an electronic format in order to complete the registration process. It is a good idea to scan the document before starting the process of creating a new case. The key piece of information you will need from the application is the referral type as this determines the workflow for the rest of the process. Click on the ‘Create Case’ button in the portfolio manager to create a new case. You will note that there is a difference in the screen colour between the workflow screens and the details screens. The details screens are lighter in colour than the workflow screens which are a deeper yellow in colour. Registering a case. This screen is for initially registering a case in SPCMS. All fields are mandatory. The referral type determines the path that the case will take through the workflow manager so it is vital that the field be selected carefully. If a case is registered with the incorrect referral type, Dept. Received Date or Version 2.2 15/08/03 Page 31 of 1 Statutory Planning Case Management System User Help Manual Referral Authority it will have to be withdrawn and registered as a new case as these fields are not editable at subsequent stages in the Workflow. Mandatory field: All. Note The date format should be dd/mm/yyyy. A validation is run on all date fields in SPCMS to ensure that they correspond to this format. Use the drop down boxes to select a referral authority or ‘Source’ and ‘Referral Type’. Source Case A Source Case is an SP Case that has previously been referred to the Department which provides background information for a case currently being registered in the Stat planning system. Note that identifying a Source Case at this stage is only of value if the case is already recorded on SPCMS. Identifying a Source Case will save you time when registering your Current Case since you can copy details from the source case into the current case Version 2.2 15/08/03 Page 32 of 1 Statutory Planning Case Management System User Help Manual This screen identifies whether there is a Source Case for the current application. If there is no Source Case choose ‘No’ from the options available and then SAVE. The Workflow skips to the ‘Attach Application’ form step. If there is a Source Case choose ‘Yes’, then SAVE at which point you will see the following screen. If you know the ID of the souce case type it in the space provided. You must type in the entire ID in the format 'SP000XXX' . If you do not know the number of the source case you can search for it using the applicants name or the Department's reply date; Version 2.2 15/08/03 Page 33 of 1 Statutory Planning Case Management System User Help Manual Choose SEARCH to bring up a list of cases that match the entered criteria. Click on the ID of the Source Case you wish to use and choose close. The Workflow Manager returns to the Set Souce Case screen. You can copy the details from the Source Case into the Current Case by choosing "Yes" at the "Copy Source Case Details" question. Version 2.2 15/08/03 Page 34 of 1 Statutory Planning Case Management System User Help Manual Attach Application form This screen is for attaching an electronic version of the application form to the case. The e-document is stored on a file server. This is a mandatory document capture point for all SP Cases. In most cases this will be a scan of the hardcopy document received from the Referral Authority. The description field should be used for descriptive information about the document entered as a text blob. This is a mandatory field. Refer to the section on Document Naming Conventions on page 31. Browse to search for a file of the SP Application. Mandatory field: Description, File. When you have uploaded the e-document into SPCMS the following screen appears. Version 2.2 15/08/03 Page 35 of 1 Statutory Planning Case Management System User Help Manual Assigning the Case to a Statutory Planning Coordinator This screen will appear where the case is being registered by someone that is NOT an SP Coordinator, for example, someone that has Admin support access to SPCMS only. The drop down list will only show those officers registered with a role as SP Coordinators. If the case is being registered by a person logged on as an SP Coordinator, the application automatically assigns that person as the SP Coordinator and this screen will not appear. An SP coordinator can reassign the case to another SP Coordinator through the Portfolio Manager. Mandatory field: Coordinator Assigning the Case to a Statutory Planning Case Manager The SP Coordinator must assign a Case Manager. Coordinators and Case Managers can also reassign cases they manage to other Case Managers through the Portfolio Manager (See Section 3.3). The drop down list will only display the names of staff that have a role as a Case Manager. Mandatory field: Case Manager At this stage and the assign SP coordinator stage, other e-documents can be attached to the case. Version 2.2 15/08/03 Page 36 of 1 Statutory Planning Case Management System User Help Manual Register Public Land Owner Consent If an application is on Public Land, the Public Land Manager's consent to the application must be provided before the case can proceed. If a consent document is not received, the applicant is informed via a standard letter. Further processing of the application stops until consent is received. If the land is public land and there is a consent letter SPCMS will ask you to attach the consent letter. If the land is not public SPCMS will go to the screen for entering case details. If the land is public and the consent details have been provided the application jumps to a screen for recording these details. Mandatory fields: Land Type, Consent Details Provided Await Consent Letter If the application is on Public Land, the consent letter from the Public Land Owner must be provided by the applicant. If the letter has not been provided the workflow enters a process called ‘Await Consent Letter’. When the letter has beeen received the ‘Consent Details Provided’ should be changed to ‘Yes’. Mandatory field: Consent Details Provided Version 2.2 15/08/03 Page 37 of 1 Statutory Planning Case Management System User Help Manual Attach Consent Letter This screen is for attaching an e-document, the Landowner Consent letter for SP applications on Public Land. This is a mandatory document capture point for all SP Cases on Public Land. The description field should be used for descriptive information about the document entered as a text blob. Refer to the section on Document Naming Conventions on page 31. Browse to search for a file of the Landowner Consent letter. Mandatory field: Description, File. The following screen is displayed after a successful upload of the e-document. Version 2.2 15/08/03 Page 38 of 1 Statutory Planning Case Management System User Help Manual Record Spatial Extent of Application Most applications must have a spatial application extent recorded. Some referral types are exceptions and will have a ‘Skip’ option when it comes to recording the spatial extent. Click on the ‘Record Application Extent’ link and this will take you to SPCMS Mapping, Section 3.4.7 to record the application area. Once you have mapped the application extent you have the option of deleting the current extent and re-entering it by clicking ‘Clear Current Application Extent’. If you are happy with the application extent you have created, click ‘Save’ to move to the next step. Edit Case details This screen is for adding details about the case such as the applicant's details, proposed use, location and planning details. This screen is split into two sections; one with information on the applicant and the other with information on the application. To move between the two screens click the ‘Applicant’ or ‘Application’ links. Version 2.2 15/08/03 Page 39 of 1 Statutory Planning Case Management System User Help Manual Case details - Main details screen The main details screen is for recording information about the case. This screen is split into two- Application and Applicant. Version 2.2 15/08/03 Page 40 of 1 Statutory Planning Case Management System User Help Manual Applicant Case reference Information Used for noting files and dates relating to the case. There are a number of fields to which you should pay particular attention. • ‘Risk’ is a subjective educated assessment by the Case Manager related to political sensitivity and/or complexity effecting DSE's ability to deliver a timely response. • The ‘File no’ should be a valid registered file ID within Portal File View. You will need to open LIMS Portal to get the relevant ID. Most of the information in the other fields in this section are derived from data entered on earlier screens in the workflow. Native vegetation to be cleared? Selecting ‘Yes’ will mean the site assessment workflow will need to be completed at a later stage. This decision can be changed by clicking ‘Change’. If it is changed to ‘Yes’ you will need to select an Accredited Primary Native Vegetation Assessor from the drop down list. Application Proposed use This is a multiple entry field for recording the proposed use of the land. Add proposed uses to the screen by clicking on the edit button. Then select the appropriate proposed use from the drop down menu. Enter the area under application, in hectares in the area field. Tick the check box beside each proposed use, then click save. Location This is a multiple field entry for recording the location of the case. Location may be a Crown description (Parish, Allotment Section) or Plan Description (Lot on Plan). Add multiple allotments by clicking on the Add button. You can also view the application extent in SPCMS mapping by clicking the ‘map’ link. Municipalities This is a multiple field entry for recording the municipality in which the case falls. This is automatically filled with the source of the application in the initial registration screen. If the site is in more than one municipality add proposed uses to the screen by clicking on the Edit button. Other details Record the Zoning and Overlay by clicking on Edit. LCC Details Notes the details of any LCC studies on the site. Note that this field is automatically updated from LIMS if the Parcel ID field in the Location is entered as a LIMS parcel number. Mandatory Fields: Risk, File No., Proposed Use, Applicant's Surname, Municipalities. Several fields in the ‘Case reference Information’ part of the screen are mandatory although they will have been entered at an earlier stage. Multiple field entries Multiple field entries are those where it is possible to have multiple records for a response. For example, an SP case may cover multiple allotments so you will need to include a list of all the allotments in the ‘Location’ field of the ‘Case Details’ screen. Three fields in the Case DetailsApplication screen are multiple field entries: Proposed Use, Location. Zoning, Overlays, and Municipality. Main Details screen - Proposed Use Clicking on [Edit] next to the Proposed Use* heading to bring up the Proposed Use Maintenance screen for adding uses to the Main Details screen. Select a proposed use from the drop down menu. Version 2.2 15/08/03 Page 41 of 1 Statutory Planning Case Management System User Help Manual Enter the area under application, in hectares, in the area field. Tick the check box beside each proposed use, then click save. Because a SP Case may have multiplte proposed uses, you will need to click the check boxes next to each selected proposed use. Note You can also amend details on an existing use by deselecting the check box beside the proposed use. Version 2.2 15/08/03 Page 42 of 1 Statutory Planning Case Management System User Help Manual Main Details Screen - Location Clicking on the [Add] next to the Location* heading brings up the Location Maintenance screen for adding allotment details to the Main Details screen. The screen provides fields for details that will help locate the allotment such as LIMS parcel number, Crown Description (Parish, Section, Allotment) or Plan Description (Lot on Plan). Because a SP Case may cover multiple allotments, you can click the [ADD] button for each of the allotments. Note You can also amend details on an existing allotment by clicking on the number in the 'No' column of Location. A screen similar to the one shown above appears allowing you to change the Parcel Number or Location Details. You can also delete the record from this screen. Version 2.2 15/08/03 Page 43 of 1 Statutory Planning Case Management System User Help Manual Main Details Screen - Municipality Maintenance Clicking on the [Edit] next to the Municpalites* heading brings up the Municpality Maintenance screen for adding additional municpality details to the Main Details screen. The screen allows you to add the municipality or municipalities in which the case falls to the Main Details screen. Because a SP Case may cover multiple municipalities, you can click the the check box for a number of municipalities. You can move through the list using the ‘Next’ and ‘Last’ links or search for the Municipality by typing the name in the search field. Once the appropriate municipalities are selected click ‘Save’. Note that you can also amend details for an existing municipality by deselecting the municipality check box and then click ‘Save’. Version 2.2 15/08/03 Page 44 of 1 Statutory Planning Case Management System User Help Manual Zoning and Overlays Select the appropriate zones or overlays for the application by selecting the check box and then clicking ‘Save’. The name or abbreviation of the overlay can also be entered in the text box. Version 2.2 15/08/03 Page 45 of 1 Statutory Planning Case Management System User Help Manual Refer Case This is the screen by which the Case Manager refers the case to other departmental staff to comment on the application. Once you hit the 'SAVE' button SPCMS will automatically generate an e-mail to advise the action officer that they have a new case to comment on. Action Officers Choose from the list provided. Multiple officers can be selected by using the <Crtl> or <Shift> keys to make the selection. Instructions Enter as a 'text blob'. The instructions are for all the Action Officers to read. Comment reply due The default date is seven days before the departmental reply is due. This gives the Case Manager time to compile the "whole of Department" response to the application. The Case Manager can manually change the ‘Comment Reply Due’ date if required. Hard Copy Documents Note any hardcopy documents that have not been included as electronic files. This might include plans and diagrams that are too large to scan. Details of the documents, including their location can be added in the text box. Version 2.2 15/08/03 Page 46 of 1 Statutory Planning Case Management System User Help Manual Comment reply date. Mandatory field: Action Officers. An email will be automatically generated and sent to the Action Officer(s) selected from the list. Note- if native vegetation is to be removed an Accredited Native Vegetation Assessor must be selected. Only one Accredited Native Vegetation Assessor can be selected per case. Note You have an option to "SKIP" the referral process. Some cases, such as referrals under the Coastal Management Act do not require responses from Action Officers and the Case Manager will prepare the “whole-of-Department” response. If more than one Accredited Native Vegetation Assessor is selected you will be prompted to select a primary officer. Version 2.2 15/08/03 Page 47 of 1 Statutory Planning Case Management System User Help Manual Action Officer Comment Sub-process Action Officers to whom the case has been referred use this screen to record their response to the application. The fields at the top of the screen cannot be changed. Draft/Final Leave the comments at Draft stage until the response is fully complied. Once the response is changed to Final and saved the Action Officer will not be able to change the response. Action Response Produces a drop down list with four responses, Modification (PSA only), No objection, Objection, Subject to conditions. The applicant will not see the AO's reponse. Comments Free format 'text blob' for comments on the application. Conditions Free format 'text blob' for an Action Officer to request conditions to be placed on the application. Action Officers can type the conditions directly into the box provided, copy and paste conditions from another document or choose from a list of Standard Conditions by clicking on the ADD STANDARD CONDITIONS button at the bottom of the screen. Check the box next to the ‘standard conditions’ you would like to add to your response. More info requested The Action Officer can request more information from the Case Manager in order to prepare the response (see More Info). Clicking on the MORE INFO button at the bottom of the screen opens a screen for sending an e-mail to the Case Manager. The ‘More info requested’ field automatically notes the date that this e-mail was sent to the Case Manager. More info received Automatically notes the date that the Case Manager responded to the request for more info. Mandatory field: None. Adding non-native vegetation zones You may wish to capture spatial information for non-native vegetation related cases as the Action Officer. This would be particularly relevant if you need to attach conditions to particular areas or zones of the application extent. Some of the information you may wish to record would be buffers along water courses or saline discharge sites to be avoided in the application. Select ‘Add Zone’ under the ‘Site Assessment’ screen. Then use the mapping facility as described in Section 3.4.8 to spatially locate the area. Once this is complete, click the chevron next to the zone number. Version 2.2 15/08/03 Page 48 of 1 Statutory Planning Case Management System User Help Manual Type a description for the zone in the text box. You may then add recommendations for the zone by clicking ‘Add’. This will take you to the Standard Condition Search screen. Click save and then move through the workflow, adding recommendations for the application. For your recommendations for each zone to become available to the case manager in constructing the ‘whole of department’ response, you must mark your zone status as ‘Final’. Version 2.2 15/08/03 Page 49 of 1 Statutory Planning Case Management System User Help Manual AO RECOMMENDATIONS This allows you to open a new window with the response prepared by an Action Officer so that the Case Manager can cut and paste from this response into the "whole of Department" response. Your comments are built up zone by zone in the AO response workflow. These are then editable under the ‘My Recommendations’ and ‘AO Response’ tabs. The zone responses must be marked as ‘Final’ for the Case Manager to use them in constructing the application response, as illustrated below: You must also mark your ‘Final Comments’ as final for your responses to be used by the Case Manager in constructing the application response as illustrated below: Version 2.2 15/08/03 Page 50 of 1 Statutory Planning Case Management System User Help Manual Version 2.2 15/08/03 Page 51 of 1 Statutory Planning Case Management System User Help Manual Department Response, Draft Final Version. The Case Manager uses this screen to compile the ‘whole of Department response’ on behalf of DSE. This process has three main functions: • Generating a Standard Cover Letter • Generating a Schedule of Conditions in PDF format • Generating a map of the spatial information recorded for the case in PDF format The generalised steps that the Case Manager must go through to create the ‘whole of Department response’ are listed below: 1. Construct response through reviewing recommendations and adding conditions. 2. Generate a PDF of the Schedule of Conditions 3. Generate a map of the spatial information associated with the case as a PDF 4. Generate the Department Response letter and attach this to the case. Approval Status Approval status relates to whether the response is in DRAFT or FINAL state (ie. whether the response is a work in progress or completed). Draft/Final Leave the comments at Draft stage until the response is fully complied. When the Response is changed to ‘Final’, SPCMS will open the window that generates the Departmental Response Letter. At this stage the Case Manager will not be able to change the response. Dept. Response Produces a drop down list with four responses, Comment Only, Modification (PSA only), No objection, Objection, Subject to conditions. This is the end response that the applicant will see. Comments Free format 'text blob' for comments on the application. The Case Manager can view a Action Officers' Responses by by clicking on AO RESPONSE at the bottom of the page. This will open a new window with the Action Officers' Comments and Conditions. These can be cut and paste into the Department Response. Conditions Free format 'text blob' for conditions to be placed on the application. The Case Manager can view a Action Officers' Responses by by clicking on AO RESPONSE at the bottom of the page. This will open a new window with the Action Officers' Comments and Conditons. These can be cut and paste into the Department Response. The Case Manager can also add standard conditions to the response. Inspection Date Date set for a follow up inspection. Mandatory field: None. Version 2.2 15/08/03 Page 52 of 1 Statutory Planning Case Management System User Help Manual Enter the required information into this screen. Then click ‘Construct Response’ Construct Response This screen can be used by the Case Manager to add or edit Application Conditions, using the links described below. Version 2.2 15/08/03 Page 53 of 1 Statutory Planning Case Management System User Help Manual Add or Edit Standand Conditions New conditions maybe added by clicking ‘Add New’. Alternatively you can add conditions from Action Officer recommendations by clicking ‘Select from AO Recs.’. Action Officer recommendations must be marked final for them to become available to the Case Manager to construct the Department’s response. You may only add conditions from the application recommendations not zone conditions. Standard Conditions imposed on SP Applications can be chosen by clicking ‘Add New’. Check the box next to each of the conditions you wish to place on the application. Once you have selected the standard conditions click ‘Continue’. To edit the text in the Application Conditions, click ‘Edit’. If you have your own conditions that you attach to an Application, save them in a MS Word™ file and you can cut and paste them into the ‘Conditions’ field on the ‘Construct Department’s Response’ screen. To add zone conditions use the ‘Add Group’ link in the ‘Construct Response’ screen. Expand or contract the lists using the +/- buttons (as in Windows Explorer). Type a name for the ‘Group Heading’ in the text box. Select the conditions you wish to add by clicking in the checkbox under ‘Select’. Once this is complete click ‘Save’ and these conditions will be added as a group to the application conditions, as in the below example. Version 2.2 15/08/03 Page 54 of 1 Statutory Planning Case Management System User Help Manual Review Recommendations To view the AO recommendations for the application click ‘Review Recommendations’. The Case Manager is then able to view the final recommendations of the Action Officers on the case. The Case Manager is also able to change the status of the recommendation from ‘Final’ to ‘Draft’ if appropriate. The recommendations can be viewed on a application or a zone basis. These lists can be expanded and contracted using the +/- buttons. Version 2.2 15/08/03 Page 55 of 1 Statutory Planning Case Management System User Help Manual Print Response Click ‘Print Response’ to generate a PDF file of the Department’s response including application conditions and assessment zone recommendations. The PDF output is not editable. If the conditions change in the system the PDF generated will reflect these changes and therefore will need to be generated again. Generate a map of the spatial information associated with the case Click the ‘Map’ link to generate a PDF map of the application extent. This map will zoom to the zones associated with the application. You can alter the scale of display or the layers displayed. To create a PDF of this map click the print tool. Enter the name of your map and save. This map can then be attached to the application. Requesting Further Information If you require more information about the application, click ‘More Info’ and this will generate a letter requesting more information which will be sent to the referral authority. Version 2.2 15/08/03 Page 56 of 1 Statutory Planning Case Management System User Help Manual Click on the link to view the letter. You may need to edit some of the details or insert additional information into this letter as it is based on a template. When saving the amended letter, you should save in .doc format (not .rtf) as the file size is smaller Type the date you received further information and if possible attach the document containing the further information, using the ‘ATTACH DOCS’ function. Once the approval status of the Department Response is marked as ‘Final’ the system will generate the Department letter Generate Department Letter. This screen calls upon a template file for producing a standard letter containing the Department's response to the Application including both Comments and Conditions. The text of the letter is based on the final version of the Departmental response. The letter is generated as an MS Word ™ Rich text format (.rtf) file which will be saved as an electronic document. Note you user must either open this document onto your own PC or download it onto your PC by clicking on the link (before clicking on SAVE) Version 2.2 15/08/03 Page 57 of 1 Statutory Planning Case Management System User Help Manual Click on the link to view the letter. You may need to edit some of the details or insert additional information into this letter as it is based on a template. When saving the amended letter, you should save in .doc format (not .rtf) as the file size is smaller. Attach Department Response. This screen is for attaching an electronic version of the Departmental Response letter to the case. This is a mandatory document capture point for all SP Cases. Once you have edited the automatically generated letter and saved it in .doc format (not .rtf) you must then attach the updated file. Refer to the section on Document Naming Conventions on page 31. The following screen is displayed after a successful upload of the e-document. Version 2.2 15/08/03 Page 58 of 1 Statutory Planning Case Management System User Help Manual Record Authority Decision. After the Department has responded to the application the next step is to record the decision of the responsible authority after the Department has been informed of the outcome. Appeals Where DSE/DPI disagrees with the decision of the Referral Authority the Case Manager or other responsible officer will decide whether or not to appeal the Authority's decision. The decision to appeal is made "off-line" from the SPCMS, although the results of this decision and the details of any appeal are recorded in SPCMS. The Workflow Manager does not differentiate between Appeals made against a Decision by DSE and appeals against DSE's response as the processes are the same either way. If there is no appeal of the decision this information is recorded on the Determine Appeal Status screen and the case is closed. Version 2.2 15/08/03 Page 59 of 1 Statutory Planning Case Management System User Help Manual Determine Appeal Status. This screen is for recording whether there is an appeal made against the decision of the Responsible Authority. There are two fields to complete: Source There are three options for this field: ‘[none]’ if there is no appeal; ‘Department’ if the appeal is generated by DSE; and ‘Other’ if the appeal comes from a party outside DSE. Appeal/Panel hearing Produces a drop down list with four responses: ‘[none]’; ‘No Action’ (where there is no Appeal against the responsible Authority's Decision); ‘Panel Hearing’; or ‘Appeal’. If you choose ‘No Action’ or ‘Panel Hearing’, the Workflow will indicate that the case is now closed. If you chose ‘Appeal’ the Workflow will take you to other screens. If there are any documents associated with the appeal you may also attach them at any screen in the appeal Workflow process. Version 2.2 15/08/03 Page 60 of 1 Statutory Planning Case Management System User Help Manual Record Appeal Details This screen is for recording details of the Appeal. Reference Number The reference number provided by VCAT or the Hearing Panel. Department Action The action taken by DSE with respect to the Appeal process. There are four possible actions; ‘[none]’; ‘No Involvement’; ‘Written Submission’; ‘Departmental Attendance’. Direction Hearing Date Record the date of the direction hearing in this field. Hearing Date Record the date of the hearing. Short Grounds of Appeal date This is a short formal statement being the basis for lodging the appeal. This date is the date that the short grounds doc was lodged. Draft/Final Leave the Appeal Details at Draft stage until the response is fully complied. When the field is changed to ‘Final’ SPCMS will open a screen for recording the outcome of the appeal. The Case Manager will not be able to change the response. Submission Grounds 'Text blob' entry area for recording the submission grounds of appeal. Submission Grounds Hardcopy Denotes whether there is a hardcopy document relating to the submission grounds. If there is a hardcopy document, attach it to the case in electronic format using the ATTACH DOCS function. Version 2.2 15/08/03 Page 61 of 1 Statutory Planning Case Management System User Help Manual Record Appeal Decision This screen is used for recording the outcome of an appeal. Case Completed Congratulations you have completed another case! Version 2.2 15/08/03 Page 62 of 1 Statutory Planning Case Management System User Help Manual 3.2.3 Variations in the process associated with Mining Cases The workflow for dealing with Statutory Planning Cases within Minerals and Petroleum Victoria (MPV) closely follows the process in other parts of DSE with the addition of the following screens. When initially registering a Stat Planning case you will need to indicate that it is an MPV Planning Permit Application. Version 2.2 15/08/03 Page 63 of 1 Statutory Planning Case Management System User Help Manual Record MPV If you have chosen the above referral type and indicated whether or not there is a Source Case the following screen appears, asking you to record the MPV Reference Type, Reference number and asking if there is a Workplan Attached to the application. Workplans for MPV Applications A workplan must be submitted with each application. The ‘Record MPV’ screen provides you with a field for indicating whether a Workplan has been attached to the application. If there is no Workplan attached, generate a letter to the applicant outside of SPCMS requesting one. The SPCMS will ask that you attach a copy of the letter to the Case as an e-document. If a Workplan is attached to the application then answer ‘Yes’ at this point. Version 2.2 15/08/03 Page 64 of 1 Statutory Planning Case Management System User Help Manual Attach Workplan Conformance letter When you have attached the Workplan conformance required letter and saved it, a screen will inform you that the document has been uploaded. Register Public Land Owner Consent Refer to the Register Public Land Owner Consent (Page 37) for dealing with these screens. Edit Case details Refer to the Edit Case Details (Page 40) for dealing with these screens. Workplan Conformance If a Workplan has been received with the application the SP Coordinator answers "Yes" to the question "Is Workplan Attached?" on the Record MPV Screen. The case is then forwarded to the Case Manager. The Workflow now follows a path determined by how closely the application conforms to the submitted Workplan. The Case Manager has three options for deciding Workplan Conformance: Application confirms to the Workplan If you are satisfied that the application confroms to the Workplan Approved in an earlier iteration of the Stat Planning process choose "Conforms" on the Register Workplan Conformance Screen. The Workflow skips to the Refer Case step in the Workflow (see page 46). The Workflow now follows the standard SPCMS process. Minor Variance between Application and Workplan Where you judge that there is a Minor Variance between the application and the workplan choose the Minor Variance option in the Register Workplan Conformance Letter screen. The Workflow skips to the Refer Case step in the Workflow (see page 46). You should note the minor variance in the Instructions to Action Officers. The Workflow now follows the standard SPCMS process. Version 2.2 15/08/03 Page 65 of 1 Statutory Planning Case Management System User Help Manual Major Variance between Application and Workplan Where you judge that there is a major variance between the application and the workplan choose the ‘Major Variance’ option in the ‘Register Workplan Conformance Letter’ screen. This option will generate a letter informing the applicant that the application does not match the workplan. The process is to then wait for a letter from the responsible authority to confirm that the application responds to the workplan. Generate and Attach the Conformance letter Major variances to the workplan should be reviewed in some detail. The first step of the review is to generate a letter to the applicant to inform them that the appliation does not conform. This is done through editing the standard letter template. Version 2.2 15/08/03 Page 66 of 1 Statutory Planning Case Management System User Help Manual The edited letter then needs to be attached to the case. Attach Authority Work Plan Conformance Response Following the dispatch of the Conformance letter await the response of the responsible authority and attach a copy of the reply to the case: SPCMS will inform you that the file has been successfully uploaded. The Workflow now skips to the Refer Case step in the Workflow (see page 44). You should note any minor variance in the Instructions to Action Officers. The Workflow now follows the standard SPCMS process. Version 2.2 15/08/03 Page 67 of 1 Statutory Planning Case Management System User Help Manual 3.2.4 Variations in the process associated with native vegetation removal This section describes the process for recording the quantity and quality of native vegetation proposed to be removed in association with the Statutory Planning Case. This system also has the capability for recording potential offset information associated with the removal of native vegetation. Only Accredited Native Vegetation Assessors will be permitted to enter vegetation assessment information. Other users with Case Manager, Action Officer or Statutory Planning Coordinator status may view this information but will not be able to enter or edit information. The workflow relating to native vegetation removal is found under the ‘Site’ tab on the ‘Case Details’ screen. 3.2.4.1 Drill down The ‘drill down’ provides results of a slice or ‘cookie cut’ through a number of spatial data layers using the application extent as the basis for the information retrieval. The spatial information comes from DSE’s Corporate Geospatial Data Layers. Metadata statements can be found in the SPCMS Mapping Application, as described in section 3.4.6. For more information please refer to Appendix C for the drill down dataset source information and buffer distances. The drill down results should be taken as a guide only about the species and communities that are mapped in the area. The drill down conducts a spatial search at a specified buffer from the application extent and therefore can not be taken as an actual representation of what is present on the site. Version 2.2 15/08/03 Page 68 of 1 Statutory Planning Case Management System User Help Manual 3.2.4.1.1 Field Kit The field kit consists of information and data recording sheets to be taken into the field when conducting a habitat hectare assessment. The components of the field kit are: 3.2.4.1.1.1 Drill Down Print Preview Clicking on this link will produce a ‘Printer Friendly’ version of the Drill Down results to be taken out into the field. 3.2.4.1.1.2 Case Map Extent Use this link to print off a map of the site. Additional layers can be added such as Bioregional Conservation Status (EVCs) or Victoria TM Mosaic satellite imagery to provide further information for the field assessment. The scale can be changed so that the map can be printed at a scale appropriate for field work. Use the Create a PDF Map of the Current View tool to print the map. 3.2.4.1.1.3 Field Assessment Form This link will open a PDF of the Field Assessment form to be printed off and used in the field. 3.2.4.2 Site Vegetation Enter the vegetation characteristics of the site. The site is defined as, public or private land consisting of contiguous or discrete patches of native vegetation requiring a quality assessment. Therefore the site is the native vegetation to be cleared within the application extent. This may contain a number of different EVCs or the same EVC but with areas of differing quality. 3.2.4.2.1.1 Entering EVC and Significant Species Information for the Site a) Click ‘Add’ next to the EVC field and the following screen will appear: Version 2.2 15/08/03 Page 69 of 1 Statutory Planning Case Management System User Help Manual b) Enter a term to limit the search in the ‘EVC Name’ field, for example “wood”. This search can be further limited if the user knows which Bioregion they are operating in. If the Conservation Status of the EVC is known then this can be used to further limit the search. c) You can navigate through the list of search results by using the ‘Next’ or ‘Last’ function buttons. d) Once the correct EVC is displayed, select the checkbox for this EVC and then click ‘Continue’. More than one EVC can be selected if the site contains more than one EVC. e) After clicking ‘Continue’, you will return to the ‘Site Vegetation’ screen. You will notice the EVC(s) that you selected are now listed. f) Click ‘Add’ to add any ‘Significant Species’ recorded for the site. This is an optional function where you can add species observed at the site, particularly rare or threatened species, or other species of interest. Note, that as this is a native vegetation assessment, only plant species can be added in this process. g) If rare or threatened species are recorded on this site, this information should be recorded on the Flora Information System. If you are uncertain about this database, contact your local Flora and Fauna Officer. It should be noted that recording this information will not generate any automatic assessment result. Version 2.2 15/08/03 Page 70 of 1 Statutory Planning Case Management System User Help Manual h) Restrict the search to species in the plant kingdom by selecting this option from the drop down menu. i) Search for the species by entering the ‘Common Name’, ‘Short Scientific Name’ or ‘Scientific Name’. You do not need to enter the full name, for example ‘orchid’ in the ‘Common Name’ field or ‘Eucalyptus’ in the ‘Scientific Name’ field. j) Click ‘Search’ to execute the function. The number of species selected in the search is displayed at the bottom of the screen. The list can be scrolled through using the ‘Next’ and ‘Last’ links. Please note that this list is sorted alphabetically on Common Names. k) Once the correct species is displayed click in the check box and click ‘Continue’. This will return you to the main ‘Site Vegetation’ screen. l) Click ‘Save’ on this screen and the species that you selected will be listed. Version 2.2 15/08/03 Page 71 of 1 Statutory Planning Case Management System User Help Manual 3.2.4.3 Site Assessment Determine if you need to enter your data as a habitat hectare assessment or a scattered tree assessment. To enter data for a habitat hectare assessment follow the instructions listed below. The ‘Site Assessment’ screen provides you with an overview of the zones within the site and allows you to view the progress through the site assessment. Clicking on the ‘Map’ link will open SPCMS mapping and allow you to view the current zone. Clicking on the chevrons (>>>) will take you to the current step in the assessment process and will allow you to edit some parts of the assessment. Clicking on the zone number link will allow you to view the details entered for the zone and to edit a limited amount of information, such as the zone status. The step column gives you an indication of how far you are through the site assessment process. 3.2.4.3.1 Zone workflow A zone is a discrete area of native vegetation consisting of one vegetation type of one condition and which forms the base unit for conducting a habitat hectare assessment. A zone consists of a unique EVC/quality combination. The zones assessed must be within the site. 3.2.4.3.1.1 Record spatial extent Click ‘Add Zone’ and follow the mapping instructions to record the extent of the zone. A number of zones can be added at once while in the mapping function. Each zone added will require a unique reference number. 3.2.4.3.2 Determine hazard rating Using the buttons select the appropriate classification for each of the categories. Version 2.2 15/08/03 Page 72 of 1 Statutory Planning Case Management System User Help Manual Once the hazard ratings have been entered then click ‘Save’. To close without saving changes, click ‘Close’. Version 2.2 15/08/03 Page 73 of 1 Statutory Planning Case Management System User Help Manual If you select one more very high hazard rating categories you will need to record the mitigation measures taken or explain if the land use change has a higher or equivalent land protection value before you can proceed. Supporting documentation can be attached using the ‘Attach Docs’ link. Once this information is recorded click the ‘Proceed with assessment link’. If application does pose a ‘Very High Land Protection Hazard’ and appropriate mitigation measures are not taken then you should not proceed with the assessment. 3.2.4.3.3 Zone description a) Enter a description for the Zone giving a general indication of the site location, for example ‘North East paddock corner’. b) Select an EVC and Bioregion from the drop down list. The EVCs in this list will be the EVCs selected for the site at the ‘Site Vegetation’ step. If the EVC is not in this list click ‘Add EVC/s to Site’ and add the EVC/s using the procedure previously described. Species can also be added to the zone using the procedure previously described. Note, that as this is a native vegetation Version 2.2 15/08/03 Page 74 of 1 Statutory Planning Case Management System User Help Manual assessment, only plant species can be added in this process. See Section 3.2.4.2.1.1 to view these instructions. c) If you intend to revegetate this zone then select ‘Yes’ from the ‘Revegetation Zone’ drop down menu. d) Click ‘Save’ to move onto the next step. 3.2.4.3.4 Habitat Score (Offset or Clearing) The habitat score window will vary depending if the zone is categorised for ‘Clearing’ or an ‘Offset’. The screen below is for an offset as it includes the ‘Maintenance’ and ‘Improvement’ columns. Maintenance and Improvement information is not relevant for clearing zones, therefore it will not be displayed when a zone is categorised as ‘clearing’. The table below gives a description of the terms used in this screen: Large Trees Large trees are defined by a minimum diameter at breast height (DBH) (1.3 metres above ground level) threshold measurement as indicated in the EVC bioregional benchmark. Medium Trees Medium trees are defined as half of the large tree minimum diameter at breast height (DBH) (1.3 metres above ground level) threshold measurement as indicated in the EVC bioregional benchmark. Tree Scape/Density The arrangement of old trees within the remnant patch or parcel of land. Tree Canopy Cover The projective foliage cover of trees within the zone. The projective foliage cover is defined as the percentage of the sample site occupied by the vertical projection of foliage only. Trees contributing to the canopy are those reaching 80% or more of their mature height, as defined within the EVC bioregional benchmark description. Understorey All vegetation strata subordinate to the canopy, including immature canopy trees. Recruitment Recruitment is defined as the establishment of individual plants beyond the initial seedling (or early germination) stage, and for at least the full annual cycle of seasons since germination or first establishment. Cover of weeds The cover of non-indigenous plants which is combined with the proportional representation of high threat species making up that weed cover to determine the ‘weed score’. Organic Litter Organic litter is defined as both coarse and fine plant debris, and organic material such as fallen leaves, twigs and small branches less then 10 cm in diameter. Logs Logs are defined as timber fallen to the ground (substantially detached from the parent tree) with a diameter >10cm and are measured by estimating the combined length of logs within a 1000 m2 sample. Cut stumps (>10 cm in diameter) less than 50 cm in height are also included in the log assessment, acknowledging that they provide valuable fauna habitat in areas where logs might be otherwise missing. Calibration Factor This is a function designed to standardise tree-less EVC scores. Patch Size A patch is a remnant of native vegetation often with a defined physical boundary (e.g. cleared pasture) occurring in fragmented landscapes. They may occur across one or more land tenures. Patches may consist of one or more habitat zones of one or more EVC x quality combinations. Neighbourhood The level of isolation or connectivity to native vegetation within a 100 m, Version 2.2 15/08/03 Page 75 of 1 Statutory Planning Case Management System User Help Manual 1 km and 5 km radii of the zone. Distance to Core The core area is defined as a patch of native vegetation greater than 50 ha. Where a site is a part of a vegetation patch greater than 50 ha, the site would be considered contiguous. Assessed Habitat Score The final score for the zone is determined by tallying all the scores from each component. The highest possible score is one. Wetland Variation Wetland Size Compare wetland to average size for “wetland type” in bioregion Catchment Neighbourhood Proportion of native vegetation within the wetland catchment modified by the catchment ‘health’. Proportion of wetland type Current proportion of the original extent of wetland area at the site. Version 2.2 15/08/03 Page 76 of 1 Statutory Planning Case Management System User Help Manual a) Enter the data for each zone as collected while undertaking the field assessment. b) Enter the number of large and medium trees within the zone. It is important that the correct Tree Scape/ Density is selected as this will impact on the offset requirements. If you have completed a habitat hectare assessment therefore you have a remnant patch of native vegetation and this must be selected from the drop down menu. c) Note that only whole numbers will be accepted in the assessment form. The number range which values may fall within is in brackets next to each category. d) There is a limit to the gains that maybe made through Maintenance and Improvement for remnant and revegetation offsets. These maximum scores must be taken into account when entering the values for Maintenance and Improvement for an offset. The system will not allow values to be entered that exceed the maximum gain scores listed. The tables below list this information: Habitat Gains for remnant patches: Habitat Component Max. Maintenance Gain Max. Improvement Gain Large trees 3 not applicable Tree canopy cover 1 1 Understorey 3 5 not applicable 6 Recruitment 1 5 Organic litter 1 3 Logs 5 5 not applicable not applicable Cover of Weeds Landscape context components Habitat Gains for revegetation: Habitat Component Max. Improvement Gain Large trees 0 Tree canopy cover 1 Understorey Cover of Weeds 2.5 2 Recruitment 0.5 Organic litter 1 Logs 5 Patch size 8 Neighbourhood 8 Distance to core area 4 e) Then click ‘Calculate’ to generate the ‘Assessed Habitat’ score. f) Click ‘Save’ to move onto the next step. EVCs without a large tree component Version 2.2 15/08/03 Page 77 of 1 Statutory Planning Case Management System User Help Manual When you are entering the Habitat Score for a EVC that does not have a large tree component, for example, Plains Grassland or Plains Sedgy Wetland, you will notice that ‘Large Trees’, ‘Tree Canopy Cover’, ‘Logs’ are filled with ‘N/A’ (not applicable), as these categories are not relevant to these EVC types. The calibration factor will also change in these cases to standardise the score. Note This screen is for a clearing zone and does not include the ‘Maintenance’ and ‘Improvement’ columns. Maintenance and Improvement information is not relevant for clearing zones, therefore it will not be displayed on this screen. Recording Scattered Trees Scattered old trees that occur within pasture rather than in clearly defined vegetation remnants (i.e. where tree densities are not greatly reduced from benchmark densities, but the understorey is less than 10% of the total cover specified for the benchmark) do not require a habitat hectare assessment. They should be recorded in the native vegetation workflow, however this will differ to the procedure specified for a remnant patch of native vegetation. The Tree Scape/Density for scattered trees should be selected from one of the following ‘Parcels of land greater than 4 ha and with 8 or more scattered old trees/ha’, ‘Parcels of land greater than 4 ha with less than 8 scattered old trees/ha’, or ‘Parcels of land less than 4 ha with any number of scattered old trees/ha’. As you have not conducted a habitat hectare assessment do not enter any values in habitat score screen. Enter the number of large and medium trees proposed to be cleared in the habitat hectares screen. Version 2.2 15/08/03 Page 78 of 1 Statutory Planning Case Management System User Help Manual 3.2.4.3.5 Conservation significance Version 2.2 15/08/03 Page 79 of 1 Statutory Planning Case Management System User Help Manual Using the buttons select the appropriate classification for each of the categories to determine the Conservation Significance of the zone. Then click ‘Save’. To close without saving changes click ‘Close’. If ‘Very High’ is selected for any of the ‘Conservation Significance’ categories, then clearing should not proceed unless exceptional circumstances apply and Ministerial approval has been obtained. These exceptional circumstances should be noted in the text box and attach documents with Ministerial approval using the ‘Attach Docs’ link and then click ‘Proceed with Assessment’. If there are no exceptional circumstances for proceeding with the assessment select the ‘Do no proceed’ link. 3.2.4.3.6 Habitat Hectares The Habitat Hectare screen varies slightly depending if the zone is for clearing or an offset. 3.2.4.3.6.1 Clearing a) Select a ‘Status’ for the Zone. Choose Draft, Final or Discarded from the drop down menu. b) Select an Ecological Function and Land Protection Function from the drop down menus. c) Enter the number of large and medium trees to be cleared. d) Click ‘Save’ to move to the next screen. e) Enter the ‘Projected Habitat Score’. The projected habitat score defaults to 0. If the vegetation is not completely removed, ie. clearance of dominant tree layer, therefore in 10 years the vegetation may still have some habitat value. f) Enter the ‘Habitat Hectare Loss/Gain’ g) You will notice the ‘Multiplier’ will be automatically populated depending on the Conservation Significance of the site. Version 2.2 15/08/03 Page 80 of 1 Statutory Planning Case Management System User Help Manual 3.2.4.3.6.2 Offset h) Select a ‘Status’ for the Zone. Choose Draft, Final or Discarded from the drop down menu. i) Select an Ecological Function and Land Protection Function from the drop down menus. The values for Ecological Function and Land Protection Function have not yet been verified so select ‘Not yet determined’ from the drop down menu. j) Select if this zone is a revegetation zone. If the zone is a revegetation zone the proportion of revegetation included in the offset is limited by the conservation significance of the area proposed to be cleared. k) Enter the number of large and medium trees to be protected and recruited. l) Click ‘Save’ to move to the next screen. Version 2.2 15/08/03 Page 81 of 1 Statutory Planning Case Management System User Help Manual 3.2.4.3.7 Zone Recommendations a) Click ‘Add’ to add Offset Conditions to the zone. This will open the ‘Standard Condition Search’ screen. Version 2.2 15/08/03 Page 82 of 1 Statutory Planning Case Management System User Help Manual b) Offset Conditions can be searched by selecting a ‘Category’ from the drop down menu, entering ‘Condition Text’, and/or selecting ‘Conservation Significance’ from the drop down menu. c) Click ‘Search’ and a list of results will be displayed. You can move through the list using the ‘Next’ and ‘Last’ links. d) Select the relevant conditions by clicking in the checkbox and then click ‘Continue’ to move to the next step. 3.2.4.3.8 Associate clearing with offsets (offset zones only) This screen will only appear when the zone is a proposed offset. If the offset involves two or more clearing zones, the offset for the clearing can be made as a proportion of the mitigation areas. Enter the percentage of the Proposed Clearing Zones to be made up from the offset. These percentages must add up to 100%. Version 2.2 15/08/03 Page 83 of 1 Statutory Planning Case Management System User Help Manual 3.2.4.3.9 Like for Like validation (offset zones only) To ensure that there is a clear link between the vegetation or habitat type that is lost through clearing and the subsequent mitigation, there will be a graded response: from a direct link between loss and offset for higher significance, down to more flexibility for lower significance leading to opportunities to optimise conservation outcomes. This draws on information entered for the EVC, Ecological Function, Land Protection Function, Habitat Score for the offset and clearing zones, amount of revegetation. This information is drawn from ‘Table 6. Summary of Responses and Offset Criteria Graded According to Conservation Significance’ from Victoria’s Native Vegetation Management – A Framework for Action. Version 2.2 15/08/03 Page 84 of 1 Statutory Planning Case Management System User Help Manual 3.2.4.4 My Recommendations This screen can be used to edit, delete or add recommendations for each zone or for the whole application. This is particularly useful if you miss a screen during the workflow. Only the Accredited Native Vegetation Assessor can add recommendations at this stage. 3.2.4.4.1.1.1 Editing and deleting Conditions a) Click ‘Edit’ to change the conditions for a particular zone. b) Edit the text within the text box as required. Version 2.2 15/08/03 Page 85 of 1 Statutory Planning Case Management System User Help Manual c) To delete a condition click in the check box beside the condition. d) Once the changes have been made click ‘Save’ which will return you to the main ‘My Recommendations’ screen. 3.2.4.4.2 Adding Conditions a) Click ‘Add’ to add conditions to a particular zone b) Conditions can be added using the ‘Standard Conditions Search’ as previously explained. c) Alternatively text can be cut and paste into the text box from programs such as MS Word™. Version 2.2 15/08/03 Page 86 of 1 Statutory Planning Case Management System User Help Manual 3.2.4.5 Net Gain Summary The net gain summary provides an accounting system for the application. 3.2.4.6 Final Comments You must mark your ‘Final Comments’ as ‘Final’ so that they are available for the Case Manager to use in constructing the ‘whole of Department Response’ as explained in the AO Recommendations section. Version 2.2 15/08/03 Page 87 of 1 Statutory Planning Case Management System User Help Manual 3.2.4.7 Editing details in the native vegetation workflow 3.2.4.7.1 Changing the spatial extent of a zone Click the ‘Map’ link next to the zone that you want to change in the Site Assessment screen. This will open the SPCMS Mapping window. Use the Capture Freehand Polygon Features tool as described in Section 3.4.8 to change the shape of the polygon. Once you have completed the mapping process, close the SPCMS Mapping window. Note You will then need to re-complete the Zone Workflow and to re-enter any information that might have changed with the alteration of the spatial extent of the zone. 3.2.4.7.2 Changing the spatial extent of the application extent The spatial extent of the application extent can be changed by clicking on the ‘Case Map Extent’ link in the Drill Down screen. You will then need to edit the polygon shape using the methods outlined in 3.4.7. Please note that changing the application extent will not refresh the drill down results. 3.2.4.7.3 Changing the ‘status’ of a zone Throughout the development of the case, the zone may change status from Draft, Final or Discarded. To change the zone status, click the zone number in the Site Assessment screen. This will take you into the Zone Details screen where you can change the ‘Status’ from the drop down menu. You will only be able to change the status of a zone once you have completed the workflow process for this zone. Note You will only be able to change the status of a zone when you are the Accredited Native Vegetation Assessor for this particular zone. 3.2.4.7.4 Editing zone details To edit the Zone Details, click the zone number in the Site Assessment screen. This will take you to the Zone Details screen. You can then edit this data. If changes are made to the zone details you will be required to re-complete the zone workflow due to the potential implications this might have on the habitat assessment. Note you are only able to edit the zone if you are the Accredited Native Vegetation Assessor for the zone. Once a zone status is changed to ‘Final’ or ‘Discarded’ you will not be able to edit it. Version 2.2 15/08/03 Page 88 of 1 Statutory Planning Case Management System User Help Manual 3.2.5 Non Referred Clearing Non Referred Clearing is found under the Portfolio tabs. This functionality is designed to capture information about planning permit applications involving the removal of native vegetation that has not been referred to DSE. Capturing this information allows DSE to develop a fuller picture in relation to native vegetation clearing, it will also assist in the overall compliance function. This information obtained in combination with clearing information will be used to identify areas for which no permit has been issued. The non-referred clearing facility provides you with a statewide list and it is not region specific. 3.2.5.1 How to record Non Referred Clearing This function allows you to search the system to ensure this information has not already been recorded. The search can be filtered by Address, Landholder or EVC. To view one of the records click on the ‘ID’. Additional information can be added to the record. You will notice that prefix for nonreferred clearing cases is NRCXXXXX. To record a new Non Referred Clearing click ‘Add’. Version 2.2 15/08/03 Page 89 of 1 Statutory Planning Case Management System User Help Manual Then enter all known information about the Non Referred Clearing and click ‘Save’. After clicking ‘Save’ the ‘Map’ link will appear. Use this link to record the area and location of the nonreferred clearing. This will open SPCMS mapping where you can record the Non Referred Clearing Area. The method of recording this area will vary depending if it is a remnant of native vegetation or scattered trees cleared. See section 3.4.8 for more information on how to use the mapping tools to record the area. The area that you map for the non referred clearing will then become available as an application layer in SPCMS mapping. To edit an existing non-referred clearing case, click on the case number and make any changes. The spatial extent can be changed by clicking on ‘MAP’. Version 2.2 15/08/03 Page 90 of 1 Statutory Planning Case Management System User Help Manual Version 2.2 15/08/03 Page 91 of 1 Statutory Planning Case Management System User Help Manual 3.3 Managing your Case Load in SPCMS The previous sections of this chapter looked at ways of viewing and editing information about Statutory Planning cases and how Cases are progressed from initial registration on the SPCMS to final completion of the case. As well as these functions, the SPCMS has tools that enable you to manage your workload, and the workload of other staff to whom Cases have been assigned. The Workflow manager enables SP Coordinators and Case Managers to Assign and re-assign SP Cases in their portfolio on a case-by-case basis. The Portfolio Manager, SP Coordinator and Case Manager Options on the Portfolio Screens allow you to manage your portfolio of Cases more efficiently by reassigning cases among SP Coordinators, Case Managers and Case Owners enmasse. This ability to reassign cases efficiently, makes it simple to transfer your cases to another officer if you are about to go on leave, or if you are an SP Coordinator or Case Manager, to ensure that workloads are evenly distributed among staff. 3.3.1 Definitions Below is a review of the different roles in the Statutory Planning response process. SP Coordinator Person responsible for coordinating the timely "whole-of-Department" response to the Responsible Authority. Case Manager Person responsible for the day-t o-day management of a case. This is usually the same as the SP Coordinator, but SPCMS will also allow a different person to be nominated in this role. Action Officer Any person responsible for providing input to the "whole-of-Department" response. This person is sometimes called a referral officer in the Department. Typically the Action Officers represent different business units within DSE. Case Owner Person responsible for carrying out the next step in the process. Not a role as such, more a status of "file ownership". In the hard copy world, this is the equivalent of the person who's IN TRAY holds the file. Admin Support Any person who provides administrative support during the pre-referral stage of a case. 3.3.2 Portfolio Menu Options We have already looked at the Portfolio Manager and how it is used to access individual cases for information and action (See Section 3.1). The Portfolio Manager can also be used to reassign cases. The below screen is the Portfolio Screen visible to an SP Coordinator. The SP Coordinator can reassign cases to other SP Coordinators, Case Managers and Action Officers. Case managers will see a more limited range of menu options as they can reassign cases to other managers or Action officers. Action Officers are not able to reassign cases. Admin support staff will have no options for reassigning cases and the only tab appearing on this screen is "Portfolio Manager". Version 2.2 15/08/03 Page 92 of 1 Statutory Planning Case Management System User Help Manual The ‘Non Referred Clearing’ tab is dealt with in the Workflow Manager Section 3.2.5. The SP Coordinator, Case Manager and Action Officer tabs are like your “Out Tray”. This function allows SP Coordinators to track the progress of a case. It also allows Case Managers and SP Coordinators to reassign cases and to completely change the case ownership. This is different to reassigning a case within the Portfolio Manager. To reassign a Coordinator, Case Manager or Owner, click on the links at the bottom of the page. Then click in the checkbox to select the case(s) that you wish to reassign. Then click reassign, and select the appropriate person from the drop down list and click on SAVE. Version 2.2 15/08/03 Page 93 of 1 Statutory Planning Case Management System User Help Manual 3.3.3 Reassigning Cases using the Portfolio Manager. Below is a Typical Portfolio Manager's screen showing cases at the "Attach Application Form" Step. The SP Coordinator, Case Manager or Action Officer can reassign any of the Cases appearing on the list by ticking the box in the "Reassign" column and choosing REASSIGN at the bottom of the screen. Version 2.2 15/08/03 Page 94 of 1 Statutory Planning Case Management System User Help Manual A dialogue box appears with names from which you can choose the staff member to which the case is to be reassigned. Choose an officer from the names on the drop down list and then SAVE. All the cases ticked on the previous screen are assigned to the new officer and that officer will be informed by an automated email that he or she has some new cases to deal with. 3.3.4 The Reassign SP Coordinator Option The SP Coordinator Screen allows Coordinators to reassign the Cases in their Portfolio to other Coordinators, Case Managers and Case Owners. The Screen is basically a list of all the projects of which you are the SP Coordinator. Clicking on the Case number in the screen will bring up the Case Details screens (see Section 3.1.2) . You cannot access the Workflow Manager from this screen. As an SP Coordinator you can only reassign your own Cases to another SP Coordinator. Cases can be sorted using bi-directional sorting (see Section 3.1.1.1). Version 2.2 15/08/03 Page 95 of 1 Statutory Planning Case Management System User Help Manual Note You should always contact other SP Coordinators or Case Managers before reassigning cases to ensure that the reassignment will not unduly effect their existing workload. Version 2.2 15/08/03 Page 96 of 1 Statutory Planning Case Management System User Help Manual If, for example, you wish to reassign Case Manager on some cases click on the REASSIGN CASE MANAGER tab at the bottom of the screen. The following screen will appear: Check the boxes in the Reassign column for those cases you wish to reassign and click REASSIGN at the bottom of the screen. You can also select or deselect all cases on the screen by clicking the (DE)SELECT ALL CASES button. You can only reassign cases to one officer at a time. Version 2.2 15/08/03 Page 97 of 1 Statutory Planning Case Management System User Help Manual The Portfolio Reassign screen appears with a list of all staff registered as Case Managers. Choose the person to whom you wish to reassign the case(s) from the drop-down list of Officers. SAVE reassign the case(s). An updated Portfolio Reassign Case Manager screen is again displayed enabling you to reassign other cases. When you have finished reassigning hit CLOSE on this screen to return to the SP Coordinator screen. Cases may be reassigned to another SP Coordinator or Case Owner in a similar fashion to the above. 3.3.5 The Reassign Case Manager Option The Case Manager screen allows Managers to reassign the cases in their Portfolio to other Case Managers and Case Owners. The Case Manager screen is basically a list of all the projects of which you are the Case Manager. Clicking on the case number in the screen will bring up the Case Details screens (see Section 3.1.2). Note You cannot access the Workflow Manager from this screen. As a Case Manager you can only reassign your own Cases to another Case Manager. Cases can be sorted using the bi-directional sorting (s ee Section 3.1.1.1). The Case Manager reassignment screen is similar to the SP Coordinator reassignment screen In Section 3.3.4, and behaves in the same way. Note You should always contact other Case Managers before reassigning cases to ensure that the reassignment will not unduly effect their existing workload. If, for example you want to reassign Case Managers the Portfolio Reassign Case manager screen appears. This is similar to the SP Coordinator reassignment screen (Section 3.3.4) and behaves in the same way. 3.3.6 The Reassign Case Owner Option The Case Owner screen allows Managers to reassign the cases in their Portfolio to other officers for actioning. Procedures are similar to those for reassigning SP Coordinators (see Section 3.3.4) or Case Managers (see Section 3.3.5) Version 2.2 15/08/03 Page 98 of 1 Statutory Planning Case Management System User Help Manual 3.4 SPCMS Mapping SPCMS Mapping is another component of the SPCMS System. The mapping window will open to ‘Record Spatial Extent of Application’ and also in the ‘Site Assessment Process’ to ‘Add Zones’. Clicking on the link into SPCMS mapping will create a new window for viewing and searching spatial information in the MapShare interface. MapShare allows you to zoom-in and zoom-out, pan around the map, identify features in the map, do queries on databases, link (hyperlink) to other sites and print out maps based on specific themes of interest (also known as map views) as published by DPI/DSE businesses. This is a simple Geographic Information System (GIS) that allows data relating to the Statutory Planning case application extent and zones to be entered, edited and analysed in relation to other data that sits within SPCMS mapping. 3.4.1 General information This map viewer has been designed for use with a minimum screen resolution of 800 x 600 pixels (Small Fonts). The recommended optimal screen resolution is 1024 x 768 pixels (Small Fonts). Version 2.2 15/08/03 Page 99 of 1 Statutory Planning Case Management System User Help Manual Toolbox Layer and legend information SP number search function Overview map Scalebar Links Status bar displaying map coordinates Version 2.2 15/08/03 Page 100 of 1 Statutory Planning Case Management System User Help Manual 3.4.2 Spatial data layers On the right hand side of the map viewer there is a List of Layers. This list describes all data layers available through the current map view. These categories can be expanded into the individual layers by clicking on the + to expand the heading. Many data layers may not be visible by default. To make them visible, tick the box under the heading ‘Visible’. You must then hit the REFRESH MAP button for changes to take effect. The layers are displayed in the categories: • Application • Biophysical • Administrative • Vicmap If the box is already ticked and the data layer is still not visible, this is because this layer has scale dependencies for the viewing of that particular data layer. Zoom-in or Zoom-out and you will see the data layer appear at a scale appropriate for viewing. When using the Identify, Query & Find tools in the Toolbox, only information from the currently active layer will be returned. If you want information from another layer, first make that layer active by clicking the circle against its name in the List of Layers. Active layers are not necessarily visible, but are the layers that will be queried. Only one layer can be active at a time. To make a layer active, click in the circle next to the layer name. Only feature data layers can be queried, therefore the image layers can not be made active. You will notice that a small ‘A’ will appear next the name of the subheading with the active layer. Visible layers can be seen on screen but are not queried. A number of layers can be visible at the one time. To make a layer visible, click in the ‘Visible’ check box and then click REFRESH VIEW. To view the metadata for any particular data layer, click on its name. 3.4.3 Searching for Statutory Planning Cases If you know the SP number of an existing case, the search function can be used to spatially locate the case. This is found below the Toolbox. Type in the SP number (SP000XXX) and then hit <Enter> on the keyboard. This is not case sensitive. The case you are searching for will be highlighted in the map viewer. 3.4.4 Toolbox On each map there is a toolbox. Amongst other things, the toolbox contains the tools needed to move around the map, to retrieve information about various features and to print your own personalised maps. By rolling your mouse over the toolbox a tool tip will appear that briefly describes what each tool does. A red square around a tool indicates that this tool is the current tool being used. Version 2.2 15/08/03 Page 101 of 1 Statutory Planning Case Management System User Help Manual Each of these tools are described below: 3.4.4.1 Zoom In This tool will allow you to Zoom In to (or magnify) the map. By doing so the map may reveal more features that were not previously visible due to scale dependencies. To use the Zoom In tool, click in the map once or click, hold and drag out a rectangle. TIP: The smaller the square you draw, the closer you zoom in! 3.4.4.2 Zoom Out This tool will allow the user to Zoom Out from the map. By doing so the map may reveal fewer features than were previously visible due to scale. To use the Zoom Out tool, click in the map once or click, hold and drag out a rectangle. TIP: The smaller the square you draw, the further you zoom out! 3.4.4.3 Pan If you want to move the map to a location immediately adjacent to your current location, but remain at the same scale, use the Pan tool. Click, hold and drag the map in any direction to the new location. 3.4.4.4 Select properties by rectangle Use this tool to select properties by clicking, holding and dragging out a rectangle over the properties that you wish to select. 3.4.4.5 Identify If you want to identify features from the Active Layer click the Identify tool then click on the feature in the map you want to get information on. A new window will pop-up with the related information. The information returned may also include a link to other parts of the system, if so click on the link to view further related information. TIP: Only the information from the currently active layer will be returned! If you want information from another layer, make that layer active by clicking the circle against its name in the List of Layers. A dot will appear in the Version 2.2 15/08/03 Page 102 of 1 Statutory Planning Case Management System User Help Manual circle to signify that the layer is active. Repeat the above to get information on the new active layer. Only one layer can be active at any one time. 3.4.4.6 Select & Identify within a Rectangle This tool selects and identifies features from the Active Layer within a rectangle defined by the user. Click the Select & Identify within a Rectangle tool then select feature/s in the map by clicking and dragging a rectangle within the map. Information will be returned on all selected features. A new window will pop-up with the related information. TIP: Only the information from the currently active layer will be returned! If you want information from another layer, make that layer active by clicking the circle against its name in the List of Layers. A dot will appear in the circle to signify that the layer is active. Repeat the above to get information on the new active layer. Only one layer can be active at any one time. 3.4.4.7 Zoom To Full Extent Use this tool to zoom to the full extent of your map view. In the case of this map it will zoom to the extent of Victoria. 3.4.4.8 Back To Last Zoom Use this tool to zoom to the extent of your previous map view. This tool will only allow you to return to the extent of your last zoom, not any previous zoom extents before this. 3.4.4.9 Set Extent to a Selected Region This tool will allow you to set the view extent to a particular region, selecting from CMA (Catchment Management Authority), LGA (Local Government Authority), Locality or Town. Type the selected name in and then click on FIND. Version 2.2 15/08/03 Page 103 of 1 Statutory Planning Case Management System User Help Manual The search results will then be displayed, as below: Click on the link with the correct search result and this will limit the view extent to this region. The selected region will also be highlighted. 3.4.4.10 Search for a Property by Number This tool will allow you to search for a property if the Property Number is known. Select the relevant LGA and enter the property number. Then click on FIND. The selected property will then appear highlighted in yellow in the map viewer. 3.4.4.11 Search for an Address This tool will allow you to search for a property using the address. Enter the address details and click FIND. Version 2.2 15/08/03 Page 104 of 1 Statutory Planning Case Management System User Help Manual The search results will display the matching addresses. Click on VIEW and this will set the map viewer to the selected address. 3.4.4.12 Search for a Parcel by Legal Description This tool will allow you to search for a parcel using a Crown Description Search or a Plan Description Search. Version 2.2 15/08/03 Page 105 of 1 Statutory Planning Case Management System User Help Manual Note- both these options can not be used simultaneously. 3.4.4.13 Set Extent to an Entered Coordinate There are three steps to setting the map view extent to map coordinates. Data coordinates gathered using topographic maps or a global position system (GPS) can be entered to set the view extent. 1. Select the Datum. Refer to your map or GPS for datum information. 2. Enter the coordinates in either: • Latitude and Longitude • AMG/MGA Easting and Northing with the appropriate Zone • VICGRID Easting and Northing Note- the VICGRID94 coordinates of the map view are displayed on the status bar at the bottom of the page. 3. Select the appropriate map width from the range of 100 metres to 100km. The scale of the map view will affect the visible layers through scale dependencies. Click on MAP COORDINATES to view the selected extent. Version 2.2 15/08/03 Page 106 of 1 Statutory Planning Case Management System User Help Manual 3.4.4.14 Clear the Selected Features This tool is used to erase all measured distances and selected or highli ghted features. 3.4.4.15 Measure Use the Measure tool to measure distance on the view. Use the mouse to draw a line defining the distance you want to measure, then release the mouse. The distance will appear in a pop up window, as below: 3.4.4.16 Set Map Scale Use this tool to set the scale of the map to a standard scale, e.g. 1:25,000. Alternatively you can you this to manually set the scale by typing the figure into the ‘Manual Scale 1’ field./ Version 2.2 15/08/03 Page 107 of 1 Statutory Planning Case Management System User Help Manual 3.4.4.17 Copy Selected Parcels as Application Extent This tool allows you to select a parcel using some of the before mentioned tools, particularly Select Properties by Rectangle and to save this area as the application extent. Once the parcels are selected, click on this tool and the following confirmation note will appear: 3.4.4.18 Capture Freehand Polygon Features This tool is used to capture areas that are not defined by parcel boundaries. Note- before using this tool ensure you are at an appropriate scale and all data layers needed to define the polygon are visible. Upon clicking on this tool the Spatial Edit Applet screen will appear: Version 2.2 15/08/03 Page 108 of 1 Statutory Planning Case Management System User Help Manual tools status bar map coordinates automatically calculated area 3.4.4.18.1 Spatial Edit Applet The Spatial Edit Applet is a small program that the system sends to your computer to allow you to record and store the spatial information. To run this applet you will need to have a java plugin installed onto your computer’s hard drive. Consult the system administrator if you need assistance in installing this plugin. This function is used to spatially capture and edit application and zone extents. The tools used in this function are described below. You will notice that the tool currently in use is shaded grey. Save This will save the area you have created and you will be returned to the main SPCMS mapping page. Select/ Move Features Use this tool to select features and then to move or edit them with other tools. Select/ Move/ Add Vertices This tool can be used to select vertices on a polygon that you have created. A vertex is the hollow squar e box that creates corners in polygons. To move a vertex Click on the vertex you want to move and hold down the mouse button and drag the vertex to the new position. You will notice when a vertex is selected, it turns red. Version 2.2 15/08/03 Page 109 of 1 Statutory Planning Case Management System User Help Manual To add a new vertex Move the cursor to a position on the polygon line where there is no vertex. When the cursor appears as a cross hair, click the mouse button to add a new vertex at this position. The curvature of the line can be increased through adding more vertices. To delete a vertex Click on the vertex you want to delete and it will turn red. Then use the DELETE key on the keyboard of the Delete tool to remove this vertex from the polygon. Delete Feature/Vertex This tool is used to delete selected vertices and features. Use the Select/Move Features tool to select the features or vertices that you want to delete and then click on the delete tool. Create Polygon Feature Use this tool to capture the application or zone extent. This tool will only create polygons. Using the mouse, slowly click where you want the polygon to start, then slowly click on each point around the polygon’s boundary, then double-click the final point. It is easier to use this tool to create the basic shape and then to modify it using the Select/Move/Add Vertex tool. Create Circle Feature Use this tool to capture circular features. Click on the map where the feature is located. Then wait for the below screen to prompt for the radius of the feature in metres. Type this in and hit ‘OK’. A circular feature will then appear on the map. Feature Properties This tool is used to enter a ‘Zone Ref’ (Zone Reference Number) of the polygons created, and to select if the feature is an offset, clearing, or other area. Select the polygon that you want to enter the description for, using the Select/Move Features tool. Then click on the Feature Properties tool and enter the description in the text box. Select the ‘Type’ from the drop down menu. Click ‘OK’ when finished. To close the text box without saving changes click ‘Cancel’. Version 2.2 15/08/03 Page 110 of 1 Statutory Planning Case Management System User Help Manual 3.4.4.18.2 Common errors encountered when using the spatial edit applet Self-intersecting features or invalid shapes If the whole polygon is highlighted red this indicates that it has self-intersecting features or invalid shapes. This means that within this polygon there are lines that are crossing over creating what appears to be two shapes joined at a single point. When you try to save this polygon an error message will come up. You must select this polygon and then delete it using the Delete Feature/Vertex tool. Alternatively you can use Select/Edit/Move Vertex button to drag out the vertex until the shape infills with blue. 3.4.4.19 Create a PDF Map of the Current View Use the Print tool to print your current map. When you press this tool, you will be prompted to enter a title for your map. When you have done this, click on GENERATE MAP to open a new Browser window in Adobe Acrobat Reader with the Map Image, Overview Map Image, and Legend displayed. You can then use the File/Print menu item to print the map. Version 2.2 15/08/03 Page 111 of 1 Statutory Planning Case Management System User Help Manual 3.4.5 Legend On each map a Legend can also be viewed. The Legend provides a graphical key of what symbology is used to represent what features in the map. The VIEW LEGEND and VIEW LAYERS buttons allow you to switch between the Legend and the List of Layers. 3.4.6 Metadata Metadata is data about data. It can be used to explain the suitability of data for intended uses. Each data layer in this map has an accompanying metadata statement that can be viewed by clicking on the layer name in the List of Layers. Metadata can include: detailed information about data collection methods; information about the accuracy of source datasets, processing history, and archival procedures to effectively manage and utilise data within custodian organisations; information about projection specifications, scale, and a data dictionary to accompany data transfers to other organisations; adequate descriptions of the content, quality and geographic extent of datasets so potential users of existing data can assess its suitability for other purposes; and summary descriptions of content and quality as well as contact information. DSE captures and maintains metadata to at least the minimum specification defined by the Australian and New Zealand Land Information Council (ANZLIC). Version 2.2 15/08/03 Page 112 of 1 Statutory Planning Case Management System User Help Manual An example of the metadata statement for Bioregional Conservation Status (EVCs) is below: 3.4.7 Record the Spatial Extent of the Application a) In the main Workflow Manager click on the link ‘Record Application Extent’. This will open the SPCMS Mapping window. You will notice that the municipality that you selected, is set as the zoom extent and is highlighted yellow. b) Using the search and zoom tools, described above; locate the general area which the application refers to. c) The application extent is the spatial representation of the area subject to the application. This may include a whole parcel, number of parcels, or a part of a parcel. Where the application extent is not clearly defined, the cadastral parcel will be used as the application extent. d) There are two ways of recording the application extent, either using the Copy Selected Parcels as Application Extent , or Capture Freehand Polygon Parcels tools. Copy Selected Parcels as Application Extent a) Select the parcel(s) that make up the application extent. b) The parcels can be selected using Search for a Property by Number, Search for an Address, Search for a Parcel by Legal Description, or you can manually select the parcel(s) using Select Properties by Rectangle. c) The parcel(s) that you want to set as the application extent should now be highlighted yellow. Version 2.2 15/08/03 Page 113 of 1 Statutory Planning Case Management System User Help Manual d) Then click on Copy Selected Parcels as Application Extent. The following message will appear: Capture Freehand Polygon Features as the application extent a) If you are using the Capture Freehand Polygon Features tool, you must ensure that ensure you are at an appropriate scale and all data layers needed to define the polygon are visible. Upon clicking on this tool the Spatial Edit Applet screen will appear. Use the Create Polygon Feature to draw the basic shape of the application extent. Use the Select/Move/Add Vertices tool to modify the shape. b) If you are not happy with the polygon you have created, use the Select/Move Features to select the feature and then the Delete Feature/Vertex tool to start again. c) If you find that you are within the Spatial Edit Applet screen and the scale or spatial position is inappropriate, or more context layers are required to record the application extent, then you will need to close this window and return to the SPCMS Map View to make the necessary adjustments. Following this you will need to click on the Capture Freehand Polygon Parcels and start again. d) Once you are satisfied with the application extent, click Save and this will return you to the SPCMS Map View and the polygon you have created will be displayed with the SP Case Number. Version 2.2 15/08/03 Page 114 of 1 Statutory Planning Case Management System User Help Manual Note- You will notice that when you are capturing the application extent the Feature Properties tool is not visible. This is because this tool is not necessary as the description of the application extent is automatically generated. 3.4.8 Add Zone For a discrete area of remnant native vegetation a) In the Site Assessment window, click ‘Add Zone’ which will open the SPCMS Mapping window to enable you to record the spatial extent of the zone. b) Click the Capture Freehand Polygon Features tool to open the Spatial Edit Applet Window. c) You must ensure that ensure you are at an appropriate scale and all data layers needed to define the polygon are visible before using this tool. Use the Create Polygon Feature to draw the basic shape of the zone. Use the Select/Move/Add Vertices tool to modify the shape. d) On completion of drawing the polygon, a window will pop -up requesting information on the Zone Ref (Zone Reference Number) and the type of feature: ‘Clearing’, ‘Offset’ or ‘Other’. You must also enter a unique code for the ‘Zone Ref’. Each polygon or zone will have a unique ‘Zone Ref’. If the code for the ‘Zone Ref’ is not unique the following error message will be displayed. e) If you are not happy with the polygon you have created, use the Select/Move Features to select the feature and then the Delete Feature/Vertex tool to start again. f) If you find that you are within the Spatial Edit Applet screen and the scale or spatial position is inappropriate, or more context layers are required to record the zone, then you will need to close this window and return to the SPCMS Map View to make the necessary adjustments. Following this you will need to click on the Capture Freehand Polygon Parcels and start again. g) Once you are satisfied with the zone extent, click Save and this will return you to the SPCMS Map View and the polygon you have created will be displayed with Zone Reference Number. Version 2.2 15/08/03 Page 115 of 1 Statutory Planning Case Management System User Help Manual Scattered Trees If you are entering information on a scattered tree assessment, then you will also need to record a polygon for the area of scattered trees or for the individual tree. This is achieved simply by drawing a polygon around the canopy diameter of the trees in the clearing proposal. a) In the Site Assessment window, click ‘Add Zone’ which will open the SPCMS Mapping window to enable you to record the spatial extent of the zone. b) Click the Capture Freehand Polygon Features tool to open the Spatial Edit Applet Window. c) You must ensure that ensure you are at an appropriate scale and all data layers needed to define the polygon are visible before using this tool. Use the Create Circle Feature tool to capture the area for an individual tree. You will need to know the radius of the canopy cover. d) Alternatively if you have a group of scattered trees used the Create Polygon Feature tool to draw around the canopy of the trees proposed for removal. e) A window will pop-up requesting information on the Zone Ref (Zone Reference Number) and the type of feature: ‘Clearing’, ‘Offset’ or ‘Other’. You must also enter a unique code for the ‘Zone Ref’. Each polygon or zone will have a unique ‘Zone Ref’. f) Once you are satisfied with the zone extent, click Save and this will return you to the SPCMS Map View and the polygon you have created will be displayed with Zone Reference Number. Naming conventions for zones To ensure that zones are named consistently the suggested naming convention is as follows: Zone Type Name Clearing cl# Offset of# Other ot# where # is the next consecutive number 3.4.8.1 Legend for Application Layer You will notice when you are capturing the polygon information for application and zone extents they will be displayed with a default legend. The final zones are displayed in green and those in draft status are displayed in brown. The application extent is always a red outline. Version 2.2 15/08/03 Page 116 of 1 Statutory Planning Case Management System User Help Manual 3.5 Reporting Module SPCMS's reporting module allows you to generate a variety of reports on the information held in the application. These are: • Case Report - creates a report based on one case • Standard Reports- select a report type based on set fields • AdHoc Case Report- generate reports on cases based on fields you choose within specified selection criteria • AdHoc Zone Report- generate reports on zones based on fields you choose within specified selection criteria • Locate Similar Cases (Text)- generate reports on cases based on fields you choose within specified selection criteria and then use the links in the report to view the case information • Locate Similar Cases (Spatial)- used to search for cases within an area that you define with specified selection criteria and sorted by selected fields. • Map Report- search for a particular case and create a map of this case. Reports can be prepared in three electronic formats. Admin support staff do not have access to the reporting module. 3.5.1 Ad Hoc Case Reports The Ad hoc case report enables you to generate reports displaying the fields you choose, within specified selection criteria (i.e. a date range) and sorted by the selected fields. The table has five columns that can be divided into three functions. Fields: Provide a list of fields for each case that you can include in the report. Check the box next to the field s you wish to include in your report. The SP Case number will be included in every report you generate. Sorting: You can choose up to three fields by which to sort. In the ‘Sort Order’ column select the field that will be the first second and third criteria for sorting and in the ‘Sort Direction’ choose whether you want to sort in ascending A to Z or descending Z to A order. Version 2.2 15/08/03 Page 117 of 1 Statutory Planning Case Management System User Help Manual Selection Criteria: This allows you to choose Criteria on which to report. These may be selection lists or free format fields. You can select more than one Selection Criteria and make multiple selections from the selection lists by using <Ctrl> or <Shift>. There are three options for generating the report; EXECUTE QUERY runs the current report. SAVE REPORT CRITERIA saves the current report in your workspace so that you can run the same report at a later date. APPLY EXISTING REPORT CRITERIA allows you to run the report criteria you saved earlier. Generating a report 1. From the SPCMS Home page choose ‘Reports’ and login to the Reports Screen. 2. Select ‘AdHoc Case Reports’ 3. Type in a name for the report. 4. Choose an Output Format. Three formats are available. HTML is recommended if you wish to look at a report on the Screen. All the reports found in the search can be viewed by clicking on the link. PDF is recommended if you wish to print your report, you will need Adobe Acrobat Reader to do so. CSV is recommended if you want to download the report into another application, particularly MS EXCEL ™. 5. Choose the fields you wish to appear in the report by checking the box next to the field name. The more fields you choose the wider the report will be. The SP Case number will appear on all reports and cannot be deselected. 6. Choose the Sort order for the report. You can choose up to three fields as the sort order. If you choose a Sort Order also chose whether you want the sort direction to be in Ascending (A to Z) or Descending (Z to A) order. 7. Choose the Selection Criteria. This determines the type of information that will appear in the report. Selection Criteria may be chosen from a selection list or they may be free -format fields. For example if you want to report all the Cases you are Managing, choose your name from the Case Manager list and run the report. If you want to find all the cases you are managing for which the Departmental reply is due before a ceratin date, choose your name from the Case Manager and enter a date range in the "Dept Reply By Date" Selection Criteria column. You can choose multiple criteria (for example multiple Case Managers) by holding down the <Shift> key and clicking on multiple selections. 8. Choose EXECUTE Query to run the report. A screen showing all the cases that match your criteria is displayed. Version 2.2 15/08/03 Page 118 of 1 Statutory Planning Case Management System User Help Manual Choosing EXECUTE QUERY results in the following report; Version 2.2 15/08/03 Page 119 of 1 Statutory Planning Case Management System User Help Manual Saving and recalling reports You can save a report for running at a later stage. This saves you time by allowing you to recall and run customised reports on a regular basis without having to re-apply your selection criteria. To save a report choose SAVE REPORT CRITERIA. The following screen is displayed. Type in a description of the new report. The description should be no more than 255 characters long and can include alphabetic and numeric characters. There is no limit to the number of reports you can store so you should clearly state the purpose of the report in the title so you know what each report contains. You can delete reports from this screen by checking the boxes next to the report you wish to delete and then choosing SAVE. To run a saved report choose APPLY EXISTING REPORT CRITERIA at the bottom of the Reports screen. Move the cursor over the report you wish to run. You will notice that the arrow changes to a pointing hand icon. Clicking on the Report filter will fill the fields of the report with the data from the filter. Select EXECUTE QUERY to run the report. Printing reports SPCMS allows you to generate PDF format documents for printing and CSV format to save as an MS EXCEL™ file. To generate a PDF report for printing. Choose output format ‘PDF’ and execute your query. The following screen is displayed. Version 2.2 15/08/03 Page 120 of 1 Statutory Planning Case Management System User Help Manual Click on the words "view your PDF report" to generate the report. You will need to have Adobe Acrobat™ reader installed on your PC. The report is displayed in PDF. You can send this to a printer or save the report as a PDF. Click on your browser's "Back" button to return to SPCMS. To generate a CSV (Excel) file. Choose output format ‘CSV’ and execute your query. The following screen is displayed. Click on the words "view your CSV report" to generate the report. A browser screen will ask you to open your report or save your report as a file. Clicking on a CSV file should open the file in MS Excel™. If it does not do so you will have to associate the file with EXCEL(See Box). Version 2.2 15/08/03 Page 121 of 1 Statutory Planning Case Management System User Help Manual Associating applications 1 In My Computer or Windows Explorer, click the View menu, and then click Options. (Note if using Windows 2000, click on the Tools menu, then click Folder Options ) 2 Click the File Types tab. 3 In the list of file types, Scroll down to the Microsoft Excel Comma Separated Values type. 4 The settings for that file type are shown in the File Type Details box. 5 Click Edit. 6 In the Actions box, click Open. 7 Click Edit, and then specify the program you want to use to open files that have this extension. Once the file is open you can save it as an .XLS (Excel) or other file type. 3.5.2 Ad Hoc Zone Reports The Ad hoc zone report enables you to generate reports displaying the fields you choose, within specified selection criteria (i.e. a date range) and sorted by selected fields. This report format and functionally is essentially the same as for Ad Hoc Case Reports, only with different categories for producing the report. Version 2.2 15/08/03 Page 122 of 1 Statutory Planning Case Management System User Help Manual Generating a Report 1. From the SPCMS Home page choose ‘Reports’ and login to the Reports screen. 2. Select ‘AdHoc Zone Reports’ 3. Type in a name for the report. 4. Choose an Output Format. Three formats are available. HTML is recommended if you wish to look at a report on the screen. All the reports found in the search can be viewed by clicking on the link. PDF is recommended if you wish to print your report, you will need Adobe Acrobat Reader to do so. CSV is recommended if you want to download the report into another application, particularly MS EXCEL ™. 5. Choose the fields you wish to appear in the report by checking the box next to the field name. The more fields you choose the wider the report will be. The SP Case number and Zone ID will appear on all reports and cannot be deselected. 6. Choose the Sort order for the report. You can choose up to three fields as the sort order. If you choose a Sort Order also choose whether you want the sort direction to be in Ascending (A to Z) or Descending (Z to A) order. 7. Choose the selection criteria. This determines the type of information that will appear in the report. Selection criteria may be chosen from a selection list or they may be free-format fields. For example if you want to report all the were you have been the assessor, type your surname into the ‘Assessor’ text box and run the Version 2.2 15/08/03 Page 123 of 1 Statutory Planning Case Management System User Help Manual report. You can choose multiple criteria (for example multiple Conservation Status) by holding down the <Shift> key and clicking on multiple selections. 8. Choose EXECUTE Query to run the report. A screen showing all the cases that match your criteria is displayed. Saving and Recalling Reports, Printing Reports Report selection criteria can be saved and recalled as previously described for Ad Hoc Case Reports. Reports can be printed, also using the same procedure as described for Ad Hoc Case Reports. 3.5.3 Case Reports This report type allows you to print out the details for a case. To run this report click on ‘Case Report’ on the reporting screen. A screen will appear asking you to enter the details of the case for which you wish to produce a report. If you know the case you wish to report on type in the Case ID. When typing in the Case ID use the full ID e.g. SP000XXX. Click EXECUTE to generate the report. If you do not know the Case ID click on "Find Case" to search for the case. Version 2.2 15/08/03 Page 124 of 1 Statutory Planning Case Management System User Help Manual Choose SEARCH to bring up a list of cases that match the criteria. Click on the ID of the case you wish to use and choose CLOSE. The Workflow Manager returns to the Report Case Details screen with the case you chose in the Case ID field. EXECUTE will generate the report. Version 2.2 15/08/03 Page 125 of 1 Statutory Planning Case Management System User Help Manual 3.5.4 Standard Reports This reporting facility allows you to generate a report based on set categories, and will allow you some modification to the criteria. Version 2.2 15/08/03 Page 126 of 1 Statutory Planning Case Management System User Help Manual Generate a Report 1. Select the type of report that you wish to generate from the Report Titles in the left hand column. 2. Select the constraints to limit the report by selecting items from the list. If you wish to select more than one value, hold down <Shift> while selecting with the mouse. For example, you may wish to generate a report on Version 2.2 15/08/03 Page 127 of 1 Statutory Planning Case Management System User Help Manual ‘Case Manager Region’ selecting ‘Port Phillip, Geelong’ and select the ‘Action Officer Business’ as ‘Coastal Management Branch’. 3. Select the ‘Output Format’ for the report from the drop down menu. As with other report formats you can choose from three format types. HTML is recommended if you wish to look at a report on the screen. All the reports found in the search can be viewed by clicking on the link. PDF is recommended if you wish to print your report, you will need Adobe Acrobat Reader to do so. CSV is recommended if you want to download the report into another application, particularly MS EXCEL ™. 4. Click ‘Execute’ and this will generate the report. 3.5.5 Locate Similar Cases (Text) This function is designed to help you to locate existing cases with similar characteristics. This function uses the Ad Hoc Reporting function to search for similar cases. Generate a Report 1. Select ‘Locate Similar Cases (Text)’ from the Reporting screen. 2. The functionality of this screen is very similar to that for Ad Hoc Reporting. 3. Type in a name for the report. 4. Choose an Output Format. Three formats are available. HTML is recommended if you wish to look at a report on the screen. All the reports found in the search can be viewed by clicking on the link. PDF is recommended if you wish to print your report, you will need Adobe Acrobat Reader to do so. CSV is recommended if you want to download the report into another application, particularly MS EXCEL ™. 5. Choose the fields you wish to appear in the report by checking the box next to the field name. The more fields you choose the wider the report will be. The SP Case number will appear on all reports and cannot be deselected. 6. Choose the Sort order for the report. You can choose up to three fields as the sort order. If you choose a Sort Order also choose whether you want the sort direction to be in Ascending (A to Z) or Descending (Z to A) order. 7. Choose the Selection Criteria. This determines the type of information that will appear in the report. Selection Criteria may be chosen from a selection list or they may be free -format fields. You can choose multiple criteria (for example, multiple Municipalities) by holding down the <Shift> key and clicking on multiple selections. 8. Choose EXECUTE Query to run the report. A screen showing all the cases that match your criteria is displayed. Saving and Recalling Reports, Printing Reports Report selection criteria can be saved and recalled as previously described for Ad Hoc Case Reports. Reports can be printed, also using the same procedure as described for Ad Hoc Case Reports. Version 2.2 15/08/03 Page 128 of 1 Statutory Planning Case Management System User Help Manual 3.5.6 Locate Similar Cases (Spatial) This function can be used to search for cases within an area that you define with specified selection criteria (i.e. a date range) and sorted by selected fields. Generate a Report 1. Select ‘Locate Similar Cases (Spatial)’ from the Reporting screen. 2. This will open the SPCMS Mapping window. 3. Using the Zoom tools, locate the area of Victoria that you are interested in querying. Once you have zoomed into a scale where you are able to view the area that you are interested in, click the Capture Freehand Polygon Features tool. 4. This will open the Spatial Edit Applet screen. Version 2.2 15/08/03 Page 129 of 1 Statutory Planning Case Management System User Help Manual 5. Use the Create Polygon Feature tool to draw a polygon of the area that you are interested in. Finish the polygon by double-clicking and ensure that it is highlighted blue. All the case application extents that are within or intersecting the polygon you have drawn will be selected for the query. 6. Another option is to use the Create Circle Feature to conduct a search at a specified radius from a certain point such as a locality. 7. There is no limit to the number of polygons or circle features that can be used to locate similar cases within the Spatial Edit Applet. Note You will not be able to use any of the tools in SPCMS mapping or the Spatial Edit Applet to edit the Application Layer polygons in this process. 8. Then click the ‘Continue’ Version 2.2 15/08/03 à button to move to the ‘Similar Case Inquiry- Spatial’ screen. Page 130 of 1 Statutory Planning Case Management System User Help Manual Note- at the top of the screen the number of cases found within the spatial extent of the polygon you created is listed. 9. The functionality of this screen is very similar to that for Ad Hoc Reporting. 10. Type in a name for the report. 11. Choose an Output Format. Three formats are available. HTML is recommended if you wish to look at a report on the screen. All the reports found in the search can be viewed by clicking on the link. PDF is recommended if you wish to print your report, you will need Adobe Acrobat Reader to do so. CSV is recommended if you want to download the report into another application, particularly MS EXCEL ™. 12. Choose the fields you wish to appear in the report by checking the box next to the field name. The more fields you choose the wider the report will be. The SP Case number will appear on all reports and cannot be deselected. 13. Choose the Sort order for the report. You can choose up to three fields as the sort order. If you choose a Sort Order also choose whether you want the sort direction to be in Ascending (A to Z) or Descending (Z to A) order. 14. Choose the Selection Criteria. This determines the type of information that will appear in the report. Selection Criteria may be chosen from a selection list or they may be free -format fields. You can choose Version 2.2 15/08/03 Page 131 of 1 Statutory Planning Case Management System User Help Manual multiple criteria (for example, multiple Municipalities) by holding down the <Shift> key and clicking on multiple selections. 15. Choose EXECUTE Query to run the report. A screen showing all the cases that match your criteria is displayed. Saving and Recalling Reports, Printing Reports Report selection criteria can be saved and recalled as previously described for Ad Hoc Case Reports. Reports can be printed, also using the same procedure as described for Ad Hoc Case Reports. 3.5.7 Map Report This function is used to search for a particular case and create a map of this case. 1. Select ‘Map Report’ from the Reporting screen. 2. This will open the SPCMS Mapping Window. 3. Type in the SP number (SP000XXX) using the SP number search function and then hit <Enter> on the keyboard. The case you are searching for will be highlighted in the map viewer. 4. Note- you will not be able to use any of the tools to edit the Application Layer polygons in this process. Attempting to use these tools will result in this pop up window being displayed. 5. Use the Identify tool with the Application Extent Layer as the active layer. Click within the application extent of the highlighted case and the SP case number will be displayed. 6. Click the link in the Identify Results pop up box and the case information will be displayed. We have now covered all the capabilities of the SPCMS. The next section looks at some of the reference materials available from within the application. Version 2.2 15/08/03 Page 132 of 1 Statutory Planning Case Management System User Help Manual 4 4.1 Reference Information Process Maps Process maps are a web published version of the DSE statutory planning business process, mapping out the step-by-step decision and action points. The link to ‘Process Maps’ is found under the main SPCMS home page. They are the basis for the construction of the workflow for this product and are particularly useful and relevant to people wanting to refresh themselves on the business process and as a training tool for new recruits to the SP function. Navigate by reading mouse-overs and clicking on links. Note that to return to the SP system will require the user to use the browser's "Back" button to reverse out of it. There is no direct link from that system back to this one. 4.2 Contacts Contacts The contacts page has contact details on all staff registered to use the SPCMS. The link to ‘Contacts’ is found under the main SPCMS home page. These details are derived from the administration area where staff are registered. Clicking on an individual's e-mail address will open your e-mail application or your Web -browser's email system for to enable you to send an e-mail to the nominated individual. Refer to Section 1.2.2.6. Version 2.2 15/08/03 Page 133 of 1 Statutory Planning Case Management System User Help Manual 4.3 General Information The general information screen will be used for any information that may support your use of the SPCMS. The link to ‘General Information’ is found under the main SPCMS home page. At the moment, there is only one link on this screen, Web links. Web links This site opens a page of links to Websites that may be of interest to users of the SPCMS. The System Administrator maintains this page. If you are aware of other sites that may be of interest contact the System Administrator. Click on the URL to open the site on a new screen. Version 2.2 15/08/03 Page 134 of 1 Statutory Planning Case Management System User Help Manual 5 Frequently Asked Questions Item 1 How Do I …… Find a case that I have worked on 2 Module Action(s) Portfolio Manager Available only to users involved in the specific case. Report Facility Available to all users with “View” access. On opening the portfolio manager a full list of active cases appears in the right hand frame sorted in descending order by Dept. Reply By Date. This list can be resorted by any column with a blue circle in the column header. Doubleclick on the arrow inside the blue circle to re-sort by the column in reverse order. Build a report using field selection, column sort order, and/or filtering criteria. Output the report in HTML format. From the output list, locate the desired case. 3 4 Find a case that I have not been involved with Report Facility Action a work item Portfolio Mana ger Available to all users with “View” access. Build a report using field selection, column sort order, and/or filtering criteria. Output the report in HTML format. From the output list, locate the desired case. Available only to a user involved in the specific case where the user is the case owner. Identify the case that you wish to work on and it’s current step from the list in the right hand frame. Click on the corresponding step in the left hand frame. Click on the chevrons (>>>>) in the right hand frame next to the appropriate case No. The case will open at the appropriate step in the workflow manager for you to carry out your work. Enter the required information and click SAVE. This will move the case to the next step in the process. 5 Access and view case details Portfolio Manager Available only to users involved in the specific case. At the portfolio manager, click on the desired SP number in the right hand frame. The case detail screens will open, defaulting to “main details”. Click on the tabs across the top of the screen to view all case details. Depending on your role and security entitlements, you may be able to edit details in these screens, add/delete Action Officers, attach documents, and/or add to the discussion thread. Version 2.2 15/08/03 Page 135 of 1 Statutory Planning Case Management System User Help Manual 6 Report Facility Available to all users with “View” access. Build a report using field selection, column sort order, and/or filtering criteria. Output the report in HTML format. From the output list, locate the desired case. Click on the SP number. The case detail screens will open, defaulting to “main details”. Click on the tabs across the top of the screen to view all case details. Depending on your role and security entitlements on the case selected, you may be able to edit details in these screens, add/delete Action Officers, attach documents, and/or add to the discussion thread. 7 Register a new case Portfolio Manager Available only to Admin Support and SP Coordinator staff involved in the specific case. Click on “Create Case” in the left frame of the portfolio manager. This will open the “Initial Registration” screen. Enter all data (paying particular attention to selecting the correct referral type), and click SAVE (an SP number is generated, but the case is not yet registered). The next screen requires the application form to be attached to the case. Enter a brief description of the document and it’s file name and source location/directory path, then click SAVE. Wait for the document to upload to the server. When done, click SAVE again. The document is now registered. Additional documents that comprise the application can now be attached to the case by clicking on the ATTACH DOCS button at the bottom of the workflow screen. You will also need to record the spatial location of the case using the ‘Record Application Extent’ link. 8 Attach documents to a case 9 Version 2.2 15/08/03 Workflow Manager Available only to users involved in the specific case. Case Details View Available only to users involved in the specific case. Click on the ATTACH DOCS button at the bottom of any workflow screen. A screen pops up requesting a brief description of the document and it’s file name and source location/directory path. Enter these details and click SAVE. Wait for the document to upload to the server. When done, click SAVE again. Repeat for each document and ensure that the document name is different to all other documents currently attached to the case. Open the case detail screens for the case to which documents will be attached and click on the “E Documents” tab at the top of the screen. Click on the ATTACH DOCS button at the bottom of the screen. A screen pops up requesting a brief description of the document and it’s file name and source location/directory path. Enter these details and click SAVE. Wait for the document to upload to the server. When done, click SAVE again. Repeat for each document and ensure that the document name is different to all other documents currently attached to the case. Page 136 of 1 Statutory Planning Case Management System User Help Manual 10 Request more information from the case manager Workflow Manager Available only to Action Officers involved in the specific case. Click on the MORE INFO function button at the bottom of any panel where this option is available. An email panel will open with the case manager on that case automatically selected as the recipient. Type your request into the text box and click SEND. The AO will retain ownership of the case (ie. The step that it is up to will not change until the AO marks their response as “Final” and clicks SAVE. 11 Request more information from the responsible authority Workflow Manager Available only to the Case Manager involved in the specific case. Click on the REQUEST MORE INFO function button at the bottom of any panel where this option is available. A standard letter template will open as a RTF document in a Word window. Edit the document as required, inserting specific information about your request. Save the finished document to your local drive in accordance with the file naming and storage convention in your notes. (ie. C:/Temp/Stat Planning/SPxxxxxx/SPxxxxxx MIR.doc) Attach this document back onto the case file by following the instructions in FAQ item 26. 12 Re-assign a case(s) Portfolio Manager A vailable only to SP Coordinators and Case Managers involved in the specific case. At the portfolio manager, click on the step in the left hand frame at which the case(s) that you wish to re-assign is located. Tick the appropriate box(s) against the case(s) for re-assignment and click RE-ASSIGN. Select a person from the list and click SAVE. The re-assigned case(s) will disappear from your portfolio, appear on the selected person’s portfolio, and an email notification sent to them. 13 Know where I’m up to in a case 14 Version 2.2 15/08/03 Portfolio Manager Available only to users involved in the specific case. Workflow Manager A vailable only to users involved in the specific case. The “Step” column in the case list in the right hand frame of the screen describes the step in the process that currently requires action on each case. At the top of each workflow screen is a description of the current step in the process that the case is up to. To see where this step fits into the overall schema, go to the system workflow diagram in the user manual. Page 137 of 1 Statutory Planning Case Management System User Help Manual 15 Withdraw a case Workflow Manager Available only to the SP Co-ordinator or Case Manager involved in the specific case. Click on the WITHDRAW CASE button at the bottom of any workflow screen up to but excluding the “Refer Case” step. Select a withdraw reason from the drop-down list and click SAVE. The case will be removed from the active list and placed in the “Withdrawn” category at the bottom of the left hand frame of the portfolio manager. Once withdrawn a case cannot be restored to an active status. 16 17 Move to the next step Get out of a case and save where I am up to Workflow Manager Available only to users involved in the specific case. Workflow Manager Available only to users involved in the specific case. If you are working on a case in the workflow manager and your role/security status allows you to continue, the next step in the process will open automatically. If you need to exit the case during the processing (this is inevitable in almost all instances), you can return to the current step by following instructions in FAQ item 4. Where some data has been entered, you must click SAVE to keep that data. A qualifier on this however is that SAVE will also move you to the next step in the process, except when all mandatory fields have not been completed or when the Response (AO or Dept.) are in “Draft” state. CLOSE will return to the previous screen without saving. 18 Case Details View Edit facility in this module is only available to co-ordinators and case managers except on the “E Documents” and “Discussion” tabs. Click SAVE to keep new data and changes to existing data. CLOSE will return to the previous screen without saving. 19 Return to a case at the point where I left it Portfolio Manager Available only to users involved in the specific case. The desired case will have a “step label” tagged to it that describes the step in the process currently requiring action. Locate the desired case in the RH frame of the Portfolio Manager and note the step description. Click on the matching description in the step list in the LH frame to bring up the action list. Locate the desired case in this list and click on the chevrons (>>>>). You are now at the same point where you previously left the case. 20 Skip through the referral process Workflow Manager Available only to the Case Manager involved in the specific case where they are the current case owner. In the workflow manager at the “Refer Case” step, the Case Manager (CM) can opt to SKIP the referral to Action Officers by clicking on the SKIP button at the bottom of that screen. This will advance the CM to the “Department Response” step. This option is required for some referral types. Once the SKIP option has been applied, you cannot go back to refer the case for comment from Action Officers Version 2.2 15/08/03 Page 138 of 1 Statutory Planning Case Management System User Help Manual 21 Refer a case to Action Officers Workflow Manager Available only to the Case Manager involved in the specific case. At the step “Refer Case”, note any pertinent instructions to the AO(s), check the AO response date is correct (modify if required), note whether any hard copy information is to accompany the case (include details about what it is, where it is stored, etc.), and select the relevant AO(s) from the AO list. (Multiple people can be selected by holding down the <CTRL> key as you select). Click SAVE to send the case to the selected AO(s). This will generate an email notification to them with a link back to the system. At this point the case will be in the “Prepare Dept. Response” step and can be actioned further by the case manager without recognition of any AO responses. However, it will usually remain at this step until AO responses are considered. 22 Add or Delete Action Officers assigned to a case Case Details View Available only to the Case Manager involved in the specific case. Ope n the case details view by clicking on the SP number for the desired case from the Portfolio Manager. Click on the “Instructions” tab. Click the “ADD” link next to the “Action Officer” heading. A selection panel will appear. Scroll down the list and select the new AO to add to the case and click SAVE. (Multiple people can be selected by holding down the <CTRL> key as you select.) To delete AOs assigned to a case, check the boxes adjacent to the desired names and click SAVE. 23 Generate standard letters Workflow Manager Available only to the Case Manager involved in the specific case. Standard letters generate automatically in this module, drawing on appropriate templates based on a combination of response and referral types. Open the system generated letter by clicking on the letter name (in bold text). Depending on your browser configuration, this will either directly open the document in a word window or request an application to run it in. If you get the latter you will need to browse through the directory structure on your C:/ drive to find MS Word.exe. Once the document is opened in Word, make any changes required, then save it to your local drive as per instructions described in FAQ item 11. 24 Version 2.2 15/08/03 Case Details View The selection of standard letter templates is available for reproduction under the “E Documents” tab. These may be nd rd useful for creation of 2 or 3 version response letters. Page 139 of 1 Statutory Planning Case Management System User Help Manual 25 Attach Documents to the case e-file Workflow Manager Available only to the case manager involved in the specific case. There are 2 mandatory document capture points in the workflow (3 if public land manager consent is required). These are the application form/letter and the Dept. Response letter. The workflow manager will automatically request descriptive detail about the document and browse to the required document file name as a step in the process. Additional documents (ie. Non-mandatory) can be attached at any time in the workflow manager by clicking on ATTACH DOCS and following instructions described in FAQ item 26. 26 27 Build a report Case Details View Under the “E Documents” tab, click on ATTACH DOCS. A panel will appear in which you select a document type, enter some descriptive detail about the document and browse to the required document file name. When all details are filled in, click SAVE. The document will upload to the central server and when finished, a message will appear. Report Facility Available to all users with “View” access. Give the report a name. Select the output format that you require (HTML = on-screen, PDF = Acrobat viewable and portable, CSV = Excel spreadsheet). Tick the boxes next to the fields you wish to report on. Select a primary/secondary/tertiary sort order on a field(s) in your report. Select a sort order against the selected sort order. Select filtering criteria. (Where criteria lists occur, multiples can be selected by holding down the <CTRL> key while you select). EXECUTE QUERY to run the report. If the report fails, go back to your selections to ensure that the report is structured correctly. HINT: It pays to gradually build the report up to what you want rather than try to get it in the first go. 28 Save report criteria to my personal report list Version 2.2 15/08/03 Report Facility Available to all users with “View” access. Set up a report as per instructions in FAQ item 27. Page 140 of 1 Statutory Planning Case Management System User Help Manual 29 Re-run a previously saved report Report Facility Available to all users with “View” access. This will allow you to re-run reports you have previously saved using the same report criteria you identified when you saved the report. Choose APPLY EXISTING REPORT CRITERIA to display all the reports you have saved. Clicking on the name in the Report Filter Column fill the fields of the report with the data from the filter. Select EXECUTE QUERY to run the report. 30 Send a report that I’ve done to someone else Report Facility Available to all users with “View” access. 31 Make my report criteria available to other people Report Facility This facility is not currently available, but can be worked around by sending the field sort and criteria selections to the other person(s) by email. 32 Record system faults or modification requests General Information Facility Available to all users with “View” access. Set up a report as per instructions in FAQ item 27 or run an existing report with output format set to PDF. When the report has generated, an Adobe Acrobat view panel will open with the report in it. Save this report to your local drive, noting the save location. Open your email client (ie. Notes, Outlook, etc.) and attach this document on your email to recipients as per usual/familiar email procedure. From the home page, click on the "General Info" tab. A panel opens displaying a list of web sites related to planning, and resource information. Click on the link next to the description "Record system errors and modification requests". Click on the "New Incident" button. Select the module that you were in when the error occurred and fill in all of the fields on the page, describing the error as fully as possible. Click on the "Record Incident" button. Your incident has now been logged and will be addressed by the system administrator. Also use this facility to record requests for modification or enhancements to the system by selecting "Modification Request" from the drop-down list. 33 Information that can help me make a decision Version 2.2 15/08/03 General Information Facility Available to all users with “View” access. From the home page, click on the "General Info" tab. A panel opens displaying a list of web sites related to planning, and resource information. Click on the link next to the description you require to open the site. Note that this will open in a separate screen and you can move between the two by clicking on the application bar at the bottom of the screen. Page 141 of 1 Statutory Planning Case Management System User Help Manual 34 Find out more about the statutory planning process in DSE Process Map Facility Available to all users with “View” access. From the home page, click on the "Process Map" tab. A panel opens displaying a list of Crown Land Management processes and a legend page for interpretation of the process maps. Click on the "Statutory Planning" link in the left hand frame. Place the mouse over a process stage to view a description of the selected stage and click on it to open the process map for that stage. Place the mouse over a process step to view a detailed description of the selected step. Click on the ovals at the start and end of the process stage to move to the next or previous stage. Note that this opens in the same screen as the SPCMS application and to return to the application you need to "BACK" out. 35 Find out who is involved in statutory planning and contact them Contact Facility Available to all users with “View” access. From the home page, click on the "Contacts" tab. A panel opens displaying a list of all users registered on the system. This list can be sorted by clicking in the blue circle in the header of each column and re-sorted in reverse order by clicking again in the circle with the arrow. Clicking on a person's first name will open a panel with additional contact details. Clicking on the email address will open a panel allowi ng you to send an email directly to the selected person. 36 Select multiple items from a drop-down list All Modules Select multiple items from a drop down list using the <Ctrl> and <Shift> keys and clicking with the mouse. Hold the <Ctrl> key down while clicking with the mouse will allow you to pick multiple items from within a drop down list. Hold the <Shift> key will select all the items between two items chosen from a drop-down list. Also see FAQ item 37, de-select a selected item from a drop-down list 37 De-select a selected item from a drop-down list All Modules De-select multiple items from a drop down list using the <Ctrl> key and clicking with the mouse. Hold the <Ctrl> key down while clicking with the mouse will allow you to de-select multiple items from within a drop down list. Also see FAQ item 38, select a multiple items from a dropdown list 38 Change the spatial extent of the application Version 2.2 15/08/03 Mapping The spatial extent of the application extent can be changed by clicking on the ‘Case Map Extent’ link in the Drill Down screen. You will then need to edit the polygon shape using the methods outlined in 3.4.7. Please note that changing the application extent will not refresh the drill Page 142 of 1 Statutory Planning Case Management System User Help Manual down results. 39 Search for the spatial location of an application Mapping In the SPCMS mapping facility use the SP number of a case to spatially locate it. The SP number search function is found below the Toolbox. Type in the SP number (SP000XXX) and then hit <Enter> on the keyboard. The case you are searching for will be highlighted in the map viewer. Report Facility To search for cases within an area that you define with specified selection criteria (i.e. a date range) and sorted by selected fields. For more information see section 3.5.6. To search for a particular case use the map report function. For more information see section 3.5.7. 40 Edit vegetation assessment details Workflow Manager Only Accredited Native Vegetation Assessors (NVA) are able to enter and edit vegetation assessment details. Only one NVA is assigned to each case and it is only this person who can edit case details. Once the native vegetation assessment zones are made final then you can not longer edit this information. 41 Provide comment on a case as an Action Officer Workflow Manager You need to be assigned as an Action Officer for the case to perform this function. Under the ‘Site’ tab go straight to ’Final Comments’ ender your comments in the ‘Comments’ field and select the appropriate ‘Action Response’. Note- you will need to mark your comments as final under the ‘Final Comments’ tab for them to be available to the Case Manager in constructing the departmental response. 42 Add conditions to a case with a spatial reference as an Action Officer Workflow Manager You need to be assigned as an Action Officer for the case to perform this function. If the zone has already been recorded for the spatial location, then click on the zone number in the main ‘’Site Assessment’ screen. Then click the Recommendations tab and ‘Add’ your conditions to the zone. Note- you will only be able to add conditions to the zone if it is still in ‘Draft’ status. If the spatial location that you wish to provide comment on has not been mapped you will need to ‘Add’ the zone in the Site Assessment screen (see section 3.4.8). You will then be prompted to add zone recommendations as you move through the workflow. For more information see section 3.2.4.4. Note- you will need to mark your comments as final under the ‘Final Comments’ tab for them to be available to the Case Manager in constructing the departmental response. 43 Add conditions to a case without a spatial reference as an Action Officer Version 2.2 15/08/03 Workflow Manager You need to be assigned as an Action Officer for the case to perform this function. Under the ‘Site’ link for the case, click ‘My Recommendations’. You are then able to ‘Add’ conditions that apply to the whole application. For more information Page 143 of 1 Statutory Planning Case Management System User Help Manual see section 3.2.4.4. Note- you will need to mark your comments as final under the ‘Final Comments’ tab for them to be available to the Case Manager in constructing the departmental response. 44 Generate the Department response with a map, as a Case Manager Workflow Manager This process has three main components: 1. Generating a Standard Cover Letter 2. Generating a Schedule of Conditions in PDF format 3. Generating a map of the case in PDF format See the Department Response section. Version 2.2 15/08/03 Page 144 of 1 Statutory Planning Case Management System User Help Manual 6 Glossary of Terms Accredited Native Vegetation Assessor The Native Vegetation Assessor (NVA) must be an accredited person who has the skills to carry out habitat hectare assessments. Only one person can be the NVA on the case at time. Action Officer (AO) Any person responsible for providing input to the "whole-of-Department" response. This person is sometimes called a "referral officer". Action Officer Comment Step The Action Officer provides comments on the Case and adds any conditions to the application. The conditions can be entered as free-format text or the Action officer can choose from a list of Standard conditions. Active layers Active layers are not necessarily visible, but are the layers that will be queried. Only one layer can be active at a time. Admin Support Any person who provides administrative support during the pre-referral stage of a case. Application extent The spatial representation of the area subject to application. Assign Case Manager Step The Case Manager for the Case is identified. This step is undertaken by the SP Coordinator and is mandatory Assign Coordinator Step The Statutory Planning Coordinator for the Case is set. This Screen will only appear when the person registering a Case is NOT an SP Coordinator. If the person registering the case IS an SP Coordinator SPCMS automatically assigns that person as the SP Coordinator. The Coordinator field is mandatory. Attach Application Step This step attaches an electronic version (MS Word™ document or scanned document) of the application document to the Case. A document must be attached at this step to advance the Case. This stage completes registration of the Case. Attach Consent Letter Step. This step is a mandatory document capture point for all SP applications on Public Land. Attach an e-doc of the Public Land Manager's consent letter. Attach Department Response Step. This is a mandatory document capture point for all SP Cases. An e-file of the Department's response letter is attached to the Case. Attach Workplan Letter Step This step enables you to attach a Workplan to a MPV Planning Permit Application Await Consent Letter Step Planning Applications on Public Land cannot proceed without the receipt of a Consent letter from the Land Manager. If no Consent letter is provide with the application, the Case remains at the Await Consent letter step until the letter is received. When the letter is received, it is recorded, attached and the Case can advance. Business rules Established processes to ensure that clients are dealt with in a consistent and systematic way. In the context of DSE's stat planning processes, business rules dictate that applications follow a workflow process initially based on the referral type. Canopy Trees contributing to the canopy are those reaching 80% or more of their mature height, as defined within the EVC bioregional benchmark. Projective foliage cover is used to assess the canopy cover in this assessment. Case Manager (CM) The person responsible for the day -to-day management of a case. Case Owner Person responsible for carrying out the next step in the process. Not a role Version 2.2 15/08/03 Page 145 of 1 Statutory Planning Case Management System User Help Manual as such, more a status of file ownership. CMA Catchment Management Authority Completed Step tells you that you have successfully completed a Case. Conservation Significance The conservation significance of a patch of native vegetation is determined according to: the conservation status of vegetation types present; the quality of the vegetation; the conservation status of species present (and the potential habitat value); the strategic location in the local landscape and other recognised criteria (such as commitments under international conventions). Datum A datum is defined by a spheroid, which approximates the shape of the Earth, and the spheroid’s position relative to the centre of the Earth. There are many spheroids representing the shape of the Earth, and many more datums based upon them. Department Response Step The Case Manager compiles a "whole-of-Department" response to the Application. Comments are added as free-format Text, while conditions are added as free-format text or chosen from a list of standard conditions available. Determine Appeal Status Step This Step is for recording whether or not there is an appeal against the decision of the Responsible Authority. The Decision to appeal is made "off-line" from the SPCMS although the results of the decision and details of any Appeal are recorded here. Determine Source Case Step Record whether there is a "Source Case" for a particular Step. Easting A six digit number locating a position on the X-axis (horizontal). e-documents Electronic documents. Refers to a document stored in any electronic format such as MS Office Word™ or Excel™, or scanned documents stored as ,jpg or .pdf files. All documents related to an SP case are converted to electronic formats and linked to the case. e-files Electronic files. Groups of e-documents relating to a case are stored as efiles. Edit required Case Details Step Record information about the Case at this step. Information about the proposed use, location, planning zones, LCC recommendations and other reference information is recorded. Several of the fields are mandatory. They are marked with an asterix. Extranet An intranet that is partially accessible to authorised outsiders. Whereas an intranet resides behind a firewall and is accessible only to people who are members of the same company or organisation, an extranet provides various levels of accessibility to outsiders. You can access an extranet only if you have a valid username and password, and your identity determines which parts of the extranet you can view. Extranets are becoming a very popular means for business partners to exchange information. Ecological Vegetation Class (EVC) A type of native vegetation classification that is described through a combination of its floristic, life form and ecological characteristics, through an inferred fidelity to particular environmental attributes. Each EVC is a collection of floristic communities that occur across a biogeographic range, and although differing in species, have similar habitat and ecological processes operating. Exceptional Circumstances The impacts are an unavoidable part of a development project, with the approval of the Minister for the Environment and Conservation (or Version 2.2 15/08/03 Page 146 of 1 Statutory Planning Case Management System User Help Manual delegate) based on considerations of environmental, social and economic values from a statewide perspective. EVC benchmark The average characteristics of a mature and apparently long undisturbed EVC within a particular bioregion in a fully vegetated landscape. Generate Department Letter Step This step provides a link to a template file for producing a standard letter containing the Department's response to the Application, including the Comments and Conditions attached by the Case Manager at the Previous step. Habitat Hectare A site-based measure of quality and quantity of native vegetation that is assessed in the context of the relevant native vegetation type. Improvement Gains can be made through improvement of the vegetation quality through active management, such as decreasing the extent and severity of weediness. Internet An international consortium of wide area networks that operate using a standard set of addresses allowing machine-to-machine connectivity on a global scale. Intranet A network based on TCP/IP protocols (an internet) belonging to an organisation, usually a corporation, accessible only by the organisation’s members, employees, or others with authorisation. An intranet's Web sites look and act just like any other Web sites, but the firewall surrounding an intranet fends off unauthorised access. LGA Local Government Authority Maintenance Gains can only be achieved through maintenance. This is through foregoing permitted existing uses which degrade the condition of the vegetat ion, such as removing large trees for firewood. Native vegetation Plants that are indigenous to Victoria, including trees, shrubs, herbs and grasses. Net Gain Is where, over a specified area and period of time, losses of native vegetation and habitat, as measured by a combined quality-quantity measure (habitat hectare), are reduced, minimised and more than offset by commensurate gains. Northing A seven digit number locating a position on the Y-axis (vertical). MPV Minerals and Petroleum Victoria, a Division of DSE Non referred clearing Where native vegetation has been removed, destroyed or lopped without this action being referred to DSE as the referral authority. This may be clearing which does not require a permit due to exemptions listed in the state planning scheme, clearing with a permit issued from the local council, or illegal clearing. NRE Department of Natural Resources and Environment, now known as the Dept. of Sustainability and Environment (DSE) or Dept. of Primary Industries Offset Actions taken to ensure commensurate gains in vegetation quality and quantity. Old Trees Large or medium trees, individuals of key, dominant long -lived tree species (as specified in the relevant EVC benchmark) that are greater than certain diameters (for large and medium) at 1.3 m above ground level. Parcel A unit of land described by a unique legal description. Patch A patch is a remnant of native vegetation often with a defined physical Version 2.2 15/08/03 Page 147 of 1 Statutory Planning Case Management System User Help Manual boundary (e.g. cleared pasture) occurring in fragmented landscapes. They may occur across one or more land tenures. Patches may consist of one or more zones. Polygon A spatial feature on a map used to define a site. A polygon is a closed shape with an area and a perimeter. Portfolio The group of cases currently in the ownership of an officer of the Department of Natural Resources and Environment. See Case Owner. Portfolio Manager Equivalent to the "IN Tray" in the hardcopy world, this is the interface where you manage your workload and action case work. Protection Protection is defined as placing a fence around a tree (or a group of trees) at least twice the diameter of the tree canopy, to exclude grazing animals and facilitate recruitment of indigenous species from soil or canopy stored seed. Record Appeal Decision Step for recording the Appeal Decision including the date and result of the Appeal. Record Appeal Details Step Step for recording the details of the Appeal, such as the hearing date and Submission Grounds. Record Authority Decision Step This Step is for recording the outcome of the Referral Authority's Decision in the Case. The Decision field and Decision Date fields are mandatory. If there is no Appeal the Case is closed here. Record MPV If the ap plication is an MPV Planning Permit Application (Section 55) this step records the MPV Reference Type and reference number. Recruitment Recruitment is defined as the establishment of individual plants beyond the initial seedling (or early germinant) stage, and for at least the full annual cycle of seasons since germination or first establishment. Refer Case Step At this step the Case Manager will refer the Case to Action Officers to comment on the case. The manager can add several Action officers and provide general instructions on the Case. Referral authority These are agencies with responsibility for managing particular resources. Referral type The circumstances under which a case has been referred to DSE for response. These are generally Acts of Parliament. Register Case Step Step for registering a Case in SPCMS. All fields are mandatory. The referral type field determines the workflow that the Case will follow. Registration of the Case is not complete until the Application form is attached (Next step). Register Public Land Owner Consent Step Applications on Public Land require the Public Land Manager's consent before a Case can proceed. If a Consent document is not received, with the applicant is informed via a standard letter. You will need to attach a copy of the Public Land Manager's consent before you can advance the case. If the Application is on freehold land this step can be ignored. Register Workplan Conformance Letter Step This Step is for MPV Planning Permit Applications (Section 55). The Case Manager records whether the Application conforms to the Workplan previously approved by the Department. Risk Field to indicate potential for a case to exceed timelines or become politically sensitive. Based on Deloite's risk assessment categories. Subjective discretion of Case Manager. Set Source Case If there is a Source Case for the Step you can link the current Case to the source Case using Set Source Case. To Save time you can Copy the Source Case details into the Current Case. Version 2.2 15/08/03 Page 148 of 1 Statutory Planning Case Management System User Help Manual Site Private or public land consisting of contiguous or discrete patches of native vegetation requiring a quality assessment. SOE Standard Operating Environment. The hardware configuration and suite of software supported by the DSE. Source Case A Source case is a "pre-application" Case where an Applicant seeks "in principal" approval for the planned activity prior to lodging a Planning Application. Cases of this type can be recorded in SPCMS as Works/ Plans/Other, Pre Planning Permit Advisory Proposals, Extractive Industry Work Plan, Mining Work Plan or Approval in Principle. SP Coordinator The person responsible for coordinating the timely "whole-of-Department" response to the Responsible Authority. System Administrator Person responsible maintaining the system and has the ability to add new users, maintain reference tables, add or remove web links etc. Vertex A vertex is the hollow square box that creates corners in polygons. Visible layers Visible layers can be seen on screen but are not queried. A number of layers can be visible at the one time. Withdraw Case The Withdraw Case Option is only available to SP Coordinators and Case Managers. It allows the Coordinator or Case Manager to withdraw a Case by providing a reason for the Withdrawal. The Case can be withdrawn at any time up to the Departmental Response stage. A case may be withdrawn for a number of reasons and when reporting these reasons should be taken into account when interpreting results. Withdrawn Step telling the User that the Case has been Withdrawn. Workflow A set of processes defined by business rules for dealing with clients in a consistent manner. In the SPCMS the workflow is established by a referral type. Subsequent processes within the workflow are determined by the response to questions posed by the Workflow Manager. Workflow Manager Step-by-step structure that manages the movement of each SP case through DSE's business process. Zone The native vegetation assessment area as defined by one EVC of a similar quality. The size of the zone will be determined by the variation within the patch of native vegetation and the context of the assessment. Version 2.2 15/08/03 Page 149 of 1 Statutory Planning Case Management System User Help Manual Appendix A - Scanning Documents. One of the major benefits fo the SPCMS is that it allows all the key documents in the case to be stored electronically and linked to the case. In some cases these documents will be in MS Word ™ format but in the majority of cases the documents will arrive at DSE in hardcopy and will need to be scanned to get the document in to an electronic format. Scanning needs to be carried out off-line as the SPCMS cannot incorporate the scanning function in the Workflow. Therefore it is essential that the any documents scanned are stored on drives that can be accessed by PCs running SPCMS and protocols for naming scanned documents ensure that the appropriate Application be readily identified and attached to the correct SPCMS Case. Scanning formats: Refer to your scanner User Manual for details on how to use the scanner. Scanner resolution should be set at 150 to 300dpi in order to minimize file sizes. Within this resolution colour and contrast should be set for the highest quality. The type of output file chosen for the scanned image should be pdf, jpg or gif. This also keeps file sizes small and ensures that the document cannot be edited. The following formats are recommended for the different file types you might encounter; Document type Scanning resolution Scanning format B & W document or drawing 150dpi .gif B & W photo or image with a greyscale 300dpi .jpg Colour photo 300dpi .jpg Notes This will give a resolution similar to a facsimile Scanning in colour increases file sizes and should be avoided where possible. Filing newly scanned documents for easy retreival. When a document has been attached to a Case in SPCMS it is stored permanently on the SPCMS servers. You do not have to keep a copy of the document on your PC's local hard drive or on any of the File Servers used for other purposes in your office. Since you are scanning the documents off-line you will need to set up temporary storage on one of your local drives for scanned documents relating to the SP Workflow. Name the Directory "Stat Planning Scanned Docs". Subdirectories for each case should be created within the main Directory. It is a good idea to keep the files on the temporary storage area until the Case is completed. Documents can be scanned as an application is registered or in a batch. The former is preferable as it allows the Case number to be included in the file name. Documents scanned as an application is registered. Wherever possible this is to be encouraged as it allows you include the SP Case number in the name of the document. The SP case number is available after the Workflow Manager Initial Registration screen is completed. The next screen will ask you to attach the application document. You should set up a sub-directory under the "Stat Planning Scanned Docs" directory called "SPXXXXXX" where XXXXXX is the SP Case number. The Application should be labelled "SPXXXXXX Application". Subsequent e-documents relating to the Case should be named with the Structure SPXXXXXX Document Type. Document Type is Application, Landowner Consent, Departmental Resonse etc. Version 2.2 15/08/03 Page 150 of 1 Appendix B-1: nre SP reg form.doc Statutory Planning Case Management System Registration Form - NRE staff member Personal Details(please print clearly) Given Name ______________________ Position DSE Business Surname ___________________________________ Position is p Permanent p Contract Expiry ___/___/___ ______________________ ________________________ Location _________________________________________________________________________ Telephone ________________________ Email _________________________________________________________ DSE User Id __________ Fax ________________________ Roles Required (please tick Box, more than one role is acceptable) p Statutory Planning Coordinator p Case Manager p Action Officer p Administrative Officer p View Conditions The allocation of an account is strictly to the individual. You, the applicant, are responsible for its use, and if others gain access to this account, then you are also responsible for their actions. DO NOT reveal your password to anyone. DO NOT allow others to log in to, or use your account. DO NOT log in to, or use another customer’s account. I have read the conditions above and am aware of the responsibilities of having access to an DSE account. Signature ________________________ Date ____/____/____ Supervisor Authorisation(please print clearly) Name ___________________________________ Position ___________________________________ Telephone ______________________ Signature ___________________________________ Date ____/____/____ Statutory Planning Coordinator Authorisation(please print clearly) Please notify LIMS System Manager of any staff transfers or resignations so that access rights may be updated or revoked. Name ___________________________________ Telephone Position ___________________________________ ______________________ I certify that all the given information is correct. Signature ___________________________________ Please return the form to : Date ____/____/____ LIMS System Manager Crown Land Management Level 3, 240 Victoria Parade, East Melbourne, 3002 DX 210099 Phone 9412 4761 FAX 9412 4742 Appendix B-2: non nre SP reg form.doc Department of Natural Resources and Environment Statutory Planning Case Management System Registration Form – Non NRE Personal Details(please print clearly) Given Name ______________________ Position Surname ___________________________________ ______________________ Company/Business ________________________ Location _________________________________________________________________________ Telephone ________________________ Email _________________________________________________________ Fax ________________________ Conditions The allocation of an account is strictly to the individual. You, the applicant, are responsible for its use, and if others gain access to this account, then you are also responsible for their actions. DO NOT reveal your password to anyone. DO NOT allow others to log in to, or use your account. DO NOT log in to, or use another customer’s account. I have read the conditions above and am aware of the responsibilities of having access to an DSE account. Signature ________________________ Date ____/____/____ Supervisor Authorisation(please print clearly) Name ___________________________________ Telephone Position ___________________________________ ______________________ I certify that all the given information is correct. Signature ___________________________________ Date ____/____/____ Statutory Planning Coordinator Authorisation(please print clearly) Please notify LIMS System Manager of any staff transfers or resignations so that access rights may be updated or revoked. Name ___________________________________ Telephone Position ___________________________________ ______________________ I certify that all the given information is correct. Signature ___________________________________ Date ____/____/____ Roles Required(please tick box, more than one role is acceptable) Statutory Planning Coordinator p Case Manager p Please return the form to: Action Officer p Administrative Officerp View p LIMS System Manager Crown Land Management Level 3, 240 Victoria Parade, East Melbourne 3002 DX 210099 Phone: 03 9412 4761 Fax: 9412 4742 Statutory Planning Case Management System User Help Manual Appendix C – Drill Down Dataset Source Information Information Theme Dataset Custodian Data Source Attribute Attribute Source Reference Table Buffer Dist. EVC Bioregional Conservation Status EVC_BCS100 Parks, Flora and L100 EVC_DESC Table EVC.LUT 500m Fauna CGDL BIOREGION_NAME Dataset EVC_BCS_DESC Dataset EVC_DESC Table EVC.LUT 500m KINGDOM Dataset COMMONNAME Table FLORSPPS.LUT NAME Table F LORSPPS.LUT KINGDOM Dataset ENGLISH Table FAUNSPPS.LUT LATIN Table FAUNSPPS.LUT BIOSITE_NO Dataset SIGLEVEL Dataset SITE_ID Database WORK_PROJECT_ID Database OUTPUT_TYPE Database SP_CASE Database REFERRAL_TYPE Database PROPOSED_USE_DE SC Database Pre-1750 EVC Threatened Flora Threatened Fauna EVC1750_CMP THFLOR500 THFAU500 L100 Fauna CGDL Parks, Flora and L500 Fauna CGDL Parks, Flora and L500 Fauna CGDL Parks, Flora and LZFF Fauna CGDL CAMS Catchment and CAMS system Site extent Water Oracle Spatial Biological Sites of Significance BS100_P CAMS Database Statutory Planning Database Parks, Flora and SP-CMS Application extent Land Victoria SPCMS system 1 km 1 km 1 km 500m 500m Oracle Spatial Version 2.2 Page 153 of 1 14/08/2003 Statutory Planning Case Management System User Help Manual Index Action Officer description of role ......................................14, 92 Actioning a Case ........................................29, 135 Ad Hoc Reports............................................... 117 CSV..........................................................9, 121 definition ................................ .......................... 9 formats .....................................................9, 118 forwarding a report ....................................... 141 generating a report ................................118, 140 HTML .............................................................. 9 PDF ..........................................................9, 120 running saved reports ............................120, 141 saving a report ......................................120, 140 Selection Criteria.......................................... 118 sort order ..................................................... 118 Add conditions to a case with a spatial reference as an Action Officer .................... 143 Add conditions to a case without a spatial reference as an Action Officer .................... 143 Administration Officer description of role ......................................15, 92 Adobe Acrobat..................................................... 9 Alpine Resorts Act 1983 ....................................... 5 Appeal Department Action field........................... 61 Appeal Screen Direction hearing date field.............................. 61 Draft/final field ................................ ................ 61 Hearing date field ........................................... 61 Reference number field................................... 61 Short Grounds of Appeal date ......................... 61 Submission Grounds field ............................... 61 Submission Grounds Hardcopy field................ 61 Associating applications ................................... 122 Attaching documents ....................................... 136 bookmark adding SPCMS bookmark to web browser ....... 15 business rules .. See Workflow Manager - business rules Case Details Action Log Screen .......................................... 28 Appeal Screen ............................................... 27 Authority Decision Screen ............................... 26 Case Reference Information............................ 41 Dept Reply Screen ......................................... 26 editing............................................................ 22 E-Documents Screen...................................... 28 Instructions Screen......................................... 25 LCC Details.................................................... 41 Location....................................................41, 43 Main Details Screen................................ ...23, 40 Municipality Maintenance...........................41, 44 Other Details .................................................. 41 Proposed Use................................ ...........41, 42 screens .......................................................... 12 view........................................................22, 135 Case Details Screen .......................................... 95 Case Manager assigning cases to Case Manager in Workflow Manager..................................................... 36 description of role ......................................14, 92 reassigning Cases .......................................... 98 Case Owner description of role ........................................... 92 reassigning Cases .......................................... 98 case priority escalation ...................................................... 20 Catchment and Land Protection Act 1994.............. 5 Coastal Management Act 1995 ............................. 5 Contacts ............................................ 11, 133, 142 Crown Land Management .................................... 5 Data Storage..................................................... 11 De-select a selec ted item from a drop-down list . 142 E Documents..................................................... 10 attaching ........................................................ 10 formats .......................................................... 31 managing....................................................... 30 mandatory document capture points ................ 31 naming conventions ........................................ 31 storage .......................................................... 11 Edit vegetation assessment details............... 143 Electronic Documents ............... See E Documents Electronic notification ................................ ......... 12 email notification of change in case ownership.......... 12 Extractive Industry Development Act 1995............. 5 Extranet ............................................................. 6 faults recording ..................................................... 141 Find a case ................................................21, 135 Flora and Fauna Guarantee Act 1988 ................... 5 Frequently Asked Questions ............................. 135 General Info ...............................................11, 141 Glossary ......................................................... 145 Intranet .............................................................. 6 Logging In ................................ ......................... 16 Logging Out ...................................................... 17 modification requests recording ..................................................... 141 MPV Sub-process .............................................. 63 Application Conforms to Workplan .............. 65 Attach Workplan Conformance letter ................ 65 Authority Workplan Conformance response...... 67 Conformance letters ....................................... 66 editing Case Details ........................................ 65 Initial Registration ........................................... 63 Major Variance.............................................. 66 Minor Variance ............................................. 65 Record MPV .................................................. 64 Register Public Land Owner Consent............... 65 Workplan Conformance .................................. 65 Workplans for MPV Applications ...................... 64 Multiple field entries ........................................... 41 Version 2.2 Page 154 of 1 14/08/2003 Statutory Planning Case Management System User Help Manual Password change ...... See Security - changing your password Person al Details changing................................ ........................ 17 Planning andEnvironment Act 1987 ...................... 5 Portfolio Manager definition ................................ .......................... 9 features ......................................................... 20 Portfolio Manager screen ................................ 19 risk status ........................................................ 9 Portfolio Menu ................................................... 92 Portfolio Reassign Screen .................................. 98 Process Maps .................................... 10, 133, 142 Provide comment on a case as an Action Officer ................................................................... 143 Reassigning a Case 29, 137. See SP Coordinator reassigning Cases or Case Manager reassigning Cases using the Portfolio Manager............................. 94 Reference Infomation....................................... 133 Referring Cases. See Workflow Manager - referring Cases Registering a new case .... See Workflow Manager regtistering a case Registration ....................................................... 14 Report formats........ See Ad Hoc Reports - formats Reporting Module ............................................ 117 Requesting information from case manager....... 137 Requesting information from the responsible authority....................................................... 137 Responsible Authority ................................ .......... 5 Returning to a Case......................................... 138 Risk definition ................................ ........................ 41 Satutory Planning Coordinator description of role ........................................... 92 Saving Case details ......................................... 138 Scanning documents ....................................... 150 Security........................................................10, 14 changing your password............................10, 18 password ...................................................... 16 Select multiple items from a drop-down list ........ 142 Sort bi-directional .................................................. 20 SP Coordinator assigning cases to SP Coordinator in Workflow Manager..................................................... 36 reassigning cases ........................................... 92 reassigning Cases .......................................... 95 Standard Operating Environment (SOE).... 6, 10, 12, 31 Standard Reports ................................................ 9 Statutory Planning Coordinator description of role ........................................... 14 Structured data .................................................. 11 System Administrator......................................... 11 toolbar adding SPCMS link to web browser ................. 15 Unstructured data .............................................. 12 View description ..................................................... 15 Web Browsers ..................................................... 6 Web links........................................................ 134 Withdraw a Case ............................................. 138 Workflow Manager Action Officer Comment .................................. 48 adding and deleting Action Officers...........46, 139 AO RESPONSE window ................................ . 50 Appeals ........................................................ 59 assigning a case to a Case Manager ............... 36 assigning a case to a SP Coordinator .............. 36 attach application form .................................... 35 attach Department response letter................... 58 attaching consent letter ................................... 38 awaiting the Consent Letter ............................. 37 business rules .................................................. 7 creating a new case........................................ 31 definition ........................................................ 6 Department response ..................................... 52 determine appeal status ............................... 60 editing Case details ...................................39, 65 generate Department letter.......................57, 139 record appeal decision .................................... 62 record appeal details ...................................... 61 record Authority decision ............................. 59 referring Cases ........................................46, 139 registering a case ....................................32, 136 registering Public Land Owner consent .......37, 65 skipping the referral process ....................47, 138 source case ................................................... 32 Strengths ......................................................... 7 Version 2.2 Page 155 of 1 14/08/2003 Statutory Planning Case Management System User Help Manual Version 2.2 Page 156 of 1 14/08/2003