1
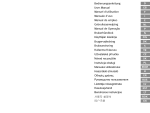
Bedienungsanleitung
User Manual
Manuel d'utilisation
D
GB
F
Manuale d'uso
I
Manual de empleo
E
Gebruiksaanwijzing
NL
Manual de Operação
Brukerhåndbok
P
N
Käyttäjän käsikirja
FIN
Brugervejledning
DK
Bruksanvisning
S
Kullanma Kılavuzu
TR
Uživatelská příručka
CZ
Návod na použitie
SK
Instrukcja obsługi
PL
Manualul utilizatorului
Használati útmutató
Οδηγίες χρήσης
Руководство пользователя
Lietotāja rokasgrāmata
Kasutusjuhend
Bendrosios instrukcijos
사용자 설명서
用户手册
ROM
H
GR
RUS
LV
EST
LT
ROK
CN
D
User Manual
Safety Instructions
GB
F
English
Symbols used
I
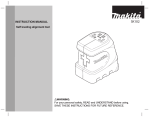
Congratulations on the purchase of your
Makita LD100P.
The symbols used in the Safety Instructions have the
following meanings:
E
Carefully read the Safety Instructions and the User Manual before
using this product.
The person responsible for the instrument must
ensure that all users understand these directions and
adhere to them.
WARNING:
Indicates a potentially hazardous situation or
an unintended use which, if not avoided, will result in
death or serious injury.
NL
FIN
CAUTION:
Indicates a potentially hazardous situation or
an unintended use which, if not avoided, may result
in minor injury and/or in appreciable material, financial and environmental damage.
Contents
Safety Instructions ............................................. 1
Start-up ................................................................ 5
Menu functions ................................................... 7
Operation............................................................. 8
Measuring ............................................................ 9
Functions ........................................................... 10
Appendix ............................................................ 14
)
Important paragraphs which must be adhered
to in practice as they enabled the product to be used
in a technically correct and efficient manner.
Use of the instrument
Permitted use
•
•
•
Measuring distances
Computing functions, e. g. areas and volumes
Measuring tilts
P
N
DK
S
TR
CZ
SK
PL
SLO
HR
H
GR
RUS
LV
EST
LT
ROK
Makita LD100P
1
Safety Instructions
CN
D
GB
F
I
Prohibited use
Areas of responsibility
•
•
•
Responsibilities of the manufacturer of the original equipment Makita Corporation Anjo, Aichi,
446-8502 Japan:
Makita is responsible for supplying the product,
including the User Manual and original accessories, in
a completely safe condition.
E
NL
•
P
N
FIN
•
DK
•
•
S
•
TR
CZ
SK
PL
SLO
HR
•
•
•
Using the instrument without instruction
Using outside the stated limits
Deactivation of safety systems and removal of
explanatory and hazard labels
Opening of the equipment by using tools (screwdrivers, etc.), as far as not specifically permitted
for certain cases
Carrying out modification or conversion of the
product
Use after misappropriation
Use of accessories from other manufacturers
without the express approval of Makita.
Deliberate or irresponsible behaviour on scaffolding, when using ladders, when measuring
near machines which are running, or near parts of
machines or installations which are unprotected
Aiming directly into the sun
Deliberate dazzling of third parties; also in the
dark
Inadequate safeguards at the surveying site (e.g.
when measuring on roads, construction sites,
etc.)
Responsibilities of the manufacturer of nonMakita accessories:
)
The manufacturers of non-Makita accessories
for the Makita LD100P are responsible for developing, implementing and communicating safety
concepts for their products. They are also responsible
for the effectiviness of these safety concepts in
combination with the Makita equipment.
Responsibilities of the person in charge of the
instrument:
WARNING
The person responsible for the instrument
must ensure that the equipment is used in accordance with the instructions. This person is also
accountable for the deployment of personnel and for
their training and for the safety of the equipment
when in use.
The person in charge of the instrument has the
following duties:
• To understand the safety instructions on the
product and the instructions in the User Manual.
H
GR
RUS
LV
EST
LT
ROK
CN
Limits of use
)
See section “Technical Data“.
The Makita LD100P is designed for use in areas
permanently habitable by humans, do not use the
product in explosion hazardous areas or in aggressive
environments.
Safety Instructions
2
Makita LD100P
•
•
D
WARNING:
Flat batteries must not be disposed of with
household waste. Care for the environment and take
them to the collection points provided in accordance
with national or local regulations.
The product must not be disposed of with
household waste.
Dispose of the product appropriately in
accordance with the national regulations in
force in your country.
Always prevent access to the product by unauthorized personnel.
To be familiar with local safety regulations
relating to accident prevention.
To inform Makita immediately if the equipment
becomes unsafe.
Hazards in use
CAUTION:
Watch out for erroneous distance measurements if the instrument is defective or if it has been
dropped or has been misused or modified.
Precautions:
Carry out periodic test measurements. Particularly
after the instrument has been subject to abnormal
use, and before, during and after important measurements.
Make sure the Makita LD100P optics is kept clean and
that there is no mechanical damage to the bumpers.
Electromagnetic Compatibility
(EMC)
The term "electromagnetic compatibility" is taken to
mean the capability of the product to function
smoothly in an environment where electromagnetic
radiation and electrostatic discharges are present,
and without causing electromagnetic interference to
other equipment.
CAUTION:
In using the instrument for distance measurements or for positioning moving objects (e.g. cranes,
building equipment, platforms, etc.) unforeseen
events may cause erroneous measurements.
WARNING:
The Makita LD100P conforms to the most stringent requirements of the relevant standards and
regulations. Yet, the possibility of it causing interference in other devices cannot be totally excluded.
Precautions:
Only use this product as a measuring sensor, not as
a control device. Your system must be configured and
operated in such a way, that in case of an erroneous
measurement, malfunction of the device or power
failure due to installed safety measures (e.g. safety
limit switch), it is assured that no damage will occur.
CAUTION:
Never attempt to repair the product yourself. In
case of damage, contact the local dealership.
GB
F
I
E
NL
P
N
FIN
DK
S
TR
CZ
SK
PL
SLO
HR
H
GR
RUS
LV
EST
LT
ROK
Makita LD100P
3
Safety Instructions
CN
D
GB
F
I
E
NL
P
N
FIN
DK
S
TR
CZ
SK
PL
SLO
HR
H
GR
RUS
LV
EST
FCC statement (applic. in U.S.)
Laser classification
This equipment has been tested and found to comply
with the limits for a Class B digital device, pursuant to
part 15 of the FCC Rules. These limits are designed to
provide reasonable protection against harmful interference in a residential installation.
This equipment generates, uses and can radiate radio
frequency energy and, if not installed and used in
accordance with the instructions, may cause harmful
interference to radio communications.
However, there is no guarantee that interference will
not occur in a particular installation.
If this equipment does cause harmful interference to
radio or television reception, which can be determined by turning the equipment off and on, the user
is encouraged to try to correct the interference by
one or more of the following measures:
• Reorient or relocate the receiving antenna.
• Increase the separation between the equipment
and receiver.
• Connect the equipment into an outlet on a circuit
different from that to which the receiver is
connected.
• Consult the dealer or an experienced radio/TV
technician for help
Integrated distancemeter
The Makita LD100P produces a visible laser beam
which emerges from the front of the instrument.
It is a Class 2 laser product in accordance with:
• IEC60825-1 : 2007 "Radiation safety of laser
products"
Laser Class 2 products:
Do not stare into the laser beam or direct it towards
other people unnecessarily. Eye protection is
normally afforded by aversion responses including
the blink reflex.
WARNING:
Looking directly into the beam with optical aids
(e.g. binoculars, telescopes) can be hazardous.
Precautions:
Do not look directly into the beam with optical aids.
CAUTION:
Looking into the laser beam may be hazardous
to the eyes.
Precautions:
Do not look into the laser beam. Make sure the laser
is aimed above or below eye level. (particularly with
fixed installations, in machines, etc.)
WARNING:
Changes or modifications not expressly
approved by Makita for compliance could void the
user’s authority to operate the equipment.
LT
ROK
CN
Safety Instructions
4
Makita LD100P
D
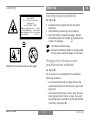
Labelling
Start-up
GB
F
Laser Radiation
Do not stare into the beam
Laser class 2
acc. IEC 60825-1:2007
Maximum radiant power:
<1mW
Emitted wavelength:
620-690nm
Beam divergence: 0.16 x 0.6 mrad
Pulse duration:
1 x 10 -9 s
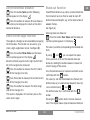
Inserting/replacing batteries
I
See figure {A}
E
1
2
3
Remove battery compartment lid and attach
handstrap.
Insert batteries, observing correct polarity.
Close the battery compartment again. Replace
the batteries when the symbol
flashes permanently in the display.
)
)
Use alkaline batteries only.
Remove the batteries before any long period
of non-use to avoid the danger of corrosion.
NL
P
N
FIN
DK
S
TR
CZ
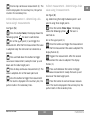
Changing the reference point
(multifunctional endpiece)
Position of the product label see last page!
SK
PL
See figure {B}
SLO
The instrument can be adapted for the following
measuring situations:
HR
•
•
For measurements from an edge, fold out the
positioning bracket until it first locks in place. See
figure {C}.
For measurements from a corner, open the positioning bracket until it locks in place, then push
the positioning bracket lightly to the right to fold
it out fully. See figure {D}.
H
GR
RUS
LV
EST
LT
ROK
Makita LD100P
5
Start-up
CN
D
GB
F
9
10
11
12
13
14
15
16
17
18
19
20
21
22
23
24
25
26
27
28
29
30
A built-in sensor automatically detects the orientation of the positioning bracket and adjusts the zero
point of the instrument accordingly.
I
E
NL
P
N
FIN
DK
S
TR
CZ
SK
PL
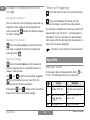
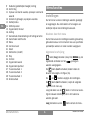
Keypad
See figure {E}:
1
2
3
4
5
6
7
8
9
10
11
ON (On/measuring) button
Plus (+) button
Minus (-) button
Functions button
Area / volume button
Equal / menu button
Memory button
Indirect measurement (Pythagoras) button
Clear / off button
Timer button
Reference button
SLO
Display
HR
See figure {F}
H
GR
RUS
LV
EST
LT
1
2
3
4
5
6
7
8
Double (partial height) measurement
Illumination
Save constant value, call up constant value
Historical memory, call up values
Battery status
Timer
Area/volume
Tilt
Horizontal distance measurement using tilt
Room corner angle function
Menu
Continuous laser
Reset
Reference (tripod)
Beep
Circumference
Wall area
Ceiling area
Intermediate line 1
Intermediate line 2
Intermediate line 3
Summary line
Laser active
Reference (front)
Reference (rear)
Reference (corner stop)
Measuring with the tripod
Stake out function
Single Pythagorean measurement
Double Pythagorean measurement
ROK
CN
Start-up
6
Makita LD100P
D
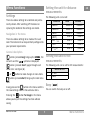
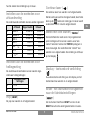
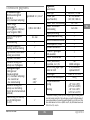
Setting the unit for distance
measurements
Menu functions
Settings
1.
2.
3.
4.
5.
6.
7.
Navigation in the menu
The menu allows settings to be made at the user
level. The instrument can be specifically configured to
your personal requirements.
Distance
0.000 m
0.0000 m
0.00 m
0.00 ft
0'00'' 1/32
0.0 in
0 1/32 in
Area
0.000 m²
0.000 m²
0.000 m²
0.00 ft²
0.00 ft²
0.00 ft²
0.00 ft²
Volume
0.000 m³
0.000 m³
0.000 m³
0.00 ft³
0.00 ft³
0.00 ft³
0.00 ft³
General description
E
NL
P
N
FIN
DK
S
TR
button (pressed long) brings up the MENU , the
set units and the
symbol are displayed.
Setting the unit for tilt
measurements
button (pressed short) pages through each
menu item. See figure {G}.
The following units can be set for tilt measurements:
Units for tilt
1.
+/- 0.0°
2.
0.00%
or
F
I
The following units can be set:
The menu allows settings to be altered and permanently stored. After switching off the device or
replacing the batteries the settings are stored.
GB
button to make changes in menu items.
button (pressed short) brings up the next menu
item.
CZ
SK
PL
SLO
HR
H
Beep ( BEEP )
A long press on the
button in the menu confirms
the new settings made in the submenu items.
GR
You can switch the beep on or off.
RUS
LV
Pressing the
button for longer in the menu
allows you to quit the settings function without
saving.
EST
LT
ROK
Makita LD100P
7
Menu functions
CN
D
GB
F
I
E
NL
P
Continuous laser (
You can switch the continuous laser function on or
off.
Measuring with the tripod ( TRIPOD )
FIN
The reference must be appropriately adjusted in
order to be able to take correct measurements with
a tripod. To do this select the TRIPOD symbol in this
menu item. You can switch the reference on the
tripod on or off. The setting can be seen on the
display
.
S
TR
CZ
SK
•
•
•
•
•
With the continuous laser function set on, each press
of the
button triggers a measurement. The laser
automatically switches off after 15 minutes.
N
DK
A reset returns the following values to their factory
settings:
)
)
Display - keypad illumination (
HR
Automatic illumination of the display and the keypad
can be switched on or off.
H
Switching on and off
Switches on the instrument and laser. The
display shows the battery symbol until the
next button is pressed.
Pressing this button for longer switches the
instrument off.
The instrument switches off automatically
after six minutes of inactivity.
)
CLEAR button
GR
RUS
LV
EST
LT
ROK
CN
The last action is cancelled. While making area or
volume measurements, each single measurement can
be deleted and remeasured in series.
Reset - returning the instrument to
the factory settings (
)
The instrument has a RESET function. When you
select the menu function RESET and confirm, the
instrument defaults to the factory settings.
Operation
All customised settings and stored values are
also lost.
Operation
PL
SLO
Reference (rear)
Display illumination (ON)
Beep (ON)
Unit (m(mm))
Stack and memory are erased
8
Makita LD100P
D
Display / keypad illumination
Measuring
GB
F
The instrument has a sensor that automatically
switches the display and keypad illumination on or off
in response to lighting conditions.
Single distance measurement
I
Press to activate the laser. Press again to trigger
the distance measurement.
E
Reference setting
The result is displayed immediately.
The default reference setting is from the rear of the
instrument.
Minimum/maximum measurement
Press this button to take the next measurement
from the front edge . A special beep sounds whenever the reference setting is changed.
P
This function allows the user to measure the
minimum or maximum distance from a fixed
measuring point. It can also be used as to determine
spacings. See figure {I}
After a measurement the reference returns automatically to the default setting (rear reference). See
figure {H}.
It is commonly used to measure room diagonals
(maximum values) or horizontal distances (minimum
values).
Press this button for longer the front reference
is set permanently.
Press and hold down this button until you hear
a beep. Then slowly sweep the laser back and forth
and up and down over the desired target point - (e.g.
into the corner of a room).
Press this button, the rear reference is set again.
NL
Press to stop continuous measurement. The
values for maximum and minimum distances are
shown in the display as well as the last measured
value in the summary line.
N
FIN
DK
S
TR
CZ
SK
PL
SLO
HR
H
GR
RUS
LV
EST
LT
ROK
Makita LD100P
9
Measuring
CN
D
GB
Volume
Functions
F
I
Addition / subtraction
E
Distance measuring.
N
FIN
DK
S
TR
one.
Press this button to take the second length
measurement (e.g. width).
The next measurement is subtracted from the
previous one.
Press this button to take the third length measurement (e.g. height). The value is shown in the second line.
This process can be repeated as required. The result
is always shown in the summary line with the
previous value in the second line.
The volume then appears in the summary line.
Press the
button for longer to display additional
room information such as ceiling/floor area, surface
area of the walls, circumference.
The last step is cancelled.
CZ
SK
Area
PL
Press once. The
display.
SLO
HR
H
GR
RUS
LV
EST
Tilt measurement
symbol appears in the
)
)
Press this button to take the first length
measurement (e.g. length).
Press it again to take the second length
measurement (e.g. width).
The result is displayed in the summary line.
Press the
button for longer to calculate the
circumference.
During tilt measurement the instrument should
be hold without a transverse tilt (± 10°).
Press to measure the inclination and the
distance. See figure {J}.
ROK
Functions
The inclination sensor measures tilts between
± 45°.
Press this button once to activate the tilt
sensor. The
symbol appears in the display. The
tilt is continuously shown as ° or % depending on the
setting.
LT
CN
symbol
Press this button to take the first length
measurement (e.g. length).
The next measurement is added to the previous
NL
P
Press this button twice. The
appears in the display.
10
Makita LD100P
D
Direct horizontal distance
Stake out function
Press this button twice and the following
symbol appears in the display
.
Two different distances (a and b) can be entered into
the instrument and can then be used to mark off
defined measured lengths, e.g. in the construction of
wooden frames.
Press this button to measure tilt and distance.
The summary line displays the result as the direct
horizontal distance.
GB
See figure {L}.
b
The value (a) and the corresponding intermediate line
flash.
Press this button three times and the room
corner symbol appears in the display
.
By using
and
, you can adjust the values
(first a and then b) to suit the desired stake out
distances. Holding the buttons down increases the
rate of change of the values.
Mark the reference points to the right and left (d1/
d2) of the angle to be measured.
Press this button to measure the first (short)
side of the triangle (d1 or d2).
Press this button to measure the second (short)
side of the triangle (d1 or d2).
Press this button to measure the third (long)
side of the triangle (d3).
The result is displayed in the summary line as the
room corner angle.
NL
N
Press this button four times and the stake out
a
function symbol appears in the display b .
The angles in a triangle can be calculated by measuring
the three sides. This function can be used e. g. to
check a right-angled room corner. See figure {K}.
I
E
P
Entering stake out distances:
Room corner angle function
F
FIN
DK
S
TR
CZ
SK
PL
Once the desired value (a) has been reached it can be
confirmed with the
button.
SLO
The value (b) and the intermediate line flashes (the
defined value (a) is automatically adopted). Value (b)
can be entered using
and
.
The defined value (b) is confirmed with the
button.
H
Pressing the
button starts the laser measurement. The display shows required stake out distance
HR
GR
RUS
LV
EST
LT
ROK
Makita LD100P
11
Functions
CN
D
GB
F
I
E
NL
P
N
FIN
DK
S
TR
CZ
•
in the summary line between the stake out point
(first a and then b) and the instrument (rear reference).
If the Makita LD100P is then moved slowly along the
stake out line the displayed distance decreases. The
instrument starts to beep at a distance of 0.1m from
the next stake out point. a
)
The arrows in the display bb indicate in which direction the Makita LD100P needs to be moved in order
to achieve the defined distance (either a or b). As
soon as the stake out point is reached the beep
changes and the intermediate line starts to flash.
Indirect measurement - determining a distance using 2 auxilliary measurements
The function can be stopped at any time by pressing
the
button.
SLO
HR
H
GR
Indirect measurement
The instrument can calculate distances using Pythagoras’ theorem.
)
Make sure you adhere to the prescribed
sequence of measurement:
•
RUS
LV
EST
LT
•
Make sure that the first measurement and the
distance to be measured are at right angles.
Use the Minimum/maximum function, as
explained in "Measuring ->
Minimum/maximum measurement".
See figure {M}
SK
PL
The minimum/maximum function can be used see explanation in "Measuring -> Minimum/
maximum measurement". The minimum value
must be used for measurements at right angles to
the target; the maximum distance for all other
measurements.
e.g. for measuring building heights or widths. It is
helpful to use a tripod when measuring heights that
require the measurement of two or three measurements.
Press this button once, the display shows
The laser is switched on.
.
Aim at the upper point (1) and trigger the
measurement. After the first measurement the value is
adopted. Keep the instrument as horizontal as possible.
All target points must be in a horizontal or vertical
plane.
The best results are achieved when the instrument is rotated about a fixed point (e.g. with the
positioning bracket fully folded out and the
instrument placed on a wall).
Press and hold down this button to trigger
continuous measurement, sweep the laser back and
forth and up and down over the ideal target point.
ROK
CN
Functions
12
Makita LD100P
Press to stop continuous measurement (2). The
result is displayed in the summary line, the partial
results in the secondary line.
Indirect measurement - determining a chain
value using 3 measurements
Indirect Measurement - determining a distance using 3 measurements
e.g. determining the height between point 1 and
point 2 using three target points.
See figure {N}
Press this button three times ; the display
shows the following symbol
. The laser is
switched on.
See figure {O}
Press this button twice; the display shows the
following symbol
. The laser is switched on.
D
GB
F
I
E
NL
P
N
Aim at the upper point (1).
FIN
Press this button and trigger the measurement.
After the first measurement the value is adopted. The
display flashes (2).
DK
Press and hold down this button to trigger
continuous measurement, sweep the laser up and
down over the ideal target point.
Triggers the measurement. After the second
measurement the value is adopted. The display
flashes (3).
CZ
Press to stop continuous measurement (2). The
value is adopted. Aim at the lower point and
Press and hold down this button to trigger
continuous measurement. Sweep the laser up and
down over the ideal target point.
Aim at the upper point (1) and trigger the
measurement. After the first measurement the value
is adopted. Keep the instrument as horizontal as
possible
press this button to trigger the measurement
(3). The result is displayed in the summary line, the
partial results in the secondary lines.
Press this button to end continuous measurement. The result is displayed in the summary line, the
partial results in the secondary lines.
S
TR
SK
PL
SLO
HR
H
GR
RUS
LV
EST
LT
ROK
Makita LD100P
13
Functions
CN
D
GB
F
I
E
NL
P
N
FIN
DK
S
TR
CZ
SK
Storage of constants/historical
storage
LV
Once the key is released the remaining seconds until
measurement (e.g. 59, 58, 57...) are displayed in a
countdown. The last 5 seconds are counted down
with a beep. After the last beep the measurement is
taken and the value is displayed.
Press this button once to recall the constant
and make it available for further calculations by
pressing button
.
)
Historical storage
The
RUS
Press and hold down this button until the
desired time delay is reached (max. 60 seconds).
Recalling the constant
HR
GR
or
You can store and recall a frequently used value e.g.
height of a room. Measure the desired distance,
press and hold the
button until the device beeps
to confirm storage.
SLO
H
Press this button to set a 5-second time delay.
Storage of a constant
Press this button twice and the previous 20
results (measurements or calculated results) are
shown in reverse order.
PL
Timer (self-triggering)
and
The timer can be used for all measurements.
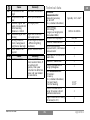
Appendix
Message codes
All message codes are displayed with either
"Error". The following errors can be corrected:
buttons can be used for navigation.
Press this button to use a result from the
summary line for further calculations.
156
Pressing the
and
buttons at the same time
erases all the values in historical storage.
160
EST
LT
204
Cause
Transverse tilt
greater than 10°
Main tilt direction,
angle too high
(> 45°)
Calculation error
or
Remedy
Hold the instrument
without any transverse
tilt
Measure angle up to
max. ± 45°
Repeat procedure
ROK
CN
Appendix
14
Makita LD100P
D
252
253
255
256
257
260
Cause
Temperature too
high
Temperature too
low
Receiver signal too
weak, measurement
time too long,
distance > 100 m
Received signal too
strong
Wrong measurement, background
brightness too high
Laser beam interrupted
Error
Cause
Error Hardware error
Technical data
Remedy
Cool down instrument
Distance
measurements:
Measuring accuracy
up to 10 m
(2 σ, standard deviation)
Power Range
Technology™:
Range (use target plate
from about 80m)
Smallest unit displayed
Distance measurement
Minimum/maximum
measurement, Continuous
measurement
Area/volume calculation of
room data
Addition / subtraction
Indirect measurement
using Pythagoras
Tilt measurements:
Tilt sensor:
Accuracy
(2 σ, standard deviation)
- to laser beam
- to the housing
Indirect measurement
using tilt sensor (direct
horizontal distance)
Angle measurement using
tilt sensor(± 45°)
Warm up instrument
Use target plate
Target too reflective
(use target plate)
Darken target (measure
in different lighting
conditions)
Repeat measurement
Remedy
Switch on/off the
device several times. If
the symbol still
appears, then your
instrument is defective.
Please call your dealer
for assistance.
GB
F
typically: ± 1.5 mm*
I
E
NL
0.05 m to 100 m
P
0.1 mm
9
FIN
N
9
DK
S
TR
9
CZ
9
SK
9
PL
SLO
HR
± 0.3°
± 0.3°
H
GR
RUS
9
LV
EST
9
LT
ROK
Makita LD100P
15
Appendix
CN
D
GB
F
I
E
NL
P
N
FIN
DK
S
TR
CZ
SK
PL
SLO
HR
H
GR
RUS
General:
Laser class
Laser type
Ø laser point
(at distances)
Autom. laser switch-off
Autom. instrument switchoff
Display illumination
Keypad illumination
Multifunctional endpiece
Timer (self-triggering)
Save constant value
Historical storage
(20 values)
Tripod thread
Battery life,
Type AAA, 2 x 1.5V
Protection against
splashes and dust
Dimensions
Weight (with batteries)
Temperature range:
Storage
Operation
LV
EST
LT
ROK
CN
Measuring conditions
II
635 nm, < 1 mW
6 / 30 / 60 mm
(10 / 50 / 100 m)
after 3 min
Measuring range
The range is limited to 100 m.
At night or dusk and if the target is in shadow the
measuring range without target plate is increased.
Use a target plate to increase the measurement
range during daylight or if the target has poor reflection properties.
after 6 min
9
9
9
9
9
Target surfaces
Measuring errors can occur when measuring toward
colourless liquids (e.g. water) or dust free glass,
Styrofoam or similar semi-permeable surfaces.
9
9
up to
5 000 measurements
IP 54, dust-proof,
splash-proof
126 x 51 x 27 mm
125 g
Aiming at high gloss surfaces may deflect the laser
beam and lead to measurement errors.
Against non-reflective and dark surfaces the
measuring time may increase.
Care
-25°C up to +70°C
(13°F up to +158°F)
-10°C up to +50°C
(14°F up to +122°F)
Do not immerse the instrument in water. Wipe off dirt
with a damp, soft cloth. Do not use aggressive
cleaning agents or solutions. Handle the instrument
as you would a telescope or camera.
* maximum deviation occurs under unfavourable conditions such
as bright sunlight or when measuring to poorly reflecting or very
rough surfaces. Measuring accuracy between 10 m and 30 m may
deteriorate to approx. ± 0.025 mm/m, for distances above 30 m
to ± 0.1 mm/m.
Appendix
16
Makita LD100P
D
EC Declaration of Conformity
GB
F
I
E
NL
P
N
FIN
DK
S
TR
CZ
SK
PL
SLO
HR
H
GR
RUS
LV
EST
LT
ROK
Makita LD100P
17
Appendix
CN
D
Gebruiksaanwijzing
Veiligheidsvoorschriften
GB
F
Nederlands
Gebruikte Symbolen
I
Gefeliciteerd met uw aanschaf van een
Makita LD100P.
De gebruikte symbolen in de veiligheidsvoorschriften
hebben de onderstaande betekenis:
E
Lees de gebruiksaanwijzing zorgvuldig door alvorens het product in
gebruik te nemen.
De beheerder van het instrument moet garanderen,
dat alle gebruikers deze aanwijzingen begrijpen en
opvolgen.
WAARSCHUWING:
Gebruiksgevaar of gebruik in strijd met de
bepalingen, welke ernstige schade aan personen of
de dood tot gevolg kan hebben.
NL
FIN
VOORZICHTIG:
Gebruiksgevaar of gebruik in strijd met de
bepalingen, dat slechts geringe schade voor
personen met zich meebrengt, maar aanzienlijke
schade aan materiaal, bezittingen of milieu kan
veroorzaken.
Inhoudsopgave
Veiligheidsvoorschriften ..................................... 1
Opstarten............................................................. 5
Menufuncties....................................................... 6
Werking ................................................................ 8
Meten ................................................................... 9
Functies................................................................ 9
Appendix ............................................................ 14
)
Belangrijke gebruiksinformatie, die de
gebruiker helpt, het product technisch juist en efficiënt te gebruiken.
Toepassingsdoel
Gebruik volgens de bepalingen
•
•
•
Meten van afstanden
Rekenfuncties, zoals oppervlakte en inhoud
Meten schuinstanden
P
N
DK
S
TR
CZ
SK
PL
SLO
HR
H
GR
RUS
LV
EST
LT
ROK
Makita LD100P
1
Veiligheidsvoorschriften
CN
D
GB
F
I
Gebruik in strijd met de bepalingen
lijke bewoning, gebruik het product niet gebieden
met explosiegevaar of in agressieve omgevingen.
•
•
•
Verantwoordelijkheidsgebieden
E
NL
•
P
N
•
FIN
DK
S
TR
CZ
•
•
•
SK
PL
SLO
•
•
HR
•
H
GR
RUS
LV
EST
LT
Gebruik van het product zonder instructie
Gebruik buiten de toepassingsgrenzen
Onwerkzaam maken van veiligheidsinrichtingen
en verwijderen van aanwijzings- en waarschuwingsetiketten
Openen van het product met gereedschap
(schroevendraaier etc.), voor zover niet nadrukkelijk voor bepaalde gevallen is toegestaan
Het verrichten van modificaties of aanpassingen
aan het product
Ingebruikname na ontvreemding
Gebruik van toebehoren van andere fabrikanten,
die niet nadrukkelijk zijn goedgekeurd door
Makita.
Opzettelijk of onverantwoord gedrag op steigers,
bij het beklimmen van ladders, bij het meten in de
buurt van draaiende machines of open machineelementen of installaties
Direct richten in de zon
Opzettelijke verblinding van derden; ook in het
donker
Onvoldoende beveiliging van de meetlocatie
(bijv.: bij het verrichten van metingen op straat,
constructielocaties, etc.)
Verantwoordelijkheden van de fabrikant van de
oorspronkelijke apparatuur Makita Corporation
Anjo, Aichi, 446-8502 Japan (kort Makita):
Makita is verantwoordelijke voor de veiligheidstechnische onberispelijke levering van het product inclusief
gebruiksaanwijzing en originele toebehoren.
Verantwoordelijkheidsgebied van de fabrikanten van secundaire toebehoren:
)
Fabrikanten van secundaire toebehoren voor
de Makita LD100P zijn verantwoordelijk voor het
ontwikkelen, invoeren en communiceren van de
veiligheidsmaatregelen voor hun producten. Zij zijn
tevens verantwoordelijk voor de effectiviteit van hun
maatregelen in combinatie met de Makita apparatuur.
Verantwoordelijkheidsgebied van de beheerder
WAARSCHUWING:
De beheerder moet er zorg voor dragen, dat de
apparatuur in overeenstemming met de instructies
wordt gebruikt. Hij is tevens verantwoordelijk voor de
inzet van personeel en hun training en voor de veiligheid van de apparatuur tijdens gebruik.
Voor de beheerder gelden de volgende verplichtingen:
Toepassingsgrenzen
)
Zie hoofdstuk: "Technische Gegevens“.
De Makita LD100P is ontworpen voor toepassing in
gebieden, die geschikt zijn voor permanente mense-
ROK
CN
Veiligheidsvoorschriften
2
Makita LD100P
D
•
•
•
Hij begrijpt de veiligheidsinformatie voor het
product en de instructies in de gebruiksaanwijzing.
Hij kent de plaatselijke, industriële voorschriften
ter voorkoming van ongevallen en leeft deze na.
Hij stelt Makita op de hoogte, zodra aan de apparatuur veiligheidsgebreken optreden.
de stroomtoevoer door een geschikte veiligheidsinrichting (bijv. veiligheids-eindschakelaar) wordt gegarandeerd, dat geen schade kan ontstaan.
WAARSCHUWING:
Verwijder de apparatuur op deskundige wijze.
Volg de plaatselijke voorschriften op voor het verwijderen van afval. Beveilig de apparatuur altijd zodanig,
dat onbevoegden er geen toegang toe kunnen krijgen.
Het product mag niet bij het huisvuil worden
weggegooid.
Het product moet in overeenstemming met
de nationale regelgeving van uw land worden
verwijderd. Voorkom steeds toegang tot het
product door onbevoegden.
Gebruiksrisico's
VOORZICHTIG:
Pas op voor foutieve metingen bij gebruik van
een defect product, na een val of andere niet toegestane belastingen resp. modificaties aan het product.
Voorzorgen:
Verricht periodiek controlemetingen. Speciaal na
overbelasting van het product, en voor en na belangrijke meettaken.
Zorg er voor, dat de optiek van de Makita LD100P
schoon wordt gehouden en let op eventuele mechanische beschadigingen van de stootranden.
Elektromagnetische compatibiliteit
(EMC)
Onder de term "Elektromagnetische Compatibiliteit"
verstaan wij het vermogen van het product om soepel
te functioneren in een omgeving met elektromagnetische straling en elektrostatische ontladingen,
zonder elektromagnetische storingen in andere
apparatuur te veroorzaken.
VOORZICHTIG:
Bij het gebruik van de producten voor
afstandsmetingen of voor het positioneren van
bewegende objecten (bijv. kranen, bouwmachines,
platforms, enz.) kunnen door onvoorziene gebeurtenissen foutieve metingen optreden.
WAARSCHUWING:
De Makita LD100P voldoet aan de strengste
eisen van de relevante normen en regelgeving.
Desondanks kan de mogelijkheid dat storing wordt
veroorzaakt in andere apparatuur niet volledig
worden uitgesloten.
Voorzorgen:
Gebruik de producten alleen als meetsensor en niet
als besturingsapparaat. Uw systeem moet dusdanig
functioneren en zijn geconstrueerd, dat bij een
foutieve meting, storing van het product of uitval van
Makita LD100P
GB
F
I
E
NL
P
N
FIN
DK
S
TR
CZ
SK
PL
SLO
HR
H
GR
RUS
LV
EST
LT
ROK
3
Veiligheidsvoorschriften
CN
D
GB
F
I
E
NL
P
N
FIN
DK
S
TR
CZ
SK
PL
SLO
HR
H
GR
RUS
LV
EST
LT
VOORZICHTIG:
Probeer het instrument nooit zelf te repareren.
Neem in geval van schade, contact op met de plaatselijke vertegenwoordiging.
Voorzorgen:
Kijk niet in de laserstraal. Let erop, dat de laserstraal
boven of onder ooghoogte wordt gericht. (speciaal bij
vaste opstellingen in installaties, machines e.d.)
Laserclassificatie
Etikettering
Geïntegreerde afstandmeter
De Makita LD100P produceert een zichtbare laserstraal, die aan de voorzijde van het apparaat naar
buiten komt.
Het product komt overeen met de laserklasse 2
volgens:
• IEC60825-1 : 2007 "Veiligheid van laserinrichtingen"
Laser Straling
Kijk niet in de laserstraal
Laser klasse 2
volgens IEC 60825-1:2007
Max. uitgezonden vermogen: 1mW
Uitgezonden golflengte:620-690nm
Straaldivergentie: 0.16 x 0.6 mrad
Pulsduur:
1 x 10 -9 s
Laser Klasse 2 producten:
Kijk niet in de laserstraal en richt niet onnodig op
andere personen. De bescherming van het oog wordt
gewoonlijk bewerkstelligd door afwendingreacties
inclusief knipperreflex .
WAARSCHUWING:
Direct in de laserstraal kijken met optische
hulpmiddelen (zoals bijv. verrekijkers, telescopen)
kan gevaarlijk zijn.
Positie van het productetiket; zie de laatste pagina!
Voorzorgen:
Kijk niet in de laserstraal met optische hulpmiddelen.
VOORZICHTIG:
Het kijken in de laserstraal kan gevaarlijk zijn
voor het oog.
ROK
CN
Veiligheidsvoorschriften
4
Makita LD100P
D
Een geïntegreerde sensor detecteert automatisch de
stand van de positioneringbeugel en bepaalt de bijbehorende correcties.
Opstarten
Inzetten / Vervangen van Batterijen
Toetsenbord
1
Zie figuur {E}:
Schuif de vergrendeling opzij en open het batterijcompartiment.
Zet nieuwe batterijen in, let op de polariteit.
Sluit het batterijcompartiment weer. Vervang de
batterijen als het pictogram
continu knippert
in het display.
)
)
1
2
3
4
5
6
7
8
9
10
11
Gebruik uitsluitend alkaline batterijen.
Neem de batterijen uit als het apparaat
langere tijd niet zal worden gebruikt om corrosie te
voorkomen.
Wijzigen van het referentiepunt
(multifunctioneel eindstuk)
Zie figuur {B}
Het instrument kan in diverse meetsituaties worden
gebruikt:
•
•
F
I
Zie figuur {A}
2
3
GB
NL
AAN (Aan/meten) toets
Plus (+) toets
Minus (-) toets
Functietoets
Oppervlakte / inhoud toets
Is-gelijktoets / menu
Opslagtoets
Indirecte meting (Pythagoras) toets
Wis/uit toets
Zelfontspannertoets
Referentietoets
P
N
FIN
DK
S
TR
CZ
SK
PL
Display
SLO
Zie figuur {F}
HR
1
2
3
4
5
6
7
8
Voor metingen vanaf een rand, de positioneringbeugel openen tot deze vastklikt. Zie figuur {C}.
Voor metingen vanuit een hoek, de positioneringbeugel openen tot deze vastklikt, met lichte druk
naar rechts kan deze verder worden gedraaid. Zie
figuur {D}.
E
H
Laser geactiveerd
Referentie (voorzijde)
Referentie (achterzijde)
Referentie (hoeksteun)
Meten met een statief
Uitzetfunctie
Enkelvoudige Pythagoras meting
Dubbele Pythagoras meting
GR
RUS
LV
EST
LT
ROK
Makita LD100P
5
Opstarten
CN
D
GB
F
I
E
NL
P
N
FIN
DK
S
TR
CZ
SK
PL
SLO
HR
H
9 Dubbele (gedeeltelijke hoogte) meting
10 Verlichting
11 Opslaan constante waarde, oproepen constante
waarde
12 Historisch geheugen, oproepen waardes
13 Batterijstatus
14 Zelfontspanner
15 Oppervlakte/ Inhoud
16 Helling
17 Horizontale afstandmeting met hellingcorrectie
18 Kamerhoek meetfunctie
19 Menu
20 Continue laser
21 Reset
22 Referentie (statief)
23 Piep
24 Omtrek
25 Oppervlakte wand
26 Oppervlakte plafond
27 Tussenresultaat 1
28 Tussenresultaat 2
29 Tussenresultaat 3
30 Eindresultaat
Menufuncties
Instellingen
Via het menu kunnen instellingen worden gewijzigd
en opgeslagen. Na uitschakelen of vervangen van
batterijen blijven de instellingen bewaard.
Bladeren door het menu
Via het menu kunnen instellingen worden gemaakt op
gebruikersniveau. Het instrument kan aan specifieke
persoonlijke wensen en eisen worden aangepast.
Algemene beschrijving
toets (lang indrukken) roept het MENU op, de
ingestelde eenheden en het
pictogram
worden weergegeven.
De
toets (kort indrukken) bladert door de
diverse menuregels. Zie figuur {G}.
De
en
toetsen wijzigen de instellingen.
De
toets (kort indrukken) roept de volgende
regel van het menu op.
GR
RUS
Lang indrukken van de
toets in het menu bevestigt de nieuwe instellingen, die in het submenu
werden gemaakt.
LV
EST
LT
Lang indrukken van de
toets verlaat de menu-
ROK
CN
Menufuncties
6
Makita LD100P
D
functie zonder de instellingen op te slaan.
Continue laser (
Instellen van de eenheden voor
afstandmeting
De onderstaande eenheden kunnen worden ingesteld:
1.
2.
3.
4.
5.
6.
7.
Afstand
0.000 m
0.0000 m
0.00 m
0.00 ft
0'00'' 1/32
0.0 in
0 1/32 in
Oppervlakte
0.000 m²
0.000 m²
0.000 m²
0.00 ft²
0.00 ft²
0.00 ft²
0.00 ft²
Inhoud
0.000 m³
0.000 m³
0.000 m³
0.00 ft³
0.00 ft³
0.00 ft³
0.00 ft³
De continue laser kan worden in of uitgeschakeld.
F
Met de continue laserfunctie ingeschakeld, levert elke
druk op de
toets een meting op. De laser wordt
automatisch na 15 minuten uitgeschakeld.
E
Meten met een statief ( TRIPOD )
De meetreferentie moet correct zijn ingesteld om
juiste metingen uit te kunnen voeren vanaf een
statief. Selecteer hiertoe het TRIPOD pictogram in
deze menuregel. De meetreferentie "statief" kan
worden in en uitgeschakeld. De instelling is zichtbaar
op het display
.
Instellen van de eenheden voor
hellingmeting
I
NL
P
N
FIN
DK
S
TR
CZ
SK
Display - toetsenbord verlichting
( )
De onderstaande eenheden kunnen worden ingesteld voor hellingmetingen:
Eenheden voor
hellingen
1.
+/- 0.0°
2.
0.00%.
De automatische verlichting van het display en het
toetsenbord kan worden in en uitgeschakeld.
PL
SLO
HR
H
GR
Reset - het instrument terugzetten
naar de fabrieksinstellingen
(
)
Piep ( BEEP )
De piep kan worden in of uitgeschakeld.
Makita LD100P
)
GB
Het instrument heeft een RESET functie. Als de
RESET menufunctie wordt geselecteerd en beves-
7
Menufuncties
RUS
LV
EST
LT
ROK
CN
D
GB
F
I
E
NL
P
N
FIN
DK
S
TR
CZ
SK
PL
SLO
HR
H
GR
RUS
LV
EST
LT
tigd, dan zal het instrument worden teruggezet naar
de fabrieksinstellingen.
en opnieuw gedaan.
Een reset zet de onderstaande fabrieksinstellingen
in:
Display / toetsenbord verlichting
•
•
•
•
•
Het instrument heeft een sensor die automatisch de
display en toetsenbordverlichting in of uitschakelt als
reactie op het omgevingslicht.
Referentie (achterzijde)
Displayverlichting (AAN)
Piep (AAN)
Eenheid (m(mm))
Historisch geheugen wordt gewist
Instellen Referentie
De standaard instelling van de meetreferentie is de
achterzijde van het instrument.
)
Alle persoonlijke instellingen en opgeslagen
waardes worden eveneens gewist.
Druk op deze toets om de volgende meting uit
te voeren vanaf de voorzijde . Er klinkt een speciale
piep iedere keer als de instelling van de meetreferentie wordt gewijzigd.
Werking
Aan en uitschakelen
Na een meting gaat de meetreferentie automatisch
terug naar de standaard instelling (referentie achterzijde). Zie figuur {H}.
Schakelt het instrument en de laser in. Het
display toont het batterij pictogram totdat de
volgende toets wordt ingedrukt.
Lang indrukken van deze toets Schakelt het
instrument uit.
Het instrument schakelt automatisch uit na
zes minuten zonder activiteit.
Lang indrukken van deze toets stelt de meetreferentie permanent in op de voorzijde.
Indrukken van deze toets stelt de meetreferentie terug op de achterzijde.
WIS toets
De laatste actie wordt afgebroken Bij het
uitvoeren van oppervlakte/inhoud of indirecte
metingen kan elke individuele meting worden gewist
ROK
CN
Werking
8
Makita LD100P
D
Meten
Functies
Enkelvoudige afstandmeting
Optellen/ Aftrekken
I
Indrukken om de laser te activeren. Nogmaals
indrukken om de afstandmeting te starten.
Afstandmeting.
E
GB
F
Het resultaat wordt direct weergegeven.
De volgende meting wordt opgeteld bij de
vorige.
Minimum/maximum meting
De volgende meting wordt afgetrokken van de
vorige.
Met behulp van deze functie kunnen de kleinste en
grootste afstand vanaf een vast punt worden
gemeten. Hij kan ook worden gebruikt om onderlinge
afstanden te meten. Zie figuur {I}
Dit proces kan zo vaak als nodig is worden herhaald.
Het eindresultaat staat altijd in de resultaatregel en
de laatste meting in de tweede regel.
P
N
FIN
DK
S
TR
De laatste stap wordt afgebroken
Hij wordt meestal gebruikt om de kamerdiagonaal
(maximale waarde) of horizontale afstand (minimum
waarde) te bepalen.
NL
CZ
Oppervlakte
SK
Eenmaal indrukken. Het
verschijnt in het display.
Deze toets ingedrukt houden totdat een piep
klinkt. Zwaai de laser nu langzaam heen en weer en
op en neer over het gewenste richtpunt - (bijv. de
hoek van de kamer).
pictogram
PL
SLO
Deze toets indrukken om de eerste meting op te
nemen (bijv. lengte).
Nog eens indrukken om de tweede meting op te
nemen (bijv. breedte).
Indrukken om de continue meting te stoppen.
De maximale en minimale afstanden worden in het
display weergegeven en de laatste meetwaarde staat
in de resultaatregel.
Het resultaat wordt weergegeven op de resultaatregel.
Druk lang op de
kenen.
toets om de omtrek te bere-
HR
H
GR
RUS
LV
EST
LT
ROK
Makita LD100P
9
Meten
CN
D
GB
F
I
E
NL
P
N
FIN
DK
S
TR
CZ
SK
PL
SLO
HR
H
GR
RUS
LV
EST
LT
ROK
CN
Inhoud
Druk tweemaal op deze toets. Het
gram verschijnt in het display.
Directe horizontale afstand
Druk tweemaal op deze toets en het volgende
pictogram verschijnt in het display
.
picto-
Deze toets indrukken om de eerste meting op te
nemen (bijv. lengte).
Deze toets indrukken om de helling en de
afstand te meten. De resultaatregel toont het eindresultaat als de directe horizontale afstand.
Deze toets indrukken om de tweede meting op
te nemen (bijv. breedte).
Kamerhoek meetfunctie
Deze toets indrukken om de derde meting op te
nemen (bijv. hoogte). De waarde wordt weergegeven
op de tweede regel.
De hoeken van een driehoek kunnen worden berekend door drie zijden te meten. Deze functie kan
worden gebruikt om bijv. rechte kamerhoeken te
controleren. Zie figuur {K}.
De inhoud verschijnt op de resultaatregel.
Druk lang op de
toets om extra informatie over
de kamer op te roepen zoals plafond/vloeroppervlak,
oppervlakte van de muren en omtrek.
Deze toets drie keer indrukken en het kamerhoek pictogram verschijnt in het display
.
Markeer de referentiepunten rechts en links (d1/d2)
van de hoek die moet worden gemeten.
Hellingmeting
)
)
De hellingsensor meet hellingen tussen ± 45°.
Deze toets indrukken om de eerste (korte) zijde
(d1 of d2) van de driehoek te meten.
Tijdens helling metingen moet het instrument
zonder zijwaartse helling (± 10°) worden gehouden.
Deze toets indrukken om de tweede (korte)
zijde (d1 of d2) van de driehoek te meten.
Druk deze toets eenmaal in om de hellingsensor
te activeren. Het
pictogram verschijnt in het
display. De helling wordt continu getoond in ° of %
afhankelijk van de instelling.
Deze toets indrukken om de derde (lange) zijde
(d3) van de driehoek te meten.
Indrukken om de helling en de afstand te meten.
Het resultaat wordt weergegeven op de resultaatregel als grootte van de kamerhoek.
Zie figuur {J}.
Functies
10
Makita LD100P
D
display toont in de resultaatregel de actuele afstand
tussen het uitzetpunt (eerst a en vervolgens b) en
het instrument (meetreferentie achterzijde ).
Uitzetfunctie
Er kunnen twee verschillende afstanden (a en b) in
het instrument worden ingevoerd om te worden
gebruikt om onderlinge afstanden te markeren, bijv.
bij de constructie van houten frames.
Als de Makita LD100P nu langzaam wordt bewogen
langs de uitzetlijn dan zal de getoonde afstand langzaam afnemen. Het instrument begint te piepen op
een afstand van 0,1m van het volgende uitzetpunt.
Zie figuur {L}.
a
Invoeren van uitzetafstanden:
b
De pijlen in het display b geven aan in welke richting de Makita LD100P moet worden verplaatst om
de gewenste afstand te bereiken (ofwel a of b).
Zodra het uitzetpunt is bereikt zal de piep veranderen
en de tussenresultaatregel gaat knipperen.
Deze toets vier keer indrukken en het uitzet
a
pictogram verschijnt in het display b .
b
De waarde (a) en de overeenkomstige regel op het
display knipperen.
Met behulp van
en
kunnen de waardes
(eerst a en daarna b) worden aangepast aan de uit te
zetten afstanden. Vasthouden van de toets verhoogt
de snelheid waarmee de waardes veranderen.
De functie kan op ieder moment worden gestopt
door indrukken van de
toets.
GB
F
I
E
NL
P
N
FIN
DK
S
TR
CZ
SK
PL
Indirecte meting
Als de gewenste maat (a) is bereikt, deze bevestigen
met de
toets.
Het instrument kan afstanden berekenen met behulp
van de stelling van Pythagoras.
SLO
De waarde (b) en de overeenkomstige regel op het
display knipperen (de opgegeven waarde voor (a)
wordt automatisch overgenomen). De waarde (b) kan
worden ingevoerd met behulp van
en
. De
opgegeven waarde (b) wordt bevestigd met de
toets.
Deze methode is vooral handig als het lastig is om de
betreffende afstand direct te meten.
H
Indrukken van de
)
Let goed op, dat de juiste meetvolgorde
wordt aangehouden:
•
Alle richtpunten moeten in hetzelfde horizontale
of verticale vlak liggen.
toets start de laser meting. Het
HR
GR
RUS
LV
EST
LT
ROK
Makita LD100P
11
Functies
CN
D
GB
•
F
I
E
NL
P
N
FIN
DK
S
TR
CZ
SK
PL
SLO
HR
H
GR
RUS
LV
EST
LT
ROK
CN
•
De beste resultaten worden bereikt als het instrument wordt geroteerd om een vast punt (bijv.
met de positioneringbeugel volledig uitgeklapt en
tegen een muur gehouden).
De minimum/maximum functie kan worden
toegepast - zie de beschrijving in "Meten ->
Minimum/maximum meting". De minimum waarde
moet worden gebruikt voor de metingen loodrecht op het richtmerk; de maximale afstand voor
alle overige metingen.
)
Let op, dat de eerste meting en de te bepalen
afstand loodrecht op elkaar staan. Gebruik de
Minimum/maximum functie, zoals beschreven in
"Meten -> Minimum/maximum meting".
Indrukken om de continue meting te stoppen (2).
Het resultaat wordt weergegeven op de resultaatregel,
de tussenresultaten op de tussenresultaatregels.
Indirecte meting - bepalen van een lengte met
behulp van 3 hulpmetingen
Zie figuur {N}
Druk tweemaal op deze toets en het volgende
pictogram
verschijnt in het display. De laser wordt
ingeschakeld.
Indirecte meting - bepalen van een lengte met
behulp van 2 hulpmetingen
Richt op het bovenste punt (1) en voer de
meting uit. De meetwaarde wordt overgenomen na
de eerste meting. Houdt het instrument zo goed
mogelijk horizontaal.
Zie figuur {M}
bijv. voor het meten van de hoogte of breedte van
gebouwen. Het is handig om een statief te gebruiken
bij het meten van hoogtes waarbij twee of meer
lengtes moeten worden bepaald.
Deze toets indrukken en vasthouden om de
continue meting te starten, zwaai de laser heen en
weer en op en neer over het ideale richtpunt.
Deze toets eenmaal indrukken, het display
toont
. De laser wordt ingeschakeld.
Indrukken om de continue meting te stoppen
(2). De meetwaarde wordt overgenomen. Richt op
het onderste punt en
Richt op het bovenste punt (1) en voer de
meting uit. De meetwaarde wordt overgenomen na
de eerste meting. Houdt het instrument zo goed
mogelijk horizontaal.
Functies
Deze toets indrukken en vasthouden om de
continue meting te starten, zwaai de laser heen en
weer en op en neer over het ideale richtpunt.
Deze toets indrukken om de meting uit te voeren
(3). Het resultaat wordt weergegeven op de resul-
12
Makita LD100P
D
taatregel, de tussenresultaten op de tussenresultaatregels.
Indirecte meting - bepalen van een lengte met
behulp van 3 hulpmetingen
bijv. bepalen van de hoogte tussen punt 1 en punt 2
met behulp van drie richtpunten.
Druk driemaal op deze toets en het volgende
pictogram
verschijnt in het display. De laser
wordt ingeschakeld.
Richt op het bovenste punt (1).
Deze toets indrukken om de meting uit te
voeren. De meetwaarde wordt overgenomen na de
eerste meting. Het display knippert (2).
Voert de meting uit. De meetwaarde wordt overgenomen na de tweede meting.
Het display knippert (3).
Deze toets ingedrukt houden om de continue
meting te starten. Zwaai de laser heen en weer en op
en neer over het ideale richtpunt.
FIN
Oproepen van constanten
DK
Deze toets eenmaal indrukken om de constante
op te roepen en druk op toets
om deze beschikbaar te krijgen voor verdere berekening.
TR
Historisch geheugen
SK
Deze toets tweemaal indrukken en de vorige 20
resultaten (metingen of berekende resultaten)
worden in omgekeerde volgorde getoond.
Deze toets indrukken om een waarde in de
resultaatregel te gebruiken voor verdere berekeningen.
Tegelijkertijd indrukken van de
en
toetsen
wist alle waardes in het historische geheugen.
13
E
Veelgebruikte waardes kunnen worden opgeslagen
en teruggeroepen, bijv. de hoogte van een kamer.
Meet de gewenste afstand, toets
ingedrukt
houden totdat het toestel piept om de opslag te
bevestigen.
De
en
toetsen kunnen worden gebruikt om
door te lijst te bladeren.
Deze toets indrukken om de continue meting te
stoppen. Het resultaat wordt weergegeven op de
resultaatregel, de tussenresultaten op de tussenresultaatregels.
F
I
Opslaan van constanten
Zie figuur {O}
Makita LD100P
Opslaan van constanten/historisch
geheugen
GB
Functies
NL
P
N
S
CZ
PL
SLO
HR
H
GR
RUS
LV
EST
LT
ROK
CN
D
GB
F
Zelfontspanner (timer)
160
I
Deze toets indrukken om een vertraging van 5
seconden in te stellen.
E
of
204
252
Deze toets ingedrukt houden tot de gewenste
vertraging is bereikt (max. 60 seconden).
253
255
Als de knop wordt losgelaten zal de resterende tijd
tot de meting in seconden (bijv. 59, 58, 57...) worden
afgeteld in het display. De laatste 5 seconden worden
afgeteld met een piep. Na de laatste piep wordt de
meting uitgevoerd en op het display weergegeven.
256
NL
P
N
FIN
DK
S
TR
CZ
257
)
De zelfontspanner kan voor alle metingen
worden gebruikt.
260
SK
PL
H
GR
RUS
Meldingen en Foutcodes
Alle meldingen en codes worden weergegeven met de
aanduiding
of "Error". De onderstaande fouten
kunnen worden hersteld:
LV
EST
LT
156
Foutieve meting,
teveel omgevingslicht
Laserstraal onderbroken
Error
Oorzaak
Error Hardwarefout
Appendix
SLO
HR
Oorzaak
Lengtehelling te
groot (> 45°)
Rekenfout
Temperatuur te
hoog
Temperatuur te laag
Ontvangstsignaal te
zwak, meettijd te
lang, afstand
> 100 m
Ontvangstsignaal te
sterk
Correctie
Meet hellingen tot max.
± 45°
Procedure herhalen
Instrument af laten
koelen
Instrument opwarmen
Gebruik een richtplaat
Teveel reflectie van
richtmerk (gebruik
richtplaat)
Richtmerk afschermen
(meten onder andere
lichtcondities)
Meting herhalen
Correctie
Schakel het apparaat
enkele malen aan en
uit. Als het pictogram
blijft terugkomen, dan
is het instrument
mogelijk defect. Neem
in dat geval contact op
met uw dealer voor
assistentie.
Oorzaak
Correctie
Dwarshelling groter Houdt het instrument
dan 10°
zonder dwarshelling
vast
ROK
CN
Appendix
14
Makita LD100P
D
Algemeen:
Laser klasse
Laser type
Ø laser spot
(op afstanden)
Autom. laser uitschakeling
Autom. instrument
uitschakeling
Display verlichting
Toetsenbordverlichting
Multifunctioneel eindstuk
Zelfontspanner (timer)
Opslaan constanten
Historisch geheugen
(20 waardes)
Statief schroefdraad
Batterij levensduur,
Type AAA, 2 x 1,5V
Bescherming tegen spatwater en stof
Afmetingen
Gewicht (met batterijen)
Temperatuurbereik:
Opslag
Technische gegevens
Afstandmetingen:
Meetnauwkeurigheid
tot 10 m
(2 σ, standaard afwijking)
Power Range
Technology™:
Bereik (gebruik richtplaat
vanaf ongeveer 80m)
Kleinste weergegeven
eenheid
Afstandmeting
Minimum/maximum
meting, continue meting
Oppervlakte/inhoud berekening van ruimten
Optellen/ Aftrekken
Indirecte meting met
behulp van Pythagoras
Hellingmetingen:
Hellingsensor:
Nauwkeurigheid
(2 σ, standaard afwijking)
- tov. laserstraal
- tov. de behuizing
Indirecte meting met
behulp van de hellingmeter (directe horizontale
afstand)
Hoekmeting met behulp
van de hellingmeter
(± 45°)
Makita LD100P
gemiddeld: ± 1,5 mm*
0,05 m tot 100 m
0.1 mm
9
9
9
9
9
± 0,3°
± 0,3°
9
Werking
II
635 nm, < 1 mW
6 / 30 / 60 mm
(10 / 50 / 100 m)
na 3 min
na 6 min
15
F
I
E
NL
P
9
9
9
9
9
FIN
9
TR
9
Tot
5 000 metingen
IP 54, stofdicht,
spatwaterdicht
126 x 51 x 27 mm
125 g
CZ
N
DK
S
-25°C tot +70°C
(13°F tot +158°F)
-10°C tot +50°C
(14°F tot +122°F)
* maximale afwijking treedt op onder ongunstige omstandigheden
zoals bij helder zonlicht of bij metingen op slecht reflecterende of
ruwe oppervlakken. De meetnauwkeurigheid tussen 10 m en 30 m
kan verminderen tot circa ± 0,025 mm/m, bij afstanden boven de
30 m tot ± 0,1 mm/m.
9
GB
Appendix
SK
PL
SLO
HR
H
GR
RUS
LV
EST
LT
ROK
CN
D
GB
F
I
E
Meetomstandigheden
Meetbereik
Het bereik is beperkt tot 100 m.
FIN
In de nacht en bij schemering of als het richtmerk in
de schaduw ligt, dan is het meetbereik zonder richtplaat groter. Gebruik een richtplaat om het meetbereik te vergroten tijdens daglicht of als het richtpunt
slecht reflecteert.
DK
Richtvlakken
NL
P
N
S
TR
CZ
SK
PL
SLO
HR
H
GR
RUS
LV
EST
LT
EC-VERKLARING VAN CONFORMITEIT
Meetfouten kunnen optreden bij metingen op kleurloze vloeistoffen (bijv. water) of schoon glas, styrofoam of dergelijke halfdoorzichtige oppervlakken.
Richten op hoogglanzende oppervlakken buigt de
laserbundel af en kan meetfouten veroorzaken.
Bij niet-reflecterende en donkere oppervlakken kan
de meettijd toenemen.
Verzorging
Het instrument niet onderdompelen in water. Vuil en
vocht afvegen met een vochtige zachte doek. Gebruik
geen agressieve schoonmaak of oplosmiddelen.
Behandel het instrument net zoals u een verrekijker
of fotocamera zou behandelen.
ROK
CN
Appendix
16
Makita LD100P