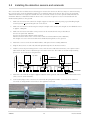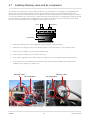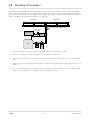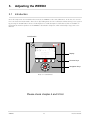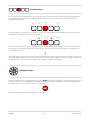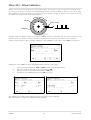
1
SERVICE MANUAL
Model 2013
Rometron B.V.
Hoge Wesselink 8
7221 CJ Steenderen
The Netherlands
www.rometron.nl
Before using the equipment,
please read and follow the user manual and the safety instructions carefully.
Subject to changes without prior notice
WEEDit
1
Dealer Manual
© Copyright 2009-2013
This manual has been created by Rometron Agricultural BV in The Netherlands and is subject to copyright. No
part of this publication may be multiplied, reproduced, stored and/or published, in any way whatsoever, without
the prior written consent of the publisher. For further information please refer to:
Rometron B.V.
Hoge Wesselink 8
7221 CJ Steenderen
The Netherlands
Internet: www.rometron.nl
Phone: +31 (0)575 451111
Fax: +31 (0)575 451184
WEEDit is represented in Australia by:
Hawkeye Precision Pty Ltd
Brendan Williams
22 Valentine Street
VIC 3550, Bendigo
Australia
Internet: www.hawkeyeprecision.com.au
Phone: +61 (0)428428708
Fax: +61 (0)344084670
Total Precision Systems
Adam Hutton
11 Marryat Ct
WA 6163, Hamilton Hill
Australia
Internet: www.totalprecision.com.au
Phone: +61 (0)429362502
Patented and Patens Pending
All rights reserved
Disclaimer
Although all information in this manual has been carefully checked and is believed to be correct, such cannot be
guaranteed. Neither Rometron Agricultural B.V. nor Hawkeye Precision Ltd, nor Total Precision Ltd. can be held
responsible for any damage, direct or indirect, resulting from the use or misuse of the information in this
manual, or the installation described herein. This is also true if Rometron was aware of the possibility of such a
damage. Your statutory rights are not affected.
Without prejudice.
Last changed: 10 December 2013
WEEDit
2
Dealer Manual
Contents
Contents
Preface
Acceptance / Declaration of Conformity
3
5
7
1
Important information
9
1.1
1.2
1.3
1.4
1.5
1.6
Safety icons
Safety symbols and warnings on the machine
Application of the WEEDit machine
Warnings when using certain herbicides
Common safety instructions and instructions to avoid accidents
Operation Instructions
Electrical installation
Common safety instruction and instructions to avoid casualties...
Crop Protection Solutions
Storage instructions
Cleaning and transport instructions
9
9
10
10
11
11
11
12
12
12
12
2
Mounting the WEEDit to a vehicle
13
2.1
2.2
2.3
2.4
2.5
2.6
2.7
2.8
Components of the WEEDit
Installing the Power Converter
Wheel sensors (HALL)
Installing the user console
Installing the detection sensors and solenoids
Installing a pressure transducer (optional)
Installing Ramsay valve and air compressor
Plumbing the sprayer
13
17
20
23
24
25
26
27
3
Adjusting the WEEDit
29
3.1
3.2
3.3
3.4
3.5
3.6
Introduction
Switching the WEEDit system on
Sensor Calibration
3.3.1
Calibrating the wheel speed sensors
3.3.2
Calibrating the spacing of the sensors
3.3.3
Individual positioning of the sensors (optional)
3.3.4
Nozzle calibration
3.3.5
Checking the timing of the detector
Calibrating the pressure transducer
Machine configuration options
Remarks when using WEEDit
29
30
31
31
32
32
33
34
35
36
37
4
Controlling the WEEDit
39
4.1
4.2
4.3
4.4
4.5
4.6
Introduction
The keyboard
The display
User Mode
Service Mode
Warnings
39
40
42
45
49
60
Continued on the next page...
WEEDit
3
Dealer Manual
5
Special Dealer Functions
63
5.1
5.2
Dealer Mode
Dealer Menus
200
Information
201
Options
202
Sensor settings
203
Nozzle settings
204
Wheel calibration
205
Testing the nozzles
206
Testing the detectors
207
Simulating a fixed speed
208
Configuration
209
Global settings
210
HALL sensor test
211
Messages
212
Automatic Configuration
213
Clipboard
214
Margin Presets
63
66
67
68
73
74
75
76
77
78
79
71
83
84
85
86
87
5.3
Messages
88
6
Trouble shooting
91
6.1
6.2
6.3
Problems with the spraying mechanism
Problems with the pump mechanism
Electric problems
92
94
95
WEEDit
4
Dealer Manual
Preface
This is the service manual of the WEEDit system. WEEDit is a revolutionary system for weed control that uses a
patented method for recognising and spraying weed, based on the fluorescent properties of the cholorophyll
molecules present in the leaves of living plants. This 3rd generation WEEDit is the successor to the original
WEEDit system that was based on the same principle. By using modern components and higher processing
power, the accuracy of the system is by far superior to earlier systems.
WEEDit is equipped with highly sensitive and accurate sensors, allowing the herbicide to be sprayed exactly on
top of the living plants, saving herbicide and minimising environmental load. Depending on the width of the
vehicle used for the WEEDit installation, up to 36 sensors may be used. Each sensor consists of five
independent detection channels, each covering a width of only 20 cm.
Sensors
Detection Channels
width of the vehicle
The drawing above shows a WEEDit installation with 5 sensors and hence 25 detection channels. It can therefore
be used to treat a lane of 5 meters wide in one operation. The maximum width of a WEEDit system is 36 meters.
A complete WEEDit setup consists of the following components:
Controlpanel
GPS
Sensor
Sensor
Sensor
3
2
1
Power
Converter
Speed
Pressure
Flow
Sensor
Sensor
Sensor
1
2
3
Battery
Please note that some components are optional and may therefore have been omitted in your installation. It is
up to the dealer to configure the system in such a way that it 'knows' which options are available or not. This
manual contains detailed information on how to install a new WEEDit system and how to adjust and calibrate
the various settings and parameters. Please read the instructions carefully prior to carrying out an installation
and follow the safety instructions in chapter 1 at all times. Please ensure that any collegues and/or customers
are also aware of these safety instructions, prior to operating a WEEDit system.
Continued on the next page
WEEDit
5
Dealer Manual
All operator controls can be found on the control panel, consisting of a display (LCD) and a series of buttons in
a rugged waterproof casing (see drawing below).
On/Off switch
Display
Function Keys
Navigation Keys
The user communicates with the WEEDit via the large LCD display, using a mixture of text and icons. Where
possible icons have been used to avoid the use of text. A limited number of menus are available to the user. For
the dealer a large number of extra (hidden) menus are available, allowing configuration and calibration of the
standard settings.
In this manual, chapter 1 gives some safety warnings and advices. Please read and follow these instructions
carefully and ensure that anyone with access to the WEEDit system is aware of these instructions.
Chapter 2 gives a detailed explanation of how to mount a WEEDit system to a vehicle. This chapter covers both
the mechanical and the electrical aspects of the installation.
In chapter 3 it is described how it is possible to adjust the WEEDit. After the installation of the components a
few things have to be calibrated and some settings have to be made.
Chapter 4 gives a complete overview of all user controls of the WEEDit and is in fact a copy of the User Manual.
Please ensure good knowledge of this chapter, so that you can answer any questions the user might have.
In chapter 5, the dealer functions are fully described, whilst chapter 6 lists all frequently reported problems and
their possible solutions.
We wish you all the best with the installation of the WEEDit.
Rometron B.V.
The Netherlands
WEEDit
6
Dealer Manual
Acceptance
Immediately after receiving the machine, please check the package for transport damage and ensure that all
components are present and complete. If any part is missing or incomplete, you must contact us immediately to
exersise you rights for replacement and/or repair.
Declaration of Conformity
We,
Rometron Agricultural B.V.,Hoge Wesselink 8, 7221 CJ Steenderen, The Netherlands
declare, entirely at our own responsibility, that the product:
Machine number
Type number
..............................*)
.............................................................................*)
to which this declaration applies, conforms to the following EEC regulations:
• 98/37/EEG
• modified by 98/79EEG.
The machine also complies with the appendices:
• EN 1050
• EN 292-1
• EN 292-2.
Steenderen, 15 August 2013
R. de Jonge
Productmanager
Rometron Agricultural BV
The Netherlands
*) Please keep the machine number at hand when asking any technical questions
WEEDit
7
Dealer Manual
This page is reserved for additional conformity declarations
WEEDit
8
Dealer Manual
1. Important information
1.1
Safety icons
These icons are used for each safety advice in situations that can be dangerous. Please pay attention to these
warnings and adjust your behaviour accordingly. Please ensure that all other users of the machine(s) are also
aware of these instructions and warnings. Besides the information present in this manual, you should also
follow any commonly available safety instructions and instructions to avoid accidents and human casualties.
1.2
Safety symbols and warning on the machine
• Safety icons on the machine are used to mark any hazardous areas. Anyone operating the machine, need to
be aware of these warnings which are present for their safety. These warnings are always used in
combination with the safety warnings.
• Some symbols give information about specific characteristics of the machine and are necessary for a correct
operation.
• Always pay attention to any warnings, advices and symbols!
• Pass all safety instructions to all other users!
• Ensure that the symbols and icons are always clean and legible! Damaged or missing symbols need
to be replaced immediately and are available from your supplier (symbol number = order number).
WEEDit
9
Dealer Manual
1.3
Application of the WEEDit machine
1. If the machine is not used as instructed in this manual, the manufacturer can never be held responsible
for any damage resulting from that use. Any undocumented or unauthorised use is entirely at the user's
own risk.
2. Documented and authorised use also implies that the operator and safety instructions, as issued by the
manufacturer, are followed strictly and that only original WEEDit parts are used.
3. The selective anti-weed system may only be operated, maintained and repaired by people with the
appropriate level of knowledge about the possible dangers. Any unauthorised changes and/or
modifications to the machine are entirely at your own risk. The manufacturer can never be held
responsible for any damage arising from such changes and/or modifications.
4. All safety instructions, as well as any other commonly applicable safety instructions and instructions with
respect to labour circumstances, traffic, etc., should always be followed strictly. You should also be aware
of (and follow) any instructions and/or legal limitations of the use of certain herbicides. This may be
subject to local law.
Pass all safety instructions to all other users!
1.4
Warnings when using certain herbicides
1. Please note that the use of slow-effective herbicides (i.e. 20 hours or longer), may cause damage to pump
membranes, hoses, pipes and tanks.
2. We specifically warn you against the use of any unauthorised mixture of two or more different herbicides.
3. Don't use herbicides that have the tendency to stick or coagulate.
4. The machine is not suitable for herbicide powders that need to be solved in water.
5. A combination of glyfosate with extra solvents may cause malfunction of the pump membranes.
When storing the machine for a longer period of time, you are advised to flush the machine with clear
water. Please note that you should also clean the hose carefully as the glyfosate solution has the
tendency to degrade the quality of the PVC hose when it is not in motion.
WEEDit
10
Dealer Manual
1.5
Common safety instructions and
instructions to avoid accidents
Basic Rule
Before using the WEEDit, check the (traffic) safety
of the machine and the vehicle. When in doubt, do not
use the machine and consult your supplier.
1. Pay attention to the safety instructions in this manual as well as any other general safety instructions.
2. The warning and advice symbols are important if you want to work in a safe environment. Following the
instructions is for your own safety!
3. Keep the machine clean to avoid the danger of fire!
4. Before driving off and using the system, check the area carefully. Ensure to have clear sight at all times!
5. When placing or removing supports, always put them in the prescribed position first (stability)!
6. Always pay attention to the maximum weight, axis load and dimensions!
7. Always check (and mount if necessary) any transport items, such as lights, safety signs, safety covers, etc.
8. Never leave the driver seat when driving the vehicle!
9. Note that the behaviour of the vehicle, as well as its steering and break characteristics, are influenced by
the WEEDit machine and the contra weights. Ensure you have sufficient steering and break power.
10. Only put the machine into service when all safety covers are in place and are in the right position.
11. Ensure that no people are present inside the virtual circle that the vehicle needs to turn around.
12. Never fill the tank above the specified maximum!
13. Read and follow the safety instructions of the manual of your sprayer.
1.6
Operation Instructions
Electrical installation
1. When servicing the electrical installation, always remove the (-) terminal of the battery.
2. Only use approved fuses. Fuses that are too large, may cause a system overload and increases the
possibility of a fire!
3. Always connect the battery in the proper order: first connect the (+) terminal, followed by the (-) terminal.
When disconnecting, do the same in reverse order.
4. The (+) terminal should have a protective cover to avoid the possibility of a short-circuit (explosion)!
5. Avoid sparks and open fire close to the battery.
6. Ensure that no cables are trapped when working on the machine. Damage to the cables may cause a
short-circuit and increases the chance of a fire.
7. When in doubt, always contact your supplier.
8. The charging capacity for the battery should be more than 100A.
(When necessary, put the vehicle in a lower gear, so that the motor makes more revolutions per minute,
to ensure that the alternator generates more power.)
9. When using an extra battery on the spraying rig, place the voltage regulating line on the battery of the rig,
to ensure that the voltage drop between the vehicle and the rig is compensated by the voltage regulator
on the alternator.
WEEDit
11
Dealer Manual
Common safety instruction and instructions to avoid casualties during service, maintenance and repair
1. Service, repair and cleaning of the machine only when the motor is turned off!
Always remove the key from the lock
2. Check all bolts and nuts regularly and tighten them if necessary.
3. When welding on the vehicle or close to it, always remove the cables from the alternator and the battery!
4. When replacing any defective parts, ensure that the replacement parts conform to the specifications of
the manufacturer of the WEEDit machine. Original WEEDit spare parts always conform to these
specifications and are available from your supplier. Using un-approved replacement parts voids warranty.
Crop Protection Solutions
1. Always follow the instructions of the manufacturer of the Crop Protection Solution!
• Wear protective clothing!
• Pay attention to any safety instructions and warnings!
• Follow the guidelines about the application of the solution, the amount to be used, and the cleaning
instructions.
2.
3.
4.
5.
6.
The use of certain herbicides may be subject to local law. Check for such laws and follow them strictly.
Never open a pipe or hose that is under pressure!
Repair the machine only after it has been cleaned extensively and always wear a protective mask.
Never fill the tank above the specified maximum level.
When handling herbicides or toxic agents, always wear protective clothing, such as protective gloves,
protective clothing and protective glasses.
7. Check for a possible interaction between the herbicide and certain sensitive parts of the machine.
8. Don't use any herbicides that have the tendency to stick or coagulate.
9. Crop protection machine may not be filled with surface water, in order to protect humans, animals and
the environment.
Storage instructions
1.
2.
3.
4.
5.
Always flush the machine with sufficient clean water prior to storing it.
Always store the machine in a dry warm place.
Ensure that all pressure is released from the system before storing it.
When the machine is stored for a longer period of time, remove the mains plug of the battery charger.
Once the spraying season is over, remove the control panel and store it in a dry warm place.
Cleaning and transport instructions
1. Do not clean the machine with a high pressure nozzle (control panel, power box, sensors, etc.).
2. Do not expose the machine to rain during transport.
3. Clean the windows of the sensors with a soft cloth regularly. Note that sand can easily scratch the
windows.
WEEDit
12
Dealer Manual
2.
Mounting the WEEDit to a vehicle
2.1
Components of the WEEDit
This chapter explains how to mount a new WEEDit machine to a vehicle. Please read this chapter carefully
before starting to mount the machine. Always follow the safety instructions of chapter 1 strictly. The block
diagram below shows how the various components of the WEEDit are connected together.
GPS
Controlpanel
Sensor
Sensor
Sensor
WALD
Sensor
Sensor
Sensor
3
2
1
Power Box
1
2
3
Speed
Pressure
Flow
Battery
The WEEDit system consists of the following components:
1.
2.
3.
4.
5.
6.
7.
8.
Power Converter
User console
Detection sensors sets
Wheel speed sensor
Pressure transducer
Cabling
Hose and fittings
Mounting brackets
Optional:
9. Ramsay valve
10. Air compressor
1. Power Converter
WEEDit
2. User Console
13
Dealer Manual
3. Detection sensor set
4. Wheel speed sensor set
5. Pressure transducer
WEEDit
6a. Cable
14
Dealer Manual
6b. Sensor cables
6c. Console cable
6d. Power cable
7. Hoses
WEEDit
15
Dealer Manual
8. Mounting brackets
Optional extras
9. Ramsay valve
WEEDit
10. Air compressor
16
Dealer Manual
2.2
Installing the Power Converter
The Power Converter has to be mounted in a protected position on the sprayer, preferably in a centred place.
The power cable coming out of the box has a length of 5 metres and runs to the hitch. Another supplied power
cable, also with a length of 6 metres, runs from the battery of the towing vehicle to its tow bar, where both
cables meet. These distances are critical, since the power cable cannot be extended. Install the Power Converter
as follows:
1. Search for a protected spot to mount the Power Converter, within the range of 11 metres of the battery and
preferably half way the hitch, so that it becomes easier to unhook the machine. Use the 4 holes in the box
to mount it. The holes with M8 thread are spaced at 300 mm. Ensure there is sufficient room at the bottom
of the box, to allow connection of the other cables.
2. Connect the power cable to the battery and run-in towards the towbar of the vehicle. Then mount the plug.
3. Run the power cable coming out of the Power Converter towards the tow bar of the vehicle and connect to
the power cable.
4. All other parts of the WEEDit system are connected to the Power Converter by means of connectors, or
directly to the PCB . Remove the 4 bolts from the lid in order to gain access to the electronic circuit inside.
The drawing on the next page shows the location of the various connections, fuses and LEDs.
Power Converter installed on a Ground glider
Power Converterinstalled on a Ground glider (detail)
Power Converter installed on a John Deere sprayer
WEEDit
Power Converter installed on a John Deere sprayer (detail)
17
Dealer Manual
Activity LEDs
The WALD motherboard (i.e. the PCB of the Power Converter) contains a number of LEDs that can be used to
check its operation. First of all, 8 green LEDs are evenly spread over the board (4 at the top and 4 towards the
bottom). When in use, these 8 green LEDs should all be lit permanently. If one of them fails, the corresponding
power unit is failing. At the bottom, to the left of the power cable are three LEDs. To the right of the power cable
are two further LEDs. These LEDs have the following meaning, from left to right:
• Heartbeat
• 12V OK
• Communication
Green
Green
Yellow
Should flash once every second.
12V power supply is OK
Flashes briefly when communicating with the system.
• Heartbeat
• Error
Green
Red
Should flash once every second.
Indicates a failure (should be off).
The heartbeat LEDs are just an indication of normal operation of the on-board microprocessors. Under normal
conditions, they should flash once every second. The communication LED flashes very briefly when the WALD
unit is communicating with other parts of the WEEDit system. It may be difficult to see this LED flashing under
bright ambient lighting conditions. Below is the layout of the board, its LEDs and its connectors:
Green
Green
Green
Green
Left
power return
Option power
Left boom
- +
Right boom
Right
power return
Green
Green
Green
Green
12V
Console
power switch
Console
1
2
3
Speed
sensors
Option
Flash (1 sec)
Error
Flash (1 sec)
Sensor inputs Pump
Comms
Speed sensor
configuration
POWER
A
MISC
Flow 1
Flow 2 Pressure
Pump
Pump switch
Connections to the PCB of the Power Converter
WEEDit
18
Dealer Manual
Power Converter Connections
Speed sensors
For correct operation of the WEEDit, the system needs to know how fast the vehicle is driving. This can be done
by mounting HALL sensors to the wheels (see chapter 2.3). Using two sensors is recommended, as it allows the
WEEDit to track curves and adjust the liquid flow accordingly. It also increases the accuracy of the system. When
two sensors are used, the LEFT sensor should be connected to input 1 and the RIGHT one goes to input 3. A
third sensor can be used to track the direction of the vehicle. When present, it should be connected to input 2
(direction). This sensor is normally not present on a WeedIT-Ag system.
1:10
1:1
1
PullUp
PullDown
2
Left
12V
5V
3
Right
Direction
The three switches to the left of the speed sensor sockets provide some level of customisation. Set these
switches as instructed by the manufacturer. The switches are shown here in their default positions. When a radar
speed sensor is used (input 1) rather than HALL sensors, the upper switch should be set to 1:10.
Left and right boom
Two connectors are provided at either side of the board, for connection of the left and right booms. The 8-pin
sockets provide power and communication to the boom, whilst the smaller 4-pin socket provides power to the
rear end of the boom. The latter should be used in large installations in order to avoid a power drop. The LEFT
boom is connected to the LEFT of the board, whilst the RIGHT boom is connected at the RIGHT.
Console
The console is connected to the two white (8-pin and 6-pin) connectors to the right of the centre.
Pump
A pump can be connected to the terminals at the bottom right. Four terminals are available: 2 for the pump
itself and two for the pump switch. Ensure that the plus and minus wires are connected the right way around.
Sensor inputs
Brown
Green
White
Brown
Green
White
Brown
Green
White
At the bottom, to the right of the centre, is a block with 14 terminals. These terminals are used for the
connection of the various sensor inputs. Be careful when inserting the wires into the tiny holes of the terminals
and avoid any short circuits. Check your wiring carefully before applying power to the board.
A
MISC
Flow 1
Flow 2 Pressure
Battery power
The main 12V battery power input is at the centre of the board (the two large green sockets). The plus wire (red)
should be connected to the leftmost socket, whilst the minus wire (black) goes to the rightmost socket. Do not
make any mistakes here. Reversing the input power can cause permanent damage to the Power Converter!
ATTENTION: Dangerously high currents!
Always disconnect the battery before
opening the Power Converter case
WEEDit
19
Dealer Manual
2.3
Wheel Speed Sensors (HALL)
For a correct timing of the system and spot-on spraying, the WEEDit needs to have an accurate speed input. To
establish this, one or two wheel speed sensors should be mounted to the wheels of the vehicle. These are the
so-called HALL sensors. One speed sensor is generally enough for an accurate calculation of the forward speed
of the vehicle. If two sensors are used, WEEDit can also track the vehicle in curves (e.g. when turning), allowing
minor corrections to be calculated.
Using a single speed sensor
The wheel speed sensor consists of a metal ring with 6 magnets and the actual HALL sensor. The ring has to be
welded into one of the wheels. On this ring, 6 evenly spaces magnet have to be mounted. The HALL sensor can
count the pulses from the magnets by mounting it 10 to 12 mm from the magnets. The cable of the sensor is
plugged into the Power Converter (HALL1). When mounting the speed sensor, follow the following steps:
1. Weld the ring to the inner side of a wheel, as shown in the picture below (example of a ground glider).
2. Attach the magnets to the ring with the white side towards the sensor.
3. Mount the wheel speed sensor at a distance of 10 to 12 mm of the magnets in such a way that it counts the
pulses when driving.
4. Connect the wheel speed sensor to the Power Converter.
min. 60 mm
white side of magnet
Magnet Mounting Ring
Whenever possible, mount the magnets on the supplied mounting ring, using stainless steel bolts. The ring
itself has to be mounted exactly at the centre of the wheel. When using a solid metal wheel (i.e. no gaps), the
ring should be mounted at a distance of approx. 1 cm from the wheel in order to avoid magnetical interference.
WEEDit
20
Dealer Manual
Speed calculation
The required number of magnets is depending on the circumference of the wheel. When too few magnets are
used, the speed of the vehicle can't be established accurately, whilst the use of too many magnets may cause
magnetical interference between the magnets. The system works best when the distance between two magnets
is equivalent with approx. 40 cm of travelled distance. The required number of magnets is calculated as follows:
Number of magnets =
Wheel circumference [cm]
40
(1)
For example, when the wheel circumference is 2.5 meter (i.e. 250 cm), the required number of magnets is 250/40
= 6 pieces (may be rounded down).
Ensure that the magnets are not mounted too close to each other and keep that as far from the centre of the
wheel. The distance between the magnets has to be at least 60 mm in order to avoid magnetical interference.
The white side of the magnets should face the wheel speed sensor.
min. 60 mm
white side of magnet
Image 2.7 - Mounting the magnets
The distance between the magnets and the head of the wheel speed sensors, should be 10 - 12 mm.
Magnet white side
10-12 mm
Hall 1
Hall 1
Wheel cross-section
Image 2.8 - Mounting the wheel speed sensors
WEEDit
21
Dealer Manual
Using two wheel speed sensors
Although one wheel speed sensor should generally be sufficient to calculate the forward speed of the vehicle
accurately, WEEDit allows for a second wheel speed sensor to be mounted on the other wheel.
The advantage of having wheel speed sensors on both wheels, is that the WEEDit can detect curves and corners.
For example, when taking a right turn, the right wheel travels far less than the left wheel. As a result, a sensor at
the far right uses much less herbicide that the one at the left. So, the extra sensor gives a much higher accuracy
of the system and causes less herbicide to be used.
l'
v
r'
Hall left
r
l
Hall right
Image 2.4 - Establishing the forward rotation
Another advantage of having a second wheel speed sensor, is that it allows continued operation when one of the
wheel speed sensors is faulty. If one of the wheel speed sensors fails, the system will issue a warning, but allows
operation to be continued. In other words: it reduces the down-time of the system. The faulty sensor should be
repaired or replaced on the next service stop.
If two wheel speed sensors are used, the second one should be connected to HALL 3 on the Power Converter.
Using three speed sensors
In systems where it is important to know the direction of the vehicle (e.g. when frequently driving in reverse), a
third speed sensor can be connected to the HALL 2 input. The extra sensor should be mounted next to the
HALL 1 sensor on the left wheel. Separate instructions are available for mounting this extra sensor.
Using alternative speed sensors
Rather than using wheel speed sensors as described in this chapter, it is also possible to use speed input from
an alternative source, such as a radar speed sensor or a GPS-Pulse converter. When using a radar speed sensor,
which is sometimes present already on the vehicle, it should be connected to the HALL 1 input. As radar speed
sensors generally produce more pulses than a HALL sensor, the upper switch should be set to 1:10.
1:10
1:1
1
PullUp
PullDown
2
3
Radar
12V
5V
Instructions on how to install a GPS or radar speed sensor, is beyond the scope of this manual.
WEEDit
22
Dealer Manual
2.4
Installing the user console
The user console is a small green unit that should be mounted in a convenient place inside the cabin of the
towing vehicle. It connects to the Power Converter by means of the supplied cable. To allow the console to be
mounted further away from the Power Converter, an extension cable is supplied. When installing the user
console, follow these steps:
Mount the user console in a suitable position inside the cabin, at such a place that the display is clearly visible
from the position of the driver, and that all controls are easily accessible. Use the console mounting kit,
including the Ram mount, for mounting the terminal in the cabin.
Run the connection cable from the user console to the Power Converter (on the sprayer) and plug it in. If
necessary, use the supplied extension cable. The cable should be plugged into the socket at the centre of the
console
Moisture Plug
External HOLD switch
Expansion
Power Converter
A user console mounted in the cabin of a self-propelled sprayer
WEEDit
23
Dealer Manual
2.5
Installing the detection sensors and solenoids
The sensors with the weed detection technology are mounted on the boom. The best way is to start mounting
the sensors at the centre and work through to the end of both wings of the boom. The sensors are spaced at
1000 mm and work on a height of 1100 mm. The five solenoids of each sensor are spaced at 200 mm and at a
minimum distance of 600 mm behind the front of the sensor. The height of a sensor is measured from the
window (facing down) to the ground.
1. Make sure the boom can control the height of approx. 1100 mm, either by using a good working height
control system, or by mounting wheels on the boom.
2. Make sure the boom is solid enough to carry the weight of the sensors. The weight of an individual sensor
is approx. 1750 gram.
3. Make sure the boom can fold in a way sensors can be mounted in the way as described:
Sensors are spaced at 1000 mm.
Sensors are mounted 1100 mm off the ground.
Distance from the front of the sensor to the nozzle is at least 600 mm (max. 1000 mm),
The height of a sensor is measured from the window (facing down) to the ground.
4. Mount the sensors on the boom with brackets, and space them at exactly 1000 mm.
5. Plug the first sensor of each side (left and right) directly into the Power Converter.
6. Link the sensors by connecting them in series. If the boom is wider than 24 metres, run a power return
cable from the last sensor of both wings to the Power Converter. This cable is used for compensating
power loss, as a result of the long distance.
Sensor
Driving direction
Top view
C
next
sensor
1
1000 mm
B
A
Console
2
3
4
5
1
2
3
4
5
1
2
3
4
600 mm
Solenoids
5
200 mm
7. Mount the solenoids at a height of approx. 600 mm off the ground, and at least 600 mm behind the front
of the sensors (max. 1000 mm).
8. Connect the plugs of the sensors to the solenoids. The plug with number 1 connects to the leftmost
solenoid, etc. Plug number 5 connects to the rightmost solenoid.
5 nozzles mounted behind the sensor
WEEDit
Sensors mounted on a boom (front) with 5 nozzles each (rear)
24
Dealer Manual
2.6 Installing a pressure transducer
To display the pressure of the WEEDit system on the console, a pressure transducer has to be installed into the
system. This transducer measures the pressure in the system. Its cable plugs into the Power Converter. Once it is
installed, follow these steps:
1. Install the pressure transducer in the hose after the Ramsay valve. To do this, a T-piece is needed. In case
no Ramsey valve is present, mount the pressure transducer in the pressure hose towards the spray line.
2. Connect the pressure transducer cable to the pressure transducer.
3. Connect the three wires at the other end of the cable to the Power Converter.
a. Take the lid off the Power Converter by removing the 4 screws in the lid.
b. Lead the cable into the box through one of the holes at the bottom.
c. Connect the wires to the connectors with the 'Press' label:
Wire 1 is power (+)
Wire 2 is signal
The yellow/green wire is ground (-)
4. Calibrate the pressure transducer in the console (see chapter 3.4, Calibrating the pressure transducer).
WEEDit
25
Dealer Manual
2.7
Installing Ramsay valve and air compressor
To maintain the right pressure at the nozzles at all time, the Ramsay valve is included in the plumbing of the
system. This valve is a big accumulator and is fed by a small air compressor. The working principle of the
Ramsay valve is based on two pressures: the air pressure and the chemical pressure. If the air pressure, which is
set to the desired pressure of the system, is higher than the chemical pressure, the diaphragm is pushed up and
the chemical goes straight from the supply line to the nozzles. If the air pressure is lower than the chemical
pressure, the chemical goes into the dump line and returns to the tank.
in/out
Dump line
Air pressure
1. Mount the Ramsay valve in the supply line of the sprayer in a protected spot.
2. Mount the air compressor close to the Ramsay valve in a protected spot (see the images below).
3. Mount the air regulator in a protected and visible spot.
4. Connect the air compressor to the Power Converter.
5. Connect the supplied air hose between the air compressor, the air regulator and the Ramsay valve.
6. Connect the hose to the Ramsay valve which has two male thread 1¼" fittings (for specifics of the
plumbing of the sprayer see chapter 2.8).
Ramsay valve
Ramsay valve
Air compressor
Air compressor
Ramsay valve and compressor installed on a Bagram sprayer
WEEDit
Ramsay valve and compressor installed on a Spra Coupe sprayer
26
Dealer Manual
2.8
Plumbing of the sprayer
The plumbing of the WEEDit system is as follows. From the pump, the feeding hose goes through the Ramsay
valve. After the Ramsay valve, the feeding line splits into two lines, going to respectively the right and the left
boom of the sprayer. From there, the nozzle line is fed by teeing in after every 4 metre maximum. The nozzle line
can be created by connecting the provided pieces of the hose.
Spray boom
Nozzles
Spray boom
Nozzles
Nozzles
Nozzles
Pressure sensor (transducer)
Pressure adjustment
and manometer
Compressor
Ramsey
valve
Tank
Filter
Pump
Dump line
1. Create the nozzle line by connecting the solenoids with the provided pieces of hose.
2. Run a 1¼" pressure hose from the pump to one side of the Ramsay valve.
3. Run a 1¼" hose from the other fitting of the Ramsay valve back into the tank. This is the so-called dump
line.
4. Split the pressure hose after the Ramsay valve into two lines along both wings of the spray boom (use at
least 1").
5. Tee-in the nozzle line after the first two sensors and again after the 6th, 10th, etc. sensor. Make sure the
sections in the spray line are evenly spread on a maximum of 4 metre.
WEEDit
27
Dealer Manual
This page is intentionally left blank
WEEDit
28
Dealer Manual
3.
Adjusting the WEEDit
3.1
Introduction
Once all components are installed and connected, the WEEDit needs a few calibrations. To do this, the console
has to be started in Dealer Mode. This is done by holding down the two red buttons whilst turning on the system
by pressing the On/Off button. Please check chapter 5 for a full description of all features that are available in
Dealer Mode. Normal operation of the WEEDit is described in chapter 4, which is basically a copy of the User
Manual.
On/Off switch
Display
Function Keys
Navigation Keys
Image 3.1 - Control Panel
Please check chapter 4 and 5 first
WEEDit
29
Dealer Manual
3.2
Switching the WEEDit system on
The Power Switch is located at the top left of the control panel. Keep this switch depressed for 1 second to turn
the machine on. Immediately after switching it on, you'll hear a short beep and the display will be activated.
After a short delay, the start-up screen will be displayed (image 3.2).
Image 3.2 - Start-up screen
The system will now perform a self-test and the control panel tries to contact the Power Converter and all
connected sensors. Once the self-test has been completed, the default screen appears (image 3.3).
Image 3.3 - Default screen
The precise contents of the default screen are depending on the number of connected sensors, the various
(optional) extensions and the current settings. In the example above, 18 sensors are present, 9 at either side
(identified as 'A' to 'I'). The sensors are always numbered from the center outwards, as seen from the driver seat.
This is also the case when the machine is mounted to the rear of the vehicle.
Each sensor is represented as a small square with a dot at the centre. Each sensor is identified by a single letter
from the alphabet, starting with the letter 'A' at the centre.
Some important measurements are shown in the top right of the display. Again, this is subject to the current
settings. If the settings on your system have been altered, different measurements may be shown.
Switching the machine off
The WEEDit can be turned off by briefly pressing the Power Button. All settings and counters will then be stored
and the machine turns itself off after a brief delay. More information about switching the machine on and off can
be found in chapter 4.
Now switch to Dealer Mode
Refer to chapter 5 for information how to do this
WEEDit
30
Dealer Manual
3.3
Sensor Calibration
3.3.1 Calibrating the wheel speed sensors
The vehicle has one or two speed sensors, depending on the choice to made in chapter 2.3. Before WEEDit can
accurately measure the speed, you need to calibrate the wheel speed sensor(s). Use menu 204 for this:
• Select a distance
Select a suitable straight road with a length of 100 meters. The length of this road needs to be known
accurately as it is used to calibrate the WEEDit. If you can find a suitable 100 meter road, you may use a 50
meter road as an alternative. The latter will, of course, slightly reduce the accuracy of the system. Use the
function keys to select the required distance.
• Start
Place the vehicle at the starting position and ensure that the steering wheel is straight. Now press OK to
start the calibration process. Next drive the vehicle to the destination. During your trip, the display will
show an animated icon of a driving vehicle.
There is also a display of the number of pulses detected. Driving slowly, the pulses should increase evenly.
When using 2 speed sensors, check whether the number of pulses is roughly the same. If there is a
difference of more than 2%, verify the correct installation of the speed sensors (e.g. the pulses left = 200,
right = 210, the difference is more than 2%). When pulses are not regularly detected, also check for the
white side of the magnet facing the speed sensor.
• Finish
As soon as the destination is reached, press OK again. The display will now show the measured data. Stop
the vehicle.
• Store the results
If you are satisfied with the results, the measured data can be stored by pressing OK once more. The new
calibration parameters will now be stored in the WEEDit's memory. If you are not satisfied at this point,
press Exit to leave the menu and restart the calibration procedure.
Using a 'high speed' sensor
Normally, wheel sensors are used for measuring speed. It is also possible to use a radar unit instead. Such units
however, generally produce many more pulses per meter, compared to standard wheel sensors. In some cases,
the number of pulses per meter may be too high for WEEDit. In such cases, it is recommended to turn on the
option use fast speed pulses. This option can be found in menu 201:
WEEDit
31
Dealer Manual
3.3.2 Calibrating the spacing of the sensors
If all sensors are mounted at even 1000 mm intervals (which should normally be the case), it is possible to use
dealer menu 212 to set the Offset for all sensors automatically. Click OK to confirm the new settings.
3.3.3 Individual positioning of the sensors (optional)
If necessary, the spacing of the sensors can also be set individually. Use menu 202 in dealer mode. First select
the required boom (left or right) by pressing the L↔R key until the letter 'L' or 'R' is shown in the page heading.
Then select the required sensor with the Next key (PageUp).
Now use the vertical arrow keys (up/down) to select the parameter you want to adjust. Then use the horizontal
arrow keys (left right) to adjust the parameter. Use OK to confirm (read the notes below and on the next page).
• Track Width
The first thing to set is the width of the vehicle. This is
important only when using 2 speed sensors (wheel sensors or
radar). It is the distance between the centre of the left speed
sensor and the right one, in mm. Ensure that both sensors are
at the same distance from the center of the vehicle. In the
drawing on the right, this distance is called 't'. As this value
will be the same for all sensors, you should confirm the new
setting by keeping OK depressed for one second. The setting
will then be sent to all sensors simultaneously.
+
-
R
o
t
Examples:
• Offset
Next, the offset for each individual sensor needs to be entered.
This is the distance between the centre of the axis and the
centre of each individual sensor, in mm. In the drawing above,
this distance is called 'o'. The centre of the axis is the reference
point from which all offsets are measured. A sensor which is
mounted exactly at this point, will have an offset of 0. Sensors
that are mounted to the right of the centre have a positive offset,
whilst sensors to the left of the centre have a negative offset.
Note that sensors may be placed outside the wheels.
Sensor
Offset
LEFT C
LEFT B
LEFT A
RIGHT A
RIGHT B
RIGHT C
-2500
-1500
-500
500
1500
2500
Measure the offset for each individual sensor as accurately as possible (in mm) and enter this for the value
of Offset in menu 202. Confirm the new value by pressing OK briefly. Now repeat this procedure for each
sensor.
WEEDit
32
Dealer Manual
3.3.4 Nozzle calibration
Use menu 203 in dealer mode. First select the required boom by using the L/R key. Then use the Next key
(PageUp) to select the first sensor.
• Height
You need to enter the height of each individual nozzle. This is the distance between the bottom of the
nozzle and the surface in mm. In the screenshot above, this distance is called 'h' (height). Measure this
distance accurately and enter it for the value of Height in menu 203. Confirm the new value by pressing
OK briefly.
• Distance
Next, enter the distance between the optical sensor and the nozzle. This is the distance between the centre
of the nozzle and the front of the sensor minus 30 mm (i.e. the centre of the transparent lense) in mm. In
the drawing above, this distance is called 'd' (distance). Measure this distance accurately and enter it for
the value of Dist in menu 203. Confirm the new value by pressing OK briefly.
Programming all nozzles simultaneously
If a value is identical for all nozzles, you have to enter it just once. By keeping OK depressed for one second, the
new value will be 'broadcast' to all sensors and all individual nozzle channels will be programmed
simultaneously. Hold the button until you've heard two beeps.
If the height and/or distance is not the same for all nozzles
Use the Next and Previous keys (PageUp and PageDown) to select the required sensor. Next use the Nozzle key (i.e.
the 2nd function key) to select the required nozzle. Enter the correct value and press OK briefly.
In most cases, the values will be identical for (nearly) all nozzles, with the possible exception of the outmost
nozzles. If this is the case, you can still use the above method to set all nozzles simultaneously. Once you've
done that, select the nozzle(s) for which the value is not correct and enter the appropriate value. Confirm the
new value by pressing OK briefly.
Repeat this procedure for all nozzles and sensor if necessary.
SENSOR
NOZZLE
Vehicle
direction
height
h
Surface
herbicide
d
distance
WEEDit
33
Dealer Manual
3.3.5 Checking the timing of the detector
ATTENTION: Be very sure that the speed measurement system is correct. This is very important for correct
targeting. The speed readout should be stable when driving at a constant speed. Also check the displayed speed
with the speedometer on your vehicle.
• Use menu 202 to set the margin to 0.
• Use a relatively open spot on the paddock. Watch the targeting on actual weeds or use some fresh leafs of a
tree. To check the timing of the spraying spot, use a piece of paper or cardboard. The spray pattern should
be symmetric over the weed.
• Always perform the two tests below in the given sequence.
Test 1 - Slow driving - Adjusting Distance
Drive over the weeds slowly with a speed of approx. 2 to 3 km/h. Check if the spray pattern is evenly distributed
in front and behind the weeds (looking in the driving direction). If the spray pattern is more in front of the
weeds, its spraying 'too early'. In that case, increase the number for distance accordingly. Do the opposite, when
the pattern is more behind the weeds. Always check the result after adjusting. The distance is set correctly when
the length of the spray pattern is evenly distributed in front and behind the weeds.
Adjusting Distance:
Spray pattern in front of weeds → increase distance
Spray pattern behind weeds → decrease distance
Test 2 - Fast Driving - Adjusting Height
The distance has to be set correctly first. Drive over the weeds once more, but now with a higher speed of
approx. 12 to 15 km/h. The spray pattern also has to be evenly distributed in front and behind the weeds. If the
spray is more in front of the weeds, it sprays 'too early'. In that case, decrease the number for Height. The
smaller the value for Height, the later the system will spray. Do the opposite when the pattern is more behind
the weeds. Adjust the height settings in small steps of 10 mm, then check the results.
Adjusting Height:
Spray pattern in front of the weeds → decrease height
Spray pattern behind the weeds → increase height
Spray pattern
WEED
Driving direction
Spray pattern in front of the weed
Behind the weeds
Correct pattern
Important: Set the Margin back to the desired value in menu 202 after you've completed both tests above.
Under normal conditions, 100 to 150 mm is a good setting.
WEEDit
34
Dealer Manual
3.4
Calibrating the pressure transducer
This calibration is only necessary when the pressure transducer is installed (chapter 2.8)
For this calibration, you need menu 209. The calibration number is the 3rd number in the list (Press). It is shown
here with a calibration factor of 790, which is the default value.
1. Change the calibration factor (using the left and right arrows) until the pressure in the main screen
matches the actual value on the pressure gauge. In most cases, the correct calibration factor for a specific
pressure transducer will be specified by the distributor or the manufacturer of your WEEDit system.
2. Store the calibration factor by pressing the OK-button.
3. Press Exit to go back to the main screen.
4. Repeat the previous steps, until your are satisfied with the result.
WEEDit
35
Dealer Manual
3.5
Machine configuration options
Once the machine has been calibrated, you need to set any installed options. Menu 201 (Options) is used for
this. This menu consists of a number of pages (use Next and Previous), each with a series of options that can be
enabled (on) or disabled (Off). Please refer to chapter 5.2 - Menu 201 - for a full description of each option.
The most important options that have to be configured are:
• The presence of an electronic pressure sensor.
• The presence of a flow meter.
• The presence of a 2nd speed sensor (needed to track curves)
Menu 201 also allows you to override the system in case of a defective HALL sensor (HALL-1 or HALL-2). The
system can then be used with a slightly lower accuracy until the defective HALL sensor has been replaced. In
case of a defective HALL sensor, (temporarily) disable the following option:
•
Speed
sensors
at
L&R
Whenever this option is enabled, the system expects speed sensors at both wheels (left and right). These
sensors are necessary to measure the speed and any curves accurately. When the option is disabled, the system
can no longer detect curves, which will make it slightly less accurate (during curves).
Menu 201 also offers the possibility to adjust the user interface to the personal preferences of the user. For
example, it allows you to set the number of times the buzzer is sounded whenever a warning is encountered.
You may also like to specify the behaviour of the display backlight in such situations.
For more information, please refer to chapter 5.2 (Dealer menus), Menu 201 (Options).
The machine is now ready for use.
WEEDit
36
Dealer Manual
3.6
Remarks when using WEEDit
• The sensitivity of the detectors may have to be adjusted, depending on the circumstances. Four different
presets are available in the Preset-menu. From the main screen, press the MENU-button once to enter the
Preset-menu. Now use the key with the leaf-icon to select the desired preset. This function allows the
WEEDit to be used under different conditions, such as wet surface after rain, bright sunlight or with very
small plants. Each preset is indicated with a number in the sensitivity key.
In the example above, preset number '2' is selected. You may have to experiment a bit in order to find the
appropriate setting. Use the display to verify the response of the sensors. The activity of each nozzle is
represented as a series of vertical bars under the sensor icons:
• Always ensure clean sensors. The cleaner the detector, the better the detection.
• The system is capable of operating at a maximum speed of 25 km/h. To be able to drive the system at 25
km/h, the distance between the front of the sensor and the nozzles has to be at least 600 mm. The pressure
should be at least 2.5 Bar, the nozzle height has to be less than 70 cm and the margin not bigger than 150
mm.
• For a proper operation, the battery voltage has to be between 11.5 and 14.5 Volt. Whenever the battery
voltage drops below a certain level, a warning will be issued.
• The alternator has to have a charging capacity of at least 100 Amp. For systems with more than 30 sensors,
we recommend at least 150 Amp.
• The valves (nozzles) have to be flushed regularly with clear water, in order to avoid clodding of the liquid.
WEEDit
37
Dealer Manual
This page is intentionally left blank
WEEDit
38
Dealer Manual
4.
Controlling the WEEDit
4.1
Introduction
All parts of the WEEDit machine are controlled from the Control Panel (see below). The control panel holds all
keys and a display on which the current status of the system is visible. Icons are used whenever possible.
On/Off switch
Display
Function Keys
Navigation Keys
The Power button is at the top left of the control panel. Directly below the display are five function keys. The
function of each of these keys is depending on the current menu level and is indicated by an icon. Below the
function keys are the navigation keys. The menu key (at the center of the navigation keys) is used to alter the
menu level, whilst the arrows are used to select a value (where appropriate).
The start-up screen always shows the version number of the firmware (the software inside the WEEDit). In the
description of certain features in this manual, the version number is sometimes referred to. In most cases the
differences between the version described in this manual and the actual version you are using will be marginal.
Certain features will only be available from a given version number onwards. The software version in the
example above is 2.54.
Also shown in the startup screen is the serial number of the console (31000001 in this case) and the date the
firmware was released (e.g. 04 November 2013). The current date and time are shown at double height.
WEEDit
39
Dealer Manual
4.2
The Keyboard
Power Switch
Switching ON
The Power switch is located at the top left of the Control Panel. Keep this button depressed for one second to turn
the WEEDit on. Immediately after the machine is switched on, you'll hear a short beep and the display will be
activated. The following screen will now appear:
The system will now do a self-test and the control panel tries to contact the Power Converter (to which all
components are connected). Once the self-test has been completed successfully, the default screen appears:
Switching OFF
During normal operation, the WEEDit can be switched off by pressing the power button briefly. All current
settings and counters will be stored in memory and the WEEDit will turn itself off. During this procedure, the
screen will show the WEEDit logo and the text 'Shutting down...'. If you press the power button
accidently, you may restart the machine by pressing the Restart key (i.e. the leftmost function key).
Forced shut down
In the rare event of a system failure, it is possible that the WEEDit cannot be turned on or off in the usual
manner. If this is the case, you need to carry out a forced shut down by keeping the power button depressed for
5 seconds or longer. Once the power button is released, the system will be turned off. Wait 5 seconds and turn it
on again.
WEEDit
40
Dealer Manual
Function Keys
At the center of the control panel are the five function keys. The function of each of these keys is depending on
the currently selected menu and is identified by an icon at the bottom of the screen. The main menu, for
example, looks like this:
If a certain key has no function in a certain menu, the icon will disappear automatically, like the 4th one in the
example above and the first one in the menu below:
Once an alternative menu has been selected, you will automatically be taken back to the main menu if no key is
pressed for 3 seconds. More information about the use of the function keys can be found in the description of
the individual menus.
The middle function key is red, as it is used for the Hold feature in the main menu. When driving the vehicle and
using the WEEDit, it will be easy to find the key and temporarily disable (Hold) the system, e.g. when turning on
the headlands. In other menus, the red key is often used to confirm a setting (OK).
Navigation keys
Below the function keys are the navigation keys. The MENU-key is at the heart of the navigation keys and is used
to select a menu. Press the MENU-key repeatedly to browse through the available menus in User Mode. Hold
the MENU-key for one second, to enter the Service Menu.
More information can be found in chapter 4.4 – User Mode.
WEEDit
41
Dealer Manual
4.3
The display
When the WEEDit is turned on, the following (default) screen will appear after a brief delay.
The precise contents of the display are depending on the options and the number of connected sensors.
Speed
The current speed of the vehicle is display at the top left of the display. Depending
on the model and the settings, the speed is presented either in m/s (meters per
second), km/h (kilometers per hour) or mph (miles per hour). The speed is also
graphically represented by a moving bar. The maximum speed is approx. 25 km/h.
Direction
When using two speed sensors (one at the left and one at the right), an arrow
shows the direction in which the vehicle is traveling. On a straight track, the arrow
should point upwards. If it doesn't do this (i.e. when it wiggles) the speed sensors
are faulty or not correctly configured.
Values
Some frequently used values are displayed at the top right of the display. Use the rightmost function key to
toggle between various measurement displays.
Pressure
This is the pressure of the liquid in kPa or bar. The pressure has to be around 3.0 bar. A warning will be
displayed if the pressure is either too high or too low (as in the rightmost example above).
Surface
This is the total area that has been processed (in Ha).
Trip distance
This is the total travelled distance [km] from the moment the machine was turned on. The counter will be
reset automatically when the machine is turned off. The grand total (i.e. from the moment the machine was
installed) can be read in a special service menu.
Uptime
This is the time [hours] that has expired since the machine was turned on. The counter will be reset
automatically when the machine is turned off. The total uptime can be read from a special service menu.
Usage
If a flow meter is connected, the liquid usage is presented instead of the uptime clock.
Continued on the next page...
WEEDit
42
Dealer Manual
Sensitivity
This shows the currently selected sensitivity preset (in the example, preset 1 is selected).
Saving
The percentage of herbicide that has been saved (compared to full coverage).
Flow
The current liquid flow in litres per minute. Note that a 2nd flow sensor might be present.
Sun
Strength of the sunlight on a scale from 1 to 10. Extremely bright sunlight (9-10) causes a lot of noise,
which might reduce the accuracy of the system.
Margin
Currently selected margin. This function allows the margin of the spraying system to be changed whilst
driving. It might be useful, for example, when the liquid spray is displaced somewhat due to strong wind.
Sensors
All sensors are shown at the center of the display. Each sensor is represented by a rectangular icon with a dot at
the centre and is identified by a letter of the alphabet above it. In the example below, 18 sensors are present, 9
at either side (left and right).
Each sensor has 5 nozzles to spray a corresponding lane of the surface. Vertical bars are used to indicate the
activity of the nozzles. In the example above, 11 sensors show activity. Sensor B on the right boom has a
problem, indicated by the exclamation mark.
A disabled sensor is indicated by a single dot (without the rectangle), e.g. sensor C on the left boom below:
In case of a serious malfunction or error (e.g. when the data cable to the sensor is broken), the display will show
an exclamation mark, such as sensor B on the right boom (below). Contact your supplier if you see this icon.
WEEDit
43
Dealer Manual
Menu bar
The bottom of the display holds the menu bar. Icons are used to illustrate the function of each function key.
Depending on the selected menu, different icons may appear. The main menu looks like the one on the left.
Whenever a certain key has no function associated with it, the icon will disappear automatically.
If no key is pressed for 3 seconds, the system will automatically revert to the main menu. Please refer to chapter
4 - User Mode - for a detailed description of each menu.
Warnings and messages
In case of trouble, e.g. when a speed sensor is malfunctioning, or when the herbicide pressure is too low, a
message will be displayed on the screen. This message will always appear just below the speed bar.
If more than one message or warning is raised, the message bar will change every few seconds, so that all
messages are presented to the user. Refer to chapter 4.6 – Warnings – for a complete overview.
WEEDit
44
Dealer Manual
4.4
User Mode
The WEEDit is entirely controlled by the keys on the control panel. In particular the function keys are used to
enable or disable certain features. In order to keep the user interface as simple as possible, all features are
grouped together in a series of menus and the five function keys are used to make a selection. The various menu
entries are described in this chapter.
Please note that some features described in this chapter may not be available on all WEEDit machines. This is
depending on the number of installed options. If a feature is not available, the icon will simply not appear.
For the average user of a WEEDit system, two menu levels are available:
1
2
User mode
Service mode
We'll first describe the various menus available in the User mode. Further down this chapter, the menus of the
service mode will be described.
Menus in User Mode
When in User Mode, the standard (default) screen will be visible and the main menu will be selected.
Press the MENU-key briefly to toggle the menus.
Pressing the MENU-key whilst the last menu is being displayed, the first one (i.e. the main menu) will appear
again. If no key is pressed for 3 seconds, the system will take you back to the default screen.
WEEDit
45
Dealer Manual
Main Menu
Activity (histogram)
This key can be used to toggle between the standard activity display and three different usage
histograms. The standard usage display shows the activity of each individual sensor as small vertical
bars under the sensor. Histograms can be used to display the level of activity over time:
Three different histogram levels can be selected by repeatedly pressing the Histogram key:
F
S
+
Fast - the display shows the short-term activity in a histogram.
Slow - the display shows the long-term activity in a histogram.
All - the display shows all activity from the moment the machine was started.
Flush
This key can be used to flush the system. When flushing, all nozzles will be opened and the liquid
(herbicide or water) will be sprayed with maximum pressure. This can be useful before starting to
spray in the field, to ensure that all solenoids are functioning properly.
Hold
This key can be used to temporarily hold the machine, e.g. when crossing a street or a field or turning
on the headlands. While in HOLD-mode, the icon will blink and a message will be displayed. The
buzzer will beep intermittently.
Measurement toggle
This key can be used to toggle between different measurement displays in the top right corner.
Default
Measurements 1
Measurements 2
Measurements 3
Note that in the default display (on the left), the bottom line changes every three seconds to show
the following in cyclic order:
WEEDit
46
Dealer Manual
Preset Menu
In the preset menu it is possible to change a few presets of the WEEDit system. These presets are located in a
second menu layer, in order to avoid accidental change of the current preset by the user.
Margin
WEEDit allows a certain margin when spraying a target. This margin runs from 0 to 200 mm and
specifies the distance before and after the target that will be sprayed. This function enables the user
to select one of four pre-defined margins, whilst driving the vehicle. The number of the selected
margin is displayed to the left of the icon. The margin-setting is represented by a 'wind'-icon, as it is
often used to compensate for the spray displacement caused by heavy wind. By default, the margin
presets are defined as follows:
1.
2.
3.
4.
50 mm
100 mm
150 mm
200 mm
Sensitivity
The WEEDit will automatically adjust itself to changes in the circumstances, e.g. the size of the
plants, the colour of the surface, ambient lighting and the weather situation (sun, rain, fog, etc.).
Nevertheless it may be necessary under special circumstances to adjust the sensitivity of the sensors
manually. For this purpose, four pre-programmed presets are available.
WEEDit
47
Dealer Manual
Sensor Menu
The Sensor Menu can be used to enable or disable an entire sensor. The function keys marked with an arrow (left
and right) are used to select the required sensor. A small arrow will be shown above the selected sensor. In the
example below, the third sensor (sensor 'C') on the left boom is selected. The On/Off button is then use to turn
the selected sensor on or off. When switched off, the sensor is represented by a single dot.
The function-keys have the following functions:
Previous sensor
Select the sensor to the left of the current sensor. The selected will be indicated with an arrow.
On/Off
Turn the selected sensor on or off.
Next sensor
Select the sensor to the right of the current sensor. The selected will be indicated with an arrow.
Show status
Show the current status of the selected sensor.
Pressing the '?'-key shows the current status of the selected sensor (menu 100). In the example below, the status
of sensor 'A' on the left boom (L) is shown. The screen shows the sensor's serial number, the current
temperature (inside the sensor) and its status (shown here as 'Running'). The screen also shows the current
activity on each of the individual nozzles. Use the browse keys (PageUp/PageDown) to browse through the
available sensors.
WEEDit
48
Dealer Manual
4.5
Service Mode
Service Mode is entered by holding down the MENU-key for one second. You'll hear a long beep to confirm that
you are in Service Mode. The display will now show the global information screen, like this:
The following menus are available in Service Mode (use the MENU-key to toggle the menus):
100
101
102
103
104
105
Information
Warnings
Nozzle cleaning
Current job
Set clock (date/time)
Nozzle selection
WEEDit Service Mode
Press and hold the MENU button for 1 second
Information about the
various WEEDit components
100
Information
101
Warnings
Warnings issued
by the system
102
Nozzle cleaning
Test sensor and
nozzle activity
103
Current job
Read productivity status
of individual jobs
104
Set time/date
Set the current time and
day with the arrow-keys
105
Nozzle selection
Set nozzle cap type
for application rate calculation
Go back to normal display by pressing the EXIT key
WEEDit
49
Dealer Manual
100 Information Menu
The information menu contains global information about the WEEDit system, plus information about each
individual sensor. This information is spread over several pages. Use the L↔R key to toggle between the left and
right boom. The first page contains global information about this WEEDit system.
In this menu, the following information is available:
Temperature
Battery
Lowest
Contrast
Uptime
Area
Total
Max
speed
Two temperatures are shown here. The first one is the temperature measured
inside the control panel. The second one is the temperature in the power box.
This is the current battery voltage
This is the lowest battery voltage measured during this session.
Display contrast. Use the arrow keys
and press OK to confirm.
Total age (hours) of this unit (from the moment of installation)
Sprayed area during this session.
Total sprayed area (during the machine's lifetime).
Maximum speed that is possible with the current settings of the machine
In this menu, the function keys have the following meaning:
Exit
Press this key to leave Service Mode. The default screen will now appear.
Select Left or Right boom
Confirm
Press this key to store the new contrast setting.
Previous page (PageDown)
Next page (PageUp)
Use the Next and Previous keys to reveal the information about each individual sensor. The number of available
extra pages is equal to the number of connected sensors on each boom.
The display header will tell you what information is being shown, e.g. when sensor 'B' on the right boom is
selected:
WEEDit
50
Dealer Manual
In the example below, the information of the first sensor (A) on the left boom is displayed:
The following information is available about each individual sensor:
Type
Serial
Temperature
Status
Nozzles
Sensor model number and firmware version.
Serial number of the sensor.
Temperature inside the sensor.
Current status of the sensor (e.g. Running).
Status of the individual nozzles. Nozzles failures are indicated with a cross,
like nozzle number 4 in the example below:
In this menu, the function keys have the following meaning:
Exit
Press this key to leave Service Mode. The default screen will now appear.
Clear warnings
On/off
Turns the selected sensor on or off.
Previous sensor
Next sensor
WEEDit
51
Dealer Manual
101 Warnings
In the default screen, a message is always displayed directly below the speed bar. If no message is present, the
current time will be displayed here. Only one message can be shown here, for example:
11.28
V
Due to lack of space in the default screen, these messages will always be short and cryptic. If more than one
problem occurs at the same time, only the one with the highest priority will be shown in the default screen. Any
other messages can be revealed by selecting the Message Menu.
Whilst in Service Mode, press the MENU-key briefly to select the Message Menu. A new screen, titled 'Messages
Global' will now appear. This screen will show all outstanding messages and errors. Please refer to chapter 5 –
Warnings – for further information on this topic.
If there are no warnings or error messages, the screen will look like this:
If there are any warnings, they will be shows in a list. If the list is too long to fit the page, you may use the
PageUp/PageDown keys to browse through the pages. However, this should normally not be necessary. Warnings
may look like this:
In this example, the pressure has been too low and too high. In both instances, the boundaries are shown at the
end of the line. In this example, the pressure has to stay between 1.00 and 3.50 bar. The dot in front of the
second line, indicates that this warning is persistant. In this example it means that the pressure is too high at
this moment.
All warnings and error messages will be retained when the WEEDit is switched off. You may clear the list of
warnings by pressing the 'Waste bin' key. Errors or warnings that are persistant, will, of course, remain displayed.
WEEDit
52
Dealer Manual
102 Nozzle cleaning
This menu is only available when the vehicle is completely stopped. If the vehicle is still moving, this menu will
be skipped. It can be used for checking the sensors.Selecting menu 102, brings up this display:
Press the red function key (marked with the leaf) to start bleeding. As long as bleeding is active, the leaf will
flash. Press the red key again to resume normal operation. Press 'Exit' to return to the default screen.
Bleeding allows to check the operation of the sensors and the nozzles. This is done as follows:
•
•
•
•
Stop the vehicle.
Press and hold the Menu-button for 1 second (this will enter Service Mode).
Press the Menu-button repeatedly until menu 102 is displayed.
Use a green (living) leaf to activate a single nozzle.
When the PWM feature is activated (see menu 105), this menu looks different and three more keys will be
available in the menu:
The function of the buttons (left to right) is:
Exit
Press this key to leave Service Mode. The default screen will now appear.
Chase
Activate the nozzles one-by-one (fast).
Bleeding
Press this key to leave Service Mode. The default screen will now appear.
Sequencing
Activate the nozzles one-by-one (slow)
Melody
Activate nozzle cleaning with a variety of frequencies.
WEEDit
53
Dealer Manual
103 Current Job
Updated in version 2.20, 12 January 2012.
In this menu, the actual herbicide usage is given in liters per hectare. The menu also shows the amount of herbicide
and the total amount of herbicide solution used since the last reset. WEEDit is capable of remembering the
usage parameters for 7 previous days (or 7 previous jobs*). When entering menu 103, the screen shows today's
totals. This is indicated as page 8/8:
Registration per day
Registration per job
Dose calibration
For an accurate calculation of the usage, it is necessary to specify the concentration of the chemical. Use the
arrow keys (left and right) to adjust the setting. Then press OK to confirm.
Refresh screen
When viewing today's totals, the screen is not refreshed so that values can be read accurately. You may refresh
the screen at any time and as often as you like by pressing the refresh-key.
Looking back in time
The initial screen always shows today's totals, like in the example above. You may, however, also recall the
totals of the last 7 days on which WEEDit was used. To do this, use the PageDown key to select the previous day,
like in the example below. The date on which the data was recorded is shown at the top:
History per job
It is also possible to save the data per job rather than per day. By default, the details in menu 103 are stored per
day. Your supplier can change this to storing data per job. This way it is possible to monitor multiple jobs on a
single day. In this mode, the current job can be cleared by pressing the Waste Bin key:
Pressing the Waste Bin key saves the current job (which will then become the previous job) and resets the
counters. In total, 8 jobs can be monitored this way.
WEEDit
54
Dealer Manual
104 Set Clock
WEEDit has an internal clock that keeps track of the current date and time, even when WEEDit is turned off or
when the battery is disconnected for a longer period of time. The clock is powered by its own Lithium battery,
that will keep it running for approx. one year.
When the unit is first delivered, or after the battery has been replaced, you may need to set the clock to the
current date and time. For this, use menu 104. If WEEDit detects an impossible date when it is turned on, it will
automatically enter menu 104. The clock is driven by a small crystal, similar to that of an electronic watch. It has
an accuracy of several seconds per year, but it may lose some accuracy as a result of very low or very high
ambient temperatures. If this is the case, you need to use menu 104 to adjust the clock.
Use the navigation keys (left/right) to select the parameter you wish to change. Then use the up/down keys to
alter the setting. Once you are satisfied with the result, press 'OK' to confirm the settings. The clock is now
programmed.
Note
If you see the above screen immediately after starting WEEDit, the battery might be empty. If the screen keeps
appearing after a restart, even after setting the clock correctly, the battery is definitely empty. In that case, you
should replace the battery.
WEEDit
55
Dealer Manual
105 Nozzle selection
This menu is accessible only when the vehicle has stopped copmpletely.
Note: this menu has been changed in software version 2.54
WEEDit systems are equipped with a so-called nozzle modulation feature, also known as PWM. When this feature is
enabled, the spraying rate of the WEEDit system becomes speed-independent. This is called PWM Rate Mode. In
addition, the PWM Bias Mode can be used to spray a small amount of liquid 'full field' and switch to 100%
spraying when weed is detected. Menu 105 deals with the PWM settings and allows selection of nozzle type and
spraying type, both of which have an effect on the spraying angle and the spraying rate. The following modes are
available (selectable with the 2nd function key):
Normal Mode (default)
By default, the PWM feature is disabled. In that case menu 105 looks like this (versions prior to 2.54):
PWM Rate Mode
The PWM feature can be enabled by pressing the Rate-key in the menu shown above. The display will then
change and two selectors will become visible: one for selecting the nozzle type and one for selecting the
application rate. In the example below, the nozzle type selector is activated. Use the up/down arrows to alter.
Once the correct nozzle type is selected, press the right arrow in order to activate the Rate selector:
You may now use the up/down arrows to set the application rate (%) at the given maximum speed. In the
example above, the application rate is set to 100% at 25 km/h and the selected nozzle type is TP40-02E. Once the
settings are complete, press OK to confirm. This will cause all sensors to be re-configured, after which the
system will restart.
WEEDit
56
Dealer Manual
When the application rate is set to a value lower than 100% (e.g. 76% as in the example below), the rightmost
function key can be used to return to a setting of 100%.
Rather than displaying the application rate in %, it is also possible to specify it in l/Ha, by pressing the l/Ha key.
The rightmost example above shows the application rate in l/Ha. In this case, the rate is 32 l/Ha at 25 km/h,
whilst the full field rate is 43 l/Ha. Revert to percentage rate by pressing the %-key.
After changing the mode of operation, all sensors have to be re-configured. This may take some time, which is
indicated by the progress bar. Once the progress bar has reached 100%, the system will restart automatically.
PWM Bias Mode
Bias Mode is actually the reverse of Rate Mode. When driving the vehicle, WEEDit will spray a small amount of
liquid 'full field'. This amount is configurable. When the system detects weed, it will switch to 100% spraying.
Bias mode can be entered by pressing the Bias-key in the menu shown above. The screen will then show this:
In this case, the rightmost selector allows setting of the bias rate (i.e. the amount of 'background' spraying).
Nozzle type
In order to correctly calculate how much liquid has been saved by using PWM-mode, WEEDit needs to know
exactly which nozzle type is used, so that it can determine the amount of liquid that would have been used for
full-field spraying. When mounting a different type of nozzle, menu 105 should be used to select the appropriate
type before proceeding. The nozzle type is usually engraved in the top surface of the nozzle. Use the up/down
arrows to select the appropriate nozzle type and press OK to confirm your choice.
Stop the vehicle
Please note that menu 105 is not available whilst driving. In order to select a different nozzle cap or set the
application rate, you need to stop the vehicle first.
WEEDit
57
Dealer Manual
105 Nozzle selection
Software version 2.54 and later
In software version 2.54 of the console's firmware, the layout of menu 105 has been changed. When the PWM
feature is disabled, menu 105 looks like this:
PWM Rate Mode
The PWM feature can be enabled by pressing the Rate-key in the menu shown above. The display will then
change and three parameters will be displayed. The upper two parameters can be changed by the user. When
entering this menu, the middle parameter (Rate) will be selected. Use the left/right arrow buttons to alter the
application rate. The value is presented in % and in l/Ha.
Use the arrow-up button to alter the nozzle type. The first parameter will be highlighted and the screen will look
like this:
In order to correctly calculate how much liquid has been saved by using PWM-mode, WEEDit needs to know
exactly which nozzle type is used, so that it can determine the amount of liquid that would have been used for
full-field spraying. When mounting a different type of nozzle, menu 105 should be used to select the appropriate
type before proceeding. The nozzle type is usually engraved in the top surface of the nozzle. Use the left/right
arrows to select the appropriate nozzle type and press OK to confirm your choice.
The parameter at the bottom (Full) shows the application rate during full-field spraying at the optimum speed.
This parameter cannot be changed. In the example above, 43 l/Ha will be used at 25 km/h when the nozzles are
fully open. The optimum speed has been configured by the dealer.
WEEDit
58
Dealer Manual
PWM Bias Mode
Bias Mode is actually the reverse of Rate Mode. When driving the vehicle, WEEDit will spray a small amount of
liquid 'full field'. This amount is configurable. When the system detects weed, it will switch to 100% spraying.
Bias mode can be entered by pressing the Bias-key in the menu shown above. The screen will then show this:
Three parameters are displayed and the middle one (Plant) will be highlighted. It allows you to calculate the
usage when a plant is detected. As the system does not know what speed you are usually driving when spraying
crops in bias-mode, the left/right arrow buttons should be used to select the desired speed. In the example
above, the usage when detecting a plant is calculated at 53 l/Ha at 20 km/h.
Use the up/down arrow buttons to alter any of the other parameters. The upper one (Nozzle) should be used to
set the appropriate nozzle type. This feature is fully described in the previous chapter. The bottom parameter
(Bias) allows the Bias-rate to be specified:
In the leftmost example the Bias rate is set to 50% which is the maximum amount of bias spraying that is
possible. Use the left/right arrow buttons to select a different value and press OK to confirm the setting.
Press OK to confirm
When changing the rate (in both Rate and Bias mode), you need to press OK in order to activate the new
settings. After pressing OK, all connected sensors will be updated, which may take a little while:
When the progress bar has finished (100%) the system will restart automatically.
WEEDit
59
Dealer Manual
4.6
Warnings
4.6.1 Introduction
In case of problems or errors, a message may appear on the screen. When in User Mode, such a message will
always be displayed immediately below the speed bar, just like in the example below where the herbicide fluid
pressure dropped too low:
In User Mode, only one message can be displayed at a time. If more than one message is pending, or if multiple
errors occur at the same time, only the message with the highest priority will be shown.
Detailed information about all messages can be read in the Message Menu. When in User Mode, keep the MENUkey depressed for one second to enter Service Mode. As series of menus are available in Service Mode. Press the
MENU key repeatedly until the screen shows menu 101.
The number of warnings is always given in the header. Each line on the display will show one message. Where
possible, the message will be more informative than the rather cryptic message that was displayed in the default
screen. For example, a Low Battery warning will also show the lower limit. Depending on the circumstances, the
Message Menu may look like this:
In the above example, 2 warnings are pending. Only the first warning (Pressure low) will be visible in the default
screen (User Mode) as it has the highest priority. In this case, the lower limit is 1 bar (shown at the right). When
a problem is solved, the error will be removed automatically. When, for example, the pressure is low because the
pump was not running, the error message will disappear when the pump is turned on and the pressure is above
the lower limit. The second line indicates that the current pressure has been too high (i.e. above the upper limit
of 3.50 bar). In this case, the 2nd error is persistent, as indicated by the dot in front of the line.
Press the Waste Bin-key to clear any temporary errors and messages. In case of a permanent failure,
the message will re-appear immediately, of course.
Press the Exit-key to leave this menu. You will be taken back to the default screen in User Mode.
WEEDit
60
Dealer Manual
WEEDit identifies the following types of messages (highest priority first):
1
2
3
Errors
Warnings
Messages
4.6.2 Overview
The following errors and warnings may appear (highest priority first):
1
2
3
4
5
6
7
8
9
10
11
12
13
14
15
16
17
18
19
20
ERROR
No WALD
Power off
Battery
Battery too high
COM error
Sync error
WALD ERROR
Max Sensor
Serial # invalid
Sensor firmware too old
Sensor serial number
Configure
Pressure too low
Pressure too high
Wheel sensor
Sensor order changed
New sensor found
Sensor missing
No sensors
A serial problem has occurred
The Power Converter does not reply
Sensors have been switched off due to low voltage
Battery voltage too low
Battery voltage too high
A communication failure has been encountered
Synchronisation failure between sensors
The Power Converter has reported a problem
The maximum number of sensors has been exceeded
The control panel doesn't have a valid serial number
The version of the firmware inside the sensor is too old
One of the sensors doesn't have a valid serial number
Restored to factory default. System needs calibration now!
Herbicide pressure below lower limit
Herbicide pressure above upper limit
One (or more) wheel sensor(s) broken
The sequence of the sensors has been altered. Calibrate!
A new sensor has been detected. Calibrate!
A sensor that was previously there, is now missing
No sensors have been found
Furthermore, the following messages may appear:
24
25
26
27
28
HOLD
Reverse
Manual
Flushing
Simulation
The WEEDit is in HOLD Mode
The vehicle is driving backwards
The nozzles are being controlled manually
The nozzles are being flushed
Speed simulation is active
Continued on the next page...
WEEDit
61
Dealer Manual
If more than one warning has been issued, they will cycle in the standard screen (user mode). You will see each
message for a few seconds before the next one is displayed. To see all messages simultaneously, use menu 101.
If there are more outstanding messages, they can be viewed in menu 101 – Warnings – (see example on the
right). The total number of messages is always printed in the header (behind the word 'Global'). In the above
example, two messages are waiting.
Any temporary (or incidental) messages can be removed by pressing the Zero-key. Permanent errors however, will
persist and stay on the screen. When the WEEDit is turned off, all messages will be deleted. Only the dealer can
then recall the 'old' messages from a special Dealer Menu.
4.6.3 Errors
This chapter gives further information about each error message. Whenever possible, advise will be given to
prevent or solve the problem. In some cases, a malfunction is permanent, but a temporary solution is possible,
so that you can continue to use the WEEDit, whilst engineers are working on a more permanent solution. In case
of doubt, always contact your supplier.
ERROR
This message will appear whenever a serious internal malfunction has occurred in the control panel's firmware.
Under normal conditions, this message should never appear. However, should this message appear, contact
your supplier immediately and report a method to reproduce the problem. Please make a note of the
circumstances under which the error has occurred, as well as the precise text in the error report (including any
error numbers etc.).
Battery voltage too low
Whenever the battery voltage drops below a certain (pre-determined) value, a message will appear. The message
will also report the lowest voltage measured during this session. For example:
11.28
V
Even though the battery voltage seems to be sufficient, it is entirely possible that the voltage sometime briefly
drops below the lower limit. The lowest battery voltage can also be read in the Message Menu (101). The lower
limit is printed to the right of the message. The lower limit is preset by the manufacturer and cannot be
changed. A typical message in menu 101 may look like this:
11.28
V
<
11.50
In this example the lowest measured battery voltage is 11.28 Volt, whilst the lower limit is 11.50 Volt. This may
be an indication that the battery is exhausted and needs to be recharged. Whenever the voltage exceeds the
upper limit (factory preset), the WEEDit may decide to turn itself off, in an attempt to protect the hardware.
When the voltage is too high, a message will be displayed. As soon as the voltage becomes dangerously high,
the unit will turn itself off without prior warning.
WEEDit
62
Dealer Manual
5.
Special Dealer Functions
This manual contains special instructions for the dealer and installer of a WEEDit system of the 3nd generation.
If you are not familiar with the operation of a WEEDit system, refer to the user manual first (chapters 1 thru 4).
5.1
Dealer Mode
As we've seen before, all features of the WEEDit are divided into menus. Some of these menus are available to
the general user, e.g. to read error messages or to check the battery voltage. The installation and calibration of a
WEEDit system however, is a dealer-only operation. This additional features are accessed through a set of
hidden menus that are only available to the dealer. These menus can only be accessed whilst the machine is in
the appropriate mode.
The following modes of operation are available:
1
2
3
User Mode
Service Mode
Dealer Mode
When in User Mode, you can access Service Mode by keeping the MENU-key depressed for 1 second. Service
Mode is described in chapter 4.5. How to enter Dealer Mode is revealed on the next page.
When in Dealer Mode, the following menus are available:
User mode
0
1
2
Main Menu
Preset Menu
Sensor Menu
Service mode
100
101
102
103
104
105
Information
Warnings
Nozzle cleaning
History
Set clock
Nozzle selection
Dealer mode
200
201
202
203
204
205
206
207
208
209
210
211
212
213
214
Information
Options
Sensor settings
Nozzle settings
Wheel calibration
Nozzle test
Detector test
Fixed Speed Simulation
Configuration
Global settings
HALL-sensor test
Warnings
Automatic Configuration
Clipboard
Margin presets
All features of the User Mode and Service Mode (0 thru 105) are explained in chapter 4 – Controlling the WEEDit.
The various Dealer Menus are further explained in the next chapters.
WEEDit
63
Dealer Manual
Start WEEDit in Dealer Mode
MENU
Information about the console and each connected
sensor (serial number, firmware version, etc.)
200
Information
201
Options
202
Sensor settings
Configuration of the sensor-specific settings, such as
margin, track width, mounting offset and fluid speed.
203
Nozzle settings
Settings that are specific for each individual nozzle,
such as height and distance from the sensor.
204
Wheel calibration
Special menu for a fully automated wheel sensor speed
calibration. Needed after mounting the wheel sensors.
205
Nozzle test
Special menu to test each nozzle of each sensor
individually. Allows each nozzle to be opened manually.
206
Detector test
Special menu to detect the weed detection sensors.
Enables detection when the vehicle is not driving
207
Fixed speed
Special menu to simulate a driving speed when the
vehicle is not driving. Needed for some tests.
208
Configuration
Menu used for changing some global settings,
such as language, speed units and pressure units.
209
Global settings
Selection of the units used for external sensors and
flow meters, and their upper and lower limits.
210
HALL-sensor test
211
Warnings
212
Auto configure
213
Clipboard
Clipboard to read and write the settings of a sensor.
This can be useful when replacing a faulty sensor.
214
Margin presets
Special menu to allow 4 margin present to be set.
These are linked to the user's wind force selection.
EXIT
WEEDit
Press and hold MENU for 2 sec.
Configurable options regarding sensors, user interface
and technical options (depending on the configuration)
Special menu for testing the HALL sensors (speed).
Display the number of pulses from left and right sensor.
Overview of the warnings that have been issued since
the last reset, even when the user has cleared them.
Automatically calculate and program the distance
between sensors when setting up a new system.
Resume normal operation
64
Dealer Manual
WARNING
Never reveal the information below to a general user!
Activating Dealer Mode
Dealer Mode is only available if the WEEDit has been started in a certain way. This procedure is necessary to
prevent the average user from running into a dealer menu accidently. Furthermore, the user should never be
able to calibrate the machine or alter any factory settings. Dealer Mode is activated as follows:
• Ensure that the WEEDit is turned OFF.
• Keep both red keys depressed (middle
function key and the MENU-key).
• Turn the machine ON by keeping the
power button down for one second.
Keep depressed
• Once the startup screen has appeared,
release both red keys.
The startup screen will show the text 'Dealer mode' below the WEEDit logo:
Apart from this, the machine will now start in the usual way and the default screen will
appear (User Mode). Service Mode can still be entered as before: by keeping the MENU-key
depressed for one second. When in User Mode, you may enter Dealer Mode by keeping the
MENU-key depressed for two seconds. Menu 200 – Information – should now appear. The
current settings from all sensors will now be read by the system. Depending on the number
of connected sensors, this may take some time.
You may leave this menu at any time by selecting another menu (press 'MENU') or pressing the Exit-key.
WEEDit
65
Dealer Manual
5.2
Dealer Menus
Every menu, with the exception of the default screen, has a number that is always shown at the top right of the
display. Whenever a menu consists of more than one page, a text-icon will appear in front of the menu number,
followed by the page number, for example:
2/5
200
In this case, menu 200 is selected and page 2 (of 5 pages) is shown. If the menu consists of more than one page,
you may use the Browse-keys to select the Previous or Next page:
We have tried to be as consistent as possible when assigning function keys. As a result, you'll find the same
functions linked to the same key throughout all menus. In most cases, the function keys are assigned as follows:
Back to User Mode
Browse
Select a channel (nozzle)
Confirm
In the initial screen of most of the menus (i.e. the first screen that is shown when the menu is entered), the
nozzle key is replaced by the L/R key, allowing selection of the left or right boom before selecting a sensor with
the browse keys. In the example below, the LEFT boom is selected. Press the key to select the right boom.
Entering parameters
Some menus are used to enter or alter parameters (e.g. height, width, distance, etc.). In these cases, the
navigation keys up/down are used to select the required parameter. The value of the selected parameter can be
changed with the left/right keys. Once you are satisfied with the new parameter, press OK to confirm the new
value. If you want to cancel the new value, simply use the up/down keys to select another parameter without
pressing OK.
Select a parameter
Use the navigation keys up and down to select the required parameter. Two arrows will
show which parameter is selected (see the example below).
Adjust the value
Use the navigation keys left and right to adjust the selected parameter. Keeping the key
depressed will start auto-repeat with an increasing speed. Key-clicks are generated by
the buzzer to illustrate the auto-repeat rate. The buzzer will stop once the upper or
lower limit is reached.
Confirm
Press OK to confirm a new value. This is the only way to set a new value.
WEEDit
66
Dealer Manual
Menu 200 - Information
This menu contains information about the control panel and about each individual sensor. Note: this
information is different from the information presented in menu 100 (Service Mode). The information in menu
200 is spread over several pages. Always keep this information at hand when contacting your supplier in case of
problems.
The first page contains information about the control panel itself.
Firmware
Date
Serial
Uptime
Travelled
Area
Max
speed
Version number of the firmware inside the control panel
Release date of the above firmware
Serial number of the control panel
Total number of hours the control panel has been used (from date of installation)
Total travelled distance (from date of installation)
Total sprayed area (from date of installation)
Maximum speed that is possible with the current settings of the machine
The extra pages contain the information about each individual sensor. The number of extra pages is equal to the
number of connected sensors. Use the Browse-keys to select the required sensor.
The following information is available about each sensor:
Type
Firmware
Date
Serial
Uptime
Travelled
Voltage
WEEDit
Sensor type
Version number of the firmware inside the sensor
Release date of the above firmware
Serial number of the selected sensor
Total number of hours the sensor has been used (from date of installation)
Total travelled distance of the sensor (from date of installation)
The DC power supply voltage measured inside the sensor
67
Dealer Manual
Menu 201 - Options
This menu is used to turn certain options on or off. The available options are spread over 3 categories, each on
its own page (1 to 5). Use the PageUp/PageDown-keys to browse through the pages. The various options are
explained below.
The state of an option is shown with an icon at the beginning of the line:
OFF
ON
The option is disabled (off)
The option is enabled (on)
Use the navigation keys (up/down) to select the required line. Use the remaining navigation keys (left/right) to
turn the option on or off. Any changed will be activated immediately; there is no need to confirm them. The
following options are available:
Page 1
Page 2
Page 3
Page 4
Page 5
WEEDit
68
Dealer Manual
Page 1 - Configuration
Pressure
sensor
The pressure on the spray line of the sprayer can by monitored by using a pressure sensor. This
enables the control panel to issue a warning whenever the pressure exceeds the preset limits. If the
pressure sensor is present (which should be the case) this option should be ON.
If, for whatever reason, you want to turn the pressure sensor off, or in case of a defective sensor,
you may disable it temporarily by turning the option OFF.
Speed
sensors
at
L
&
R
This option should be ON when both speed sensors are present; one at the left wheel and one at
the right. If only one speed sensor is used, this option should be OFF. When in use, both speed
sensors should produce roughly the same number of pulses on a straight track. See also 3.3.1.
Pump
off
during
hold
When this option is ON, the herbicide pressure pump is temporarily stopped when the WEEDit is
on HOLD. As soon as normal operation is resumed, the pump is turned ON again. Note: this option
is only used when a small electric pump is present.
Flow
sensor
present
This option should be on when the basic flow sensor is present. This is the sensor that measures
the flow of the herbicide solution. For a correct calculation of the herbicide usage, the herbicide
dose should be configured in menu 103.
Flush
when
overload
WEEDit can be used reliably at speeds up to 25 km/h. To ensure that WEEDit can even be used at
higher speeds, you may turn this option ON. When exeeding the 25 km/h limit, WEEDit will then
switch to full coverage spraying.
Misc
sensor
present
To allow for future extensions to the system, WEEDit has a versatile additional sensor input, called
MISC (miscellaneous). When in use, the MISC input can be calibrated elsewhere. It is also possible
to assign to appropriate units (e.g. volt, meters, mm, etc.). Depending on the selected set of meters,
the sensor value can be read in the top right corner of the display.
Run
nozzles
in
parallel
This option should be used with care and is only intended for experimental use. When ON, all
nozzles of a single sensor are switched in parallel.
WEEDit
69
Dealer Manual
Page 2 - User interface
Buzzer
on
HOLD
When this option is ON, the buzzer will sound an intermitted tone when the machine is in HOLD
mode. During HOLD, the machine cannot spray any herbicide. This mode can be used, e.g. when
turning the vehicle on the field. This option is ON by default.
Stop
buzzer
after
10
x
The intermitted buzzer can be annoying, especially when the HOLD feature is frequently used. If
this is the case, you might want to select this option as well, so that the buzzer is silenced after
beeping 10 times. This option is ON by default.
Use
LCD
backlight
The LCD display has a backlight. Whenever the WEEDit is used in bright sunlight, the backlight will
hardly be visible. However, when using the WEEDit under dark circumstances, e.g. in tunnels, in the
evenings or during bad weather, the backlight gives you a clear view on the display. If you don't
want to use the backlight you might turn it off. This option is ON by default.
Flash
when
error
When this option is ON, the backlight will flash a few times whenever a new error message is
displayed on the screen. After blinking a few times, the backlight reverts to normal operation. This
option is ON by default.
Flash
when
warning
This option is similar to the previous one. When turned ON, the display will blink a few times
whenever a warning is displayed on the screen. Warnings are issues, e.g. when the battery voltage
or the pressure has dropped too far. This option is ON by default.
Flash
when
message
This option is similar to the previous one. When turned ON, the display will blink a few times
whenever a message is displayed on the screen. Messages are issued, e.g. when the users enters
HOLD mode, drives in reverse direction or has selected Speed Simulation. This option is OFF by
default.
Menu
auto-fallback
This option affects the use of the various menu's in user mode. When enabled (default), the system
automatically returns to the main menu whenever no key has been pressed for 3 seconds. When
this option is disabled, the system will not return to the main menu unless toggled manually.
Cost
instead
of
saving
By default, the Saving indicator in the main display (marked with the $-sign) will show the
percentage of herbicide (and hence money) saved by using WEEDit. A percentage of, say, 65%
means that you have saved 65% on herbicide.
By turning this option ON, the indicator shows the % of cost, rather than the saving. A percentage
of, say, 62% means that you are spending only 62% of your previous budget.
WEEDit
70
Dealer Manual
Page 3 - Interfaces
Flow
1
use
pull-up
A flow sensor is a small self-contained electronic device that sends pulses to the WEEDit console.
Depending on the type of sensor, the interface need to be configured for pull-up or pull-down. The
default is pull-down (option OFF). When using alternative sensors, you may have to configure the
interface to use pull-up (option ON).
Flow
2
use
pull-up
Same as the above, but for the 2nd flow sensor.
Pressure
current-mode
A pressure sensor is a small self-contained electronic device that measures the pressure of, say, a
fluid and converts it into a voltage or current. Two types of pressure sensors are supported by the
WEEDit console: sensors that produce a voltage, and sensors that produce a current. By default,
WEEDit accepts voltage-based sensors, as these are most commonly used.
When current-based sensors are used, this option should be turned ON. Please note that this option should be used
with care, as applying a voltage to a current-input, can damage the circuits inside the WEEDit console. Use this
option ONLY when instructed to do so by the manufacturer.
Misc
current-mode
Same as the above, but for the miscellaneous input.
Use
GPS
pulse
for
speed
By default, wheel sensors are used to sense the speed as which the WEEDit vehicle is travelling. As
an alternative to wheel sensors, an external GPS pulse unit can be used. Please note that this
option only supports GPS motion sensors that produce a series of pulses at a rate linear to the
current speed. Use only GPS units that are approved by the manufacturer.
Use
fast
speed
pulses
The number of pulses produced by the wheel sensors, depend on the current speed and the
number of magnets on the wheels. The WEEDit console has been configured such that it can cope
with nearly all pulse rates that are normally expected, whilst maintaining good filtering against
spurious signals.
In situations, however, where the setup produces pulses at a much higher rate, the filtering inside
the WEEDit consule might have to be adjusted accordingly. If this is the case, turn ON this option.
History
per
job
(not
day)
Normally, the history details in menu 103 are stored by day, geving a history of 8 days (including
the present day). With this option it is possible to register the history per job rather than per day.
This way it is possible to register multiple jobs (up to 8) on a single day.
WEEDit
71
Dealer Manual
Page 4 - Options
This menu is not available in WEEDit-Ag configuration.
Page 5 - PWM settings
This page holds all PWM-related options:
Enable
PWM
mode
Nozzle Modulation (or PWM) allows the system to reduce the application rate of the liquid when
driving at lower speeds (i.e. speeds lower than the optimum speed set in menu 209/2). In other
words: it makes the application rate speed-independent. The PWM feature must be enabled by the
manufactuer before it is shown here. If the option is available, the dealer has to enable it before the
user can turn PWM on and off.
Show
rate/bias
in
%
By default, the application rate (in PWM mode) is displayed in l/Ha, when compared to full-field
spraying. It is also possible however, to display the application rate in % by enabling this option.
Despite the setting of this option, the user can still toggle between l/Ha and %.
This option has been removed in version 2.54 of the firmware.
User
selection
rate/bias
When this option is enabled, the user can select between PWM Rate Mode and PWM Bias Mode
from menu 105. If this option is OFF, the mode selection key (i.e. the second function key in menu
105) will not be available.
WEEDit
72
Dealer Manual
Menu 202 - Sensor settings
This menu is used to change the settings of each individual sensor. These settings are important for a correct
operation of the WEEDit. Here you need to specify the distance between the left wheel and the right wheel and
the position of each sensor on the axis. Menu 202 is shown in the leftmost image below.
The display shows the number of connected sensors. In the above example, 2 sensors are connected.
Use the L↔R key to select the required boom, then use the Browse-keys to select the required sensor. The menu
header shows which sensor is currently selected, as shown in the rightmost example above.
Use the arrow keys up/down to select the parameter you want to change and use the other arrow keys left/right
to alter the value. Once you are satisfied with the new value, press OK to confirm.
Margin
This setting is used to adjust the detection accuracy of the WEEDit. In the example above, the margin is set to
50 mm, which means that when spraying a plant, a margin of 50 mm before and after the plant will be taken into
account. Under normal conditions, the Margin should be between 100 and 150 mm.
Track (t)
This is the distance between the centre of the left speed sensor and the centre of the right speed sensor in mm.
In the above example a distance of 20000 mm is used. The value of Track should be identical for each
connected sensor. Also note that the distance between the leftmost speed sensor and the centre of the vehicle,
should be the same as between the rightmost speed sensor and the centre of the vehicle. This applies to both
wheel sensors and radar units. Confirm the new value by keeping the OK-key depressed for one second. A long
beep will tell you that the new value has been passed to all sensors. After this second beep, the settings for all
sensors has been changed.
Offset (o)
This is the distance between the centre of a sensor and the centre of the vehicle's axis in mm. Consider the
middle of the axis as the origin (i.e. a distance of 0). Sensors to the right of the centre will have a positive offset,
whilst sensors to the left of the centre have a negative offset. A sensor that is mounted exactly at the centre of the
axis, will have an offset of 0. Please note that it is possible to mount the sensors outside the wheels as well.
The offset value needs to be different for each sensor. Confirm the new value therefore by pressing the OK-key
briefly and repeat this procedure for each individual sensor. You may also use menu 212 for auto-calibration.
➤ For more information, refer to the chapter 3.3 Sensor Calibration.
Fluid
The fluid speed (mm/s) is needed to correct the delay between the droplets leaving the nozzle and hitting the
target. Please note that the fluid speed might be different for different nozzle types.
WEEDit
73
Dealer Manual
Menu 203 - Nozzle settings
Each sensor consists of 5 nozzles (channels). Menu 203 is used to alter the settings of each individual nozzle.
These settings are important for a correct operation of the WEEDit. You need to specify the distance between
the detector (optical sensor) and the nozzle, as well as the height of each nozzle. Menu 203 looks like this:
The display shows the number of connected nozzles. In the above example, 45 nozzles are connected (9 x 5). Use
the L↔R key to select the required boom, then use the Browse-keys to select the required sensor.
The display will now show the first sensor (or any other sensor selected with the Browse-keys), as follows:
Next use the 2nd function key to select the required Nozzle. The number of the selected sensor and the selected
nozzle is displayed in the menu header. The nozzle number is also displayed in the second key icon.
Use the navigation keys up/down to select the parameter you want to change and use the left/right keys to
adjust the value. Once you are satisfied with the new value, confirm it by pressing OK.
Height (h)
This is the height of the nozzle, measured from the bottom of the nozzle to the surface, in mm. In the above
example a Height of 600 mm is used.
Dist (d)
This is the distance between the detector and the nozzle, measured from the centre of the optical detector (i.e.
the lens) and the centre of the nozzle head, in mm. In the above example a distance of 600 mm is used.
Programming all nozzles simultaneously
In most situations, the above settings will be identical for (nearly) all nozzles. If this is the case, you may set the
value only once and keep OK depressed for one second to send the new value to all nozzles simultaneously. two
beeps confirm that you have succeeded.
More information in the chapter 3.5 Calibration.
WEEDit
74
Dealer Manual
Menu 204 - Wheel calibration
HALL sensors are used to measure the speed of the vehicle. In most cases, only one speed sensor will be used.
In some cases however, one speed sensors will be present at the left wheel (HALL 1) and one sensor at the right
wheel (HALL 2). The wheel(s) with a speed sensor, carries a number of magnets. Whenever the vehicle is moved,
the HALL sensors will 'count' the passing magnets.
Wheel
HALL sensor
Pulse to Relay Box
Magnets
The pulses from the HALL sensors are used by the WEEDit console to determine the speed of the vehicle. As the
machine can be mounted to a variety of vehicles, the dimensions of the wheels, and hence the number of
magnets, will vary. This requires a simple calibration of the WEEDit to your vehicle. Menu 204 is used for this:
Calibration of the WEEDit is rather straightforward and involves only 4 steps:
1
2
3
4
Select the required distance: 50 m of 100 m (100 m is selected by default)
Place the vehicle at the start of the road and press OK
Drive the vehicle to the destination and press OK again
Confirm the new calibration by pressing OK once more
The calibration procedure may be aborted at any time by pressing the Exit-key.
More information in chapter 2.3 Wheel Speed Sensors (HALL).
WEEDit
75
Dealer Manual
Menu 205 - Testing the nozzles
When verifying the operation of the nozzles, it may be useful to turn only a single nozzle on. Menu 205 is
provided especially for this purpose.
Use the L↔R key to select the required boom, then use the Browse-keys to select the required sensor. Next, use
the Nozzle-key to select the required nozzle of that sensor. An arrow will be shown above the selected nozzle.
Once the required nozzle is selected, use the middle function key
to turn the nozzle on or off. While the nozzle
is on, you may use the Nozzle-key to select another one. The previously selected nozzle will then automatically be
disengaged. An active (open) nozzle is indicated on the display by an animated spray. Whilst a nozzle is active,
the icon in the middle function key will blink.
The keys have the following meaning:
Ready
Use this key to return to the menu as soon as the test is completed.
Nozzle
Select the required nozzle.
On/off
Turn a nozzle on or off.
Previous sensor
Select the previous sensor. The number of the selected sensor will be at the top of the screen.
Next sensor
Select the next sensor. The number of the selected sensor will be at the top of the screen.
WEEDit
76
Dealer Manual
Menu 206 - Testing the detectors
Just like testing the individual nozzles (previous menu), it may be useful to test a single detector. It is
particularly useful when you have doubts about the status or calibration of a paticular channel.
First use the L↔R key to select the required boom, then use the Browse-keys to select the required sensor. Next,
use the Nozzle-key to select the required detector of that sensor. Turn the channel on by pressing the middle
function key .
As long as a detector is activated, the corresponding nozzle will be driven as appropriate. The right half of the
display shows the actual values of the channel and a vertical bar shows the actual signal level of that channel.
As this value is subject to noise and fast changes, the peak level is also displayed. The Sigma value is an
indication of the noise level, calculated by the sensor.
The actual values can also be read when the detector is not activated. However, the nozzle is not driven in that
situation.
The keys have the following meaning:
Ready
Use this key to return to the menu menu as soon as the test is completed.
Nozzle
Select the required nozzle.
On/off
Turn a nozzle on or off.
Previous sensor
Select the previous sensor. The number of the selected sensor will be at the top of the screen.
Next sensor
Select the next sensor. The number of the selected sensor will be at the top of the screen.
WEEDit
77
Dealer Manual
Menu 207 - Simulating a fixed speed
Some tests can only be carried out at a specific speed. This means that the vehicle has to be driven during the
test, which may be cumbersome, especially when trying to solve a problem. In that case it is possible to
simulate a fixed speed by using menu 207.
The selected (simulation) speed is presented at the center of the screen (in m/s). Use the navigation keys left
and right to alter the speed.
Starting the simulation
The middle function key (on/off) is used to enable or disable the speed simulation. As long as speed simulation
is active, the icon
will blink. After pressing the on/off key, the system immediately reverts to User Mode.
Function keys are available for some useful presets (i.e. 1 m/s and 2 m/s). Pressing one of these keys will always
turn speed simulation on and revert to User Mode.
Simulation
As long as speed simulation is active, the message 'Simulation' will be visible in the default screen.
Turning simulation OFF
Speed simulation can only be turned off in menu 207. If simulation is still active the icon above the middle
function key will blink. Press the
key to turn it off. The system will take you back to the default screen and
normal operation is resumed.
Nozzle cleaning
Menu 207 can also be used to test the nozzles (or to bleed the nozzles when they are blocked). As the nozzles
can only be tested when the vehicle is driving, menu 207 allows you to 'simulate' a fixed speed when the vehicle
is not moving. You may use a fixed speed of, say, 2 m/s. Next put a green (living) leaf in front of one of the
sensors. The corresponding nozzle will then be activated. Nozzle cleaning is also possible in menu 102.
WEEDit
78
Dealer Manual
Menu 208 - Configuration
This menu can be used to adapt the WEEDit to the user's preferences. The following is available in menu 208:
Language
This controls the choice of the on-screen language in user mode. The following languages are available:
English
French
German
Dutch
Spanish
Russian
Speed
This setting controls the units in which the current speed will be displayed on-screen (user mode). The following
speed units are available:
m/s
km/h
mph
Meters per second
Kilometers per hour
Miles per hour
(pressure)
This setting controls the units in which the current pressure is displayed. The following settings are available:
Press.
bar
kPa
Bar
Kilo-Pascal
(miscellaneous)
To allow for future extensions to the WEEDit system, an additional versatile sensor input, called 'miscellaneous',
or MISC for short, is provided. As it is currently unknown for what purpose the MISC input will be used in the
future, a wide range of units can be configured so that it will suit nearly any application. The following units are
available:
Misc.
--bar
kPa
V
mV
A
mA
kg
g
lum
%
°C
°F
°K
°
WEEDit
No units
Bar
kilo-Pascal
Volt
milli-Volt
Ampère
milli-Ampère
kilogram
gram
Lumen
Percentage
Degrees Celcius
Degrees Farenheit
Degrees Kelvin
Degrees
m
mm
in.
l
ml
Gal
l/s
G/s
dB
dBm
W
mW
Rad
79
meters
milli-meters
Inches
Litres
milli-litres
Gallons
litres per second
Gallons per second
Decibel
Decibel-meter
Watt
milli-Watt
Radians
Dealer Manual
Flow
2
Whenever a second flow meter is installed, it purpose can be set in this menu. The second flow meter can be
used on its own, e.g. for measuring a separate liquid flow, or can be used to measure the actual amount of liquid
used. It can also be used to measure in the flow in the left and right booms separatly, in which case their pulses
should be added together. The following options are available:
•
•
•
•
Off
On
Herbicide
Add
RefBox
With this setting, one of the sensors can be selected as 'reference sensor' or 'reference box'. The reference sensor
is used for the calculation of the sunlight factor (displayed on the main screen). It is important that a realistic
sensor is selected for this, i.e. one that exposed to direct sunlight most of the time, and not one that is in the
shadow (e.g. behind the vehicle).
PWM
This setting controls the default mode of the PWM feature. Please note that the PWM-feature has to be enabled
first in menu 201 (page 5). The following modes are available:
• Off
• Rate
• Bias
The same choices are available in User Menu 105, but only when the option User selection rate/bias in menu 201
(page 5) is enabled. This way it is possible to create a Rate-only or a Bias-only system without the user being
able to alter this.
WEEDit
80
Dealer Manual
Menu 209 - Global settings
This menu is used to alter the setting of some variables. The settings are spread over 2 pages.
Page 1
PressÏ
This setting is used to set a treshold for the lowest allowable pressure on the system. Whenever the pressure
drops below this value, a warning is issued.
PressÍ
This setting is used to set a treshold for the highest allowable pressure on the system. Whenever the pressure
exceeds this value, a warning will be issued.
Press
Calibration factor of the pressure sensor.
Press0
When a pressure sensor does not operate in the range 0-5V but, for example, in the range 1-6V, it is possible to
set the offset with this parameter.
MiscÏ
Miscellaneous sensor lower warning threshold.
MiscÍ
Miscellaneous sensor upper warning threshold.
Misc
Calibration factor for the miscellaneous sensor.
Misc0
When a miscellaneous sensor does not operate in the range 0-5V but, for example, in the range 1-6V, it is
possible to set the offset with this parameter.
WEEDit
81
Dealer Manual
Page 2
Flow 1 / Flow 2
Main flow meter calibration factor in pulses per liter.
Pulses
This is the number of pulses counted by the speed sensor for each 100 metres. The value is in pulses per 100
metres (or pulses per hm).
Lane
This figure specifies the width of a single detection lane, i.e. the width covered by a single nozzle. By default, this
should be set to 20 cm (i.e. 200 mm).
Speed
When PWM is enabled and the vehicle slows down, the PWM feature will correct the application rate, so that the
same amount of liquid is applied at all speeds. The parameter Speed, measured in m/s, defines the speeds at
which the PWM application rate is 100%. At lower speeds, the application rate with then be reduced proportially.
If a system is never used at speeds higher than, say, 15 km/h, it is best to set the Speed parameter to 15 km/h, so
that the PWM feature can be used at its full resolution.
Flow 1
Main flow meter calibration factor (measured in pulses per litre).
Flow 2
Second flow meter calibration factor (measured in pulses per litre). Please note that the second flow meter has
to be enabled in menu 208 before it can be calibrated. In the example above it is disabled.
Lance
This function is not used in the current configuration, so it may be ignored.
In this menu, the function-keys have the following meaning:
Exit
Return to main screen (User Mode).
Toggle min/max values
This key allows the currently selected value to be toggled between the minimum and maximum
value. This allows easier entry of extremely large values that would otherwise take too long. Press the
key to set the selected value to its (preset) minumum. Once pressed, this key changes to Max>.
Pressing it again sets the value to its (preset) maximum. The key then changes back to <Min.
OK
Confirm settings.
WEEDit
82
Dealer Manual
Menu 210 - HALL Sensor Test
This menu is useful when testing the HALL sensors or other speed sensors. The HALL sensors are mounted to
the left and/or right wheels. They are used to measure the current speed (and angle) of the vehicle. A detailed
description of how these sensors should be mounted, can be found in chapter 2.3. Menu 210 shows a graphical
presentation of both wheels and the two speed sensors. The number of recorded pulses for the left wheel (HALL
sensor 1) and the right wheel (HALL sensor 2) are shown in a live display.
Sensor HALL 1 should be mounted to the left wheel and sensor HALL 2 should be mounted to the right wheel.
Input from both wheels is need to accurately follow the track of the vehicle (curves). This menu can be used to
check whether pulses from both sensors are received well. When travelling on a straight road, both counters
should increased evenly.
The following keys can be used:
Exit
Return to main screen (User Mode).
Acoustic feedback
This feature allow an acoustic feedback of any of the speed sensors, making it easier to trace
intermittend failures. By default, acoustic feedback is switched off. Pressing the Speaker-key
repeatedly, selects any of the three speed sensors:
1
2
R
Sensor 1 (left wheel)
Sensor 2 (right wheel)
Reverse detection
➤ Also refer to chapter 2.3 Wheel Speed Sensors (HALL).
WEEDit
83
Dealer Manual
Menu 211 - Messages
This menu can be used to review older error messages. It can be useful when investigating a problem with a
WEEDit. All errors, warnings and messages that have been shown to the user (since the last warnings-reset) will be
displayed.
Only 7 messages can be shown simultaneously. If more than 7 messages have been recorded, you may use the
PageUp and PageDown keys to browse through the messages. For a complete overview of all possible messages,
please refer to chapter 5.3.
The other keys have the following meaning
Back
This takes you back to the main screen.
Reset
Press this key to erase all currently recorded messages.
WEEDit
84
Dealer Manual
Menu 212 - Automatic Configuration
This menu can be used for fast configuration of a new system. It reduces the time to set up such a large system,
particularly with respect to calculating and programming the distance of each sensor to the centre of the vehicle.
Assuming that all sensors are evenly distributed, menu 212 will calculate and programall offsets once the
distance between two individual sensors (offset) has been specified.
WEEDit
85
Dealer Manual
Menu 213 - Clipboard
Version 2.20 onwards
This feature has been added to allow quick configuration of a sensor when replacing it. It is assumed that the
system has been configured correctly and that a single sensor has to be replaced. This feature allows you to copy
the settings of the old sensor to the new one.
Before removing the old sensor, go to menu 213 and select the required boom (L↔R) and sensor (Page Up/
Down). Now copy the settings from the sensor to the clipboard of the console, by pressing the clipboard
button.
Once the settings have been loaded into the new sensor, the display will change to this:
Now switch off the system, replace the sensor and turn the system on again (in Dealer Mode). Goto Menu 213
again, select the appropriate boom and sensor, and press the clipboard button to copy the settings from the
clipboard into the new sensor.
The clipboard can be cleared by pressing the waste bin key.
WEEDit
86
Dealer Manual
Menu 214 - Margin Presets
Version 2.20 onwards
This option is only available when the Wind Margin-feature has been enabled by the manufacturer. The Wind
Margin-feature allows the user to select between four preset margins on the fly, depending on the current wind
speed. By default, the margins are set to:
1
2
3
4
50 mm
100 mm
150 mm
200 mm
The presets can be modified by the dealer in Menu 214:
When enabled, the user can change the factors in the preset menu (when in User mode: press the Menu button
once to enter the Preset menu). The image below shows the Preset menu. The second button (i.e. the flag icon)
can be used by the user to change the predefined margin settings.
WEEDit
87
Dealer Manual
5.3
Messages
WEEDit identifies the following types of messages (highest priority first):
1
2
3
Errors
Warnings
Messages
5.3.1 Overview
The following errors and warnings may appear (highest priority first):
1
2
3
4
5
6
7
8
9
10
11
12
13
14
15
16
17
18
19
20
ERROR
No WALD
Power off
Battery
Battery too high
COM error
Sync error
WALD ERROR
Max Sensor
Serial # invalid
Sensor firmware too old
Sensor serial number
Configure
Pressure too low
Pressure too high
Wheel sensor
Sensor order changed
New sensor found
Sensor missing
No sensors
A serial problem has occurred
The Power Converter does not reply
Sensors have been switched off due to low voltage
Battery voltage too low
Battery voltage too high
A communication failure has been encountered
Synchronisation failure between sensors
The Power Converter has reported a problem
The maximum number of sensors has been exceeded
The control panel doesn't have a valid serial number
The version of the firmware inside the sensor is too old
One of the sensors doesn't have a valid serial number
Restored to factory default. System needs calibration now!
Herbicide pressure below lower limit
Herbicide pressure above upper limit
One (or more) wheel sensor(s) broken
The sequence of the sensors has been altered. Calibrate!
A new sensor has been detected. Calibrate!
A sensor that was previously there, is now missing
No sensors have been found
Furthermore, the following messages may appear:
24
25
26
27
28
HOLD
Reverse
Manual
Flushing
Simulation
The WEEDit is in HOLD Mode
The vehicle is driving backwards
The nozzles are being controlled manually
The nozzles are being flushed
Speed simulation is active
Continued on the next page...
WEEDit
88
Dealer Manual
If more than one warning has been issued, they will cycle in the standard screen (user mode). You will see each
message for a few seconds before the next one is displayed. To see all messages simultaneously, use menu 101.
If there are more outstanding messages, they can be viewed in menu 101 – Messages Global – (see example on the
right). The total number of messages is always printed in the header (behind the word 'Global'). In the above
example, two messages are waiting.
Any temporary (or incidental) messages can be removed by pressing the Waste bin-key. Permanent errors
however, will persist and stay on the screen. When the WEEDit is turned off, all messages will be deleted. Only
the dealer can then recall old (recorded) messages by using menu 211.
5.3.2 Errors
This chapter gives further information about each error message. Whenever possible, advise will be given to
prevent or solve the problem. In some cases, a malfunction is permanent, but a temporary solution is possible,
so that you can continue to use the WEEDit, whilst engineers are working on a more permanent solution. In case
of doubt, always contact your supplier.
ERROR
This message will appear whenever a serious internal malfunction has occurred in the control panel's firmware.
Under normal conditions, this message should never appear. However, should this message appear, contact
your supplier immediately and report a method to reproduce the problem. Please make a note of the
circumstances under which the error has occurred, as well as the precise text in the error report (including any
error numbers etc.).
Battery voltage too low
Whenever the battery voltage drops below a certain (pre-determined) value, a message will appear. The message
will also report the lowest voltage measured during this session. For example:
11.28
V
Even though the battery voltage seems to be sufficient, it is entirely possible that the voltage sometime briefly
drops below the lower limit. The lowest battery voltage can also be read in the Message Menu (101). The lower
limit is printed to the right of the message. The lower limit is preset by the manufacturer and cannot be
changed. A typical message in menu 101 may look like this:
11.28
V
<
11.50
In this example the lowest measured battery voltage is 11.28 Volt, whilst the lower limit is 11.50 Volt. This may
be an indication that the battery is exhausted and needs to be recharged. Whenever the voltage exceeds the
upper limit (factory preset), the WEEDit may decide to turn itself off, in an attempt to protect the hardware.
When the voltage is too high, a message will be displayed. As soon as the voltage becomes dangerously high,
the unit will turn itself off without prior warning.
WEEDit
89
Dealer Manual
This page is intentionally left blank
WEEDit
90
Dealer Manual
6.
Troubleshooting
This chapter may be of help when you encounter problems when using the WEEDit. In case of a problem, always
check this chapter first to see whether a solution for your problem is given. If your problem is not in this list, or
when the provided solution doesn't work for you, please contact your supplier.
When discussing problems, a possible cause and the possible solution(s), we'll use the following layout:
Problem
Possible cause
Solution
1.1
Machine doesn't spray at all
De machine may be on HOLD
Activate the machine by pressing HOLD
The valves are not connected properly
Check the electrical wires to the nozzles.
The following problems are discussed in this chapter:
Problems with the spraying mechanism
1.1
1.2
1.3
1.4
Machine doesn't spray at all
One value (nozzle) keeps spraying continuously
One or more sensor(s) do not spray
The machine is spraying too early or too late
Problems with the pump mechanism
2.1
2.2
2.3
Pump doesn't start
Pressure is unstable
The pump has difficulty building pressure
Electrical problems
3.1
3.2
3.3
3.4
3.5
Global checkpoints
The display doesn't show anything after startup
Speed detection is not correct
Keys on the control panel do not respond
The sensors don't work (properly)
WEEDit
91
Dealer Manual
6.1 - Problems with the spraying mechanism
1.1
Machine doesn't spray at all
The machine is on HOLD.
Re-activate the machine by pressing the HOLD key (middle function key).
The valves (nozzles) are not connected properly.
Check all electrical connections to the nozzles for broken wires and also check the connections to the
Power Converter.
Speed is not measured.
• Check the connections to the HALL sensors for broken wires and check the connections of the
HALL sensors to the Power Converter.
• Check the distance between the HALL sensors and the magnets. This has to be between 10 - 12
Refer to chapter 2.5 for information about the alignment of the HALL sensors.
The sensors don't work at all.
You may have a problem with one or more sensors. Refer to 'Electrical problems'.
1.2
One value (nozzle) keeps spraying continuously
Nozzle is blocked by dirt.
Clean the nozzle by flushing the machine. If this doesn't work, carefully release the black nut from the
head of the nozzle (M8 nut), but be careful not to lose the spring. Clean the nozzle and the filter and refit all parts.
The signal level of the corresponding detector is above 150 (see possible causes below).
Use menu 206 to read the actual signal level. Use a clean surface and place the sensors at the normal
height (facing the surface). The detection level should be between 10 and 120 (provided the sensor
doesn't 'see' any green leaves).
The lens of the detector is dirty.
Clean the lens.
Optical defect.
If one of the optical filters (glass) or lenses are not in place or damaged, the signal may be disturbed. if
this is the case, the entire sensor needs to be replaced.
Electronic defect
Replace the sensor.
1.3
One or more sensor(s) do not spray
The sensor is inactive.
Ensure the sensor is enabled in the Sensor Menu. If the sensor is disabled, all nozzles of that sensor
will also be disabled.
The nozzle is blocked.
Release the locking nut of the nozzle and blow any dirt away.
The nozzle connections are damaged.
Check the wires to the solenoids. Two wires are used to connect each solenoid to the system. If one of
the terminals is removed from the solenoid, the display should show a cross.
The solenoid isn't properly fitted to the nozzle
Verify whether the solenoid is properly and tightly fitted to the nozzle.
WEEDit
92
Dealer Manual
The nozzle connection cable is defect.
Check the connection of the nozzle for broken wires. Also check the connections between the nozzle
and the sensor.
The corresponding detector is wrongly adjusted.
Use menu 206 to verify the signal level of the detector.
1.4
The machine sprays to late or too early
The machine is not placed at the proper height.
Check the height of the nozzles. The height should be around 70 cm above the ground.
The pressure is not correctly set.
Check the pressure of the system and make sure that no false air is sucked in. Check the plumbing on
the pressure system and the correct operation of the Ramsay Valve.
The speed is not determined properly. This may have one of the following causes:
One magnet is missing from one of the wheels.
Check whether all magnets are present on both wheels.
The speed sensors haven't been calibrated properly.
Use menu 205 to re-calibrate the speed sensors.
One or more magnets are not oriented correctly to the Hall sensor.
Ensure that the white side of the magnet is facing the Hall sensor.
The height or distance of the nozzle(s) has not been set correctly.
Use menu 203 to set the proper values.
The sensor offset hasn't been set properly.
Use menu 202 to set the position of the sensors on the axis of the vehicle. When using an odd number
of sensors, the middle one should always have an Offset of 0. The sensor to the left of it, should
have an Offset of -1000 mm, whilst the sensor to the right of the middle should have an offset of
+1000 mm. These values are suitable for a standard vehicle. Also check whether Track has been
configured correctly. This is the distance between the centre of the left wheel and the centre of the
right wheel.
Also refer to chapter 3.3.3 and the description of menu 202 in chapter 5.2.
WEEDit
93
Dealer Manual
6.2 - Problems with the pump mechanism
This chapter refers to problems that may arise when using an electric pump. The pump drivers may also be used
to drive the compressor of a Ramsay Valve.
2.1
Pump doesn't start
The pump is not connected properly.
Check whether the connector is fitted properly and check each individual wire. Use a voltmeter to check
whether a voltage is applied to the pump.
The pump fuse is broken.
Replace the pump fuse in the Power Converter (refer to chapter 2.6 for more information).
The system is on HOLD.
Activate the system by pressing the HOLD-key.
The pump is broken.
Replace the pump.
The pump cable is damaged.
Check the pump cable for any broken wires and replace it if necessary. Use the connection table in
chapter 2.6 for reference.
The connector isn't properly wired.
When the system is turned on, the pump should start running immediately. The pump relay is driven by
the control panel. If all other function are working as expected, the problem is not caused by the
control panel. Use a voltmeter to verify the voltage on the pump connection (inside the Power
Converter). Also check the pump fuse. If no power is present on the pump connector, the Relay Box is
broken. Replace the entire Power Converter.
2.2
Pressure is unstable
False air is sucked in.
Check the system for leakage. Check the plumbing to the pump and the Ramsay Valve. Replace a
leaking part if necessary.
2.3
The pump has difficulty building pressure
Air is present in the system.
Release any surplus air from the system by flushing it. Refer to chapter 4.4 for more information about
flushing.
Liquid intake is blocked.
Check the intake. Also refer to problem 2.2.
WEEDit
94
Dealer Manual
6.3 Electric problems
3.1
Global checkpoints
Check whether all nozzle are correctly driven. Note the following points:
• Ensure that all sensors are enabled (Sensor Menu).
• Enable flushing. All nozzles should be flushed now.
• If not all nozzles are flushed, check the nozzle connections (connector).
Check the operation of the HALL sensors. Note the following points:
• Turn the machine on.
• Check whether all magnets are present and ensure that the distance between the magnets and the
HALL sensors is between 10 and 12 mm.
• Check whether all magnets are oriented correctly, i.e. with the white side facing the HALL sensor.
• The green LED at the rear of the HALL sensor should be lit. Whenever the HALL sensor 'sees' a
magnet, a yellow LED should light up as well.
• If the green LED is off, check the sensor cable. Also check the power voltage to the sensors inside
the Power Converter.
• Check whether the appropriate voltages are present on the PCB. Whenever the HALL sensor 'sees'
a magnet, the terminal marked 'HALL' should change from 12 Volt to 0 Volt.
• Check whether the pulses from the HALL sensors are received by the control panel. Use menu 204
to verify this. The pulses should also be present in the Power Converter on the connector for the
control panel. When the pulses are present on this connector, but they are not visible in menu
204, check the cable between the Power Converter and the control panel for broken wires.
• Ensure that the magnets are not placed too close to each other in order to avoid magnetical
interference between them. This can be verified by temporarily removing every other magnet. If
this solves the problem, the magnets are indeed to close to each other. In that case place the
magnets further from the centre of the wheel.
• If all the above has been checked and no causes were found while the speed still isn't properly
determined, contact your supplier.
Check for proper sensor operation. Note the following points:
• Ensure that the lenses of the optical parts of each sensor are clean.
• Check whether all sensors are (properly) connected.
• Turn the system on.
• Check whether all sensors are reported on the display.
• If one or more sensors are missing, first turn the system off (no restart), wait a few seconds and
turn the system on again. It is possible that one of the sensors didn't start properly first time.
• All sensors should now radiate a beam of red light. If a sensor doesn't do that, it's broken. If none
of the sensors radiate a red beam, check the battery voltage and the fuses inside the Power
Converter.
• Use menu 204 to simulate a fixed speed.
• Use a large living green leaf to force a detection. The corresponding nozzles should now be driven.
Also check the operation of the nozzles themselves.
• If a sensor doesn't respond well, you need to replace it. Return the defective sensor to your
supplier.
WEEDit
95
Dealer Manual
3.2
The display doesn't show anything after startup
The processor has not started correctly.
Use a forced shut down by holding down the power button for 5 seconds. Then release the button. Wait
a few seconds and restart the system in the usual manner.
The control panel is broken.
Replace the control panel.
3.3
Speed detection is not correct
The connector for the HALL sensors isn't properly connected or isn't connected at all.
Check the connector and its wires.
The magnets are at the wrong distance from the HALL sensors.
The magnets have to pass by the head of the HALL sensors exactly. Also check the distance between
the magnets and the HALL sensors (10 - 12 mm). Also refer to chapter 2.5.
The magnets are not mounted properly.
The white side of the magnets should face the HALL sensors. Mount the magnets exactly as described
in chapter 2.5.
One of the HALL sensors is broken.
First check the power supply to the HALL sensor. If power is applied correctly, the green LED at the
rear of the HALL sensor should be lit. The yellow LED should come on whenever a magnet passes by.
Replace the defective HALL sensor if necessary.
The magnets are too close together.
If this is the case, the magnets may cause magnetic interference, causing one big magnetic field. Place
the magnets further apart or further way from the axis of the wheel. Also refer to chapter 2.5 for more
information.
The cable between the Power Converter and the control panel is broken.
Check the cable for any broken wires or contacts and replace it if necessary.
3.4
The keys on the control panel do not respond
All keys are dead.
The processor inside the control panel is 'hanging'. Keep the power button down for at least 5 seconds
to force a shut down. Release the button, wait a few seconds and then restart the machine.
Only one key is failing.
The contact foil of the keyboard is worn-out or broken. Replace the control panel.
The control panel is broken.
Replace the contact foil of the console (keyboard).
3.5
The sensors do not work (properly)
Use menu 206 to verify the operation of the detectors.
The optical part of the detector is dirty.
Clean the window of the optical sensor with a soft damp cloth.
WEEDit
96
Dealer Manual
3.5
The sensors do not work (properly) (continued)
Speed is not measured correctly.
The sensors will only work when the vehicle is driving or when a speed is simulated.
The sensors are not connected properly.
Check all connectors to and from the sensors.
The cable to a sensor is broken..
Check the cables to and from the sensors for broken wires. Replace the cable(s) if necessary.
WEEDit
97
Dealer Manual