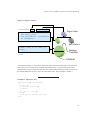
1
Swarm User Guide
Swarm Development Group
Paul Johnson
University of Kansas
Department of Political Science
[email protected]
Alex Lancaster
Santa Fe Institute
[email protected]
Swarm User Guide
by Swarm Development Group
by Paul Johnson and Alex Lancaster
Published 10 April 2000
Copyright © 1999-2000 by Swarm Development Group
A User’s Guide for the Swarm Simulation System
This document began with the Swarm Tutorial presented at SwarmFests 1998 and 1999 by Benedikt Stefansson of
CASA Inc. (formerly of UCLA Department of Economics). The Swarm Toolkit is discussed in three stages of
increasing detail. The first part provides an introductory treatment and description of Swarm. The second part
provides a deeper survey of the anatomy of a swarm program. The third part goes into significantly greater detail on
some elements of programming in Swarm that users are likely to enounter as they build programs with Swarm. Users
are encouraged to explore the Swarm sample programs and to visit the Swarm home page (http://www.swarm.org),
where they can find out the latest news and join the Swarm e-mail community.
Paul Johnson’s effort on this project was supported in part by a grant from the National Science Foundation
(SBR-9709404). Paul is the primary author of the main bulk of the Guide material.
Alex Lancaster is responsible for most of the SGML-"smithing" and markup issues in DocBook (see Colophon) and
supplied additional material and text.
Licence terms for Swarm User Guide
Reproduction of this documentation requires prior copyright release in writing, from the copyright holder (the Swarm Development Group);
except for reasonable personal use or educational purposes. Reproduction for mass distribution or profit, is not permitted. The SGML source and
associated utilites needed to generate this documentation can be found in the package: userbook-0.9.tar.gz
(ftp://ftp.swarm.org/pub/swarm/userbook-0.9.tar.gz). Permission to use, copy, modify and distribute both the swarmdocs package and the
documentation it generates (that is the HTML, TeX, dvi, PostScript and RTF output), must be in accordance with the GNU General Public
Licence (http://www.gnu.org/copyleft/gpl.html) (GPL).
Table of Contents
About this Guide ........................................................................................................................................9
Part I. Basic Concepts .............................................................................................................................11
1. Introduction ..................................................................................................................................12
1.1. Basic Facts About Swarm................................................................................................12
1.2. Swarm is a Dynamic Platform.........................................................................................13
1.3. Prerequisites for Success with Swarm.............................................................................14
2. Programming and Simulation ......................................................................................................16
2.1. What is an Object?...........................................................................................................16
2.2. The Variety of Objects.....................................................................................................18
2.3. The Advantages of Object Oriented Programming .........................................................18
2.3.1. Encapsulation......................................................................................................18
2.3.2. Inheritance...........................................................................................................19
2.4. Discrete Event Simulation ...............................................................................................20
3. Nuts and Bolts of Object-Oriented Programming........................................................................21
3.1. Multilanguage support and Swarm..................................................................................21
3.1.1. Objective C .........................................................................................................21
3.1.2. Java......................................................................................................................21
3.1.3. Why is Swarm Written in Objective C?..............................................................22
3.2. Objective C Basics...........................................................................................................22
3.2.1. The id Variable Type ..........................................................................................22
3.2.2. Interface File: Declaration of a Class..................................................................23
3.2.3. Implementation File: Defining a Class ...............................................................25
3.2.4. C Functions vs. Objective C Methods ................................................................26
3.3. Java Basics.......................................................................................................................27
3.4. Giving Life to Classes: Instantiation ...............................................................................28
3.4.1. Instantiation: Objective C Style ..........................................................................29
3.4.2. Instantiation: Java Style ......................................................................................30
3.5. A Brief Clarification: Classes and Protocols in Objective C...........................................30
4. The notion of a Swarm.................................................................................................................33
4.1. Primary and Auxiliary Agents.........................................................................................33
4.2. The (Swarm) OOP way ...................................................................................................33
4.3. Managing Memory in Swarms ........................................................................................34
4.4. What goes on in the buildObjects method?.............................................................34
4.5. What goes on in the buildActions method?.............................................................35
4.6. Merging Schedules in Swarms ........................................................................................36
5. The Graphical User Interface .......................................................................................................38
5.1. Elements of the Swarm GUI............................................................................................38
5.2. GUI Probe Displays.........................................................................................................40
3
5.3. Using the GUI Probe Display..........................................................................................42
Part II. Swarm Applications: Examples and Illustrations...................................................................44
6. The Swarm Tutorial: Reprise .......................................................................................................45
6.1. Tutorial Progression.........................................................................................................45
6.2. What Are You Supposed to Learn from the Tutorial?.....................................................46
6.3. After the Tutorial: What now?.........................................................................................48
7. Creating Objects In Swarm ..........................................................................................................49
7.1. Begin at the Beginning ....................................................................................................49
7.2. Detailed Look at createBegin/createEnd ............................................................49
7.3. Swarm Zones and Recursive Objects Creation ...............................................................51
7.4. Using Swarm Library Objects and Header Files .............................................................53
7.5. Variations on a Theme .....................................................................................................55
7.6. How Do You Kill Off Those Poor Little Devils? ............................................................56
8. Doing the Chores: set and get .................................................................................................59
8.1. Get and Set Methods .......................................................................................................59
8.2. Using Set Methods During Object Creation....................................................................60
8.3. Passing Information Around............................................................................................61
8.4. Circumventing the Object-Oriented Guidelines ..............................................................63
9. Building Schedules ......................................................................................................................64
9.1. Building Schedules ..........................................................................................................64
9.2. What’s that M() Thing? ..................................................................................................65
9.3. ActionGroups....................................................................................................................68
9.4. Activating Swarms...........................................................................................................69
9.5. What is an Activity?.......................................................................................................70
9.6. Dynamic Scheduling .......................................................................................................71
10. Working with Lists.....................................................................................................................73
10.1. The List Class ...............................................................................................................73
10.2. Basic List Syntax..........................................................................................................73
10.3. Lists: Managing Objects in the Model Swarm ..............................................................74
10.4. Lists: Passing Information Among Levels in a Swarm Model......................................76
10.5. Lists: Organizing Repetitive Chores inside Objects ......................................................77
11. Checking on a Swarm’s progress: The Observer .......................................................................81
11.1. Monitoring a Swarm......................................................................................................81
11.2. Making a clickable ZoomRaster .....................................................................................81
11.3. Displaying Results in Graphs ........................................................................................86
12. Probing and Displaying the Contents of Swarm Objects...........................................................88
12.1. What’s a Probe?.............................................................................................................88
12.2. Managing Probe Displays..............................................................................................89
12.3. How to Customize Probe Displays................................................................................91
12.4. Controlling Precision of Display ...................................................................................93
4
12.4.1. Global setting of precision ................................................................................94
12.4.2. Setting Precision for Individual Probes ............................................................95
Part III. Advanced Topics .......................................................................................................................97
13. Anything C can do, Swarm Can Do Better ................................................................................98
13.1. Managing command line parameters.............................................................................98
13.2. Using C Functions in Swarm.......................................................................................101
13.3. Examples of Useful Functions: getInt and getDouble.......................................103
13.4. Dynamic Memory Allocation and Swarm Zones ........................................................104
13.5. Dropping Unused Objects ...........................................................................................106
14. The Swarm Collections Library ...............................................................................................109
14.1. Overview: the List, Map and Array Protocols ..............................................................109
14.2. Choosing between Lists, Maps, and Arrays .................................................................110
14.3. Using Swarm Arrays....................................................................................................111
14.4. Swarm Maps..................................................................................................................112
14.5. Accessing Collections with Indices.............................................................................117
15. Using the Random Library.......................................................................................................119
15.1. Built-in Random Number Distributions ......................................................................119
15.2. Overview of the Random Library................................................................................120
15.3. The Random Number Generators................................................................................122
15.3.1. How to use the default random generator .......................................................122
15.3.2. A list of generators in Swarm .........................................................................123
15.3.3. A note on starting seeds ..................................................................................124
15.4. The Distributions in Swarm.........................................................................................125
15.4.1. Classes that adopt the ProbabilityDistribution Protocol .................................125
15.4.2. Matching generator and distribution objects...................................................125
15.4.3. Setting numerical parameters of distribution objects......................................126
15.5. How to Create Other Random Number Distributions .................................................127
16. Serialization .............................................................................................................................129
16.1. Using the LispArchiver to manage simulation parameters .........................................129
16.1.1. Using the Standard lispAppArchiver .....................................................129
16.1.2. Using Custom LispArchiver Instances ...........................................................132
A. Swarm Tools ......................................................................................................................................135
A.1. Web Resources for Object-Oriented Languages ....................................................................135
A.2. Debugging Tips for Swarm ....................................................................................................135
A.2.1. Finding bugs ..............................................................................................................136
A.2.2. Preventing Bugs: Objective C....................................................................................136
A.2.3. Preventing Bugs: Java................................................................................................137
A.3. Emacs and Swarm ..................................................................................................................137
A.3.1. Objective C ................................................................................................................138
A.3.2. Java ............................................................................................................................138
5
B. Objective C - Swarm Style ...............................................................................................................139
B.1. Non-Conventional Techniques, And The Libraries In Which They’re Used .........................139
B.2. Zones ......................................................................................................................................139
B.2.1. Zones in Principle ......................................................................................................139
B.2.2. Zones in Practice........................................................................................................139
B.3. Create Phase ...........................................................................................................................140
B.3.1. The Create Phase in Principle....................................................................................140
B.3.2. The Create Phase in Practice .....................................................................................141
B.4. Collections and Defobj ...........................................................................................................142
C. Random Library Appendix..............................................................................................................144
C.1. Supplemental comments on random number generators .......................................................144
C.2. Usage Guide ...........................................................................................................................144
C.2.1. Usage Guide for Generators ......................................................................................144
C.2.1.1. Simple generators..........................................................................................146
C.2.1.1.1. the lazy way ......................................................................................146
C.2.1.1.2. using a single seed value...................................................................146
C.2.1.1.3. using a vector of seed values ............................................................147
C.2.1.1.4. antithetic values ................................................................................148
C.2.1.1.5. generator output................................................................................148
C.2.1.2. Split generators..............................................................................................149
C.2.1.3. Saving and Resetting State ............................................................................151
C.2.2. Usage Guide for Distributions ...................................................................................152
C.2.2.1. Creating distributions ....................................................................................152
C.2.2.1.1. the lazy way: .....................................................................................152
C.2.2.1.2. Without default parameters, using a simple generator .....................153
C.2.2.1.3. Without default parameters, using a split generator .........................153
C.2.2.1.4. With default parameters, using a simple generator...........................154
C.2.2.1.5. With default parameters, using a split generator ..............................154
C.2.2.1.6. You may reset the default parameters this way, as often as you like 154
C.2.2.1.7. You can obtain the current values of parameters ..............................154
C.2.2.1.8. You can reset the variate counter and other state variables this way 155
C.2.2.1.9. Finally, we have the InternalState protocol methods........................155
C.2.2.2. Saving And Restoring State ..........................................................................156
C.3. Advanced Usage Guide ..........................................................................................................156
C.3.1. Choosing a Generator ................................................................................................156
C.3.1.1. Choosing A Generator...................................................................................156
C.3.1.2. Strategy For Using Random Generators .......................................................157
C.3.1.3. Generator Quality..........................................................................................158
C.3.1.4. More generator data ......................................................................................161
C.3.2. Default Generators for the Distributions....................................................................163
6
C.3.2.1. Random Library: Default Generators............................................................163
C.3.2.2. Utility Generator And Distributions..............................................................164
C.3.3. Random Library Test Programs .................................................................................164
C.4. Resources for random number generation..............................................................................166
C.4.1. Generators..................................................................................................................166
C.4.2. Distributions...............................................................................................................166
C.4.3. Useful Web Sites........................................................................................................167
Bibliography .........................................................................................................................167
Bibliography...........................................................................................................................................170
Index........................................................................................................................................................172
Colophon.................................................................................................................................................175
7
List of Tables
C-1. Random Library: Generator Statistical Tests...................................................................................158
C-2. Random Library: Generator Data ....................................................................................................161
C-3. Random Library: Default Generators ..............................................................................................164
List of Figures
2-1. Agent-based modeling........................................................................................................................16
2-2. Interface vs. Implementation..............................................................................................................19
3-1. Objective C Basics .............................................................................................................................23
4-1. Nested hierarchy of Swarms...............................................................................................................36
4-2. Swarm virtual computer .....................................................................................................................37
5-1. Line graphs (in this case, a time series)..............................................................................................38
5-2. Histograms..........................................................................................................................................38
5-3. Rasters of discrete two-dimensional data...........................................................................................39
5-4. Example ProbeMaps for the tutorial ModelSwarm and ObserverSwarm ..............................................39
12-1. Combining two VarProbe and one MessageProbes on a ProbeDisplay..............................................88
B-1. Schematic of proto-object creation..................................................................................................140
List of Examples
3-1. Objective C class ................................................................................................................................24
3-2. C vs Objective C.................................................................................................................................27
3-3. Java class ............................................................................................................................................27
12-1. Generating a probeMap .................................................................................................................91
12-2. Non-verbose probeMap creation ...................................................................................................93
12-3. Global setting precision in HeatbugObserverSwarm.m .......................................................................94
12-4. Setting precision for individual probes in HeatbugModelSwarm.m: ....................................................95
14-1. Maps and keys ................................................................................................................................112
16-1. Using a standard lispAppName instance....................................................................................130
16-2. Creating a Lisp parameter file with an alternate name...................................................................132
8
About this Guide
This Guide presents an overview of the Swarm simulation toolkit. It is intended to be used in conjunction
with other materials, which include the sample programs and tutorials provided by the Swarm team and
the Swarm Documentation Set. Since this is a user guide, it is intended to be less formal and not so
encyclopaedic as the Reference Guide to Swarm
(http://www.santafe.edu/projects/swarm/swarmdocs/refbook/refbook.html). When there is any doubt, the
Reference Guide (and the source code itself) is the final, most appropriate, authority.
•
Part I. An overview of Swarm and a brief primer on Swarm object-oriented programming using
Objective C and Java.
At the time of writing only Part I has been written from a joint Objective C/Java perspective,
subsequent Parts assume you are using the Objective C version of Swarm, a limitation we hope
to rectify in future versions of this Guide
•
Part II. A reprise on the Swarm tutorial package, explaining in-depth various non-obvious features of
Swarm coding. As previously noted, the present this only covers the Objective C version
•
Part III. Advanced Topics: as you might guess, not for the uninitiated, these are important topics you
will need to know to become a competent in using the Swarm libraries.
The inspiration for this Guide was provided by Benedikt Stefansson <[email protected]>, who
prepared a series of lectures for the 1998 and 1999 SwarmFests. Benedikt generated a series of slides and
illustrations and many of them have been adapted for this Guide. He has also provided help in the form
of sample code and advice about many topics.
Conventions used in this document:
Note
Interesting fact(s), not necessarily of vital significance to the user.
Tip
A coding tip, a suggested convention to adopt or suggested usage.
9
About this Guide
Important
Important fact(s) you should know before proceeding to the next section.
Caution
A note of caution, generally regarding a changed usage, deprecated functionality or other
compatibility issue.
Warning
Vital information that a user needs to be aware of before proceeding.
10
Part I. Basic Concepts
Chapter 1. Introduction
The Swarm project was started in 1994 by Chris Langton, then at Santa Fe Institute
(http://www.santafe.edu) (SFI)in New Mexico. It is currently based at the non-for-profit organization,
Swarm Development Group (http://www.swarm.org) also based in Santa Fe, New Mexico. The aim was
to develop both a vocabulary and a set of standard computer tools for the development of multi-agent
simulation models (so-called ABMs, short for Agent-Based Models). Armed with this framework,
researchers are able to focus on the substance of the modeling task, avoiding some of the complicated
details of computer coding.
The Swarm project has benefitted from the contributions of many programmers, including Roger
Burkhart, Nelson Minar, Manor Askenazi, Glen Ropella, Sven Thommesen, Marcus Daniels, Alex
Lancaster, Vladimir Jojic, and Irene Lee.
1.1. Basic Facts About Swarm
Swarm is a collection of software libraries which provide support for simulation programming. Among
the most prominent features are the following.
•
Swarm Code is Object-Oriented. The swarm libraries are written in a computer language called
"Objective-C", a superset of the C language. Objective-C adds the ability to create software "classes"
from which individual instances can be created. These instances are self-contained entities, and the
terminology of object-oriented programming turns out to be very well suited to discussions of
agent-based models.
•
Swarm Programs are Hierarchical. Most swarm applications have a structure that roughly goes like
this. First, a top level–often called the "observer swarm"–is created. That layer creates screen displays
and it also creates the level below it, which is called the "model swarm". The model swarm in turn
creates the individual agents, schedulestheir activities, collects information about them and relays that
information when the observer swarm needs it. This terminology is not required by Swarm, but its use
does facilitate it.
•
Swarm Provides Many Handy Tools. As we shall see in later sections, the Swarm libraries provide a
number of convenient pieces of code that will facilitate the design of an agent-based model. These
tools facilitate the management of memory, the maintenance of lists, scheduling of actions, and many
other chores.
Users build simulations by incorporating Swarm objects in their own programs. Users are encouraged to
study a number of tutorial examples in order to make full use of the Swarm libraries and the strategy of
modeling that inspires them.
12
Chapter 1. Introduction
1.2. Swarm is a Dynamic Platform
Swarm is free software (http://www.gnu.org/philosophy/free-sw.html) 1. The current Swarm distribution
is effectively 2 released under the GNU General Public License (GPL
(http://www.gnu.org/copyleft/gpl.html)). The free software model of software development is
particularly effective for a tool like Swarm, for both theoretical and practical reasons:
•
Complete Observability. With full source available, if necessary, the modeller can always track the
execution of the simulation right down to the operating system level. This is very important for
reproducibility, and ultimately allows you to go about proving (in an abstract mathematical sense) a
simulation’s ‘correctness’.
•
Developer Mind-Share. More practically, Swarm is open source so that we can harness developer
mind-share: more technically minded users can identify bugs, write patches, implement new features
generally contribute to the evolution of Swarm. These are all identical to the reasons that the
GNU/Linux operating system has grown so fast (and is so robust) [DiBona et. al. 1999]. As Swarm
grows, more programmers, and technically curious modellers are becoming involved in the project.
The development work is being done by the Swarm Development Group (http://www.swarm.org),
located in Santa Fe, New Mexico. (The Swarm project relocated from the SFI at the end of October
1999). Their results are periodically released on the Internet and users have access to the source code.
The creators fully intended for users to take the code, experiment with it, and propose changes and
enhancements. This open source strategy is designed to capture the contributions of a lively research
community. When users make improvements in the libraries, they are encouraged to announce them to
the community and make them available. As a result of the interaction of the community and the Swarm
team, the Swarm libraries are constantly being revised.
To get an idea of how much things change, consider the brief history of the project. Swarm was
originally intended for Unix operating systems that support the X Windows System. The first beta
version of Swarm was released in 1995. In January 1997, version 1.0 was released to the public. It would
run on Solaris and Linux operating systems. Quickly after that, minor releases followed that opened up
Swarm to the DEC Alpha platform and other flavors of Unix. In April 1998, the reach of Swarm again
broadened, as version 1.1 was released and, with the help of the Cygnus Win32 package, Swarm could
be used on the Microsoft Windows 95/NT (and now 98) operating systems. In late 1999 the Swarm
1.
sometimes referred to as "open source" source software, see the Open Source Definition
(http://www.opensource.org/osd.html)
2.
The core Swarm libraries are currently released under the LGPL (http://www.gnu.org/copyleft/lgpl.html), but the standard
binary distributions generally include many GPLed support components, which effectively mean that Swarm is GPLed.
13
Chapter 1. Introduction
releases 2.0 and 2.0.1 introduced a Java layer for Swarm to enable Java programmers to access Swarm
libraries and enabled the export of data through the HDF5 binary data format from NSCA.
Because Swarm does grow and change as a result of the complex interaction within a research
community, its precise path for development is not predictable. Current priorities for the Swarm team at
the SDG include the further generalization of Swarm to be useful on a broader array of platforms and in
conjunction with additional computer languages. Prototype XML and Scheme layers for Swarm have
been tested, for example.
1.3. Prerequisites for Success with Swarm.
Swarm was originally conceived as a set of standardized methods for the design of multi-agent
simulation models. One need not be a highly accomplished computer program to user the Swarm
libraries. In fact, as the installation process for Swarm becomes increasingly streamlined, it is quite easy
for anyone with suitable hardware to test some of the sample applications. For people who have
Windows 98/NT or Linux operating systems, compiled versions of the Swarm libraries are available and
installation is quite painless
However, it is not easy to create new Swarm applications. Doing so requires the creation of a computer
program. While one need not be an expert programmer, one must have a rudimentary understanding of
vital computing concepts. The required knowledge will vary with the sort of model that one is intending
to create, of course, but, at the bare minumum, users must have:
•
•
a basic understanding of computer programming
and, at the time of writing, either of the two object-oriented programming languages, Java or
Objective C 3
Java is a straightforward language to learn, and has the advantage of being a mainstream, well-supported
language in terms of both tools and documentation. Objective-C is, well, truly elegant and fun to use and
people who know C say it is fairly easy to learn (C is also a highly useful language and it is relatively
easy to learn).
People who have not done computer programming will thus need to do some background preparation
before they try to make a serious effort at building a Swarm model.
If you choose to implement your models in Objective C, we suggest that the first step is to find one of the
many elementary guides to computing with C, such as The C Programming Language, [Kernighan &
3.
in the Objective C case, an understanding of the C computer language, is also helpful, since Objective C is a superset of the C
language
14
Chapter 1. Introduction
Ritchie, 1988]. Written by the authors of C, Brian Kernighan and Dennis Ritchie, it is a truly readable
and informative manual that all users ought to investigate.
If you choose to implement your models in Java, there are literally thousands of introductory
programming-in-Java resources on the market, both in paper and electronic form (see Section A.1 for
some starting points).
A manual with examples and exercises is vital. These will teach the basics about writing code and
compiling it into programs.
The Objective-C language is best learned from the online book Object Oriented Programming and the
Objective C Language [NeXT, 1993].
15
Chapter 2. Programming and Simulation
Swarm is designed to help researchers build models in which low-level actors interact (often called
"complex systems"). The researcher has to give content to "agents," possibly by thinking of them as
honey bees, investors, trees, or (the ubiquitous) "bugs." One research goal is to discern overall patterns
that emerge from these detailed behaviors at the individual level.
Figure 2-1. Agent-based modeling
Bottom up modeling
Inanimate agents
Animate agents
Observer
Data
Organizations of agents
Object oriented programming is ideally suited to represent models of this sort. As we shall see, the
objects are self-contained. Objects may be designed to convey information (answer questions) from other
objects and also they can retain, categorize, and summarize information.
2.1. What is an Object?
16
Chapter 2. Programming and Simulation
A careful study of either of the object-oriented programming languages (Java or Objective-C) is required
before any significant progress can be made in building a Swarm model. The material presented here is
intended as a summary or reminder of such a study, rather than a substitute.
An object consists of two kinds of information
•
Variables. The list of variables summarizes the "state" of the agent–its age, wealth, its ability, and so
forth. These variables may be of any type that is allowed in C, such as integer (int), floating-point
number (float), an array, a pointer, and so forth. These variables might also be of type id, which
means they might also be instances of classes, and;
•
Methods. Methods determine what the object can do. Typically, there will be methods that receive
information from the "outside world", methods that send messages to the outside, and methods that
process information.
Variables and methods are given meaningful names, so code is easier to read. The custom is to run words
together to make meaningful tags, such as goToStore or goHome.
Objects are created through a process called "instantiation." Put tersely, code is written in "classes" and
then objects are created as instances of their classes. The varibles that an instance, or object, keeps inside
itself are called "instance variables". The information contained inside instance variables is available to
all methods inside that object. If one of the methods in an object needs to have "private" information that
is not available to other methods in the object, then "method variables" can be created to hold that
information.
In both Objective-C and Java, the term message is often used to refer to an instruction that tells an object
to carry out one of its methods. (For readers more familiar to C++, the term member function, refers to
the same thing as the term method). Here is an example of a message that tells an object known as
bobDole to execute its method runForPresident.
Objective C example
Java example
[bobDole runForPresident];
bobDole.runForPresident();
In Objective C, some methods have parameters that specify details and they are added with colons (:)
after the name of the method to be executed. In Java, the entire method name is listed before the
parameters are given 1. For example, if the method runForPresident required additional
parameters, such as the year and the name of the runningmate, then the message might look like so:
Objective C example
1.
Java example
In our Java example we use a dollar sign ($) inline between the parts of the method that are separated in the Objective C case.
This is purely a convention introduced to stay as close to conventions adopted by the Java Swarm libraries. This is in no way
enforced by the Java language itself.
17
Chapter 2. Programming and Simulation
Objective C example
Java example
[bobDole runForPresident:2000 with:
bobDole.runForPresident$with (2000,
RossPerot];
RossPerot);
We will have plenty of additional examples in the rest of the Guide.
2.2. The Variety of Objects
In a Swarm model, there can be many types of agents (see Figure 2-1) Obviously, if a model is going to
describe honey bees, it has to have honey bee agents. It will also have objects that represent other actors
in the model, and not all other actors are animate. There might be other insects and bears, but there will
also be objects that represent the environment (trees, rainstorms, etc). The model will typically also have
objects that facilitate the modeling process and collect information about the simulation and relay it to
the researcher.
2.3. The Advantages of Object Oriented
Programming
Object oriented programming (OOP)is well suited to describe autonomous agents,so it should have
appeal to scientists and modelers on that basis alone. However, that is not the end of the subject. OOP it
has virtues that are equally important to computer programmers. OOP, as it is found in Objective-C, is
not exactly the same as OOP in C++ or Java, but these languages have some significant features in
common. The features we emphasize here are encapsulation and inheritance.
2.3.1. Encapsulation
The values of the variables inside an object are private, unless methods are written to pass
that information outside of the object.
This has both substantive and practical implications. The substantive importance is that the
representation of an individual actor now presumes that the actor is a self-contained entity and that other
actors do not automatically have access to all information inside that actor. Like humans, objects have to
take effort to convey information to each other about their internal states. The practical advantages of
encapsulation, however, are just as important. Computer projects can be broken down into separable
components (code for the classes) and when the code is finished, the details of what goes on inside each
object may not be important to the programmer. For example, if an object groceryStore can respond
to an message takeMoney, and it gets the job done, we might not care how it does it.
18
Chapter 2. Programming and Simulation
Figure 2-2. Interface vs. Implementation
Objects hide their
functions and data
User only has to be familiar
with the interface of an object,
not it’s implementation
This is commonly referred to as the separation of "interface" from "implementation." While the interface
declares what methods the object can execute, the implementation may remain hidden (see Figure 2-2),
the user only has to be familiar with the interface of an object, not it’s implementation
2.3.2. Inheritance
Each subclass inherits all variables and methods of its superclass.
Inheritance works because code for each class designates that class as a subclass of a superclass. For
example, in the GNU Objective-C compiler used in the Swarm project, there is a most basic class,
"object". From the object class, the Swarm libraries create subclasses, and subclasses are created from
them, and so forth until the programmer in a swarm project wants to create a new class of actors that is
subclassed from SwarmObject. If the programmer needs to create several varieties of that class, there is no
need to totally rewrite each one. Subclasses can be created that have as a base all variables and methods
of the class but then new methods and variables can be added as well.
When a method, say takeMoney, exists in a class Store, and then a subclass is created, say
then all objects instantiated from the subclass will respond to takeMoney. If the
programmer wants to rewrite the takeMoney method for GroceryStores, however, then the method can
GroceryStore,
19
Chapter 2. Programming and Simulation
be revised inside the code for the subclass and then all instances of the GroceryStore class will respond
to takeMoney in that specialized way. The method inside the GroceryStore subclass will override the
super-class’s definition of the method.
2.4. Discrete Event Simulation
A Swarm simulation proceeds in discrete time steps. Objects are created and then interact according to a
scheduling mechanism. As the simulation proceeds, the agents update their instance variables and they
may be asked to report their state to the observer swarm layer of the simulation.
The modeling process in Swarm, then, is quite different from simulation modeling in a non-object
oriented language, such as Fortran or Pascal. These so-called "procedural languages" do not allow the
modeler to take advantage of reusable classes through inheritance or the preservation of data allowed by
encapsulation. Here’s an example of a simulation in a procedural language:
Procedural language pseudo-code
1.
get parameters
2.
initialize2
3.
for 1 to timesteps do:
a.
for 1 to num_agents do:
i.
b.
4.
agent-i-do-something 3
show state 4
quit
2.
Generally sets up data structures and support for output.
3.
Here must provide data structure to save agent’s state and implement behavior
4.
Implementation of output often left to the programmer
20
Chapter 3. Nuts and Bolts of
Object-Oriented Programming
3.1. Multilanguage support and Swarm
Swarm is not a single application that is ‘turned on’. Swarm is a set of libraries that you can pick and
choose features from. In order to use the Swarm libraries, it is necessary to create or use code that calls
Swarm features.
3.1.1. Objective C
Until recently, there was one way to use Swarm features: write and compile a program in Objective C.
This is a flexible and way to write a model using Swarm. Objective C models tend to have good
performance because they are compiled by a native code optimizing compiler, namely GCC.
Objective C was created by Brad Cox [NeXT, 1993]. The aim was to create an elegant, object-oriented
extension of C in the style of the Smalltalk language [Goldberg & Robson, 1989]. Objective C was used
most intensively in the design of the NeXT computer operating system, which is now owned by Apple
and is basis of Apple’s runtime environment WebObjects.
3.1.2. Java
Since Swarm 2.0, modellers can use Java. For new users of Swarm, writing models in Java is
considerably harder to get wrong. Java is also a more attractive languages for new users to learn since it
is a popular language that has benefits outside of Swarm modelling.
Java was created by Sun Microsystems, initially to provide a platform-independent layer or interface for
embedded devices (such as set-top boxes for digital television) and was originally known as Oak. With
the advent and growth of the world wide web from 1992 onwards, Oak was renamed Java and redirected
at the market created by the web. “Write once, run anywhere” was the motto of the original Java
developers, the idea being to create an abstraction layer between the programmer and the underlying chip
architecture (ix86, Sparc, Alpha) known as a virtual machine (or interpreter) 1
1.
In theory all programmers needed to do was to write so-called "pure Java" code that targeted the virtual machine, whilst the
virtual machine itself only needed to ported once to each new architecture or chip, by the maintainers of the language itself
(rather than the applications programmer). With certain caveats, this has been largely realized, and Java is now a robust
platform that is used in both web client GUI programming (applets) as well as server applications (servlets). Use of Java does
come at a cost, the extra step of translating the virtual machine instructions into the native machine instructions at run-time
does have a performance penalty at run-time, but with the advent of so-called native compilers which do this translation at
21
Chapter 3. Nuts and Bolts of Object-Oriented Programming
The purpose of the Java layer of Swarm (actually it is a system that is potentially extensible to other
languages such as Scheme or C++) is to mirror the protocols of the Swarm libraries as Java interfaces.
For more details on the ongoing work of integrating Swarm with other languages and simulation
technologies such as XML and Scheme, see the paper Integrating Simulation Technologies With
Swarm [Daniels, 1999].
3.1.3. Why is Swarm Written in Objective C?
Since Objective C is not currently a mainstream programming language, it is natural to ask why the
Swarm project chose Objective C. There are a number of reasons:
•
Objective C is easier to learn. Objective C takes the familiar C language and adds a few simple
elements. Objective C does not allow overloading or multiple inheritance of classes (although the use
of protocols enables this, to an extent)
•
Objective C allows run-time binding. In contrast to other languages which check the match between
the receiver of a command and its ability to carry out the command when a program is compiled,
Objective C leaves that matching exercise until the program is running. This means, for example, that
one can have a program that builds a list of objects and then sends a message to each one. In Objective
C, the compiler won’t worry about which type of object is in the list. The advantage, conceptually, is
that one can put commands in their code without knowing the precise identity of the receiver, so code
can be written to allow an environment and set of objects to change and evolve. The disadvantage, as
critics of run-time binding will quickly point out, is that programs crash when an object recieves a
message and it does not have the method that it is being told to execute. The organization of Swarm
into protocols reduces the risk of these crashes, however, because the compiler does check and issue a
warning if a method is not implemented in a class that advertises a certain protocol.
3.2. Objective C Basics
3.2.1. The id Variable Type
compile-time (rather than at run-time), many applications can, in principle, run much faster than they currently do.
22
Chapter 3. Nuts and Bolts of Object-Oriented Programming
The variable type that is added by Objective C is id. It is the default type for objects in Objective C.
Think of this as a special variable type (which is actually a pointer to a special data structure - namely the
object)
All objects can refer to themselves by using the label self . This is necessary if, in the code that defines
the object, the programmer wants to make the object execute one of its methods. For example, suppose
an object has a method called updateRecords. If a command
[self updateRecords];
is received, then the updateRecords command will be executed, presumably to cause the updating of
instance variables.
All objects can refer to superclass by the name super . For example:
[super updateRecords]
3.2.2. Interface File: Declaration of a Class
If you look in a directory where some Objective C Swarm code resides, you will see files in pairs, such
as ObserverSwarm.h and ObserverSwarm.m, ModelSwarm.h and ModelSwarm.m, and so forth. The "h" files
are the interface files (commonly called header files), while the "m" files are the implementation files
23
Chapter 3. Nuts and Bolts of Object-Oriented Programming
Figure 3-1. Objective C Basics
@interface Bug : SwarmObject {
Super class
int xPos, yPos;
int worldXSize, worldYSize;
id foodSpace;
}
-setX: (int) x Y: (int) y;
-step;
@end
Sub classes
Instance
Variables
Methods
As illustrated in Figure 3-1, the interface declares the name of the class and the name of its superclass.
Then it gives a list of variable types and names enclosed by braces ({}), and then the names of the
methods that the class can implement are listed. The variables defined in this list can be used by any of
the methods defined for the class. (These are often called "ivars", short for instance variables.)
Example 3-1. Objective C class
(1)@interface Bug(2) : SwarmObject(3)
{
int xPos, yPos;
int worldXSize, worldYSize;(4)
id foodSpace;
}
- setX: (int) x Y: (int) y;(5)
- step;(6)
- (return_type)look: (direction_type) d;(7)
@end
24
Chapter 3. Nuts and Bolts of Object-Oriented Programming
(1) Declarations of instance variables and methods
(2) Sub class
(3) Super class
(4) Instance Variables
(5) declares method called set that takes two arguments
(6) declares a method called step.
(7) declares a method called look that takes one argument of type direction_type and returns an
argument of type return_type.
3.2.3. Implementation File: Defining a Class
Each implementation file–the .m that parallels the .h – must import its header file. For the header file
described above, called Bug.h, for example, the implementation looks like:
#import "Bug.h"
@implementation Bug
- setX: (int) x Y: (int) y
{
xPos = x;
yPos = y;
return self;
}
- step
{
// body
return self;
}
- (return_type)look: (direction_type)d
{
return_type returnval;
// body of method
return returnval;
}
This example shows a number of important features. First, note that the method look specifies a return
type, (return_type). In this example, return_type would have to be replaced by a variable type, such
as int, float, or whatever, and returnval would have to be a variable of that type. When that method
is called, the receiving code must be able to accept a return of that type. In contrast, the method step
25
Chapter 3. Nuts and Bolts of Object-Oriented Programming
does not specify a return type. That means the default type, id, is returned. The code that calls this
method must be consistent with that return type.
The return self command is used for two types of situations. Suppose the method is not intended to
create any output, but rather it changes some instance variables. For example, suppose there is some
program that creates an instance of Bug called aBug . Then that object is sent this message:
[aBug step]
In such a case, the code that calls that method does not expect anything back from it (except itself).
Rather than fuss with void as the return type, as one might in C, one can simply return self .
In another case, one might actually intend to return the object to a list or another object. In such a case,
return self will also be appropriate. If one is making a list of collected bugs, for example, then the usage
of return self in that method will give back aBug id to the calling program. To be perfectly concrete
about it, suppose the calling code has a list called collectedBugs. Then using the addLast
notation from the Swarm collections library, the command to add aBug to the list after being collected
might look like this:
[collectedBugs addLast: [aBug look:
aDirection]];
3.2.4. C Functions vs. Objective C Methods
For readers who are already familiar with C, perhaps a comparison of C functions against Objective C
methods is in order. Since Objective C is a superset of C, an Objective C method can include any valid C
commands. A method can return any type that a C function can return, and in addition it can an id
(which, strictly speaking, is a pointer to an object).
In the abstract, an Objective C method has this structure:
- (type)name: (type)arg1 argName2: (type)arg2
{
(body)
return returnval;
}
In comparison, a C function would look like this:
(type)name((type) arg1,(type) arg2))
{
(body)
return returnval;
}
26
Chapter 3. Nuts and Bolts of Object-Oriented Programming
The code in body of an Objective C method can be exactly the same as in C. The two languages are
compared side-by-side in the following example, which describes how a function rand_move() might
compare to a method rand_move:. Of course, each of these assumes there are other functions and
variables that can be accessed, but the contrast in style should be informative.
Example 3-2. C vs Objective C
C
Objective C
void rand_move(int i) { int tmp_loc; do{
- rand_move: p { id loc; do{ loc=[self
tmp_loc=get_rand_loc(); }
getRandLoc]; } while([world at: loc]!=nil); [p
while(val[tmp_loc]!=0); val[location[i]]=0;
moveTo: loc]; return self; }
val[tmp_loc]=i; }
3.3. Java Basics
One of the most obvious and immediate differences between Objective C (and incidentally C++) and
Java, is that Java does not partion classes into "declarations" (header files) and "implementations"
(implementation files). All information for any Java class is contained in a single .java file.
Perhaps the best way to illustrate this is to consider the Java equivalent of the previous Objective C
Example 3-1.
Example 3-3. Java class
(1)public class Bug(2) extends SwarmObject(3)
{
int xPos, yPos;
int worldXSize, worldYSize;(4)
FoodSpace foodSpace;
public Object setX$Y (int x, int y)(5)
{
xPos = x;
yPos = y;
return this;
}
public Object step()(6)
{
// body of step() code
27
Chapter 3. Nuts and Bolts of Object-Oriented Programming
return this;
}
public return_type look(direction_type d)(7)
{
return_type returnval;
// body of look() code
return returnval;
}
}
(1) Complete class defintion
(2) Sub class
(3) Super class
(4) Instance Variables
(5) declares method called set$Y() that takes two arguments
(6) declares a method called step() takes no arguments.
(7) declares a method called look() that takes one argument of type direction_type and returns an
argument of type return_type.
One important distinction to notice is that Java does not have a notion of an id or "generic" data type. All
variables must be assigned a type, in the above example the foodSpace instance variable is declared as
being of type FoodSpace. This is because Java is a strongly typed language. The compiler checks all types
of all variables to ensure all receiver objects respond to the messages that are sent to them by the
programmer. Most of the rest of the other differences between the Objective C and Java examples given,
lie almost purely in deviations of syntax. Here are a few obvious ones (this list is by no means exhaustive
and the reader is encouraged to consult their Java or Objective C reference manual for all the detailed
syntax):
•
In Objective C, method names and the parameters are interspersed, whilst in Java, the entire method
name is given before the parameters.
•
In Java self is referred to as this (super retains its meaning and syntax in both languages).
3.4. Giving Life to Classes: Instantiation
After the code is written to implement the class (with .h and .m files for Objective C and .java in the
Java case), there is still work to be done. Instances of the class must be created. The creation of instances
28
Chapter 3. Nuts and Bolts of Object-Oriented Programming
of a class is one of the specialized features of Swarm. Since the instantiation process can be sometimes
different from the that described in the Objective C and Java literature, it is worth some special attention.
The creation of the substantively important objects is often handled in the model swarm. This process
uses the specialized memory management and object creation code in the Swarm library.
3.4.1. Instantiation: Objective C Style
The objects that represent the actors in a simulation–the substantively important entities–are usually
subclassed from the SwarmObject class. The "inheritance hierarchy" that leads to the class SwarmObject
passes through classes that allow the creation and deletion of objects from a simulation. Objects are often
created by a pair of "bookend" commands, createBegin and createEnd. This is not part of the
Objective C syntax. Rather, it is unique to Swarm.
Suppose the Bug.h and Bug.m files from previous exist, and one wants to create an instance of that class.
In a file ModelSwarm.m, one would typically have a method called buildObjects, which is usually a
method that houses all object creation. For example:
// Excerpt from ModelSwarm.m that creates a Bug instance
#import "Bug.h"
// {other imports and code that defines schedules, etc}
- buildObjects
{
id aBug;
bug = [Bug createBegin: self];
// commands that set permanent features of the agent can apppear here
bug = [Bug createEnd];
}
The class’s "factory object", Bug, is told to create an object in a memory zone that is provided by
ModelSwarm (ModelSwarm is the self .). Then the object aBug is instructed to finish the creation process,
after optional commands are added to define the features of the object (typically, to set permanent
structural aspects of the class). Many of these subtleties are explained in depth in later sections (see also
Appendix B).
Object instances need not be created by the createBegin/createEnd pair. Objects can often be
created by a simple create command 2.
aBug = [Bug create: self];
In code written for older versions of Swarm, one will often see a slightly different syntax in
ModelSwarm.m:
2.
For example, the Swarm collections library includes a class called List, which is most often created this way.
29
Chapter 3. Nuts and Bolts of Object-Oriented Programming
aBug = [Bug create: [self getZone]];
In Objective C, this usage is still valid, although it is deprecated. Since now the objects of type Swarm,
like the model swarm itself, are memory zones, there is no need to get a zone in which to put the bug.
Rather, the bug can be put in the zone that is provided by the model swarm itself.
3.4.2. Instantiation: Java Style
For most stock objects created in application Java code (including user-created Java classes), the entire
createBegin/createEnd apparatus can be dispensed with. Java uses the term constructor for the
method that creates an instance of a class. The Java interface to the Swarm libraries have "convenience"
constructors which essentially bracket the entire set of create-time messages in a single call to the
constructor (or call the constructor with no arguments as in the present case). The simplest method to
create a Java Bug object is to invoke the following:
aBug = Bug (this.getZone());
This is equivalent to the final Objective C example given in the last section. In summary here is the
comparison:
Objective C example
Java example
aBug = [Bug create: [self getZone]];
aBug = Bug (this.getZone());
Note that the explicit create: method in the Objective C case, is made implicit in the Java case.
It is still possible to use the create and createBegin/createEnd apparatus in Java, but due to
Java’s strongly-typed nature, it can require considerably more coding overhead than in Objective C,
and will be left to later version of the Guide.
3.5. A Brief Clarification: Classes and Protocols in
Objective C
There is one additional complication that readers should be aware of. Objective C allows the creation of
entities called protocols. A protocol, as readers will recall from their study of Objective C, is a list of
methods that an object is able to execute. Swarm is structured by protocols, which means that there are
lists of methods assigned to various names and classes inside the library "adopt" those protocols and then
implement the methods listed in the protocols. Hence, in the Swarm Reference materials present the
libraries as a collection of classes, each of which adheres to a given set of protocols.
30
Chapter 3. Nuts and Bolts of Object-Oriented Programming
To the Swarm user, the distinction between class and protocol is not vital most of the time. The most
important Swarm protocols, such as the type Swarm (from objectbase/Swarm.h) or SwarmObject (from
objectbase/SwarmObject.h), can be used as if they were classes. In the Swarm Reference Guide, there is
a list of all protocols. The protocols that adopt the CREATABLE protcol are the ones that users can use as if
they were factory objects. For example, the EZGraph protocol adopts the CREATABLE protocol, so when
the user needs to create an instance, so the observer swarm file can use the EZGraph to create graphs.
Almost all of the Swarm protocols adopt the CREATABLE protocol, so they can be used as if they were
classes from which users subclass to make model swarms or individual agents. It should not matter to the
user that these are abstract defined types that have adopted protocols (taken on the obligation to
implement methods listed in protocols). The class SwarmObject, for example, adopts protocols Create and
Drop as well as CREATABLE. This means that the user can act as if there is a class called SwarmObject,
and that the SwarmObject will be able to respond to class methods like createBegin, and that
instances created by SwarmObject will be able to respond to createEnd, drop, or any other method
that is listed in a protocol listed by SwarmObject.
One of the principal advantages of protocol usage is that there will be compile-time warnings if the
user’s code tries to send a "bad message" to an object. If a message tells an object to goOutside, and
none of the protocols adopted by that agent have a method called goOutside, then the compiler will
warn the user about it. In a crude way, adopting a protocol is like advertising that a class can do certain
things, and the compiler enforces a ‘truth in advertising’ policy. If the compiler flags include -WERROR,
causing all warnings to be treated as errors, then these warnings will stop the compilation.
The fact that many of the important components of the Swarm library are organized as protocols can,
however, be important in some notation. Early versions of Swarm had less emphasis on protocols than
the current version. As a result of the introduction of protocols, usage conventions have changed. In
Swarm, there is a class List that can be used to create collections. In the "old days" of Swarm, one would
create a statically typed object of class List, as this code indicates:
List * listOfPuppies;
listOfPuppies=[List create: [self getZone]];
Swarm no longer allows users to statically allocate objects in this way. This code will make the compiler
crash, because there is no class inside Swarm called List, there is only a protocol. The compiler will fail,
and the user will get a vague warning about a parse error in the vicinity of the List usage.
We know from the Swarm Reference Guide that the List protocol advertises that it adopts the CREATABLE
protocol, so the mistake is not in the usage of List to create the listOfPuppies. Rather, the mistake is in
the declaration of the listOfPuppies itself. If one needs to define a variable listOfPuppies that has
the properties of a List class item, the recommended approach is to create a variable of type id and
indicate the protocols adopted by that object in brackets:
id
List
listOfPuppies;
listOfPuppies=[List create: [self getZone]];
31
Chapter 3. Nuts and Bolts of Object-Oriented Programming
It is also legal to define listOfPuppies as a generic object, as in
id listOfPuppies;
listOfPuppies=[List create: [self getZone]];
This usage is legal, and the program should compile without difficulty. The only shortcoming is that the
user will not be warned if the listOfPuppies object is sent any inappropriate messages within the
program. When these inappropriate messages are sent during the run, then the program will crash,
possibly with a message that the object listOfPuppies does not respond to the message it was sent.
Since almost all of the important pieces of functionality in the Swarm library are now written in the
protocol format and are CREATABLE, these details may be important. However, these details do not
significantly change the way applications are designed. Swarm entities can still be treated as classes.
32
Chapter 4. The notion of a Swarm
As explained in an earlier section, Swarm is designed for hierarchical creation of computer objects. The
observer swarm object is created first, and it creates a user interface and it also instantiates the model
swarm, and the model swarm then creates levels below and schedules their activities.
One of the original intentions of the Swarm project was to give users the ability to create high quality
code with a minimum of fuss. The Swarm library creates a sequence of classes that accumulate and
refine the ability to create simulation objects, manage memory for them, and schedule their activities.
4.1. Primary and Auxiliary Agents
Terminology can cause confusion because computer programmers may use the term "agent" in a way
that befuddles scientists. To the scientist, the term agent refers to a theoretically important entity that is
modeled by a simulation. To a programmer, the term agent is usually broader, something like object. As
a result, there is sometimes slippage in a discussion of "agent-based modeling" because an understanding
of the term agent is not shared.
We intend to finesse this (big surprise!) by creating terminology for two kinds of agents. This separation
of agents into primary and auxiliary groups is created solely for discussion in this manual. The idea is
that primary agents are the ones that the research sets out to model in the first place. They are described
in a theory, they have substantive importance. Usually in this sense we have representations of important
"actors" and one or more objects to represent the world in which they interact.
To the surprise of most new users, it is often also necessary to create auxiliary agents that facilitate the
work of the primary agents. For example, in a model of majority rule voting, one can have primary
agents like voters and candidates. There may be a need for an auxiliary class called Counter, a class that
can spawn objects that can be used to tally the votes that are cast.
In most cases, when we talk about multi-agent systems, we are referring to the primary agents.
4.2. The (Swarm) OOP way
Swarm models follow a common syntax that helps users to understand the way their parts interact. The
observer swarm and the model swarm are typically designed in a similar way. Methods that will appear
in many classes, for example, include:
Objective C example
Java example
+ createBegin; - createEnd; - buildObjects; -
createBegin (); createEnd () buildObjects ();
buildActions; - activateIn;
buildActions (); activateIn ();
There are also methods that allow the input and output of information from the object. By custom, these
33
Chapter 4. The notion of a Swarm
are usually prefaced by the words get and set. For example:
Objective C example
Java example
-setParameterValue: (int) value; -(int)
Object setParameterValue (int value); int
getParameterValue;
getParameterValue ();
These methods can be written to so that setParameterValue causes an object to set some internal
parameter equal to a value, and getParameterValue will cause the agent to report back the value.
In addition,there will be methods that carry out the specialized actions dictated by the substance of the
research problem.
The model swarm object is usually subclassed from Swarm and it is the primary object that is
responsible for telling subclasses to build their agents. The model swarm also give those agents a place in
memory, and schedules their activities.
4.3. Managing Memory in Swarms
The allocation and deallocation of memory is a necessary feature in any simulation project. Allocating
and deallocating memory is one of the most troublesome elements of designing software and Swarm is
well equipt to deal with that problem. Swarm provides libraries for this purpose which make the process
transparent to user.
In Swarm, objects are created and dropped using a notion of memory zones, and the "dirty work" of
allocating memory is handled inside the libraries. In the next sections, we discuss the way objects are
created and given a place in memory. When those objects are no longer needed, the program can send
that object the drop message, which removes it from memory.
4.4. What goes on in the buildObjects method?
If the reader inspects just a few of the sample Swarm programs, the importance of the building objects
should become apparent. Objects are named and memory is set aside for them in this stage. In the
buildObjects method, one typically finds commands that not only create the objects being used in
the current class, but there will also be a command which instructs the next-lower level of agent to create
its objects.
Consider the rich example provided by the code from the Arborgames model. In the buildObjects
method of the observer swarm, one finds a large number of commands that create graphical display
objects (objects subclassed from the graph library). One also finds commands that create the simulation
control panel, which will appear on the screen and offer the user the ability to start and stop the
simulation.
34
Chapter 4. The notion of a Swarm
It is vital to note also that the buildObjects method in the observer swarm file triggers the creation
of the next lower level of agents. It creates a memory zone and creates a model swarm in that memory
zone. Using the current style, the code would look like so:
Objective C example
Java example
forestModelSwarm = [ForestModelSwarm create:
forestModelSwarm = ForestModelSwarm
self]; [forestModelSwarm buildObjects];
(this.getZone());
forestModelSwarm.buildObjects ();
In the Objective C case only, users may find older versions of this code which accomplish the same
purpose, but are slightly more verbose and do not take into account the fact that the observer swarm
object is itself a memory zone.
modelZone = [Zone create: [self getZone]];
forestModelSwarm = [ForestModelSwarm create: modelZone];
[forestModelSwarm buildObjects];
Note the importance of the last line in either of these excerpts. The first line of the code creates the model
swarm object (in this case, it is called forestModelSwarm), but the last line tells that object to create
its own objects by telling the forestModelSwarm to execute its own buildObjects method. To
find out what that implies, one must go look in the implementation file (or .java file in the Java case) for
the ForestModelSwarm to see what objects it creates.
4.5. What goes on in the buildActions method?
In the standard case, the buildActions method has two important components. It creates objects of
these two classes.
• ActionGroup:
• Schedule:
an ordered set of "simultaneous" events and
controls how often the elements in the action group are executed
In the buildActions methods of the Arborgames model, there are plenty of interesting examples. In
the observer swarm, for example, there are commands that schedule the updating of the graphical display
and also there are commands that instruct the lower level classes to execute their own buildActions
methods.
In the ModelSwarm’s buildActions method, one typically finds the heart of the substantive action of
the simulation. Commands tell agents, or lists of agents, that they should carry out their methods. These
commands are placed into instances of the ActionGroup class, which means that they will all be repeated
whenever the group is repeated. The repetition is controlled by commands that create schedules and
indicate how often those schedules will be repeated.
35
Chapter 4. The notion of a Swarm
4.6. Merging Schedules in Swarms
As mentioned above, there can be buildActions methods in many different classes. Since each one
can create action groups and schedules, it is important that all of these activities are coordinated in a
logical way. One of the strengths of the Swarm toolkit is that it maintains a coherent, master schedule.
The schedules of each sub Swarm are merged into the schedule of next higher level. Finally all schedules
are merged in the top level Swarm. This synchronization is managed by the Swarm Activity library when
the activateIn:method is called in each successive element of the hierarchy.
This multi-level integration of swarm schedules means that the model can indeed be thought of as a
nested hierarchy of models.
Figure 4-1. Nested hierarchy of Swarms
Schedule
Probes
The Interface
The Model
Swarm
Agent
Sub-Swarm
Sub-sub-Swarm
36
Chapter 4. The notion of a Swarm
A Swarm as a Virtual Computer
Figure 4-2. Swarm virtual computer
At an even more abstract level, the Swarm libraries can be thought of as a layer on top of the operating
system’s kernel. This notion is especially relevant when the user can pause a simulation and individually
interact with agents, reviewing and changing their internal values.
37
Chapter 5. The Graphical User Interface
5.1. Elements of the Swarm GUI
Swarm provides a number of classes and protocols which generate a graphical user interface (GUI) to the
user running a Swarm simulation, including:
Figure 5-1. Line graphs (in this case, a time series)
38
Chapter 5. The Graphical User Interface
Figure 5-2. Histograms
Figure 5-3. Rasters of discrete two-dimensional data
39
Chapter 5. The Graphical User Interface
Figure 5-4. Example ProbeMaps for the tutorial ModelSwarm and ObserverSwarm
A custom ProbeMap
with 1 MessageProbes
Model
Swarm
A custom ProbeMap
with 4 MessageProbes
Observer
Swarm
ControlPanel is
provided by kernel
All except the last (probes) are fairly self-explanatory and will be dealt with in subsequent chapters. This
section describes how probes appear to the user running a Swarm simulation, and how the user can
manipulate them. Probes also serve purposes other than assisting graphical widgets that the user can
manipulate. However, in this section we will focus only on their role in the context of the GUI of a
running simulation. The construction of the probes using the Swarm libraries is also left to a subsequent
chapter.
5.2. GUI Probe Displays
Graphical probes allow a user to view a snapshot of any object in a Swarm simulation in a graphical
form. There are two distinct kinds of displays the user might see:
•
DefaultProbeMaps. If an object to be probed is specified without any particular ProbeMap being
specified, then the ProbeDisplay generated will provide a window of class DefaultProbeDisplay,
which displays all the variables resident in that class structure.
40
Chapter 5. The Graphical User Interface
Figure 5-5. Default ProbeMap (also showing the superclass)
41
Chapter 5. The Graphical User Interface
•
CustomProbeMaps. If a ProbeMap is specified then the ProbeDisplay follows exactly the specification
as represented by the contents of a ProbeMap. When used in this manner, ProbeDisplays can generate
tailored interfaces to objects (so for example, we have purposefully hidden certain instance variables in
the MousetrapModelSwarm class, and have shown only one of the methods which the class understands).
Figure 5-6. Custom ProbeMap
5.3. Using the GUI Probe Display
Common to both the standard ProbeDisplay and the CompleteProbeDisplay:
•
The different fields in the ProbeDisplay can be updated by typing in new values and pressing Return.
However, certain fields (containing pointers or ids, for example) cannot be modified and will generate
a beep if such a modification is attempted.
•
If an instance variable/argument slot is defined to hold an object, then that object can be
drag&dropped into another variable/argument slot by clicking on it with the first mouse button (a
small rectangle with the name of the object will appear - simply drag it to another object-typed
variable/argument slot and release the mouse button).
•
Also, if an instance variable/argument slot is defined to hold an object, then that object can be
inspected by clicking the entry for that variable/argument slot with the third mouse button (a
ProbeDisplay for that object will be generated).
Available Only on the Customized ProbeDisplay:
42
Chapter 5. The Graphical User Interface
•
Note that the sunken label at the top of the ProbeDisplay is also active. By clicking on it with the first
mouse button you get a drag&drop’able representation of self . By clicking on it with the third
mouse button you get a CompleteProbeDisplay to self .
Available only on the CompleteProbeDisplay:
•
•
•
The green superclass button can be used to display the succesive superclasses of the object being
probed.
The red hide button can be used to hide classes which are irrelevant thus reducing clutter.
The hide button on the lowest class in the hierarchy has a special meaning since clicking on it
dismisses the entire ProbeDisplay.
43
Part II. Swarm Applications:
Examples and Illustrations
44
Chapter 6. The Swarm Tutorial: Reprise
Most Swarm users share terminology and perspective that allows them to communicate with each other
about modeling projects. These shared elements are first introduced to most users in the Swarm Tutorial,
a series of exercises prepared by Christopher Langton. The Tutorial exercises are distributed on the SDG
web site in the swarmapps package.
Do Your Homework!
There is no way to get anywhere with Swarm unless you are willing to get your hands dirty. The
Swarmapps package provides some examples of swarm programs that deserve study. That
package also provides the bug tutorial, a series of exercises that all Swarm users must read, edit,
compile, study, test, explore, and investigate.
If you are new to Swarm, and don’t know much about programming in general, and possibly less
about Objective-C in particular, the tutorial series is a perfect place to start. Even if you are an expert
programmer, a study of the tutorial is the right place to start. Many of key terms in Swarm model
building are introduced in the tutorial and there is simply no substitute for a careful analysis of the
material.
Java Stops Here!
From hereon in, the Guide will only refer to examples in Objective C. The Guide is in the process of
being updated to include Java examples of the basic Swarm concepts covered in the following
chapters. That said, although many of the concepts described are described in Objective C terms,
most of the concepts carry over intact into the Java context, and (mostly!) only differ in fairly trivial
syntactical ways, so it possible that Java users can benefit from the following sections
6.1. Tutorial Progression
The tutorial gameplan is as follows: Begin with a program written in C that is little more than a basic
"hello world" program about a "bug" creature that wanders. Through a series of steps which first
introduce Objective-C and then the Swarm hierarchical modeling approach, one can gain a good
grounding in Swarm modeling.
The tutorial outline is as follows:
1. simpleCBug. Simple C code about a bug
45
Chapter 6. The Swarm Tutorial: Reprise
2. simpleObjCBug. Bug is now Objective-C class
3. simpleObjCBug2. Adds FoodSpace object
4. simpleSwarmBug. Introduces the ModelSwarm as the central organizing element. From the class
Swarm in the Swarm library, this code creates subclass ModelSwarm, and the instance of ModelSwarm is
created and called modelSwarm (in main.m). In the class ModelSwarm, one finds an implementation
of the Schedule class, the workhorse that keeps the Swarm train moving on time.
5. simpleSwarmBug2. Introduces the bugList, an instance of the List class, and illustrates some
ways in which simulations with many agents can be organized.
6. simpleSwarmBug3. Introduces the Swarm class ObjectLoader that the can grab data from a file and
read it into an object (in this case, the modelSwarm).
7. simpleObserverBug. Subclasses from the Swarm class SwarmGUI to create a new class
ObserverSwarm, an instance of which is created and called observerSwarm. This is the first
example with a complete Swarm hierarchy which begins with main.m and translates actions from
ObserverSwarm to ModelSwarm to individual agents.
8. simpleObserverBug2. This example adds probes that allow users to click on graphics to reveal
information inside them.
9. simpleExperBug. Introduces the possibility that a simulation might be run over and over in "batch"
mode while the graphical interface reports summaries of the runs to the user.
6.2. What Are You Supposed to Learn from the
Tutorial?
So, after you worked on the tutorial for 20 hours or so, what then? You should know all kinds of details
about how Swarm can be used, of course, but there are some bigger themes.
It is not vital to know how to model bugs (although, perhaps for an entomologist...), rather, it is vital to
understand that Swarm is a toolkit that provides a housing for a modeling exercise. Swarm imposes no
inherent limitations on the nature of agents that can be represented within its framework.
Don’t read much further in this user guide until you work on the tutorial. You will know if you have
worked on it long enough when you understand clearly each of the following points.
•
Swarm has many classes to make the modeling job easier. There are workhorse classes like Swarm,
and SwarmObject, but also there are many "little helpers" like List. Getting to know the
SwarmGUI,
46
Chapter 6. The Swarm Tutorial: Reprise
ins-and-outs of these little helpers is extremely important.
•
Swarm handles memory details. Did you note that there are no malloc and free and other standard
C memory-managing commands in Swarm code? Those commands exist, but they exist inside the
Swarm library, and they are accessed on behalf of users who use create or createBegin and
drop to access memory for objects and get rid of them. To create objects (instances of classes) in
Swarm, there must either be a createmessage sent to a class or there must be a
createBegin/createEnd pair that serves as bookends for commands that create an instance, set
its internal state, and complete the instantiation.
•
Case is important. Including the right header files may give you access to "factory objects" like List
or Schedule. You can use any name you like for the objects that are created as instances. By custom, an
instance of a class–an object–is named in small letters, such as bugList as an instance of List or
modelSchedule as an instance of Schedule. In the tutorial, when there is a single instance of a class
to be created, by convention, it is typically named the lowercase version of the class name, such as the
foodSpace object which is an instantiation of FoodSpace.
•
Neatness counts. As in any kind of programming task, neatness counts. Classes in Swarm are created
with methods that group together their jobs by functions. One will often find, in ObserverSwarm for
example, commands that create a modelSwarm instance and then issue it these commands:
[modelSwarm buildObjects];
[modelSwarm buildActions];
The buildObjects method creates objects and buildActions creates schedules. If one wanted to,
one could build a gigantic method in the ModelSwarm class called doStuff and then call that method
with:
[modelSwarm doStuff];
Programs written with this approach are hard to proofread and manage. It is much better to write small
methods, each of which accomplishes a relatively specific task.
1.
•
There is often a need for "record keeping" classes. In order for data to be displayed meaningfully
in a graph, for example, it must be provided to the graph object in a format that the graph object can
handle. The class World in simpleObserverBug is subclassed from Swarm’s Grid2d class.
•
Graphics are optional, but nice. Commands in the Observer Swarm control the graphical display.
There are many kinds of graphs and ways to alter their appearance. It is not necessary to design a
Swarm program to make pretty pictures, however. One might just as well run in a "batch" mode that
prints numbers into files for later inspection. There is a useful example of the batch mode in the
Heatbugs code.
•
Open Source means open the source. To find out what messages an instance of a class will respond
to, you should first consult the API 1: the Swarm Reference Guide. In most cases the average user will
Application Programmers Interface
47
Chapter 6. The Swarm Tutorial: Reprise
encounter, consulting the API is sufficient, but when you really need to know how something is
implemented (either to understand the efficiency implications of using a certain method in your
program or if a particular method appears to not behave as documented), you can go look in the
Swarm source code itself. That’s what the members of the Swarm team do when users ask questions.
6.3. After the Tutorial: What now?
After the tutorial exercises are finished, one can then proceed to study the example applications in
swarmapps and others that are available (for free!) on the web. The application called Heatbugs in
the swarmapps package gives a rich and workable example of a simulation that builds on the ideas in
the tutorial.
48
Chapter 7. Creating Objects In Swarm
The way in which objects are created depends on a computer’s compiler and the software libraries
available to the user. The implementation of Objective C on a system using the GNU compiler will not
be exactly the same as the implementation on a Next system. While most of the points made in the
literature on Objective C easily carry over to Swarm modeling, the commands needed to create objects
are an exception. In the Objective C manual for Next systems, for example, one finds a syntax methods
init and alloc that are not used in Swarm. That’s why a brief study of object creation is important.
7.1. Begin at the Beginning
Pick any Swarm application you like, such as Heatbugs. Look in main.m. What do you find? There’s a
check to see if the GUI mode or batch mode is to be run, and depending on that choice, either the
ObserverSwarm or the BatchSwarm is designated as theTopLevelSwarm.
Suppose we have do not do anything special when compiling and running the heatbugs executable, so
the GUI mode is used. In that case, the relevant code in main.m is this:
if (swarmGUIMode == 1)
{
theTopLevelSwarm = [HeatbugObserverSwarm createBegin: globalZone];
SET_WINDOW_GEOMETRY_RECORD_NAME (theTopLevelSwarm);
theTopLevelSwarm = [theTopLevelSwarm createEnd];
}
The first command inside the brackets tells the class HeatbugObserverSwarm to execute its
createBegin method and return an object which is to be named theTopLevelSwarm. In this
example, the HeatbugObserverSwarm is the class and also serves as a "factory object", an object that can
build instances of its class. The second command is a macro that saves window positions on subsequent
runs of the program. It is set between the createBegin and createEnd methods because it is
setting permanent features of the object theTopLevelSwarm. The last command "seals" off the
creation phase by telling the recently created object theTopLevelSwarm to run its createEnd method.
In the Swarm Reference guide, many of the protocols have methods that are divided between three
phases. The phases are "Creating", "Setting", and "Using". It is important to pay attention to the phase in
which a method is listed. Methods or macros listed in the Creating phase must only be used between the
createBegin and createEnd messages. If such a method is used after the createEnd, it will cause
the program to fail. Similarly, a method in the Using phase must be used only after the createEnd method
has finished. Methods in the Setting phase can be used at any time in an object’s life cycle.
49
Chapter 7. Creating Objects In Swarm
7.2. Detailed Look at createBegin/createEnd
Now take the next step and look at the createBegin and createEnd methods that are called by the
code in main.m. Follow the steps into HeatbugObserverSwarm.m. Here you find the methods
+createBegin and -createEnd. The plus sign on createBegin indicates that this method
cannot be executed by an instance of the class HeatbugModelSwarm, but rather only by the factory object.
Here is a portion of the method createBegin:
+ createBegin: aZone
{
HeatbugObserverSwarm *obj;
id ProbeMap probeMap;
obj = [super createBegin: aZone];
obj->displayFrequency = 1;
// [Code that creates "probemaps" omitted here]
return obj;
}
This a good example of how the Swarm toolkit handles the creation of objects. The pointer to the class
HeatbugObserverSwarm named obj is defined. Since HeatbugObserverSwarm is subclassed from GUISwarm,
it is important to be sure that all of the important variables of a GUISwarm object are initialized and
inherited by HeatbugObserverSwarm. This is done in one step by telling the superclass to execute its
createBegin method. Since the classes are linked together in a hierarchy, each higher level class in
turn executes its createBegin statement. That is how the instance of the class ends up setting values
for all the variables that it inherits.
The createBegin method of its superclass is called to put the created objects in aZone, which is the
name of the space passed in from main.m. The memory zone that is created is returned and set equal to
obj. Then the return obj command gives back the created object to the calling code, in this case
main.m, which then treats it as theTopLevelSwarm.
The reader can investigate in the Swarm source code to see that GUISwarm inherits through a hierarchical
chain the ability to create memory zones and objects. GUISwarm is subclassed from Swarm, which in turn
inherits from CSwarmProcess. That class is defined in the activity directory of the source code in a file
called SwarmProcess.m. This is the first place where you will find createBegin and createEnd
methods as you move up the inheritance tree, so it must be that these are the methods that are executed
when super is told to do something in this code.
The createEnd method in HeatbugObserverSwarm.m is quite simple:
- createEnd
{
return [super createEnd];
}
50
Chapter 7. Creating Objects In Swarm
In a case like this, when the super class is inside the Swarm library, it may be hard to figure out exactly
why this command is needed. As a matter of fact, it is not necessary in this case at all, but it does not do
any harm. If it were omitted from this class, then this class would just inherit createEnd method from
the somewhere above in the family tree. By using it in this way, we make sure that the commands of the
super class’s createEnd method are executed, and this may be important because those steps might
initialize some variables that this class inherits.
There are cases in which the createEnd statement may be more substantial. In the createBegin
phase, we typically find commands that set permanent features of objects. Some methods that initialize
instance variables can also be included. In the example above, the variable display frequency
inside *obj is set equal to 1. These variables are set at the first possible opportunity because other
variables may depend on them. After main.m calls the createBegin method, main.m may include
statements that further tailor the state of the object and those commands may depend on values set in
createBegin. Finally, when main.m calls createEnd, a new slew of commands may be executed
that define further elements of the object.
The createEnd statement may be a convenient place to put any code that completes the initialization
of an object. For example, suppose inside there is a variable called age. In createEnd, one might find
this:
- createEnd
{
[super createEnd];
age=0;
return self;
}
The super class’s createEnd method is executed, which will assure that any variables initialized there
are set properly. Then the instance variable age is set equal to 0. (Sometimes you will find examples in
which createEnd is a "garbage can" that collects a large number of commands that set initial values
for variables inside the object. These commands might as well be regrouped and put into a new method
inside the object that might be called setInitialValues that would be executed after the createEnd.
The readability of the code is enhanced that way.)
The create message causes the receiver to carry out both its createBegin and createEnd
methods. Why didn’t we always use create? Well, sometimes we need to define variables between the
createBegin and createEnd steps, as seen in main.m. If there is no need to set values in that way
(no methods are listed in the Creating phase in the Swarm Reference Guide are used), then create is
enough.
7.3. Swarm Zones and Recursive Objects Creation
51
Chapter 7. Creating Objects In Swarm
One of the most troublesome exercises in computer programming is the management of dynamically
allocated memory. The correct usage of dynamic memory requires a great deal of care, and when a
portion of memory is no longer needed, is must be "freed," made available to the central processor. If
memory is allocated and then forgotten, a "memory leak" is said to exist because the program does not
tell the operating system to reclaim unused memory addresses.
The Swarm libraries are designed to handle memory allocation with a minimum of user intervention. The
createBegin and create commands allocate memory and the user is not expected to think about where
the RAM comes from to store an object. Similarly, when a program is finished with an object, that object
can be sent the drop message and that should take care of freeing the memory that the object used.
The create statements used in Swarm typically have this flavor:
someUserCreatedObject = [SomeSwarmLibraryObject
create: someMemoryZoneHere];
(The method create can be replaced by a createBegin/createEnd pair as described above.)
More specific examples are discussed below and are of course scattered throughout the Swarm examples.
The important thing is that an object in the Swarm library is able to respond to a method that creates an
instance of itself and that instance lives in a memory zone that is managed by the Swarm library.
In the main.m file, the top level Swarm is created and it is allocated into an instance of Zone called
globalZone.
theTopLevelSwarm = [HeatbugObserverSwarm createBegin: globalZone];
This globalZone is created when the initSwarm function is called at the beginning of a swarm
program. The top level Swarm is told to create itself in that space. Any Swarm objects of type Swarm or
GUISwarm are able to serve as memory zones. Inside the ModelSwarm one sees a command such as:
probeMap = [EmptyProbeMap createBegin: self];
This tells the EmptyProbeMap class in the Swarm library to create an instance of itself in the memory zone
allocated by the ModelSwarm, and that allocated object is to be named probeMap.
The objects at the top level of the swarm hierarchy (whether Swarm or GUISwarm) have the power to
"create space" for objects that live inside them. As the code in main.m proceeds through the creation of
theTopLevelSwarm, it is allocating memory and setting other important creation-state variables.
Then, that newly created object is told to go through its paces:
[theTopLevelSwarm
[theTopLevelSwarm
[theTopLevelSwarm
[theTopLevelSwarm
buildObjects];
buildActions];
activateIn: nil];
go];
When you go look at the buildObjects method executed by the theTopLevelSwarm, what do
you find? Depending on what edition of the Heatbugs source you have, you will find something like this:
52
Chapter 7. Creating Objects In Swarm
heatbugModelSwarm = [HeatbugModelSwarm create: self];
In this code, the self is the observer level, meaning that the HeatbugModelSwarm class is told to create an
instance of itself in the memory zone provided by the observer, and that allocated object is named
heatbugModelSwarm.
If you then follow the code into the HeatbugModelSwarm.m file, you find it has createBegin commands
that initialize a number of instance variables and objects. Unless you have a pretty old piece of code,
those objects will be created in the memory zone self , the space provided by the model swarm itself.
Objects that are of type SwarmObject are not memory zones, and so when objects are created inside
classes that inherit from SwarmObject, a command to allocate memory must be used.
bugPixmap = [Pixmap createBegin: [self getZone]];
The bugPixmap object is created inside Heatbug.m, but the name of the memory zone where that object
"lives" has to be retrieved with the [self getZone] command. The [self getZone] method returns the
name of the zone in which the bug exists, which in this case is heatbugModelSwarm.
7.4. Using Swarm Library Objects and Header Files
It often seems as if objects appear by "magic." It is more reasonable to say they are provided by the
Swarm library in a way that is not entirely obvious. For example, suppose you want to create a list of
objects. One can declare an object listOfFriends and then create it, like so:
id listOfFriends;
listOfFriends = [List create: self];
You see little bits like this all over example code from Swarm projects. Where does this List class object
come from? Why are you able to use it even though there is no import statement for List.h at the top of
the program? It seems as though, if you want to make a call on the List class, you ought to include
List.h at the top of your file, right?
To use many of the Swarm classes, it is not necessary to use such an explicit import statement since you
are not subclassing. Instead, it is necessary to include one of the "general purpose" header files that
corresponds to the major sections of the Swarm library. To create List instances, for example, one needs
to import the "general purpose" collections.h, which declares not only List, but other collections classes
as well.
The general purpose header files can be found in the include directory of your swarm installation. They
are:
•
activity.h
53
Chapter 7. Creating Objects In Swarm
•
analysis.h
•
collections.h
•
collections.h
•
gui.h
•
objectbase.h
•
random.h
•
simtools.h
•
simtoolsgui.h
•
space.h
As you browse the Swarm Reference Guide, you will find many protocols that adopt the CREATABLE
protcol, which means that you can use them to create objects in your code. When you use them, import
one of these library headers. For example, to create List objects, import collections.h. That header file
should be included in any file that refers to a List, Map, Set, or any of the other creatable collections
objects.
Should the general purpose header file be included in the .h (header) file or the .m (implementation) file
of your class? Generally speaking, it is only necessary in the .m file, since that is where you are doing the
work of creating the object. The only exception to this rule arises if you refer to the protocol protocol in
your header file. It is necessary to include the collections.h in your header file if you want to declare an
object that will adopt a protocol, as in
id
List
aList;
If you forget to import collections.h, the compiler will fail and say there was a parse error. This happens
because it does not have a class or protocol List in its purview, and so it assumes you have made a
typographical error.
On the other hand, if your header file uses a general declaration, as in
id aList;
then there is no need to include collections.h in the header file. It should only be included in the
implementation file for your class.
Explicit importing of a class-specific header file is only required when you need to subclass from that
file. Since your header file declares that you are creating a class, and it defines the superclass, then the
import statement must be included in your header file. SwarmObject is the most frequently used
superclass, so consider it for example. Your class’s header file should import both the general purpose
library header objectbase.h as well as objectbase/SwarmObject.h
We will summarize this by offering two rules of thumb:
54
Chapter 7. Creating Objects In Swarm
•
if you use a class that conforms to a protocol (such as List) to create objects in your own program,
you need to include one of the general Swarm library headers.
•
if, however, you are subclassing from a class that adheres to a protocol, you need to import the header
file for that class.
We hasten to point out that not all of the Swarm protocols will allow you to subclass from them. To avoid
some serious complications, the List type cannot be used to create user-specific classes. One can create
Lists and use them as intended, but one cannot create variants of the Swarm List class to customize their
behavior for a specific project.
As good coding practice, you should try to keep your files clean. Each file should only include imports
for header files that you actually reference in that particular interface/implementation file pair. Don’t
adopt a "include everything" mentality when importing files.
7.5. Variations on a Theme
Once you have seen how an object can be created, you should start thinking about how your simulation
will be organized. Within the standard Swarm approach, you begin with main.m allocating space for the
top level swarm, which may be either a gui or batch swarm. Then the model swarm object is created in
that top level, and the model swarm in turn creates the substantively important objects that embody the
model you seek to investigate.
There are a number of different ways in which the creation of objects can be managed. Some are more
intuitive than others, some are more "reusable" than others. Since the first Swarm exercise for most
people involves bugs, it is not surprising that many examples of Swarm code follow the convention of the
bugs project. As found in SimpleSwarmBug3, for example, the ModelSwarm.m file creates the bug objects
in this way:
- buildObjects
{
Bug *aBug;
int x, y;
[some lines omitted here]
bugList = [List create: self];
for (y = 0; y < worldYSize; y++)
for (x = 0; x < worldXSize; x++)
if ([uniformDblRand getDoubleWithMin: 0.0 withMax: 1.0] < bugDensity)
{
aBug = [Bug createBegin: self];
[aBug setWorld: world Food: food];
aBug = [aBug createEnd];
[aBug setX: x Y: y];
[bugList addLast: aBug];
}
55
Chapter 7. Creating Objects In Swarm
reportBug = [bugList removeFirst];
[bugList addFirst: reportBug];
return self;
}
This code cycles over the spaces in a lattice, and if the conditions are right, it causes the Bug class to
create an instance of itself, called aBug , and then that instance is added to the bugList.
Some changes can be made to make this code a little more versatile. For example, create a new method
called spawnOneBug that moves out the bug creation steps.
- buildObjects
{
Bug *aBug;
int x, y;
[some lines omitted here]
bugList = [List create: self];
for (y = 0; y < worldYSize; y++)
for (x = 0; x < worldXSize; x++)
if ([uniformDblRand getDoubleWithMin: 0.0 withMax: 1.0] < bugDensity)
{
[self spawnOneBug];
}
reportBug = [bugList removeFirst];
[bugList addFirst: reportBug];
return self;
}
- spawnOneBug
{
aBug = [Bug createBegin: self];
[aBug setWorld: world Food: food];
aBug = [aBug createEnd];
[aBug setX: x Y: y];
[bugList addLast: aBug];
return self;
}
Why is this more versatile? By isolating the steps necessary to create a bug and add it to the bugList in
the spawnOneBug method, we make it much easier to add new bugs to the simulation as time goes by.
7.6. How Do You Kill Off Those Poor Little Devils?
56
Chapter 7. Creating Objects In Swarm
If you look at Swarm examples for any amount of time, you can’t help but run into objects that get
dropped. Little "helper objects" like indexes for lists are created and just as readily discarded with the
command:
[someIndexName drop];
If everything goes the way it is supposed to, this should take the object out of memory and free that
memory for the program to reuse.
What if the objects inside your simulation are supposed to be born and killed through time? The Swarm
bug tutorial mainly focuses on models in which a population of actors is created at the outset and those
individuals remain in existence throughout the length of the program. What if we wanted code to model a
world in which the happy HeatBugs could reproduce themselves, or what if the unhappy ones could die
and be freed from their never ending search for a place neither too cool or too hot?
The Swarm SugarScape model provides an excellent example of a way to manage the birth and death
of agents in an on-going model. The sss model’s ModelSwarm.m file contains the critical ingredients. It
has a method addNewRandomAgent which does what spawnOneBug does–it includes all the
commands that create an instance of a SwarmObject and initializes it. sss also provides a handy structure
to kill off agents and replace them with new ones. This is managed in a three stage process. The model
swarm creates a Swarm list object called reaperQueue. When an event occurs that forces an object
below the survival threshold, then that object is added to the reaperQueue by the agentDeath
method. Then the model Swarm’s schedule includes a command that removes the dead agents from the
reaperQueue. The reapAgents method transverses the list of agents who are to die, it removes
them from the list of active agents and then tells them to drop themselves from memory.
- agentDeath: (SugarAgent *)agent
{
[reaperQueue addLast: agent];
if (replacement)
// Replacement rule R (p.32)
[self addNewRandomAgent];
return self;
}
// remove all the agents on the reaperQueue from the agentList
// This allows us to defer the death of an agent until it’s safe to
// remove it from the list.
- reapAgents
{
id index, agent;
index = [reaperQueue begin: [self getZone]] ;
while ((agent = [index next])) {
[agentList remove: agent];
[agent drop];
}
[reaperQueue removeAll];
[index drop];
57
Chapter 7. Creating Objects In Swarm
return self;
}
58
Chapter 8. Doing the Chores: set and get
Object-oriented programming organizes the way programmers think about information in a new way.
The objects maintain their variables (the "instance variables", or IVARs for short) and the information
contained in those variables is private, self-contained within the object. This has benefits in the design of
code and it also captures some intuitions the autonomy of individual agents in a simulation exercise.
Objects are thus insulated, more or less, and although this makes some things easier to code, it also
makes some things more difficult. For example, in C a variable can be set and its value can be changed
anywhere in the program. In object-oriented languages like Objective-C, an object can hold several
variables and those values can only be changed by the object itself if we remain within the recommended
limits of good programming habits. Some ways to go outside those bounds will be discussed below, but
generally speaking it is a good idea to respect the fact that objects maintain their own data.
If objects are maintaining their own data, how do we manage information in a Swarm project. Early on in
the development of Swarm, the coders adopted a convention (common to Objective C, Java, Smalltalk
and numerous other object-oriented languages) that the term set starts a method name that sets a value
inside an object, such as setIdealTemperature or setAge. The term get is used as the beginning
of a method that causes the agent to return some value, such as getIdealTemperature or getAge.
8.1. Get and Set Methods
Get and set methods are needed to pass information among objects. For example, consider Heatbugs.
In the Heatbug.m code, one finds a methods that set information inside the bug and also methods that
retrieve information from it. Consider the method setIdealTemperature
- setIdealTemperature: (HeatValue)i
{
idealTemperature = i;
return self;
}
The Heatbug object has an instance variable called idealTemperature, and this sets the value of that
variable.
If some other object needs to know the heatbug’s ideal temperature, what has to be done? We would have
to add a method to the Heatbug.m that returns the value of idealTemperature. Something like this
might suffice:
- (double) getIdealTemperature
{
return idealTemperature;
}
59
Chapter 8. Doing the Chores: set and get
As much as possible, it is recommended that information be exchanged in this way. Hence, when the
observer swarm needs a list of all the agents in a simulation in order to create a graph, the model swarm
should have a method, such as getAgentList, that returns a list of agents that the observer swarm can
use.
8.2. Using Set Methods During Object Creation
Consider the way the model swarm level of a simulation can be designed. If the values of many variables
are set inside the ModelSwarm.m file, and those values are to be passed to the individual agents at the time
of creation, then the code that creates individual objects might be designed like this:
aBug = [Bug createBegin: globalZone];
aBug = [aBug createEnd];
[aBug setWorldSizeX: xsize Y: ysize];
[aBug setFoodSpace: foodSpace];
[aBug setX: xPos Y: yPos];
[aBug setIdealTemp: [uniformDblRand getDoubleSample]];
This code presupposes that the ModelSwarm.m file has pre-existing variables (probably integers) xsize,
size, xPos, and yPos, as well as an object foodSpace and an object uniformDblRand that can
give back a random number. This code also presupposes that set methods exist for the Bug class that can
get these jobs done.
There are some matters of "taste" and "judgment" that affect model design. One might ask, for example:
“why does this code set the ideal temperature in this way?” Why not create a method inside the Bug.m
file, such as initializeValues like so:
- initializeValues
{
idealTemperature= [uniformDblRand getDoubleSample]
return self;
}
If this method existed, then the code that creates the bug and sets values in it could have the command
[aBug setIdealTemp: [uniformDblRand getDoubleSample]];
replaced with this:
[aBug initializeValues];
This would achieve the purpose of setting the idealTemperature variable inside the object called
aBug . And, from the information-hiding perspective of object-oriented programming, it seems better
because the value drawn for the variable idealTemperature is never exposed to any other object.
60
Chapter 8. Doing the Chores: set and get
There are a few practical reasons why the first way of setting the ideal temperature might be preferred.
First, for the programmer’s convenience, it is nice to have as many of the "parametric" changes in a
single file as possible. The Bug class can be written and never edited again if all of the changes needed
are kept in the ModelSwarm.m file. Second, you might save memory dealing with these things in the
ModelSwarm.m file. Suppose that the object uniformDblRand has to be created in order to draw a
random number. If you insist on writing a method like initializeValues inside the Bug.m, then you
need to worry about how that random number generator object is created inside each bug object. It
certainly saves memory to create just one random generator in the ModelSwarm.m file and then draw
numbers from it inside the model swarm itself. There are some good arguments for this approach in the
literature on random number generation. The issue seems somewhat esoteric, but the argument is that
one is better off making repeated draws from the same random number generator than making one call
against each of the many random number generators. For reasons like this, Swarm examples tend to have
information translated into objects from the model swarm level, even though it is technically allowable to
have that information-creation process completely isolated within the object.
8.3. Passing Information Around
In order to send messages to objects from another class, it is necessary not only to use the correct
message, but also to import that class’s header file into the code. The ObserverSwarm.m file can only tell
the HeatbugModelSwarm to run its createBegin method if ObserverSwarm.m includes the header file for
the HeatbugModelSwarm. In HeatbugObserverSwarm.m, we find this:
#import "HeatbugModelSwarm.h"
The inclusion in the "m" file is sufficient if no reference to the HeatbugModelSwarm is necessary in the
HeatbugObserverSwarm.h file. It may be necessary to move the import statement into the header file (the
"h" file), however, if any references to a class are contained in the "h" file. In HeatbugModelSwarm.h, for
example, one finds these import statements:
#import "Heatbug.h"
#import "HeatSpace.h"
Since these are included, the variable and method definitions can refer to elements of these classes. The
variable list declares a pointer to an object of type HeatSpace:
HeatSpace *heat
and there is a method that has an object of type Heatbug as an argument:
-addHeatbug: (Heatbug *)bug;
61
Chapter 8. Doing the Chores: set and get
Many Swarm programmers have run into the following problem. As we have seen, It is not difficult to
have the model swarm level create an object. Through the set methods, various values can be set inside
the object by commands in the model swarm. However, the programmer wants the agent to be able to
access variables inside the model swarm as the simulation progresses. Suppose the HeatbugModelSwarm
has an instance variable called numberOfBugsAlive, and inside HeatbugModelSwarm we define a
method getNumberOfBugsAlive that returns that number. Suppose further we want any heatbug to
be able to find out how many bugs are alive at any instant. It is tempting to write inside Heatbugs.m
something like:
[heatbugModelSwarm getNumberOfBugsAlive];
to access that information. That construction will not work, however, unless we take some special
precautions. First, each Heatbug has to be made "aware" of what model swarm it belongs to. Inside
Heatbug.h, a variable would have to be defined:
id heatbugModelSwarm;
To set the value of this variable, the Heatbug.m file needs to have a method like this:
- setModelSwarm: (id) nameOfSwarm
{
heatbugModelSwarm = nameOfSwarm;
return self;
}
The value of the instance variable heatbugModelSwarm has to be set in the model swarm when other
values are set. When the HeatbugModelSwarm is creating bugs, it sets the other values like the ideal
temperature and the position, but further it would set itself as the model swarm to which that bug
belongs, like so:
aBug = [Bug createBegin: globalZone];
aBug = [aBug createEnd];
[aBug setWorldSizeX: xsize Y: ysize];
[aBug setFoodSpace: foodSpace];
[aBug setX: xPos Y: yPos];
[aBug setIdealTemp: [uniformDblRand getDoubleSample]];
[aBug setModelSwarm: self];
This assures that, inside aBug, the value of the instance variable heatbugModelSwarm is defined.
The final precaution is that the header file HeatbugModelSwarm.h must be imported into Heatbug.m. It is
very important that the import statement is added to Heatbug.m, not Heatbug.h. If it is added to
Heatbug.h, then the program will not compile because the inclusion causes a circularity: Heatbug.h is
included in HeatbugModelSwarm.h, but HeatbugModelSwarm.h is also included in Heatbug.h. Putting the
import statement in the "m" file avoids that ciruclarity. And, since the import has to be in the "m" file, the
62
Chapter 8. Doing the Chores: set and get
definition of the variable heatbugModelSwarm in Heatbug.h uses the generic type id, rather than a
specific type, such as HeatbugModelSwarm.
Many swarm examples are designed to avoid the need to allow objects created by model swarm to also
access information directly from it. This is usually done by creating a "space" object that keeps records
on the model swarm. Individual agents report their positions to the space and the space calculates any
necessary statistics about the swarm. The code for the space object can include get methods that the
individual agents can execute when they need information about their environment. This approach has
the added advantage that additional methods can be inherited from the general space objects in the
Swarm library.
8.4. Circumventing the Object-Oriented Guidelines
If one wants to avoid treating objects as containers that hold both data and methods, one can do so. The
C language allows the creation of global variables, ones that can be accessed in any part of the code.
These external variables exist outside a particular class and are thus available to it. The names used for
external variables must be unique. One cannot have a global variable called temperature as well as a
temperature variable defined as an instance variable for each object. There are some occasions in which a
program can be made to run more quickly if the whole get/set exercise is circumvented by creating a
global variable.
Another way in which the object-oriented guidelines can be circumvented is the use of the -> operator.
Suppose we have an object called dog and it has instance variables numberOfBones and
timeSpentSleeping . Ordinarily, within the object-oriented paradigm, the numberOfBones
would have to be set by a method such as setNumberOfBones. However, the language does allow a
shortcut of the following sort. The syntax dog->numberOfBones refers to the value of the instance variable
numberOfBones inside the object named dog . Hence, one could have a statement:
dog->numberOfBones = 3;
that sets the numberOfBones to 3 inside the dog. This kind of code is considered to be heavy-handed
and brutish because it does not use the methods written for the dog class with which it can set that value
and update it. A mistake made with the -> operator can corrupt the values inside an object.
Even though the usage of -> is discouraged, one does find examples of this syntax in Swarm code.
Almost all Swarm examples use this kind of shortcut in the createBegin phase of the model swarm
file, for example. This is done, however, because there is no alternative. We want the GUI probe display
to allow the user to adjust parameter values before the simulation commences. It is thus necessary to set
values inside some objects even before those objects have finished their createBegin/createEnd routine.
63
Chapter 9. Building Schedules
The core of the Swarm system is the set of features that enhance the design process of simulation
projects. The scheduling apparatus is one of the truly important elements of the Swarm system because it
offers a way to integrate the actions (and responses) many different agents in many different levels of a
simulation.
The actions that go on in a simulation are orchestrated by a objects that respond to the Schedule protocol.
Schedules are generally built in the buildActions method of an object. A Schedule is something like
a calendar in which one might put a red letter X when an important event is supposed to occur. The user
then defines what the important events are and integrates them into the Schedule. Then the Schedule must
be activated within the larger Swarm hierarchy of the object.
9.1. Building Schedules
Here is an example of some code that makes a simple Schedule. This sort of Schedule might appear in
the ModelSwarm level of the bug tutorial, for example.
- buildActions
{
modelSchedule=[Schedule createBegin: self];
[modelSchedule setRepeatInterval: 1];
modelSchedule = [modelSchedule createEnd];
[modelSchedule at: 0 createActionTo: aBug message: M(step)];
return self;
}
The first three lines in the method create the Schedule named modelSchedule. It might as well be
aBugsLife or any other name the user chooses. Between the createBegin and createEnd
methods, the only detail that this Schedule sets is the repeat interval, which is one. That means that all of
the actions assigned to the modelSchedule will be executed at each time step.
Once the code has created a Schedule object and set the repeat interval, then that object can be told to
insert actions into its Schedule. These actions cause the modelSchedule to build commands that
make the desired actions happen. No two simultions are exactly the same, of course, and so there are no
hard-and-fast rules. Generally, however, the modelSchedule is usually told to do either of two
methods, at:createActionTo:message or at:createActionForEach:message. The
first is used when the action of a single object must be Scheduled, while the second is used to Schedule
activities for whole lists.
In this simple example, the modelSchedule has only a single action, which instructs the one bug in
the simulation, whose name is aBug , to carry out its method called step. It might be that there is a
64
Chapter 9. Building Schedules
whole list of bugs, bugList, and each bug has to be instructed to carry out its step action. In such a
case, the command would be:
[modelSchedule at: 0 createActionForEach: bugList message: M(step)];
Some additional scheduling topics are discussed, but first the abstract question of selectors and the M
operator must be addressed.
9.2. What’s that M() Thing?
The commands that tell a Schedule to add actions usually have notation like like
M(someMethodName) at the end. M() is a macro used in Swarm to mean that the selector for the
message "step" is returned. Selector, or SEL, is a variable type in Objective C which refers to the abstract
name used in the compiler to refer to a method, in this case step. M is short for message (or method)
and was "created to save the time of typing @selector(myMethod)," in the words of Nelson Minar.
Many of the methods available in the Swarm library want input in the form of a selector, an symbolic
reference to a method name, and the M() notation is one shorthand way of giving it what it wants.
Some of the methods in the Swarm library will also want a list of parameters that go with the selector.
Suppose, for example, you have a psychologist agent that has this method:
- dealWithProblemBetween:anObject And: (id) anotherObject;
Presumably, you have some code in which there are objects, perhaps named bill and susan, and
when you are not needing the Swarm libraries for anything, you just tell your psychologist agent to carry
out that method with a command such as:
[yourShrinksName dealWithProblemBetween: bill And: susan];
The name of this method is dealWithProblemBetween:And: and its input variables are two
objects.
Now suppose you have a whole list of psychologists, and that you want each one of them to deal with the
problem between bill and susan. Furthermore, you want them to do it over and over again. To do that,
you need Swarm to schedule the job, so you run into that selector problem again. Notice in the Swarm
documentation that the Schedule protocol can respond to a method called createActionForEach,
which has a prototype like this:
- at: (timeval_t)tVal createActionForEach: target message: (SEL)aSel : arg1 : arg2
At the end of this definition, we see this method wants to be given a selector, and then the two arguments
that go with it. We know we can grab the selector of the command we want with
65
Chapter 9. Building Schedules
M(dealWithProblemBetween:And:), so when we tell the schedule object to make each
psychologist look into the bill and susan problem, we need a command like this:
[modelSchedule at: 0 createActionForEach: listOfShrinks message: M(dealWithProblemBetween:And:):bill:susan];
Admittedly, this notation seems ungainly, but it works.
It is a difficult understand the reason why the selector is needed in the first place. If one is not well versed
in Objective C, it may be best just to follow the form of the examples provided with Swarm and not
worry about the M() until it is absolutely necessary. 1
You can go look in the Swarm libraries to see many examples to show why selectors are so vital. Just by
coincidence, we happened to be looking at the Object2dDisplay.m file, where there is a particularly clear
example of how these selectors come into play. The Object2dDisplay’s display method is often
scheduled in the observer swarm level of projects that draw on ZoomRaster grids. In order to make this
possible, the selector is required.
When an instance of Object2dDisplay is created, one of the first thing the user does it tell that object
what the display message for its members is. The Object2dDisplay is passed a selector by the
"setDisplayMessage" method.. This bit of code is from SwarmSugarScape’s ObserverSwarm.m file.
agentDisplay = [Object2dDisplay createBegin: [self getZone]];
[agentDisplay setDisplayWidget: worldRaster];
[agentDisplay setDiscrete2dToDisplay: [sugarSpace getAgentGrid]];
[agentDisplay setObjectCollection: [modelSwarm getAgentList]];
[agentDisplay setDisplayMessage: M(drawSelfOn:)];
// note the draw method passed as selector
agentDisplay = [agentDisplay createEnd];
The Object2dDisplay is told which widget it is addressed to setDisplayWidget and which agent list
([modelSwarm getAgentList]). Note how the object agentDisplay is told to set inside it the
value of the selector M(drawSelfOn:). It does not ask for the additional information of the input
variables that would ordinarly follow drawSelfOn:. It only wants the selector.
1.
On the off chance that you have reached a point of necessity, and that is why you are reading this guide, consider this
explanation of the problem. Many jobs happen inside the swarm library. If you want each member of a certain list to receive a
message every time period, you need to give Swarm a way to keep track of the members and the message. Since the objects at
which you want the messages aimed already exist and are objects, it is quite straightford to pass a Swarm object that object’s
name. Passing a Swarm object a method name is, however, more difficult. You need to give the Swarm object something
symbolic if it is to receive and remember it. You wouldn’t want the Swarm library to be built around the passing of character
strings, right? (Well, maybe you would, but pretend your answer is no!) If you pass the selector, you are passing a variable
type that the Swarm libraries can remember and use when they need it.
66
Chapter 9. Building Schedules
Each item in the list of agents, which is retrieved by the command [modelSwarm getAgentList],
has the method drawSelfOn:. Here is the method drawSelfOn:, which can be found in
SugarAgent.m:
- drawSelfOn: (id
Raster
)r
{
[r drawPointX: x Y: y Color: 100];
return;
}
If the agent gets the message drawSelfOn:r, then the agent in turn tells the object r to use its
drawPointX:Y:Color: method to put the agent on the picture.
The importance of the selector becomes apparent after a study of the file Object2dDisplay.m in the
Swarm space library. In Object2dDisplay.m, we find this method:
- setDisplayMessage: (SEL)s
{
displayMessage = s;
return self;
}
This takes the selector and puts its value into an instance variable called displayMessage. The other
set methods in Object2dDisplay have already set the variable objectCollection and
displayWidget. So, floating around inside the Object2dDisplay instance, are instance variables that
can be put to use in scheduling the actions.
When the display method of Object2dDisplay gets scheduled by the ObserverSwarm, this method
from Object2dDisplay.m is called:
- display
{
[...some irrelevant lines omitted...]
// if we have a collection to display, just use that.
[objectCollection forEach: displayMessage: displayWidget];
}
The forEach: method in the Swarm library takes a selector as its first argument, and any parameters
needed by the selector follow, separated by semicolons. So, in this example, the displayMessage
variable has been set as drawSelfOn and the displayWidget has been set as the worldRaster .
So when the display method executes, it passes to each object in the list a message that tells it to draw
itself on the worldRaster .
Almost all uses of the selector type in Swarm allow a variable number of arguments. It is important to
note, however, that these arguments are generally required to be objects. We would have some trouble if
the arguments were floating point values, for example. When such a case arises, one if usually forced to
write "wrapper" objects around floats in order to pass them to the Swarm library. For example, consider a
67
Chapter 9. Building Schedules
change in the problem faced by the hypothetical psychologists discussed above. Suppose instead of
dealing with bill and susan, they are instructed instead to set some variables inside themselves, such
as idealTemperature or setLengthOfFeelers (these are buggish psychologists, say). The
method in the psychologist class might have this interface:
- setTemperature: (float)temp And: (float)feeler;
Now, if you wanted the Swarm to schedule this setTemperature:And: method to happen every
time step, perhaps to "reinitialize" the objects to a "fresh" state, then you would be in a world of hurt. If
you need the temperature to be set at 37.3 and the feeler to be 54.1, you would be tempted to write this,
but you would be making a big mistake:
[modelSchedule at: 0 createActionForEach: listOfShrinks message: M(setTemperature:And):37.3:54.1];
The createActionForEach: method is looking for something like SELECTOR:id:id at the end,
but this command instead gives it SELECTOR:float:float.
When you need to pass float values in this way, you may have to redesign your methods so that they can
take objects. For example, you might make a new kind of object to hold the values of those floating point
numbers. This new class is often called a "wrapper" class. If that new class, call it the ParameterHolder
for discussion, is able to respond to methods like getTemp and getFeelr, then this problem could be
tackled by rewriting the setTemperature:And: method into something like:
- setParameters: holdingObject;
If you have an instance of ParameterHolder, called aHolder for short, then the psychologist can be told
to setParameters by a command like this:
[aShrink setParameters: aHolder];
Presumably, inside the setParameters method there are actions that get the values from the
aHolder which is passed in, as necessary.
If you need to schedule a whole list of psychologists to reset themselves, the schedule command could be
written as:
[modelSchedule at: 0 createActionForEach: listOfShrinks message: M(setParameters):aHolder];
9.3. ActionGroups
An ActionGroup is a set of actions that are supposed to happen in sequence. The buildActions
method is often designed to first create an ActionGroup and then to schedule that is be repeated every
now and then.
68
Chapter 9. Building Schedules
Consider the Swarm SugarScape again. Its model swarm has this buildActions method 2:
- buildActions
{
[super buildActions];
// One time tick, a set of several actions:
//
randomize the order of agent updates (to be fair)
//
update all the agents
//
kill off the agents who just died
//
update the sugar on the world
modelActions = [ActionGroup create: [self getZone]];
[modelActions createActionTo: sugarSpace message: M(updateSugar)];
[modelActions createActionTo: shuffler message: M(shuffleList:) : agentList];
[modelActions createActionForEach: agentList message: M(step)];
[modelActions createActionTo: self message: M(reapAgents)];
// The schedule is just running our actions over and over again
modelSchedule = [Schedule createBegin: [self getZone]];
[modelSchedule setRepeatInterval: 1];
modelSchedule = [modelSchedule createEnd];
[modelSchedule at: 0 createAction: modelActions];
return self;
}
ActionGroups
group together events at same timestep. Schedule then executes the actions. If there is only
one ActionGroup in a schedule, then one might as well not create a group and just add the actions to a
schedule one at a time. The use of ActionGroups is most valuable when several sets of separate actions
are considered and they need to be scheduled to start at different times or repeat at different intervals.
9.4. Activating Swarms
The buildActions method is intended to be the place in which one creates Swarm schedules, but that
does not make the simulation carry out the scheduled actions. In order to put the object’s schedule into
the "grander scheme of things" in Swarm, it is necessary to activate it. Through the activation
mechanism, the Swarm library integrates the many diverse actions of the different objects that exist in
the simulation. It is done through a hierarchical series of activateIn methods. The main.m tells the
top level swarm to activate itself (after it has been told to create its objects and schedules, of course).
Then the top level swarm activates any schedules it might have created and (here’s where the hierarchy
comes into play) it tells the next lower level to activate itself. That next level activates its schedules and
tells the level below to activate itself. This is how the activities of many different levels are synchronized.
2.
Note: the use of shuffler to mix the agents in the list has been integrated into the Swarm libraries and by the time you read this
there may be some new syntax involved.
69
Chapter 9. Building Schedules
Virtually any Swarm program will offer a sufficient example of the progression of activateIn
methods from top to bottom. The main.m in Heatbugs has this:
[theTopLevelSwarm activateIn: nil];
The top level swarm is told to activate itself in nil, which is a way of telling the top level that it is in
fact at the top of the hierarchy. It is not told to activate itself within the zone of any other swarm, in other
words. When the time comes, the lower levels are told to activate themselves in the zone of the swarm
that is one step above it (as we shall see).
Assuming we are doing a graphical model, the activateIn: method of the top level is found in
In the HeatbugObserverSwarm.m’s activateIn: method, we find commands
that both activate schedules within the observer swarm and also activate schedules in the next lower level
of the simulation:
HeatbugObserverSwarm.m.
- activateIn: swarmContext
{
[super activateIn: swarmContext];
[heatbugModelSwarm activateIn: self];
[displaySchedule activateIn: self];
return [self getActivity];
}
It is important to recognize that the activateIn methods of each class within the hierarchy fulfill a
vital role in synchronizing the schedules of the levels. These are typically written so that, first, the
activateIn method of the superclass is executed. Then the schedules of the current class are told to
activate themselves in the current context, and then the activateIn method of the next lower level
Swarm is told to activate itself.
The activateIn: method returns an object of class Activity, which is a sufficiently important concept
that it is treated on its own in the next section.
9.5. What is an Activity?
The Activity class is a vital element of the Swarm approach. It’s fundamental purpose is to merge all the
subjective points of view of agents at different levels into a single objective time sequence. Somehow, the
name Activity does not seem powerful enough. Perhaps perhaps it would be better called an
ActivityManagerAndIntegrator, or something grand. Of course, on a practical level, it responds to
messages like run, stop, next, terminate, and so forth.
70
Chapter 9. Building Schedules
If you have an object subclassed from Activity, you can tell it to make the simulation run, stop,
terminate, or respond to a number of other commands. Swarm programs are designed hierarchically, so
that if you tell an activity from one level to stop, you stop all lower levels of the simulation as well. Many
Swarm programmers do not come face-to-face with the Activity class because it sits behind the scenes.
The control panel, in particular, allows users to start and stop their simulations, and all the while the
Activity class objects are behind the scenes, doing the actual work.
It is easy to "grab" the activity object of a given Swarm. The method which returns the activity of a
Swarm is getActivity. If one needs to tell the object modelSwarm to stop, for example, then the
command:
[[modelSwarm getActivity] stop];
will get the job done. This first grabs that object’s activity, and tells that activity to stop. To make that
object start up again, it can be sent the run message.
The ability to start, stop, and terminate an activity is particularly handy when designing a program that
repeats a Swarm experiment. These methods are used in the Swarm tutorial’s "SimpleExperBug2" model
as well as the "RepeatingHeatbugs" application that is available at the Swarm ftp site.
9.6. Dynamic Scheduling
The schedules described so far are of a particular static sort. Each agent, or each agent in a list, is told to
execute some action at some particular time. What if the simulation is designed so that the activation of a
certain agent is conditional on events within the model? The need to create a flexible schedule gives rise
to an important feature of Swarm that is referred to as a dynamic schedule. The Mousetrap application
is a fully worked out example that shows the power of dynamic scheduling.
The idea behind dynamic scheduling is so simple that one can be in danger of confusing it by explaining
it too much. Simply put, the strategy is as follows. First, create an object from the Swarm Schedule class.
Don’t put any actions in the schedule, just let it sit there in the buildActions method, doing nothing
(yet). Second, write a method that tells that schedule to add things that are to be executed at particular
times. It is as simple as that.
The concept is quite simple, but, as the Mousetrap application illustrates, it can be quite complicated in
the implementation. The simplest possible dynamic scheduling project of which we are aware was made
available in the package Swarmfest99-demos (in the swarm ftp site, it should be available in the
users-contrib/anarchy section). The application is called simpleObserverBug-growth. It begins
with the familiar exercise from the Swarm tutorial and then models the regeneration of the food supply.
In the simpleObserverBug-growth example, the ModelSwarm.m file has all of the usual ingredients.
The dynamic schedule is created in the buildActions method, like so:
growthSchedule = [Schedule createBegin: self];
71
Chapter 9. Building Schedules
[growthSchedule setAutoDrop: 1];
growthSchedule = [growthSchedule createEnd];
The growthSchedule is created and the setAutoDrop feature is set, so that actions are executed
one time and then dropped from the growthSchedule. Otherwise, once we add an action into the
schedule, it will repeat itself forever.
In the ModelSwarm.m, one also finds the method that has the power to add items to the schedule. It is
called scheduleGrowthAtX:Y:. When this method is called, it grows more food at a particular spot.
- scheduleGrowthAtX: (int)x Y: (int)y
{
long time;
time=[[self getActivity] getCurrentTime];
[growthSchedule at: time+growthInterval
createActionTo: foodSpace
message: M(putValue:atX:Y:):1:x:y];
return self;
}
As you can see, this method retrieves the current time, and then it tells the growth schedule to create an
action to the foodspace at a time in the future. And the ungainly M() notation appears, which we
described in greater detail in Section 9.2. Note that the putValue:atX:Y: method requires 3 integer
parameters, which represent the value being put in the space and the two coordinates.
The preceeding steps are the essence of creating the dynamic schedule. The empty schedule is created,
and a method is created that can tell that schedule to add an item. The only remaining step is to design
the simulation so that this method actually gets executed during the course of the program. That means
that some class has to have a method that can tell the modelSwarm to execute its
scheduleGrowthAtX:Y: method. In this example, it is done by making the foodSpace object
aware of the modelSwarm and the, when a piece of food is consumed, the dynamic scheduling process
is put to use. From the FoodSpace.m class, here is the relevant method:
- eatX: (int)x Y: (int)y
{
[self putValue: 0 atX: x Y: y];
[model scheduleGrowthAtX: x Y: y];
return self;
}
72
Chapter 10. Working with Lists
Programmers who have worked primarily in non-object-oriented languages like Fortran, Pascal, or C, are
sometimes perplexed at the way Swarm programs manage repetitive tasks. While there is no hard rule
that iterative chores have to be managed in a certain way, one will find a fairly common approach that
uses a Swarm object called List. Since this usage is both widespread in Swarm and different from the
usual strategy in other languages, it deserves some discussion.
10.1. The List Class
This section is not intended as a comprehensive review of Swarm’s Collections library. That job is left to
a later chapter. Instead, the purpose of this section is to introduce some popular usages of the List class
and discuss the implications for simulation modeling.
The concept of a "linked list" may be familiar to C programmers. The motivating idea of a linked list is
that one can develop a collection of entities by defining a series of structures that refer to each other. The
first structure contains not only the information needed to describe a single entity a pointer to the next
entity in the series. A linked list has a major advantage that it is flexible. Unlike an array that is allocated
to allow N members, a linked list can grow indefinitely as members are added and it can shrink as
members are deleted. The complicated problem is to make sure that the structures always correctly refer
to each other as entities are added and removed.
The Swarm Collections library provides a protocol called List that provides the swarm program with all
of the benefits of a linked list and none of the hassles. The usage of List objects seems rather informal. A
list can be told to add an object at the end or the beginning, or to retrieve an object that is in a certain
position in a list. Working together with another Swarm protocol, the Index protocol, the List object has
a great deal of power and many uses. It should be noted that Swarm provides other, more structured
"container" classes as well (Array, OrderedSet, Map, and so forth), but a treatment of them is left to a later
chapter.
10.2. Basic List Syntax
A list is created by making a call to the List class object. Since there are probably not going to be any
creation-time variables to set, the method used is typically create, rather than a
createBegin/createEnd pair. In order to use method calls against the List object, one can import
the header file collections.h from the Swarm library, and then this command will create a List object:
id nameOfSomeList;
nameOfSomeList = [List create: self];
73
Chapter 10. Working with Lists
Recall from the discussion of object creation that self refers to the memory zone in which the list is
created. This is appropriate in a Swarm or GUISwarm instance, while other classes would use [self
getZone] in place of self .
Once a list object exists, it can carry out many instructions. In the List protocol, methods that can add
and remove either the first or last object in a list are defined. For example, to add an object called fred
at the end of a list called listOfDogs, one could write:
[listOfDogs addLast: fred];
and, if it were necessary to remove the last object in the list, one could write:
[listOfDogs removeLast];
The object of type List is able not only to carry out the addFirst:, addLast:, removeFirst:,
and removeLast: methods, it can also inherits methods from the Collections protocol. Some of the
useful methods in the Collections protocol are:
•
getCount: Use this to find out how many items are already in the list
•
begin: aZone: This creates an Index object that can be used to traverse this list.
•
remove: aMember. This will search through a list to find aMember and it will remove that object
(and return it).
•
removeAll: This take all elements out of the list, but it will not destroy the list or the elements in the
list.
•
deleteAll: Be careful: this removes the elements from memory as it clears the list
Lists have many uses in Swarm projects. The following sections discuss them, in turn. First, lists are used
to manage collections of objects and schedule their activities in the model swarm layer of a simulation.
Second, lists are used to pass information back and forth between levels of a simulation. Third, lists can
be used by individual agents to keep track of their experiences and manage their information
10.3. Lists: Managing Objects in the Model Swarm
In the swarmapps package, one can find the Hello World example exercises. This exercise provides a
good example of the way in which lists are used to organize the agents in a model swarm. In section
three of the Hello World package, a list of people called pplList is created. Here is a skeleton
74
Chapter 10. Working with Lists
showing the important commands that create and use the List protocol in the model swarm level. The
file is called PplModelSwarm.m.
@implementation PplModelSwarm
- buildObjects
{
//...
// build the list to keep track of the ppl
pplList = [List create: [self getZone]];
for (inci = 0; inci < numPpl; inci++)
{
Person * person;
id name;
// allocate memory for a temporary person
person = [Person createBegin: [self getZone]];
//...
[person setWorld: pplList Room: room Party: self];
//...
person = [person createEnd];
// add the person to the list of people
[pplList addLast: person];
}
}
- buildActions
{
//...
modelActions createActionForEach: pplList message: M(step)];
//...
}
As in most Swarm examples, the list is created in the buildObjects method. The List class object is
a "factory object," it can create instances that can answer to the List protocol. In this case, the list is
called pplList.
In order to instruct the factory object List to manufacture an object that acts like a List, one would
ordinarily have to import the collections.h header file. However, as in many Swarm examples, the
collections.h file has already been included in a file that has been included in this file, and so an explicit
import statement is not needed.
After an object that responds to the List protocol is created, then objects can be added onto that list. In
this example, after pplList is created, then the buildObjects method proceeds into a for loop that
creates the people objects. At the end of that loop, each person is added to the pplList by the
command:
[pplList addLast: person];
75
Chapter 10. Working with Lists
The Swarm libraries take care of allocating memory and all the other details.
Once this list of people is created, what happens? In this case, the list of people becomes the central
organizing element of actions that are to be scheduled. The object modelActions is told to go through
the people list, one at a time, and cause each person to carry out its step method. The ins-and-outs of
activity and schedule design are discussed elsewhere. This createActionForEach method works
because the target is a Swarm collection item, the pplList, and the Swarm library knows how to
traverse through the list of people.
10.4. Lists: Passing Information Among Levels in a
Swarm Model
Simplified scheduling is not the only usage for lists. It is equally important that list objects can be used to
quickly communicate a great deal of information between objects. This is done by creating methods that
can get a list and pass it to another object.
In the PplModelSwarm.m file, for example, one finds this method:
- getPplList
{
return pplList;
}
When another object needs a list of people, the PplModelSwarm is able to supply it.
This design is extremely convenient when it comes time to consider the observer swarm level of the
simulation. The PplObserverSwarm.m file gets the list of people from the PplModelSwarm and uses that list
to collect data in order to construct graphs. Consider the avgFriendGraph object, for example, which
charts the average number of friends per person. The buildObjects section of PplObserverSwarm.m
has this command:
[avgFriendGraph createAverageSequence: "avgNumFriends"
withFeedFrom: [pplModelSwarm getPplList]
andSelector: M(getNumFriends)];
The method createAverageSequence:withFeedFrom:andSelector is equipped to take a
list of objects, ask each one to supply a piece of data (the getNumFriends returns an integer from the
person object), and builds an average that is plotted. This powerful, easy method of passing information
for presentation is possible because the various Swarm libraries are designed to work together. While the
user could certainly ignore the List protocol and design her own setup for managing collections, doing
so would indeed be costly because one would be forced to forfeit the convenient features of the other
libraries that can handle Swarm List objects.
76
Chapter 10. Working with Lists
The ability to pass a list to the observer swarm in order to create a graph is just one benefit of Swarm
protocol. Note in the PplModelSwarm example that when people are created, one of the set messages
(setWorld:Room:Party:) tells the individual person in which list it is currently residing. When
that method executes, it sets the value of an instance variable called pplPresent inside the person.
(Look at the code in Person.m to verify it!) Since each individual person has that list available, it can ask
the list for information. For example, to find out how many other people are still in the list, the Person
object can do this:
List
[pplPresent getCount]-1
which returns an integer equal to the number of objects in the pplList minus 1. The Person object
does not have to do anything to update the pplPresent variable to reflect current conditions. Since the
pplPresent variable is actually a pointer to the pplList as it currently exists in the PplModelSwarm,
this is always "up to date". Some additional usages that the Person class might include require the
creation of Index objects, which are introduced in the next section.
10.5. Lists: Organizing Repetitive Chores inside
Objects
In the Hello World example, each instance of the Person class is aware of the pplList that exists in
the PplModelSwarm. Inside the individual person, the name used to refer to that list is pplPresent.
Because pplPresent refers to an object that conforms to the List protocol, and all List objects follow
the Collections protocol, then a number of interesting features can be put to use.
Suppose the we want to have the person go through the list of people in the list and make a new list that
includes all of the people in that list who have a lot of friends, say more than 3. In order to carry this out,
code has to be designed to traverse through the pplPresent list, ask each one how many friend it has,
and then if that person has more than 3, then add that person to another list.
One of the most interesting protocols in Swarm is the Index protocol. In mathematics, one might have
seen a variable Xi, and the index variable i can range from 1 through the number of possible values. In
Swarm, Index means much more than that. A Swarm Index is a "living, breathing" object that can be
moved around in a list, and the Index can also respond to requests for information.
For new Swarm users, the most puzzling thing about the usage of Index is the creation process. Index
objects are not created with the standard swarm createBegin/createEnd pair. Instead, any object
from the Collections class, such as a List, can spawn an index by using the begin: method. In one
step, the begin: method will create an object that conforms to the Index protocol and positions that
index object before the first element of the collection. Here is an example of how the pplPresent list
might create an index called pplIndex :
id <Index> pplIndex;
77
Chapter 10. Working with Lists
pplIndex = [ pplPresent begin: [self getZone]];
The first line declares the instance variable that will be the index. It is not necessary to include the
protocol name Index in the declaration, so it might as well have been just id pplIndex. Some
programmers prefer to include the extra information in the declaration because it clarifies the code and
also may help to catch programming mistakes.
After it is created, the pplIndex can respond to messages. Many of the methods that Index objects can
carry out will do two things at the same time: the Index will be positioned and the identity of the object at
which the index currently resides will be returned. For example, consider this code that sets a variable
called elementFromList equal to the next one, as provided by the index:
elementFromList = [pplIndex next];
When it is first created, the pplIndex is positioned at the edge of the collection, just before the first
object in the collection. If we want the index to move to the next object, and give us a pointer to the next
object in the list, it is done with that command. (As in C, collections are numbered beginning with the
number zero).
It is common in Swarm examples to use the next method of the Index object in a while statement that
cycles through the elements of a list. Here is a bit of code that would go through the list of people in
Hello World and ask each one how many friends it has. And, if the number is larger than 3, then that
object is added to a list popularPeople (which we assume is created somewhere else in the code).
id <Index> pplIndex = nil;
id
element = nil;
int numberOfFriends;
pplIndex = [pplPresent begin: [self getZone]];
while ((element = [pplIndex next]) != nil)
{
numberOfFriends = [element getNumFriends];
if (numberOfFriends > 3)
[popularPeople addLast: element];
}
[index drop];
This example uses a number of convenient features from the C language. One is that the conditions
evaluated in logical statements are actually calculated. Hence, the conditional in the while statement
causes the pplIndex to move to the next element, in the process setting the variable element equal to
that object. As a result, inside the curly braces, the variable element can be used to refer to that particular
element from the list. In this case, that object is asked to give us its number of friends.
78
Chapter 10. Working with Lists
The index object, pplIndex plays a vital role in this example. The index index is accessed inside the
while statement so that we can cycle through the elements in a list. The while statement in the previous
example will begin with the first element of the list, and one-by-one it will move through the pplList.
What happens when it gets to the end? When it is positioned at the last element of the list, then the
[pplIndex next] command will return nil. The logical condition is set so that the program exits the
while loop at that point.
If one inspects a number of Swarm examples, one will find the while loop is constructed in slightly
different ways, but the effect is the same. For example, the logical condition is sometimes written simply
as ([pplIndex next]). This is allowed because of the convention that, as long as this does not return nil,
then the while loop will continue. If that approach is used, instead of using element in the while loop, we
replace all occurrences of element with [index get], like so:
id <Index> pplIndex
int numberOfFriends;
= nil;
pplIndex = [pplPresent begin: [self getZone]];
while (([pplIndex next]))
{
numberOfFriends = [[pplIndex get] getNumFriends];
if (numberOfFriends > 3)
[popularPeople addLast: [pplIndex get]];
}
[pplIndex drop];
This last change would cause a performance penalty because the pplIndex object is asked to evaluate
and return on object three times.
It is hard to overstate the value of the Index protocol in working with Swarm lists. One especially
important feature of Index is that it can be used to manage items in the list itself. That is, the index can
do more than just point to objects. If an index is positioned at an object, and one wants to cut that object
from the list, then the command [pplIndex remove] will get the job done. The index will automatically
reorient itself, so that the next time the index receives the next instruction, it will point to the next valid
member of the list.
Watch out for nil objects when using "while" loops
If you loop through a list, checking only that the index is not positioned over a nil object, your loop
might end before you expect if there is a nil object in your list.
A variable of type id might be unintialized, or nil. Suppose that, through intention or error, an object
person1 has been set to nil, as in
79
Chapter 10. Working with Lists
person1=nil;
This could happen if, for example, the object referred to by the name person1 has been dropped, and the
user is careful to set the name equal to nil in order to be safe.
Now suppose the program adds person1 to a list, and other (nonnil) objects are added as well. If the
program creates an index and tries to loop through this list with the while construction described above,
there will be a major problem. The loop will be executed, until the index object arrives at person1. Since
person1 is equal to nil, then [pplIndex next] will return nil, and the program will exit the while list and
continue with the next commands. If there is a danger that some of the objects in a list might be nil, and
the programmer wants the loop to continue after "skipping over" the nil objects, then the best approach is
a for loop that takes advantage of some symbols defined in the Swarm libraries. For each object in a list,
the Index protocol’s method getLoc will tell us whether the index is positioned in the list on a
"Member." If the [index next] message causes the index to "step off the last" object in a list, then the
return from that message is "End."
{
id <Index> pplIndex = [pplPresent begin: aZone];
id member;
for (member = [pplIndex next]; [pplIndex getLoc] == Member; member = [pplIndex next])
{
// do something with member ...
}
[index drop];
}
When it is created, the index is automatically positioned at the Start. The first argument in the for
statement positions the index on the first member of the collection. The second argument says that the for
loop continues as long as the returned value from getLoc is equal to the symbol Member. And after the
loop is complete, the third argument says that the index is supposed to step to the next object in the list.
Be sure to drop index objects when you are finished with them
It is important to drop the instance of Index when its use is completed. That’s accomplished by the
[pplIndex drop]; command in the last example. If this is forgotten, the index will continue to occupy
memory and waste resources.
80
Chapter 11. Checking on a Swarm’s
progress: The Observer
11.1. Monitoring a Swarm
When a Swarm program is running in the GUI mode, what the user sees is controlled by the top level
Swarm that we often call the observer swarm. The observer swarm adopts the GUISwarm protocol, which
means that it has all of the features of a Swarm plus some "optional added extras." The file that contains
the source that controls the user interface for a specific project may be called simply ObserverSwarm.m. In
many examples, authors have customized the name of the file to include the name of their project, as in
HeatbugObserverSwarm.m or ForestModelSwarm.m
The most prominent of the extra features of the observer swarm is the control panel. The control panel is
the familiar set of buttons that can Start and Stop a swarm model. The control panel also can "step" the
simulation through its paces one time-unit at-at-time using the Next button. The Save button on the
control panel is intended to save the window positions of objects that are able to do so.
Apart from the control panel, what the user sees at run-time is completely dependent on the particular
example that is being considered. It is probably safe to say, however, that if one stays within the Swarm
library, without adding external support from the Graph library or other toolkits, then there two
especially important kinds of display objects that can be created in ObserverSwarm.m. These two are:
•
The ZoomRaster. In just about any of the common swarm applications, there is some sense of
geometry or spatial position. The ZoomRaster graph is the tool that is used to represent the positioning
of agents and other objects in that space.
•
The Data Display Graphs. For the visual presentation of summary information, Swarm provides a set
of tools for presenting information in graphic format. Two of the most common sorts are the
histogram, which shows the relative frequency of various values occurring in a stream of data, and a
line graph which displays the changes over time in one or more variables as a simulation progresses.
These capabilities are provided by the Swarm protocols EZDistribution and EZGraph, respectively.
The following sections discuss the achitecture of these two classes of displays in greater depth. Most of
the examples for discussion are taken from the Arborgames code provided by Melissa Savage.
11.2. Making a clickable ZoomRaster
There is no doubt that one of the most impressive aspects of a Swarm presentation is the visually
intriguing movement of agents on a landscape. The ability to stop a simulation from the control panel
81
Chapter 11. Checking on a Swarm’s progress: The Observer
and then click on objects, open up displays that reveal their internal variables and allow them to be
changed, is one of the main strengths of the Swarm library.
In order to introduce the way in which these ZoomRaster displays are created, we have to introduce a
number of inter-linked Swarm toolkit items. Before we are done, we have to talk about objects created
using the space library, as well as objects from the gui library. In the Arborgames simulation, there is a
set of standard examples that quite nicely illustrate the vital steps. For emphasis, we now consider these
elements individually.
1. Create a ColorMap. Swarm was first developed for the Unix operating system. Programmers who
have worked in X will probably already know that the X server offers a long list of possible colors.
If we want to access those colors, we can build a ColorMap object in Swarm. After it is defined, and
commands are executed which draw on the screen, then the ColorMap object will control which
colors are displayed.
Here is an excerpt from the file ForestObserverSwarm.m in which an object, called colormap, is
created and then told to remember that the numbers 25, 26,and 27 refer to the colors
"white","LightCyan1" and "PaleTurquoise" which is defined deep in the bowels of the video display.
colormap = [Colormap create: [self getZone]];
[colormap setColor: 25 ToName: "white"];
[colormap setColor: 26 ToName: "LightCyan1"];
[colormap setColor: 27 ToName: "PaleTurquoise"];
ColorMaps
can have fancier items. For example, colors need not be referred to by simple names.
Rather, each color can be referred to in a numerical format. All colors can be referred to by the
intensity of their red, blue, and green components, for example. If one needs to assign the many
available shades of red to the numbers between 100 and 150, it can easily be done with commands
that use the RGB format. There is an example of such a use of the ColorMap protocol in the
heatbugs source code.
2. Create a ZoomRaster. A ZoomRaster is a visual placeholder, a rectangular entity of a certain size.
After trimming out some of the detail, the steps that create the ZoomRaster called forestRaster
in Arborgames look like this:
forestRaster = [ZoomRaster createBegin: [self getZone]];
SET_WINDOW_GEOMETRY_RECORD_NAME (forestRaster);
forestRaster = [forestRaster createEnd];
[forestRaster setColormap: colormap];
[forestRaster setZoomFactor: 4];
[forestRaster setWidth: [forestModelSwarm getWorldSize]
Height: [forestModelSwarm getWorldSize]];
[forestRaster setWindowTitle: "The Forest"];
[forestRaster pack];
82
Chapter 11. Checking on a Swarm’s progress: The Observer
This code should be viewed as foundation-building. The ZoomRaster object is created, and the macro
SET_WINDOW_GEOMETRY_RECORD_NAME is executed. This means that, when the user clicks
save on the control panel, the window position of the forestRaster object will be saved in a
file in the user’s account.
To briefly summarize the effect of the other commands, we note the following. The fourth line tells
the new raster object to use the colormap we just created. The fifth line controls the magnification of
the display, which in this case is 4. The sixth line asks the forestModelSwarm object to report
back the horizontal and vertical dimensions of the grid on which trees exist and then uses those to
set the width and height of the ZoomRaster object’s display. The eighth line gives the display window
a name and the last line, which tells the forestRaster to pack itself, causes the display to be
initialized according to the settings we just provided.
3. Map a Swarm Space object onto the ZoomRaster. By itself, a ZoomRaster is just a nice looking set
of edges around a blank background. In order to display things inside that window, we need to create
a connection between the agents who live in the model swarm (and lower level swarms) and then
display them in the observer swarm. This is done most commonly by telling each agent that it lives
in a Swarm object known as a Grid2d. As the agent goes through its lifetime, one of its activities is
to put itself at a position in the grid and then (possibly) erase itself from the old spot and put itself in
the new spot.
The Swarm protocol Object2dDisplay can handle the work of drawing the positions of agents in a
object on a ZoomRaster. In the Arborgames example, the forestRaster is used by an
object called treeDisplay which connects the agents in the Grid2d to the graphical display.
Grid2d
treeDisplay = [Object2dDisplay createBegin: [self getZone]];
[treeDisplay setDisplayWidget: forestRaster];
[treeDisplay setDiscrete2dToDisplay:
[[forestModelSwarm getTheForest] getTreeGrid]];
[treeDisplay setObjectCollection:
[[forestModelSwarm getTheForest] getTreeList]];
[treeDisplay setDisplayMessage: M(drawSelfOn:)];
treeDisplay = [treeDisplay createEnd];
This example is slightly more complicated than most, because the Grid2d object is not retrieved
directly from forestModelSwarm , but rather from another object that is defined in the
forestModelSwarm . Except for that wrinkle, this is a standard example. The Object2dDisplay
protocol is told to use the forestRaster as its "display widget." It is necessary to tell the
treeDisplay which Grid2d to use, and this chore is accomplished by the setDiscrete2dDisplay
command.
Why the setObjectCollection message and the setDisplayMessage are used is
interesting and important. The Object2dDisplay protocol has a method called display, which can
be put in a schedule by the user. When the display method is executed, the treeDisplay (since it
follows the Object2dDisplay protocol) will send each of the agent-objects in the Grid2d a message
telling it to draw itself in the forestRaster . How does it tell the object to draw itself? We tell it
83
Chapter 11. Checking on a Swarm’s progress: The Observer
how by passing it the selector for the agent-object’s drawSelfOn: method. Each agent must be
able to respond to a message of this sort:
[anAgent drawSelfOn: aRaster];
The program will crash if each agent that is positioned in the Grid2d is not able to respond to
drawSelfOn:.
The message setObjectCollection: [[forestModelSwarm getTheForest] getTreeList]] is not
strictly necessary and the program will run without it. It may not run so quickly, however. Without
this command, the treeDisplay will respond to the display message by searching in each
possible position of the Grid2d and sending each object it finds the drawSelfOn: message. If the
grid is large relative to the number of agents, then this might be a very slow process. The
setObjectCollection method eliminates the need for treeDisplay to search through the
whole grid. When the object collection is set, then the treeDisplay will simply go through the
list of objects and tell each one to display itself.
4. Tell the ZoomRaster Where to Send Mouse Clicks. A ZoomRaster object is highly self-aware. If you
stop a simulation and right-click on an object, you may see a probe display pop up. That does not
happen by magic, of course. It is necessary to tell the raster that, when there is a certain kind of
click, that it is supposed to pass that click to some other object that knows what to do with it. That’s
why there is a command like this in the buildObjects phase:
[forestRaster setButton: ButtonRight
Client: treeDisplay
Message: M(makeProbeAtX:Y:)];
The treeDisplay is told to make a probe for the object that exists at a particular point in the grid.
5. Schedule the Display. This is one of the aspects of Swarm that could use some standardization. In
the schedule, one generally includes steps that erase the raster, then the Object2dDisplay is told to
update itself by the display command, and then that display is drawn to the screen by telling the
ZoomRaster to drawSelf.
In a simple model, one in which we only have one ZoomRaster to update, then the schedule could be
as simple. In the buildActions part of the code, one could create an ActionGroup like this:
displayActions = [ActionGroup create: self];
[displayActions createActionTo: forestRaster message: M(erase)];
[displayActions createActionTo: treeDisplay message:M(display)];
[displayActions createActionTo: forestRaster message: M(drawSelf)];
(Of course, that action group has to be put into a schedule, which will probably execute it at each
time point.) The buildActions method in arborgames is a bit more complicated than that
since a large number of displays are managed.
6. Make sure the Agents Put Themselves in the Grid! Inside the code that creates the individual
agents who are to be drawn on the grid, one must be careful to accomplish two things. First, the
84
Chapter 11. Checking on a Swarm’s progress: The Observer
drawSelfOn: method must be created. Second, if one wants to have a clickable ZoomRaster that
allows agents to be probed, it is also vital to have the agents report their positions.
It is fairly standard in Swarm models to manage this by creating a Grid2d object in the model swarm
level and then, when an agent is created, use a setWorld method to notify the agent where it lives.
In heatbugs, for example, each heatbug has a step method that controls how it searches for heat
and moves to find a better spot. When it has decided where to go, the heatbug puts "nil" at it spot in
the grid where it used to be and then it puts itself at the new coordinates. Here is the relevant code
from Heatbug.m:
[world putObject: nil atX: x Y: y];
[world putObject: self atX: newX Y: newY];
In the Arborgames example, the trees don’t consciously move themselves. Rather, they are created
and destroyed according to a set of rules that put them in a spot for a while. When a tree is created, it
is added to the grid with this command that is in the Forest.m file:
- addTree: aTree atX: (int) xVal Y: (int) yVal
{
[treeList addFirst: aTree];
[treeGrid putObject: aTree atX: xVal Y: yVal];
return self;
}
Trees don’t move (so far as we know), so we only need to update this tree’s position arises when the
tree dies. The Forest.m file creates a class of methods common to the different kinds of forests, and
then the subclasses like MatureForest are created to provide additional detail. There are methods that
remove a tree from the simulation and take it off the grid. The trees that are supposed to die are
added to a Swarm list called the exitQ. For each timestep, the forest tells each kind of tree to do its
step method, which adds trees to the exitQ list, and then the forest’s step method removes
those trees from the grid. In the MatureForest.m file,
- step
{
id aTree, index;
[treeList forEach: M(step)];
index = [exitQ begin: [self getZone]];
while( (aTree = [index next]) )
{
[treeList remove: aTree];
[treeGrid putObject: nil atX: [aTree getX] Y: [aTree getY]];
[index remove];
[aTree drop];
}
[index drop];
return self;
}
85
Chapter 11. Checking on a Swarm’s progress: The Observer
11.3. Displaying Results in Graphs
The most commonly used graphs in Swarm are histograms, which display the frequency distribution of a
variable, and line plots, which show changes over time in real-valued numbers. There are some little
details that arise in some applications, but for the most part creating graphs is easy.
The Swarm protocol that can create line plots is called EZGraph. The essential steps require the user to
create a graph object, and optionally to assign labels for various display attributes. For example,
returning to the Arborgames simulation, one can create a graph showing the numbers of trees of
various sorts. The first step is to create the graph object, in this case called popGraph.
popGraph = [EZGraph createBegin: [self getZone]];
SET_WINDOW_GEOMETRY_RECORD_NAME (popGraph);
[popGraph setTitle: "population"];
[popGraph setAxisLabelsX: "time" Y: "population"];
popGraph = [popGraph createEnd];
After the EZGraph object is in existence, then it can be instructed to prepare itself to plot some lines. A
stream of numbers is thought of as a sequence, and internal to the Swarm library there is an object type
called sequence that is used by the graph tools to keep track of the numbers they are to present.
When the graph object is told to create the sequence, it can be told to formulate a summary statistic and
plot it. In the Heatbugs simulation, the aim is to plot a summary of the unhappiness of all bugs. The
average level of unhappiness of all bugs is the chosen indicator. Here is a code excerpt that shows how an
object called unhappyGraph is told to create a sequence for plotting:
[unhappyGraph createAverageSequence: "unhappiness"
withFeedFrom: [heatbugModelSwarm getHeatbugList]
andSelector: M(getUnhappiness)];
This uses the createAverageSequence:withFeedFrom:andSelector method. Note that the
sequence is assigned the name "unhappiness". The quotation marks are needed because the name of the
sequence is a character string. The unhappyGraph is told to take data from the list of bugs, which is
found by asking the heatbugModelSwarm to get the list. Each bug in the list responds to a method
getUnhappiness. The combined effect of these elements is to create the sequence which will collect
the average values.
We hasten to point out that not all sequences need be averages. Output from individual objects can be
plotted as well. For an example, we return to the Arborgames EZGraph object called popGraph. The
population graph is intended to show how numbers for each sort of tree. There is a Swarm list of all
species called speciesList. The following code iterates through the list of all species and tells the
popGraph to create a sequence for each one.
for (i = 0; i < speciesNumber; i++)
{
86
Chapter 11. Checking on a Swarm’s progress: The Observer
id aSpecies;
aSpecies = [speciesList atOffset: i];
[popGraph createSequence: [aSpecies getSpeciesName]
withFeedFrom: aSpecies andSelector: M(getCount)];
}
Each species is able to give its name (respond to getSpeciesName) and provide a count of the
number of trees (respond to getCount). If some kind of mistake occurs, say a different kind of object
is added into the speciesList, then the program will crash during the run (and there probably will
also be a compiler warning).
The work to this point has created the graph object, and told it what to graph, but it does not cause the
graph to be presented as the simulation runs. In order to see the plots, the commands have to be part of
the observerSwarm’s scheduled activity. As it turns out, an EZGraph has a very simple method called
step that can do the necessary work, so somewhere in the buildActions method, a command such
as this is required:
[displayActions createActionTo: popGraph message: M(step)];
This is often part of an ActionGroup that is scheduled to update all graphs and ZoomRasters.
87
Chapter 12. Probing and Displaying the
Contents of Swarm Objects
Probes allow the user to dynamically interact with the objects in their simulation. As the simulation
progresses, the user can observe and adjust the values of the instance variables. Furthermore, the user can
cause objects to execute their methods, taking parameter values or input specified by the user during the
simulation. generating method calls. The main appeal of this approach is that these interactions are not
hardwired into the program code, but occur due to user-generated requests. This interactive process is
managed by objects and methods that are, for the most part, hidden from the user. Still, the interaction
can be customized easily.
12.1. What’s a Probe?
Anyone who has run Heatbugs (or any of the demo programs, for that matter) has seen a probe display.
It is a rectangular window that has rows which list attributes of the object being displayed. The data being
displayed may be gathered from a high level object, such as the observer swarm or the model swarm, or
it may be collected from an individual agent. Almost all Swarm projects have a probe display for the
observer and model swarms because starting values for the parameters can be set with those displays.
Probe displays for individual agents are typically created during a run by user interaction with the Swarm
program (for example, by clicking on a "clickable ZoomRaster", as discussed in the previous section).
The key to this capability is the probe. A probe is an object that can gather information from one object
and relay it to other objects, including displays on the screen. Swarm provides two kinds of probes. The
Swarm class VarProbe extracts the value of a specific instance variable from an object. The second kind
of probe is provided by the MessageProbe class. The MessageProbe. A message probe gives the user the
ability to access methods inside an object–to send messages to it, in other words:
• VarProbe.
Probes an instance variable. A variable probe appears to the user in a window with the name
of the instance variable and a space that may display the value of the variable (or show a blank or
"nil"). Variable probes can display the values of integers and floating point numbers, as well as
information about the identity of object variables. Variable probes do not display the contents of C
arrays or structs.
. Probes a method. In the same window where the Variable Probe is shown, there may be
"buttons" that have the names of methods on them. These buttons will be executed when they are
depressed. If a method takes arguments, there will be spaces in which the user can enter them. This
can cause agents to change their course of action during a simulation run.
• MessageProbe
88
Chapter 12. Probing and Displaying the Contents of Swarm Objects
Figure 12-1. Combining two VarProbe and one MessageProbes on a ProbeDisplay
MessageProbe
VarProbes
Object
There are two main uses for probes: they can be fed into data-collection objects and serve as interfaces to
the objects about which data is being collected (thus keeping the data-collection objects as general as
possible) - the Averager class, for example, directly subclasses MessageProbe. Or, they can be used in
order to generate a GUI to the individual objects in the simulation (the more common usage).
There is a middle-level object between the probe display that appears on the screen and the individual
probes. It is the ProbeMap. A probe map is a set that collects up all of the probes for a given object. The
probe display does not manage individual probes, but rather it manages probe maps. As we shall see,
then, most of the detail in tailoring probe displays ends up in steps that add or remove probes from the
probe map.
12.2. Managing Probe Displays
The appearance of the probe display can be custom-tailored by the programmer. In order to understand
the effect of customization, it is probably best to begin with an understanding of the "default" appearance.
89
Chapter 12. Probing and Displaying the Contents of Swarm Objects
The default probe displays for a simulation can be created quite easily. In the HeatbugObserverSwarm.m
file, for example, one finds these lines:
CREATE_ARCHIVED_PROBE_DISPLAY (heatbugModelSwarm);
CREATE_ARCHIVED_PROBE_DISPLAY (self);
These are macro commands that cause actions inside the Swarm kernel to create the default probe
displays for the model swarm and observer swarm, respectively. That is all that is required to create the
default probe displays.
It might be a good exercise for the user to check this for herself. Leave those macro lines in
HeatbugObserverSwarm.m, and comment out everything else to do with probes in that file and also in
HeatbugModelSwarm.m. When heatbugs is executed, the user will see that the default probe display
presents a list of the instance variables of the object and, if their values are set at start time, those values
will be displayed as well.
This bare-bones setup will not automatically update the display as the simulation proceeds. It presents
only a snapshot of the creation-time settings. Many variables that have no value set before time 0 will
show blanks or the word nil and that will never change.
If one wants the probe pisplay to be updated, then an update command has to be included in the
schedule. In the buildActions method of HeatbugObserverSwarm.m, this is the command that will
cause the updating to occur (presumably, it was commented out in the bare-bones test described above):
[displayActions createActionTo: probeDisplayManager message:
M(update)];
The probeDisplayManager is a global object and when it is told to update in the observer swarm’s
schedule, it will update the probes of objects in all other levels of the simulation.
All of this works because the Swarm kernel provides a great deal of functionality that the user may never
need to inspect or worry about. Most importantly, the object probeDisplayManager is not
explicitly created by the user. Rather, it appears automatically in any Swarm program that has the GUI
mode turned on in its main.m. The probeDisplayManger is the object that receives messages to
create displays for various objects, such as the macro statements above.
The default probe display for an object includes only the probes for the instance variables of the object. It
has no buttons to click and execute methods inside the object (i.e., it has no message probes). If one wants
the message probes, there are two alternatives. While the program is running, a right-click on the object’s
name button in the top-left part of the display will cause the message probes to be displayed. A second
alternative is to change the macro used to create the probe displays. Use these macro commands instead:
CREATE_ARCHIVED_COMPLETE_PROBE_DISPLAY (heatbugModelSwarm);
CREATE_ARCHIVED_COMPLETE_PROBE_DISPLAY (self);
This will cause the probe display to include all instance variables and methods.
90
Chapter 12. Probing and Displaying the Contents of Swarm Objects
12.3. How to Customize Probe Displays
Why might one want to customize the display? Well, frankly, the default probe display may look ugly. It
may include lots of variables the user does not want to see. There are some instance variables, such as C
arrays, that cannot be probed, and so their inclusion in a probe display is uninformative. Swarm is
designed to allow the user to pick and choose which variables ought to be included in the display. There
are a number of strategies for customizing, one of the standard strategiew uses an object called
probeLibrary .
Like probeDisplayManager , the probeLibrary is a global object provided by the Swarm
kernel. Customization is achieved by writing code that communicates back and forth from objects to the
probeLibrary . In short, the programmer "checks out" a unique, shared copy of a Probe/ProbeMap
from the probeLibrary object (of class ProbeLibrary) provided by the kernel. By shared we mean
that a similar request made at a different point in the code, will return a reference to the very same probe
instance.
Here is a skeleton example of the commands that can create a customized probe display using this
approach.
Example 12-1. Generating a probeMap
To generate a probeMap for an instance of the class Agent called agent, which consists of two fields:
one VarProbe for the instance variable someIVar and one MessageProbe for the message
someMessage, use the following:
probeMap = [EmptyProbeMap createBegin: self];
[probeMap setProbedClass: [self class]];
probeMap = [probeMap createEnd];
[probeMap addProbe: [probeLibrary getProbeForVariable: "someIVar"
inClass: [agent class]]];
[probeMap addProbe: [probeLibrary getProbeForMessage: "someMessage"
inClass: [agent class]] setHideResult: 1]];
[probeLibrary setProbeMap: probeMap For: [agent class]];
Don’t forget to execute the CREATE_PROBE_DISPLAY for this object in the observer swarm.
In the file HeatbugModelSwarm.m, one can find a fully fleshed out example of these steps.
probeMap = [EmptyProbeMap createBegin: aZone];
[probeMap setProbedClass: [self class]];
probeMap = [probeMap createEnd];
91
Chapter 12. Probing and Displaying the Contents of Swarm Objects
[probeMap addProbe:
inClass:
[probeMap addProbe:
inClass:
[probeMap addProbe:
inClass:
[probeMap addProbe:
inClass:
[probeMap addProbe:
inClass:
[probeMap addProbe:
inClass:
[probeMap addProbe:
inClass:
[probeMap addProbe:
inClass:
[probeMap addProbe:
inClass:
[probeMap addProbe:
[probeLibrary getProbeForVariable: "numBugs"
[self class]]];
[probeLibrary getProbeForVariable: "diffuseConstant"
[self class]]];
[probeLibrary getProbeForVariable: "worldXSize"
[self class]]];
[probeLibrary getProbeForVariable: "worldYSize"
[self class]]];
[probeLibrary getProbeForVariable: "minIdealTemp"
[self class]]];
[probeLibrary getProbeForVariable: "maxIdealTemp"
[self class]]];
[probeLibrary getProbeForVariable: "minOutputHeat"
[self class]]];
[probeLibrary getProbeForVariable: "maxOutputHeat"
[self class]]];
[probeLibrary getProbeForVariable: "evaporationRate"
[self class]]];
[probeLibrary getProbeForMessage:
"toggleRandomizedOrder"
inClass: [self class]]];
[probeMap addProbe: [probeLibrary getProbeForVariable: "randomMoveProbability"
inClass: [self class]]];
[probeMap addProbe: [[probeLibrary getProbeForMessage: "addHeatbug:"
inClass: [self class]]
setHideResult: 1]];
[probeLibrary setProbeMap: probeMap For: [self class]];
As in the generic example, in the heatbugs case the user follows a three step procedure that puts a
customized probe map in place of the standard "variable probes only" default.
1. A new object called probeMap is created. The probeMap is an instance of the the Swarm class
EmptyProbeMap. Next we customize the probe map and pass it to the display mechanism.
2. One-by-one, tell probeMap to add probes for individual variables and messages, and those probes
are retrieved from the probeLibrary .
3. Tell the probeLibrary that, when it creates a probe display for this object, to use this special
objectprobeMap rather than the default.
It is important to understand how this customization fits in with the default probe map. The
probeDisplayManager creates a widget for every object that you tell it to. Unless you tell it
otherwise, it assumes that the widget for every object is be based on the "default probemap" which
includes probes for all instance variables, no message probes. If you alter the probeMap by the methods
we have been discussing, you are replacing the generic "has it all" probeMap with a customized
probeMap. If you right-click on the object name button in a customized probeMap, what pops up is a
probe display based on the complete probeMap specification, a map in which all variables and methods
are listed.
92
Chapter 12. Probing and Displaying the Contents of Swarm Objects
The procedure outlined above is clear and methodical. It is also open to different kinds of customization.
If there is no need for customization of individual probes, there is a "shortcut" that can be used to get
most of this work done. Swarm has a class called CustomProbeMap. The CustomProbeMap can create the
probeMap and fill it with the desired probes. Here is an example as it would appear in the heatbugs
model.
Example 12-2. Non-verbose probeMap creation
probeMap = [CustomProbeMap create: aZone forClass: [self class]
withIdentifiers: "numbugs",
"diffuseConstant", "worldXSize",
"worldYSize","minIdealTemp",
"maxIdealTemp","minOutputHeat",
"maxOutputHeat", "evaporationRate",
"toggleRandomizedOrder"
"randomMoveProbability",":",
"addHeatbug:", NULL];
[probeLibrary setProbeMap: probeMap For: [self class]];
The last argument to the method create:forClass:withIdentifiers: is basically a set of
character strings that are strung together and used inside the Swarm library to do the work of creating the
individual probes. The colon separates the variable probes from the message probes. Notice the inclusion
of NULL at the end of the input, which signals the end of the input to the CustomProbeMap.
This method will not allow customization of individual probes, so the setHideResult:1 command
that appears in the heatbugs example cannot be included. In order to get specialized probes of that sort,
we could break this into two steps, one that creates the probeMap with the default probes and then
another which adds the special probes. Consider this:
probeMap = [CustomProbeMap create: aZone forClass: [self class]
withIdentifiers: "numbugs",
"diffuseConstant", "worldXSize",
"worldYSize","minIdealTemp",
"maxIdealTemp","minOutputHeat",
"maxOutputHeat", "evaporationRate",
"toggleRandomizedOrder"
"randomMoveProbability",
NULL];
[probeMap addProbe: [[probeLibrary getProbeForMessage: "addHeatbug:"
inClass: [self class]]
setHideResult: 1]];
[probeLibrary setProbeMap: probeMap For: [self class]];
93
Chapter 12. Probing and Displaying the Contents of Swarm Objects
12.4. Controlling Precision of Display
This section deals with the control of the precision of display of floating point number on ProbeDisplays.
12.4.1. Global setting of precision
There are two types of global precision setting via :
•
-setDisplayPrecision: (int) nSigFigsSaved Sets the number of significant figures for
floating point (and double-floating) numbers diplayed on a GUI widget. Currently this is only
implemented for VarProbes. The display uses the %*g sprintf-style formatting, which can vary slightly
from implementation to implementation. If you set the number of significant figures to 3, then a float
of value of 0.6344346 is displayed as 0.634 on the GUI widget.Note that this in no way affects the
underlying stored value of the floating point number.
•
-setSavedPrecision: (int) nSigFigsSaved Sets the global default for the saving of floats
through ObjectSaver. All objects with floats and doubles as instance variables are saved with the
precision specified by this method. This is independent of the displayed precision of the same instance
variable on a GUI widget.
To actually initialise these defaults: in the top level swarm, you should add the calls to the global
probelibrary instance (which is actually created by the initSwarm call in main) during the createBegin method (this sets the precision in the global instance, before any probes are checked out of
the instance. If neither method is called on probeLibrary , then the precision defaults to six
significant figures in both cases.
Example 12-3. Global setting precision in HeatbugObserverSwarm.m
+ createBegin: aZone
{
HeatbugObserverSwarm * obj;
id ProbeMap probeMap;
[...]
probeMap = [EmptyProbeMap createBegin: aZone];
[probeMap setProbedClass: [self class]];
probeMap = [probeMap createEnd];
// set the display defaults
[probeLibrary setDisplayPrecision: 3];
// typically saved precision would be higher than displayed precision
// for statistical and data analysis purposes
[probeLibrary setSavedPrecision: 10];
94
Chapter 12. Probing and Displaying the Contents of Swarm Objects
// Add in a bunch of variables, one per simulation parameters
[probeMap addProbe: [probeLibrary getProbeForVariable: "displayFrequency"
inClass: [self class]]];
[...]
// Now install our custom probeMap into the probeLibrary.
[probeLibrary setProbeMap: probeMap For: [self class]];
return obj;
}
12.4.2. Setting Precision for Individual Probes
The formatting for an individual probe can be set directly, using a sprintf-style formatting string.
Typically, customProbeMaps are created in the +createBegin factory method for a Swarm or a
SwarmObject. To set the formatting for a floating point probe, the method from VarProbe is used:
•
-setFormatFloat: (const char *)floatFormat is applied to the instance of the VarProbe
"checked-out" of the global probeLibrary instance. The sprintf-formatting string can "over-ride"
the "%g" format set by the global precision (as above) (Typically "%g" chooses between the "%f" and
"%e", depending on the size of the exponent - which is implementation-dependent - this method
allows you to explicitly set the type of display).
In the following example, it is desired that the number of significant figures for the floating point variable
randomMoveProbability is three (3). Currently (Swarm 2.0.1) this is only works for VarProbes
and not MessageProbes, as yet.
Example 12-4. Setting precision for individual probes in HeatbugModelSwarm.m:
+ createBegin: aZone
{
HeatbugModelSwarm * obj;
id ProbeMap probeMap;
id floatProbe;
[...]
// the -setFloatFormat is applied to the probe which is
// "returned" from the call to probeLibrary
floatProbe = [[probeLibrary getProbeForVariable: "randomMoveProbability"
inClass: [self class]]
setFloatFormat: ".3f"];
// now we have the probe - put it back into the customMap
[probeMap addProbe: floatProbe];
95
Chapter 12. Probing and Displaying the Contents of Swarm Objects
[...]
return obj;
}
Or, more compactly:
+ createBegin: aZone
{
HeatbugModelSwarm *obj;
id ProbeMap probeMap;
[...]
[probeMap addProbe: [[probeLibrary getProbeForVariable: "randomMoveProbability"
inClass: [self class]]
setFloatFormat: "%.3f"]];
[...]
return obj;
}
96
Part III. Advanced Topics
97
Chapter 13. Anything C can do, Swarm
Can Do Better
Any programming statements that will work in C can also be used in a Swarm program. Hence, if one
needs access to a programming library that can be used in C, one can also access that library in Swarm.
Furthermore, functions written for C programs can be integrated into Swarm code.
13.1. Managing command line parameters
One of the obscure and difficult parts of C programming is designing a program to handle command line
arguments. The argc and argv[] approach is difficult to manage. Swarm has built-in tools to handle
this problem.
If you compile a Swarm program, you "automatically" get some built-in command line parameters. You
can see what they are when you type the program’s name, followed by -help. Here is some output from
the heatbugs program:
./heatbugs -help
Usage: lt-heatbugs [OPTION...]
$
-s, -varyseed
Run with a random seed
-b, -batch
Run in batch mode
-m, -mode=MODE
Specify mode of use (for archiving)
-t, -show-current-time
Show current time in control panel
-no-init-file
Inhibit loading of ~/.swarmArchiver
-?, -help
Give this help list
-usage
Give a short usage message
-V, -version
Print program version
Mandatory or optional arguments to long options are also mandatory or optional
for any corresponding short options.
If you type a command line like
$
./heatbugs -s -t
then Swarm will use a random number seed that is based on the system’s clock and the display of the
control panel will show the time. As a result, the random number stream used in the program will be
different each time you run the program.
A person might want to add command line parameters to their Swarm code if they want to automate the
processing of many simulation runs. For example, if one wanted to make a simulation run 50 times for
each setting of a particular parameter value, then one would need to design a way to pass that particular
parameter value from the command line. The repetition of the program can be managed by a user-created
98
Chapter 13. Anything C can do, Swarm Can Do Better
script (written in some language like Perl, for example), or with a simulation tool like Drone
(http://drone.sourceforge.net), developed by Ted Belding of the Center for the Study of Complex
Systems at the University of Michigan.
If the user wants to pass additional parameters in the command line, Swarm has built in procedures that
make argument processing a bit easier than using the command line processing available in C. This
functionality is found in Swarm’s Arguments protocol. The details of the usage of Arguments are
explained quite well in the Reference Guide to Swarm. Rather than explain every detail, we choose here
to explain one worked example 1.
The first step is to edit the main.m. Add an import command for our object that will manage the
parameters:
#import "MyParameters.h"
and then change the initSwarm command to this:
initSwarmArguments (argc, argv, [MyParameters class]);
This change tells the swarm kernel to look in your class called MyParameters for information about how
to process the command line arguments.
Next, write the files MyParameters.h and MyParameters.m. Here they are:
//Parameters.h
#import defobj/Arguments.h
@interface MyParameters: Arguments_c
{
int numBugs;
}
- (int)getBugArg;
@end
//Parameters.m
#import "MyParameters.h"
#import stdlib.h
@implementation MyParameters
1.
This example is available in full in the package ParameterHeatbugs.tar.gz
(http://lark.cc.ukans.edu/~pauljohn/Swarm/MySwarmCode/ParameterHeatbugs.tar.gz). All of the changes described here
begin with the Heatbugs application distributed in the package swarmapps-2.1.tar.gz
(ftp://ftp.swarm.org/pub/swarm/swarmapps-2.1.tar.gz).
99
Chapter 13. Anything C can do, Swarm Can Do Better
+ createBegin: aZone
{
static struct argp_option options[] = {
{"numBugs",’n’,"N", 0, "Set numBugs", 5},
{ 0 }
};
MyParameters *obj = [super createBegin: aZone];
[obj addOptions: options];
return obj;
}
- (int)parseKey: (int)key arg: (const char*)arg
{
if (key == ’n’)
{
numBugs = atoi(arg);
return 0;
}
else
return [super parseKey: key arg: arg];
}
- (int) getBugArg
{
if (numBugs)
return numBugs;
else
return -1;
}
@end
The parseKey:arg: method indicates that when the key is n, meaning the command line passed -n
after the program name, then it the corresponding argument is taken and converted to an integer (by the
atoi function, the reason for which the include of stdlib.h is needed). When another class tells our
parameter manager class to getBugArg, then the command line argument will be returned if there was
one, otherwise it will return -1.
The only interesting wrinkle arises when it is necessary to retrieve the value of numBugs from the
parameter class. When the Swarm kernel is initialized, it creates an object called arguments. Any
commands that one wants to address to the MyParameters class are instead addressed to arguments.
For example, when we want the HeatbugModelSwarm.m class to set the initial values, we add an import
statement for MyParameters.h and then we make calls against the arguments class. The syntax is like this:
+ createBegin: aZone
{
HeatbugModelSwarm *obj; id
100
Chapter 13. Anything C can do, Swarm Can Do Better
CustomProbeMap
probeMap; obj = [super createBegin: aZone];
// Now fill in various simulation parameters with default values or
// grab values from MyParameters.
obj->numBugs = 10;
if (([arguments getBugArg] != -1))obj->numBugs=[arguments getBugArg];
[and so forth]
This example sets the number of bugs equal to 10, but if the value is included in a command line option,
then that value is incorporated.
Once the Makefile is touched up to include references to MyParameters, then the program compiles and
hthe output from the help command indicates the new parameter is recognized:
./heatbugs -help
Usage: lt-heatbugs [OPTION...]
$
-s, -varyseed
-b, -batch
-m, -mode=MODE
-t, -show-current-time
-no-init-file
-n, -numBugs=N
-?, -help
-usage
-V, -version
Run with a random seed
Run in batch mode
Specify mode of use (for archiving)
Show current time in control panel
Inhibit loading of ~/.swarmArchiver
Set numBugs
Give this help list
Give a short usage message
Print program version
Mandatory or optional arguments to long options are also mandatory or optional
for any corresponding short options.
Report bugs to [email protected].
It does not make any difference whether the user starts the program with the command:
./heatbugs -n 444
or
$ ./heatbugs -numBugs=444.
$
In either case, the probe map will indicate the initial number of bugs is 444.
13.2. Using C Functions in Swarm
101
Chapter 13. Anything C can do, Swarm Can Do Better
The fundamental rules of C programming apply in Swarm. Perhaps most importantly:
•
Use prototypes for functions used in many files. If a function is defined in one file, and it is to be
used in another, then there must be a prototype in the header file and that header must be included in
each file that makes calls on the function.
•
Type functions as "static" if they are used only in one file. When a function’s use is confined to the
file in which it is called, use static to type it in order to reduce the danger of confusion that might
result if other files use functions of the same name.
If a function is defined at the top of a source code file–after the includes and imports but before the
implemenation line, then that function can be called anywhere in that file. If the function is not used in
any other files, then there is no need to put a prototype for it in the header file and the declaration of the
function should start with "static".
A function can also be defined inside a method!. It looks a bit peculiar when functions crop up inside
Objective C methods, but there is nothing wrong with doing so. Of course, when a function is defined
inside a method, then its scope is sharply restricted. That function can be called only inside that method.
There are some occasions in which is is extremely handy to define functions inside methods. Two
particulary useful aspects of this practice are as follows. First, Objective C calls to self can be made in
such functions. If a function needs some value, and it intends to get it by calling a get method such as
[self getThatNumber] it will work as long as the function is defined inside a legitimate Objective C
method. If the function is located at the top of the file, before the implementation statement, then the
term self will have no meaning and the program will not compile.
The second useful aspect is of this practice is that one can have several different functions with the same
name if those functions are set inside Objective C methods. It may seem hard to imagine situations in
which this would be useful, but they do arise.
Suppose inside a class there are two methods and each makes use of a function from the standard C
libraries. If the function expects to have some other user-defined function available when it is run, then
the user can customize that user-defined function inside each method. To be a bit more concrete, consider
the GNU C library’s binary search tree defined in the header file search.h. The function tsearch
(version 2.1) has this prototype:
void * tsearch(const void *key , void ** rootp, int (*compar) (const void *, const void *) );
The tsearch function checks to see if a node already exists by using a comparison function. If an
equal node exists, then tsearch returns that node. If no such node exists, tsearch adds the node to the
tree. Note that the comparision function used in the tsearch must be included as the last argument.
102
Chapter 13. Anything C can do, Swarm Can Do Better
The problem may arise that one wants to use different comparison functions when working with a single
tree. Once a tree is created with a comparison function called compare_node, then all calls on the tree
must use a comparison function with the same name. Perhaps there is some slight wrinkle to be
introduced when deciding whether one node is equal to another when they are being inserted and when
they are being printed out or removed. By defining several compare functions, one inside each method
that makes use of the tree, one can acheive the desired level of specialization.
13.3. Examples of Useful Functions: getInt and
getDouble
Functions can come in handy in many cases, but let’s begin with a particularly useful example that
continues with the project of managing parameters. Suppose you have a Swarm file MyParameters.m that
sets the values of many parameters. Suppose there are 50 ints and 40 doubles. You may go insane writing
methods to get each parameter specifically by name.
There is no need to write specific get methods for each variable because a combination of methods from
Swarm and C can be used to create "generic" get functions that will retrieve the values. In the top part of
the MyParameters.m file, between the include statements and the implementation statement, the functions
are defined thus:
//MyParameters.m
[import statements here]
id
makeProbe (id obj, const char *ivarName)
{
id probe = [VarProbe createBegin: [obj getZone]];
[probe setProbedClass: [obj getClass]];
[probe setProbedVariable: ivarName];
return [probe createEnd];
}
double
getDouble (id obj, const char *ivarName)
{
id probe = makeProbe (obj, ivarName);
double ret = [probe probeAsDouble: obj];
[probe drop];
return ret;
}
int
getInt (id obj, const char *ivarName)
{
id probe = makeProbe (obj, ivarName);
int ret = [probe probeAsInt: obj];
103
Chapter 13. Anything C can do, Swarm Can Do Better
[probe drop];
return ret;
}
@implementation MyParameters
[and so forth...]
These functions are made available to calls in other files by declaring them in the header file,
MyParameters.h. The declarations are inserted between the import statements and before the interface
declaration.
//MyParameters.h
[import statements here]
id
makeProbe (id obj, const char *ivarName);
double
getDouble (id obj, const char *ivarName);
int
getInt (id obj, const char *ivarName);
@interface MyArguments: Arguments_c
[And so forth...]
In any file that includes MyParameters.h, one can retrieve the value of a parameter by using the getInt
and getDouble functions. For example, if there is an instance variable defined in MyParameters called
maxHeat, it can be retrieved by the following call to the function:
getInt(arguments, "maxHeat");
This call is made against the object called arguments because, as mentioned in the previous section,
the instantiation of MyParameters is named arguments inside the Swarm kernel.
13.4. Dynamic Memory Allocation and Swarm
Zones
Veteran C programmers have no doubt tangled with the problem of dynamic memory allocation using
malloc or calloc. In its Zone protocol, Swarm has methods that can be used in place of these
functions. While there is nothing inherently wrong with using the built-in C functions to allocate
memory, there are some advantages in the Swarm methods that may reduce the danger of memory leaks.
Swarm users who are not familiar with dynamic memory allocation may wish to consult a C manual. In a
nutshell, the problem is this. If one wants to create an array, the elementary way to do so is to declare the
array like so:
104
Chapter 13. Anything C can do, Swarm Can Do Better
int array[5];
This creates an array of 5 integers. When the program runs, memory is set aside where values can be
placed into and retrieved from the array.
This standard approach only works when the user knows that there will be exactly 5 elements in the
array. What if some calculations are done during the run of the program and then it is necessary to create
an array that depends on that calculated number? This is the kind of case for which dynamic memory
allocation is needed. If, during a run, some number N is calculated, and then one needs to have an array
of length N, then the program can grab some of the system’s physical memory and use it.
Dynamic memory in Swarm can be accessed by the methods alloc: and allocBlock: in Swarm’s
Zone protocol. First, it is necessary to declare a pointer that will serve as the address of the dynamically
allocated memory. Second, the memory is allocated to that pointer. Here is an example from a class
called Point, which is used to dynamically allocate space for arrays of real numbers.
//Point.h
@interface Point: SwarmObject {
double * position;
int spaceSize;
}
-buildObjects;
-(void) drop;
-setSpaceSize:(int) size;
//Point.m
#import Point.h
@implementation Point
- buildObjects
{
//position = xmalloc(spaceSize * sizeof(double));
//Test to make sure the memory was allocated. If not, exit immediately
//if(position==NULL) exit(8);
position = [[self getZone] allocBlock: spaceSize * sizeof(double)];
return self;
}
- (void)drop
{
//free(position);
[[self getZone] freeBlock: position blockSize: spaceSize * sizeof(double)];
[super drop];
}
- setSpaceSize: (int)size
{
spaceSize=size;
return self;
105
Chapter 13. Anything C can do, Swarm Can Do Better
}
Note that for the C programmer’s information there are commented-out versions of malloc and free
calls.
When a user wants to use the Point class to create a new Point, which has an array of doubles inside it,
then an instance of the Point class is created in the usual Swarm way. Then the size is set, and then the
Point is told to build its objects, which allocates the dynamic memory. For example:
id
newPoint;
newPoint=[Point createBegin: [self getZone];
newPoint= [newPoint createEnd:];
[newPoint setSize: N];
[newPoint buildObjects];
After that space is allocated, then it can be used by methods in the Point class as if it were an array. The
reason that one can treat the pointer to the dynamically allocated memory as if it were an array is found
in the fundamental similarity of pointers and arrays in C. Interested research should consult the C
manuals for a comparision of pointers and arrays. To consider a usage example, a method could be
written to fill the array with random numbers between 1 and 5.
- fillRandomly
{
int i;
spaceSize; i++)
for(i = 0, i
{
position[i]=[uniformDblRand getDoubleWithMin: 1 withMax: 5];
return self;
}
}
A memory leak is a flaw in a program which causes it to access dynamic memory and then "waste" it by
dropping all references to it without letting the operating system know that the memory is no longer
needed. In C, the free() function tells the operating system that the memory can be reallocated to
other purposes. If the programmer forgets to free memory that is no longer needed, then the memory
demands of the program will expand with each new allocation, taking memory that might be used by
other applications and eventually causing the program to crash.
In Swarm, memory allocated with allocBlock: can be freed explicitly with the freeBlock:
method. The usage of freeBlock: is illustrated in the drop method of the Point class. This drop
method is used only to free the dynamic memory, but it would also explicitly drop any Swarm objects
that were created inside the object. The topic of designing programs to avoid memory leaks is discussed
further in the next section.
106
Chapter 13. Anything C can do, Swarm Can Do Better
13.5. Dropping Unused Objects
Most Swarm objects will respond to the drop message. This message causes them to execute whatever
commands are necessary to remove themselves from memory. When objects created by user-created
classes are no longer needed, they should be dropped as well. It is vital, therefore, to customize the drop
method of a user-defined class so that all objects created within the object are explictly dropped.
In the Point class, the super class’s drop method is inherited from SwarmObject. However, if we were to
tell a Point object to drop, it would not automatically drop the dynamically allocated memory referred to
by the pointer position. Similarly, any other Swarm objects allocated in the Point object would not
be dropped. In order to be sure these are dropped, the drop method should be overridden and customized.
When that method is overridden, it is vital to make sure the super class’s drop method is executed. That
is the reason that the Point class’s drop method begins with [super drop]. Any objects that have been
allocated in Point, such as the memory devoted to the variable position, should be taken care of at
that stage. Any Swarm objects that have been created, such as lists, list indexes, or other objects should
be dropped in the drop command.
Many users think that there ought to be an "automatic" way to drop all objects that exist inside an object.
This would certainly be convenient, since rewriting a drop method to make sure all objects are correctly
disposed of can be tedious and possibly error-prone. While there is no such automatic object-dropping
facility, there is a way to design Swarm code that comes close.
To make sure that all objects inside another object are dropped, users might consider a strategy that uses
more carefully. Instead of following the Zone usage examples provided by most Swarm
applications, consider instead creating agents inside separate memory zones. When a zone gets the drop
method, it does drop all objects inside it!
Zones
Here is how such a program might be designed. Suppose that agents are to be created in the model
swarm by a for loop. The usual approach would create the objects in the model swarm itself, using the
Zone of the model swarm.
//in the buildObjects method of ModelSwarm.m
numAgents;i++)
for(i=0;i
{
id agent;
agent=[Agent createBegin: self];
agent=[agent createEnd];
[agentList addLast: agent];
}
Suppose that instead of creating the instances of the class Agent inside the model swarm itself, we create
a Zone object each time through the loop, and then create the agent inside that zone. For example,
//in the buildObjects method of ModelSwarm.m
numAgents; i++)
for(i = 0;i
{
id agent, newZone;
107
Chapter 13. Anything C can do, Swarm Can Do Better
newZone=[Zone create: self];
agent=[Agent createBegin: newZone];
agent=[agent createEnd];
[agentList addLast: agent];
}
The Agent class might create all kinds of objects, and we could use the method described above to write a
drop method for the Agent class. However, this second approach has simplicity on its side. If it is
necessary to drop an agent, instead of using the command [agent drop], we instead find out what the
agent’s zone is, and drop that:
//first, suppose you want to remove an agent named "agent".
//Remove references to agent from the list
[agentList remove: agent];
//Then drop that agent’s zone
{
id agentZone;
agentZone=[agent getZone];
[agentZone drop];
}
//This could be achieved with a single line: [[agent getZone] drop];
This Zone-oriented approach might bring a bit of peace of mind because it eliminates the danger of a
memory leak that may result when an agent is dropped but the objects inside it are not.
108
Chapter 14. The Swarm Collections
Library
14.1. Overview: the List, Map and Array Protocols
The most frequently used kinds of collections are the List, Map and Array protocols. They have some
elements in common. They all comply with the Collection protocol, most importantly, which means
they have methods with which items can be added, retrieved, and removed. Also, each can be used to
create an index object, which can make management of lists an easier chore.
It is very important to note that these collections are primarily intended to manage objects, not integers
or floating point values. 1 If you need an array of integers (or floats or chars or whatever else), just use an
ordinary C array. When it is necessary to use strings, integers, or floating point values in a Swarm
collection, there are two workarounds. One is to use typecasting to put those other values inside the
space allocated for a pointer to an object. For various reasons, that approach is not as desirable as the
alternative of creating "wrapper objects" that can contain those other types of variables. In short, while
typecasting will often work, it is generally a better strategy is to design more carefully the objects you
want to keep in Swarm collections and use recommended procedures for retrieving them.
Some commands that work in Swarm collections are:
1.
•
getCount: Returns the number of members in the collection
•
atOffset: i: Retrieves the ith member of the collection
•
atOffset:i put: obj: Inserts obj at location i
•
contains: obj Returns 1 if obj is member
•
remove: obj: Removes object obj
•
removeAll: Removes all objects from collection, but leaves the objects in memory
•
deleteAll: Removes all objects from collection and deletes them from memory
•
forEach:M(message): Sends message to all members
Type casting for both storage of variables in collections as well as usage of non-object values for keys was discussed in the
original Swarm design. Roger Burkhart defined a protocol MemberType which would have been adopted by the Collection
protocol: “The MemberType option may be used to declare the type of member which a collection contains. Its value must be
an object having one of the ValueType types defined in defobj. (..Currently no ValueType objects are implemented, so
MemberType is not supported.)” This protocol was to have two methods: -setMemberType: aDataType and
-getMemberType.
109
Chapter 14. The Swarm Collections Library
This chapter does not discuss the Swarm Set protocol because, at the current time, it has no functionality
beyond the regular Swarm List protocol.
14.2. Choosing between Lists, Maps, and Arrays
The different kinds of collections objects are useful for different purposes. The List class can be used to
create easy-to-use containers that make it relatively simple to manage iterative chores. Use a Swarm List
when you intend to have all objects processed in order, for example. (Lists can also be processed in a
randomized order). The Map and Array classes are intended for more structured maintenance of
collections.
Because they serve these specialized objectives, there are some commands uniquely available to each of
the Swarm container classes. For example, as we saw in an earlier chapter, the List class can respond to
methods like addFirst:, addLast:, removeFirst, and removeLast. A List object can be used in a
flexible way, objects can be thrown onto the end or the beginning of the list with these methods. These
are not available in Map or Array, because Map and Array objects have more intricate internal structure.
A Swarm Array object is used when it is necessary to store objects in a specific order. The Swarm Array
is somewhat similar to a C array, in the sense that objects can be inserted at a particular position and their
values can be retrieved from that position. A Swarm Array can be processed iteratively, as a List can.
A Swarm Map is used when objects are not stored according to their numerical position in a list, but rather
according to the value of some object. For example, a Map can store objects that have rankings of favorite
foods for each of several people. If each person is an object, then the person’s identity works as a "key"
that controls the insertion and removal of the object from the Map.
Enhancement and streamlining of the Swarm Collections library is an ongoing chore, but at the current
time the user’s choice of List, Map, or Array is partly driven by the way these classes are implented in
Swarm. The List and Map classes are comparatively slow. If one needs to make repeated accesses to a
List or Map from randomly selected positions, the program will run comparatively slowly. Here’s why:
1. Suppose you have a Map and you have entered objects that represent food tastes for each of 500
people.
2. If you then tell your Map object to retrieve the food preference of the person "Bart", for example,
then the Map will be processed from the beginning (the first inserted object) and each will be checked
to see if its key (its "owner," as it were) is "Bart."
3. If Bart’s object happens to be at the end of the Map, then a lot of objects will be checked.
4. Then, when you ask for the object of person "Fred", it begins at the start of the Map and checks,
one-by-one, until it finds the object whose key is Fred.
110
Chapter 14. The Swarm Collections Library
At the time of writing, the Map object, has no way to go straight to the one you want 2, so it goes through
this repetitive checking process. The same is true of the List class. As a result, if there are many objects,
programs will run slowly when they try to insert and retrieve data for specific objects when using Swarm
Lists or Maps.
In contrast, the processing of a Swarm Array can be quite fast because the elements are entered with
integer keys. A Swarm Array can quickly retrieve item number ten. Unlike a Map, it does not start at the
beginning and go through a sequence of checks until it comes to the tenth item. Because of the internal
structuring of the Swarm Array, the tenth item is retrieved without checking the first nine.
As a result of the aforementioned issue about the speed of the program, there is going to be a judgment
call. A Map will work fine and quickly if there are just a few items stored, but the time wasted looking for
a specific item increases with the length of the list. An Array might be a good choice, except allocating
space for an array may waste memory. For example, suppose we are preparing to survey 20 people out of
a population of 100,000. If each person is assigned a number, and then numbers are chosen at random,
we might end up with people in our sample that are numbered {44, 63, 555, 4432, 6689, 21001, 44934,
78343, 99921}. If we use a Map, we could just add the 10 objects. On the other hand, if we wanted to use
an Array with the person’s number serving as the Array index, we would have to allocate an Array with
100,000 elements in order to store these ten items. This wastes memory, but objects can indeed be
retrieved quickly. Most people would prefer a Map for this purpose. If there were 10,000 people being
sampled, however, the Array might work best.
14.3. Using Swarm Arrays
The Swarm Array is the easiest to use of the Swarm collections. At create-time, the size of the Array is
set. For example, to create an Array called foods that has 15 elements, this code will get the job done:
id Arraya foods;
food=[Array create: [self getZone] setCount: 15];
If it is necessary to add elements to the Array, then the setCount:method of the Array class can be
used to increase the size ofthe Array.
Entries are inserted, accessed, and removed from the Array in a rather obvious way. As in C, the
numbering of the Array elements begins with 0, so the last element in the Array has the index value 14.
To insert an object called steak into the foods Array at index value 6, the appropriate command is:
2.
a potential enhancement to the collections library is an option that would allow the user to select a hash-table implementation
of the Map protocol, which would effectively allow this kind of random-access
111
Chapter 14. The Swarm Collections Library
[foods atOffset: 6 put: steak];
When it is necessary to retrieve the steak object, this will do:
retrievedObject=[foods atOffset: 6];
A Swarm Array object will allow quick access of any particular object because the objects are indexed by
an integer.
An Array will work like a Swarm List for the purposes of repetitive processing. Since an Array includes
a fixed number of objects, they can easily be accessed with for loops, but while loops will work just as
well. An Array object can be told to create an index object for itself, and that index can be used in the
way that we described in the chapter on Lists.
There is only one surprise awaiting users of the Array protocol: objects cannot be removed from Arrays.
Since the Array protocol’s major strength is its speed, and the speed depends on maintaining a fixed list
of items, the remove method of the Collections protocol is disabled in Array. Rather than remove an item
from an Array, one must put nil at a position in the Array. This achieves the same effect as remove, but
it preserves the Array "placeholder" so that future objects can be inserted at that spot.
14.4. Swarm Maps
Experienced programmers are familiar with the term "key" as it refers to management of collections.
People who are new to programming and Swarm often find this idea quite confusing. Hence, we will
explain.
Think of a Map as two rows of objects. The bottom row contains the objects you want to store and
retrieve. The top row contains the names of the objects. If you put an object into a Map, you tell the Map its
name and the Map handles the problem of inserting the object into the bottom row and putting the name in
the top row. When an object is removed from a Map, its name is also removed from the top row. If you
need to get an object, you tell the Map its name and the Map then goes to the right position in the top row
and then it gives back the corresponding object in the bottom row.
The names of the objects are called "keys" in Swarm (and other programming languages). The usage of
keys is somewhat confusing and difficult for newcomers because the keys should be Swarm objects.
Example 14-1. Maps and keys
Here is a simple example. Suppose we are creating a series of objects in a for loop. In each step, we tell
the class Person, which is subclassed from SwarmObject to create an instance aFriend and we add that
Person to a listOfPeople. Then we tell the class Preferences to create an instance and we insert the
112
Chapter 14. The Swarm Collections Library
instance into a Map, using the Person object as the key. Note that the Map and List are declared before the
loop.
id List listOfPeople;
id Map mapOfPreferences;
listOfPeople=[List create: [self getZone]];
mapOfPreferences=[Map create: [self getZone]];
for(i=0; i
50; i++)
{
id aFriend, aPreference;
aFriend = [Person createBegin: [self getZone]];
aFriend = [aFriend createEnd];
[listOfPeople addLast: aFriend];
aPreference = [Preferences createBegin: [self getZone]];
aPreference = [aPreference createEnd];
[mapOfPreferences at: aFriend insert: aPreference];
}
To retrieve a preference object, it is first necessary to figure out which person you want and then tell the
Map to return that person’s preference. For example, suppose you decide to grab the 6th person and find
out what their preferences are. Then try this:
id aParticularPerson, thePreference;
aParticularFriend=[listOfPeople atOffset: 6];
thePreference=[mapOfPreferences at: aParticularFriend];
// here you can do anything you want to with thePreference you get back.
Similarly, you could cycle through the listOfPeople by creating a Swarm index for the
listOfPeople and then use the returned value from [index next] as the key:
id index, aPerson;
index= [listOfPeople begin: [self getZone]];
while( (aPerson=[index next])!=nil )
{
id thePreference;
thePreference = [mapOfPreferences at: aPerson];
// here you insert some code that does something with the retrieved preference!
}
This example works because the Map object automatically compares the objects acting as keys to see if
they are identical. This is the default compare: method of the class SwarmObject. If one wishes to
compare the objects by another criterion, then a comparison function can be declared when the Map is
created. Lacking a user-defined comparison function, the Map will always use the compare: that is
defined in the key object. Lacking such a function, the program should not run.
113
Chapter 14. The Swarm Collections Library
When an object that is being used as a key has a compare: function, then the Map will use that function
to decide if the two objects are equal. If a comparison function is declared when the Map is created, then
that comparison function will be used instead. Swarm includes some built-in comparison functions, but,
as we will see, the usage of customized functions is quite easy and convenient. If no comparison function
is declared, then the fall-back approach checks for a compare: method in the key object itself. Since all
objects that are based on Swarm inherit from the defined object class, all such objects have (at least)
access to the bare minimum compare: that checks to see if two objects are identical. Classes from
which key objects are created can, of course, create more informative comparison methods.
Lets begin with the problem of using integers as keys. There are two possible approaches, typecasting
and the creation of "integer wrappers." The typecasting approach is used in many Swarm applications.
The essence of this approach is to use type casting to trick the Swarm library to make it treat an integer
as if it were an object. Without going too deeply into the computer science of the issue, it may not be
possible to explain this, but we will take a stab at it. On many computer systems, a pointer uses the same
amount of space as an integer. Hence, it is possible to cast an integer as a pointer to "fool" the compiler,
and then to retrieve the value of the integer from the place in memory where the pointer was supposed to
be. (Confusing? Many users say, yes!) Instead of inserting objects into a Map with objects as keys, using
this casting trick, one can insert objects at integer values that are cast as objects of type id. For example:
[mapOfPreferences at: (id) 13 insert: aFriend]
In order for this to work, the mapOfPreferences has to be created so that it knows integers are going
to be passed through in this way. At create time, the Map must be told to use the built-in comparison
function that will uncast the pointers and compare them.
mapOfPreferences = [Map createBegin: aZone];
[mapOfPreferences setCompareFunction: compareIntegers];
mapOfPreferences = [mapOfPreferences createEnd];
The GridTurtle code example grid3b.m uses this appoach.
This "casting" approach to creating a keys has some serious shortcomings. Most importantly, it is
severely nonportable. Code written in this way on a Linux system might not work on a DEC Unix
system. Why? On DEC Unix, an integer and a pointer do not have the same size.
What is the alternative if one wants to enter objects into a Map using integers as keys? The answer is:
create an "integer wrapper" class. This integer wrapper can store and retrieve the values of integers, and
these objects can be used as keys in Swarm Maps.
Here is the integer wrapper class 3, which is called Integer:
3.
There is an example of a program by Marcus Daniels that uses integer wrappers at MapIntegerIndex.txt
(http://lark.cc.ukans.edu/~pauljohn/SwarmFaq/WorkingExampleCode/MapIntegerIndex.txt).
114
Chapter 14. The Swarm Collections Library
//Integer.h
#import defobj/Create.h
@interface Integer: CreateDrop
{
int value;
member_t link;
}
- setValue: (int)value;
- (int)getValue;
@end
//Integer.m
@implementation Integer
- setValue: (int)theValue
{
value = theValue;
return self;
}
- (int)getValue
{
return value;
}
@end
In order to use the Integer class keys, the Map has to be told how to compare them, so it knows when it
has found a key that matches what it is searching for. In the example, the comparison function is called
compareIntegerObjects ( ) and it takes two objects, and it then retrieves the value from each
object, and returns the difference of the two. When 0 is returned, it is treated as a "match". The following
code snip creates 50 Preference objects and it creates an Integer object for each one. Each time the user
wants to insert an object into a Map, an Integer wrapper is created.
#include Integer.h
#include Preference.h
// Here is a "comparison function"
int
compareIntegerObjects (id obj1, id obj2)
{
return ((Integer *) obj1)->value - ((Integer *) obj2)->value;
}
id
id
id
List listOfPeople;
Array arrayOfIntegers;
Map mapOfPreferences;
mapOfPreferences = [[[Map createBegin: [self getZone]]
setCompareFunction: compareIntegerObjects]
createEnd];
115
Chapter 14. The Swarm Collections Library
for (i = 0; i
50; i++)
{
id aPreference;
aPreference = [Preference createBegin: [self getZone]];
aPreference = [aPreference createEnd];
anInteger = [[Integer createBegin: [self getZone] setValue: i] createEnd];
[mapOfPreferences at: anInteger insert: aPreference];
}
After the mapOfPreferences is filled with objects, then they can be retrieved by their key values.
One can create a single Integer object, and then insert a value into it, and then use it as the key. The
following will work to retrieve the Preference object corresponding to the Integer key with value 23.
Supposing the Preference class has a method outputVitalInfo, this will retrieve those objects and
tell them to execute that method.
id desiredPreferenceObject;
Integer * key = INTEGER(0);
//same as [key setValue: 23];
key- value =23;
desiredPreferenceObject= [mapOfPreferences at: key];
printf("The preference Object gives this output \n");
[desiredPreferenceObject outputVitalInfo];
This is written out this way to make the code as clear as possible. The example program cited above
includes a number of macro definitions that can be used to make working with the Integer class more
elegant (and less tedious).
The same kind of approaches can be used if one wants to use strings as keys in a Map. The easiest way to
use strings as the keys is to use the Swarm String protocol to create objects that act as "wrappers" for the
string names. In the Swarm Documentation, one can find the GridTurtle test programs for the Collections
library. The file grid3.m contains an example that does exactly this. The code in grid3.m creates a string,
equal to the index variable i, and then sets that string into a String object, which is in turn used as the
key. Of course, there is no reason that the chosen character string had to be a simple number. If you want
to, you can create strings for all your friends and wrap them inside String objects.
Unless you define a comparison function, the String objects are compared according to the compare:
method that is defined for Swarm Strings. This function is defined in the Swarm library in the file
StringObject.m. The comparison uses the C function strcmp to find out if the object’s own string is the
same as the string retrieved from the other object (which is called aString ):
- (int)compare: aString
{
return strcmp (string, ((String_c *) aString)->string);
}
116
Chapter 14. The Swarm Collections Library
As in the case of integers, the built-in compare: method can be over-ridden by a customized comparison
function declared by the user.
14.5. Accessing Collections with Indices
Any collection can generate an Index that can be used to access its members. The command to create an
Index for a given collection is begin:. The type of Index created by a collection depends on the type of
collection being indexed. If one desires an index of randomly shuffled members of a collection, then
beginPermuted: is the necessary command.
An Index object will understand messages like get, which will return the object at which the Index is
currently positioned, next, which will move the Index object to the next object in the collection and
return that object, and findNext: objectName, which will cause the Index object to search forward
into the collection until it finds an object that is the same as objectName.
The usage of indexes can make some code work more smoothly. For example, as we noted in our
discussion of Lists, the Index can be used to orchestrate the repetitive processing of a List object in the
following way:
id aCollection;
id Index index;
aCollection = [List create: [self getZone]];
index = [aCollection begin: [self getZone]];5
while( (anObject=[index next]) != nil )
{
//write code that does something to anObject
}
This code will cycle through the List. Because the Index object remembers its position in the List, the
processing is efficient in the sense that the next command causes just one step to be taken. This is a
sharp contrast with the usage of collections methods like [aCollection atOffset: i], which cause the
List to begin at the beginning and count up to the ith object.
Perhaps the most significant advantage of indices is that they can be used manage collections. If items
are removed from a collection by its Index object, then the Index object is automatically kept up to date.
On the other hand, if items are removed directly by collections methods, such as [aCollection remove:
thisObject], then the indexes that had been previously created for that List will be damaged and they
must be dropped and recreated. On the other hand, if an Index is positioned on the desired member, and
then the index is told to remove that object, then the change will be made in the collection and the index
will automatically be adjusted.
In order to make an index remove objects correctly, the fundamental problem is to correctly position the
index within the collection. To make an index object reposition itself at the beginning of the collection,
the command [index setLoc: Start] can be used. Index objects can be manually positioned with
117
Chapter 14. The Swarm Collections Library
methods like [index findNext: targetObject] or [setOffset: i]. These will, respectively, move to the
next object which, according to the comparison function, matches the target object, or move the index to
the ith object in the collection. Once the index is positioned, then the object can be removed with [index
remove].
The Swarm List class creates Index objects that have more functionality than the other classes. The
Index of a List class collection can be used to insert objects as well as delete them. For example, [index
addAfter: newObject] can set a new object into a collection after the object currently under the index.
The addition of objects by the index is not allowed in Swarm Arrays or Maps because of the internal
structure of those classes.
118
Chapter 15. Using the Random Library
The creation of random numbers is a surprisingly complicated affair. It is also vital to the success of a
simulation exercise. Sooner or later you will want to simulate some real-life stochastic phenomenon
which occurs in a manner resembling an identifiable statistical distribution, for example (to take the
canonical simulation example) the time intervals between customers arriving to join a queue in front of a
bank teller. Or perhaps you just want to add some controlled unpredictability to the behavior of your
agents. One of the strengths of Swarm, as a simulation framework, is that it includes a number of
methods for the creation of streams of random numbers that meet exacting standards.
Before we step in to the details of the Swarm random library, there is one point that needs to be made.
There is no such thing as a random number, at least as far as a computer is concerned. Every number a
computer creates comes from a formula. The challenge is to find a formula that makes the numbers
sufficiently unpredictable that we can proceed as if they are random numbers that satisfy statistical
requirements, like statistical independence of successive draws. This means that the device puts out
numbers so that, even knowing all previous values, one is not able to predict the next number to come out
without looking inside the program to steal the algorithm that is generating the numbers. The procedures
we describe here might are more correctly be called pseudo-random number generators. With that point
being clear, we often refer to them as random number generators.
In his section of the Swarm User Guide, we provide a survey of the basics of using the Swarm Random
Library. A detailed technical manual has been prepared and it is included as an appendix to this guide. It
goes into considerably greater depth on the technical issues that arise in generating random numbers.
15.1. Built-in Random Number Distributions
Since not all users want to become experts in random (well, pseudo-random) numbers, we will start with
the easy alternative. In the Swarm kernel–the code that executes at the beginning of any swarm
program–there are three objects that can give useful random number streams. These objects are
initialized and structured according to built-in assumptions that reflect the state-of-the-art in the creation
of random number streams. The first two supply integers at random, the last one supplies numbers on a
continuum.
The three built-in random number distributions are:
•
uniformUnsRand This object will draw a positive integer at random within a user specified
interval. To get a random integer between 3 and 47, this command will work:
myUnsigned = [uniformUnsRand getUnsignedWithMin: 3 withMax: 47];
The object uniformUnsRand is an instance of the Swarm class UniformUnsignedDist. Readers can
consult the documentation for a full explanation of all available options.
119
Chapter 15. Using the Random Library
•
uniformIntRand This object will draw an ingeger at random from an interval that may include
negative or positive numbers. A usage example would be:
myInteger = [uniformIntRand getUnsignedWithMin: -44 withMax: 47];
This object is an instance of the Swarm UniformIntegerDist, which is fully documented in the Swarm
documentation.
•
uniformDblRand This object will draw a real number from a user-specified interval. Unlike the
previous two, this distribution is not restricted to integers. If a random number from the interval [1,5]
is needed, this command will work:
myDouble
= [uniformDblRand getDoubleWithMin: 1 withMax: 5];
This object is an instance of the Swarm UniformDoubleDist.
These are global objects that can be used in any file that is part of a Swarm program.
When a Swarm program starts, it initializes these random number creators. They will deliver the same
stream of numbers every time the program is run unless the user adds the "vary seed" parameter when the
program is run. This parameter is -s and is added on the command line. For a full list of possible options,
type the name of the application followed by -help.
These built-in random distribution objects use another built-in Swarm object that is called
"randomGenerator". The object "randomGenerator" feeds input into each distribution. The meaning of
the term "random generator" is explored in the next sections.
15.2. Overview of the Random Library
Suppose you want to draw random numbers from a Normal Distribution with a mean of 33 and variance
of 10. There is no "normal distribution object" created automatically in the Swarm kernel, you have to
create that in your code. In order to explain how this is done, it is important to understand the two-step
nature of the process of creating random numbers from a distribution.
Mathematically speaking, numbers are created as draws from a particular distribution through a two-step
process. First, one or more numbers on a given interval are drawn. If one is creating a continuous
distribution, the interval is usually [0,1). Then using various formulae from the field of statistics, a draw
from a particular distribution is created that depends on the draw(s) in the first step. This two-step
process is documented in the literature on simulation. (A very readable and complete treatment is found
in Averill M. Law and W.David Kelton, Simulation Modeling and Analysis, New York: McGraw Hill.)
The first stage in the process uses an object called a random number generator. A random number
generator is a component that can generate unpredictable numbers within some interval that are "equally
likely" to occur. There have been many kinds of procedures proposed for creating numbers that appear to
120
Chapter 15. Using the Random Library
be random. Swarm includes a great many of these. The default random generator, the one that Swarm
uses to generate its built-in random number objects, is MT19337. The generator has a period close to
219937 (1 x 106001), so there is no danger of running a simulation long enough for the generator to
repeat itself. At one microsecond per call, it would take about 3.2 x 105987 years to exhaust this
generator. For comparison, the age of the Universe is ‘only’ 2 x 10¹⁰ years! This generator can be asked
either for a real number (a variable of type double) between [0,1) or for an integer, which will be
uniformly distributed on the range [0,4294967295] = [0,232-1].
In the second stage, the output from the random number generator is used to create a random variate that
meets the specificiations of a particular distribution. Of course, some are done more easily than others. If
one needs a draw from a Uniform distribution, then the output of the random number generator itself can
be used. On the other hand, some distributions require complicated transformations in order to create
numbers that appear as if they were generated from the distribution. For many common statistical
distributions, the code to transform the uniformly distributed random numbers into other distributions are
provided in the Swarm library. While there are some distributions that are not currently supported, they
can typically be constructed by users with the existing distributions as building blocks.
The Swarm Random library can be divided into two parts, which parallel the two-stage process we have
described. There are
•
Generators
•
Distributions
The following sections will dig into the details of these libraries, but first we will offer a couple of simple
usage examples.
Suppose one wants to draw numbers from a normal distribution. The normal is a well known distribution
and it has known statistical properties. The object "randomGenerator" is created when the Swarm kernel
is initialized, so it can be used in any distribution as the random number generator. To create a
NormalDist distribution object and connect it to the predefined MT19937 generator, this code will suffice:
#import random.h
//This includes the Swarm random library
id NormalDist myNormalDist; //This names your object and adopts the NormalDist protocol
myNormalDist = [NormalDist create: [self getZone]
setRandomGenerator: randomGenerator];
If for some reason, one does not want to use MT19937 as the generator, then one of the other Swarm
generators can be selected and explicitly created. The next code example uses a generator called RWC8gen.
This code will first create an instance of that generator, then it will create an object to draw normally
distributed observations.
int mySeed = 123776;
121
Chapter 15. Using the Random Library
id myGenerator;
id NormalDist myNormalDist;
myGenerator = [RWC8gen create: [self getZone]
setStateFromSeed: mySeed];
myNormalDist = [NormalDist create: [self getZone]
setRandomGenerator: myGenerator];
The random library is designed in a highly versatile way. Each generator must have a "seed" value, a
starting place from which to spin out the random numbers. As long as one leaves the seed at the same
value, then the stream of random numbers will be replicated each time the program is run. If one does
not want to specify a seed, then that chore can be left up to Swarm, which will insert a seed on behalf of
the user. The way to create a generator that uses the system default value for the seed is shown here:
myGenerator = [RWC8gen createWithDefaults: [self getZone]];
Another example of the versatility of the Swarm random library is in the design of the distribution
classes themselves. We have already seen examples in which random numbers are drawn according to
user specified requirements. In the case of the Normal distribution, one can draw from a distribution with
a mean of 0 and variance of 1.3 with this command:
double sample;
sample = [myNormalDist getSampleWithMean: 0.0 withVariance: 1.3];
If one expects to want many draws from a distribution with that same set of parameters, then the
distribution object can be told to set those values as the defaults. After the default values of the mean and
variance are set, then values retrieved from that distribution object can be retrieved with the simpler
method getDoubleSample. For example:
[myNormalDist setMean: 0.0 setVariance: 1.3];
sample = [myNormalDist getDoubleSample];
Of course, each distribution will have its own parameters and particular methods for setting them. These
parameters can be reset at any time.
15.3. The Random Number Generators
Recall that computers can’t create real random numbers, just streams of numbers that appear random to
the outside observer. As a rule of thumb, users are well advised to choose a well tested generator which
has a long period, which is the number of draws that can be made before the sequence repeats. We also
want a generator that runs fast and uses little memory. (These wishes are of course in conflict with each
122
Chapter 15. Using the Random Library
other, so choice involves compromise.) And the generator should perform ‘acceptably’ in a statistical
sense. Readers who wish to pursue what this might mean are referred to the bibliography.
15.3.1. How to use the default random generator
Suppose you want to draw some random numbers with the default random generator. When a swarm
program runs, it creates a globally available object called randomGenerator that can be used in any part
of the program to draw random numbers.
If you want to draw unsigned integers, try this:
unsigned int myUnsigned;
myUnsigned = [randomGenerator getUnsignedSample];
The values returned will be uniformly distributed in the range [0,4294967295] = [0,2 32-1].
Or, if you need floating-point values instead, you can say
double myDouble;
myDouble = [randomGenerator getDoubleSample];
The returned values will be uniformly distributed in the range [0.0,1.0), i.e. they may be equal to 0.0 but
never 1.0.
15.3.2. A list of generators in Swarm
The default generator used in Swarm is MT19337, but there are a number of others that are provided to suit
the needs of experimentation and replication of previous studies. These generators have been subjected
to various statistical tests, and the results of these tests are described in Advanced Usage Guide.
The current generators in Swarm are:
•
ACGgen: Additive Congruential Generator
•
C2LCGXgen: A short component based generator. This is considered a high quality generator
•
C2MRG3gen: Combined Multiple Recursive Generator
•
C2TAUSUSxgen: A Family of Combined Trausworthe generators
•
C3MWCgen: Combined Multiply With Carry Generator
•
C4LCGXgen: Combined random generator using 4 (PMM)LGC generators
•
LCGxgen: Family of Linear Congruential Generators
123
Chapter 15. Using the Random Library
•
MRGxgen: Family of Multiple Recrusive (LCG) Generators
•
MT19937gen: ’Mersenne Twister’ Twisted GFSR generator. The Swarm default
•
MWCxgen: Family of Multiply-With Carry generators
•
PMMLCGxgen: Family of Prime Modulus Multiplicative Linear Congruential Generators
•
PSWBgen: Subract-With-Borrow Congruential Generator with prime modulus
•
RWC2gen: 2-lag Recursion With Carry generator
•
RWC8gen: Multiply With Carry generator
•
SCG: Subtractive Congruential Generator
•
SWBxgen: Family of Subtract-With-Borrow Congruential Generators
•
TGFSRgen: Twisted GFSR generator
•
TT403gen: A single long generator recommended for use
•
TT775gen: A single long generator recommended for use
•
TT800gen: A single long generator recommended for use
All the Swarm generators except two conform to the ‘SimpleRandomGenerator’ protocol. The two ‘split’
generators that do not, C2LCGX and C4LCGX, are described in the Generator Usage Guide.
15.3.3. A note on starting seeds
Whenever a random generator is created, its state has to be initialized. It uses a "seed", a positive integer,
as its starting place. To make life easy for the user, the Swarm generators can be initialized to a
predictable and repeatable state. Every time you initialize a given generator with a particular seed, you
should get the same sequence of numbers from it.
You create and initialize a generator with a specific seed this way:
#import <random.h>
id <SimpleRandomGenerator> myGenerator;
unsigned int mySeed;
mySeed = 123776;
myGenerator = [RWC8gen create: [self getZone]
setStateFromSeed: mySeed];
If it is necessary to set or reset the seed after the generator has bene created, it can be done with the
setStateFromSeed: method:
124
Chapter 15. Using the Random Library
mySeed = 4532657;
[randomGenerator setStateFromSeed: mySeed];
You may do this any time during a simulation, not just at the start.
If you start your simulation with the command line option -s, which is short for –varyseed, then the seed
will be chosen at random on the basis of the system clock. If you do not add that command line option,
your simultion will use the exact same stream of random numbers every time you run it. This makes
replication easy.
15.4. The Distributions in Swarm
All distributions are created through the two-step process outlined above. First one needs a random
number generator. Then one initializes the distribution, optionally setting its parameters at the time of
creation.
15.4.1. Classes that adopt the ProbabilityDistribution
Protocol
The distributions currently offered in the Swarm library are
•
BernoulliDist: Bernoulli distributions describes the number of "successes" in a fixed number of trials
•
ExponentialDist: Exponential distribution
•
GammaDist: Gamma distribution
•
LogNormalDist: log-Normal distibution
•
NormalDist: Normal distribution
•
RandomBitDist: Random Bit Distribution: returns YES or NO with equal likelihood
•
UniformDoubleDist: Uniform continuous distribution on a range
•
UniformIntegerDist: Equally likely integers in a range
•
UniformUnsignedDist: Equally likely integers in a positive range
15.4.2. Matching generator and distribution objects
125
Chapter 15. Using the Random Library
Each distribution object must have a generator associated with it. You may create a new generator for
each distribution. Or, you may connect multiple distribution objects to one generator, so that they end up
drawing output from the generator in an interleaved fashion. (This is what has been done with the
predefined distributions.)
There is a method called createWithDefaults that can be uses to streamline the creation process. Here is a
usage example:
myNormalDist = [NormalDist createWithDefaults: [self getZone]];
If you create distribution objects using the createWithDefaults method Distribution Usage Guide,
each distribution object is assigned its own, newly created, private random generator. Each distribution
class uses a different class of default random generator, just to keep things as statistically independent as
possible.
You can assign a seed for the private generator with code like this:
[[myNormalDist getGenerator] setStateFromSeed: 9874321];
The usage of createWithDefaults is not without its dangers, however. If createWithDefaults is used to
create two distributions of the same type, say two NormalDistributions, then (obviously) then each will
have the same kind of private generator created for it. And, unless the simulation is started with the
–varyseed option, then both private generators will start with the same seed and the two distributions will
generate identical numbers.
15.4.3. Setting numerical parameters of distribution objects
Each distribution has its own set of key parameters. You may deal with these parameters in three
different ways:
1. Assign "default parameter values" when the distribution object is created For example:
#import <random.h>
id <NormalDist> myNormalDist;
double sample;
myNormalDist = [NormalDist create: [self getZone]
setGenerator: randomGenerator];
[myNormalDist setMean: 0.0 setVariance: 2.1];
sample = [myNormalDist getDoubleSample];
126
Chapter 15. Using the Random Library
2. Specify parameters when random numbers are drawn. These values do not override or change the
defaults that were set when the distribution was created.
#import <random.h>
id <NormalDist> myNormalDist;
double sample;
myNormalDist = [NormalDist create: [self getZone]
setGenerator: randomGenerator];
sample = [myNormalDist getSampleWithMean: 0.0 withVariance: 1.3];
3. Re-set the parameters anytime. For example,
[myNormalDist setMean: 0.0 setVariance: 2.1];
sample = [myNormalDist getDoubleSample]; // from N[0.0,2.1]
For a more detailed description of the methods available from distribution objects, see the Distribution
Usage Guide.
15.5. How to Create Other Random Number
Distributions
Suppose one wants to draw numbers according to a distribution that is not offered in Swarm. For
example, the Beta distribution is a distribution that has two parameters. The Beta distribution can take on
almost any unimodal shape, ranging from uniform, to highly skewed to the left or right (see Law and
Kelton, p. 166). The Beta distribution can be produced by taking two draws from a particular Gamma
distribution and transforming them. For example, one can first create the gammaDist1 and then put it
to use:
- initializeRNGs
{
[randomGenerator setStateFromSeed: 34733];
gammaDist1= [GammaDist create: self setGenerator: randomGenerator setAlpha: 2 setBeta: 1];
return self;
}
-(double) getBetaVariateAlpha1: (double) alpha1 Alpha2: (double) alpha2
{
double y1, y2;
y1=[gammaDist1 getSampleWithAlpha: alpha1 withBeta: 1];
y2=[gammaDist1 getSampleWithAlpha: alpha2 withBeta: 1];
127
Chapter 15. Using the Random Library
return y1/(y1+y2);
}
With these methods defined, then the code must simply execute the initializeRNGs and then grab a
Beta variate by specifying the two parameters, alpha1 and alpha2:
id gammaDist1;
double aDrawFromBeta;
[self initializeRNGs];
aDrawFromBeta = [self getBetaVariateAlpha1: .8
Alpha2: 2 ];
128
Chapter 16. Serialization
The term serialization refers to the ability to save more than one related object to either persistent data
storage (such as a file) or to send an object over a network stream, such as TCP/IP. When an object is
saved to disk (or sent over a ‘wire’) we record a reference to the saved object, so that the original object
can be restored at a later date. This reference is referred to as a ‘serial number’, hence the term
‘serialization’.
Swarm has two forms of support for serialization:
•
Lisp. Lisp serialization reads and generates human readable text-file in Lisp format. This form of
serialization is well-suited to applications that require either a human generated text file to create
object parameters (such as simulation parameter files), or require a human-readable output.
•
HDF5. HDF5 (http://hdf.ncsa.uiuc.edu/HDF5/) is high density binary data storage format created by
NSCA (http://www.ncsa.uiuc.edu/). HDF5 serialization is well-suited to applications that involve
reading and/or saving large data sets. It is a database-oriented format which a number of third-party
tools (such as the R (http://www.ci.tuwien.ac.at/R/) statistical package which is a freely-available
clone of SPlus (http://www.mathsoft.com/splus/)) can read.
16.1. Using the LispArchiver to manage
simulation parameters
Earlier versions of Swarm used the protocols ObjectSaver and ObjectLoader to read/write object state
to disk using an ad-hoc file format. These protocols only partially implemented the saving of certain
types and the continued use of these protocols is now officially deprecated and may go away in
future releases.
16.1.1. Using the Standard lispAppArchiver
Every Swarm application comes with a singleton 1 instance variable for reading object data formatted in
Lisp. This instance is called lispAppArchiver . Like the probeLibrary and arguments
instances, it is global to your entire application. This instance expects to find a file called appName.scm 2:
1.
A singleton class is a class that is designed to have only one global instance per application
2.
.scm
is the standard suffix for Scheme (a dialect of Lisp) files
129
Chapter 16. Serialization
, in either the current datapath for the application ( SWARMHOME/share/swarm/appName ) or in the local
directory. Using this variable obviates the need for hand creation of LispArchiver instances. It permits
one datafile (which can contain as many keys to objects as is required), and imposes a naming
convention for that datafile.
Example 16-1. Using a standard lispAppName instance
The heatbugs application uses this global singleton class. The datafile heatbug.scm looks like this:
(list
(cons ’batchSwarm
(make-instance ’HeatbugBatchSwarm
#:loggingFrequency 1
#:experimentDuration 200))
(cons ’modelSwarm
(make-instance ’HeatbugModelSwarm
#:numBugs 200
#:minIdealTemp 10000
#:maxIdealTemp 20000
#:minOutputHeat 10000
#:maxOutputHeat 20000
#:randomMoveProbability 0.0)))
The Lisp file consists of two ‘keys’ or ‘serial’ numbers batchSwarm and modelSwarm for the parameters for
two different objects. These keys are completely at the discretion of the user to choose. (Note also that
the file syntax allows Lisp-style comments: a ‘;’ colon followed by any text).
This input file would correspond with the following interface files, for the HeatbugBatchSwarm class we
have HeatbugBatchSwarm.h
@interface HeatbugBatchSwarm: Swarm
{
int loggingFrequency;
// Frequency of fileI/O
int experimentDuration;
id displayActions;
id displaySchedule;
id stopSchedule;
// schedule data structs
HeatbugModelSwarm *heatbugModelSwarm;
id unhappyGraph;
// When to Stop the Sim
// the Swarm we’re observing
//
//
//
//
The EZGraph will be used
in FileI/O mode rather
than the usual Graphics
mode...
}
// omitting methods
130
Chapter 16. Serialization
For the HeatbugModelSwarm class, HeatbugModelSwarm.h:
@interface HeatbugModelSwarm: Swarm
{
int numBugs;
// simulation parameters
double evaporationRate;
double diffuseConstant;
int worldXSize, worldYSize;
int minIdealTemp, maxIdealTemp;
int minOutputHeat, maxOutputHeat;
double randomMoveProbability;
BOOL randomizeHeatbugUpdateOrder;
id modelActions;
// scheduling data structures
id modelSchedule;
id heatbugList;
// list of all the heatbugs
id <Grid2d> world;
// objects representing
HeatSpace *heat;
// the world
}
// omitting methods
Note that for each instance variable name of the form #:ivarname somevalue in the Lisp parameter file
there exists a corresponding instance variable in the class header file. However, not all instance variables
in the header file have corresponding entries in the Lisp parameter file. This is because the other instance
variables are either unimportant as parameters (i.e. they can be regenerated by other parameters), or they
are instance variables that pertain to the running model itself (such as modelSchedule, which is a
Schedule instance).
To generate the objects with these corresponding parameters set in each object, you need the request the
global lispAppArchiver archiver to ‘generate’ an instance of the object using the appropriate ‘key’.
So here’s an excerpt from main.m:
if (swarmGUIMode == 1)
{
// Do GUI mode creation (omitted)
}
else
// No graphics - make a batchmode swarm (using the key
// ‘batchSwarm’ from the default lispAppArchiver) and run it.
if ((theTopLevelSwarm = [lispAppArchiver getWithZone: globalZone
key: "batchSwarm"]) == nil)
raiseEvent(InvalidOperation,
"Can’t find the parameters to create batchSwarm");
[theTopLevelSwarm buildObjects];
Note that you still pass the globalZone Zone instance to the getWithZone:key:, as you would if
you were using the standard create: functions.
131
Chapter 16. Serialization
The key thing to realize here is that the getWithZone:key: call actually instantiates the object (i.e.
automatically runs the createBegin/createEnd apparatus internally 3). This has implications for
the design of parameter files, since it means, for one thing, that all the appropriate instance variables
necessary for a complete creation of an object must be present in the input Lisp file. It is possible to have
a subset of ivars, but that subset should be sufficient to completely specify the object, i.e. no CREATE
time messages can be sent to the object once it has been created. (Of course you can still send SETTING
or USING messages to instance once it has been created).
The HeatbugModelSwarm is created in a similar way, from the buildObjects method in
HeatbugBatchSwarm.m:
// Create the model inside us - no longer create ‘Zone’s explicitly.
// The Zone is now created implicitly through the call to create the
// ‘Swarm’ inside ‘self’.
// But since we don’t have any graphics, we load the object from the
// global ‘lispAppArchiver’ instance which is created automatically
// from the file called ‘heatbugs.scm’
// ‘modelSwarm’ is the key in ‘heatbugs.scm’ which contains the
// instance variables for the HeatbugModelSwarm class, such as
// numBugs etc.
if ((heatbugModelSwarm = [lispAppArchiver getWithZone: self
key: "modelSwarm"]) == nil)
raiseEvent(InvalidOperation,
"Can’t find the parameters to create modelSwarm");
// Now, let the model swarm build its objects.
[heatbugModelSwarm buildObjects];
Note that after the creation of the heatbugModelSwarm instance, it responds in the normal way to
valid methods, such as buildObjects.
16.1.2. Using Custom LispArchiver Instances
This section addreses those situations that require custom creation of multiple data files or alternate data
filenames.
3.
Note that this is in contrast to the obsolete ObjectLoader method, which required the user to create the object and then make a
call to an ObjectLoader instance with the appropriate filename.
132
Chapter 16. Serialization
Example 16-2. Creating a Lisp parameter file with an alternate name
Here is a sample Lisp input parameter for the Mousetrap simulation, batch.scm.
(list
(cons ’batchSwarm
(make-instance ’MousetrapBatchSwarm ; parameters for the batchSwarm
#:loggingFrequency 1))
(cons ’modelSwarm
(make-instance ’MousetrapModelSwarm ; parameters for the modelSwarm
#:gridSize 40
#:triggerLikelihood 1.0
#:numberOutputTriggers 4
#:maxTriggerDistance 4
#:maxTriggerTime 16
#:trapDensity 1.0)))
The Lisp file consists of ‘keys’ or ‘serial’ numbers batchSwarm and modelSwarm identical to heatbugs
This Lisp input file has variables listed the following interface files (not shown) MousetrapBatchSwarm.h
and MousetrapModelSwarm.h, for the MousetrapBatchSwarm and MousetrapModelSwarm classes.
The only difference with the previous example, is that we explicitly create an instance of the
with the named file, and then ask the archiver to ‘generate’ an instance of the object using
the appropriate ‘key’ as per the previous example. So here’s the relevant excerpt from main.m:
LispArchiver
// create an instance of the LispArchiver to retrieve the file
// set the path to ‘batch.scm’
id archiver = [LispArchiver create: globalZone setPath: "batch.scm"];
//
//
//
//
if
retrieve the object from the archiver, if it can’t be found
just raise an event; note that the call to the
archiver will actually *instantiate* the object if the
parameters are found in the Lisp file
((theTopLevelSwarm =
[archiver getWithZone: globalZone key: "batchSwarm"]) == nil)
raiseEvent(InvalidOperation,
"Can’t find archiver file or appropriate key");
[archiver drop];
The MousetrapModelSwarm is created in a similar way, from the buildObjects method in
MousetrapBatchSwarm.m:
// create the instance to read the file
archiver = [LispArchiver create: self setPath: "batch.scm"];
// * ‘modelSwarm’ is the key for the instance of the MousetrapModelSwarm
//
with parameter values for the model instance variables: gridSize
//
triggerLikelihood, numberOutputTriggers, maxTriggerDistance,
//
maxTriggerTime, trapDensity
// if we can’t find the right key from the LispArchiver, raise an event
133
Chapter 16. Serialization
if ((mousetrapModelSwarm =
[archiver getWithZone: self key: "modelSwarm"]) == nil)
raiseEvent(InvalidOperation,
"Can’t find archiver file or appropriate key");
// don’t need the archiver instance anymore
[archiver drop];
Note that when you have called the archiver instance to instantiate all the objects of interest, you have no
need of the archiver instance and you can safely drop it.
Note also that, although the only difference from the previous example, is the name of the file does not
conform to the appName.scm convention, but in principle the two keys could have been in different files,
in which case in would have not been possible to use the global lispAppArchiver instance.
134
Appendix A. Swarm Tools
A.1. Web Resources for Object-Oriented
Languages
The main technical skill currently 1 required of a Swarm user is the ability to write in at least one of
following object oriented languages: Java or Objective C. Other recommended skills include the ability
to use tools such as gdb and emacs. For the record, if you know C and have some form of experience
in either C++ or Smalltalk, then learning Objective C should take no more than a day or so.
Here are some Objective C resources:
•
Objective C references (http://www.swarm.org/resources-objc.html) List of Objective C references on
the Web. Includes a 10 minute overview to Objective C that is most of what you need to know about
Objective C. Originally contributed by Nelson Minar
•
Object-Oriented Programming and the Objective-C Language
(http://developer.apple.com/techpubs/macosxserver/ObjectiveC/index.html) An excellent (online!)
book on Objective C. This is for generic NeXT Objective C: Swarm uses GNU Objective C in addition
to our defobj extensions (see defobj library in : Reference Guide to Swarm
(http://www.santafe.edu/projects/swarm/swarmdocs/refbook/refbook.html))
Unlike Objective C, the market is literally bursting at the seams with books on Java, so we merely point
out a few relevant sites:
•
GNU and the Java language (http://www.gnu.org/software/java/java.html) is a page run by the Free
Software Foundation (http://www.gnu.org) that details many free/open source Java tools, most notably
the reimplementation of Sun’s JDK: Kaffe (http://www.kaffe.org).
•
JavaSoft (http://java.sun.com), Sun Microsystems main Java page, and a new users section:
New-to-Java Programming Center (http://developer.java.sun.com/developer/onlineTraining/new2java/)
A.2. Debugging Tips for Swarm
Debugging software is an art, perhaps even more so than writing the software itself. All software we
write will have bugs: it is important to know how to diagnose a bug when it happens and how to write
code defensively so you have less bugs in the first place.
1.
As we continue extend Swarm’s multilanguage features, further language bindings may become available.
135
Appendix A. Swarm Tools
A.2.1. Finding bugs
Bugs come in two categories: those that crash your program and those that don’t. Bugs that crash your
program are friendlier because they’re obvious. Bugs that you don’t notice are much more dangerous:
one nagging question in every programmer’s mind should be "is the program doing what I think it is
doing?"
gdb. By far the most useful tool for finding bugs is a good debugger, a shell you can run a program under
and set breakpoints, inspect the values of variables, etc. The best free debugger for Unix is probably gdb,
available from the GNU ftp site (ftp://prep.ai.mit.edu/pub/gnu/). gdb seems unfriendly and confusing at
first, but it is definitely worth your time to learn it.
The most important gdb commands are help: browse online help, where: show me a stack trace, where
did we crash?, list: show me the source code where we are, break, set a breakpoint, and print: show me
the value of of some expression. If your program is crashing on you, run it under gdb and look at the
stack trace. If it looks to be buggy but you don’t know where, start setting breakpoints and see when
things go awry.
gdb and Objective C. Unfortunately, at this time gdb does not directly support Objective C. There are
some workarounds (http://www.cons.org/cracauer/objc-hint-gdb.html) that make debugging Objective C
programs possible. They are based on the knowledge that Objective C is little more than a glorified
syntax for structs (objects) and strange function names (methods).
defobj: xprint(), xprintid(), xfprint(), xfprintid(), xexec(), and xfexec(). Swarm also has a few
functions defined that can be used to make debugging easier. In particular, the function xprint(object)
prints out the class of an object, and xexec(object, "message") calls the message specified on the object.
These can be invoked under gdb as call xprint(aHeatbug). Note that you can’t pass arguments to a
message, nor can you see the return value. There are also methods xfprint(collection) and
xfexec(collection, "message") that print or exec foreach member of a collection.
gdb and Java. Swarm models written in Java will ultimately use the Swarm libraries which are still
written in Objective C. The Java Native Interface (JNI) is the magic glue that binds these languages
together. Thus if the crash occurs is the user (Java) portion of the code then the user is advised to use the
standard Java debugging tools jdb and the like. (If a crash happens in the Java virtual machine (JVM), it
should generally be clear from the error message that it is a Java-related problem). gdb is only useful
when the crash occurs inside the Swarm libraries (i.e. outside the user’s Java code). In this case you can
invoke gdb in the following way:
$JAVASWARMGDB=gdb
javaswarm StartModelName
From then on the preceeding information on the use of gdb in the Objective C context, continues to apply.
A.2.2. Preventing Bugs: Objective C
136
Appendix A. Swarm Tools
Defensive programming can help prevent a good number of bugs. When writing code, try to test it
incrementally: make small changes whose effects you think you can predict and then test them. Don’t
outsmart yourself with cleverness: write code correctly first, then go in and hack it up if you need it to be
more efficient. Put in sanity checks for conditions that shouldn’t go wrong in normal usage, but might if
you make a mistake.
-Wall. Swarm currently compiles all code with "gcc -Wall", which tells gcc to emit warnings for a lot of
things that it wouldn’t normally complain about. Warnings are not (necessarily) errors - warnings will be
generated for legal code if gcc thinks that what you’re doing could easily be a mistake. You might find
this frustrating at first, but it helps catch a lot of common errors, including forgetting to include a
prototype or forgetting to return a value from a function. Passing -Wall is good discipline.
nil_method. Objects in Objective C are essentially pointers to structs. So what happens if you send an
object to the pointer 0x0, "nil" in Objective C parlance? Unfortunately, most implementations of
Objective C, including gcc, define methods to nil as having no effect. The code:
aHeatbug = [Heatbug create: aZone];
aHeatbug = 0; // oops! bug.
[aHeatbug setIdealTemperature: idealTemp];
will not generate any errors.
The reason this is unfortunate is that it’s a common bug to trash a pointer accidentally, set it to 0. It
would be nice if your program then crashed when you tried to send a message to that mangled object:
instead, the message send will fail silently and the program will continue to execute. This can make it
hard to find bugs.
There are two ways to make messages sent to nil crash your program. The simplest is to put a breakpoint
on nil_method under gdb: nil_method is invoked every time a message is sent to nil. Alternately, you can
make a copy of the libobjc runtime source and edit nil_method to do whatever you want. The source
code in src/defobj contains a file objc.patch that patches the runtime from gcc 2.7.2.
A.2.3. Preventing Bugs: Java
The good news for Java programmers is that since Java is a strongly typed language, many of the pitfalls
that beset Objective C programmers, never materialize in the Java context. Nevertheless the reader is
cautioned to use as many of the standard defensive programming techniques as possible.
A.3. Emacs and Swarm
137
Appendix A. Swarm Tools
Emacs is the world’s best editor, infinitely configurable and powerful and free. If you’re not used to a
Unix text editor and want to write programs, emacs is probably best to learn. The information here will
show you how to set up emacs to use an Objective C or Java specific mode for editing source code and
how to get emacs to colour your source code for you nicely. Emacs can also help you find compilation
errors, run a debugger, and even act like a class browser. Documentation for those things are not here, see
the Emacs documentation itself.
A.3.1. Objective C
objc-mode. One of the best things about emacs is that one can load different "major modes" to edit types
of files. Major modes making editing files easier by providing structure to your editing. In particular,
there are programming language modes that do nice things like indentation for you.
Starting with emacs-19.30, the default C mode is cc-mode.el, a nice rewrite of the original c-mode.el.
Luckily for us, cc-mode.el supports Objective C directly. The basic function to invoke it is objc-mode.
The following bit of code in your .emacs will cause emacs to automatically enter objc-mode on all files
that end in .m or .h:
(setq auto-mode-alist
(append ’(("\\.h$" . objc-mode)
("\\.m$" . objc-mode))))
Highlighting code. Emacs running under X has the ability to colour your source code according to
syntax. There are two packages to do this: font-lock and hilit19.
font-lock. emacs-20 and later also has a font-lock mode for Objective-C that supports the method syntax
unique to Objective-C. We recommend the use of font-lock, over hilit19, now that the identification of
Objective C syntax in emacs is better supported, as font-lock supports ’lazy-fontification’ (i.e. as you
type fontification), a feature that hilit19 never offered. See the manual provided with emacs for how to
turn on this feature to highlight .h and .m files in ’objc-mode’ automatically.
A.3.2. Java
jde. The aforementioned cc-mode.el also supports Java directly. But in the Java case we can go one
better, with the complete free/open source Integrated Development Environment (IDE) known as the Java
Development Environment (jde). It’s available from the Sunsite (http://sunsite.auc.dk/jde/) in Denmark
138
Appendix B. Objective C - Swarm Style
The Swarm system provides a few extensions to the syntax/style of Objective-C. This note describes
those features which are important to know as a beginner and those which can be ignored. This is also
peripherally relevant for Java programmers.
B.1. Non-Conventional Techniques, And The
Libraries In Which They’re Used
When building some of the internals of the Swarm system, we found that there was a need to add a
certain amount of machinery to the conventional Objective C language. In particular, we found that the
system used for object creation needed to be expanded. The main goal of this document is to explain
very briefly what those changes are, and why the user need never know about them...
Even within the Swarm libraries, only the most fundamental ones require the usage of some of the magic
described below. Essentially, only Defobj, Collections and Activity use the features described below.
Nevertheless, there are some minor conventions, which as a consequence, must be used throughout the
code.
B.2. Zones
B.2.1. Zones in Principle
Perhaps the most visible change from normal Objective C is the use of Zones within which objects are
allocated. We have requiered that objects be allocated within specific Zones for two main reasons:
•
Probing. Zones will be used to facilitate the process of Probing.
•
Garbage Collection. In later versions of Swarm, the Zones will be used to coordinate garbage
collection.
•
Parallelism. In Swarm 2.0 we hope to use the Zone system to facilitate the management of distributed
memory.
B.2.2. Zones in Practice
As a beginning user, when required to provide a Zone, you can simply use the globalZone variable which
is global and is already initialised to a valid zone. But, this is discouraged because the things in that Zone
139
Appendix B. Objective C - Swarm Style
are expected to be resident throughout the entire execution of the program and can lead to inefficient use
of memory. Also, you should always attempt to allocate memory from Zones rather than using malloc.
And when allocating a temporary object that won’t be needed past the current scope, a scratchZone is
provided.
B.3. Create Phase
B.3.1. The Create Phase in Principle
One of the more surprising mechanisms used in Swarm is the Create Phase protocol. The idea behind the
protocol is that when you create an object, you are not really getting the final object - only a
"proto-object". This "proto-object" is then sent a sequence of "create phase" messages which are meant
to provide hints to the system about the way in which the object is going to be used.
So, for example, when creating a List object you may declare that you will only access the list from
either end, never from an arbitrary location. By doing so you allow the "proto-object" to provide you
with a tailored implementation which attempts to meet your specific usage patterns. This sort of
approach is crucial for the performance-critical libraries in Swarm (such as the Activity library). Here is
a schematic of what sometimes occurs in these libraries:
140
Appendix B. Objective C - Swarm Style
Figure B-1. Schematic of proto-object creation
B.3.2. The Create Phase in Practice
Since this form of object creation is still quite rare in the object oriented community, we do not expect
the users to write code which actually implements this sort of technique. However, we do advise the
users to try and split those messages which are supposed to be sent only once in the lifetime of an object
(just after the object is created) from the ones that are sent multiple times.
For example, if your object has a variable which will never change and furthermore should be set at the
very early stages of its lifetime (say, Color), then you should declare the message which sets this variable
before the createEnd message:
-setColor: (int) aColor ; // createPhase message -createEnd ;
141
Appendix B. Objective C - Swarm Style
-(int) getColor ; // normal message
The only other requirement is that whenever you create any object in Swarm, you should always
re-assign the object, when createEnd is called.
anObject = [anObject createEnd] ;
This is because certain proto-objects in the swarm library will not return themselves at createEnd time. In
fact, they may return a completely different class of object, which happens to satisfy the needs of the
user. We therefore suggest that even when createEnding your own classes you should stick to this
standard creation format.
In some classes, you will see that some "convenience methods" for object creation have been provided.
These are basically parametrized constructors that the author of the class felt would be handy. However,
the objects that result from the use of these "convenience methods" should not differ in any way from an
object created via a sequential set of separate methods called during the create phase (as long as each of
the appropriate parameters are set). It is important to retain the "null constructor" for a couple of reasons:
1) it allows the interface for a class to *grow* without breaking legacy code and 2) it facilitates the use of
development and design tools in handling objects. JavaBeans is one example where this particular
constraint (the requirement of a null constructor) is in use and necessary, today.
B.4. Collections and Defobj
Two last pieces of advice:
1. When using the Collections library, if you want to create your own versions of the collections, don’t
do it by subclassing the collections themselves. Instead, create a different class of object which
contains inside it, an instance of the appropriate class (this is called delegation in the OOP
community). You should do this because the actual subclassing of objects which actively use the
createPhase stuff (by actively I mean ones that don’t return self on a createEnd), is not well
supported.
2. Defobj is the most basic library in Swarm. It provides the foundation on which the system builds
schedules, collections and swarmObjects. It is therefore quite involved and you should not feel
disheartened if the concepts embodied within it seem unfamiliar, or if the code seems a bit cryptic.
You should now be ready to use Objective C in a more or less Swarm compliant way. Theoretically, all
you need to do is follow these standards. In particular, you should be able to code your simulations
without needing to know anything else about the language extensions (you still need to learn about the
142
Appendix B. Objective C - Swarm Style
libraries and tools provided by Swarm, but their interface is written in straight Objective C, so there
should be no language barrier).
143
Appendix C. Random Library Appendix
C.1. Supplemental comments on random number
generators
Please consider some additional warnings about the usage of random number generators
1. DO NOT use generators with bad statistical properties. See Advanced Usage Guide for a discussion
of the generators implemented in this library.
2. DO NOT use generators whose maximum cycle length is too short for the intended application; you
don’t want your generators to start repeating themselves. Be especially aware of this if you use the
PMMLCGgen class of generator; these have good properties but a fairly short cycle. See Advanced
Usage Guide to read more about how to select a generator.
3. AVOID having generators in your simulation run in ‘lock-step’, producing output that is statistically
correlated. This may happen if you have several generators of the same class, all started with the
same default seed.
4. Be aware that even the best generators can have unexpected correlations with particular
implementations of some models. As a result, in some cases using a "better" random number
generator can result in worse (less correct) model behavior than one could obtain when using a "bad"
generator. If you suspect your model may have this kind of problem, you probably should re-run
some experiments using a different underlying generator, to make sure the results are (statistically at
least) the same. (For examples of this, see the references [Ferrenberg et al 1992] and [Nature 1994].)
C.2. Usage Guide
C.2.1. Usage Guide for Generators
144
Appendix C. Random Library Appendix
A note on ‘simple’ vs. ‘split’ generators
Most of the generators supplied are of the ’simple’ variety. Think of these as supplying a
single, long stream of pseudorandom numbers. The description in the introduction of how
to obtain generator output assumed a simple generator.
There are also two generators, C2LCGXgen and C4LCGXgen, which are of the ‘split’
variety. Think of them as consisting of a number of virtual generators, each supplying an
independent stream of numbers which we can divide up into a number of segments of a
given length. To obtain output from such a generator, we need to specify what virtual
generator to draw from:
myUnsigned = [mySplitGenerator getUnsignedSample: virtualgen];
Read more about how to manage split generators below.
I shall first discuss ‘simple’ generators, and then discuss how ‘split’ generators differ from ‘simple’ ones.
In the following text, wherever I use PSWBgen as an example you may substitute any other generator.
Note: any name that starts with my is meant to designate a variable of the appropriate type which you
have defined in your own program.
Note: on defining variables that hold (pointers to) generators: it is now a convention in the rest of Swarm
that if you want to specify what type of object a pointer should point to, you say:
id <protocolname> varname;
varname = [classname create: aZone];
instead of
classname *varname;
varname = [classname create: aZone];
Although it is usually the case that the protocolname = the classname, in some cases it is not. And
publishing the protocols allows the programmers to keep unpublished what should remain internal
private class methods.
The generators are different from other Swarm objects, in that they all perform the same function; they
are drop-in replacements for each other. The ’split’ generators (C2LCGXgen, C4LCGXgen) all conform to the
same protocol, SplitRandomGenerator. The ’simple’ (non-split) generators all conform to the same
protocol, SimpleRandomGenerator.
Thus, when defining generators in your own program, you should say
id <SimpleRandomGenerator> varname;
145
Appendix C. Random Library Appendix
varname = [classname create: aZone];
(Though see below for the different create methods available.)
For backward compatibility, protocols LCG1gen, TT800gen etc. are still defined, but their use is
deprecated and they may disappear later.
C.2.1.1. Simple generators
You create a generator in one of 3 ways:
C.2.1.1.1. the lazy way
id <SimpleRandomGenerator> myGenerator;
myGenerator = [ PSWBgen createWithDefaults: [self getZone] ];
This allocates the object and initializes it with STARTSEED, which equals NEXTSEED if -varyseed
was not specified, or RANDOMSEED if it was. (These macros are defined in the file ’randomdefs.h’ in
the source directory.)
C.2.1.1.2. using a single seed value
id <SimpleRandomGenerator> myGenerator;
myGenerator = [ PSWBgen create: [self getZone]
setStateFromSeed: mySeed ];
This allocates the object and initializes it with your seed value. If the object actually requires a vector of
seed values to fill the state, this method generates the rest of the values needed using an inline PMMLCG
generator.
You can find out later what seed value was used to initialize the generator:
myUnsigned = [ myGenerator getInitialSeed ];
And you can find out what the largest valid seed value is by calling
myUnsigned = [ myGenerator getMaxSeedValue ];
(In the current version of the library, the largest valid seed value is 2 32-1 for all the generators. The seed
may not be 0.)
You may reset the generator’s state at any time using this method:
146
Appendix C. Random Library Appendix
[ myGenerator setStateFromSeed: mySeedValue ];
This will also reset to 0 the currentCount variable.
Alternatively, you may use the new -reset method [myGenerator reset], which resets the generator its
state at startup, or its state at the point when -setStateFromSeed(s) was last used. Counters are zeroed.
C.2.1.1.3. using a vector of seed values
Assume we have defined a fixed array at compile time:
unsigned
int mySeedVector [vectorLength];
Then we can do this:
id <SimpleRandomGenerator> myGenerator;
myGenerator = [ PSWBgen create: [self getZone]
setStateFromSeeds: mySeedVector ];
You can find out how many seed values are required by asking
myUnsigned = [ myGenerator lengthOfSeedVector ];
(Obviously, you must first successfully have created the object to do this, for example using
createWithDefaults! Or, see data in Generator Data Table)
And we allocate the seed vector dynamically this way:
unsigned int *mySeedVector;
mySeedVector = [[self getZone] alloc: [ myGenerator lengthOfSeedVector]];
You can find out what vector of seed values was used to initialize the object:
unsigned int *myVector;
myVector = [ myGenerator getInitialSeeds ];
And you can find out the largest seed values that are allowed for the particular generator:
unsigned int *myVectorToo;
myVectorToo = [ myGenerator getMaxSeedValues ];
(These values vary from generator to generator, and they may not be the same for all elements of the
vector for a given generator. Valid seeds never take the value 0.)
NOTE: in the above two calls, the variable myVector is set to point to an array internal to the generator.
If you want to preserve the array’s values outside the generator, you need to allocate space in your
147
Appendix C. Random Library Appendix
program either statically or dynamically, and use a for-loop to copy data from myVector[i] to
myAllocatedVector[i].
You may reset the generator’s state at any time by using the method
[ myGenerator setStateFromSeeds: (unsigned *) mySeedVector ];
This will also reset to 0 the currentCount variable.
NOTE: if you set a generator’s state from a vector of seeds, the call:
myUnsignedValue = [ myGenerator getInitialSeed ];
will return a value of 0 (an invalid seed). On the other hand, if you initialize the generator with a single
seed value, the call
mySeedVector = [ myGenerator getInitialSeeds ];
will return the seed vector that would produce identical output to what you obtained using the single seed.
C.2.1.1.4. antithetic values
You can make the generator serve up antithetic values by setting:
[ myGenerator setAntithetic: YES ];
If thus set, this makes -getUnsignedSample return (unsignedMax-x) instead of x, and the floating point
methods return (1.0 - y) instead of y. The default for this parameter is that it is not set.
You can ascertain if this flag is set by calling
myBooleanValue = [ myGenerator getAntithetic ];
C.2.1.1.5. generator output
You obtain successive pseudorandom numbers from a generator by calling:
myUnsignedValue = [ myGenerator getUnsignedSample ];
The largest value that may be returned can be found by asking
myUnsignedValue = [ myGenerator getUnsignedMax ];
(The smallest value returned is always 0.)
If you would rather have floating point output in the range [0.0,1.0), you call one of these:
148
Appendix C. Random Library Appendix
// Using 1 unsigned value to fill the mantissa:
myFloatValue = [ myGenerator getFloatSample ];
myDoubleValue = [ myGenerator getThinDoubleSample ];
// Using 2 unsigned values to fill the mantissa:
myDoubleValue
= [ myGenerator getDoubleSample ];
myLongDoubleValue = [ myGenerator getLongDoubleSample ];
NOTE that the last method is not portable, because the size of a long double varies and hence the
precision varies between architectures.
Finally, you can obtain a count of how many variates have been generated:
myLongLongInt = [ myGenerator getCurrentCount ];
(currentCount is an unsigned long long int, which counts up to 2 64.)
C.2.1.2. Split generators
A split generator is a generator for which we are able to split the output stream into arbitrary
non-overlapping segments, which we can access directly and easily. Such segments are statistically
independent streams of (pseudo)random numbers.
We configure a split generator as consisting of a number (A) of "virtual generators", each of which has
access to a number (2 v) of segments of length 2 w. The parameters A,v,w are specified when the generator
is created. For example, for the C4LCGXgen generator, the default creation values are A=128, v=31,
w=41. The only limitation is that A*(2 v)*(2w) must not exceed the generator’s cycle length, which is 2 60
for C2LCGXgen and 2 120 for C4LCGXgen.
We specify the configuration (A,v,w) at create time this way:
id <SplitRandomGenerator> myGenerator;
myGenerator = [ C4LCGXgen create: [self getZone]
setA: 64 setv: 20 setw: 76
setStateFromSeed: mySeedValue ];
id <SplitRandomGenerator> myGenerator;
myGenerator = [ C4LCGXgen create: [self getZone]
setA: 32 setv: 25 setw: 60
setStateFromSeeds: (unsigned *) mySeedVector ];
(In both cases, the only limitation is that A * 2 v * 2w must be less than the generator’s period, 2 60 for
C2LCGX and 2120 for C4LCGX.)
For obtaining output, we need to specify which of the A ’virtual’ generators we want to draw from:
myUnsignedValue
myFloatValue
= [ myGenerator getUnsignedSample: 12 ];
= [ myGenerator getFloatSample: myVirtualGenerator ];
149
Appendix C. Random Library Appendix
myDoubleValue
= [ myGenerator getThinDoubleSample: someUnsignedValue ];
myDoubleValue
= [ myGenerator getDoubleSample: 32 ];
myLongDoubleValue = [ myGenerator getLongDoubleSample: 0 ];
Virtual generators are numbered from 0 to (A-1).
Obtaining the current count of variates generated likewise:
myLongLongInt = [ myGenerator getCurrentCount:
myVirtualGenerator ];
myLongLongInt = [ myGenerator getCurrentSegment: myVirtualGenerator ];
The latter call indicates what segment number the specified virtual generator is currently drawing
numbers from.
Other than these methods, the methods discussed above under ’simple’ generators are the same for ’split’
generators.
In *addition* to this, ’split’ generators have the following methods to manage the virtual generators:
// Place all virtual generators at the start of the first segment:
[ myGenerator initAll ]; // done automatically at creation
// Place all virtual generators back to the start of the current segment:
[ myGenerator restartAll ];
// Place all virtual generators at the start of the next segment:
[ myGenerator advanceAll ];
// Place all virtual generators at the start of the indicated segment:
[ myGenerator jumpAllToSegment: myLongLongIntValue ];
You may also address individual virtual generators:
[
[
[
[
myGenerator
myGenerator
myGenerator
myGenerator
initGenerator:
restartGenerator:
advanceGenerator:
jumpGenerator:
myVgen ];
myVgen ];
myVgen ];
myVgen
toSegment: myLongLongIntValue ];
InternalState methods common to simple and split generators:
// Print (most of) the object’s state data to a stream:
[ myNormalDist describe: myStream ];
The stream myStream may be created thus:
id myStream = [ OutStream create: [self getZone] setFileStream: stdout ]; or
id myStream = [ OutStream create: [self getZone] setFileStream: stderr ];
// Get the (class) name of the object:
myString = [ myNormalDist getName ];
150
Appendix C. Random Library Appendix
// Get the object’s ’magic number’, used by putStateInto / setStateFrom:
myUnsigned = [ myNormalDist getMagic ];
C.2.1.3. Saving and Resetting State
You may save, and later restore, the internal state of a generator using these methods:
// Get the size of the memory buffer needed by putStateInto / setStateFrom:
myUnsigned = [ myGenerator getStateSize ];
// Extract the generator’s state data into your memory buffer:
[ myGenerator putStateInto: myBuffer ];
// Set the generator’s state from data in a memory buffer:
[ myGenerator setStateFrom: myBuffer ];
To illustrate, assume the following data definitions:
FILE * myFile;
const char * myFileName = "MyGenFile.bin"; // or whatever
int stateSizeG;
id stateBufG;
int status;
The following code shows how to save an object’s state to disk: (You should add your own code to deal
with disk file errors, either aborting or printing out error messages.)
// Ask how big a buffer we need:
stateSizeG = [ myGenerator getStateSize ];
// Allocate memory for the buffer:
stateBufG = [[self getZone] alloc: stateSizeG];
// Ask the generator to put state data into the buffer:
[ myGenerator putStateInto: (void *) stateBufG ];
// Open a disk file for output:
myFile = fopen(myFileName, "w");
if (myFile == NULL) { }; // error on open: disk full, or no permissions
// Write the state buffer to disk in binary form:
status = fwrite(stateBufG, stateSizeG, 1, myFile);
if (status < 1) { }; // error on write: disk full?
// Close the file
status = fclose(myFile);
if (status) { }; // error on close ?
151
Appendix C. Random Library Appendix
// Free the memory allocated to the buffer:
[[self getZone] free: stateBufG];
// Or, for test purposes, just zero the buffer data instead:
// memset(stateBufG, 0, stateSizeG);
This code shows how to set an object’s state from a disk file:
// Ask how big a buffer we need:
stateSizeG = [ myGenerator getStateSize ];
// Allocate memory for the buffer:
stateBufG = [[self getZone] alloc: stateSizeG];
// Open a disk file for input:
myFile = fopen(myFileName, "r");
if (myFile == NULL) { }; // error on open: file not found
// Read state data into the memory buffer:
status = fread(stateBufG, stateSizeG, 1, myFile);
if (status < 1) { }; // error on read
// Close the file:
status = fclose(myFile);
if (status) { }; // error on close
// Ask the generator set its state from the buffer data:
[ myGenerator setStateFrom: (void *) stateBufG ];
// Free the memory allocated to the buffer:
[[self getZone] free: stateBufG];
C.2.2. Usage Guide for Distributions
Where I use NormalDist in examples below, substitute any other distribution and its parameters as
needed.
NOTE: any name that starts with my is meant to designate a variable of the appropriate type which you
have defined in your own program.
C.2.2.1. Creating distributions
You create a distribution in one of several ways:
152
Appendix C. Random Library Appendix
C.2.2.1.1. the lazy way:
id <NormalDist> myNormalDist;
myNormalDist = [ NormalDist createWithDefaults: [self getZone]];
This method will create a distribution object with no default statistical parameters set, as well as a fresh
generator object connected to it. The generator object is initialized with STARTSEED (see the discussion
above). Different distribution classes use different generators for this purpose.
C.2.2.1.2. Without default parameters, using a simple generator
id <NormalDist> myNormalDist;
myNormalDist = [ NormalDist create: [self getZone]
setGenerator: mySimpleGenerator ];
must of course first have been set to point to a random generator of the ‘simple’ type. Note
that you cannot assign a different generator to a distribution after it has been created.
myGenerator
You can create the generator at the same time as the distribution:
id <NormalDist> myNormalDist;
myNormalDist = [ NormalDist create: [self getZone]
setGenerator: [TT800gen create: [self getZone]
setStateFromSeed: 34453]
];
C.2.2.1.3. Without default parameters, using a split generator
id <NormalDist> myNormalDist;
myNormalDist = [ NormalDist create: [self getZone]
setGenerator: mySplitGenerator
setVirtualGenerator: 7 ];
or perhaps
id <NormalDist> myNormalDist;
myNormalDist = [ NormalDist create: [self getZone]
setGenerator: [C4LCGXgen createWithDefaults: [self getZone]]
setVirtualGenerator: 99 ];
A split generator can be thought of as comprising a set of virtual generators (streams of random
numbers), and a distribution object must be ‘connected’ to one of these streams. You cannot re-assign the
generator or the virtual generator after a distribution object has been created.
153
Appendix C. Random Library Appendix
In all these cases, when we want to obtain a random variate from this distribution object we need to
specify the statistical parameters:
myDouble = [ myNormalDist getSampleWithMean: 3.3 withVariance: 1.7];
You can use different parameters for every call. (And you can use this call even if default parameters
have been set.)
C.2.2.1.4. With default parameters, using a simple generator
id <NormalDist> myNormalDist;
myNormalDist = [ NormalDist create: [self getZone]
setGenerator: mySimpleGenerator
setMean: 7.6 setVariance: 1.2 ];
C.2.2.1.5. With default parameters, using a split generator
id <NormalDist> myNormalDist;
myNormalDist = [ NormalDist create: [self getZone]
setGenerator: mySplitGenerator
setVirtualGenerator: 33
setMean: 3.2 setVariance: 2.1 ];
In these cases, we do not need to specify parameters to get a random number:
myDouble = [ myNormalDist getDoubleSample ];
However, you are allowed to specify parameters even if default parameters have been set.
(Of course, different distributions have different parameters: RandomBitDist has none, the Uniform
objects have minimum and maximum limit values, NormalDist and LogNormalDist use Mean and
Variance, ExponentialDist only Mean, and GammaDist used alpha and beta. See the individual
distribution protocols or the file random/distributions.h for the specific methods available. )
C.2.2.1.6. You may reset the default parameters this way, as often as you like
[ myNormalDist setMean: 3.3 setVariance: 2.2 ];
154
Appendix C. Random Library Appendix
C.2.2.1.7. You can obtain the current values of parameters
// Default parameters:
myDouble1 = [ myNormalDist getMean ];
myDouble2 = [ myNormalDist getVariance ];
myDouble3 = [ myNormalDist getStdDev ];
// Get a pointer to the generator object:
myOtherGenerator = [ myNormalDist getGenerator ];
// Get the number of the virtual generator (if a split generator is used):
myUnsignedValue = [ myNormalDist getVirtualGenerator];
// Find out if default parameters have been set:
myBoolean
= [ myNormalDist getOptionsInitialized ];
// Find out how many variates the object has delivered so far:
// (The counter is an unsigned long long int, which goes up to 2^64.)
myLongLongInt
= [ myNormalDist getCurrentCount ];
C.2.2.1.8. You can reset the variate counter and other state variables this way
[ myNormalDist reset ];
This is most likely done in conjunction with resetting the connected generator, using
[ myGenerator setStateFromSeed: mySeedValue ]
or simply
[ myGenerator reset ];
C.2.2.1.9. Finally, we have the InternalState protocol methods
// Print (most of) the object’s state data to a stream:
[ myNormalDist describe: myStream ];
The stream myStream may be created thus:
id myStream = [ OutStream create: [self getZone] setFileStream: stdout ]; or
id myStream = [ OutStream create: [self getZone] setFileStream: stderr ];
// Get the (class) name of the object:
myString = [ myNormalDist getName ];
155
Appendix C. Random Library Appendix
// Get the object’s ‘magic number’, used by putStateInto / setStateFrom:
myUnsigned = [ myNormalDist getMagic ];
C.2.2.2. Saving And Restoring State
You may save, and later restore, the internal state of a distribution object using InternalState methods.
•
See the Generator Usage Guide, which describes how to do this. The code for saving/restoring
distributions would be similar.
•
Note that saving the state of a distribution object will NOT automatically save the state of the attached
generator; you are responsible for doing so. (Since it is possible, even encouraged, to use a single
generator to feed several distribution objects, this is the only sane way of doing it.)
C.3. Advanced Usage Guide
This section amplifies the Usage Guide with material on how to choose a random generator for your
simulation, what default generators have been implemented for the distribution objects, and information
on the set of test programs used.
C.3.1. Choosing a Generator
C.3.1.1. Choosing A Generator
In this version of Random for Swarm there are a total of 36 different generators implemented. If you are
a serious simulationist you need to select which one(s) to use for your model.
Here are some factors to consider:
a. We want a generator to have as good statistical properties as possible. We measure this by subjecting
the generators to various tests. I have subjected the implemented generators to two sets of tests,
Diehard and ENT. (Look in directory /testR6 of the test package.) (The Generators quality table
summarizes the test results. The highlights are:
i. The LCG and SCG generators are of very poor quality (they fail many of the tests), and should
never be used. [They are likely to disappear in the next release.]
156
Appendix C. Random Library Appendix
ii. The lagged-Fibonacci generators (ACG, SWBi, PSWB) all fail the Diehard ‘Birthday Spacings
Test’, and are therefore only conditionally recommended for use.
iii. The other 32-bit generators pass all tests, and I therefore have no reason not to recommend them
all for use.
iv. The 31-bit generators all fail certain tests because one bit has a constant value. Beyond that they
all seem to be ok.
b. We want a generator to have a long enough period for our purpose, and in general the longer the
period the better. (However, note that to generate 2 64 random numbers from a fast generator like
MT19937 would take 2.1 million years on a 486/66, so in practice any generator with a period close
to 260 or larger will be acceptable.) The PMMLCG generators, although they are of acceptable
quality otherwise, have a period less than 2 31 which we can exhaust in under 3 hours. So use those
only for quick ‘toy’ applications.
c. We want a generator to execute efficiently, the faster the better. The Generators data table indicates
the execution times for the generators as implemented.
d. We want a generator to take as little resources (memory) as possible. The Generators data table
indicates the size of each generator’s state in bits.
e. Other things being equal, we want our generator to have a single full period rather than a number of
shorter periods, since we may not know whether a particular starting seed will put us into a long or a
short subcycle. This disqualifies SWB, and possibly the new MWC and RWC generators (Marsaglia
does not say how many periods these generators have, but only gives the period length.)
C.3.1.2. Strategy For Using Random Generators
There are 3 possible strategies for using random generators:
a. Use one single generator for your whole simulation, and have all ‘users’ of randomness
(distributions and other objects) call this single generator in an interleaved fashion. For this purpose,
generators such as MT19937, TT800, TT775, TT443 (and possibly PSWB and SWB) seem
particularly well suited since they have immense periods. The code in random/random.m shows how
to connect several distribution objects to a single random generator. The generator randomGenerator
supplied there is of class MT19937.
b. Use a single generator of long period, but divide this long period up into a number of
non-overlapping (hence statistically independent) segments, and let each ‘user’ of randomness draw
their random numbers from separate segments. Doing this requires that we be able to quickly access
these separate segments. The ‘split’ generators C2LCGX and C4LCGX implement such a scheme.
157
Appendix C. Random Library Appendix
You can specify at creation how you want the period of these generators subdivided. (See the source
code for details.)
c. Use a separate random generator for each ‘user’ of randomness. In this case, you need to make sure
that two or more generators of the same type are not started with the same seed, since in this case
their output will be highly correlated. Provide your own seeds, or use RANDOMSEED or
NEXTSEED.
The distribution objects, if created with the ‘createWithDefault: aZone’ method, will create for
themselves a fresh generator, with each class of distribution using a different class of generator. All the
generators in this case are initialized with NEXTSEED (or RANDOMSEED, if you start the program
with -varyseed).
C.3.1.3. Generator Quality
These tables shows the results of testing the generator objects statistically:
Table C-1. Random Library: Generator Statistical Tests
Generator
timing uS
(unsigned)
bits state
period (s) #
length
tests failed (x)
abcdefghijklmnopqrstuvwx
30-bit output
SCG
3.328
1650
1 255
x.xx2xxxxxxx..x..xx.xx..
32-bit output
LCG1
2.564
32
1 232
x...xxxxxxx.........x...
LCG2
2.564
32
1 232
x...xxxxxxx.........x...
LCG3
2.564
32
1 232
x...xxxxxxx.........x...
ACG
2.702
1760
1 255
x.......................
SWB1
3.285
1185
64 21178
x.......................
SWB2
3.285
769
1536 2757
x.......................
SWB3
3.285
673
192 2664
x.......................
PSWB
3.452
1377
1 21376
x.......................
MWCA
3.399
64
?? 259
........................
MWCB
3.420
64
?? 259
........................
MT19937
3.698
19968
1 219937
........................
158
Appendix C. Random Library Appendix
Generator
TT800
timing uS
(unsigned)
4.654
C3MWC
bits state
800
period (s) #
length
1 2800
tests failed (x)
........................
6.387
192
?? 2118
........................
RWC2
7.445
96
?? 292
........................
RWC8
14.649
288
?? 2250
........................
31-bit output
C2TAUS1
4.078
62
1 260
1..-1x111x1.........x...
C2TAUS2
4.078
62
1 260
1..-1x111x1.........x...
C2TAUS3
4.078
62
1 260
1..-1x111x1.........x...
TT775
4.654
775
1 2775
1..-1x111x1.........x...
TT403
4.670
403
1 2403
1..-1x111x1.........x...
PMMLCG1
4.715
31
1 231
1..-1x111x1.........x...
PMMLCG2
4.715
31
1 231
1..-1x111x1.........x...
PMMLCG3
4.715
31
1 231
1..-1x111x1.........x...
PMMLCG4
4.715
31
1 231
1..-1x111x1.........x...
PMMLCG5
4.715
31
1 231
1..-1x111x1.........x...
PMMLCG6
4.715
31
1 231
1..-1x111x1.........x...
PMMLCG7
4.715
31
1 231
1..-1x111x1.........x...
PMMLCG8
4.715
31
1 231
1..-1x111x1.........x...
PMMLCG9
4.715
31
1 231
1..-1x111x1.........x...
C2LCGX
7.029
62
1 260 (Split)
1..-1x111x1.........x...
MRG5
9.674
155
1 2155
1..-1x111x1.........x...
MRG6
10.449
186
1 2186
1..-1x111x1.........x...
MRG7
10.913
217
1 2217
1..-1x111x1.........x...
C4LCGX
11.688
124
1 2210 (Split)
1..-1x111x1.........x...
C2MRG3
13.459
186
1 2185
1..-1x111x1.........x...
Test code
Test suite
Explanation of test codes
a
Diehard
Birthday Spacings Test
b
Diehard
Overlapping 5-permutation Test
c
Diehard
Binary Rank Test (31x31)
d
Diehard
Binary Rank Test (32x32)
159
Appendix C. Random Library Appendix
Test code
Test suite
Explanation of test codes
e
Diehard
Binary Rank Test (6x8)
f
Diehard
Bitstream Test (overlapping
20-tuples)
g
Diehard
OPSO (Overlapping Pairs, Sparse
Occupancy)
h
Diehard
OQSO (Overlapping Quadruples,
Sparse Occupancy)
i
Diehard
DNA Test
j
Diehard
Count-the-1’s Test (integers)
k
Diehard
Count-the-1’s Test (specific bytes)
l
Diehard
Parking Lot Test
m
Diehard
Minimum Distance Test
n
Diehard
3D Spheres Test
o
Diehard
Squeeze Test
p
Diehard
Overlapping Sums Test
q
Diehard
Runs Test
r
Diehard
Craps Test
s
ENT
Entropy Test
t
ENT
Compression test
u
ENT
Chi-Square Test
v
ENT
Arithmetic Mean
w
ENT
Monte Carlo value for Pi
x
ENT
Serial Correlation Coefficient
Indication
Explanation of indications
.
The generator passed this test
1
The generator passed this test, except for the lowest
bit
2
The generator passed this test, except for the 2
lowest bits
x
The generator failed this test completely
-
This test cannot be passed by this generator (too few
bits)
160
Appendix C. Random Library Appendix
Notes.
•
For 31-bit generators, it is normal to fail 1 part of these tests:a,e,g,h,i,k. This is because we left-shift
the output of these generators by 1 bit, so that the lowest bit is always 0.
•
For 31-bit generators, it is normal to fail test d (32x32 rank test).
•
All 31-bit generators also fail tests f, j, and u (and most others don’t.) This is *likely* due to the
constant low bit.
Choosing A Generator.
•
Clearly unacceptable generators: LCG1, LCG2, LCG3, SCG.
•
Conditionally recommended generators: ACG, SWB1, SWB2, SWB3, PSWB.
•
Use with caution: the PMMLCGx generators (due to their very short period 2 31).
•
All other generators are recommended at this time.
C.3.1.4. More generator data
And this table gives further data about the generators:
Table C-2. Random Library: Generator Data
Generator
Seeds
Modulus
Cycles
(length)
Bits
Speed
State
(a) Simple Short Generators
LCG1
1
232
1m
32
1.442
32
LCG2
1
232
1m
32
1.442
32
LCG3
1
232
1m
32
1.442
32
PMMLCG1
1
231-1
1 m-1
31
0.784
31
PMMLCG2
1
231-1
1 m-1
31
0.784
31
PMMLCG3
1
231-1
1 m-1
31
0.784
31
PMMLCG4
1
231-1
1 m-1
31
0.784
31
PMMLCG5
1
231-105
1 m-1
31
0.784
31
161
Appendix C. Random Library Appendix
Generator
Seeds
Modulus
Bits
Speed
State
231-225
Cycles
(length)
1 m-1
PMMLCG6
1
31
0.784
31
PMMLCG7
1
231-325
1 m-1
31
0.784
31
PMMLCG8
1
231-85
1 m-1
31
0.784
31
PMMLCG9
1
231-249
1 m-1
31
0.784
31
(b) Simple Long Generators
ACG
55
232
1 255
32
1.369
760
SCG
55
109
1 255
30
1.111
650
SWB1
37+c
232
64 21178
32
1.126
185
SWB2
24+c
232
1536 2757
32
1.126
769
SWB3
21+c
232
192 2664
32
1.126
673
PSWB
43+c
232-5
1 21376
32
1.070
1377
TT403
13
231
1 2403
31
0.792
403
TT775
25
231
1 2775
31
0.795
775
TT800
25
232
1 2800
32
0.795
800
MT19937
624
232
1 219937
32
1.000
19937
MRG5
5
231-1
1 2155
31
0.382
155
MRG6
6
231-1
1 2186
31
0.354
186
MRG7
7
231-1
1 2217
31
0.339
217
MWCA
2
232
? 259
32
1.088
64
MWCB
2
232
? 259
32
1.088
64
RWC2
3
232
? 292
32
0.497
96
RWC8
18s
232
? 2250
32
0.252
288
(c) Long Generators with Splitting Facilities: (none)
(d) Combined Generators
C2TAUS1 (M)2
231-1
1 260
31
0.907
62
C2TAUS2 (M)2
231-1
1 260
31
0.907
62
C2TAUS3 (M)2
231-1
1 260
31
0.907
62
C2MRG3 (M) 6
231-1
1 2185
31
0.275
186
162
Appendix C. Random Library Appendix
Generator
Seeds
C3MWC (M) 6
Modulus
232
Cycles
(length)
? 2118
Bits
Speed
State
32
0.570
192
(e) Combined Generators with Splitting Facilities
C2LCG (M,S) 2
231-85
1 260
31
0.526
62
C4LCG (M,S) 4
231-1
1 2120
31
0.316
124
Generator
Calculating cycle lengths
LCGi
cycle = m = 232
PMMLCGi
cycle = m-1 < 231
ACG
cycle = 2r
SCG
cycle = 2r
SWBi
cycle = ( 232r - 232s ) / #cycles
PSWB
cycle = mr - ms
TGFSRi
cycle = 2w*N - 1
MRGi
cycle = mi - 1
C2MRG3
cycle = (m13 - 1)*(m23 - 1)/2
C2TAUSi
cycle = Mask1 * Mask2
C2LCG
cycle = (m1 * m2) / 2
C4LCG
cycle = (m1 * m2 * m3 * m4) / 8
MWCA, MWCB
cycle = ? (not specified by Marsaglia)
C3MWC
cycle = ? " "
RWC2
cycle = ? " "
RWC8
cycle = ? " "
C.3.2. Default Generators for the Distributions
C.3.2.1. Random Library: Default Generators
When distributions are created using the createWithDefaults: aZone method, they create their
own generator and initialize it with NEXTSEED (or with RANDOMSEED, if you started the program
with the -varyseed switch).
163
Appendix C. Random Library Appendix
The generators used are as follows:
Table C-3. Random Library: Default Generators
Distribution
Generator
RandomBitDist
uses
C2TAUS1gen
BernoulliDist
uses
C2TAUS2gen
UniformIntegerDist
uses
TT403gen
UniformUnsignedDist
uses
TT775gen
UniformDoubleDist
uses
TT800gen
NormalDist
uses
MWCAgen
LogNormalDist
uses
MWCBgen
ExponentialDist
uses
C2TAUS3gen
GammaDist
uses
PSWBgen
These generators were chosen on the basis of quality and execution speed.
C.3.2.2. Utility Generator And Distributions
There are 4 default random objects defined in random/random.m. These are:
id
id
id
id
<MT19937gen>
randomGenerator;
<UniformIntegerDist>
uniformIntRand;
<UniformUnsignedDist> uniformUnsRand;
<UniformDoubleDist>
uniformDblRand;
These objects may be called from anywhere in your program. Note (a): the generator is initialized with
NEXTSEED or RANDOMSEED depending on the use of the -varyseed command line option. Note (b):
the distribution objects are created without default statistical parameters.
C.3.3. Random Library Test Programs
1. In a separate tar file (ftp://ftp.swarm.org/pub/swarm/RandomTests-0.81.tgz), available at the SFI ftp
site, there are a set of programs which exercise aspects of the generator objects’ functionality. The
164
Appendix C. Random Library Appendix
following (very utilitarian) programs are available:
•
testR0. a program which exercises every generator and distribution, verifying correct operation
and comparing output to that obtained on the author’s system.
•
testR1. a program which prints out diagnostic output for code in random.m.
•
testR2. a program which asks each distribution and generator to describe itself using the Swarm
xprint method.
•
testR3. a program which asks each distribution and generator to describe itself using the objects’
’describe’ method.
•
testR4. a program that performs timing tests on each generator and distribution, computing the
time it takes to call each object 10,000,000 times.
•
testR6. a program that generates a binary file containing 2.5M variates from a specified generator,
for purposes of statistical testing (e.g. with ENT or Diehard.)
•
testR7. a program which records, for each generator, the value of unsignedMax, the number of
output bits, and the value of lengthOfSeedVector.
•
testR9. a program which records, for each generator and distribution, the object’s ’magic number’
and the buffer size needed for getState/setState.
2. Statistical testing: the generators have been put through the tests in the /testR6/ENT and
/testR6/Diehard directories. The raw data can be found there. The results are summarized in the test
log files found in the same test distribution. The distribution objects have not been tested statistically
yet.
The code here represents an effort to implement several efficient, reasonably safe generators. The
algorithms come from reading the literature (Bibliography). These algorithms have been implemented as
accurately as possible and run through some simple tests. Some generators, included here for historical
reasons only, are known to have bad statistical properties, and their use is deprecated. See Advanced
Usage Guidefor information on the quality of the included generators.
While the objects in this library are believed to function correctly, the prudent and paranoid modeller
would do well testing them in some domain-specific way. One easy way to do this is to run an
experiment twice: once with one class of generator (say, PMMLCG), and once with another (say, SWB).
If the results differ radically, then you can suspect one of the generators. If they don’t, well, the
generators still might be faulty!
The generators supplied with this release have been subjected to statistical testing using George
Marsaglia’s Diehard tests as well as John Walker’s entropy tests (ENT). The results of these tests are
summarized in Generator quality table. Other data on the properties of the generators are found there as
well. These data support a discussion of how to choose one or more generators for your simulation.
165
Appendix C. Random Library Appendix
The ENT test is included in the tarball of test programs mentioned above. The Diehard tests are
copyright and hence are not, but they can be downloaded from the web at:
ftp://ftp.csis.hku.hk/pub/random (ftp://ftp.csis.hku.hk/pub/random).
The distribution objects have not been statistically tested.
C.4. Resources for random number generation
This section lists some of the source reference material used in programming the random generators and
distributions. The following is a list of source articles or books from which the generator and distribution
objects were implemented
C.4.1. Generators
•
LCG. a golden oldie; see [Knuth 1981] or [Numerical Recipes].
•
PMMLCG. see [Park & Miller 1988], [L’Ecuyer & Cote 1991] and [L’Ecuyer & Andres 1997].
•
ACG. a golden oldie; see [Knuth 1981] or [Numerical Recipes].
•
SCG. a golden oldie; see [Knuth 1981] or [Numerical Recipes].
•
SWB. see [Marsaglia & Zaman 1991]
•
PSWB. see [Marsaglia & Zaman 1991]
•
MRG. see [L’Ecuyer et al 1993]
•
C2MRG3. see [L’Ecuyer 1996(a)] and [L’Ecuyer 1999(a)]
•
C2TAUS. see [Tezuka & L’Ecuyer 1991], [L’Ecuyer 1996(b)] and [L’Ecuyer 1999(b)]. Also
[Tausworthe 1965].
•
TGFSR (TT800, TT775, TT403). see [Matsumoto & Kurita 1992] and [Matsumoto & Kurita 1994].
•
MT19937. see [Matsumoto & Nishimura 1998].
•
MWCA, MWCB, C3MWC, RWC2, RWC8 ("Mother"). See [Marsaglia 1994(a)] and [Marsaglia
1994(b)].
•
C2LCGX. See [L’Ecuyer & Cote 1991]
•
C4LCGX. See [L’Ecuyer & Andres 1997]
166
Appendix C. Random Library Appendix
C.4.2. Distributions
•
RandomBitDist. Code contributed by Nelson Minar. (mailto://[email protected])
•
BernoulliDist. Code contributed by Barry McMullin (mailto://[email protected]).
•
UniformIntegerDist. Code contributed by Nelson Minar (mailto://[email protected]).
•
UniformUnsignedDist. Code contributed by Nelson Minar (mailto://[email protected]).
•
UniformDoubleDist. Code contributed by Nelson Minar (mailto://[email protected]).
•
NormalDist. See [Numerical Recipes].
•
LogNormalDist. See [Numerical Recipes].
•
ExponentialDist. See [Russell 1992].
•
GammaDist. See [Watkins 1994].
C.4.3. Useful Web Sites
•
Pierre L’Ecuyer maintains a personal web site (http://www.iro.umontreal.ca/~lecuyer). He has many
of his own papers there, as well as further links. He has papers both on generating random numbers
and on testing random number generators.
•
George Marsaglia has a personal web site (http://stat.fsu.edu/~geo). His battery of tests for random
generators, called Diehard, is not available there, but rather from Hong Kong
(ftp://ftp.csis.hku.hk/pub/random). A GUI version of Diehard has been under development for some
time, but is not yet ready.
•
The pLab (http://random.mat.sbg.ac.at) project in Salzburg, Austria, also has much useful information.
Bibliography
[Ferrenberg et al 1992] Alan M. Ferrenberg, D. P. Landau, and Y. Joanna Wong, "Monte Carlo
Simulations: Hidden Errors from "Good" Random Number Generators": Physical Review Letters,
no. 23, vol. 69, December, 1992.
[Knuth 1981] Donald Knuth, The Art of Computer Programming, 2nd ed., vol. II, Seminumerical
Algorithms, Addison-Wesley, Reading, 1981.
[L’Ecuyer et al 1993] Pierre L’Ecuyer, F. Blouin, and R. Couture, "A Search for Good Multiple Recursive
Random Generators.": ACM TOMACS, vol. 3, pp. 87-98, 1993.
167
Appendix C. Random Library Appendix
[L’Ecuyer 1996(a)] Pierre L’Ecuyer, "Combined Multiple Recursive Generators.": Operations Research,
no. 5, vol. 44, pp. 816-822, 1997.
[L’Ecuyer 1996(b)] Pierre L’Ecuyer, "Maximally Equidistributed Combined Tausworthe Generators":
Mathematics and Computation, no. 65, vol. 213, pp. 203-213, 1996.
[L’Ecuyer 1999(a)] Pierre L’Ecuyer, "Good Parameter Sets for Combined Multiple Recursive Random
Number Generators": Operations Research, no. 1, vol. 47, pp. 159-164, 1999.
[L’Ecuyer 1999(b)] Pierre L’Ecuyer, "Tables of Maximally-Equidistributed Combined LFSR
Generators": Mathematics and Computation, no. 225, vol. 68, pp. 261-269, 1999.
[L’Ecuyer & Andres 1997] Pierre L’Ecuyer and Terry H. Andres, "A Random Number Generator Based
on the Combination of Four LCGs.": Mathematics and Computers in Simulation, vol. 44, pp.
99-107, 1997.
[L’Ecuyer & Cote 1991] Pierre L’Ecuyer and Serge Cote, "Implementing a Random Number Package
with Splitting Facilities": ACM TOMACS, no. 1, vol. 17, pp. 98-111, March, 1991.
[Marsaglia 1994(a)] George Marsaglia, "The Mother of All Random Generators": Posted by Bob
Wheeler to sci.stat.consult (news://sci.stat.consult) and sci.math.num-analysis
(news://sci.math.num-analysis) on behalf of George Marsaglia on October 28, 1994. The code is
available at ftp.taygeta.com (ftp://ftp.taygeta.com/pub/c/mother.c) .
[Marsaglia 1994(b)] George Marsaglia, "Multiply-With-Carry Generators": File "mwc1.ps" on
Marsaglia’s Diehard CD-ROM, available online at ftp.csis.hku.hk
(ftp://ftp.csis.hku.hk/pub/random).
[Marsaglia & Zaman 1991] George Marsaglia and Arif Zaman, "A New Class of Random Number
Generators.": Annals of Applied Probability, no. 3, vol. 3, pp. 462-480.
[Matsumoto & Kurita 1992] M. Matsumoto and Y. Kurita, "Twisted GFSR generators": ACM TOMACS,
vol. 2, 1992, pp. 179-194.
[Matsumoto & Kurita 1994] Makoto Matsumoto and Yoshiharu Kurita, "Twisted GFSR Generators II":
ACM TOMACS (Amended by K. Matsumoto, 8 July 1996)., no. 3, vol. 4, pp. 254-266.
[Matsumoto & Nishimura 1998] M. Matsumoto and T. Nishimura, "Mersenne Twister: A
623-dimensionally Equidistributed Uniform Pseudorandomnumber Generator": ACM TOMACS,
no. 1, vol. 8, pp. 3-30, 17 December 1998.
[Nature 1994] "News and Views": Nature, vol. 372, December, 1994.
168
Appendix C. Random Library Appendix
[Numerical Recipes] W. H. Press, S. A Teukolsky, W. T. Vetterling, and B. P. Flannery, Numerical
Recipes in C, 2nd ed., Cambridge University Press, 1992.
[Park & Miller 1988] Stephen K. Park and Keith W. Miller, "Random Number Generators: Good Ones
Are Hard to Find.": CACM, no. 10, vol. 31, pp. 1192-1201, October 1988.
[Tausworthe 1965] R.C. Tausworthe, "Random Numbers Generated by Linear Recurrence modulo 2":
Math. Comput., vol. 19, pp. 201-209, 1965.
[Tezuka & L’Ecuyer 1991] Shu Tezuka and Pierre L’Ecuyer, "Efficient and Portable Combined
Tausworthe Random Number Generators.": ACM TOMACS, no. 2, vol. 1, pp. 99-112.
[Russell 1992] Edward C. Russell, "Building Simulation Models With SIMSCRIPT II.5", CACI Products
Company, La Jolla, 1992, The company’s web site is: http://www.caciasl.com.
[Watkins 1994] Kevin Watkins, Discrete Event Simulation in C, McGraw-Hill, 1994.
169
Bibliography
A short bibliography of books, articles, papers useful for learning to program with the Swarm libraries.
Books
[Goldberg & Robson, 1989] Smalltalk 80 : The Language, Adele Goldberg and David Robson,
0201136880, June 1989, Addions-Wesley.
Abstract. Classic Smalltalk reference.
[Kernighan & Ritchie, 1988] The C Programming Language, K & R, , 2, Brian Kernighan and Dennis
Ritchie, 0-13-110370-9, Revised, 1988, Prentice Hall, 1988.
Prentice Hall Software Series.
Abstract. The definitive reference on the C programming language by its inventors.
[NeXT, 1993] Object Oriented Programming and the Objective C Language, NeXT Computer,
0-201-63251-9, 1993, Addison-Wesley.
Abstract. This book describes the Objective-C language as it is implemented for NeXTSTEP.
While clearly targeted at NeXTSTEP, it is a good first-read to get to learn Objective-C
This book is out of print, but availble at the : Apple website
(http://developer.apple.com/techpubs/macosxserver/ObjectiveC/index.html)
[Van der Linden, 1994] Expert C Programming: Deep C Secrets, Peter van der Linden, 0-13-177429-8,
1994, SunSoft Press: Prentice Hall.
Abstract. A book for more advanced Swarm users: excellent for information on more abstruse
matters of memory-management, linker issues and pointers. Covers much UNIX and C arcana
which is difficult to find documented anywhere else (obscure man pages notwithstanding) in an
engaging and humourous style.
[DiBona et. al. 1999] Open Sources: Voices from the Open Source Revolution, Edited by Chris DiBona,
Edited by Sam Ockman, Edited by and Mark Stone, 1-56592-582-3, 1999, O’Reilly & Associates
Inc., Sebastopol.
170
Bibliography
Papers
[Daniels, 1999] Marcus Daniels, Integrating Simulation Technologies with Swarm
(http://www.swarm.org/intro-papers.html), Agent Simulation: Applications, Models and Tools,
October 1999, Argonne National Laboratory, University of Chicago.
171
Index
A
ActionGroup, 68
activateIn, 36, 69
Activity, 70
starting and stopping, 71
agent-based, 16
agents
auxiliary , 33
primary , 33
arborgames, 35
Archiver
application
global, 129
Arguments protocol, 99
Array
(See collections)
atOffset:, 109
maps
contrast with arrays, 110
keys, 112
usage, 112
nil objects in, 79
wrapper usage in, 109
complex systems, 16
control panel, 81
CREATABLE, 54
createActionForEach:
usage in schedules, 65
createActionTo:
usage in schedules, 64
createBegin
(See object creation)
Creating
(See phases)
D
deleteAll, 109
B
Drone, 99
drop, 52, 57, 107
buildActions
(See Schedule)
dynamic scheduling
(See Schedule)
buildObjects
(See object creation)
E
C
collections
arrays
contrast with maps, 110
usage, 111
index usage, 77, 117
lists, 73
adding and removing objects, 74
looping through members, 77
EZDistribution, 81
EZGraph, 81, 86
F
forEach:, 109
function
C, 101
172
G
get methods, 59
getActivity
(See Activity)
getCount, 76, 109
graphical interface
(See GUISwarm)
GUISwarm, 50, 81
data display graphs, 86
graph types, 38
LispArchiver
application
custom, 132
List Protocol
(See collections)
M
M()
(See selector)
Map
(See collections)
H
HDF5, 129
heatbugs
command-line parameters, 98
creating objects in, 49
parameter files, 130
I
memory allocation
dynamic, 104
Swarm Zones, 34, 52
mousetrap
parameter files, 133
O
object creation, 28
Index Protocol
(See collections)
instance variables
intitialization, 59
instantiation
(See object creation)
J
Java, 21
constructor
(See object creation)
buildObjects method, 34
CREATABLE protocol, 31
create, 51
createBegin, 50
createBegin/createEnd, 29, 49
createEnd, 50
in Java, 30
in Objective C, 29
object recycling, 57
object-oriented programming, 21
Object2dDisplay
usage example, 66
Objective C, 21
protocols
usage inSwarm, 30
L
objects
Lisp, 129
OO
getting information from, 61
173
(See object-oriented programming)
P
parameter
command-line, 98
files, 129
phases, 49
ProbabilityDistribution Protocol
(See random numbers)
probe displays, 40
programming
object-oriented programming, 16
encapsulation, 18
inheritance, 19
protocols
(See Objective C)
nonobject arguments to, 68
usage in display objects, 66
serialization, 129
set methods, 59
Setting
(See phases)
simulation
agent-based, 16
discrete event, 20
stopping a simulation
(See Activity)
Swarm, 33
agents
(See agents)
common syntax, 33
described, 12
tutorial, 46
using Swarm library objects , 53
R
U
random numbers
Using
built-in distributions, 119
creatable distributions, 125
generators, 122
removeAll, 109
(See phases)
V
variable declarations
S
Schedule
buildActions method, 35
creating, 64
dynamic, 71
selector
adding arguments to, 65
defined, 65
in schedules, 65
justification for usage, 66
protocol usage in, 31
W
wrapper, 68, 109
integer wrapper as map key, 114
Z
ZoomRaster, 81, 81
Colophon
This book is generated entirely from a single SGML source document marked up in the DocBook 3.1
DTD (http://www.oasis-open.org/docbook/). To generate the resultant output, we use the Modular
DocBook stylesheets (http://www.nwalsh.com/docbook/dsssl/index.html) provided by Norman Walsh
(http://www.nwalsh.com).
175