1
Operating Instructions
(For Software)
Electronic Board
(elite Panaboard)
Model No.
UB-T780
UB-T780
Stand is sold separately.
Before operating this unit, please read these instructions completely and keep them carefully for future
reference.
Introduction
Introduction
Thank you for purchasing the Panasonic Electronic Board.
Feature Highlights
By connecting the elite Panaboard to a computer and using a projector to display the contents of the
computer’s screen on the elite Panaboard, you can do the following.
Electronic Pen Features
• Manipulate objects on the screen by using the electronic pen as a mouse.
• Draw and erase lines on the screen by using the electronic pen.
• Save images of the screen that were created by drawing with the electronic pen.
elite Panaboard book
Use the elite Panaboard book software that supports elite Panaboard operations, such as writing, drawing,
attaching images and computer operations. This software lets you save the contents of the screen on your
computer and retrieve it for later use.
Two Operation Modes for elite Panaboard software
You can use the elite Panaboard software in one of the 2 operation modes below.
• Desktop drawing mode
• elite Panaboard book mode
Desktop Drawing Mode
You can use the electronic pen to write text, draw pictures, and manipulate programs on the image projected
on the elite Panaboard. Items that you draw can be saved in a file. The desktop background and application
data will not be altered.
elite Panaboard book Mode
elite Panaboard book is software for creating teaching materials and presentations. Files created with the elite
Panaboard book software are saved in a proprietary format (.peb). You can use materials created with elite
Panaboard book to aid with presentations and explanations.
2
Operating Instructions (For Software)
Introduction
About the Operating Instructions
There are 2 separate operating manuals for the elite Panaboard.
For Basic Operations
(printed document)
For Software
(this document)
Instructions for connecting and operating the elite Panaboard, as well
as instructions for installation construction.
Instructions for the included elite Panaboard software and elite
Panaboard book.
Abbreviations
Windows® refers to the Microsoft® Windows® operating system.
Windows® 2000 refers to the Microsoft® Windows® 2000 operating system.
Windows® XP refers to the Microsoft® Windows® XP operating system.
Windows Vista® refers to the Microsoft® Windows Vista® operating system.
Excel® refers to the Microsoft® Excel® spreadsheet software.
PowerPoint® refers to the Microsoft® PowerPoint® presentation graphics program.
DirectX® refers to the Microsoft® DirectX® application programming interface.
Trademarks
•
•
•
•
•
Microsoft, Windows, Windows Vista, DirectX, Excel, PowerPoint and Windows Media are either registered
trademarks or trademarks of Microsoft Corporation in the United States and/or other countries.
IBM and AT are trademarks of International Business Machines Corporation in the United States, other
countries, or both.
Intel and Pentium are trademarks or registered trademarks of Intel Corporation in the United States and
other countries.
Adobe, Reader and Flash are either registered trademarks or trademarks of Adobe Systems Incorporated
in the United States and/or other countries.
All other trademarks identified herein are the property of their respective owners.
Operating Instructions (For Software)
3
Introduction
System Requirements
Computer
CPU
Operating System
Interface
Memory (RAM)
Hard Disk
IBM® PC/AT® or compatible with a CD-ROM drive
Intel® Pentium® 4 processor or later
Windows 2000 SP4 / Windows XP / Windows Vista
USB 2.0
256 MB or greater (Windows 2000 SP4)
512 MB or greater (Windows XP)
512 MB or greater (Windows Vista)
Hard disk with at least 200 MB of free space (not including the space required
for saving files)
Note
•
•
•
•
•
•
•
•
4
To run the elite Panaboard software, Microsoft .NET Framework 1.1 or later and DirectX 7.0 or later
are required. When you install the elite Panaboard software on the CD-ROM, .NET Framework 1.1 will
be installed on your computer if it is not already installed.
The system requirements above do not meet the recommended specifications of all operating systems.
You must have Windows Media® Player 10 or later, or Adobe® Flash® Player installed to insert and play
back movies.
Inserting and playing back movies is not supported in Windows 2000 SP4.
The handwriting recognition feature is supported in Windows Vista Ultimate, Windows Vista Home
Premium, Windows Vista Business, and Windows XP Tablet PC Edition 2005.
If you are using Windows 2000 SP4 or later, or Windows XP Professional, you must have the Tablet
PC SDK and Microsoft Windows XP Tablet PC Edition 2005 Recognizer Pack installed to use the
handwriting recognition feature.
The handwriting recognition feature is not supported in Windows Vista Home Basic and Windows XP
Home Edition.
You must have enough available hard disk space in order to record and play back movies.
Operating Instructions (For Software)
Table of Contents
Desktop Drawing Mode ...........................................................................7
Starting the elite Panaboard software and Performing Calibration .............................7
Using the Desktop Drawing Tool .....................................................................................8
Arrow ................................................................................................................................8
Eraser ...............................................................................................................................9
Marker (Black/Red/Blue/Green) .......................................................................................9
Undo .................................................................................................................................9
Redo .................................................................................................................................9
Refresh .............................................................................................................................9
All Clear ............................................................................................................................9
Setting ..............................................................................................................................9
White Background ..........................................................................................................10
Capture ...........................................................................................................................10
PowerPoint Slide Show ..................................................................................................11
On-Screen Keyboard ......................................................................................................12
elite Panaboard book .....................................................................................................13
Magnifier .........................................................................................................................13
Screen Shade .................................................................................................................13
Spotlight .........................................................................................................................13
Recorder .........................................................................................................................14
Change Icon Size ...........................................................................................................15
Changing the Display of the Desktop Drawing Tool ....................................................15
Using the Electronic Pen to Switch between the Pointer and Marker Tools .............16
Using the Electronic Pen to Change the Position of the Desktop Drawing
Tool ...................................................................................................................................16
About the elite Panaboard software Menu ...................................................................17
Calibrate .........................................................................................................................17
Tool ................................................................................................................................17
Options... ........................................................................................................................17
Help… ............................................................................................................................18
About… ..........................................................................................................................18
Exit .................................................................................................................................18
elite Panaboard book mode ..................................................................19
Starting elite Panaboard book .......................................................................................19
elite Panaboard book Screen .........................................................................................20
elite Panaboard book Main Screen ................................................................................20
About the Toolbar Buttons ..............................................................................................21
Using elite Panaboard book ...........................................................................................22
Creating a Presentation File ...........................................................................................22
Giving a Presentation with the File You Created ............................................................24
Exporting a Presentation File .........................................................................................25
Recording Desktop Operation ........................................................................................25
Playing Movies in elite Panaboard book ........................................................................25
Using the Drawing Tools ................................................................................................25
Marker (Black/Red/Blue/Green) .....................................................................................25
Highlighter ......................................................................................................................25
Eraser .............................................................................................................................25
Operating Instructions (For Software)
5
Line .................................................................................................................................25
Shapes ...........................................................................................................................26
Text ................................................................................................................................26
Working with Drawn Objects .........................................................................................27
Selecting an Object ........................................................................................................27
Moving an Object ...........................................................................................................27
Resizing an Object .........................................................................................................27
Rotating an Object ..........................................................................................................27
Changing Object Properties ...........................................................................................27
Adding Text to a Shape ..................................................................................................28
Changing the Object Order ............................................................................................28
Graying out an Object (Shade) .......................................................................................28
Duplicating an Object .....................................................................................................28
Recognizing free-form lines as characters .....................................................................28
Using Movie Files ............................................................................................................29
Playing a movie file ........................................................................................................29
About the elite Panaboard book Menus ........................................................................29
File Menu ........................................................................................................................29
Edit Menu .......................................................................................................................32
Insert Menu ....................................................................................................................34
Page Menu .....................................................................................................................34
View Menu ......................................................................................................................35
Format Menu ..................................................................................................................38
Tool Menu ......................................................................................................................41
Help Menu ......................................................................................................................43
Software Installation ..............................................................................44
Installing the elite Panaboard software ........................................................................44
Uninstalling the elite Panaboard software ....................................................................45
Troubleshooting .....................................................................................46
Troubleshooting ..............................................................................................................46
6
Operating Instructions (For Software)
Desktop Drawing Mode
e
D
skto
p
ra
in
w
g
M
d
Starting the elite
Panaboard software and
Performing Calibration
1. Turn on the elite Panaboard.
2. Connect the elite Panaboard to your computer
with the USB cable.
• The elite Panaboard software starts
automatically.
• When you start the elite Panaboard software for
the first time, the calibration screen is displayed.
• Restart your computer if you are prompted to do
so. After the computer has restarted, connect
the elite Panaboard to your computer with the
USB cable.
3. Perform calibration.
4. Press the electronic pen at a right angle against
the board at the intersecting points of each
circle until it disappears (about 2 seconds).
Repeat in the order shown in the illustration
below.
1
•
•
•
•
Hold and press the electronic pen at a right
angle to the screen board.
When you push down on the penpoint, the
electronic pen makes a buzzing sound.
When the position of the indicated point has
been determined correctly, calibration
automatically moves to the next point.
When calibration has finished normally, a
completion dialog box is displayed.
2
5. Click [OK].
• If the elite Panaboard and projector are fixed so
•
4
that they will not move (Wall mounted case),
select the [Always use this calibration
information.] check box, and click [OK] to skip
calibration from the next time you start the elite
Panaboard software. To redisplay the
calibration screen, refer to "Options...
(Page 17) ".
After calibration has completed, the
icon is
displayed in the notification area, and the
3
Operating Instructions (For Software)
7
Desktop Drawing Mode
Desktop Drawing Tool is automatically
displayed.
Using the Desktop Drawing Tool
The Desktop Drawing Tool is displayed when you start
the elite Panaboard software. By using the Desktop
Drawing Tool, you can draw and erase characters and
pictures on the desktop or application data. In addition,
you can switch between all of the functions provided by
the tools with the electronic pen.
Tool Names
Arrow
Black Marker
Blue Marker
Undo
•
[Desktop Drawing Tool]
You will be able to use elite Panaboard
software.
Refresh
Setting
Capture
On-Screen Keyboard
Eraser
Red Marker
Green Marker
Redo
All Clear
White Background
PowerPoint Slide Show
elite Panaboard book
Magnifier
Screen Shade
Spotlight
Recorder
Change Icon Size
Shrinking
Arrow
You can use the electronic pen as a mouse.
1. Click
(Arrow) on the Desktop Drawing Tool.
• The electronic pen can be used in the same way
as a mouse.
Left click
Push and release the penpoint on the elite
Panaboard.
Right click
Push and release the penpoint on the elite
Panaboard while holding down the pen button
on the electronic pen.
Double click
Push and release the penpoint 2 times on the
elite Panaboard.
8
Operating Instructions (For Software)
Desktop Drawing Mode
Drag & Drop
Push the penpoint on the elite Panaboard and
select an object. Drag the object by moving the
pen while keeping the penpoint pushed down,
and release.
Eraser
You can erase sections of freeform lines with the
electronic pen.
1. Click
(Eraser) on the Desktop Drawing Tool.
Refresh
The lines drawn on the screen may be occasionally
erased or their positions may change as a result of
moving windows or using an application. When this
happens, you can redisplay the drawn lines in their
original position.
1. Click
(Refresh) on the Desktop Drawing
Tool.
• The lines that you drew on the board are
redisplayed.
2. Drag the electronic pen over the areas that you
want to erase. (Move the electronic pen while
keeping the penpoint pushed down against the
elite Panaboard.)
Marker (Black/Red/Blue/Green)
You can draw characters, pictures and free-form lines
with the electronic pen. You can also set the color of the
lines that are drawn.
1. Click one of
(Black Marker)/
(Red Marker)/
(Blue Marker)/
(Green Marker) on the
Desktop Drawing Tool.
2. Draw on the elite Panaboard using the
electronic pen.
Undo
You can undo an action.
(Undo) on the Desktop Drawing Tool.
1. Click
• The previous action is undone.
All Clear
You can erase all of the lines drawn with the Marker tool.
1. Click
(All Clear) on the Desktop Drawing
Tool.
• A confirmation window is displayed.
2. Select [Yes] to erase all lines.
• All lines on the screen are erased.
• To cancel the All Clear operation, click [No].
Setting
You can change the width, color and transparency of
the marker, as well as the size of the eraser tool. You
can change the width independently for each of the 4
marker types.
(Setting) on the Desktop Drawing Tool.
1. Click
•
The "Marker/Eraser Setting" window is
displayed.
Redo
You can redo an action that you previously undid.
(Redo) on the Desktop Drawing Tool.
1. Click
• The action that was previously undone with the
[Undo] command is redone.
Operating Instructions (For Software)
9
Desktop Drawing Mode
2. Set the marker color and width, and the eraser
size as desired.
Note
•
•
•
Same Width
Selecting this option sets the width for all
markers to be the same.
Black/Red/Blue/Green
Set the width independently for each marker.
Enter a value from 1 to 30. Alternately, you can
use the slider to change the value by moving it
left and right.
Click to change color
Click a marker, and the Color Settings window
is displayed in which you can change the color
for the marker.
Highlight
Selecting this option makes the color for the
marker semi-transparent.
Eraser Radius
Set the radius for the eraser. Enter a value from
1 to 60. Alternately, you can use the slider to
change the value by moving it left and right.
3. Click [OK].
• A confirmation window is displayed asking if you
want to apply the new settings to all previously
drawn lines.
4. Click [All Strokes] or [New Strokes].
• If you select [All Strokes], all previously drawn
lines will be updated to reflect the new settings.
• If you select [New Strokes], the new settings will
only be applied to lines that you draw from that
point forward.
10
Operating Instructions (For Software)
When you change the color of a marker, the
color is displayed in the marker button on the
Desktop Drawing Tool.
If you select the [Highlight] option, the
underlying image will be displayed through the
drawn line. If the underlying image's colors are
dark, the line will be difficult to see, so do not
select the [Highlight] option in this case. In
addition, if lines intersect, the intersection will be
black.
For Windows Vista, the number of highlight
marker changes (check/uncheck) is limited to
10.
White Background
You can display the entire desktop as white. This
feature can be used for giving supplementary
explanations.
(White Background) on the Desktop
1. Click
Drawing Tool.
• The desktop is displayed as all white. To return
(White
to the original display, click
Background) again.
Capture
Save the displayed screen and all lines drawn with the
electronic pen to a file.
There are 2 ways to save the display:
• Save the file by inputting a name.
• Save the file using the current date and time as the
file name.
For information about saving files and file formats, refer
to "Options... (Page 17) ".
To save a file by inputting a file name
1. Click
(Capture) on the Desktop Drawing
Tool.
• The "Save As" window is displayed.
2. Specify the folder and name for the file, and
select a file format.
• You can select the following formats in File
Type.
– Bitmap file (.bmp)
Desktop Drawing Mode
– JPEG file (.jpg)
– TIFF file (.tif)
3. Click [Save].
• If you select an existing TIFF file in the "Save
As" window, a window will be displayed asking
if you want to add the image to the existing file
or overwrite the existing file.
– To add the file
Select [Yes]. The new image is appended
to the end of the existing file, and the file is
saved as a multi-page TIFF file.
– To overwrite the file
Select [No]. The existing file is deleted, and
the new file is saved as a single page TIFF
file.
To save a file using the current date and time
as the file name
icon in the notification area,
1. Right-click the
2.
3.
4.
5.
and select [Options...].
Select the [Save file automatically, named with
the date] check box, and specify the "Save
Folder" and "File Format".
Click [OK] to close the "Options" window.
(Capture) on the Desktop Drawing
Click
Tool.
• A save confirmation window is displayed.
Click [OK].
• If you select the [Do not show this message
again] check box, the window will not be
displayed the next time you save with this
method. To display the window again, refer to
"Options... (Page 17) ".
PowerPoint Slide Show
You can start PowerPoint from the Desktop Drawing
Tool and display a slide show. Items drawn with the
electronic pen are stored on a per-slide basis, so items
that you draw on one slide are not displayed on the next
slide when you change slides. In addition, you can save
the items you drew on the slides to a file so that they
can be reused the next time you present the slide show.
Note
•
•
The items you draw on the screen are Desktop
Drawing Tool data and not PowerPoint data.
To play a slide show
1. Click
(PowerPoint Slide Show) on the
Desktop Drawing Tool.
• The "Open" window is displayed.
2. Specify the folder and file name of the
PowerPoint file to play.
3. Click [Open].
• PowerPoint starts, and the slide show begins
automatically.
Note
•
•
If a PowerPoint file is already open, clicking
(PowerPoint Slide Show) will not display the
"Open" window, but will start playing the open
file as a slide show instead.
If you are running a slide show from
PowerPoint, click
(PowerPoint Slide Show)
to start using the elite Panaboard software with
the slide show.
To change the slide
During a slide show, the buttons
(Next) and
(Previous) are displayed in the Desktop Drawing Tool.
(Next) or
(Previous) on the Desktop
1. Click
Drawing Tool.
• These buttons function the same as [Next] and
[Previous] in PowerPoint.
• If you have selected the marker or eraser, it is
not necessary to temporarily select the Arrow
tool.
Note
•
If you change the slide without using the
Desktop Drawing Tool, drawing data will not be
displayed. Click
(Refresh) to display the
drawing data.
To exit the slide show
1. Click
(PowerPoint Slide Show) on the
Desktop Drawing Tool during a slide show.
• The PowerPoint slide show exits.
In order to use these features with PowerPoint,
you must have PowerPoint 97 or later installed
on your computer.
Operating Instructions (For Software)
11
Desktop Drawing Mode
Note
•
1. Click
(Next)
If the slide show exits when you click
or by another means, the Desktop Drawing Tool
will recognize that the slide show has exited and
will return to no-slide-show mode without
having to click
(PowerPoint Slide Show).
To save the items drawn on a slide
When you exit the Desktop Drawing Tool, a window is
displayed asking whether you want to save the data
drawn or erased with the marker and eraser tools as a
drawing data file.
If you indicate that you want to save the data, the
drawing data will be saved under the same name as the
PowerPoint file as a drawing data file (extension ".ips").
By default, the location of the file is the same as the
PowerPoint file. If the file cannot be saved to this
location, the folder specified in "Options... (Page 17)
" is used.
Note
•
The drawing data is saved in a file with a
proprietary image format (.ips).
To use saved drawing data and display it on a
slide show
When you click
(PowerPoint slide show) to play a
slide show, if there is a drawing data file with the same
name and in the same folder as the PowerPoint file or
in the file specified in "Options... (Page 17) ", a
confirmation window will be displayed asking whether
you want to use this data. If you indicate that you want
to use the data, the drawing items will be loaded from
the drawing data file and displayed on the slide show.
Note
•
If you no longer need a saved drawing data file,
delete it using Explorer or another application.
On-Screen Keyboard
The On-Screen Keyboard is a virtual keyboard that is
displayed on the desktop image that is projected on the
elite Panaboard. You can enter characters by clicking
on the keys of the On-Screen Keyboard.
You can use the Original Keyboard or Windows
Keyboard for the screen keyboard. To change the type
of screen keyboard, refer to "Options... (Page 17) ".
12
Operating Instructions (For Software)
(On-Screen Keyboard) on the Desktop
Drawing Tool.
2. Make the application to input characters the
active application, and move the text cursor to
the location where you want to input characters.
(For example, in Excel, double-click a cell to enter
text-entry mode.)
3. Click characters on the On-Screen Keyboard.
Using the original Screen Keyboard
Selecting the On-Screen Keyboard
You can select the method by which the
On-Screen Keyboard is displayed. Select one of
the following items from the [Keyboard] menu on
the On-Screen Keyboard’s menu bar.
Enhanced Keyboard
Displays a keyboard that includes the numeric
pad.
Standard Keyboard
Displays a keyboard that does not include the
numeric pad.
Displaying the On-Screen Keyboard on top of
other windows
You can have the On-Screen Keyboard always
displayed on top of all other windows. On the
On-Screen Keyboard menu bar, select [Settings]
® [Always On Top], and a check mark is displayed
next to the item. Select this item again to disable
this option, and the check mark is removed.
Changing the On-Screen Keyboard's size
You can change the size of the On-Screen Keyboard. On the On-Screen Keyboard menu bar,
select [Settings] ® [Resize] and select one of
[Large], [Middle], or [Small].
• You can change the size of the On-Screen
Keyboard by dragging its right and left edges.
You cannot change the size by dragging the
top and bottom edges.
• The On-Screen Keyboard’s width-height ratio
is fixed.
• The window’s width can be changed from 1/2
to 2 times of the [Middle] size.
Desktop Drawing Mode
Note
•
•
The name of the application in which characters
will be entered is displayed in the title of the
On-Screen Keyboard.
When the On-Screen Keyboard is displayed,
(On-Screen Keyboard) closes the
clicking
On-Screen Keyboard.
elite Panaboard book
You can start elite Panaboard book from the Desktop
Drawing Tool.
1. Click
(elite Panaboard book) on the Desktop
Drawing Tool.
• elite Panaboard book starts.
•
•
You can hide a section of the image projected on the
elite Panaboard with a gray box.
1. Click
(Screen Shade) on the Desktop
Drawing Tool.
• The Screen Shade feature is activated and a
gray box covers the whole screen.
• If you activate the screen shade with the marker
selected, the mouse pointer will change to an
arrow.
2. Drag the edges of the box to resize it to only
cover the necessary area of the screen.
• The selected section of the desktop image is
hidden by the screen shade.
Note
•
Note
•
Screen Shade
The Desktop Drawing Tool will be displayed at
a reduced size.
The Arrow tool will be selected in the Desktop
Drawing Tool.
When elite Panaboard book is running, you can
open a new elite Panaboard book window and
(elite
have multiple files open by clicking
Panaboard book).
Magnifier
You can enlarge a section of the image projected on the
elite Panaboard.
1. Click
(Magnifier) on the Desktop Drawing
Tool.
• The magnification window opens.
• If you open the magnification window with the
marker selected, the mouse pointer will change
to an arrow.
2. Drag the magnification window over the area
that you want to enlarge.
• The area displayed in the magnification window
is enlarged.
3. Right-click in the magnification window and
change the magnification level.
• You can set the magnification to 2x, 3x, 4x, and
5x.
You can incrementally display the area that is
covered by the screen shade by dragging the
shade.
Spotlight
You can display a portion of the image displayed by elite
Panaboard as though a spotlight were shining on it.
1. Click
(Spotlight) on the Desktop Drawing
Tool.
• The Spotlight window is displayed.
• When you select the Spotlight tool with the
marker selected, the mouse pointer changes to
an arrow.
2. Move the spotlight by dragging it to a location
where the spotlight is not shining.
3. Drag the spotlight's blue frame to resize it.
Operating Instructions (For Software)
13
Desktop Drawing Mode
Recorder
You can record a movie of the projected image and your
operations.
(Recorder) on the Desktop Drawing
1. Click
Tool.
• The Recorder window is displayed.
Minimize when Recording Starts
Select this item to minimize the Recorder window
when recording starts.
Record the entire desktop.
Record a specific window, indicated
by a red frame.
Record a specific area of the screen,
specified by dragging a red frame.
Pause recording.
Stop recording and save.
The "Save As" window will be displayed. Specify the folder and file
name and save the file.
Configure the video quality and operation settings for recording.
Specifying the video quality and operation settings
When you click
(Settings), the Recording
Settings screen is displayed.
Minimize to Notification area
Select this item to display the
icon in the
notification area when the window is minimized.
When this option is not selected, the application
appears in the taskbar when minimized.
To operate the software, click
to
display the Recorder window.
Notification area operations
To pause recording
Click
in the notification area.
To resume recording, click
cation area.
in the notifi-
To stop recording
Double-click, or right-click the icon in the notification area, select [Stop], and save the
recording.
Video and Audio Quality
Select the video and audio quality.
Frame Rate
Set the number of frames to record in 1 second.
To set a value that is not in the list, enter a value in
[Custom].
Temporary Files Folder
Set the folder where temporary files used for
recording are saved. Select a folder that has
enough free space.
14
Operating Instructions (For Software)
Desktop Drawing Mode
Expected recordable time
This value is an estimate of the recording time
based on the current settings. When you set [Video
and Audio Quality], [Frame Rate], and [Temporary
Files Folder], use the estimated time displayed in as
a reference.
For details about operation, refer to "Recording Desktop
Operation (page 25)".
Note
•
To record audio, you need a microphone
attached to your computer.
Change Icon Size
You can change the size of the icons in the Desktop
Drawing Tool.
1. Click
(Change Icon Size) on the Desktop
Drawing Tool.
• The icons become smaller.
Note
•
To return the icons to their original size, click
(Change Icon Size).
Changing the Display of
the Desktop Drawing
Tool
You can display the Desktop Drawing Tool in 3 different
sizes.
Standard Display
Displays all of the buttons.
Marker Display
This display is for only drawing and erasing lines.
The Capture and PowerPoint Slide Show buttons
are hidden.
Minimized Display
When the Desktop Drawing Tool covers an area of
the desktop, by minimizing the tools you can
minimize the area of the desktop that is covered.
(Shrinking) or
(Expansion) on the
1. Click
Desktop Drawing Tool.
• The display of the Desktop Drawing Tool
changes.
Standard Display
Marker Display
Minimized Display
Operating Instructions (For Software)
15
Desktop Drawing Mode
Note
•
•
During a PowerPoint slide show,
(Next) and
(Previous) are added to the Standard and
Marker displays.
You can change the size of the buttons in the
Desktop Drawing Tool between "small" and
"large" by clicking
or
(Change Icon Size)
in Standard display.
Using the Electronic Pen
to Switch between the
Pointer and Marker Tools
By using the electronic pen, you can switch between
(Arrow) and
(Black/Red/Blue/Green Marker).
1. With
(Arrow) or
(Black/Red/Blue/Green
Marker) selected, double-click the penpoint
while holding down the pen button.
• When
(Arrow) is selected, the tool switches
(the marker that was last selected). Right
to
after the elite Panaboard software has been
started and no marker has been selected yet,
this operation changes to
(Black Marker).
•
When
(Black/Red/Blue/Green Marker) is
selected, the tool switches to
(Arrow).
Note
•
If
(Eraser) has been selected, the tool will
switch between
marker.
16
(Eraser) instead of the
Operating Instructions (For Software)
Using the Electronic Pen
to Change the Position of
the Desktop Drawing
Tool
During a presentation, the presenter often moves back
and forth in front of the elite Panaboard. If the Desktop
Drawing Tool is on the other side of the board, it will be
difficult to operate it. In these cases, a presenter can
use the electronic pen to move the Desktop Drawing
Tool to a specific location on the board.
1. With
(Black/Red/Blue/Green Marker) or
(Eraser) selected, click the penpoint while
holding down the pen button.
• The Desktop Drawing Tool disappears from the
screen.
2. Push and hold the penpoint at the location
where you want to move the tool to while
holding down the pen button.
• The Desktop Drawing Tool reappears.
Desktop Drawing Mode
About the elite
Panaboard software
Menu
Spotlight
Display the spotlight.
Recorder
Display the Recorder window.
If you right-click on the
icon displayed in the
notification area, the elite Panaboard menu will be
displayed. You can perform the actions below for the
elite Panaboard software.
Options...
Configure the elite Panaboard software options.
Calibrate
Calibrate the position of the image projected on the
screen so that characters and lines drawn with the
electronic pen are displayed in the correct position.
The projected image will become misaligned if you
move either the elite Panaboard or the projector. If this
happens, perform calibration again to correctly realign
the elite Panaboard and projector.
Tool
Use functions such as the magnifying glass and screen
shade, and display the Desktop Drawing Tool and the
On-Screen Keyboard.
Draw
Display the Desktop Drawing Tool.
On-Screen Keyboard
Display the On-Screen Keyboard.
Magnifier
Display the magnification window.
Screen Shade
Display the screen shade.
Calibrate on Startup
When this option is selected, calibration is
performed every time the elite Panaboard software
starts.
Show Desktop Drawing Tool on Startup
When this option is selected, the Desktop Drawing
Tool is automatically displayed when the elite
Panaboard software starts.
Original Keyboard
Use the elite Panaboard's built-in keyboard as the
virtual keyboard (® Page 12).
Windows Keyboard
Use the On-Screen Keyboard included with
Windows as the virtual keyboard (® Page 12).
Note
•
In Windows Vista, if you open the [Options]
dialog box for the Windows Keyboard
(Tablet PC Input Panel), you will not be able
Operating Instructions (For Software)
17
Desktop Drawing Mode
to use the electronic pen. Use the mouse to
close the [Options] dialog box.
JPEG
Set the quality level for saving files in JPEG format.
TIFF
Select the [Compression (PACKBITS)] check box
to compress files when saving in TIFF format.
Save file automatically, named with the date
When this option is selected, files saved with the
Capture feature are saved with the current date and
time as their file name.
Save Folder
Specify the folder in which to save image files.
File Format
Specify the file format in which to save image files.
Display save verification dialog box
Select this option to display a confirmation dialog
box to confirm the file name when saving.
Desktop Drawing Tool : Drawing Data File
When you save drawing data for PowerPoint files in
a separate location from the PowerPoint file itself,
specify the folder to display when loading drawing
data.
Help…
Display the elite Panaboard software help.
Note
•
To display help, you must have Adobe®
Reader® installed on your computer.
About…
Display information about the elite Panaboard software
version.
Exit
Exit the elite Panaboard software.
18
Operating Instructions (For Software)
elite Panaboard book mode
e
litP
a
n
b
o
rd
km
Starting elite Panaboard
book
1. On the [Start] menu, point to [All Programs] ®
[Panasonic] ® [elite Panaboard], and click [elite
Panaboard book].
• elite Panaboard book starts.
Note
•
•
You can also start elite Panaboard book from
the shortcut icon on the desktop.
You can also start elite Panaboard book by
clicking
(elite Panaboard book) on the
Desktop Drawing Tool. When you start elite
Panaboard book, the Desktop Drawing Tool is
minimized.
Operating Instructions (For Software)
19
elite Panaboard book mode
elite Panaboard book Screen
elite Panaboard book Main Screen
A Title Bar
Displays the name of the file being edited and the program name.
B Menu Bar
The main menu for elite Panaboard book.
C Toolbar
Displays commands that you can use with elite Panaboard book.
D Main Window
Displays the current page.
E Side Pane
Contains 4 buttons for page, gallery, and attachment operations.
• Page
Displays thumbnail images of the document pages.
• Gallery
A collection of various images, arranged by theme.
• Attachments
You can include external files (Excel spreadsheets, photographs, etc.) that you can access during a
presentation using elite Panaboard book.
• Move Window Button
This function shrinks and moves the elite Panaboard book window to the bottom of the screen. Clicking
it again returns the window to its original position. This function is useful when you cannot reach the
top of the screen with the electronic pen.
20
Operating Instructions (For Software)
elite Panaboard book mode
About the Toolbar Buttons
A B C
D E F G
S T
U
H I
V
W
J
M N O P Q
K L
X
Y
Z
!
New
Eraser (® Page 25)
Open
Line (® Page 25)
Save
Shapes (® Page 26)
Cut
Text (® Page 26)
Copy
Zoom
Delete
Zoom In
Paste
Zoom Out
R
" #
Undo
Redo
Add New Page
Go To Previous Page
Go To Next Page
Screen Capture
Magnifier
Screen Shade
Spotlight
On-Screen Keyboard
Full Screen
Select (® Page 27)
Infinite Clone (® Page 28)
Marker (Black/Red/Blue/Green)
(® Page 25)
Highlighter (® Page 25)
Operating Instructions (For Software)
21
elite Panaboard book mode
Using elite Panaboard
book
This section explains using an example, how to create
presentation materials with elite Panaboard book, and
how to use elite Panaboard book when giving a
presentation. For details about each of the tools and
functions in elite Panaboard book, refer to the following
sections.
• "Using the Drawing Tools (Page 25) "
• "Working with Drawn Objects (Page 27) "
• "About the elite Panaboard book Menus
(Page 29) "
Create a title
1. On the toolbar, click
(Text).
2. Click on the location where you want to add text.
• The "Text Properties" window and a text box are
displayed, and you enter text edit mode.
3. Enter text using the keyboard, and adjust the
size and position of the text box.
• With the "Text Properties" window, you can
change the size and color of the text.
4. Click in the white area on the page to leave text
edit mode.
• To edit text later, double-click the text to enter
text edit mode.
Draw a line under the title
Creating a Presentation File
Before Creating a Presentation
•
•
•
Decide on the main theme for your presentation.
Think about how you are going to organize the
content.
Prepare any necessary photos or illustrations. You
can obtain illustrations from a clip-art CD, or by
downloading them from the Internet.
Creating a New File
1. On the elite Panaboard book toolbar, click
(New) to create a new file.
Page 1
1. On the toolbar, click the down arrow next to
(Line), and select the red line.
• The mouse pointer changes to +.
2. Drag with the right mouse button to draw a
horizontal line.
• To change the type and color of the line, you
can right-click on the line and display the
"Selection Properties" window, where you can
make changes.
Insert images
1. Select [Gallery] in the side pane.
• In the side pane, folders are displayed in the top
section, and images are displayed in the bottom
section.
2. Drag and drop the desired images to copy them
to the main window.
• The images in the sample are located in
"Special Occasions" and "Buildings".
• The images will be pasted onto the page.
3. Click the images to select them and change
their sizes.
Add a speech bubble
1. On the toolbar, click the down arrow next to
(Shapes), and select the speech bubble
shape.
• The mouse pointer changes to +.
22
Operating Instructions (For Software)
elite Panaboard book mode
2. Click on the page.
• A speech bubble object is displayed.
3. Double-click on the speech bubble to add text.
• You can also enter text edit mode for a shape
Delete unnecessary objects
1. Select an object, and right-click it.
2. Select [Delete].
object by clicking [Text] on the [Edit] menu.
Click in the white area at the top of the page to
leave text edit mode.
4. Adjust the size and position of the speech
bubble.
•
Page 2
Draw a rectangle on page 2
1. On the toolbar, click the down arrow next to
(Shapes), and select the rectangle.
The mouse pointer changes to +.
Click on the page.
• A rectangle object is displayed.
Select the object, and adjust its size and
position.
Right-click the object, and select [Properties...].
In the "Selection Properties" window, change
the colors for [Fill] and [Line].
Click [OK] and close the "Selection Properties"
window.
•
2.
3.
Copy page 1 and create page 2
1. Select [Page] in the side pane.
• The thumbnail image is displayed.
2. Right-click the thumbnail, and select [Add Copy
4.
5.
6.
Page].
• Page 2 is automatically created.
Copy the rectangle, rotate it, and change its
color
1. Right-click the rectangle object, and select
2.
3.
4.
5.
6.
[Copy].
Right-click on the page, and select [Paste].
Drag the rotate icon to rotate the copied object.
Right-click the rotated object, and select
[Properties...].
In the "Selection Properties" window, change
the colors for [Fill] and [Line].
Click [OK] and close the "Selection Properties"
window.
Operating Instructions (For Software)
23
elite Panaboard book mode
7. On the toolbar, click
(Infinite Clone), and
drag the rotated object next to the building to
create a copy.
2. Specify the folder and name for the file, and
click [Save].
• The file is saved in the proprietary elite
Panaboard book format (.peb).
Giving a Presentation with the
File You Created
1. On the [File] menu, click [Open].
• The "Select File to Open" window is displayed.
2. Select the file created in the previous section,
Add curved lines and lengths
1. Click the down arrow next to
(Black Marker),
and select the type of line you want to use.
• The mouse pointer changes to a marker.
2. Draw a curved line by dragging the mouse.
(Text), and input the
3. On the toolbar, click
length.
Add the answer
1. On the toolbar, click the down arrow next to
(Shapes), and select the rectangle shape.
2. Drag the mouse at the location where you want
3.
4.
5.
6.
to display the answer.
• A rectangle object is displayed.
Double-click the object, and enter the answer.
Right-click the object, and select [Properties...].
In the "Selection Properties" window, clear the
[No Fill] check box.
Right-click the object, point to [Shade], and
select [On (Shaded)].
• The answer is hidden by a shade.
Saving the File
1. On the [File] menu, click [Save As...].
• The "Save As" window is displayed.
24
Operating Instructions (For Software)
and click [Open].
• The file is displayed.
3. On the [View] menu, click [Full Screen] to
display the file at full screen.
• The screen switches to full-screen mode, and
the Full Screen toolbar is displayed.
Previous Page
Display the previous page.
Next Page
Display the next page.
Toolbar
Display/hide the File & Edit toolbar, and
Tool toolbar.
Exit Full Screen
Return to normal mode.
4. Give the presentation while using each of the
functions.
• You can use the following functions while giving
a presentation:
Marker
Use the marker to write further
explanations, draw underlines, etc.
Highlighter
Use the highlighter to emphasize important
points.
Shade
Operate the shade feature for objects that
have it set.
5. Click the [Go To Next Page] button on the
toolbar to display the next page according to the
flow of your presentation.
• The next page is displayed.
elite Panaboard book mode
Note
•
Click the [Go To Previous Page] button on the
toolbar to display the previous page.
Using the Drawing Tools
Marker (Black/Red/Blue/Green)
Exporting a Presentation File
To use the presentation file with other applications, you
can export it to the following formats:
• BMP, GIF, JPEG, TIFF, PNG, HTML
For details, refer to "Configure Image Settings for
Exporting (Page 31) ".
Recording Desktop Operation
1. Click
(Recorder) on the Desktop Drawing
Tool.
• The Recorder window is displayed.
2. Click
.
• Recording of the entire desktop will begin.
• The Recorder icon will be displayed in the
notification area.
3. While recording, perform normal operation on
the desktop.
in the notification area, and
4. Right-click
select [Stop].
• Recording of the entire desktop stops.
• The "Save As" window is displayed. Specify the
folder and file name and save the file.
Playing Movies in elite
Panaboard book
1. On the [Insert] menu, click [Media File...].
• The "Open" window is displayed.
2. Select the saved movie file, and click [Open].
• The movie will be pasted onto the page, and
play back will begin.
Draw freeform lines for pictures and characters.
1. On the toolbar, click the down arrow next to
(Marker [Black/Red/Blue/Green]), and select
a line style.
• The mouse pointer changes to a marker.
• By selecting [Customize Markers...], you can
change the line type, color, transparency, etc.,
of the markers displayed in the list.
2. Drag the mouse to draw a freeform line.
Note
•
Free-form lines can be recognized as written
characters. For details, refer to "Recognizing
free-form lines as characters (page 28)".
Highlighter
Paint over lines, shapes, text and other objects on the
page you want to emphasize. Objects that you paint
over will be displayed through the highlighter.
1. On the toolbar, click the down arrow next to
(Highlighter), and select a line style.
• The mouse pointer changes to a highlighter.
• By selecting [Customize Highlighters...], you
can change the line type, color, etc., of the
highlighters displayed in the list.
2. Drag the mouse to draw a freeform line.
Eraser
Erase portions of lines drawn with the Marker and
Highlighter tool.
1. On the toolbar, click the down arrow next to
(Eraser), and select the type of eraser.
• The mouse pointer changes to an eraser.
2. Drag the mouse to erase objects.
Line
Draw straight lines.
Operating Instructions (For Software)
25
elite Panaboard book mode
1. On the toolbar, click the down arrow next to
2. Click or drag at the location where you want to
(Line), and select a line style.
• The mouse pointer changes to +.
• By selecting [Customize Lines...], you can
change the line type, color, etc., of the lines
displayed in the list.
2. Drag the mouse to draw a straight line.
insert text.
• The "Text Properties" window and a text box are
displayed.
3. Enter text into the text box.
• In the "Text Properties" window, you can
change settings such as the size and font of the
characters.
4. Click in the white area on the page to leave text
edit mode.
Note
•
By dragging with the right mouse button, you
can draw a line slanted at 15-degree intervals.
After drawing, the mouse pointer returns to
(Select).
•
Shapes
Draw a variety of pre-defined shapes.
1. On the toolbar, click the down arrow next to
(Shapes), and select the type of shape to
draw.
• The mouse pointer changes to +.
• By selecting [Customize Shapes...], you can
change the line type, color, transparency, etc.,
of the shapes displayed in the list.
2. Drag the mouse to draw the selected shape.
Note
•
By dragging with the right mouse button, you
can draw the shape with a fixed height-width
ratio.
After drawing, the mouse pointer returns to
(Select).
You can enter text in the shape by
double-clicking it.
•
•
Text
Add and edit text in text edit mode.
1. On the toolbar, click the down arrow next to
(Text), and select the text style.
• The mouse pointer changes to a text insertion
bar.
• By selecting [Customize Text...], you can
change the font, size, etc., of the text displayed
in the list.
26
Operating Instructions (For Software)
elite Panaboard book mode
Working with Drawn Objects
You can perform operations on objects that you have
drawn, such as resizing, moving, and rotating them.
This section explains how to draw and manipulate
objects, using the marker as an example.
Selecting an Object
(Select).
1. On the toolbar, click
2. Click an object.
• When you select the object, icons appear
around it.
Note
•
To select multiple objects, drag the mouse to
specify the area in which to select objects.
Moving an Object
Change Height icon
Drag to change the height of the object.
Rotating an Object
1. On the toolbar, click
(Select), and select an
object.
• When you select the object, icons appear
around it.
(rotate icon),
2. Move the mouse pointer over
and drag to rotate the object.
Changing Object Properties
1. On the toolbar, click
(Select), and select an
object.
• When you select the object, icons appear
around it.
(Menu icon), and select
2. Click the
[Properties...].
• The "Selection Properties" window is displayed.
1. On the toolbar, click
(Select), and move the
mouse pointer over an object.
• The mouse pointer changes to a cross.
2. To move the object, drag the object when the
mouse pointer is a cross.
Resizing an Object
1. On the toolbar, click
(Select), and select an
object.
• When you select the object, icons appear
around it.
(Change Width),
(Change Size),
2. Drag the
and
(Change Height) icons to resize the
object.
Change Width icon
Drag to change the width of the object.
Change Size icon
Drag to change the size of the object freely.
By dragging with the right mouse button, you
can change the size of the object, including any
text, with a fixed width-height ratio.
•
•
•
In the "Selection Properties" window, you can
change settings such as the color, type, and
thickness of the line.
The settings are different depending on the type
of object selected.
If you have selected multiple objects, you can
change common properties for the selected
objects. For details, refer to "Set Object
Properties (Page 38) ".
Operating Instructions (For Software)
27
elite Panaboard book mode
Adding Text to a Shape
Duplicating an Object
1. On the toolbar, click
1. On the toolbar, click
(Infinite Clone).
• The mouse pointer changes to the duplication
(Select), and
double-click a shape object.
• A text-input area is displayed.
2. Enter text.
arrow.
2. Drag the object you want to duplicate.
• A copy of the object is created where you
release the mouse button.
Changing the Object Order
1. On the toolbar, click
(Select), and select one
object that overlaps other objects.
2. Click
(Menu icon), and select [Order].
• The following items are displayed in the
submenu:
– Bring To Front
– Send To Back
– Bring To Forward
– Send Backward
3. Select the order for the object.
Graying out an Object (Shade)
1. On the toolbar, click
(Select), and select the
object you want to gray out.
2. Click
(Menu icon), and point to [Shade].
• The following items are displayed in the
submenu:
– Off
– On (Shaded)
– On (Unshaded)
3. Select [On (Shaded)].
• The object is covered with a shade, turning it
gray, and the shade icon is displayed on the
top-center of the object.
Note
•
•
28
If you click an object covered with a shade, the
object is uncovered (On [Unshaded]).
By clicking the shade icon, you can switch
between covering and uncovering the object
with the shade.
Operating Instructions (For Software)
Note
•
•
Because you can repeat this operation as many
times as you want, you can create many
duplicate objects.
You cannot duplicate objects that are locked in
place.
Recognizing free-form lines as
characters
1. Click
(Select), and select the free-form lines
to apply handwriting recognition to.
(Menu icon), and select [Recognition].
2. Click
• Select a character from the candidate list that is
displayed, and click [OK]. The free-form lines
will be converted to text.
Note
•
When you click
(Menu icon) and select
[Language to recognize], you can change the
language used for handwriting recognition.
elite Panaboard book mode
Using Movie Files
You can place movies on a page and then play them
from the page.
Playing a movie file
1. Click
(Select), and select a movie file object.
2. Click
(Menu icon), and select [Media].
• The following sub-menu is displayed.
– Play
– Pause
– Stop
– Backward
– Forward
– Loop
3. Select [Play].
• The movie will start playing.
Note
•
You can control movie play back from the
sub-menu. Select an operation as necessary.
About the elite
Panaboard book Menus
File Menu
You can perform the following actions from the File
menu.
• Create a New File
• Open a File
• Save an Open File
• Save an Open File under a Different Name
• Export a File
• View a Print Preview
• Print a Page
• Set File Information
• Configure Image Settings for Exporting
• Configure Recovery File Settings
• Exit elite Panaboard book
Create a New File
1. On the [File] menu, click [New].
• A new file is created.
Open a File
1. On the [File] menu, click [Open].
• The "Select File to Open" window is displayed.
2. Navigate to the folder where the file is saved,
and double-click the desired file.
• The selected file opens.
Save an Open File
1. On the [File] menu, click [Save].
• The file is saved, overwriting the old file.
Operating Instructions (For Software)
29
elite Panaboard book mode
Save an Open File under a Different
Name
1. On the [File] menu, click [Save As...].
• The "Save As" window is displayed.
2. Specify the folder and name for the file, and
click [Save].
• The file is saved in the proprietary elite
Panaboard book format (.peb).
Export a File
You can export files to use them in other programs. You
can export to the following file formats.
• BMP, GIF, JPEG, TIFF, PNG, HTML, PDF
Exporting to BMP, GIF, JPEG, TIFF, or PNG
Format
1. On the [File] menu, point to [Export], and click
[Image...].
• The "Export Image" window is displayed.
•
In the "Export HTML" window, you can set the
following options.
Index File
Specify the location to store the data.
Page Scale (Page Image/Thumbnail Image)
Set the scaling factor for images and
thumbnails.
Page Size (Page Image/Thumbnail Image)
Set the size for images and thumbnails.
Constrain Proportions
Keep the height-width ratio the same as the
original file.
•
To change the size of the exported image, click
[Settings…]. For details, refer to "Configure
Image Settings for Exporting (Page 31) ".
2. Specify the pages to export or select [All
Pages], and click [OK].
• The "Save As" window is displayed.
3. Specify the folder and name for the file, select
the file type, and click [Save].
• The file is exported to the specified file format.
Exporting to HTML
1. On the [File] menu, point to [Export], and click
[HTML...].
• The "Export HTML" window is displayed.
30
Operating Instructions (For Software)
Export Range
Specify the range of pages to export.
Export Content
Display "Title", "Comments", and "Author"
when you have exported the file.
Colors
Set the color for the index page.
2. Configure the settings for the file to export, and
click [OK].
Exporting to PDF
1. On the [File] menu, point to [Export], and click
[PDF...].
elite Panaboard book mode
•
The "Export PDF" window is displayed.
•
2. Specify the pages to export, or select [All
Pages], and click [OK].
• The "Save As" window is displayed.
3. Specify the folder and file name, and click
[Save].
• The specified pages will be exported as a PDF
file.
Note
•
In the "Information" window, you can change
the following settings:
– Title
– Comments
– Author
2. Enter the file information, and click [OK].
Configure Image Settings for Exporting
1. On the [File] menu, point to [Setting], and click
[Export Image...].
• The "Image Settings" window is displayed.
Each page will be saved as a separate image.
View a Print Preview
1. On the [File] menu, click [Print Preview].
• A preview window is displayed.
Note
•
To return to the main window, click [Close].
Print a Page
1. On the [File] menu, click [Print...].
• The "Print" window is displayed.
2. Click [OK].
• Printing starts.
Set File Information
1. On the [File] menu, point to [Setting], and click
[Information...].
• The "Information" window is displayed.
•
In the "Image Settings" window, you can
configure the following settings:
– TIFF Compression
– JPEG Quality
– Page Scale
– Page Size
– Constrain Proportions
2. Configure the file export settings, and click
[OK].
Operating Instructions (For Software)
31
elite Panaboard book mode
Configure Recovery File Settings
Edit Menu
When you make a presentation file by using elite
Panaboard book, elite Panaboard book can make a
recovery file automatically. If the original file is corrupted
or accidentally deleted, you can use the recovery file.
1. On the [File] menu, point to [Setting], and click
[File...].
• The "File Settings" window is displayed.
You can perform the following actions from the Edit
menu.
• Undo
• Redo
• Cut
• Copy
• Paste a Cut or Copied Object
• Delete an Object
• Select All Objects
• Edit Text
• Cover All Objects that Have Shade Enabled
Undo
1. On the [Edit] menu, click [Undo].
• The previous action is undone.
•
In the "File Settings" window, you can configure
the following settings:
– Create Recovery File
– Same Folder as Original File
– Save recovery information automatically
every XX minutes
2. Configure the recovery file settings, and click
[OK].
Exit elite Panaboard book
1. On the [File] menu, click [Exit].
Redo
1. On the [Edit] menu, click [Redo].
• The action that was previously undone with the
[Undo] command is performed again.
Cut
1. On the toolbar, click the [Select] button.
2. Select the object you want to cut.
3. On the [Edit] menu, click [Cut].
• The object is removed from the document and
placed on the clipboard.
Copy
1. On the toolbar, click the [Select] button.
2. Select the object you want to copy.
3. On the [Edit] menu, click [Copy].
• A copy of the object is placed on the clipboard.
Paste a Cut or Copied Object
1. Move to the page where you want to paste the
cut or copied object.
32
Operating Instructions (For Software)
elite Panaboard book mode
2. On the page where you want to paste the object,
on the [Edit] menu, click [Paste].
• The cut or copied object will be pasted on the
page.
Delete an Object
Cover All Objects that Have Shade
Enabled
1. On the [Edit] menu, click [Display All Shade].
• All objects on the page that have the shade
feature enabled are grayed out.
1. On the toolbar, click the [Select] button.
2. Select the object you want to delete.
3. On the [Edit] menu, click [Delete].
• The object is deleted.
Select All Objects
1. On the [Edit] menu, click [Select All].
• All objects on the page are selected.
Note
•
Locked objects are not selected.
Edit Text
1. On the toolbar, click the [Select] button.
2. Select a text or shape object.
3. On the [Edit] menu, click [Text].
• The "Text Properties" window and a text box are
displayed.
•
In the "Text Properties" window, you can
change settings such as the size and font of the
text.
4. Edit the text.
Operating Instructions (For Software)
33
elite Panaboard book mode
Insert Menu
Page Menu
You can perform the following actions from the Insert
menu.
• Insert an Image File
• Insert a Movie File
You can perform the following actions from the Page
menu.
• Add a New Page
• Copy and Add a New Page
• Clear a Page
• Delete the Current Page
• Move to the Next Page
• Return to the Previous Page
Insert an Image File
1. On the [Insert] menu, click [Picture File...].
• The "Open" window is displayed.
2. Select the image you want to insert, and click
[Open].
• The selected image is placed onto the page.
Insert a Movie File
1. On the [Insert] menu, click [Media File...].
• The "Open" window is displayed.
2. Select the movie you want to insert, and click
[Open].
• The selected movie is placed onto the page.
Add a New Page
1. On the [Page] menu, click [Add New Page].
• The new page is added as the last page.
Copy and Add a New Page
1. On the [Page] menu, click [Add Copy Page].
• A copy of the current page is added as the next
page.
Clear a Page
1. On the [Page] menu, click [Clear Page].
• All of the objects on the current page are
deleted.
Note
•
Locked objects are not deleted with this
command. Unlock the objects, then delete them
(Page 39).
Delete the Current Page
1. On the [Page] menu, click [Delete Current Page].
• A window confirming that you want to delete the
page is displayed.
2. Click [Yes].
• The current page is deleted, and the next page
is displayed.
Note
•
•
34
Operating Instructions (For Software)
If there is only 1 page, you cannot use this
command.
When you delete a page, you cannot restore it
with the [Undo] command.
elite Panaboard book mode
Move to the Next Page
1. On the [Page] menu, click [Go To Next Page].
• The next page is displayed.
Return to the Previous Page
1. On the [Page] menu, click [Go To Previous
Page].
• The previous page is displayed.
View Menu
You can perform the following actions from the View
menu.
• Display the Page Side Window
• Display the Gallery Side Window
• Display the Attached Files Side Window
• Display the File & Edit Toolbar
• Display the Page & View Toolbar
• Display the Tool Toolbar
• Display the Zoom Toolbar
• Display the Screen Capture Toolbar
• Switch to Full-screen Mode
• Change the Magnification Level
• Clamp a Page
• Change Icon Settings
• Display the Magnifier
• Display the Screen Shade
• Display the Spotlight
• Display the On-Screen Keyboard
Display the Page Side Window
1. On the [View] menu, click [Page].
• The "Page" view is displayed in the side pane.
• Thumbnails of the pages are displayed in
"Page".
Display the Gallery Side Window
1. On the [View] menu, click [Gallery].
• The "Gallery" view is displayed in the side pane.
• A collection of various images is displayed in
•
•
"Gallery", arranged by theme.
You can insert pictures and objects in a page by
dragging them from "Gallery" and "My Content".
You can register items in the "My Content"
folder by dragging and dropping objects from
the main window.
(Objects cannot be registered in the "Gallery"
folder.)
Operating Instructions (For Software)
35
elite Panaboard book mode
Display the Attached Files Side Window
1. On the [View] menu, click [Attachments].
• The "Attachments" view is displayed in the side
•
•
pane.
You can include external files (Excel
spreadsheets, photographs, etc.) that you can
access during a presentation in "Attachments".
To add files to the "Attachments" list, click the
(Insert button). Select one of the menu
items listed below and add files or web page
links.
Display the File & Edit Toolbar
1. On the [View] menu, click [File & Edit Toolbar].
• The File & Edit Toolbar is displayed.
Display the Page & View Toolbar
1. On the [View] menu, click [Page View Toolbar].
• The Page & View Toolbar is displayed.
[Insert copy of file]
Save a copy of the specified file in the
document.
[Insert hyperlink]
Add a link to the specified web page
address.
•
36
[Insert shortcut to file]
Add a link (shortcut) to the specified file. If
you will be opening the shortcut file on
another computer, confirm that the file
pointed to by the shortcut opens.
You can open an attached file or web site by
double-clicking it in the "Attached File" list. You
can also drag an item and insert it on the page,
and then open it from the page.
Operating Instructions (For Software)
Display the Tool Toolbar
1. On the [View] menu, click [Tool Toolbar].
• The Tool Toolbar is displayed.
Display the Zoom Toolbar
1. On the [View] menu, click [Zoom Toolbar].
• The Zoom Toolbar is displayed.
elite Panaboard book mode
Display the Screen Capture Toolbar
Switch to Full-screen Mode
1. On the [View] menu, click [Screen Capture
1. On the [View] menu, click [Full Screen].
• The screen switches to full-screen mode, and
Toolbar].
• The Screen Capture Toolbar is displayed.
the Full Screen Toolbar is displayed.
Note
•
Takes a screen shot of the entire
desktop.
Takes a screen shot of the window
surrounded with a red border.
Takes a screen shot of an area specified by dragging a red frame.
Display the Magnifier
1. On the [View] menu, select [Magnifier].
• For details about using the magnifying lens,
refer to "Magnifier (page 13)".
Display the Screen Shade
1. One the [View] menu, click [Screen Shade].
• For details about using the screen shade, refer
to "Screen Shade (page 13)".
Display the Spotlight
1. On the [View] menu, click [Spotlight].
• For details about using the spotlight, refer to
"Spotlight (page 13)".
Display the On-Screen Keyboard
1. On the [View] menu, select [On-Screen
Keyboard].
• For details about the screen keyboard, refer to
"On-Screen Keyboard (page 12)".
To return to normal mode, click
(Exit Full
Screen) on the Full Screen Toolbar, or press the
ESC key.
Change the Magnification Level
1. On the [View] menu, point to [Zoom].
• A submenu is displayed.
300 %, 200 %, 150 %, 125 %, 100 %, 75 %,
50 %
Display the page at the selected
magnification.
Entire Page
Display the page so that all of it is visible in
the main window.
Page Width
Display the page so that the width of the
page is the same as the width of the main
window.
Single Page Display
Display 1 page in the main window.
Dual Page Display
Display 2 pages side-by-side in the main
window. The active page is displayed with
an orange frame, and by clicking a page,
you can make it the active page.
2. Select your desired zoom level.
• The page is displayed at the selected zoom
level.
Clamp a Page
1. On the [View] menu, click [Clamp Page].
• The active page is held in place.
Operating Instructions (For Software)
37
elite Panaboard book mode
Note
•
The [Clamp Page] menu item is only available
when [Dual Page Display] has been selected.
In [Single Page Display], you will not be able to
select this item.
Change Icon Settings
1. On the [View] menu, click [Icon Setting...].
• The "Icon Setting" window is displayed.
Format Menu
You can perform the following actions from the Format
menu.
• Set Object Properties
• Group Objects
• Ungroup Objects
• Flip an Object
• Change Object Order
• Lock an Object
• Gray Out an Object (Shade)
• Add a Link to an Object
Set Object Properties
•
In the "Icon Setting" window, you can change
the following settings:
Size
You can select the icon size.
• Large Icons
• Small Icons
Text
You can select whether to display the button
name text.
• Hide Text
• Show Text
2. Change the settings, and click [OK].
You can set the properties for selected objects.
1. Select the objects whose properties you want to
set, and on the [Format] menu click
[Properties...].
• The "Selection Properties" window is displayed.
2. Change the settings, and click [OK].
• The changes are applied to the selected
objects.
Group Objects
Group multiple objects into a single object.
1. Select the objects you want to group.
2. On the [Format] menu, click [Group].
• The selected objects are grouped.
Ungroup Objects
1. Select a grouped object.
2. On the [Format] menu, click [Ungroup].
• The grouped object is ungrouped.
Flip an Object
1. Select the object you want to flip.
2. On the [Format] menu, point to [Flip].
3. In the submenu, select [Left/Right] or [Up/
Down].
• The object is flipped in the selected direction.
38
Operating Instructions (For Software)
elite Panaboard book mode
Change Object Order
When multiple objects overlap, you can change the
order in which they are arranged.
1. Select an object.
2. On the [Format] menu, point to [Order].
• The following items are displayed in the
submenu:
– Bring To Front
– Send To Back
– Bring To Forward
– Send Backward
3. Select the order operation for the object.
Note
•
When you have selected multiple objects, the
[Bring To Forward] and [Send Backward] items
are unavailable.
Lock an Object
3. Select [On (Shaded)].
• The object is covered with a shade, turning it
gray, and the shade icon is displayed on the
top-center of the object.
Note
•
•
If you click an object covered with a shade, the
shade is removed.
By clicking the shade icon, you can switch
between covering and uncovering the object
with the shade.
Add a Link to an Object
When you add a link to an object, a link icon is displayed
in the lower-left corner of the object. When you click the
link icon, the link destination is displayed.
1. Select the object to add a link to.
2. On the [Format] menu, click [Link...].
• The "Link Settings" window is displayed.
1. Select the object to lock.
2. On the [Format] menu, point to [Lock].
• The following submenu is displayed:
Unlock
Unlock a locked object.
Lock In Place
Lock the object’s position and size.
Allow Move
Lock the object’s size, but allow it to be
moved.
Allow Move and Rotate
Lock the object’s size, but allow it to be
moved and rotated.
3. Select your desired option to lock the object.
Gray Out an Object (Shade)
1. Select the object to gray out.
2. On the [Format] menu, point to [Shade].
• The following items are displayed in the
•
You can configure the following link settings:
Web Page
Access a site on the Web.
Address
Enter an Internet address in the text
box.
submenu:
– Off
– On (Shaded)
– On (Unshaded)
Operating Instructions (For Software)
39
elite Panaboard book mode
Page
Jump to a specified page in the current file.
Page
Select the target page from the pages
in the tree view.
File
Open a specified file.
File
Select the file for the link target by
clicking the [Browse…] button.
File Copy
A copy of the specified file is attached,
and the link is set to point to the copy.
File Shortcut
A shortcut to the specified file is
attached, and the link is set to point to
the shortcut.
Current Attachments
Open an attached file.
40
Operating Instructions (For Software)
Name
Select the file for the link target from the
file list.
Size
Displays the size of the files.
3. Set the link, and click [OK].
elite Panaboard book mode
Tool Menu
You can perform the following actions from the Tool
menu.
• Select
• Infinite Clone
• Marker (Black/Red/Blue/Green)
• Highlighter
• Eraser
• Line
• Shapes
• Text
• Zoom In
• Zoom Out
Select
Operate it as the mouse pointer.
1. On the [Tool] menu, click [Select].
Infinite Clone
If you drag and move the object you want to duplicate,
it will be duplicated at the location you drop it. You can
repeat this operation as many times as you want.
1. On the [Tool] menu, click [Infinite Clone].
Marker (Black/Red/Blue/Green)
Draw freeform lines for pictures and characters.
1. On the [Tool] menu, point to [Black Marker/Red
Marker/Blue Marker/Green Marker], and select a
line style.
• The mouse pointer changes to a marker.
• By selecting [Customize Markers...], you can
change the line type, color, transparency, etc.,
of the markers displayed in the list.
2. Drag the mouse to draw a freeform line.
Highlighter
Paint over lines, shapes, text and other objects on the
page you want to emphasize. Objects that you paint
over will be displayed through the highlighter.
1. On the [Tool] menu, point to [Highlighter], and
select a line style.
• The mouse pointer changes to a highlighter.
•
By selecting [Customize Highlighters...], you
can change the line type, color, etc., of the
highlighters displayed in the list.
2. Drag the mouse to draw a freeform line.
Eraser
Erase portions of lines drawn with the Marker and
Highlighter tool.
1. On the [Tool] menu, point to [Eraser], and select
the type of eraser.
• The mouse pointer changes to an eraser.
2. Drag the mouse to erase objects.
Line
Draw straight lines.
1. On the [Tool] menu, point to [Line], and select a
line style.
• The mouse pointer changes to +.
• By selecting [Customize Lines...], you can
change the line type, color, etc., of the lines
displayed in the list.
2. Drag the mouse to draw a straight line.
Note
•
•
By dragging with the right mouse button, you
can draw a line slanted at 15-degree intervals.
After drawing, the mouse pointer returns to
(Select).
Shapes
Draw a variety of pre-defined shapes.
1. On the [Tool] menu, point to [Shapes], and
select the type of shape to draw.
• The mouse pointer changes to +.
• By selecting [Customize Shapes...], you can
change the line type, color, transparency, etc.,
of the shapes displayed in the list.
2. Drag the mouse to draw the selected shape.
Note
•
•
By dragging with the right mouse button, you
can draw the shape with a fixed height-width
ratio.
After drawing, the mouse pointer returns to
(Select).
Operating Instructions (For Software)
41
elite Panaboard book mode
•
You can enter text in the shape by
double-clicking it.
Text
Add and edit text in text edit mode.
1. On the [Tool] menu, point to [Text], and select
the text style.
• The mouse pointer changes to a text insertion
bar.
• By selecting [Customize Text...], you can
change the font, size, etc., of the text displayed
in the list.
2. Click or drag at the location where you want to
insert text.
• The "Text Properties" window and a text box are
displayed.
3. Enter text into the text box.
• In the "Text Properties" window, you can
change settings such as the size and font of the
characters.
• After you have entered text, click an area on the
page outside of the text box, and the text box
disappears.
Zoom In
1. On the [Tool] menu, click [Zoom In].
.
• The mouse pointer changes to
2. Drag over the area that you want to enlarge to
specify the zoom area.
• The selected area is zoomed in on.
Note
•
•
Instead of selecting a specific zoom area, you
can zoom in a set amount by clicking.
When the page exceeds the size of the
viewable area, scroll bars are displayed.
Zoom Out
1. On the [Tool] menu, click [Zoom Out].
• The mouse pointer changes to
.
2. Drag over the area that you want to zoom out
from to specify the zoom-out area.
• The selected area is zoomed out.
42
Operating Instructions (For Software)
•
Instead of selecting a specific zoom area, you
can zoom out a set amount by clicking.
elite Panaboard book mode
Help Menu
You can perform the following actions from the Help
menu.
• View Help
• Download the Latest Software
• View Version Information
View Help
1. On the [Help] menu, click [Help...].
• The Help is displayed.
Note
•
To display help, you must have Adobe Reader
installed on your computer.
Download the Latest Software
1. On the [Help] menu, click [Download the latest
version].
• If your computer is connected to the Internet,
the download web site will open and you will be
able to download the latest version of the
software.
View Version Information
1. On the [Help] menu, click [About...].
• The About window is displayed.
Operating Instructions (For Software)
43
Installation
Software
Software Installation
Installing the elite
Panaboard software
You need to install the elite Panaboard software on the
computer that will be used with the elite Panaboard.
To install the elite Panaboard software, follow the
procedure below.
6. When the following screen is displayed, confirm
that the USB cable is not connected to your
computer or the elite Panaboard, and click [OK].
• If the USB cable is connected to the elite
Panaboard, disconnect the cable, and click
[OK].
• If .NET Framework 1.1 or later is not installed,
an installation screen is displayed. Follow the
on-screen directions to install these
components.
Notice
•
•
Do not connect the USB cable until the
installation is completed.
Do not connect more than 1 elite Panaboard to
the same computer.
(Doing so can cause erroneous behavior on the
computer.)
1. Turn on your computer and start Windows
operating system.
• Log into an account with Administrator
privileges.
2. Insert the included CD-ROM into the CD-ROM
drive.
• The setup screen is displayed.
• If the setup screen does not appear, select your
CD-ROM drive in Explorer, and double-click
"Menu.exe".
• In Windows Vista, if the Autoplay dialog box is
displayed, click [Run Menu.exe].
3. When the "Welcome" screen is displayed, click
[Next].
4. Click [Install elite Panaboard].
5. If you agree to the terms in the "License
Agreement", click [Yes].
• In Windows Vista, if the "User Account Control"
window is displayed, click [Continue] to
continue with the installation.
44
Operating Instructions (For Software)
7. When the installation wizard is displayed, follow
the on-screen instructions and continue with
the installation.
8. When installation has finished, click [Finish].
• Restart your computer if you are prompted to do
so.
• The group [elite Panaboard] is created in the
[Panasonic] group in the program menu.
• The following items appear in the [elite
Panaboard] group:
– elite Panaboard software
– elite Panaboard book
– Operating Instructions for Basic Operations
– Operating Instructions for Software
– Download the latest version
Software Installation
Uninstalling the elite
Panaboard software
If it is necessary to uninstall the elite Panaboard
software, follow the procedure below.
1. Turn on your computer and start Windows.
• Log into an account with Administrator
privileges.
2. Select [Add or Remove Programs] from the
Control Panel.
• In Windows 2000, select [Add/Remove
Programs], and in Windows Vista, select
[Uninstall a program].
3. Select Panasonic elite Panaboard, then remove
it.
4. Follow the on-screen instructions.
5. When uninstallation is complete, restart your
computer.
Operating Instructions (For Software)
45
Troubleshooting
Troubleshooting
Troubleshooting
When you think there may be a problem, follow the steps in the table below. If the problem persists, contact
your dealer.
Symptom
Possible cause and solution
See page
• The power to the electronic board is not turned on.
The computer does not rec- → Turn on the power to the electronic board.
ognize the electronic board. • The USB cable is disconnected.
→ Correctly connect the USB cable.
–
The electronic pen's posi- • The position of the electronic board or projector has changed.
tion is not detected correct- • The zoom or resolution of the projector has been changed.
ly.
→ Perform calibration again.
17
•
•
•
The electronic pen is being held at an angle.
Direct sunlight or strong light is striking the screen.
A remote control is being aimed at the receiver on the electronic
board.
• The side of the electronic board is placed near the wall, or the
top of the electronic board is placed near the ceiling.
Drawing data is lost or dis• The electronic board is placed near the vents of an air condiplayed in the wrong locationer.
tion.
• A plasma or LCD television is being used near by the electronic
The electronic pen loses the
board.
functions.
• The receiver of the electronic board is blocked.
• The transmitter of the electronic pen is covered with your hand.
• Two or more the electronic pens are used at the same time.
→ Check that none of the above is causing the problem.
If misalignment is not caused by any of the above, perform calibration again.
–
The message "The pen battery is low. Replace the bat- Replace the battery of the electronic pen, which has "The pen battery soon" appears on the tery is low. Replace the battery soon." message displayed.
computer screen.
–
When the marker/eraser setting was changed to [All Strokes], the
number of highlight marker changes (check/uncheck) exceeded the
limit.
→ For Windows Vista, the number of highlight marker changes
(check/uncheck) is limited to 10.
Change the highlight setting in the marker/eraser setting dialog
to a value that is within this limit.
9
"The settings could not be
applied to all drawings.
Some strokes were not
drawn." is displayed and the
eraser/marker tool in the
Desktop Drawing Tool cannot be selected.
46
Operating Instructions (For Software)
Troubleshooting
Symptom
Possible cause and solution
See page
While using the redo feature, the number of highlight marker
"The limit was exceeded,
and the stroke could not be changes (check/uncheck) exceeded the limit.
drawn." is displayed and the → For Windows Vista, the number of highlight marker changes
eraser/marker tool in the
(check/uncheck) is limited to 10.
Desktop Drawing Tool canChange the highlight setting in the marker/eraser setting dialog
not be selected.
to a value that is within this limit.
9
When selecting a marker, or when selecting White Background/
PowerPoint Slide Show/Next/Previous, the number of highlight
marker changes (check/uncheck) exceeded the limit.
→ For Windows Vista, the number of highlight marker changes
(check/uncheck) is limited to 10.
Change the highlight setting in the marker/eraser setting dialog
to a value that is within this limit.
9
"The maximum number of
highlight marker changes
(check/uncheck) was exceeded, and the marker
could not be selected." is
displayed and the desired
marker cannot be selected.
• The necessary video playback software is not installed.
→ If an old version of Windows Media Player or Adobe Flash
Player is installed, or Windows Media Player or Adobe Flash
Player is not installed, install the latest version of Windows Media Player or Adobe Flash Player.
Movies cannot be inserted, • You are trying to insert or play a movie in an unsupported video
or cannot be played.
format.
→ The supported formats are: AVI, WMV, MPG, MPEG, and SWF.
If the problem persists, the movie format or a codec may be
causing the problem.
• On Windows 2000 SP4, movie files cannot be played in elite
Panaboard book.
You may not be able to use the handwriting recognition feature with
your operating system.
The necessary handwriting recognition software for your operating
system may not be installed.
The handwriting recognition
→ For information about operating systems, refer to "System Remenu does not display, or
quirements (page 4)".
does not operate.
If you need to install handwriting recognition software, follow
the procedure in "Download the Latest Software (page 43)" to
open the download web site, and then follow the directions on
the web site.
–
–
Operating Instructions (For Software)
47
Panasonic Communications Company of North America
Unit of Panasonic Corporation of North America
One Panasonic Way, Secaucus, New Jersey 07094
Panasonic Canada Inc.
5770 Ambler Drive, Mississauga, Ontario, L4W 2T3
Panasonic Business Systems U.K.
A Division of Panasonic U.K. Ltd.
Willoughby Road, Bracknell, Berkshire, RG12 8FP
Panasonic Marketing Europe GmbH
Hagenauer Strasse 43
65203 Wiesbaden, Germany
For information of Compliance with EU relevant Regulatory
Directives, Contact to Authorised Representative:
Panasonic Testing Centre
Panasonic Marketing Europe GmbH
Winsbergring 15, 22525 Hamburg, Germany
(For EU only)
Panasonic Global Site
http://panasonic.net/
© 2007 Panasonic Communications Co., Ltd. All Rights Reserved.
PJQXC0120XA KK1207MS2068
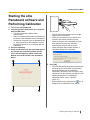
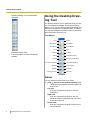

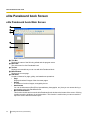
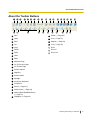
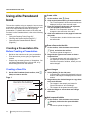
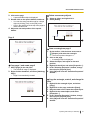
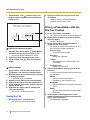


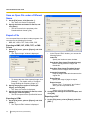
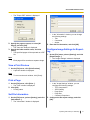
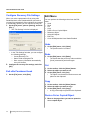
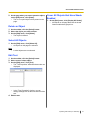

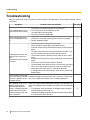
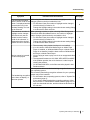
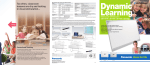


![Operating Instructions (Portuguese [Brazil])](http://vs1.manualzilla.com/store/data/006052096_1-84739a8f11f03fef0d4289e674ebe49f-150x150.png)