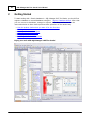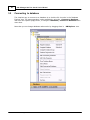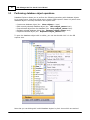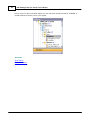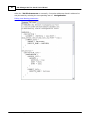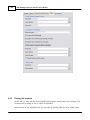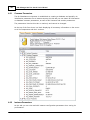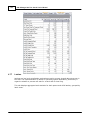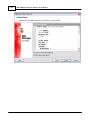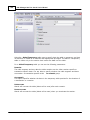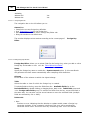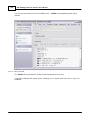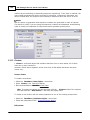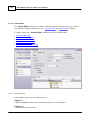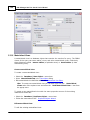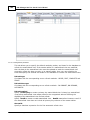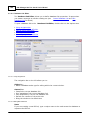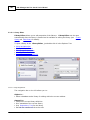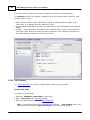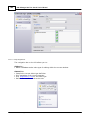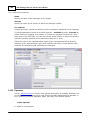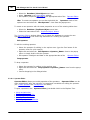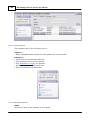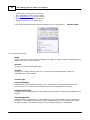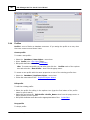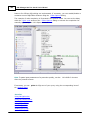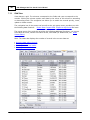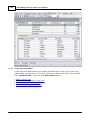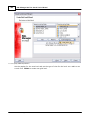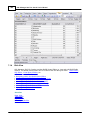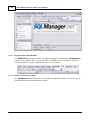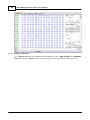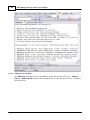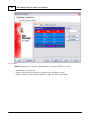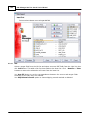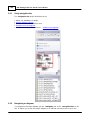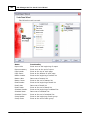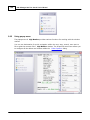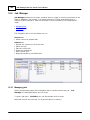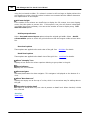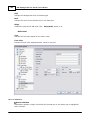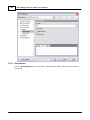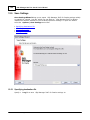
1
SQL Manager 2007 for Oracle
User's Manual
© 2007 EMS Database Management Solutions
SQL Manager 2007 for Oracle
User's Manual
© 2007 EMS Database Management Solutions
All rights reserved.
This manual documents EMS SQL Manager for Oracle 1.5.x.x
No parts of this work may be reproduced in any form or by any means - graphic, electronic, or mechanical, including
photocopying, recording, taping, or information storage and retrieval systems - without the written permission of the
publisher.
Products that are referred to in this document may be either trademarks and/or registered trademarks of the
respective owners. The publisher and the author make no claim to these trademarks.
While every precaution has been taken in the preparation of this document, the publisher and the author assume no
responsibility for errors or omissions, or for damages resulting from the use of information contained in this
document or from the use of programs and source code that may accompany it. In no event shall the publisher and
the author be liable for any loss of profit or any other commercial damage caused or alleged to have been caused
directly or indirectly by this document.
Use of this documentation is subject to the following terms: you may create a printed copy of this documentation
solely for your own personal use. Conversion to other formats is allowed as long as the actual content is not altered
or edited in any way.
Document generated on: 2007-11-19
3
SQL Manager 2007 for Oracle User's Manual
Table of Contents
Part I Welcome to SQL Manager 2007 for Oracle!
16
What's
...........................................................................................................................................19
new
System
...........................................................................................................................................20
requirements
Feature
...........................................................................................................................................21
Matrix
Installation
...........................................................................................................................................22
Registration
...........................................................................................................................................23
How
...........................................................................................................................................25
to register SQL Manager
License
...........................................................................................................................................27
Agreement
Version
...........................................................................................................................................29
history
EMS
...........................................................................................................................................33
SQL Manager FAQ
Other
...........................................................................................................................................36
EMS Products
Part II Getting Started
43
Selecting
...........................................................................................................................................44
style and language
First
...........................................................................................................................................45
time started
Using Desktop
..................................................................................................................................................................
Panel
45
Working
...........................................................................................................................................47
with databases
Working
...........................................................................................................................................48
with database objects
Using
...........................................................................................................................................49
database popup menu
Using
...........................................................................................................................................50
object popup menu
Switching
...........................................................................................................................................51
between windows
Part III Database Explorer
53
Managing
...........................................................................................................................................55
database registration info
Connecting
...........................................................................................................................................56
to database
Performing
...........................................................................................................................................57
database object operations
Creating
...........................................................................................................................................59
projects
Navigating
...........................................................................................................................................61
database objects with tabs
Selecting
...........................................................................................................................................62
multiple objects
Recently
...........................................................................................................................................63
opened objects
Finding
...........................................................................................................................................64
database elements
SQL
...........................................................................................................................................65
Assistant
Configuring
...........................................................................................................................................66
Database Explorer
Part IV Database Management
69
Register
...........................................................................................................................................71
Database Wizard
© 2007 EMS Database Management Solutions
4
SQL Manager 2007 for Oracle User's Manual
Setting connection
..................................................................................................................................................................
properties
71
Setting registration
..................................................................................................................................................................
options
73
Database
...........................................................................................................................................75
Registration Info
Editing connection
..................................................................................................................................................................
properties
75
Setting database
..................................................................................................................................................................
options
77
Setting display
..................................................................................................................................................................
options
79
Setting default
..................................................................................................................................................................
directories
80
Setting log..................................................................................................................................................................
options
81
Setting SSH
..................................................................................................................................................................
tunnel options
82
Editing
...........................................................................................................................................84
Local Naming parameters
Using navigation
..................................................................................................................................................................
bar
84
TNS File Constructor
.................................................................................................................................................................. 85
Viewing file
..................................................................................................................................................................
contents
87
Editing
...........................................................................................................................................89
Profile parameters
General options
.................................................................................................................................................................. 90
Naming options
.................................................................................................................................................................. 91
Oracle Advaced
..................................................................................................................................................................
Security
94
Authentication
.......................................................................................................................................................................... 94
Integrity
..........................................................................................................................................................................
and Encryption
97
TCP/IP
..........................................................................................................................................................................
Access Rights
99
SSL
.......................................................................................................................................................................... 99
Configure..................................................................................................................................................................
Utilities
101
Viewing file
..................................................................................................................................................................
contents
103
Oracle
...........................................................................................................................................105
client checker
Database
...........................................................................................................................................106
Information
Common ..................................................................................................................................................................
Parameters
107
Instance Parameters
.................................................................................................................................................................. 107
Extended..................................................................................................................................................................
Parameters
108
Database
...........................................................................................................................................110
Statistics
System Statistics
.................................................................................................................................................................. 110
Last Analyze
..................................................................................................................................................................
Stats
111
Sessions .................................................................................................................................................................. 112
Hit
..........................................................................................................................................................................
Ratio
113
Process
.......................................................................................................................................................................... 113
Locks
.......................................................................................................................................................................... 114
Storage .................................................................................................................................................................. 114
SGA
.................................................................................................................................................................. 115
Wait Events
.................................................................................................................................................................. 116
Latches .................................................................................................................................................................. 117
Part V Database Objects Management
120
New
...........................................................................................................................................121
Object
Duplicate
...........................................................................................................................................122
Object
Duplicate..................................................................................................................................................................
Object Wizard
122
Selecting
..........................................................................................................................................................................
source database
123
Selecting
..........................................................................................................................................................................
object to duplicate
124
Selecting
..........................................................................................................................................................................
destination database
125
Modifying
..........................................................................................................................................................................
new object's definition
126
Schema
...........................................................................................................................................128
objects
Storage attributes
.................................................................................................................................................................. 128
© 2007 EMS Database Management Solutions
5
SQL Manager 2007 for Oracle User's Manual
Editing object
..................................................................................................................................................................
description
130
Viewing object
..................................................................................................................................................................
DDL definition
130
Browsing..................................................................................................................................................................
object dependecies
131
Tables .................................................................................................................................................................. 132
New
..........................................................................................................................................................................
table
134
Using navigation bar
......................................................................................................................................... 134
Setting table properties
......................................................................................................................................... 135
External table parameters
................................................................................................................................... 139
Record parameters
................................................................................................................................... 141
Field parameters ................................................................................................................................... 143
Specifying fields ......................................................................................................................................... 145
Table
..........................................................................................................................................................................
Editor
147
Using navigation bar
......................................................................................................................................... 148
Managing fields ......................................................................................................................................... 149
Managing keys ......................................................................................................................................... 150
Managing foreign .........................................................................................................................................
keys
151
Managing checks ......................................................................................................................................... 151
Managing indices ......................................................................................................................................... 152
Managing triggers......................................................................................................................................... 152
Viewing table data......................................................................................................................................... 153
Fields
.......................................................................................................................................................................... 154
Field Editor
......................................................................................................................................... 156
Setting field name ...................................................................................................................................
and type
156
Setting field defaults
................................................................................................................................... 157
Setting field description
................................................................................................................................... 158
Keys
.......................................................................................................................................................................... 159
Key Editor
......................................................................................................................................... 160
Using navigation bar
................................................................................................................................... 161
Editing Key definition
................................................................................................................................... 162
Setting Key options
................................................................................................................................... 163
Foreign
..........................................................................................................................................................................
Keys
164
Foreign Key Editor......................................................................................................................................... 166
Using navigation bar
................................................................................................................................... 167
Editing foreign key...................................................................................................................................
definition
167
Checks
.......................................................................................................................................................................... 168
Check Editor
......................................................................................................................................... 170
Using navigation bar
................................................................................................................................... 171
Editing check definition
................................................................................................................................... 171
Indices
.......................................................................................................................................................................... 172
Triggers
.......................................................................................................................................................................... 173
Views
.................................................................................................................................................................. 175
View
..........................................................................................................................................................................
Editor
177
Using navigation bar
......................................................................................................................................... 177
Editing View definition
......................................................................................................................................... 178
Viewing view fields
......................................................................................................................................... 179
Managing keys ......................................................................................................................................... 180
Managing foreign .........................................................................................................................................
keys
181
Managing triggers......................................................................................................................................... 181
Viewing view data......................................................................................................................................... 182
Procedures
.................................................................................................................................................................. 182
Procedure
..........................................................................................................................................................................
Editor
184
Using navigation bar
......................................................................................................................................... 185
Editing procedure .........................................................................................................................................
definition
186
Executing procedure/function
......................................................................................................................................... 187
© 2007 EMS Database Management Solutions
6
SQL Manager 2007 for Oracle User's Manual
Specifying input parameters
......................................................................................................................................... 187
Functions.................................................................................................................................................................. 188
Function
..........................................................................................................................................................................
Editor
190
Using navigation bar
......................................................................................................................................... 190
Editing Function definition
......................................................................................................................................... 191
Browsing Function.........................................................................................................................................
parameters
191
Triggers .................................................................................................................................................................. 192
Trigger
..........................................................................................................................................................................
Editor
193
Using navigation bar
......................................................................................................................................... 194
Editing trigger definition
......................................................................................................................................... 195
DB and Schema
..................................................................................................................................................................
Triggers
196
DB
..........................................................................................................................................................................
and Schema Trigger Editor
198
Using navigation bar
......................................................................................................................................... 199
Editing DB/Schema
.........................................................................................................................................
Trigger definition
199
Indices .................................................................................................................................................................. 200
Index
..........................................................................................................................................................................
Editor
201
Using navigation bar
......................................................................................................................................... 202
Creating new index
......................................................................................................................................... 203
Packages.................................................................................................................................................................. 205
Package
..........................................................................................................................................................................
Editor
206
Using navigation bar
......................................................................................................................................... 207
Editing package definition
......................................................................................................................................... 207
Package Bodies
.................................................................................................................................................................. 208
Package
..........................................................................................................................................................................
Body Editor
209
Using navigation bar
......................................................................................................................................... 210
Editing Package Body
......................................................................................................................................... 211
Sequences
.................................................................................................................................................................. 211
Sequences
..........................................................................................................................................................................
Editor
213
Using navigation bar
......................................................................................................................................... 214
Editing sequence definition
......................................................................................................................................... 214
Clusters .................................................................................................................................................................. 215
Cluster
..........................................................................................................................................................................
Editor
217
Using navigation bar
......................................................................................................................................... 217
Editing cluster definition
......................................................................................................................................... 218
Materialized
..................................................................................................................................................................
Views
219
Materialized
..........................................................................................................................................................................
View Editor
220
Using navigation bar
......................................................................................................................................... 221
Editing Materialized
.........................................................................................................................................
View
221
Viewing Materialized
.........................................................................................................................................
View fields
223
Setting Refresh parameters
......................................................................................................................................... 224
Setting USING INDEX
.........................................................................................................................................
parameters
225
Viewing Materialized
.........................................................................................................................................
View data
226
Materialized
..................................................................................................................................................................
View Logs
227
Materialized
..........................................................................................................................................................................
View Log Editor
229
Using navigation bar
......................................................................................................................................... 230
Editing Materialized
.........................................................................................................................................
View Log definition
230
Synonyms
.................................................................................................................................................................. 231
Synonym
..........................................................................................................................................................................
Editor
232
Using navigation bar
......................................................................................................................................... 233
Editing synonym definition
......................................................................................................................................... 233
Database..................................................................................................................................................................
Links
234
Database
..........................................................................................................................................................................
Link Editor
236
Using navigation bar
......................................................................................................................................... 236
Editing DB Link definition
......................................................................................................................................... 236
© 2007 EMS Database Management Solutions
7
SQL Manager 2007 for Oracle User's Manual
Object Types
.................................................................................................................................................................. 237
Object
..........................................................................................................................................................................
Type Editor
238
Using navigation bar
......................................................................................................................................... 239
Editing Object Type
.........................................................................................................................................
definition
240
Object Type
..................................................................................................................................................................
Bodies
241
Object
..........................................................................................................................................................................
Type Body Editor
242
Using navigation bar
......................................................................................................................................... 243
Editing Object Type
.........................................................................................................................................
Body definition
244
Array Types
.................................................................................................................................................................. 245
Array
..........................................................................................................................................................................
Type Editor
246
Using navigation bar
......................................................................................................................................... 247
Editing Array Type.........................................................................................................................................
definition
248
Libraries .................................................................................................................................................................. 249
Library
..........................................................................................................................................................................
Editor
251
Using navigation bar
......................................................................................................................................... 251
Editing Library definition
......................................................................................................................................... 252
Java Sources
.................................................................................................................................................................. 252
Java
..........................................................................................................................................................................
Source Editor
254
Using navigation bar
......................................................................................................................................... 255
Editing Java Source
.........................................................................................................................................
definition
255
Java Classes
.................................................................................................................................................................. 256
Java
..........................................................................................................................................................................
Class Editor
258
Using navigation bar
......................................................................................................................................... 258
Editing Java Class.........................................................................................................................................
definition
259
Java Resources
.................................................................................................................................................................. 260
Java
..........................................................................................................................................................................
Resource Editor
261
Using navigation bar
......................................................................................................................................... 262
Editing Java Resource
.........................................................................................................................................
definition
262
Index Types
.................................................................................................................................................................. 263
Index
..........................................................................................................................................................................
Type Editor
264
Using navigation bar
......................................................................................................................................... 265
Editing Index Type.........................................................................................................................................
definition
266
Operators.................................................................................................................................................................. 266
Operator
..........................................................................................................................................................................
Editor
267
Using navigation bar
......................................................................................................................................... 268
Editing Operator definition
......................................................................................................................................... 268
Dimensions
.................................................................................................................................................................. 270
Dimension
..........................................................................................................................................................................
Editor
271
Using navigation bar
......................................................................................................................................... 272
Editing Dimension definition
......................................................................................................................................... 273
Nonschema
...........................................................................................................................................276
objects
Contexts .................................................................................................................................................................. 276
Context
..........................................................................................................................................................................
Editor
277
Using navigation bar
......................................................................................................................................... 277
Editing Context definition
......................................................................................................................................... 278
Users
.................................................................................................................................................................. 279
User
..........................................................................................................................................................................
Editor
280
Using navigation bar
......................................................................................................................................... 280
Editing user definition
......................................................................................................................................... 281
Tablespace parameters
......................................................................................................................................... 282
Setting quotas
......................................................................................................................................... 283
Proxy Users
......................................................................................................................................... 283
Roles
.................................................................................................................................................................. 284
Role
..........................................................................................................................................................................
Editor
285
© 2007 EMS Database Management Solutions
8
SQL Manager 2007 for Oracle User's Manual
Using navigation bar
......................................................................................................................................... 285
Editing role definition
......................................................................................................................................... 286
Profiles .................................................................................................................................................................. 287
Profile
..........................................................................................................................................................................
Editor
288
Using navigation bar
......................................................................................................................................... 289
Editing Profile definition
......................................................................................................................................... 289
Consumer
..................................................................................................................................................................
Groups
291
Consumer
..........................................................................................................................................................................
Group Editor
292
Using navigation bar
......................................................................................................................................... 293
Editing Consumer Groups
......................................................................................................................................... 294
Resource..................................................................................................................................................................
Plans
295
Resource
..........................................................................................................................................................................
Plan Editor
296
Using navigation bar
......................................................................................................................................... 297
Editing Resource Plan
......................................................................................................................................... 298
Resource Plan Directives
......................................................................................................................................... 299
Directories
.................................................................................................................................................................. 300
Directory
..........................................................................................................................................................................
Editor
301
Using navigation bar
......................................................................................................................................... 301
Editing Directory definition
......................................................................................................................................... 302
Tablespaces
.................................................................................................................................................................. 302
Tablespace
..........................................................................................................................................................................
Editor
303
Using navigation bar
......................................................................................................................................... 304
Editing Tablespace......................................................................................................................................... 305
Managing Tablespace
.........................................................................................................................................
files
307
Rollback ..................................................................................................................................................................
Segments
308
Rollback
..........................................................................................................................................................................
Segment Editor
309
Using navigation bar
......................................................................................................................................... 310
Editing Rollback Segment
......................................................................................................................................... 311
Redo Log..................................................................................................................................................................
Groups
311
Redo
..........................................................................................................................................................................
Log Group Editor
312
Using navigation bar
......................................................................................................................................... 313
Editing Redo Log Group
......................................................................................................................................... 314
Part VI Queries
317
SQL
...........................................................................................................................................319
Editor
Using Navigation
..................................................................................................................................................................
bar
320
Working with
..................................................................................................................................................................
SQL Editor area
321
Using the..................................................................................................................................................................
context menu
323
Viewing query
..................................................................................................................................................................
plan
324
Using object
..................................................................................................................................................................
links
326
Executing..................................................................................................................................................................
queries and viewing results
326
Viewing query
..................................................................................................................................................................
logs
328
Using PL/SQL
..................................................................................................................................................................
Code Debugger
329
Visual
...........................................................................................................................................332
Query Builder
Using navigation
..................................................................................................................................................................
bar
333
Working with
..................................................................................................................................................................
diagram area
334
Joining two
..................................................................................................................................................................
objects
334
Setting criteria
.................................................................................................................................................................. 335
Setting output
..................................................................................................................................................................
fields
337
Setting grouping
..................................................................................................................................................................
criteria
338
Setting parameters
..................................................................................................................................................................
of sorting
339
Working with
..................................................................................................................................................................
editor area
340
Executing..................................................................................................................................................................
query
341
© 2007 EMS Database Management Solutions
9
SQL Manager 2007 for Oracle User's Manual
Query
...........................................................................................................................................343
parameters
Input parameters
..................................................................................................................................................................
dialog
343
Part VII Data Management
345
Data
...........................................................................................................................................346
View
Grid View.................................................................................................................................................................. 347
Grouping
..........................................................................................................................................................................
data
348
Filtering
..........................................................................................................................................................................
records
348
Working
..........................................................................................................................................................................
in multi-level mode
350
Create
..........................................................................................................................................................................
Grid Level Wizard
351
Specify master level
......................................................................................................................................... 352
Select table or query
.........................................................................................................................................
for new level
353
Selecting detail table
......................................................................................................................................... 354
Bind master and detail
.........................................................................................................................................
levels
355
Specify additional .........................................................................................................................................
parameters
356
Viewing
..........................................................................................................................................................................
data in card view
357
Form View
.................................................................................................................................................................. 358
Print Data.................................................................................................................................................................. 359
Blob View.................................................................................................................................................................. 360
Navigating
..........................................................................................................................................................................
with the BLOB Editor
361
Editing
..........................................................................................................................................................................
as hexadecimal dump
361
Editing
..........................................................................................................................................................................
as plain text
362
Editing
..........................................................................................................................................................................
as rich text (RTF)
363
Editing
..........................................................................................................................................................................
as image
364
Editing
..........................................................................................................................................................................
as HTML
365
Applying
..........................................................................................................................................................................
changes
366
Filter
...........................................................................................................................................367
Builder Dialog
Invoking ..................................................................................................................................................................
the Filter Builder dialog
368
Adding new
..................................................................................................................................................................
condition
368
Setting filter
..................................................................................................................................................................
criteria
369
Setting filter
..................................................................................................................................................................
operator
370
Setting filter
..................................................................................................................................................................
criteria values
371
Adding new
..................................................................................................................................................................
group
371
Setting group
..................................................................................................................................................................
operator
372
Applying ..................................................................................................................................................................
filter conditions
373
Part VIII Import/Export Tools
375
Export
...........................................................................................................................................376
Data Wizard
Setting destination
..................................................................................................................................................................
file name and format
377
Selecting..................................................................................................................................................................
fields for export
378
Adjusting..................................................................................................................................................................
data formats
379
Setting header
..................................................................................................................................................................
and footer
379
Setting format-specific
..................................................................................................................................................................
options
380
Excel
..........................................................................................................................................................................
options
380
Data format
......................................................................................................................................... 381
Fields
................................................................................................................................... 382
Options
................................................................................................................................... 383
Styles
................................................................................................................................... 384
Extensions
......................................................................................................................................... 385
Hyperlinks
................................................................................................................................... 386
Notes
................................................................................................................................... 387
Charts
................................................................................................................................... 388
© 2007 EMS Database Management Solutions
10
SQL Manager 2007 for Oracle User's Manual
Cells
................................................................................................................................... 390
Merged Cells
................................................................................................................................... 391
Advanced
......................................................................................................................................... 392
Access
..........................................................................................................................................................................
options
393
Word
..........................................................................................................................................................................
/ RTF options
394
Base Styles
......................................................................................................................................... 395
Strip Styles
......................................................................................................................................... 396
HTML
..........................................................................................................................................................................
options
397
Preview
......................................................................................................................................... 398
Basic
......................................................................................................................................... 399
Multi-file
......................................................................................................................................... 400
Advanced
......................................................................................................................................... 401
PDF
..........................................................................................................................................................................
options
402
TXT
..........................................................................................................................................................................
options
403
CSV
..........................................................................................................................................................................
options
404
XML
..........................................................................................................................................................................
options
405
Setting common
..................................................................................................................................................................
export options
406
Import
...........................................................................................................................................408
Data Wizard
Selecting..................................................................................................................................................................
source file name and format
408
Selecting..................................................................................................................................................................
data source
410
Setting fields
..................................................................................................................................................................
correspondence
410
Excel
.......................................................................................................................................................................... 411
Access
.......................................................................................................................................................................... 412
DBF
.......................................................................................................................................................................... 413
XML
.......................................................................................................................................................................... 414
TXT
.......................................................................................................................................................................... 415
CSV
.......................................................................................................................................................................... 416
Adjusting..................................................................................................................................................................
data formats
417
Setting advanced
..................................................................................................................................................................
field formats
418
Setting import
..................................................................................................................................................................
mode
419
Customizing
..................................................................................................................................................................
common options
420
Export
...........................................................................................................................................422
as SQL Script
Specifying
..................................................................................................................................................................
destination server
423
Setting destination
..................................................................................................................................................................
file name
423
Setting BLOB
..................................................................................................................................................................
options
424
Selecting..................................................................................................................................................................
fields to export
425
Editing result
..................................................................................................................................................................
SQL script
426
Setting export
..................................................................................................................................................................
options
427
Part IX Database Tools
430
Dependency
...........................................................................................................................................431
Tree
Visual
...........................................................................................................................................433
Database Designer
Using navigation
..................................................................................................................................................................
bar
434
Navigating
..................................................................................................................................................................
on diagram
434
Adding objects
..................................................................................................................................................................
to diagram
435
Removing..................................................................................................................................................................
objects from diagram
435
New objects
..................................................................................................................................................................
creation
436
Creating relationships
.................................................................................................................................................................. 436
Working with
..................................................................................................................................................................
multiple pages
437
Reverse engineering
.................................................................................................................................................................. 437
Printing diagram
.................................................................................................................................................................. 438
Print
..........................................................................................................................................................................
Preview dialog
439
© 2007 EMS Database Management Solutions
11
SQL Manager 2007 for Oracle User's Manual
Print
..........................................................................................................................................................................
Setup dialog
440
Saving/Loading
..................................................................................................................................................................
diagram
441
Setting diagram
..................................................................................................................................................................
options
441
SQL
...........................................................................................................................................442
Script Editor
Using navigation
..................................................................................................................................................................
bar
442
Using popup
..................................................................................................................................................................
menu
443
Using script
..................................................................................................................................................................
explorer
444
Extract
...........................................................................................................................................446
Database Wizard
Selecting..................................................................................................................................................................
source database
447
Specifying
..................................................................................................................................................................
destination file name
447
Selecting..................................................................................................................................................................
components to extract
448
Setting BLOB
..................................................................................................................................................................
options
449
Selecting..................................................................................................................................................................
objects to extract their structure
450
Selecting..................................................................................................................................................................
objects to extract their data
451
Customizing
..................................................................................................................................................................
script options
452
Print
...........................................................................................................................................454
Metadata
Using navigation
..................................................................................................................................................................
bar
454
Printing options
.................................................................................................................................................................. 455
HTML
...........................................................................................................................................457
Report Wizard
Select database
..................................................................................................................................................................
and directory
457
Select type
..................................................................................................................................................................
of database objects
458
Selecting..................................................................................................................................................................
schema
459
Specify report
..................................................................................................................................................................
style
459
Set additional
..................................................................................................................................................................
parameters
460
Report
...........................................................................................................................................462
management
Create Report
..................................................................................................................................................................
Wizard
462
Specifying
..........................................................................................................................................................................
report name and options
463
Selecting
..........................................................................................................................................................................
report bands
464
Selecting
..........................................................................................................................................................................
report style
466
Specifying
..........................................................................................................................................................................
paper settings
466
Specifying
..........................................................................................................................................................................
margins
467
Specifying
..........................................................................................................................................................................
other page settings
468
Report Designer
.................................................................................................................................................................. 469
Adding
..........................................................................................................................................................................
dialog form
470
Adding
..........................................................................................................................................................................
database component
471
Adding
..........................................................................................................................................................................
query component
472
Specifying
..........................................................................................................................................................................
fields
473
Viewing
..........................................................................................................................................................................
report
474
Report Viewer
.................................................................................................................................................................. 475
Using
..........................................................................................................................................................................
navigation bar
476
SQL
...........................................................................................................................................477
Monitor
Using navigation
..................................................................................................................................................................
bar
477
Using popup
..................................................................................................................................................................
menu
478
Part X Server Tools
480
Grant
...........................................................................................................................................482
Manager
Using navigation
..................................................................................................................................................................
bar
482
Managing..................................................................................................................................................................
objects grants
484
Managing..................................................................................................................................................................
system privileges
486
Managing..................................................................................................................................................................
Roles
487
Job
...........................................................................................................................................489
Manager
© 2007 EMS Database Management Solutions
12
SQL Manager 2007 for Oracle User's Manual
Managing..................................................................................................................................................................
jobs
489
Job Editor.................................................................................................................................................................. 490
Part XI Services
494
Truncate
...........................................................................................................................................495
Selecting..................................................................................................................................................................
objects to truncate
495
Setting truncate
..................................................................................................................................................................
options
497
Advanced
...........................................................................................................................................499
Stats Expert
Selecting..................................................................................................................................................................
object and stats type
499
Setting statistics
..................................................................................................................................................................
options
500
Recompile
...........................................................................................................................................503
invalid objects
Using navigation
..................................................................................................................................................................
bar
503
Working with
..................................................................................................................................................................
recompile service
504
Enable/Disable
...........................................................................................................................................505
constraints
Selecting..................................................................................................................................................................
target table
505
Specifying
..................................................................................................................................................................
operation
507
Backup
...........................................................................................................................................509
Database
Checking..................................................................................................................................................................
DB and instance options
510
User-managed
..................................................................................................................................................................
script
511
Selecting
..........................................................................................................................................................................
datafiles
511
Setting
..........................................................................................................................................................................
additional options
511
Recovery..................................................................................................................................................................
Manager (RMAN)
513
Specifying
..........................................................................................................................................................................
datafiles
513
Setting
..........................................................................................................................................................................
additional options
514
Restore
...........................................................................................................................................516
Database
User-managed
..................................................................................................................................................................
script
517
Verifying
..........................................................................................................................................................................
current settings
517
Selecting
..........................................................................................................................................................................
datafiles
517
Setting
..........................................................................................................................................................................
additional options
518
Recovery..................................................................................................................................................................
Manager (RMAN)
519
Setting
..........................................................................................................................................................................
additional options
519
Part XII SQL Manager Options
522
Environment
...........................................................................................................................................523
Options
Preferences
.................................................................................................................................................................. 523
Confirmations
.................................................................................................................................................................. 524
Windows .................................................................................................................................................................. 525
Tools
.................................................................................................................................................................. 526
DB
..........................................................................................................................................................................
Explorer
527
Object
..........................................................................................................................................................................
Editors
528
SQL
..........................................................................................................................................................................
Editor
529
SQL
..........................................................................................................................................................................
Monitor
530
SQL
..........................................................................................................................................................................
Script
531
Query
..........................................................................................................................................................................
Builder
532
Style & Color Palette
......................................................................................................................................... 533
Visual
..........................................................................................................................................................................
Database Designer
534
Color Palette
......................................................................................................................................... 535
Print
..........................................................................................................................................................................
Metadata
536
Data
..........................................................................................................................................................................
Export
537
Fonts
.................................................................................................................................................................. 538
Grid
.................................................................................................................................................................. 539
© 2007 EMS Database Management Solutions
13
SQL Manager 2007 for Oracle User's Manual
Data
..........................................................................................................................................................................
Options
541
Print
..........................................................................................................................................................................
Data
543
Color
..........................................................................................................................................................................
& Formats
544
Advanced
.......................................................................................................................................................................... 545
Column
..........................................................................................................................................................................
Options
547
Localization
.................................................................................................................................................................. 548
Editor
...........................................................................................................................................551
Options
General .................................................................................................................................................................. 551
Display .................................................................................................................................................................. 552
Color
.................................................................................................................................................................. 553
Quick Code
.................................................................................................................................................................. 554
SQL Formatter
.................................................................................................................................................................. 555
Settings
.......................................................................................................................................................................... 556
SQL
..........................................................................................................................................................................
Words
558
Key Mapping
.................................................................................................................................................................. 559
Visual
...........................................................................................................................................561
Options
Bars and ..................................................................................................................................................................
Menus
561
Trees and..................................................................................................................................................................
Lists
562
Edit controls
.................................................................................................................................................................. 563
Check boxes
.................................................................................................................................................................. 564
Buttons .................................................................................................................................................................. 565
Page controls
.................................................................................................................................................................. 566
Group boxes
.................................................................................................................................................................. 567
Splitters .................................................................................................................................................................. 568
Navigaton..................................................................................................................................................................
bar
569
Keyboard
...........................................................................................................................................571
Templates
Save
...........................................................................................................................................572
Settings
Specifying
..................................................................................................................................................................
destination file
572
Selecting..................................................................................................................................................................
settings
573
Selecting..................................................................................................................................................................
databases
574
Saving settings
.................................................................................................................................................................. 575
Part XIII External Tools
578
External
...........................................................................................................................................580
Tools Window
External
...........................................................................................................................................581
Tool Info Editor
Part XIV Localization
583
Localization
...........................................................................................................................................584
Editor
Select
...........................................................................................................................................586
Program Language
Part XV How to...
588
Work
...........................................................................................................................................588
with Database Objects
Work with..................................................................................................................................................................
Users
588
Create
..........................................................................................................................................................................
User
588
Part XVI Appendix
591
Changing
...........................................................................................................................................591
Metadata window
Tip
...........................................................................................................................................593
of the Day
© 2007 EMS Database Management Solutions
14
SQL Manager 2007 for Oracle User's Manual
Find
...........................................................................................................................................594
Text dialog
Replace
...........................................................................................................................................596
Text dialog
Format
...........................................................................................................................................598
Specifiers
Language
...........................................................................................................................................601
Info Editor
Using
...........................................................................................................................................602
templates
Supported
...........................................................................................................................................603
file formats
To-Do
...........................................................................................................................................605
List
Window
...........................................................................................................................................607
List
Customize
...........................................................................................................................................608
Toolbars
© 2007 EMS Database Management Solutions
Part
I
16
1
SQL Manager 2007 for Oracle User's Manual
Welcome to SQL Manager 2007 for Oracle!
EMS SQL Manager 2007 for Oracle is a high performance tool for Oracle Database
Server administration and development. SQL Manager for Oracle works with any Oracle
versions from 8.1.7 to 10g and supports all Oracle objects and all Oracle data types
including the new BINARY_FLOAT and BINARY_DOUBLE types, and others. It offers plenty
of powerful tools for experienced users such as Visual Database Designer, Visual Query
Builder, and powerful BLOB editor to satisfy all their needs. SQL Manager for Oracle has a
state-of-the-art graphical user interface with a well-described wizard system, so clear in
use that even a newbie will not be confused with it.
Visit our web-site for details: http://www.sqlmanager.net/
Key features:
Rapid database management and navigation
· Multiple host/database connections
· Registering selected databases to work with
© 2007 EMS Database Management Solutions
17
SQL Manager 2007 for Oracle User's Manual
·
·
·
·
·
·
Schema restriction to see only required schemas
Projects to work with the selected database objects only
Connecting via local port forwarding through the SSH tunnel
Multiple user-defined tabs for any tree node to access it in one-click
Working with multiple selected objects at a time
Grouping/ungrouping registered databases
Easy management of all Oracle objects (including create/edit/ drop operations)
· Managing tables and all their subobjects: fields, primary, unique and foreign keys,
indices, triggers, and check constraints
· Managing views and all their subobjects: fields, triggers, primary, unique and foreign
keys
· Managing procedures, functions, sequences, packages and package bodies
· Managing users, roles, profiles, consumer groups and resource plans
· Managing database and schema triggers, clusters, synonyms, database links,
materialized views and materialized view logs
· Managing object and array types, object type bodies, libraries
· Managing java sources, resources and classes
· Managing index types, operators, dimensions
· Managing contexts, directories, table spaces, rollback segments, redo log groups
· Managing jobs
· Duplicating database objects
· Viewing dependencies between database objects
Advanced data manipulation tools
· Powerful BLOB viewer/editor with several types of viewing BLOB data
· Plenty of useful tools such as data grouping, fast search and filtering
· Multi-level master-detail view to work with several linked tables at the same time
· Table and card views to see data the way you like
· Ability to copy and paste selected records
· Exporting data to SQL script as INSERT statement
Impressive data export and import capabilities
· Exporting data to most popular formats: MS Excel, MS Word, HTML, PDF, TXT, CSV,
DBF, XML, etc.
· Exporting data to MS Access
· Importing data from MS Excel, DBF, TXT and CSV
· Importing data from MS Access
Effective security management
· Grant manager displaying all database object grants in the form of a grid
· Ability to set permissions for table columns
· Easy management of database users, roles and profiles
Excellent visual and text tools for query building
· Visual query builder allows you to build complicated queries without any knowledge of
SQL syntax
· Multiple SQL editors with code completion and syntax highlight
· Large script execution (SQL script editor)
· Ability to view query plan as diagram
· SQL Formatter (Available from SQL Editor context menu)
Report designer with clear in use report construction wizard
© 2007 EMS Database Management Solutions
18
SQL Manager 2007 for Oracle User's Manual
· Create Report Wizard allows you to create simple reports in a few clicks
· Managing reports the same way as if they were database objects: accessing reports
directly through DB Explorer tree
Powerful visual database designer
· Ability to create, edit and drop tables and table fields, set links between tables
visually
· Reverse engineering
· Saving as image or printing database diagram
Latest Oracle version support
· Support of all server versions from 8.1.7 to 10g R2
· Support of all Oracle data types including the new BINARY_FLOAT and
BINARY_DOUBLE types
· Powerful and easy management of object permissions, including column-level
permissions
New state-of-the-art graphical user interface
· Office 11 and Windows XP visual schemes support
· Well-described Wizard System
· User-friendly database explorer for easy management of all Oracle objects
· Windows Toolbar to switch between windows easily, like in Windows Task Bar
· Navigation bars with hot actions in most of the windows
· Ability to save all program settings
· Customizable toolbars for all program windows
· Fully customizable program interface
· Powerful visual options module
· Localizable program interface
Other useful tools to make your work with Oracle server as easy as it can be
· Extracting metadata into text files or SQL script editor
· Powerful print metadata module to create customizable metadata reports
· Report designer for building powerful reports visually
· SQL Monitor
· HTML report wizard to create a detailed HTML report about your database quickly
...and other useful features
· Keyboard templates
· To-do list
· External tool manager
Product information:
Homepage:
Support Ticket System:
Register on-line at:
© 2007 EMS Database Management Solutions
http://www.sqlmanager.net/en/products/oracle/manager
http://www.sqlmanager.net/support
http://www.sqlmanager.net/en/products/oracle/manager/buy
19
1.1
SQL Manager 2007 for Oracle User's Manual
What's new
Version
Release date
SQL Manager 2007 for Oracle 1.5.0.1
November 19, 2007
What's new in SQL Manager 2007 for Oracle?
Implemented PL/SQL Code Debugger in SQL Editor
Added an ability to log the values of bind-variables in SQL Monitor
Added Tips of the Day
Statements of type MERGE INTO... USING ... were parsed incorrectly. Fixed now
An Access Violation error occurred on attempt to Recompile invalid objects. Fixed now
The application used to freeze upon adding an object to Visual Database Designer
when a large number of objects were opened. Fixed now
· Other minor improvements and bug-fixes
· Added Polish localization
· Updated English localization
·
·
·
·
·
·
See also:
Version history
© 2007 EMS Database Management Solutions
20
1.2
SQL Manager 2007 for Oracle User's Manual
System requirements
System requirements for SQL Manager 2007 for Oracle
· 300-megahertz (MHz) Intel® Pentium II-compatible or faster processor;
600-megahertz (MHz) or faster processor recommended
· Microsoft® Windows NT4 with SP4 or later, Microsoft® Windows 2000, Microsoft®
Windows 2000 Server, Microsoft® Windows XP, Microsoft® Windows 2003 Server,
Microsoft® Windows Vista
· 64 MB RAM or more; 128 MB or more recommended
· 50MB of available HD space for program installation
· Super VGA (800x600) or higher-resolution video adapter and monitor; Super VGA
(1024x768) or higher-resolution video adapter and monitor recommended
· Microsoft® Mouse or compatible pointing device
· Oracle® Client 8.1.7 or higher
· Possibility to connect to any local or remote Oracle server
© 2007 EMS Database Management Solutions
21
1.3
SQL Manager 2007 for Oracle User's Manual
Feature Matrix
The FREE Lite version of SQL Manager 2007 for Oracle does not include all features of
the Full version and has some limitations concerning the number of the databases that
can be registered and a number of data manipulation and server maintenance tools. The
detailed feature matrix is given below.
Note that when using the FREE Lite version of SQL Manager 2007 for Oracle you can
activate a 30-day period of fully-functional usage. After the period expires, you will be
able to continue using the Lite version.
© 2007 EMS Database Management Solutions
22
1.4
SQL Manager 2007 for Oracle User's Manual
Installation
If you are installing SQL Manager 2007 for Oracle for the first time on your PC:
· download the SQL Manager 2007 for Oracle distribution package from the download
page available at our site;
· unzip the downloaded file to any local directory, e.g. C:\unzipped;
· run OraManagerPro.exe from the local directory and follow the instructions of the
installation wizard;
· after the installation process is completed, find the SQL Manager shortcut in the
corresponding group of Windows Start menu.
If you want to upgrade an installed copy of SQL Manager 2007 for Oracle to the
latest version:
· download the executable file of SQL Manager 2007 for Oracle from the download page
available at our site;
· unzip the downloaded file to any local directory, e.g. C:\unzipped;
· close SQL Manager application if it is running;
· replace the previous version of SQL Manager by copying the unzipped executable file
to the C:\...\%program_directory%\ location;
· run SQL Manager 2007 for Oracle using its shortcut in the corresponding group of
Windows Start menu.
Also you can use the full distribution package to upgrade your current version of SQL
Manager 2007 for Oracle. In this case, you should repeat the steps you have made for
the first-time installation. Note that the full distribution package is larger than a single
executable file.
See also:
SQL Manager FAQ
License agreement
© 2007 EMS Database Management Solutions
23
1.5
SQL Manager 2007 for Oracle User's Manual
Registration
To make it easier for you to purchase our products, we have contracted with share-it!
registration service. The share-it! order process is protected via a secure connection and
makes on-line ordering by credit/debit card quick and safe. The following information
about share-it! is provided for your convenience.
Share-it! is a global e-commerce provider for software and shareware sales via the
Internet. Share-it! accepts payments in US Dollars, Euros, Pounds Sterling, Japanese Yen,
Australian Dollars, Canadian Dollars or Swiss Franks by Credit Card (Visa,
MasterCard/EuroCard, American Express, Diners Club), Bank/Wire Transfer, Check or Cash.
If you have ordered EMS software online and would like to review your order information,
or if you have questions about ordering, payments, or shipping procedures, please visit
our Customer Care Center, provided by share-it!
Please note that all of our products are delivered via ESD (Electronic Software Delivery)
only. After purchase you will be able to immediately download the registration keys or
passwords and download links for archives of full versions. Also you will receive a copy of
registration keys or passwords by e-mail. Please make sure to enter a valid e-mail address
in your order. If you have not received the keys within 2 hours, please, contact us at
[email protected].
Product distribution
SQL Manager 2007 for Oracle
Maintenance*
SQL Manager 2007 for Oracle
Maintenance*
SQL Manager 2007 for Oracle
Maintenance*
SQL Manager 2007 for Oracle
Maintenance*
SQL Manager 2007 for Oracle
Maintenance*
SQL Manager 2007 for Oracle
Maintenance*
SQL Manager 2007 for Oracle
(Business license) + 1-Year
Price
$275
(Business license) + 2-Year
$344
(Business license) + 3-Year
$385
(Non-commercial license) + 1-Year
$135
(Non-commercial license) + 2-Year
$169
(Non-commercial license) + 3-Year
$189
(Trial version)
Free! Download
Now!
Free! Download
Now!
SQL Manager 2007 for Oracle Lite
Register
Now!
*EMS Maintenance Program provides the following benefits:
· Free software bug fixes, enhancements, updates and upgrades during the
maintenance period
· Free unlimited communications with technical staff for the purpose of reporting
Software failures
· Free reasonable number of communications for the purpose of consultation on
operational aspects of the software
© 2007 EMS Database Management Solutions
24
SQL Manager 2007 for Oracle User's Manual
After your maintenance expires you will not be able to update your software or get
technical support. To protect your investments and have your software up-to-date, you
need to renew your maintenance.
You can easily reinitiate/renew your maintenance with our on-line, speed-through
Maintenance Reinstatement/Renewal Interface. After reinitiating/renewal you will receive
a confirmation e-mail with all the necessary information.
See also:
How to register SQL Manager
© 2007 EMS Database Management Solutions
25
1.6
SQL Manager 2007 for Oracle User's Manual
How to register SQL Manager
If you have not registered your copy of SQL Manager 2007 for Oracle yet, you can do it
by pressing the Register Now button and entering your registration information in the
Register SQL Manager 2007 for Oracle dialog.
To register your newly purchased copy of EMS SQL Manager 2007 for Oracle, perform the
following steps:
· receive the notification letter from Share-it! with the registration info;
· enter the Registration Name and the Registration Key from this letter;
· make sure that the registration process has been completed successfully – check the
registration information in the About SQL Manager 2007 for Oracle dialog (use the
Help | About menu item to open this dialog).
© 2007 EMS Database Management Solutions
26
SQL Manager 2007 for Oracle User's Manual
See also:
Registration
License Agreement
© 2007 EMS Database Management Solutions
27
1.7
SQL Manager 2007 for Oracle User's Manual
License Agreement
Copyright (C) 1999-2007 EMS Database Management Solutions, Inc.
All rights reserved.
IMPORTANT: PLEASE READ THIS AGREEMENT CAREFULLY BEFORE USING THE
SOFTWARE.
END USER LICENSE AGREEMENT
EMS Database Management Solutions, Inc. ("EMS") agrees to provide the user ("USER")
with a copy of this software product ("SOFTWARE"), and grants the USER a limited license
to use the SOFTWARE. This LICENSE AGREEMENT ("LICENSE") defines what the USER may
do with the SOFTWARE, and contains limitations on warranties, liabilities and remedies.
This LICENSE may be revoked by EMS at any time without notice if the USER fails to
comply with the terms of this LICENSE. The copyright and all other rights in the
SOFTWARE shall remain with EMS.
LICENSE OF UNREGISTERED SOFTWARE
An unregistered copy of the SOFTWARE ("UNREGISTERED SOFTWARE") may be used by
the USER for evaluation purposes for a period of thirty (30) days following the initial
installation of the UNREGISTERED SOFTWARE. At the end of the trial period ("TRIAL
PERIOD"), the USER must either register the SOFTWARE or remove it from his system. The
UNREGISTERED SOFTWARE may be freely copied and distributed to other users for their
evaluation.
LICENSE OF REGISTERED SOFTWARE
A registered copy of the SOFTWARE ("REGISTERED SOFTWARE") allows the USER to use
the SOFTWARE only on a single computer or network and only by a single user at a time.
If the USER wishes to use the SOFTWARE for more than one user, the USER will need a
separate license for each individual user. The USER is allowed to make one copy of the
REGISTERED SOFTWARE for back-up purposes.
DISTRIBUTION OF UNREGISTERED SOFTWARE
The uninstalled, UNREGISTERED SOFTWARE may be freely copied and distributed to other
users provided the USER complies with the following requirements. If the USER offers this
uninstalled, UNREGISTERED SOFTWARE for download ("SHAREWARE SITE USER"), then the
SHAREWARE SITE USER agrees to:
(1) Immediately replace this version of the uninstalled, UNREGISTERED SOFTWARE with a
new version of this SOFTWARE if a new version is released by EMS, or
(2) Delete this version of the UNREGISTERED SOFTWARE immediately upon written email
notice by EMS.
TERM OF LICENSE
This LICENSE shall continue for as long as the USER uses the REGISTERED SOFTWARE
and/or distributes the UNREGISTERED SOFTWARE according to the terms of this
agreement.
However, this LICENSE will terminate if the USER fails to comply with any of its terms or
conditions. The USER agrees, upon termination, to destroy all copies of the REGISTERED
and/or UNREGISTERED SOFTWARE. The limitations of warranties and liability set forth in
this LICENSE shall continue in force even after termination.
ACCEPTANCE OF THIS LICENSE AGREEMENT
By downloading and/or installing this SOFTWARE, the USER agrees to the terms of this
© 2007 EMS Database Management Solutions
28
SQL Manager 2007 for Oracle User's Manual
LICENSE.
DISCLAIMER OF WARRANTY AND LIABILITY
THE SOFTWARE AND THE ACCOMPANYING FILES ARE PROVIDED "AS IS" WITHOUT
WARRANTY OF ANY KIND. TO THE MAXIMUM EXTENT PERMITTED BY APPLICABLE LAW,
EMS DISCLAIMS ALL WARRANTIES, EXPRESSED OR IMPLIED, INCLUDING, BUT NOT LIMITED
TO, ANY IMPLIED WARRANTIES OF PERFORMANCE, MERCHANTABILITY, FITNESS FOR A
PARTICULAR PURPOSE, AND NONINFRINGEMENT. TO THE MAXIMUM EXTENT PERMITTED BY
APPLICABLE LAW, IN NO EVENT SHALL EMS BE LIABLE FOR ANY DIRECT, INDIRECT,
CONSEQUENTIAL OR INCIDENTAL DAMAGES (INCLUDING, BUT NOT LIMITED TO, DAMAGES
FOR LOSS OF BUSINESS PROFITS, BUSINESS INTERRUPTION OR LOSS OF BUSINESS
INFORMATION) ARISING OUT OF THE USE OF OR INABILITY TO USE THE SOFTWARE.
ANY LIABILITY OF EMS WILL BE LIMITED EXCLUSIVELY TO PRODUCT REPLACEMENT OR
REFUND OF ORIGINAL PURCHASE PRICE.
OTHER RESTRICTIONS
The USER may not rent, lease, sublicense, translate, disassemble, reverse engineer, or
de-compile the SOFTWARE, or modify or merge the SOFTWARE with any part of the
software in another program. This LICENSE may not be assigned or otherwise transferred
without the prior written consent of EMS.
INVALID PROVISIONS
If any provision of this LICENSE shall be declared invalid or unenforceable, the remaining
provisions of this LICENSE shall remain in full force and effect to the fullest extent
permitted by law. In such event, each provision of this LICENSE which is invalid or
unenforceable shall be replaced with a provision as similar in terms to such invalid or
unenforceable provision as may be possible which is legal and enforceable.
ENTIRE AGREEMENT
This LICENSE is the entire agreement between EMS and the USER, and supersedes any
other agreement, oral or written, and may not be changed except by a written signed
agreement.
© 2007 EMS Database Management Solutions
29
1.8
SQL Manager 2007 for Oracle User's Manual
Version history
Product name
SQL Manager 2007
SQL Manager 2005
SQL Manager 2005
SQL Manager 2005
SQL Manager 2005
for
for
for
for
for
Oracle
Oracle
Oracle
Oracle
Oracle
Version
Version 1.4.0.1
Version 1.3.0.1
Version 1.2.0.1
Version 1.1.0.1
Version 1.0.0.1
Release date
August 17, 2007
June 5, 2007
March 27, 2007
January 24, 2007
December 5, 2006
Full version history is available at
http://www.sqlmanager.net/products/oracle/manager/news
Version 1.4.0.1
· Backup/Restore Database feature is implemented; the User managed and RMAN user
strategies are available
· Recompile Invalid Objects is also available for users who have no
SELECT_CATALOG_ROLE privilege
· The Dependency Tree building speed significantly increased
· It was impossible to obtain data via a WITH-prefixed query. Fixed now
· Extract to SQL script. When extracting the CLOB field data as string the ' symbol was
not processed correctly. Fixed now
· Key Mapping. The Quick Code settings used to be displayed incorrectly. Fixed now
· The Ctrl+Alt+Q key combination used to invoke procedure list in default scheme, which
made it impossible to enter the @ symbol in the German layout. Fixed now
· A wrong script used to be generated when setting the 'Not Null' option in Table Editor.
Fixed now
· When obtaining a sequence definition the current sequence value was not taken into
account. Fixed now
· Database Registration Info. The Reconnection prompt used to popup even if no
changes were made. Fixed now
· Other minor improvements and bug-fixes
Scroll to top
Version 1.3.0.1
· Oracle Client Checker is added to check client and home settings on starting the
program. It can also be called from Database Registration Info dialog
· Advanced Statistics Wizard is added to collect, delete and import/export the statistics
on specified objects for optimizer
· Truncate Wizard is added for truncating table and cluster data
· Enable/Disable Constraints Wizard is added to disable and enable the constraints of
different types (for selected tables)
· Procedures and functions are shown as subobjects for the packages in DB Explorer, as
well as in the Code Completion list
· The Recompile Invalid Objects service is added, which allows to recompile selected
invalid PL/SQL objects
· Code Completion. Now the objects are displayed in Code Completion list even if they
were not refreshed in the object tree list of DB Explorer (can be switched off with the
help of corresponding option)
© 2007 EMS Database Management Solutions
30
SQL Manager 2007 for Oracle User's Manual
· Extract Database. Wrong statements for creating materialized views used to be
displayed in target script. Fixed now
· When duplicating a table the schema name of the target table was missing in field
descriptions, which caused an error on executing the script. Fixed now
· Visual Database Designer. When opening a previously saved diagram the ‘Object not
found in database’ error used to occur. Fixed now
· Visual Database Designer. In some rare cases foreign keys were not displayed. Fixed
now
· Database Registration Info. The value of the Rollback on Disconnect option was not
taken into account in case of emergency disconnect. Fixed now
· When deleting multiple materialized view logs in object tree a wrong script used to be
generated. Fixed now
· Fixed the AV error which used to occur on creating a view
· Dependency Tree. It was impossible to open the editor from a diagram for indices and
triggers. Fixed now
· SQL Script. In some rare cases the script parser detected object type wrong for
materialized views, object types, array types; those objects were placed into the
wrong branch in DB Explorer. Fixed now
· DB Explorer. After disconnecting from a database the Recent Objects list remained
active. Fixed now
· Other small improvements and bug-fixes
Scroll to top
Version 1.2.0.1
· Database Statistics form is added. It displays summary on instance performance, date
of last gathering the statistics on tables and indices. It also outputs the information
on I/O sessions performance, CPU-time, UGA-memory, Hit-Ratios, Locks; the
information on Tablespaces, Segments, SGA, Control Files, Data Files, Rollback
Segments. Free space estimation is displayed graphically. Detailed information on wait
events and latches is also available
· Database Information form is added. Contains common information on current
database instance and NLS parameters. Allows viewing and editing its configuration
parameters
· Object Tables support implemented
· The ability to start gathering information for separate table or schema is added
· The method of access level test to data dictionary (hierarchical privileges by roles, by
system privileges) is fixed and expanded
· Print Metadata. A report on the table now includes field descriptions
· Visual Database Designer. The method of refreshing during reverse engineering is
optimized. Performing reverse engineering now it is possible to refresh selected
schemas only
· Create and editing database reports is now available for limited access users
· DB Explorer. The ability to rename database groups added
· SQL Editor. The SELECT queries containing the DISTINCT keyword used to work
incorrectly. Fixed now
· Reports could not be renamed. Fixed now
· When extracting a database by a user with the limited access to the data dictionary
the error used to occur. Fixed now
· When opening invalid objects within the ‘floating windows’ environment the ‘Cant focus
a disabled or invisible window’ error used to occur. Fixed now
· Local Naming Parameters Editor. There are some errors in editor work fixed
· The bug with incorrect displaying dependencies for materialized view log is fixed now
© 2007 EMS Database Management Solutions
31
SQL Manager 2007 for Oracle User's Manual
· Other small improvements and bug-fixes
Scroll to top
Version 1.1.0.1
· Full support of External and Index-Organized tables
· Invalid status objects are marked with a cross in DB Explorer tree now. Users are
considered invalid if any of EXPIRED, LOCKED, EXPIRED GRACE, EXPIRED TIMED
account statuses takes place. \their account status is one of the following: EXPIRED,
LOCKED, EXPIRED GRACE, EXPIRED TIMED
· SQL Script: Ability to execute selected statements and statement under cursor added
· SQL Script: DBMS output is displayed now
· SQL Script: Script is not loaded into memory anymore when executing a script from
file
· SQL Editor: DBMS output is displayed now
· SQL Editor: When switching between queries the cursor and scrolling bar position were
not saved. Fixed now
· XMLType is added to the list of available fields
· Changing Metadata window. If any error occurs the cursor is now moved to a place
which caused an error
· When refreshing tablespaces on Oracle 9.2 an error used to occur. Fixed now
· If table or view lists were not refreshed in DB Explorer, the first attempt to execute a
query in SQL Editor could take a long time, especially if connection was slow or the
server was overloaded. Fixed now
· In some rare cases on opening the Code Completion window and typing symbols the
window started to blink. Fixed now
· When closing a report in some cases Access Violation errors used to occur. Fixed now
· The bug with refreshing some objects by a user with no SELECT_CATALOG_ROLE
privilege is fixed now. (Some objects could be refreshed by a user with no
SELECT_CATALOG_ROLE privilege. Fixed now.)
· Visual Database Designer. When deleting foreign keys the confirmation dialog did not
appear. Fixed now
· Database Registration. Databases of default home were always displayed at the
database list, disregarding which home was selected. Fixed now. (The database list
always displayed databases from default home directory, irrespective of the selected
home. Fixed now.)
· When creating a tablespace on Oracle 8 or Oracle 9 the Minimum Extent Size
parameter was ignored in some cases. Fixed now
· Other small improvements and bug-fixes
Scroll to top
Version 1.0.0.1
Basic features:
· Rapid database management and navigation
· Easy management of all Oracle objects (including create/edit/drop operations)
· Advanced data management and manipulation tools
· Impressive data export and import capabilities
· Effective security management
· Excellent visual and text tools for query building
· Report designer with clear in use report construction wizard
· Powerful visual database designer
· Latest Oracle version support
© 2007 EMS Database Management Solutions
32
SQL Manager 2007 for Oracle User's Manual
· New state-of-the-art
and more...
graphical user interface
Scroll to top
See also:
What's new
© 2007 EMS Database Management Solutions
33
1.9
SQL Manager 2007 for Oracle User's Manual
EMS SQL Manager FAQ
Please read this page attentively if you have questions about
for Oracle.
EMS SQL Manager 2007
Table of contents
Product questions
· What is EMS SQL Manager for Oracle?
· What is the difference between Full/Lite editions of EMS SQL Manager for Oracle?
· What do I need to start working with EMS SQL Manager for Oracle?
· What is the difference between the Export/Import functions in SQL Manager and the
Data Export/Import utilities?
· What is the difference between the Query Builder module in SQL Manager and the SQL
Query for Oracle utility?
· What is the difference between the Extract Database function in SQL Manager for
Oracle and the DB Extract for Oracle standalone utility?
Common questions
· I can't modify DDL. Why?
· How can I customize data formats in grid?
· I need to perform some changes in database objects of my test database and then
make the same changes on another database. Are there any tools for this purpose in
SQL Manager for Oracle?
· When I create database objects, their names are always converted to upper case.
How I can prevent it?
Export/Import questions
· I tried to export data from a table, but found that I can export only the first 1000
records. Can I export all the records from a table if it contains more than 1000
records?
· What is the difference between the "Extract Database" and "Export as SQL Script"
functions?
· How can I change the default directory where exported data are saved?
Question/answer list
Product questions
Q: What is EMS SQL Manager for Oracle?
A: EMS SQL Manager 2007 for Oracle is a powerful tool for Microsoft® SQL Server™
administration and development. SQL Manager 2007 for Oracle works with all Oracle
versions from 7 to 2005 and supports all of the latest features including Assemblies,
DDL Triggers, Synonyms, Typed XML columns, and so on. It offers plenty of powerful
tools for experienced users to satisfy all their needs. SQL Manager 2007 for Oracle has
a new state-of-the-art graphical user interface with well-described wizard system, so
clear in use that even a newbie will not be confused with it.
Q: What is the difference between Full/Lite editions of EMS SQL Manager for Oracle?
A: These editions of SQL Manager for Oracle differ in price and features. To register SQL
Manager for Oracle, see the Purchase page, and to learn about the difference in
© 2007 EMS Database Management Solutions
34
SQL Manager 2007 for Oracle User's Manual
features please go to our
Feature Matrix page.
Q: What do I need to start working with EMS SQL Manager for Oracle?
A: First of all, you must have a possibility to connect to some instance of
Oracle server to
work with SQL Manager. You can download Oracle from
http://www.oracle.com/technology/software. Besides, you need your workstation to
satisfy the system requirements of SQL Manager 2007 for Oracle.
Q: What is the difference between the Export/Import functions in SQL Manager and the
Data Export/Import utilities?
A: The Data Export/Import for Oracle utilities include some additional features which are
not available in SQL Manager, such as:
· export/import data from/to several tables simultaneously;
· export/import data from/to tables selected from different databases on one host;
· a command-line utility to export/import data using the configuration file with all the
export/import options.
Q: What is the difference between the Query Builder module in SQL Manager and the SQL
Query for Oracle utility?
A: First of all, SQL Query for Oracle works faster as it is a much lighter product. Besides,
it provides additional features for query building, e.g.:
· keeping query history which allows you to rollback to any edited query;
· various interface improvements for more productive and easier work.
Q: What is the difference between the Extract Database function in SQL Manager for
Oracle and the DB Extract for Oracle standalone utility?
A: The DB Extract for Oracle utility includes some additional features which are not
available in SQL Manager, such as:
· extracting metadata and/or data from several databases on one host;
· a console application for performing extract in one-touch;
· faster extraction speed.
Scroll to top
Common questions
Q: I can't modify DDL. Why?
A: The DDL tabs of the SQL Manager editors are read-only. To modify an object, you can
copy the text to the clipboard and modify it using SQL Editor.
Q: How can I customize data formats in grid?
A: You can customize all display formats: integer, float, date, time and datetime using
the Color & Formats page of the Environment Options dialog.
Q: I need to perform some changes in database objects of my test database and then
make the same changes on another database. Are there any tools for this purpose in
SQL Manager for Oracle?
A: The Database Registration Info dialog provides the Logs section where you can enable
logging metadata changes performed over the database and/or SQL queries executed
in SQL Editor.
Q: When I create database objects, their names are always converted to upper case.
How I can prevent it?
© 2007 EMS Database Management Solutions
35
SQL Manager 2007 for Oracle User's Manual
A: Please try to switch off the "Convert created objects' names to upper case" option
within the Object Editors section of the Environment Options dialog.
Scroll to top
Export/Import questions
Q: I tried to export data from a table, but I found that I could export only the first 1000
records. Can I export all the records from a table if it contains more than 1000
records?
A: The Export Data function exports only those records which are currently selected in
the Grid View. The selection is limited to 1000 by default, so you should increase this
value to select all the records to be able to export them all. Also you can set the
default limit value using the Grid page of the Environment Options dialog.
Q: What is the difference between the "Extract Database" and "Export as SQL Script"
functions?
A: Export as SQL Script is intended for exporting table data that will be inserted into a
database system other than Oracle. Use Extract Database Wizard to copy metadata
and/or data to a database on Oracle afterwards.
Q: How can I change the default directory where exported data are saved?
A: Follow the steps below to change the default directory:
1. Right-click the database alias in DB Explorer and select the 'Database Registration
Info...' context menu item (you can also find this item in the 'Database' main
menu) to open the Database Registration Info dialog.
2. Proceed to the Directories section within the dialog.
3. Set the 'Default directory for Export Data'.
Scroll to top
If you still have any questions, contact us at our
© 2007 EMS Database Management Solutions
Support Center.
36
1.10
SQL Manager 2007 for Oracle User's Manual
Other EMS Products
Quick navigation
MySQL
Microsoft SQL PostgreSQL
InterBase /
FireBird
Oracle
IBM DB2
DBISAM
Tools &
components
MySQL
SQL Management Studio for MySQL
EMS SQL Management Studio for MySQL is a complete solution for database administration and
development. SQL Studio unites the must-have tools in one powerful and easy-to-use
environment that will make you more productive than ever before!
SQL Manager for MySQL
Simplify and automate your database development process, design, explore and maintain
existing databases, build compound SQL query statements, manage database user rights and
manipulate data in different ways.
Data Export for MySQL
Export your data to any of 15 most popular data formats, including MS Access, MS Excel, MS
Word, PDF, HTML and more.
Data Import for MySQL
Import your data from MS Access, MS Excel and other popular formats to database tables via
user-friendly wizard interface.
Data Pump for MySQL
Migrate from most popular databases (MySQL, PostgreSQL, Oracle, DB2, InterBase/Firebird,
etc.) to MySQL.
Data Generator for MySQL
Generate test data for database testing purposes in a simple and direct way. Wide range of data
generation parameters.
DB Comparer for MySQL
Compare and synchronize the structure of your databases. Move changes on your development
database to production with ease.
DB Extract for MySQL
Create database backups in the form of SQL scripts, save your database structure and table
data as a whole or partially.
SQL Query for MySQL
Analyze and retrieve your data, build your queries visually, work with query plans, build charts
based on retrieved data quickly and more.
Data Comparer for MySQL
Compare and synchronize the contents of your databases. Automate your data migrations from
development to production database.
Scroll to top
Microsoft SQL
© 2007 EMS Database Management Solutions
37
SQL Manager 2007 for Oracle User's Manual
SQL Management Studio for SQL Server
EMS SQL Management Studio for SQL Server is a complete solution for database administration
and development. SQL Studio unites the must-have tools in one powerful and easy-to-use
environment that will make you more productive than ever before!
SQL Manager for SQL Server
Simplify and automate your database development process, design, explore and maintain
existing databases, build compound SQL query statements, manage database user rights and
manipulate data in different ways.
Data Export for SQL Server
Export your data to any of 15 most popular data formats, including MS Access, MS Excel, MS
Word, PDF, HTML and more
Data Import for SQL Server
Import your data from MS Access, MS Excel and other popular formats to database tables via
user-friendly wizard interface.
Data Pump for SQL Server
Migrate from most popular databases (MySQL, PostgreSQL, Oracle, DB2, InterBase/Firebird,
etc.) to Microsoft® SQL Server™.
Data Generator for SQL Server
Generate test data for database testing purposes in a simple and direct way. Wide range of
data generation parameters.
DB Comparer for SQL Server
Compare and synchronize the structure of your databases. Move changes on your development
database to production with ease.
DB Extract for SQL Server
Create database backups in the form of SQL scripts, save your database structure and table
data as a whole or partially.
SQL Query for SQL Server
Analyze and retrieve your data, build your queries visually, work with query plans, build charts
based on retrieved data quickly and more.
Data Comparer for SQL Server
Compare and synchronize the contents of your databases. Automate your data migrations from
development to production database.
Scroll to top
PostgreSQL
SQL Management Studio for PostgreSQL
EMS SQL Management Studio for PostgreSQL is a complete solution for database administration
and development. SQL Studio unites the must-have tools in one powerful and easy-to-use
environment that will make you more productive than ever before!
SQL Manager for PostgreSQL
Simplify and automate your database development process, design, explore and maintain
existing databases, build compound SQL query statements, manage database user rights and
manipulate data in different ways.
Data Export for PostgreSQL
Export your data to any of 15 most popular data formats, including MS Access, MS Excel, MS
Word, PDF, HTML and more
© 2007 EMS Database Management Solutions
38
SQL Manager 2007 for Oracle User's Manual
Data Import for PostgreSQL
Import your data from MS Access, MS Excel and other popular formats to database tables via
user-friendly wizard interface.
Data Pump for PostgreSQL
Migrate from most popular databases (MySQL, SQL Server, Oracle, DB2, InterBase/Firebird,
etc.) to PostgreSQL.
Data Generator for PostgreSQL
Generate test data for database testing purposes in a simple and direct way. Wide range of
data generation parameters.
DB Comparer for PostgreSQL
Compare and synchronize the structure of your databases. Move changes on your development
database to production with ease.
DB Extract for PostgreSQL
Create database backups in the form of SQL scripts, save your database structure and table
data as a whole or partially.
SQL Query for PostgreSQL
Analyze and retrieve your data, build your queries visually, work with query plans, build charts
based on retrieved data quickly and more.
Data Comparer for PostgreSQL
Compare and synchronize the contents of your databases. Automate your data migrations from
development to production database.
Scroll to top
InterBase / Firebird
SQL Management Studio for InterBase/Firebird
EMS SQL Management Studio for InterBase and Firebird is a complete solution for database
administration and development. SQL Studio unites the must-have tools in one powerful and
easy-to-use environment that will make you more productive than ever before!
SQL Manager for InterBase/Firebird
Simplify and automate your database development process, design, explore and maintain
existing databases, build compound SQL query statements, manage database user rights and
manipulate data in different ways.
Data Export for InterBase/Firebird
Export your data to any of 15 most popular data formats, including MS Access, MS Excel, MS
Word, PDF, HTML and more
Data Import for InterBase/Firebird
Import your data from MS Access, MS Excel and other popular formats to database tables via
user-friendly wizard interface.
Data Pump for InterBase/Firebird
Migrate from most popular databases (MySQL, SQL Server, Oracle, DB2, PostgreSQL, etc.) to
InterBase/Firebird.
Data Generator for InterBase/Firebird
Generate test data for database testing purposes in a simple and direct way. Wide range of
data generation parameters.
© 2007 EMS Database Management Solutions
39
SQL Manager 2007 for Oracle User's Manual
DB Comparer for InterBase/Firebird
Compare and synchronize the structure of your databases. Move changes on your development
database to production with ease.
DB Extract for InterBase/Firebird
Create database backups in the form of SQL scripts, save your database structure and table
data as a whole or partially.
SQL Query for InterBase/Firebird
Analyze and retrieve your data, build your queries visually, work with query plans, build charts
based on retrieved data quickly and more.
Data Comparer for InterBase/Firebird
Compare and synchronize the contents of your databases. Automate your data migrations from
development to production database.
Scroll to top
Oracle
SQL Management Studio for Oracle
EMS SQL Management Studio for Oracle is a complete solution for database administration and
development. SQL Studio unites the must-have tools in one powerful and easy-to-use
environment that will make you more productive than ever before!
SQL Manager for Oracle
Simplify and automate your database development process, design, explore and maintain
existing databases, build compound SQL query statements, manage database user rights and
manipulate data in different ways.
Data Export for Oracle
Export your data to any of 15 most popular data formats, including MS Access, MS Excel, MS
Word, PDF, HTML and more.
Data Import for Oracle
Import your data from MS Access, MS Excel and other popular formats to database tables via
user-friendly wizard interface.
Data Pump for Oracle
Migrate from most popular databases (MySQL, PostgreSQL, MySQL, DB2, InterBase/Firebird,
etc.) to Oracle
Data Generator for Oracle
Generate test data for database testing purposes in a simple and direct way. Wide range of data
generation parameters.
DB Comparer for Oracle
Compare and synchronize the structure of your databases. Move changes on your development
database to production with ease.
DB Extract for Oracle
Create database backups in the form of SQL scripts, save your database structure and table
data as a whole or partially.
SQL Query for Oracle
Analyze and retrieve your data, build your queries visually, work with query plans, build charts
based on retrieved data quickly and more.
© 2007 EMS Database Management Solutions
40
SQL Manager 2007 for Oracle User's Manual
Data Comparer for Oracle
Compare and synchronize the contents of your databases. Automate your data migrations from
development to production database.
Scroll to top
DB2
SQL Management Studio for DB2
EMS SQL Management Studio for DB2 is a complete solution for database administration and
development. SQL Studio unites the must-have tools in one powerful and easy-to-use
environment that will make you more productive than ever before!
SQL Manager for DB2
Simplify and automate your database development process, design, explore and maintain
existing databases, build compound SQL query statements, manage database user rights and
manipulate data in different ways.
Data Export for DB2
Export your data to any of 15 most popular data formats, including MS Access, MS Excel, MS
Word, PDF, HTML and more.
Data Import for DB2
Import your data from MS Access, MS Excel and other popular formats to database tables via
user-friendly wizard interface.
Data Pump for DB2
Migrate from most popular databases (MySQL, PostgreSQL, Oracle, MySQL, InterBase/Firebird,
etc.) to DB2
Data Generator for DB2
Generate test data for database testing purposes in a simple and direct way. Wide range of data
generation parameters.
DB Comparer for DB2
Compare and synchronize the structure of your databases. Move changes on your development
database to production with ease.
DB Extract for DB2
Create database backups in the form of SQL scripts, save your database structure and table
data as a whole or partially.
SQL Query for DB2
Analyze and retrieve your data, build your queries visually, work with query plans, build charts
based on retrieved data quickly and more.
Data Comparer for DB2
Compare and synchronize the contents of your databases. Automate your data migrations from
development to production database.
Scroll to top
DBISAM
SQL Manager for DBISAM
Simplify and automate your database development process, design, explore and maintain
existing databases, build compound SQL query statements, manage database user rights and
manipulate data in different ways.
Scroll to top
© 2007 EMS Database Management Solutions
41
SQL Manager 2007 for Oracle User's Manual
Tools & components
Advanced Data Export
Advanced Data Export Component Suite (for Borland Delphi and .NET) will allow you to save
your data in the most popular office programs formats.
Advanced Data Import
Advanced Data Import™ Component Suite for Delphi® and C++ Builder® will allow you to
import your data to the database from files in the most popular data formats.
Advanced PDF Generator
Advanced PDF Generator for Delphi gives you an opportunity to create PDF documents with
your applications written on Delphi® or C++ Builder®.
Advanced Query Builder
Advanced Query Builder is a powerful component suite for Borland® Delphi® and C++
Builder® intended for visual building SQL statements for the SELECT, INSERT, UPDATE and
DELETE clauses.
Advanced Excel Report
Advanced Excel Report for Delphi is a powerful band-oriented generator of template-based
reports in MS Excel.
Advanced Localizer
Advanced Localizer™ is an indispensable component suite for Delphi® for adding multilingual
support to your applications.
Source Rescuer
EMS Source Rescuer™ is an easy-to-use wizard application for Borland Delphi® and
C++Builder® which can help you to restore your lost source code.
Scroll to top
© 2007 EMS Database Management Solutions
Part
II
43
2
SQL Manager 2007 for Oracle User's Manual
Getting Started
To start working with Oracle databases in SQL Manager 2007 for Oracle you should first
register a database or several databases using the Register Database Wizard. After that
you can connect to database, manage its objects, table data, and so on. See the
instructions below to learn how to perform these operations in the easiest way.
·
·
·
·
·
·
How the product looks when you start it for the first time
Working with databases
Working with database objects
Using database popup menu
Using object popup menu
Switching between child windows
Enjoy your work with SQL Manager 2007 for Oracle!
© 2007 EMS Database Management Solutions
44
2.1
SQL Manager 2007 for Oracle User's Manual
Selecting style and language
When you start SQL Manager 2007 for Oracle for the first time, you have to choose
environment style and program language. You can always change these settings later by
selecting Options | Environment Options main menu item to change environment style
and Options | Select Program Language main menu item to change program language.
Environment style
This switch allows you to define the basic window behavior style - MDI (like MS Office) or
Floating Windows (like Borland IDE).
Bar style for child forms
Allows you to define the location of action buttons. They can be located at the
Navigation bar on the left and/or on the Toolbar.
Program Language
Select the interface language from the list of available languages.
© 2007 EMS Database Management Solutions
45
2.2
SQL Manager 2007 for Oracle User's Manual
First time started
This is how SQL Manager 2007 for Oracle looks when you start it for the first time. Click
Manage existing database(s) to register existing databases in the Register Database
Wizard or Edit local naming parameters to call the TNS File Constructor.
The Desktop Panel also allows you to open database tools, which do not require database
registration, i.e. SQL Script Editor and Manage Jobs, as well as refer to the SQL Manager
2007 for Oracle or Oracle help systems and link to some useful internet resources.
2.2.1
Using Desktop Panel
The Desktop Panel shown when no child windows are open allows you to:
· Register already existing databases in order to manage them with SQL Manager 2007
for Oracle.
· Edit local naming parameters to call the TNS File Constructor.
· Create new table within the current database using New Table window.
· Create new database object within the current database.
· Execute SQL Script in SQL Script Editor.
· Manage Oracle jobs in Jobs Manager.
· Execute a query.
· Grant permissions on database objects to users in Grant Manager.
· Show this help file.
· Browse SQL Manager 2007 for Oracle home page.
© 2007 EMS Database Management Solutions
46
SQL Manager 2007 for Oracle User's Manual
· See SQL Manager 2007 for Oracle on-line documentation.
· Go to Technical Support Center.
· See SQL Manager 2007 for Oracle Frequently Asked Questions.
© 2007 EMS Database Management Solutions
47
2.3
SQL Manager 2007 for Oracle User's Manual
Working with databases
After you have registered the required databases they appear in the explorer tree on the
left. If the Show Hosts option is checked at the Environment Options | DB Explorer page,
database hosts are also displayed in the tree (hint: you can also use Show Hosts menu
item in the dropdown menu of View Mode button on the DB Explorer toolbar for the same
purpose.) To connect to a database, simply double-click it in the explorer. If connection
succeeds, the database node expands showing the tree of its objects.
© 2007 EMS Database Management Solutions
48
2.4
SQL Manager 2007 for Oracle User's Manual
Working with database objects
The nodes of the DB Explorer tree allow you to access objects of the selected database
respectively. If Oracle server you connected to supports certain types of objects, their
nodes will appear in the tree. Double-click an object to open it in the appropriate editor.
Right-click at the object to display the popup menu, which allows you to perform various
operations over the selected object or database.
If you want to use the explorer tree for working with table subobjects: fields, indexes,
Environment Options | DB
and foreign keys, check the Show Table Subobjects option at the
Explorer page. (hint: you can also use Show Table Subobjects menu item in the
dropdown menu of View Mode button on the DB Explorer toolbar for the same purpose.)
© 2007 EMS Database Management Solutions
49
2.5
SQL Manager 2007 for Oracle User's Manual
Using database popup menu
The popup menu of registered database or an object group in the explorer tree allows you
to:
· Connect to the selected database.
· Disconnect from the selected database.
· Register new database through the Register Database Wizard.
· Unregister the selected database.
· Unregister the selected database group and all its databases.
· Edit the selected database registration info within the Database Registration Info
Dialog.
· Edit local naming parameters to call the TNS File Constructor.
· Edit Profile parameters.
· Customize DB Explorer look (see Configuring Database Explorer).
· Create new tab for the selected database for
quick accessing it through this tab.
© 2007 EMS Database Management Solutions
50
2.6
SQL Manager 2007 for Oracle User's Manual
Using object popup menu
The popup menu of the database object (e.g. table) in the explorer tree allows you to:
· Create a new database object.
· Open the selected object in its editor.
· Rename the selected object (note that not all the objects can be renamed).
· Drop the selected database object.
· Duplicate the selected object (create a new object with the same properties as the
selected object has).
· Define grants for the selected object
· Create new tab for the selected node for quick accessing it through this tab.
© 2007 EMS Database Management Solutions
51
2.7
SQL Manager 2007 for Oracle User's Manual
Switching between windows
The Windows Toolbar allows you to switch between child windows easily, like in
Windows Task Bar.
To activate the window you need, simply click one of the window buttons. To perform
some additional actions with the window, right-click on its button and select appropriate
menu item from popup menu.
See also:
Customizing toolbars
© 2007 EMS Database Management Solutions
Part
III
53
3
SQL Manager 2007 for Oracle User's Manual
Database Explorer
Database Explorer (or DB Explorer) is the basic navigation window for working with
databases and database objects. Its treelike structure with multiple tabs allows you to
perform almost all operations upon the databases and their objects quickly and easily. The
following list contains the most common features provided by the Database Explorer.
·
·
·
·
·
·
·
·
·
Managing database registration info
Connecting to a database
Performing basic operations upon database objects
Creating projects to work with selected objects only
Navigating database objects using multiple tabs
Selecting multiple objects
Easy access to recently opened objects
Viewing information about database objects
Configuring Database Explorer
To view or hide this window use the
View | DB Explorer menu item or press F11.
Use the Ctrl+Shift+C shortcut to collapse current
the parent node.
© 2007 EMS Database Management Solutions
DB Explorer tree branch and switch to
54
SQL Manager 2007 for Oracle User's Manual
© 2007 EMS Database Management Solutions
55
3.1
SQL Manager 2007 for Oracle User's Manual
Managing database registration info
Database Explorer allows you to perform the following operations related with registering
databases from its popup menu:
· Register database
· Unregister database
· Edit database registration info
© 2007 EMS Database Management Solutions
56
3.2
SQL Manager 2007 for Oracle User's Manual
Connecting to database
The simplest way to connect to a database is to double-click its node in the Database
Explorer tree. The same operation is also available by using the Connect to Database
item from the explorer popup menu, or using the Database | Connect to Database main
menu item.
Note that you can change database nodes order by dragging them in
© 2007 EMS Database Management Solutions
DB Explorer tree.
57
3.3
SQL Manager 2007 for Oracle User's Manual
Performing database object operations
Database Explorer allows you to perform the following operations with database objects
by its popup menu. Note that popup menu contains object-specific items only when some
database object is currently selected in the explorer tree.
·
·
·
·
·
Create new database object (the New <object>... item).
Edit currently selected database object (the Edit <object_name> item).
Drop selected object from the database (the Drop <object_name> item).
Rename selected database object (the Rename <object_name> item).
Duplicate selected object (the Duplicate <object_name> item).
To open the database object with its editor, you can also double-click it in the DB
explorer tree.
Note that you can distinguish invalid database objects by their icons which are marked
© 2007 EMS Database Management Solutions
58
SQL Manager 2007 for Oracle User's Manual
with a cross. In the screenshot below you can see that stored procedure 'SYNCRN' is
invalid because of some errors in its syntax.
See also:
New Object
Duplicate Object
© 2007 EMS Database Management Solutions
59
3.4
SQL Manager 2007 for Oracle User's Manual
Creating projects
Use the Projects node in each database to work with the selected objects of this
database only. You can place here any object from the database tree.
Creating project
· Create a folder (and maybe some subfolders) by right-clicking the
selecting the New Folder menu item.
· Specify the new object name in the dialog window.
Projects node and
Adding project
· Drag the object(s) from the database tree and drop it to the project folder, or
· Select the Add Object item from the context menu of the desirable project folder,
corresponding dialog window will appear.
Note: You can also create separate tab for your project. See
Navigating database
objects with tabs section.
Removing object from project
To remove an object from the project:
· Right-click the object and select the Remove Object menu item.
· Confirm removing in the dialog window
Note: This does not drop the object out of database, but only removes it from the
project tree.
© 2007 EMS Database Management Solutions
60
SQL Manager 2007 for Oracle User's Manual
© 2007 EMS Database Management Solutions
61
3.5
SQL Manager 2007 for Oracle User's Manual
Navigating database objects with tabs
To make your work with Database Explorer even more convenient, SQL Manager 2007 for
Oracle supports working with several tabs in Database Explorer. Use tabs when you wish
to work only with exact node of explorer tree: with one specific database, with tables of
some database or with specific database project. Creating such tabs will minimize scrolling
on the large trees. For example, you can create a tab for each registered database and
switch between them with a single click on a tab.
Creating tab
To create a new tab:
· Right-click the node for which you wish to create a tab and select
Here... menu item.
New Tab from
Removing tab
To remove the tab:
· Move to this tab by clicking on it's shortcut
· Right-click the Database Explorer and select
Delete Current Tab menu item.
Note: Navigating through the tabs is also possible with the help of shortcuts
· Ctrl+Shift+N - Next tab;
· Ctrl+Shift+P - Previous tab;
© 2007 EMS Database Management Solutions
62
3.6
SQL Manager 2007 for Oracle User's Manual
Selecting multiple objects
You can select more than one object in Database Explorer by pressing the Ctrl key and
selecting these objects clicking on them to perform the following actions:
· Edit database objects
· Drop database objects
· Drag these objects to the projects (See
© 2007 EMS Database Management Solutions
Creating Projects)
63
3.7
SQL Manager 2007 for Oracle User's Manual
Recently opened objects
Use Recent Objects button on the Database Explorer toolbar to access the list of
recently opened database objects (during the current work session). This list is common
for all the databases. Next to the object name the database name is displayed. Select the
object from this list to open it with the editor.
To change the number of objects, considered 'recent' select the
Options | Environment
Options menu item and set the Recent objects count option value on the Tools | DB
Explorer page (see Environment Options for details).
© 2007 EMS Database Management Solutions
64
3.8
SQL Manager 2007 for Oracle User's Manual
Finding database elements
SQL Manager 2007 for Oracle provides the ability to search for items in DB Explorer tree.
It may be useful if you have lots of database objects and sometimes it may be hard to
find one that you need.
To call the Find Item dialog right-click the Database node of the explorer tree and
select the Find Item... item from the popup menu or simply use the <Ctrl + F> key
shortcut.
© 2007 EMS Database Management Solutions
65
3.9
SQL Manager 2007 for Oracle User's Manual
SQL Assistant
This area helps you to work with the DB Explorer window, displaying the additional
information about the selected object or group of objects.
If you select a server in the DB Explorer, the SQL Assistant displays the list of the
registered databases, where those you are connected to, are displayed in bold.
Double-clicking the database alias in the SQL Assistant connects you to the database or
disconnects you from it.
If you select a database in the DB Explorer, the SQL Assistant displays the list of the
database object groups and a number of objects for each group. Selecting an object
group in the DB Explorer displays the list of objects in the SQL Assistant.
Double-clicking the object name in the SQL Assistant makes the object available for
editing in the proper editor window. Right-clicking the object or group of objects (selected
with the Ctrl or Shift buttons) allows you to edit or drop the selected objects.
What is displayed in SQL Assistant when a table is selected in DB Explorer depends on
the position of the Tables' Details switch. It can be called via the View Mode button |
Tables' Details menu on the toolbar or via the popup menu of the SQL Assistant.
Selecting other objects in the DB Explorer displays its DDL definition or description in
the SQL Assistant depending on position of the Other Objects' Details switch. It can be
called via the View Mode button | Other Objects' Details menu on the toolbar or via
the popup menu of the SQL Assistant.
© 2007 EMS Database Management Solutions
66
3.10
SQL Manager 2007 for Oracle User's Manual
Configuring Database Explorer
Use View Mode button on the Database Explorer toolbar to configure Database Explorer
for your needs.
The dropdown menu of this button allows you to:
·
·
·
·
·
·
Show/hide table subobjects as child nodes of database objects.
Show/hide view subobjects as child nodes of database objects.
Show/hide host nodes for registered databases.
Sort list of databases by its aliases.
Hide disconnected databases from the tree.
Setup the SQL Assistant area.
Use Environment Options... | DB Explorer to see more options configuring DB Explorer.
© 2007 EMS Database Management Solutions
67
SQL Manager 2007 for Oracle User's Manual
© 2007 EMS Database Management Solutions
Part
IV
69
4
SQL Manager 2007 for Oracle User's Manual
Database Management
SQL Manager 2007 for Oracle provides all the tools you need to manage and navigate
databases. Note that to start working with databases in
SQL Manager 2007 for Oracle you
are to register them (see Register Database Wizard).
Register Database
To register a single database in SQL Manager 2007 for Oracle
· Select the Database | Register Database menu item.
· Set connection, authorization and other options in the Register Database Wizard.
Unregister Database
To unregister a single database
· Select the database to unregister in the DB Explorer tree.
· Select the Database | Unregister Database menu item.
· Confirm unregistering in the dialog window.
Connect to Database
To connect to a database
· Select the database to connect to in the
DB Explorer tree.
· Double click its alias.
or
· Select the Database | Connect to Database menu item.
Disconnect from Database
To disconnect from a database
· Select the database to disconnect from or any of its objects in the
· Select the Database | Disconnect from Database menu item.
© 2007 EMS Database Management Solutions
DB Explorer.
70
SQL Manager 2007 for Oracle User's Manual
© 2007 EMS Database Management Solutions
71
4.1
SQL Manager 2007 for Oracle User's Manual
Register Database Wizard
The Register Database Wizard allows you to register a single database. To open the
wizard select the Database | Register Database... menu item, or press Shift+Alt+R. You
can also use the Register Database button on the main toolbar.
· Setting connection properties
· Setting registration options
· Using templates
See also:
Oracle client checker
4.1.1
Setting connection properties
Set the connection properties in the corresponding boxes: database name and optional
alias for it, authentication type, user name, password.
Windows authentication
Use Windows Integrated Security for the login. If you are editing an existing login, this
option cannot be altered. If you are creating a new login, clicking this option activates
the options below it.
© 2007 EMS Database Management Solutions
72
SQL Manager 2007 for Oracle User's Manual
Server authentication
Use server authentication for the login. Server Authentication stores logins and passwords
in server and does not depend upon Windows.
User name
User name for connecting to the database server.
Password
Password for connecting to the server.
Connect as
Select a system role to login - SYSDBA, SYSOPER, Normal.
Database name
Select the database name to register from the drop-down list.
Database alias
Any database alias that is convenient for you (e.g. MyTestDatabase). This alias will be
displayed in the DB Explorer window.
© 2007 EMS Database Management Solutions
73
4.1.2
SQL Manager 2007 for Oracle User's Manual
Setting registration options
Enter the database name and set the database alias and other options.
Font charset
Character set to display data in the grid.
Login prompt before connection
Enables SQL Manager 2007 for Oracle to prompt for user name and password each time
you connect to the database.
Autoconnect on startup
With this option on SQL Manager 2007 for Oracle automatically establishes connection
with the registered database at application startup.
Refresh objects on connection
This option allows to skip refreshing objects on connection to database is added. It is
highly recommended to uncheck this option if your database contains many objects or if
connection to the database is slow.
Rollback on disconnect
All active transactions are rolled back on disconnect from the server.
At the Logs tab specify log file names for metadata changes logging and SQL query
logging, if necessary.
Click the Finish button when done to start working with the selected databases in
Manager 2007 for Oracle.
© 2007 EMS Database Management Solutions
SQL
74
SQL Manager 2007 for Oracle User's Manual
© 2007 EMS Database Management Solutions
75
4.2
SQL Manager 2007 for Oracle User's Manual
Database Registration Info
Use the Database Registration Info dialog to edit the properties of registered database,
set on its creation. To open the dialog, select the database in the explorer tree, then
select the Database | Database Registration Info... menu item. You can also use the
corresponding button of the main toolbar.
·
·
·
·
·
·
4.2.1
Editing connection properties
Setting database options
Setting display options
Setting default directories
Setting log options
Setting SSH tunnel options
Editing connection properties
Edit the connection properties in the corresponding boxes: authentication type, user
name and password. Also you can edit database alias - an optional name to display the
database in the explorer tree and all the program tools.
© 2007 EMS Database Management Solutions
76
SQL Manager 2007 for Oracle User's Manual
Windows authentication
Use Windows Integrated Security for the login. If you are editing an existing login, this
option cannot be altered. If you are creating a new login, clicking this option activates
the options below it.
Server authentication
Use server authentication for the login. Server Authentication stores logins and passwords
in server and does not depend upon Windows.
User name
User name for connecting to the database server.
Password
Password for connecting to the server.
Connect as
Select a system role to login - SYSDBA, SYSOPER, Normal.
Database name
Select the database name to register from the drop-down list.
Database alias
Any database alias that is convenient for you (e.g. MyTestDatabase). This alias will be
displayed in the DB Explorer window.
Font charset
Character set to display data in the grid.
Press the Edit TNS File and Edit SQLNET File buttons to edit the
set connection parameters within the TNS File Constructor.
See also:
Oracle client checker
© 2007 EMS Database Management Solutions
Profile parameters and
77
4.2.2
SQL Manager 2007 for Oracle User's Manual
Setting database options
Customize database options according to your needs. The detailed description is given
below.
Login prompt before connection
Enables SQL Manager 2007 for Oracle to prompt for user name and password each time
you connect to the database.
Autoconnect on startup
With this option on SQL Manager 2007 for Oracle automatically establishes connection
with the registered database at application startup.
Refresh objects on connection
This option allows to skip refreshing objects on connection to database is added. It is
highly recommended to uncheck this option if your database contains many objects or if
connection to the database is slow.
Rollback on disconnect
All active transactions are rolled back on disconnect from the server.
Enable trace
© 2007 EMS Database Management Solutions
78
SQL Manager 2007 for Oracle User's Manual
Creates a trace log file at the client side which allows you to view statistics data on
sessions, connections, etc.
Auto commit
When checked, applying transactions is automatic.
Decimal separator
Define the separator which will be used for floating point type values.
Optimize goal
Establishes the default behavior for choosing an optimization approach for the instance.
AllRows
The optimizer uses a cost-based approach for all SQL statements in the session
regardless of the presence of statistics and optimizes with a goal of best throughput
(minimum resource use to complete the entire statement).
FirstRows
The optimizer uses a mix of cost and heuristics to find a best plan for fast delivery of the
first few rows.
Statement cashed
Schema restriction
Allows to hide a schema to disable refreshing its objects. Note that the SYS schema
cannot be restricted
© 2007 EMS Database Management Solutions
79
4.2.3
SQL Manager 2007 for Oracle User's Manual
Setting display options
Specify objects you wish to display in the
© 2007 EMS Database Management Solutions
Database Explorer tree.
80
4.2.4
SQL Manager 2007 for Oracle User's Manual
Setting default directories
Set the default directories for database extract, data export, data import, and misc. (e.g.
these paths will be used by default when saving HTML reports).
© 2007 EMS Database Management Solutions
81
4.2.5
SQL Manager 2007 for Oracle User's Manual
Setting log options
Specify log file names for metadata changes logging and SQL query logging, if necessary.
Note: This log is useful when you are going to move changes made in development
database to the production database.
Metadata Changes
You can enable logging all the metadata changes to the SQL log file. Check the
Enable
Logging Metadata Changes option and set the name of the log file. All metadata
changes within the current database will be logged to the specified file.
SQL Editor
Check this option and set the name of the log file to enable logging SQL queries and error
messages to the SQL log file. All the queries prepared or executed in SQL Editor and Visual
Query Builder will be logged to the specified file.
© 2007 EMS Database Management Solutions
82
4.2.6
SQL Manager 2007 for Oracle User's Manual
Setting SSH tunnel options
Check the Connect through the Secure Shell (SSH) tunnel option to establish
connection to intermediate SSH server before connecting to a database and forward all
<DB_SERVER> commands through the secure tunnel. Set the SSH connection properties in
the corresponding boxes: SSH host name, SSH port, SSH user name, and SSH password.
Note: <DB_SERVER> host name at the Connection page should be set relatively to the
SSH server in this case. For example, if both of <DB_SERVER> and SSH servers are
located on the same computer, you should specify localhost as Host name instead of
server's external host name or IP address.
SSH Key file
Specify the location (the secure box) of the Private key file on your local machine.
Supported Private Key file formats are:
OpenSSH
Putty
SSH.com
Note that you need to trust your local machine not to scrape your passphrase or a copy
of your Private key file while it is out of its secure box.
© 2007 EMS Database Management Solutions
83
SQL Manager 2007 for Oracle User's Manual
© 2007 EMS Database Management Solutions
84
4.3
SQL Manager 2007 for Oracle User's Manual
Editing Local Naming parameters
Local names parameters are gathered in TNS file, which is a configuration file that
contains net service names mapped to connect descriptors for the local naming method,
or net service names mapped to listener protocol addresses.
To call the TNS File Constructor window right-click on the group/database and select the
Edit Local Naming parameters item of the context menu.
· Using navigation bar
· TNS File Constructor
· Viewing file contents
4.3.1
Using navigation bar
The navigation bar on the left allows you to:
Object bar:
· Select a database for editing within the current window.
© 2007 EMS Database Management Solutions
85
SQL Manager 2007 for Oracle User's Manual
General bar:
· Load contents from an external file
· Save current TNS file contents
· Test a network address selected for service
· Refresh the content of the active tab
Net Services bar:
· Append/insert a service to an existing service list
· Delete a new net service
· Move the service in the list up/down.
The next bar displays various actions according to the current page of
Constructor.
4.3.2
TNS File
TNS File Constructor
Use TNS File Constructor to edit the configuration file.
A net service name is an alias mapped to a database network address contained in a
connect descriptor. A connect descriptor contains the location of the listener through a
© 2007 EMS Database Management Solutions
86
SQL Manager 2007 for Oracle User's Manual
protocol address and the service name of the database to which to connect. Clients and
database servers (that are clients of other database servers) use the net service name
when making a connection with an application.
Net services
Service name
A simple name for a service that resolves to a connect descriptor. Use context menu to
insert/append/delete a service. You can also test a selected address with the help of the
corresponding menu item.
Description List Balancing
Used for client load balancing of multiple listeners. Press on a cell near the
to call the pop-up menu which allows to set the Balancing options:
service name
Use Oracle8 and previous compatible syntax
Enables using syntax which complies with the previous Oracle versions when creating TNS
file.
Try to connect via each address by turns until success
Correlates with LOAD_BALANCE=OFF.
Try to connect via each address randomly until success
This is by default
Try to connect via one address selected randomly success
Correlates with FAILOVER=OFF.
Use each address for connection by turns until success
Correlates with FAILOVER=OFF, LOAD_BALANCE=OFF, SOURCE_ROUTE=ON.
Use only the first address for connection
Correlates with FAILOVER=OFF, LOAD_BALANCE=OFF.
Descriptions
Connect data
Defines the database to which to connect. Use context menu to insert/append/delete a
connection. You can also test a selected address with the help of the corresponding
menu item.
Receive buffer / Send buffer
Specify, in bytes, the buffer space for receive/send operations of sessions. This
parameter is supported by the TCP/IP, TCP/IP with SSL, and SDP protocols.
SDU
Optimizes the transfer rate of data packets being sent across the network with the
session data unit (SDU) size you specify.
Type of Service
Use this parameter to specify the type of service to use for an Oracle Rdb database. This
parameter should only be used if the application supports both an Oracle Rdb and Oracle
© 2007 EMS Database Management Solutions
87
SQL Manager 2007 for Oracle User's Manual
database service, and you want the application to load balance between the two.
Addresses
Define a list of protocol addresses.
Address list
Use corresponding buttons above the group or context menu items to add/insert/delete
an address list.
Click on the name of the protocol to call the menu which allows to set protocol options host, protocol and port.
Then set Receive buffer / Send buffer parameters, if needed.
Testing of a selected address can be done with the help of the corresponding menu item
or button.
4.3.3
Viewing file contents
At this tab you may see the result TNS file contents. The contents can be saved to file or
copied to clipboard.
With the help of the navigation bar you can load an existing TNS file to be edited either
© 2007 EMS Database Management Solutions
88
SQL Manager 2007 for Oracle User's Manual
within the TNS File Constructor or manually. Connection addresses listed in address list
may be tested by selecting the corresponding item of Navigation bar.
Editing Local Naming parameters
© 2007 EMS Database Management Solutions
89
4.4
SQL Manager 2007 for Oracle User's Manual
Editing Profile parameters
Profile Parameter Editor enables you to:
·
·
·
·
·
·
·
Specify the client domain to append to unqualified names
Prioritize naming methods
Enable logging and tracing features
Route connections through specific processes
Configure parameters for external naming
Configure Oracle Advanced Security
Use protocol-specific parameters to restrict access to the database
To call the Profile Parameters window right-click on the group/database and select the
Edit Profile Parameters item of the context menu.
·
·
·
·
·
General options
Naming options
Oracle Advaced Security
Configure Utilities
Viewing file contents
Availability:
© 2007 EMS Database Management Solutions
90
SQL Manager 2007 for Oracle User's Manual
Windows Full
Windows Lite
4.4.1
Yes
Yes
General options
Here you can take a brief look at the general server configuration options.
Tracing
Trace level
Turns tracing on/off, at a specific level. Select client level at the appropriate drop-down
box.
Trace directory and Trace filename
Specify the name of the trace file and the directory where it should be stored.
Please note that tracing options may be configured for the server as well as for the client.
You need to switch to the appropriate tab of the
Tracing group.
Client trace file name should be unique
Use the option to specify whether or not a unique trace file is created for each client
trace session. When the value is set to on, a process identifier is appended to the name
of each trace file, enabling several files to coexist.
Logging
Log directory
Specify the destination directory for the client (if the
(if the Server tab is selected) log file.
Client tab is selected) or DB server
Log file name
Specify the name of the log file for the client/DB server.
Routing
Route the client to an Connection Manager protocol address
Routes the client to a protocol address for an Oracle Connection Manager.
Always use a dedicated server
Enables connections from this client use a dedicated server process, even if shared server
is configured.
Advanced
Wait duration for active connection probe
Use this parameter to specify a the time interval, in minutes, to send a probe to verify
that client/server connections are active.
Client registration ID
Set a unique identifier for this client computer. This identifier is passed to the listener with
© 2007 EMS Database Management Solutions
91
SQL Manager 2007 for Oracle User's Manual
any connection request and is included in the Audit Trail. The identifier can be any
alphanumeric string up to 128 characters long.
Disable signal handling for Linux
Use this parameter to turn signal handling on or off for UNIX systems.
Disable Out-of-Band break messages
If turned on, disables the ability to send and receive "break" messages using urgent data
provided by the underlying protocol. Once enabled, this feature applies to all protocols
used by this client.
4.4.2
Naming options
Methods
The Selected list indicates the order of the naming methods, such as TNSNAMES or
Oracle Names, that will be used for client name requests.
To include an item from to the Selected, move it from the Available list to the Selected
by double-clicking or dragging their names. To remove an item from the list, move it back
in the same way. You can also use the arrow buttons to move the selected items
(multiple selection can be performed using Ctrl or Shift).
The Preferred Servers tab
Indicates the name, addresses, and order of Oracle Names servers that will be used for a
© 2007 EMS Database Management Solutions
92
SQL Manager 2007 for Oracle User's Manual
client's name requests.
Use context menu to insert/append/delete a server. You can also test a selected address
with the help of the corresponding menu item.
The Oracle names tab
Wait duration before disconnection from Names server
Limits the amounts of time the Oracle Names server will wait for the connection from a
client to complete.
Default domain
Indicates the domain from which the client most often requests names. When this
parameter is set, the default domain name will be automatically appended to any
unqualified service name.
Wait duration before connection retry
Determines how long a client will wait for a response from an Oracle Names server before
reiterating the request to the next server in the preferred servers list.
Number of retries per each Names server
Specifies the number of times the client should try each server in the list of preferred
servers before allowing the operation to fail.
Number of connections to a Names server
Determines how many connections an Oracle Names client may have open at one time.
© 2007 EMS Database Management Solutions
93
SQL Manager 2007 for Oracle User's Manual
Initial number of preallocated messages
Determines the initial number of messages allocated in the client's message pool which are
used for forwarded message requests.
The DCE tab
DCE cell name
Specifies the Distributed Computing Environment (DCE) cell name (prefix) to use for name
lookup.
The NIS tab
NIS map file name
Specifies the file to be used to map Network Information Service (NIS) attributes to an
NIS mapname.
NIS is a Sun Microsystems' Yellow Pages (yp) client/server protocol for distributing system
configuration data such as user and host names between computers on a network.
© 2007 EMS Database Management Solutions
94
SQL Manager 2007 for Oracle User's Manual
4.4.3
Oracle Advaced Security
4.4.3.1
Authentication
Methods
Enables one or more authentication services. To include an item from to the Selected,
move it from the Available list to the Selected by double-clicking or dragging their
names. To remove an item from the list, move it back in the same way. You can also use
the arrow buttons to move the selected items (multiple selection can be performed using
Ctrl or Shift).
The Kerberos5 tab
Service name
Define the name of the service used to obtain a Kerberos service ticket
Credential cache file
Specifiy the complete path name to the Kerberos credentials cache file.
© 2007 EMS Database Management Solutions
95
SQL Manager 2007 for Oracle User's Manual
Configuration file
Specify the complete path name to the Kerberos configuration file, which contains the
realm for the default KDC and maps realms to KDC hosts.
Realm translation file
Specify the complete pathname to the Kerberos realm translation file, which provides a
mapping from a host name or domain name to a realm.
Key table
Specify the complete path name to the Kerberos principal/secret key mapping file, which
is used to extract keys and decrypt incoming authentication information.
Waiting time before credential expiration
Specify how many seconds can pass before a Kerberos credential is considered out of
date.
The CyberSAFE tab
GSSAPI service
Define the CyberSAFE service principal.
The Identix tab
Database
Specify the service name or alias for the authentication fingerprint database.
Database user
Specify the well known user name for the fingerprint database.
Database password
Specify the well known password for the fingerprint database.
© 2007 EMS Database Management Solutions
96
SQL Manager 2007 for Oracle User's Manual
Idenix method
Specify the method name for the fingerprint database. The method name must be
ORACLE.
The RADIUS tab
Host name
Specifies the location of the primary RADIUS server, either by its host name or IP address.
Port
Listening port of the primary RADIUS server.
Number of connection retries
Times to resend.
Please note that parameters listed above (i.e. host name, port and number of connection
retries) may be configured for the primary server as well as for the alternative server. You
need to switch to the appropriate tab.
Wait duration before disconnection from server
Time to wait for response.
RADIUS secret key file
Specifies the full path to the file containing the RADIUS shared secret.
Default keyword
This parameter sets the keyword to request a challenge from the RADIUS server. User
types no password on the client.
Interface class name
Sets the name of the Java class that contains the graphical user interface when RADIUS
is in the challenge-response (asynchronous) mode.
Send accounting
Turns accounting on and off. If you enable accounting, packets will be sent to the active
RADIUS server at the listening port plus one. By default, packets are sent to port 1646.
You need to turn this feature on only when your RADIUS server supports accounting and
you want to keep track of the number of times the user is logging on to the system.
Challenge response
This parameter turns on or turns off the challenge-response, or asynchronous, mode
support.
© 2007 EMS Database Management Solutions
97
4.4.3.2
SQL Manager 2007 for Oracle User's Manual
Integrity and Encryption
Encryption
Here you determine a list of encryption algorithms used by this client or server acting as a
client. This list is used to negotiate a mutually acceptable algorithm with the other end of
the connection.
To include an item from to the Selected, move it from the Available list to the Selected
by double-clicking or dragging their names. To remove an item from the list, move it back
in the same way. You can also use the arrow buttons to move the selected items
(multiple selection can be performed using Ctrl or Shift).
Please note that you need to switch to the
algorithms used by server.
Server tab to form a list of encryption
Encryption seed
The characters that form the value for this parameter can be used to seed the random
number generator that is used to generate cryptographic key material. The more random
the characters entered into this field are, the stronger the keys are.
© 2007 EMS Database Management Solutions
98
SQL Manager 2007 for Oracle User's Manual
Integrity
This parameter specifies a list of data integrity algorithms this client or server acting as a client uses.
This list is used to negotiate a mutually acceptable algorithm with the other end of the connection.
To include an item from to the Selected, move it from the Available list to the Selected
by double-clicking or dragging their names. To remove an item from the list, move it back
in the same way. You can also use the arrow buttons to move the selected items
(multiple selection can be performed using Ctrl or Shift).
Checksum level
This parameter specifies the desired data integrity behavior when a client or another server acting as a
client connects to this server.
Please note that you need to switch to the Server tab to form a list of integrity algorithms used by
server.
© 2007 EMS Database Management Solutions
99
4.4.3.3
SQL Manager 2007 for Oracle User's Manual
TCP/IP Access Rights
Use the Check access rights for TCP/IP connections option to determine which clients
to allow or deny access.
Grant access for
Specify which clients are allowed access to the database. This list takes precedence over
the Deny access for list if both lists are present.
Deny access for
Specify which clients are denied access to the database.
You can select to preempt delays in buffer flushing within the TCP/IP protocol stack by
enabling the corresponding option.
4.4.3.4
SSL
Wallet configuration
Specify the location of wallets. Wallets are certificates, keys, and trustpoints processed
by SSL.
Method
Specify the type of storage.
Directory
Specify the location of Oracle wallets on file system.
© 2007 EMS Database Management Solutions
100
SQL Manager 2007 for Oracle User's Manual
Certificate revocation checking
Method
Configure a revocation check for a certificate.
CRL file / CRL path
Specify the destination directory and the name of the file where you can assemble the
CRL of CAs for client authentication.
Cipher suite configuration
Use this group to control what combination of encryption and data integrity is used by the
Secure Sockets Layer (SSL).
To include an item from to the Selected, move it from the Available list to the Selected
by double-clicking or dragging their names. To remove an item from the list, move it back
in the same way. You can also use the arrow buttons to move the selected items
(multiple selection can be performed using Ctrl or Shift).
Require client SSL authetication
Use this option to force the version of the SSL connection. Clients and database servers
must use a compatible version.
Require server X.509 name match
Use the option to enforce that the distinguished name (DN) for the database server
matches its service name. If you enforce the match verifications, then SSL ensures that
the certificate is from the server. If you select to not enforce the match verification, then
SSL performs the check but allows the connection, regardless if there is a match. Not
enforcing the match allows the server to potentially fake its identify.
© 2007 EMS Database Management Solutions
101
4.4.4
SQL Manager 2007 for Oracle User's Manual
Configure Utilities
Oracle Enterprise Manager Daemon
Trace level
Turn tracing on or off. Set a specific level of tracing for the Oracle Enterprise Manager
daemon.
Trace directory
Specify the destination directory of the Oracle Enterprise Manager daemon trace file.
Trace mask
With this field you can specify that only the Oracle Enterprise Manager daemon trace
entries are logged into the trace file.
© 2007 EMS Database Management Solutions
102
SQL Manager 2007 for Oracle User's Manual
Oracle Names Control utility
Server password
Use the parameter NAMESCTL.SERVER_PASSWORD to indicate the value that matches the
configured password set in the names.ora file with the NAMES.PASSWORD parameter.
Encrypt password internally
If checked the password is sent to the Oracle Names server encrypted.
Enable a set of internal undocumented commands
The option enables/disables a set of internal undocumented commands.
Suppress any connection error messages
If checked, any error messages are suppressed when the client is unable to connect to a
default Oracle Names server.
Run sensitive commands without confirmation
Use this option to indicate whether sensitive commands should be prompted with a
confirmation when running the Oracle Names Control utility.
Trace level
Set a specific level of tracing for the Oracle Names Control utility.
Trace directory
Specify the directory where trace output from the Oracle Names Control utility is placed.
Trace file
Specify the file in which the Oracle Names Control utility trace output is placed.
Trace file name should be unique
Indicates whether or not a process identifier is appended to the name of each trace file
generated. If this option is enabled, several trace files can co-exist.
TNSPing utility
Trace level
Turn tracing on/off. If set to on, sets a specific level of tracing for the TNSPing utility.
Trace directory
Specify the destination directory for the TNSPing utility trace file.
© 2007 EMS Database Management Solutions
103
4.4.5
SQL Manager 2007 for Oracle User's Manual
Viewing file contents
At this tab you may see the result SQLNET.ORA Network Configuration file contents. The
contents can be saved to file or copied to clipboard.
With the help of the navigation bar you can load an existing TNS file to be edited either
© 2007 EMS Database Management Solutions
104
SQL Manager 2007 for Oracle User's Manual
within the Profile Parameter Editor or manually.
© 2007 EMS Database Management Solutions
105
4.5
SQL Manager 2007 for Oracle User's Manual
Oracle client checker
The Oracle client checker dialog allows you to check the validity of Oracle client. It also
provide common information on client settings.
The Oracle client checker dialog is called by pressing the appropriate button at the
Register Database Wizard (also available at the Database Registration Info dialog).
© 2007 EMS Database Management Solutions
106
4.6
SQL Manager 2007 for Oracle User's Manual
Database Information
The Database information form allows you to get all information on NLS parameters for
the database as well as configuration parameters for current instance and current
session which can be changed to optimize server performance.
To call the dialog please choose desired database in the DB Explorer tree and then select
the Database Information menu item from context menu. Another way is selecting the
appropriate item from View section of the program main menu.
Common Parameters
Instance Parameters
Extended Parameters
© 2007 EMS Database Management Solutions
107
4.6.1
SQL Manager 2007 for Oracle User's Manual
Common Parameters
The NLS database environment is established on creating a database and partially via
initialization parameter file at instance startup. At this tab you can obtain all information
on database common parameters, as well as NLS instance and session parameters.
The parameters listed at this tab re read-only and cannot be changed.
At the top of the form there is a block displaying all necessary information on the server
an all its components and their versions.
4.6.2
Instance Parameters
At this tab you can view and edit instance configuration parameters thus tuning its
performance.
© 2007 EMS Database Management Solutions
108
SQL Manager 2007 for Oracle User's Manual
At the bottom of the form you can see the Parameter editor which displays detailed
information on the parameter selected. Some parameter values can be changed at the
corresponding editor fields (you can recognize them by values at the Session/System
Modifiable columns).
4.6.3
Extended Parameters
At this tab there are extended database parameters collected, such as database startup
time, date of creation, database role, information on current locks, database cache, pool
size, etc. All the parameters are read-only.
© 2007 EMS Database Management Solutions
109
SQL Manager 2007 for Oracle User's Manual
© 2007 EMS Database Management Solutions
110
4.7
SQL Manager 2007 for Oracle User's Manual
Database Statistics
The Database Statistics form provides all essential statistics on the database selected system statistics, statistics on sessions (including hit ratio, information on locks and
processes); statistics on storage, wait events, latches, etc.
To call the Database Statistics form you need to choose desired database in the DB
Explorer tree and then select the Database Statistics menu item from context menu.
Another way is selecting the appropriate item from View section of the program main
menu.
The navigation bar at the left (Refresh Options section) allows you to set the time of
refreshing the statistics information.
System Statistics
Last Analyze Stats
Sessions
Storage
SGA
Wait Events
Latches
4.7.1
System Statistics
This tab of the dialog allows to view database statistics; all stats are grouped into
classes - User, Redo, Enqueue, RAC (Real Application Clusters), SQL, Debug, etc.
With the help of the Class button on a top grey header you can filter the class of
statistics displayed.
© 2007 EMS Database Management Solutions
111
4.7.2
SQL Manager 2007 for Oracle User's Manual
Last Analyze Stats
A this tab you can see date and time of the last statistics gathered on tables and indices.
You can select tables/indices to gather statistics for them with the help of respective
context menu item opened in the DB Explorer tree. (to select all the tables and indices
you can choose the whole schema as well).
With the help of the Object Type button on a top grey header you can filter the object
type for statistics to be displayed.
© 2007 EMS Database Management Solutions
112
4.7.3
SQL Manager 2007 for Oracle User's Manual
Sessions
At the Sessions tab of the Database Statistics form you can find all necessary
information on current sessions at desired database; it provides information on hit ratio,
processes and locks.
The grid at the top of the frame lists all the sessions opened to selected database (The
most I/O active sessions are coloured red) and their parameters - SID, status, type
information on CPU time and UGA memory.
With the help of respective items of the navigation bar allows you to kill or disconnect
session selected.
At the lower part of the frame the information on hit ratio, processes and locks is
displayed.
Hit Ratio
Process
Locks
© 2007 EMS Database Management Solutions
113
4.7.3.1
SQL Manager 2007 for Oracle User's Manual
Hit Ratio
This tab provides session hit ratio details and displays hit ratio dynamics graphically.
The hit ratio of a user session is the ratio of number of correct predictions and the total
number of links the user traversed in the session.
4.7.3.2
Process
This tab provides details on processes and displays CPU usage by sessions graphically.
© 2007 EMS Database Management Solutions
114
4.7.3.3
SQL Manager 2007 for Oracle User's Manual
Locks
This tab displays all session locks. Select the desired session from the top list to see its
locks/locked objects and detailed information on them at the bottom frame.
4.7.4
Storage
This tab allows viewing details on storage attributes on selected tablespaces, control
files, data files, etc.
Please select the desired tablespace at the top frame to see its storage details at the
bottom frame. You can also filter attibutes by segment type by defining it at the
respective drop-down list.
© 2007 EMS Database Management Solutions
115
SQL Manager 2007 for Oracle User's Manual
To get information on control files/data files or details of RBS (rollback segment ) activity by pressing
corresponding button at the bottom of the frame.
4.7.5
SGA
This tab allows you to view statistics on memory usage at SGA which is a group of shared
memory structures that contain data and control information for one Oracle database
instance.
At the Summary SGA frame the information on SGA memory and shred pool memory is
available; it is also displayed graphically as a diagram (note that tou can click on it and
holding the mouse button in order to rotate the diagram to get the best view).
© 2007 EMS Database Management Solutions
116
SQL Manager 2007 for Oracle User's Manual
To obtain detailed information on library/data dictionary cache you need to switch to the corresponding
tab by selecting the appropriate button at the bottom of the frame.
4.7.6
Wait Events
The following tab displays all wait events which present in the Oracle database server.
For detailed information on wait event parameters and their descriptions please see your
Oracle Database reference.
© 2007 EMS Database Management Solutions
117
4.7.7
SQL Manager 2007 for Oracle User's Manual
Latches
Latches are low level serialization mechanisms used to protect shared data structures in
the SGA. The implementation of latches is operating system dependent, particularly in
regard to whether a process will wait for a latch and for how long.
This tab displays aggregate latch statistics for both parent and child latches, grouped by
latch name.
© 2007 EMS Database Management Solutions
118
SQL Manager 2007 for Oracle User's Manual
For detailed information on latches and their descriptions please see your Oracle Database reference.
© 2007 EMS Database Management Solutions
Part
V
120
5
SQL Manager 2007 for Oracle User's Manual
Database Objects Management
SQL Manager 2007 for Oracle provides powerful tools to manage database objects.
Note: before working with database objects in SQL Manager 2007 for Oracle you should
Database Management).
connect to the database first (see
Create New Database Object
To create a database object:
Select the Database | New Object menu item.
New Object Dialog.
Select the type of an object to create in the
Follow the steps of the wizard or edit object properties in the dialog depending on the
selected object type.
Note that you can also create a specific database object (e.g. new table or new
procedure) by selecting the appropriate item of the explorer tree context menu or by
pressing the <Ctrl + N> hotkey.
Drop Database Object
To drop a database object:
Select a database object to drop in the explorer tree.
Right-click the object to drop to bring the popup menu.
Select the Drop <object type> <object name> menu item.
Confirm dropping in the dialog window.
Edit Database Object
To edit a database object:
Select a database object in the explorer tree.
Right-click the object to drop to bring the popup menu.
Select the Edit <object type> <object name> menu item.
© 2007 EMS Database Management Solutions
121
5.1
SQL Manager 2007 for Oracle User's Manual
New Object
The New Object dialog allows you to select an object type for creating and run the
appropriate wizard or dialog. To open the dialog select the Database | New Object...
menu item.
Select a database, where the new object should be created, from the
Database
dropdown list. Pick an object type icon and click the OK button to invoke the
corresponding wizard or dialog.
See also:
Duplicate Object Wizard
Availability:
Windows Full
Windows Lite
© 2007 EMS Database Management Solutions
Yes
Yes
122
5.2
SQL Manager 2007 for Oracle User's Manual
Duplicate Object
To duplicate a database object you can either select it in the explorer tree and use the
Duplicate <object type> <object name>... item from the object popup menu, or use
the Database | Duplicate Object... menu item to invoke the Duplicate Object Wizard.
5.2.1
Duplicate Object Wizard
Use the Duplicate Object Wizard to create a new database object with the same
properties as one of the existing ones. To open the wizard select the
Database |
Duplicate Object... menu item.
·
·
·
·
·
Selecting source database
Selecting object to duplicate
Selecting destination database
Modifying new object's definition
Using templates
See also:
New Object
© 2007 EMS Database Management Solutions
123
5.2.1.1
SQL Manager 2007 for Oracle User's Manual
Selecting source database
Select the database containing a source object.
© 2007 EMS Database Management Solutions
124
5.2.1.2
SQL Manager 2007 for Oracle User's Manual
Selecting object to duplicate
Select a database object to copy its properties to the new object.
© 2007 EMS Database Management Solutions
125
5.2.1.3
SQL Manager 2007 for Oracle User's Manual
Selecting destination database
Select the database to create a new object, set the name of the new database object.
© 2007 EMS Database Management Solutions
126
5.2.1.4
SQL Manager 2007 for Oracle User's Manual
Modifying new object's definition
Browse the result SQL statement. You can edit it if necessary. Click
done.
Finish button when
Close the Wizard after duplicating
Check this option if you don't intend to duplicate more objects.
Open object when finished
This control defines whether the object duplicated should be opened with the
corresponding object editor after finishing.
© 2007 EMS Database Management Solutions
127
SQL Manager 2007 for Oracle User's Manual
© 2007 EMS Database Management Solutions
128
5.3
SQL Manager 2007 for Oracle User's Manual
Schema objects
A schema is a collection of logical structures of data, or schema objects. A schema is
owned by a database user and has the same name as that user. Each user owns a single
schema. Schema objects can be created and manipulated with SQL and include the
following types of objects:
Array Types
Clusters
Database links
Database triggers
Dimensions
Functions
Libraries
Indices
Index Types
Java classes, Java resources, Java sources
Materialized views
Materialized view logs
Object types, Object type bodies
Operators
Packages, Package bodies
Procedures
Sequences
Synonyms
Tables
Triggers
Views
Use DB Explorer tree to navigate between schemas and its objects.
See also:
Non Schema objects
5.3.1
Storage attributes
The Storage properties frame lets you specify how a database object should be stored
in a database. Storage parameters affect both how long it takes to access data stored in
the database and how efficiently space in the database is used.
First specify object's physical attributes - Tablespace (which is an allocation of space in
the database that can contain schema objects.) and
Buffer pool.
The Buffer pool parameter lets you specify a default buffer pool or cache for an object.
All blocks for the object are stored in the specified cache.
· The KEEP buffer pool retains the schema object's data blocks in memory.
· The RECYCLE buffer pool eliminates data blocks from memory as soon as they are no
longer needed.
· The DEFAULT buffer pool contains data blocks from schema objects that are no
© 2007 EMS Database Management Solutions
129
SQL Manager 2007 for Oracle User's Manual
tassigned to any buffer pool, as well as schema objects that are explicitly assigned to
the DEFAULT pool.
Initial number of transactions
Specify the initial number of concurrent transaction entries allocated within each data
block allocated to the database object.
Use the Cache option to indicate how
Oracle should store blocks in the buffer cache.
Specify Row dependencies if you want to enable row-level dependency tracking. This
setting is useful primarily to allow for parallel propagation in replication environments.
Extents
An extent is a logical unit of database storage space allocation made up of a number of
contiguous data blocks. One or more extents in turn make up a segment. When the
existing space in a segment is completely used, Oracle allocates a new extent for the
segment.
Initial extent
Specify the size of the first extent of the object.
when you create the schema object.
Oracle allocates space for this extent
Next extent
Specify in bytes the size of the next extent to be allocated to the object.
Percent increase
Specify the percent by which the third and subsequent extents grow over the preceding
extent. The default value is 50, meaning that each subsequent extent is 50% larger than
the preceding extent.
Minimum extent
Specify the total number of extents to allocate when the object is created. This
parameter lets you allocate a large amount of space when you create an object, even if
the space available is not contiguous.
Maximum extent
Specify the total number of extents, including the first, that Oracle can allocate for the
object.
Set Free lists properties for the current object in the appropriate group.
Free lists
The default and minimum value for this parameter is 1, meaning that each free list group
contains one free list.
Groups
Specify the number of groups of free lists for the database object you are creating. The
default and minimum value for this parameter is 1.
Space usage parameters
© 2007 EMS Database Management Solutions
130
SQL Manager 2007 for Oracle User's Manual
Enable you to control the use of free space for inserts and updates to the rows in all the
data blocks of a particular segment.
The Percent free parameter sets the minimum percentage of a data block to be reserved
as free space for possible updates to rows that already exist in that block.
The Percent used parameter sets the minimum percentage of a block that can be used
for
row data plus overhead before new rows are added to the block.
The Parallel and Parallel options groups lets you parallelize the creation of the object.
Select the Parallel option if you want to select a Degree of parallelism equal to the
number of CPUs available on all participating Instances.
5.3.2
Editing object description
The Description tab allows you to view and edit the comment for the object.
5.3.3
Viewing object DDL definition
The DDL tab displays the SQL statements for creating the objects with all its subobjects
(if there are any). This text is read-only. If you want to change the object definition, use
the appropriate editor tabs instead, or copy the text to the Windows Clipboard and paste
it in the SQL Editor or SQL Script Editor.
© 2007 EMS Database Management Solutions
131
5.3.4
SQL Manager 2007 for Oracle User's Manual
Browsing object dependecies
The Dependencies tab allows you to view objects that depend on edited object and
objects that edited object depends. Below you can see DDL of currently selected object.
Double-click on any shown object opens the appropriate object editor.
© 2007 EMS Database Management Solutions
132
5.3.5
SQL Manager 2007 for Oracle User's Manual
Tables
Relational databases store all their data in tables. A table is a data structure consisting
of an unordered set of horizontal rows, each containing the same number of vertical
columns. The intersection of an individual row and column is a field that contains a
specific piece of information. Much of the power of relational databases comes from
defining the relations among the tables.
Create table
To create a new table:
· Select the Database | New Object menu item.
· Select Table in the New Object window.
· Edit table properties and fields on the appropriate tabs of the
New Table window.
Hint: To create new table you can also right-click the
Tables node of the explorer
tree and select the New Table... item from the popup menu.
To create a new table with the same properties as one of the existing tables has:
· Select the Database | Duplicate Object menu item.
· Follow the instructions of the Duplicate Object Wizard.
The Duplicate Object Wizard window allows you to select the database to create the new
table in and to edit the result SQL statement for creating the table.
Edit table
© 2007 EMS Database Management Solutions
133
SQL Manager 2007 for Oracle User's Manual
To edit the existing table (manage its fields, indices, data, etc):
· Select the table for editing in the explorer tree (type the first letters of the table
name for quick search).
· Right-click and select the Edit Table <Table_Name> item in the popup menu or
simply double-click the table.
· Edit table subobjects and data on the appropriate tabs of the
Table Editor.
Drop table
To drop a table:
· Select the table for editing in the explorer tree.
· Right-click and select the Drop Table <Table_Name> item from the popup menu.
· Confirm dropping in the dialog window.
© 2007 EMS Database Management Solutions
134
5.3.5.1
SQL Manager 2007 for Oracle User's Manual
New table
New Table window allows you to create new table, set table properties, specify table
fields and edit table description.
New Table window can be open automatically after the table is created. (see
Table for details).
·
·
·
·
Using navigation bar
Setting table properties
Object storage attributes
Specifying table fields
See also:
Table Editor
Field Editor
5.3.5.1.1 Using navigation bar
The navigation bar on the left allows you to:
Object bar:
© 2007 EMS Database Management Solutions
Create
135
SQL Manager 2007 for Oracle User's Manual
· Select a database for creating table.
General bar:
· Compile the current table definition.
· Bring the window to its default size.
5.3.5.1.2 Setting table properties
The Table tab lets you set table properties.
First, specify table name and schema to which current table belongs. Then define the
type of the table.
For Regular tables set some type-specific options:
Monitoring
Use the option to start the collection of modification statistics on this table.
Set Logging whether the creation of the table will be logged in the redo log file.
No row movement
This option lets you specify whether the database can move a table row. It is possible for
a row to move, for example, during table compression or an update operation on
partitioned data. Select this option to allow the database to move a row, thus changing
the rowid.
© 2007 EMS Database Management Solutions
136
SQL Manager 2007 for Oracle User's Manual
Select the Global Temporary table type to specify that the table is temporary and that
its definition is visible to all sessions with appropriate privileges. The data in a temporary
table is visible only to the session that inserts the data into the table.
For a Global Temporary table you can set the following parameters:
Duration
The table segment and any data the table contains can be either session-specific or
transaction-specific data. You are able to specify whether the table segment and data
are session- or transaction-specific at the
On commit group.
On commit
This option specifies whether the data in the temporary table persists for the duration of
a transaction or a session.
Delete rows
Oracle will truncate the table (delete all its rows) after each commit.
Preserve rows
Oracle will truncate the table (delete all its rows) when you terminate the session.
© 2007 EMS Database Management Solutions
137
SQL Manager 2007 for Oracle User's Manual
Clustered table
Select Clustered to define that the table is a part of cluster. The columns listed at the
field below are the table columns that correspond to the cluster columns. To create a
clustered table you need to specify name of the cluster and its schema.
© 2007 EMS Database Management Solutions
138
SQL Manager 2007 for Oracle User's Manual
Index-organized table
This type of tables has a storage organization that is a variant of a primary B-tree. Data
for an index-organized table is stored in a B-tree index structure in a primary key sorted
manner. Besides storing the primary key column values of an index-organized table row,
each index entry in the B-tree stores the nonkey column values as well.
To set the IOT primary constraint move the primary key which uniquely identifies the row
from the Available list into Selected.
© 2007 EMS Database Management Solutions
139
SQL Manager 2007 for Oracle User's Manual
External tables
Defines that an external table should be created which accesses data in external sources
as if it were in a table in the database. To obtain more information on this table type
please see External table parameters.
Table storage attributes can be set at the
Physical attributes frame.
5.3.5.1.2.1 External table parameters
An external table does not describe any data that is stored in the database. Nor does it
describe how data is stored in the external source. Instead, it describes how the external
table layer needs to present the data to the server.
© 2007 EMS Database Management Solutions
140
SQL Manager 2007 for Oracle User's Manual
Type
Specify The Access Driver type - ORACLE_LOADER, which lets you read table data from
an external table and load it into a database. Oracle also provides the ORACLE_DATAPUMP
type, which lets you unload data (that is, read data from a table in the database and
insert it into an external table) and then reload it into an Oracle database.
Parallel options
The degree of parallel access to an external table is specified using standard parallel hints
and with the PARALLEL clause.
Default directory name
Specify a default directory object corresponding to a directory on the file system where
the external data sources may reside.
Reject limit
Specify how many conversion errors can occur during a query of the external data before
an Oracle Database error is returned and the query is aborted.
Locations
© 2007 EMS Database Management Solutions
141
SQL Manager 2007 for Oracle User's Manual
Use the green plus button to specify one or more external data sources (red minus button
removes selected location). Usually the data source is a file, but it need not be. It is up
to the access driver to interpret this information in the context of the external data.
The dialog called by pressing the corresponding button provides the interface to the
external table access driver. You specify access parameters when you create the external
table.
The access parameters described in this chapter provide the interface to the external
table access driver. You specify access parameters when you create the external table.
Character set
Identifies the character set of the datafile.
© 2007 EMS Database Management Solutions
142
SQL Manager 2007 for Oracle User's Manual
Data endian
Indicates the endianness of data whose byte order may vary depending on the platform
that generated the datafile.
String size in
Indicates whether the lengths specified for character strings are in bytes or characters.
Byte order mark
Specify whether or not the datafile should be checked for the presence of a byte-order
mark (BOM).
· UNCHECK indicates that the datafile should not be checked for a BOM and that all the
data in the datafile should be read as data.
· CHECK indicates that the datafile should be checked for a BOM. This is the default
behavior for a datafile in a Unicode character set.
Skip
Skips the specified number of records in the datafile before loading. This parameter can
only be specified when nonparallel access is being made to the data.
Record length
Fixed
Identifies the records as all having a fixed size of length bytes. The size specified for
Fixed records must include any record termination characters, such as newlines.
Compared to other record types, fixed-length fields in fixed-length records are the easiest
field and record formats for the access driver to process.
Variable
Indicates that the records have a variable length and that each record is preceded by a
character string containing a number with the count of bytes for the record. The length
of the character string containing the count field is the size argument that follows the
Variable parameter. Note that size indicates a count of bytes, not characters. The count
at the beginning of the record must include any record termination characters, but it does
not include the size of the count field itself. The number of bytes in the record
termination characters can vary depending on how the file is created and on what
platform it is created.
Delimited by
Indicates the characters that identify the end of a record.
Delimited by newline
Specifies that the actual value used is platform-specific. On UNIX platforms, NEWLINE is
assumed to be "\n". On Windows NT, NEWLINE is assumed to be "\r\n".
Files
Badfile
Name the file to which records are written when they cannot be loaded because of errors.
The purpose of the bad file is to have one file where all rejected data can be examined
and fixed so that it can be loaded.
© 2007 EMS Database Management Solutions
143
SQL Manager 2007 for Oracle User's Manual
Discard file
Name the file to which records are written that fail the condition in the LOAD WHEN
clause.
Log file
Name the file that contains messages generated by the external tables utility while it was
accessing data in the datafile.
Setting any of the three parameters described above you are to specify an appropriate
directory/filename.
Storage
Read size
Specify the size of the read buffer. The size of the read buffer is a limit on the size of the
largest record the access driver can handle.
Data cache
Specify the date cache size (in entries). By default, the date cache feature is enabled
(for 1000 elements). To completely disable the date cache feature, set it to 0. The date
cache feature is only available for direct path loads.
Load when
Identify the records that should be passed to the database.
The following are some examples:
empid != BLANKS
(dept_id = "SPORTING GOODS" OR dept_id = "SHOES") AND total_sales != 0
At the top of the form you specify default parameters for the fields as described below:
© 2007 EMS Database Management Solutions
144
SQL Manager 2007 for Oracle User's Manual
Terminated by
Define the delimiter to show that everything between the current position in the record
and the next occurrence of the termination string is considered part of the field.
Start / End
If you set these parameters, the access driver starts at the current position in the record
and skips over all whitespace looking for the first delimiter. All whitespace between the
current position and the first delimiter is ignored. Next, the access driver looks for the
second enclosure delimiter (or looks for the first one again if a second one is not
specified). Everything between those two delimiters is considered part of the field.
The Optionally parameter means the Start / End delimiters can either both be present or
both be absent.
Trim
Used to specify that spaces should be trimmed from the beginning of a text field, the end
of a text field, or both. Spaces include blanks and other nonprinting characters such as
tabs, line feeds, and carriage returns.
© 2007 EMS Database Management Solutions
145
SQL Manager 2007 for Oracle User's Manual
Missing field values are null
Indicates that if there is not enough data in a record for all fields, then those fields with
missing data values are set to NULL.
Reject rows with all null fields
Indicates that a row will not be loaded into the external table if all referenced fields in the
row are null.
The Field list group identifies the fields in the datafile and their datatypes.
Field name
is a string identifying the name of a field in the datafile.
Data type
Indicates the datatype of the field. If datatype is omitted, the access driver assumes the
datatype is CHAR(255).
Size
Define the maximum size for the Data type.
StartPos
Number of bytes or characters from the beginning of the record to where the field begins.
It positions the start of the field at an absolute spot in the record rather than relative to
the position of the previous field.
EndPos
Indicates the absolute byte or character offset into the record for the last byte of the
field.
Note the the Position parameter should be specified if you use StartPos / EndPos
parameters.
At the bottom you can set specific parameters for the fields selected from the
Field list.
5.3.5.1.3 Specifying fields
The Fields tab is intended for specifying table fields. Double-click a field to open the Field
Editor for editing the field. A right-click displays the popup menu, allowing you to create
new, edit or drop the selected field. Using this menu you can also change the field order
or create a copy of the field.
See Fields for details.
© 2007 EMS Database Management Solutions
146
SQL Manager 2007 for Oracle User's Manual
Object table
Defines that an object table which is a table that uses an object type for a column
definition should be created. An object table is explicitly defined to hold object instances
of a particular type.
The columns of an object table correspond to the top-level attributes of type which is
specified at the Object type name field.
© 2007 EMS Database Management Solutions
147
5.3.5.2
SQL Manager 2007 for Oracle User's Manual
Table Editor
Table Editor is the basic SQL Manager 2007 for Oracle tool for working with tables. It
allows you to create, edit and drop table's fields, indices, foreign keys, and other table
subobjects, manage table data, and much more.
To open a table in the
Table for details).
·
·
·
·
·
·
·
·
·
·
·
Table Editor, just double-click it in the Explorer Tree (see
Using navigation bar
Managing table fields
Object storage attributes
Managing table foreign keys
Managing table checks
Managing table indices
Managing table triggers
Viewing table data
Editing object description
Viewing DDL definition
Browsing object dependencies
See also:
New Table
Field Editor
Foreign Key Editor
© 2007 EMS Database Management Solutions
Edit
148
SQL Manager 2007 for Oracle User's Manual
5.3.5.2.1 Using navigation bar
The navigation bar on the left allows you to:
Object bar:
· Select a database and a table for editing within the current window.
General bar:
· View current table Table properties
· Print table metadata
· View Dependency Tree for the table.
· Refresh the content of the active Table Editor tab
· Bring the window to its default size.
· Alter Table Editor options.
The next bar displays various actions according to the current page of
Table Editor.
The Explorer bar displays table subobjects in a form of a tree. You can edit a table
subobject by double-clicking it.
© 2007 EMS Database Management Solutions
149
SQL Manager 2007 for Oracle User's Manual
5.3.5.2.2 Managing fields
The Fields tab is intended for managing table fields. Double-click a field to open the Field
Editor for editing the field. A right-click displays the popup menu, allowing you to create
new, edit or drop the selected field. Using this menu you can also change the field order
or create a copy of the field.
See Fields for details.
© 2007 EMS Database Management Solutions
150
SQL Manager 2007 for Oracle User's Manual
5.3.5.2.3 Managing keys
The Keys tab is provided for managing table/view keys. Right-clicking in the tab area
allows you to add new, edit, or drop the selected key.
See Keys for details.
© 2007 EMS Database Management Solutions
151
SQL Manager 2007 for Oracle User's Manual
5.3.5.2.4 Managing foreign keys
The Foreign Keys tab is provided for managing table foreign keys. Right-clicking in the
tab area allows you to add new, edit, or drop the selected foreign key.
See Foreign Keys for details.
5.3.5.2.5 Managing checks
The Checks tab is provided for managing table checks. Double-click a check to open the
Check Editor for editing the check. A right-click displays the popup menu, allowing you to
create new, edit, or drop the selected check.
See Checks for details.
© 2007 EMS Database Management Solutions
152
SQL Manager 2007 for Oracle User's Manual
5.3.5.2.6 Managing indices
The Indexes tab is provided for managing table indexes. Double-click an index to open
the Index Editor for editing the index. A right-click displays the popup menu, allowing you
to create new, edit, or drop the selected index.
See Indices for details.
5.3.5.2.7 Managing triggers
The Triggers tab is provided for managing table triggers. Double-click a trigger to open
the Trigger Editor for editing the trigger. A right-click displays the popup menu, allowing
you to create new, edit, or drop the selected trigger.
© 2007 EMS Database Management Solutions
153
SQL Manager 2007 for Oracle User's Manual
See Triggers for details.
5.3.5.2.8 Viewing table data
The Data tab displays the table data as a grid (see Data View for details). The popup
menu of this tab and the Data Management navigation bar allow you to Export Data,
Import Data, Export as SQL Script.
© 2007 EMS Database Management Solutions
154
5.3.5.3
SQL Manager 2007 for Oracle User's Manual
Fields
Table fields are managed on the Fields tab of the Table Editor.
Add Field
To add a field to the table:
·
·
·
·
Open the table in the Table Editor/View Editor.
Open the Fields tab.
Right-click and select the New Field item from the popup menu
Edit field properties within the Fields Editor Dialog
Edit Field
To edit the table field:
· Open the table in the Table Editor.
· Open the Fields tab.
© 2007 EMS Database Management Solutions
155
SQL Manager 2007 for Oracle User's Manual
· Right-click the field and select the Edit Field item from the popup menu or simply double-click the
field to edit
· Edit field properties within the Fields Editor Dialog
Drop Field
To drop the table field:
·
·
·
·
Open the table in the Table Editor.
Open the Fields tab.
Right-click on the field to drop and select the
Confirm dropping in the dialog window
© 2007 EMS Database Management Solutions
Drop Field item from the popup menu.
156
SQL Manager 2007 for Oracle User's Manual
5.3.5.3.1 Field Editor
Field Editor dialog allows you to edit the properties of the table fields.
· Setting field name and type
· Setting field defaults
· Setting field description
See also:
Table Editor
5.3.5.3.1.1 Setting field name and type
Use the Column name edit box to set the field name. Note that the name of the field
must be unique among all the field names in the table.
The Data type tab defines the type of the field data. For
specify the schema.
User-defined data type please
Type
Here you can set the field type by selecting it from the drop-down list of the standard or
user-defined data types.
Size
© 2007 EMS Database Management Solutions
157
SQL Manager 2007 for Oracle User's Manual
Defines the length of the field value.
Scale
Defines the precision of the field value for float data types.
Not Null
Check this option to prevent the entry of NULL or unknown values in column. Not null
affects all INSERT and UPDATE operations on a column.
5.3.5.3.1.2 Setting field defaults
The Default tab allows you to define the default value for the column. You can either
select the default object from the database defaults or define the default value for the
column. The second option is unavailable for the Computed field type.
© 2007 EMS Database Management Solutions
158
SQL Manager 2007 for Oracle User's Manual
5.3.5.3.1.3 Setting field description
On the Description tab you can set the column description that can be any optional
text.
© 2007 EMS Database Management Solutions
159
5.3.5.4
SQL Manager 2007 for Oracle User's Manual
Keys
Keys are managed on the Keys tab of the Table Editor/View Editor.
A primary key constraint designates a column as the primary key of a table or view. A
composite primary key designates a combination of columns as the primary key.
Add Key
To add a key to the table or view:
·
·
·
·
Open the table/view in the Table Editor/View Editor.
Open the Keys tab.
Right-click and select the Add Key... item from the popup menu.
Edit key properties within the Key Editor dialog.
Edit Key
To edit key:
· Open the table/view in the Table Editor/View Editor.
· Open the Keys tab.
· Right-click the key and select the Edit Key item from the popup menu or simply
double-click the key to edit.
· Edit key properties within the Key Editor Dialog.
Drop Key
To drop the key:
·
·
·
·
Open the table or view in the Table Editor/View Editor.
Open the Keys tab.
Right-click the key to drop and select the Drop Key item from the popup menu.
Confirm dropping in the dialog window.
© 2007 EMS Database Management Solutions
160
SQL Manager 2007 for Oracle User's Manual
5.3.5.4.1 Key Editor
The Key Editor allows you to edit the properties of the key. It opens when you create a
new key or edit the existing one (see Create Key and Edit Key for details).
·
·
·
·
Using navigation bar
Editing key definition
Editing object description
Viewing DDL definition
See also:
Table Editor
Index Editor
Check Editor
Trigger Editor
© 2007 EMS Database Management Solutions
161
SQL Manager 2007 for Oracle User's Manual
Availability:
Windows Full
Windows Lite
Yes
Yes
5.3.5.4.1.1 Using navigation bar
The navigation bar on the left allows you to:
General bar:
· Compile the current key definition
· Refresh the content of the active tab
· Bring the window to its default size.
The next bar displays various actions according to the current page of
© 2007 EMS Database Management Solutions
Key Editor.
162
SQL Manager 2007 for Oracle User's Manual
5.3.5.4.1.2 Editing Key definition
Key Editor allows you to select fields for the key, when you add or edit a foreign key to
the table or view with the Table Editor/View Editor.
Name
Specify the key name or enable the System named option. In this case Oracle will
generate the check name automatically when compiling check definition.
Schema
Is the name of the schema to which the object belongs.
Table
Select the table or view for which the key is created.
To include fields to the key, move the fields from the Available Fields list to the
Included Fields by double-clicking or dragging them, both in the Table fields group and
in the Foreign table fields group. To remove the fields from the key, move them back in
the same way. You can also use the arrow buttons to move the selected fields (multiple
fields are selected by Ctrl or Shift).
Create as unique key
Designates a column as a unique key.
© 2007 EMS Database Management Solutions
163
SQL Manager 2007 for Oracle User's Manual
5.3.5.4.1.3 Setting Key options
Status
Specify Disabled to disable the integrity constraint. Set the option to
want the constraint to be applied to the data in the table or view.
Enabled if you
Validation
Correlates with the corresponding server constraint behaviour parameters and NOVALIDATE.
VALIDATE
Deferrable
Set the option to Initially immediate to indicate that Oracle should check this
constraint at the end of each subsequent SQL statement. Specify
Initially deferred to
indicate that Oracle should check this constraint at the end of subsequent transactions.
Rely
Correlates with the corresponding server constraint behaviour parameters NORELY.
Exceptions processing
© 2007 EMS Database Management Solutions
RELY and
164
SQL Manager 2007 for Oracle User's Manual
This group lets you define exception handling (e.g. causes Oracle to write to the
exceptions table information about any rows in the current table that violate the
constraint). Specify the schema and the name of the exceptions table.
Note: you cannot process exceptions a view constraint in this way.
5.3.5.5
Foreign Keys
Table/view foreign keys are managed on the Foreign Keys tab of the Table Editor/View
Editor.
A foreign key constraint (also called a referential integrity constraint) designates a column
as the foreign key and establishes a relationship between that foreign key and a specified
primary or unique key, called the referenced key. A composite foreign key designates a
combination of columns as the foreign key.
Add Foreign Key
To add a foreign key to the table:
·
·
·
·
Open the table or view in the Table Editor/View Editor.
Open the Foreign Keys tab.
Right-click and select the Add Foreign Key... item from the popup menu.
Edit foreign key properties within the Foreign Key Editor dialog.
Edit Foreign Key
To edit foreign key:
· Open the table or view in the Table Editor/View Editor.
· Open the Foreign Keys tab.
· Right-click the foreign key and select the Edit Foreign Key item from the popup menu
© 2007 EMS Database Management Solutions
165
SQL Manager 2007 for Oracle User's Manual
or simply double-click the key to edit.
· Edit foreign key properties within the Foreign Key Editor Dialog.
Drop Foreign Key
To drop the foreign key:
· Open the table/view in the Table Editor/View Editor.
· Open the Foreign Keys tab.
· Right-click the key to drop and select the Drop Foreign Key item from the popup
menu.
· Confirm dropping in the dialog window.
© 2007 EMS Database Management Solutions
166
SQL Manager 2007 for Oracle User's Manual
5.3.5.5.1 Foreign Key Editor
The Foreign Key Editor allows you to edit the foreign key fields and its other properties.
It opens when you create a new foreign key or edit the existing one (see
Create Foreign
Key and Edit Foreign Key for details).
·
·
·
·
Using navigation bar
Editing foreign key definition
Editing object description
Viewing DDL definition
See also:
Table Editor
Index Editor
Check Editor
Trigger Editor
© 2007 EMS Database Management Solutions
167
SQL Manager 2007 for Oracle User's Manual
Availability:
Windows Full
Windows Lite
Yes
Yes
5.3.5.5.1.1 Using navigation bar
The navigation bar on the left allows you to:
General bar:
· Compile the current foreign key definition
· View Dependency Tree for the foreign key.
· Refresh the content of the active Foreign Key Editor tab
· Bring the window to its default size.
The next bar displays various actions according to the current page of
Editor.
Foreign Key
5.3.5.5.1.2 Editing foreign key definition
Foreign Key Editor allows you to select fields for the foreign key, when you add or edit a
foreign key to the table or view w it h the Table Editor/View Editor.
Name
Specify the foreign key name or enable the System named option. In this case Oracle
will generate the check name automatically when compiling check definition.
Schema
Is the name of the schema to which the object belongs.
Table
Select the table or view for which the foreign key is created.
To include fields to the key, move the fields from the Available Fields list to the
Included Fields by double-clicking or dragging them, both in the Table fields group and
in the Foreign table fields group. To remove the fields from the key, move them back in
the same way. You can also use the arrow buttons to move the selected fields (multiple
fields are selected by Ctrl or Shift).
Delete rule:
· None
Produce an error indicating that the deletion or update would create a foreign key
constraint violation. If the constraint is deferred, this error will be produced at
constraint check time if there still exist any referencing rows. This is the default
© 2007 EMS Database Management Solutions
168
SQL Manager 2007 for Oracle User's Manual
action.
· Set Null
Set the referencing column(s) to null.
· Cascade
Delete any rows referencing the deleted row, or update the value of the referencing
column to the new value of the referenced column, respectively.
To get information on the foreign key options see
5.3.5.6
Setting key options.
Checks
Check specifies an expression producing a Boolean result which new or updated rows
must satisfy for an insert or update operation to succeed. Expressions evaluating to TRUE
or UNKNOWN succeed. Should any row of an insert or update operation produce a FALSE
result an error exception is raised and the insert or update does not alter the database. A
check constraint specified as a column constraint should reference that column's value
only, while an expression appearing in a table constraint may reference multiple columns.
Table checks are managed on the
© 2007 EMS Database Management Solutions
Checks tab of the Table Editor.
169
SQL Manager 2007 for Oracle User's Manual
Add Check
To add a check to the table:
·
·
·
·
Open the table in the Table Editor.
Open the Checks tab.
Right-click and select the Add Check... item from the popup menu.
Edit check properties within the Check Editor dialog.
Edit Check
To edit check:
· Open the table in the Table Editor.
· Open the Checks tab.
· Right-click the check and select the Edit Check item from the popup menu or simply
double-click the key to edit.
· Edit check properties within the Check Editor Dialog.
Drop Check
To drop the check:
·
·
·
·
Open the table in the Table Editor.
Open the Checks tab.
Right-click the key to drop and select the
Confirm dropping in the dialog window.
© 2007 EMS Database Management Solutions
Drop Check item from the popup menu.
170
SQL Manager 2007 for Oracle User's Manual
5.3.5.6.1 Check Editor
The Check Editor allows you to edit check properties. It opens when you create a new
check or edit the existing one (see Create Foreign Key and Edit Foreign Key for details).
·
·
·
·
Using navigation bar
Editing check definition
Editing object description
Viewing DDL definition
See also:
Table Editor
Index Editor
Foreign Key Editor
Trigger Editor
© 2007 EMS Database Management Solutions
171
SQL Manager 2007 for Oracle User's Manual
5.3.5.6.1.1 Using navigation bar
The navigation bar on the left allows you to:
General bar:
· Compile the current check definition
· View Dependency Tree for the check.
· Refresh the content of the active Check Editor tab
· Bring the window to its default size.
The next bar displays various actions according to the current page of
Check Editor.
5.3.5.6.1.2 Editing check definition
The Check tab allows you to enter condition for the check.
Name
Set the check name or enable the System named option. In this case Oracle will
generate the check name automatically when compiling check definition.
Schema
Is the name of the schema to which the object belongs.
Table
Select the table for the check from the drop-down list of the database tables.
© 2007 EMS Database Management Solutions
172
5.3.5.7
SQL Manager 2007 for Oracle User's Manual
Indices
Table indices are managed on the Indices tab of the Table Editor.
Create Index
To add an index to the table:
·
·
·
·
Open the table in the Table Editor.
Open the Indices tab.
Right-click and select the New Index item from the popup menu.
Edit the index properties within the Index Editor.
Edit Index
To edit the table index:
· Open the table in the Table Editor.
· Open the Indices tab.
· Right-click the index and select the Edit Index <Index_Name> or simply double-click
the index to edit.
· Edit the index properties within the Index Editor.
Drop Index
To drop the table index:
·
·
·
·
Open the table in the Table Editor.
Open the Indices tab.
Right-click on the index to drop and select the
Confirm dropping in the dialog window.
© 2007 EMS Database Management Solutions
Drop Index item from the popup menu.
173
5.3.5.8
SQL Manager 2007 for Oracle User's Manual
Triggers
A table trigger is a stored PL/SQL block associated with a table.
Table/view triggers are managed on the Triggers tab of the Table Editor/View Editor.
Create Trigger
To add a trigger to the table or view:
· Open the table or view in the Table Editor/View Editor.
· Open the Triggers tab.
· Right-click and select the New Trigger item from the popup menu.
© 2007 EMS Database Management Solutions
174
SQL Manager 2007 for Oracle User's Manual
· Edit the trigger properties within the Trigger Editor.
Edit Trigger
To edit the trigger:
· Open the table/view in the Table Editor/View Editor.
· Open the Triggers tab.
· Right-click the trigger and select the Edit Trigger <Trigger_Name> or simply
double-click the trigger to edit.
· Edit the trigger properties within the Trigger Editor.
Drop Trigger
To drop the trigger:
· Open the table or view in the Table Editor/View Editor.
· Open the Triggers tab.
· Right-click on the trigger to drop and select the Drop Trigger item from the popup
menu.
· Confirm dropping in the dialog window.
© 2007 EMS Database Management Solutions
175
5.3.6
SQL Manager 2007 for Oracle User's Manual
Views
A view is a logical table based on one or more tables or views. A view contains no data
itself. The tables upon which a view is based are called base tables.
Create view
To create a new view:
· Select the Database | New Object... menu item.
· Select View in the New Object dialog.
· Edit view definition within the View Editor.
Hint: To create new view you can also right-click the
Views node of the explorer tree
and select the New View... item from the popup menu. Or you can click the Create
View button on the toolbar of Table Editor.
Another way to create a view is building a query in the Visual Query Builder tool (click
the Create View button on the toolbar after finishing building).
To create a new view with the same properties as one of the existing views has:
· Select the Database | Duplicate Object... menu item.
· Follow the instructions of the Duplicate Object Wizard.
Edit view
To edit the existing view (manage its fields, indexes, data, etc):
· Select the view for editing in the explorer tree (type the first letters of the view name
for quick search).
· Right-click and select the Edit View <View_Name> item from the popup menu or
simply double-click the view.
· Edit view definition and data on the appropriate tabs of the View Editor.
To change the name of the view:
· Select the view to rename in the explorer tree.
© 2007 EMS Database Management Solutions
176
SQL Manager 2007 for Oracle User's Manual
· Right-click and select the Rename View <View_Name> item from the popup menu.
· Edit view name in the dialog window.
Drop view
To drop a view:
· Select the view to drop in the explorer tree.
· Right-click and select the Drop View <View_Name> item from the popup menu.
· Confirm dropping in the dialog window.
© 2007 EMS Database Management Solutions
177
5.3.6.1
SQL Manager 2007 for Oracle User's Manual
View Editor
The View Editor allows you to create new view and edit the existing view definition (view
name and the SELECT statement it implements). It opens when you create a new view or
edit the existing one (see Create View and Edit View for details).
To open a view in the
·
·
·
·
·
·
·
·
·
·
View Editor, double-click it in the explorer tree.
Using navigation bar
Editing View definition
Viewing fields
Managing keys
Managing foreign keys
Managing triggers
Viewing data
Editing object description
Viewing DDL definition
Browsing object dependencies
5.3.6.1.1 Using navigation bar
The navigation bar on the left allows you to:
© 2007 EMS Database Management Solutions
178
SQL Manager 2007 for Oracle User's Manual
Object bar:
Select a database and a view for editing within the current window.
General bar:
· Compile the current view
· Print metadata of the current view
· View Dependency Tree for the view
· Refresh the content of the active tab
· Bring the window to its default size.
The next bar displays various actions according to the current page of
View Editor.
5.3.6.1.2 Editing View definition
Name
Specify the name of the view.
Schema
Specify the schema to contain the view.
Force
Check this option if you want to create the view regardless of whether the base tables of
the view or the referenced object types exist or the owner of the schema containing the
view has privileges on them.
With check option
When enabled, this option indicates that Oracle prohibits any changes to the table or
view that would produce rows that are not included in the subquery (you can set it in
the User defined constraint name field).
Read only
When checked, this option indicates that the view cannot be updated.
© 2007 EMS Database Management Solutions
179
SQL Manager 2007 for Oracle User's Manual
You can give new names to the view fields in the
comma.
Fields area separating them with a
5.3.6.1.3 Viewing view fields
The Fields tab is provided for viewing fields represented in the view.
A right-click displays the popup menu, allowing you to export field name list or copy it to
clipboard.
© 2007 EMS Database Management Solutions
180
SQL Manager 2007 for Oracle User's Manual
5.3.6.1.4 Managing keys
The Keys tab is provided for managing table/view keys. Double-click a key to open the
Key Editor for editing it. Right-clicking in the tab area allows you to add new, edit, or drop
the selected key.
See Keys for details.
© 2007 EMS Database Management Solutions
181
SQL Manager 2007 for Oracle User's Manual
5.3.6.1.5 Managing foreign keys
The Foreign Keys tab is provided for managing table/view foreign keys. Double-click a
trigger to open the Foreign Key Editor for editing the foreign key. Right-clicking in the tab
area allows you to add new, edit, or drop the selected foreign key.
See Foreign Keys for details.
5.3.6.1.6 Managing triggers
The Triggers tab is provided for managing table triggers. Double-click a trigger to open
the Trigger Editor for editing the trigger. A right-click displays the popup menu, allowing
you to create new, edit, or drop the selected trigger.
See Triggers for details.
© 2007 EMS Database Management Solutions
182
SQL Manager 2007 for Oracle User's Manual
5.3.6.1.7 Viewing view data
The Data tab displays the view data as a grid (see Data View for details). The popup
menu of this tab and the Data Management navigation bar allow you to Export Data,
Import Data, Export as SQL Script.
5.3.7
Procedures
A procedure is a group of PL/SQL statements that you can call by name. A call
specification (sometimes called call spec) declares a Java method or a third-generation
language (3GL) routine so that it can be called from SQL and PL/SQL. The call spec tells
Oracle which Java method to invoke when a call is made. It also tells the database what
type conversions to make for the arguments and return value.
Creating Procedure
To create a new procedure:
· Select the Database | New Object... menu item.
· Select Procedure in the New Object dialog.
· Edit procedure within the Procedure Editor.
Hint : To create new procedure you can also right-click the Procedures node of the explorer tree
and select New Procedure... item from the popup menu.
To create a new procedure with the same properties as one of the existing procedures
© 2007 EMS Database Management Solutions
183
SQL Manager 2007 for Oracle User's Manual
has:
· Select the Database | Duplicate Object... menu item.
· Follow the instructions of the Duplicate Object Wizard.
Editing Procedure
To edit an existing procedure:
· Select the procedure for editing in the explorer tree (type the first letters of the
procedure name for quick search)
· Right-click and select the Edit Procedure item from the popup menu or simply
double-click the procedure.
· Edit procedure definition in the editor area of the Procedure Editor.
To change the name of a Procedure:
· Select the procedure to rename in the explorer tree.
· Right-click and select the Rename Procedure item from the popup menu.
· Edit procedure name in the dialog window.
Executing Procedure
To execute a procedure:
· Select the procedure in the explorer tree (type the first letters of the procedure name
for quick search).
· Right-click and select Edit Procedure item from the popup menu or simply double-click
the procedure.
· Execute procedure by clicking on the Execute Procedure item in the Procedure Editor.
Dropping Procedure
To drop a Procedure:
· Select the procedure to drop in the explorer tree.
· Right-click and select the Drop Procedure item from the popup menu.
· Confirm dropping in the dialog window.
© 2007 EMS Database Management Solutions
184
5.3.7.1
SQL Manager 2007 for Oracle User's Manual
Procedure Editor
The Procedure Editor allows you to create new procedure, execute the existing
procedure or edit its definition. It opens when you create a new procedure or edit the
existing one (see Create Procedure and Edit Procedure for details).
·
·
·
·
·
·
·
Using navigation bar
Editing procedure definition
Executing procedure
Specifying input parameters
Editing object description
Viewing DDL definition
Browsing object dependencies
© 2007 EMS Database Management Solutions
185
SQL Manager 2007 for Oracle User's Manual
Availability:
Windows Full
Windows Lite
Yes
Yes
5.3.7.1.1 Using navigation bar
The navigation bar on the left allows you to:
Object bar:
Select a database and a procedure for editing within the current window.
General bar:
· Compile the current procedure
· Execute the current procedure
· Print metadata of the current procedure
· View Dependency Tree for the procedure
· Refresh the content of the active tab
· Bring the window to its default size.
The next bar displays various actions according to the current page of
© 2007 EMS Database Management Solutions
Procedure Editor.
186
SQL Manager 2007 for Oracle User's Manual
5.3.7.1.2 Editing procedure definition
The Procedure tab allows you to view and edit the definition for the stored procedure.
Note: to paste input parameters into procedure text use <Ctrl+Shift+P> shortcut .
© 2007 EMS Database Management Solutions
187
SQL Manager 2007 for Oracle User's Manual
5.3.7.1.3 Executing procedure/function
Procedure Editor/Function Editor provides an ability to execute current procedure or
function. Click the Execute item of the navigation bar to execute the procedure/function.
If the procedure/function parameters, SQL Manager 2007 for Oracle allows you to specify
the values for these parameters in the Input Parameters dialog, which appears just before
execution. The result of the successfully executed procedure/function, as well as the
error message in case of execution failure, appears in the message panel at the bottom of
the Procedure Editor/Function Editor.
5.3.7.1.4 Specifying input parameters
If the stored procedure/function has parameters, the Input Parameter dialog appears
before executing it. It allows you to specify the values for all parameters. After changes
are done, click the OK button to execute the stored procedure/function, or the
Cancel
button to abort the execution.
© 2007 EMS Database Management Solutions
188
5.3.8
SQL Manager 2007 for Oracle User's Manual
Functions
A stored function (also called a user function or user-defined function) is a set of
PL/SQL statements you can call by name. Stored functions are very similar to procedures,
except that a function returns a value to the environment in which it is called. User
functions can be used as part of a SQL expression.
Create Function
To create a new user-defined function:
· Select the Database | New Object... menu item.
· Select Function in the New Object dialog.
· Edit user-defined function definition within the Function Editor.
Hint: To create new user-defined function you can also right-click the
Functions
node of the explorer tree and select the New Function... item from the popup menu.
To create a new user-defined function with the same properties as one of the existing
user-defined functions has:
· Select the Database | Duplicate Object... menu item.
· Follow the instructions of the Duplicate Object Wizard.
Edit Function
To edit the existing user-defined function:
· Select the user-defined function for editing in the explorer tree (type the first letters of
the user-defined function name for quick search).
· Right-click and select the Edit Function <Function_Name> item from the popup menu
or simply double-click the user-defined function.
· Edit user-defined function definition and description on the appropriate tabs of the
Function Editor.
© 2007 EMS Database Management Solutions
189
SQL Manager 2007 for Oracle User's Manual
Drop Function
To drop a user-defined function:
· Select the user-defined function to drop in the explorer tree.
· Right-click and select the Drop Function <Function_Name> item from the popup
menu.
· Confirm dropping in the dialog window.
© 2007 EMS Database Management Solutions
190
5.3.8.1
SQL Manager 2007 for Oracle User's Manual
Function Editor
The UDF Editor allows you to define user-defined function properties. It opens when you
create a new user-defined function or edit the existing one (see
Create UDF and Edit UDF
for details).
To open a view in the
·
·
·
·
·
·
UDF Editor, double-click it in the Explorer Tree.
Using navigation bar
Editing user-defined function definition
Browsing user-defined function parameters
Editing object description
Viewing DDL definition
Browsing object dependencies
5.3.8.1.1 Using navigation bar
The navigation bar on the left allows you to:
Object bar:
· Select a database and a user-defined function for editing within the current window.
General bar:
· Compile the current user-defined function definition
· Print metadata of the current user-defined function
· View Dependency Tree for the user-defined function
· Refresh the content of the active tab
· Bring the window to its default size
© 2007 EMS Database Management Solutions
191
SQL Manager 2007 for Oracle User's Manual
The next bar displays various actions according to the current page of
Function Editor.
5.3.8.1.2 Editing Function definition
The Function tab allows you to view and edit the definition for the user-defined function.
On executing a function please see
Executing procedure/function.
5.3.8.1.3 Browsing Function parameters
The Parameters tab is provided for browsing list of parameters for the user-defined
function. A right-click displays the popup menu, allowing you to export this list to desired
format.
© 2007 EMS Database Management Solutions
192
5.3.9
SQL Manager 2007 for Oracle User's Manual
Triggers
A trigger is an anonymous PL/SQL block or a call to a procedure implemented in PL/SQL or
Java
Oracle automatically executes a trigger when specified conditions occur.
Create Trigger
To create a new Trigger:
· Select the Database | New Object... menu item.
· Select Trigger in the New Object dialog.
· Edit Trigger definition within the Trigger Editor.
Hint: To create new Trigger you can also right-click the
Triggers node of the explorer
tree and select the New Trigger... item from the popup menu.
To create a new Trigger with the same properties as one of the existing Triggers has:
· Select the Database | Duplicate Object... menu item.
· Follow the instructions of the Duplicate Object Wizard.
Edit Trigger
To edit the existing Trigger:
· Select the Trigger for editing in the explorer tree (type the first letters of the Trigger
name for quick search).
· Right-click and select the Edit Trigger <Trigger_Name> item from the popup menu or
simply double-click the _Trigger.
· Edit Trigger definition and data on the appropriate tabs of the Trigger Editor.
© 2007 EMS Database Management Solutions
193
SQL Manager 2007 for Oracle User's Manual
Drop Trigger
To drop a Trigger:
· Select the user to drop in the explorer tree.
· Right-click and select the Drop Trigger <Trigger_Name> item from the popup menu.
· Confirm dropping in the dialog window.
5.3.9.1
Trigger Editor
The Trigger Editor allows you to define trigger properties. It opens when you create a
new trigger or edit the existing one (see Create trigger and Edit trigger for details).
·
·
·
·
·
Using navigation bar
Editing trigger definition
Editing object description
Viewing DDL definition
Browsing object dependencies
© 2007 EMS Database Management Solutions
194
SQL Manager 2007 for Oracle User's Manual
Availability:
Windows Full
Windows Lite
Yes
Yes
5.3.9.1.1 Using navigation bar
The navigation bar on the left allows you to:
Object bar:
· Select a database and a trigger for editing within the current window.
General bar:
· Compile the current trigger definition
· Print metadata of the current trigger
· View Dependency Tree for the trigger
· Refresh the content of the active tab
· Bring the window to its default size
The next bar displays various actions according to the current page of the
.
© 2007 EMS Database Management Solutions
Trigger Editor
195
SQL Manager 2007 for Oracle User's Manual
5.3.9.1.2 Editing trigger definition
The main trigger parameters are set on the Trigger tab.
Name
Name of the trigger; it must be unique to the database.
Trigger on
Table or view name, the trigger is created for.
Trigger type
Specify whether the trigger should fire after/before/instead of executing the triggering
event ('instead of' mode is only available for views). For row triggers, the trigger is fired
before each affected row is changed.
For each
Specify Row value for this option to designate the trigger as a row trigger. Oracle fires a
row trigger once for each row that is affected by the triggering statement and meets
the optional trigger constraint defined in the WHEN condition.
On Event
Conditions of the trigger firing, i.e. table/view operation for firing (Insert, Update or
Delete).
References
Here the correlation names should be specified. You can use correlation names in the
PL/SQL block and WHEN condition of a row trigger to refer specifically to old and new
values of the current row. The default correlation names are OLD and NEW. If your row
trigger is associated with a table named OLD or NEW, use this option to specify different
correlation names to avoid confusion between the table name and the correlation name. If
the trigger is defined on a nested table, then OLD and NEW refer to the row of the nested
table, and PARENT refers to the current row of the parent table.
© 2007 EMS Database Management Solutions
196
SQL Manager 2007 for Oracle User's Manual
5.3.10 DB and Schema Triggers
A database trigger is:
· A stored PL/SQL block associated a schema, or the database or
· An anonymous PL/SQL block or a call to a procedure implemented in PL/SQL or Java
Oracle automatically executes a trigger when specified conditions occur.
Create DB/Schema Trigger
To create a new DB/Schema Trigger:
· Select the Database | New Object... menu item.
· Select DB/Schema Trigger in the New Object dialog.
· Edit DB/Schema Trigger definition within the DB/Schema Trigger Editor.
Hint: To create new DB/Schema Trigger you can also right-click the DB/Schema
Triggers node of the explorer tree and select the New DB/Schema Trigger... item
from the popup menu.
To create a new DB/Schema Trigger with the same properties as one of the existing
DB/Schema Triggers has:
© 2007 EMS Database Management Solutions
197
SQL Manager 2007 for Oracle User's Manual
· Select the Database | Duplicate Object... menu item.
· Follow the instructions of the Duplicate Object Wizard.
Edit DB/Schema Trigger
To edit the existing DB/Schema Trigger:
· Select the DB/Schema Trigger for editing in the explorer tree (type the first letters of
the DB/Schema Trigger name for quick search).
· Right-click and select the Edit DB/Schema Trigger <DB/Schema Trigger_Name>
item from the popup menu or simply double-click the DB/Schema Trigger.
· Edit DB/Schema Trigger definition and data on the appropriate tabs of the DB/Schema
Trigger Editor.
Drop DB/Schema Trigger
To drop a DB/Schema Trigger:
· Select the DB/Schema Trigger to drop in the explorer tree.
· Right-click and select the Drop DB/Schema Trigger <DB/Schema Trigger_Name>
item from the popup menu.
· Confirm dropping in the dialog window.
© 2007 EMS Database Management Solutions
198
SQL Manager 2007 for Oracle User's Manual
5.3.10.1 DB and Schema Trigger Editor
The DB/Schema Trigger Editor allows you to define DB/Schema Trigger properties. It
opens when you create a new sequence or edit the existing one (see
Create DB/Schema
Trigger and Edit DB/Schema Trigger for details).
To open a view in the
·
·
·
·
·
DB/Schema Trigger Editor, double-click it in the explorer tree.
Using navigation bar
Editing DB/Schema Trigger definition
Editing object description
Viewing DDL definition
Browsing object dependencies
© 2007 EMS Database Management Solutions
199
SQL Manager 2007 for Oracle User's Manual
Availability:
Windows Full
Windows Lite
Yes
Yes
5.3.10.1.1 Using navigation bar
The navigation bar on the left allows you to:
Object bar:
· Select a database and a DB/Schema trigger for editing within the current window.
General bar:
· Compile the current DB/Schema trigger definition
· Print metadata of the current DB/Schema trigger
· View Dependency Tree for the DB/Schema trigger
· Refresh the content of the active tab
· Bring the window to its default size
5.3.10.1.2 Editing DB/Schema Trigger definition
The main trigger parameters are set on the Trigger tab.
Name
Name of the trigger; it must be unique to the database.
Trigger type
© 2007 EMS Database Management Solutions
200
SQL Manager 2007 for Oracle User's Manual
Specify whether the trigger should fire after/before/instead of executing the triggering
event. For row triggers, the trigger is fired before each affected row is changed.
Trigger on
Database or schema name, the trigger is created for.
On Event
Specify one or more particular states of the database that can cause the trigger to fire.
You can create triggers for these events on database or schema. For each of these
triggering events, Oracle opens an autonomous transaction scope, fires the trigger, and
commits any separate transaction (regardless of any existing user transaction).
The trigger body consists of an optional list of local variables and their data types and a
block of statements in Oracle procedure and trigger language, bracketed by BEGIN and
END. These statements are performed when the trigger fires.
5.3.11 Indices
An index is a schema object that contains an entry for each value that appears in the
indexed column(s) of the table or cluster and provides direct, fast access to rows.
Create index
To create a new index:
© 2007 EMS Database Management Solutions
201
SQL Manager 2007 for Oracle User's Manual
· Select the Database | New Object... menu item.
· Select index in the New Object dialog.
· Edit index definition within the Index Editor.
Hint: To create new index you can also right-click the Indices node of the explorer
tree and select the New index... item from the popup menu.
To create a new index with the same properties as one of the existing indices has:
· Select the Database | Duplicate Object... menu item.
· Follow the instructions of the Duplicate Object Wizard.
Edit index
To edit the existing index:
· Select the index for editing in the explorer tree (type the first letters of the index name
for quick search).
· Right-click and select the Edit index <Index_Name> item from the popup menu or
simply double-click the index.
· Edit index definition and data on the appropriate tabs of the Index Editor.
Drop index
To drop a index:
· Select the index to drop in the explorer tree.
· Right-click and select the Drop index <Index_Name> item from the popup menu.
· Confirm dropping in the dialog window.
5.3.11.1 Index Editor
The Index Editor Dialog allows you to edit index properties.
Also you can access the Index Editor Dialog from the New Object dialog. In this case you
will be able to create indexes for different tables at once.
© 2007 EMS Database Management Solutions
202
SQL Manager 2007 for Oracle User's Manual
·
·
·
·
·
·
Using navigation bar
Creating new index
Object storage attributes
Editing object description
Viewing DDL definition
Browsing object dependencies
See also:
Table Editor
Availability:
Windows Full
Windows Lite
Yes
Yes
5.3.11.1.1 Using navigation bar
The navigation bar on the left allows you to:
Object bar:
· Select a database and an index for editing within the current window.
© 2007 EMS Database Management Solutions
203
SQL Manager 2007 for Oracle User's Manual
General bar:
· Compile the current index
· Print metadata of the current index
· View Dependency Tree for the index
· Refresh the content of the active tab
· Bring the window to its default size
The next bar displays various actions according to the current page of
Index Editor.
5.3.11.1.2 Creating new index
Name
Set the name of the new index.
Schema
Is the name of the schema to which the object belongs.
Table schema / Table name
Specify the schema and table on which you are defining the index.
Table index/Cluster index
Specify whether a table or cluster index should be created.
Logging
Specify whether the creation of the index will be logged or not logged in the redo log file.
Reverse
Enable this option to store the bytes of the index block in reverse order, excluding the
rowid. You cannot specify No sort with this option enabled.
No sort
specify NOSORT to indicate to the database that the rows are already stored in the
database in ascending order, so that Oracle does not have to sort the rows when
creating the index.
Key compress
Her you can enable key compression, which eliminates repeated occurrence of key column
values and may substantially reduce storage. Use the Columns field to to specify the
© 2007 EMS Database Management Solutions
204
SQL Manager 2007 for Oracle User's Manual
prefix length (number of prefix columns to compress).
Index type
Select Unique to indicate that the value of the column (or columns) upon which the
index is based must be unique.
To include columns to the list, move them from the Table columns list to the Index
columns by double-clicking or dragging their names. To remove the columns from the list,
move them back in the same way. You can also use the arrow buttons to move the
selected types (multiple selection can be performed using Ctrl or Shift).
Use the "Arrow up" and "Arrow down" buttons to move the fields in the list up an down
Use the "Plus sign" and "Cross" buttons to add/delete the expression built from columns of
table, constants, SQL functions, and user-defined functions.
Primary
Makes index a primary key.
Fulltext
Makes index fulltext.
Unique
© 2007 EMS Database Management Solutions
205
SQL Manager 2007 for Oracle User's Manual
Makes index unique.
5.3.12 Packages
The package is an encapsulated collection of related procedures, functions, and other
program objects stored together in the database. The package specification declares
these objects. The package body, specified subsequently, defines these objects.
Create package
To create a new package:
· Select the Database | New Object... menu item.
· Select package in the New Object dialog.
· Edit package definition within the Package Editor.
Hint: To create new package you can also right-click the
Packages node of the
explorer tree and select the New package... item from the popup menu.
To create a new package with the same properties as one of the existing packages has:
· Select the Database | Duplicate Object... menu item.
· Follow the instructions of the Duplicate Object Wizard.
Edit package
To edit the existing package:
· Select the package for editing in the explorer tree (type the first letters of the package
name for quick search).
· Right-click and select the Edit package <Package_Name> item from the popup menu
or simply double-click the package.
· Edit package definition and data on the appropriate tabs of the Package Editor.
Drop package
To drop a package:
· Select the package to drop in the explorer tree.
· Right-click and select the Drop package <Package_Name> item from the popup
menu.
· Confirm dropping in the dialog window.
© 2007 EMS Database Management Solutions
206
SQL Manager 2007 for Oracle User's Manual
5.3.12.1 Package Editor
The Package Editor allows you to define package properties. It opens when you create a
new package or edit the existing one (see Create Package and Edit Package for details).
To open a view in the
·
·
·
·
·
Package Editor, double-click it in the explorer tree.
Using navigation bar
Editing package definition
Editing object description
Viewing DDL definition
Browsing object dependencies
© 2007 EMS Database Management Solutions
207
SQL Manager 2007 for Oracle User's Manual
Availability:
Windows Full
Windows Lite
Yes
Yes
5.3.12.1.1 Using navigation bar
The navigation bar on the left allows you to:
Object bar:
· Select a database and a package for editing within the current window.
General bar:
· Compile the current package
· Print metadata of the current package
· View Dependency Tree for the package
· Refresh the content of the active tab
· Bring the window to its default size
5.3.12.1.2 Editing package definition
Specify the package specification, which can contain type definitions, cursor declarations,
variable declarations, constant declarations, exception declarations, PL/SQL subprogram
© 2007 EMS Database Management Solutions
208
SQL Manager 2007 for Oracle User's Manual
specifications, and call specifications, which are declarations of a C or Java routine
expressed in PL/SQL.
5.3.13 Package Bodies
Package body is an encapsulated collection of related procedures, stored functions, and
other program objects stored together in the database. The package body defines these
objects. The package specification, defined in an earlier in Packages, declares these
objects. Packages are an alternative to creating procedures and functions as standalone
schema objects.
Create Package Body
To create a new Package Body:
· Select the Database | New Object... menu item.
· Select Package Body in the New Object dialog.
· Edit Package Body definition within the Package Body Editor.
Hint: To create new Package Body you can also right-click the
Package Bodies node
of the explorer tree and select the New Package Body... item from the popup menu.
© 2007 EMS Database Management Solutions
209
SQL Manager 2007 for Oracle User's Manual
To create a new Package Body with the same properties as one of the existing Package
bodies has:
· Select the Database | Duplicate Object... menu item.
· Follow the instructions of the Duplicate Object Wizard.
Edit Package Body
To edit the existing Package Body:
· Select the Package Body for editing in the explorer tree (type the first letters of the
Package Body name for quick search).
· Right-click and select the Edit Package Body <Package Body_Name> item from the
popup menu or simply double-click the Package Body.
· Edit Package Body definition and data on the appropriate tabs of the Package Body Editor
.
Drop Package Body
To drop an Package Body:
· Select the Package Body to drop in the explorer tree.
· Right-click and select the Drop Package Body <Package Body_Name> item from the
popup menu.
· Confirm dropping in the dialog window.
5.3.13.1 Package Body Editor
The Package Body Editor allows you to define default properties. It opens when you
create a new default or edit the existing one (see Create Package Body and Package
Body Editor for details).
To open a view in the
·
·
·
·
·
Package Body Editor, double-click it in the explorer tree.
Using navigation bar
Editing Package Body
Editing object description
Viewing DDL definition
Browsing object dependencies
© 2007 EMS Database Management Solutions
210
SQL Manager 2007 for Oracle User's Manual
Availability:
Windows Full
Windows Lite
Yes
Yes
5.3.13.1.1 Using navigation bar
The navigation bar on the left allows you to:
Object bar:
· Select a database and a package body for editing within the current window.
General bar:
· Compile the current package body
· Print metadata of the current package body
· View Dependency Tree for the package body
· Refresh the content of the active tab
· Bring the window to its default size
© 2007 EMS Database Management Solutions
211
SQL Manager 2007 for Oracle User's Manual
5.3.13.1.2 Editing Package Body
Specify the package body, which can contain PL/SQL subprogram bodies or call
specifications, which are declarations of a C or Java routine expressed in PL/SQL.
5.3.14 Sequences
Sequence is a database object from which multiple users may generate unique integers.
You can use sequences to automatically generate primary key values. When a sequence
number is generated, the sequence is incremented, independent of the transaction
committing or rolling back. If two users concurrently increment the same sequence, then
the sequence numbers each user acquires may have gaps, because sequence numbers
are being generated by the other user. One user can never acquire the sequence number
generated by another user. After a sequence value is generated by one user, that user
can continue to access that value regardless of whether the sequence is incremented by
another user.
Create sequence
To create a new sequence:
· Select the Database | New Object... menu item.
· Select Sequence in the New Object dialog.
© 2007 EMS Database Management Solutions
212
SQL Manager 2007 for Oracle User's Manual
· Edit sequence definition within the
Sequence Editor.
Hint: To create new sequence you can also right-click the
Sequences node of the
explorer tree and select the New Sequence... item from the popup menu.
To create a new sequence with the same properties as one of the existing sequences
has:
· Select the Database | Duplicate Object... menu item.
· Follow the instructions of the Duplicate Object Wizard.
Edit sequence
To edit the existing sequence:
· Select the sequence for editing in the explorer tree (type the first letters of the
sequence name for quick search).
· Right-click and select the Edit Sequence <Sequence_Name> item from the popup
menu or simply double-click the sequence.
· Edit sequence definition and data on the appropriate tabs of the Sequence Editor.
Drop sequence
To drop a sequence:
· Select the sequence to drop in the explorer tree.
· Right-click and select the Drop Sequence <Sequence_Name> item from the popup
menu.
· Confirm dropping in the dialog window.
© 2007 EMS Database Management Solutions
213
SQL Manager 2007 for Oracle User's Manual
5.3.14.1 Sequences Editor
The Sequence Editor allows you to define sequence properties. It opens when you
create a new sequence or edit the existing one (see Create Sequence and Edit Sequence
for details).
To open a view in the
·
·
·
·
·
Sequence Editor, double-click it in the
Using navigation bar
Editing sequence definition
Editing object description
Viewing DDL definition
Browsing object dependencies
© 2007 EMS Database Management Solutions
Explorer Tree.
214
SQL Manager 2007 for Oracle User's Manual
5.3.14.1.1 Using navigation bar
The navigation bar on the left allows you to:
Object bar:
· Select a database and a sequence for editing within the current window.
General bar:
· Compile the current sequence definition
· Print metadata of the current sequence
· View Dependency Tree for the sequence
· Refresh the content of the active tab
· Bring the window to its default size
The next bar displays various actions according to the current page of
Sequence Editor.
5.3.14.1.2 Editing sequence definition
Name
Set the name of the new sequence in the edit field.
Increment
Specifies which value is added to the current sequence value to create a new value. A
positive value will make an ascending sequence, a negative one a descending sequence.
The default value is 1.
Min Value
Determines the minimum value a sequence can generate.
Max Value
Determines the maximum value for the sequence.
Cache
Specifies how many sequence numbers are to be preallocated and stored in memory for
faster access. The minimum value is 1 (only one value can be generated at a time, i.e.,
no cache).
Cycle
This option allows the sequence to wrap around when the maxvalue or minvalue has been
© 2007 EMS Database Management Solutions
215
SQL Manager 2007 for Oracle User's Manual
reached by an ascending or descending sequence respectively. If the limit is reached, the
next number generated will be the minvalue or maxvalue, respectively. Otherwise, any
calls to nextval after the sequence has reached its maximum value will return an error.
Order
Use this option to guarantee that sequence numbers are generated in order of request.
This clause is useful if you are using the sequence numbers as timestamps. Guaranteeing
order is usually not important for sequences used to generate primary keys.
5.3.15 Clusters
A cluster is a schema object that contains data from one or more tables, all of which
have one or more columns in
common. Oracle stores together all the rows from all the tables that share the same
cluster key.
Create cluster
To create a new cluster:
· Select the Database | New Object... menu item.
· Select Cluster in the New Object dialog.
· Edit cluster definition within the Cluster Editor.
Hint: To create new cluster you can also right-click the
Clusters node of the explorer
tree and select the New Cluster... item from the popup menu.
To create a new cluster with the same properties as one of the existing clusters has:
· Select the Database | Duplicate Object... menu item.
· Follow the instructions of the Duplicate Object Wizard.
Edit cluster
© 2007 EMS Database Management Solutions
216
SQL Manager 2007 for Oracle User's Manual
To edit the existing cluster:
· Select the cluster for editing in the explorer tree (type the first letters of the cluster
name for quick search).
· Right-click and select the Edit Cluster <Cluster_Name> item from the popup menu or
simply double-click the cluster.
· Edit cluster definition and data on the appropriate tabs of the Cluster Editor.
Drop cluster
To drop a cluster:
· Select the cluster to drop in the explorer tree.
· Right-click and select the Drop Cluster <Cluster_Name> item from the popup menu.
· Confirm dropping in the dialog window.
© 2007 EMS Database Management Solutions
217
SQL Manager 2007 for Oracle User's Manual
5.3.15.1 Cluster Editor
The Cluster Editor allows you to define default properties. It opens when you create a
new default or edit the existing one (see Create Cluster and Edit Cluster for details).
To open a view in the
·
·
·
·
·
·
Cluster Editor, double-click it in the explorer tree.
Using navigation bar
Editing cluster definition
Object storage attributes
Editing object description
Viewing DDL definition
Browsing object dependencies
5.3.15.1.1 Using navigation bar
The navigation bar on the left allows you to:
Object bar:
· Select a database and a cluster for editing within the current window.
General bar:
· Compile the current cluster
© 2007 EMS Database Management Solutions
218
SQL Manager 2007 for Oracle User's Manual
·
·
·
·
Print metadata of the current cluster
View Dependency Tree for the cluster
Refresh the content of the active tab
Bring the window to its cluster size
5.3.15.1.2 Editing cluster definition
Name
Set the name of the new cluster.
Schema
Is the name of the schema to which the object belongs.
Cluster size
Specify the amount of space in bytes reserved to store all rows with the same cluster key
value or the same hash value.
Define the type of the cluster:
In an Index cluster, Oracle stores together rows having the same cluster key value.
Each distinct cluster key value
is stored only once in each data block, regardless of the number of tables and rows in
which it occurs.
In a Hash cluster, Oracle stores together rows that have the same hash key value. The
hash value for a row is the value returned by the hash function of the cluster.
Hash Single-Table indicates that the cluster is a type of hash cluster containing only
one table. This cluster type can provide faster access to rows than would result if the
table were not part of a cluster.
If you choose to to create a hash cluster and specify the number of hash values for the
hash cluster.
Hash function
Specify an expression to be used as the hash function for the hash cluster or select to
use default values.
© 2007 EMS Database Management Solutions
219
SQL Manager 2007 for Oracle User's Manual
5.3.16 Materialized Views
A materialized view is a database object that contains the results of a query. The FROM
clause of the query can name tables, views, and other materialized views. Collectively
these objects are called master tables (a replication term) or detail tables (a data
warehousing term).
Create materialized view
To create a new materialized view:
· Select the Database | New Object... menu item.
· Select Materialized View in the New Object dialog.
· Edit materialized view definition within the Materialized View Editor.
Hint: To create new materialized view you can also right-click the
Materialized
Views node of the explorer tree and select the New Materialized View... item from
the popup menu.
To create a new materialized view with the same properties as one of the existing
materialized views has:
· Select the Database | Duplicate Object... menu item.
· Follow the instructions of the Duplicate Object Wizard.
Edit materialized view
To edit the existing materialized view:
© 2007 EMS Database Management Solutions
220
SQL Manager 2007 for Oracle User's Manual
· Select the materialized view for editing in the explorer tree (type the first letters of the
materialized view name for quick search).
· Right-click and select the Edit Materialized View <Materialized View_Name> item
from the popup menu or simply double-click the materialized view.
· Edit materialized view definition and data on the appropriate tabs of the Materialized View
Editor.
Drop materialized view
To drop a materialized view:
· Select the materialized view to drop in the explorer tree.
· Right-click and select the Drop Materialized View <Materialized View_Name> item
from the popup menu.
· Confirm dropping in the dialog window.
5.3.16.1 Materialized View Editor
The Materialized View Editor allows you to define materialized view properties. It opens
when you create a new materialized view or edit the existing one (see Create Materialized
View and Edit Materialized View for details).
·
·
·
·
·
·
·
·
·
·
Using navigation bar
Editing materialized view definition
Object storage attributes
Viewing Materialized View fields
Setting Refresh parameters
Setting USING INDEX parameters
Viewing Materialized View data
Editing object description
Viewing DDL definition
Browsing object dependencies
© 2007 EMS Database Management Solutions
221
SQL Manager 2007 for Oracle User's Manual
5.3.16.1.1 Using navigation bar
The navigation bar on the left allows you to:
Object bar:
· Select a database and a materialized view for editing within the current window.
General bar:
· Compile the current materialized view definition
· Print metadata of the current materialized view
· View Dependency Tree for the materialized view
· Refresh the content of the active tab
· Bring the window to its default size
5.3.16.1.2 Editing Materialized View
Name
Specify the name of the materialized view to be created.
Schema
Specify the schema to contain the materialized view. If you omit schema, then Oracle
creates the materialized view in your schema.
On prebuilt table
The option lets you register an existing table as a preinitialized materialized view. This
clause is particularly useful for registering large materialized views in a data warehousing
environment.
© 2007 EMS Database Management Solutions
222
SQL Manager 2007 for Oracle User's Manual
Select Updatable to allow a subquery, primary key, object, or rowid materialized view to
be updated.
The Organisation index lets you create an index-organized materialized view. In such a
materialized view, data rows are stored in an index defined on the primary key of the
materialized view.
Compress
Use these options to instruct the database whether to compress data segments to
reduce disk and memory use.
Cache
For data that will be accessed frequently, Cache specifies that the blocks retrieved for
this table are placed at the most recently used end of the least recently used (LRU) list in
the buffer cache when a full table scan is performed. This attribute is useful for small
lookup tables. Nocache specifies that the blocks are placed at the least recently used
end of the LRU list.
Rewrite query
This group lets you specify whether the materialized view is eligible to be used for query
rewrite.
Specify Enable to enable the materialized view for query rewrite.
Specify Logging or Nologging to establish the logging characteristics for the materialized
view. The default is the logging characteristic of the tablespace in which the materialized
view resides.
Cluster
The Cluster group lets you create the materialized view as part of the specified cluster.
A cluster materialized view uses the space allocation of the cluster.
In the Subquery editor you need to create the view definition as SQL statement, so it is
enough to simply edit the whole definition in the editor area to make changes, and click
the Compile view item on the navigation bar to apply it to the view on the server.
© 2007 EMS Database Management Solutions
223
SQL Manager 2007 for Oracle User's Manual
5.3.16.1.3 Viewing Materialized View fields
The Fields tab allows you to view the materialized view fields. Note that the tab is only
appears after compiling a materialized view.
© 2007 EMS Database Management Solutions
224
SQL Manager 2007 for Oracle User's Manual
5.3.16.1.4 Setting Refresh parameters
This tab allows you to specify the default methods, modes, and times for the database to
refresh the materialized view. If the master tables of a materialized view are modified,
then the data in the materialized view must be updated to make the materialized view
accurately reflect the data currently in its master tables. Here you can schedule the
times and specify the method and mode for the database to refresh the materialized view.
Refresh type
Correlates with the corresponding server refresh methods - NEVER, FAST, COMPLETE and
FORCE.
Refresh time type
Correlates with the corresponding server refresh methods - ON COMMIT, ON DEMAND,
AUTOMATIC.
Refresh method
Specify Primary key to create a primary key materialized view. Primary key materialized
views allow materialized view master tables to be reorganized without affecting the
eligibility of the materialized view for fast refresh.
Specify RowID to create a rowid materialized view. RowID materialized views are useful if
the materialized view does not include all primary key columns of the master tables.
Start with
Specify a datetime expression for the first automatic refresh time.
© 2007 EMS Database Management Solutions
225
SQL Manager 2007 for Oracle User's Manual
Next
Specify a datetime expression for calculating the interval between automatic refreshes.
5.3.16.1.5 Setting USING INDEX parameters
The Using index tab lets you establish the value of the INITRANS and STORAGE
parameters for the default index Oracle uses to maintain the materialized view data. If
Using index is not specified, then default values are used for the index. Oracle uses the
default index to speed up incremental (FAST) refresh of the materialized view.
You cannot specify the Percent used parameter here.
© 2007 EMS Database Management Solutions
226
SQL Manager 2007 for Oracle User's Manual
5.3.16.1.6 Viewing Materialized View data
The Data tab allows you to view the data containing in the materialized view. Note that
the tab is only appears after compiling a materialized view.
© 2007 EMS Database Management Solutions
227
SQL Manager 2007 for Oracle User's Manual
5.3.17 Materialized View Logs
A materialized view log is a table associated with the master table of a materialized
view.
Create materialized view log
To create a new materialized view log:
· Select the Database | New Object... menu item.
· Select Materialized View Log in the New Object dialog.
· Edit materialized view log definition within the Materialized View Log Editor.
Hint: To create new materialized view log you can also right-click the Materialized
View Logs node of the explorer tree and select the New Materialized View Log...
item from the popup menu.
To create a new materialized view log with the same properties as one of the existing
materialized view logs has:
· Select the Database | Duplicate Object... menu item.
· Follow the instructions of the Duplicate Object Wizard.
Edit materialized view log
© 2007 EMS Database Management Solutions
228
SQL Manager 2007 for Oracle User's Manual
To edit the existing materialized view log:
· Select the materialized view log for editing in the explorer tree (type the first letters of
the materialized view log name for quick search).
· Right-click and select the Edit Materialized View Log <Materialized View
Log_Name> item from the popup menu or simply double-click the materialized view log.
· Edit materialized view log definition and data on the appropriate tabs of the Materialized
View Log Editor.
Drop materialized view log
To drop a materialized view log:
· Select the materialized view log to drop in the explorer tree.
· Right-click and select the Drop Materialized View Log <Materialized View
Log_Name> item from the popup menu.
· Confirm dropping in the dialog window.
© 2007 EMS Database Management Solutions
229
SQL Manager 2007 for Oracle User's Manual
5.3.17.1 Materialized View Log Editor
The Materialized View Log Editor allows you to define materialized view log properties.
It opens when you create a new materialized view log or edit the existing one (see Create
Materialized View Log and Edit Materialized View Log for details).
·
·
·
·
·
·
Using navigation bar
Editing Materialized View Log definition
Object storage attributes
Editing object description
Viewing DDL definition
Browsing object dependencies
© 2007 EMS Database Management Solutions
230
SQL Manager 2007 for Oracle User's Manual
5.3.17.1.1 Using navigation bar
The navigation bar on the left allows you to:
Object bar:
· Select a database and a materialized view log for editing within the current window.
General bar:
· Compile the current materialized view log definition
· Print metadata of the current materialized view log
· View Dependency Tree for the materialized view log
· Refresh the content of the active tab
· Bring the window to its default size
5.3.17.1.2 Editing Materialized View Log definition
Name
Specify the name of the materialized view log to be created.
Schema
Specify the schema containing the materialized view log master table.
Table
Specify the name of the master table for which the materialized view log is to be created.
Cache
For data that will be accessed frequently, Cache specifies that the blocks retrieved for
this log are placed at the most recently used end of the least recently used (LRU) list in
the buffer cache when a full table scan is performed. This attribute is useful for small
lookup tables. Nocache specifies that the blocks are placed at the least recently used
end of the LRU list.
Logging
Specify either Logging or Nologging to establish the logging characteristics of the
tablespace in which the materialized view log resides.
New values
This group lets you determine whether Oracle saves both old and new values for update
DML operations in the materialized view log.
With ...
Use the With group to indicate whether the materialized view log should record the
primary key, rowid, object ID, or a combination of these row identifiers when rows in the
master are changed.
Specify With object ID to indicate that the system-generated or user-defined object
identifier of every modified row should be recorded in the materialized view log.
Specify With primary key to indicate that the primary key of all rows changed should be
recorded in the materialized view log.
Specify With ROWID to indicate that the rowid of all rows changed should be recorded in
© 2007 EMS Database Management Solutions
231
SQL Manager 2007 for Oracle User's Manual
the materialized view log.
Specify With sequence to indicate that a sequence value providing additional ordering
information should be recorded in the materialized view log. Sequence numbers are
necessary to support fast refresh after some update scenarios.
Specify With filter columns for the columns whose values you want to be recorded in
the materialized view log for all rows that are changed.
Fields for materialized view log
To specify the fields whose values are to be recorded into the materialized view log, move
them from the Available Fields list to the Selected fields by double-clicking or dragging
them. To remove the fields from the index, move them back in the same way. You can
also use the arrow buttons to move the selected fields (multiple fields are selected by
Ctrl
or Shift).
5.3.18 Synonyms
Synonym is an alternative name for a table, view, sequence, procedure, stored function,
package, materialized view, Java class schema object, user-defined object type, or
another synonym.
Create synonym
To create a new synonym:
© 2007 EMS Database Management Solutions
232
SQL Manager 2007 for Oracle User's Manual
· Select the Database | New Object... menu item.
· Select Synonym in the New Object dialog.
· Edit synonym definition within the Synonym Editor.
Hint: To create new synonym you can also right-click the
Synonyms node of the
explorer tree and select the New Synonym... item from the popup menu.
To create a new synonym with the same properties as one of the existing synonyms has:
· Select the Database | Duplicate Object... menu item.
· Follow the instructions of the Duplicate Object Wizard.
Edit synonym
To edit the existing synonym:
· Select the synonym for editing in the explorer tree (type the first letters of the
synonym name for quick search).
· Right-click and select the Edit Synonym <Synonym_Name> item from the popup
menu or simply double-click the synonym.
· Edit synonym definition and data on the appropriate tabs of the Synonym Editor.
Drop synonym
To drop a synonym:
· Select the synonym to drop in the explorer tree.
· Right-click and select the Drop Synonym <Synonym_Name> item from the popup
menu.
· Confirm dropping in the dialog window.
5.3.18.1 Synonym Editor
The Synonym Editor allows you to define synonym properties. It opens when you create
a new sequence or edit the existing one (see Create Synonym and Edit Synonym for
details).
To open a view in the
·
·
·
·
Synonym Editor, double-click it in the explorer tree.
Using navigation bar
Editing synonym definition
Viewing DDL definition
Browsing object dependencies
© 2007 EMS Database Management Solutions
233
SQL Manager 2007 for Oracle User's Manual
5.3.18.1.1 Using navigation bar
The navigation bar on the left allows you to:
Object bar:
· Select a database and a synonym for editing within the current window.
General bar:
· Compile the current synonym definition
· Print metadata of the current synonym
· View Dependency Tree for the synonym
· Refresh the content of the active tab
· Bring the window to its default size
5.3.18.1.2 Editing synonym definition
Synonym name
Is the name of the new synonym.
Schema
Specifies the schema in which the synonym is created.
Public synonym
Check this option to create a public synonym. Public synonyms are accessible to all users.
However each user must have appropriate privileges on the underlying object in order to
use the synonym.
DB Link name
You can specify a complete or partial database link to create a synonym for a schema
object on a remote database where the object is located.
Object schema
Is the schema containing the base object that the synonym references.
Object name
© 2007 EMS Database Management Solutions
234
SQL Manager 2007 for Oracle User's Manual
Is the base object that the synonym references.
Use the Select object button to select manually the object that the synonym references.
5.3.19 Database Links
A database link is a schema object in one database that enables you to access objects
on another database. The other database need not be an Oracle system. However, to
access non-Oracle systems you must use Oracle Heterogeneous Services.
Create Database Link
To create a new database link:
· Select the Database | New Object... menu item.
· Select Database Link in the New Object dialog.
· Edit database link definition within the Database Link Editor.
Hint: To create new database link you can also right-click the
Database Links node
of the explorer tree and select the New Database Link... item from the popup menu.
To create a new database link with the same properties as one of the existing database
links has:
· Select the Database | Duplicate Object... menu item.
· Follow the instructions of the Duplicate Object Wizard.
Edit Database Link
To edit the existing database link:
· Select the database link for editing in the explorer tree (type the first letters of the
database link name for quick search).
· Right-click and select the Edit Database Link <Database Link_Name> item from the
popup menu or simply double-click the database link.
· Edit database link definition and data on the appropriate tabs of the Database Link Editor.
© 2007 EMS Database Management Solutions
235
SQL Manager 2007 for Oracle User's Manual
Drop Database Link
To drop a database link:
· Select the database link to drop in the explorer tree.
· Right-click and select the Drop Database Link <Database Link_Name> item from the
popup menu.
· Confirm dropping in the dialog window.
© 2007 EMS Database Management Solutions
236
SQL Manager 2007 for Oracle User's Manual
5.3.19.1 Database Link Editor
The Database Link Editor allows you to define database link properties. It opens when
you create a new type or edit the existing one (see Create Database Link and Edit
Database Link for details).
To open a database link in the
·
·
·
·
·
Database Link Editor, double-click it in the explorer tree.
Using navigation bar
Editing database link definition
Editing object description
Viewing DDL definition
Browsing object dependencies
5.3.19.1.1 Using navigation bar
The navigation bar on the left allows you to:
Object bar:
· Select a database and a type for editing within the current window.
General bar:
· Compile the current database link
· Print metadata of the current database link
· View Dependency Tree for the database link
· Refresh the content of the active tab
· Bring the window to its default size
5.3.19.1.2 Editing DB Link definition
Name
If you are creating a new DB link, type a unique name to be used across the database to
represent the DB link.
© 2007 EMS Database Management Solutions
237
SQL Manager 2007 for Oracle User's Manual
Public DB link
Use this option to create a public database link available to all users.
Shared DB link
Check the option to use a single network connection to create a public database link that
can be shared among multiple users.
Use CURRENT_USER
Use this option to create a current user database link. The current user must be a global
user with a valid account on the remote database.
Remote database connection
This group of controls lets you enable a connection to the remote database.
Authenticated by
Specify the username and password on the target instance. These parameters
authenticate the user to the remote server and are required for security.
5.3.20 Object Types
Use the Object Type Editor to create the specification of an object type, a SQLJ object
type, or an incomplete object type.
Create object type
To create a new object type:
· Select the Database | New Object... menu item.
· Select Object Type in the New Object dialog.
· Edit object type definition within the Object Type Editor.
Hint: To create new object type you can also right-click the
Object Types node of
the explorer tree and select the New Object Type... item from the popup menu.
© 2007 EMS Database Management Solutions
238
SQL Manager 2007 for Oracle User's Manual
To create a new object type with the same properties as one of the existing object types
has:
· Select the Database | Duplicate Object... menu item.
· Follow the instructions of the Duplicate Object Wizard.
Edit object type
To edit the existing object type:
· Select the object type for editing in the explorer tree (type the first letters of the
object type name for quick search).
· Right-click and select the Edit Object Type <Object Type_Name> item from the
popup menu or simply double-click the object type.
Object Type Editor.
· Edit object type definition and data on the appropriate tabs of the
Drop object type
To drop a object type:
· Select the object type to drop in the explorer tree.
· Right-click and select the Drop Object Type <Object Type_Name> item from the
popup menu.
· Confirm dropping in the dialog window.
5.3.20.1 Object Type Editor
The Object Type Editor allows you to define object type properties. It opens when you
create a new object type or edit the existing one (see
Create object type and Edit object
type for details).
·
·
·
·
·
Using navigation bar
Editing object type definition
Editing object description
Viewing DDL definition
Browsing object dependencies
© 2007 EMS Database Management Solutions
239
SQL Manager 2007 for Oracle User's Manual
5.3.20.1.1 Using navigation bar
The navigation bar on the left allows you to:
Object bar:
· Select a database and a object type for editing within the current window.
General bar:
· Compile the current object type definition
· Print metadata of the current object type
· View Dependency Tree for the object type
· Refresh the content of the active tab
· Bring the window to its default size
The next bar displays various actions according to the current page of
Editor.
© 2007 EMS Database Management Solutions
Object Type
240
SQL Manager 2007 for Oracle User's Manual
5.3.20.1.2 Editing Object Type definition
Use the Object Type Editor window to create a user-defined object type. The variables
that form the data structure are called attributes. The member subprograms that define
the behavior of the object are called methods. The keywords AS OBJECT are required
when creating an object type.
© 2007 EMS Database Management Solutions
241
SQL Manager 2007 for Oracle User's Manual
5.3.21 Object Type Bodies
You can create an object type body to define or implement the member methods defined
in the object type specification. The object type body defines the name of the object
type, its attributes, methods, and other properties. The object type body contains the
code for the methods that implement the type.
Create object type body
To create a new object type body:
· Select the Database | New Object menu item.
· Select Object Type Body in the New Object window.
· Edit object type body properties and fields on the appropriate tabs of the
Type Body Editor.
Object
Hint: To create a new object type body you can also right-click the
Object Type
Body node of the explorer tree and select the New Object Type Body... item from
the popup menu.
To create a new object type body with the same properties as one of the existing object
has:
· Select the Database | Duplicate Object menu item.
· Follow the instructions of the Duplicate Object Wizard.
The Duplicate Object window allows you to select the database to create the new object
type body in and to edit the result SQL statement for creating the object type body.
Edit object type body
To edit the existing object type body:
· Select the object type body for editing in the explorer tree (type the first letters of
the object type body name for quick search).
· Right-click and select the Edit Object Type Body <Object_Type_Body_Name>
item in the popup menu or simply double-click the object type body.
· Edit schema subobjects and data on the appropriate tabs of the
Object Type Body
Editor.
Drop object type body
To drop a object type body:
· Select the object type body for dropping in the explorer tree.
· Right-click and select the Drop Object Type Body <Object_Type_Body_Name>
item from the popup menu.
· Confirm dropping in the dialog window.
© 2007 EMS Database Management Solutions
242
SQL Manager 2007 for Oracle User's Manual
5.3.21.1 Object Type Body Editor
Object Type Body Editor allows you to edit properties of the object type bodies.
Object
Type Body Editor can be opened automatically after the object type body is created and
is available on editing the object type body (see Create Object Type Body and Edit Object
Type Body for details).
To open a object type body in the
explorer tree.
Object Type Body Editor, just double-click it in the
· Using navigation bar
· Editing Object Type Body definition
· Editing object description
© 2007 EMS Database Management Solutions
243
SQL Manager 2007 for Oracle User's Manual
· Viewing DDL definition
· Browsing object dependencies
5.3.21.1.1 Using navigation bar
The navigation bar on the left allows you to:
Object bar:
· Select a database and a object type body for editing within the current window.
General bar:
· Compile the current object type body definition
· Print metadata of the current operator
· View Dependency Tree for the object type body
· Refresh the content of the active tab
© 2007 EMS Database Management Solutions
244
SQL Manager 2007 for Oracle User's Manual
5.3.21.1.2 Editing Object Type Body definition
Use the Object Type Editor window to create a user-defined object type body. The
object type body defines the name of the object type, its attributes, methods, and other
properties. The object type body contains the code for the methods that implement the
type. For each method specified in an object type specification for which you did not
specify the call specification, you must specify a corresponding method body in the object
type body.
© 2007 EMS Database Management Solutions
245
SQL Manager 2007 for Oracle User's Manual
5.3.22 Array Types
Use the Array Type Editor to create the specification of a named varying array (varray) or
a nested table type.
Create array type
To create a new array type:
· Select the Database | New Object menu item.
· Select Array Type in the New Object window.
· Edit array type properties and fields on the appropriate tabs of the Array Type Editor.
Hint: To create new array type you can also right-click the
Array Types node of the
explorer tree and select the New Array Type... item from the popup menu.
To create a new array type with the same properties as one of the existing tables has:
· Select the Database | Duplicate Object menu item.
· Follow the instructions of the Duplicate Object Wizard.
The Duplicate Object window allows you to select the database to create the new array
type in and to edit the result SQL statement for creating the array type.
Edit array type
To edit the existing array type:
· Select the array type for editing in the explorer tree (type the first letters of the
array type name for quick search).
· Right-click and select the Edit Array Type <Array Type_Name> item in the popup
menu or simply double-click the array type.
· Edit array type subobjects and data on the appropriate tabs of the Array Type Editor.
Drop array type
To drop a array type:
· Select the array type for editing in the explorer tree.
· Right-click and select the Drop Array Type <Array Type_Name> item from the
popup menu.
· Confirm dropping in the dialog window.
© 2007 EMS Database Management Solutions
246
SQL Manager 2007 for Oracle User's Manual
5.3.22.1 Array Type Editor
Array Type Editor allows you to edit properties of the array types. Array Type Editor
can be open automatically after the array type is created and is available on editing the
array type (see Create Array Type and Edit Array Type for details).
To open a array type in the
·
·
·
·
·
Array Type Editor, just double-click it in the Explorer Tree.
Using navigation bar
Editing array type definition
Editing object description
Viewing DDL definition
Browsing object dependencies
© 2007 EMS Database Management Solutions
247
SQL Manager 2007 for Oracle User's Manual
5.3.22.1.1 Using navigation bar
The navigation bar on the left allows you to:
Object bar:
· Select a database and a array type for editing within the current window.
General bar:
· Compile the current array type definition
· Print metadata of the current operator
· View Dependency Tree for the array type
· Refresh the content of the active tab
© 2007 EMS Database Management Solutions
248
SQL Manager 2007 for Oracle User's Manual
5.3.22.1.2 Editing Array Type definition
Name
Is the name of the new array type or a nested table type..
Schema
Specifies the schema in which the array type or a nested table type is created.
VArray
lets you create the type as an ordered set of elements, each of which has the same
datatype. You must specify a name and a maximum limit of one or more. The array limit
must be an integer literal.
Specify array size below at the corresponding box.
Nested table
lets you create a named nested table.
Data type
If data type is an object type, then the nested table type describes a table whose
columns match the name and attributes of the object type. If defined data type is a
scalar type, then the nested table type describes a table with a single, scalar type
column called COLUMN_VALUE.
The type name for the objects contained in the varray must be one of the following:
· A built-in datatype
· A REF
· An object type
© 2007 EMS Database Management Solutions
249
SQL Manager 2007 for Oracle User's Manual
5.3.23 Libraries
Library is a schema object associated with an operating-system shared library.
Create library
To create a new library:
· Select the Database | New Object menu item.
· Select Library in the New Object window.
· Edit library properties and fields on the appropriate tabs of the
Library Editor.
Hint: To create new library you can also right-click the Libraries node of the explorer
tree and select the New Library... item from the popup menu.
To create a new library with the same properties as one of the existing tables has:
· Select the Database | Duplicate Object menu item.
· Follow the instructions of the Duplicate Object Wizard.
The Duplicate Object window allows you to select the database to create the new library
in and to edit the result SQL statement for creating the library.
© 2007 EMS Database Management Solutions
250
SQL Manager 2007 for Oracle User's Manual
Edit library
To edit the existing library:
· Select the library for editing in the explorer tree (type the first letters of the library
name for quick search).
· Right-click and select the Edit Library <Library_Name> item in the popup menu
or simply double-click the library.
· Edit library subobjects and data on the appropriate tabs of the Library Editor.
Drop library
To drop a library:
· Select the library for editing in the explorer tree.
· Right-click and select the Drop Library <Library_Name> item from the popup
menu.
· Confirm dropping in the dialog window.
© 2007 EMS Database Management Solutions
251
SQL Manager 2007 for Oracle User's Manual
5.3.23.1 Library Editor
Library Editor allows you to edit properties of the librarys. Library Editor can be open
automatically after the library is created and is available on editing the library (see Create
Library and Edit Library for details).
To open a library in the Library Editor, just double-click it in the Explorer Tree.
·
·
·
·
·
Using navigation bar
Editing library definition
Editing object description
Viewing DDL definition
Browsing object dependencies
5.3.23.1.1 Using navigation bar
The navigation bar on the left allows you to:
Object bar:
· Select a database and a library for editing within the current window.
General bar:
· Compile the current library definition
· Print metadata of the current library
· View Dependency Tree for the library
· Refresh the content of the active tab
© 2007 EMS Database Management Solutions
252
SQL Manager 2007 for Oracle User's Manual
5.3.23.1.2 Editing Library definition
Name
Specify the name that will represent this library when a user declares a function or
procedure with a call_spec.
Schema
Specifies the schema in which the array type or a nested table type is created.
Library filename
Specify a string literal, enclosed in single quotation marks. This string should be the path
or filename your operating system recognizes as naming the shared library.
DB Link name
Specify a certain DB link if you want external procedures to be run from a database link
other than the server.
5.3.24 Java Sources
Use Java Source Editor to create a schema object containing a Java source.
Create Java source
© 2007 EMS Database Management Solutions
253
SQL Manager 2007 for Oracle User's Manual
To create a new Java source:
· Select the Database | New Object... menu item.
· Select Java Source in the New Object dialog.
· Edit Java source definition within the Java Source Editor.
Hint: To create new Java source you can also right-click the
Java Sources node of
the explorer tree and select the New Java Source... item from the popup menu.
To create a new Java source with the same properties as one of the existing Java
sources has:
· Select the Database | Duplicate Object... menu item.
· Follow the instructions of the Duplicate Object Wizard.
Edit Java source
To edit the existing Java source:
· Select the Java source for editing in the explorer tree (type the first letters of the Java
source name for quick search).
· Right-click and select the Edit Java Source <Java Source_Name> item from the
popup menu or simply double-click the Java source.
· Edit Java source definition and data on the appropriate tabs of the Java Source Editor.
Drop Java source
To drop a Java source:
· Select the Java source to drop in the explorer tree.
· Right-click and select the Drop Java Source <Java Source_Name> item from the
popup menu.
· Confirm dropping in the dialog window.
© 2007 EMS Database Management Solutions
254
SQL Manager 2007 for Oracle User's Manual
5.3.24.1 Java Source Editor
The Java Source Editor allows you to define Java source properties. It opens when you
create a new sequence or edit the existing one (see Create Java Source and Edit Java
Source for details).
To open a view in the
·
·
·
·
·
Java Source Editor, double-click it in the explorer tree.
Using navigation bar
Editing Java source definition
Editing object description
Viewing DDL definition
Browsing object dependencies
© 2007 EMS Database Management Solutions
255
SQL Manager 2007 for Oracle User's Manual
5.3.24.1.1 Using navigation bar
The navigation bar on the left allows you to:
Object bar:
· Select a database and a Java source for editing within the current window.
General bar:
· Compile the current Java source definition
· Print metadata of the current Java source
· View Dependency Tree for the Java source
· Refresh the content of the active tab
· Bring the window to its default size
The next bar displays various actions according to the current page of
Editor.
Java Source
5.3.24.1.2 Editing Java Source definition
Name
This field specifies the name of the schema object in which the source code is held.
Schema
The Schema field specifies the schema in which the object containing the Java file will
reside.
Auto compile
© 2007 EMS Database Management Solutions
256
SQL Manager 2007 for Oracle User's Manual
The option defines whether Java source compilation should occur automatically.
The Resolver field lets you specify a mapping of the fully qualified Java name to a Java
schema object, where:
· match_string is either a fully qualified Java name, a wildcard that can match such a
Java name, or a wildcard that can match any name.
· schema_name designates a schema to be searched for the corresponding Java schema
object.
· A dash (-) as an alternative to schema_name indicates that if match_string matches a
valid Java name, Oracle can leave the name unresolved. The resolution succeeds, but
the name cannot be used at run time by the class.
5.3.25 Java Classes
Use Java Class Editor to create a schema object containing a Java class.
Create Java class
To create a new Java class:
· Select the Database | New Object... menu item.
· Select Java Class in the New Object dialog.
· Edit Java class definition within the Java Class Editor.
Hint: To create new Java class you can also right-click the
Java Classes node of the
explorer tree and select the New Java Class... item from the popup menu.
© 2007 EMS Database Management Solutions
257
SQL Manager 2007 for Oracle User's Manual
To create a new Java class with the same properties as one of the existing Java classes
has:
· Select the Database | Duplicate Object... menu item.
· Follow the instructions of the Duplicate Object Wizard.
Edit Java class
To edit the existing Java class:
· Select the Java class for editing in the explorer tree (type the first letters of the Java
class name for quick search).
· Right-click and select the Edit Java Class <Java Class_Name> item from the popup
menu or simply double-click the Java class.
· Edit Java class definition and data on the appropriate tabs of the Java Class Editor.
Drop Java class
To drop a Java class:
· Select the Java class to drop in the explorer tree.
· Right-click and select the Drop Java Class <Java Class_Name> item from the popup
menu.
· Confirm dropping in the dialog window.
© 2007 EMS Database Management Solutions
258
SQL Manager 2007 for Oracle User's Manual
5.3.25.1 Java Class Editor
The Java Class Editor allows you to define Java class properties. It opens when you
create a new sequence or edit the existing one (see Create Java Class and Edit Java
Class for details).
To open a view in the
·
·
·
·
·
Java Class Editor, double-click it in the explorer tree.
Using navigation bar
Editing Java class definition
Editing object description
Viewing DDL definition
Browsing object dependencies
5.3.25.1.1 Using navigation bar
The navigation bar on the left allows you to:
Object bar:
· Select a database and a Java class for editing within the current window.
General bar:
· Compile the current Java class definition
· Print metadata of the current Java class
· View Dependency Tree for the Java class
· Refresh the content of the active tab
© 2007 EMS Database Management Solutions
259
SQL Manager 2007 for Oracle User's Manual
· Bring the window to its default size
The next bar displays various actions according to the current page of
.
Java Class Editor
5.3.25.1.2 Editing Java Class definition
Server filename/Directory
Specify the directory and filename of a previously created file on the operating system
and server file containing the sequence.
Force
Uncheck the option to roll back the results of this CREATE command if you have specified
either RESOLVE or COMPILE and the resolution or compilation fails. If you do not specify
this option, then Oracle takes no action if the resolution or compilation fails. That is, the
created schema object remains.
Auto compile
The option defines whether Java class compilation should occur automatically.
The Resolver field lets you specify a mapping of the fully qualified Java name to a Java
schema object, where:
· match_string is either a fully qualified Java name, a wildcard that can match such a
Java name, or a wildcard that can match any name.
· schema_name designates a schema to be searched for the corresponding Java schema
object.
· A dash (-) as an alternative to schema_name indicates that if match_string matches a
valid Java name, Oracle can leave the name unresolved. The resolution succeeds, but
the name cannot be used at run time by the class.
© 2007 EMS Database Management Solutions
260
SQL Manager 2007 for Oracle User's Manual
5.3.26 Java Resources
Use the Java Resource Editor to create a schema object containing a Java resource.
Creating Java Resource
To create a new Java resource:
· Select the Database | New Object... menu item.
· Select Java Resource in the New Object dialog.
· Edit Java resource within the Java Resource Editor.
Hint : To create new Java resource you can also right-click the Java Resources node of the
explorer tree and select New Java Resource... item from the popup menu.
To create a new Java resource with the same properties as one of the existing Java
resources has:
· Select the Database | Duplicate Object... menu item.
· Follow the instructions of the Duplicate Object Wizard.
Editing Java Resource
To edit an existing Java resource:
· Select the Java resource for editing in the explorer tree (type the first letters of the
Java resource name for quick search)
· Right-click and select the Edit Java Resource item from the popup menu or simply
double-click the Java resource.
· Edit Java resource definition in the editor area of the Java Resource Editor.
Dropping Java Resource
To drop a Java Resource:
· Select the Java resource to drop in the explorer tree.
· Right-click and select the Drop Java Resource item from the popup menu.
· Confirm dropping in the dialog window.
© 2007 EMS Database Management Solutions
261
SQL Manager 2007 for Oracle User's Manual
5.3.26.1 Java Resource Editor
The Java Resource Editor allows you to create new Java resource, execute the existing
Java resource or edit its definition. It opens when you create a new Java resource or edit
the existing one (see Create Java Resource and Edit Java Resource for details).
·
·
·
·
Using navigation bar
Editing Java resource definition
ting object description
Viewing DDL definition
© 2007 EMS Database Management Solutions
262
SQL Manager 2007 for Oracle User's Manual
· Browsing object dependencies
5.3.26.1.1 Using navigation bar
The navigation bar on the left allows you to:
Object bar:
Select a database and a Java resource for editing within the current window.
General bar:
· Compile the current Java resource definition
· Print metadata of the current Java resource
· View Dependency Tree for the Java resource
· Refresh the content of the active tab
· Bring the window to its default size.
The next bar displays various actions according to the current page of
Editor.
Java Resource
5.3.26.1.2 Editing Java Resource definition
Name
This field specifies specifies the name of the schema object to hold the Java resource.
© 2007 EMS Database Management Solutions
263
SQL Manager 2007 for Oracle User's Manual
Schema
The Schema field specifies the schema in which the object containing the Java file will
reside.
Server filename/Directory
Specify the directory and filename of a previously created file on the operating system
and server file containing the sequence.
The Resolver field lets you specify a mapping of the fully qualified Java name to a Java
schema object, where:
· match_string is either a fully qualified Java name, a wildcard that can match such a
Java name, or a wildcard that can match any name.
· schema_name designates a schema to be searched for the corresponding Java schema
object.
· A dash (-) as an alternative to schema_name indicates that if match_string matches a
valid Java name, Oracle can leave the name unresolved. The resolution succeeds, but
the name cannot be used at run time by the class.
5.3.27 Index Types
Indextype is an object that specifies the routines that manage a domain
(application-specific) index. Indextypes reside in the same namespace as tables, views,
and other schema objects. The indextype name is bound to an implementation type,
which in turn specifies and refers to user-defined index functions and procedures that
implement the indextype.
Create index type
To create a new index type:
· Select the Database | New Object menu item.
· Select Index Type in the New Object window.
· Edit index type properties and fields on the appropriate tabs of the
Editor.
© 2007 EMS Database Management Solutions
Index Type
264
SQL Manager 2007 for Oracle User's Manual
Hint: To create new index type you can also right-click the
Index Types node of the
explorer tree and select the New Index Type... item from the popup menu.
To create a new index type with the same properties as one of the existing tables has:
· Select the Database | Duplicate Object menu item.
· Follow the instructions of the Duplicate Object Wizard.
The Duplicate Object window allows you to select the database to create the new index
type in and to edit the result SQL statement for creating the index type.
Edit index type
To edit the existing index type:
· Select the index type for editing in the explorer tree (type the first letters of the
index type name for quick search).
· Right-click and select the Edit Index Type <Index Type_Name> item in the
popup menu or simply double-click the index type.
· Edit index type subobjects and data on the appropriate tabs of the
Index Type
Editor.
Drop index type
To drop a index type:
· Select the index type for editing in the explorer tree.
· Right-click and select the Drop Index Type <Index Type_Name> item from the
popup menu.
· Confirm dropping in the dialog window.
5.3.27.1 Index Type Editor
Index Type Editor allows you to edit properties of the index types. Index Type Editor
can be open automatically after the index type is created and is used when editing the
index type (see Create Index Type and Edit Index Type for details).
To open a index type in the
·
·
·
·
·
Index Type Editor, just double-click it in the Explorer Tree.
Using navigation bar
Editing index type definition
Editing object description
Viewing DDL definition
Browsing object dependencies
© 2007 EMS Database Management Solutions
265
SQL Manager 2007 for Oracle User's Manual
5.3.27.1.1 Using navigation bar
The navigation bar on the left allows you to:
Object bar:
· Select a database and a index type for editing within the current window.
General bar:
· Compile the current index type definition
· Print metadata of the current operator
· View Dependency Tree for the index type
· Refresh the content of the active tab
© 2007 EMS Database Management Solutions
266
SQL Manager 2007 for Oracle User's Manual
5.3.27.1.2 Editing Index Type definition
Name
Specify the name of the indextype to be created.
Schema
Specify the name of the schema in which the indextype resides.
For operator
Choose the proper schema and specify the list of operators supported by the indextype.
To include operators to the list, move them from the Available list to the Selected by
double-clicking or dragging their names. To remove the operators from the list, move
them back in the same way. You can also use the arrow buttons to move the selected
operators (multiple selection can be performed using Ctrl or Shift).
Define the name of the implementation object at the corresponding field to bind the
indextype to an implementation type, which specifies and refers to user-defined index
functions and procedures that implement the indextype.
5.3.28 Operators
Use the Operator Editor to create a new operator and define its bindings. Operators can
be referenced by indextypes and by SQL queries and DML statements.The operators, in
turn, reference functions, packages, types, and other user-defined objects.
Create operator
To create a new operator:
© 2007 EMS Database Management Solutions
267
SQL Manager 2007 for Oracle User's Manual
· Select the Database | New Object menu item.
· Select Operator in the New Object window.
· Edit operator properties and fields on the appropriate tabs of the
Operator Editor.
Hint: To create new operator you can also right-click the
Operators node of the
explorer tree and select the New Operator... item from the popup menu.
To create a new operator with the same properties as one of the existing tables has:
· Select the Database | Duplicate Object menu item.
· Follow the instructions of the Duplicate Object Wizard.
The Duplicate Object window allows you to select the database to create the new
operator in and to edit the result SQL statement for creating the operator.
Edit operator
To edit the existing operator:
· Select the operator for editing in the explorer tree (type the first letters of the
operator name for quick search).
· Right-click and select the Edit Operator <Operator_Name> item in the popup
menu or simply double-click the operator.
· Edit operator subobjects and data on the appropriate tabs of the
Operator Editor.
Drop operator
To drop a operator:
· Select the operator for editing in the explorer tree.
· Right-click and select the Drop Operator <Operator_Name> item from the popup
menu.
· Confirm dropping in the dialog window.
5.3.28.1 Operator Editor
Operator Editor allows you to edit properties of the operators. Operator Editor can be
open automatically after the operator is created and is available on editing the operator
(see Create Operator and Edit Operator for details).
To open a operator in the
·
·
·
·
·
Operator Editor, just double-click it in the Explorer Tree.
Using navigation bar
Editing operator definition
Editing object description
Viewing DDL definition
Browsing object dependencies
© 2007 EMS Database Management Solutions
268
SQL Manager 2007 for Oracle User's Manual
5.3.28.1.1 Using navigation bar
The navigation bar on the left allows you to:
Object bar:
· Select a database and a operator for editing within the current window.
General bar:
· Compile the current operator definition
· Print metadata of the current operator
· View Dependency Tree for the operator
· Refresh the content of the active tab
· Bring the window to its default size
5.3.28.1.2 Editing Operator definition
Name
Specify the name of the operator to be created.
© 2007 EMS Database Management Solutions
269
SQL Manager 2007 for Oracle User's Manual
Schema
Specify the schema containing the operator.
Bindings
Use + (plus sign) and - (minus sign) buttons to add or remove parameter datatypes for
binding the operator to a function.
Editing Operator binding
The signature of each binding - that is, the sequence of the datatypes of the arguments
to the corresponding function - must be unique according to the rules of overloading.The
parameter_type can itself be an object type. If it is, then you can optionally qualify it
with its schema.
Object types schema name
Specify the name of the schema in which the operator resides.
To include types to the list, move them from the Available list to the Selected by
double-clicking or dragging their names. To remove the types from the list, move them
back in the same way. You can also use the arrow buttons to move the selected types
(multiple selection can be performed using Ctrl or Shift).
Return type
Specify the return datatype for the binding.The return type can itself be an object type.
If so, then you can optionally qualify it with its schema in the Implementation object
schema and Implementation object name fields.
Implementation type
Use this group clause to describe the implementation of the binding.
Ancillary
Use this type to indicate that the operator binding is ancillary to the specified primary
operator binding. In this case please fill the Ancillary operator schema and Ancillary
operator fields.
Context
Use this type to indicate to describe the functional implementation of a binding that is not
ancillary to a primary operator binding. In this case please fill the Scan context schema
and Scan context fields.
© 2007 EMS Database Management Solutions
270
SQL Manager 2007 for Oracle User's Manual
5.3.29 Dimensions
A dimension defines a parent-child relationship between pairs of column sets, where all
the columns of a column set must come from the same table. However, columns in one
column set (called a level) can come from a different table than columns in another set.
The optimizer uses these relationships with materialized views to perform query rewrite.
Create dimension
To create a new dimension:
· Select the Database | New Object menu item.
· Select Dimension in the New Object window.
· Edit dimension properties and fields on the appropriate tabs of the
© 2007 EMS Database Management Solutions
Dimension Editor.
271
SQL Manager 2007 for Oracle User's Manual
Hint: To create new dimension you can also right-click the Dimensions node of the
explorer tree and select the New Dimension... item from the popup menu.
To create a new dimension with the same properties as one of the existing tables has:
· Select the Database | Duplicate Object menu item.
· Follow the instructions of the Duplicate Object Wizard.
The Duplicate Object window allows you to select the database to create the new
dimension in and to edit the result SQL statement for creating the dimension.
Edit dimension
To edit the existing dimension:
· Select the dimension for editing in the explorer tree (type the first letters of the
dimension name for quick search).
· Right-click and select the Edit Dimension <Dimension_Name> item in the popup
menu or simply double-click the dimension.
· Edit dimension subobjects and data on the appropriate tabs of the Dimension Editor.
Drop dimension
To drop a dimension:
· Select the dimension for editing in the explorer tree.
· Right-click and select the Drop Dimension <Dimension_Name> item from the
popup menu.
· Confirm dropping in the dialog window.
5.3.29.1 Dimension Editor
Dimension Editor allows you to edit properties of the dimensions. Dimension Editor can
be open automatically after the dimension is created and is used when editing the
dimension (see Create Dimension and Edit Dimension for details).
To open a dimension in the Dimension Editor, just double-click it in the Explorer Tree.
·
·
·
·
·
Using navigation bar
Editing dimension definition
Editing object description
Viewing DDL definition
Browsing object dependencies
© 2007 EMS Database Management Solutions
272
SQL Manager 2007 for Oracle User's Manual
5.3.29.1.1 Using navigation bar
The navigation bar on the left allows you to:
Object bar:
· Select a database and a dimension for editing within the current window.
General bar:
· Compile the current dimension definition
· Print metadata of the current dimension
· View Dependency Tree for the dimension
· Refresh the content of the active tab
· Bring the window to its default size
© 2007 EMS Database Management Solutions
273
SQL Manager 2007 for Oracle User's Manual
5.3.29.1.2 Editing Dimension definition
Name
Specify the name of the dimension to be created. The name must be unique within its
schema.
Schema
Specify the schema in which the dimension will be created.
Levels
A level defines dimension hierarchies and attributes.
Use + (plus sign) and - (minus sign) buttons to add or remove a dimension level.
© 2007 EMS Database Management Solutions
274
SQL Manager 2007 for Oracle User's Manual
Editing dimension level
Specify the name of the level, schema name and define the columns in the level (the
tables you specify in here must already exist).
To include columns to the list, move them from the Available list to the Selected by
double-clicking or dragging their names. To remove the columns from the list, move them
back in the same way. You can also use the arrow buttons to move the selected types
(multiple selection can be performed using Ctrl or Shift).
Attributes
In the corresponding lists you specify the columns that are uniquely determined by a
hierarchy level. The columns in level must all come from the same table as the dependent
columns.
Editing dimension hierarchy
Here you can define a linear hierarchy of levels in the dimension. Each hierarchy forms a
chain of parent-child relationships among the levels in the dimension. Hierarchies in a
dimension are independent of each other. They may, but need not, have columns in
common. Each level in the dimension should be specified at most once in this clause, and
each level must already have been created.
© 2007 EMS Database Management Solutions
275
SQL Manager 2007 for Oracle User's Manual
Hierarchy name
Specify the name of the hierarchy. This name must be unique in the dimension.
Hierarchy levels
Specify the name of a level that has an n:1 relationship with a parent level and press the
Add button. To remove the relationship lease select it and press the corresponding
button.
Join keys
Here you can specify an inner equijoin relationship for a dimension whose columns are
contained in multiple tables. Setting this relationship is required and permitted only when
the columns specified in the hierarchy are not all in the same table.
Table schema Table name
Specify the schema and table of each child column,
Level to reference
Specify the name of a level.
Join key columns
Specify one or more columns that are join-compatible with columns in the parent level and
press the Add button. To remove the column please select it and press the
corresponding button.
To include columns to the list, move them from the Available list to the Selected by
double-clicking or dragging their names. To remove the columns from the list, move them
back in the same way. You can also use the arrow buttons to move the selected types
(multiple selection can be performed using Ctrl or Shift).
Specify the name of a level that has an n:1 relationship with a parent level and press the
Add button. To remove the relationship lease select it and press the corresponding
button.
© 2007 EMS Database Management Solutions
276
5.4
SQL Manager 2007 for Oracle User's Manual
Nonschema objects
Other types of objects are also stored in the database and can be created and
manipulated with SQL but are not contained in a schema:
Contexts
Users
Roles
Profiles
Consumer Groups
Resource Plans
Directories
Tablespaces
Rollback Segments
Redo Log Groups
Use DB Explorer tree to navigate between the objects.
See also:
Schema objects
5.4.1
Contexts
Use Context Editor to create a namespace for a context (a set of application-defined
attributes that validates and secures an application) and associate the namespace with
the externally created package that sets the context.
Create context
To create a new context:
· Select the Database | New Object... menu item.
· Select Context in the New Object dialog.
· Edit context definition within the Context Editor.
Hint: To create new context you can also right-click the
Contexts node of the
explorer tree and select the New Context... item from the popup menu.
To create a new context with the same properties as one of the existing contexts has:
· Select the Database | Duplicate Object... menu item.
· Follow the instructions of the Duplicate Object Wizard.
Edit context
To edit the existing context:
· Select the context for editing in the explorer tree (type the first letters of the context
name for quick search).
© 2007 EMS Database Management Solutions
277
SQL Manager 2007 for Oracle User's Manual
· Right-click and select the Edit Context <Context_Name> item from the popup menu
or simply double-click the context.
Context Editor.
· Edit context definition and data on the appropriate tabs of the
Drop context
To drop a context:
· Select the context to drop in the explorer tree.
· Right-click and select the Drop Context <Context_Name> item from the popup menu.
· Confirm dropping in the dialog window.
5.4.1.1
Context Editor
The Context Editor allows you to define context basic properties. It opens when you
create a new context or edit the existing one (see
Create Context and Edit Context for
details).
·
·
·
·
·
Using navigation bar
Editing context definition
Editing object description
Viewing DDL definition
Browsing object dependencies
5.4.1.1.1 Using navigation bar
The navigation bar on the left allows you to:
Object bar:
· Select a database and a context for editing within the current window.
General bar:
© 2007 EMS Database Management Solutions
278
SQL Manager 2007 for Oracle User's Manual
·
·
·
·
·
Compile the current context definition
Print metadata of the current context
View Dependency Tree for the context
Refresh the content of the active tab
Bring the window to its default size
The next bar displays various actions according to the current page of
Context Editor.
5.4.1.1.2 Editing Context definition
Name
Specify the name of the context namespace to create or modify. Context namespaces are
always stored in the schema SYS.
Schema
Specify the schema owning package.
Package
Specify the PL/SQL package that sets or resets the context attributes under the
namespace for a user session.
Context type
Accessed globally
Indicates that any application context set in namespace is accessible throughout the
entire instance. This setting lets multiple sessions share application attributes.
Initialized externally
Indicates that the namespace can be initialized using an OCI interface when establishing a
session.
Initialized globally
Indicates that the namespace can be initialized by the LDAP directory when a global user
connects to the database. After the session is established, only the designated PL/SQL
package can issue commands to write to any attributes inside the namespace.
© 2007 EMS Database Management Solutions
279
5.4.2
SQL Manager 2007 for Oracle User's Manual
Users
User is an account through which you can log in to the database.
Create user
To create a new user:
· Select the Database | New Object... menu item.
· Select User in the New Object dialog.
· Edit user definition within the User Editor.
Hint: To create new user you can also right-click the
Users node of the explorer tree
and select the New User... item from the popup menu.
To create a new user with the same properties as one of the existing users has:
· Select the Database | Duplicate Object... menu item.
· Follow the instructions of the Duplicate Object Wizard.
Edit user
To edit the existing user:
· Select the user for editing in the explorer tree (type the first letters of the user name
for quick search).
· Right-click and select the Edit User <User_Name> item from the popup menu or
simply double-click the user.
· Edit user definition and data on the appropriate tabs of the User Editor.
Drop user
To drop a user:
· Select the user to drop in the explorer tree.
© 2007 EMS Database Management Solutions
280
SQL Manager 2007 for Oracle User's Manual
· Right-click and select the Drop User <User_Name> item from the popup menu.
· Confirm dropping in the dialog window.
5.4.2.1
User Editor
The User Editor allows you to define user properties and membership. It opens when you
create a new user or edit the existing one (see Create User and Edit User for details).
·
·
·
·
·
·
·
·
Using navigation bar
Editing user definition
Setting Tablespace parameters
Setting quotas
Defining Proxy Users
Editing object description
Viewing DDL definition
Browsing object dependencies
5.4.2.1.1 Using navigation bar
The navigation bar on the left allows you to:
Object bar:
· Select a database and a user for editing within the current window.
General bar:
© 2007 EMS Database Management Solutions
281
SQL Manager 2007 for Oracle User's Manual
·
·
·
·
·
Compile the current user definition
Print metadata of the current user
View Dependency Tree for the user
Refresh the content of the active tab
Bring the window to its default size
The next bar displays various actions according to the current page of
User Editor.
5.4.2.1.2 Editing user definition
Name
Specify the name of the user to be created. This name can contain only characters from
your database character set and comply with the naming rules.
Authentication method
Password authentication
Indicates that the user must specify password to log on to the database.
Operating system authentication
A user must be authenticated by an external service, such as an operating system or a
third-party service. In this case, Oracle relies on authentication by the operating system
or third-party service to ensure that a specific external user has access to a specific
database user.
Global authentication
A user must be authorized by the enterprise directory service (Oracle Internet Directory).
In this case you are to fill all necessary fields below, as follows: common name, country
name, organization, X500 name, etc.
Expire password now
This setting forces the user or the DBA to change the password before the user can log in
to the database.
Lock account now
Use this option to lock the user's account and disable access.
Resource profile
© 2007 EMS Database Management Solutions
282
SQL Manager 2007 for Oracle User's Manual
Specify the profile you want to assign to the user. The profile limits the amount of
database resources the user can use.
5.4.2.1.3 Tablespace parameters
Default tablespace
In the Name field you are to specify the default tablespace for objects that the user
creates.
Temporary tablespace
Specify the tablespace or tablespace group for the user's temporary segments in the
Name field.
Quota on
Specify the maximum amount of space the user can allocate in the tablespace.
© 2007 EMS Database Management Solutions
283
SQL Manager 2007 for Oracle User's Manual
5.4.2.1.4 Setting quotas
The Quotas tab allows you to view and set the quotas for existing tablespaces. For your
convenience you may call the built-in byte calculator by pressing the 'arrow down' button.
5.4.2.1.5 Proxy Users
This tab let you expose user to proxy use by database user, activate all, some, or none of
the roles of the user, and specify whether authentication is required.
Proxy users
To include users to the list, move them from the Available list to the Included by
double-clicking or dragging their names. To remove the users from the list, move them
back in the same way. You can also use the arrow buttons to move the selected types
(multiple selection can be performed using Ctrl or Shift).
After that you are to correlate selected users with the roles listed in the
roles list.
© 2007 EMS Database Management Solutions
Proxy user
284
5.4.3
SQL Manager 2007 for Oracle User's Manual
Roles
A role is a set of privileges that can be granted to users or to other roles. You can use
roles to administer database privileges. You can add privileges to a role and then grant
the role to a user. The user can then enable the role and exercise the privileges granted
by the role.
Create role
To create a new role:
· Select the Database | New Object... menu item.
· Select Role in the New Object dialog.
· Edit role definition within the Role Editor.
Hint: To create new role you can also right-click the
Roles node of the explorer tree
and select the New Role... item from the popup menu.
To create a new role with the same properties as one of the existing roles has:
· Select the Database | Duplicate Object... menu item.
· Follow the instructions of the Duplicate Object Wizard.
© 2007 EMS Database Management Solutions
285
SQL Manager 2007 for Oracle User's Manual
Edit role
To edit the existing role:
· Select the role for editing in the explorer tree (type the first letters of the role name for
quick search).
· Right-click and select the Edit Role <Role_Name> item from the popup menu or simply
double-click the role.
· Edit role definition and data on the appropriate tabs of the Role Editor.
Drop role
To drop a role:
· Select the role to drop in the explorer tree.
· Right-click and select the Drop Role <Role_Name> item from the popup menu.
· Confirm dropping in the dialog window.
5.4.3.1
Role Editor
The Role Editor allows you to define role basic properties. It opens when you create a
new role or edit the existing one (see Create Role and Edit Role for details).
·
·
·
·
·
Using navigation bar
Editing role definition
Editing object description
Viewing DDL definition
Browsing object dependencies
5.4.3.1.1 Using navigation bar
The navigation bar on the left allows you to:
© 2007 EMS Database Management Solutions
286
SQL Manager 2007 for Oracle User's Manual
Object bar:
· Select a database and a role for editing within the current window.
General bar:
· Compile the current role definition
· Print metadata of the current role
· View Dependency Tree for the role
· Refresh the content of the active tab
· Bring the window to its default size
The next bar displays various actions according to the current page of
Role Editor.
5.4.3.1.2 Editing role definition
Name
Specify the name of the role to be created.
Authentication method
Password authentication
Indicates that the user must specify password to log on to the database. Set the
password and confirm it at the corresponding boxes.
Operating system authentication
A user must be authenticated by an external service, such as an operating system or a
third-party service. In this case, Oracle relies on authentication by the operating system
or third-party service to ensure that a specific external user has access to a specific
database user.
Global authentication
A user must be authorized by the enterprise directory service (Oracle Internet Directory).
Not identified
Indicates that this role is authorized by the database and that no password is required to
enable the role.
© 2007 EMS Database Management Solutions
287
5.4.4
SQL Manager 2007 for Oracle User's Manual
Profiles
Profile is a set of limits on database resources. If you assign the profile to a user, then
that user cannot exceed these limits.
Create profile
To create a new profile:
· Select the Database | New Object... menu item.
· Select Profile in the New Object dialog.
· Edit profile definition within the Profile Editor.
Hint: To create new profile you can also right-click the
Profiles node of the explorer
tree and select the New Profile... item from the popup menu.
To create a new profile with the same properties as one of the existing profiles has:
· Select the Database | Duplicate Object... menu item.
· Follow the instructions of the Duplicate Object Wizard.
Edit profile
To edit the existing profile:
· Select the profile for editing in the explorer tree (type the first letters of the profile
name for quick search).
· Right-click and select the Edit Profile <Profile_Name> item from the popup menu or
simply double-click the profile.
· Edit profile definition and data on the appropriate tabs of the Profile Editor.
Drop profile
To drop a profile:
© 2007 EMS Database Management Solutions
288
SQL Manager 2007 for Oracle User's Manual
· Select the profile to drop in the explorer tree.
· Right-click and select the Drop Profile <Profile_Name> item from the popup menu.
· Confirm dropping in the dialog window.
5.4.4.1
Profile Editor
The Profile Editor allows you to define profile basic properties. It opens when you create
a new profile or edit the existing one (see Create Profile and Edit Profile for details).
·
·
·
·
·
Using navigation bar
Editing profile definition
Editing object description
Viewing DDL definition
Browsing object dependencies
© 2007 EMS Database Management Solutions
289
SQL Manager 2007 for Oracle User's Manual
5.4.4.1.1 Using navigation bar
The navigation bar on the left allows you to:
Object bar:
· Select a database and a profile for editing within the current window.
General bar:
· Compile the current profile definition
· Print metadata of the current profile
· View Dependency Tree for the profile
· Refresh the content of the active tab
· Bring the window to its default size
The next bar displays various actions according to the current page of
Profile Editor.
5.4.4.1.2 Editing Profile definition
Name
Specify the name of the profile to be created. Use profiles to limit the database resources
available to a user for a single call or a single session.
Resource parameters
Sessions per user
Specify the number of concurrent sessions to which you want to limit the user.
CPU per session
Specify the CPU time limit for a session, expressed in hundredth of seconds.
CPU per call
Specify the CPU time limit for a call (a parse, execute, or fetch), expressed in hundredths
of seconds.
Connect time
Specify the total elapsed time limit for a session, expressed in minutes.
Idle time
Specify the permitted periods of continuous inactive time during a session, expressed in
© 2007 EMS Database Management Solutions
290
SQL Manager 2007 for Oracle User's Manual
minutes. Long-running queries and other operations are not subject to this limit.
Logical reads per session
Specify the permitted number of data blocks read in a session, including blocks read from
memory and disk.
Logical reads per call
Specify the permitted number of data blocks read for a call to process a SQL statement
(a parse, execute, or fetch).
Composite limit
Specify the total resource cost for a session, expressed in service units. Oracle calculates
the total service units as a weighted sum of CPU_PER_SESSION, CONNECT_TIME,
LOGICAL_READS_PER_SESSION, and PRIVATE_SGA.
Private SGA
Specify the amount of private space a session can allocate in the shared pool of the
system global area (SGA).
Password parameters
Failed login attempts
Specify the number of failed attempts to log in to the user account before the account is
locked.
Password lifetime
Specify the number of days the same password can be used for authentication. If you
also set a value for PASSWORD_GRACE_TIME, the password expires if it is not changed
within the grace period, and further connections are rejected.
Password reuse time
Specifies the number of days before which a password cannot be reused.
Password reuse max
Specifies the number of password changes required before the current password can be
reused.
Password lock
Specify the number of days an account will be locked after the specified number of
consecutive failed login attempts.
Password grace time
Specify the number of days after the grace period begins during which a warning is issued
and login is allowed. If the password is not changed during the grace period, the password
expires.
Password verify function
Lets a PL/SQL password complexity verification script be passed as an argument to the
CREATE PROFILE statement.
© 2007 EMS Database Management Solutions
291
5.4.5
SQL Manager 2007 for Oracle User's Manual
Consumer Groups
Consumer groups let you group user sessions together by resource requirements.
Resource consumer groups are different from user roles; one database user can have
different sessions assigned to different resource consumer groups.
Create consumer group
To create a new consumer group:
· Select the Database | New Object... menu item.
· Select Consumer Group in the New Object dialog.
· Edit consumer group definition within the Consumer Group Editor.
Hint: To create new consumer group you can also right-click the
Consumer Groups
node of the explorer tree and select the New Consumer Group... item from the
popup menu.
© 2007 EMS Database Management Solutions
292
SQL Manager 2007 for Oracle User's Manual
To create a new consumer group with the same properties as one of the existing
consumer groups has:
· Select the Database | Duplicate Object... menu item.
· Follow the instructions of the Duplicate Object Wizard.
Edit consumer group
To edit the existing consumer group:
· Select the consumer group for editing in the explorer tree (type the first letters of the
consumer group name for quick search).
· Right-click and select the Edit Consumer Group <Consumer group_Name> item
from the popup menu or simply double-click the consumer group.
· Edit consumer group definition and data on the appropriate tabs of the Consumer Group
Editor.
Drop consumer group
To drop a consumer group:
· Select the consumer group to drop in the explorer tree.
· Right-click and select the Drop Consumer Group <Consumer Group_Name> item
from the popup menu.
· Confirm dropping in the dialog window.
5.4.5.1
Consumer Group Editor
The Consumer Group Editor allows you to define consumer group basic properties. It
opens when you create a new consumer group or edit the existing one (see Create
Consumer Group and Edit Consumer Group for details).
·
·
·
·
·
Using navigation bar
Editing consumer group definition
Editing object description
Viewing DDL definition
Browsing object dependencies
© 2007 EMS Database Management Solutions
293
SQL Manager 2007 for Oracle User's Manual
5.4.5.1.1 Using navigation bar
The navigation bar on the left allows you to:
Object bar:
· Select a database and a consumer group for editing within the current window.
General bar:
· Compile the current consumer group definition
· Print metadata of the current consumer group
· View Dependency Tree for the consumer group
· Refresh the content of the active tab
· Bring the window to its default size
The next bar displays various actions according to the current page of
Editor.
© 2007 EMS Database Management Solutions
Consumer Group
294
SQL Manager 2007 for Oracle User's Manual
5.4.5.1.2 Editing Consumer Groups
Use the Users and Roles lists to form a consumer group.
Name
The name of the consumer group to be created.
Users / Roles
To include users/roles to the list, move them from the Available list to the Included by
double-clicking or dragging their names. To remove the users/roles from the list, move
them back in the same way. You can also use the arrow buttons to move the selected
items (multiple selection can be performed using Ctrl or Shift).
Admin opt
If this option is checked the users granted switch privilege for the consumer group may
also grant switch privileges for that consumer group to others.
Init group
The initial consumer group of a user is the consumer group to which any session created
by that user initially belongs. This option sets the initial resource consumer group for a
user.
The CPU method and Mandatory controls are disabled for future use as they are not
supported in the current versions of Oracle.
© 2007 EMS Database Management Solutions
295
5.4.6
SQL Manager 2007 for Oracle User's Manual
Resource Plans
Use Resource Plan Editor to define resource plans.
Create resource plan
To create a new resource plan:
· Select the Database | New Object... menu item.
· Select Resource Plan in the New Object dialog.
· Edit resource plan definition within the Resource Plan Editor.
Hint: To create new resource plan you can also right-click the
Resource Plans node
of the explorer tree and select the New Resource Plan... item from the popup menu.
To create a new resource plan with the same properties as one of the existing resource
plans has:
© 2007 EMS Database Management Solutions
296
SQL Manager 2007 for Oracle User's Manual
· Select the Database | Duplicate Object... menu item.
· Follow the instructions of the Duplicate Object Wizard.
Edit resource plan
To edit the existing resource plan:
· Select the resource plan for editing in the explorer tree (type the first letters of the
resource plan name for quick search).
· Right-click and select the Edit Resource Plan <Consumer group_Name> item from
the popup menu or simply double-click the resource plan.
· Edit resource plan definition and data on the appropriate tabs of the Resource Plan Editor.
Drop resource plan
To drop a resource plan:
· Select the resource plan to drop in the explorer tree.
· Right-click and select the Drop Resource Plan <Resource Plan_Name> item from the
popup menu.
· Confirm dropping in the dialog window.
5.4.6.1
Resource Plan Editor
The Resource Plan Editor allows you to define resource plan properties. It opens when
you create a new resource plan or edit the existing one (see Create Resource Plan and
Edit Resource Plan for details).
·
·
·
·
·
·
Using navigation bar
Editing resource plan definition
Resource Plan Directives
Editing object description
Viewing DDL definition
Browsing object dependencies
© 2007 EMS Database Management Solutions
297
SQL Manager 2007 for Oracle User's Manual
5.4.6.1.1 Using navigation bar
The navigation bar on the left allows you to:
Object bar:
· Select a database and a resource plan for editing within the current window.
General bar:
· Compile the current resource plan definition
· Print metadata of the current resource plan
· View Dependency Tree for the resource plan
· Refresh the content of the active tab
· Bring the window to its default size
The next bar displays various actions according to the current page of
Editor.
© 2007 EMS Database Management Solutions
Resource Plan
298
SQL Manager 2007 for Oracle User's Manual
5.4.6.1.2 Editing Resource Plan
Use Resource Plan Editor to define resource plans.
Name
The name of the resource plan.
Available consumer group and subplans
To include consumer group / subplan to the list, move them from the Available list to
the Included by double-clicking or dragging their names. To remove the consumer group /
subplan from the list, move them back in the same way. You can also use the arrow
buttons to move the selected items (multiple selection can be performed using Ctrl or
Shift).
Active
Immediately activates a resource plan after compiling.
© 2007 EMS Database Management Solutions
299
SQL Manager 2007 for Oracle User's Manual
5.4.6.1.3 Resource Plan Directives
For each consumer group / subplan previously added at the
set a number of parameters (directives options).
Resource Plan tab you can
Name
The name of the consumer group or subplan.
Level 1 - Level 8
Specify the CPU percentage at the corresponding level.
Degree Of Parallelism
Specify a limit on the degree of parallelism for any operation.
Active Session Pool
Specify maximum number of concurrently active sessions for a consumer group.
Timeout
Specify time (in seconds) after which a job in the inactive session queue (waiting for
execution) will time out.
Max Undo Pool
© 2007 EMS Database Management Solutions
300
SQL Manager 2007 for Oracle User's Manual
Set a maximum in kilobytes (K) on the total amount of undo generated by a consumer
group.
Max Execution Time
Specify the maximum execution time (in seconds) allowed for a session.
Switch Group
Specify consumer group to which this session is switched if other switch criteria is met.
Switch Time
Specify time (in seconds) that a session can execute before an action is taken.
Switch Estimate
If checked, Oracle uses its execution time estimate to automatically switch the consumer
group of an operation before beginning its execution.
You can create optional comments to consumer group / subplan directives at the
Directives Comments tab.
5.4.7
Directories
A directory object specifies an alias for a directory on the server file system where
external binary file LOBs (BFILEs) and external table data are located. You can use
directory names when referring to BFILEs in your PL/SQL code and OCI calls, rather than
hard coding the operating system path name, for management flexibility.
Create directory
To create a new
directory:
· Select the Database | New Object... menu item.
· Select Directory in the New Object dialog.
· Edit directory definition within the Directory Editor .
Hint: To create new directory you can also right-click the
Directories node of the
explorer tree and select the New Directory... item from the popup menu.
To create a new directory with the same properties as one of the existing directories has:
· Select the Database | Duplicate Object... menu item.
© 2007 EMS Database Management Solutions
301
SQL Manager 2007 for Oracle User's Manual
· Follow the instructions of the
Duplicate Object Wizard.
Edit directory
To edit the existing directory:
· Select the directory for editing in the explorer tree (type the first letters of the
directory name for quick search).
· Right-click and select the Edit Directory <Directory_Name> item from the popup
menu or simply double-click the directory.
· Edit directory definition and data on the appropriate tabs of the Directory Editor .
Drop directory
To drop a directory:
· Select the directory to drop in the explorer tree.
· Right-click and select the Drop Directory <Directory_Name> item from the popup
menu.
· Confirm dropping in the dialog window.
5.4.7.1
Directory Editor
The Directory Editor allows you to define directory properties. It opens when you create
a new directory or edit the existing one (see Create Directory and Edit Directory for
details).
·
·
·
·
·
Using navigation bar
Editing directory definition
Editing object description
Viewing DDL definition
Browsing object dependencies
5.4.7.1.1 Using navigation bar
The navigation bar on the left allows you to:
© 2007 EMS Database Management Solutions
302
SQL Manager 2007 for Oracle User's Manual
Object bar:
· Select a database and an object for editing within the current window.
General bar:
· Compile the current object definition
· Print metadata of the current object
· View Dependency Tree for the object
· Refresh the content of the active tab
· Bring the window to its default size
The next bar displays various actions according to the current page of
Profile Editor.
5.4.7.1.2 Editing Directory definition
Name
Specify the name of the directory object to be created. The maximum length of directory
is 30 bytes. You cannot qualify a directory object with a schema name.
Directory path
Specify the full path name of the operating system directory of the server where the files
are located.
5.4.8
Tablespaces
Tablespace is an allocation of space in the database that can contain schema objects.
© 2007 EMS Database Management Solutions
303
SQL Manager 2007 for Oracle User's Manual
Create tablespace
To create a new tablespace:
· Select the Database | New Object... menu item.
· Select Tablespace in the New Object dialog.
· Edit tablespace definition within the Tablespace Editor.
Hint: To create new tablespace you can also right-click the
Tablespaces node of the
explorer tree and select the New Tablespace... item from the popup menu.
To create a new tablespace with the same properties as one of the existing tablespaces
has:
· Select the Database | Duplicate Object... menu item.
· Follow the instructions of the Duplicate Object Wizard.
Edit tablespace
To edit the existing tablespace:
· Select the tablespace for editing in the explorer tree (type the first letters of the
tablespace name for quick search).
· Right-click and select the Edit Tablespace <Tablespace_Name> item from the popup
menu or simply double-click the tablespace.
Tablespace Editor.
· Edit tablespace definition and data on the appropriate tabs of the
Drop tablespace
To drop a tablespace:
· Select the tablespace to drop in the explorer tree.
· Right-click and select the Drop Tablespace <Tablespace_Name> item from the
popup menu.
· Confirm dropping in the dialog window.
5.4.8.1
Tablespace Editor
The Tablespace Editor allows you to define tablespace basic properties. It opens when
you create a new tablespace or edit the existing one (see
Create Tablespace and Edit
Tablespace for details).
·
·
·
·
·
·
·
Using navigation bar
Editing tablespace definition
Managing tablespace files
Object storage attributes
Editing object description
Viewing DDL definition
Browsing object dependencies
© 2007 EMS Database Management Solutions
304
SQL Manager 2007 for Oracle User's Manual
5.4.8.1.1 Using navigation bar
The navigation bar on the left allows you to:
Object bar:
· Select a database and an object for editing within the current window.
General bar:
· Compile the current object definition
· Print metadata of the current object
· View Dependency Tree for the object
· Refresh the content of the active tab
· Bring the window to its default size
The next bar displays various actions according to the current page of
Editor.
© 2007 EMS Database Management Solutions
Tablespace
305
SQL Manager 2007 for Oracle User's Manual
5.4.8.1.2 Editing Tablespace
Name
Specify the name of the tablespace to be created.
Tablespace type
Permanent
Contains persistent schema objects. Objects in permanent tablespaces are stored in
datafiles.
Temporary
contains schema objects only for the duration of a session. Objects in temporary
tablespaces are stored in tempfiles.
Undo
A type of permanent tablespace used by Oracle Database to manage undo data if you are
running your database in automatic undo management mode.
Logging
Check the option to set the default logging attributes of all tables, indexes, materialized
views, materialized view logs, and partitions within the tablespace.
Force logging
Use this option to put the tablespace into FORCE LOGGING mode. Oracle Database will log
all changes to all objects in the tablespace except changes to temporary segments,
overriding any NOLOGGING setting for individual objects.
Big file
Use this clause to specify that the tablespace is a bigfile tablespace. A bigfile tablespace
contains only one datafile or tempfile, which can contain up to approximately 4 billion
(232) blocks with the maximum size of the single datafile or tempfile is 128 terabytes (TB)
(for a tablespace with 32K blocks).
Online
When checked, the tablespace is available immediately after creation to users who have
© 2007 EMS Database Management Solutions
306
SQL Manager 2007 for Oracle User's Manual
been granted access to the tablespace.
Compress
This clause lets you specify default default compression of data for all tables created in
the tablespace (not valid for a temporary tablespace).
Default storage
Valid only for a dictionary-managed tablespace. This group lets you specify default
storage parameters for all objects created in the tablespace. For more information see
Storage attributes.
Extent management
Dictionary
Use this option if you want the tablespace to be managed using dictionary tables. In this
case set the Default storage parameters.
© 2007 EMS Database Management Solutions
307
SQL Manager 2007 for Oracle User's Manual
Locally
Check this option if you want the tablespace to be locally managed. Locally managed
tablespaces have some part of the tablespace set aside for a bitmap.
Allocation
Auto
Specifies that the tablespace is system managed. Users cannot specify an extent size.
Uniform
Specifies that the tablespace is managed with uniform extents of amount of bytes set in
the Block size field of the Extent management group.
Default
Check the option to use default settings for table space management.
Auto segment
Use the option if you want the database to manage the free space of segments in the
tablespace using a bitmap. If you checked this option, then the database ignores any
specification for PCTUSED, FREELIST, and FREELIST GROUPS in subsequent storage
specifications for objects in this tablespace.
5.4.8.1.3 Managing Tablespace files
Specify the datafiles to make up the permanent tablespace or the tempfiles to make up
the temporary tablespace.
Use the corresponding items of context menu either to add, remove or edit file.
Adding/editing a file
Name
Specify the name of either a datafile or tempfile.
Size
Specify the size of the file in bytes.
Reuse
Check the box to allow Oracle to reuse an existing file.
© 2007 EMS Database Management Solutions
308
SQL Manager 2007 for Oracle User's Manual
Autoextension
Enables or disables the automatic extension of a new or existing datafile or tempfile.
Next size
Specify the size in bytes of the next increment of disk space to be allocated automatically
when more extents are required.
Maximum size
Specify the maximum disk space allowed for automatic extension of the datafile.
Unlimited maximum size
Check the option if you do not want to limit the disk space that Oracle can allocate to
the datafile or tempfile.
5.4.9
Rollback Segments
Rollback segment is an object that Oracle Database uses to store data necessary to
reverse, or undo, changes made by transactions.
Create rollback segment
To create a new rollback segment:
· Select the Database | New Object... menu item.
· Select Rollback Segment in the New Object dialog.
· Edit rollback segment definition within the Rollback Segment Editor.
© 2007 EMS Database Management Solutions
309
SQL Manager 2007 for Oracle User's Manual
Hint: To create new rollback segment you can also right-click the
Rollback
Segments node of the explorer tree and select the New Rollback Segment... item
from the popup menu.
To create a new rollback segment with the same properties as one of the existing rollback
segments has:
· Select the Database | Duplicate Object... menu item.
· Follow the instructions of the Duplicate Object Wizard.
Edit rollback segment
To edit the existing rollback segment:
· Select the rollback segment for editing in the explorer tree (type the first letters of the
rollback segment name for quick search).
· Right-click and select the Edit Rollback Segment <Rollback Segment_Name> item
from the popup menu or simply double-click the rollback segment.
· Edit rollback segment definition and data on the appropriate tabs of the Rollback Segment
Editor.
Drop rollback segment
To drop a rollback segment:
· Select the rollback segment to drop in the explorer tree.
· Right-click and select the Drop Rollback Segment <Rollback Segment_Name> item
from the popup menu.
· Confirm dropping in the dialog window.
5.4.9.1
Rollback Segment Editor
The Rollback Segment Editor allows you to define rollback segment basic properties. It
opens when you create a new rollback segment or edit the existing one (see Create
Rollback Segment and Edit Rollback Segment for details).
·
·
·
·
·
Using navigation bar
Editing rollback segment definition
Editing object description
Viewing DDL definition
Browsing object dependencies
© 2007 EMS Database Management Solutions
310
SQL Manager 2007 for Oracle User's Manual
5.4.9.1.1 Using navigation bar
The navigation bar on the left allows you to:
Object bar:
· Select a database and an object for editing within the current window.
General bar:
· Compile the current object definition
· Print metadata of the current object
· View Dependency Tree for the object
· Refresh the content of the active tab
· Bring the window to its default size
The next bar displays various actions according to the current page of
Segment Editor.
© 2007 EMS Database Management Solutions
Rollback
311
SQL Manager 2007 for Oracle User's Manual
5.4.9.1.2 Editing Rollback Segment
Name
Specify the name of the rollback segment to be created.
Tablespace
Identify the tablespace in which the rollback segment is created.
Public
Enable the option to indicate that the rollback segment is public and is available to any
instance.
Online
Check the option to bring the rollback segment online, making it available for transactions
by your instance.
Storage
The Storage group lets you specify storage characteristics for the rollback segment. For
more information see Storage attributes.
5.4.10 Redo Log Groups
Use Redo Log Group Editor to add one or more redo log file groups to the specified
thread or instance, making them available to the instance to which the thread is assigned.
Create redo log group
To create a new redo log group:
· Select the Database | New Object... menu item.
· Select Redo Log Group in the New Object dialog.
· Edit redo log group definition within the Redo Log Group Editor.
© 2007 EMS Database Management Solutions
312
SQL Manager 2007 for Oracle User's Manual
Hint: To create new redo log group you can also right-click the
Redo Log Groups
node of the explorer tree and select the New Redo Log Group... item from the popup
menu.
To create a new redo log group with the same properties as one of the existing redo log
groups has:
· Select the Database | Duplicate Object... menu item.
· Follow the instructions of the Duplicate Object Wizard.
Edit redo log group
To edit the existing redo log group:
· Select the redo log group for editing in the explorer tree (type the first letters of the
redo log group name for quick search).
· Right-click and select the Edit Redo Log Group <Redo Log Group_Name>item from
the popup menu or simply double-click the redo log group.
· Edit redo log group definition and data on the appropriate tabs of the Redo Log Group
Editor.
Drop redo log group
To drop a redo log group:
· Select the redo log group to drop in the explorer tree.
· Right-click and select the Drop Redo Log Group <Redo Log Group_Name>item from
the popup menu.
· Confirm dropping in the dialog window.
5.4.10.1 Redo Log Group Editor
The Redo Log Group Editor allows you to define redo log group basic properties. It opens
when you create a new redo log group or edit the existing one (see Create Redo Log
Group and Edit Redo Log Group for details).
·
·
·
·
·
Using navigation bar
Editing redo log group definition
Editing object description
Viewing DDL definition
Browsing object dependencies
© 2007 EMS Database Management Solutions
313
SQL Manager 2007 for Oracle User's Manual
5.4.10.1.1 Using navigation bar
The navigation bar on the left allows you to:
Object bar:
· Select a database and an object for editing within the current window.
General bar:
· Compile the current object definition
· Print metadata of the current object
· View Dependency Tree for the object
· Refresh the content of the active tab
· Bring the window to its default size
The next bar displays various actions according to the current page of
Editor.
© 2007 EMS Database Management Solutions
Redo Log Group
314
SQL Manager 2007 for Oracle User's Manual
5.4.10.1.2 Editing Redo Log Group
Adding a new redo log group to your database:
Name
The group number uniquely identifies the redo log group. The the default value is
generated automatically. You can enter a different group number in this field, if you
desire.
Status
Status of the redo log group: Current, Active, or Inactive.
Sequence
Sequence number of the redo log group.
File size
Size of the redo log file.
Reuse existing files
Allows Oracle to reuse existing file.
Adding new members to an existing group:
Members
List of members to be included in the redo log group.
Use context menu to append/delete a member or press the green plus/red minus buttons.
© 2007 EMS Database Management Solutions
315
SQL Manager 2007 for Oracle User's Manual
© 2007 EMS Database Management Solutions
Part
VI
317
6
SQL Manager 2007 for Oracle User's Manual
Queries
SQL Manager 2007 for Oracle provides two powerful tools for working with the SQL
queries: SQL Editor for editing the query text directly and Visual Query Builder for building
queries visually.
Creating a new Query
To create a new query in SQL Editor:
· Select Tools | New SQL Editor menu item.
· Click Add new query button on the toolbar.
· Edit the query text on the Edit tab of the SQL Editor.
To create a new query in Query Builder:
· Select Tools | New Query Builder menu item.
· Build the query on the Builder tab of Visual Query Builder.
Editing Query
To open a query in SQL Editor:
· Select Tools | Show SQL Editor menu item.
· Use the number buttons at the bottom of the area to find one of the previously edited
queries. The last edited query is displayed automatically on opening the editor.
· To load a query from an *.sql file click Load from file button at the navigation bar.
To open a query in Query Builder:
·
·
·
·
Select Tools | Show Query Builder menu item.
The last edited query is displayed on the Builder tab.
To load a previously saved diagram click Load Diagram item at the navigation bar.
To load a query from an *.sql file, open the Editor tab and click Load from file button
at the navigation bar.
Executing Query
To execute a query:
· Create a new query or open the existing one.
· Click Execute query button on the toolbar of SQL Editor or Visual Query Builder
respectively.
· View/edit the returned data on the Results tab.
Saving Query
To save a query:
· Create a new query or open the existing one.
· Click Save to file item at the navigation bar of SQL Editor or Save query item at the
Editor tab of Visual Query Builder respectively to save the current query to *.sql file.
© 2007 EMS Database Management Solutions
318
SQL Manager 2007 for Oracle User's Manual
· Click Save diagram item at the navigation bar of the Builder tab of Visual Query
Builder to save the designed diagram.
· Click Save All button on SQL Editor toolbar to save all the opened queries to one file.
© 2007 EMS Database Management Solutions
319
6.1
SQL Manager 2007 for Oracle User's Manual
SQL Editor
SQL Editor is the basic tool of SQL Manager 2007 for Oracle for creating and executing
queries. The tool allows you to create and edit the SQL text of a query, prepare and
execute queries and view the results of query execution.
To open SQL Editor, select the Tools | New SQL Editor / Tools | Show SQL Editor main
menu items or use the corresponding
/
toolbar buttons. You can also use the Shift +
F12 / F12 shortcuts for the same purpose.
·
·
·
·
·
·
·
·
Using Navigation bar
Working with SQL Editor area
Using the context menu
Viewing query plan
Using object links
Executing queries and viewing results
Viewing query logs
Using PL/SQL Code Debugger
See also:
Visual Query Builder
SQL Script Editor
© 2007 EMS Database Management Solutions
320
6.1.1
SQL Manager 2007 for Oracle User's Manual
Using Navigation bar
The
·
·
·
·
·
·
·
·
·
·
·
·
·
·
·
·
·
·
·
Navigation bar of SQL Editor allows you to:
select a database for the query;
execute the current query;
view estimated query execution plan;
add a new query (note that the current query text will NOT be lost);
remove the current query;
remove all queries from the editor;
rename the query;
run Visual Query Builder to design the query as a diagram;
switch the results representation mode: on Edit tab or on separate tab;
configure SQL Editor within the Tools | SQL Editor page of the Environment Options
dialog;
activate the Find Text dialog;
load a query from an *.sql file using the Open SQL File dialog;
save the query to an *.sql file using the Save as... dialog;
save all the queries to an *.sql file;
commit/rollback the transaction;
export the returned dataset using Export Data Wizard;
export data as SQL Script using the Export as SQL Script wizard;
import data into the table using Import Data Wizard;
debug the PL/SQL code using PL/SQL Debugger.
© 2007 EMS Database Management Solutions
321
SQL Manager 2007 for Oracle User's Manual
See also:
Working with SQL Editor area
Using the context menu
Viewing query plan
Using object links
Executing queries
Viewing query logs
Using PL/SQL Code Debugger
6.1.2
Working with SQL Editor area
The Editor area of SQL Editor is available within the Edit tab and is provided for working
with SQL queries in text mode.
For your convenience the
© 2007 EMS Database Management Solutions
syntax highlight, code completion and a number of other
322
SQL Manager 2007 for Oracle User's Manual
features for efficient SQL editing are implemented. If necessary, you can enable/disable or
customize most of SQL Editor features using the Editor Options dialog.
The example of code completion is illustrated in the picture below. You can set the delay
within the Quick code section of the Editor Options dialog or activate the completion list
manually by pressing the Ctrl+Space shortcut.
Hint: To paste input parameters of a procedure quickly, use the
after the procedure name.
If necessary, you can
the context menu.
Ctrl+Shift+P shortcut
print the SQL text of your query using the corresponding item of
See also:
Using Navigation bar
Using the context menu
Viewing query plan
Using object links
Executing queries
Viewing query logs
© 2007 EMS Database Management Solutions
323
SQL Manager 2007 for Oracle User's Manual
Using PL/SQL Code Debugger
6.1.3
Using the context menu
The context menu of SQL Editor area contains execution commands, most of the
standard text-processing functions (Cut, Copy, Paste, Select All) and functions for
working with the query as a whole, e.g. you can move the cursor to a particular line,
change the case of selected text, view the query properties or print the text of the
query. Each of these operations can be also performed with the corresponding hot keys
used.
Implementation of the Find Text and the Replace Text dialogs contributes to more
efficient work with the SQL code.
Find the complete list of SQL Editor context menu items below. The context menu allows
you to:
· execute the query/selected text/text under cursor, and reset execution point (if
necessary);
· manage markers: Drop Marker, Collect Marker, Swap Marker;
· toggle bookmarks allowing you to navigate through the query text and jump to a line
with a particular number;
· perform editing operations: Undo/Redo, Cut, Copy, Paste, Select all;
· perform search and replace operations;
· change case of the selected text;
· save/load a query to/from an external *.sql file;
· perform preview/print operations;
· format the selected code using SQL Formatter to make the code easier to read;
· toggle a comment for a code fragment;
· open the Editor Options dialog.
© 2007 EMS Database Management Solutions
324
SQL Manager 2007 for Oracle User's Manual
See also:
Using Navigation bar
Working with SQL Editor area
Viewing query plan
Using object links
Executing queries
Viewing query logs
Using PL/SQL Code Debugger
6.1.4
Viewing query plan
Using SQL Manager 2007 for Oracle, you can view the plan for each of the queries
created and executed in the application. The query plan is available within the
© 2007 EMS Database Management Solutions
325
SQL Manager 2007 for Oracle User's Manual
corresponding Plan tab.
To view the Plan of a query, open the query in SQL Editor and use the
item of the Navigation bar.
Explain query
The Plan tab allows you to view the sequence of actions performed by the database
server in the process of the query execution, and the amount of system resources used
for the query execution. Note that this tab only appears after you have executed the
query.
If necessary, you can specify that the
Plan tab appears automatically upon query
execution in SQL Editor: select the
Explain query option available within the Tools |
SQL Editor section of the Environment Options dialog.
See also:
Using Navigation bar
© 2007 EMS Database Management Solutions
326
SQL Manager 2007 for Oracle User's Manual
Working with SQL Editor area
Using the context menu
Using object links
Executing queries
Viewing query logs
Using PL/SQL Code Debugger
6.1.5
Using object links
Objects that exist in the database are highlighted in the text as hyperlinks. You can open
an object in the appropriate editor by clicking the object name in the text with the
Ctrl
key pressed.
Please note that you can change the way highlighted objects look in the editor: use the
Color section of the Editor Options dialog.
See also:
Using Navigation bar
Working with SQL Editor area
Using the context menu
Viewing query plan
Executing queries
Viewing query logs
Using PL/SQL Code Debugger
6.1.6
Executing queries and viewing results
When all the query parameters are set, you can immediately execute the query in SQL
Editor.
To execute a query, click the
Execute query item of the Navigation bar. You can also
use the context menu or F9 hot key for the same purpose.
© 2007 EMS Database Management Solutions
327
SQL Manager 2007 for Oracle User's Manual
If the SQL syntax is correct, the query is executed and, in case the query statement is
supposed to return data (e.g. as SELECT statement), the returned dataset appears within
the Results tab. The position of the tab depends on the Results on Edit tab / Results
on separate tab selection in the Navigation bar.
If SQL syntax of the query contains any errors, the query execution is stopped and the
corresponding error message is displayed in the status bar area at the bottom of the
editor window.
By default, data returned by a query are displayed as a grid (see Data View for details).
The context menu of the grid allows you to Export Data, Export as SQL Script.
© 2007 EMS Database Management Solutions
328
SQL Manager 2007 for Oracle User's Manual
See also:
Using Navigation bar
Working with SQL Editor area
Using the context menu
Viewing query plan
Using object links
Viewing query logs
Using PL/SQL Code Debugger
6.1.7
Viewing query logs
This tab allows you to view the query
Editor.
© 2007 EMS Database Management Solutions
log. The log is available within the Logs tab of SQL
329
SQL Manager 2007 for Oracle User's Manual
Using this tab you can view the text of each query, information on the date and time of
the query execution, the number of rows fetched, etc. With the help of the context
menu the log can be printed, saved to file or cleared. You can also use a number of SQL
Editor context menu generic functions.
See also:
Using Navigation bar
Working with SQL Editor area
Using the context menu
Viewing query plan
Using object links
Executing queries
Using PL/SQL Code Debugger
6.1.8
Using PL/SQL Code Debugger
PL/SQL Code Debugger is a new feature of SQL Manager 2007 for Oracle. This tool is
provided for step-by-step code debugging: anonymous blocks, procedures, functions,
packages, triggers, object types. Much of the power of the debugger comes from toggling
breakpoints, getting variables' values, and fetching call stacks.
© 2007 EMS Database Management Solutions
330
SQL Manager 2007 for Oracle User's Manual
The
·
·
·
·
·
Edit tab of the PL/SQL Code Debugger window contains the following areas:
the Debug pane of the Navigation bar;
the Watches list;
the PL/SQL code area;
the Call stack box;
the Breakpoints list.
Note: All areas within the Edit tab of the PL/SQL Code Debugger window are dockable,
i.e. you can drag an area to any location within the parent form.
The Logs tab of the
PL/SQL Code Debugger window displays the debug log.
The Debug pane of the Navigation bar provides several debug commands:
Start: this command is used to start the debugging session;
Break: this command stops the current debugging session;
Continue: use this command to continue execution up to the next breakpoint;
Step over: traces the code disregarding the object body (procedure, function);
Trace into: traces the code using the object body (procedure, function);
Trace out: traces the code up to the point of leaving the object body (procedure,
function);
Run to exception: traces the code up to the nearest exception point;
Toggle breakpoint: use this command to add/remove breakpoints;
Clear watches: allows you to clear the variables added to the Watches list.
The Watches list allows you to watch the variables that have been declared in the code,
© 2007 EMS Database Management Solutions
331
SQL Manager 2007 for Oracle User's Manual
and the value of each variable.
variable:
Watch name
Value
The following attributes are listed for each watched
The PL/SQL code area presents the statement being debugged. All points that have
been set within the code are marked with corresponding signs. Active breakpoints are
highlighted red, and inactive breakpoints are highlighted green.
The Call stack box lists the call stacks, if applicable.
The Breakpoints list displays the currently toggled breakpoints.
are listed for each breakpoint:
Line
Status
Unit owner
Unit name
See also:
Using Navigation bar
Working with SQL Editor area
Using the context menu
Viewing query plan
Using object links
Executing queries
Viewing query logs
© 2007 EMS Database Management Solutions
The following attributes
332
6.2
SQL Manager 2007 for Oracle User's Manual
Visual Query Builder
Visual Query Builder is implemented in SQL Manager 2007 for Oracle for building queries
visually. The tool allows you to create and edit queries without deep knowledge of SQL.
You can also prepare and execute queries, and view the results of their execution.
To open Visual Query Builder, select the Tools | New Query Builder / Tools | Show
Query Builder main menu items or use the corresponding
/
toolbar buttons.
·
·
·
·
·
·
·
·
·
Using navigation bar
Working with diagram area
Joining two database objects by fields
Setting the selection criteria
Setting output fields for selection
Setting the grouping criteria
Setting parameters of sorting
Working with editor area
Executing query and viewing results
See also:
SQL Editor
Visual Database Designer
© 2007 EMS Database Management Solutions
333
6.2.1
SQL Manager 2007 for Oracle User's Manual
Using navigation bar
The navigation bar at the left allows you to:
·
·
·
·
·
·
Select a database for query.
Execute the current query.
Clear the current query.
Create view on the base of current table(s).
Configure Visual Query Builder.
Bring the window to its default size.
The Visual Builder bar allows you to load a query/diagram from file and to save current
query/diagram to a file.
The Data Management bar allows you to:
· Export data into most popular data formats.
· Export data as SQL script.
The Objects bar allows you to add tables and views to the diagram.
© 2007 EMS Database Management Solutions
334
6.2.2
SQL Manager 2007 for Oracle User's Manual
Working with diagram area
The main area of the Visual Query Builder is the Builder area. Here you can build your
query by placing the database tables on the area, selecting the required data and setting
links between objects.
To add a table to the query, simply drag it from Database Explorer tree of the main
window to the Builder area. To include a table field in the query, click at the left of the
field name in the list or double-click it to check the box next to the field name. To include
all the fields, click at the left of the table caption. If you don't check any fields, the SQL
statement is generated as SELECT * FROM <Table_Name>, i.e. all the fields are selected.
To remove the fields from the query, uncheck the corresponding fields; to remove the
object, close it by clicking the cross button at the object caption, or select the object
and press Del key. To edit the object alias, double-click the object caption.
6.2.3
Joining two objects
To associate database objects by two fields, just drag one field from the object list to
another. This will set a link between these objects by the selected fields. After you finish
dragging, a line will appear between the linked fields. You can view and edit the properties
of object association. To do that, aim cursor at the link line. A hint containing the
© 2007 EMS Database Management Solutions
335
SQL Manager 2007 for Oracle User's Manual
association condition will appear.
To edit the properties, double click the line or right-click and choose the
Property item
from the popup menu. A dialog window will appear, where you can change the association
condition by choosing it from the list (=, >, <, >=, <=, <>).
Also you can check or uncheck the Include all option for each object, included in the
association. Click OK to confirm the changes you have made.
To remove a link between objects, right-click the link line and select the
from the popup menu.
Delete Link item
To delete all the links of some object, click button '-' next to the object alias. To insert a
point to the link line, right-click on the line and choose Insert Point item from the popup
menu. A new point will appear, using which you can move the link line.
6.2.4
Setting criteria
Use the Criteria page to set the selection conditions.
To add a condition, click the button at the left and select
popup menu.
© 2007 EMS Database Management Solutions
Add condition item from the
336
SQL Manager 2007 for Oracle User's Manual
Edit the condition by clicking its parts and setting their values. Clicking the button at the
left of the condition string activates the popup menu, which allows you to add a new
condition of the same enclosure level, add a new enclosure level, delete the current
condition, open or close the condition, if it is composite.
A simple condition string contains three fields: an argument, a condition and a second
argument (if required for the condition). Clicking each field allows you to set its value.
Clicking the argument field allows editing it as a text field. You can set a table name or a
definite value in this field. Right-clicking the field in the edit mode activates the popup
menu, which contains the Insert Field function (also called by Shift+Enter).
This function allows you to choose a field from the list of all the table fields, available in
the query. Clicking the condition field activates the popup menu, where you can choose
the condition you need. The way of proceeding the condition is set in the upper string of
the area (All, Any, None, or Not all of the following are met). Click the underlined word to
change it.
© 2007 EMS Database Management Solutions
337
6.2.5
SQL Manager 2007 for Oracle User's Manual
Setting output fields
The Selection page displays the output fields of the query. It allows you to edit the
names of the query output fields, set their displaying order and set the aggregate
functions (SUM, MIN, MAX, AVG, and COUNT) for each field. To remove the field from the
list, right-click the field row and choose Delete current row from the popup menu. To
change the input query field, double click it and then type the field name on the keyboard
or choose it from the dropdown list.
To change the output query field name, double click it and type the field name on the
keyboard.
To set the aggregate function for the field, double click the field row in the
Aggregate
column and then type the function name on the keyboard or choose it from the dropdown
list.
Select only unique records
If you check this option the repeated records are not included into the query result (the
DISTINCT word will be added to the query text).
© 2007 EMS Database Management Solutions
338
6.2.6
SQL Manager 2007 for Oracle User's Manual
Setting grouping criteria
On the Grouping Criteria page you can set the conditions for grouping query records.
They are set in the same way as the selection of
criteria. These conditions will be
included in HAVING statement of the generated query.
© 2007 EMS Database Management Solutions
339
6.2.7
SQL Manager 2007 for Oracle User's Manual
Setting parameters of sorting
Set the way of sorting query records on the Sorting page. The field list at the left
represents all the output query fields; the list at the right contains fields, by which the
query records will be sorted. To move the field from one list to another, drag the selected
field or use the Add and Remove buttons. To change the sorting order, select a field in
the right list and move it using the Up and Down buttons.
To change the sorting direction, select a field in the right list and switch the direction
(Ascending, Descending) using the A..Z/Z..A button.
© 2007 EMS Database Management Solutions
340
6.2.8
SQL Manager 2007 for Oracle User's Manual
Working with editor area
In the Editor area the query text is automatically generated while you build query.
You can edit this text according to the rules of SQL, and all the changes will be displayed
on the Builder page of Visual Query Builder.
© 2007 EMS Database Management Solutions
341
6.2.9
SQL Manager 2007 for Oracle User's Manual
Executing query
To execute the query click button Execute query on the navigation bar. This displays
the Result tab. This tab displays the result data, returned by the query, as a grid (see
Data View for details). The popup menu of this tab and the Data Management navigation
bar allow you to Export Data, Export As SQL Script and more.
© 2007 EMS Database Management Solutions
342
SQL Manager 2007 for Oracle User's Manual
© 2007 EMS Database Management Solutions
343
6.3
SQL Manager 2007 for Oracle User's Manual
Query parameters
Both of SQL Editor and Visual Query Builder support using of parameters inside the query
text. A parameter is a kind of variable, which value can be specified just before the query
execution. In the query text the parameter should appear as an identifier with a colon (':')
at its beginning, e.g.
:param1.
Note: The Allow using of parameters in query text option should be checked at the
Options | Environment options | Tools tab for this feature to be enabled.
6.3.1
Input parameters dialog
The Input Parameters dialog is used to specify the query parameters as well as values
of the input parameters of the procedure or function before execution. Click OK button to
apply the values and execute the query or click Cancel button to abort execution.
© 2007 EMS Database Management Solutions
Part
VII
345
7
SQL Manager 2007 for Oracle User's Manual
Data Management
Table data and query results are displayed on the
SQL Editor, Visual Query Builder, etc.
Data or Results tab of Table Editor,
The data can be displayed in three modes: Grid View, Form View and Print Data. See
Data View to learn more about these modes.
The toolbars of these tabs as well as the popup menus (activated by right-click on the
grid) provide the following functions for managing data:
· Export Data
Exports data to various formats, including MS Excel, MS Access, RTF, HTML, PDF and
more.
· Export As SQL Script
Exports data to the SQL script as a number of INSERT statements.
· Import Data
Imports data from MS Excel, MS Access, DBF, TXT, and CSV.
· Edit BLOB
Allows you to view and edit the content of BLOB and TEXT fields.
© 2007 EMS Database Management Solutions
346
7.1
SQL Manager 2007 for Oracle User's Manual
Data View
SQL Manager 2007 for Oracle provides you with powerful tools for viewing, editing and
printing data from tables and queries. This topic shows how you can work with data in the
simplest and the most direct way.
· Grid View
· Form View
· Print Data
See also:
Table Editor
SQL Editor
Visual Query Builder
© 2007 EMS Database Management Solutions
347
7.1.1
SQL Manager 2007 for Oracle User's Manual
Grid View
View data as a grid. The columns correspond to the fields and rows correspond to the
records. Clicking the column caption sorts data by the values of this column in ascending
or descending mode. The navigation bar allows you to switch the records quickly, insert,
update or delete records.
The navigation bar of the parent tool as well as the grip popup menu provides you with
the following data functions: Export Data, Import Data, Export As SQL Script and more.
The popup menu of the grid also provides the following additional functions: use current
field value as a filter, set the field value as Null, edit BLOB (for BLOB fields; see BLOB
Viewer/Editor).
Note: The status bar displays the number of records in the current data set.
·
·
·
·
Grouping data within the grid.
Filtering records.
Working in multi-level mode.
Viewing data in card view.
© 2007 EMS Database Management Solutions
348
7.1.1.1
SQL Manager 2007 for Oracle User's Manual
Grouping data
You can group grid data by any of the columns by dragging the column header to appear
area. Now all the records are displayed as subnodes to the grouping row value as shown
at the picture. To reverse grouping, just drag the column name from the upper area back.
7.1.1.2
Filtering records
You can filter records in the grid by one of the following methods:
· Right-click a row and select Quick Filter item from the popup menu to filter records by
the current value of the selected column.
© 2007 EMS Database Management Solutions
349
SQL Manager 2007 for Oracle User's Manual
· Click the dropdown button at the column caption area and select one of the column
values to filter records by this value of the selected column.
· Click the dropdown button at the column caption area, then select the
Custom item
and build a simple filter within a dialog in the following way: select a logical operator for
checking the column values (like, is less than, is greater than, etc) and set the value to
be checked by this operator in the right box; then set the second condition if necessary
and set the relation between these two conditions, whether both of them should be
matched or just any of them; use character '_' to represent any single symbol in the
condition and use character '%' to represent any series of symbols in the condition.
© 2007 EMS Database Management Solutions
350
SQL Manager 2007 for Oracle User's Manual
After you have set a filter, the filtering panel becomes visible at the bottom of grid, where
you can see the active filtering condition and easily enable or disable it by clicking a
check box at the left. Using this panel you can also customize your filter in a more
complicated way by clicking the Customize button and building your filter within the
Filter Builder Dialog.
7.1.1.3
Working in multi-level mode
One of unique features of SQL Manager 2007 for Oracle is ability to work with data in
multi-level mode to view and modify data in several related tables at one time. To manage
levels right-click on the grid and select Grid Levels submenu. It allows you to:
· Add new grid level using Create Grid Level Wizard.
· Delete current grid level.
© 2007 EMS Database Management Solutions
351
7.1.1.4
SQL Manager 2007 for Oracle User's Manual
Create Grid Level Wizard
Create Grid Level Wizard allows you to add a new detail level to the grid in order to get
master-detail representation of your data. To open the wizard right-click on the grid and
select Add Grid Level... menu item from Grid Levels submenu.
·
·
·
·
Specify master level.
Select a table or a query for new level.
Bind master and detail level fields.
Specify additional level parameters.
© 2007 EMS Database Management Solutions
352
SQL Manager 2007 for Oracle User's Manual
7.1.1.4.1 Specify master level
Select master level to which a new level will be added and select the source type of new
level data: table or query.
© 2007 EMS Database Management Solutions
353
SQL Manager 2007 for Oracle User's Manual
7.1.1.4.2 Select table or query for new level
Select a master table to which a new level should be added or enter a query to be used
as a source of new grid level. You can use Query Builder tool if query is selected as
source type.
© 2007 EMS Database Management Solutions
354
SQL Manager 2007 for Oracle User's Manual
7.1.1.4.3 Selecting detail table
Specify the schema and select a table for the detail view at the corresponding drop-down
lists. Set Show tables related by foreign keys only option to narrow list of selectable
tables.
© 2007 EMS Database Management Solutions
355
SQL Manager 2007 for Oracle User's Manual
7.1.1.4.4 Bind master and detail levels
Define pairs of fields to link master and detail level data sources.
© 2007 EMS Database Management Solutions
356
SQL Manager 2007 for Oracle User's Manual
7.1.1.4.5 Specify additional parameters
Set the caption for the new level and set the type of view for the level: as a table or as
a card. Click Finish to create new grid level.
© 2007 EMS Database Management Solutions
357
7.1.1.5
SQL Manager 2007 for Oracle User's Manual
Viewing data in card view
You can represent data in table or card view according to your needs. To manage the
levels representation right-click on the grid and select Grid Levels submenu. It allows you
to:
· View data in a form of table.
· View data in a form of cards.
© 2007 EMS Database Management Solutions
358
7.1.2
SQL Manager 2007 for Oracle User's Manual
Form View
Form View tab allows you to view data as a form. On the form the current record is
displayed: field name and its value. If these data are available for editing, you can do it
on this form. The navigation bar allows you to switch the records quickly, insert, update
or delete records.
Each field has a Null switch, which allows you to clear the field value quickly; near each
number field a calculator button is placed (calculator field automatically fills the current
field); near each date field calendar button is placed (date, selected in the calendar,
automatically fills the current field).
© 2007 EMS Database Management Solutions
359
7.1.3
SQL Manager 2007 for Oracle User's Manual
Print Data
At the Print Data tab data are displayed in the way they are printed, in WYSIWYG mode.
Using buttons on the toolbar you can design report, change the view scope, save and
load previously saved report, and set the page printing parameters.
© 2007 EMS Database Management Solutions
360
7.1.4
SQL Manager 2007 for Oracle User's Manual
Blob View
SQL Manager 2007 for Oracle provides BLOB Viewer/Editor to view and edit BLOB fields
content. The BLOB Viewer/Editor can be invoked from the data grid within Table Editor,
SQL Editor, Visual Query Builder, etc.
·
·
·
·
·
·
·
Navigating within the BLOB Viewer/Editor
Viewing/Editing BLOB field as hexadecimal dump
Viewing/Editing BLOB field as plain text
Viewing/Editing BLOB field as rich text (RTF)
Viewing/Editing BLOB field as graphical image
Viewing/Editing BLOB field as HTML
Applying changed to data
See also:
Data View
Table Editor
SQL Editor
Visual Query Builder
© 2007 EMS Database Management Solutions
361
7.1.4.1
SQL Manager 2007 for Oracle User's Manual
Navigating with the BLOB Editor
The BLOB Editor provides an ability to navigate among the records using DB Navigation
buttons on the toolbar. Also you can load the new BLOB content and save or clear the
current content by using the appropriate items on the toolbar.
7.1.4.2
Editing as hexadecimal dump
The Hexadecimal panel allows you to edit data in hexadecimal mode. Use the Ins key to
switch between Insert and Overwrite modes.
© 2007 EMS Database Management Solutions
362
7.1.4.3
SQL Manager 2007 for Oracle User's Manual
Editing as plain text
The Text panel allows you to edit data as a simple text. Use Save to File and Load from
File items on the navigation bar to save the text to a file, or load the text from a file.
© 2007 EMS Database Management Solutions
363
7.1.4.4
SQL Manager 2007 for Oracle User's Manual
Editing as rich text (RTF)
The Rich Text panel allows you to edit data as a Rich Text format (RTF). Use Save to
File and Load from File items on the navigation bar to save the text to a file, or load the
text from a file.
© 2007 EMS Database Management Solutions
364
7.1.4.5
SQL Manager 2007 for Oracle User's Manual
Editing as image
The Image panel shows field data as image. Use Save to File and Load from File items
on the navigation bar to save the image to a file, or load the image from a file.
© 2007 EMS Database Management Solutions
365
7.1.4.6
SQL Manager 2007 for Oracle User's Manual
Editing as HTML
The HTML panel displays field data in Hyper-Text Markup Language format (HTML). You
can load a new content to the field using Load from File item on the navigation bar, or
save current field content to a file using Save to File item.
© 2007 EMS Database Management Solutions
366
7.1.4.7
SQL Manager 2007 for Oracle User's Manual
Applying changes
After changes are done, click
discard them.
© 2007 EMS Database Management Solutions
Post Edit button to apply the changes or
Cancel Edit to
367
7.2
SQL Manager 2007 for Oracle User's Manual
Filter Builder Dialog
SQL Manager 2007 for Oracle provides the Filter Builder dialog to facilitate creating and
applying filter criteria for the data grid within Table Editor, SQL Editor, Visual Query Builder
, etc. In addition, it allows you to save filter criteria to an external file for future use.
·
·
·
·
·
·
·
·
Invoking the Filter Builder dialog
Adding new condition to the filter
Setting filter criteria in condition
Setting filter operator in condition
Setting filter criteria values in condition
Adding new group to condition
Setting group operator in the condition
Applying filter conditions
See also:
Data View
Table Editor
SQL Editor
Visual Query Builder
© 2007 EMS Database Management Solutions
368
7.2.1
SQL Manager 2007 for Oracle User's Manual
Invoking the Filter Builder dialog
To call the Custom filter window click the Customize button on the Filter panel. This
panel is visible if any filtering is already applied to the grid (you can use column header
menu or grid menu for quick filtering).
To invoke the Filter Builder Dialog, please press the Filter button which is left to
at the dataset navigation bar.
Find: item
To illustrate usage of Filter Builder Dialog, see example in the next topics.
7.2.2
Adding new condition
Suppose we need to select employees from the sample table Employees with the ID
greater than 100.
These criteria are applied to the Employee_ID column. Click the press the button to add
a new condition box. This will add a new condition to the criteria. Alternatively, you can
left-click the Filter box and select the Add Condition option from the dropdown menu.
© 2007 EMS Database Management Solutions
369
SQL Manager 2007 for Oracle User's Manual
Next Step >>
7.2.3
Setting filter criteria
As we need to apply the filter criteria to the Employee_ID column, left-click the column
box (next to the ellipsis button) to open the dropdown list displaying the available column
names. Then select the Employee_ID item.
© 2007 EMS Database Management Solutions
370
SQL Manager 2007 for Oracle User's Manual
Next Step >>
7.2.4
Setting filter operator
Select the 'Greater than' item in the operator box. This will add one empty value box to
specify the range for the 'Greater than' condition.
© 2007 EMS Database Management Solutions
371
SQL Manager 2007 for Oracle User's Manual
Next Step >>
7.2.5
Setting filter criteria values
On this step, you need to specify the range for the 'Greater than' operator.
You can do this either manually by typing a value using the keyboard or via the value
editor activated when you click the value box.
Next Step >>
7.2.6
Adding new group
If you need to add a group of conditions, left-click the ellipsis button for the Employee_ID
condition and select Add Group menu item.
© 2007 EMS Database Management Solutions
372
SQL Manager 2007 for Oracle User's Manual
Next Step >>
7.2.7
Setting group operator
To set the group operator, left-click the operator box (by default, it specifies AND
operator) and select OR item from the menu.
© 2007 EMS Database Management Solutions
373
SQL Manager 2007 for Oracle User's Manual
Next Step >>
7.2.8
Applying filter conditions
Click Apply button to see the result of the filtering you made and click
close the dialog with or without saving your filter correspondingly.
OK or Cancel to
The Filter Builder dialog allows you to save filter criteria to and load them from an external
file. Clicking Save As… or Open… buttons activates one of these dialogs. Filter settings
are stored in a file with .flt extension. A column in the file is referenced by its position
within a view. This means that filter settings cannot be correctly restored if columns were
deleted from the view after saving the filter to a file.
© 2007 EMS Database Management Solutions
Part
VIII
375
8
SQL Manager 2007 for Oracle User's Manual
Import/Export Tools
SQL Manager 2007 for Oracle provides powerful tools to import and export data.
· Export Data
Exports data to various formats, including MS Excel, MS Access, RTF, HTML, PDF and
more.
· Export Data As INSERT
Exports data to the SQL script as a number of INSERT statements.
· Import Data
Imports data from MS Excel, MS Access, DBF, TXT, and CSV.
· Using templates
© 2007 EMS Database Management Solutions
376
8.1
SQL Manager 2007 for Oracle User's Manual
Export Data Wizard
Export Data Wizard allows you to export data from table, view, procedure or query
result to any available format. You can save your settings as a template at any time for
later use.
To call the wizard right-click the table (view, procedure, etc.) in DB Explorer, select
Data
Manipulatiton and corresponding operation then. Another way is to select Data tab of
Table Editor/View Editor, then corresponding menu item of the Data Management bar
(navigation bar) or simply use context menu of the Grid -> Data Manipulation.
·
·
·
·
·
·
·
Setting name and format for destination file
Selecting fields for export
Adjusting formats applied to exported data
Setting header and footer text for destination file
Setting options according to the selected format
Setting common export options
Using templates
See also:
Export As SQL Script Wizard
Import Data Wizard
© 2007 EMS Database Management Solutions
377
8.1.1
SQL Manager 2007 for Oracle User's Manual
Setting destination file name and format
Select one of the available destination formats and set name for the result file. The file
name extension in the Destination file name box changes according to the selected
export type.
Destination format
MS Excel - the most popular e-table format - Microsoft Excel. The result files are fully
compatible with the versions 95, 97, 2000 and XP.
MS Access - export to Microsoft Access format trough an ADO connection.
MS Word - one of the most popular text processing format - Microsoft Word. The result
files are fully compatible with the versions 95, 97, 2000 and XP.
RTF - Rich Text Format supported by many text processing programs (e.g. WordPad).
HTML - as it follows from its name, exports data to HTML files (complete compatibility
with HTML 4.0 specification).
PDF - the PDF format is a standard and general format in electronic publishing.
© 2007 EMS Database Management Solutions
378
SQL Manager 2007 for Oracle User's Manual
Text file - the plain text format.
CSV - Comma Separated Value format.
DIF - Data Interchange File format.
SYLK - Symbolic Links format.
Note: all the text formats including Text file, CSV, DIF, SYLK are usually used as working
or interchange formats.
LaTeX - the LaTeX format, which is a popular (especially among mathematicians and
physicists) macroextension of TeX pack developed by D.Knut.
XML - the XML format. XML is a markup language for documents containing structured
information.
DBF - the data will be exported to the DBF format.
8.1.2
Selecting fields for export
Select table fields for export. If you leave all the fields in the Available Fields list, all fields
will be exported except BLOBs.
© 2007 EMS Database Management Solutions
379
8.1.3
SQL Manager 2007 for Oracle User's Manual
Adjusting data formats
This step allows you to customize formats applied to exported data. Edit the format masks
to adjust the result format in the way you need.
For more details see Format specifiers.
8.1.4
Setting header and footer
Set header and footer text for the result file. This text will appear before or after data in
the result file respectively.
© 2007 EMS Database Management Solutions
380
8.1.5
SQL Manager 2007 for Oracle User's Manual
Setting format-specific options
Data Export Options are defined on Step 5 of the
·
·
·
·
·
·
·
·
8.1.5.1
Export Data Wizard.
Excel Options
Access Options
Word / RTF Options
HTML Options
PDF Options
TXT Options
CSV Options
XML Options
Excel options
This step allows you to customize options for target MS Excel file.
You can customize
Data format, Extensions and set Advanced options.
· Data format
· Extensions
· Advanced
© 2007 EMS Database Management Solutions
381
SQL Manager 2007 for Oracle User's Manual
8.1.5.1.1 Data format
The Data Format tab contains general options, which allow you to adjust the format for
each kind of Excel cells. This means that you can specify such parameters as font,
borders, filling color and method, etc. for each entity (such as data field, header, footer,
caption, data, hyperlink and so on) separately. Also it is possible to create styles to make
target Excel file be striped by columns or rows (the Styles tab).
· Fields
· Options
· Styles
© 2007 EMS Database Management Solutions
382
SQL Manager 2007 for Oracle User's Manual
8.1.5.1.1.1 Fields
On this tab you can set font options, border and fill options and select and aggregate
functions for all the fields you want to export. You can reset settings at any time using
buttons Reset Item and Reset All.
© 2007 EMS Database Management Solutions
383
SQL Manager 2007 for Oracle User's Manual
8.1.5.1.1.2 Options
On this tab you can set font options, border and fill options for all elements of the Excel
sheet (header, caption, footer, aggregates and hyperlinks). You can reset settings at any
time using buttons Reset Item and Reset All.
© 2007 EMS Database Management Solutions
384
SQL Manager 2007 for Oracle User's Manual
8.1.5.1.1.3 Styles
On this tab you can make a style template: set font options, border and fill options and
save them. You can reset settings at any time using buttons
Reset Item and Reset All.
If you have created or loaded more than one style template, they could be ignored, or
used column-by-column or row-by-row (it depends on strip style setting at the bottom).
© 2007 EMS Database Management Solutions
385
SQL Manager 2007 for Oracle User's Manual
8.1.5.1.2 Extensions
Extensions tab provides an ability to add hyperlinks and notes and to any cell of target
file, to specify a value of a cell, to create a chart and to merge cells. Click
Plus button to
add add an element. Click Minus button to delete an element.
·
·
·
·
·
Hyperlinks
Notes
Charts
Cells
Merged Cells
© 2007 EMS Database Management Solutions
386
SQL Manager 2007 for Oracle User's Manual
8.1.5.1.2.1 Hyperlinks
If you create a hyperlink:
·
·
·
·
choose cell coordinates
select if this is a local hyperlink or not
enter its title
specify its target
© 2007 EMS Database Management Solutions
387
SQL Manager 2007 for Oracle User's Manual
8.1.5.1.2.2 Notes
If you create a note:
· choose cell coordinates
· enter text of a note for that cell
· select font and fill properties using appropriate tabs
© 2007 EMS Database Management Solutions
388
SQL Manager 2007 for Oracle User's Manual
8.1.5.1.2.3 Charts
if you create a chart:
·
·
·
·
·
·
enter chart title
select chart style
choose legend position
specify if you want to show legend
specify if you want to set chart color automatically
select chart position and category labels using appropriate tabs
© 2007 EMS Database Management Solutions
389
SQL Manager 2007 for Oracle User's Manual
·
·
·
·
add one or more series
enter its' titles
select data ranges (from a chosen column or from a specified range in a table)
choose colors for all the graphs
© 2007 EMS Database Management Solutions
390
SQL Manager 2007 for Oracle User's Manual
8.1.5.1.2.4 Cells
If you want to add a value in a specific cell:
·
·
·
·
choose cell coordinates
select cell type
enter its value
if you are adding numeric or date/time value, you can set cell format
© 2007 EMS Database Management Solutions
391
SQL Manager 2007 for Oracle User's Manual
8.1.5.1.2.5 Merged Cells
If you want to merge some cells:
· set the range to merge
© 2007 EMS Database Management Solutions
392
SQL Manager 2007 for Oracle User's Manual
8.1.5.1.3 Advanced
Advanced options allow you to:
·
·
·
·
Specify page header
Specify page footer
Specify sheet title in target file
Choose a picture to be a page background
Calculate column width automatically
This option allows wizard to determine column width in target file automatically.
© 2007 EMS Database Management Solutions
393
8.1.5.2
SQL Manager 2007 for Oracle User's Manual
Access options
This step allows you to customize options for target MS Access file. Set the name for
target table and specify whether the wizard should create a new table in Access
database if it does not exist yet, or use the existing table to export data into.
© 2007 EMS Database Management Solutions
394
8.1.5.3
SQL Manager 2007 for Oracle User's Manual
Word / RTF options
This step allows you to customize options for target MS Word/RTF file.
· Base Styles
· Strip Styles
© 2007 EMS Database Management Solutions
395
SQL Manager 2007 for Oracle User's Manual
8.1.5.3.1 Base Styles
Base styles tab contains the list of target file entities, such as table header, data, etc.
You can customize style options, such as font name and size, background and foreground
colors, text alignment and so on, for each of them by clicking the corresponding item in
the list and setting the options for it in the right-side panel. All the changes you make
with current style are represented in the Sample Cell panel. You can reset settings at
any time using buttons Reset Item and Reset All.
You can also choose page orientation for target Word/RTF file on this tab.
© 2007 EMS Database Management Solutions
396
SQL Manager 2007 for Oracle User's Manual
8.1.5.3.2 Strip Styles
On this tab you can make a style template: set font options, border and fill options and
save them. You can reset settings at any time using buttons
Reset Item and Reset All.
If you have created or loaded more than one style template, they could be ignored, or
used column-by-column or row-by-row (it depends on strip style setting at the bottom).
© 2007 EMS Database Management Solutions
397
8.1.5.4
SQL Manager 2007 for Oracle User's Manual
HTML options
This step allows you to customize options for target HTML file.
·
·
·
·
Preview
Basic
Multi-file
Advanced
© 2007 EMS Database Management Solutions
398
SQL Manager 2007 for Oracle User's Manual
8.1.5.4.1 Preview
Preview tab allows you to select style of HTML file from a number of built-in templates
provided by the Templates combo box. You can choose any of these templates,
customize it by clicking on objects in the preview panel, and save it as a custom template
using Save template button. Use Load template button to load previously saved
custom templates from hard disk. Click on an element of a table to select a color.
© 2007 EMS Database Management Solutions
399
SQL Manager 2007 for Oracle User's Manual
8.1.5.4.2 Basic
Basic tab allows you to specify basic parameters of target HTML file. You can:
· specify title of a result file
· select if CSS should be internal or external (in a specified .css file)
· select if want to export boolean fields of a table as HTML check boxes.
© 2007 EMS Database Management Solutions
400
SQL Manager 2007 for Oracle User's Manual
8.1.5.4.3 Multi-file
Multi-file tab provides you with an ability to split target HTML file into several separated
files. This tab allows you to specify the record count for a single file, set an option to
generate an index HTML file, and add an ability of navigation between each other to each
of exported files.
© 2007 EMS Database Management Solutions
401
SQL Manager 2007 for Oracle User's Manual
8.1.5.4.4 Advanced
The Advanced tab contains such HTML options as default font, background, cell padding
and spacing, etc.
© 2007 EMS Database Management Solutions
402
8.1.5.5
SQL Manager 2007 for Oracle User's Manual
PDF options
This step allows you to customize options for target PDF file. On this step you can
customize general options of target PDF file, such as fonts, page size, page margins,
column/row spaces, line width, etc.
© 2007 EMS Database Management Solutions
403
8.1.5.6
SQL Manager 2007 for Oracle User's Manual
TXT options
This step allows you to customize options for target text file. Set the
Calculate column
width options on if you want each column of target file be adjusted to the maximum
number of characters in it. The Spacing option specifies the number of spaces between
columns in target file.
© 2007 EMS Database Management Solutions
404
8.1.5.7
SQL Manager 2007 for Oracle User's Manual
CSV options
This step allows you to customize options for target CSV file. You can specify column
separator and optional values quote character for target file on this step.
© 2007 EMS Database Management Solutions
405
8.1.5.8
SQL Manager 2007 for Oracle User's Manual
XML options
This step allows you to customize options for target XML document. Specify XML
document encoding in the Encoding edit box and set the Standalone option on if you wish
target document to be standalone.
Note that export is only possible from XML-Datapacket (CDS) format. Conversion between
generic XML documents and the data packets that are used by
SQL Manager 2007 for
Oracle can be performed with the help of XML Mapper by Borland (R).
© 2007 EMS Database Management Solutions
406
8.1.6
SQL Manager 2007 for Oracle User's Manual
Setting common export options
Set the common export options and click Finish button to start the export process. The
detailed description of these options is given below.
© 2007 EMS Database Management Solutions
407
SQL Manager 2007 for Oracle User's Manual
Go to the first record
If checked, starts export from the first record of the data set.
Export empty tables
If checked, allows you to export tables even if they are empty.
Skip
Specifies the number of records, which are skipped before export starts.
Export fetched records / Export only ... records / Export all records
Specifies the number of records to export: only records currently fetched, a fixed number
of records or all records.
Open files after export
If checked, opens the result files in the associated program after export.
Print files after export
If checked, sends the result files to default printer after export.
© 2007 EMS Database Management Solutions
408
8.2
SQL Manager 2007 for Oracle User's Manual
Import Data Wizard
Import Data Wizard allows you to import data to a table from MS Excel, MS Access,
DBF, TXT or CSV file.
Setting source file name and format
Selecting source object for import data from
Setting the correspondence between the source and target fields
Adjusting common data formats
Setting advanced field formats
Setting import mode and data write type
Customizing common import options
Using templates
See also:
Export Data Wizard
8.2.1
Selecting source file name and format
Select the type of the source file: MS Excel, MS Access, DBF, XML, TXT, or CSV and
select the source file name. The file name extension in the Source file name box
changes according to the selected import type. Select the delimiter and quote characters
© 2007 EMS Database Management Solutions
409
SQL Manager 2007 for Oracle User's Manual
for CSV files.
MS Excel - the most popular e-table format - Microsoft Excel. Files created with the
versions 95, 97, 2000 and XP are fully supported.
MS Access - import from Microsoft Access format trough an ADO connection.
DBF - the data will be imported from the DBF format.
XML - the XML format. XML is a markup language for documents containing structured information.
TXT - the plain text format.
CSV - Comma Separated Value format.
Note: the text formats including Text file and CSV are usually used as working or
interchange formats.
© 2007 EMS Database Management Solutions
410
8.2.2
SQL Manager 2007 for Oracle User's Manual
Selecting data source
Note: this step is available only if you import data from an Access database.
Select a table from table list or type a query in the corresponding text box to specify data
source. If you choose a query as data source, you also can load an SQL query from a file
or save the current one to a file using the corresponding buttons.
8.2.3
Setting fields correspondence
The correspondence between import fields is defined at the corresponding step of the
Import Data Wizard.
·
·
·
·
·
·
MS Excel
MS Access
DBF
XML
TXT
CSV
© 2007 EMS Database Management Solutions
411
8.2.3.1
SQL Manager 2007 for Oracle User's Manual
Excel
Select ranges in the grid for the target field, selected in the
Fields list. Click column or
caption to select a whole column or row respectively. Using the popup menu of the
Ranges list you can add or edit ranges manually, as well as remove them or change their
order. After you define a range for the selected field, proceed to the next one. If source
file and destination table have the same order of columns or rows, you can use Auto Fill
Cols or Auto Fill Rows buttons to set the correspondence between them automatically.
© 2007 EMS Database Management Solutions
412
8.2.3.2
SQL Manager 2007 for Oracle User's Manual
Access
Select a target field from the left list and select a source Access field from the right list,
then click Add button. This adds a link for these fields to the lower list. Click Remove or
Clear button to remove the selected or all items from the lower list.
Use Auto Fill button to set the correspondence between the source and target fields
according to the way they are ordered.
© 2007 EMS Database Management Solutions
413
8.2.3.3
SQL Manager 2007 for Oracle User's Manual
DBF
Select a target field from the left list and select a source DBF field from the right list, then
click Add button. This adds a link for these fields to the lower list. Click Remove or Clear
buttons to remove the selected or all items from the lower list.
Use Auto Fill button to set the correspondence between the source and target fields
according to the way they are ordered.
Use Skip deleted records option to chose skipping records marked as deleted.
© 2007 EMS Database Management Solutions
414
8.2.3.4
SQL Manager 2007 for Oracle User's Manual
XML
Select a target field from the left list and select a source XML field from the right list,
then click Add button. This adds a link for these fields to the lower list. Click Remove or
Clear button to remove the selected or all items from the lower list.
Note that import is only possible from XML-Datapacket (CDS) format. Conversion between
generic XML documents and the data packets that are used by
SQL Manager 2007 for
Oracle can be performed with the help of XML Mapper by Borland (R).
Use Auto Fill button to set the correspondence between the source and target fields
according to the way they are ordered.
© 2007 EMS Database Management Solutions
415
8.2.3.5
SQL Manager 2007 for Oracle User's Manual
TXT
Select the target field in the list, and then double-click in the text viewer area to add
separators, delimiting the source column bounds. Click between the separators to assign
the correspondence. Proceed to the next field when done.
The Skip Lines option allows you to point out a number of the unrequired lines to skip.
© 2007 EMS Database Management Solutions
416
8.2.3.6
SQL Manager 2007 for Oracle User's Manual
CSV
Select the target field in the list, and then click at the source column in the viewer area
to set the correspondence. Repeat this operation for each field.
Use Auto Fill button to set the correspondence between the CSV columns and target
fields according to the way they are ordered.
The Skip Lines option allows you to point out a number of the unrequired lines to skip.
© 2007 EMS Database Management Solutions
417
8.2.4
SQL Manager 2007 for Oracle User's Manual
Adjusting data formats
SQL Manager 2007 for Oracle provides a number of options for setting common formats for
all imported data.
For more details see Format specifiers.
© 2007 EMS Database Management Solutions
418
8.2.5
SQL Manager 2007 for Oracle User's Manual
Setting advanced field formats
Select a field in the list and adjust format options that will be applied to this field only.
© 2007 EMS Database Management Solutions
419
8.2.6
SQL Manager 2007 for Oracle User's Manual
Setting import mode
Use Import mode to select whether to insert all records, or to update/delete existing
ones. Note that for updating/deleting existing records in the target table you should move
its key columns from the Available columns list to the Selected columns list.
© 2007 EMS Database Management Solutions
420
8.2.7
SQL Manager 2007 for Oracle User's Manual
Customizing common options
Set the common options and click Finish button to start import.
© 2007 EMS Database Management Solutions
421
SQL Manager 2007 for Oracle User's Manual
© 2007 EMS Database Management Solutions
422
8.3
SQL Manager 2007 for Oracle User's Manual
Export as SQL Script
Export as SQL Script Wizard allows you to export data from a table or a query result to
SQL script as a number of INSERT statements.
To export data as INSERT from a table or a query:
· open the table in Table Editor or open and execute query in SQL Editor or Query Builder;
· open Data or Result tab respectively;
· click Export as SQL Script item on the navigation bar.
·
·
·
·
·
Setting destination file name for the script
Selecting field to export
Editing result create statement
Specifying export options
Using templates
See also:
Export Data Wizard
SQL Script Editor
Extract Metadata
© 2007 EMS Database Management Solutions
423
8.3.1
SQL Manager 2007 for Oracle User's Manual
Specifying destination server
On this step you are to select destination server. Result script will be generated in
compliance with the specifications of the target server.
8.3.2
Setting destination file name
Set the file name for the result script and set the table name to include in the result SQL
script.
Note that you can save the script to file. Select the appropriate item and set target file
name.
© 2007 EMS Database Management Solutions
424
8.3.3
SQL Manager 2007 for Oracle User's Manual
Setting BLOB options
Set the desirable extract options for BLOBs. Select whether the BLOBs should be
extracted as strings or to a file. In that case please specify destination file name and
location. You may use optional file compression as well.
© 2007 EMS Database Management Solutions
425
8.3.4
SQL Manager 2007 for Oracle User's Manual
Selecting fields to export
Select fields to include in the result SQL script. All the table fields are included in the
Selected fields list by default. If you do not want some fields to be exported, move them
back to the Available fields list.
© 2007 EMS Database Management Solutions
426
8.3.5
SQL Manager 2007 for Oracle User's Manual
Editing result SQL script
This step is available only if Add CREATE TABLE statement option was checked on the
Setting destination file name step of the Wizard. It allows you to edit the SQL script
for creating table.
© 2007 EMS Database Management Solutions
427
8.3.6
SQL Manager 2007 for Oracle User's Manual
Setting export options
Specify export options according to your needs. Check Load generated script into
Script Editor option to load the result to SQL Script Editor after executing. Choose if the
block of records should be commited and define the size of the block. Click Finish button
to start the process.
© 2007 EMS Database Management Solutions
428
SQL Manager 2007 for Oracle User's Manual
© 2007 EMS Database Management Solutions
Part
IX
430
9
SQL Manager 2007 for Oracle User's Manual
Database Tools
SQL Manager 2007 for Oracle provides a number of powerful tools for working with the
databases.
The following tools are available:
Dependency Tree
Allows you to view all the object dependencies in a one diagram.
Visual Database Designer
Allows you to lay out your database schema visually.
SQL Monitor
Displays all the SQL statements executed while working in SQL Manager 2007 for Oracle.
SQL Script Editor
Executes SQL scripts to the database.
Extract Database Wizard
Extracts the table metadata to the SQL script, which can be later executed on another
machine to reserve the database structure.
Print Metadata
Creates powerful metadata reports in the WYSIWYG mode, ready for printing.
HTML Report
Creates powerful metadata reports in the HTML format.
Report Designer
Allows you to build and print database reports
Using templates
© 2007 EMS Database Management Solutions
431
9.1
SQL Manager 2007 for Oracle User's Manual
Dependency Tree
The Dependency Tree tool allows you to view all the object dependencies in a one
diagram. To call the Dependency Tree window select the Tools | Dependency Tree
menu item.
To view dependencies of the object, click the
Select object button on the toolbar. Then
select the object from the dialog window. The dependency tree will appear in the main
area of the window.
The root object is marked out with blue frame. The objects which the root object depends
from are situated at the left of the tree. The objects which depends from the root object
are situated at the right of the tree.
You can switch between the objects by selecting them from the diagram. The selected
object will become the root object.
To show/hide subobjects click the
toolbar.
Show Subobjects / Hide Subobjects button on the
There is history of selected root objects available. You can move back and forward
through this history using arrow buttons on the toolbar.
© 2007 EMS Database Management Solutions
432
SQL Manager 2007 for Oracle User's Manual
Availability:
Windows Full
Windows Lite
© 2007 EMS Database Management Solutions
Yes
No
433
9.2
SQL Manager 2007 for Oracle User's Manual
Visual Database Designer
Visual Database Designer is provided for designing your database visually. It allows you
to create, edit and drop tables and table fields, set links between tables, and so on.
To open the designer, select the
·
·
·
·
·
·
·
·
·
·
·
Tools | Visual Database Designer main menu item.
Using navigation bar
Navigating on diagram
Adding objects to diagram
Removing objects from diagram
New object creation
Creating relationships
Working with multiple pages
Reverse engineering
Printing diagram
Saving/Loading diagram
Setting diagram options
See also:
Visual Query Builder
© 2007 EMS Database Management Solutions
434
9.2.1
SQL Manager 2007 for Oracle User's Manual
Using navigation bar
The navigation bar at the left allows you to:
·
·
·
·
·
9.2.2
Select the database to design.
Setting diagram options.
Bring the window to its default size.
Navigate with the diagram.
View the list of objects that can be added to the diagram.
Navigating on diagram
To navigate on the large diagram use the Navigator tool on the navigation bar at the
left. It allows you to see the whole diagram in a reduced size and even to move the
© 2007 EMS Database Management Solutions
435
SQL Manager 2007 for Oracle User's Manual
objects in the diagram. The area currently visible at the main diagram area is outlined in
red color.
9.2.3
Adding objects to diagram
To add an object to the diagram, drag it from the Objects group on the navigation bar
into the desired place on the diagram or simply double-click on this object.
9.2.4
Removing objects from diagram
To remove an object(s) from the diagram, select them, right-click on its title and choose
Hide Selected Object(s) menu item or simply press the Del key.
© 2007 EMS Database Management Solutions
436
9.2.5
SQL Manager 2007 for Oracle User's Manual
New objects creation
To create a new table using Visual Database Designer:
· Press Create table button on the toolbar;
· Click at the desired point on the diagram to place the new table to;
· Create new table with the New Table dialog.
9.2.6
Creating relationships
To create a new relationship (which is the foreign key in terms of database):
·
·
·
·
Press Create relation button on the toolbar;
Click on the table where referential constraint should be created;
Click on the referred table;
Create new foreign key with the New Foreign Key dialog.
© 2007 EMS Database Management Solutions
437
9.2.7
SQL Manager 2007 for Oracle User's Manual
Working with multiple pages
You can create several pages in one diagram to separate certain subject areas from the
database for better viewing and understanding.
To manage diagram pages, right-click on the tabs under the diagram area and select the
appropriate menu item for adding, deleting or renaming pages.
9.2.8
Reverse engineering
The reverse engineering process builds relationship diagram basing on the current
database's structure. The objects are arranged automatically within the diagram. To start
the reverse engineering process press the appropriate button on the toolbar.
© 2007 EMS Database Management Solutions
438
9.2.9
SQL Manager 2007 for Oracle User's Manual
Printing diagram
Visual Database Designer allows you to print and preview the diagram.
To preview the diagram:
· Press Print Preview button on the toolbar.
· Preview the diagram in the Print Preview Dialog.
To setup print options:
· Press Print Options button on the toolbar.
· Set printing options in the Print Setup Dialog and press OK button.
To print the diagram:
· Press Print button on the toolbar.
· Set printing options in the Print Setup Dialog and press Print button.
© 2007 EMS Database Management Solutions
439
9.2.9.1
SQL Manager 2007 for Oracle User's Manual
Print Preview dialog
Print Preview dialog allows you to see the diagram layout before it will be printed.
© 2007 EMS Database Management Solutions
440
9.2.9.2
SQL Manager 2007 for Oracle User's Manual
Print Setup dialog
Print Setup dialog of the Visual Database Designer allows you to:
· Choose the desired printer;
· Specify print layout: print using defined scale factor or arrange diagram at defined
number of pages horizontally and vertically;
· Specify page options: margins, headers and footers;
· Point out other print options.
© 2007 EMS Database Management Solutions
441
SQL Manager 2007 for Oracle User's Manual
9.2.10 Saving/Loading diagram
Use Save Diagram and Open Diagram buttons on the toolbar to save the diagram for
future use or to load the previously saved diagram.
9.2.11 Setting diagram options
Using this dialog you can setup behavior and look of every diagram page. See detail
description of every option at the Visual Database Designer page of Environment Options
dialog.
© 2007 EMS Database Management Solutions
442
9.3
SQL Manager 2007 for Oracle User's Manual
SQL Script Editor
Using SQL Script Editor, you can view, edit and execute SQL scripts. To open
Script Editor select the Tools | SQL Script menu item.
SQL
In the script area you can view and edit the SQL script text. For your convenience syntax
highlight and code completion features are implemented.
Using navigation bar
Using popup menu
Using script explorer
Note: SQL Script Editor doesn't show SELECT query results. Please use
that purpose instead.
9.3.1
Using navigation bar
The navigation bar at the left allows you to:
· Select the database for the script.
© 2007 EMS Database Management Solutions
SQL Editor for
443
SQL Manager 2007 for Oracle User's Manual
·
·
·
·
·
·
·
·
9.3.2
Execute the script.
Create a new blank script.
Load a script from a file or save a script to file.
Disable parsing the statements.
Enable logging the results.
Configure SQL Script Editor within the Environment Options dialog.
Bring the window to its default size.
Navigate between the statements in the script using the Explorer.
Using popup menu
The popup menu of the edit area contains standard functions for working with the text
(Cut, Copy, Paste, Find, Replace, Toggle Bookmarks, etc.) and also functions for
processing the script, which allow you to save/load script to/from file, and preview/print
script.
© 2007 EMS Database Management Solutions
444
9.3.3
SQL Manager 2007 for Oracle User's Manual
Using script explorer
The Explorer group on the navigation bar displays the tree of objects, used in the
current script and allows you to get to the needed script fragment quickly by clicking the
object in the tree.
© 2007 EMS Database Management Solutions
445
SQL Manager 2007 for Oracle User's Manual
© 2007 EMS Database Management Solutions
446
9.4
SQL Manager 2007 for Oracle User's Manual
Extract Database Wizard
Using the Extract Database Wizard you can extract database objects and data to the
SQL script, e.g. for backup purposes. To open this wizard, select the
Tools | Extract
Database menu item.
Use the Templates... button to save the wizard configuration for future use or to load
the previously saved configuration for faster extract.
Selecting database to extract
Specify destination script file name
Selecting components to extract
Selecting database objects to extract their structure
Selecting database objects to extract their data
Customizing script options
Using templates
See also:
Export As SQL Script
© 2007 EMS Database Management Solutions
447
9.4.1
SQL Manager 2007 for Oracle User's Manual
Selecting source database
Select the source database to extract. Check Extract all metadata and data of the
database option, if needed, to simplify the wizard.
9.4.2
Specifying destination file name
Choose whether to load generated script to SQL Script Editor or to save this script to a
file.
Specify destination file name in case of saving script to a file.
© 2007 EMS Database Management Solutions
448
9.4.3
SQL Manager 2007 for Oracle User's Manual
Selecting components to extract
Select what to copy - database objects, table data, or both.
© 2007 EMS Database Management Solutions
449
9.4.4
SQL Manager 2007 for Oracle User's Manual
Setting BLOB options
Set the desirable extract options for BLOBs. Select whether the BLOBs should be
extracted as strings or to a file. In that case please specify destination file name and
location. You may use optional file compression as well.
© 2007 EMS Database Management Solutions
450
9.4.5
SQL Manager 2007 for Oracle User's Manual
Selecting objects to extract their structure
Select database object to copy or chose
Extract all objects option to copy all objects
from the database. Note that this step is not available if you select the
Extract data
only mode on selecting what copy.
© 2007 EMS Database Management Solutions
451
9.4.6
SQL Manager 2007 for Oracle User's Manual
Selecting objects to extract their data
Select tables to copy their data by moving them from the Available tables list to the
Selected tables one. Note that this step is not available if you select the
Extract
structure only mode on selecting what copy.
© 2007 EMS Database Management Solutions
452
9.4.7
SQL Manager 2007 for Oracle User's Manual
Customizing script options
This step allows you to customize structure and data copying. Click
start copying.
© 2007 EMS Database Management Solutions
Finish button to
453
SQL Manager 2007 for Oracle User's Manual
© 2007 EMS Database Management Solutions
454
9.5
SQL Manager 2007 for Oracle User's Manual
Print Metadata
Print Metadata allows you to print the metadata of any database object. To open it
select Tools | Print Metadata menu item.
Select the type of the database objects to print using buttons at the navigation bar.
Move the objects from the Available objects list to the Objects for printing list using
arrow buttons, by double-clicking or dragging them (multiple objects can be selected
using buttons Ctrl and Shift).
See also:
HTML Report
9.5.1
Using navigation bar
The navigation bar at the left allows you to:
·
·
·
·
·
Select the database for the report.
Print metadata for selected objects.
Preview the report.
Bring the window to its default size.
Filter database objects by type.
© 2007 EMS Database Management Solutions
455
9.5.2
SQL Manager 2007 for Oracle User's Manual
Printing options
If you select table(s) among the tables for printing, Printing Options appear at the
bottom.
Fields/Params, Foreign Keys, Checks, Indices, Triggers, DDL and Description.
Specify which items should be printed.
Note that you are able to make a preview of the report and print metadata for selected
objects; select the corresponding items of the navigation bar.
© 2007 EMS Database Management Solutions
456
SQL Manager 2007 for Oracle User's Manual
© 2007 EMS Database Management Solutions
457
9.6
SQL Manager 2007 for Oracle User's Manual
HTML Report Wizard
HTML Report wizard allows you to generate a detailed HTML report about the selected
database metadata. To open HTML Report wizard select the Tools | HTML Report menu
item.
·
·
·
·
·
Select source database and output directory
Select type of database objects to extract
Specify Cascading Style Sheet for the report
Set additional parameters
Using templates
See also:
Export Data Dialog
Print Metadata
9.6.1
Select database and directory
Select the source database for the report. Select
result HTML files.
© 2007 EMS Database Management Solutions
output directory for storing the
458
9.6.2
SQL Manager 2007 for Oracle User's Manual
Select type of database objects
Select database ojbect types to include in the report.
© 2007 EMS Database Management Solutions
459
9.6.3
SQL Manager 2007 for Oracle User's Manual
Selecting schema
Choose the schema(s) from which the metadata of objects should be extracted. Note
that the objects are selected at the
Select type of database objects step.
9.6.4
Specify report style
Edit a CSS file that would be used in the result report.
© 2007 EMS Database Management Solutions
460
9.6.5
SQL Manager 2007 for Oracle User's Manual
Set additional parameters
Set the HTML Report additional parameters.
Charset
Set the character set for the result files.
Show report after generating
This option opens the result report in your default browser after generating.
You can also set an optional text to header and footer of the result HTML report.
© 2007 EMS Database Management Solutions
461
SQL Manager 2007 for Oracle User's Manual
© 2007 EMS Database Management Solutions
462
9.7
SQL Manager 2007 for Oracle User's Manual
Report management
SQL Manager 2007 for Oracle provides Report Designer for creating powerful reports,
Create Report Wizard to simplify the process of creating report, and Report Viewer to view
finished reports.
Reports can be stored either in the database ('xxx reports' table will be created to store
them) or in the folder on your hard drive, specified at the Edit Database Registration Info
dialog on the Directories page.
9.7.1
Create Report Wizard
Using the Create Report Wizard you can create a report blank in a definite style
containing required datasets, bands and fields on them.
To open the dialog select the
in the dialog.
Database | New Object... menu item, then select Report
Hint: To create new report you can also right-click the
Reports node of the explorer tree
and select the New Report... item from the popup menu.
·
·
·
·
·
·
Specifying report name and options
Selecting report bands
Selecting report style
Specifying paper settings
Specifying margins
Specifying other page settings
See also:
Report Designer
Report Viewer
© 2007 EMS Database Management Solutions
463
9.7.1.1
SQL Manager 2007 for Oracle User's Manual
Specifying report name and options
Select the database for adding a report. Choose the action you need to perform: create
new report or import the existing report from file. Set the name for a new report and
specify the save options for it.
Create Report Wizard provides two variants for saving a report. If you choose Save to
database the report will be created on the server inside the database itself. Otherwise
choose Save to file; the standard save file dialog appears.
Click Next button to select report bands for a new report, or to locate the existing
report.
© 2007 EMS Database Management Solutions
464
9.7.1.2
SQL Manager 2007 for Oracle User's Manual
Selecting report bands
Select required bands to be placed in the report by moving them from the Available
Bands list to the Report Bands one. Create datasets for 'data' bands if necessary by
clicking Edit button.
Brief information about bands functionality is listed below. See
information.
© 2007 EMS Database Management Solutions
FastReport help for more
465
SQL Manager 2007 for Oracle User's Manual
Name
Functionality
Report title
Prints once at the beginning of report
Report summary
Prints once at the end of report
Page header
Prints at the top of each page
Page footer
Prints at the bottom of each page
Master header
Prints at the beginning of master list
Master data
Data rows of master list
Master footer
Prints at the end of master list
Detail header
Prints at the beginning of detail list
Detail data
Data rows of detail list
Detail footer
Prints at the end of detail list
Subdetail header
Prints at the beginning of subdetail list
Subdetail data
Data rows of subdetail list
Subdetail footer
Prints at the end of subdetail list
Group header
Prints at the beginning of each group
Group footer
Prints at the end of each group
© 2007 EMS Database Management Solutions
466
9.7.1.3
SQL Manager 2007 for Oracle User's Manual
Selecting report style
Select the report style by clicking one of the buttons demonstrating the future look of the
report.
9.7.1.4
Specifying paper settings
Specify report options, such as paper size and orientation, page margins. Check Open the
report after the wizard has finished option to edit generated report with Report
Designer. Click Finish button to start report generation process.
© 2007 EMS Database Management Solutions
467
9.7.1.5
SQL Manager 2007 for Oracle User's Manual
Specifying margins
Stretch to print area
If this option is checked, size of report adjusts to the print area. If this option isn't
checked, you can specify exact left, right, top and bottom margins (in millimeters).
Open the report after the wizard has finished
If this option is checked, the report will be opened after creating.
© 2007 EMS Database Management Solutions
468
9.7.1.6
SQL Manager 2007 for Oracle User's Manual
Specifying other page settings
Options
Print to previous page
This option allows to use white space on a previous page. This option can be used in case
when a report template consists of several pages or when printing batch (composite)
reports.
Two-pass report
If this option is selected, report's formation will be performed in two steps. During the first
pass, a report is formed, and is divided into pages, but the result is not saved anywhere.
During the second pass a standard report formation with saving a result in the stream is
performed.
Page numbering
This option allows to print a page numbers.
Columns
Number
This parameter specifies a number of columns for multi-column reports' printing.
Gap, mm
This parameter specifies width of a gap between columns.
© 2007 EMS Database Management Solutions
469
SQL Manager 2007 for Oracle User's Manual
Open the report after the wizard has finished
If this option is checked, the report will be opened after creating.
9.7.2
Report Designer
The Report Designer allows you to create and edit reports. This tool can be opened
after completion of Create Report Wizard to design a new report. To edit already existing
project use the appropriate Report Viewer navigation bar item.
This module is provided by FastReport (http://www.fast-report.com) and has its own
help system. Press F1 key in the Report Designer to call the FastReport help.
Please find below the instruction on how to create a simple report in the
:
·
·
·
·
·
Report Designer
Adding dialog form
Adding database component
Adding query component
Adding fields to the report
Viewing the report
Note: The Object Inspector that allows you to edit report object properties, can be
© 2007 EMS Database Management Solutions
470
SQL Manager 2007 for Oracle User's Manual
opened by pressing the F11 key.
See also:
Create report wizard
Report Viewer
9.7.2.1
Adding dialog form
In the Report Designer right-click the page tab and select
The Dialog Form will be created as shown below.
© 2007 EMS Database Management Solutions
Add Dialog Form menu item.
471
9.7.2.2
SQL Manager 2007 for Oracle User's Manual
Adding database component
On the Dialog Form do the following:
·
·
·
·
·
·
Pick the Database component (lower on the left toolbar) and drop it on the form.
Within the Object Inspector enter the HostName and the DatabaseName
properties manually, e.g. 'localhost' and 'mysql'.
Set the LoginPrompt property to True.
Set the Connected property to True.
Enter your login and password (e.g 'root' and empty password).
Set the LoginPrompt property to False.
© 2007 EMS Database Management Solutions
472
SQL Manager 2007 for Oracle User's Manual
Note: The Object Inspector that allows you to edit report object properties, can be
opened by pressing the F11 key.
9.7.2.3
Adding query component
On the Dialog Form do the following:
·
·
·
·
Pick the Query component on the left toolbar and drop it on the form.
Select the name of your Database component in the dropdown list of the
Query1.Database property.
Set the Query1.SQL property value, e.g. 'SELECT * FROM user'.
Set Query1.Active to True.
© 2007 EMS Database Management Solutions
473
SQL Manager 2007 for Oracle User's Manual
Note: The Object Inspector that allows you to edit report object properties, can be
opened by pressing the F11 key.
9.7.2.4
Specifying fields
At Page1 insert your fields into the report by clicking
toolbar.
© 2007 EMS Database Management Solutions
Insert DB Fields button on the top
474
9.7.2.5
SQL Manager 2007 for Oracle User's Manual
Viewing report
Click Preview button on the toolbar. This mode allows you to view and print the result
report.
© 2007 EMS Database Management Solutions
475
9.7.3
SQL Manager 2007 for Oracle User's Manual
Report Viewer
Using the Report Viewer you can view, edit, save and print reports.
Main operations with the report can be found at Using navigation bar page.
See also:
Create report wizard
Report Designer
© 2007 EMS Database Management Solutions
476
9.7.3.1
SQL Manager 2007 for Oracle User's Manual
Using navigation bar
The Navigation bar on the left allows you to:
·
·
·
·
·
·
Select a database and a report for viewing.
Refresh the current report.
Edit the current report with Report Designer.
Save the report to a file.
Print the current report.
Bring the window to its default size.
© 2007 EMS Database Management Solutions
477
9.8
SQL Manager 2007 for Oracle User's Manual
SQL Monitor
SQL Monitor allows you to view the SQL code of all the operations executed over
databases and database objects in SQL Manager 2007 for Oracle. The content of the
window can't be edited, but can be copied to the clipboard, saved to a text file or
printed.
To open the SQL Monitor window, select Tools | SQL Monitor menu item.
· Using navigation bar
· Using popup menu
9.8.1
Using navigation bar
The navigation bar at the left allows you to:
·
·
·
·
·
Clear the window contents.
Save the content of the window to a text file.
Search for a string through the logged SQL code
Configure SQL Monitor in the Environment Options dialog.
Bring the window to its default size.
© 2007 EMS Database Management Solutions
478
9.8.2
SQL Manager 2007 for Oracle User's Manual
Using popup menu
The popup menu of SQL Monitor provides various functions for working with the window
content.
You can use bookmarks for quick navigation within the text, copy, search, save text to
file or print the content of the SQL Monitor window. The Properties menu item allows you
to configure all the editors and viewers within the Editor Options dialog.
© 2007 EMS Database Management Solutions
Part
X
480
10
SQL Manager 2007 for Oracle User's Manual
Server Tools
SQL Manager 2007 for Oracle provides Grant Manager for managing grants roles and
system privileges (including granting privileges on the selected databases, tables and
fields).
Managing User Grants
To define user grants for database objects:
· Select the Tools | Grant Manager menu item.
· Select the database host from the drop-down list on
· Edit database privileges within the Grant Manager.
Grant Manager toolbar.
Managing Jobs
To create/edit/suspend jobs please use
Job Manager:
· Select the Tools | Job Manager menu item.
· Select the database from the drop-down list on
· Edit job within the Job Editor.
© 2007 EMS Database Management Solutions
Job Manager toolbar.
481
SQL Manager 2007 for Oracle User's Manual
© 2007 EMS Database Management Solutions
482
10.1
SQL Manager 2007 for Oracle User's Manual
Grant Manager
Grant Manager allows you to set the user access grantee for certain databases and their
objects.
To open Grant Manager select the
·
·
·
·
Tools | Grant Manager menu item.
Using navigation bar
Managing objects grants
Managing system privileges
Managing Roles
10.1.1 Using navigation bar
The navigation bar on the left allows you to:
© 2007 EMS Database Management Solutions
483
SQL Manager 2007 for Oracle User's Manual
Object bar:
· Select a database for editing within the current window.
General bar:
· Refresh the content of the active tab
· Edit existing user
· Clear the filter applied
· Bring the window to its default size
Grantee bar:
· Select a user/role for displaying their grants.
The next bar displays various actions according to the current page of
© 2007 EMS Database Management Solutions
Grant Manager.
484
SQL Manager 2007 for Oracle User's Manual
10.1.2 Managing objects grants
Object grants are managed at this tab.
The Object Name column contains a list of the objects on which the grants can be set;
every subsequent column has the name of the permission which can be granted for the
selected object (e.g. Alter, Insert, Update, etc.).
The list of the object displayed can be configured in several ways.
· Select a user/role at the Navigation bar to their grants.
· Check the Granted only option to display objects with at least one granted operation.
· Selecting a specific type of the object from the drop-down list right under the name of
© 2007 EMS Database Management Solutions
485
SQL Manager 2007 for Oracle User's Manual
the Object Grants tab.
· Using the Filter to select a schema and specify filter for the object name.
You can use standard wildcards like *(asterix) or %(percent sign) which are the same, or
? (question mark). To exclude the object names set in the filter use ! (exclamation mark)
at the begining. (e.g. the result for !T* is everything except the object names starting
with T).
If any of these symbols presents in the name of the object and you do need to apply filter
to them, just double that symnbol (e.g. the result for !!T* will be all objects which names
begin with !T).
To grant a permission on an an object, find appropriate object in the Object Name list and
a the column with corresponding permission. Note that the cells highlighted in grey are not
available for setting grants due to the obvious reason (e.g. you cannot execute a table,
alter a procedure, etc.).
There are 4 states available for every permission:
· Granted
· Granted with GRANT option
· Revoke
· Has grants for columns
Click on a cell to grant a specific permission for a certain object.
The panel at the bottom allows to view granted columns for the tables.
© 2007 EMS Database Management Solutions
486
SQL Manager 2007 for Oracle User's Manual
10.1.3 Managing system privileges
To edit the specific privileges of a user to the database, select the database from the
Database and the user from the Grantee list box at the navigation bar and the to which
these privileges should be applied.
Right-click on a cell right to the desired system privilege then select the Grant item from
the popup menu to grant the privilege to the selected user/role or select the
Revoke
item from the popup menu to forbid the selected privilege.
© 2007 EMS Database Management Solutions
487
SQL Manager 2007 for Oracle User's Manual
10.1.4 Managing Roles
On this tab you can define which users/roles may obtain specific roles and define whether
a role should be assigned to a selected user by default.
Select a user/role at the navigation bar | Grantee and then select a role which current
user/role may obtain and right-click on a cell right to the desired role. Select the Grant
item from the popup menu to grant the role to the selected user/role or select the
Revoke item from the popup menu to forbid the selected role.
To set current role as default for a selected user/role please use context menu of the
cell.
© 2007 EMS Database Management Solutions
488
SQL Manager 2007 for Oracle User's Manual
© 2007 EMS Database Management Solutions
489
10.2
SQL Manager 2007 for Oracle User's Manual
Job Manager
Job Manager allows you to create, schedule and run single or recurring execution of the
tasks in database. Job (routine) is a stored procedure, PL/SQL anonymous block or
external C/Java procedure. Jobs are executed in server processes in the background
mode.
· Managing jobs
· Job Editor
The navigation bar on the left allows you to:
Servers bar:
· Select a server to operate with
General bar:
· Refresh the content of the active tab
· Add a new job
· Edit the current job
· Delete an existing job
· Start current job
· Bring the window to its default size
10.2.1 Managing jobs
Select corresponding items of the navigation bar or use the context menu of
Manager to create/edit/delete and run a job.
To open a job in the Job Editor you can also double-click its name.
Note that current user can only run a job manually if he owns it.
© 2007 EMS Database Management Solutions
Job
490
SQL Manager 2007 for Oracle User's Manual
10.2.2 Job Editor
The Job Editor window opens automatically on attempt to create or edit a job.
The General tab
Job ID
Is set by server automatically.
Job owner
Name of the current user who creates the job.
Next Time
The next execution time for a specified job. Set execution date and time at the corresponding boxes.
Periodically
Set the interval between executions for a specified job. Use the
Every minute, Every
hour, Every day and Custom interval fields for defining a recurrence period.
Broken
Disables job execution. Oracle does not attempt to run broken jobs. However, you can
force a broken job to run.
© 2007 EMS Database Management Solutions
491
SQL Manager 2007 for Oracle User's Manual
The PL/SQL Code tab
Define the Object type: a stored procedure or package containing external C/Java
procedures.
Select the schema that contains a package/procedure. Then in the
desired procedure.
You can also create a PL/SQL anonymous block directly at the
Routine filed select a
What editor.
Parse
If the option is enabled, then Oracle parses the procedure associated with the job.
When finished, press OK to compile SQL script that creates a job.
© 2007 EMS Database Management Solutions
492
SQL Manager 2007 for Oracle User's Manual
© 2007 EMS Database Management Solutions
Part
XI
494
11
SQL Manager 2007 for Oracle User's Manual
Services
SQL Manager 2007 for Oracle provides graphical wizard interface for many native Oracle
services, which are intended for database and table maintenance. To make your work
with the server easier SQL Manager 2007 for Oracle also provides some graphical tools for
working with the server as a whole.
The following services and server tools are available:
Truncate Wizard
The Truncate Wizard allows you to truncate tables and clusters in the selected
database.
Advanced Statistics Expert Wizard
The Advanced Statistics Expert wizard allows you to collect various statistics as an aid
to improve the performance.
Recompile Invalid Objects Wizard
The Recompile Invalid Objects service allows you look up for inavlid object in selected
schema and recompile its definition.
Enable/Disable Constraints Wizard
The Enable/Disable Constraints wizard allows you to enable and disable constraints; it
finds the them and converts them using Oracle statements.
Backup Database
The Backup Database wizard is intended for creating backups of your Oracle database.
Restore Database
The Restore Database wizard is intended for restoring your Oracle database from
backups.
© 2007 EMS Database Management Solutions
495
11.1
SQL Manager 2007 for Oracle User's Manual
Truncate
The Truncate Wizard allows you to truncate tables and clusters in the selected
database.
To start the wizard please select the
Services | Truncate menu item.
See also:
Services
11.1.1 Selecting objects to truncate
At the first step please select target database from the list and desired object type
(table/cluster).
© 2007 EMS Database Management Solutions
496
SQL Manager 2007 for Oracle User's Manual
Having selected the database you need to choose the schema which contains tables/
clusters to be processed.
© 2007 EMS Database Management Solutions
497
SQL Manager 2007 for Oracle User's Manual
To include objects to the list, move them from the Available list to the Selected by
double-clicking or dragging their names. To remove the objects from the list, move them
back in the same way. You can also use the arrow buttons to move the selected objects
(multiple selection can be performed using Ctrl or Shift).
11.1.2 Setting truncate options
Materialized view log options
Please specify whether a materialized view log defined on the table is to be preserved or
purged when the table is truncated.
Storage
Specify Drop to deallocate all space from the deleted rows from the table or cluster
except the space allocated by the MINEXTENTS parameter of the table or cluster. This
space can subsequently be used by other objects in the tablespace.
By specifying Reuse the space from the deleted rows allocated to the table or cluster will
be retained. Storage values are not reset to the values when the table or cluster was
created. This space can subsequently be used only by new data in the table or cluster
resulting from insert or update operations.
© 2007 EMS Database Management Solutions
498
SQL Manager 2007 for Oracle User's Manual
Press Finish to start the process.
© 2007 EMS Database Management Solutions
499
11.2
SQL Manager 2007 for Oracle User's Manual
Advanced Stats Expert
The Advanced Statistics Expert wizard allows you to collect various statistics as an aid
to improve the performance. You can choose to collect and manage statistics for whole
system or database, schemas, tables and domain indexes.
To start the wizard please select the
item.
Services | Advanced Statistics Expert menu
See also:
Services
11.2.1 Selecting object and stats type
At the first step please select target database from the list.
Having selected the database you need to choose the schema which contains the desired
table.
© 2007 EMS Database Management Solutions
500
SQL Manager 2007 for Oracle User's Manual
To include th objects to the list, move them from the Available list to the Selected by
double-clicking or dragging their names. To remove the objects from the list, move them
back in the same way. You can also use the arrow buttons to move the selected objects
(multiple selection can be performed using Ctrl or Shift).
11.2.2 Setting statistics options
Specify additional settings for
© 2007 EMS Database Management Solutions
Advanced Statistics Expert.
501
SQL Manager 2007 for Oracle User's Manual
Target Schema
Schema containing stat table
Target Name
User stat table identifier describing where to save the current statistics.
Stat ID
Identifier (optional) to associate with these statistics within stat table
Granularity
Granularity of statistics to collect (only pertinent if the table is partitioned).
· DEFAULT: Gather global- and partition-level statistics.
· SUBPARTITION: Gather subpartition-level statistics.
· PARTITION: Gather partition-level statistics.
· GLOBAL: Gather global statistics.
· ALL: Gather all (subpartition, partition, and global) statistics.
Options
Further specification of which objects to gather statistics for:
· GATHER: Gathers statistics on all objects in the schema.
· GATHER AUTO: Gathers all necessary statistics automatically. Oracle implicitly
determines which objects need new statistics, and determines how to gather those
statistics.
· GATHER STALE: Gathers statistics on stale objects as determined by looking at the
*_tab_modifications views. Also, return a list of objects found to be stale.
© 2007 EMS Database Management Solutions
502
SQL Manager 2007 for Oracle User's Manual
· GATHER EMPTY: Gathers statistics on objects which currently have no statistics.
also, return a list of objects found to have no statistics.
· LIST AUTO: Returns a list of objects to be processed with GATHER AUTO.
· LIST STALE: Returns list of stale objects as determined by looking at the
*_tab_modifications views.
· LIST EMPTY: Returns list of objects which currently have no statistics.
Method opt
Specify the method of gathering stats - for all indexed/hidden columns.
Degree
Degree of parallelism.
Estimate percent
Percentage of rows to estimate.
Block sample
Whether or not to use random block sampling instead of random row sampling. Random
block sampling is more efficient, but if the data is not randomly distributed on disk, then
the sample values may be somewhat correlated.
Force
When checked, deletes column statistics even if locked.
No invalidate
Does not invalidate the dependent cursors if checked.
© 2007 EMS Database Management Solutions
503
11.3
SQL Manager 2007 for Oracle User's Manual
Recompile invalid objects
The Recompile Invalid Objects service allows you look up for inavlid object in selected
schema and recompile its definition.
To start the service please select the
Services | Recompile Invalid Objects menu item.
See also:
Services
11.3.1 Using navigation bar
The navigation bar on the left allows you to:
Object bar:
· Select a database for editing within the current window.
General bar:
· Look for invalid objects
· Recompile selected objects
· Clear the content of current window
The next bar displays various actions according to the current page of
objects service.
© 2007 EMS Database Management Solutions
Recompile invalid
504
SQL Manager 2007 for Oracle User's Manual
11.3.2 Working with recompile service
Select the schema and object type at the corresponding boxes; click the link at the
navigation bar to perform the search.
To recompile an invalid object click corresponding link at the navigation bar.
© 2007 EMS Database Management Solutions
505
11.4
SQL Manager 2007 for Oracle User's Manual
Enable/Disable constraints
The Enable/Disable Constraints wizard allows you to enable and disable constraints; it
finds the them and converts them using Oracle statements.
To start the wizard please select the
item.
Services | Enable/Disable Constraints menu
See also:
Services
11.4.1 Selecting target table
At the first step please select target database from the list.
© 2007 EMS Database Management Solutions
506
SQL Manager 2007 for Oracle User's Manual
Having selected the database you need to choose the schema which contains the desired
table.
© 2007 EMS Database Management Solutions
507
SQL Manager 2007 for Oracle User's Manual
To include tables to the list, move them from the Available list to the Selected by
double-clicking or dragging their names. To remove the objects from the list, move them
back in the same way. You can also use the arrow buttons to move the selected objects
(multiple selection can be performed using Ctrl or Shift).
11.4.2 Specifying operation
At this step you are to specify the desired operation to be performed and constraint
types to be enabled/disabled.
Press Finish to start the process.
© 2007 EMS Database Management Solutions
508
SQL Manager 2007 for Oracle User's Manual
© 2007 EMS Database Management Solutions
509
11.5
SQL Manager 2007 for Oracle User's Manual
Backup Database
The Backup Database wizard is intended for creating backups of your Oracle database.
During its work the script to perform backup will be created, which can be edited manually
if needed.
Important: Please note that you should have a clear idea of the backup/restore
mechanism
Note that a wrong combination of backup/restore settings can damage your
database!
To start the wizard please select the
Services | Backup menu item.
The wizard will guide through the entire process - checking instance current settings,
tuning all the options necessary both for User-managed backup script and Oracle
Recovery Manager backup.
First, at the corresponding boxes specify the desired database for backup, destination
directories for the script and the backup itself to be stored.
Then at the
Backup using group select the desired backup strategy:
© 2007 EMS Database Management Solutions
510
SQL Manager 2007 for Oracle User's Manual
User-managed backup script
or
Recovery manager (RMAN)
See also:
Restore Database
Services
11.5.1 Checking DB and instance options
Database and destination directories specified at the previous step, please check current
database settings for selected User-managed script backup strategy.
Then select the desired backup mode - online or cold.
During cold backup the database is shut down and copying of the datafiles is performed
by means of the operating system itself.
In online mode there is no need to shutdown the database but the it needs to be in the
ARCHIVELOG mode.
© 2007 EMS Database Management Solutions
511
SQL Manager 2007 for Oracle User's Manual
11.5.2 User-managed script
11.5.2.1 Selecting datafiles
At this step of the Wizard you need to select the datafiles for backup. By default all the
datafiles of the database are selected; uncheck the unwanted ones.
11.5.2.2 Setting additional options
The additional options of the
© 2007 EMS Database Management Solutions
Backup Database Wizard are set at this step.
512
SQL Manager 2007 for Oracle User's Manual
Backup longname
A full name of the backup options file to be created.
Backup controlfile
Specify whether the controlfile should be included into backup.
Recreate PFILE if need
Option checked, the appropriate command which recreates the PFILE from existing SPFILE
is added to the backup script.
Recreate temporary data files
Specify whether the Oracle temporary datafiles should be recreated.
OS specific options
Specify the OS which commands should be used in the script generated.
Close on success
Closes wizard window automatically on successful completion.
Press Finish to start the process.
© 2007 EMS Database Management Solutions
513
SQL Manager 2007 for Oracle User's Manual
11.5.3 Recovery Manager (RMAN)
11.5.3.1 Specifying datafiles
At this step of the Backup Database Wizard you need to seelect backup type and set
some additional backup options for RMAN backup strategy.
Backup type
Full backup is a backup of a datafile that includes every allocated block in the file being
backed up.
An Incremental backup is either a level 0 backup, which includes every block in the file
except blocks compressed out because they have never been used, or a N - level backup
(N between 1 and 4), which includes only those blocks that have been changed since the
parent backup was taken.
The goal of an incremental backup is to back up only those data blocks that have
changed since a previous backup. You can use it to create incremental backups of
datafiles, tablespaces, or the whole database.
Delete expired
Adds to the RMAN script a special command which removes expired archievelogs.
Autobackup controlfile
Checking the option ensures that a usable backup of the control file is included with the
backup and tagged in order to simplify restoring the control file with the rest of the
database. (starting from version 9 of the server).
Snapshot controlfile name
All the changes made to the database when performing backup will be logged at the
Snapshot controlfile name set (recommended for version 8 of the Server).
© 2007 EMS Database Management Solutions
514
SQL Manager 2007 for Oracle User's Manual
11.5.3.2 Setting additional options
The additional options of the
© 2007 EMS Database Management Solutions
Backup Database Wizard are set at this step.
515
SQL Manager 2007 for Oracle User's Manual
User
Target user under which the RMAN session will be created.
Using catalog
Catalog can be considered as a special database which stores backup settings. Specify
Catalog user and Database name to use it.
RMAN script execution
Specify the OS which commands should be used in the script generated or select
script now for immediate execution.
Close on success
Closes wizard window automatically on successful completion.
Press Finish to start the process.
© 2007 EMS Database Management Solutions
Run
516
11.6
SQL Manager 2007 for Oracle User's Manual
Restore Database
The Restore Database wizard is intended for restoring your Oracle database from
backups. During its work the script to perform restore will be created, which can be edited
manually if needed.
Important: Please note that you should have a clear idea of the backup/restore
mechanism
Note that a wrong combination of backup/restore settings can damage your
database!
To start the wizard please select the
Services | Restore menu item.
The wizard will guide through the entire process - checking saving backup settings, tuning
all the options necessary both for User-managed script and Oracle Recovery Manager
restore.
First, at the corresponding boxes specify the desired database for restore into, locate the
script and set the directory containing backup.
See also:
Backup Database
Services
© 2007 EMS Database Management Solutions
517
SQL Manager 2007 for Oracle User's Manual
11.6.1 User-managed script
11.6.1.1 Verifying current settings
Please check current database settings for selected
strategy.
Specify the server home at the
User-managed script backup
Oracle Home field.
Restore from online backup
The previously created online backup will be used to restore the database.
Enforce shutdown of the instance
Adds the command to shutdown the server into script.
11.6.1.2 Selecting datafiles
At this step of the Wizard you need to select the datafiles to be restored. By default all
the datafiles of the backup are selected; uncheck the unwanted ones.
© 2007 EMS Database Management Solutions
518
SQL Manager 2007 for Oracle User's Manual
11.6.1.3 Setting additional options
The additional options of the
© 2007 EMS Database Management Solutions
Restore Database Wizard are set at this step.
519
SQL Manager 2007 for Oracle User's Manual
Controlfile
Specify whether the controlfile should be restored.
OS specific options
Specify the OS which commands should be used in the script generated or select
script now for immediate execution.
Close on success
Closes wizard window automatically on successful completion.
11.6.2 Recovery Manager (RMAN)
11.6.2.1 Setting additional options
The additional options of the
© 2007 EMS Database Management Solutions
Restore Database Wizard are set at this step.
Run
520
SQL Manager 2007 for Oracle User's Manual
User
Target user under which the RMAN session will be created.
Using catalog
Catalog can be considered as a special database which stores backup settings. Specify
Catalog user and Database name to use it.
RMAN script execution
Specify the OS which commands should be used in the script generated or select
script now for immediate execution.
Run
Restore controlfile from autobackup
Restores the control file from autobackup if checked, otherwise you need to specify at
the corresponding field the name of the snapshot controlfile containing all the changes (if
any) made to the database.
Restore from online backup
The previously created online backup will be used to restore the database.
Close on success
Closes wizard window automatically on successful completion.
© 2007 EMS Database Management Solutions
Part
XII
522
12
SQL Manager 2007 for Oracle User's Manual
SQL Manager Options
SQL Manager 2007 for Oracle provides full customization of program interface, window
behavior, various options of all tools and more. This chapter tells you how to use all these
options.
Environment Options
General SQL Manager 2007 for Oracle options: environment style, confirmations, window
restrictions, DB Explorer, SQL Editor, SQL Monitor, Visual Query Builder options and more.
Editor Options
Customizing of all the SQL editors - SQL Editor, SQL Script, and more.
Visual Options
Customizing program interface - bars, trees, menus, etc.
Keyboard Templates
Keyboard templates for quicker editing SQL.
Besides, the Options dialogs allows you to export all program settings to a *.reg file for
future use, e.g. on another machine (see Save Settings for details).
© 2007 EMS Database Management Solutions
523
12.1
SQL Manager 2007 for Oracle User's Manual
Environment Options
Environment Options allow you to customize general SQL Manager 2007 for Oracle
options. To open the Environment Options window select the Options | Environment
Options menu item.
Preferences
Confirmations
Windows
Tools
· DB Explorer
· Object Editors
· SQL Editor
· SQL Monitor
· SQL Script
· Query Builder
· Print Metadata
· Data Export
· Fonts
· Grid
· Data Options
· Print Data
· Color & Formats
· Advanced
· Column Options
· Localization
·
·
·
·
12.1.1 Preferences
Show splash screen on startup
Displays the splash screen on SQL Manager 2007 for Oracle startup.
Restore desktop on connect
On disconnecting from the database the database windows and their positions which were
refreshed on connect will be restored.
Disable multiple instances
Prohibits running multiple instances of SQL Manager 2007 for Oracle.
Encrypted passwords
Encrypts passwords for connecting to databases in the Windows registry.
Show desktop panel (for MDI Environment style only)
Displays the Desktop Panel when no windows are open.
© 2007 EMS Database Management Solutions
524
SQL Manager 2007 for Oracle User's Manual
12.1.2 Confirmations
Confirm saving of object
If this option is on, the program requires confirmation each time you want to save
changes in database object.
Confirm dropping object
If this option is on, the program requires confirmation for dropping database object.
Confirm exit from SQL Manager 2007 for Oracle
If this option is on, the program requires confirmation when you want to exit
2007 for Oracle.
SQL Manager
Confirm transaction commit
If this option is checked, the program requires confirmation of the transaction commit.
Confirm transaction rollback
If this option is checked, the program requires confirmation of the transaction rollback.
Confirm deleting records
Enables displaying confirmation dialog on attempt to delete a record.
Confirm metadata changing
If this option is on, the program requires confirmation of metadata changing (See
© 2007 EMS Database Management Solutions
525
SQL Manager 2007 for Oracle User's Manual
Changing Metadata window).
Availability:
Windows Full
Windows Lite
Yes
Yes
12.1.3 Windows
Environment Style
This switch allows you to define the basic window environment - MDI (like MS Office) or
Floating Windows (like Borland IDE).
Windows restrictions
This option allows you to set the number of editors (Table Editor, SQL Editor, etc.) that
can be opened at a time.
Zoom options
This option is available only if Environment Style is 'Floating-windows environment'. It
allows you to set the window maximization size: full screen, restricted by main form,
restricted by main form and DB Explorer.
Bar style for child forms
Allows you to define the location of action buttons. They can be located at the
© 2007 EMS Database Management Solutions
526
SQL Manager 2007 for Oracle User's Manual
Navigation bar at the left and/or on the Toolbar.
You can also Enable floating toolbars feature by clicking the appropriate option.
12.1.4 Tools
Show only connected databases in drop-down menu
Displays only connected databases in the dropdown menus of such tools as:
SQL Script, etc.
QueryBuilder,
Allow using parameters in query text
This feature allows you to specify different values within a query in a popup dialog just
before the query execution. Use the colon (':') character before some identifier (e.g. :P1)
to specify a parameter within a query.
Add ROWID to simple SELECT queries to make them updatable
Query execution/Getting data in object editors
Asynchronous execution
Check this option to allow executing a query/getting object data in the background mode.
Fetch all data
Enables fetching of all records when executing a query/getting object data.
© 2007 EMS Database Management Solutions
527
SQL Manager 2007 for Oracle User's Manual
12.1.4.1 DB Explorer
Show database groups in DB Explorer
Shows/hides database groups in the DB Explorer tree.
Show Table Subobjects
Shows/hides table subobjects (fields, indices, etc.) in the
Sort by aliases
Show registered databases sorted by its aliases in the
DB Explorer tree.
DB Explorer tree.
Rename objects by editing in place
Allows you to edit object names right in the DB Explorer by selecting them and clicking on
them one more time.
Recent objects count
Defines the number of objects displayed on the
Recent tab of the
DB Explorer.
Tables' Details in SQL Assistant
Switches the SQL Assistant mode for displaying table fields, indices, foreign keys, table
status, definition or description.
© 2007 EMS Database Management Solutions
528
SQL Manager 2007 for Oracle User's Manual
12.1.4.2 Object Editors
Convert created object's names to uppercase
Set this option to create all objects with names in uppercase.
Always open the Fields tab
Always opens the Fields tab default on activating the
Table Editor.
Show Object Explorer
Enables/disables displaying the object explorer tree by default at the left of each
Editor.
Table
Do not retrieve record count for a table
Enable this option for not to retrieve record count, as this can take a long time for large
tables.
© 2007 EMS Database Management Solutions
529
SQL Manager 2007 for Oracle User's Manual
12.1.4.3 SQL Editor
Explain query
If this option is checked, query plan is displayed at the bottom of the
SQL Editor window.
Show result for each query
If this option is checked and you execute two or more queries (divided by "go"), result for
each query will be shown. Otherwise, only the result of the last query will be shown.
Execute selected text separately
Check this option to allow the separate executing of the selected text.
Write only successful executed queries to database SQL log file
If this option is checked, unsuccessful queries will not be saved to SQL Editor log file.
(See Log page in the Edit Database Registration Info dialog)
Show results on Edit tab
Check this option to see query execution results on the same page with the query text,
rather than on different pages.
Don't save queries automatically for the next sessions
If this option is checked, query text will not be saved. Otherwise, it will be saved in
Windows registry.
Disable transaction confirmation
If this option is checked, no transaction confirmation will be required on closing
© 2007 EMS Database Management Solutions
Visual
530
SQL Manager 2007 for Oracle User's Manual
Query Builder and SQL Editor. Specify the default action ('Commit' or 'Rollback') and this
action will be performed automatically each time when you exit Query Builder or SQL
Editor. Check the Perform default action after each operation.
12.1.4.4 SQL Monitor
SQL Log
You can enable logging all the SQL Monitor events to a log file. Check option Log SQL
Monitor events to file and set the name of the log file. To clear the log file after it
reaches some definite size check Clear log file when it is greater than option and set
the maximum file size in kilobytes.
Show non-SQL messages
Displays messages other than containing SQL ones.
Show time of operation
Dislpays execution time of logged operations.
Show always on top
Dislpays SQL Monitor tool always on top.
© 2007 EMS Database Management Solutions
531
SQL Manager 2007 for Oracle User's Manual
12.1.4.5 SQL Script
Abort script on error
If this option is checked, script execution is aborted when an error occurs.
Rollback on abort
This option is available only if Abort Script on Error is checked. This option evokes
automatic rollback on script execution abort.
Enable parsing
With this option checked, SQL Script Editor parses loaded script to enable fast navigation
on them in the Explorer tool.
Show message when done
Displays message box on finishing script execution.
© 2007 EMS Database Management Solutions
532
SQL Manager 2007 for Oracle User's Manual
12.1.4.6 Query Builder
Allow SELECT queries only
When this option is checked INSERT, UPDATE, DELETE statements are not allowed on the
Builder tab of Query Builder.
Select condition row
Displays the selected condition in different row on the
tabs of Query Builder.
Criteria and Grouping Criteria
Drag field name
Displays the dragged field name in the Builder area.
Hide selection when inactive
Hides the selection when Query Builder is inactive.
Show field types
Displays the field type next to the field in the table box.
Union all by default
Check this option to use UNION ALL expression in Query Builder by default.
The UNION keyword enables you to include the results of two SELECT statements in one
resulting table.
The ALL parameter incorporates all rows into the results, including duplicates. If not
specified, duplicate rows are removed.
© 2007 EMS Database Management Solutions
533
SQL Manager 2007 for Oracle User's Manual
Visible Tabs
These options specify which Query Builder tabs are available and which are not. Check
boxes to make the appropriate tabs visible.
Script Format
These options specify the case formatting of keywords and functions in query text on
the Edit tab. As is saves the original case, Uppercase sets all the keywords/functions to
upper case, Lowercase sets all the keywords/functions to lower case, and First upper
sets the first letters of all keywords/functions to upper case.
You can set style and color for all
Query Builder objects by using Style and Color Palette.
12.1.4.6.1 Style & Color Palette
Style
These options specify how
Query Builder objects look like - 3D, flat, etc.
Color Palette page
These options define colors of different Query Builder elements: condition row, active
caption, table client area, etc. Click an item to select a color for the appropriate
Query
Builder element.
© 2007 EMS Database Management Solutions
534
SQL Manager 2007 for Oracle User's Manual
12.1.4.7 Visual Database Designer
Model notation
When you work in Visual Database Designer, you can choose one of the following modeling
notations:
· Integration DEFinition for Information Modeling (IDEF1X) notation
· Information Engineering (IE) notation
The IDEF1X and IE notations use different symbols to represent entity and table
relationships.
Draw PRIMARY KEY fields separately
Separates primary key fields from other fields with the line.
Draw entities icons
Displays icons at the left of entity header according to its type.
Draw attributes icons
Displays icons at the left of attribute according to its type (primary key, foreign key,
ordinary field).
Show grid
Displays dots on the diagram area to make the grid visible.
Snap to grid
© 2007 EMS Database Management Solutions
535
SQL Manager 2007 for Oracle User's Manual
Automatically aligns entities on the form with the nearest gridline. You cannot place an
entity in between gridlines.
Grid size
Sets grid spacing in pixels along the x- and y-axes. Specify a higher number to increase
grid spacing.
Entity header font
Select a font type and size to dislpay entity headers.
Attributes font
Select a font type and size to dislpay attributes.
You can set color for all database designer diagram objects by using Color Palette.
12.1.4.7.1 Color Palette
Color Palette page
These options define colors of different Visual Database Designer elements: work area,
table captions, field area, etc. Click an item to select a color for the appropriate
Database
Designer element.
© 2007 EMS Database Management Solutions
536
SQL Manager 2007 for Oracle User's Manual
12.1.4.8 Print Metadata
Default Paper Size
Defines the default paper size for the reports created with the
© 2007 EMS Database Management Solutions
Print Metadata tool.
537
SQL Manager 2007 for Oracle User's Manual
12.1.4.9 Data Export
This page allows you to customize formats applied to exported data. Edit the format
masks to adjust the result format in the way you need.
Fore more details see Adjusting Data Formats
© 2007 EMS Database Management Solutions
538
SQL Manager 2007 for Oracle User's Manual
12.1.5 Fonts
System font name
Defines the font name used by SQL Manager 2007 for Oracle.
System font size
Defines the font size used by
SQL Manager 2007 for Oracle.
The box below displays the sample text using the selected font.
© 2007 EMS Database Management Solutions
539
SQL Manager 2007 for Oracle User's Manual
12.1.6 Grid
General options
Striped Grids
Displays the odd grid rows in a different color, defined by the
Stripy option.
Show editor immediately
Allows editing the cell value right after the cell is clicked.
Always show editor
Set this option to make the cell editors always active.
Enable auto-search in grid
Set this option to enable start typing and have the grid automatically navigate to the
closest match.
Row multi-selection
With this option set, multiple rows can be selected.
Column auto-width
With this option set, column widths are changed in order to display all columns without
© 2007 EMS Database Management Solutions
540
SQL Manager 2007 for Oracle User's Manual
using the horizontal scrollbar. If a column's content is still too large to display without the
grid needing to resize, then the column's values are truncated and the hidden characters
are replaced with an end ellipsis.
Cell auto-height
If the widths of the columns are insufficient to display the full content, then text clipping
occurs. Set this option to prevent this. If this option is set, the cell content is displayed
in multiple lines where necessary. You can set the number of lines to display using Cell
max line count option.
Grid layout preference
Select Save and restore layout option to keep the original grid width. Select Autofit
column widths option to shrink the grid columns so that the longest visible column value
fits.
Root level options
These options are applied to the main view of the grid. See
Grid View for details.
Detail level options
These options are applied to the detail view of the grid. See
Grid View for details.
Show "Group by" box
Displays a box above the column captions allowing to group data in the grid.
Show indicator
Displays the row indicator.
Show navigator
Activates/deactivates the data navigator. This navigator is displayed at the bottom of a
view.
Show "New item row"
Displays an empty row at the top of a view, which is a convenient way for adding data to
the grid.
Hide tabs for single detail
This option is actual when only one view is present on detail level. When checked, it hides
the view tab.
See also:
Data Frame
© 2007 EMS Database Management Solutions
541
SQL Manager 2007 for Oracle User's Manual
12.1.6.1 Data Options
Default Grid Mode
· Load all rows
The grid loads all records from a dataset. This option increases the grid performance
by reloading only changed dataset records when updating. In this mode all features
(automatic sorting, filtering and summary calculations) are available.
· Load visible rows
The grid loads only a fixed number of dataset records into memory. This option
minimizes dataset loading time. The automatic sorting, filtering, summary calculations
are not supported in this mode.
Default Grid Mode defines grid mode which will be used by default.
With the Load all rows option enabled, when loading data, all the records are loaded into
grid buffers. In this mode opening the tables with many records may take a very long
time. But in this case you have some advantages: e.g. in the filter drop-down list the
column headers are displayed with the values for quick filter; it is possible to open several
sublevels at the same time when viewing data in master-detail view, etc.
Because opening and other operations with an object consisting of many records takes
sufficient time the Load visible rows mode should be used instead. It can be set
individually for each table and is saved between sessions (can be set via grid context
menu).
© 2007 EMS Database Management Solutions
542
SQL Manager 2007 for Oracle User's Manual
Advanced
Use shared connection for each data view within a database
Uncheck this option to use separate connection for each data view within a database.
Use SQL sorting in data view
The data view will be ordered using SQL sort.
Use SQL filter in data view of Table and View Editors
The data view will be ordered using SQL filter.
With the Use SQL Sorting in data view option enabled a click on the column header for
sorting causes reloading all table data with the selected field in ORDER BY expression of
the SELECT statement. Otherwise the sorting is performed by means of grid. If the table
consists of huge number of records and the Select only XXX records mode (Limit options
in table and view editors) is used this mode is more preferable (e.g. all the records which field
values start with "A" will be displayed, and not those which were in originally opened XXX
records.
All above-mentioned is related to the Use SQL filter in data view option. If the filter is
applied to the tables consisting of many records it is strongly recommended to enable this
option. After enabling it the filter will be applied to all table records, not only to those
which are displayed at the present moment.
Load visible rows mode if records more than
Set this option to switch to load visible rows mode when number of records in dataset
exceeds specified number.
String fields width (chars)
Using this option you can limit string fields width that may improve performance on large
datasets.
© 2007 EMS Database Management Solutions
543
SQL Manager 2007 for Oracle User's Manual
12.1.6.2 Print Data
Save/restore following print data properties
These options specify which Print Data properties will be saved between work sessions
(e.g. if you tick off the Page settings item, those the settings will be saved and stored
between sessions).
© 2007 EMS Database Management Solutions
544
SQL Manager 2007 for Oracle User's Manual
12.1.6.3 Color & Formats
Display formats
Integer fields
Defines the format for displaying TINYINT, SMALLINT, MEDIUMINT, INTEGER, and BIGINT
fields.
Float fields
Defines the format for displaying FLOAT, DOUBLE and DECIMAL fields.
Datetime fields
Defines the format for displaying DATETIME fields.
Date fields
Defines the format for displaying DATE fields.
Time fields
Defines the format for displaying TIME fields.
Colors
© 2007 EMS Database Management Solutions
545
SQL Manager 2007 for Oracle User's Manual
Grid
Defines the background color of the data grid.
Row
Defines the color of the selected row in the data grid.
Stripy
Defines the color of the odd rows if the
Stripy Grids option is on.
Null Values
Text
Defines the text that stands for the NULL value.
Font Color
Defines the font color displaying NULL values in the grid.
12.1.6.4 Advanced
Invert selection
Determines whether a single cell within the focused row or the whole row is highlighted
when focused.
© 2007 EMS Database Management Solutions
546
SQL Manager 2007 for Oracle User's Manual
Cell hints for clipped text
Indicates whether a hint box is displayed when hovering over a cell containing clipped
text.
Focus cell on cycle
Determines whether the focus moves to the next row after it reaches the right-most cell
within the current row.
Focus first cell on new record
Determines whether the focus moves to the first cell of a newly created row.
Next cell on pressing Enter
Determines whether the current view columns can be navigated by using the Enter key.
Show navigation hints
Indicates whether a hint box is displayed when hovering over navigator buttons.
MRU list in column filter
Enables showing of Most Recently Used items when filtering columns
Expand buttons for empty details
Specifies whether to display expand buttons within master rows that don't have
associated details.
Card width
Defines the width of the card used in Card View mode.
Large Memo Editor
Sets number of lines for text-typed fields when viewing data in Form view.
Word wrap in memo editor
Determines whether long strings are wrapped within a memo editor.
Grid lines
Determines whether to display vertical and horizontal lines between cells.
Show edit buttons
Indicates whether an edit button is displayed.
Detail tabs position
Specifies position of the tabs on detail level views.
Card layout direction
Specifies the direction of cards in Card View mode.
© 2007 EMS Database Management Solutions
547
SQL Manager 2007 for Oracle User's Manual
12.1.6.5 Column Options
Auto-select text
Determines whether all text within an editor is automatically selected when the editor
gets focus.
Hide selection on losing focus
Determines whether the visual indication of the selected text remains when the editor
loses focus.
Inserting Return characters
Specifies whether a user can insert return characters into text.
Inserting Tab characters
Specifies whether a user can insert tab characters into text.
Word wrap
Determines whether long strings are wrapped within a memo editor.
Popup memo editors
Turns on popup memo editors for text BLOB type fields.
Use Ctrl+Up instead of Up to increase spin values
Allows you to use Ctrl+Up and Ctrl+Down key combinations for editing the spin values
(integer field values).
© 2007 EMS Database Management Solutions
548
SQL Manager 2007 for Oracle User's Manual
Show large increment buttons
Determines whether fast buttons are visible within an editor.
Increment
Specifies the increment value for a spin editor.
Large increment
Specifies the fast increment value for the spin editor.
Spin editors buttons' position
Specifies the position of spin editor buttons.
12.1.7 Localization
The Localization page is provided for managing the SQL Manager 2007 for Oracle
localization files.
You can create your own *.lng files similar to those, available at the $(SQL Manager 2007
for Oracle)\Languages folder, add them to the list of available languages on this tab and
set the new language as a program interface language.
Auto scan languages on startup
When checked, the directory with localization files will be scanned automatically on
program startup; all the languages found will be added into the list of available languages.
© 2007 EMS Database Management Solutions
549
SQL Manager 2007 for Oracle User's Manual
Default directory
The default directory for adding the new *.lng files.
Choose program language
Selects the program interface language.
Available languages
Lists all the languages available for localization and the corresponding *.lng files.
Double-click a language in the list to edit its name or *.lng file.
Add defaults
Searches in the Default directory folder for the *.lng files and adds all them to the list.
Add
Opens the Language Editor dialog for adding a new language file.
Edit
Opens the Language Editor dialog for changing the name or the corresponding *.lng file of
the language selected in the Available languages list box.
Delete
Removes the language selected in the
See also:
Localizing SQL Server Manager
© 2007 EMS Database Management Solutions
Available languages list box.
550
SQL Manager 2007 for Oracle User's Manual
© 2007 EMS Database Management Solutions
551
12.2
SQL Manager 2007 for Oracle User's Manual
Editor Options
Editor Options allow you to set the parameters of viewing and editing the SQL
statements within SQL Manager 2007 for Oracle. To open the Editor Options window
select the Options | Editor Options menu item.
·
·
·
·
·
·
General
Display
Color
Quick Code
SQL Formatter
Key Mapping
12.2.1 General
Auto indent
If this option is checked, each new indention is the same as the previous when editing
SQL text.
Insert mode
If this option is checked, insert symbols mode is on by default.
Use syntax highlight
Enables syntax highlight in the object editor window.
Find text at cursor
If this option is checked, the Text to find field in the Find Text Dialog window is
automatically filled with the text on which cursor is set.
Always show hyperlinks
If this option is checked, hyperlinks are displayed in the editor window. To open a link,
click it with the Ctrl button pressed.
Show line numbers
If this option is checked, line numbers are displayed in the SQL text editor window.
Trim trailing spaces
If this option is checked, all spaces after the last symbol in line will be trimmed.
Use smart tabs
If this option is checked, tab length will be variable. After pressing a Tab button the
cursor aligns with the nearest first or last position of another line.
Take from previous line only
Tab length will be variable. After pressing a Tab button the cursor aligns with the
first or last position of the previous line.
Convert Tab characters to spaces
If this option is checked, Tab symbol is replaced by the "spaces".
© 2007 EMS Database Management Solutions
552
SQL Manager 2007 for Oracle User's Manual
Drag and drop text
This option allows to drag and drop selected text.
Group undo
This option allows you to undo multiple actions of the same kind.
Keep caret horizontal position
If this option is checked, the horizontal position of a cursor is kept. If you move a cursor
(by Up and Down arrows) on a line, which length is less than current cursor horizontal
position, it will be positioned after the last symbol of a line.
Tab stops
Defines the tab length, used when editing a text.
Undo limit
Defines the maximum number of changes possible to be undone.
12.2.2 Display
Visible right margin
Makes the right text margin visible.
© 2007 EMS Database Management Solutions
553
SQL Manager 2007 for Oracle User's Manual
Visible gutter
Makes the gutter visible in the editor window.
Right margin
Defines the position of the right text margin in the editor window.
Gutter width
Defines the gutter width in the editor window.
Editor font, Size
Use these options to set the editor font and its size. If the
Show only fixed-width fonts
option is checked, only fonts with the fixed width are displayed in Editor font dropdown
list.
12.2.3 Color
On Color tab you can specify font and background colors and attributes of the text,
editor uses to mark out different text fragments: default, comments, strings, SQL
keywords, numbers, links, wrong symbols, identifiers, symbols, and selected text. Set the
foreground and background colors for different elements in the corresponding boxes.
© 2007 EMS Database Management Solutions
554
SQL Manager 2007 for Oracle User's Manual
12.2.4 Quick Code
Code completion
If this option is checked then on typing the first word symbols in the SQL text editor you
will be offered some variants for the word completion in a popup list (analogue of the
Code Insight in Delphi IDE). The popup list will appear a period of time, defined by
Delay option.
Code parameters
If this option is checked, the Delphi-like hint for functions is enabled.
Delay
Using this option you can change the time the popup list takes to appear.
Code case
Allows you to change the case of the words inserted automatically.
Auto launch keyboard templates
Allows you to use keyboard templates for faster typing frequently met expressions (see
Keyboard Templates).
Color scope categories
If this option is checked, object types will differ in color in the popup menu.
© 2007 EMS Database Management Solutions
555
SQL Manager 2007 for Oracle User's Manual
Sort by scope / Sort by name
Switches sorting objects in the popup menu by name or by type (Table, Function, etc.).
12.2.5 SQL Formatter
SQL Formatter is a new feature added to SQL Editor. It is a useful tool for formatting
queries, making SQL statements easy to read.
© 2007 EMS Database Management Solutions
SQL
556
SQL Manager 2007 for Oracle User's Manual
12.2.5.1 Settings
Format SQL query
Turns on SQL formatting, making the SQL statements easier to read.
Format subquery
Allows to format subqueries
© 2007 EMS Database Management Solutions
557
SQL Manager 2007 for Oracle User's Manual
© 2007 EMS Database Management Solutions
558
SQL Manager 2007 for Oracle User's Manual
12.2.5.2 SQL Words
Wrap first element
Wraps the selected text at a specific column.
Select the key words after which formatting should be applied.
Params in line/list
Allows you to display the parameters followed by the key words (specify them below) in
list or in line.
OR - AND
Set the placement of the AND an OR operations according to the operands followed by
them. See the example below.
Left
WHERE
AND ...
AND ...
AND ...
Separate
© 2007 EMS Database Management Solutions
559
SQL Manager 2007 for Oracle User's Manual
WHERE
...
AND
...
AND
Right
WHERE
... AND
... AND
... AND
The Keywords case and Identifiers case options allow you to define the case of the
corresponding items.
You may choose UPPER, lower, Capitalize.
Default case means leaving the name of the identifier or a keyword "AS IS".
Space before bracket
Adds a "space" symbol before the opening bracket and after the closing one.
Space into brackets
Adds a "space" symbol after the opening bracket and before the closing one.
Indents in list
Sets the size of indent relative to the previous string.
12.2.6 Key Mapping
For your convenience SQL Manager 2007 for Oracle provides key mapping. On this tab you
can set the shortcuts for various commands/operations according to your needs.
Select the command for which you want to make a shortcut from Commands the list on
the right, then place cursor into the Key editor and press key combination you find useful
(use Ctrl Alt Shift buttons). After setting the shortcut, press
New button to add it into
the list of existing Key combinations.
Note: you may set a double key combination e.g.
Ctrl-K, Ctrl-H by using Add button.
Hotkeys mapping may be saved as a scheme. Manage the schemes using
Delete buttons.
Save As... and
You can export Key mapping scheme into various formats via Export Data Wizard, that
can be called by pressing Export button.
© 2007 EMS Database Management Solutions
560
SQL Manager 2007 for Oracle User's Manual
© 2007 EMS Database Management Solutions
561
12.3
SQL Manager 2007 for Oracle User's Manual
Visual Options
This window allows you to customize the application interface style to your liking. To open
this window select the Options | Visual Options menu item.
Use Scheme Name to select the interface scheme you like: Office XP style, Windows XP
native style, etc. You can create your own interface schemes by customizing any visual
options you like on the appropriate tabs (Bars and Menus, Trees and Lists, Edit
Controls, Check Boxes, Buttons, etc.) and clicking the Save As button.
All the customizing you make is displayed on the Sample panel.
·
·
·
·
·
·
·
·
·
Bars and menus
Trees and lists
Edit controls
Check boxes
Buttons
Page controls
Group boxes
Splitters
Navigation bar
12.3.1 Bars and Menus
Use the Bars and menus tab to customize
and menus animation.
© 2007 EMS Database Management Solutions
SQL Manager 2007 for Oracle toolbars style
562
SQL Manager 2007 for Oracle User's Manual
12.3.2 Trees and Lists
Use the Trees and lists tab to select various tree view options.
© 2007 EMS Database Management Solutions
563
SQL Manager 2007 for Oracle User's Manual
12.3.3 Edit controls
Use the Edit controls to customize the appearance of different
Oracle edit controls.
© 2007 EMS Database Management Solutions
SQL Manager 2007 for
564
SQL Manager 2007 for Oracle User's Manual
12.3.4 Check boxes
The Check boxes tab allows you to customize the appearance of check boxes and radio
buttons.
© 2007 EMS Database Management Solutions
565
SQL Manager 2007 for Oracle User's Manual
12.3.5 Buttons
Use the Buttons tab to customize
© 2007 EMS Database Management Solutions
SQL Manager 2007 for Oracle buttons.
566
SQL Manager 2007 for Oracle User's Manual
12.3.6 Page controls
The Page controls tab allows you to customize the style of all
Oracle page controls.
© 2007 EMS Database Management Solutions
SQL Manager 2007 for
567
SQL Manager 2007 for Oracle User's Manual
12.3.7 Group boxes
Use the Group boxes tab to customize all SQL Manager 2007 for Oracle group boxes to
your liking.
© 2007 EMS Database Management Solutions
568
SQL Manager 2007 for Oracle User's Manual
12.3.8 Splitters
Use the Splitters tab to customize all SQL Manager 2007 for Oracle splitters to your
liking.
© 2007 EMS Database Management Solutions
569
SQL Manager 2007 for Oracle User's Manual
12.3.9 Navigaton bar
Use the Navigation bar tab to customize all SQL Manager 2007 for Oracle navigation bars
to your liking.
© 2007 EMS Database Management Solutions
570
SQL Manager 2007 for Oracle User's Manual
© 2007 EMS Database Management Solutions
571
12.4
SQL Manager 2007 for Oracle User's Manual
Keyboard Templates
The Keyboard Templates window allows you to create new keyboard templates for
quicker typing regularly met expressions and to edit the existing ones. To call this window
select the Options | Keyboard Templates menu item from the popup menu.
You can deactivate the existing template by choosing it from the list at the left of the
window and removing flag from its name. Also you can edit template name, using button
Edit, delete a template, using button Delete and edit template expression in the right
part of the window. For faster editing you can use buttons
Cursor Position, Author,
Time, Date.
To add a new template, click Add, set the template name and define the template
expression. In the upper left corner of the window you can choose the case of the
template expression.
© 2007 EMS Database Management Solutions
572
12.5
SQL Manager 2007 for Oracle User's Manual
Save Settings
Save Settings Wizard allows you to export SQL Manager 2007 for Oracle settings wholly
or partially to a single *.reg file, which you can apply to SQL Manager 2007 for Oracle
installed on another machine or use to backup previous settings. To open the wizard
select the Options | Save Settings menu item.
·
·
·
·
Specifying destination file
Selecting settings
Selecting databases
Saving settings
12.5.1 Specifying destination file
Specify a *.reg file to save SQL Manager 2007 for Oracle settings to.
© 2007 EMS Database Management Solutions
573
SQL Manager 2007 for Oracle User's Manual
12.5.2 Selecting settings
The options of this step specify the information saved to the result file, e.g.
Registration Info, Environment options, etc.
© 2007 EMS Database Management Solutions
Database
574
SQL Manager 2007 for Oracle User's Manual
12.5.3 Selecting databases
Select registered databases to save their settings by moving them from the
Databases list to Selected Databases.
© 2007 EMS Database Management Solutions
Available
575
SQL Manager 2007 for Oracle User's Manual
12.5.4 Saving settings
Click Finish button to start the extracting.
© 2007 EMS Database Management Solutions
576
SQL Manager 2007 for Oracle User's Manual
© 2007 EMS Database Management Solutions
Part
XIII
578
13
SQL Manager 2007 for Oracle User's Manual
External Tools
You can add external programs to SQL Manager 2007 for Oracle to make it more
effective.
Adding External Tool
To add an external program:
· Select the Options | External Tools menu item.
· Click Add... button in the External Tools dialog.
· Click the button next to the Program box to select the program *.exe file, or set the
program execution file manually in this box.
· Set the program title, hot key, working directory and execution parameters if necessary
in the proper boxes of the External Tool Info Editor.
· Click OK in the External Tool Info Editor and External Tools dialogs.
This adds the icon and the title of the program you selected to the
Tools | External
Tools submenu. Now you can run this tool quickly without stopping work with SQL
Manager 2007 for Oracle.
Removing External Tool
To remove an external program:
·
·
·
·
Select the Options | External Tools menu item.
Select the tool to remove from the Tools list in the External Tools dialog.
Click Delete button.
Click OK to confirm removing the tool and closing the dialog.
The selected tool is removed and is no longer accessible from the
submenu.
© 2007 EMS Database Management Solutions
Tools | External Tools
579
SQL Manager 2007 for Oracle User's Manual
© 2007 EMS Database Management Solutions
580
13.1
SQL Manager 2007 for Oracle User's Manual
External Tools Window
The External Tools window allows you to add executable programs to the Tools |
External Tools menu to access them quickly from SQL Manager 2007 for Oracle. To call
this window select the Options | External Tools menu item.
Tools
Lists all added external tools.
Add
Opens External Tool Info Editor for adding a new tool.
Edit
Opens External Tool Info Editor for editing title, .exe file, hot key, working directory or
execution parameter of the tool, selected in the Tools list box.
Delete
Removes the selected tool from the list of
SQL Manager 2007 for Oracle external tools.
To change the order of tools in the list use the arrow buttons below the list box or press
buttons Shift+Ctrl+Up / Shift+Ctrl+Down on the keyboard. You can also drag items in the
list box to change their positions.
© 2007 EMS Database Management Solutions
581
13.2
SQL Manager 2007 for Oracle User's Manual
External Tool Info Editor
The External Tool Info Editor window allows you to set the parameters of calling the
external program from SQL Manager 2007 for Oracle. This window is available on adding or
editing the external tool (see Add External Tool and External Tools).
Title
Title displayed in the Tools | External Tools submenu for calling the tool.
Hot Key
Press a key or a key combination on the keyboard to set it as a hot key for the tool.
Program
Full path to the program *.exe file.
Working Dir
Program default directory.
Parameters
Parameters for executing the program.
© 2007 EMS Database Management Solutions
Part
XIV
583
14
SQL Manager 2007 for Oracle User's Manual
Localization
SQL Manager 2007 for Oracle provides multi-language interface support. You can change
the program language easily, edit existing localizations, and create your own localization
files.
Changing Program Language
To select the program interface language:
· Select the Options | Select Program Language menu item.
· Select the interface language in the Select Program Language dialog.
· Click OK to close the dialog.
Editing Program Localization
To edit the interface localization:
· Open one of the program windows (e.g. Table Editor, SQL Editor) to edit the localization
of its captions and hints.
· Press Shift+Ctrl+L on the keyboard to open Localization Editor window.
· Edit window captions and hints as you like.
· Click Save button on the toolbar.
Note that the Localization Editor window is available only if the selected language is
different than default.
Creating New Localization
To create a new localization:
· Create a new localization file similar to one of those situated in the $(SQL Manager 2007
for Oracle)\Languages folder.
· Select the Options | Environment Options menu item.
· Open the Environment Options | Localization dialog tab.
· Click Add button on this tab.
· Set the language name and the path to the new *.lng file in the dialog window.
The new language is added to the list of available languages. Now you can set it as a
program interface language via the Select Program Language dialog or the Localization tab
of the Environment Options.
© 2007 EMS Database Management Solutions
584
14.1
SQL Manager 2007 for Oracle User's Manual
Localization Editor
The Localization Editor window allows you to edit the captions and hints of any SQL
Manager window, if the selected program language is different from the default one.
To call this window, use the
2007 for Oracle.
Shift+Ctrl+L shortcut in any child window of
SQL Manager
The working area of the window contains the element names and the corresponding
strings divided by the "=" character. These strings are what you see in the program as
menu items, window captions, button hints, etc. Edit them to change the program
appearance. Be careful and do not edit the identifiers that stand before the "=" character
- this will not produce any effect.
For your convenience the Find and Replace features are provided - the corresponding
toolbar buttons are used to call the Find Text dialog or the Replace Text dialog
respectively. The Search Again
button enables the repeated search for the text that
was last searched.
When you are done with editing, click the
changes you have made.
© 2007 EMS Database Management Solutions
Save
button on the toolbar to apply the
585
SQL Manager 2007 for Oracle User's Manual
See also:
Select Program Language
Localization
© 2007 EMS Database Management Solutions
586
14.2
SQL Manager 2007 for Oracle User's Manual
Select Program Language
The Select Language dialog allows you to select a language for
Oracle localization.
To open this dialog, select the
SQL Manager 2007 for
Options | Select Program Language... main menu item.
The dialog displays the list of available languages configured on the Environment Options |
Localization page. Select a language from the list and click OK to confirm your choice and
close the dialog.
See also:
Environment Options | Localization
See also:
Localization Editor
Localization
© 2007 EMS Database Management Solutions
Part
XV
588
SQL Manager 2007 for Oracle User's Manual
15
How to...
15.1
Work with Database Objects
15.1.1 Work with Users
15.1.1.1 Create User
A database user is a security principal enabling object access permission control at the
finest level of granularity. A user represents a single SQL Server login within the scope of
the database in which the user is defined.
Create user
To create a new user:
· Select the Database | New Object... menu item.
· Select User in the New Object dialog.
· Edit user definition within the User Editor.
Hint: To create new user you can also right-click the
Users node of the explorer tree
and select the New User... item from the popup menu.
To create a new user with the same properties as one of the existing users has:
· Select the Database | Duplicate Object... menu item.
· Follow the instructions of the Duplicate Object Wizard.
Edit user
To edit the existing user:
· Select the user for editing in the explorer tree (type the first letters of the user name
for quick search).
· Right-click and select the Edit User <User_Name> item from the popup menu or
simply double-click the user.
· Edit user definition and data on the appropriate tabs of the User Editor.
To change the name of the user:
· Select the user to rename in the explorer tree.
· Right-click and select the Rename User <User_Name> item from the popup menu.
· Edit user name in the dialog window.
Drop user
To drop a user:
· Select the user to drop in the explorer tree.
· Right-click and select the Drop User <User_Name> item from the popup menu.
© 2007 EMS Database Management Solutions
589
SQL Manager 2007 for Oracle User's Manual
· Confirm dropping in the dialog window.
© 2007 EMS Database Management Solutions
Part
XVI
591
SQL Manager 2007 for Oracle User's Manual
16
Appendix
16.1
Changing Metadata window
The Changing Metadata window is used to trace the errors and edit SQL statements
during their compilation. The compilation window appears each time metadata is changed,
both when the compilation is successful and when there are compilation errors. To hide
this window for successful metadata changes, select the
Don't show this window on
success option.
Compile SQL
This area displays the SQL statement pending to be executed to perform metadata
changing. In this area you can view and edit the SQL statement.
In case of a compilation error the Error tab also becomes visible - here you can view the
error description returned by the server.
Commit
This button starts execution of the statement(s). Click it to commit the current
transaction. This button is available only if there were no errors in compilation.
Rollback
This button cancels the script execution and allows you to return to the previous stage
(editor window or DB Explorer).
If necessary, you can copy information to clipboard and save it in a text editor
afterwards (the button is only enabled when a compilation error occurs).
If you want this window to appear only in case of an error, uncheck the
© 2007 EMS Database Management Solutions
Confirm
592
SQL Manager 2007 for Oracle User's Manual
metadata changing (Changing Metadata Window) option (checked by default)
available within the Confirmations section of the Environment Options dialog.
© 2007 EMS Database Management Solutions
593
16.2
SQL Manager 2007 for Oracle User's Manual
Tip of the Day
This window allows you to see short messages notifying you about interesting
particularities and useful features of SQL Manager 2007 for Oracle.
To open this window, select the
Help | Tip of the Day main menu item.
If you check the
Show tips at startup option, this window will popup each time you
start SQL Manager 2007 for Oracle.
© 2007 EMS Database Management Solutions
594
16.3
SQL Manager 2007 for Oracle User's Manual
Find Text dialog
The Find Text dialog is provided for quick and flexible searching for specified text within
the working area of SQL Manager editors.
Text to find
Enter a search string in this box. The Arrow-Down button which can be found next to the
input box allows you to select any of the previously entered search strings.
Options
Case Sensitive
This option can be used to differentiate uppercase characters from lowercase ones during
the search process.
Whole words only
Use this option to search for words only (with this option off, the search string might be
found within longer words.)
Regular Expressions
Recognizes regular expressions in the search string.
Direction
Forward
Searches from the current position to the end of the working area.
Backward
Searches from the current position to the beginning of the working area.
Scope
Global
Searches within the entire working area, in the direction specified by the
setting.
© 2007 EMS Database Management Solutions
Direction
595
SQL Manager 2007 for Oracle User's Manual
Selected text
Searches only within the currently selected text, in the direction specified by the
Direction setting. You can use the mouse or block commands to select a block of text.
Origin
From cursor
The search starts at the cursor's current position, and then proceeds either forward to
the end of the scope, or backward to the beginning of the scope depending on the
Direction setting.
Entire scope
The search covers either the entire block of selected text or the entire script (no matter
where the cursor is in the Editor area) depending upon the Scope options.
© 2007 EMS Database Management Solutions
596
16.4
SQL Manager 2007 for Oracle User's Manual
Replace Text dialog
The Replace Text dialog is provided for searching and replacing text within the working
area of SQL Manager editors.
Text to find
Enter a search string in this box. The Arrow-Down button which can be found next to the
input box allows you to select any of the previously entered search strings.
Text to replace
This box allows you to enter a string to replace the search string. The Arrow-Down button
which can be found next to the input box allows you to select any of the previously
entered strings. To replace the search string with an empty string, leave this input box
blank.
Options
Case Sensitive
This option can be used to differentiate uppercase characters from lowercase ones during
the search process.
Whole words only
Use this option to search for words only (with this option off, the search string might be
found within longer words.)
Regular Expressions
Recognizes regular expressions in the search string.
Prompt on replace
Check this option if you wish to be prompted before replacing upon each occurrence of
the search string. When this option is off, the search string is replaced automatically.
Direction
© 2007 EMS Database Management Solutions
597
SQL Manager 2007 for Oracle User's Manual
Forward
Searches and replaces from the current position to the end of the working area.
Backward
Searches and replaces from the current position to the beginning of the working area.
Scope
Global
Searches and replaces within the entire working area, in the direction specified by the
Direction setting.
Selected text
Searches and replaces only within the currently selected text, in the direction specified
by the Direction setting. You can use the mouse or block commands to select a block of
text.
Origin
From cursor
The search and replace process starts at the cursor's current position, and then proceeds
either forward to the end of the scope, or backward to the beginning of the scope
depending on the Direction setting.
Entire scope
The search and replace process covers either the entire block of selected text or the
entire script (no matter where the cursor is in the Editor area) depending upon the Scope
options.
Click the Replace All button to replace every occurrence of the search string. If you
have checked the Prompt on replace option, the confirmation dialog box appears upon
each occurrence of the search string.
© 2007 EMS Database Management Solutions
598
16.5
SQL Manager 2007 for Oracle User's Manual
Format Specifiers
The following format specifiers are supported in the format string:
Float/Integer format
0
Digit place holder. If the value being formatted has a digit in the position where the '0'
appears in the format string, then that digit is copied to the output string. Otherwise, a
'0' is stored in that position in the output string.
#
Digit placeholder. If the value being formatted has a digit in the position where the '#'
appears in the format string, then that digit is copied to the output string. Otherwise,
nothing is stored in that position in the output string.
.
Decimal point. The first '.' character in the format string determines the location of the
decimal separator in the formatted value; any additional '.' characters are ignored.
,
Thousand separator. If the format string contains one or more ',' characters, the output
will have thousand separators inserted between each group of three digits to the left of
the decimal point. The placement and number of ',' characters in the format string does
not affect the output, except to indicate that thousand separators are wanted.
E+
Scientific notation. If any of the strings 'E+', 'E-', 'e+', or 'e-' are contained in the format
string, the number is formatted using scientific notation. A group of up to four '0'
characters can immediately follow the 'E+', 'E-', 'e+', or 'e-' to determine the minimum
number of digits in the exponent. The 'E+' and 'e+' formats cause a plus sign to be output
for positive exponents and a minus sign to be output for negative exponents. The 'E-' and
'e-' formats output a sign character only for negative exponents.
Date/Time format
c
Displays the date using the format using the Short Date Format, followed by the time
using the Long Time Format. The time is not displayed if the date-time value indicates
midnight precisely.
d
Displays the day as a number without a leading zero (1-31).
dd
Displays the day as a number with a leading zero (01-31).
ddd
Displays the day as an abbreviation (Sun-Sat) using the strings of the Short Day Names.
dddd
© 2007 EMS Database Management Solutions
599
SQL Manager 2007 for Oracle User's Manual
Displays the day as a full name (Sunday-Saturday) using the strings of the Long Day
Names.
ddddd
Displays the date using the Short Date Format.
dddddd
Displays the date using the Long Date Format.
e
Displays the year in the current period/era as a number without a leading zero (Japanese,
Korean and Taiwanese locales only).
ee
Displays the year in the current period/era as a number with a leading zero (Japanese,
Korean and Taiwanese locales only).
g
Displays the period/era as an abbreviation (Japanese and Taiwanese locales only).
gg
Displays the period/era as a full name. (Japanese and Taiwanese locales only).
m
Displays the month as a number without a leading zero (1-12). If the m specifier
immediately follows an h or hh specifier, the minute rather than the month is displayed.
mm
Displays the month as a number with a leading zero (01-12). If the mm specifier
immediately follows an h or hh specifier, the minute rather than the month is displayed.
mmm
Displays the month as an abbreviation (Jan-Dec) using the strings given of the Short
Month Names.
mmmm
Displays the month as a full name (January-December) using the strings of the Long
Month Names.
yy
Displays the year as a two-digit number (00-99).
yyyy
Displays the year as a four-digit number (0000-9999).
h
Displays the hour without a leading zero (0-23).
hh
Displays the hour with a leading zero (00-23).
n
Displays the minute without a leading zero (0-59).
© 2007 EMS Database Management Solutions
600
SQL Manager 2007 for Oracle User's Manual
nn
Displays the minute with a leading zero (00-59).
s
Displays the second without a leading zero (0-59).
ss
Displays the second with a leading zero (00-59).
z
Displays the millisecond without a leading zero (0-999).
zzz
Displays the millisecond with a leading zero (000-999).
t
Displays the time using the Short Time Format.
tt
Displays the time using the Long Time Format.
am/pm
Uses the 12-hour clock for the preceding h or hh specifier, and displays 'am' for any hour
before noon, and 'pm' for any hour after noon. The am/pm specifier can use lower, upper,
or mixed case, and the result is displayed accordingly.
a/p
Uses the 12-hour clock for the preceding h or hh specifier, and displays 'a' for any hour
before noon, and 'p' for any hour after noon. The a/p specifier can use lower, upper, or
mixed case, and the result is displayed accordingly.
ampm
Uses the 12-hour clock for the preceding h or hh specifier, and displays the contents of
the TimeAMString global variable for any hour before noon, and the contents of the
TimePMString global variable for any hour after noon.
/
Displays the date separator character using the Date Separator.
:
Displays the time separator character using the Time Separator.
'xx'/"xx"
Characters enclosed in single or double quotes are displayed as-is, and do not affect
formatting.
© 2007 EMS Database Management Solutions
601
16.6
SQL Manager 2007 for Oracle User's Manual
Language Info Editor
The Language Info Editor dialog allows you to set the language name and specify the
corresponding *.lng localization file. This dialog is opened when you add or edit a language
(see Environment Options | Localization).
Language Name
The name of the language that is displayed in the Select Program Language dialog and
within the Available Languages list of the Environment Options | Localization section.
Language File
The *.lng file containing the translated string resources. See the
%program_directory%\Languages folder to find already existing localization files.
Adding a language
The Add language dialog allows you to specify your own localization file and set the
language name.
Editing a language
The Edit language dialog allows you to change the language name or select another
localization file for the specified language.
© 2007 EMS Database Management Solutions
602
16.7
SQL Manager 2007 for Oracle User's Manual
Using templates
For your convenience the ability to use templates is provided by
Oracle.
SQL Manager 2007 for
Instead of performing a long chain of routine steps all the time you can save all the
options of the wizard for future use as a template file. Select the
Templates | Save
Template drop-down menu item, specify the template file name and set an optional
comment for the template file.
When starting the wizard next time, you can load the template by selecting the
Templates | Load Template drop-down menu item.
Note that saving/loading of templates is possible at any step of the wizard.
© 2007 EMS Database Management Solutions
603
16.8
SQL Manager 2007 for Oracle User's Manual
Supported file formats
MS Excel
The most popular e-table format used by Microsoft® Excel (*.xls). The result files are
fully compatible with Microsoft® Excel versions 97-2000, 2003 and XP.
MS Access
File of Microsoft® Access format (*.mdb) with an ADO connection used.
MS Word
One of the most popular text processing formats used by Microsoft® Word (*.doc). The
result files are fully compatible with Microsoft® Word versions 97-2000, 2003 and XP.
RTF
Rich Text Format (*.rtf) supported by many text processing programs (e.g. WordPad).
HTML
Hyper Text Markup Language file format (*.html, *.htm), complete compatibility with
HTML 4.0 specification.
PDF
A standard format in electronic publishing (*.pdf).
Text file
Plain text file format (*.txt).
CSV file
Comma-Separated Value file format (*.csv).
DIF file
Data Interchange File (*.dif) format.
SYLK
Symbolic Links (*.slk) file format.
Note: all the text formats including Text file, CSV, DIF, SYLK are usually used as working
or interchange formats.
LaTeX
A specific file format (*.tex) which is a popular (especially among mathematicians and
physicists) macroextension of TeX pack developed by D.Knut.
XML
A markup language for documents containing structured information (*.xml).
DBF
Database file format (*.dbf)used by dBASE and a number of xBASE applications.
MS Excel 2007
The contemporary e-table format used by Microsoft® Excel 2007 (*.xlsx). The result files
are fully compatible with Microsoft® Excel 2007.
© 2007 EMS Database Management Solutions
604
SQL Manager 2007 for Oracle User's Manual
MS Word 2007
The contemporary text processing format used by Microsoft® Word 2007 (*.docx). The
result files are fully compatible with Microsoft® Word 2007.
ODF Spreadsheets
OASIS Open Document Format for Office Applications - open document file format for
spreadsheets (*.ods) used by a number of applications including OpenOffice.org and
KOffice.
ODF text
OASIS Open Document Format for Office Applications - open document file format for
word processing (*.odt) documents used by a number of applications including
OpenOffice.org and KOffice.
© 2007 EMS Database Management Solutions
605
16.9
SQL Manager 2007 for Oracle User's Manual
To-Do List
The To-Do List window allows you to make up a list of tasks for the database.
To call this window, select the
Shift+Ctrl+T shortcut.
View | To-Do List main menu item, or use the
The task list is displayed in a form of a grid. Its columns (Action, Priority, User, Category)
correspond to the task parameters. Clicking the column caption to sort the task list by
the current parameter or change the sorting direction.
Database
Select the database to apply the task list to. When switching between the databases you
can view different task lists.
To add a task to this list, click the Add Item link of the Navigation bar, or select Add
Item in the context menu. You can also use the Ins key for the same purpose. Define the
task parameters and click OK to add the new task to the list.
Text
Optional text to describe the task.
Priority
Set a numeric value to indicate the priority of the task.
User Name
The database User name this task is applied to.
Category
Set a category for the task. Using categories may be useful for grouping tasks.
© 2007 EMS Database Management Solutions
606
SQL Manager 2007 for Oracle User's Manual
To modify a task, select the task in the list and click the Edit Item link of the Navigation
bar, or select Edit Item in the context menu. You can also use the Enter key for the
same purpose.
To remove a task, select the task in the list and click the Delete Item link of the
Navigation bar, or select Delete Item in the context menu. You can also use the Del key
for the same purpose.
To remove all tasks from To-Do List, click the Delete all link of the Navigation bar, or
select Delete all in the context menu. You can also use the Ctrl+Del shortcut for the
same purpose.
© 2007 EMS Database Management Solutions
607
SQL Manager 2007 for Oracle User's Manual
16.10 Window List
The Window List dialog allows you to browse the list of windows that are currently
opened within SQL Manager 2007 for Oracle IDE.
To call this window, select the
Ctrl+0 shortcut.
Windows | Window List main menu item, or use the
If necessary, you can right-click within the list area to call the popup menu which allows
you to close the windows one by one or in groups.
© 2007 EMS Database Management Solutions
608
SQL Manager 2007 for Oracle User's Manual
16.11 Customize Toolbars
The Customize Toolbars window allows you to select the buttons displayed on the
Manager 2007 for Oracle toolbars and change their positions.
SQL
To call this window, click the down-arrow button at the right-side of any toolbar, then
click Add or Remove Buttons and select Customize.
Toolbars
Toolbars
The toolbars of the window from which the
toolbar name to show or hide the toolbar.
Customize was called. Click a box near the
New
Adds a new toolbar to the toolbar list and to the parent window.
Rename
Renames a user-created toolbar.
Delete
Deletes a user-created toolbar.
Commands
This tab allows you to view the list of all the commands available within toolbars of the
parent window. Selecting categories in the Categories list box displays commands of the
selected category (e.g. 'Database' or 'Tools') in the Commands list box. You can pick a
command and drag it on any parent window toolbar to create a button for this command.
© 2007 EMS Database Management Solutions
609
SQL Manager 2007 for Oracle User's Manual
Options
Menus show recently used commands first
With this option on the parent window menus drop-down containing only several items
available, which have been used recently. To display full menus unselect this option.
Show full menus after a short delay
This option is available only if Menus show recently used commands first is on. It
displays full menus after a few seconds of showing only recent items.
Reset my usage data
Resets the lists of recently used commands in the toolbars and menus.
Large Icons
Displays larger icons on the parent window toolbars.
Show ToolTips on toolbars
Shows tips on navigating to the toolbar button.
Show shortcut keys in ToolTips
Shows shortcuts for faster activating the corresponding commands in the button tips.
Menu animations
Select how menus appear in the parent window.
© 2007 EMS Database Management Solutions
610
SQL Manager 2007 for Oracle User's Manual
Credits
Software Developers:
Alex Paclin
Alexey Butalov
Michael Kuzevanov
Alexey Saybel
Technical Writers:
Serge Slobodenyuk
Dmitry Doni
Olga Ryabova
Cover Designer:
Tatyana Makurova
Translators:
Anna Shulkina
Serge Fominikh
Team Coordinators:
Alexey Butalov
Alexander Chelyadin
Roman Tkachenko
© 2007 EMS Database Management Solutions