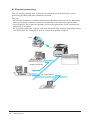
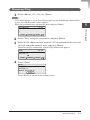
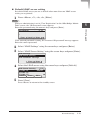
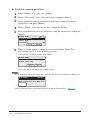
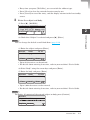
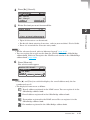
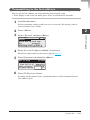
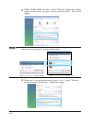
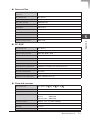
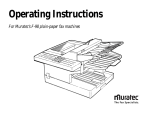
1
for MFX-2200, MFX-2225, MFX-2320, MFX-2325, MFX-2700, MFX-2720, MFX-2725 User's Guide Preface Thank you for purchasing “OfficeBridge”. “OfficeBridge” is a document management system that allows you to manage documents on your network, including faxes. This book explains how to set your Multi Function Peripherals (MFP) and to use the Internet Fax and scan functions on your MFP when “OfficeBridge” has been installed. The Manuals The following manuals are included with the OfficeBridge. Setup Guide (Book) This is the first documentation you should refer to for installing and setting up the OfficeBridge. User's Guide (PDF) Explains how to use the Internet Fax and scanner functions on your machine when the OfficeBridge has been installed. This book is a PDF file. To see this manual, the Adobe Acrobat Reader is required. Reference Manual (HTML) Explains how to use all of the OfficeBridge functions and utility programs. You can install this manual on your computer and see it using a web browser. If you do not install the “Reference manual” on your computer, you can see it from the CD directly by running the “Index.html” located on the following address. G:\Manuals\English\ReferenceManual (G: is a CD drive letter) ii Contents Preface............................................................................................ii The Manuals..................................................................................ii How to read this manual..............................................................vi Trademarks...................................................................................vi Main Features.............................................................................. vii Chapter 1 MFP Settings............................................... 1-1 Network Settings........................................................................1-3 Setting TCP/IP............................................................................1-3 Checking the MAC address........................................................1-7 Setting SMB................................................................................1-7 Running Ping..............................................................................1-9 Setting LDAP............................................................................1-10 Setting the time zone................................................................1-16 Clearing the server data...........................................................1-17 Printing the system settings list..............................................1-18 Internet Fax Settings.............................................................. 1-19 Setting the default e-mail fixed form.......................................1-19 Setting the default format of an attached file.........................1-20 Setting the priority display of the address book.....................1-20 Displaying the Mail Settings key with priority......................1-21 Setting the soft keys.................................................................1-22 Setting the touch panel keys....................................................1-23 Printing the OfficeBridge address book..................................1-26 Printing the fax settings list....................................................1-26 Network Scan Settings........................................................... 1-27 Setting the default scan size....................................................1-28 Setting the default of divide transmission..............................1-29 Setting the soft keys.................................................................1-29 Setting the touch panel keys....................................................1-30 Setting the auto reset time......................................................1-33 Setting the key touch tone.......................................................1-34 Setting the scan prohibition.....................................................1-35 Printing the scanner settings list............................................1-35 Printing the folder shortcut list...............................................1-36 Shutdown.................................................................................. 1-37 Shutting down...........................................................................1-37 Contents iii Configuring from the Web Browser..................................... 1-38 Logging in OfficeBridge............................................................1-38 Logging out OfficeBridge..........................................................1-40 Chapter 2 MFP Operations......................................... 2-1 Internet Fax.................................................................................2-2 Basic transmission.....................................................................2-2 Transmitting to the last address.............................................2-21 Using the mail history..............................................................2-22 Selecting the file format...........................................................2-23 POP reception...........................................................................2-25 Network Scan........................................................................... 2-26 Storing scanned documents in a shared folder.......................2-26 Transmitting the scanned document by e-mail......................2-31 Posting the scanned document in the bulletin board.............2-40 Circulating the scanned document..........................................2-43 Requesting processing of the scanned document....................2-45 Zooming in/out the document...................................................2-47 Selecting the file format...........................................................2-49 Chapter 3 Using the Reference Manual................... 3-1 Configuration of the reference manual......................................3-2 Starting the reference manual...................................................3-2 Using the reference manual.......................................................3-3 Using the search function..........................................................3-9 Chapter 4 Troubleshooting......................................... 4-1 Error message.............................................................................4-2 Error code....................................................................................4-4 Troubles on the window operation.............................................4-7 Troubles on a printer................................................................4-14 Troubles on “OB InfoMonitor”..................................................4-16 Troubles on “OB Document Download Manager”...................4-17 Cannot open the resident web page.........................................4-18 Folder shared settings..............................................................4-19 iv Contents Chapter 5 Appendix...................................................... 5-1 Main Specifications....................................................................5-2 Contents How to read this manual Symbols In this manual, the following symbols are used with the items where important operational and safety information must be observed. Describes warnings to protect yourself and others from serious or potentially fatal injury if you handle the machine incorrectly. For safe operation, please follow instructions carefully. Describes cautions to protect yourself and others from personal injury or damage to properties if you handle the machine incorrectly. For safe operation, please follow instructions carefully. IMPORTANT Describes important conditions or restrictions you should carefully observe to avoid problems caused by incorrect operations. NOTE Describes reference information and additional notes for operations. Fax Ready Fax Mode Key descriptions 2 Aprthe 2007 4:46 Memory 100%as follows: In this manual, operating keys are described Contrast ScanSize The keyResol. names on the control panel are shown in < >, and the key names on the touch Normal Normal Auto 1/2 panel are in [ ]. • Keys on the control panel Enclosed in < >, for example, <Job Confirm. / Fax Cancel>. • Touch panel keys Enter Enclosed in [ ], for example, [Enter]. Trademarks Muratec, the Muratec logo and all Muratec product names contained here in are trademarks of Murata Machinery, Ltd. Microsoft®, Windows®, Internet Explorer®, and Word® are trademarks or registered trademarks of the Microsoft Corporation in the United States and/or other countries. All other company names and product names referenced are trademarks or registered trademarks of their respective companies. All company names, person's names and other information used in the screen in this book are fictitious. vi How to read this manual Main Features Fax transmission/reception and e-mail transmission You can: · Send a document created with a Windows application software such as “Microsoft Word”, by fax or e-mail directly from your PC, and also view a received fax on your PC. · Send a fax as “e-mail” by specifying a destination e-mail address. The fax is sent to the destination as an e-mail attachment (TIFF or PDF file). · Save paper without the need to print documents. Main Features vii Scanner You can: · Save a scanned document in a shared folder on a network PC. (Scan to folder) · Send a scanned document by e-mail. (Scan to mail) · Send a scanned document directly to the OfficeBridge users. · Use a scanned document to send, print, download to a PC, post to a bulletin board, circulate, and request another user to process. · Import a scanned document into a TWAIN-compatible application. viii Main Features Printer You can use this product as a network printer. Main Features ix Bulletin board You can post a scanned or received document to the bulletin board that all OfficeBridge users can view. You can: · View the posted documents on your PC. · Announce quickly what you want all users to know, such as a newsletter. Document posted Document posted Main Features Circulation You can circulate a scanned or received document to specific users. One who circulated a document can check whether the recipients have read it. Circulation is useful when: · You want a specific person in charge to check a material. · You want to announce information such as an in-house event. Main Features xi Request processing You can request another user to process a scanned or received document, with its processing deadline and your comments attached. You can: · Attach your comments including the processing deadline and notes on the processing when you request recipients to process an order form or estimation request form received by fax. The requesting person can check the processing result (whether the processing is complete). · Re-assign the processing request with your comments. The original requesting person can check when the request has been re-assigned to another recipient. Order Request processing Re-assign process xii Main Features Chapter 1 MFP Settings This chapter describes the network settings to use OfficeBridge, and how to change the default settings of Internet Fax or Network Scan. Network Settings................................................................................. 1-3 Setting TCP/IP.................................................................................................. 1-3 Checking the MAC address.............................................................................. 1-7 Setting SMB...................................................................................................... 1-7 Running Ping.................................................................................................... 1-9 Setting LDAP.................................................................................................. 1-10 Setting the time zone...................................................................................... 1-16 Clearing the server data................................................................................. 1-17 Printing the system settings list.................................................................... 1-18 Internet Fax Settings........................................................................ 1-19 Setting the default e-mail fixed form............................................................. 1-19 Setting the default format of an attached file............................................... 1-20 Setting the priority display of the address book........................................... 1-20 Switching the OfficeBridge received fax forwarding ON/OFF..................... 1-21 Displaying the Mail Settings key with priority............................................. 1-21 Setting the soft keys....................................................................................... 1-22 Setting the touch panel keys.......................................................................... 1-23 Printing the OfficeBridge address book......................................................... 1-26 Printing the fax settings list.......................................................................... 1-26 Network Scan Settings..................................................................... 1-27 Setting the defaults of document type/contrast/resolution........................... 1-27 Setting the default scan size.......................................................................... 1-28 Setting the default file format of a scanned document................................. 1-28 Setting the default of divide transmission.................................................... 1-29 Setting the soft keys....................................................................................... 1-29 Setting the touch panel keys.......................................................................... 1-30 Setting the auto reset time............................................................................. 1-33 Setting the key touch tone.............................................................................. 1-34 Setting the scan prohibition........................................................................... 1-35 Printing the scanner settings list.................................................................. 1-35 Printing the folder shortcut list..................................................................... 1-36 Shutdown............................................................................................ 1-37 Shutting down................................................................................................. 1-37 Configuring from the Web Browser............................................... 1-38 Logging in OfficeBridge.................................................................................. 1-38 Logging out OfficeBridge................................................................................ 1-40 Network Settings Setting TCP/IP IMPORTANT • Before changing the IP address, be sure to gain approval from your network administrator. If you carelessly change it, the network may malfunction. • If you use the DHCP (Dynamic Host Configuration Protocol) server, the IP address will be automatically set. The following shows how to set the IP address when you do not use the DHCP server. 1 Press <Menu>, <7>, <2>, <3>, [Enter]. NOTE If an administrator is set in “User Registration” on the OfficeBridge “Admin Tools” screen, the “OB Password” screen appears. Enter the password using the numeric keys and press [Enter]. OB Password _ Clear Cancel 0/ 20 Lower case Enter If the entered password is wrong, the “Incorrect OB password” message appears. Enter the correct password. 2 Select “IP Address” and press [Enter]. Network Settings 1-3 1 MFP Settings Set the network environment to connect to a PC on which you use OfficeBridge. DHCP setting 3 4 Select “DHCP Setting” and press [Enter]. Select “Off ” using the cursor keys and press [Enter]. DHCP Setting Off On Cancel Enter IP address setting 5 6 Select “IP Address” and press [Enter]. Enter the IP address using the numeric keys and press [Enter]. IP Address 192.168.001.010 Cancel Enter If you enter the wrong number, press the cursor keys to scroll to the desired position, and reenter the number. Subnet Mask setting 7 8 Select “Subnet Mask” using the cursor keys and press [Enter]. Enter the Subnet Mask address using the numeric keys and press [Enter]. Subnet Mask 255.255.255.000 Cancel 1-4 Network Settings Enter Set the following items if necessary. If not necessary, proceed to step 21. Gateway 1 setting Select “Gateway1” using the cursor keys and press [Enter]. Enter the Gateway 1 address using the numeric keys and press [Enter]. Gateway1 192.168.000.001 Cancel Enter Gateway 2 setting 11 12 Select “Gateway2” using the cursor keys and press [Enter]. Enter the Gateway 2 address using the numeric keys and press [Enter]. Gateway2 192.168.000.002 Cancel Enter DNS setting 13 14 15 Select “DNS Setting” using the cursor keys and press [Enter]. Select “DNS1” and press [Enter]. Enter the address of the DNS 1 server using the numeric keys and press [Enter]. DNS1 192.168.000.003 Cancel 16 Enter Select “DNS2” using the cursor keys and press [Enter]. Network Settings 1-5 1 MFP Settings 9 10 17 Enter the address of the DNS 2 server using the numeric keys and press [Enter]. DNS2 192.168.000.004 Cancel 18 19 Select “DNS Suffix” using the cursor keys and press [Enter]. Enter the DNS suffix using the numeric keys and press [Enter]. DNS Suffix 7/ 50 Lower case aaa.com_ Clear 20 21 22 Enter Cancel Enter Press [Close]. Press [Close]. When a screen appears asking if you want to restart the machine, press [Yes]. Unless you restart the machine, the TCP/IP settings do not change. To activate IP address change, restart machine. Restart machine? Yes No NOTE If an OfficeBridge login user is found, the following screen appears. Be sure to let all users log out before restarting the machine. To activate IP address change, restart machine. Login user to OB found User 001 (200.1.37.123) Yes No 1-6 Network Settings Checking the MAC address You cannot enter (or change) the MAC address. 1 Press <Menu>, <7>, <2>, <3>, [Enter]. NOTE If an administrator is set in “User Registration” on the OfficeBridge “Admin Tools” screen, the “OB Password” screen appears. Enter the password using the numeric keys and press [Enter]. OB Password _ Clear 2 3 Cancel 0/ 20 Lower case Enter Select “MAC Address” using the cursor keys and press [Enter]. Check the MAC address and press [Close]. MAC Address 00:50:81:20:B2:4D Close Setting SMB 1 Press <Menu>, <7>, <2>, <3>, [Enter]. NOTE If an administrator is set in “User Registration” on the OfficeBridge “Admin Tools” screen, the “OB Password” screen appears. Enter the password using the numeric keys and press [Enter]. OB Password _ Clear 2 Cancel 0/ 20 Lower case Enter Select “SMB Setting” using the cursor keys and press [Enter]. Network Settings 1-7 1 MFP Settings NetBIOS setting 3 4 Select “NetBIOS” and press [Enter]. Enter the NetBIOS using the numeric keys and press [Enter]. NetBIOS 8/ 15 Lower case MFX-2725_ Clear Cancel Enter Workgroup setting 5 6 Select “WorkGroup” using the cursor keys and press [Enter]. Enter the workgroup name using the numeric keys and press [Enter]. WorkGroup 9/ 15 Lower case Workgroup_ Clear Cancel Enter To switch the character entry mode, press <#> of the numeric keys. WINS 1 setting 7 8 Select “WINS1” using the cursor keys and press [Enter]. Enter the WINS 1 address using the numeric keys and press [Enter]. WINS1 . . . Cancel Enter WINS 2 setting 9 10 Select “WINS2” using the cursor keys and press [Enter]. Enter the WINS 2 address using the numeric keys and press [Enter]. WINS2 . . Cancel 11 . Enter Press [Close]. Press <Reset> to return to the standby screen. 1-8 Network Settings Running Ping 1 Press <Menu>, <7>, <2>, <3>, [Enter]. NOTE OB Password _ 0/ 20 Lower case Clear 2 3 Cancel Enter Select “Ping” using the cursor keys and press [Enter]. Enter the IP address or host name of a PC or network device you want to check using the numeric keys, and press [Enter]. Communication is established, and the Ping information appears. Ping 192.168.0.1 11/ 50 Number Clear 4 Cancel Enter Press [Close]. Ping Ping 32 Data: 192.168.0.1 Packet Tx =4 Rx =4 Close Press <Reset> to return to the standby screen. Network Settings 1-9 1 MFP Settings If an administrator is set in “User Registration” on the OfficeBridge “Admin Tools” screen, the “OB Password” screen appears. Enter the password using the numeric keys and press [Enter]. Setting LDAP Set the LDAP search functions. NOTE • You can register up to five LDAP server settings. • You cannot access more than one LDAP server simultaneously. 1 Press <Menu>, <7>, <2>, <3>, [Enter]. NOTE If an administrator is set in “User Registration” on the OfficeBridge “Admin Tools” screen, the “OB Password” screen appears. Enter the password using the numeric keys and press [Enter]. OB Password _ Clear Cancel 0/ 20 Lower case Enter If the entered password is wrong, the “Incorrect OB password” message appears. Enter the correct password. 2 Select “LDAP Settings” using the cursor keys and press [Enter]. LDAP server setting 3 Select “LDAP Server Setting” using the cursor keys and press [Enter]. LDAP Settings LDAP Server Setting LDAP Parameter settings Close 4 Enter Select the LDAP server number using the cursor keys and press [Edit]. LDAP Server Setting 1/2 01:<Not registered> 02:<Not registered> 02:<Not registered> Close Edit 1-10 Network Settings 5 Select the desired item using the cursor keys and press [Enter]. 01: 1/4 Name: Server Name: IP Address: . . . Close Enter 01: Port Number:389 Account Name Password: Close 01: Login Required:No Start Point Max Results:50 Close 2/4 Enter Enter 01: Time Limit:Unlimited Optional Settings Close Item Name Server Name IP Address Port Number Account Name Password Login required Start Point Max Results Time Limit 1 MFP Settings 3/4 4/4 Enter Description You can assign a name to the setting. Up to 23 characters can be entered. Enter the LDAP server name. Up to 99 alphanumeric characters can be entered. If you enter both the LDAP server name and IP address, the IP address has a priority. Enter the IP address of the LDAP server. Enter the port number of the LDAP server. The default setting value is 389. Set the account name when you log in the LDAP server. You need to enter this item when setting “Login required” to “Yes”. Up to 49 alphanumeric characters can be entered. Set the password when you log in the LDAP server. You need to enter this item when setting “Login required” to “Yes”. Up to 29 alphanumeric characters can be entered. Set to “Yes” when the authentication is required for logging in the LDAP server. When setting to “Yes”, you must enter “Account Name” and “Password”. Enter the position to start searching. (Example: soouid=employeeuser,c=JP) Up to 99 alphanumeric characters can be entered. Enter the maximum number of LADP search results you receive. The default setting value is 50. Enter the time out value (second) for LDAP communication. To set the time out value to unlimited, enter “0000”. The default setting value is 0000 seconds. Network Settings 1-11 Item Optional Settings 6 7 Description You can add one more attribute to search than “Name”, “Fax Number (Tel Number)”, “Mail Address”, and “Department”. Attribute Enter the attribute to search. Value Enter the text to search for. How to search Specify the search criteria. Any:Searches for destinations including the specified text. Equal:Searches for destinations which exactly match the specified text. Initial:Searches for destinations which start with the specified text. Final:Searches for destinations which end with the specified text. Not Use:The entered text will not be used for searching. After setting the items, press [Enter]. Press [Close]. Press <Reset> to return to the standby screen. 1-12 Network Settings Default LDAP server setting Set which LDAP server you use as default when more than one LDAP server setting are registered. 1 Press <Menu>, <7>, <2>, <3>, [Enter]. NOTE OB Password _ Clear Cancel 0/ 20 Lower case Enter If the entered password is wrong, the “Incorrect OB password” message appears. Enter the correct password. 2 3 Select “LDAP Settings” using the cursor keys and press [Enter]. Select “LDAP Server Setting” using the cursor keys and press [Enter]. LDAP Settings LDAP Server Setting LDAP Parameter settings Close 4 5 Enter Select the LDAP server using the cursor keys and press [Default]. LDAP Server Setting 1/2 01:LDAP 001 :default 02:LDAP 002 03:LDAP 003 Default Close Edit Press [Close]. Press <Reset> to return to the standby screen. Network Settings 1-13 1 MFP Settings When an administrator is set in “User Registration” on the OfficeBridge “Admin Tools” screen, the “OB Password” screen appears. Enter the password using the numeric keys and press [Enter]. Deleting the LDAP server setting 1 Press <Menu>, <7>, <2>, <3>, [Enter]. NOTE If an administrator is set in “User Registration” on the OfficeBridge “Admin Tools” screen, the “OB Password” screen appears. Enter the password using the numeric keys and press [Enter]. OB Password _ Clear Cancel 0/ 20 Lower case Enter If the entered password is wrong, the “Incorrect OB password” message appears. Enter the correct password. 2 3 Select “LDAP Settings” using the cursor keys and press [Enter]. Select “LDAP Server Setting” using the cursor keys and press [Enter]. LDAP Settings LDAP Server Setting LDAP Parameter settings Close 4 5 6 Enter Select the LDAP server setting you want to delete using the cursor keys and press [Edit]. LDAP Server Setting 1/2 01:LDAP 001 :default 02:LDAP 002 03:LDAP 003 Default Close Edit Delete all items: “Name”, “Server Name”, and “IP Address”. Press [Close]. Press <Reset> to return to the standby screen. 1-14 Network Settings LDAP parameter setting Set the parameters for LDAP search attributes. You can set the parameters for “Name”, “Mail Address”, “Fax Number”, “Tel Number”, and “Department”. IMPORTANT An LDAP system administrator should configure this setting. 1 1 Press <Menu>, <7>, <2>, <3>, [Enter]. If an administrator is set in “User Registration” on the OfficeBridge “Admin Tools” screen, the “OB Password” screen appears. Enter the password using the numeric keys and press [Enter]. OB Password _ Clear Cancel 0/ 20 Lower case Enter If the entered password is wrong, the “Incorrect OB password” message appears. Enter the correct password. 2 3 4 5 Select “LDAP Settings” using the cursor keys and press [Enter]. Select “LDAP Parameter Settings” using the cursor keys and press [Enter]. Set each parameter and press [Enter]. Press [Close]. Press <Reset> to return to the standby screen. Network Settings 1-15 MFP Settings NOTE Setting the time zone Set the time zone. A time zone is a region that adopts the same time differences as the ones from the Royal Observatory, Greenwich, England (within ± 12 hours), usually regarded as standard time around the world. Before using “Internet Time” of OfficeBridge, you need to set the time zone. 1 2 3 Press <Menu>, <9>, [Enter]. Select “Time zone” using the cursor keys and press [Enter]. User Install 3/3 Standard TTI: TTI1 TTI Number: Time zone:+00:00 Close Enter Enter the time zone using [-] ([+]) and the numeric keys or cursor keys, and press [Enter]. Time zone 1/2 Enter time zone +00:00 - Cancel Enter Press <Reset> to return to the standby screen. Example of Time Zone: GMT–11:00 Midway Island GMT–10:00 Hawaii GMT–09:00 Alaska GMT–08:00 Pacific Time (US & Canada) GMT–07:00 Mountain Time (US & Canada) GMT–06:00 Central Time (US & Canada) GMT–05:00 Eastern Time (US & Canada) GMT–04:00 Atlantic Time (Canada) GMT–03:30 Newfoundland GMT (Greenwich Mean Time): Dublin, Edinburgh, Lisbon, London GMT+01:00 Amsterdam, Berlin, Bern, Rome, Stockholm, Vienna GMT+01:00 Brussels, Copenhargen, Madrid, Paris GMT+08:00 Taipei, Beijing, HongKong GMT+09:00 Tokyo, Osaka, Seoul GMT+10:00 Guam 1-16 Network Settings Clearing the server data IMPORTANT Clear the data specified in the network settings, such as the IP address. All data specified in OfficeBridge will be also cleared by this operation. 1 1 Press <Menu>, <7>, <2>, <7>, [Enter]. NOTE If an administrator is set in “User Registration” on the OfficeBridge “Admin Tools” screen, the “OB Password” screen appears. Enter the password using the numeric keys and press [Enter]. OB Password _ Clear 2 3 Cancel 0/ 20 Lower case Enter When a screen appears asking if you want to delete, press [Yes]. Server data clear Delete All data registered in Network option OK to delete? Yes No When the deletion confirmation screen appears again, press [Yes]. Server data clear Deleted data can’t be restored Do you delete it? OK to delete? No Yes When the deletion is completed, the following screen appears. Data cleared. *Shut power off 4 Shut down (refer to page 1-37) and turn off the power. The server data is cleared by this operation. Network Settings 1-17 MFP Settings Printing the system settings list You can print the system settings list. * The network settings list is included in the system settings list. 1 2 3 4 Press <Menu>, select “List” using the cursor keys and press [Enter]. Or open the one-touch key panel and press <List>. Select “Settings” using the cursor keys and press [Enter]. Select “System Settings” using the cursor keys and press [Enter]. When a screen appears asking if you want to print, press [Yes]. System Settings Would you like to print? Yes No NOTE To shortcut the process, press <Menu>, <1>, <0>, <1>, <3>, [Enter], and press [Yes]. 1-18 Network Settings Internet Fax Settings Setting the default e-mail fixed form NOTE Register the e-mail fixed form in [E-mail Settings] on the OfficeBridge “Admin Tools” screen. (Refer to “E-mail settings” in “Setting connections”, Reference Manual.) 1 2 Press <Menu>, <5>, <0>, <2>, <7>, [Enter]. Select “On” and press [Enter]. Fixed Form Off On Cancel 3 Enter Select the fixed form using the cursor keys and press [Enter]. Fixed Form 1/4 Fixed text Text (Subject) 01:News Release Cancel Enter Press <Reset> to return to the standby screen. Internet Fax Settings 1-19 1 MFP Settings You can set the default subject and message attached to Internet Fax. Setting the default format of an attached file You can set the default format of a file attached to Internet Fax. 1 2 Press <Menu>, <5>, <0>, <2>, <5>, [Enter]. Select the format using the cursor keys and press [Enter]. • [TIFF-S] TIFF format for the simple mode. All documents are converted into A4 size, 200 dpi or less for transmission. • [TIFF-F] TIFF format for the full mode. Documents are transmitted in the same size and resolution as scanned. • [PDF] Transmit in PDF format. File Format TIFF-S TIFF-F PDF Cancel Enter Press <Reset> to return to the standby screen. Setting the priority display of the address book You can select the address book type displayed first on the fax standby screen. 1 2 Press <Menu>, <5>, <1>, <4>, <5>, [Enter]. Select the address book type using the cursor keys and press [Enter]. Default Address Book MFP Addressbook OfficeBridge Addressbook Cancel Enter • You can select “MFP Addressbook” or “OfficeBridge Addressbook”. • Press <Reset> to return to the standby screen. 1-20 Internet Fax Settings Switching the OfficeBridge received fax forwarding ON/OFF You can switch ON or OFF the OfficeBridge received fax forwarding function (automatically forwarding received documents to OfficeBridge) collectively. 1 2 Press <Menu>, <5>, <1>, <4>, <3>, [Enter]. Using the cursor keys, select “Off ” to switch OFF the received fax forwarding function, “On” to switch it ON; then press [Enter]. OB transmission setup Off On Cancel Enter Press <Reset> to return to the standby screen. Displaying the Mail Settings key with priority You can display the Mail Settings key (Internet Fax standby screen) first when pressing <Fax>. 1 2 Press <Menu>, <5>, <1>, <4>, <7>, [Enter]. Select “On” using the cursor keys and press [Enter]. Mail priority Off On Cancel Enter Press <Reset> to return to the standby screen. Internet Fax Settings 1-21 1 MFP Settings Setting the soft keys You can assign frequently-used functions in Internet Fax to the soft keys. 1 2 3 4 Press <Menu>, <7>, <0>, <1>, [Enter]. Select the desired soft key number using the cursor keys and press [Enter]. Soft Key Setting 1/2 1:Speed Dial Fax Set. 2:On hook Fax Set. 3:TTI Fax Set. Close Enter Select “Fax Settings” using the cursor keys and press [Enter]. Soft Key Setting Copy Settings Fax Settings Scanner Settings Close Enter Select “I-Fax mode” using the cursor keys and press [Enter]. Soft Key Setting (Fax) Fax mode I-Fax mode Close 5 Enter Select the function you want to assign using the cursor keys and press [Enter]. • To continue to set, repeat step 2 through 5. • Press <Reset> to return to the standby screen. Soft Key Setting (Fax) 1/4 Resolution Re-mail Contrast MailEdit MailAddr OB Adr.Book Tx Cancel Enter 1-22 Internet Fax Settings Setting the touch panel keys You can assign frequently-used functions in Internet Fax to the touch panel keys on the standby screen. You can enter all the advanced functions in the touch panel. To enter/edit a touch panel key 1 2 3 4 5 Select “Fax mode” using the cursor keys and press [Enter]. Select “I-Fax mode” using the cursor keys and press [Enter]. Select “Enter/Edit” and press [Enter]. Select the desired touch panel key using the cursor keys and press [Enter]. I-Fax mode 3/3 7:Shutdown 8:<Not registered> Close 6 1 Press <Menu>, <7>, <0>, <3>, [Enter]. Enter Select the function you want to enter using the cursor keys and press [Enter]. To continue to enter, repeat step 5 and 6. I-Fax mode Resolution Contrast MailAddr 1/4 Re-mail MailEdit OB Adr.Book Tx Cancel Enter Press <Reset> to return to the standby screen. To enter from a blank touch panel key To easily enter the function, press a touch panel key without an entered function on the standby screen. 1 Press [], and press a blank touch panel key. Mail Tx Ready Fax Mode 2 Apr 2007 13:30 Memory:100% Shutdown 3/3 Internet Fax Settings 1-23 MFP Settings 2 Press [Yes]. Touchpanel Key Setting I-Fax mode Would you like to enter? Yes 3 4 No Select the function you want to enter in the touch panel key using the cursor keys and press [Enter]. I-Fax mode 1/4 Resolution Re-mail Contrast MailEdit MailAddr OB Adr.Book Tx Cancel Enter The function is entered in the touch panel key. When a new blank touch panel key is displayed, you can continue to enter. Advanced functions entered in the touch panel keys will be deleted from <Menu>. To delete a touch panel key 1 2 3 4 5 6 Press <Menu>, <7>, <0>, <3>, [Enter]. Select “Fax mode” using the cursor keys and press [Enter]. Select “I-Fax mode” using the cursor keys and press [Enter]. Select “Delete” using the cursor keys and press [Enter]. Select the function you want to delete using the cursor keys and press [Enter]. I-Fax mode 1/3 1:Resolution 2:Contrast 3:Menu change Close Enter When a screen appears asking if you want to to delete, press [Yes]. The function display changes to <Not registered>. • To continue to delete, repeat step 5 and 6. 1-24 Internet Fax Settings I-Fax mode 1:Resolution Delete touch key Yes No Press <Reset> to return to the standby screen. If you delete all the touch panel keys, only one blank touch panel key is displayed. Mail Tx Ready Fax Mode 2 Apr 2007 13:30 Memory:100% You can directly enter a function from the blank touch panel key. (page 1-23) To initialize the touch panel keys You can return the edited touch panel keys to the factory preset condition. 1 2 3 4 5 Press <Menu>, <7>, <0>, <3>, [Enter]. Select “Fax mode” using the cursor keys and press [Enter]. Select “I-Fax mode” using the cursor keys and press [Enter]. Select “Initialize” using the cursor keys and press [Enter]. When a screen appears asking if you want to initialize, press [Yes]. When the initialization is complete, the “ It was initialized” message is displayed, and the touch panel keys return to the default. I-Fax mode Initialize touch key Yes No Press <Reset> to return to the standby screen. Internet Fax Settings 1-25 1 MFP Settings NOTE Printing the OfficeBridge address book You can print the entered “OfficeBridge Address Book”. 1 2 3 Press <Menu>, select “List” using the cursor keys and press [Enter]. Or open the one-touch key panel and press <List>. Select “OB Address Book” using the cursor keys and press [Enter]. When a screen appears asking if you want to print, press [Yes]. OB Address Book Would you like to print? Yes No NOTE To shortcut the process, press <Menu>, <1>, <1>, [Enter], and press [Yes]. Printing the fax settings list You can print the fax settings list. * The Internet Fax settings list is included in the fax settings list. 1 2 3 4 Press <Menu>, select “List” using the cursor keys and press [Enter]. Or open the one-touch key panel and press <List>. Select “Settings” using the cursor keys and press [Enter]. Select “Fax Settings” using the cursor keys and press [Enter]. When the screen appears, asking you to print, press [Yes]. Fax Settings Would you like to print? Yes No NOTE To shortcut the process, press <Menu>, <1>, <0>, <0>, <9>, [Enter], and press [Yes]. 1-26 Internet Fax Settings Network Scan Settings You can set the defaults of document type, contrast, and resolution for scanning. To set the document type 1 2 Press <Menu>, <6>, <0>, <1>, <1>, [Enter]. Select the document type using the cursor keys and press [Enter]. • [Text] Select this option when the document contains text. • [Text&Photo] Select this option when the document contains text and photos. • [Photo] Select this option when the document contains photos. • [Background] Select this option to suppress printing the base pattern or base color of a document. Doc. Type Text Text&Photo Photo Background Cancel Enter Press <Reset> to return to the standby screen. To set the contrast 1 2 Press <Menu>, <6>, <0>, <1>, <3>, [Enter]. Select the contrast using [] [] or <> <> of the cursor keys and press [Enter]. Contrast Lightest Normal Darkest Cancel Enter • You can select from five levels: “Lightest” - “Normal” - “Darkest”. • Press <Reset> to return to the standby screen. Network Scan Settings 1-27 1 MFP Settings Setting the defaults of document type/contrast/ resolution To set the resolution 1 2 Press <Menu>, <6>, <0>, <1>, <5>, [Enter]. Select the resolution using the cursor keys and press [Enter]. Resolution 200dpi 300dpi 600dpi Cancel Enter • You can select “200dpi”, “300dpi” or “600dpi”. • Press <Reset> to return to the standby screen. Setting the default scan size You can set the default scan size of a document. 1 2 Press <Menu>, <6>, <0>, <1>, <7>, [Enter]. Select the scan size using the cursor keys and press [Enter]. ScanSize Auto A4 B4 A3 A5 B5 A4 A5 B5 Cancel Enter Press <Reset> to return to the standby screen. Setting the default file format of a scanned document You can set the default save file format of a scanned document. 1 2 Press <Menu>, <6>, <0>, <1>, <9>, [Enter]. Select the file format using the cursor keys and press [Enter]. File Format TIFF4 B4 PDF Cancel Enter • You can select “TIFF” or “PDF”. • Press <Reset> to return to the standby screen. 1-28 Network Scan Settings Setting the default of divide transmission You can set whether to divide scanned multi-page documents into one page and transmit each page as the separate document (divide transmission). 1 2 Press <Menu>, <6>, <0>, <2>, <1>, [Enter]. Using the cursor keys, select “On” to perform the divide transmission, or “Off ” not to perform; then press [Enter]. Div. Tx Off On Cancel Enter Press <Reset> to return to the standby screen. Setting the soft keys You can assign frequently-used functions in scanning to the eight soft keys. 1 2 3 4 5 Press <Menu>, <7>, <0>, <1>, [Enter]. Select the desired soft key number using the cursor keys and press [Enter]. Soft Key Setting 1/2 1:Speed Dial Fax Set. 2:On hook Fax Set. 3:TTI Fax Set. Close Enter Select “Scanner Settings” using the cursor keys and press [Enter]. Select the function type you want to set in the soft key using the cursor keys and press [Enter]. Soft Key Setting (Scan) 1/2 Folder Mail User Close Enter Select the function you want to assign using the cursor keys and press [Enter]. • To continue to set, repeat step 2 through 5. • Press <Reset> to return to the standby screen. Network Scan Settings 1-29 1 MFP Settings Soft key Setting (Scan) 1/2 Select folder Resolution Doc. Type ScanSize Contrast Zoom Cancel Enter Setting the touch panel keys You can assign frequently-used functions in scanning to the touch panel keys on the standby screen. You can enter all the advanced functions in the touch panel. To enter/edit a touch panel key 1 2 3 4 5 Press <Menu>, <7>, <0>, <3>, [Enter]. Select “Scan mode” using the cursor keys and press [Enter]. Select the function type you want to enter in the touch panel key using the cursor keys and press [Enter]. Touchpanel Key Setting 1/2 Folder Mail User Close Enter Select “Enter/Edit” and press [Enter]. Select the desired touch panel key using the cursor keys and press [Enter]. Folder mode 3/3 7:Shutdown 8:<Not registered> Close 6 Enter Select the function you want to enter using the cursor keys and press [Enter]. To continue to enter, repeat step 5 and 6. Folder mode 1/2 Select folder Resolution Doc. Type ScanSize Contrast Zoom Cancel Enter Press <Reset> to return to the standby screen. 1-30 Network Scan Settings To enter from a blank touch panel key To easily enter the function, press a touch panel key without an entered function on the standby screen. 1 Press [], and press a blank touch panel key. Scan Ready (Folder) Ratio:100% Size:Auto Mem.:100% Shutdown 3/3 2 Press [Yes]. Touchpanel Key Setting Folder mode Would you like to enter? Yes 3 4 MFP Settings 1 No Select the function you want to enter in the touch panel key using the cursor keys and press [Enter]. Folder mode 1/2 Select folder Resolution Doc. Type ScanSize Contrast Zoom Cancel Enter The function is entered in the touch panel key. When a new blank touch panel key is displayed, you can continue to enter. Advanced functions entered in the touch panel keys will be deleted from <Menu>. Network Scan Settings 1-31 To delete a touch panel key 1 2 3 4 5 6 Press <Menu>, <7>, <0>, <3>, [Enter]. Select “Scan mode” using the cursor keys and press [Enter]. Select the function type of the touch panel key to delete using the cursor keys and press [Enter]. Select “Delete” using the cursor keys and press [Enter]. Select the function you want to delete using the cursor keys and press [Enter]. Folder mode 1/3 1:Select folder 2:Doc. Type 3:Contrast Close Enter When a screen appears asking if you want to delete, press [Yes]. The function display changes to <Not registered>. • To continue to delete, repeat step 5 and 6. Folder mode 1:Select folder Delete touch key Yes No Press <Reset> to return to the standby screen. NOTE If you delete all the touch panel keys, only one blank touch panel key is displayed. Scan Ready (Folder) Ratio:100% Size:Auto Mem.:100% You can directly enter a function from the blank touch panel key. (page 1-31) 1-32 Network Scan Settings To initialize the touch panel keys You can return the edited touch panel keys to the factory preset condition. 1 2 3 4 5 Press <Menu>, <7>, <0>, <3>, [Enter]. Select “Scan mode” using the cursor keys and press [Enter]. Select the function type of the touch panel key to initialize using the cursor keys and press [Enter]. Select “Initialize” using the cursor keys and press [Enter]. When a screen appears asking if you want to initialize, press [Yes]. When the initialization is complete, the “ It was initialized” message is displayed, and the touch panel keys return to the default. Folder mode Initialize touch key Yes No Press <Reset> to return to the standby screen. Setting the auto reset time You can set the time period after which the scan screen automatically returns to the standby screen. After scanning operation, if you operate nothing within the time period specified here, the set items are reset and the screen returns to the standby screen. When you set “Reset After Scan” to OFF, the display is reset after the time period set in the auto reset time. 1 2 Press <Menu>, <7>, <0>, <5>, [Enter]. Select “Scanner mode” using the cursor keys and press [Enter]. To set the reset time 3 4 Check that “Auto Reset Time” is selected and press [Enter]. Set the time period using the numeric keys or cursor keys and press [Enter]. Auto Reset Time (01-10) min. 0_3 min. Cancel Enter Network Scan Settings 1-33 1 MFP Settings • The setting range is from 1 to 10 minutes. • Press <Reset> to return to the standby screen. To reset the screen when scanning is complete 3 4 Select “Reset After Scan” using the cursor keys and press [Enter]. Select “On” using the cursor keys and press [Enter]. Reset After Scan Off On Cancel Enter Press <Reset> to return to the standby screen. Setting the key touch tone You can set the key touch tone during scan operation. 1 2 3 4 Press <Menu>, <7>, <0>, <7>, [Enter]. Select “Key Touch Tone” using the cursor keys and press [Enter]. Select “Scanner” using the cursor keys and press [Enter]. Select the tone using the cursor keys and press [Enter]. Key Touch Tone Low Mid High Cancel Enter • You can select “Low”, “Mid” or “High”. • Press <Reset> to return to the standby screen. 1-34 Network Scan Settings Setting the scan prohibition To prohibit scanning, set this option. If you set this option and press <Scan>, the “Scan Mode” message appears and scanning is not allowed. 1 1 Press <Menu>, <7>, <1>, <7>, [Enter]. NOTE If set the protect function is set in “Protect Settings”, the following screen appears. In this case, enter the protect passcode and press [Enter]. Protect Pcode(0000-9999) Enter protect passcode _ Clear Cancel Enter If no protect passcode is registered in the MFP, the “ No protect passcode” message appears, and you cannot set the scan prohibition. Refer to your machine's User's Guide and register the protect passcode. 2 3 Select “Scan Mode” using the cursor keys and press [Enter]. Select “Prohibit” using the cursor keys and press [Enter]. Scan Mode Prohibit Usable Cancel Enter Press <Reset> to return to the standby screen. Printing the scanner settings list You can print the scanner settings list. •If the display is not in the fax mode, press <Fax> to switch to the fax mode. Note that you do not need to switch to the fax mode for the shortcut operation. 1 2 3 Press <Menu>, select “List” using the cursor keys and press [Enter]. Or open the one-touch key panel and press <List>. Select “Settings” using the cursor keys and press [Enter]. Select “Scanner Settings” using the cursor keys and press [Enter]. Network Scan Settings 1-35 MFP Settings 4 When a screen appears asking if you want to print, press [Yes]. Scanner Settings Would you like to print? Yes No NOTE To shortcut the process, press <Menu>, <1>, <0>, <1>, <1>, [Enter], and press [Yes]. Printing the folder shortcut list You can print the folder shortcut list. •If the display is not in the fax mode, press <Fax> to switch to the fax mode. Note that you do not need to switch to the fax mode for the shortcut operation. 1 2 3 4 Press <Menu>, select “List” using the cursor keys and press [Enter]. Or open the one-touch key panel and press <List>. Select “Other Lists” using the cursor keys and press [Enter]. Select “Folder Shortcut” using the cursor keys and press [Enter]. When a screen appears asking if you want to print, press [Yes]. Folder Shortcut Would you like to print? Yes No NOTE •To shortcut the process, press <Menu>, <1>, <0>, <3>, <3>, [Enter], and press [Yes]. •If no folder shortcut is registered, the “ 1-36 Network Scan Settings Not Registered” message appears. Shutdown Shutting down Be sure to shut down before turning off the power of the MFP. In addition, be sure to shut down in the following cases: • After you set/change “IP Address” in the network settings 1 MFP Settings • After you change the language setting • After you clear the server data 1 2 Press <Menu>, <0>, [Enter]. When the confirmation screen appears, press [Yes]. Shut down OB to turn off power safety Would you like to shut down? Yes No NOTE If an OfficeBridge login user is found at the moment, the following screen appears. If you shut down, all users will be disconnected from OfficeBridge. Login user to OB found. User 001 (200.001.037.125) Would you like to shut down? Yes No 3 Turn off the power. Shutdown 1-37 Configuring from the Web Browser You can configure the OfficeBridge settings or register your address book from the web browser. The e-mail server settings or e-mail-related settings can be set only from the browser. NOTE • Internet Explorer 5.0.1 or later, or Netscape Navigator 7.0 or later is required for the browser. • To configure from the browser, you need to set the IP address for the MFP. Logging in OfficeBridge 1 2 Start up the browser. Enter the MFP IP address in the address field and press <Enter> on the keyboard. (Ex. http://192.168.1.10/) NOTE If you do not know the MFP IP address, check as follows: 1 Press <Menu>, <7>, <2>, <3>, [Enter]. 2 Select “IP Address” and press [Enter]. 3 Check “IP Address” displayed on the screen. 3 The “User List” window appears. Click the user name to log in. NOTE If only one OfficeBridge user is registered, this window does not appear. 1-38 Configuring from the Web Browser 4 Enter the login password and click [Login]. NOTE If no login password is set, this window does not appear. 5 Click the “Admin Tools” tab to display the optional window. 6 Click the desired item and configure. NOTE For more details on how to configure, refer to “Reference Manual”. Configuring from the Web Browser 1-39 MFP Settings 1 Logging out OfficeBridge 1 Click [Log Out] at the top right of the window. NOTE To log out OfficeBridge, be sure to click [Log Out]. You may not log out properly only by closing the browser. 1-40 Configuring from the Web Browser Chapter 2 MFP Operations This chapter describes the specific operations for Internet Fax and Network Scan. Internet Fax.......................................................................................... 2-2 Basic transmission............................................................................................ 2-2 Transmitting to the last address.................................................................... 2-21 Using the mail history.................................................................................... 2-22 Selecting the file format................................................................................. 2-23 Transmitting large volume of documents by page (Divide transmission)... 2-24 POP reception................................................................................................. 2-25 Network Scan..................................................................................... 2-26 Storing scanned documents in a shared folder............................................. 2-26 Transmitting the scanned document by e-mail............................................. 2-31 Transferring the scanned document to the registered user......................... 2-38 Posting the scanned document in the bulletin board.................................... 2-40 Circulating the scanned document................................................................ 2-43 Requesting processing of the scanned document.......................................... 2-45 Zooming in/out the document......................................................................... 2-47 Scanning large volume of documents by page (Divide transmission).......... 2-48 Selecting the file format................................................................................. 2-49 Internet Fax Basic transmission This section explains about the basic transmission using Internet Fax. •When you press <Fax>, the standby screen display differs depending on whether the mail function priority display (refer to page 1-21) is “ON” or “OFF”. This manual explains the operation when the mail function priority display is “ON”. Fax Ready Fax Mode Mail Tx Ready Fax Mode 2 Apr 2007 13:30 Memory:100% Resol. Contrast MenuChg. Normal Normal Fax 1/3 2 Apr 2007 13:30 Memory:100% Resol. Contrast MenuChg. Normal Normal I-FAX 1/3 When the mail function priority display is “OFF” When the mail function priority display is “ON” When the mail function priority display is “OFF”, and you press [MenuChg.] in the fax standby screen, the same screen as when it is “ON” is displayed. •If the display is not in the fax mode, press <Fax> to switch to the fax mode. To enter an e-mail address and transmit Enter an e-mail address directly and transmit. 1 2 Load the document. Set the resolution, contrast and scan size as necessary. For setting, refer to your machine's User's Guide. Enter the e-mail address. (1) Press [], [MailAddr]. Mail Tx Ready Fax Mode 2 Apr 2007 13:30 Memory:100% ScanSize MailAddr MailEdit Auto 2/3 (2) Enter the e-mail address using the numeric keys and press [Enter]. To set more than one address, repeat steps (1) and (2). Press Start Lower case To :[email protected]_ Clear Cancel Enter • Up to 50 alphanumeric characters can be entered. • Press <#> to switch the character entry mode. 2-2 Internet Fax • Every time you press [To/Cc/Bcc], you can switch the address type. • Press [Clear] to clear the entered characters one by one. • Press [Cancel] to cancel the entry, and the display returns to the fax standby screen. 3 Enter the subject and body. (1) Press [], [MailEdit]. Mail Tx Ready Fax Mode [email protected] 2 Apr 2007 13:30 Memory:100% ScanSize MailAddr MailEdit Auto 3/4 MFP Operations 2 (2) Check that “Subject” is selected and press [], [Enter]. NOTE You can change the default e-mail fixed form. (page 1-19) (3) Enter the subject and press [Enter]. EditSub. Lower E-mail Message_ Clear Cancel 14/ 80 Enter • Up to 80 characters can be entered. • For details about entering characters, refer to your machine's User's Guide. (4) Select “Body” using the cursor keys and press [Enter]. (5) Enter the body and press [Enter]. EditText Lower 57/1024 Please see the file attached._ Clear Cancel Enter • Up to 1,024 characters can be entered. • For details about entering characters, refer to your machine's User's Guide. NOTE To display all contents of the entered subject or body, press [Content]. MailEdit Subject:E-mail Message Body :This is an E-mail mess Template Content Internet Fax 2-3 All contents will be displayed. This ia an E-mail message. Please see the file attached. Close 1/ 57 • Press the cursor keys to move the cursor. • Press [Close] to return to the “MailEdit” screen. NOTE You can use the “fixed form” to enter the subject and body. Register the fixed form in OfficeBridge in advance. (Refer to “E-mail settings” in “Setting connections”, Reference Manual.) (1) Press [Template] on the “MailEdit” screen. MailEdit Subject:E-mail Message Body :This is an E-mail mess Template Content (2) Select the registered fixed form using the cursor keys and press [Enter]. MailEdit Fixed text Text (Subject) 01:News Release Cancel 1/4 Enter If you select “Fixed text”, the following contents are set. Subject: E-mail Message Body : This is an e-mail message. Please see the file attached. (6) Press [], [Close]. 4 Check the address. (1) Press [Location]. Mail Tx Ready Fax Mode [email protected] 2 Apr 2007 13:30 Memory:100% Press [Location] Location to check entries. 1/4 2-4 Internet Fax (2) Check the address. Location To :[email protected] Delete Close Tx Start • To change the address type, select the address to change using the cursor keys, and press [To/Cc/Bcc]. 5 Press [Tx Start] or <Start>. The “Scanning” message appears, and the document is scanned. Location To :[email protected] Delete Close Tx Start NOTE •If the document is not a standard size, the “ScanSize” screen appears. Specify the document size and press [Enter]. ScanSize A3 A5 A4 A5 A4 B4 Cancel B5 B5 Card Enter •If the memory overflows while scanning the document for the I-Fax transmission, the following message appears. Wait until the memory is available and scan again. Fax Mode Memory overflow 2 Apr 2007 13:30 Memory: 0% Resol. Contrast MenuChg. Normal Normal I-FAX 1/3 For multi-page documents, if the memory overflows while scanning the second page or later, the following message appears. Press [Yes] to enable scanning of the stored documents. Press [No] to disable, and the stored documents will be cleared. Memory overflow Number of stored page: 3 Store these pages? Yes No Internet Fax 2-5 2 MFP Operations • To delete the entered address, select the address using the cursor keys, and press [Delete]. When the “OK to delete?” message appears, press [Yes]. * The “Data size exceeds limit” message may be displayed. Take a countermeasure such as adjusting the document type or contrast, or dividing the documents to scan in several times. 6 Select whether to scan the next document. <Not to scan the next document> Press [Next Doc] while scanning the document, and set it to “No”. Mail Tx Scanning [email protected] A4 Normal P001 Memory:100% TxReport Next Doc Off No The document is scanned and transmitted to the specified address. NOTE When the document is loaded on the ADF, the [Next Doc] option is set to “No” in advance. <To scan the next document> (1) Press [Next Doc] while scanning the document, and set it to “Yes”. Mail Tx Scanning [email protected] A4 Normal P001 Memory:100% TxReport Next Doc Off Yes NOTE When the document is not loaded on the ADF, the [Next Doc] option is set to “Yes” in advance. (2) When the “Please Set next doc.” message appears, load the next document and press [Scan NextPage]. To transmit as a new document, press [], [New Doc.]. The document which has been scanned will be transmitted. Please Set next doc. [email protected] A4 Normal P001 Memory: 99% TxReport Scan Start Off NextPage Sending 1/3 The next document is scanned. 2-6 Internet Fax (3) To finish scanning and transmit, press [Start Sending]. Please Set next doc. [email protected] A4 Normal P003 Memory: 98% Start TxReport Scan OFF NextPage Sending 1/3 The document is scanned and transmitted to the specified address. NOTE Mail Tx Scanning [email protected] A4 Normal P001 Memory:100% TxReport Next Doc On Yes o select the address from the OfficeBridge address book and T transmit NOTE You need to register address information in the OfficeBridge address book in advance. (Refer to “Creating an OB address book” in “Creating an address book”, Reference Manual.) 1 2 Load the document. Set the resolution, contrast and scan size as necessary. For setting, refer to your machine's User's Guide. Select the destination address pressing the cursor key <>, and press [Select]. To set more than one address, repeat this operation. OB Addressbook 3/7 JKL :Jim Adams JKL :John Smith MNO :Mary Polanski Clear Close Select Internet Fax 2-7 2 MFP Operations To attach the transmission report to the document, press [TxReport] and set “On”. NOTE Press [Index] to display the index screen. Select the alphabet group containing the initial of the address, and press [Enter]. The addresses with the selected initials appear. GHI PQRS ABC JKL TUV Close 3 4 DEF MNO WXYZ smbl Enter Press [Close]. Enter the subject and body. (1) Press [], [MailEdit]. Mail Tx Ready Fax Mode 0001:John Smith 2 Apr 2007 13:30 Memory:100% ScanSize MailAddr MailEdit Auto 3/4 (2) Check that “Subject” is selected and press [], [Enter]. NOTE You can change the default e-mail fixed form. (page 1-19) (3) Enter the subject and press [Enter]. EditSub. Lower E-mail Message_ Clear Cancel 14/ 80 Enter • Up to 80 characters can be entered. • For details about entering characters, refer to your machine's User's Guide. (4) Select “Body” using the cursor keys and press [Enter]. (5) Enter the body and press [Enter]. EditText Lower 57/1024 Please see the file attached._ Clear Cancel Enter • Up to 1,024 characters can be entered. • For details about entering characters, refer to your machine's User's Guide. (6) Press [Close]. 2-8 Internet Fax 5 Check the address. (1) Press [Location]. Mail Tx Ready Fax Mode 0001:John Smith 2 Apr 2007 13:30 Memory:100% Press [Location] Location 1/4 to check entries. (2) Check the address. Delete Close Tx Start • To change the address type, select the address to change using the cursor keys, and press [To/Cc/Bcc]. • If a group is set in the address, “Group” is displayed. In this case, the document is transmitted to the addresses set in the group address book in OfficeBridge. • To delete the set address, select the address using the cursor keys, and press [Delete]. When the “OK to delete?” message appears, press [Yes]. 6 Press [Tx Start] or <Start>. The “Scanning” message appears, and the document is scanned. Location To :John Smith Delete 7 Close Tx Start Select whether to scan the next document. <Not to scan the next document> Press [Next Doc] while scanning the document, and set it to “No”. Mail Tx Scanning 0001:John Smith A4 Normal P001 Memory:100% TxReport Next Doc Off No The document is scanned and transmitted to the specified address. NOTE When the document is loaded on the ADF, the [Next Doc] option is set to “No” in advance. Internet Fax 2-9 MFP Operations 2 Location To :John Smith Group:Group 1 <To scan the next document> (1) Press [Next Doc] while scanning the document, and set it to “Yes”. Mail Tx Scanning 0001:John Smith A4 Normal P001 Memory:100% TxReport Next Doc Off Yes NOTE When the document is not loaded on the ADF, the [Next Doc] option is set to “Yes” in advance. (2) When the “Please Set next doc.” message appears, load the next document and press [Scan NextPage]. To transmit as a new document, press [], [New Doc.]. The document which has been scanned will be transmitted. Please Set next doc. 0001:John Smith A4 Normal P001 Memory: 99% TxReport Scan Start OFF NextPage Sending 1/3 The next document is scanned. (3) To finish scanning and transmit, press [Start Sending]. Please Set next doc. 0001:John Smith A4 Normal P003 Memory: 98% Start TxReport Scan OFF NextPage Sending 1/3 The document is scanned and transmitted to the specified address. NOTE To attach the transmission report to the document, press [TxReport] and set “On”. Mail Tx Scanning 0001:John Smith A4 Normal P001 Memory:100% TxReport Next Doc On Yes 2-10 Internet Fax To use the OfficeBridge speed dial and transmit When you know a speed dial number in the OfficeBridge address book in advance, you can directly specify the number to set the address and transmit. 1 2 3 4 Load the document. Set the resolution, contrast and scan size as necessary. For setting, refer to your machine's User's Guide. Press <Menu>. Select “OB Adr.Book Tx” using the cursor keys and press [Enter]. I-Fax 1/3 Re-mail Stamp OB Adr.Book Tx Cover Page TTI Tx Report Enter Settings Close Set the speed dial number using the numeric keys or cursor keys and press [Enter]. To set more than one address, repeat steps 3 and 4. OB Speed Dial No.(0001-9999) Please Enter Number 0001_:John Smith Cancel 5 6 Enter Press [Close]. Enter the subject and body. (1) Press [], [MailEdit]. Mail Tx Ready Fax Mode 0001:John Smith 2 Apr 2007 13:30 Memory:100% ScanSize MailAddr MailEdit Auto 3/4 (2) Check that “Subject” is selected and press [], [Enter]. NOTE You can change the default e-mail fixed form. (page 1-19) Internet Fax 2-11 2 MFP Operations (3) Enter the subject and press [Enter]. EditSub. Lower E-mail Message_ Clear 14/ 80 Cancel Yes Enter No • Up to 80 characters can be entered. • For details about entering characters, refer to your machine's User's Guide. (4) Select “Body” using the cursor keys and press [Enter]. (5) Enter the body and press [Enter]. EditText Lower 57/1024 Please see the file attached. Clear Cancel Yes Enter No • Up to 1,024 characters can be entered. • For details about entering characters, refer to your machine's User's Guide. (6) Press [Close]. 7 Check the address. (1) Press [Location]. Mail Tx Ready Fax Mode 0001:John Smith 2 Apr 2007 13:30 Memory:100% Press [Location] Location to check entries. 1/4 (2) Check the address. Location To :John Smith To :Chang.K Delete Close Tx Start • To change the address type, select the address to change using the cursor keys, and press [To/Cc/Bcc]. • To delete the set address, select the address using the cursor keys, and press [Delete]. When the “OK to delete?” message appears, press [Yes]. 2-12 Internet Fax 8 Press [Tx Start] or <Start>. The “Scanning” message appears, and the document is scanned. Location To :John Smith 9 Close Tx Start Select whether to scan the next document. <Not to scan the next document> Press [Next Doc] while scanning the document, and set it to “No”. Mail Tx Scanning 0001:John Smith A4 Normal P001 Memory:100% TxReport Next Doc Off No The document is scanned and transmitted to the specified address. NOTE When the document is loaded on the ADF, the [Next Doc] option is set to “No” in advance. <To scan the next document> (1) Press [Next Doc] while scanning the document, and set it to “Yes”. Mail Tx Scanning 0001:John Smith A4 Normal P001 Memory:100% TxReport Next Doc Off Yes NOTE When the document is not loaded on the ADF, the [Next Doc] option is set to “Yes” in advance. Internet Fax 2-13 2 MFP Operations Delete (2) When the “Please Set next doc.” message appears, load the next document and press [Scan NextPage]. To transmit as a new document, press [], [New Doc.]. The document which has been scanned will be transmitted. Please Set next doc. 0001:John Smith A4 Normal P001 Memory: 99% TxReport Scan Start OFF NextPage Sending 1/3 The next document is scanned. (3) To finish scanning and transmit, press [Start Sending]. Please Set next doc. 0001:John Smith A4 Normal P003 Memory: 98% TxReport Scan Start OFF NextPage Sending 1/3 The document is scanned and transmitted to the specified address. NOTE To attach the transmission report to the document, press [TxReport] and set “On”. Mail Tx Scanning 0001:John Smith A4 Normal P001 Memory:100% TxReport Next Doc On Yes o search for the address by the LDAP search function and T transmit You can search for information registered in the OfficeBridge address book or the LDAP server to specify the address, and transmit. NOTE To use this function, you need to configure the LDAP server setting. (Refer to “Setting LDAP” (page 1-10) in this manual or “LDAP settings” in “Setting connections”, Reference Manual.) 1 2 3 Press <Fax> to switch to the fax mode. Load the document. Set the resolution, contrast and scan size as necessary. For setting, refer to your machine's User's Guide. Press the cursor key <>. 2-14 Internet Fax 4 5 Press [], [Search]. OB Addressbook ABC :Beth.W ABC :Carl.M ABC :Chang.K Index 1/7 Search Enter the text you want to search for. Simple Search _ Clear Cancel 0/ 99 Lower case 2 Execute • Up to 99 characters can be entered. • For details about entering characters, refer to your machine's User's Guide. • Press <#> to switch the character entry mode. NOTE •For the advanced search, refer to “Advanced search” (page 2-18). •You can register the search results from the LDAP server in the OfficeBridge address book. (Refer to “To register the LDAP search results in the OfficeBridge address book”, page 2-20) 6 Press [Execute]. The search results appear. Results:0019 E-mail 1/7 :Edward Hill :Jim Adams :Sam.K Clear Close Select NOTE • Press [] and [View] to switch the display: the e-mail address only, the fax number only or all. • The displayed icons mean as follows: : E-mail address registered in the LDAP server. You can register it in the OfficeBridge address book. : E-mail address registered in the OfficeBridge address book. : Fax number registered in the LDAP server. You can register it in the OfficeBridge address book. : Fax number registered in the OfficeBridge address book. Internet Fax 2-15 MFP Operations 7 Select the destination address using the cursor keys and press [Select]. You can select more than one address. To release the selection, select the address you want to release, and press [Clear]. Results:0019 E-mail 1/7 :Edward Hill :Jim Adams :Sam.K Clear Close Select 8 When you finish selecting the address, press [], [Enter]. Location To :Sam.K To :Mike.M Delete Close Tx Start • To search for other addresses and add, press [Close], [], [NewSerch]. Repeat the operation from step 5. • To change the address type, select the address to change using the cursor keys, and press [], [To/Cc/Bcc]. 9 10 Press [Tx Start] or <Start>. Select whether to scan the next document. <Not to scan the next document> Press [Next Doc] while scanning the document, and set it to “No”. Mail Tx Scanning 0008:Sam.K A4 Normal P001 Memory:100% TxReport Next Doc Off No The document is scanned and transmitted to the specified address. NOTE When the document is loaded on the ADF, the [Next Doc] option is set to “No” in advance. <To scan the next document> (1) Press [Next Doc] while scanning the document, and set it to “Yes”. Mail Tx Scanning 0008:Sam.K A4 Normal P001 Memory:100% TxReport Next Doc Off Yes 2-16 Internet Fax NOTE When the document is not loaded on the ADF, the [Next Doc] option is set to “Yes” in advance. (2) When the “Please Set next doc.” message appears, load the next document and press [Scan NextPage]. To transmit as a new document, press [], [New Doc.]. The document which has been scanned will be transmitted. 2 MFP Operations Please Set next doc. 0008:Sam.K A4 Normal P001 Memory: 99% TxReport Scan Start OFF NextPage Sending 1/3 The next document is scanned. (3) To finish scanning and transmit, press [Start Sending]. Please Set next doc. 0008:Sam.K A4 Normal P003 Memory: 98% TxReport Scan Start OFF NextPage Sending 1/3 The document is scanned and transmitted to the specified address. NOTE To attach the transmission report to the document, press [TxReport] and set “On”. Mail Tx Scanning 0008:Sam.K A4 Normal P001 Memory:100% TxReport Next Doc On Yes Internet Fax 2-17 Advanced search You can also specify the search criteria for “Name”, “Fax”, “E-mail” and “Org.” and search in more detail. NOTE In the advanced search, only information registered in the LDAP server is searched. The OfficeBridge address book is not searched. 1 2 3 4 Press <Fax> to switch to the fax mode. Press the cursor key <>. Press [], [Search]. OB Addressbook ABC :Beth.W ABC :Carl.M ABC :Chang.K Index 5 Search Press [], [Advanced]. Simple Search 0/ 99 Lower Case _ CharMode 1/7 Blank Advanced Enter the text to search for. Adv. Search [AND mode] Name :Not Fax :Not E-mail :Not Execute Close Edit Item Name Fax E-mail Org. [AND/OR] [Server] 2-18 Internet Fax 1/2 Use Use Use Adv. Search [AND mode] 2/2 Org. :Not Use Execute Close Edit Description Enter a name or a part of a name to be searched for. Enter a fax number or a part of a fax number to be searched for. Enter an e-mail address or a part of an e-mail address to be searched for. If you entered the text in the “Name” field, you can press [], [Copy Name] to paste the name. Enter in this field to narrow which organization the searched information by “Name”, “Fax”, or “E-mail” belongs to. Press [], [And/Or] to switch over. And : Searches for information that meets all criteria entered above. Or : Searches for information that meets any of criteria entered above. Press to change the LDAP server. 6 Specify the search criteria. Press [], [SrchMthd]. Adv. Search [AND mode] 1/2 Name:Muratec :Any Fax :Not Use E-mail :Not Use AND/OR SrchMthd Server Item Any Equal Initial Final Not Use 7 Search Method Any Equal Not Use Initial Final Cancel Enter Description Searches for destinations including the specified text. Searches for destinations which exactly match the specified text. Search for destinations which start with the specified text. Search for destinations which end with the specified text. The entered text will not be used for searching. Press [Execute]. The search results appear. Results :0037 All 1/13 :Beth.W :Carl.M :Chang.K Clear Close Select NOTE • Press [] and [View] to switch the display: the e-mail address only, the fax number only or all. • The displayed icons mean as follows: : E-mail address registered in the LDAP server. You can register it in the OfficeBridge address book. : Fax number registered in the LDAP server. You can register it in the OfficeBridge address book. 8 2 MFP Operations Select the destination address using the cursor keys and press [Select]. You can select more than one address. To release the selection, select the address you want to release, and press [Clear]. Results :0037 All 1/13 :Beth.W :Carl.M :Chang.K Clear Close Select Internet Fax 2-19 9 When you finish selecting the address, press [], [Enter]. Location To :Beth.W Delete Close Tx Start • To search for other addresses and add, press [Close], [], [NewSerch]. Repeat the operation from step 5. • To change the address type, select the address to change using the cursor keys, and press [], [To/Cc/Bcc]. 10 Press [Tx Start] or <Start>. o register the LDAP search results in the OfficeBridge T address book 1 2 3 4 Run the LDAP search. The search results shown with OfficeBridge address book. Press [], [Info]. Results: 0037 All 1/13 :Beth.W :Carl.M :Chang.K Info View or can be registered in Press [Register]. Contact Information 1/2 Name:Beth.W E-mail:[email protected] Fax:4444444 Cancel Register Enter the address book number using the numeric keys and press [Enter]. Register to OB (0001-9999) Please Enter the number 0011 Cancel Enter The search results are registered in the OfficeBridge address book. 2-20 Internet Fax Transmitting to the last address You can set the last address you transmitted to and transmit again. • If the display is not in the fax mode, press <Fax> to switch to the fax mode. 1 2 3 4 Load the document. Set the resolution, contrast and scan size as necessary. For setting, refer to your machine's User's Guide. 2 Press <Menu>. Select “Re-mail” and press [Enter]. I-Fax Menu 1/3 Re-mail Stamp OB Adr.Book Tx Cover Page TTI Tx Report Settings Close Enter MFP Operations Enter the e-mail subject and body as necessary. For details about entering characters, refer to page 2-3. 5 Press [Location] and check the address. Mail Tx Ready Fax Mode 2 Apr 2007 13:30 Memory100% Press [Location] Location 1/4 to check entries. 6 Press [Tx Start] or <Start>. Scanning the document starts, and the document will be transmitted to the last address again. Internet Fax 2-21 Using the mail history You can set the address using the transmission history and transmit. • If the display is not in the fax mode, press <Fax> to switch to the fax mode. 1 2 3 4 5 Load the document. Set the document type, contrast and scan size as necessary. For setting, refer to your machine's User's Guide. Press <Menu>. Select “MailHist” using the cursor keys and press [Enter]. I-Fax Menu 2/3 TTI Select Delayed Tx Fax Forward Fax & Copy MailHist Div. Tx Settings Close Enter Select the address to transmit to using the cursor keys and press [Enter]. Select from history 1/7 01:[email protected] 02:[email protected] 03:[email protected] Close Enter To change the e-mail address, re-enter the e-mail address and press [Enter]. Not to change it, just press [Enter]. Press Start Lower case To :[email protected] Clear 6 7 Cancel Enter Press [Close]. Enter the e-mail subject and body as necessary. For details about entering characters, refer to page 2-3. 2-22 Internet Fax 8 9 Press [Location] and check the address. Mail Tx Ready Fax Mode [email protected] 2 Apr 2007 13:30 Memory:100% Press [Location] Location to check entries. 1/4 Press [Tx Start] or <Start>. Scanning the document starts, and the document will be transmitted to the specified address. Selecting the file format You can select the file format of an image attached to an e-mail and transmit. • If the display is not in the fax mode, press <Fax> to switch to the fax mode. 1 2 3 4 5 6 7 Load the document. Set the document type, contrast and scan size as necessary. For setting, refer to your machine's User's Guide. Set the address. For setting, refer to the pages corresponding to the transmission method in “Basic transmission”. Press <Menu>. Select “File Format” using the cursor keys and press [Enter]. I-Fax Menu 3/3 File Format List POP Rx Enlarge Tx Settings Close Enter Select the file format using the cursor keys and press [Enter]. File Format TIFF-S TIFF-F PDF Cancel Enter Press [Close]. Enter the e-mail subject and body as necessary. For details about entering characters, refer to page 2-3. Internet Fax 2-23 2 MFP Operations 8 9 Press [Location] and check the address. Mail Tx Ready Fax Mode 0001:John Smith 2 Apr 2007 13:30 Memory:100% Press [Location] Location to check entries. 1/4 Press [Tx Start] or <Start>. Scanning the document starts, and the document will be transmitted to the specified address. Transmitting large volume of documents by page (Divide transmission) You can divide scanned multi-page documents into one page and transmit each page as the individual e-mail. • If the display is not in the fax mode, press <Fax> to switch to the fax mode. 1 2 3 4 5 Load the document. Set the document type, contrast and scan size as necessary. For setting, refer to your machine's User's Guide. Set the address. For setting, refer to the pages corresponding to the transmission method in “Basic transmission”. Press <Menu>. Select “Div. Tx” using the cursor keys and press [Enter]. I-Fax Menu 2/3 TTI Select Delayed Tx Fax Forward Fax & Copy MailHist Div. Tx Settings Close Enter Select “On” using the cursor keys and press [Enter]. Div. Tx Off On Cancel 6 Press [Close]. 2-24 Internet Fax Enter 7 Enter the e-mail subject and body as necessary. For details about entering characters, refer to page 2-3. 8 9 Press [Location] and check the address. Press [Tx Start] or <Start>. Scanning the document starts, and the documents will be divided and transmitted to the specified address. The following shows two methods for receiving Internet Fax using POP. (1) At specified time intervals (2) At user's will (Real-time) If you receive only a few documents each day, or you want to check the reception immediately, use the real-time method. This manual describes the real-time method only. • If the display is not in the fax mode, press <Fax> to switch to the fax mode. 1 2 Press <Menu>. Select “POP Rx” using the cursor keys and press [Enter]. I-Fax Menu 3/3 File Format List POP Rx Enlarge Tx Settings Close Enter The “POP Reception” message appears. Mail Tx Ready Fax Mode POP Reception 2 Apr 2007 13:30 Memory:100% Resol. Contrast MenuChg. Normal Normal I-FAX 1/3 Internet Fax 2-25 MFP Operations 2 POP reception Network Scan Storing scanned documents in a shared folder You can scan a document and store it in a shared folder on the network. • To use the Scan to folder function, you need to set a shared folder on your PC. For setting, refer to “Folder shared setting” (page 4-19). • Register the folder shortcut in [Folder Shortcuts] on the OfficeBridge “Admin Tools” screen. (Refer to “Registering folder shortcuts” in “Setting functions”, Reference Manual.) • If the display is not in the scan mode, press <Scan> to switch to the scan mode. 1 2 Load the document. Press [Folder]. Folder 3 Mail User 1/2 Press [Folder]. Scan Ready (Folder) Ratio:100% Size:Auto Mem.:100% Folder Doc.Type Contrast Text Normal 1/3 4 Select the shared folder where you want to store the document using the cursor keys, and press [Select]. To set more than one shared folder, repeat this operation. Select folder 01:Folder 1 02:Folder 2 03:Folder 3 Clear Close 5 Press [Close]. 2-26 Network Scan 1/4 Select 6 Set the document type of the scanned document. (1) Press [], [Doc. Type]. (2) Select the document type using the cursor keys and press [Enter]. Doc. Type Text Background Text&Photo Photo Cancel Enter 7 2 Set the contrast of the scanned document. (1) Press [Contrast]. (2) Select the contrast using [] [] or <> <> of the cursor keys and press [Enter]. Contrast Lightest Normal Cancel 8 Darkest Enter Set the resolution of the scanned document. (1) Press [], [Resolution]. (2) Select the resolution using the cursor keys and press [Enter]. Resolution 200dpi 300dpi 600dpi Cancel 9 Enter Set the scan size of the scanned document. (1) Press [ScanSize]. (2) Select the scan size using the cursor keys and press [Enter]. ScanSize Auto A4 A3 A5 A4 A5 Cancel 10 B4 B5 B5 Enter Set the file name of the scanned document. (1) Press <Menu>. (2) Select “File Name” using the cursor keys and press [Enter]. Network Scan 2-27 MFP Operations (3) Enter the file name using the numeric keys and press [Enter]. File Name scanfile_ Clear Lower Cancel 8/ 20 Enter Up to 20 characters can be entered. NOTE •If the file name is registered in “File Name” settings of OfficeBridge, you can press [FileName] to select the file name from the registered contents. (Refer to “Setting scan functions” in “Setting functions”, Reference Manual.) File Name 01:File Name 1 02:File Name 2 Cancel Enter •You can transmit the scanned document by e-mail when you store it in the shared folder. Press [Mode Chg] to switch to the “Mail” mode and set the e-mail address. For setting the e-mail address, refer to step 3, “Transmitting the scanned document by e-mail” (page 2-31). Scan Ready (Folder) Ratio:100% Size:Auto Mem.:100% Resol. ScanSize Mode Chg 300dpi Auto Folder 3/4 11 Check the location folder. (1) Press [Location]. Scan Ready (Folder) Ratio:100% Size:Auto Mem.:100% Press [Location] Location to check entries. 1/4 (2) Check the location folder. Location 01:Folder 1 Delete Close Tx Start To delete the set location, select the location using the cursor keys, and press [Delete]. When the “OK to delete?” message appears, press [Yes]. 2-28 Network Scan 12 Press [Tx Start] or <Start>. The “Scanning” message appears, and the document is scanned. Location 01:Folder 1 Delete Close Tx Start NOTE ScanSize A3 A5 A4 A5 A4 B4 Cancel B5 B5 Card Enter •If the memory overflows while scanning the document, the following message appears. Wait until the memory is available and scan again. (Folder) Memory overflow Ratio:100% Size:Auto Mem.: 0% Folder Doc.Type Contrast Text Normal 1/3 For multi-page documents, if the memory overflows while scanning the second page or later, the following message appears. Press [Yes] to enable scanning of the stored documents. Press [No] to disable, and the stored documents will be cleared. Memory overflow Number of stored page: 3 Store these pages? Yes No * The “Data size exceeds limit” message may be displayed. Take a countermeasure such as adjusting the document type or contrast, or dividing the documents to scan in several times. Network Scan 2-29 2 MFP Operations •If the document is not a standard size, the “ScanSize” screen appears. Specify the document size and press [Enter]. 13 Select whether to scan the next document. <Not to scan the next document> Press [Next Doc] while scanning the document, and set it to “No”. Scanning Folder 1 A4 Text P001 Next Doc No Memory:100% The document is scanned and transferred to the specified location. NOTE When the document is loaded on the ADF, the [Next Doc] option is set to “No” in advance. <To scan the next document> (1) Press [Next Doc] while scanning the document, and set it to “Yes”. Scanning Folder 1 A4 Text P001 Next Doc Yes Memory:100% NOTE When the document is not loaded on the ADF, the [Next Doc] option is set to “Yes” in advance. (2) When the “Please Set next doc.” message appears, load the next document and press [Scan NextPage]. To scan as a new document, press [Scan New Document]. Please Set next doc. Folder 1 A4 Text P001 Memory: 99% Scan Scan New Scanning NextPage Document End 1/3 The “Scanning” message appears, and the next document is scanned. (3) To finish scanning and transfer, press [Scanning End]. Please Set next doc. Folder 1 A4 Text P003 Memory: 98% Scan Scan New Scanning NextPage Document End 1/3 The document is scanned and transferred to the specified location. 2-30 Network Scan NOTE •When the “Transferring” message is displayed, you cannot scan the next document. •When the divide transmission is set to “ON”, [New Doc.] is not displayed. Transmitting the scanned document by e-mail You can scan the document and directly transmit it by e-mail. • If the display is not in the scan mode, press <Scan> to switch to the scan mode. 1 2 Load the document. Press [Mail]. Folder 3 Mail User 1/2 Set the e-mail address you transmit the scanned document to. <To enter the e-mail address> (1) Press [], [MailAddr]. Scan Ready (Mail) Ratio:100% Size:Auto Mem.:100% ScanSize MailAddr MailEdit Auto 2/3 (2) Enter the e-mail address using the character keys and press [Enter]. To set more than one address, repeat steps (1) and (2). Press Start Lower case To :[email protected]_ Clear Cancel 2 MFP Operations Enter • Up to 50 alphanumeric characters can be entered. • Press [CharMode] to switch the character entry mode. Select the entry mode using the cursor keys and press [Enter]. • Every time you press [To/Cc/Bcc], you can switch the address type. • Press [Clear] to clear the entered characters one by one. • Press [Cancel] to cancel the entry, and the display returns to the scan standby screen (mail). Network Scan 2-31 <To select from the address book> (1) Select the destination address pressing the cursor key <>, and press [Select]. To set more than one address, repeat this operation. OB Addressbook ABC :Beth.W ABC :Carl.M ABC :Chang.K Clear Close 1/7 Select (2) Press [Close]. <To use the OfficeBridge speed dial> (1) Press <Menu>. (2) Select “OB Adr.Book Tx” using the cursor keys and press [Enter]. (3) Set the speed dial number using the numeric keys or cursor keys and press [Enter]. To set more than one address, repeat steps (1) through (3). OB Speed Dial No.(0001-9999) Please Enter Number 0001_:John Smith Cancel Enter <To use the LDAP search function> Refer to “To search for the address by the LDAP search function and transmit” (page 2-14). 4 Enter the subject and body. (1) Press [], [MailEdit]. Scan Ready (Mail) Ratio:100% Size:Auto Mem.:100% ScanSize MailAddr MailEdit Auto 3/4 (2) Check that “Subject” is selected and press [], [Enter]. NOTE You can change the default e-mail fixed form. (page 1-19) 2-32 Network Scan (3) Enter the subject and press [Enter]. EditSub. Lower E-mail Message_ Clear Cancel 14/ 80 Enter • Up to 80 characters can be entered. • For details about entering characters, refer to your machine's User's Guide. (4) Select “Body” using the cursor keys and press [Enter]. EditText Lower 57/1024 Please see the file attached._ Clear Cancel Enter • Up to 1,024 characters can be entered. • For details about entering characters, refer to your machine's User's Guide. NOTE •To display all contents of the entered subject or body, press [Content]. MailEdit Subject:E-mail Message Body :This is an E-mail mess Template Content All contents will be displayed. This is an E-mail message. Please see the file attached. Close 1/ 57 • Press the cursor keys to move the cursor. • Press [Close] to return to the “MailEdit” screen. •You can use the “fixed form” to enter the subject and body. Register the fixed form in OfficeBridge in advance. (Refer to “E-mail settings” in “Setting connections”, Reference Manual.) (1) Press [Template] on the “MailEdit” screen. MailEdit Subject:E-mail Message Body :This is an E-mail mess Template Content Network Scan 2-33 MFP Operations 2 (5) Enter the body and press [Enter]. (2) Select the registered fixed form using the cursor keys and press [Enter]. If you select “Fixed text”, the following contents are set. Subject: E-mail Message Body : This is an E-mail message. Please see the file attached. MailEdit Fixed text Text (Subject) 01:Notification Cancel 1/4 Enter (6) Press [], [Close]. 5 Set the document type of the scanned document. (1) Press [], [Doc. Type]. (2) Select the document type using the cursor keys and press [Enter]. Doc. Type Text Background Text&Photo Photo Cancel Enter 6 Set the contrast of the scanned document. (1) Press [Contrast]. (2) Select the contrast using [] [] or <> <> of the cursor keys and press [Enter]. Contrast Lightest Normal Cancel 7 Darkest Enter Set the resolution of the scanned document. (1) Press [Resolution]. (2) Select the resolution using the cursor keys and press [Enter]. Resolution 200dpi 300dpi 600dpi Cancel 2-34 Network Scan Enter 8 Set the scan size of the scanned document. (1) Press [], [ScanSize]. (2) Select the scan size using the cursor keys and press [Enter]. ScanSize Auto A4 A3 A5 A4 A5 Cancel 9 2 Set the file name of the scanned document. (1) Press <Menu>. (2) Select “File Name” using the cursor keys and press [Enter]. (3) Enter the file name using the numeric keys and press [Enter]. File Name scanfile_ Clear Lower Cancel 8/ 20 Enter Up to 20 characters can be entered. NOTE •If the file name is registered in [File Name Settings] of OfficeBridge, you can press [FileName] to select the file name from the registered contents. (Refer to “Setting scan functions” in “Setting functions”, Reference Manual.) File Name 01:File Name 1 02:File Name 2 Cancel Enter •You can store the scanned document in the shared folder when you transmit it by e-mail. Press [Mode Chg] to switch to the “Folder” mode and set the destination shared folder. Scan Ready (Mail) Ratio:100% Size:Auto Mem.:100% Mode Chg Shutdown Mail 4/4 Network Scan 2-35 MFP Operations B4 B5 B5 Enter 10 Check the address. (1) Press [Location]. (2) Check the address. Location To :[email protected] To :[email protected] Delete Close Tx Start • To change the address type, select the address to change using the cursor keys, and press [To/Cc/Bcc]. • To delete the entered address, select the address using the cursor keys, and press [Delete]. When the “OK to delete?” message appears, press [Yes]. 11 Press [Tx Start] or <Start>. The “Scanning” message appears, and the document is scanned. Location To :[email protected] Delete Close Tx Start NOTE •If the document is not a standard size, the “Scan Size” screen appears. Specify the document size and press [Enter]. ScanSize A3 A5 A4 A5 A4 B4 Cancel B5 B5 Card Enter •If the memory overflows while scanning the document, the following message appears. Wait until the memory is available and scan again. (Mail) Memory overflow Ratio:100% Size:Auto Mem.: 0% Doc.Type Contrast Resol. Text Normal 300dpi 1/3 2-36 Network Scan For multi-page documents, if the memory overflows while scanning the second page or later, the following message appears. Press [Yes] to enable scanning of the stored documents. Press [No] to disable, and the stored documents will be cleared. Memory overflow Number of stored page: 3 Store these pages? No * The “Data size exceeds limit” message may be displayed. Take a countermeasure such as adjusting the document type or contrast, or dividing the documents to scan in several times. 12 Select whether to scan the next document. <Not to scan the next document> Press [Next Doc] while scanning the document, and set it to “No”. Scanning [email protected] A4 Text P001 Next Doc No Memory:100% The document is scanned and transmitted to the specified address. NOTE When the document is loaded on the ADF, the [Next Doc] option is set to “No” in advance. <To scan the next document> (1) Press [Next Doc] while scanning the document, and set it to “Yes”. Scanning [email protected] A4 Text P001 Next Doc Yes Memory:100% NOTE When the document is not loaded on the ADF, the [Next Doc] option is set to “Yes” in advance. Network Scan 2-37 2 MFP Operations Yes (2) When the “Please Set next doc.” message appears, load the next document and press [Scan NextPage]. To scan as a new document, press [Scan New Document]. Please Set next doc. [email protected] A4 Text P001 Memory: 99% Scan Scan New Scanning NextPage Document End 1/3 The “Scanning” message appears, and the next document is scanned. (3) To finish scanning and transmit, press [Scanning End]. Please Set next doc. [email protected] A4 Text P003 Memory: 98% Scan Scan New Scanning NextPage Document End 1/3 The document is scanned and transmitted to the specified address. NOTE •When the “Transferring” message is displayed, you cannot scan the next document. •If the divide transmission is set to “On”, [Scan New Document] is not displayed. Transferring the scanned document to the registered user You can scan the document and transfer it to the “Scan” document list of the registered user of OfficeBridge. •If the display is not in the scan mode, press <Scan> to switch to the scan mode. 1 2 Load the document. Press [User]. Folder 2-38 Network Scan Mail User 1/2 3 Select the registered user you want to transfer the document to using the cursor keys, and press [Select]. To set more than one user, repeat this operation. User select 001:User001 002:User002 003:User003 Clear Close 1/11 Select 4 5 6 Press [Close]. Set the document type, contrast, resolution and scan size of the scanned document as necessary. Set the file name of the scanned document. (1) Press <Menu>. (2) Select “File Name” using the cursor keys and press [Enter]. (3) Enter the file name using the numeric keys and press [Enter]. File Name Report_ Clear Lower Cancel 6/ 20 Enter Up to 20 characters can be entered. NOTE If the file name is registered in “File Name” settings of OfficeBridge, you can press [FileName] to select the document category from the registered contents. (Refer to “Setting scan functions” in “Setting functions”, Reference Manual.) File Name 01:File Name 1 02:File Name 2 Cancel 7 Enter Set the document category. (1) Press <Menu>. (2) Select “Category” using the cursor keys and press [Enter]. Network Scan 2-39 2 MFP Operations To select the user group, press [Group] and select the desired group using the cursor keys. (3) Enter the category using the numeric keys and press [Enter]. Category Lower Document _1 Clear Cancel 10/ 20 Enter Up to 20 characters can be entered. NOTE If the file name is registered in “File Name” settings of OfficeBridge, you can press [Category] to select the file name from the registered contents. (Refer to “Setting scan functions” in “Setting functions”, Reference Manual.) Category 01: Category 1 02: Category 2 Cancel 8 9 Enter Press [Location] and check the address. Press [Tx Start] or <Start>. Location 001:User001 Delete Close Tx Start Scanning the document starts, and the document will be transferred to the specified user. Posting the scanned document in the bulletin board You can transfer the scanned document to the “Bulletin Board” document list of OfficeBridge and post it. •If the display is not in the scan mode, press <Scan> to switch to the scan mode. 1 2 Load the document. Press [], [Bulletin]. Bulletin Circul. Request 2-40 Network Scan 2/2 3 4 5 Select the sender using the cursor keys and press [Enter]. Sender 1/11 001:User001 002:User002 003:User003 Cancel Enter Set the document type, contrast, resolution and scan size of the scanned document as necessary. Set the subject. (1) Press [], [Subject]. Scan Ready (Bulletin) Ratio:100% Size:Auto Mem.:100% Resol. ScanSize Subject 300dpi Auto 2/3 (2) Enter the subject using the numeric keys and press [Enter]. Subject Report_ Lower Clear Cancel 6/ 80 Enter Up to 80 characters can be entered. NOTE If the file name is registered in “File Name” settings of OfficeBridge, you can press [Subject] to select the subject from the registered contents. (Refer to “Setting scan functions” in “Setting functions”, Reference Manual.) Subject 01: Subject 1 02: Subject 2 Cancel 6 Enter Set the document category. (1) Press <Menu>. (2) Select “Category” using the cursor keys and press [Enter]. Network Scan 2-41 2 MFP Operations (3) Enter the category using the numeric keys and press [Enter]. Category Lower Document _1 Clear 10/ 20 Cancel Enter Up to 20 characters can be entered. 7 Set the posting period. (1) Press <Menu>. (2) Select “PostTime” using the cursor keys and press [Enter]. (3) Not to set the posting period (post indefinitely), select “No” and press [Enter]. To set the posting period, select “Yes” and press [Enter]. PostTime No Yes Cancel Enter (4) If you select “Yes”, set the posting period using the numeric keys or cursor keys, and press [Enter]. PostTime (01-99) Days 0_3 Days Cancel Enter The setting range is from 1 to 99 days. 8 Set the comments. (1) Press <Menu>. (2) Select “Comment” using the cursor keys and press [Enter]. (3) Enter the comments and press [Enter]. Comment _ Lower Clear Cancel 0/1024 Enter Up to 1,024 characters can be entered. 2-42 Network Scan 9 Press <Start>. Scanning the document starts, and the document will be transferred to the “Bulletin Board” document list of OfficeBridge. Circulating the scanned document You can transfer the scanned document to the “Circulated” document list of OfficeBridge and circulate it. •If the display is not in the scan mode, press <Scan> to switch to the scan mode. 1 2 Load the document. Press [], [Circul.]. Bulletin Circul. Request 3 4 MFP Operations 2/2 Select the sender (originator) using the cursor keys and press [Enter]. Sender 1/11 001:User001 002:User002 003:User003 Cancel Enter Select the receiver using the cursor keys and press [Enter]. To set more than one receiver, repeat this operation. User select 001:User001 002:User002 003:User003 Clear Close 1/11 Select To select the user group, press [Group] and select the desired group using the cursor keys. 5 6 2 Press [Close]. Set the document type, contrast, resolution and scan size of the scanned document as necessary. Network Scan 2-43 7 Set the subject. (1) Press [], [Subject]. Scan Ready (Circulation) Ratio:100% Size:Auto Mem.:100% Subject Shutdown 4/4 (2) Enter the subject using the numeric keys and press [Enter]. Subject Lower Information_ Clear Cancel 11/ 80 Enter Up to 80 characters can be entered. 8 Set the document category. (1) Press <Menu>. (2) Select “Category” using the cursor keys and press [Enter]. (3) Enter the category using the numeric keys and press [Enter]. Category Lower Document _2 Clear Cancel 10/ 20 Enter Up to 20 characters can be entered. 9 Set the hold time. (1) Press <Menu>. (2) Select “Hold Time” using the cursor keys and press [Enter]. (3) Not to set the hold time (hold indefinitely), select “No” and press [Enter]. To set the hold time, select “Yes” and press [Enter]. Hold Time No Yes Cancel 2-44 Network Scan Enter 10 Set the comments. (1) Press <Menu>. (2) Select “Comment” using the cursor keys and press [Enter]. (3) Enter the comments and press [Enter]. Up to 1,024 characters can be entered. Lower Clear Cancel 0/1024 2 Enter Press [Location] and check the address. Press [Tx Start] or <Start>. Scanning the document starts, and the document will be transferred to the “Circulated” document list of OfficeBridge. Requesting processing of the scanned document You can transfer the scanned document to the “Processing” document list of OfficeBridge and post it. •If the display is not in the scan mode, press <Scan> to switch to the scan mode. 1 2 Load the document. Press [], [Request]. Bulletin Circul. Request 3 2/2 Select the original requesting person using the cursor keys and press [Enter]. Sender 1/11 001:User001 002:User002 003:User003 Cancel Enter Network Scan 2-45 MFP Operations 11 12 Comment _ 4 5 6 Select the requested recipient using the cursor keys and press [Enter]. Receiver 1/11 001:User001 002:User002 003:User003 Cancel Enter Set the document type, contrast, resolution and scan size of the scanned document as necessary. Set the subject. (1) Press [], [Subject]. Scan Ready (Request) Ratio:100% Size:Auto Mem.:100% Subject Deadline Shutdown 19,21:30 3/4 (2) Enter the subject using the numeric keys and press [Enter]. Subject Request_ Lower Clear Cancel 7/ 80 Enter Up to 80 characters can be entered. 7 Set the document category. (1) Press <Menu>. (2) Select “Category” using the cursor keys and press [Enter]. (3) Enter the category using the numeric keys and press [Enter]. Category Lower Document _3 Clear Cancel 10/ 20 Enter Up to 20 characters can be entered. 8 Set the deadline. (1) Press [], [Deadline]. Scan Ready (Request) Ratio:100% Size:Auto Mem.:100% Subject Deadline Shutdown 19,21:30 3/4 2-46 Network Scan (2) Set the deadline using the numeric keys or cursor keys and press [Enter]. Deadline(1-31 days) 09, 18:00 Cancel Enter The setting range is from 1 to 31 days, and 00:00 to 23:59. 9 Set the comments. (1) Press <Menu>. (3) Enter the comments and press [Enter]. Comment _ Lower Clear Cancel 0/1024 Enter Up to 1,024 characters can be entered. 10 Press <Start>. Scanning the document starts, and the document will be transferred to the “Processing” document list of OfficeBridge. Zooming in/out the document You can zoom in/out the document in the desired ratio and scan. •If the display is not in the scan mode, press <Scan> to switch to the scan mode. 1 2 3 4 5 2 MFP Operations (2) Select “Deadline” using the cursor keys and press [Enter]. Load the document. Select an operation. Press <Menu>. Select “Zoom” using the cursor keys and press [Enter]. Select the enlarging or reducing ratio using the cursor keys and press [Enter]. Zoom:100% Fixed Even Magnification (100%) A3->B4,A4->B5 ( 86%) B4->A4,B5->A5 ( 81%) Zoom Cancel Enter Network Scan 2-47 NOTE Press [Zoom] to select a zoom ratio. Set the zoom ratio using the numeric keys or cursor keys and press [Enter]. Press [Fixed] to return to the original screen. Zoom(50-400) Use Num pad or cursor Please input Fixed 6 Cancel Zoom 100 % Enter After your desired operations, the document is scanned and transferred. Scanning large volume of documents by page (Divide transmission) You can divide multi-page documents into one page and scan each page as the individual document to transmit/transfer. • If the display is not in the scan mode, press <Scan> to switch to the scan mode. 1 2 3 4 5 Load the document. Select an operation. Press <Menu>. Select “Div. Tx” using the cursor keys and press [Enter]. Select “On” using the cursor keys and press [Enter]. Div. Tx Off On Cancel 6 Enter After your desired operations, the document is scanned and transferred. 2-48 Network Scan Selecting the file format You can select the file format of the scanned document. You cannot set this function in the following operations. • • Transfer the scanned document to the registered user • Post the scanned document in the bulletin board • Circulate the scanned document • Request processing of the scanned document • If the display is not in the scan mode, press <Scan> to switch to the scan mode. 5 2 Load the document. Select an operation. Press <Menu>. Select “File Format” using the cursor keys and press [Enter]. Scan Menu Zoom File Format Div. Tx List File Name Settings Close Enter Select the file format of the scanned document using the cursor keys and press [Enter]. File Format TIFF PDF Cancel Enter You can select “TIFF” or “PDF”. 6 After your desired operations, the document is scanned and transferred. Network Scan 2-49 MFP Operations 1 2 3 4 2-50 Network Scan Chapter 3 Using the Reference Manual This chapter describes how to use “OfficeBridge Reference Manual”. This is an electronic manual that provides detailed information on how to use OfficeBridge. Configuration of the reference manual............................................................ 3-2 Starting the reference manual......................................................................... 3-2 Using the reference manual............................................................................. 3-3 Using the search function................................................................................. 3-9 Configuration of the reference manual Functions This explains what you should know before using OfficeBridge. Settings This gives detailed information on how to set up OfficeBridge. The administrator should read this section. Operation This gives detailed information on how to operate OfficeBridge, focusing on its functions. Starting the reference manual 1 2 3 3-2 Click the [Start] button, and then select “All Programs(P)”. Select “OfficeBridge”, and then click “Reference Manual” from the displayed menu. The browser software starts up, displaying “OfficeBridge Reference Manual”. Using the reference manual The following example shows how to display the contents of “User registration” from “Settings”. There are two ways to display the contents: from links in the body text or from the index. To display the contents from links in the body text The window contains blue underlined items, as well as the descriptive text. These underlined items have their linked pages. Clicking one of them jumps you to the page containing more detailed information. 1 Click “Settings” on the top page. 3 Using the Reference Manual The top window of “Settings” appears. 3-3 The index of “Settings” is displayed on the left side. The contents are displayed on the right side. NOTE The pink-highlighted item in the index indicates that the contents are displayed on the right side. 2 Click “Registering in the “OfficeBridge” dialog box” in the index. The contents of “User registration” appear. 3-4 3 Scroll down the window and click “User name”. Using the Reference Manual 3 The contents of “Use name” appear. 4 To return to the top of “Settings”, click [Settings]. 3-5 To display the contents from the index 1 Click “Settings” on the top page. The top window of “Settings” appears. The index of “Settings” is displayed on the left side. The contents are displayed on the right side. NOTE The pink-highlighted item in the index indicates that the contents are displayed on the right side. 3-6 2 Click “Making a user registration” in the index. The hierarchy under “Making a user registration” appears in the index, while the contents on the right side. 3 Click “User registration”. The hierarchy under “User registration” appears in the index, while the contents on the right side. 3-7 Using the Reference Manual 3 4 Click “User name”. The contents of “User name” appear. 5 To return to the top of “Settings”, click [Settings]. NOTE · You can return to the previous window by clicking “Back” at the lower right of the window. · To close the electronic manual, select “Close” from the browser's “File” menu, or click the [] button at the top right of the window. 3-8 Using the search function To get more details about particular operations or settings, you can search for and consult the related pages in the electronic manual. 1 Enter the keyword you want to search for into the text box at the upper right of the window. 2 3 Click the [Search] button. The titles of the sections and subsections containing the keyword appear. Click one of the titles to display the corresponding page. 3-9 Using the Reference Manual 3 AND search To run an AND search, put a space between keywords. 1 2 3 3-10 Enter the keywords you want to search for into the text box at the upper right of the window. Click the [Search] button. The titles of the sections and subsections containing all the keywords appear. Click one of the titles to display the corresponding page. Chapter 4 Troubleshooting This chapter shows sample phenomena that OfficeBridge does not properly operate and explains the countermeasures. For error messages and error codes not explained here, refer to the MFP User's Guide. If you do not solve the problem by countermeasures explained here, please contact your authorized Muratec dealer. Error message................................................................................................... 4-2 Error code.......................................................................................................... 4-4 Troubles on the window operation................................................................... 4-7 Troubles on a printer...................................................................................... 4-14 Troubles on “OB InfoMonitor”........................................................................ 4-16 Troubles on “OB Document Download Manager”......................................... 4-17 Cannot open the resident web page............................................................... 4-18 Folder shared settings.................................................................................... 4-19 Error message Message Check the ID number Status and countermeasure 1.Lower 4 digits of the fax number registered by the destination do not match with those of the entered number. Check the ID number. 2.The fax number is not registered by the other party. Call the other party and ask him/her to check the fax number of their machine. Error code T.2.2 T.2.2 Check the sending party's passcode Ask the other party to check the machine. Ask the other party to check the passcode. Check condition of remote fax Call the other party and ask him/her to check T.1.1, T.2.1 the mode, fax number, status of their machine. T.2.2, T.2.3 T.5.1, T.5.2 T.8.1, R.8.1 Check the received documents Call the other party and ask him/her to check the operating status of their machine. Resend the document. Please dial again 1.The document may not be read properly. Resend the document. 2.The phone line may have a problem. Resend the document. 3.The dialing tone did not return at the “/P” or “/T” position. Check the “/P” or “/T” position and resend. (These symbols may not be necessary depending on the switchboard.) T.4.2 T.3.1 T.4.1 T.5.3 D.0.8 1.The document was not successfully D.0.2 transmitted to the destination, despite having redialed the preset number of times. Re-enter the destination fax number and transmit again. If this message appears again, call the other party to ask him/her to check the status of their machine. 2.Check the communication line type is correct. (Refer to the MFP User's Guide) Dialing number is not set Re-set the speed dial and resend the document. D.0.6 Stopped Communication stopped. Restart the operation. 4-2 D.0.3 T.1.4 R.1.4 Message An LDAP server has not been registered. Check the LDAP server settings. Status and countermeasure An LDAP server is not registered or its settings are not correct. Refer to “Network Settings” (page 1-3) and set correctly. If you are not sure about the LDAP settings, consult your system administrator. An LDAP server has not been selected. Check the LDAP server settings. The LDAP server cannot be found. Check the LDAP server settings. Invalid parameters! Check the LDAP server settings. 4 No Network Connection. Troubleshooting LDAP reference execution error. A LAN cable is not connected. Connect a LAN cable. 4-3 Error code D: Dialing Errors G3 Transmission Mode Error code Description of code Countermeasure D.0.1 Transmission and reception occurred simultaneously Resend the document. D.0.2 Receiving line is busy Resend the document. D.0.3 <Stop> was pressed Resend the document. D.0.6 The receiving fax number is not registered when using the auto-dial function Set the correct fax number and then resend the document. D.0.7 The receiving party did not answer when using the auto-dial function Set the correct fax number and then resend the document. A dial tone cannot be detected Check the line cable is connected properly. Check the dial tone detect settings. he dialing tone did not return at the “/P” or “/T” position Check the “/P” or “/T” position and resend. (These symbols may not be necessary depending on the switchboard.) D.0.8 T: Transmission Errors Mode Error code G3 Transmission T.1.1 T.1.4 T.2.1 T.2.2 4-4 Description of code Countermeasure Wrong number (receiving party answered and hung up) Check the correct fax number and resend the document. The receiving party answered manually and hung up the phone Check the receiving method on the other machine. The other machine is not a G3 machine This machine cannot communicate with it. <Stop> was pressed when the communication starts (only displayed in the auto print journal) Resend the document. The line status was bad (especially when communicating overseas) and the receiving party cut off the line Resend the document. If this error occurs repeatedly, contact your authorized Muratec dealer. Your machine's settings do not match with the other machine's Check the settings on the other machine. If the receiving party has special settings, ask him/her to release them. Your machine's settings do not match with the other machine's Check the model and setting status on the other machine. Error code T.3.1 ECM Transmission G3 Transmission T.3.2 T.4.1 T.4.2 Description of code Countermeasure In a consecutive transmission, the pages from the second page caused a read error Resend the document starting from the page that caused the error. A document of which length is longer than 900 mm was transmitted Cut the length of a page into 900 mm or less, and resend. Brightness in the lamp is insufficient if the “Lamp error. Call for service” message is displayed after transmission is interrupted Turn the power from OFF to ON and try to copy. If the “Lamp error. Call for service” message is not displayed, resend the document. If the same message is displayed even when you copy, contact your authorized Muratec dealer. Due to a line error, communication failed. Resend the document. If this error occurs repeatedly, contact your authorized Muratec dealer. Due to a line error, the receiving party disconnected the line during document transmission Resend the document. If this error occurs repeatedly, contact your authorized Muratec dealer. An image quality error occurred at the receiving party (due to line error) All pages were received but some of them might have a poor image quality. Ask the receiving party to check the quality of the document. T.4.4 The line is disconnected during transmission (due to a line error) Resend the document. T.5.1, T.5.2, T.5.3 The line is disconnected during transmission (due to a line error) Resend the document. If this error occurs repeatedly, contact your authorized Muratec dealer. T.8.1 The reception mode does not match Check the other machine. The receiving party may not use a fax machine. 4-5 4 Troubleshooting G3 Transmission Mode R: Reception Errors Mode Error code R.1.1 Description of code Countermeasure Your machine is set to manual reception or transfer reception and is ready to receive, but no signal comes from the sending party The sending party may operate incorrectly. If you know who the sending party is, ask him/her to resend the document. Your machine's mode does not match with the sending party's G3 Transmission R.1.2 R.1.4 <Stop> was pressed during reception (only displayed in the auto print journal) R.1.5 Due to a line error, communication failed R.2.3 Due to a line error, the line is disconnected R.3.1 ECM Reception R.3.3 4-6 Junk fax is received when the junk fax block function is on (only displayed in the auto print journal) If you know who the sending party is, ask him/her to resend the document. If this error occurs repeatedly, contact your authorized Muratec dealer. If you know who the sending party is, ask him/her to resend the document. If you know who the sending party is, A document was pulled out or <Stop> ask him/her to resend the document. was pressed by the sending party If this error occurs repeatedly, contact your authorized Muratec dealer. Due to a line error, the signal cut off during reception (due to line error) R.3.4 Reception is not available even at the slowest speed (due to a line error) R.3.5 Due to memory overflow, the reception failed Check the amount of memory left and ask the sending party to resend. R.4.2 Due to a line error, the signal cut off during reception (due to line error) R.4.4 Memory overflow (only displayed in the auto print journal) If you know who the sending party is, ask him/her to resend the document. If this error occurs repeatedly, contact your authorized Muratec dealer. R.5.1 The signal cut off during reception The sending party pressed <Stop> R.5.2 Due to a line error, the signal cut off during reception (due to line error) R.8.1 Your machine's mode does not match with the other machine's If you know who the sending party is, ask him/her to resend the document. If this error occurs repeatedly, contact your authorized Muratec dealer. Check the other machine. The other party may not have a document, for example, in polling. Troubles on the window operation Device to check Cannot connect PC to OfficeBridge. Check point Check if the OfficeBridge IP address is entered correctly. Countermeasure Check the OfficeBridge IP address and enter correctly. Check if the Refer to the Reference Manual and configure OfficeBridge network the network settings correctly. settings are correct. Check if the browser settings are correct. Check if the LAN cable is connected. Check the browser settings by the following step. ·Go to “Tools” on the menu bar − “Internet Options” − “Connections” tab − “Local Area Network (LAN) settings Explorer”, and press the [LAN Settings] button to check the proxy server settings. Check the LAN cable connection and connect correctly. Check if the LAN Replace the LAN cable. cable is not damaged. Check if the network Replace the network card. card (LAN card) is not damaged. Check if the system ·Check the memory on your PC satisfies the memory on Windows operating environment of OfficeBridge, and is sufficient. if not, expand the memory. ·If multiple software applications or unnecessary resident software are running, exit them. MFP Check if the user information is registered. Register the user information in the “User Registration Settings” dialog box of OfficeBridge. Check if the correct password is entered. Enter the password registered in the “User Registration Settings” dialog box of OfficeBridge. Check if the power is Turn ON the power. ON. Check if the LAN cable is connected. Check the LAN cable connection and connect correctly. Check if the LAN Replace the LAN cable. cable is not damaged. Check if the network Configure the network settings correctly (refer settings are correct. to page 1-3). 4-7 4 Troubleshooting Phenomenon Phenomenon Device to check Cannot connect Network to OfficeBridge. peripheral devices (ex. LAN hub, router) Network peripheral devices (ex. LAN hub, router) Check point Countermeasure Check if the power is Turn ON the power. ON. Check if the LAN cable is connected. Check the LAN cable connection and connect correctly. Check if the LAN Replace the LAN cable. cable is not damaged. Check if the network Connect the LAN cable to other port of the peripheral device is device, and check it operates correctly. If it not damaged. does not operate, replace the device. Check if the network Refer to the operational manual of the device settings are correct. and configure the network settings correctly. PC A table size, character pitch, or line pitch on the displayed window is different from ones in the manual. Check if the specified Use Internet Explorer 5.0.1 or later, or browser is used. Netscape Navigator 7.0 or later for the browser. If you use an old version of the browser, we recommend installing the latest version. PC Check if the character size is not changed. Adjust the character size in the character size setting on the browser. Unable to open PC the resident web page which you can access from the browser. The Internet Explorer security setting has not been set properly. Is the Internet Explorer security set properly? Change the Internet Explorer security setting as follows. Refer to page 4-18. A character size on the displayed window is different from one in the manual. 4-8 Cannot open a document Cannot transmit/ receive a fax. Device to check PC PC Check point Countermeasure Check if an image viewer is installed. Without installing an image viewer, you cannot view a document. Exit OfficeBridge and install an image viewer. A similar status may also occur when the version of an image viewer is old. Re-install the latest version of an image viewer. Check if you associate the extension (TIFF or PDF) with an image file in your OS. Refer to the OS operation manual of your PC, and associate the extension. Check if a plugin application is installed. Check if a plug-in application including QuickTime or RealOne, or an image viewer is installed. If installed, associate the extension with an image file. Check if the LAN cable is connected. Check the LAN cable connection and connect correctly. Check if the LAN Replace the LAN cable. cable is not damaged. Check if the network Replace the network card. card (LAN card) is not damaged. 4-9 4 Troubleshooting Phenomenon Phenomenon Cannot transmit/ receive a fax. Device to check Check point Countermeasure PC Check is the system Check the memory on your PC satisfies the memory on Windows operating environment of OfficeBridge, and if is sufficient. not, expand the memory. If multiple software applications or unnecessary resident software are running, exit them. MFP Check if the power is Turn ON the power. ON. Check if the LAN cable is connected. Check the LAN cable connection and connect correctly. Check if the LAN Replace the LAN cable. cable is not damaged. Check if the phone line cable is connected. Check the phone line cable connection and connect correctly. Check if the phone line cable is not damaged. Replace the phone line cable. Check if the communication line settings (dial or push) are correct. Check the communication line and set correctly. Check if an advanced fax function (ex. Block Junk Fax, Closed Communication) is not set. Refer to the MFP User's Guide and release these settings. Check if the network Configure the network settings correctly (refer settings are correct. to page 1-3). Network peripheral devices (ex. LAN hub, router) Check if the power is Turn ON the power. ON. Check if the LAN cable is connected. Check the LAN cable connection and connect correctly. Check if the LAN Replace the LAN cable. cable is not damaged. Check if the network Connect the LAN cable to other port of the peripheral device is device, and check it operates correctly. If it not damaged. does not operate, replace the device. Check if the network Refer to the operational manual of the device settings are correct. and configure the network settings correctly. 4-10 Phenomenon Device to check Cannot PC transmit/ receive an e-mail message Check point Countermeasure Check if you set the Configure the correct account/password account/password settings in the “SMTP/POP Settings” dialog settings of the e-mail box of OfficeBridge. server correctly. Check if the LAN cable is connected. Check the LAN cable connection and connect correctly. Check if the LAN Replace the LAN cable. cable is not damaged. Check if the network Replace the network card. card (LAN card) is not damaged. Check if the power is Turn ON the power. ON. Check if the LAN cable is connected. Check the LAN cable connection and connect correctly. Check if the LAN Replace the LAN cable. cable is not damaged. Check if the phone line cable is connected. Check the phone line cable connection and connect correctly. Check if the phone line cable is not damaged. Replace the phone line cable. Check if the network Configure the network settings correctly (refer settings are correct. to page 1-3). Network peripheral devices (ex. LAN hub, router) Check if the power is Turn ON the power. ON. Check if the LAN cable is connected. Check the LAN cable connection and connect correctly. Check if the LAN Replace the LAN cable. cable is not damaged. Check if the network Connect a LAN cable to other port of the peripheral device is device, and check it operates correctly. If it not damaged. does not operate, replace the device. Check if the network Refer to the operational manual of the device settings are correct. and configure the network settings correctly. MFP Cannot use the advanced search function An LDAP server is not registered or its settings are not correct. Refer to “Network Settings” (page 1-3) and set correctly. The TCP/IP settings are not correct. 4-11 4 Troubleshooting MFP Phenomenon Device to check A document PC created with the specified application software cannot be sent by fax or e-mail. There is a document list window (Bulletin Board, Circulated, Request Processing) not displayed. PC Check point Countermeasure Check if “Muratec MFX-**** Fax” (**** means your machine name) is installed. Otherwise, you cannot send a document created with the specified application software. Exit OfficeBridge and install “Muratec MFX-**** Fax” (**** means your machine name). Check if “Muratec MFX-**** Fax” (**** means your machine name) is selected. From the print menu of the application software, set the using printer to “Muratec MFX-**** Fax” (**** means your machine name). Check if the port settings of “Muratec MFX-**** Fax” (**** means your machine name) is correct. Check the “Port to print” settings in “Muratec MFX-**** Fax” (**** means your machine name) and set the print destination port with the correct IP address. Check if the document list function is set to “ON”. Set the function to “ON” in each function setting dialog box of OfficeBridge. Set the correct forwarding condition in the Check if the forwarding condition “Received fax forwarding setting” dialog box of OfficeBridge. settings of received documents are correct. A received fax document is not forwarded. A received fax document is not forwarded. MFP Check if the power is Turn ON the power. ON. A forwarded document is not printed. PC Check if the print setting of forwarded documents is ON. MFP Check if the power is Turn ON the power. ON. PC Check if you select a correct forwarding user on the control panel. A scanned document is not forwarded. 4-12 Set the print setting for forwarded documents in the “Received fax forwarding setting” dialog box of OfficeBridge. Select a correct user. Cannot import a scanned document in the application software. A processed document is not stored on the document list window. Device to check PC PC Check point Countermeasure Check if “Muratec OB TWAIN Connector” is installed. If “Muratec OB TWAIN Connector” is not installed, you cannot import a scanned document in the application software. Exit OfficeBridge and install “Muratec OB TWAIN Connector”. Check if “Muratec OB TWAIN Connector” is set as the read device. Set the read device of the application software to “Muratec OBTWAIN Connector”. Check if the storing document size does not exceed the memory of MFP. Check the amount of memory left on the document list window, and delete unnecessary documents from the document list to make an available memory. 4 Troubleshooting Phenomenon 4-13 Troubles on a printer Phenomenon Cannot print a document Device to check PC MFP Check point Countermeasure Check if the LAN cable is connected. Check the LAN cable connection and connect correctly. Check if the LAN cable is not damaged. Replace the LAN cable. Check if the network card (LAN card) is not damaged. Replace the network card. Check if the system memory on Windows is sufficient. ·Check the memory on your PC satisfies the operating environment of OfficeBridge, and if not, expand the memory. ·If multiple software applications or unnecessary resident software are running, exit them. Check if the power is ON. Turn ON the power. Check if paper is loaded. Load paper properly. Check if the drum cartridge or toner cartridge is installed. Install the drum cartridge or toner cartridge correctly. Check if the LAN cable is connected. Check the LAN cable connection and connect correctly. Check if the LAN cable is not damaged. Replace the LAN cable. Check if the network settings are Configure the network settings correct. correctly (refer to page 1-3). Network peripheral devices (ex. LAN hub, router) Cannot print a document 4-14 Network peripheral devices (ex. LAN hub, router) Check if the power is ON. Turn ON the power. Check if the LAN cable is connected. Check the LAN cable connection and connect correctly. Check if the LAN cable is not damaged. Replace the LAN cable. Check if the network peripheral device is not damaged. Connect the LAN cable to other port of the device, and check it operates correctly. If it does not operate, replace the device. Check if the network settings are Refer to the operational manual correct. of the device and configure the network settings correctly. Phenomenon Device to check PC A document created with the specified application software cannot be printed. Check point Countermeasure Check if “Muratec MFX-****” Otherwise, you cannot print (**** means your machine name) a document created with the is installed. specified application software. Exit OfficeBridge and install “Muratec MFX-****” (**** means your machine name). Check if “Muratec MFX-****” From the print menu of the (**** means your machine name) application software, set the using is selected. printer to “Muratec MFX-****” (**** means your machine name). PC Check if the paper size or direction you set in the application software is given priority. The settings in the application software may be given priority to the ones in the printer driver for printing. Configure the correct settings on the application software. Check if the memory required for When you print in multiple printing is sufficient. copies, check in one copy. Check if the memory required for Set the image resolution lower. printing is sufficient. Make an image more simple to decrease the data size. A document is not printed properly PC Cannot select items on the printer driver PC Documents set PC in a work group in Microsoft Excel are not printing properly Check if the spool settings of the printer driver are correct. — Check if each worksheet in Microsoft Excel has the same settings in “Page Settings” and printer driver settings. Change the spool data format of the printer driver from “EMF mode” to “RAW mode”. You may not combine and use some functions together depending on the function. Areas displayed in gray cannot be selected. When you set some worksheets in a workgroup in Microsoft Excel and print them, you need the same settings in both “Page Settings” and “printer driver settings” for each worksheet. 4-15 4 Troubleshooting A document created with the specified application software is not printing properly. Troubles on “OB InfoMonitor” Phenomenon Device to check A newly arrived PC document is not notified. 4-16 Check point Countermeasure Check if “OB InfoMonitor” is running. If “OB InfoMonitor” is not running, a newly arrived document is not notified. Start up “OB InfoMonitor”. Check if the IP address is entered correctly. Enter the same address as one of OfficeBridge in the “OB Settings” dialog box of “OB InfoMonitor”. Check if a correct user is selected. Select a user correctly in the “User Settings” dialog box of “OB InfoMonitor”. Check if the notification settings for newly arrived documents are configured correctly. Set the notification type correctly in the “Notification (Sound) Settings” dialog box of “OB InfoMonitor”. Check if the popup display is set to ON. Right-click the task tray icon of “OB InfoMonitor” and check “View popups” is selected. Check if the connection to “OB InfoMonitor” is not rejected in virus scan software or security software settings. Set the port number (60000) of “OB InfoMonitor” to the excluded range of virus scan software or security software. Check if the connection to “OB InfoMonitor” is not rejected in the firewall settings. Set the port number (60000) of “OB InfoMonitor” to the excluded range of firewall. Troubles on “OB Document Download Manager” Device to check PC Check point Countermeasure Check if “OB Document Download Manager” is running. If “OB Document Download Manager” is not running, you cannot download. Start up “OB Document Download Manager”. Check if the IP address is entered correctly. Enter the same address as one of OfficeBridge in the “OB settings” dialog box of “OB Document Download Manager”. Check if a correct user is selected. Set a user correctly in the “User settings” dialog box of “OB Document Download Manager”. Check if a download task is created. Create a download task in the “Download Utility – Console” dialog box of “OB Document Download Manager”. Check if “OB Document Download Manager” on other PCs has the setting of automatic document deletion after downloading a document. Release the setting of automatic document deletion after downloading a document on other PCs. 4-17 4 Troubleshooting Phenomenon Cannot download a document Cannot open the resident web page Phenomenon Cannot open the resident web page which you can access from the browser. Check point Countermeasure The LAN cable is not connected firmly. Check whether the LAN cable is firmly connected. If using Windows Vista/Server 2003, the Internet Explorer security has not been set properly. Please change the Internet Explorer security setting as follows. (The images are based on Vista.) 1. Open Internet Explorer, and click the “Tools” button, and then click “Internet Options”. 2. C lick the “Security” tab, and then click the “Trusted sites”. 3. Click [Sites]. 4. Enter your machine IP address “http://xxx.xxx.xxx. xxx” in the “Add this website to the zone” field. 5. Clear the “Require server verification (https:) for all sites in this zone” check box. Click [Add]. 6. Click [Close], and then click [OK]. 4-18 Folder shared settings To use the Scan to folder function, you need to set a shared folder on your PC. This section explains how to set it. When using Windows Vista 1 Right click the folder to setup and select “Share...”. Troubleshooting 4 2 Click “Network and Sharing Center”. 4-19 3 Under “Public folder sharing”, select “Turn on sharing to anyone with network access can open, change, and create file”. Then click “Apply”. When the “User Account Control” dialog box appears, type an administrator password or provide confirmation. NOTE (When you log on as an administrator) (When you log on as a standard user) 4 When the “Password protected sharing” is “On”, select “Turn off password protected sharing”. Then click “Apply”. 4-20 NOTE When the “User Account Control” dialog box appears, type an administrator password or provide confirmation. 5 Close the “Network and Sharing Center” dialog box. 6 Select “Everyone (All users in this list)” from the list, and click “Add”. Troubleshooting 4 7 Change the “Permission Level” to “Co-owner”. 8 Click “Share”. 9 Click “Done”. 4-21 hen using Windows XP Professional/Windows 2000 W (Advanced settings) 1 Right-click a folder to be shared, and select “Properties”. 2 After you click the “Sharing” tab, click “Share this folder”. If the window on Windows XP Professional is different from this one, refer to the next section “ When using Windows XP Professional (Simple settings)”. 4-22 3 Enter an optional shared name in “Share name”. 4 Click the [Permissions] button. Troubleshooting 4 5 Check “Allow” for “Full Control” of the user account you permit. 4-23 6 Click the [OK] button. 7 Click the [OK] button again and complete setting. 4-24 When using Windows XP Professional (Simple settings) 1 2 Right-click a folder to be shared, and select “Properties”. After you click the “Sharing” tab, click “If you understand the security risks…”. 4 Troubleshooting 3 Select “Just enable file sharing” and click the [OK] button. 4-25 4 5 After you check “Share this folder on the network”, enter an optional share name in “Share name”. Then, also check “Allow network users to change my files”. Click the [OK] button and complete setting. NOTE The setting window vary depending on other operating systems, however, the setting contents are same. Set in the same methods. 4-26 Chapter 5 Appendix Main Specifications............................................................................. 5-2 Main Specifications Basic specifications Client operating system • WindowsVista Ultimate • WindowsVista Ultimate 64-bit edition • WindowsVista Enterprise • WindowsVista Enterprise 64-bit edition • WindowsVista Business • WindowsVista Business 64-bit edition • WindowsVista Home Premium • WindowsVista Home Premium 64-bit edition • WindowsVista Home Basic • WindowsVista Home Basic 64-bit edition • Windows Server 2003 *1 • Windows XP Professional • Windows XP Home Edition • Windows 2000 Professional *2 • Windows NT Workstation 4.0 (SP6a or later)*3 • Windows Me • Windows 98 Second Edition (SE) • Windows * Not support “Terminal Service”, “Remote Desktop”, “MetaFrame”, and some other functions. *1 Only printer function is available in Windows Server 2003. *2 Compatible with Windows 2000 Professional Service Pack 4 or later. *3 Compatible with Windows NT Workstation 4.0 Service Pack 6a or later. TIFF Viewer is required separately. Client PC PC/AT compatible machine System requirements (Minimum PC operating environment) CPU Interface Ethernet 10Base-T, 100Base-TX Network protocol TCP/IP, UDP/IP Compatible browser Internet Explorer 5.0.1 or later, or Netscape 7.1 5-2 Main Specifications : based on the operating environment recommended for the above operating systems. Memory : based on the operating environment recommended for the above operating systems Hard disk : 40 MB or more (free disk space required, depending on usage) Internet Fax SMTP, POP3 Document size A3, B4, A4 Max resolution 600 × 600 dpi (equivalent) Encoding method MIME/Base64 Image coding method MH, MR, MMR, JBIG Standard ITU-T T.37 Grayscale 256 levels E-mail/Fax mixed broadcast Available Transmission reservation 1,000 jobs (including fax and Internet fax) Broadcast transmission Available Attached data format TIFF, PDF 5 Appendix E-mail communication protocol PC-FAX Document size A3, B4, A4 Max resolution 600 × 600 dpi (equivalent) Image coding method MH, MR, MMR, JBIG Communication mode Super G3 & G3 Transmission speed Max. 33.6 Kbps Grayscale 128 levels Broadcast transmission Available Transmission reservation 1,000 jobs (including fax and Internet fax) Cover page transmission Available F-Code transmission Available Receiving routing User ID, Fax, E-mail, Shared folder Address book registration Max. 2,000 destinations Network scanner Document size A3, B4, A4, A4 Max resolution 600 × 600 dpi (max) Grayscale 256 levels Data format User : TIFF E-mail : TIFF/PDF Shared folder : TIFF/PDF Scanning speed Approx. 1 sec. (A4, 200 × 200 dpi) , B5, B5 , A5, A5 Zoom ratio ADF and FBS: 50 to 400%, RADF: 50 to 200 % Density 5 levels TWAIN standard Compliant Main Specifications 5-3 Network printer Paper size * For details, refer to the MFP User's Guide. Bypass tray: • A3, A4, A4 , A5, A5 , B4, B5, B5 , Postcard, F4 (210 mm × 330 mm), 8K (270 mm × 390 mm), 16K (195 mm × 270 mm), 16K (270 mm × 195 mm), Letter, Letter , Legal, 11 × 17, H.Ltr, H.Ltr , Executive, Executive , COM10, Monarch, DL, Envelope1 (90 mm × 205 mm), Envelope2 (240 mm × 332 mm) • Custom paper Paper width: 90 to 297 mm Paper length: 140 to 432mm Paper cassette: A3, A4, A4 , A5, A5 , B4, B5, B5 , F4 (210 mm × 330 mm), 8K (270 mm × 390 mm), 16K (195 mm × 270 mm), 16K (270 mm × 195 mm), Letter, Letter 17, H.Ltr, H.Ltr , Executive, Executive , Legal, 11 × Recording resolution 600 dpi Printer language GDI method Continuous print speed MFX-2200, MFX-2225: 22 sheets/min. MFX-2320, MFX-2325: 23 sheets/min. MFX-2700, MFX-2720, MFX-2725: 27 sheets/min. (Using A4 in 1st paper cassette) Warm-up time 15 sec. or less (at a room temperature of 20ºC) Print copies Max. 999 Sort Available Device Management Device information management MFP information, Device information Transmission/Reception history Fax, E-mail Job cancel Fax, Print Address information settings MFP address book (Speed dial), OB address book Received fax forwarding User ID, Fax number, E-mail address, Shared folder Registration settings E-mail document, Cover page Default settings Document deletion, Preview type, Download type, Document storage period, Processing deadline Environment settings Network settings, E-mail environment, Remote connection 5-4 Main Specifications 4 © Murata Machinery, Ltd. 2006 DA4-92110-60