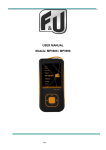
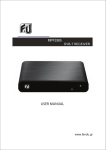
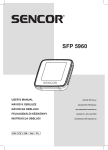
1
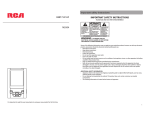
User Manual the player. Remark: the player support video formats of .amv. Resolution should Remark: Earphone should connect to player as an antenna. Otherwise ● Basic Operation be 128x128. Please use video converting tool in gift CD to convert the the player can not receive channels. In main menu interface, press video to which this player support (reference to point 5). 3.6 3.3 In Main interface, press press to select option, button to enter. press Menu / OK button to show Record In Main interface, press time interface. select Music menu, then press record or pause. Local folder: short press Menu / OK Stop: long press Menu / OK to save button to select music file Last / next: short press button to save file and turn off the or Support MPEG-4 (AMV) format video Support FM Radio Lyric display synchronously or to 3.7 Voice In Main interface, press Multi EQ modes and repeat modes press Volume: short press V to enter into volume status, then interface. short press Support txt E-book reading Multi-Languages OSD menu 2. Player Layout Last / next: short press Last / next: short press to display last or next picture. the same folder. Volume: short press V to enter into volume status, then Photo file list: in photo display interface, press Set EQ: please get to Settings > Music to set EQ. short press folder/file list. Press or 3.5 Set Play/Repeat mode: please get to Settings > Music to In Main interface, press to FM Radio reference to point 3.8.5) button to display it. to select FM Radio menu, then press to enter FM radio 3.8 TEXT In Main interface, press to select Text menu, then to enter E-book file list. of .mp3, .wma, .wav, .flac, .ape. Manual Scan: short press Press 3.2 to select frequency manually, Long press press Manual support audio formats Video to select Video menu, then to enter video file list. Press to or Auto Browse: Long press scan channels and set the found channels to Preset one by reference to point 3.8.3). one. After auto scan, it’ll get to the first preset channel. Press Save Bookmark:press to select save position, press Menu / OK button ,then press Bookmark add. short press Load Bookmark: short press Menu / OK button, then to select Save then press Menu / OK press Volume: short press V to enter into volume status, then Delete Channel: press Menu / OK button to show options, load. short press short press Text file list: in text browse interface, press to select Delete then press Menu / to select bookmark, press Menu / OK button to Video file list: in playback interface, press Menu / OK OK button. button to get to folder/file list. Press Volume: short press V to enter into volume status, then button to browse it. short press . video file, press Menu / OK button to play it. to select to select Save Channel: press Menu / OK button to show options, button. to adjust volume up or down. press to browse page by page automatically. (Auto Browse setting video. or short by page. to select Auto to get to preset channels one by one. to fast backwards or forwards the Browse: Search then press Menu / OK button. Then the player will to get last or next video. Fast backword / Fast forward: to select E-book file, button to view the text. to browse up or down page Auto Scan: press Menu / OK button to show options, press Last / next: short press or player will auto scan and stop till it find channel. to select return main interface. to get to to select photo file, press press player press pictures one by one automatically. (Auto Browse setting interface. the long press button to turn off or to adjust volume up or down. (reference to 3.8.1) 7.earphone port In the status of power on, long press short the player will display Fast backword / Fast forward: long press 5. Power on/off & play/pause the player; Browse: fast backwards or forwards the voice recording. play or pause the video playing. button to turn on Auto to get to last voice recording or same name as music file (eg. Abcde.mp3) and both files should be in 3. Menu/OK ● Power On / Off or Lyric show: To show the lyric, the lyric file (eg. Abcde.lrc) should be in Play / Pause: short press In the status of power off,long press to next recording. resume normal playback. to 3. Operation instruction to select picture file, play or pause the voice recording.. video file, press Menu / OK button 9. sport clip to view the picture. to set repeat start point A, press In Main interface, press 8. microphone/reset press A-B repeat: press press 6. Next/ fast forward to enter picture list. Press Play / Pause: short press Remark: 4. last / fast backward to select Photo menu, then press to enter voice recording to adjust volume up or down. set Play mode. (reference to 3.8.1) 2. volume+/- Photo In Main interface, press or The third time press Menu / OK button will cancel A-B repeat and Built-in microphone for long time recording 1. USB port to select Voice menu, then fast backwards or forwards the music. again to set repeat end point B. Then player will repeat the segment. Support JPG format picture view button into pedometer interface Exit: exit pedometer interface and into main interface player. File of recorded voice are saved in folder of VOICE 3.4 Fast backword / Fast forward: long press Pedometer: short press Menu / OK file and get to main interface, or long press to to get to last music or next music. Support MP3, WAV, FLAC, APE formats audio to select file, then press Menu / OK button to enter. to to enter music play interface. play or pause the music playing. 1.44 inch TFT screen to enter Pedometer interface. Press Record / Pause: short press to Play / Pause: short press 1. Key features to enter recording interface. Music In Main interface, press Media Player MP5618 / MP5628 to select Pedometer menu, then press to select Record menu, then press 3.1 Pedometer Page 1 of 3 folder/file list. Press or to adjust volume up or down. to get to to select text file, press 3.9 Game In Main interface, press to select Game menu, then press to enter game A. Find the software file Action Tool.exe from folder of Record Volume Upgrade Tool in player. Click it to show below dialog box: Set record volume level. 3.8.3 Text: Auto play SW: interface. Turn on or off for text auto page. Key function: Auto play time: : play or pause Menu Set high or normal record quality. / OK: Change cube Set gap time for text auto page. 3.8.4 FM Radio: direction : move cube left or right Stereo SW Set FM stereo on or off. 3.10 Explorer FM Region B. Set the player to Settings>System>Upgrade, click it show Set FM receiving region. Four options: China, Europe, warning of Firmware upgrade; select Yes and then connect Play / Open file: press Japan, USA. the player to PC using USB cable. (In case if player can’t to select file/folder, press Menu / 3.8.5 Photo: turn on, hold Menu / OK button and connect player to PC OK button to play or open it. If the Auto play SW: using USB cable at the same time, till PC find the player file is not supported by this player, Turn on or off for photo auto scroll. storage.). If connect successful, the dialog box will show it can not play or open. Auto play time: “UsbBoot Set gap time for photo auto scroll. information, then do as below point c. If connection failed, In Main interface, press to select explorer menu, then press Delete to enter explorer. file: in file list, download successfully!” and show flash 3.8.6 Display: the dialog box will show “USB device not found!”, then be a warning, select Yes to delete file, or select No to Backlight Time connect again. cancel deleting. Set the time if no operation on play, the backlight will turn C. After connecting successfully, do as below press to select file then press V button, there will 3.11 Settings In Main interface, press to select Settings menu, then press to enter setting 5.2 Convert Video to AMV format From PC>Program to run AMV Converter as below picture and steps for converting: 2) Select Resolution: 160x128 3) Select original input vido 4)Select saving off. 1) Select firmware. (firmware file is in Lum / Brightness gift CD, named with extension .BIN). Location 5) input target Set the display brightness level. options. Backlight Mode file name 3.8.1 Music: Normal: screen will be semi dark when time’s up; 6) Select quality, Repeat mode Power Save: screen will be all dark when time’s up. ratio and segment. Once: play one music one time. 3.8.7 Power Off Time: Repeat one: repeat current music Set auto power off time. again and again. 7) Click save 2) Click Update. 3.8.8 Language: 1) Click Add 9) Click Convert 8) Click close Folder once: play all music in current folder one time. Set player menu language. 3) Till it finish, After converting, copy the converted video file to the player, Folder repeat: repeat all music in current folder. 3.8.9 System: click Exit then enjoy it through player. All once: play all the music in memory one time. About All repeat: repeat all the music in memory. View the player information of firmware version, date and D. Disconnect the player from PC, start the player again. 6. Accessories: Intro: play the first 10 seconds of each music. memory status. The player will work properly. Earphone 1 piece; USB cable 1 piece; user manual 1 piece; Play mode Upgrade Order: play music in order. Upgrade firmware setting. (Reference to point 4) 5. Video Convert Shuffle: play music in random. Default Set The player support video of AMV format in resolution of EQ Select Set the system to original. 128x128. Please use the software in player to convert the Natural, Rock, Pop, Classic, soft, Jazz, DBB Sport band 1 piece 3.8.10 Exit: to exit settings. video. The AMVConverter supports multi kind of video MS PlayFX Set formats (AVI, RM, RMVB, MPG, MPG4, ASF, DAT, WMV, etc) 3D HeadPhone, Pure Bass 4. Firmware upgrade convert to AMV format. User EQ Set If the player doesn’t work or works sub normally, find the 5.1 AMV Converter Tool Setup firmware upgrade tool and firmware in player to upgrade the Click software Nano_Video_convert.exe in player; then button to confirm and get back. player. Processes as bellow: follow the steps to setup the AMV Converter tool to PC. 3.8.2 Record: Note before updating: a. Don’t upgrade firmware if playing Record Quality properly. b. Backup files to other storage before upgrade. Set EQ by user. Press to select, press Menu / OK Page 2 of 3 7. Notice about recycling Your product is designed and manufactured with high quality materials and components which can be recycled and reused. This symbol means that electrical and electronic equipment, at their end-of-life, should be disposed of separately from your household waste. Please dispose of this equipment at your local community waste collection/recycling centre. In the European Union there are separate collection systems for used electrical and electronic products. Please help us to conserve the environment we live in! 8. Declaration of Conformity This product complies with the requirement of below directives: EMC Directive: 2004 / 108 / EC Low Voltage Directive (LVD): 2006 / 95 / EC ErP Directive: 1275/2008/EC Restriction of Hazardous Substance (RoHS) Directive: 2002/95/EC R&TTE Directive: 1999/5/EC EXCLUSIVE IMPORTER IN GREECE: Amiridis – Savidis S.A. 33, Vas. Olgas Street – P.C. 54641 – Thessaloniki, Greece. Tel: +30 2310-850107, 2310-850108, Fax: +30 2310-867835 45 Posidonos St. – P.C. 18344 – Moschato, Athens, Greece Tel: +30 210 9402064, Fax: +30 210 9402137 www.amiridis-savvidis.gr Page 3 of 3