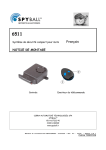
1
6527
6517/16 6512/11
Sistema di sicurezza compatto per moto
Sistema de segurança compacto para motos
Compact motorcycle security system
ΑΝΤΙΚΛΕΠΤΙΚΟ ΣΥΣΤΗΜΑ ΜΟΤΟΣΙΚΛΕΤΑΣ
MANUALE DI UTILIZZO
MANUAL DE USO
USER MANUAL
Ο∆ΗΓΙΕΣ ΓΙΑ ΤΟΝ ΧΡΗΣΤΗ
Centralina
Central
Control unit
Κεντρική µονάδα
Trasmettitore di comando a distanza
Transmissores de comando à distância
Remote control transmitter
Χειριστήριo
DELTA ELETTRONICA SPA
SPYBALL DIVISION
VIA ASTICO 41
21100 VARESE
www.spyball.it
Manuale utente AB6527ITSAB, AB6517-16ITSAB, AB6512-11ITSAB
Italiano / Portoghese / Inglese / Greco
Rev. 00 – 10/04 - Pagina 1 di 24
Codice 06DE1807C
Italiano:
grazie per aver scelto un sistema di sicurezza Spyball. Vi invitiamo a leggere e conservare con
cura il presente manuale di utilizzo.
Sommario
1
Contenuto del kit
2
Inserimento
3
Disinserimento
4
Funzioni protettive
5
Attivazione ‘passiva’ della funzione di immobilizzo motore
6
Disattivazione temporanea del sensore di spostamento
7
Intervento dell’allarme
8
Autoalimentazione (modd. 6527, 6517/16)
9
Spegnimento automatico temporizzato (funzione ‘sleep’)
10 Memoria d’allarme
11 Caratteristiche del telecomando
11.1 Riallineamento dei trasmettitori
11.2 Inizializzazione di nuovi trasmettitori
12 Codice confidenziale di emergenza
13 Regolazione della sensibilità del sensore di spostamento
14 Funzioni selezionabili
14.1 Selezione della funzione di attivazione “passiva” dell’ immobilizzatore
14.2 Selezione dei segnali acustici di inserimento / disinserimento e della funzione “panico”
15 Guida ricerca guasti
1. Contenuto del kit
Il kit comprende
Una centrale
Due trasmettitori di comando a distanza (modd. 6511 e 6516: un trasmettitore)
Un kit accessori di montaggio
Una busta riservata all’utilizzatore contenente il manuale di utilizzo, due cards ‘Codice Confidenziale’ (vedere
paragrafo relativo), uno sticker deterrente Spyball
2. Inserimento
Per attivare il sistema premete una volta il pulsante n. 1 del trasmettitore. L’inserimento è confermato da:
Un lampeggio prolungato degli indicatori di direzione
L’accensione della spia LED
Il LED rimane acceso con luce fissa per circa 60 secondi. Si tratta del cosiddetto periodo di inibizione, del quale il
sistema necessita per stabilizzarsi. Trascorso questo periodo, il LED inizia a lampeggiare, ad indicare che il sistema è
pienamente attivo. Un circuito di sicurezza rende impossibile l’attivazione accidentale del sistema a motore acceso.
3. Disinserimento
Per disattivare il sistema, premete una volta il pulsante n. 1 del trasmettitore (due se è in stato d’allarme). Il
disinserimento è confermato da:
Un lampeggio breve degli indicatori di direzione
Lo spegnimento della spia LED
4. Funzioni protettive
Doppio immobilizzo motore (mod. 6527) / immobilizzo motore (modd. 6517/16, 6512/11) All’inserimento il sistema
immobilizza immediatamente (=senza periodo di inibizione di 60 secondi) la moto, interrompendo due punti vitali / un punto vitale
del suo impianto elettrico. L’avviamento diviene impossibile.
Protezione perimetrica. Il sistema dispone di un ingresso d'allarme negativo istantaneo per pulsanti di massa (non
forniti). Questi possono essere installati, ad esempio, sotto la sella o sul bauletto; in caso di forzatura determinano
l’intervento dell’allarme.
Protezione anti-sollevamento/anti-traino. E' assicurata da un sensore di spostamento di tipo ottico in grado di rilevare
qualsiasi variazione di posizione della moto (brevetto SPYBALL) e segnalarla con l’intervento dell’allarme.
Manuale utente AB6527ITSAB, AB6517-16ITSAB, AB6512-11ITSAB
Italiano / Portoghese / Inglese / Greco
Rev. 00 – 10/04 - Pagina 2 di 24
Codice 06DE1807C
Protezione blocchetto di accensione. A sistema inserito un circuito rileva i tentativi non autorizzati di accendere il
quadro, provocando l’intervento dell’allarme.
Attivazione “passiva” della funzione di immobilizzo motore
L'immobilizzo del motore è fondamentale per la sicurezza del veicolo.
La sua attivazione può pertanto essere resa automatica ('passiva'). Per selezionare o escludere questa funzione,
procedete come descritto al paragrafo 14.1. Se la funzione è attiva, anche quando non inserite il sistema volontariamente
tramite il radiocomando (per dimenticanza, ad esempio), il doppio immobilizzatore si aziona comunque circa 60 secondi
dopo lo spegnimento del quadro. Una volta di ritorno alla moto, all'accensione del quadro, il lampeggio veloce del LED ed
una serie di segnali sonori Vi ricorderanno che il motore è immobilizzato. Per disattivare i circuiti di immobilizzo e
permettere l'avviamento, lasciate la chiave di accensione in posizione ON e premete il pulsante n. 1 del trasmettitore.
Il disinserimento è confermato dallo spegnimento del LED e dall’arresto dei segnali acustici.
ATTENZIONE: per ragioni di sicurezza, se l'accensione del quadro non è seguita dal disinserimento dell’immobilizzatore,
dopo un minuto il sistema completo si inserirà automaticamente entrando in allarme.
6. Disattivazione temporanea del sensore di spostamento
Il sistema può essere inserito senza attivare il sensore di spostamento.
Ciò può rivelarsi utile in diverse occasioni, laddove serve protezione antifurto ma la moto può essere soggetta a
movimento (ad esempio durante un trasporto in traghetto, oppure in caso di stazionamento al bordo di una strada dove il
passaggio di mezzi pesanti potrebbe causare falsi allarmi, ecc.).
Procedura:
Premete il pulsante n. 1 di un trasmettitore per inserire il sistema;
Prima che si spengano gli indicatori di direzione, premete il pulsante n. 2;
Un segnale acustico confermerà che il sensore è stato disattivato.
La soppressione è valida per un solo periodo di inserimento; il funzionamento del sensore è automaticamente ripristinato
all'inserimento seguente.
7. Intervento dell'allarme
Qualsiasi irregolarità registrata:
dal circuito di rilevazione perimetrica (es. l'apertura della sella protetta da un pulsante di massa)
dal sensore di spostamento (es. un tentativo di traino della moto)
dal circuito di protezione del blocchetto di accensione (es. un tentativo di forzare il blocchetto)
provoca l'intervento di un ciclo di allarme di 30 secondi (o una serie di segnali acustici durante i 60 secondi iniziali di
inibizione – funzione “check control”).
L'allarme è dato da una sirena piezoelettrica 118dB incorporata nel dispositivo (allarme sonoro) e dal lampeggio degli
indicatori di direzione (allarme ottico).
All'arresto il sistema di allarme si riposiziona in stato 'inserito'.
Durante la fase di allarme, bisognerà premere due volte il pulsante n. 1 per disattivare il sistema, una volta soltanto per
arrestare la sirena e il lampeggio senza disattivarlo.
Allo scopo di ridurre al minimo il disturbo ambientale, il numero di cicli d'allarme è limitato a 10/ingresso d’allarme per
periodo di inserimento.
8. Autoalimentazione (modd. 6527, 6517/16)
Questi due modelli sono 'autoalimentati', cioè dotati di batterie interne al Ni-MH ricaricabili con la marcia della moto.
In caso di interruzione dell'alimentazione normale (ad esempio, taglio dei cavi della batteria della moto), la batteria
interna permette al sistema (se inserito) di intervenire segnalando il sabotaggio.
Quando l’alimentazione viene ripristinata, il sistema si ripresenta nel medesimo stato (inserito / disinserito) in cui si
trovava prima dell’interruzione.
9. Spegnimento automatico temporizzato (funzione 'sleep')
Sebbene il consumo di corrente dei sistemi Spyball sia estremamente basso, un'altra speciale funzione è stata prevista
allo scopo di proteggere ulteriormente la batteria della Vostra moto: il dispositivo si spegne automaticamente, riducendo
il suo consumo di corrente a pressochè zero, dopo 1 giorno di inutilizzo del motociclo ad allarme disinserito o 21 giorni ad
allarme inserito. Solo l'immobilizzatore, se inserito, rimane attivo.
Quando è in condizione 'sleep', il sistema di allarme non risponde al radiocomando in quanto anche il ricevitore risulta
spento.
Manuale utente AB6527ITSAB, AB6517-16ITSAB, AB6512-11ITSAB
Italiano / Portoghese / Inglese / Greco
Rev. 00 – 10/04 - Pagina 3 di 24
Codice 06DE1807C
Per ripristinare le normali funzioni del dispositivo, mantenete premuto il pulsante n. 1 del radiocomando ed accendete il
quadro.
10. Memoria d’allarme
Se il sistema è entrato in allarme durante la Vostra assenza, al disinserimento ne sarete allertati da segnali acustici
differenziati a seconda della natura dell’effrazione che ha provocato l’intervento:
a) 1 segnale acustico = manipolazione del blocchetto d’accensione, accesso non autorizzato ad un’area protetta da
pulsanti di massa, interruzione dell’alimentazione
b) 2 segnali acustici = sollevamento o traino della moto
c) 3 segnali acustici = a + b
Il segnale rimane memorizzato fino alla fine del tempo di inibizione (60 secondi) che segue l’inserimento successivo.
11. Caratteristiche del telecomando radio
Questi sistemi di sicurezza sono protetti contro l'uso di 'scanners' e di dispositivi in grado di registrare e riprodurre il
codice del trasmettitore ('grabbers'). Infatti il codice del trasmettitore varia ogni volta che il sistema viene
inserito/disinserito grazie ad un esclusivo sistema di avanzamento 'random' denominato 'Ghost Code'.
Il trasmettitore radio è identificato dal codice 8712 (da utilizzare per l’acquisto di eventuali ricambi). Ha due tasti con
funzioni differenziate e una spia LED che lampeggia durante la trasmissione.
E’ alimentato da una batteria al Litio CR 2032 da 3V.
La frequenza dei lampeggi del LED si riduce quando la batteria è prossima ad esaurirsi. In tal caso, sostituite la pila
esausta e smaltitela servendoVi degli appositi contenitori. Nota: per garantire un buon contatto, estraete la pila nuova
dalla confezione e inseritela nel trasmettitore senza toccarla con le dita (manipolatela con un panno morbido).
11.1. Riallineamento dei trasmettitori
Questa operazione si rende necessaria qualora un trasmettitore già ‘appreso’ dal Vostro sistema di allarme si
desincronizzi rispetto al ricevitore.
Questo può accadere, ad esempio, se il trasmettitore viene azionato ripetutamente fuori dalla portata del ricevitore.
Premere il pulsante n. 1 del radiocomando per un secondo, poi rilasciare;
Premerlo ancora e mantenerlo premuto per circa 10 secondi;
Il trasmettitore e il ricevitore si riallineano;
L'allarme commuta (inserendosi o disinserendosi).
11.2 Inizializzazione di nuovi trasmettitori
In caso di smarrimento o guasto, un nuovo trasmettitore o due nuovi trasmettitori può/possono essere inizializzato/i
come segue:
Disinserite il sistema (allarme ed immobilizzatore) tramite il trasmettitore restante (se disponibile) oppure
inserendo il Vostro Codice Confidenziale di disinserimento di emergenza
Accendete il quadro, poi spegnetelo e attendete circa 20 secondi: il LED sul cruscotto si illumina per circa 2 secondi
Mentre il LED è illuminato, riaccendete il quadro: il LED si spegne e l’allarme emette un segnale acustico
Da ora avete a disposizione 6 secondi (*) per premere in sequenza i pulsanti n. 1 di entrambi i trasmettitori: il
sistema emette un segnale acustico per confermare il successo dell’operazione di inizializzazione
Spegnere il quadro
(*) Una volta trascorsi i 6 secondi a Vostra disposizione, il sistema emette un segnale acustico per avvisarVi che il periodo
di inizializzazione è terminato
Importante:
1.
Per ragioni di sicurezza il sistema può accettare al massimo due radiocomandi.
2.
Ogni procedura di inizializzazione disabilita i trasmettitori precedentemente ‘appresi’ dal ricevitore. Se avete
smarrito un trasmettitore e desiderate inizializzarne uno di ricambio non dimenticate dunque di inizializzare
nuovamente anche quello in Vostro possesso o quest'ultimo risulterà inutilizzabile. Se invece non intendete
inizializzare un nuovo trasmettitore, ri-inizializzate quello in Vostro possesso: così facendo metterete fuori uso
quello che avete smarrito.
12. Codice Confidenziale d'emergenza
In caso di smarrimento o guasto del radiocomando, il sistema può essere disattivato attraverso la procedura sotto
descritta, utilizzando il Codice Confidenziale riportato sulle cards nella busta riservata all'utilizzatore.
Manuale utente AB6527ITSAB, AB6517-16ITSAB, AB6512-11ITSAB
Italiano / Portoghese / Inglese / Greco
Rev. 00 – 10/04 - Pagina 4 di 24
Codice 06DE1807C
Allarme completo inserito
1. Accendere il quadro.
Il sistema entra in allarme.
Attendere 30 secondi.
L'allarme si arresta. Il LED si spegne, poi inizia a lampeggiare lentamente.
3. Lasciare il quadro acceso fino ad ottenere un numero di lampeggi corrispondente alla prima cifra del codice
confidenziale, poi spegnerlo (se, ad esempio, la prima cifra del Vostro codice è 3, spegnere il quadro dopo 3 lampeggi).
Il led si spegne.
4. Entro 3 secondi, riaccendere il quadro e mantenerlo acceso fino ad ottenere un numero di lampeggi del LED
corrispondente alla seconda cifra del codice confidenziale, poi spegnerlo (se, ad esempio, la seconda cifra del Vostro
codice è 2, spegnere il quadro dopo 2 lampeggi).
Se le prime due cifre composte vengono riconosciute, il LED emette una serie di brevi lampeggi; si può avanzare e
comporre le cifre restanti del codice confidenziale utilizzando la medesima procedura. In caso di errore, si avrà un
ciclo d'allarme di 30 secondi all'arresto del quale si potrà riavviare la procedura (a partire dall'operazione n. 3).
UNA VOLTA COMPOSTE CORRETTAMENTE TUTTE LE CIFRE, IL SISTEMA SI DISINSERISCE. IL
DISINSERIMENTO E' CONFERMATO DAL LAMPEGGIO DEGLI INDICATORI DI DIREZIONE.
Solo blocco motore inserito
1. Accendere il quadro.
Il LED lampeggia velocemente e la sirena emette segnali acustici per indicare che il blocco motore è attivo. Dopo un
minuto segue un ciclo d’allarme. Al termine, il LED si spegne, poi inizia a lampeggiare lentamente.
2. Seguire la procedura descritta nel paragrafo precedente, iniziando dalla posizione 3.
2.
13. Regolazione della sensibilità del sensore di spostamento
Il sensore di spostamento può avere 8 diversi livelli di sensibilità, che vengono selezionati attraverso il trasmettitore.
Questi 8 livelli si dividono in due categorie principali : sensibilità ALTA (principalmente intesa per le moto), sensibilità
BASSA (principalmente intesa per gli scooter). All’interno di ogni categoria sono possibili 4 diversi settaggi.
Per regolare la sensibilità, procedere come segue:
Premere il pulsante n. 1 di un trasmettitore per attivare la centrale
Dopo che si sono spenti gli indicatori di direzione, accendere il quadro ed attendere circa 15 secondi: il LED si spegne
per un paio di secondi
Durante questo periodo di tempo premere il pulsante n. 1 del trasmettitore per selezionare la categoria “sensibilità
ALTA”, oppure premere il pulsante n. 2 per selezionare la categoria “sensibilità BASSA”: il dispositivo emette un
segnale acustico se era tarato sulla sensibilità bassa, tre segnali acustici se era tarato sulla sensibilità alta (nota:
questa segnalazione acustica ha lo scopo di permettere all’utilizzatore di verificare come era stato settato il
dispositivo precedentemente).
A questo punto il LED inizia a lampeggiare con 4 frequenze diverse in successione: PIU’ VELOCE E’ IL LAMPEGGIO, PIU’
ALTA E’ LA SENSIBILITA’ (NOTA: il punto di partenza è il livello di sensibilità sul quale il sistema era precedentemente
settato).
Spegnere il quadro in corrispondenza del livello di sensibilità che si desidera selezionare: il dispositivo emette un
segnale acustico e gli indicatori di direzione lampeggiano per confermare il successo dell’operazione.
14. Funzioni selezionabili
14.1 – Selezione della funzione di attivazione “passiva” dell’ immobilizzatore
(questa funzione è attiva all’origine)
Per abilitare la funzione di attivazione “passiva”:
Inserite il sistema > gli indicatori di direzione lampeggiano e il LED si illumina.
Prima che si spengano gli indicatori di direzione, accendete il quadro e attendete il bip che conferma l’entrata in
procedura di selezione, quindi premete il pulsante 1 di un trasmettitore > il sistema emette un segnale acustico
Spegnete il quadro
Per disabilitare la funzione di attivazione “passiva”:
Inserite il sistema > gli indicatori di direzione lampeggiano e il LED si illumina
Prima che si spengano gli indicatori di direzione, accendete il quadro e attendete il bip che conferma l’entrata in
procedura di selezione (ma NON premete il pulsante 1), quindi spegnetelo
Manuale utente AB6527ITSAB, AB6517-16ITSAB, AB6512-11ITSAB
Italiano / Portoghese / Inglese / Greco
Rev. 00 – 10/04 - Pagina 5 di 24
Codice 06DE1807C
ATTENZIONE:
QUESTA
OPERAZIONE
DISABILITA
ANCHE
I
SEGNALI
ACUSTICI
DI
INSERIMENTO/DISINSERIMENTO E LA FUNZIONE “PANICO”. SE DESIDERATE QUESTE FUNZIONI, NON
DIMENTICATE DI RIPRISTINARLE PREMENDO IL PULSANTE 2 PRIMA DI SPEGNERE IL QUADRO (V. 14.2).
14.2 – Selezione dei segnali acustici di inserimento / disinserimento e della funzione “panico”
(queste funzioni sono disabilitate all’origine)
Se abilitate, queste funzioni consentono di :
ottenere la conferma acustica dell’inserimento e del disinserimento accanto a quella ottica: 2 segnali> allarme ON, un
segnale > allarme OFF;
provocare volontariamente l’intervento dell’allarme premendo il pulsante n. 2. L’allarme panico dura 10 secondi ma può
essere arrestato prima premendo il pulsante n. 1.
Per abilitare le funzioni di segnalazione acustica on/off e “panico”:
Inserite il sistema > gli indicatori di direzione lampeggiano e il LED si illumina
Prima che si spengano gli indicatori di direzione, accendete il quadro e attendete il bip che conferma l’entrata in
procedura di selezione, quindi premete il pulsante 2 di un trasmettitore > il sistema emette due segnali acustici
Spegnete il quadro
Per disabilitare le funzioni di segnalazione acustica on/off e “panico”:
Inserite il sistema > gli indicatori di direzione lampeggiano e il LED si illumina
Prima che si spengano gli indicatori di direzione, accendete il quadro e attendete il bip che conferma l’entrata in
procedura di selezione (ma NON premete il pulsante 2), quindi spegnetelo
ATTENZIONE: QUESTA OPERAZIONE DISABILITA ANCHE LA FUNZIONE DI INSERIMENTO “PASSIVO”
DELL’IMMOBILIZZATORE. SE DESIDERATE QUESTA FUNZIONE, NON DIMENTICATE DI RIPRISTINARLA
PREMENDO IL PULSANTE 1 PRIMA DI SPEGNERE IL QUADRO (V. 14.1).
15. Guida ricerca guasti
Problema
Verifiche/operazioni suggerite
L’allarme non risponde al trasmettitore
-
L’allarme / immobilizzatore è
disinserito, ma la moto non parte
-
Il sistema non va in allarme per
spostamento / sollevamento
-
Verificate che il sistema non sia entrato in condizione sleep (v.
paragrafo 9)
Avvicinate il trasmettitore alla centralina (l’area potrebbe essere
interessata da interferenze che disturbano il segnale radio)
Sostituite la batteria del trasmettitore
Riallineate i trasmettitori (v. paragrafo 11.1)
Se nessuna delle operazioni ha esito positivo, contattate un centro
assistenza Spyball
Verificate che la moto sia in folle
Verificate che l’interruttore RUN/OFF sia in posizione RUN
Verificate che il fusibile principale dell’accensione della moto sia
integro
Verificate che la batteria della moto sia carica
Alcuni modelli di moto si avviano soltanto con il cavalletto laterale
sollevato, oppure con la leva della frizione tirata
Se nessuna delle operazioni ha esito positivo, contattate un centro
assistenza Spyball
E’ trascorso il tempo di inibizione?
Il sensore di spostamento è attivato (non escluso)?
Regolate il sensore di spostamento (v. paragrafo 13)
Se nessuna delle operazioni ha esito positivo, contattate un centro
assistenza Spyball
Manuale utente AB6527ITSAB, AB6517-16ITSAB, AB6512-11ITSAB
Italiano / Portoghese / Inglese / Greco
Rev. 00 – 10/04 - Pagina 6 di 24
Codice 06DE1807C
RACCOMANDAZIONE !
Anche se è disegnato per essere resistente all’ingresso di acqua,
questo dispositivo elettronico può essere seriamente danneggiato dal
lavaggio ad alta pressione. Non dirigete mai il getto verso la centrale
e proteggetela per evitare infiltrazioni.
Illustrazioni, descrizioni e caratteristiche sono fornite solo a titolo indicativo. Il fabbricante si riserva il diritto di
modificarle senza preavviso. Si declina qualsiasi responsabilità per malfunzionamenti/danni imputabili ad installazione o
utilizzo non conformi alle specifiche fornite.
PORTUGUES:
obrigado por ter escolhido um sistema de segurança Spyball. Recomendamos ler e conservar
com cuidado o presente manual de uso.
Sumário
1
Conteúdo do kit
2
Ligação
3
Desactivação
4
Funções de protecção
5
Activação ‘passiva’ da função de imobilização do motor
6
Desactivação temporária do sensor de deslocação
7
Intervenção do alarme
8
Auto-alimentação (6527, 6517/16)
9
Desligação automática temporizada (função ‘sleep’)
10 Memória de alarme
11 Características do comando via rádio
11.1 Novo alinhamento dos transmissores
11.2 Inicialização de novos transmissores
12 Código confidencial de emergência
13 Regulação da sensibilidade do sensor de deslocação
14
14.1
14.2
15
Funções seleccionáveis
Selecção da função de activação “passiva” do imobilizador
Selecção dos sinais acústicos de ligação / desactivação e da função “pânico”
Guia procura de avarias
1. Conteúdo do kit
O kit compreende
Uma central
Dois transmissores de comando à distância (6511 / 6516: 1 transmissor)
Um kit acessórios de montagem
Um saco destinado ao utilizador contendo o manual de uso, dois cartões ‘Código Confidencial’ (ver parágrafo relativo),
um adesivo Spyball
2. Ligação
Para activar o sistema premer uma vez o botão n. 1 do transmissor. A activação é confirmada por:
Um intermitência prolongado dos pisca-piscas
A ignição da sinal LED
O LED permanece aceso com luz fixa durante cerca 60 segundos. Trata-se do chamado período de inibição, do qual o
sistema necessita para se estabilizar. Passado este período, o LED começa a piscar, para indicar que o sistema é
completamente activo. Um circuito de segurança torna impossível a activação acidental do sistema com o motor aceso.
3. Desactivação
Para desactivar o sistema, premer uma vez o botão n. 1 do transmissor (duas vezes se estiver em estado de alarme). A
desactivação é confirmada por:
Manuale utente AB6527ITSAB, AB6517-16ITSAB, AB6512-11ITSAB
Italiano / Portoghese / Inglese / Greco
Rev. 00 – 10/04 - Pagina 7 di 24
Codice 06DE1807C
-
Um intermitência breve dos pisca-piscas
sinal LED apaga-se.
4. Funções de protecção
Imobilização dupla do motor (6527) / Imobilização do motor (6517/16, 6512/11). Quando se liga o sistema
imobiliza imediatamente (=sem período de inibição de 60 segundos) a moto. É impossível arrancar o motor.
Protecção perimétrica. O sistema dispõe de uma entrada de alarme negativo instantâneo para botões de massa (não
fornecidos). Estes botões podem ser instalados, por exemplo, debaixo do assento ou no porta-objectos; no caso de
violação provocam a activação do alarme.
Protecção anti-levantamento/anti-reboque. É garantida por um sensor de deslocação de tipo óptico capaz de detectar
qualquer variação de posição da moto (patente SPYBALL) sinalizando-a com a activação do alarme.
Protecção fechadura de ignição. Quando o sistema está ligado um circuito detecta as tentativas não autorizadas de
acender o quadro, provocando a activação do alarme.
5. Activação “passiva” da função de imobilização dupla do motor
A imobilização do motor é fundamental para a segurança do veículo.
Portanto tornou-se a sua activação automática ('passiva'). Ou seja: embora não ligar o sistema voluntariamente através do
comando via rádio (por esquecimento, por exemplo), o duplo imobilizador acciona-se automaticamente cerca de 60
segundos depois de se ter desligado o quadro. Depois que se volta para a moto, quando se liga o quadro, a intermitência
rápida do LED e uma série de sinais sonoros advertem que o motor está imobilizado. Para desactivar os circuitos de
imobilização e consentir o arranque, deixar a chave de ignição na posição ON e premer o botão n. 1 do transmissor.
A desactivação é confirmada quando o LED se apaga e os sinais acústicos param.
ATENÇÃO: por motivos de segurança, se a ignição do quadro não for seguida pela desactivação do imobilizador, depois de
um minuto o sistema completo liga-se automaticamente entrando em alarme.
6. Desactivação temporária do sensor de deslocação
O sistema pode ser ligado sem activar o sensor de deslocação.
Isto pode revelar-se útil em várias ocasiões, onde sirva a protecção contra roubo mas a moto pode estar sujeita a
movimento (por exemplo durante um transporte de barco, ou no caso de estacionamento na beira de uma estrada onde a
passagem de veículos pesados pode causar falsos alarmes, etc.).
Procedimento:
Premer o botão n. 1 de um transmissor para ligar o sistema;
Antes que os pisca-piscas se apaguem, premer o botão n. 2;
Um sinal acústico confirmará que o sensor foi desactivado.
A supressão é válida só por um período de ligação; o funcionamento do sensor é automaticamente restabelecido durante a
ligação seguinte.
7. Intervenção do alarme
Qualquer irregularidade registada:
pelo circuito de detecção perimétrica (ex. a abertura do assento protegida por um botão de massa)
pelo sensor de deslocação (ex. uma tentativa de reboque da moto)
pelo circuito de protecção da fechadura de ignição (ex. uma tentativa de forçar a fechadura)
provoca a intervenção de um ciclo de alarme de 30 segundos (ou uma série de sinais acústicos durante os 60 segundos
iniciais de inibição – função “check control”).
O alarme é dado por uma sirena piezo eléctrica 118 dB incorporada no dispositivo (alarme sonoro) e pela intermitência dos
pisca-piscas (alarme óptico).
Depois de parar, o sistema de alarme coloca-se novamente no estado de "ligado".
Durante a fase de alarme, é preciso premer duas vezes o botão n. 1 para desactivar o sistema, ou apenas uma vez parar a
sirena e a intermitência sem o desactivar.
Com o fim de reduzir ao mínimo o disturbo ambiental, o número de ciclos de alarme é limitado a 10/entrada de alarme por
período de ligação.
8. Auto-alimentação (6527, 6517/16)
Este modelo é 'auto-alimentado', ou seja, é dotado de baterias internas de Ni-MH recarregáveis a través da marcha da
moto.
No caso de interrupção da alimentação normal (por exemplo, corte dos cabos da bateria da moto), a bateria interna
consente ao sistema (se estiver activado) intervir sinalizando a violação.
Manuale utente AB6527ITSAB, AB6517-16ITSAB, AB6512-11ITSAB
Italiano / Portoghese / Inglese / Greco
Rev. 00 – 10/04 - Pagina 8 di 24
Codice 06DE1807C
Quando a alimentação for restabelecida, o sistema apresenta-se no mesmo estado (ligado / desligado) no qual se
encontrava antes da interrupção.
9. Desligação automática temporizada (função 'sleep')
Embora o consumo de corrente deste sistema seja extremamente baixo, uma outra especial função foi prevista com o fim
de proteger ulteriormente a bateria da Sua moto: o dispositivo apaga-se automaticamente, reduzindo o consumo de
corrente praticamente a zero, depois de 1 dia em que não se usa o motociclo com o alarme desligado ou 21 dias com o
alarme ligado. Somente o imobilizador, se estiver activado, permanece activo.
Quando se encontra na condição 'sleep', o sistema de alarme não responde ao comando via rádio porque também o
receptor resulta apagado.
Para restabelecer as normais funções do dispositivo, manter premido o botão n. 1 do comando via rádio e ligar o quadro.
10. Memória de alarme
Se o sistema entrou em alarme durante a Sua ausência, quando for desactivado provocará alguns sinais acústicos
diferenciados segundo a natureza da violação que provocou a activação do alarme:
1 sinal acústico = manipulação da fechadura de ignição, acesso não autorizado a uma área protegida por botões de
massa, interrupção da alimentação
2 sinais acústicos = levantamento ou reboque da moto
3 sinais acústicos = a + b
O sinal permanece memorizado até ao fim do tempo de inibição (60 segundos) que segue a activação sucessivo.
11. Características do comando via rádio
Este sistema de segurança está protegido contra o uso de 'scanners' e de dispositivos capazes de registar e reproduzir o
código do transmissor ('grabbers'). De facto o código do transmissor varia todas as vezes que se liga/desliga o sistema
graças a um exclusivo sistema de avançamento 'random' chamado 'Ghost Code'.
A referência do transmissor é 8712 (para ser mencionado quando encomendar peças).
O transmissor possui dois comandos com funções diferentes e um LED que pisca durante a transmissão.
É alimentado por uma bateria de Lítio V, tipo CR2032.
A frequência com que a luz do painel de aviso pisca diminui quando a bateria está a descarregar. Substitua a bateria e
coloque em local de recolha apropriado.
11.1. Novo alinhamento dos transmissores
Esta operação torna-se necessária no caso em que um transmissor já ‘ensinado' pelo Seu sistema de alarme se
dessincronize com respeito ao receptor.
Premer o botão n. 1 do comando via rádio por um segundo.
Premer novamente, mantendo-o premido por cerca de 10 segundos;
transmissor e o receptor alinham-se novamente;
alarme comuta (quando se liga/desliga).
11.2 Inicialização de novos transmissores
O sistema é originariamente fornecido com dois transmissores. No caso de extravio ou de avaria, um novo transmissor ou
dois novos transmissores pode ser inicializados do seguinte modo:
Desligar o sistema (alarme e imobilizador) através do outro transmissor (se disponível) ou introduzindo o Seu Código
Confidencial de desactivação de emergência
Ligar o quadro e depois desligar e aguardar cerca de 20 segundos: o LED no tablier acende-se por cerca de 2
segundos
Enquanto o LED estiver aceso, ligar novamente o quadro: o LED apaga-se e o alarme emite um sinal acústico
A partir deste momento tem-se à disposição 6 segundos (*) para premer em sequência os botões n. 1 dos dois
transmissores: o sistema emite um sinal acústico para confirmar o sucesso desta operação de inicialização
Desligar o quadro
(*) Depois de terem passado os 6 segundos à Sua disposição, o sistema emite um sinal acústico para o avisar que o período
de inicialização acabou
Importante:
1.
Por motivos de segurança o sistema pode aceitar ao máximo dois comandos via rádio.
2. Cada procedimento de inicialização desactiva os transmissores precedentemente ‘aprendidos' pelo receptor. No caso
em que se tenha perdido um transmissor e se deseja inicializar um outro sobresselente não esquecer de inicializar
novamente também aquele em Seu possesso, caso contrário o mesmo resultará inutilizável. No caso em que não se
-
Manuale utente AB6527ITSAB, AB6517-16ITSAB, AB6512-11ITSAB
Italiano / Portoghese / Inglese / Greco
Rev. 00 – 10/04 - Pagina 9 di 24
Codice 06DE1807C
deseje inicializar um novo transmissor, ri-inicialize aquele em Seu possesso: assim fazendo torna inutilizável aquele
que foi extraviado.
12. Código Confidencial de emergência
Em caso de extravio ou avaria do comando via rádio, o sistema pode ser desactivado através do seguinte procedimento,
utilizando o Código Confidencial que consta nos cartões contidos no envelope destinado ao usuário.
Alarme completo ligado
1. Acender o quadro.
O sistema entra em alarme.
2.
Aguardar 30 segundos.
3.
Deixar o quadro aceso até se obter um número de intermitências correspondente ao primeiro algarismo do código
confidencial, depois apagá-lo (se, por exemplo, o primeiro algarismo do Seu código é 3, desligar o quadro depois de 3
intermitências).
O alarme pára. O LED apaga-se e depois começa a piscar lentamente.
O led apaga-se.
Dentro de 3 segundos, acender o quadro e mantê-lo aceso até se obter um número de intermitências do LED
correspondente ao segundo algarismo do código confidencial, depois apagá-lo (se, por exemplo, o segundo algarismo
do Seu código é 2, desligar o quadro depois de 2 intermitências).
Se os primeiras dois algarismos compostos forem reconhecidos, o LED emite uma série de breves intermitências;
pode-se continuar a compor os restantes algarismos do código confidencial utilizando o mesmo procedimento. No caso
de erro, verifica-se um ciclo de alarme de 30 segundos no fim do qual se poderá recomeçar o procedimento (a partir
da operação n. 3).
DEPOIS DE SE TEREM COMPOSTO CORRECTAMENTE TODOS OS ALGARISMOS, O SISTEMA EXCLUI-SE. A
DESACTIVAÇÃO É CONFIRMADA PELA INTERMITÊNCIA DOS PISCA-PISCAS.
Apenas bloqueio motor ligado
1. Acender o quadro.
O LED acende-se com intermitência rápida e a sirena emite sinais acústicos para indicar que o bloqueio motor está
activo. Depois de um minuto segue um ciclo de alarme. No final, o LED apaga-se e depois começa a piscar lentamente.
2. Seguir o procedimento descrito no parágrafo precedente, iniciando da posição 3.
4.
13. Regulação da sensibilidade do sensor de deslocação
O sensor de deslocação do dispositivo pode ter 8 níveis diferentes de sensibilidade, que podem ser seleccionados através do
transmissor. Estes 8 níveis dividem-se em duas categorias principais: sensibilidade ALTA (principalmente concebida para as
moto), sensibilidade BAIXA (principalmente concebida para os scooters). Dentro de cada categoria é possível efectuar 4 set ups
diferentes.
Para regular a sensibilidade, proceder como segue:
Premer o botão n. 1 de um transmissor para activar a central
Depois que os pisca-piscas se apagaram, acender o quadro e aguardar cerca de 15 segundos: o LED apaga-se por cerca
de dois segundos
Durante este período de tempo premer o botão n. 1 do transmissor para seleccionar a categoria “sensibilidade
ALTA”, ou premer o botão n. 2 para seleccionar a categoria “sensibilidade BAIXA”: o dispositivo emite um sinal
acústico se estava regulado na sensibilidade baixa, três sinais acústicos se estava regulado na sensibilidade alta
(nota: esta sinalização acústica tem a função de consentir ao usuário verificar como estava regulado o dispositivo
precedentemente).
A este ponto o LED começa a piscar com 4 frequências diversas em sucessão: QUANTO MAIS RÁPIDA É A
INTERMITÊNCIA, MAIS ELEVADA É A SENSIBILIDADE (NOTA: o ponto de partida é o nível de sensibilidade no qual o
sistema estava precedentemente regulado).
Desligar o quadro em correspondência do nível de sensibilidade que si deseja seleccionar: o dispositivo emite um sinal
acústico e os pisca-piscas piscam para confirmar o sucesso desta operação.
14. Funções seleccionáveis
14.1 – Selecção da função de activação “passiva” do imobilizador
Para habilitar a função de activação “passiva”:
Ligar o sistema : os pisca-piscas piscam e o LED acende-se
Manuale utente AB6527ITSAB, AB6517-16ITSAB, AB6512-11ITSAB
Italiano / Portoghese / Inglese / Greco
Rev. 00 – 10/04 - Pagina 10 di 24
Codice 06DE1807C
-
Antes que os pisca-piscas se apaguem, ligar o quadro e aguarde sinal auditivo confirmando o inicio do procedimento de
selecção.
Premer o botão 1 de um transmissor: o sistema emite um sinal acústico
Desligar o quadro
Para desactivar a função de activação “passiva”:
Ligar o sistema: os pisca-piscas piscam e o LED acende-se
Antes que os pisca-piscas se apaguem, ligar o quadro e aguarde sinal auditivo confirmando o inicio do procedimento de
selecção (mas NÃO premer o botão 1), e depois desligar
ATENÇÃO: ESTA OPERAÇÃO DESACTIVA TAMBÉM OS SINAIS ACÚSTICOS DE LIGAÇÃO/DESACTIVAÇÃO E A FUNÇÃO
“PÂNICO”. SE SE DESEJA ESTAS FUNÇÕES, NÃO ESQUECER DE RESTABELECÊ-LAS pressionando o botão 2 antes de
desligar a ignição (vêr parágrafo 14.2).
14.2 – Selecção dos sinais acústicos de ligação / desactivação e da função “pânico”
Se estiverem desactivadas, estas funções consentem:
obter a confirmação acústica da ligação e da desactivação juntamente com aquela óptica: 2 sinais = alarme ON, um sinal =
alarme OFF;
provocar voluntariamente a activação do alarme premendo o botão n. 2. O alarme pânico dura 10 segundos mas pode ser
parado antes premendo o botão n. 1.
Para habilitar as funções de sinalização acústica on/off e “pânico”:
Ligar o sistema: os pisca-piscas piscam e o LED acende-se
-
Antes que os pisca-piscas se apaguem, ligar o quadro e aguarde sinal auditivo confirmando o inicio do procedimento de
selecção.
Premer o botão 2 de um transmissor: o sistema emite dois sinais acústicos
Desligar o quadro
Para desactivar as funções de sinalização acústica on/off e “pânico”:
Ligar o sistema: os pisca-piscas piscam e o LED acende-se
Antes que os pisca-piscas se apaguem, ligar o quadro e aguarde sinal auditivo confirmando o inicio do procedimento de
selecçãoo (mas NÃO premer o botão 2), e depois desligar
ATENÇÃO: ESTA OPERAÇÃO DESACTIVA TAMBÉM A FUNÇÃO DE LIGAÇÃO “PASSIVO” DO IMOBILIZADOR. SE SE
DESEJA ESTA FUNÇÃO, NÃO ESQUECER DE A RESTABELECER pressionando o botão 1 antes de desligar a ignição (vêr
parágrafo 14.1).
15. Guia procura de avarias
Problema
O alarme não responde ao transmissor
O alarme / imobilizador está desligado,
mas a moto não parte
Verificações/operações sugeridas
Verificar que o sistema não tenha entrado na condição sleep (v.
parágrafo 9)
Aproximar o transmissor à central (a área pode estar interessada
por interferências que disturbam o sinal rádio)
Substituir a bateria do transmissor
Alinhar novamente os transmissores (v. parágrafo 11.1)
No caso em que nenhuma destas operações tenha êxito positivo,
contactar um centro assistência Spyball
Verificar que a moto esteja em ponto morto
Verificar que o interruptor RUN/OFF esteja na posição RUN
Verificar que o fusível principal da ignição da moto esteja íntegro
Verificar que a bateria da moto esteja carregada
Alguns modelos de moto partem somente se o cavalete lateral estiver
levantado, ou com a alavanca da embraiagem puxada
O sistema não activa o alarme por
deslocação / levantamento
-
No caso em que nenhuma destas operações tenha êxito positivo,
contactar um centro assistência Spyball
É passado o tempo de inibição?
O sensor de deslocação está activado (não excluído)?
Regular o sensor de deslocação (v. parágrafo 13)
No caso em que nenhuma destas operações tenha êxito positivo,
contactar um centro assistência Spyball
Manuale utente AB6527ITSAB, AB6517-16ITSAB, AB6512-11ITSAB
Italiano / Portoghese / Inglese / Greco
Rev. 00 – 10/04 - Pagina 11 di 24
Codice 06DE1807C
MUITO IMPORTANTE !
Embora tenha sido desenhado para resistir à entrada de água,
este dispositivo electrónico pode ser seriamente danificado pela
lavagem a alta pressão. Nunca dirija o jacto de água para a
central e proteja-a para evitar infiltrações.
Ilustrações, descrições e características são fornecidas apenas a título indicativo. O fabricante reserva o direito de
efectuar modificações sem aviso prévio. Declina-se qualquer responsabilidade por mau funcionamento /danos atribuíveis a
instalação ou uso não conformes às instruções fornecidas.
English:
thank you for choosing a Spyball security system. We recommend that you read this manual and
keep it in a safe place.
Table of contents
1
Contents of the kit
2
Arming
3
Disarming
4
Protection functions
5
‘Passive’ arming of the engine immobiliser
6
Temporary disabling of the movement sensor
7
Alarm cycle
8
Self-powering and status memory
9
Automatic timed switch-off function ('sleep' function)
10 Alarm memory and diagnostics
11 Features of the radio remote control
11.1 Re-alignment of transmitters
11.2 Programming of spare transmitters
12 Emergency disarming Confidential Code
13 Adjusting the sensitivity of the movement sensor
14 Selectable functions
14.1 Setting/unsetting the function of ‘passive’ arming of the immobiliser
14.2 Setting/unsetting the audible signals of arming/disarming and the “panic” function
15 Troubleshooting guide
1. Contents of the kit
The kit includes:
A control unit
Two remote control transmitters (6511 and 6516: one transmitter)
A set of fitting accessories
A user information pack, including the manual, two ‘Confidential Code’ cards (see paragraph), a Spyball warning
sticker
2. Arming
To arm the system, press push-button n. 1 of the radio transmitter once.
Arming is confirmed by:
A long flash of the turn indicators
The lighting up of the warning light (LED)
The LED remains constantly lit for approximately 60 seconds. This time period is the arming time required by the alarm.
Once this time has elapsed, the warning light begins to flash indicating that the alarm is now fully set.
A safety circuit makes arming impossible whilst the vehicle ignition or auxiliary circuit is active.
Manuale utente AB6527ITSAB, AB6517-16ITSAB, AB6512-11ITSAB
Italiano / Portoghese / Inglese / Greco
Rev. 00 – 10/04 - Pagina 12 di 24
Codice 06DE1807C
3. Disarming
To disarm the system, press push-button n. 1 of the radio transmitter once (twice if in alarm condition).
Disarming is confirmed by:
A short flash of the turn indicators.
The extinguishment of the LED.
4. Protection functions
Dual engine immobilisation (6527) / engine immobilisation (6517/16, 6512/11). Arming the system causes the
immediate activation of the engine immobiliser (no 60-sec. arming time). This function prevents the motorbike from
being driven under its own power by an unauthorised person.
Peripheral protection. The system has a negative instantaneous alarm trigger input for contact switches (not supplied).
These can be fitted to the seat or the topcase. Any attempt to gain access to the protected area will trigger the alarm.
Movement detection. It is ensured by a revolutionary sensor (SPYBALL® patent) which triggers the alarm when a
change in the motorbike position is detected.
Ignition lock tamper protection. A special circuit detects any unauthorised attempts to turn ignition on whilst the
system is armed.
5. 'Passive' arming of the engine immobiliser
The function of engine immobilisation is vital to the security of a vehicle. Therefore its activation can be made automatic
('passive'). See paragraph 14.1. If the passive mode is selected, the motorcycle engine is always immobilised
automatically about 60 seconds after you have turned the ignition off, even in the event that you forget to set the
system via the radio transmitter.
Upon return to your bike, as soon as you turn the ignition ON, the quick flashing of the LED and audible signals will
remind you that the engine is immobilised. At this stage, to disarm the immobiliser and be able to start the motorbike,
keep the ignition key ON and press push-button n. 1 of the radio transmitter. Disarming is confirmed by the
extinguishment of the LED and the stop of the audible signals.
IMPORTANT: for security reasons, if turning the ignition ON is not followed by disarming the immobiliser, after one
minute the complete system passively sets and starts to sound.
6. Temporary disabling of the movement sensor
The system can be armed without activating the movement sensor.
This facility may be useful when anti-theft protection is required but the bike may be subject to movement (for example
on a ferry or in the event that the bike is parked beside a road where the passage of heavy vehicles might trigger the
alarm).
Procedure:
Press push-button n. 1 of a transmitter to arm;
Before the turn indicators extinguish, press push-button n. 2;
An audible signal will confirm the sensor has been de-activated.
The cancellation is temporary, that is valid for an arming period only. The function of movement detection is reinstated
upon the subsequent arming.
7. Alarm cycle
Any irregularity being detected
by the peripheral detection circuit (e.g. lifting a seat protected by a contact switch)
by the movement sensor (e.g. an attempt to tow the motorbike away);
by the ignition lock tamper protection circuit (e.g. an attempt to force the lock)
generates an alarm cycle of 30 secs (or causes the system to bleep during the 60-sec. arming time – ‘check control’
function).
The alarm condition is signalled by the 118dB piezoelectric siren which is integrated in the device (sound warning) as well
as by the flashing of the turn indicators (visual warning).
After that the device automatically returns to the set condition.
During the alarm condition pressing the remote control once will simply silence the siren and stop the indicators, leaving
the system armed and ready to detect further irregularities. In order to disarm the system it is necessary to press the
push-button twice.
In order to minimise environmental disturbance, the alarm cycles in an activation period are limited to a maximum of
10/sensor trigger input.
8. Self-powering (6527, 6517/16)
Manuale utente AB6527ITSAB, AB6517-16ITSAB, AB6512-11ITSAB
Italiano / Portoghese / Inglese / Greco
Rev. 00 – 10/04 - Pagina 13 di 24
Codice 06DE1807C
These models are ‘self-powered’, i.e. equipped with back-up batteries that recharge with the motorcycle’s run. In the
event that the normal power supply to the armed system is cut (e.g. disconnection of the motorcycle battery terminals)
the back-up battery allows the system to signal the sabotage.
When the supply is reinstated, the system sets to the same status (on/off) as it was before the interruption.
9. Automatic timed switch-off function ('sleep' function)
The current consumption rates of this alarm system are extremely low.
Nevertheless another special facility has been implemented in order to protect the battery of your motorcycle:
The device switches off automatically after the motorbike has been stationary for 1 day with the alarm system in
disarmed status or 21 days with the alarm system in armed status. Only the engine immobiliser remains active. The
current consumption rate drops to nearly zero. While in 'sleep' condition, the alarm system does not respond to the radio
transmitter, because the receiver is also OFF. To reinstate the normal functions of the device, keep push-button n. 1
pressed and turn the motorcycle ignition ON.
10. Alarm memory and diagnostics
If the alarm has been triggered in your absence, upon disarming you will be warned by different audible signals
depending on the nature of the alarm cause:
a) 1 bleep = tampering with the ignition lock, unauthorized access to the area protected by the contact switch, cut of
power supply
b) 2 bleeps = lifting or towing the bike
c) 3 bleeps = a + b
The warning signal will remain stored until the end of the arming period (60 secs) following the subsequent arming.
11. Features of the radio remote control
The remote control set of this security system is protected against the use of devices called 'scanners' and 'grabbers'
which can record and reproduce the transmitter code.
In fact the transmitter code changes every time the alarm is turned on/off thanks to an advanced method of random
encryption ('Ghost Code').
The part number of the transmitter is 8712 (to be quoted when ordering spares). It has two buttons with different
functions and a LED that flashes during transmission.
It is powered by a 3V Lithium battery type CR2032.
The flashing frequency of the LED decreases as the battery is going flat. Replace it and dispose of it at the appropriate
collection points. To ensure good contact, take the new battery out of its package and place it into the transmitter
without touching it (use a soft cloth to manipulate it).
11.1 Re-alignment of transmitters
This operation is necessary in the event that a remote transmitter already 'learnt' by your alarm system has got
desynchronised from the receiver. This may happen, for example, if the transmitter is pressed repeatedly outside the
receiver operating range.
Press push-button n. 1 of the remote transmitter one second, then release it;
Press it again and hold it down about 10 seconds;
The transmitter and receiver get re-aligned;
The alarm system switches on or off.
11.2 Programming of spare transmitters
The alarm system is originally supplied with two radio transmitters.
In case of loss or failure, one or two new transmitters can be initialised as follows:
Disarm the system (alarm and immobiliser) via the remaining transmitter (if any) or by entering your personal
emergency disarming Confidential Code
Turn the ignition ON, then turn it OFF and wait about 20 secs: the dashboard LED illuminates for about 2 secs
While the LED is illuminated turn the ignition ON again: the LED extinguishes and the alarm bleeps once
You now have 6 secs at your disposal (*) to press the number 1 push-buttons of the two transmitters in turn: the
system bleeps to confirm the success of the initialisation operations
Turn the ignition OFF
(*) Once the 6 secs at your disposal have elapsed, the system bleeps to warn you that the initialisation period is over.
Remarks:
1)
For security reasons, every system can accept a maximum of two remote transmitters.
Manuale utente AB6527ITSAB, AB6517-16ITSAB, AB6512-11ITSAB
Italiano / Portoghese / Inglese / Greco
Rev. 00 – 10/04 - Pagina 14 di 24
Codice 06DE1807C
2)
Every initialisation procedure disables the transmitters which the receiver had previously 'learnt'. Therefore:
if you have lost a transmitter and you wish to initialise a spare one, do not forget to initialise also the one which
has remained in your possession (or it will stop working). If you do not wish to initialise a spare one, re-initialise
the transmitter which has remained in your hands: so doing you will disable the one you have lost.
12. Emergency disarming Confidential Code
In case of loss or failure of the radio transmitter, the security system can be disarmed via the following emergency
procedure, using the Confidential Code which is printed on the cards in the user information pack.
If the complete system is armed.
1. Turn the ignition on.
The alarm will begin to sound.
2. Wait 30 seconds.
The alarm will stop. The LED will start to flash.
Count the number of flashes. As soon soon as the number of flashes equals the first digit of your secret code,
turn the ignition OFF. (For example, if the first digit of your code is 3, then wait for the LED to flash 3 times
before turning the ignition OFF).
The LED will go out.
4. Three seconds later, turn the ignition ON again. Count the number of flashes. As soon as the number of flashes
equals the second digit of your secret code, turn the ignition OFF (for example, if the second digit of your code is 2,
then wait for the LED to flash 2 times before turning the ignition OFF).
If the first two digits are recognized, the LED will give some quick flashes and you will be allowed to go on and enter
the remaining digits using the same procedure.
In case of error, a 30-sec. alarm cycle will follow. After that you will be able to repeat the procedure (starting from
pos. 3).
ONCE ALL THE DIGITS HAVE BEEN ENTERED PROPERLY, THE SYSTEM WILL DISARM ITSELF. THIS WILL BE
CONFIRMED BY THE FLASHING OF THE TURN INDICATORS.
If only the engine immobiliser is armed:
1. Turn the ignition ON.
The LED flashes quickly and the siren bleeps to indicate that the immobiliser is active.
After one minute, an alarm cycle follows. At the end, the LED stops, then it begins to flash slowly.
2. Follow the same procedure as described in the previous paragraph, starting from pos. 3.
3.
13. Adjusting the sensitivity of the movement detector:
The movement sensor in this security system has 8 different levels of sensitivity, which can be set via the radio
transmitter. These 8 levels fall into 2 main categories: HIGH sensitivity (basically intended for motorcycles), LOW
sensitivity (basically intended for scooters); within each group 4 different settings are possible.
To adjust sensitivity, operate as follows:
Press push-button n. 1 of a transmitter to arm the unit
After the turn indicators have extinguished, turn the ignition key ON and wait about 15 secs: the LED extinguishes
for a couple of seconds
During this time period press push-button n. 1 of the transmitter to select the HIGH sensitivity category, or pushbutton n. 2 to select the LOW sensitivity category: the unit will bleep once if it was previously set to low sensitivity
or three times if it was set to high sensitivity (Remark: this is meant to give you the opportunity to check how the
system was set)
At this stage the LED will start cycling through 4 different flashing frequencies: THE QUICKER THE FLASHING, THE
HIGHER THE SENSITIVITY. (Remark: the starting point is the sensitivity level the system was previously set to).
Turn the ignition OFF when you come to the sensitivity level you wish to select: the unit bleeps once and the turn
indicators flash to confirm the success of the operation.
14.Selectable functions
14.1 Setting/unsetting the function of ‘passive’ arming of the immobiliser
(this function is on when the unit is delivered)
To set the function of ‘passive’ arming:
Arm the system > The turn indicators will flash and the LED illuminate
Before the turn indicators switch off, turn the ignition on and wait for the audible signal confirming that you have
entered the selecting procedure, then press push-button n. 1 of either transmitter > the system will bleep
Manuale utente AB6527ITSAB, AB6517-16ITSAB, AB6512-11ITSAB
Italiano / Portoghese / Inglese / Greco
Rev. 00 – 10/04 - Pagina 15 di 24
Codice 06DE1807C
Turn the ignition off.
To unset the function of ‘passive’ arming :
Arm the system > The turn indicators will flash and the LED illuminate
Before the turn indicators switch off, turn the ignition on and wait for the audible signal confirming that you have
entered the selecting procedure (but DO NOT PRESS push-button n. 1), then turn it off
REMARK: THIS OPERATION DEACTIVATES ALSO THE AUDIBLE SIGNALS OF ARMING/DISARMING AND THE
‘PANIC’ FUNCTION. If you wish these functions, do not forget to reinstate them by pressing push-button 2 before you
turn the ignition off (see paragraph 14.2).
14.2 Setting/unsetting the audible signals of arming/disarming and the ‘panic’ function
(these functions are off when the unit is delivered)
If activated, these functions will allow:
To get an audible confirmation of arming/disarming beside the visual one: 2 bleeps > alarm on; 1 bleep > alarm off;
To deliberately release an alarm cycle by pressing button n. 2. The ‘panic’ alarm lasts 10 secs but it can be stopped
earlier by pressing push-button n. 1.
To activate the audible on/off signals and the ‘panic’ function:
Arm the system > the turn indicators will flash and the LED illuminate
Before the turn indicators switch off, turn the ignition on and wait for the audible signal confirming that you have
entered the selecting procedure, then press push-button n. 2 of either transmitter > the system will bleep twice.
Turn the ignition off
To deactivate the audible on/off signals and the ‘panic’ function:
Arm the system > the turn indicators will flash and the LED illuminate
Before the turn indicators switch off, turn the ignition on and wait for the audible signal confirming that you have
entered the selecting procedure (but DO NOT PRESS push-button n. 2), then turn it off
REMARK: THIS OPERATION DEACTIVATES ALSO THE FUNCTION OF ‘PASSIVE’ ARMING OF THE IMMOBILISER
If you wish this function, do not forget to reinstate it by pressing push-button 1 before you turn the ignition off (see
paragraph 14.1).
15. Troubleshooting guide
Problem
Recommended inspections/actions
The alarm does not respond to the
transmitter
-
The alarm/immobiliser is disarmed, but
the motorcycle will not not start
The system is not triggered by
moving/lifting the bike
The system might be in sleep mode (see paragraph 9)
Operate the transmitter closer to the unit (the area might be affected by
noises interfering with the radio signal)
Replace the transmitter battery
Re-align the transmitters (see paragraph 11.1)
If none of these operations has a positive issue, consult a Spyball dealer
-
Is the motorcycle in neutral gear?
Is the kill switch in the RUN position?
Make sure that the main ignition fuse in the motorcycle is intact
Make sure that the motorcycle battery is charged
Some models will only start with the side stand up or the clutch lever pulled
in
If none of these operations has a positive issue, consult a Spyball dealer
-
Has the arming time elapsed?
Is the movement sensor active (not disabled)?
Adjust the movement sensor (see paragraph 13)
If none of these operations has a positive issue, consult a Spyball dealer
-
WARNING!
Manuale utente AB6527ITSAB, AB6517-16ITSAB, AB6512-11ITSAB
Italiano / Portoghese / Inglese / Greco
Rev. 00 – 10/04 - Pagina 16 di 24
Codice 06DE1807C
Although designed to be resistant to water ingress, this
electronic equipment might be damaged by steam cleaning / high
pressure washing.Never direct the jet at the unit and protect
it to prevent water infiltration.
Diagrams, descriptions and features are only indicative. The manufacturer reserves the right to modify them without
notice. The manufacturer will not be responsible for malfunctions/damages resulting from the negligence of the the
supplied installation and operation instructions.
Ελληνικά:
Ευχαριστούµε που επιλέξατε ένα αντικλεπτικό SPYBALL για την ασφάλεια της µοτοσικλέτας σας.
Προτείνουµε να µελετήσετε προσεκτικά αυτό το εγχειρίδιο και να το φυλάξετε σ’ ένα ασφαλές µέρος.
ΠΕΡΙΕΧΟΜΕΝΑ
1
Περιεχόµενο της συσκευασίας
2
Οπλισµός
3
Αφοπλισµός
4
Λειτουργίες προστασίας
5
Παθητικός οπλισµός διακοπής του κινητήρα ( immobiliser)
6
Προσωρινή απενεργοποίηση του αισθητήρα κραδασµού ( µπίλια)
7
Κύκλος συναγερµού
8
Αυτοτροφοδοσία, µνήµη συναγερµού
9
Λειτουργία αυτόµατου χρονοδιακόπτη ( κατάσταση ‘sleep’)
10 Μνήµη συναγερµού και διάγνωση.
11 Προδιαγραφές του χειριστηρίου.
11.1 Επαναπρογραµµατισµός χειριστηρίου
11.2 Προγραµµατισµός νέου χειριστηρίου
12 Αφοπλισµός έκτακτης ανάγκης µέσω προσωπικού κωδικού
13 Ρύθµιση ευαισθησίας του αισθητήρα κραδασµού
14 Επιλεγόµενες λειτουργίες
15 Οδηγός επίλυσης προβληµάτων
1. Περιεχόµενα της συσκευασίας
Η συσκευασία του συναγερµού περιλαµβάνει:
Tην κεντρική µονάδα
∆ύο χειριστήρια (το µοντέλο 6511 διατίθεται µε ένα χειριστήριο)
Σετ µε αξεσουάρ εγκατάστασης (παρελκόµενα)
Πακέτο ενηµέρωσης για τον χρήστη, που περιέχει οδηγίες, δύο κάρτες προσωπικού κωδικού (βλέπε αντίστοιχη
παράγραφο) και ένα αυτοκόλλητο σήµα της SPYBALL.
2. Οπλισµός
Για να οπλίσει το σύστηµα πατήστε το µπουτόν Νο.1 µια φορά.
Ο οπλισµός θα επιβεβαιωθεί από:
Ένα άναµµα –µεγάλης διάρκειας- των φλάς
Το άναµµα του ενδεικτικού LED
To LED παραµένει σταθερά αναµµένο για περίπου 60 δευτερόλεπτα. Αυτός είναι ο χρόνος που χρειάζεται ο συναγερµός για να
οπλίσει. Μετά την πάροδο του χρόνου αυτού, το ενδεικτικό λαµπάκι (LED) αρχίζει να αναβοσβήνει, δείχνοντας έτσι ότι το
σύστηµα έχει οπλίσει.
Ένα κύκλωµα ασφαλείας καθιστά τον οπλισµό αδύνατο όταν ο διακόπτης ανάφλεξης του οχήµατος είναι ανοιχτός.
3. Αφοπλισµός
Manuale utente AB6527ITSAB, AB6517-16ITSAB, AB6512-11ITSAB
Italiano / Portoghese / Inglese / Greco
Rev. 00 – 10/04 - Pagina 17 di 24
Codice 06DE1807C
Για να αφοπλίσει το σύστηµα πατήστε το µπουτόν Νο.1 του χειριστηρίου µία φορά (δύο φορές αν το σύστηµα βρίσκεται σε
κατάσταση συναγερµού –δηλαδή αν ηχεί )
Ο αφοπλισµός θα επιβεβαιωθεί από:
Ένα άναµµα –σύντοµης διάρκειας- των φλάς
Το σβήσιµο του ενδεικτικού LED.
4. Λειτουργίες προστασίας
∆ιπλό µπλοκάρισµα (µοντ. 6527) - µπλοκάρισµα κινητήρα (µοντ. 6511):Με τον οπλισµό του συστήµατος ενεργοποιείται
αµέσως η διακοπή του κινητήρα (χωρίς την καθυστέρηση των 60 δευτερολέπτων). Η λειτουργία αυτή αποτρέπει την οδήγηση
της µοτοσικλέτας αυτόνοµα από µη εξουσιοδοτηµένο άτοµο.
Περιφερειακή προστασία:Το σύστηµα έχει µια είσοδο που διεγείρεται µε στιγµιαία αρνητική εντολή από διακόπτες επαφής(δεν
διατίθονται) που µπορούν να τοποθετηθούν στη σέλα ή την µπαγκαζιέρα .Κάθε απόπειρα πρόσβασης στις προστατευόµενες
περιοχές θα διεγείρει το συναγερµό.
Ανίχνευση κίνησης:Την ανίχνευση οποιασδήποτε κίνησης εξασφαλίζει ο µοναδικός αισθητήρας –µπίλια-(παγκόσµια πατέντα
της SPYBALL) που διεγείρει το συναγερµό αµέσως όταν ανιχνεύσει αλλαγή της θέσης της µοτοσικλέτας.
Προστασία παραβίασης του διακόπτη εκκίνησης:Ένα ειδικό κύκλωµα ανιχνεύει κάθε προσπάθεια παραβίασης του διακόπτη
ανάφλεξης - εκκίνησης, όταν το σύστηµα είναι οπλισµένο.
5. Παθητικός οπλισµός της διακοπής του κινητήρα (immobiliser)
Η λειτουργία της διακοπής του κινητήρα είναι πολύ σηµαντική για την ασφάλεια της µοτοσικλέτας σας .Για τον λόγο αυτό η
ενεργοποίησή της µπορεί να γίνεται αυτόµατα (παθητικά). Αυτό σηµαίνει ότι ο κινητήρας της µοτοσικλέτας πάντοτε θα
µπλοκάρει αυτόµατα σε 60 δευτερόλεπτα µετά το κλείσιµο του διακόπτη, ακόµη και αν ξεχάσετε να ενεργοποιήσετε το σύστηµα
µέσω του χειριστηρίου. (Βλέπε παράγραφο 14.1)
Αφότου επιστρέψετε στη µοτοσικλέτα σας, µόλις ανοίξετε το διακόπτη εκκίνησης, ένα γρήγορο αναβόσβηµα του ενδεικτικού
LED και ηχητικά σήµατα θα σας υπενθυµίσουν ότι ο κινητήρας είναι µπλοκαρισµένος. Κατά τη φάση αυτή, προκειµένου να
απενεργοποιήσετε το παθητικό µπλοκάρισµα (immobiliser) και να εκκινήσετε τη µοτοσικλέτα, αφήστε το διακόπτη ανοιχτό και
πατήστε το µπουτόν Νο 1 του χειριστηρίου. Ο αφοπλισµός θα επιβεβαιωθεί από το σβήσιµο του LED και τη διακοπή των
ηχητικών σηµάτων.
ΠΡΟΣΟΧΗ: Για λόγους ασφαλείας, αν το άνοιγµα του διακόπτη δεν ακολουθήσει ο αφοπλισµός του παθητικού
µπλοκαρίσµατος, µετά από ένα λεπτό θα οπλίσει αυτόµατα όλο το σύστηµα και θα αρχίσει να ηχεί.
6.Προσωρινή απενεργοποίηση του αισθητήρα κραδασµού
Το σύστηµα µπορεί να οπλίσει χωρίς να ενεργοποιηθεί ο αισθητήρας κραδασµού.
Η λειτουργία αυτή µπορεί να είναι χρήσιµη όταν η αντικλεπτική προστασία χρειάζεται, αλλά η µοτοσικλέτα δέχεται κινήσεις
όπως π.χ. µέσα σε πλοίο ή σε περίπτωση που η µοτοσικλέτα έχει παρκάρει δίπλα σε δρόµο υψηλής κυκλοφορίας όπου η
διέλευση µεγάλων οχηµάτων µπορεί να διεγείρει τον συναγερµό.
∆ιαδικασία:
Πατήστε το µπουτόν Νο 1 του χειριστηρίου για να οπλίσετε το σύστηµα
Πριν σβήσουν τα φλας πατήστε το µπουτόν Νο 2
Ένα ηχητικό σήµα θα επιβεβαιώσει την απενεργοποίηση του αισθητήρα κραδασµού.
Η απενεργοποίηση είναι προσωρινή, δηλαδή ισχύει µόνο για ένα κύκλο οπλισµού. Η λειτουργία του αισθητήρα θα
επανέλθει µε τον επόµενο οπλισµό.
7. Κύκλος συναγερµού
Κάθε προσπάθεια παραβίασης που ανιχνεύεται
Από το κύκλωµα περιφερειακής προστασίας (π.χ. προσπάθεια παραβίασης της σέλας-αν αυτή προστατεύεται από διακόπτη
επαφής)
Από τον αισθητήρα κραδασµού (π.χ. προσπάθεια µετακίνησης της µοτοσικλέτας)
Από το κύκλωµα προστασίας του διακόπτη εκκίνησης (π.χ. προσπάθεια παραβίασης της κλειδαριάς)
Γίνετε αιτία ενός συναγερµού 30 δευτερολέπτων (εκτός από το χρόνο οπλισµού των πρώτων 60 δευτερολέπτων όπου το
σύστηµα βρίσκετε σε φάση ελέγχου λειτουργιών- ‘check control’)
Η κατάσταση συναγερµού γίνεται αντιληπτή τόσο από την πιεζοηλεκτρική σειρήνα έντασης 118 db που είναι ενσωµατωµένη στο
σύστηµα, όσο και από το αναβόσβηµα των φλας (οπτικός συναγερµός).
Μετά από αυτό το σύστηµα επανέρχεται σε κατάσταση ετοιµότητας.
Κατά τη διάρκεια του ηχητικού συναγερµού πατώντας το χειριστήριο µια φορά, απλά παύει να ηχεί η σειρήνα και να
αναβοσβήνουν τα φλάς, ενώ το σύστηµα παραµένει οπλισµένο και έτοιµο να ανιχνεύσει καινούργιες προσπάθειες παραβίασης.
Για να αφοπλίσετε το σύστηµα όταν ηχεί είναι απαραίτητο να πατήσετε το χειριστήριο δύο φορές.
Manuale utente AB6527ITSAB, AB6517-16ITSAB, AB6512-11ITSAB
Italiano / Portoghese / Inglese / Greco
Rev. 00 – 10/04 - Pagina 18 di 24
Codice 06DE1807C
Προκειµένου να µειωθεί η περιφερειακή ενόχληση που προκαλείτε από τη διέγερση του συστήµατος συναγερµού, ο κύκλος
ενεργοποίησης που αντιστοιχεί σε κάθε αισθητήρα του συστήµατος έχει περιορισθεί –µε νόµο της E.U.- σε 10 φορές.
8. Αυτοτροφοδοσία και µνήµη συναγερµού.
Το σύστηµα αυτό (ΑΒ/6527) είναι αυτοτροφοδοτούµενο, είναι δηλαδή εξοπλισµένο µε επαναφορτιζόµενες µπαταρίες, οι οποίες
φορτίζουν µε την χρήση της µοτοσικλέτας. Σε περίπτωση που διακοπεί η κανονική τροφοδοσία του συστήµατος από τη
µοτοσικλέτα ( π.χ. αποσύνδεση κάποιου πόλου της µπαταρίας της µοτοσικλέτας ) και εφ’ όσον το σύστηµα είναι οπλισµένο, οι
εσωτερικές του αυτές µπαταρίες του επιτρέπουν να ενεργοποιήσει κανονικά ηχητικό συναγερµό.
Όταν η τροφοδοσία επανέλθει, το σύστηµα επανέρχεται και αυτό στην ίδια κατάσταση που βρισκόταν πριν τη διακοπή.
9. Λειτουργία αυτόµατου χρονοδιακόπτη ('sleep' function)
Η κατανάλωση ρεύµατος στο σύστηµα αυτό είναι εξαιρετικά χαµηλή.
Ποτέ πριν κάποιο άλλο σύστηµα δεν έχει φροντίσει τόσο για την προστασία της µπαταρίας της µοτοσικλέτας σας
Το σύστηµα απενεργοποιείται αυτόµατα µετά από 1 ηµέρα από την ακινητοποίηση της µοτοσικλέτας όταν ο συναγερµός δεν
είναι οπλισµένος, ή µετά από 21 ηµέρες όταν ο συναγερµός είναι οπλισµένος. Μόνο η διακοπή του κινητήρα (immobiliser)
παραµένει ενεργοποιηµένη. Η κατανάλωση του ρεύµατος γίνετε σχεδόν µηδενική. Όταν το σύστηµα βρίσκεται σε αυτή την
κατάσταση, δεν ανταποκρίνεται ούτε στο χειριστήριό του, επειδή και ο δέκτης του είναι επίσης σε κατάσταση OFF. Για να το
επαναφέρεται στην κανονική του λειτουργία, κρατήστε πατηµένο το µπουτόν Νο 1 του χειριστηρίου και ανοίξτε τον κεντρικό
διακόπτη ανάφλεξης της µοτοσικλέτας.
10. Μνήµη συναγερµού και διάγνωση
Αν το σύστηµα συναγερµού ενεργοποιηθεί κατά την απουσία σας, αργότερα, κατά τον αφοπλισµό του, θα ενηµερωθείτε γι’ αυτό
από διαφορετικά ηχητικά σήµατα που θα ακολουθήσουν ανάλογα την αιτία που προκάλεσε το συναγερµό:
a) 1 ηχητικό (µπίπ) = προσπάθεια παραβίασης του διακόπτη ανάφλεξης, παραβίαση περιοχής που προστατεύετε από διακόπτες
επαφής, διακοπή τροφοδοσίας
b) 2 ηχητικά =προσπάθεια µετακίνησης ή ανύψωσης της µοτοσικλέτας
c) 3 ηχητικά = a + b
Η παραπάνω διάγνωση θα παραµείνει αποθηκευµένη µέχρι το τέλος της επόµενης περιόδου οπλισµού του συστήµατος (60
δευτερόλεπτα) που θα ακολουθήσει.
11. Προδιαγραφές του χειριστηρίου (χαρακτηριστικά)
Τόσο ο δέκτης όσο και τα χειριστήρια του αντικλεπτικού αυτού συστήµατος είναι προστατευµένα από τη χρήση συστηµάτων
γνωστών ως 'scanners' και 'grabbers' τα οποία µπορούν να ηχογραφήσουν και να αναπαράγουν τον κωδικό εκποµπής.
Στην πραγµατικότητα ο κωδικός αυτός που εκπέµπουν τα χειριστήρια αλλάζει κάθε φορά που ενεργοποιείτε ή απενεργοποιείτε
το συναγερµό, χάρη σε µία προηγµένη µέθοδο κυλιόµενης κρυπτογράφησης ('Ghost Code').
Το χειριστήριο (κωδικός ανταλλακτικού 8712) έχει δύο µπουτόν µε διαφορετικές λειτουργίες (βλέπε αντίστοιχη εικόνα) και ένα
ενδεικτικό λαµπάκι (LED) που αναβοσβύνει κατά την εκποµπή του σήµατος.
Τροφοδοτείται από µια µπαταρία λιθίου 3 volt τύπου CR 2032.
Η συχνότητα ανάµατος του LED µειώνετε όσο πέφτει η τάση της µπαταρίας.
Αντικαταστήστε την αµέσως όταν αντιληφθείτε το παραπάνω ή µειωθεί η απόσταση τηλεχειρισµού, φροντίζοντας να
τοποθετηθεί η νέα µπαταρία σωστά στα προβλεπόµενα σηµεία επαφής χωρίς να την αγγίξετε µε τα χέρια σας.
Όταν αντικατασταθεί η µπαταρία, η προσωρινή διακοπή της τροφοδοσίας µπορεί να προκαλέσει αποσυγχρονισµό και διακοπή
της λειτουργίας του χειριστηρίου. Αν είναι απαραίτητο εφαρµόσατε τη διαδικασία επαναπρογραµµατισµού που περιγράφετε
παρακάτω. Αφήστε την παλαιά µπαταρία σε κατάλληλο σηµείο περισυλλογής ακαταλλήλων.
11.1 Επαναπρογραµµατισµός χειριστηρίων
Η διαδικασία αυτή είναι απαραίτητη σε περίπτωση όπου κάποιο χειριστήριο που λειτουργεί κανονικά µε τον συναγερµό σας
αποσυγχρονιστεί και πάψει ξαφνικά να λειτουργεί. Αυτό µπορεί να συµβεί για παράδειγµα εξ αιτίας της παραµονής του για
µεγάλο χρονικό διάστηµα χωρίς µπαταρία ή µε κάποια µπαταρία χωρίς φορτίο, όπως επίσης και αν πατηθεί το χειριστήριο
επανειληµµένα εκτός της περιοχής λειτουργίας – ανταπόκρισης του δέκτη (του συναγερµού).
Στην περίπτωση αυτή ακολουθήστε την παρακάτω διαδικασία:
Πατήστε το µπουτόν Νο 1 του χειριστηρίου για ένα δευτερόλεπτο και µετά αφήστε το
Πατήστε το ξανά και κρατήστε το πατηµένο για 15 περίπου δευτερόλεπτα
Ο ποµπός (χειριστήριο) και ο δέκτης του συναγερµού αυτόµατα προγραµµατίζονται
Το σύστηµα ενεργοποιείται ή απενεργοποιείται αντίστοιχα.
11.2Προγραµµατισµός νέων χειριστηρίων
Manuale utente AB6527ITSAB, AB6517-16ITSAB, AB6512-11ITSAB
Italiano / Portoghese / Inglese / Greco
Rev. 00 – 10/04 - Pagina 19 di 24
Codice 06DE1807C
Το σύστηµα συναγερµού σας προσφέρετε από τον κατασκευαστή του µε δύο χειριστήρια.
Σε περίπτωση απώλειας ή βλάβης, ένα ή δύο καινούργια χειριστήρια µπορούν να προγραµµατιστούν ως εξής:
Αφοπλίστε το σύστηµα (συναγερµό και immobiliser) από το δεύτερο χειριστήριο (αν σας έχει αποµείνει) ή µε τη χρήση του
προσωπικού κωδικού έκτακτης ανάγκης (emergency disarming Confidential Code).
Γυρίστε τον κεντρικό διακόπτη ανάφλεξης στη θέση ON, και µετά στη θέση OFF , και περιµένετε περίπου 20
δευτερόλεπτα Το ενδεικτικό LED θα ανάψει για περίπου 2 δευτερόλεπτα.
Ενώ το ενδεικτικό LED είναι αναµµένο γυρίστε πάλι τον διακόπτη στη θέση ON Το LED θα σβήσει και ο συναγερµός
θα δώσει ένα σύντοµο ηχητικό.
Τώρα έχετε 6 δευτερόλεπτα στη διάθεσή σας (*) για να πατήσετε το µπουτόν Νο 1 και των δύο χειριστηρίων, ένα κάθε
φορά, το σύστηµα δίνει ένα σύντοµο ηχητικό για να επιβεβαιώσει την επιτυχία της διαδικασίας.
Γυρίστε το διακόπτη ανάφλεξης στη θέση OFF.
(*) Όταν τα 6 δευτερόλεπτα περάσουν, το σύστηµα δίνει ένα σύντοµο ηχητικό, για να σας ειδοποιήσει µε τον τρόπο αυτό ότι ο
χρόνος προγραµµατισµού έχει τελειώσει.
ΣΗΜΕΙΩΣΗ:
1. Για λόγους ασφαλείας, κάθε σύστηµα µπορεί να δεχθεί µέχρι δύο χειριστήρια.
2. Κάθε διαδικασία προγραµµατισµού ακυρώνει τα προηγούµενα χειριστήρια. Για το λόγο αυτό: αν χάσετε ένα χειριστήριο και
θέλετε να προγραµµατίσετε ένα καινούργιο, µην ξεχάσετε να προγραµµατίσετε επίσης και το άλλο – δεύτερο –χειριστήριο
που σας έχει αποµείνει (γιατί διαφορετικά θα σταµατήσει να λειτουργεί). Αν δεν θέλετε να προγραµµατίσετε ένα
καινούργιο, ξανά-προγραµµατίστε αυτό που σας έχει µείνει, έτσι ώστε να ακυρώσετε αυτό που χάθηκε.
-
12. Προσωπικός κωδικός έκτακτης ανάγκης (χρησιµεύει για τον αφοπλισµό ολόκληρου του συστήµατος ή του immobiliser
σε περίπτωση βλάβης ή απώλειας των χειριστηρίων)
Σε περίπτωση απώλειας ή βλάβης του χειριστηρίου, το σύστηµα συναγερµού µπορεί να απενεργοποιηθεί µε την ακόλουθη
διαδικασία, χρησιµοποιώντας τον προσωπικό σας κωδικό, που υπάρχει τυπωµένος στις κάρτες µέσα στο φάκελο οδηγιών του
χρήστη.
Αν είναι πλήρως οπλισµένο το σύστηµα συναγερµού.
1. Ανοίξτε το γενικό διακόπτη (εκκίνησης) της µοτοσικλέτας.(ON)
Το σύστηµα θα αρχίσει να ηχεί.
2. Περιµένετε περίπου 30 δευτερόλεπτα.
Ο συναγερµός θα σταµατήσει. Το ενδεικτικό LED θα αρχίσει να αναβοσβήνει.
3. Μετρήστε τον αριθµό των αναµµάτων. Όταν ο αριθµός αυτός ταυτισθεί µε το πρώτο νούµερο του προσωπικού σας
κωδικού, κλείστε τον διακόπτη (OFF). Για παράδειγµα, αν το πρώτο ψηφίο του κωδικού σας είναι το 3, τότε θα
πρέπει να περιµένετε να ανάψει το LED 3 φορές πριν κλείσετε τον διακόπτη.
Το LED θα σβήσει.
4. Μέσα σε 3 δευτερόλεπτα, ( ΠΡΟΣΟΧΗ, ΜΗΝ ΞΕΠΕΡΑΣΕΤΕ ΤΟΝ ΧΡΟΝΟ ΑΥΤΟ ) ανοίξτε πάλι τον διακόπτη (ΟΝ).
Το ενδεικτικό LED θα αρχίσει να αναβοσβήνει.
Μετρήστε τον αριθµό των αναµµάτων. Όταν ο αριθµός αυτός ταυτισθεί µε το δεύτερο ψηφίο του προσωπικού σας κωδικού,
κλείστε τον διακόπτη (OFF). Για παράδειγµα, αν το δεύτερο ψηφίο του κωδικού σας είναι το2,τότε θα πρέπει να περιµένετε να
ανάψει το LED 2 φορές πριν κλείσετε τον διακόπτη.
Αν τα δύο πρώτα ψηφία αναγνωρισθούν από το σύστηµα ως σωστά, το LED θα δώσει µερικά γρήγορα ανάµµατα για
επιβεβαίωση και κατόπιν θα επιτρέψει να προχωρήσετε στα επόµενα δύο ψηφία, κάνοντας ακριβώς την ίδια διαδικασία.
Σε περίπτωση λάθους, ένας κύκλος συναγερµού 30 δευτερολέπτων θα ακολουθήσει, και κατόπιν θα πρέπει να επαναλάβετε
την ίδια διαδικασία (ξεκινώντας από τη θέση 3).
ΟΤΑΝ ΟΛΑ ΤΑ ΨΗΦΙΑ ΣΧΗΜΑΤΙΣΘΟΥΝ ΣΩΣΤΑ, ΤΟΤΕ ΤΟ ΣΥΣΤΗΜΑ ΘΑ ΑΦΟΠΛΙΣΘΕΙ ΜΟΝΟ ΤΟΥ. Η ΕΝΕΡΓΕΙΑ
ΑΥΤΗ ΘΑ ΕΠΙΒΕΒΑΙΩΘΕΙ ΑΠΟ ΤΟ ΑΝΑΜΜΑ ΤΩΝ ΦΛΑΣ ΚΑΙ ΤΟ ΗΧΗΤΙΚΟ ΑΦΟΠΛΙΣΜΟΥ.
Αν είναι οπλισµένο µόνο το immobiliser :
1. Ανοίξτε τον γενικό διακόπτη (ΟΝ).
Το LED θα αναβοσβήσει γρήγορα και η σειρήνα θα δώσει ηχητικά σήµατα δείχνοντας έτσι ότι το immobiliser είναι
ενεργοποιηµένο.
Μετά από ένα λεπτό θα ακολουθήσει ένας κύκλος συναγερµού. Στο τέλος, το LED θα σταµατήσει, και µετά θα αρχίσει να
αναβοσβήνει αργά.
2.Ακολουθήστε την ίδια διαδικασία που περιγράφεται στην παραπάνω παράγραφο, αρχίζοντας από την θέση 3.
13. Ρύθµιση ευαισθησίας του αισθητήρα µετακίνησης:
Ο αισθητήρας µετακίνησης (µπίλια) πού υπάρχει µέσα στο σύστηµα συναγερµού έχει 8 διαφορετικά επίπεδα ευαισθησίας, όπου
µπορούν να ρυθµιστούν από το χειριστήριο. Τα 8 αυτά επίπεδα ευαισθησίας χωρίζονται σε 2 µεγάλες κατηγορίες: α) Κατηγορία
Manuale utente AB6527ITSAB, AB6517-16ITSAB, AB6512-11ITSAB
Italiano / Portoghese / Inglese / Greco
Rev. 00 – 10/04 - Pagina 20 di 24
Codice 06DE1807C
ΥΨΗΛΗΣ ευαισθησίας (σχεδιασµένη ειδικά για µοτοσικλέτες),και β) ΧΑΜΗΛΗΣ ευαισθησίας (σχεδιασµένη κυρίως για σκούτερ
και ελαφρές µοτοσικλέτες), όπου µέσα σε κάθε κατηγορία υπάρχουν 4 πιθανές ρυθµίσεις.
Για να ρυθµίσετε την ευαισθησία, ακολουθήστε τα παρακάτω:
Πατήστε το µπουτόν Νο 1 του χειριστηρίου για να οπλίσετε το σύστηµα.
Αµέσως µετά το σβήσιµο των φλας, ανοίξτε το διακόπτη (ΟΝ), και περιµένετε περίπου 15 δευτερόλεπτα Το LED
σβήνει για µερικά (δύο) δευτερόλεπτα.
Μέσα σε αυτό το χρόνο πατήστε το µπουτόν Νο 1 του χειριστηρίου για να επιλέξετε την κατηγορία ΥΨΗΛΗΣ ευαισθησίας,
ή πατήστε το µπουτόν Νο 2, για να επιλέξετε την κατηγορία ΧΑΜΗΛΗΣ ευαισθησίας Η σειρήνα θα ηχήσει µία φορά αν
έχετε επιλέξει την ΧΑΜΗΛΗ ευαισθησία, ή τρεις φοράς αν έχετε επιλέξει ΥΨΗΛΗ ευαισθησία ( Σηµείωση: αυτό σηµαίνει
ότι µπορείτε επίσης να ελέγξετε πως έχει ρυθµιστεί το σύστηµα).
Στη φάση αυτή το ενδεικτικό LED θα αρχίσει να ανάβει µε τέσσερις διαφορετικούς τρόπους – συχνότητες: όσο πιο γρήγορα
ανάβει τόσο πιο µεγάλη ευαισθησία έχει. (Σηµείωση: Το σηµείο εκκίνησης είναι το επίπεδο της ευαισθησίας που είχε
προηγούµενα ρυθµιστεί το σύστηµα).
Κλείστε τον διακόπτη (OFF) όταν επιλέξετε το επίπεδο ευαισθησίας που επιθυµείτε Η σειρήνα θα ηχήσει µια φορά και
τα φλας θα ανάψουν για να επιβεβαιώσουν την επιτυχή διαδικασία.
14. Επιλεγόµενες λειτουργίες:
14.1. Επιλογή της λειτουργίας «παθητική ενεργοποίηση του immobiliser».
Για να ενεργοποιήσετε τον παθητικό (αυτόµατο) οπλισµό του immobiliser:
Ενεργοποιήστε το σύστηµα. Τα φλας και το ενδεικτικό LED θα ανάψουν.
Πριν σβήσουν τα φλας, ανοίξτε το διακόπτη της µοτοσικλέτας και πατήστε το µπουτόν Νο 1 ενός χειριστηρίου . Το
σύστηµα εκπέµπει ένα ηχητικό σήµα.
Κλείστε το διακόπτη.
Για να απενεργοποιήσετε τον παθητικό οπλισµό του immobiliser:
Ενεργοποιήστε το σύστηµα. Τα φλας και το ενδεικτικό LED ανάβουν.
Πριν σβήσουν τα φλας, ανοίξτε το διακόπτη της µοτοσικλέτας (αλλά ΜΗΝ πατήστε το µπουτόν Νο 1 του χειριστηρίου)
και αφήστε τον ανοιχτό µέχρι να σβήσουν τα φλας. Μετά κλείστε το διακόπτη.
ΠΡΟΣΟΧΗ: Η διαδικασία αυτή απενεργοποιεί επίσης και τα ηχητικά σήµατα ενεργοποίησης – απενεργοποίησης του
συστήµατος, όπως επίσης και η λειτουργία του πανικού. Εάν θέλετε αυτές τις λειτουργίες µην ξεχάσετε να τις
επανενεργοποιήσετε πατώντας το µπουτόν Νο 2 πριν κλείσετε το διακόπτη (βλέπε παράγραφο 14.2).
14.2. Επιλογή του ηχητικού σήµατος οπλισµού – αφοπλισµού και της λειτουργίας του «πανικού».
Για να επιβεβαιώσετε τις λειτουργίες αυτές συµβουλευτείτε τα παρακάτω:
Επιτυχής επιβεβαίωση ηχητικού σήµατος οπλισµού – αφοπλισµού συνοδεύει την οπτική ένδειξη ως εξής:
∆ύο (2) ηχητικά σήµατα =ηχητικό σήµα συναγερµού σε λειτουργία.
Ένα (1) ηχητικό σήµα = ηχητικό σήµα συναγερµού εκτός λειτουργίας.
Προξενήστε συναγερµό (πανικό) πατώντας το µπουτόν Νο 2 ενός χειριστηρίου. Η διάρκεια του πανικού είναι δέκα (10)
δευτερόλεπτα, αλλά µπορείτε να διακόψετε το συναγερµό πανικού πατώντας το µπουτόν Νο 1 του χειριστηρίου.
Για να ενεργοποιήσετε τη λειτουργία του ηχητικού σήµατος οπλισµού – αφοπλισµού και του πανικού:
Ενεργοποιήστε το σύστηµα συναγερµού. Τα φλας και το ενδεικτικό LED θα ανάψουν.
Πριν σβήσουν τα φλας, ανοίξτε το διακόπτη της µοτοσικλέτας και πατήστε το µπουτόν Νο 2 ενός χειριστηρίου. Το
σύστηµα εκπέµπει δύο ηχητικά σήµατα.
Κλείστε το διακόπτη.
Για να απενεργοποιήσετε τη λειτουργία του ηχητικού σήµατος οπλισµού – αφοπλισµού και του πανικού:
Ενεργοποιήστε το σύστηµα συναγερµού. Τα φλας και το ενδεικτικό LED θα ανάψουν.
Πριν σβήσουν τα φλας, ανοίξτε το διακόπτη της µοτοσικλέτας (αλλά ΜΗΝ πατήστε το µπουτόν Νο 2 του χειριστηρίου)
και αφήστε τον ανοιχτό µέχρι να σβήσουν τα φλας. Μετά κλείστε το διακόπτη.
ΠΡΟΣΟΧΗ: Η διαδικασία αυτή απενεργοποιεί επίσης και τη λειτουργία του immobiliser. Εάν θέλετε τη λειτουργία αυτή
(immobiliser), µην ξεχάσετε να την επανενεργοποιήσετε πατώντας το µπουτόν Νο 1 πριν κλείσετε το διακόπτη (βλέπε
παράγραφο 14.1).
ΣΗΜΕΙΩΣΗ: Στην περίπτωση που επιθυµείτε την ενεργοποίηση της παθητικής λειτουργίας του immobiliser (παράγραφος
14.1), αλλά ΚΑΙ του ηχητικού σήµατος οπλισµού – αφοπλισµού & της λειτουργίας «πανικού» (παράγραφος 14.2), θα πρέπει να
πατήσετε τα µπουτόν Νο 1 & Νο 2 του χειριστηρίου µέσα στην ίδια περίοδο που ο διακόπτης της µοτοσικλέτας είναι ανοιχτός.
15. Οδηγός επίλυσης προβληµάτων
ΠΡΟΒΛΗΜΑ
ΠΡΟΤΕΙΝΟΜΕΝΟΣ ΕΛΕΓΧΟΣ - ΕΝΕΡΓΕΙΕΣ
Manuale utente AB6527ITSAB, AB6517-16ITSAB, AB6512-11ITSAB
Italiano / Portoghese / Inglese / Greco
Rev. 00 – 10/04 - Pagina 21 di 24
Codice 06DE1807C
Το σύστηµα δεν ανταποκρίνεται στο
χειριστήριο
-
Το σύστηµα
συναγερµού/immobiliser είναι
αφοπλισµένο, αλλά η µοτοσικλέτα
δεν παίρνει εµπρός.
-
Το σύστηµα δεν διεγείρετε µε
κούνηµα/σήκωµα της µοτοσικλέτας
-
Ίσως το σύστηµα να βρίσκετε σε κατάσταση «sleep» (βλέπε παράγραφο 9)
Πλησιάστε το χειριστήριο πιο κοντά στην κεντρική µονάδα (η περιοχή µπορεί να έχει
“ηλεκτρονικό θόρυβο” πράγµα που επηρεάζει το σήµα)
Αλλάξτε την µπαταρία του χειριστηρίου
Ξανά-προγραµµατίστε τα χειριστήρια (βλέπε παράγραφο 11.1)
Αν καµία από τις παραπάνω ενέργειες δεν έχει θετικό αποτέλεσµα, επικοινωνήστε µε
τον τοπικό συνεργάτη SPYBALL
Έχετε βάλει νεκρά στο κιβώτιο ταχυτήτων;
Είναι ο διακόπτης της ανάφλεξης (kill switch) στη θέση «RUN»;
Βεβαιωθείτε ότι η κεντρική ασφάλεια ή η ασφάλεια της ανάφλεξης είναι Ο.Κ.
Βεβαιωθείτε ότι η µπαταρία της µοτοσικλέτας είναι φορτισµένη
Μερικά µοντέλα µοτοσικλετών παίρνουν εµπρός ΜΟΝΟ µε σηκωµένο το πλάγιο στάντ ή
πατηµένο το συµπλέκτη
Αν καµία από τις παραπάνω ενέργειες δεν έχει θετικό αποτέλεσµα, επικοινωνήστε µε
τον τοπικό συνεργάτη SPY BALL
Έχει περάσει ο απαραίτητος χρόνος οπλισµού;
Είναι ενεργοποιηµένος ο αισθητήρας µετακίνησης; (όχι απενεργοποιηµένος)
Ρυθµίστε τον αισθητήρα κίνησης (βλέπε παράγραφο 13)
Αν καµία από τις παραπάνω ενέργειες δεν έχει θετικό αποτέλεσµα, επικοινωνήστε µε
τον τοπικό συνεργάτη SPYBALL
ΠΡΟΣΟΧΗ !
Αν και το σύστηµα είναι από κατασκευής του προστατευµένο από πιθανή
διέλευση νερού, σαν ένα ηλεκτρονικό εξάρτηµα που είναι µπορεί να
προκληθεί πρόβληµα ή ζηµιά από καθάρισµα µε ατµό/πλύσιµο µε υψηλή
πίεση.
Ποτέ µην κατευθύνετε την πίεση απ’ ευθείας στη µονάδα συναγερµού και
προστατέψτε την προλαµβάνοντας τη δίοδο νερού.
∆ιαγράµµατα, περιγραφές και χαρακτηριστικά είναι µόνον ενδεικτικά.Ο κατασκευαστής δεν ευθύνεται για δυσλειτουργίες κινδύνους που προέρχονται από την µη σωστή τήρηση των οδηγιών τοποθέτησης και χρήσης .
DICHIARAZIONE DI CONFORMITÀ - ec DECLARATION OF CONFORMITY
Manuale utente AB6527ITSAB, AB6517-16ITSAB, AB6512-11ITSAB
Italiano / Portoghese / Inglese / Greco
Rev. 00 – 10/04 - Pagina 22 di 24
Codice 06DE1807C
Il sottoscritto rappresentante il seguente costruttore
The undersigned, representing the following manufacturer
Costruttore (o suo Rappresentante Autorizzato):
Manufacturer (or his authorized Representative) : Delta Elettronica S.p.A.
Indirizzo :
Address : Via Astico 41, 2100 Varese (Italy)
dichiara qui di seguito che il prodotto herewith declares that the product
Identificazione del prodotto :
Product identification : RX-DLT 434 M
risulta in conformità a quanto previsto dalla seguente direttiva comunitaria (comprese tutte le modifiche applicabili)
is in conformity with the provisions of the following EC directive(s) (including all applicable amendments)
Riferimento n°
Reference n°
99/5/CE
Titolo :
Title :
Direttiva riguardante le apparecchiature radio e le apparecchiature terminali di telecomunicazione e il reciproco riconoscimento
della loro conformità
Directive on radio equipment and telecommunications terminal equipment and the mutual recognition of their
conformity
e che sono state applicate tutte le norme tecniche sottindicate / and that the standards referenced here below :
Norme armonizzate
Titolo :
Harmonized std.
Title :
95/54/CE
EN 300 220-3: 2000
EN 50371
Direttiva 95/54/CE della Commissione, del 31 ottobre 1995, che adegua al progresso tecnico la direttiva
72/245/CEE del Consiglio concernente il ravvicinamento delle disposizioni legislative degli Stati membri, relative alla
soppressione delle perturbazioni radioelettriche provocate dai motori ad accensione comandata dei veicoli a motore
a che modifica la direttiva 70/156/CEE per quanto riguarda l’omologazione dei veicoli a motore e dei loro rimorchi
Commission Directive 95/54/EC of 31 October 1995 adapting to technical progress Council Directive
72/245/EEC on the approximation of the laws of the Member States relating to the suppression of radio
interference produced by spark-ignition engines fitted to motor vehicles and amending Directive
70/156/EEC on the approximation of the laws of the Member States relating to the type-approval of motor
vehicles and their trailers
Compatibilità elettromagnetica e spettro radio (ERM); apparecchiature per comunicazioni a corto raggio (SRD);
apparati radio operanti nella banda di frequenza da 25 MHz a 1000 MHz con livelli di potenza fino a 500 mW. Parte
3: Norma europea armonizzata relativa ai requisiti essenziali di cui all’articolo 3.2 della direttiva R&TTE.
Electromagnetic compatibility and Radio spectrum Matters (ERM); Short-Range Devices (SRD); Radio
equipment to be used in the 25 MHz to 1000 MHz frequency range with power levels ranging up to 500 mW;
Part 3: Harmonized EN covering essential requirements under article 3.2 of the R&TTE Directive.
Esposizione umana ai campi elettromagnetici (10 MHz - 300 GHz). Norma generica per apparecchi elettronici ed
elettrici di bassa potenza.
Generic standard to demonstrate the compliance of low power electronic and electrical apparatus with the
basic restrictions related to human exposure to electromagnetic fields
(10 MHz – 300GHz).
Delta Elettronica Laboratory Test Report n. 072/04 for the unit P/N 1048 equipped with RX-DLT 434 M
Varese (luogo / place),
07/04/04 (data / date)
Dario Parisi (Product Homologation Manager)
(firma / signature)
Declaration of Conformity
I hereby declare that the product
transmitter , type 7777 / 8712
(Name of product, type or model, batch or serial number)
satisfies all the technical regulations applicable to the product within the scope of Council
Directives 73/23/EEC, 89/336/EEC and 99/5/EC:
Manuale utente AB6527ITSAB, AB6517-16ITSAB, AB6512-11ITSAB
Italiano / Portoghese / Inglese / Greco
Rev. 00 – 10/04 - Pagina 23 di 24
Codice 06DE1807C
EN
EN
EN
EN
300220-3 : 2000
300683
60950C
50371
(Title(s) of regulations, standards, etc.)
All essential radio test suites have been carried out.
NOTIFIED BODY: EMCCert Dr. Rasek
− Address:
Boelwiese 5
91320 Ebermannstadt
Germany
Identification Number: 0678
MANUFACTURER or AUTHORISED REPRESENTATIVE:
− Address:
Delta Elettronica S.p.A.
via Astico, 41
I - 21100 Varese
ITALY
This declaration is issued under the sole responsibility of the manufacturer and, if applicable, his authorised
representative.
Point of contact:
Dario Parisi, tel: +39-0332-825111 , fax: +39-0332-222005
(Name, telephone and fax number)
Varese, 29.03.2004
(Place, date of issue)
(Signature)
Homologations Mng.
(Name and title in block letters)
Manuale utente AB6527ITSAB, AB6517-16ITSAB, AB6512-11ITSAB
Italiano / Portoghese / Inglese / Greco
Rev. 00 – 10/04 - Pagina 24 di 24
Codice 06DE1807C