1
INDEX.
ENGLISH
ITALIAN
FRENCH
GERMAN
SPANISH
RUSSIAN
Introduction
The BlueAnt Z9 Dual Microphone portable mono headset utilizes Bluetooth Wireless
Technology. Its dual microphones combined with the BlueAnt Voice Isolation Technology™
software, provide the BlueAnt Z9 with revolutionary clear and clean voice input enabling high
quality voice communications. Winner of the prestigious CES 2007 Design and Engineering
award, the BlueAnt Z9 is the next generation in Noise Suppression, Echo Cancellation and
Wind Noise Reduction for Bluetooth headsets.
There are two settings of Voice Isolation - STANDARD and MAX.
Voice Isolation Standard is for use in normal environments and gives you a natural
sounding voice removing mild noise.
Voice Isolation Max gives you superior voice clarity in a wide variety of high noise areas.
ENGLISH
Z9 USER GUIDE
Features of the BlueAnt Z9
•
•
•
•
•
•
•
•
•
•
•
•
•
•
Winner of CES 2007 Innovations Design & Engineering Award
Two microphones for pure speech
Voice Isolation Technology ™ BlueAnt’s revolutionary Digital Signal
Processor (DSP) software
During a call, users can switch between two Voice Isolation modes –
Standard and Max
This world class DSP provides echo suppression, noise reduction and wind
noise reduction which separates the desired voice signal from background
noise enabling crystal clear conversation in even the noisiest of environments
Incorporates ‘On-the-Fly’ phone switching with up to 3 paired devices
Automatic connection & reconnection notification
Different ringtones for known and unknown contacts
Innovative tie clip for attaching to shirt or cuff, when not in use
Small & lightweight (1.5” in length & weighs only 0.35 oz) (41mm &10grams)
Stylish, translucent ear hook
Up to 5.5 hrs talk-time or 200 hrs standby
2 Year Replacement Warranty
Bluetooth v2.0
Bluetooth is the most advanced cable-replacement technology available today. It enables
effortless wireless connections between your Bluetooth devices within a range of up to 10m
(30 ft).
What devices work with the Z9 Dual Microphone?
Your headset is a Bluetooth V2.0 qualified product and supports both the Headset and
Handsfree Bluetooth profiles. The Z9 can store information and wirelessly interact with up to
three different Bluetooth V1.1, V1.2 or V2.0 compliant devices (backward and forward
compatible), including mobile phones, PDA’s, PC’s / Mac’s or any Bluetooth enabled device
that supports Headset profile or Handsfree profile. This manual focuses on how to use
your headset with your Bluetooth enabled phone.
What’s in the Package?
> A BlueAnt Z9 Dual Microphone Bluetooth Headset
> 3 x Translucent Ear hooks
> USB Cable
> AC Adaptor
> Quick Start Guide
> User Manual
> Warranty Card
ENGLISH
What is Bluetooth wireless technology?
Overview
Before you can use your headset, you must do the following two things:
1. Fully charge your headset using one of the chargers provided.
2. Pair your headset with a Bluetooth enabled device, e.g. Cell phone, PDA, Computer
Charging
Your Z9 comes with a built-in rechargeable battery. For first time use, you must fully charge
your Z9. During charging, the indicator shows a steady Red light. When the battery is fully
charged, the Red light will turn off. It takes 120-150 minutes to fully charge the battery. The
more you talk using your headset, the less standby time your battery has. Your headset will
require longer charging times when not used over extended periods of time.
ENGLISH
Getting Started
Charging the Z9 with the USB connecter
1. Plug the USB charging cable into the PC/Mac's USB port
2. Plug the other end of the USB charging cable into the charging port of your headset.
Make sure the USB plug matches up to the USB socket on the headset. Do not force the
plug into the socket, it should slide in easily. The Red LED will turn ON.
3. When charging is complete the Red LED will turn OFF. Remove the charging
adapter.
Charging the Z9 with the Wall Charger
1. Plug the AC Charger into a power socket and the cable into the charging port on the Z9.
Make sure the USB plug matches up to the USB socket on the headset. Do not force the
plug into the socket it should slide in easily. The Red LED will turn ON.
2. When charging is complete the Red LED will turn OFF. Remove the charging
adapter.
ENGLISH
Wearing the BlueAnt Z9
Push the ear hook through the ear hook hole which sits on
the headset clip and adjust its length to fit comfortably on
your ear. Ensure that the headset is pointing towards your
mouth. You can wear the Z9 on left or right ears.
For optimal performance of the Z9
headset, angle the headset so that
it points towards your mouth.
Pairing
Before use, you must pair the headset with your cell phone. Pairing will create a stored
connection in both the Z9 and your Bluetooth cell phone. Pairing need only be done once,
when first connecting to a new phone. The Z9 can store pairing information for up to three (3)
different Bluetooth devices. If you wish to pair another different device once 3 devices are
paired, you will need to RESET the Z9 as per the instructions in Basic Headset Functions
below.
Pairing Procedure
This is an example only and may differ from your phone, but the process will be the same.
1.
2.
3.
4.
First turn the phone OFF and then back ON again to refresh its memory.
Bring the mobile phone to about 30cm from the Z9 Dual Microphone.
Find the Bluetooth menu in your mobile phone. Turn Bluetooth ON. (Check your mobile
phone user guide if necessary)
With the Z9 OFF, Press and Hold the MFB
for about 6 seconds. The LED will appear
a solid Blue, and then will start flashing. The Z9 is now in Pairing mode and ready to be
found in searches by other Bluetooth devices. Pairing mode will be active for 2 minutes.
5.
6.
7.
8.
9.
Perform a Bluetooth device discovery on your mobile phone to add a new device. (It
takes a few seconds to search for and find other Bluetooth devices around you).
When Bluetooth devices are found, the phone will display "BlueAnt Z9". Scroll to it and
press OK to confirm that you want to Pair with it.
Enter Passkey "0000" when your phone prompts you. The phone and Z9 will now Pair.
An additional security setting in your phone may be needed to allow the headset and
phone to connect automatically without confirmation each time you connect your Z9.
Generally in the options for the BlueAnt Z9, it will be referred to as "set as authorized",
"add to trusted devices", ‘’allow connection’’ or similar.
If required for first time connection, select the BlueAnt Z9 to connect with your phone.
OR, Click the MFB
on the Z9, to connect with the phone.
ENGLISH
Pairing Procedure (continued)
Basic Headset Functions
For easy reference, also see the Button/Function Matrix and the Quick Start Guide.
1. Power ON: Press and Hold the MFB
for 3 seconds. The solid Blue LED will light up, and
if the battery has ample charge the Blue LED will stay on for up to 5 Seconds. If the battery is
low a solid Red LED will be displayed. After powering ON, your headset will automatically
connect to your last used phone if it is in operating range. If this phone is not range, the Z9
will enter idle mode after 60 seconds. If no phone has yet been Paired, the Z9 will enter into
Pairing mode.
2. Power OFF: Press and Hold the MFB
for 3 seconds. The Red LED flashes three times.
3. Enter Pairing Mode: With the Z9 OFF, Press and Hold the MFB
for about 6 seconds
until the LED flashes Blue. The Z9 will stay in pairing mode for 2 minutes then will go into idle
mode. To re-enter pairing mode, repeat this step. If you had already paired 3 devices and
want to pair again, you will need to RESET the Z9 to enter pairing mode.
4. Make a Call: Dial the number using your phone as normal. Audio will automatically transfer
to the headset.
5. To Answer or End a call: Click the MFB
and Hold the MFB
once when there is an incoming call. Press
for 3 seconds to end the call.
6. Reject*: a call: Press and Hold the MFB
for 3 seconds when there is an incoming call.
7. Redial*: the last call, Press and Hold the Volume
Button for about 3 seconds. To cancel
Redial, click the MFB
8. Activate Voice Dialing*: While connected to a phone, Press the MFB
once. Voice
commands must have been previously recorded into your phone (see your phones user guide
for specific instructions).
9. Volume level: Click Volume
or Volume
during a call to adjust the desired level.
Volume changes will be remembered for the next call. Be sure to use the headset at a
comfortable and safe volume level.
ENGLISH
Basic Headset Functions (continued)
Basic Headset Functions (continued)
10. Disconnect / Transfer: To disconnect the Z9 with the currently connect phone Click
Volume
and Volume
together once. This will also transfer an ongoing call to the phone.
11. Reconnect: To reconnect your phone to the Z9, simply turn the Z9 ON. Or with the Z9
ON simply press the MFB
. Alternatively, you can use the menu of your Bluetooth phone.
12. Mute/Unmute the microphone. Press and Hold Volume
for 3 seconds during a call.
13. Call Waiting*: While on a call and another incoming call appears, (beep tones dependent
on your network) Press and Hold Volume
and Volume
together for 3 seconds. The
current call will be placed on Hold and the incoming call will be answered. To return to the
held call, Click Volume
and Volume
together again for 3 seconds.
14. Call Conference*: To add a held call to the current conversation, Press and Hold
Volume for 3 seconds
15. Disable/Enable the LED indicators: (for night time driving): When your headset is in idle
or standby mode Press and Hold Volume
and Volume
together for 3 seconds. After
turning the headset OFF and back ON, the LED Indicators will be active again by default.
Note the LED’s are turned OFF while a call is active.
16. Z9 Reset: If you have already Paired 3 devices to the Z9 it is not possible to pair another
as the memory is full. If you want to pair with another phone you must reset the headset.
To reset the Z9 to factory settings; while in idle mode (not connected to any device), Click
Volume , Volume
and MFB
together (3 buttons). The Z9 will refresh its memory,
delete all current pairing information and automatically go into Pairing mode (LED will flash
Blue) ready to pair with a new device.
* To use these functions, your phone/device must support the Bluetooth Handsfree Profile.
The Bluetooth Headset profile will not activate these features of the BlueAnt Z9.
ENGLISH
Basic Headset Functions (continued)
BlueAnt Voice Isolation Technology™
You can switch between two settings of Voice Isolation - STANDARD and MAX.
Voice Isolation Standard -
For use in normal everyday environments and gives you a
natural sounding voice while removing mild noise.
Voice Isolation Max -
Gives you more intelligible voice in a wide variety of high
noise environments.
HOW DO I SWITCH?
To switch between Standard and Max: Click the MFB
•
•
•
•
while on a call
When switching between Standard and Max you will hear a confirmation voice tag
played from the Z9 speaker.
When you first turn the headset ON, it will be in the Standard setting.
After switching the headset OFF and back ON, the headset will return to the
Standard setting by default.
Standard and Max both use the same amount of battery power.
Note:
Standby Mode
means connected
to a device but
not on a call.
Idle Mode
means the Z9
is ON but not
connected to any
device
Multiple
button presses
mean click
together
Button
Power ON
Power OFF
Enter Pairing Mode
Connect to Device 1
Connect to Device 2
Connect to Device 3
Answer Call
End Call
Reject Call
Redial Last Number
MFB
MFB
MFB
MFB
MFB
MFB
MFB
MFB
MFB
Vol
MFB
Voice Dial Activate
Disconnect/ Transfer
&
Vol
Call Conference
Call Waiting
&
Vol
Vol
Vol
Volume Up
Volume Down
Mute
Turn LED’s OFF/ON
Switch Voice Isolation
between Standard and Max
Reset Device
&
MFB
MFB
&
&
Time
Status
3 Seconds
3 Seconds
6 Seconds
One Click
Two Clicks
Three Clicks
Click
3 Seconds
3 Seconds
3 Seconds
From OFF
Idle/Standby
From OFF
Idle
Idle
Idle
Ringing
Active Call
Ringing
Standby
Click
Click
Standby
Connected
3 Seconds
3 Seconds
Active Call
Active Call
Click
Click
3 Seconds
3 Seconds
Active Call
Active Call
Active Call
Idle/Standby
Click
Active Call
Click
Idle
ENGLISH
Z9 Function
Button Function
Matrix
LED Indicator Chart
Power ON
Power OFF
Pairing Mode
Reset
Charging
Charging with Power ON
Charging Complete
Low Battery
Idle
Standby
Ongoing call
Solid Blue for 5 Seconds
Red flash 3 times
Blue flashing
Blue flashing
Solid Red
Solid Red with a Purple Flash
Red indicator OFF
All LED’s change to Red
Blue flash every 8 seconds
2 Blue flashes every 5 seconds
NO LED’s
Pairing your headset with multiple Bluetooth devices
The Z9 will connect to only one device at a time but 3 devices can be paired to it.
1. Make sure the last phone used has Bluetooth switched off or is out of range.
2. Follow the procedure in ‘Pairing Procedure’ above for each device you want to pair.
On-the-Fly Phone Switching
After pairing a 2nd or 3rd mobile, Smartphone, PDA or computer as per the pairing procedure,
you can switch between the devices using the following procedure.
Selecting the required mobile phone
1. Disconnect from the currently connected phone: Click Vol
together.
and Vol
2. Connect to any of the three paired devices on request by clicking the MFB
Once for the first paired phone
Twice for the second paired phone
Three times for the third paired phone
Note: Be sure to remember in what order the 3 devices have been paired.
ENGLISH
Advanced Headset Functions
Firmware upgrade
The BlueAnt Z9 is firmware upgradeable via the USB port and provided USB cable.
Please see the support section at www.blueantwireless.com for information and downloads
for available upgrades.
Further Information
Setting up a Phone Profile (different to Bluetooth Profiles)
In your phone, set up a Profile with appropriate ringing volumes and keypad tones and select
and activate when using with the Z9. Some phones can automatically activate a desired
profile when connecting to a Car Kit or Headset Accessory. E.g. Go to Enhancement Settings
and select a Default Profile to activate when the headset connects. With some phones you
can also personalize levels to make suitable for yourself (see your phone’s user manual for
instructions on using and activating Phone Profiles). Typical phone Profiles are General,
Outdoor, Meeting, Silent, Handsfree, Headset, Portable handsfree and Carkit.
Resetting Your Phone/PDA
Phones and PDA’s can become prone to software and memory issues which may cause
Bluetooth reconnection problems. This can be fixed simply by turning the phone OFF and
back ON again. The phone will be reset and the working memory cleared.
Resetting your phone weekly can help maintain it’s functionality including Bluetooth.
Troubleshooting and Support Documents
See the support section of www.blueantwireless.com for troubleshooting and Frequently
Asked Questions (FAQ) as well as info on using with computers for VOIP application\s.
ENGLISH
Phone/PDA/Computer Software
Please make sure you have the latest firmware upgrade for your phone especially if you are
using a PDA Phone. Go to the support section of the manufacturers’ website to check that
you have the latest version. Many new mobile phones, PDA’s and computer phones require a
Bluetooth patch to improve Bluetooth functionality from the original released version.
Specifications
General
Specification
RF Spec.
User Interface
Audio
Battery type
Talk Time
Stand-By time
Weight
Dimensions
z Bluetooth v2.0
z Up to 10 meters RF coverage
z CE,FCC,BQB, Ctick, RoHS / WEEE Compliant
z Headset Profile, Hands-Free profile
z Carrier Frequency 2.402 ~ 2.480GHz
z < 0.1% BER at -80 dBm
z 0 ± 4 dBm (Class 2)
z Blue color LED for operation indication.
z Red color LED for low battery indication.
z Mini USB for Charging battery or F/W upgrade
3GPP with DSP solution
3.7V Lithium Polymer battery
Up to 5.5 Hours
200hrs.
0.35 oz / 10 grams without ear hook or 11 grams with ear-hook
1.5 x 0.69 x 0.44 (inches) / 41 x 17.5 x 11.2 (mm)
BlueAnt Warranty Process
1. Should you be having difficulties in operation please refer to the online FAQ and support
documents, or call us. Our number is on the back page of this manual
2. Check our website for more information, updated manuals and troubleshooting.
www.blueantwireless.com
3. Call us and speak to one of the BlueAnt Wireless Customer Service Team
We will clarify whether you have a hardware or connection issue.
4. If your unit is confirmed to be faulty, a Return Merchandise Authorization (RMA) will be
issued.
5. Return the unit directly to BlueAnt for testing and replacement of faulty items.
Warranty Terms and Conditions
1. BlueAnt Warrant the original purchaser of this product only.
2. BlueAnt will replace or repair any faulty product provided it has not
been misused or abused in any way.
3. There are no user serviceable parts inside this product. Using a nonauthorized repairer will void the warranty.
4. The Warranty is valid for 2 years (24 months) from the date of purchase.
• Proof of purchase must be provided to obtain warranty service.
• Headset must be in original packaging with serial number for warranty to be valid.
ENGLISH
Help
5. Warranties are effective from the proof of purchase date and not from the date of any
subsequent repair or replacement.
Disclaimers:
This manual is published by BlueAnt. The information contained in this document is subject to
change without notice. All rights reserved. The Bluetooth word, mark and logos are owned by
the Bluetooth SIG, Inc. and any use of such marks by BlueAnt is under license. Other
trademarks and trade names are those of their respective owners.
Please protect your ears.
Warning: This headset can reach a maximum volume of 101 decibels. Prolonged use of a
headset at high volumes may affect your hearing capacity. Using for extensive time periods
may result in noise induced hearing loss (NIHL). Hearing loss may occur if the headset is
used at maximum volumes for more than 5 minutes per day. Hearing loss may occur if the
headset is used at medium volumes if used for more than 1 hour per day. Exposure to sound
at such a close range may result in hearing loss, even at low levels. Do not listen at high
volume levels. Remember that your ears will adapt to the volume level set and if you change
to higher levels your ear may feel no discomfort but may be doing damage to your ear.
(Applicable in the European Union and other European countries with separate collection)
This marking shown on the product or its literature, indicates that it should not be disposed with
other household wastes at the end of its working life. To prevent possible harm to the
environment or human health from uncontrolled waste disposal, please separate this from other
types of wastes and recycle it responsibly to promote the sustainable reuse of material
resources. Household users should contact either the retailer where they purchased this
product, or their local government office, for details of where and how they can take this item for
environmentally safe recycling. Business users should contact their supplier and check the
terms and conditions of the purchase contract. This product should not be mixed with other
commercial wastes for disposal.
This equipment is in compliance with the essential requirements and other relevant provisions of Directive 1999/5/EC
FCC Notices
This device contains FCC ID: VHFBLUEANTZ9 which complies with part 15 of the FCC rules.
Operation is subject to the following two conditions: (1) This device may not cause harmful
interference, and (2) This device must accept any interference received, including interference that
may cause undesired operation.
FCC RF Exposure requirements:
“This device and its antenna(s) must not be co-located or operating in conjunction with any other
antenna or transmitter.”
ENGLISH
Correct Disposal of This Product (Waste Electrical & Electronic Equipment)
GUIDE DE L’UTILISATEUR
de BlueAnt Z9
BlueAnt Z9 est une oreillette à deux microphones dotée de la technologie sans fil Bluetooth. Profitant de
BlueAnt Voice Isolation Technology™, logiciel de synthèse réputé pour sa clarté cristalline, le double
microphone révolutionne la saisie vocale et accroît les performances acoustiques de BlueAnt Z9 lors des
communications orales en temps réel. BlueAnt Z9 est lauréat du prix « CES Design and Engineering »; ce
prix prestigieux contribue à en faire la prochaine génération des micros-casques Bluetooth à grandes
capacités antibruit.
L’isolation vocale se fait en deux modes : STANDARD et MAX.
Isolation vocale Standard :
Ce mode s’utilise en milieu ordinaire de tous les jours, maintient le
naturel de votre voix tout en supprimant les faibles bruits
ambiants.
Isolation vocale MAX :
Ce mode rend votre voix plus audible dans divers milieux très
bruyants.
FRENCH
Aperçu du produit
Caractéristiques de BlueAnt Z9
•
•
•
•
•
•
•
•
•
•
•
•
•
•
Prix CES Innovations Design & Engineering 2007
Deux microphones pour une saisie vocale intelligible et naturelle
Voice Isolation Technology ™ issue de Digital Signal Processor (DSP), logiciel de
synthèse révolutionnaire de BlueAnt
Alternance possible entre deux modes d’isolation vocale – Standard et Max – au cours
d’un appel
DSP de première qualité et ultraperformant : suppression d’échos, réduction de bruits, y
compris le bruit caractéristique du vent et conversation d’une clarté cristalline, même
dans un milieu très bruyant, grâce à une meilleure isolation des signaux vocaux et des
bruits de fond
Communication téléphonique à la volée avec possibilité de connecter jusqu’à trois des
appareils jumelés
Témoin de connexion et de reconnexion automatique
Sonnerie différente selon les correspondants, connus et inconnus
Prise casque innovante pour une fixation (hors usage) à la chemise ou à la boutonnière
Poids et taille réduits (3,8 cm de longueur pour un poids de 11 g seulement)
Crochet auriculaire translucide et élégant
Autonomie de conversation/veille : 5,5 h/200 h
Garantie de pièce de rechange de 2 ans
Bluetooth 2.0
Technologie sans fil Bluetooth
Bluetooth est la technologie sans fil la plus évoluée aujourd’hui sur le marché. Elle assure
facilement la liaison entre vos appareils Bluetooth dans un rayon de 10 mètres (30 pieds).
Votre micro-casque est validé Bluetooth 2.0 et gère les profils casque et mains libres.
L’oreillette Z9 peut stocker de l’information et se connecter sans fil à trois appareils
homologués Bluetooth 1.1, 1.2 ou 2.0 (compatibilité descendante et ascendante), y compris
les téléphones mobiles et les ANP (assistant numérique personnel), sous PC ou Mac, ou tout
autre appareil adapté à Bluetooth et prenant en charge les profils casque et mains libres. Le
présent guide vous montre comment utiliser votre oreillette de concert avec votre
téléphone validé Bluetooth.
Contenu de l’emballage
> 1 oreillette Bluetooth à microphone mixte BlueAnt Z9
> Guide de démarrage rapide
> 3 crochets auriculaires translucides
> Guide de l’utilisateur
> Câble de connexion USB
> Carte de garantie
> Adaptateur CA
FRENCH
Appareils compatibles avec le microphone mixte Z9
Présentation
MFB (Bouton
Multifonction)
USB
Baisse de
Volume
Augmentation
de volume
Crochet auriculaire
Haut-parleur
Mise en service
Avant de pouvoir utiliser votre oreillette, vous devez effectuer les deux étapes suivantes :
1. charger complètement votre oreillette à l’aide de l’un des chargeurs fournis;
2. brancher votre oreillette sur un appareil validé Bluetooth tel qu’un téléphone cellulaire, un ANP ou un
Charge
L’oreillette Z9 est fournie avec une pile rechargeable intégrée. Lorsque vous l’utilisez pour la première fois,
vous devez charger complètement votre Z9. Pendant la charge, un voyant lumineux rouge s’allume en
permanence et lorsque la pile est à pleine charge, le voyant rouge s’éteint. La pile prend entre 2 h et 2 h
30 pour être pleinement chargée. Les conversations prolongées réduisent l’autonomie de veille de la
batterie.
périodes.
L’oreillette mettra plus de temps à se recharger si elle reste inutilisée pendant de longues
FRENCH
ordinateur.
Charger la Z9 au moyen du câble USB
1. Branchez le câble USB de charge sur le port USB de votre PC ou Mac.
2. Branchez l’autre extrémité du câble USB sur le port d’alimentation du micro-casque. Assurez-vous que le
câble de connexion USB corresponde à la prise d’alimentation USB du micro-casque. Le câble devrait
s’insérer facilement dans la prise. Aucune force n’est donc nécessaire. Le voyant DEL rouge s’allume.
3. Lorsque la charge est complète, le voyant DEL rouge s’éteint. Enlevez l’adaptateur du chargeur.
Charger la Z9 sur une prise murale
1. Branchez le chargeur sur la prise murale d’alimentation secteur et connectez le câble sur le port
d’alimentation de la Z9. Assurez-vous que le câble de connexion USB corresponde à la prise
d’alimentation USB du micro-casque. Le câble devrait s’insérer facilement dans la prise. Aucune force
n’est donc nécessaire. Le voyant DEL rouge s’allume.
2. Lorsque la charge est complète, le voyant DEL rouge s’éteint. Enlevez l’adaptateur du chargeur.
Port de l’oreillette BlueAnt Z9
FRENCH
Passez le crochet auriculaire à travers le trou prévu dans
l’attache du micro-casque et ajustez la longueur de manière à
ce qu’il s’accroche confortablement à votre oreille. Assurezvous que le micro-casque est orienté vers la bouche. La Z9
se porte sur l’oreille gauche ou droite.
Pour une performance optimale,
l’oreillette Z9 doit être orientée
vers la bouche.
Pairage
Avant d’utiliser l’oreillette, vous devez créer entre elle et votre téléphone cellulaire une clé de liaison
commune. Cette opération de couplage permettra de garder en mémoire une connectivité entre votre
oreillette et votre téléphone cellulaire Bluetooth. Le pairage ne devra se faire qu’une seule fois, c’est-à-dire
lorsque la Z9 est connectée pour la première fois à un nouveau téléphone. La Z9 peut stocker les données
de pairage de trois (3) périphériques Bluetooth différents. Si vous désirez établir une liaison avec un autre
appareil, au-delà des trois premiers, vous devrez RÉINITIALISER l’oreillette en suivant les instructions cidessous (Fonctions micro-casque de base).
Procédure de pairage
Les étapes indiquées ci-après ne le sont qu’à titre indicatif, car pouvant varier d’un téléphone à l’autre tout
en conservant le même processus.
1.
2.
3.
4.
Mettez votre téléphone sur Arrêt, puis sur Marche pour rafraîchir la mémoire.
Rapprochez votre téléphone mobile à environ 30 cm du microphone mixte Z9.
Localisez le menu Bluetooth de votre téléphone mobile. Mettez Bluetooth sur Marche. (Au besoin,
consultez le guide de l’utilisateur de votre téléphone mobile.)
Mettez l’oreillette sur Arrêt, puis appuyez sur le bouton MFB
pendant environ 6 secondes, sans le
relâcher. Le voyant DEL s’allumera en bleu intense et se mettra à clignoter. A ce stade, l’oreillette
est en mode Pairage et prête à se connecter à d’autres périphériques validés Bluetooth en repérage.
Le mode Pairage restera actif pendant deux 2 minutes.
Procédure de pairage (suite)
5.
Pour ajouter un nouveau périphérique Bluetooth, repérez-le sur votre téléphone mobile. (Il ne faut
que quelques secondes pour rechercher et trouver d’autres périphériques Bluetooth à proximité.)
6.
Une fois la liaison établie avec un périphérique Bluetooth ou plus, votre téléphone affichera « BlueAnt
Z9 ». Défilant vers le bas, sélectionnez-le, puis appuyez sur OK pour confirmer le pairage.
Entrez la clé de liaison « 0000 » lorsque le téléphone vous y invite. Le téléphone et le Z9 sont
maintenant en liaison.
8.
Un paramètre de sécurité additionnel pourrait se révéler nécessaire pour assurer la connexion
automatique entre l’oreillette et le téléphone, c’est-à-dire sans confirmation préalable. En général,
dans le menu des options de BlueAnt Z9, on se référera à ce paramètre par : « défini comme
autorisé », « ajouter aux périphériques sûrs », « connexion autorisée » ou autres.
9.
Si nécessaire à la première connexion, sélectionnez l’option BlueAnt Z9 pour vous connecter au
téléphone OU appuyez sur le bouton MFB
de l’oreillette pour vous connecter au téléphone.
FRENCH
7.
Fonctions de base du micro-casque
Pour faciliter la consultation, vous pouvez vous référez également au Tableau des boutons/fonctions et au
Guide de démarrage rapide.
1. Mise en service : Appuyez sur le bouton MFB
pendant 3 secondes, sans le relâcher. Le voyant
DEL bleu s’allumera en continu et, si la pile est suffisamment chargée, le voyant restera allumé pendant 5
secondes. En revanche, si la pile est en partie déchargée, le voyant DEL rouge s’allumera en continu. Une
fois mise en service, votre oreillette se connectera automatiquement au dernier téléphone que vous avez
utilisé, à moins qu’il ne soit hors de portée. Si aucun téléphone n’a été mis en liaison, votre Z9 se mettra en
mode Pairage. Si aucun des téléphones appariés n’est dans la zone de fonctionnement, votre Z9 se mettra
en mode Inactif.
2. Mise hors service : Appuyez sur le bouton MFB
Del rouge clignote trois fois.
pendant 3 secondes, sans le relâcher. Le voyant
3. Entrer en mode Pairage : Mettez l’oreillette sur Arrêt, puis appuyez sur le bouton MFB
pendant
environ 6 secondes, jusqu’à ce que le voyant Del bleu commence à clignoter. L’oreillette restera en mode
Pairage pendant deux minutes, puis passera en mode Veille. Pour passer à nouveau en mode Pairage,
répétez cette étape.
4. Placer un appel : Composez le numéro sur le pavé numérique de votre téléphone. La sortie audio se
fera automatiquement par le micro-casque.
Fonctions micro-casque de base (suite)
pendant trois
7. Recomposer le dernier numéro*: Appuyez, sans le relâcher, sur le bouton Volume
secondes environ. Pour annuler la recomposition du dernier numéro, cliquez sur MFB
8. Activer la composition vocale *: Appuyez une fois sur MFB
pendant que vous êtes connecté à un
téléphone. Les commandes vocales doivent avoir été enregistrées sur le téléphone (voir le guide de
l’utilisateur du téléphone).
9. Volume : Pour ajuster le volume à votre convenance, cliquez sur le bouton Volume
pendant que vous êtes au téléphone.
ou Volume
10. Déconnecter / Transférer : Pour couper la liaison de la Z9 avec le téléphone actuellement connecté ou
et Volume
réacheminer vers le téléphone un appel en cours, cliquez à la fois sur les boutons Volume
FRENCH
5. Répondre à un appel ou y mettre fin : Cliquez sur une fois MFB
à l’arrivée d’un appel. Appuyez sur
le bouton MFB
pendant 3 secondes, sans le relâcher pour y mettre fin.
6. Refuser* un appel : Appuyez sur le bouton MFB
pendant 3 secondes, sans le relâcher, à l’arrivée
d’un appel.
Fonctions micro-casque de base (suite)
11. Reconnecter : Pour reconnecter votre téléphone à l’oreillette Z9, mettez-la simplement en service. Ou
encore, appuyez sur MFB
une fois que Z9 est sur Marche. Autrement, vous pouvez le faire à partir du
menu de votre téléphone Bluetooth.
12. Sourdine / fin de sourdine : Appuyez, sans relâcher, sur le bouton Volume
pendant que vous êtes au téléphone.
pendant trois secondes
13. Appel en attente* : Si vous êtes au téléphone et qu’un autre appel arrive (timbres sonores variant selon
et Volume
pendant trois secondes..
votre réseau), appuyez à la fois sur les boutons Volume
L’appel en cours sera mis en attente au profit de l’appel entrant. Pour revenir à l’appel en attente, appuyez
et Volume
pendant trois secondes.
à la fois sur les boutons Volume
14. Appel conférence* : Pour faire entrer un correspondant dans une conversation en cours, appuyez, sans
pendant trois secondes.
relâcher, sur le bouton Volume
Fonctions micro-casque de base (suite)
15. Désactiver/activer les voyants DEL : (pour conduite de nuit) : Appuyez à la fois sur les boutons
Volume
et Volume
pendant trois secondes lorsque votre oreillette est en mode Inactif ou Veille. Si
l’oreillette est mise sur Arrêt, puis remis en service, les voyants DEL redeviennent actifs par défaut. Notez
16. Réinitialisation de l’oreillette Z9 : Si vous avez déjà apparié trois périphériques à votre oreillette, la
mémoire sera pleine et il ne vous sera plus possible d’en apparier un autre, à moins de réinitialiser
l’oreillette.
et MFB
Pour rétablir les paramètres d’usine de l’oreillette Z9, cliquez à la fois sur Volume
, Volume
(3 boutons) pendant qu’elle est en mode Inactif (c’est-à-dire non apparié à un appareil). L’oreillette
réactualisera sa mémoire, supprimera toutes les données de pairage courantes et se mettra
automatiquement en mode Pairage (voyant DEL clignotant en bleu), prêt à établir un pairage avec un
nouveau périphérique.
*Pour accéder à ces fonctions, votre téléphone ou périphérique doit disposer du profil Mains libres de
Bluetooth. Ces fonctions de BlueAnt Z9 ne seront pas activées par le profil Micro-casque Bluetooth.
FRENCH
que les voyants DEL sont éteints pendant qu’un appel est en cours.
Voice Isolation Technology™ de BlueAnt
Vous pouvez alterner entre deux modes d’isolation vocale : STANDARD et MAX.
Voice Isolation Standard :
Ce mode s’utilise en milieu ordinaire de tous les jours, maintient le
naturel de votre voix tout en supprimant les faibles bruits
ambiants.
Voice Isolation MAX :
Ce mode rend votre voix plus audible dans divers milieux très
bruyants.
COMMENT PASSER D’UN MODE À L’AUTRE ?
Pour alterner entre les modes Standard et Max : Cliquez sur MFB
téléphone.
•
•
•
•
pendant que vous parlez au
Lorsque vous alternez entre les modes Standard et Max, Z9 fait retentir un timbre sonore à titre de
confirmation.
Lorsque vous mettez l’oreillette en marche pour la première fois, l’isolation vocale sera en mode
Standard.
Si vous démarrez et arrêtez l’oreillette, elle se remettra par défaut en mode Standard.
La consommation de pile est la même en mode Standard ou en mode MAX.
Remarque :
Mode Veille
Connexion à un
appareil mais aucun
appel
n’est en cours
Mode Inactif
Z9 sur Marche
mais non
connectée à un
périphérique
Bouton
Mise en service
Mise hors service
Saisie du mode Pairage
Se connecter à 1 appareil
Se connecter à 2 appareils
Se connecter à 2 appareils
Répondre à un appel
Terminer un appel
Refuser un appel
Rappel au dernier numéro
MFB
MFB
MFB
MFB
MFB
MFB
MFB
MFB
MFB
Vol
MFB
Activer le composeur vocal
Transférer/Déconnecter Z9
et
Téléconférence
Vol
Appel en attente
et
Augmenter le volume
Appuyer sur
boutons multiples
Boutons à cliquer
ensemble
Vol
Vol
Vol
Baisser le volume
Sourdine
Voyant DEL allumé/éteint
Alterner le mode d’isolation
vocale : Standard et Max
Réinitialiser un appareil
et
MFB
MFB
et
et
Exécution
État *
3 secondes
3 secondes
6 secondes
1 clic
2 clics
3 clics
Cliquez sur
3 secondes
3 secondes
3 secondes
Arrêt
Inactif/Veille
Arrêt
Inactif
Inactif
Inactif
Sonnerie
Appel actif
Sonnerie
Veille
Cliquez sur
Cliquez sur
Veille
Connecté
3 secondes
Appel actif
3 secondes
Appel actif
Cliquez sur
Appel actif
Cliquez sur
3 secondes
3 secondes
Appel actif
Appel actif
Inactif/Veille
Cliquez sur
Appel actif
Cliquez sur
Inactif
FRENCH
Fonction Z9
Tableau des
boutons/
fonctions
Tableau du voyant DEL
Mise en service
Mise hors service
Mode Pairage
Réinitialiser
Alimentation
Charge en état de marche
Pleine charge
Décharge de pile
Inactif
Veille
Appel en cours
Bleu continu pendant 5 secondes
Clignotant rouge (3 fois)
Clignotant bleu
Clignotant bleu
Rouge continu
Rouge continu avec clignotant violet
Voyant rouge éteint
Voyants DEL au rouge
Clignotant bleu toutes les 8 secondes
2 clignotements bleus toutes les 5 secondes
Voyants DEL inactifs
Fonctions micro-casque avancées
Pairage de votre micro-casque avec plusieurs périphériques Bluetooth
L’oreillette ne se connecte qu’à un seul appareil Bluetooth à la fois, mais peut établir un pairage avec trois
périphériques.
Commutation téléphonique à la volée (On-the-Fly Phone Switching)
Après le pairage du deuxième ou du troisième mobile, téléphone intelligent, ANP ou ordinateur, suivant la
procédure de pairage, vous pouvez permuter de l’un à l’autre selon la procédure ci-après :
Sélection du téléphone mobile visé
1. Déconnectez-vous du téléphone en cours en appuyant cliquez à la fois sur les boutons
2. Connectez-vous à l’un des trois périphériques appariés en cliquant sur MFB
Une fois pour le premier téléphone apparié
Deux fois pour le deuxième téléphone apparié
Trois fois pour le troisième téléphone apparié
et
, c’est-à-dire
Remarque : Assurez-vous de vous rappeler l’ordre de pairage des trois appareils.
FRENCH
1. Assurez-vous que le dernier téléphone sollicité n’est pas réglé sur Bluetooth ou qu’il est hors de portée.
2. Suivez la Procédure de pairage (voir plus haut) pour établir une liaison avec chaque périphérique.
Mise à jour du micrologiciel
BlueAnt Z9 est un micrologiciel actualisable via le port USB et au moyen du câble USB fourni.
Pour en savoir plus sur le micrologiciel et les mises à jour disponibles, consultez la rubrique Assistance sur
www.blueantwireless.com
Information complémentaire
Définition d’un profil téléphonique (autre que les profils Bluetooth)
Sur votre téléphone, définissez un profil selon la sonnerie et la tonalité, puis procédez à la sélection et à
l’activation lorsque vous utilisez votre oreillette Z9. Certains téléphones peuvent activer automatiquement le
profil voulu lorsqu’ils se connectent à un Kit auto ou à un accessoire pour micro-casque. A titre d’exemple,
cliquez sur le menu Amélioration et choisissez un profil à activer par défaut lorsque se connecte le microcasque. Certains téléphones vous permettent aussi de personnaliser les niveaux à l’envie (consultez le
guide de l’utilisateur de votre téléphone pour savoir comment activer et utiliser les profils téléphoniques).
Voici les profils téléphoniques types : Général, Plein air, Réunion, Muet, Mains libres, Micro-casque,
Portable mains libres et Kit auto.
Réinitialisation de votre téléphone/ANP
Les téléphones et les ANP sont sujets à des problèmes informatiques (logiciel et mémoire) qui pourraient
entraîner des problèmes de reconnexion Bluetooth. Ces problèmes peuvent être réglés facilement dès lors
que vous mettez le téléphone hors service puis en service à nouveau. Le téléphone s’en trouvera
réinitialisé et la mémoire de travail effacée.
La réinitialisation hebdomadaire de votre téléphone aidera au maintien des fonctionnalités dont Bluetooth.
Dépannage et assistance
Pour obtenir des documents d’assistance (dépannage, FAQ) et savoir tirer partie des applications voix sur
IP sur l’ordinateur, consultez la rubrique Assistance sur le site www.blueantwireless.com
FRENCH
Micrologiciel pour téléphone, ANP et ordinateur
Assurez-vous d’avoir la mise à jour la plus récente du micrologiciel, surtout si vous utilisez un téléphone
ANP. Pour en être sûr, consultez la rubrique Assistance sur le site Web du fabricant. Nombreux sont les
nouveaux téléphones mobiles, ANP et ordinateurs qui nécessitent un correctif Bluetooth pour en améliorer
les fonctionnalités acquises depuis la version d’origine.
Spécifications
Spécifications
générales
Spécifications RF
Interface
utilisateur
Audio
Type de pile
Temps de
conversation
Veille
Poids
Dimensions (mm)
z Bluetooth 2.0
z Portée RF de 10 m
z Certifiée CE, FCC, BQB, RoHS / WEEE
z Profils Micro-casque et Mains libres
z Fréquence de service 2.402 ~ 2.480 GHz
z TEB < 0.1% à -80 dBm
z 0 ± 4 dBm (classe 2)
z Voyant Del bleu (indicateur fonctionnel)
z Voyant DEL rouge (indicateur de décharge de la batterie)
z Mini USB pour charger la pile ou actualiser le micrologicel
3GPP avec technologie DSP
Pile au lithium-polymère 3.7V
Jusqu’à 5,5 heures
200 heures
10/11 g sans/avec crochet auriculaire
41 x 17.5 x 11.2 (mm) / 1.61 x 0.69 x 0.44 (inches)
Aide
en ligne (FAQ) ou n’hésitez pas à nous appeler. Notre numéro de téléphone se trouve au verso du
présent guide.
2. Visitez aussi notre site Web et vous y trouverez des informations complémentaires y compris des guides
d’utilisation et de dépannage actualisés. www.blueantwireless.com
3. Appelez-nous et parlez à un membre de notre équipe du Service à la clientèle
Nous pourrons déterminer si vous avez un problème de matériel ou de connexion.
4. Si votre oreillette s’avère défectueuse, un numéro d’autorisation de retour d’article (RMA) vous sera émis.
5. Retournez l’oreillette directement à BlueAnt pour dépannage et remplacement de pièces défectueuses.
Garantie : conditions générales
1. BlueAnt garantie ce produit seulement à l’acheteur d’origine.
2. BlueAnt remplacera ou réparera un produit défectueux à condition qu’il n’ait pas
été utilisé à mauvais escient ou été mal exploité de quelque manière que ce soit.
3. Le produit ne contient aucune pièce à entretenir par l’utilisateur. Le recours à un
réparateur non autorisé annulera la garantie.
4. La garantie est valable pour deux (2) ans (24 mois) à compter de la date d’achat.
• Le service prévu par la garantie ne sera assuré que si la demande est accompagnée
d’une preuve d’achat.
FRENCH
Garantie BlueAnt : processus
1. Si vous avez des difficultés à faire fonctionner l’oreillette, veuillez consulter les documents d’assistance
• Pour que la garantie soit valide, l’oreillette doit être dans l’emballage d’origine portant le numéro de
série.
5. La garantie est valable seulement à partir de la date d’achat et non de celle d’une réparation ou d’un
remplacement quelconque.
Avis de non-responsabilité :
Le présent guide est publié par BlueAnt. Les renseignements que renferme le présent guide sont sujets à
modification sans préavis. Tous droits réservés. Le mot Bluetooth de même que la marque et les logos
Bluetooth appartiennent à Bluetooth SIG, Inc. et sont exploités ici par BlueAnt sous licence. Toutes les
autres marques de commerce et appellations commerciales mentionnées dans la présente restent la
propriété des détenteurs respectifs.
Veuillez protéger vos oreilles.
Mise en garde : L’oreillette peut atteindre 101 décibels en volume maximum. L’utilisation prolongée à
volume élevé risque de porter atteinte à votre capacité auditive. De même, l’utilisation de l’oreillette pendant
de longues périodes peut entraîner la perte d’audition due au bruit. La perte d’audition peut se produire si
l’oreillette est utilisée à des volumes maximums au-delà de 5 minutes par jour. La perte d’audition peut se
produire si l’oreillette est utilisée à des volumes moyens pendant plus d’une heure par jour. L’exposition au
son dans un champ rapproché peut provoquer la perte d’audition, même à des faibles volumes.
Par la présente [nom du fabricant] déclare que l'appareil [type d'appareil] est conforme aux
exigences essentielles et aux autres dispositions pertinentes de la directive 1999/5/CE.
Z9 GUÍA
DEL USUARIO
Introducción
Hay dos configuraciones para aislamiento de voz: STANDARD y MAX.
El aislamiento de voz Standard, para uso en ambientes normales, elimina
ruidos leves y ofrece un sonido natural de la voz.
El aislamiento de voz Max ofrece una claridad de voz superior en una gran
variedad de zonas de alto ruido.
SPANISH
El auricular portátil mono BlueAnt Z9 con micrófono dual utiliza tecnología inalámbrica
Bluetooth. Sus dos micrófonos, combinados con el software de Voice Isolation TechnologyTM
de BlueAnt, ofrecen al BlueAnt Z9 una entrada clara y nítida del tono de la voz, y con ello,
una comunicación de alta calidad. Galardonado con el prestigioso premio CES Design and
Engineering, el BlueAnt Z9 representa la próxima generación de auriculares Bluetooth con
reducción de ruido y cancelación de eco.
Características del BlueAnt Z9
•
•
•
•
•
•
•
•
•
•
•
•
•
•
Ganador del premio CES 2007 Innovations Design & Engineering
Dos micrófonos para voz
Voice Isolation Technology ™ Digital Signal Processor (DSP), el software revolucionario
de BlueAnt
Durante una llamada, los usuarios pueden cambiar entre dos modos de aislamiento de
voz: Standard y Max
Este DSP de calidad internacional brinda supresión de eco, reducción de ruido ambiental
y de viento, lo cual separa la señal deseada de voz del ruido de fondo para permitir
conversaciones cristalinas en medio de los ambientes más ruidosos.
Incorpora conmutación de señal telefónica sin interrupción (On-the-Fly) hasta con tres
equipos asociados
Notificación de conexión y reconexión automática
Diferentes tonos de timbre para contactos conocidos y desconocidos
Clip para corbata innovador que se sujeta a la camisa o al puño, cuando la unidad no
está en uso
Pequeño y liviano (sólo 1,5 pulgadas [3,8 cm] de longitud y pesa apenas 0,35 oz [10 g])
Gancho para la oreja transparente y elegante
Hasta 5,5 horas de tiempo de habla o 200 horas en inactividad
2 años de garantía de reemplazo
Bluetooth v2.0
¿Qué es la tecnología inalámbrica Bluetooth?
Bluetooth es la tecnología de comunicación sin cables más avanzada en la actualidad. Permite
comunicaciones inalámbricas sin dificultades entre equipos Bluetooth dentro de perímetros de hasta 10 m
(30 pies) a la redonda.
¿Qué equipos son compatibles con el Z9 con micrófono dual?
¿Qué contiene el paquete?
> Un auricular BlueAnt Z9 Bluetooth con micrófono dual
> 3 ganchos para la oreja transparentes
> Cable USB
> Adaptador de CA
> Guía de inicio rápido
> Manual del usuario
> Tarjeta de garantía
SPANISH
Su auricular es un producto calificado para Bluetooth V2.0 y es compatible con ambos perfiles Bluetooth:
Auricular (Headset) y Manos Libres (Handsfree). El Z9 puede almacenar información e interactuar de
manera inalámbrica con hasta tres equipos compatibles con Bluetooth V1.1, V1.2 o V2.0 (compatibilidad
con versiones anteriores o posteriores), incluidos teléfonos celulares, PDA, PC/Mac o cualquier equipo con
capacidad Bluetooth compatible con los perfiles Auricular (Headset) o Manos Libres (Handsfree). Este
manual se enfocará en cómo utilizar el auricular con un teléfono con capacidad Bluetooth.
Generalidades
MFB (botón de
múltiples funciones)
Disminuir
volumen
USB
Aumentar
volumen
Gancho para
la oreja
Parlante
Para comenzar
Antes de poder utilizar el auricular, se deberá hacer lo siguiente:
1. Cargar el auricular por completo utilizando uno de los cargadores suministrados.
2. Asociar el auricular con un equipo con capacidad Bluetooth; p. ej., teléfono celular, PDA,
computador.
Carga
El Z9 está acompañado de una batería integrada recargable. Esta se deberá cargar por
completo antes de utilizar el Z9 por primera vez, este proceso tendrá un tiempo de duraciόn
una luz roja constante. Cuando la batería esté cargada por completo, la luz roja se apagará.
Mientras más tiempo se utilice el auricular para hablar, menor será el tiempo que la batería
permanecerá cargada durante períodos de inactividad. Si el auricular no se utiliza durante un
largo periodo, requerirá un mayor tiempo de carga.
SPANISH
de aproximadamente 120 a 150 minutos. Durante el proceso de carga, el indicador mostrará
Cargar el Z9 a través de un conector USB
1. Conecte el cable de carga USB en el puerto USB de la PC/Mac.
2. Conecte el otro extremo del cable de carga USB en el puerto de carga del auricular.
Asegúrese de que el conector USB coincida con el enchufe USB del auricular. No fuerce
el conector en el enchufe; éste debería deslizarse con facilidad. El LED rojo se encenderá.
3. Cuando la carga esté completa, el LED rojo se apagará. Desconecte el adaptador de
carga.
Cargar el Z9 a través de un cargador de pared
1. Conecte el cargador de CA en el enchufe de la pared y el cable en el puerto de carga del
Z9. Asegúrese de que el conector USB coincida con el enchufe USB del auricular. No
fuerce el conector en el enchufe; éste debería deslizarse con facilidad. El LED rojo se
encenderá.
2. Cuando la carga esté completa, el LED rojo se apagará. Desconecte el adaptador de
carga.
Colocación del BlueAnt Z9
Para un funcionamiento óptimo,
coloque el auricular Z9 en un
ángulo tal que apunte en
dirección a la boca.
SPANISH
Empuje el gancho haci la oreja a través del orificio ubicado
en el clip del auricular y gradúe su longitud para que se
ajuste cómodamente sobre la oreja. Asegúrese de que el
auricular apunte en dirección a la boca. Puede ponerse el Z9
en la oreja derecha o la izquierda.
Asociar el auricular con otro equipo
Antes de utilizar el Z9, deberá asociar el auricular con su teléfono celular. La asociación creará una
conexión que se almacenará tanto en el Z9 como en el teléfono celular con capacidad Bluetooth. El
proceso de asociación se deberá efectuar solamente una vez, la primera vez que se conecte el auricular a
un teléfono nuevo. El Z9 puede almacenar asociaciones hasta con tres (3) equipos Bluetooth diferentes. Si
se desea asociar otro equipo después de haber asociado tres equipos, se deberá REINICIAR (RESET) el
Z9 siguiendo las instrucciones en la sección Funciones básicas del auricular.
Proceso de asociación
El siguiente es simplemente un ejemplo y podría diferir con respecto a su teléfono, pero el proceso será el
mismo.
1.
2.
3.
4.
Primero, apague el teléfono y préndalo nuevamente para actualizar la memoria.
Coloque el teléfono celular a unos 30 cm del Z9 con micrófono dual.
Ingrese al menú de Bluetooth en su teléfono celular. Active la capacidad Bluetooth (verifique en la
guía del usuario de su teléfono celular si esto es necesario).
Con el Z9 apagado, oprima y mantenga oprimido el MFB
por unos 6 segundos. El LED se
encenderá tomando un color azul, ésta luz será fija; se debe esperar a que la luz se vuelva
intermitente, lo cual indicará que el Z9 se encuentra en la modalidad de Asociación listo para ser
identificado por otros equipos Bluetooth. La modalidad Asociación permanecerá activa por 2 minutos.
Proceso de asociación (continuación)
5.
Inicie el proceso de detección de equipos Bluetooth en su teléfono celular para agregar una nueva
unidad. (El proceso tomará algunos segundos para detectar otros equipos Bluetooth en las
cercanías.)
6.
Cuando se detecte el equipo Bluetooth, la pantalla del teléfono mostrará “BlueAnt Z9”. Seleccione
7.
Ingrese el código “0000” cuando el teléfono se lo pida. El teléfono y el Z9 se encuentran ahora
esta opción y oprima OK para confirmar que desea asociar su teléfono con el Z9.
asociados.
8.
Puede que su teléfono requiera una configuración de seguridad adicional para permitir que el
auricular y el teléfono se conecten automáticamente sin que se necesite confirmar cada vez que
devices”, “allow connection” o algo similar en las opciones del BlueAnt Z9.
9.
De ser requerido la primera vez que se conecte, seleccione el BlueAnt Z9 para que se conecte a su
teléfono. O bien, presione el MFB
en el Z9 para conectarse al teléfono.
SPANISH
conecte el Z9. Por lo general, esta configuración aparece como “set as authorized”, “add to trusted
Funciones básicas del auricular
Para referencia rápida, véase también la Tabla de botones/funciones y la Guía de inicio rápido.
1. Encendido: Mantenga oprimido el MFB
por 3 segundos. El LED se iluminará azul. Si la batería tiene
suficiente carga, ésta permanecerá iluminada por 5 segundos, de lo contrario, el LED cambiará a color rojo
indicando así que la batería está baja. Después de ser encendido, el auricular se conectará
automáticamente al último teléfono utilizado que se encuentre en alcance operacional. Si todavía no se ha
asociado un teléfono, el Z9 ingresará en modalidad Asociación. Si no hay un teléfono en alcance
operacional, el Z9 ingresará en modalidad Reposo.
2. Apagado: Oprima y mantenga oprimido el MFB
durante unos segundos.
por 3 segundos. El LED rojo tornará intermitente
3. Ingresar en modalidad Asociación: Con el Z9 apagado, oprima y mantenga oprimido el MFB
por
unos 6 segundos hasta que el LED se ilumine azul intermitente. El Z9 permanecerá en modalidad de
Asociación por 2 minutos para luego pasar a modalidad Inactiva. Si desea ingresar nuevamente a la
modalidad de Asociación, repita este paso.
4. Efectuar una llamada: Marque el número como lo hace normalmente en su teléfono. El audio se
transferirá automáticamente al auricular.
Funciones básicas del auricular (continuación)
5. Para responder o Terminar una llamada: Oprima el MFB
Oprima y mantenga oprimido el MFB
una vez cuando entre una llamada.
por 3 segundos para terminar la llamada.
6. Rehusar*: una llamada: Oprima y mantenga oprimido el MFB
llamada.
por 3 segundos cuando entre una
7. Marcar de nuevo*: Para marcar de nuevo la última llamada, oprima y mantenga oprimido el botón
del Volumen por unos 3 segundos. Para cancelar Marcar de nuevo, oprima el MFB
.
8. Activar Marcado por voz*: Mientras se encuentre conectado a un teléfono, oprima el MFB
una vez.
Los comandos de voz deben haber sido grabados con anterioridad en el teléfono (véase la guía del usuario
del teléfono).
o
del Volumen durante una llamada para ajustar el nivel
deseado.
10. Desconectar / Transferir: Para desconectar el Z9 del teléfono actualmente conectado o para transferir
la llamada actual nuevamente al teléfono, oprima simultáneamente los botones
vez. Esto también transferirá la llamada activa al teléfono.
y
del Volumen una
SPANISH
9. Nivel de volumen: Oprima el botón
Funciones básicas del auricular (continuación)
11. Reconectar: Para reconectar su teléfono se puede utilizar cualquiera de los siguientes pasos:
Encienda el Z9; oprima el MFB
con el Z9 encendido; o también, puede utilizar el menú de su teléfono
Bluetooth.
12. Activar/Desactivar el micrófono: Oprima y mantenga oprimido el botón
del Volumen por 3
segundos durante una llamada.
13. Llamada en espera*: Si entra una llamada en medio de una llamada existente (el tono de notificación
varía según el proveedor de servicio), oprima y mantenga oprimidos simultáneamente los botones
y
del Volumen por tres segundos. La llamada actual se pondrá en espera y se podrá atender la llamada
entrante. Para regresar a la llamada en espera, oprima y mantenga oprimidos simultáneamente los botones
y
del Volumen por tres segundos.
14. Conferencia telefónica*: Para agregar una llamada retenida a una conversación existente, oprima y
del Volumen por 3 segundos.
mantenga oprimido el botón de
Funciones básicas del auricular (continuación)
15. Activar/Desactivar los indicadores de LED: (para conducción nocturna): Cuando el auricular esté en
modalidad Reposo o Inactiva, oprima y mantenga oprimidos simultáneamente los botones
y
del
Volumen por tres segundos. Después de apagar y volver a encender el auricular, los indicadores de LED se
activarán nuevamente de manera automática. Note que los LED se encuentran apagados durante una
llamada activa.
oprima simultáneamente los botones
y
del Volumen y MFB
(3 botones). El Z9 actualizará la
memoria, borrará todos los archivos de asociación e ingresará automáticamente en modalidad Asociación
(el LED se iluminará intermitentemente en azul), listo para asociarse con un nuevo equipo.
* Para utilizar estas funciones, su teléfono/equipo debe ser compatible con el perfil Manos Libres de
Bluetooth.
El perfil Manos Libres de Bluetooth no activará estas funciones del BlueAnt Z9.
SPANISH
16. Reiniciar el Z9: Si ya se han asociado 3 equipos con el Z9, no será posible asociar otro ya que la
memoria se encuentra llena. Si desea asociar el Z9 con otro teléfono, deberá reiniciar el auricular.
Para reiniciar el Z9 a la configuración de fábrica: en la modalidad Reposo (no conectado a ningún equipo),
Voice Isolation Technology™ de BlueAnt
Se puede cambiar entre las dos configuraciones para aislamiento de voz: STANDARD y MAX.
Aislamiento de voz Standard - Para uso en ambientes normales cotidianos. Brinda un
sonido natural de voz por medio de la eliminación de ruido
leve.
Aislamiento de voz Max -
Brinda una calidad más clara de voz en una amplia variedad
de áreas con altos niveles de ruido.
¿CÓMO SE HACE PARA CAMBIAR?
Para cambiar entre Standard y Max: Oprima el MFB
•
•
•
•
durante la llamada
Durante el cambio entre Standard y Max escuchará una confirmación auditiva a través del
parlante del Z9.
El auricular estará en configuración Standard al encenderse por primera vez.
Después de apagar y volver a encender el auricular, el auricular regresará a la configuración
Standard de manera automática.
Ambas configuraciones, Standard y Max, consumen la misma cantidad de energía de la
batería.
NOTA:
Modalidad Inactiva
significa que está
conectado
a un equipo pero no
en una llamada.
Tiempo
Estado
Encendido
Funciones del Z9:
Botón
MFB
3 segundos
A partir de Apagado
Apagado
MFB
3 segundos
A partir de Encendido
Ingresar modalidad Asociación
MFB
6 segundos
A partir de Apagado
Conectar a Equipo 1
MFB
Oprimir una vez
Reposo
Conectar a Equipo 2
MFB
Oprimir dos veces
Reposo
Conectar a Equipo 3
MFB
Oprimir tres veces
Reposo
Responder llamada
MFB
Oprimir
Repique
Terminar llamada
MFB
3 segundos
Llamada activa
Rehusar llamada
MFB
3 segundos
Repique
3 segundos
Inactivo (Stand-by)
Oprimir
Inactivo (Stand-by)
Marcar de nuevo el último número
Vol
Activación de marcado por voz
Modalidad Reposo
significa que el Z9
está encendido pero
que
no está conectado a
ningún
equipo
Presionar botones
significa oprimir a la vez
MFB
Transferir/Desconectar el Z9
y
Conferencia telefónica
Vol
Llamada en espera
y
Aumentar volumen
Vol
Oprimir
Conectado
3 segundos
Llamada activa
3 segundos
Llamada activa
Oprimir
Llamada activa
Llamada activa
Disminuir volumen
Vol
Oprimir
Mudo
Vol
3 segundos
Llamada activa
3 segundos
Reposo/Inactivo
Oprimir
Llamada activa
Oprimir
Reposo
Prender/Apagar indicadores de LED
y
Cambiar tipo de aislamiento de voz:
entre Standard y Max
Reiniciar equipo
MFB
MFB
y
y
SPANISH
Tabla de
botones/
Funciones
Cuadro de indicadores de LED
Encendido
Apagado
Modalidad Asociación
Reiniciar
Carga
Carga con el equipo
encendido
Carga completa
Batería baja
Reposo
Inactivo (Stand-by)
Llamada en curso
Azul permanente durante 5 segundos
Rojo se enciende intermitente 3 veces
Iluminación intermitente azul
Iluminación intermitente azul
Rojo permanente.
Rojo permanente con iluminación
intermitente en violeta
Apagado indicador rojo
Todos los indicadores de LED cambian a
rojo
Iluminación intermitente en azul cada 8
segundos
2 iluminaciones intermitentes en azul
cada 5 segundos
Indicadores de LED apagados
Funciones avanzadas del auricular
Uso del auricular con múltiples equipos Bluetooth
El Z9 se conectará a sólo un equipo a la vez y se podrá asociar a un total de 3 equipos.
1. Asegúrese de que el último teléfono usado tenga la función Bluetooth desactivada o que se encuentre
fuera de alcance operacional.
2. Siga las instrucciones de la sección “Proceso de asociación” para cada equipo que se desee asociar.
Cambio de señal telefónica sin interrupción (On-the-Fly switching)
Después de asociar un segundo o tercer Smartphone, PDA o computador siguiendo las instrucciones del
proceso de asociación, podrá cambiar entre los equipos a través del siguiente procedimiento.
Seleccionar el teléfono celular requerido
Una vez para el primer teléfono asociado
Dos veces para el segundo teléfono asociado
Tres veces para el tercer teléfono asociado
Nota: Asegúrese de recordar el orden de asociación de los 3 equipos.
y
SPANISH
1. Desconectar el Z9 del teléfono actualmente conectado: oprima simultáneamente los botones
del Volumen
2. Conecte a cualquiera de los tres equipos asociados oprimiendo el MFB
.
Actualización del firmware
Se puede actualizar el firmware del BlueAnt Z9 a través del puerto USB con el cable USB suministrado.
Véase la sección de asistencia técnica en www.blueantwireless.com para obtener información y descargas
de cualquier actualización disponible.
Información adicional
Configuración de perfil del teléfono (diferente de perfiles Bluetooth)
En su teléfono, configure un perfil con volúmenes de repique y tonos de teclado apropiados. Selecciónelo y
actívelo cuando utilice el Z9. Algunos teléfonos pueden activar automáticamente el perfil deseado cuando
se los conecta a un accesorio vehicular o auricular. Ejemplo: vaya a Configuraciones especiales
(Enhancement Settings) y seleccione un perfil predeterminado para que se active cuando se conecte el
auricular. En algunos teléfonos es posible ajustar los niveles para adecuarlos al uso personal (véase el
manual del usuario de su teléfono para instrucciones acerca de cómo utilizar y activar los diferentes
perfiles). Los perfiles más comunes son General, Exteriores, Reunión, Silencioso, Manos Libre, Auricular,
Manos Libres portátil y Accesorio vehicular.
Software para teléfono/PDA/computador
Asegúrese de tener la última actualización del firmware para su teléfono, especialmente si utiliza un
teléfono PDA. Vaya a la sección de asistencia técnica en la página web del fabricante para verificar que
tenga la última versión. Muchos de los nuevos teléfonos celulares, PDA y teléfonos por computador
necesitan un paquete de actualización de Bluetooth para mejorar la funcionalidad Bluetooth con respecto a
la última versión disponible.
Reiniciar el teléfono/PDA
Los teléfonos y PDA pueden a menudo presentar problemas de memoria que pueden causar problemas de
reconexión con Bluetooth. Para solucionar esto, basta con apagar el equipo y encenderlo nuevamente. El
teléfono se reiniciará y la memoria activa quedará actualizada en limpio.
Reiniciar el teléfono semanalmente puede ayudar a mantener su funcionalidad en orden, incluida la
funcionalidad Bluetooth.
Véase la sección de asistencia técnica de www.blueantwireless.com para solución de problemas y
preguntas frecuentes (FAQ), además de información sobre uso de computadores con aplicaciones de
VOIP.
SPANISH
Solución de problemas y documentos de respaldo
Especificaciones
Especificaciones
generales
Especificaciones
RF
Interfaz del usuario
Audio
Tipo de batería
Tiempo de habla
Tiempo de
inactividad (Standby)
Peso
Dimensiones (mm)
z Bluetooth v2.0
z Hasta 10 metros de cobertura RF
z De conformidad con CE, FCC, BQB, RoHS / WEEE
z Perfil de auricular, Perfil de Manos Libres v1.0
z Frecuencia de transmisión 2,402 ~ 2,480 GHz
z < 0,1% BER a -80 dBm
z 0 ± 4 dBm (Clase 2)
z LED color azul para indicación de funcionamiento
z LED color rojo para indicación de batería baja
z Mini USB para cargar la batería o actualización de firmware
3GPP con solución DSP
Batería de litio-polímero de 3,7 V
Hasta 5,5 horas
200 horas
10 g sin gancho para la oreja; 11 g con gancho para la oreja
1.5 x 0.69 x 0.44 (inches) / 41 x 17.5 x 11.2 (mm)
Ayuda
Proceso de garantía de BlueAnt
1. En caso de experimentar dificultades de funcionamiento, consulte las preguntas frecuentes (FAQ) y los
documentos de respaldo en línea; si lo desea puede llamarnos a nuestro número telefónico que se
encuentra en la contraportada de este manual
2. Consulte nuestra página web (www.blueantwireless.com) para obtener más información, manuales
actualizados y ayuda para la resolución de problemas.
3. Llámenos para hablar con un representante del equipo de atención al cliente de BlueAnt Wireless
Le indicaremos si su problema es de hardware o de conexión.
4. Si se determina que su unidad está defectuosa, se le emitirá una Autorización de devolución de
mercadería (RMA).
5. Devuelva la unidad directamente a BlueAnt para evaluación y reemplazo de los elementos defectuosos.
2. BlueAnt reemplazará o reparará cualquier producto defectuoso siempre y cuando
éste no haya sido usado descuidadamente o abusado de alguna manera.
3. Este producto no cuenta con ningún elemento que pueda ser reparado por el
usuario. El uso de servicios de reparación no autorizados anulará la garantía.
4. La garantía es válida por 2 años (24 meses) a partir de la fecha de compra.
• Se deberá suministrar comprobante de compra para obtener el servicio de garantía.
SPANISH
Términos y condiciones de la garantía
1. BlueAnt ofrece garantía solamente al comprador original de este producto.
• El auricular deberá estar en el paquete original con su número de serie correspondiente para que la
garantía sea válida.
5. Las garantías tienen efecto a partir de la fecha del comprobante de compra y no a partir de la fecha de
cualquier reparación o reemplazo subsiguiente.
Limitaciones:
Este manual fue publicado por BlueAnt. La información contenida en este documento está sujeta a cambio
sin previo aviso. Todos los derechos reservados. La palabra Bluetooth, marca y logotipos son propiedad de
Bluetooth SIG, Inc. Todo uso de tales marcas por parte de BlueAnt se encuentra bajo licencia. Las otras
marcas registradas y nombres comerciales pertenecen a sus respectivos dueños.
Protéjase los oídos.
Advertencia: Este auricular puede alcanzar un volumen máximo de 101 decibeles. El uso prolongado del
auricular a volúmenes altos puede afectar su capacidad auditiva. El uso por períodos extensos puede
ocasionar la pérdida de la audición inducida por el ruido (NIHL). La pérdida de la audición puede producirse
si el auricular se utiliza a volúmenes máximos por más de 5 minutos al día, o si el auricular se utiliza a
volúmenes intermedios por más de 1 hora al día. La exposición a sonidos provenientes de fuentes emisoras
tan cercanas al oído puede ocasionar pérdida de la audición, incluso a niveles bajos.
Por medio de la presente [nombre del fabricante] declara que el [clase de
equipo] cumple con los requisitos esenciales y cualesquiera otras disposiciones
aplicables o exigibles de la Directiva 1999/5/CE.
Introduzione
L’auricolare mono portatile BlueAnt Z9 a doppio microfono utilizza la tecnologia wireless Bluetooth. I doppi
microfoni, insieme al software Voice Isolation Technology™ di Blue Ant, costituiscono l’auricolare BlueAnt
Z9, dotato di rivoluzionario input vocale chiaro e senza disturbi, che consente comunicazioni vocali di qualità
superiore. Vincitore del prestigioso premio CES Design and Engineering, l’auricolare BlueAnt Z9
rappresenta la nuova generazione in materia di riduzione del rumore ed eliminazione dell’eco per gli
auricolari a tecnologia Bluetooth.
Sono possibili due impostazioni per l’isolamento della voce: STANDARD e MAX.
L’isolamento della voce Standard si usa in ambienti normali e fornisce una voce naturale, rimuovendo i
rumori moderati di fondo.
L’isolamento della voce Max offre una straordinaria chiarezza della voce anche in ambienti molto
rumorosi.
ITALIAN
Z9 – GUIDA
DELL’UTENTE
Funzioni dell’auricolare BlueAnt Z9
•
•
•
•
•
•
•
•
•
•
•
•
•
•
Vincitore del premio CES 2007 Innovations Design & Engineering Award
Doppio microfono per una conversazione priva di disturbi
Rivoluzionario software Digital Signal Processor (DSP) di Blue Ant per Voice Isolation
Technology ™
Durante una chiamata, gli utenti possono disporre di due modalità di Voice Isolation
(isolamento della voce), Standard e Max, e passare dall’una all’altra
Questo evolutissimo DSP elimina l'eco, riduce dei rumori e i fruscii causati dal vento,
attraverso la separazione del segnale vocale desiderato dai rumori di fondo, consentendo
così una conversazione di qualità cristallina, persino negli ambienti più rumorosi
Include la funzione di commutazione telefonica “On-the-Fly”, dotata fino a 3 dispositivi
accoppiati, che consentono all’utente di trasmettere il collegamento Bluetooth da un
auricolare all’altro premendo semplicemente un pulsante
Notifica di connessione e riconnessione automatica
Suonerie diverse in base ai contatti noti o sconosciuti all’utente
Innovativo clip di aggancio per attaccare l’auricolare alla camicia o al polsino quando non
è in uso
Piccolo e leggero (solo 9 millimetri di lunghezza per 7,8 grammi di peso)
Elegante gancio da orecchio traslucido
Fino a 5,5 ore di durata in conversazione o 200 in standby
Garanzia operativa di sostituzione della durata di 2 anni
Bluetooth v2.0
Bluetooth è la più avanzata tecnologia attualmente disponibile per fare a meno dei cavi.
Permette la connessione senza fili tra i dispositivi Bluetooth presenti in un raggio di 10 m.
Quali dispositivi sono compatibili con il doppio microfono Z9?
L'auricolare è un prodotto certificato Bluetooth V2.0 e supporta entrambi i profili Bluetooth Headset e
Handsfree. L’auricolare Z9 è in grado di memorizzare informazioni e comunicare senza fili con tre diversi
dispositivi Bluetooth compatibili, V1.1, V1.2 o V2.0 (retrocompatibile e compatibile con versioni successive),
tra cui telefoni cellulari, dispositivi PDA, PC/Mac o qualsiasi dispositivo dotato di tecnologia Bluetooth che
supporti i profili Headset o Handsfree. Questo manuale riguarda soprattutto l’uso dell’auricolare con il
telefonino dotato di tecnologia Bluetooth.
Contenuto della confezione
> Auricolare a doppio microfono BlueAnt Z9 con tecnologia
> Guida rapida
Bluetooth
> Manuale dell’utente
> 3 ganci da orecchio traslucidi
> Certificato di garanzia
> Cavo USB
> Adattatore CA
ITALIAN
In cosa consiste la tecnologia wireless Bluetooth?
Descrizione generale
MFB (pulsante
multifunzione)
USB
Volume
Giù
Volume
Su
Gancio da
orecchio
Altoparlante
Prima di utilizzare l’auricolare, è necessario effettuare le due operazioni seguenti.
1. Caricare completamente l’auricolare usando uno dei caricatori in dotazione.
2. Inserire l’auricolare in un dispositivo dotato di tecnologia Bluetooth, ad esempio telefono
cellulare, PDA, computer
Caricamento
L’auricolare Z9 è dotato di batteria ricaricabile incorporata. La prima volta che si usa
l'auricolare Z9 è necessario caricarlo completamente. Durante la carica, l’indicatore mostrerà
una luce rossa fissa. Quando la batteria è completamente carica, la luce rossa si spegnerà.
Occorrono dai 120 ai 150 minuti per caricare completamente la batteria. Più si parla usando
l’auricolare e il doppio microfono, minore sarà il tempo di standby della batteria. L’auricolare
richiederà tempi di carica più lunghi quando non viene usato per lungo tempo.
ITALIAN
Per iniziare
Carica dell’auricolare Z9 con il connettore USB
1. Inserire un’estremità del cavo USB da ricarica nella porta USB del PC/Mac
2. Inserire l’altra estremità del cavo USB nella porta di ricarica dell’auricolare. Verificare che lo spinotto USB
corrisponda alla presa USB sull’auricolare. Non forzare lo spinotto nella presa: dovrebbe scivolarvi
facilmente. Il LED rosso si accenderà.
3. Quando la carica è completa il LED rosso si spegnerà. Rimuovere l’adattatore di ricarica.
Carica dell’auricolare Z9 con il caricatore da parete
1. Inserire il caricatore CA in una presa di corrente e il cavo nella porta di ricarica sull’auricolare Z9.
Verificare che lo spinotto USB corrisponda alla presa USB sull’auricolare. Non forzare lo spinotto nella
presa: dovrebbe scivolarvi facilmente. Il LED rosso si accenderà.
2. Quando la carica è completa il LED rosso si spegnerà. Rimuovere l’adattatore di ricarica.
Spingere il gancio da orecchio attraverso il foro che si trova sul
dispositivo di aggancio dell'auricolare e regolarne la lunghezza
fino a quando non si appoggia comodamente sull’orecchio.
Verificare che il microfono dell’auricolare punti verso la bocca.
L’auricolare Z9 si può portare sull’orecchio destro o sinistro.
ITALIAN
Come portare l’auricolare BlueAnt Z9
Per prestazioni ottimali dell’auricolare
Z9, sistemarlo in modo tale che punti
verso la bocca.
Accoppiamento
Prima dell’uso, si deve abbinare l’auricolare al proprio cellulare. L’accoppiamento creerà una connection
che sarà memorizzata sia nel Z9 sia nel cellulare con tecnologia Bluetooth. L’accoppiamento deve essere
effettuato una volta sola, vale a dire durante la prima connessione a un nuovo telefonino. L’auricolare Z9 è
in grado di memorizzare informazioni di accoppiamento destinate fino a tre (3) dispositivi Bluetooth diversi.
Se si desidera accoppiare un altro dispositivo diverso quando sono stati già accoppiati 3 dispositivi, sarà
necessario eseguire la procedura di RESET dell’auricolare Z9, secondo le istruzioni riportate di seguito
nelle Funzioni di base dell’auricolare.
Procedura di accoppiamento
Questo è solo un esempio, e il telefonino dell'utente potrà essere diverso, ma la procedura sarà la stessa.
1.
Per prima cosa spegnere e riaccendere il telefonino per aggiornarne la memoria.
2.
Portare il cellulare a circa 30 cm dal doppio microfono Z9.
3.
Trovare il menu Bluetooth nel cellulare. Attivare la funzione Bluetooth. (Consultare la guida dell’utente
del proprio cellulare, se necessario)
4.
Con l’auricolare Z9 su OFF, tenere premuto il MFB
per circa 6 secondi. Il LED mostrerà una luce
blu fissa, poi inizierà a lampeggiare. L’auricolare Z9 si trova ora in modalità Accoppiamento, ed è
pronto per essere trovato quando altri dispositivi con tecnologia Bluetooth lo cercheranno. La modalità
Accoppiamento rimarrà attiva per 2 minuti.
5.
Eseguire una ricerca di dispositivi Bluetooth sul proprio cellulare per aggiungere un nuovo dispositivo.
(Occorreranno pochi secondi per cercare e trovare altri dispositivi Bluetooth nei pressi dell’utente).
6.
Quando si trovano dispositivi Bluetooth, il telefonino visualizzerà "BlueAnt Z9". Far scorrere lo
schermo fino a trovare l’auricolare e premere OK per confermare l’accoppiamento.
7.
Inserire il codice di accesso "0000" quando il telefonino lo richiede. Ora il telefonino e l’auricolare Z9
sono associati.
8.
Potrebbe essere necessaria un'altra impostazione di sicurezza nel proprio cellulare per consentire
all’auricolare e al cellulare di collegarsi automaticamente senza conferma ogni volta che si collega il
proprio Z9. In genere, nelle opzioni per l’auricolare BlueAnt Z9 appariranno i riferimenti "imposta
come autorizzato", "aggiungi ai dispositivi associati", ‘’consenti la connessione” o altro ancora.
9.
Se necessario per la prima connessione, selezionare il BlueAnt Z9 per collegarsi al proprio telefonino.
OPPURE, premere il MFB
sul Z9 per collegarsi al telefonino.
ITALIAN
Procedura di accoppiamento (continua)
Funzioni di base dell’auricolare
Per immediato riferimento, vedere anche il display a matrice Pulsante/Funzione e la Guida rapida.
1. Accensione Tenere premuto il MFB
per 3 secondi. Si accenderà il LED con la luce blu fissa e, se la
batteria è carica, il LED blu rimarrà acceso fino a un massimo di 5 secondi. Se la batteria è quasi scarica, il
LED mostrerà una luce rossa fissa. Dopo l’accensione l’auricolare si collegherà automaticamente all’ultimo
cellulare usato, se questo si trova nell’area di copertura. Se non è stato ancora accoppiato a un cellulare, lo
Z9 entrerà in modalità Accoppiamento. Se nell’area non appare alcun cellulare accopiato, l’auricolare Z9
entrerà in modalità Idle.
2. Spegnimento Tenere premuto il MFB
per 3 secondi. Il LED rosso lampeggerà tre volte.
3. Entrata nella modalità Accoppiamento Con l’auricolare Z9 su OFF, tenere premuto il MFB
per circa
6 secondi, fino a quando il LED blu lampeggerà. L’auricolare Z9 rimarrà in modalità Accoppiamento per 2
minuti, quindi entrerà in modalità standby. Per rientrare nella modalità Accoppiamento, ripetere questo
passaggio.
4. Chiamata Digitare il numero usando il cellulare come di consueto. L’audio si trasferirà automaticamente
all’auricolare.
5. Rispondere a una chiamata o terminarla Fare clic sul MFB
chiamata. Tenere premuto il MFB
una volta sola quando è in arrivo una
per 3 secondi per terminare la chiamata.
6. Rifiutare* una chiamata Tenere premuto il MFB
per 3 secondi quando è in arrivo una chiamata.
7. Richiamare automaticamente* Per richiamare automaticamente l’ultimo numero chiamato, tenere
premuto il pulsante Volume
per circa 3 secondi. Per annullare l'operazione, fare clic sul MFB
8. Attivare Composizione numero vocale* Restando collegati al cellulare, premere il MFB
una volta
sola. I comandi vocali dovranno essere stati registrati in precedenza nel proprio cellulare; per informazioni
su questa operazione, vedere la Guida dell'utente del proprio telefonino).
9. Livello volume Fare clic su Volume
livello desiderato.
o Volume
durante una chiamata per regolare il volume al
ITALIAN
Funzioni di base dell’auricolare (continua)
Funzioni di base dell’auricolare (continua)
10. Disconnettere / Trasferire la chiamata Per disconnettere l’auricolare Z9 con il telefonino ancora
collegato, oppure per trasferire una chiamata in corso al telefonino, fare clic su Volume
contemporaneamente.
e Volume
11. Ricollegarsi Per riconnettere il telefonino al Z9, basterà accendere l’auricolare Z9. Oppure, con lo Z9
acceso, basterà premere il MFB
. In alternativa, si potrà utilizzare il menu del telefonino Bluetooth.
12. Alternare le funzioni Mute/Unmute sul microfono. Tenere premuto Volume
per 3 secondi durante
una chiamata.
13. Chiamata in attesa* Se un'altra chiamata in arrivo appare durante una chiamata in corso, (i toni di bip
dipenderanno dalla rete) tenere premuti i pulsanti Volume
e Volume
assieme per 3 secondi. La
chiamata in corso sarà messa in attesa; in questo modo, si potrà rispondere alla chiamata in arrivo. Per
tornare alla chiamata messa in attesa, tenere premuti i pulsanti Volume
secondi.
e Volume
assieme per 3
14. Chiamata conferenza* Per aggiungere una chiamata in attesa alla conversazione in corso, tenere
premuto Volume
per 3 secondi
15. Disattivare/Attivare gli indicatori LED (per la guida notturna) Quando l’auricolare si trova in modalità
assieme per 3 secondi.
e Volume
Idle o Standby, tenere premuti i pulsanti Volume
Dopo aver spento e riacceso l’auricolare, gli indicatori LED si riattiveranno nuovamente per impostazione
predefinita. Notare che i LED sono spenti durante una chiamata attiva.
16. Reset del Z9 Se sono già stati abbinati 3 dispositivi all’auricolare Z9, non sarà possibile accoppiarne un
altro, poiché la memoria è piena. Se si desidera accoppiare l’auricolare con un altro telefonino, sarà
necessario eseguire la procedura di reset dell’auricolare.
Per eseguire la procedura di reset e riportare l’auricolare Z9 alle impostazioni di fabbrica, mentre il
dispositivo si trova in modalità Idle (non collegato ad altri dispositivi), fare clic contemporaneamente su
Volume , Volume
e MFB
(3 pulsanti). L’auricolare Z9 aggiornerà la propria memoria, eliminerà tutte
le informazioni di accoppiamento presenti e si porterà automaticamente in modalità Accoppiamento (i LED
blu lampeggeranno), pronto per essere associato a un nuovo dispositivo.
* Per usare queste funzioni il telefonino/dispositivo deve supportare il profilo Handsfree di Bluetooth.
Il profilo Headset di Bluetooth non attiverà queste funzioni del BlueAnt Z9.
ITALIAN
Funzioni di base dell’auricolare (continua)
Voice Isolation Technology™ di BlueAnt
Si può commutare tra le due impostazioni di Voice Isolation: STANDARD e MAX.
Voice Isolation - Standard Voice Isolation - Max -
Da usare negli ambienti normali quotidiani; offre una voce dal suono
naturale e rimuove i rumori di fondo moderati.
Rende la voce più intelligibile in una vasta gamma di ambienti molto
rumorosi.
COME PASSO DA UNA MODALITÀ ALL’ALTRA?
Per commutare tra le modalità Standard e Max: Fare clic sul MFB
•
•
•
•
durante una chiamata
Quando si commuta tra le modalità Standard e Max si sentirà un comando vocale di conferma
riprodotto dall’altoparlante dell’auricolare Z9.
Quando si accende l'auricolare per la prima volta, il dispositivo si troverà in modalità Standard.
Dopo avere spento e riacceso l'auricolare, questo tornerà per impostazione predefinita in modalità
Standard.
Le modalità Standard e Max usano entrambe la stessa quantità di energia della batteria.
Nota:
Modalità Standby
significa essere collegati
a un dispositivo ma non
in chiamata.
Modalità Idle
significa che Z9
si trova su ON, ma non
è collegato ad alcun
dispositivo
Modalità Multipla
premere i pulsanti vuol
dire fare clic sui pulsanti
contemporaneamente
Pulsante
MFB
MFB
MFB
MFB
MFB
MFB
MFB
MFB
MFB
Tempo
3 secondi
3 secondi
6 secondi
Un clic
Due clic
Tre clic
Clic
3 Secondi
3 Secondi
3 Secondi
Stato
Da OFF
Idle/Standby
Da OFF
Idle
Idle
Idle
Squillo
Chiamata attiva
Ringing
Standby
Clic
Clic
Standby
Collegato
Vol
3 secondi
Chiamata attiva
e
3 secondi
Chiamata attiva
Vol
MFB
Attivare combinaz. vocale
Trasf./Disconnetti Z9
e
Chiamata conferenza
Chiamata in attesa
Volume +
Vol
Clic
Chiamata attiva
Volume -
Vol
Clic
Chiamata attiva
Mute
Vol
3 secondi
Chiamata attiva
LED OFF/ON
e
MFB
3 secondi
Idle/Standby
Clic
Chiamata attiva
Clic
Idle
Commuta Voice Isolation
tra Standard e Max
Reset dispositivo
MFB
e
e
ITALIAN
Matrice Pulsante
Funzione
FunzioneZ9
Accendere (su ON)
Spegnere (su OFF)
Avviare accoppiamento
Collegarsi al dispositivo 1
Collegarsi al dispositivo 2
Collegarsi al dispositivo 3
Rispondere alla chiamata
Terminare la chiamata
Rifiutare la chiamata
Richiam. automaticamente
Grafico Indicatori LED
Accensione (su ON)
Spegnimento (su OFF)
Modalità Accoppiamento
Reset
Carica
Carica con aliimentazione su ON
Completamento carica
Batteria scarica
Idle
Standby
Chiamata in corso
Blu fisso per 5 secondi
Rosso: lampeggia 3 volte
Blu a lampeggio
Blu a lampeggio
Rosso fisso
Rosso fisso con lampeggio viola
Indicatore rosso spento (OFF)
Tutti I LED diventano rossi
Blu e lampeggia ogni 8 secondi
2 lampeggi blu ogni 5 secondi
NESSUN LED ACCESO
Uso dell’auricolare con più dispositivi Bluetooth
L’auricolare Z9 si collegherà solo a un dispositivo per volta; tuttavia, può essere abbinato a 3 dispositivi.
1. Verificare che l’ultimo telefonino utilizzato abbia la funzione Bluetooth disattivata o sia fuori dall’area di copertura.
2. Seguire la procedura sopra descritta in ‘Procedura di Accoppiamento’ per ciascun dispositivo da abbinare.
On-the-Fly Phone Switching (Commutazione telefonica senza interruzione)
Dopo aver associato un secondo o un terzo cellulare, Smartphone, PDA o computer, secondo la procedura
di accoppiamento sulla pagina citata, si potrà commutare tra dispositivi usando la seguente procedura.
Selezionare il cellulare richiesto
1. Disconnettersi dal telefonino attualmente collegato. Fare clic su Volume
contemporaneamente.
e Volume
2. Collegarsi a qualsiasi dei tre dispositivi associati su richiesta, facendo clic sul MFB
Una volta per il primo dispositivo associato
Due volte per il secondo dispositivo associato
Tre volte per il terzo dispositivo associato
Nota: assicurarsi di ricordarsi l'ordine in cui i 3 dispositivi sono stati associati.
ITALIAN
Funzioni avanzate dell’auricolare
Aggiornamento firmware
L’auricolare BlueAnt Z9 può aggiornare il firmware mediante la porta e il cavo USB in dotazione.
Vedere la sezione Supporto all’indirizzo www.blueantwireless.com per informazioni, download e
aggiornamenti disponibili.
Altre informazioni
Impostazione di un profilo telefonico (diverso dai profili Bluetooth)
Impostare un Profilo nel proprio telefonino con i volumi delle suonerie e i toni del tastierino appropriati,
quindi selezionarlo e attivarlo quando si usa l’auricolare Z9. Alcuni telefoni possono attivare
automaticamente un profilo desiderato quando si collegano a un kit auto o a un accessorio per auricolari. Ad
esempio, andare a Impostazioni di potenziamento e selezionare un Profilo predefinito da attivare quando si
connette l’auricolare. Con alcuni telefonini si possono, inoltre, personalizzare i livelli per renderli adatti alle
proprie esigenze (vedere il manuale dell’utente del proprio telefonino per le istruzioni su come usare e
attivare profili telefonici). Profili telefonici tipici sono Generale, All’aperto, Riunione, Silenzioso, Vivavoce,
Auricolare, Vivavoce portatile e kit auto.
Reset del proprio telefonino/PDA
I telefonini e i PDA possono presentare problemi di software e memoria, che a loro volta potranno causare
problemi di riconnessione alla funzione Bluetooth. Questo problema può essere risolto semplicemente
spegnendo e riaccendendo il telefonino. La procedura di reset del telefonino sarà ultimata e la memoria
attiva sarà azzerata.
Eseguire la procedura di reset del telefonino ogni settimana può aiutare a mantenere la sua funzionalità,
inclusa quella della funzione Bluetooth.
Documenti per il supporto e la risoluzione dei problemi
Vedere la sezione di supporto di www.blueantwireless.com per le informazioni sulla risoluzione di problemi
e le Domande frequenti (FAQ), oltre alle informazioni sull’uso dei computer per applicazioni VOIP.
ITALIAN
Cellulare/PDA/Software per computer
Assicurarsi di disporre dell'ultimo aggiornamento del firmware per il proprio telefonino, specie se si usa un
PDA. Andare alla sezione Supporto del sito Web del produttore per essere certi di avere la versione più
recente. Molti nuovi cellulari, PDA e telefonini/computer richiedono una patch Bluetooth per migliorare la
funzionalità Bluetooth rispetto alla versione originale.
Specifiche
Specifiche
generali
Spec. RF
Interfaccia utente
Audio
Tipo batteria
Durata chiamata
Tempo di Standby
Peso
Dimensioni (mm)
z Bluetooth v2.0
z Copertura RF fino a 10 m
z Conforme alle direttive CE,FCC,BQB, RoHS / WEEE
z Profilo Headset , Profilo Hands-Free
z Frequenza portante 2.402 ~ 2.480GHz
z < 0.1% BER a -80 dBm
z 0 ± 4 dBm (Classe 2)
z LED blu per indicare il funzionamento regolare.
z LED rosso per indicare la batteria scarica.
z Mini USB per caricare la batteria o aggiornare il firmware
3GPP con soluzione DSP
Batteria ai polimeri di litio da 3.7V
Fino a 5,5 ore
200 h.
10 g senza gancio da orecchio, 11 g con il gancio
41,6 x 17,5 x 11,0
Help
1. In caso di difficoltà di funzionamento, fare riferimento alle Domande frequenti (FAQ) in linea, ai documenti
di supporto, o chiamare il nostro reparto assistenza. Il nostro numero si trova sull’ultima pagina del
manuale
2. Visitare il nostro sito Web per altre informazioni, manuali aggiornati e risoluzione di problemi.
www.blueantwireless.com
3. Chiamateci e parlate con un membro del Team del Servizio Clienti BlueAnt Wireless
Chiariremo i vostri dubbi e vi diremo se riguardano l’hardware o la connessione.
4. Se la vostra unità si rivela difettosa, sarà emessa un'Autorizzazione di Restituzione Merce (Return
Merchandise Authorization o RMA) .
5. Restituire l’unità direttamente a BlueAnt per i test e la sostituzione di elementi difettosi
Termini e condizioni di garanzia
1. BlueAnt copre con la garanzia solo l'acquirente originale del prodotto.
2. BlueAnt sostituirà o riparerà qualsiasi prodotto difettoso, a condizione che non sia
stato usato in modo scorretto o danneggiato in qualsiasi modo.
3. Non esistono parti di questo prodotto che l’utente sia in grado di riparare per conto
suo. Usando un servizio di riparazione non autorizzato, la Garanzia decade.
4. La Garanzia è valida per 2 anni (24 mesi) dalla data dell’acquisto.
• Per ottenere una riparazione in Garanzia bisogna presentare la prova d’acquisto.
• Perché la Garanzia sia valida l’auricolare deve trovarsi nella confezione originale con il codice prodotto.
5. Le Garanzie sono valide dalla data della prova d’acquisto e non dalla data di qualsiasi successiva
sostituzione o riparazione.
ITALIAN
Procedura di garanzia BlueAnt
Clausole di non responsabilità
Questo manuale viene pubblicato da BlueAnt. Le informazioni contenute in questo documento
sono soggette a modifiche senza preavviso. Tutti i diritti riservati. Il termine, il marchio e i logo
Bluetooth sono di proprietà di Bluetooth SIG, Inc. BlueAnt utilizza i suddetti marchi su licenza.
Altri marchi e denominazioni commerciali appartengono ai rispettivi proprietari.
Proteggete le vostre orecchie.
Avviso: questo auricolare può raggiungere un volume massimo di 101 decibel. L’uso
prolungato ad alto volume di un auricolare può diminuire il vostro udito. L’uso dell’auricolare
per periodi prolungati può avere come risultato la perdita dell'udito dovuta al rumore (Noise
Induced Hearing Loss o NIHL). La perdita dell’udito si può verificare se l’auricolare viene
utilizzato al massimo del volume per oltre 5 minuti al giorno. La perdita dell’udito si può
verificare se l’auricolare viene utilizzato a un volume medio per oltre 1 ora al giorno.
L’esposizione al suono a una distanza così ravvicinata potrebbe causare la perdita dell’udito
anche a bassi livelli.
Con la presente [nome del costruttore] dichiara che questo [tipo di apparecchio] è
conforme ai requisiti essenziali ed alle altre disposizioni pertinenti stabilite dalla
direttiva 1999/5/CE.
Einleitung
Das tragbare Mono-Headset BlueAnt Z9 mit Doppelmikrofon nutzt die Bluetooth-Wireless-Technologie. Mit den zwei
Mikrofonen und der BlueAnt Voice Isolation Technology™ Software liefert das BlueAnt Z9 kristallklare
Sprachübertragung und qualitativ hochwertigen Empfang. Das BlueAnt Z9 wurde mit dem renommierten CES Design
and Engineering Award ausgezeichnet und gilt als die nächste Generation der Bluetooth-Headsets, die sich durch
Umgebungsgeräuschfilterung und Widerhallunterdrückung auszeichnen.
Es gibt zwei Einstellungen für die Sprachisolierung - STANDARD und MAX.
Die Standard-Sprachisolierung wird in normaler Umgebung verwendet und erzielt nach Ausfilterung von leichten
Geräuschen eine natürlich klingende Stimme.
Die Max. Sprachisolierung erzielt eine kristallklare Sprachwiedergabe in Bereichen mit hohem Lärmpegel.
GERMAN
Z9 BENUTZERHANDBUCH
Features des BlueAnt Z9
•
•
•
•
•
•
•
•
•
•
•
•
•
•
Ausgezeichnet mit dem CES 2007 Innovations Design & Engineering Award
Zwei Mikrofone für klare Sprachwiedergabe
Voice Isolation Technology ™ - die revolutionäre Digital Signal Processor (DSP)
Software von BlueAnt
Während eines Gesprächs kann der Benutzer zwischen zwei
Sprachisolierungsmodi auswählen – Standard oder MAX.
Der einzigartige DSP (digitaler Signalprozessor) garantiert
Widerhallunterdrückung, Rausch- und Windgeräuschminderung und trennt das
gewünschte Sprachsignal vom Geräuschhintergrund, so dass selbst in lautesten
Umgebungen ein kristallklares Gespräch gewährleistet wird
Im Betrieb kann auf bis zu drei gepaarte Geräte gewechselt werden
Benachrichtigung bei automatischer Verbindung und Verbindungswiederholung
Unterschiedliche Klingeltöne für bekannte Nummern und für unbekannte Anrufer
Ist das Gerät nicht in Gebrauch, kann es mit dem praktischen Clip-Bügel einfach
am Hemd oder am Ärmelaufschlag befestigt werden
Klein und handlich (nur 3,8 cm lang und knapp 10 g schwer)
Modernes Design, lichtdurchlässiger Ohrbügel
Bis zu 5,5 Stunden Sprechzeit oder 200 Stunden im Standby-Betrieb
2-Jahresgarantie mit Geräteaustausch
Bluetooth v2.0
Was ist die Bluetooth-Wireless-Technologie?
Bluetooth ist die derzeit modernste Drahtlostechnologie. Sie ermöglicht mühelos drahtlose
Verbindungen zwischen Ihren Bluetooth-Geräten innerhalb eines Bereiches von bis zu 10 m.
Bei Ihrem Headset handelt es sich um ein für Bluetooth V2.0 qualifiziertes Produkt, das sowohl
Headset- als auch Handsfree-Bluetooth-Profile unterstützt. Das Z9 kann Informationen speichern
und drahtlos mit bis zu drei verschiedenen Bluetooth V1.1, V1.2 oder V2.0 Geräten (rückwärts- und
vorwärtskompatibel) interagieren, einschließlich mit Handys, PDAs, PCs/Macs oder anderen
Bluetooth-aktivierten Geräten, die Headset- oder Handsfree-Profile unterstützen. In diesem
Handbuch wird der Einsatz Ihres Headsets mit Ihrem Bluetooth-fähigen Telefon beschrieben.
Verpackungsinhalt
> BlueAnt Z9 Bluetooth Doppelmikrofon-Headset
> Schnellstartanleitung
> 3 x lichtdurchlässige Ohrbügel
> Benutzerhandbuch
> USB-Kabel
> Garantiekarte
> Wechselstromadapter
GERMAN
Welche Geräte funktionieren mit dem Z9 Doppelmikrofon?
Übersicht
MFB (Multi
Function Button –
Multifunktionsschaltfläche)
Lautstärke
leiser
USB
Lautstärke
lauter
Ohrbügel
Hörmuschel
Erste Schritte
Bevor Sie Ihr Headset in Betrieb nehmen können, müssen Sie Folgendes unternehmen:
1. Laden Sie das Headset mithilfe eines der mitgelieferten Ladegeräte vollständig auf.
2. Paaren Sie das Headset mit einem Bluetooth-fähigen Gerät, z. B. einem Handy, PDA oder
Aufladen
Ihr Z9 wird mit einem integrierten, aufladbaren Akku geliefert. Bevor Sie das Gerät zum
ersten Mal einsetzen, müssen Sie Ihr Z9 vollständig aufladen. Während des Ladevorgangs
leuchtet auf der Anzeige eine rote Dauerlampe. Wenn der Akku vollständig geladen ist,
schaltet sich die rote Lampe aus. Die Ladezeit des Akkus beträgt 120 - 150 Minuten. Je
länger Sie über Ihr Headset sprechen, desto geringer wird die verfügbare Standby-Zeit Ihres
Akkus. Ihr Headset braucht länger zum Aufladen, wenn es während längerer Zeit nicht
benutzt wurde.
GERMAN
Computer.
Aufladen des Z9 mit dem USB-Steckverbinder
1. Stecken Sie das USB-Ladekabel in den USB-Anschluss an Ihrem PC oder Mac.
2. Stecken Sie das andere Ende des USB-Ladekabels in den Ladeanschluss Ihres Headsets. Vergewissern Sie sich,
dass der USB-Stecker in die USB-Buchse Ihres Headsets passt. Forcieren Sie den Stecker nicht in die Buchse; er
sollte problemlos einzuführen sein. Die rote LED leuchtet auf.
3. Wenn der Aufladevorgang beendet ist, schaltet sich die rote LED aus. Entfernen Sie den Ladeadapter.
Aufladen des Z9 mit dem Wandaufladegerät
1. Stecken Sie das Wechselstrom-Aufladegerät in eine Steckdose und das Kabel in den Ladeanschluss des Z9.
Vergewissern Sie sich, dass der USB-Stecker in den USB-Anschluss Ihres Headsets passt. Forcieren Sie den
Stecker nicht in die Buchse; er sollte problemlos einzuführen sein. Die rote LED leuchtet auf.
2. Wenn der Aufladevorgang beendet ist, schaltet sich die rote LED aus. Entfernen Sie den Ladeadapter.
So tragen Sie das BlueAnt Z9
GERMAN
Schieben Sie den Ohrbügel durch die Ohrbügel-Öffnung am
Clip des Headsets und passen Sie die Länge so an, dass der
Clip bequem am Ohr sitzt. Vergewissern Sie sich, dass das
Headset in Richtung Mund zeigt. Sie können das Z9 sowohl
am rechten als auch am linken Ohr tragen.
Um eine optimale Leistung des Z9
Headsets zu erzielen, positionieren
Sie es nach vorne in Richtung Mund.
Bluethooth-Paarung
Vor dem Einsatz des Headsets müssen Sie eine Bluethooth-Paarung mit Ihrem Handy durchführen.
Dadurch wird eine gespeicherte Verbindung zwischen dem Z9 und Ihrem Bluetooth-Handy erstellt. Die
Bluetooth-Paarung muss nur einmal - vor der ersten Verbindung mit einem neuen Telefon - durchgeführt
werden. Das Z9 kann Paarungsinformationen für bis zu drei (3) verschiedene Bluetooth-Geräte speichern.
Wenn Sie nach dem Ausführen von drei Bluetooth-Paarungen eine weitere Paarung für ein anderes Gerät
einrichten wollen, müssen Sie das Z9 gemäß den unten stehenden Anweisungen für grundlegende
Funktionen zurücksetzen.
Ausführen einer Bluetooth-Paarung
Dies ist nur ein Beispiel und kann je nach Telefon unterschiedlich sein. Die auszuführenden Schritte sind
jedoch identisch.
1.
2.
3.
Schalten Sie zuerst das Telefon aus und anschließend wieder ein, um den Speicher zurückzusetzen.
Stellen Sie einen Abstand von ungefähr 30 cm zwischen dem Handy und dem Z9 her.
Öffnen Sie das Bluetooth-Menü auf Ihrem Handy. Schalten Sie Bluetooth EIN. (Lesen Sie falls
erforderlich die entsprechenden Anleitungen im Handbuch zu Ihrem Handy durch).
4.
Drücken Sie bei ausgeschaltetem Handy die MFB-Taste
und halten Sie sie ca. 6 Sekunden lang
gedrückt. Die blaue LED leuchtet zuerst als Dauerlampe auf und beginnt dann zu blinken. Das Z9
befindet sich nun im Paarungsmodus und kann von anderen Bluetooth-Geräten erkannt werden. Der
Paarungsmodus bleibt 2 Minuten lang aktiv.
5.
6.
7.
8.
9.
Führen Sie auf Ihrem Handy eine Suche nach einem Bluetooth-Gerät durch, um ein neues Gerät
hinzuzufügen. (Das Suchen und Erkennen anderer Bluetooth-Geräte in Ihrer Umgebung dauert
einige Sekunden).
Nachdem die Bluetooth-Geräte gefunden wurden, wird auf dem Telefondisplay „BlueAnt Z9“
angezeigt. Scrollen Sie zu dieser Funktion und drücken Sie „OK“, um zu bestätigen, dass Sie mit
diesem Gerät einen Paarungsvorgang ausführen wollen.
Geben Sie bei entsprechender Aufforderung den Kennschlüssel „0000“ ein. Zwischen dem Telefon
und dem Z9 wird jetzt eine Paarung durchgeführt.
Eine zusätzliche Sicherheitseinstellung auf Ihrem Telefon ist möglicherweise erforderlich, damit das
Headset und das Telefon automatisch verbunden werden, so dass nicht bei jeder Verbindung mit
dem Z9 eine Bestätigung notwendig ist. Im Allgemeinen werden in diesem Fall in den Optionen für
das BlueAnt Z9 Hinweise wie „set as authorized", „add to trusted devices", „allow connection’’ oder
ähnlich angezeigt.
Wenn es für die erste Verbindung erforderlich ist, wählen Sie BlueAnt Z9, damit eine Verbindung mit
Ihrem Telefon hergestellt wird, ODER drücken Sie die MFB-Taste
Verbindung zum Telefon herzustellen.
auf dem Z9, um eine
GERMAN
Ausführen einer Bluetooth-Paarung (Fortsetzung)
Grundlegende Funktionen des Headsets
Als Schnellreferenz können Sie die Tasten-/Funktionsmatrix und die Schnellstartanleitung nutzen.
1. Einschalten: Drücken Sie die MFB-Taste
und halten Sie sie 3 Sekunden lang gedrückt. Die Dauerlampe der
blauen LED leuchtet auf. Wenn der Akku ausreichend geladen ist, bleibt die blaue LED bis zu 5 Sekunden lang
erleuchtet. Ist die Akkuladung niedrig, leuchtet die Dauerlampe der roten LED. Nach dem Einschalten verbindet sich
Ihr Headset automatisch mit dem zuletzt verwendeten Telefon, wenn dieses sich im Betriebsbereich befindet. Wenn
noch kein Paarungsvorgang mit einem Telefon ausgeführt wurde, wechselt das Z9 in den Paarungsmodus. Falls sich
kein Telefon mit erstellter Paarung in Reichweite befindet, geht das Z9 in den Ruhemodus über.
2. Ausschalten: Drücken Sie die MFB-Taste
dreimal auf.
und halten Sie sie 3 Sekunden lang gedrückt. Die rote LED blinkt
3. Übergang in den Paarungsmodus: Drücken Sie bei ausgeschaltetem Z9 die MFB-Taste
und halten Sie sie
ca. 6 Sekunden lang gedrückt. Die LED Blau blinken. Das Z9 bleibt während 2 Minuten im Paarungsmodus und geht
dann in den Standby-Modus über. Um erneut in den Paarungsmodus zu wechseln, wiederholen Sie diesen Schritt.
4. Einen Anruf tätigen: Wählen Sie wie gewohnt eine Nummer auf Ihrem Telefon. Audio wird automatisch auf das
Headset übertragen.
5. Ein Gespräch annehmen oder beenden: Drücken Sie bei einem eingehenden Anruf die MFB-Taste
Gespräch zu beenden, drücken Sie die MFB-Taste
und halten Sie sie 3 Sekunden lang gedrückt.
. Um das
Grundlegende Funktionen des Headsets (Fortsetzung)
6. Einen Anruf abweisen*: Drücken Sie die MFB-Taste
und halten Sie sie 3 Sekunden lang gedrückt, sobald
ein Telefonanruf eingeht.
und halten Sie sie ca. 3
Sekunden lang gedrückt. Um die Wahlwiederholung abzubrechen, drücken Sie die MFB-Taste
.
8. Sprachwahl aktivieren*: Drücken Sie bei bestehender Verbindung mit einem Telefon einmal die MFB-Taste
Die Sprachbefehle müssen zuvor auf Ihrem Telefon aufgezeichnet werden (Informationen dazu finden Sie im
Benutzerhandbuch Ihres Telefons). Um die Sprachwahl abzubrechen, drücken Sie die MFB-Taste
9. Lautstärkeregelung: Drücken Sie während eines Gesprächs die Lautstärketaste
gewünschte Lautstärke einzustellen.
oder
.
, um die
.
GERMAN
7. Wahlwiederholung* des letzten Telefonanrufs: Drücken Sie die Lautstärketaste
Grundlegende Funktionen des Headsets (Fortsetzung)
10. Trennen / Weiterleiten: Um das Z9 vom derzeit angeschlossenen Telefon zu trennen oder ein derzeit geführtes
und
gleichzeitig
Telefongespräch an das Telefon zurückzuleiten, drücken Sie Lautstärketasten
11. Erneutes Verbinden: Um Ihr Telefon erneut mit dem Z9 zu verbinden, schalten Sie das Z9 ein. Wenn das Z9
bereits eingeschaltet ist, können Sie einfach die MFB-Taste
drücken. Sie können auch das Menü Ihres
Bluetooth-Telefons verwenden.
12. Das Mikrofon stummschalten bzw. die Stummschaltung aufheben: Drücken Sie während eines Gesprächs
die Lautstärketaste
und halten Sie sie 3 Sekunden lang gedrückt.
13. Anklopfen*: Falls während eines Gesprächs ein weiterer Telefonanruf ankommt (die Pieptöne hängen von Ihrem
Netzwerk ab), drücken Sie die Lautstärketasten
und
gleichzeitig und halten Sie sie 3 Sekunden lang
gedrückt. Der derzeitige Telefonanruf wird in die Warteschleife gesetzt und der neu ankommende Telefonanruf wird
entgegen genommen. Um zum gehaltenen Telefonanruf zurückzukehren, drücken Sie die Lautstärketasten
gleichzeitig und halten Sie sie 3 Sekunden lang gedrückt.
und
Grundlegende Funktionen des Headsets (Fortsetzung)
14. Telefonkonferenz*: Um einen gehaltenen Telefonanruf in das laufende Gespräch einzubinden, drücken Sie die
Lautstärketaste
und halten Sie die Taste 3 Sekunden lang gedrückt.
15. Deaktivieren/Aktivieren der LED-Anzeigen (beim Fahren nachts): Wenn sich Ihr Headset im Ruhe- oder
und
gleichzeitig und halten Sie sie 3 Sekunden
erneut auf. Beachten Sie, dass die LEDs bei einem aktiven Telefongespräch ausgeschaltet sind.
16. Zurücksetzen des Z9: Wenn Sie bereits für 3 Geräte einen Paarungsvorgang mit dem Z9 ausgeführt haben, ist
eine weitere Paarung nicht mehr möglich, da der Speicher voll ist. Wenn Sie eine Paarung mit einem anderen
Telefon herstellen wollen, müssen Sie das Headset zurücksetzen.
So setzen Sie das Z9 auf die Werkseinstellungen zurück: Während sich das Gerät im Ruhemodus befindet (also
nicht mit einem anderen Gerät verbunden ist), drücken Sie Lautstärketasten
und
sowie die MFB-Taste
gleichzeitig (3 Tasten). Das Z9 setzt den Speicher zurück, löscht alle vorhandenen Paarungsinformationen, geht
automatisch in den Paarungsmodus über (LED blinkt blau) und ist für die Paarung mit einem neuen Gerät bereit.
*Um diese Funktionen nutzen zu können, muss Ihr Telefon/Gerät das Bluetooth-Handsfree-Profil unterstützen.
Das Bluetooth-Headset-Profil aktiviert dieses Funktionen nicht am BlueAnt Z9.
GERMAN
Standby-Modus befindet, drücken Sie die Lautstärketasten
lang gedrückt.. Nach dem Aus- und erneuten Einschalten des Headsets leuchten die LED-Anzeigen standardmäβig
BlueAnt Voice Isolation Technology™
Sie können zwischen zwei Einstellungen zur Sprachisolierung umschalten - STANDARD und MAX.
Standard-Sprachisolierung -
Für den Gebrauch in normaler Tagesumgebung. Erzielt eine
natürlich klingende Stimme, aus der alle leisen Geräusche
ausgefiltert wurden.
Max-Sprachisolierung -
Erzielt eine wesentlich verständlichere Stimme in stark
lärmbeeinflussten Umgebungen.
WIE WIRD UMGESCHALTET?
Umschalten zwischen Standard und Max: Drücken Sie während eines Gesprächs die MFB-Taste
•
•
•
•
.
Beim Umschalten zwischen „Standard“ und „Max“ ertönt in der Z9-Hörmuschel ein Sprachkennzeichen
zur Bestätigung.
Wenn Sie das Headset zum ersten Mal einschalten, ist die Einstellung „Standard“ aktiviert.
Nach dem Aus- und erneuten Einschalten übernimmt das Headset wieder die Einstellung „Standard“.
Für „Standard“ und „Max“ wird die gleiche Akkuleistung benötigt.
Hinweis :
Standby-Modus
bedeutet verbunden
mit einem Gerät,
jedoch nicht während
eines Gesprächs.
Ruhemodus
bedeutet, Z9 ist
eingeschaltet, jedoch
nicht mit einem
anderen Gerät
verbunden.
Mehrere
Tasten drücken
bedeutet gleichzeitig
drücken.
Dauer
Status
EINSCHALTEN
Taste
MFB
3 Sekunden
von AUS
AUSSCHALTEN
MFB
3 Sekunden
von EIN
Zu Paarungsmodus
MFB
6 Sekunden
von AUS
Verbindung mit Gerät 1
MFB
einmal drücken
Ruhe
Verbindung mit Gerät 2
MFB
zweimal drücken
Ruhe
Verbindung mit Gerät 3
MFB
dreimal drücken
Ruhe
Anruf beantworten
MFB
drücken
Klingeln
Anruf beenden
MFB
3 Sekunden
aktives Gespräch
Anruf zurückweisen
MFB
3 Sekunden
Klingeln
3 Sekunden
Standby
Wiederwahl
Lautst
Sprachwahl aktivieren
MFB
Z9 weiterleiten/trennen
und
Telefonkonferenz
Lautst
Anklopfen
und
Lautstärke +
Lautst
drücken
Standby
drücken
verbunden
3 Sekunden
aktives Gespräch
3 Sekunden
aktives Gespräch
drücken
aktives Gespräch
Lautstärke -
Lautst
drücken
aktives Gespräch
Stummschalten
Lautst
3 Sekunden
aktives Gespräch
LEDs ein-/ausschalten
&
Sprachisolierung
Standard bzw. Max
Gerät zurücksetzen
MFB
MFB
&
&
3 Sekunden
Ruhe/Standby
drücken
aktives Gespräch
drücken
Ruhe
GERMAN
Z9-Funktion
Tasten/Funktionsmatrix
LED-Anzeigetafel
Einschalten
Ausschalten
Paarungsmodus
Zurücksetzen
Aufladen
Aufladen im eingeschalteten Zustand
Aufladen beendet
Niedriger Akkustand
Ruhe
Standby
Laufendes Gespräch
Blaue Dauerlampe während 5 Sekunden
Rot blinkt dreimal
Blau blinken
Blau blinken
Rote Dauerlampe
Rote Dauerlampe mit violettem Blinken
Rote Anzeige AUS
Alle LEDs wechseln auf rot
Blau blinkt alle 8 Sekunden
2 Mal blaues Blinken alle 5 Sekunden
Keine LEDs
Erweiterte Funktionen des Headsets
Einsatz des Headsets mit mehreren Bluetooth-Geräten
Das Z9 kann jeweils nur mit einem einzigen Gerät verbunden sein, es können jedoch Paarungen für drei Geräte ausgeführt werden.
Austausch der Geräte im Betrieb
Nach Ausführen einer Bluetooth-Paarung für ein zweites oder drittes Handy, Smartphone, einen PDA oder einen Computer gemäß der oben
aufgeführten Schritte können Sie wie nachfolgend beschrieben zwischen den Geräten umschalten.
Wählen des erforderlichen Handys
1. Trennen das Headset vom derzeit verbundenen Telefon: drücken Sie Lautstärketasten
und
2. Stellen Sie die Verbindung zu einem der drei gepaarten Geräte her, indem Sie die MFB-Taste
Einmal für das erste gepaarte Telefon
Zweimal für das zweite gepaarte Telefon
Dreimal für das dritte gepaarte Telefon
Hinweis: Vergessen Sie nicht, in welcher Reihenfolge die drei Geräte gepaart wurden.
gleichzeitig
drücken:
GERMAN
1. Stellen Sie sicher, dass die Bluetooth-Funktion des zuletzt von Ihnen benutzten Telefons ausgeschaltet ist oder sich dieses außerhalb des
Erkennungsbereichs befindet.
2. Führen Sie die unter „Ausführen einer Bluetooth-Paarung“ aufgeführten Schritte für jedes Gerät durch, für das eine Paarung durchgeführt
werden soll.
Firmware-Upgrade
BlueAnt Z9 ist Firmware, die über den USB-Anschluss und das mitgelieferte USB-Kabel aufgerüstet werden
kann.
Weitere Informationen und Downloads für Aktualisierungen finden Sie auf der Seite „Support“ unter
www.blueantwireless.com.
Weitere Informationen
Einrichten eines Telefonprofils (abweichend von Bluetooth-Profilen)
Sie können für Ihr Telefon ein Profil mit gewünschten Klingellautstärken und Tastaturtönen einrichten, damit
diese bei Einsatz des Z9 gewählt und aktiviert werden. Einige Telefone können automatisch ein
gewünschtes Profil aktivieren, wenn sie mit einem Fahrzeugsatz oder mit Headset-Zubehör verbunden
werden. Gehen Sie dazu zu den erweiterten Einstellungen und wählen Sie ein Standardprofil, das beim
Anschluss des Headsets aktiviert werden soll. Für gewisse Telefone können auch angepasste
Stufeneinstellungen vorgenommen werden (sehen Sie im Benutzerhandbuch Ihres Telefons nach für
Anleitungen für die Nutzung und Aktivierung von Telefonprofilen). Typische Telefonprofile sind Allgemein,
Draußen, Besprechung, Stumm, Handsfree, Headset, Freisprecheinrichtung und Autoset.
Zurücksetzen Ihres Telefons/PDAs
Telefone und PDAs sind anfällig für Software- und Speicherprobleme, die zu Schwierigkeiten
bei der Bluetooth-Verbindung führen können. Dieses Problem kann einfach behoben werden,
indem Sie das Telefon aus- und wieder einschalten. Das Telefon wird zurückgesetzt und der
Arbeitsspeicher geleert.
Ein wöchentliches Zurücksetzen des Telefons trägt zur Aufrechterhaltung aller Funktionen,
einschlieβlich der Bluetooth-Funktionalität, bei.
Fehlersuche und Support-Unterlagen
Auf der Supportseite unter www.blueantwireless.com finden Sie Fehlerbehebungstipps,
häufig gestellte Fragen (FAQs) sowie Informationen zum Einsatz von Computern für VOIPAnwendungen.
GERMAN
Telefon-/PDA-/Computer-Software
Vergewissern Sie sich, dass Sie über das neueste Firmware-Upgrade für Ihr Telefon
verfügen, insbesondere falls Sie ein PDA-Telefon benutzen. Besuchen Sie die Support-Seite
auf der Hersteller-Webseite, um zu prüfen, ob Sie die neueste Version haben. Viele neue
Handys, PDAs und Computertelefone benötigen einen Bluetooth-Patch, um die BluetoothFunktionalität der ursprünglichen Marktversion zu verbessern.
Technische Daten
Allgemeine
technische Daten
Funkfrequenzdaten
Benutzeroberfläche
Audio
Akkutyp
Sprechzeit
Standby-Zeit
Gewicht
Abmessungen
(mm)
z Bluetooth v2.0
z Bis zu 10 m Funkfrequenzabdeckung
z Erfüllt CE, FCC, BQB, RoHS / WEEE Normen
z Headset-Profil, Handsfree-Profil
z Trägerfrequenz 2,402 ~ 2,480 GHz
z < 0,1% BER bei -80 dBm
z 0 ± 4 dBm (Klasse 2)
z Blaue LED für die Betriebsanzeige
z Rote LED zur Anzeige eines niedrigen Akkustandes
z Mini-USB zum Aufladen des Akkus oder F/W-Upgrade
3 GPP mit DSP-Lösung
3,7 V Lithium-Polymer
Bis zu 5,5 Stunden
200 Stunden
10 g ohne Ohrbügel, 11 g mit Ohrbügel
41,6 x 17,5 x 11,0
Hilfe
1. Sollten beim Betrieb Probleme auftreten, lesen Sie bitte die häufig gestellten Fragen (FAQ) und SupportUnterlagen auf unserer Website oder rufen Sie uns an. Unsere Telefonnummer finden Sie auf der Rückseite
dieses Handbuchs.
2. Weitere Informationen, aktualisierte Handbücher und Fehlerbehebungstipps sind auf unserer Webseite zu finden
unter www.blueantwireless.com
3. Kontaktieren Sie uns und sprechen Sie mit einem Mitarbeiter des BlueAnt Wireless Kundendienstteams.
Wir werden klären, ob es sich um ein Hardware- oder Verbindungsproblem handelt.
4. Falls sich herausstellt, dass Ihr Gerät fehlerhaft ist, erhalten Sie eine Rücksendenummer (RMA).
5. Senden Sie das Gerät zur Prüfung und zum Ersatz fehlerhafter Komponenten direkt an BlueAnt zurück.
Garantiebedingungen
1. Die BlueAnt-Garantie gilt nur für den ursprünglichen Käufer dieses Produkts.
2. BlueAnt gewährleistet den Ersatz oder die Reparatur von fehlerhaften Geräten, deren
Schäden nicht auf missbräuchliche oder fehlerhafte Verwendung zurückzuführen sind.
3. Dieses Produkt umfasst keine vom Benutzer zu wartenden Teile. Bei Reparaturen, die
von nicht autorisierten Personen ausgeführt werden, erlischt die Garantie.
4. Die Garantie hat eine Gültigkeit von 2 Jahren (24 Monaten) ab dem Kaufdatum.
• Der Kaufbeleg muss vor Inanspruchnahme des Garantie-Service vorgelegt werden.
• Damit die Garantie in Anspruch genommen werden kann, muss das Headset in der
Originalverpackung mit der Seriennummer eingeschickt werden.
GERMAN
BlueAnt Garantie
5. Die Garantie gilt ab dem Nachweis des Kaufdatums und nicht ab dem Zeitpunkt einer nachfolgenden Reparatur
oder eines Austausches.
Haftungsausschluss
Dieses Handbuch wurde von BlueAnt herausgegeben. Die darin enthaltenen Informationen sind freibleibend. Alle
Rechte vorbehalten. Die Bezeichnung Bluetooth, die Marke Bluetooth und die Bluetooth-Logos sind Eigentum der
Bluetooth SIG, Inc., und die Verwendung dieser Zeichen durch BlueAnt unterliegt einer Lizenz. Andere Marken und
Handelsnamen sind Eigentum der jeweiligen Inhaber.
Schützen Sie Ihr Gehör.
Warnung: Dieses Headset kann eine maximale Lautstärke von 101 Dezibel erreichen. Eine Verwendung des
Headsets über einen längeren Zeitraum hinweg bei zu hoher Lautstärke kann Ihr Hörvermögen beeinträchtigen. Die
übermäßige Verwendung des Headsets kann zu durch Lärm bedingten Hörverlust führen. Bei einer Verwendung des
Headsets während mehr als 5 Minuten pro Tag bei maximaler Lautstärke kann bereits ein Verlust des Hörvermögens
auftreten. Bei einer Verwendung des Headsets während mehr als einer Stunde pro Tag bei mittlerer Lautstärke kann
ebenfalls ein Verlust des Hörvermögens auftreten. Selbst die Verwendung des Geräts bei geringer Lautstärke kann
aufgrund der Nähe der Geräuschquelle zum Ohr zu einem Verlust des Hörvermögens führen.
Hiermit erklärt [Name des Herstellers], dass sich das Gerät [Gerätetyp] in
Übereinstimmung mit den grundlegenden Anforderungen und den übrigen
einschlägigen Bestimmungen der Richtlinie 1999/5/EG befindet.
Z9 USER GUIDE
Введение
В портативной моно-гарнитуре BlueAnt Z9 с двойным микрофоном используется беспроводная
технология Bluetooth. Два микрофона гарнитуры в комплекте с программным обеспечением BlueAnt
Voice Isolation Technology™ обеспечивают революционно чёткую и чистую передачу голоса
устройством BlueAnt Z9 для высококачественной голосовой связи. Обладатель престижной награды
CES Design and Engineering Award, BlueAnt Z9 представляет собой новое поколение устройств с
точки зрения шумо- и эхоподавления в гарнитурах Bluetooth.
Режим Voice Isolation Standard предназначен для использования в обычной среде и обеспечивает
естественное звучание голоса, подавляя незначительный шум.
Режим Voice Isolation Max обеспечивает наивысшую чистоту голоса в различных зонах повышенного
шума.
RUSSIAN
Устройство предусматривает два варианта настроек изоляции голоса – STANDARD и MAX.
Характеристики BlueAnt Z9
•
•
•
•
•
•
•
•
•
•
•
•
•
•
Обладатель награды CES 2007 Innovations Design & Engineering Award
Два микрофона, обеспечивающих чистую передачу голоса
Voice Isolation Technology ™ – революционно новое программное обеспечение BlueAnt для
цифровой обработки сигнала (ЦОС)
Во время вызова пользователь может переключаться между двумя режимами изоляции
голоса: Standard и Max
ЦОС мирового класса обеспечивает эхо- и шумоподавление, а также подавление шумов
ветра, отделяющее передаваемый голосовой сигнал от фоновых шумов, что, в свою
очередь, обеспечивает кристально чистое качество связи даже в самых шумных условиях
Встроенное переключение телефона «на лету», допускающее подключение до 3-х
сопряженных устройств
Уведомление об автоматическом подключении и переподключении
Различные рингтоны для знакомых и незнакомых абонентов
Зажим новой конструкции, позволяющий закреплять устройство на рубашке или воротнике,
когда им не пользуются
Небольшие размеры и вес (всего 4 см длиной и весом менее 10 гр)
Стильный полупрозрачный заушник
Время работы в режиме разговора – до 5,5 часов, время работы в режиме ожидания – до
200 часов
Гарантия замены – 2 года
Bluetooth v2.0
Что такое беспроводная технология Bluetooth?
Bluetooth – наиболее современная не использующая кабельные соединения технология, доступная
на сегодняшний день. С её помощью вы легко можете установить беспроводное соединение между
устройствами Bluetooth на расстоянии до 10 м.
Какие устройства работают с Z9 с двойным микрофоном?
Что в упаковке?
> Bluetooth-гарнитура BlueAnt Z9 с двойным
> Адаптер переменного тока
микрофоном
> Краткое руководство по началу работы
> 3 x полупрозрачных заушника
> Руководство пользователя
> Кабель USB
> Гарантийный талон
RUSSIAN
Ваша гарнитура – это устройство стандарта Bluetooth V2.0, поддерживающее как профиль гарнитуры,
так и профиль громкой связи Bluetooth. Устройство Z9 способно сохранять информацию и
взаимодействовать беспроводным способом с тремя различными устройствами Bluetooth стандарта
V1.1, V1.2 или V2.0 (с прямой и обратной совместимостью), включая мобильные телефоны, КПК,
PC/Mac и любые другие устройства Bluetooth, поддерживающие профиль гарнитуры или громкой
связи. В данном руководстве, в основном, приведена информация об использовании
гарнитуры с вашим телефоном с поддержкой Bluetooth.
Общий вид
MFB (Многофункциональная
кнопка)
USB
Уменьшить
громкость
Увеличить
громкость
Заушник
Динамик
Начало работы
Перед использованием гарнитуры необходимо выполнить следующее:
1. Полностью зарядить гарнитуру при помощи одного из поставляемых зарядных устройств.
2. Произвести сопряжение гарнитуры с устройством Bluetooth, например, с мобильным телефоном,
КПК или компьютером.
Зарядка
Гарнитура
Z9
поставляется
в
комплекте
со
встроенным
аккумулятором.
Перед
первым
использованием Z9 устройство необходимо полностью зарядить. Во время зарядки индикатор будет
меньше она будет работать в режиме ожидания. Если гарнитура не используется в течение
длительного времени, для зарядки потребуется больше времени.
RUSSIAN
постоянно гореть красным светом. По завершении зарядки индикатор погаснет. Полная зарядка
аккумулятора занимает 120-150 минут. Чем больше вы разговариваете, используя гарнитуру, тем
Зарядка Z9 при помощи USB-кабеля
1. Подключите зарядный USB-кабель к USB-порту PC или Mac.
2. Вставьте другой конец USB-кабеля в зарядный порт вашей гарнитуры. Убедитесь в том, что USBразъём кабеля соответствует USB-гнезду гарнитуры. При подключении кабеля не применяйте
силу, кабель должен легко вставляться в гнездо. Загорится красный индикатор.
3. По завершении зарядки красный индикатор погаснет. Извлеките зарядный адаптер.
Зарядка Z9 при помощи сетевой розетки
1. Вставьте зарядное устройство переменного тока в сетевую розетку, а кабель – в зарядный порт Z9.
Убедитесь в том, что USB-разъём кабеля соответствует USB-гнезду гарнитуры. При подключении
кабеля не применяйте силу, кабель должен легко вставляться в гнездо. Загорится красный
индикатор.
2. По завершении зарядки красный индикатор погаснет. Извлеките зарядный адаптер.
Как носить BlueAnt Z9
Вставьте заушник в отверстие для заушника, расположенное на
зажиме гарнитуры, и отрегулируйте длину для комфортного
крепления заушника на ухе. Гарнитура должна быть расположена
по направлению ко рту. Устройство Z9 можно носить на левом или
правом ухе.
RUSSIAN
Для обеспечения оптимальной работы
гарнитуры Z9 расположите ее по
направлению ко рту.
Сопряжение
Перед использованием необходимо произвести сопряжение гарнитуры с вашим мобильным телефоном. В
результате будет установлено сопряженное подключение Z9 и вашего мобильного телефона с поддержкой
Bluetooth. Сопряжение выполняется только один раз, при первом подключении к телефону. Z9 может
сохранять информацию о сопряжениях для трёх (3) различных устройств Bluetooth одновременно. Если вы
пожелаете установить сопряжение с четвёртым устройством, вам придётся СБРОСИТЬ настройки Z9 в
соответствии с инструкциями, приведёнными в разделе «Основные функции гарнитуры» ниже.
Процедура сопряжения
Ниже описывается приблизительная процедура сопряжения. Фактическая процедура может варьироваться в зависимости от
телефона, но процесс будет аналогичным.
1.
Сначала выключите телефон и снова включите его, чтобы обновить его память.
2.
Поднесите мобильный телефон к устройству Z9 с двойным микрофоном на расстояние около 30 см.
3.
Найдите в вашем мобильном телефоне меню Bluetooth. Включите Bluetooth. (При необходимости
4.
Не включая Z9, нажмите и удерживайте кнопку MFB
обратитесь к руководству пользователя для вашего мобильного телефона)
в течение приблизительно 6 секунд. Сначала
индикатор загорится синим светом, затем начнёт мигать. Теперь гарнитура Z9 находится в режиме
сопряжения и готова к обнаружению другими устройствами Bluetooth. Режим сопряжения остаётся
включенным в течение 2 минут.
Процедура сопряжения (продолжение)
5.
Выполните поиск устройств Bluetooth на своём мобильном телефоне и добавьте новое
устройство. (Поиск доступных устройств Bluetooth, расположенных в зоне действия телефона,
занимает несколько секунд.)
6.
После обнаружения устройств Bluetooth на телефоне будет отображено название «BlueAnt Z9».
Выберите это устройство и нажмите OK для подтверждения сопряжения.
7.
Когда телефон потребует ввода пароля, введите «0000». Будет осуществлено сопряжение телефона и
Z9.
8.
Для того чтобы гарнитура и телефон могли автоматически устанавливать связь друг с другом без
подтверждения при каждом подключении Z9, возможно, потребуется настроить дополнительные
параметры безопасности телефона. Обычно такой параметр настройки сопряжения с BlueAnt Z9
9.
Если необходимо, при первом подключении подтвердите подключение BlueAnt Z9 к вашему телефону
ИЛИ нажмите кнопку MFB
на Z9, чтобы выполнить подключение к телефону.
RUSSIAN
называется «установить как разрешенное», «добавить к разрешённым устройствам», «разрешить
подключение» или подобным образом.
Основные функции гарнитуры
Для быстрой справки смотрите таблицу кнопок и функций, а также «Краткое руководство по началу работы».
1. Включение питания. Нажмите и удерживайте кнопку MFB
в течение 3 секунд. Индикатор загорится
синим светом, а если аккумулятор достаточно заряжен, индикатор будет непрерывно гореть синим светом в
течение 5 секунд. Если уровень заряда аккумулятора недостаточен, индикатор загорится красным светом.
После включения гарнитура автоматически подключается к последнему использовавшемуся вами телефону,
если он находится в зоне действия. Если еще не установлено сопряжение ни с одним телефоном, Z9
перейдёт в режим сопряжения. Если в зоне действия нет ни одного сопряженного телефона, Z9 перейдёт в
автономный режим.
2. Выключение питания. Нажмите и удерживайте кнопку MFB
мигнёт три раза.
в течение 3 секунд. Красный индикатор
3. Вход в режим сопряжения. На выключенной гарнитуре Z9 нажмите и удерживайте кнопку MFB
в
течение приблизительно 6 секунд. Z9 будет находиться в режиме сопряжения в течение 2 минут, после чего
перейдёт в режим ожидания. Для повторного входа в режим сопряжения повторите этот шаг.
4. Выполнение вызова. Наберите номер на клавиатуре телефона, как обычно. Звук будет автоматически
передаваться на гарнитуру.
Основные функции гарнитуры (продолжение)
5. Ответ на вызов или завершение вызова. Однократно нажмите кнопку MFB
вызова. Для завершения вызова нажмите и удерживайте кнопку MFB
при получении входящего
в течение 3 секунд.
6. Отклонение* вызова. При получении входящего вызова нажмите и удерживайте кнопку MFB
3 секунд.
7. Повторный набор*. Для повторного вызова последнего номера нажмите кнопку громкости
в течение
и
удерживайте её в течение 3 секунд. Для отмены повторного вызова нажмите кнопку MFB
.
8. Активация голосового набора*. Когда гарнитура подключена к телефону, один раз нажмите кнопку MFB
. Голосовые команды должны были быть предварительно записаны в память вашего телефона (см.
9. Уровень громкости. Чтобы отрегулировать громкость, нажмите кнопку Громкость
.
или Громкость
во
время выполнения вызова.
10. Отключение / передача. Чтобы отключить гарнитуру Z9 от подключённого в настоящее время телефона
или перевести текущий вызов обратно на телефон, нажмите одновременно
кнопки Громкость
и Громкость
RUSSIAN
руководство пользователя телефона). Для отмены голосового набора нажмите кнопку MFB
Основные функции гарнитуры (продолжение)
11. Повторное подключение. Для повторного подключения вашего телефона к Z9, просто включите
гарнитуру Z9. Либо просто нажмите кнопку MFB
на включённой гарнитуре Z9. Вы также можете
воспользоваться меню вашего телефона с поддержкой Bluetooth.
12. Отключение/включение микрофона. Во время выполнения вызова нажмите кнопку Громкость
и
удерживайте её в течение 3 секунд.
13. Ожидание вызова. Если во время выполнения вызова вы получаете другой входящий вызов (звуковой
сигнал зависит от вашей сети), одновременно нажмите кнопки Громкость
и Громкость
.
Текущий вызов будет переведён в режим ожидания, и вы сможете ответить на входящий вызов. Чтобы
вернуться к ожидающему вызову, одновременно нажмите кнопки Громкость
и Громкость
14. Конференц-связь*. Для добавления ожидающего вызова к текущему разговору, нажмите и удерживайте
нажатой кнопку Громкость
в течение 3 секунд.
Основные функции гарнитуры (продолжение)
15. Отключение/включение светодиодных индикаторов (для ночного вождения). Когда ваша гарнитура
находится в автономном режиме или в режиме ожидания, одновременно нажмите кнопки Громкость
и
.
Громкость
После выключения и последующего включения гарнитуры, светодиодные индикаторы снова
будут включены по умолчанию. Обратите внимение, что во время выполнения вызова индикаторы
отключаются.
16. Сброс настроек Z9. Если вы уже установили сопряжение между гарнитурой Z9 и тремя устройствами, вы
не сможете выполнить сопряжение с дополнительным
устройству) одновременно нажмите кнопки Громкость
, Громкость
и MFB
(три кнопки). Произойдет
обнуление памяти Z9, вся информация о текущих сопряжениях будет удалена, и устройство автоматически
перейдёт в режим сопряжения с новым устройством (индикатор загорится синим светом).
* Для использования этих функций ваш телефон или другое устройство должны поддерживать профиль
Bluetooth громкой связи. Профиль Bluetooth-гарнитуры не активирует эти функции устройства BlueAnt Z9.
RUSSIAN
устройством, так как память гарнитуры уже заполнена. Чтобы подключить дополнительное устройство,
необходимо выполнить сброс настроек гарнитуры.
Для возврата к заводским настройкам в автономном режиме (когда гарнитура не подключениа к какому-либо
Технология BlueAnt Voice Isolation™
Существует два режима настроек изоляции голоса – STANDARD и MAX.
Voice Isolation Standard
Используется в обычной среде и обеспечивает
естественное звучание голоса, подавляя незначительные
шумы.
Voice Isolation Max
Обеспечивает более чёткое звучание голоса в различных
зонах повышенного шума.
КАК ПЕРЕКЛЮЧАТЬСЯ МЕЖДУ РЕЖИМАМИ?
Для переключения между режимами Standard и Max нажмите кнопку MFB
выполнения вызова
•
•
•
•
во время
При переключении между режимами Standard и Max вы услышите через динамик Z9
подтверждающий голосовой сигнал.
При первом включении гарнитуры активируется режим Standard.
После выключения и последующего включения гарнитуры по умолчанию активируется
режим Standard.
Оба режима Standard и Max потребляют одинаковое количество энергии аккумулятора.
Таблица кнопок и
функций
Примечание:
Режим ожидания
означает наличие
подключения
к устройству, но без
выполнения вызова.
Автономный режим
означает, что гарнитура
Z9
включена, но не
подключена к какомулибо
устройству .
Множественные
нажатия кнопок
означают
одновременное
нажатие
Кнопка
Время
Состояние
MFB
3 секунды
Из ВЫКЛ.
Питание ВЫКЛ.
MFB
3 секунды
Нерабочий/Ожидание
Вход в режим сопряжения
MFB
6 секунд
Из ВЫКЛ.
Подключение к устройству 1
MFB
Одно нажатие
Автономный
Подключение к устройству 2
MFB
Два нажатия
Автономный
Подключение к устройству 3
MFB
Три нажатия
Автономный
Ответ на вызов
MFB
щелчок
Звонок
Завершение вызова
MFB
3 секунды
Активный вызов
MFB
3 секунды
Звонок
Громк.
3 секунды
Ожидание
Отклонение вызова
Повторный набор последнего
номера
Активация голосового набора
MFB
Передача/отключение Z9
Конференц-связь
и
Громк.
Ожидание вызова
и
щелчок
Ожидание
щелчок
Подключено
3 секунды
Активный вызов
3 секунды
Активный вызов
щелчок
Активный звонок
Активный звонок
Увеличение громкости
Громк.
Уменьшение громкости
Громк.
щелчок
Отключение звука
Громк.
3 секунды
Активный звонок
3 секунды
Нерабочий/Ожидание
щелчок
Активный вызов
щелчок
Автономный
Включение/выключение
светодиодных индикаторов
Переключение изоляции голоса
между режимами Standard и Max
Сброс настроек устройства
F
и
MFB
MFB
,
и
RUSSIAN
Функция Z9
Питание ВКЛ.
Таблица светодиодных
индикаторов
Питание ВКЛ.
Питание ВЫКЛ.
Режим сопряжения
Сброс
Зарядка
Зарядка с включённым питанием
Зарядка завершена
Низкий уровень заряда аккумулятора
Автономный
Ожидание
Активный вызов
Постоянно горит синим светом в течение 5 секунд
Мигает красным светом 3 раза
мигания синим светом
мигания синим светом
Постоянно горит красным светом
Постоянно горит красным светом, мигает фиолетовым
Красный индикатор ВЫКЛ.
Все индикаторы горят красным светом
Мигает синим светом каждые 8 секунд
2 мигания синим светом каждые 5 секунд
Светодиодные индикаторы НЕ горят
Дополнительные функции гарнитуры
Использование гарнитуры с несколькими Bluetooth-устройствами
Одновременно Z9 подключается только к одному устройству, но допускается сопряжение с тремя
устройствами.
1. Убедитесь в том, что у последнего использовавшегося телефона выключен режим Bluetooth или телефон
находится вне зоны действия.
2. Для выполнения сопряжения с каждым из выбранных вами устройств следуйте указаниям, приведенным в
разделе «Процедура сопряжения».
Переключение телефона «на лету»
После сопряжения со вторым или третьим мобильным телефоном, смартфоном, КПК или компьютером
согласно процедуре сопряжения, описанной выше, вы можете переключаться между устройствами
следующим образом.
1. Отключите подключенный в настоящее время телефон.Для этого нажмите одновременно кнопки Громкость
и Громкость
2. Подключитесь к одному из трёх устройств, с которыми выполнено сопряжение, нажатием кнопки MFB
один раз для первого сопряженного телефона
два раза для второго сопряженного телефона
три раза для третьего сопряженного телефона.
Примечание: запомните, в каком порядке было выполнено сопряжение с 3 устройствами.
:
RUSSIAN
Выбор мобильного телефона
Обновление прошивки
Прошивку BlueAnt Z9 можно обновить через USB-порт и поставляемый в комплекте USB-кабель.
Дополнительная информация и дистрибутивы всех доступных обновлений размещены в разделе
технической поддержки сайта www.blueantwireless.com.
Дополнительная информация
Настройка Профиля телефона (отличного от Bluetooth-профилей)
Настройте в своём телефоне Профиль с соответствующими уровнями громкости звонка и тона
нажатия клавиш, выберите его и активируйте во время использования Z9. Некоторые телефоны
могут автоматически активировать требуемый профиль при подключении к автомобильному
комплекту или гарнитуре. Например, перейдите в «Дополнительные настройки» и выберите Профиль
по умолчанию, активируемый при подключении к гарнитуре. В некоторых телефонах вы также
сможете персонализировать уровни громкости по своему усмотрению (см. указания по
использованию и активированию профилей телефона в руководстве пользователя телефона).
Типичными Профилями телефона являются Общий, На улице, Совещание, Тихий, Громкая связь,
Гарнитура, Портативная громкая связь и В автомобиле.
Программное обеспечение мобильного телефона, КПК или компьютера
Убедитесь в том, что на вашем телефоне установлена последняя версия прошивки, особенно если
вы используете телефон на базе КПК. Посетите раздел поддержки веб-сайта изготовителя и
проверьте наличие последней версии ПО. Многие новые мобильные телефоны, КПК и компьютерные
телефоны требуют установки Bluetooth-патча для улучшения функциональности Bluetooth по
сравнению с первоначальной версией.
Информация по поиску и устранению неисправностей и технической поддержке
В разделе технической поддержки сайта www.blueantwireless.com содержится информация по поиску
и устранению неисправностей и ответы на часто задаваемые вопросы, а также информация по
использованию устройства с приложениями IP-телефонии на компьютере.
RUSSIAN
Сброс настроек телефона/КПК
Телефоны и КПК могут некорректно работать из-за проблем с программным обеспечением и
использованием памяти, что может привести к трудностям с повторной установкой соединения
Bluetooth. Такие трудности можно легко устранить, просто выключив и снова включив телефон.
Телефон будет перезагружен, а рабочая память очищена.
Еженедельная перезагрузка может помочь вам поддержать функциональность телефона, включая
работу функции Bluetooth.
Технические характеристики
Общие
характеристики
РЧ-характеристики
Пользовательский
интерфейс
Аудио
Тип аккумулятора
Время в режиме
разговора
Время в режиме
ожидания
Вес
Габариты (мм)
z Bluetooth v2.0
z РЧ-покрытие – до 10 метров
z Соответствует требованиям CE, FCC, BQB, RoHS / WEEE
z Профиль гарнитуры, Профиль громкой связи v1.0
z Несущая частота 2,402 ~ 2,480 ГГц
z < 0,1% BER при -80 дБмВт
z 0 ± 4 дБмВт (Класс 2)
z Синий свет индикатора указывает на выполнение операции.
z Красный свет индикатора указывает на низкий уровень заряда аккумулятора.
z Мини-USB для зарядки аккумулятора или обновления прошивки
3GPP с ЦОС
Литиево-полимерный аккумулятор 3,7 В
до 5,5 часов
200 часов
10 г без заушника, 11 г с заушником
41,6 x 17,5 x 11,0
Справка
Гарантийные сроки и условия условия
1. BlueAnt выдаёт гарантию только первому покупателю данного изделия.
2. BlueAnt заменит или отремонтирует любое неисправное изделие, при
условии, что оно использовалось надлежащим образом без
злоупотреблений.
3. Данное изделие не содержит обслуживаемых пользователем частей. В случае
пользования услугами неавторизованного специалиста по ремонту гарантия аннулируется.
4. Гарантия действительна в течение 2 лет (24 месяцев) с даты приобретения устройства.
Для прохождения гарантийного обслуживания необходимо предоставить документ,
подтверждающий покупку.
RUSSIAN
Гарантийные условия BlueAnt
1. В случае возникновения каких-либо проблем с функционированием устройства, обратитесь к
онлайн-справке (FAQ), документам по технической поддержке или свяжитесь с нами по телефону.
Наш номер телефона указан на обратной стороне данного руководства
2. Дополнительную информацию, обновлённые руководства и информацию по поиску и устранению
неисправностей вы можете получить на нашем сайте. www.blueantwireless.com
3. Позвоните нам и побеседуйте с одним из сотрудников Службы поддержки клиентов BlueAnt
Wireless. Мы выясним, связан ли ваш вопрос с аппаратным обеспечением или с проблемой
подключения.
4. В случае подтверждения неисправности вашего устройства, вам будет выдано Разрешение на
возврат товара (Return Merchandise Authorization -RMA).
5. Для тестирования и замены неисправных компонентов верните устройство
непосредственно в компанию BlueAnt
• Для того чтобы гарантия оставалась в силе, гарнитура должна находиться в оригинальной
упаковке, на которой указан серийный номер.
5. Гарантия считаются действующей с даты покупки изделия, подтверждённой соответствующим
документом, а не с даты любогопоследующего ремонта или замены устройства.
Отказ от ответственности:
Данное руководство издано компанией BlueAnt. Представленная в данном руководстве информация
может быть изменена без предварительного уведомления. Все права зарезервированы. Текстовый
товарный знак и логотипы Bluetooth принадлежат Bluetooth SIG, Inc, а любое использование таких
знаков осуществляется BlueAnt по лицензии. Другие товарные знаки и торговые марки принадлежат
соответствующим владельцам.
Пожалуйста, берегите свои уши.
ВНИМАНИЕ! Максимальная громкость звука данной гарнитуры может достигать 101 децибел.
Продолжительное использование гарнитуры на повышенной громкости может оказать отрицательное
воздействие на ваш слух. Продолжительное использование устройства может привести к потере
слуха в результате воздействия шума. Потеря слуха возможна в результате использования
гарнитуры на максимальной громкости в течение более 5 минут в день. Потеря слуха
возможна в результате использования гарнитуры при среднем уровне громкости в течение
более 1 часа в день. Воздействие звука на таком близком расстоянии также может привести
к потере слуха даже при использовании гарнитуры при низком уровне громкости.


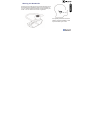


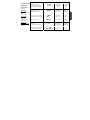


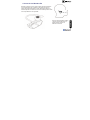


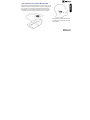


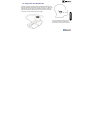


![Bedienungsanleitung standard [deutsch]](http://vs1.manualzilla.com/store/data/006921579_1-4090b773ef21ef930ff7092d22cd960f-150x150.png)