Transcript
Downloading and Installing the USB Driver for the M1000
1. When the driver download begins, select "Save" when prompted to either "Run" or Save".
2. When choosing where the file will be saved, be sure to select a familiar location, like My
Documents or the Desktop. This way when the download has finished, the file(s) is easy to
find.
3. The driver download is a ZIP file, which means the driver is stored in a compressed file. To
extract the files stored in it, a program like WinZip is needed if you have Windows 2000
(XP has a utility built in).
4. On XP, when the files are extracted it will create the folder, “M1000_USB_RAW-Drivers”,
and place the driver into that folder. The default behavior is to create the folder in the same
location as the ZIP file it self. So the folder will be in the same location as the downloaded
file, making it easy to find. If the operating system is Windows 2000, extract the driver with
the program of your choosing.
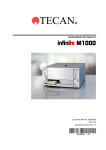
5. Power up the M1000 and connect one end of the USB cable to the M1000 and the other end
to a USB port on the Windows PC.
6. When the cable is connected, the Hardware Wizard will open. If prompted to use Windows
Update, select “No, not this time.”, and click NEXT.
7. It is very unlikely that Windows would be able to locate the driver on its own, so select the
option to “Specify a location.”, and click NEXT if prompted.
8. Whether or not there is a need to click NEXT, there will be a prompt to choose the
location(s) Windows is to search. Deselect Removable Media, like a floppy or CD-ROM,
and instead select the option to “Specify the location” with a “Browse” button.
9. Use the “Browse” button to find the “M1000_USB_RAW-Drivers” folder, and when that
folder is highlighted the “OK” or “Open” button will become active or “click-able. When
the button is clicked, the Wizard will go all the way back to the step where the “Browse”
button was initially clicked.
10. With the location of the driver files showing in the small text box next to the Browse button,
now click NEXT.
11. When Windows has completed the installation of the driver, the Wizard can be closed by
clicking the “Finish” button.
