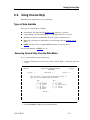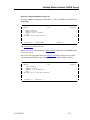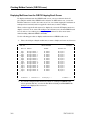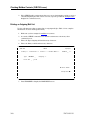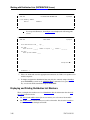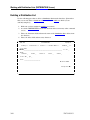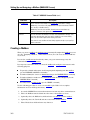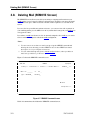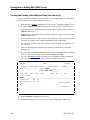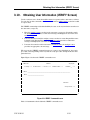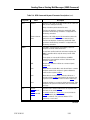
1
!()+ OS 2200 TCP/IP Application Services (TAS) Mail Processor User Guide ( Copyright 1997 Unisys Corporation. All rights reserved. Unisys is a registered trademark of Unisys Corporation. Level 6R1 September 1997 Priced Item Printed in U S America 3787 3239-101 The names, places, and/or events used in this publication are not intended to correspond to any individual, group, or association existing, living, or otherwise. Any similarity or likeness of the names, places, and/or events with the names of any individual, living or otherwise, or that of any group or association is purely coincidental and unintentional. NO WARRANTIES OF ANY NATURE ARE EXTENDED BY THE DOCUMENT. Any product and related material disclosed herein are only furnished pursuant and subject to the terms and conditions of a duly executed Program Product License or Agreement to purchase or lease equipment. The only warranties made by Unisys, if any, with respect to the products described in this document are set forth in such License or Agreement. Unisys cannot accept any financial or other responsibility that may be the result of your use of the information in this document or software material, including direct, indirect, special, or consequential damages. You should be very careful to ensure that the use of this information and/or software material complies with the laws, rules, and regulations of the jurisdictions with respect to which it is used. The information contained herein is subject to change without notice. Revisions may be issued to advise of such changes and/or additions. RESTRICTED - Use, reproduction, or disclosure is subject to the restrictions set forth in DFARS 252.227-7013 and 252.11 15/FAR 52.227-14 & 52.227-19 for commercial computer software. Correspondence regarding this publication should be forwarded to Unisys Corporation either by using the Business Reply Mail form included with this document, or by addressing remarks to Unisys Corporation,Tredyffrin/Malvern Product Information, Malvern Development Center, P.O. Box 203, Paoli, PA, 19301, U.S.A.Comments about documentation can also be sent through e-mail to: [email protected] Unisys is a registered trademark of Unisys Corporation. All other terms mentioned in this document that are known to be trademarks or service marks have been appropriately capitalized. Unisys Corporation cannot attest to the accuracy of this information. Use of a term in this document should not be regarded as affecting the validity of any trademark or service mark. Contents About This Guide Section 1. 1.2. 1.3. 1.4. 1.5. What Is TAS? : : : : : : : : : : : : : : : : : : : : : : : : : : : : : : : : : : : : :: : : : : : : : : Communications Protocol is TCP/IP TAS Components : : : : : : : : : : : : : : : : : : : : : : : : : : : : What Is The Mail Processor? : : : : : : : : : : : : : : : : : : : User Interfaces to the Mail Processor : : : : : : : : : : : : Environment : : : : : : : : : : : : : : : : : : : : : : : : : : : : : : : : Overview of Mail : : : : : : : : :: : : : : : : : : : :: : : : : : : : : Using Mailboxes : : : : : : : : : : : : : : : : : : : : : : : : : : : : : : Identifying Messages and Maintaining the database Identifying Local or Remote Hosts : : : : : : : : : : : : : : Specifying Local and Remote Host-ids : : : : : : : : : : : : : : : : : : : :: : : : : : : : : : :: : : : : : : : : Defining Host-ids Internet Physical Address Host-id Format : : : : : Logical Host Name Format : : : : : : : : : : : : : : : : Local and Remote Message Delivery : : : : : : : : : : : : : Local and Remote Message Display Formats : : : : : : : : : : : : Header Format for Local Incoming Mail Header Format for Remote Incoming Mail : : : : : Updating Local and Remote Distribution Lists and Members :: : : : : : : : : : :: : : : : : : : : : :: : : : : : : : Automatic Update : : : : : : : : : : : : : : : : : : : : : : : Non-automatic Update : : : : : : : : : : : : : : : : : : : : Overview of Mail Commands : : : : : : : : : : : : : : : : : : : 1-1 1-1 1-1 1-2 1-2 1-2 1-3 1-3 1-4 1-5 1-5 1-5 1-5 1-6 1-7 1-7 1-7 1-8 1-8 1-8 1-8 1-9 Getting Started with the Menu Interface 2.1. 3787 3239-101 xv Introduction 1.1. Section 2. : : : : :: : : : : : : : : : :: : : : : : : : : :: : : : : : : : : : :: : : : : : : : : Starting and Ending a Mail Processor Session : : : : Calling the Mail Processor : : : : : : : : : : : : : : : : : : : : : Command Prerequisites : :: : : : : : : : : : :: : : : : : : : : Exiting the Mail Processor : : : : : : : : : : : : : : : : : : : : : iii 2-1 2-1 2-2 2-2 Contents 2.2. 2.3. Section 3. 2-3 2-3 2-3 2-4 2-5 2-6 2-6 2-8 2-8 2-8 2-9 2-9 2-9 2-10 2-11 2-11 2-11 2-12 2-13 2-15 2-15 Using the Menu Interface 3.1. 3.2. iv Using Command Screens : : : : : : : : : : : : : : : : : : : : : : Accessing Command Screens : : : : : : : : : : : : : : : : : : Accessing a Command Screen from the Main Menu : : : : : : : : : : : : : : : : : : : : : : : : : : : : : : Accessing a Command Screen from Another Command Screen : : : : : : : : : : : : : : : : : : : : Sections of a Command Screen : : : : : : : : : : : : : : : : : Using the Header Section :: : : : : : : : : :: : : : : Using the Function Key Section : : : : : : : : : : : : : Using the Command Section : : : : : : : : : : : : : : : Specifying Case Sensitive Field Values : : Types of Fields : : : : : : : : : : : : : : : : : : : : : Required Fields : : : : :: : : : : : : : : :: : : : : Entering Information : : : : : : : : : : : : : : : : : Using the Message Section : : : : : : : : : : : : : : : : Executing a Command : : : : : : : :: : : : : : : : : :: : : : : Using On-Line Help :: : : : : : : : : : :: : : : : : : : : :: : : : : Types of Help Available : : : : : : : :: : : : : : : : : :: : : : : Accessing General Help from the Main Menu : : : : : : Accessing Command Help : : : : :: : : : : : : : : :: : : : : Accessing Field Help : : : : : : : : : : : : : : : : : : : : : : : : : Accessing Help for Errors : : : : : : : : : : : : : : : : : : : : : Using the MHELP Command : : : : : : : : : : : : : : : : : : : Command Overview : : : : : : : : : : :: : : : : : : : : :: : : : : Checking Mailbox Contents (CHECK Screen) : : : : : : : : : :: : : : : : : : : :: : : : : Checking for Incoming Mail Displaying an Incoming Mail List : : : : : : : : : : : : Deleting Mail Items from the CHECK Incoming Result Screen : : : : : : : :: : : : : : : : : : :: : : : Displaying Mail Items from the CHECK Incoming Result Screen : : : : : : : :: : : : : : : : : : :: : : : Returning Control to the CHECK Command Screen : : : : : : : : : : : : : : : : : : : : : : : : : : : : : Printing an Incoming Mail List : : : : : : : : : : : : : : : : : : :: : : : : : : : : :: : : : : Checking for Outgoing Mail Displaying an Outgoing Mail List : : : : : : : : : : : : Deleting Mail Items from the CHECK Outgoing Result Screen : : : : : : : :: : : : : : : : : : :: : : : Displaying Mail Items from the CHECK Outgoing Result Screen : : : : : : : :: : : : : : : : : : :: : : : 3-1 3-2 3-4 3-4 3-6 3-8 3-15 3-16 3-17 3-18 3-19 3-22 3787 3239-101 Contents Returning Control to the CHECK Command Screen : : : :: : : : : : : : : : :: : : : : : : : : : :: : : : : : : : 3.3. 3.4. 3.5. 3.6. 3.7. 3.8. 3.9. 3.10. 3787 3239-101 Printing an Outgoing Mail List : : : : : : : : : : : : : : Working with Distribution Lists (DISTRIBUTION Screen) : : : : : : : : : : : : : : : : : : : : : : : : : : : : : : : : : : Creating a Distribution List : : : : : : : : : : :: : : : : : : : : Displaying and Printing Distribution List Names : : : : Displaying and Printing Distribution List Members : : Adding Members to a Distribution List : : : : : : : : : : : : Removing Members from a Distribution List : : : : : : : Deleting a Distribution List : : : : : : : : : : : : : : : : : : : : : Retrieving and Saving Mail (GET Screen) : : : : : : : : Retrieving Incoming Mail : : : : : : : : : : : : : : : : : : : : : : : Deleting the Mail Item from the Mailbox : : : : : : Returning Control to the GET Command Screen Retrieving Outgoing Mail : : : : : : : : : : : : : : : : : : : : : : : Deleting the Mail Item from the Mailbox : : : : : : Returning Control to the GET Command Screen Setting Up and Assigning a Mailbox (MAILBOX Screen) : : : : : : : : : : : : : : : : : : : : : : : : : : : : : : : : : : Creating a Mailbox : : : : : : : : : : : : : : : : : : : : : : : : : : : Assigning a Mailbox : : : : : : : : : : : : : : : : : : : : : : : : : : Changing Mailbox Information : : : : : : : : :: : : : : : : : : Deleting a Mailbox : : : : : : :: : : : : : : : : : :: : : : : : : : : Getting Host Implementation Information (MHELP Screen) : : : : : : : : : : : : : : : : : : : : : : : : : : : : : : : : : : Creating Outgoing Mail (PREPARE Screen) : : : : : : : Creating Outgoing Mail by Entering Text at the Terminal : : : : : : : : : : : : : : : : : : : : : : : : : : : : : : : : Creating Outgoing Mail with Text from a File : : : : : : : : : : : : : :: : : : : : : : : Deleting Mail (REMOVE Screen) Removing Incoming Mail Items from a Mailbox : : : : : Removing Outgoing Mail Items from a Mailbox : : : : : Sending New or Existing Mail (SEND Screen) : : : : : Creating and Sending New Mail : : : : : : : : : : : : : : : : : Creating and Sending a New Mail Item by Entering Text at a Terminal : : : : : : : : : : : : : : : : : : : : Creating and Sending a New Mail Item Using Text from a File : : : : : : : : : : : : : : : : : : : : : : : : : : Sending an Existing Mail Item : : : : : : : : : : : : : : : : : : : Obtaining User Information (VERIFY Screen) : : : : : v 3-27 3-28 3-30 3-32 3-35 3-36 3-39 3-41 3-44 3-46 3-48 3-51 3-52 3-53 3-55 3-56 3-58 3-60 3-62 3-63 3-64 3-66 3-68 3-70 3-72 3-74 3-75 3-76 3-78 3-80 3-80 3-88 3-94 3-101 Contents Section 4. Getting Started with the Command Interface 4.1. 4.2. 4.3. Section 5. 4-1 4-1 4-1 4-2 4-3 4-3 4-3 4-4 4-4 4-5 4-5 4-7 4-8 4-8 4-8 4-9 4-9 4-10 4-10 Using Mail Processor Commands 5.1. 5.2. 5.3. 5.4. 5.5. 5.6. vi Starting and Ending a Mail Processor Session : : : : Calling the Mail Processor : : : : : : : : : : : : : : : : : : : : : Command Prerequisites : : : : : : : : : : : : : : : : : : : : : : : Exiting the Mail Processor : : : : : : : : : : : : : : : : : : : : : Specifying Commands : : : : : : : : :: : : : : : : : : :: : : : : Specifying Case Sensitive Parameter Values : : : : : : : Using Positional Notation : : : : : : : : : : : : : : : : : : : : : : Abbreviating and Continuing a Command : : : : : : : : : : Entering Message Text at a Terminal : : : : : : : : : : : : : Responding to Mail Processor Prompts : : : : : : : : : : : Command Format Conventions : :: : : : : : : : : :: : : : : : : : :: : : : : Summary of Commands and Parameters Using Online Help for Commands : : : : : : : : : : : : : : : : : : : : : : :: : : : : : : : : :: : : : : Types of Help Available Accessing General Help : : : : : : : : : : : : : : : : : : : : : : : Accessing Command Help : : : : : : : : : : : : : : : : : : : : : Accessing Keyword Parameter Help : : : : : : : :: : : : : Getting Help with Errors : : : : : : : : : : : : : : : : : : : : : : : Using the MHELP Command : : : :: : : : : : : : : :: : : : : Command Overview : : : : : : : : : : :: : : : : : : : : :: : : : : Checking Mailbox Contents (CHECK Command) : : : : : : :: : : : : : : : : :: : : : : Checking for Incoming Mail Checking for Outgoing Mail : : : : :: : : : : : : : : :: : : : : Disconnecting from the Mail Processor (DISCONNECT Command) : : :: : : : : : : : : : :: : : : Working with Distribution Lists (DISTRIBUTION Command) : : : : : :: : : : : : : : : :: : : : : : : : : : :: : : : Creating a Distribution List : : : : : : : : : : : : : : : : : : : : : Displaying and Printing Distribution List Names : : : : : Displaying and Printing Distribution List Members : : : Adding Members to a Distribution List : : : : : : : : : : : : Removing Members from a Distribution List : :: : : : : Deleting a Distribution List : : : : : : : : : : : : : : : : : : : : : : : : : : Retrieving and Saving Mail (GET Command) Retrieving Incoming Mail : : : : : : : : : : : : : : : : : : : : : : : Retrieving Outgoing Mail : : : : : : : : : : : : : : : : : : : : : : : Setting Up and Assigning a Mailbox (MAILBOX Command) : : : : : :: : : : : : : : : :: : : : : : : : : : :: : : : 5-1 5-2 5-3 5-5 5-7 5-8 5-10 5-11 5-12 5-14 5-15 5-16 5-17 5-19 5-20 5-21 3787 3239-101 Contents 5.7. 5.8. 5.9. 5.10. 5.11. Creating a Mailbox : : : : : : : : : : : : : : : : : : : : : : : : : : : Assigning a Mailbox : : : : : : : : : : : : : : : : : : : : : : : : : : Changing Mailbox Information : : : : : : : : :: : : : : : : : : Deleting a Mailbox : : : : : : :: : : : : : : : : : :: : : : : : : : : Getting Host Implementation Information (MHELP :: : : : : : : : : : :: : : : : : : : : : :: : : : : : : : Command) Creating Outgoing Mail (PREPARE Command) : : : : Creating Outgoing Mail by Entering Text at the Terminal : : : : : : : : : : : : : : : : : : : : : : : : : : : : : : : : Creating Outgoing Mail with Text from a File : : : : : : : Deleting Mail (REMOVE Command) : : : :: : : : : : : : : Removing Outgoing Mail : : : : : : : : : : : : : : : : : : : : : : : Removing Incoming Mail : : : : : : : : : : : : : : : : : : : : : : : Sending New or Existing Mail Messages (SEND :: : : : : : : : : : :: : : : : : : : : : :: : : : : : : : Command) Creating and Sending a New Message : : : : : : : : : : : : Sending an Existing Mail Item : : : : : : : : : : : : : : : : : : : Obtaining User Information (VERIFY Command) : : : Appendix A. OS 2200 File-Naming Conventions Appendix B. Remote Host Error Messages Appendix C. Special Considerations Glossary Bibliography 3787 3239-101 vii 5-23 5-24 5-25 5-26 5-27 5-28 5-29 5-30 5-32 5-32 5-33 5-34 5-36 5-38 5-39 Figures 1-1. 1-2. 1-3. Typical Mail Processor Environment Single User with Multiple Mailboxes Multiple Users with Shared Mailbox : : : : : : : : : :: : : : : : : : : : :: : : : : : : : : 1-2 1-4 1-4 2-1. 2-2. 2-3. 2-4. Mail Processor Main Menu : : : : : : : : : : : : : : : : : : : : : : : : : : : : : : : : : : : : : Sample Command Screen : : : : : : : : : : : : : : : : : : : : : : : : : : : : : : : : : : : : : Sample Command Help Screen : : : : : : : : : : : : : : : : : : : : : : : : : : : : : : : : : Sample Error Message : : : : : : : : :: : : : : : : : : :: : : : : : : : : : :: : : : : : : : : 2-2 2-6 2-13 2-15 3-1. 3-2. 3-3. 3-4. 3-5. 3-6. 3-7. 3-8. 3-9. CHECK Command Screen : : : : : : :: : : : : : : : : :: : : : : : : : : : :: : : : : : : : : DISTRIBUTION Command Screen : : : : : : : : : : : : : : : : : : : : : : : : : : : : : : : : GET Command Screen : : : : : : : : : : : : : : : : : : : : : : : : : : : : : : : : : : : : : : : : MAILBOX Command Screen : : : : : : : : : : : : : : : : : : : : : : : : : : : : : : : : : : : : MHELP Command Screen : : : : : : :: : : : : : : : : :: : : : : : : : : : :: : : : : : : : : PREPARE Command Screen : : : : :: : : : : : : : : :: : : : : : : : : : :: : : : : : : : : REMOVE Command Screen : : : : : : : : : : : : : : : : : : : : : : : : : : : : : : : : : : : : SEND Command Screen : : : : : : : :: : : : : : : : : :: : : : : : : : : : :: : : : : : : : : VERIFY Command Screen : : : : : : :: : : : : : : : : :: : : : : : : : : : :: : : : : : : : : 3-2 3-30 3-46 3-58 3-66 3-69 3-74 3-78 3-101 4-1. 4-2. Calling the Mail Processor Accessing General Help 3787 3239-101 : : : : : : : : :: : : : : : : : : : :: : : : : : : : : : : : : : : : : : :: : : : : : : : : : :: : : : : : : : : : : : : : : :: : : : : : : : : :: : : : : : : : : : :: : : : : : : : : : : : : : : : : :: : : : : : : : : :: : : : : : : : : : :: : : : : : : : : ix 4-1 4-8 Tables 1-1. Internet Physical Address Components : : : : : : :: : : : : : : : : : :: : : : : : : : : 1-6 2-1. 2-2. Function Key Section Requests Filling in Command Screen Fields : : :: : : : : : : : : :: : : : : : : : : : :: : : : : : : : : : :: : : : : : : : : :: : : : : : : : : : :: : : : : : : : : 2-7 2-9 3-1. 3-2. 3-3. 3-4. 3-5. 3-6. 3-7. 3-8. 3-9. 3-10. 3-11. 3-12. CHECK Screen Fields : : : : : : : : : : : : : : : : : : : : : : : : : : : : : : : : : : : : : : : : : MAIL PRINT Screen Fields : : : : : : :: : : : : : : : : :: : : : : : : : : : :: : : : : : : : : DISTRIBUTION Screen Fields : : : : : : : : : : : : : : : : : : : : : : : : : : : : : : : : : : : MAIL PRINT Screen Fields : : : : : : :: : : : : : : : : :: : : : : : : : : : :: : : : : : : : : GET Screen Fields : : : : : : : : : : : : : : : : : : : : : : : : : : : : : : : : : : : : : : : : : : : MAIL PRINT Screen Fields : : : : : : :: : : : : : : : : :: : : : : : : : : : :: : : : : : : : : MAILBOX Screen Fields : : : : : : : : :: : : : : : : : : :: : : : : : : : : : :: : : : : : : : : MHELP Screen Fields : : : : : : : : : : : : : : : : : : : : : : : : : : : : : : : : : : : : : : : : : PREPARE Screen Fields : : : : : : : : : : : : : : : : : : : : : : : : : : : : : : : : : : : : : : : REMOVE Screen Fields : : : : : : : : : : : : : : : : : : : : : : : : : : : : : : : : : : : : : : : : SEND Screen Fields : : : : : : : : : : : : : : : : : : : : : : : : : : : : : : : : : : : : : : : : : : VERIFY Screen Fields : : : : : : : : : : : : : : : : : : : : : : : : : : : : : : : : : : : : : : : : : 3-3 3-3 3-31 3-31 3-47 3-48 3-59 3-66 3-69 3-75 3-78 3-102 4-1. Command Format Conventions : : :: : : : : : : : : :: : : : : : : : : : :: : : : : : : : : 4-5 5-1. 5-2. 5-3. 5-4. 5-5. 5-6. 5-7. 5-8. 5-9. CHECK Command Keyword Parameter Descriptions : : : : : : : : : : : : : : : : : DISTRIBUTION Command Keyword Parameter :: : : : : : : : : : :: : : : : : : : : GET Command Keyword Parameter Descriptions : : : : : : : : : : : : : : : : : : : MAILBOX Command Keyword Parameter Descriptions : : : : : :: : : : : : : : : MHELP Command Keyword Parameter Descriptions : : : : : : : : : : : : : : : : : PREPARE Command Parameter Descriptions : :: : : : : : : : : : :: : : : : : : : : REMOVE Command Keyword Parameter Descriptions : : : : : : : : : : : : : : : : SEND Command Keyword Parameter Descriptions : : : : : : : : : : : : : : : : : : VERIFY Command Keyword Parameter Descriptions : : : : : : : : : : : : : : : : : 5-2 5-9 5-17 5-21 5-27 5-29 5-32 5-34 5-39 A-1. A-2. OS 2200 SDF File-Naming Conventions : : : : : : : : : : : : : : : : : : : : : : : : : : : OS 2200 Program File-Naming Conventions : : : : : : : : : : : : : : : : : : : : : : : A-1 A-2 3787 3239-101 xi Examples 4-1. 4-2. 4-3. 4-4. 4-5. Invalid Command Continuation : : : : : : : : : : : : : : : : : : : : : : : : : : : : : : : : : : Valid Command Continuation : : : : : : : : : : : : : : : : : : : : : : : : : : : : : : : : : : : Accessing Command Help : : : : : : : : : : : : : : : : : : : : : : : : : : : : : : : : : : : : : Accessing Keyword Parameter Help : : : : : : : : : : : : : : : : : : : : : : : : : : : : : Accessing Online Help for Errors : : : : : : : : : : : : : : : : : : : : : : : : : : : : : : : : 4-4 4-4 4-9 4-10 4-10 5-1. 5-2. 5-3. 5-4. 5-5. 5-6. 5-7. 5-8. 5-9. 5-10. 5-11. 5-12. 5-13. 5-14. 5-15. 5-16. 5-17. 5-18. 5-19. 5-20. 5-21. 5-22. 5-23. 5-24. 5-25. 5-26. Checking Incoming Mail : : : : : : : : : : : : : : : : : : : : : : : : : : : : : : : : : : : : : : : Checking Outgoing Mail : : : : : : : : : : : : : : : : : : : : : : : : : : : : : : : : : : : : : : : Disconnecting from the Mail Processor : : : : : : : : : : : : : : : : : : : : : : : : : : : Creating a Distribution List : : : : : : : : : : : : : : : : : : : : : : : : : : : : : : : : : : : : : Displaying Distribution List Names : : : : : : : : : : : : : : : : : : : : : : : : : : : : : : : Displaying and Printing Distribution List Names : : : : : : : : : : : : : : : : : : : : : Displaying Distribution List Members : : : : : : : : : : : : : : : : : : : : : : : : : : : : : Displaying and Printing Distribution List Members : : : : : : : : : : : : : : : : : : : Adding Members to a Distribution List : : : : : : : : : : : : : : : : : : : : : : : : : : : : Removing Members from a Distribution List : : :: : : : : : : : : : :: : : : : : : : : Deleting a Distribution List : : : : : : : : : : : : : : : : : : : : : : : : : : : : : : : : : : : : : Retrieving Incoming Mail : : : : : : : :: : : : : : : : : :: : : : : : : : : : :: : : : : : : : : Retrieving Outgoing Mail : : : : : : : :: : : : : : : : : :: : : : : : : : : : :: : : : : : : : : Creating a New Mailbox : : : : : : : : : : : : : : : : : : : : : : : : : : : : : : : : : : : : : : : Assigning an Existing Mailbox : : : :: : : : : : : : : :: : : : : : : : : : :: : : : : : : : : Changing Mailbox Information : : : :: : : : : : : : : :: : : : : : : : : : :: : : : : : : : : Deleting a Mailbox : :: : : : : : : : : : :: : : : : : : : : :: : : : : : : : : : :: : : : : : : : : Getting Host Implementation Information : : : : : : : : : : : : : : : : : : : : : : : : : : Preparing Mail at the Terminal : : : : : : : : : : : : : : : : : : : : : : : : : : : : : : : : : : Preparing Mail from a File : : : : : : :: : : : : : : : : :: : : : : : : : : : :: : : : : : : : : Removing Outgoing Mail : : : : : : : : : : : : : : : : : : : : : : : : : : : : : : : : : : : : : : : Removing Incoming Mail : : : : : : : : : : : : : : : : : : : : : : : : : : : : : : : : : : : : : : : Creating and Sending Mail from a File : : : : : : : : : : : : : : : : : : : : : : : : : : : : Creating and Sending Mail at the Terminal : : : : : : : : : : : : : : : : : : : : : : : : : Sending Previously Created Mail : :: : : : : : : : : :: : : : : : : : : : :: : : : : : : : : Obtaining User Information : : : : : : : : : : : : : : : : : : : : : : : : : : : : : : : : : : : : : 5-4 5-6 5-7 5-11 5-12 5-12 5-13 5-14 5-15 5-16 5-16 5-19 5-20 5-24 5-24 5-25 5-26 5-27 5-30 5-31 5-33 5-33 5-37 5-37 5-38 5-40 3787 3239-101 xiii About This Guide Purpose This guide describes how to use the Unisys TCP/IP Application Services (TAS) Mail Processor. It includes information on both the Display Processing System (DPS 1100) menu interface and the Interactive Processing Facility (IPF 1100) command interface to the mail processor. Scope This guide provides an overview of the TAS Mail Processor and its data base environment. It describes the two product interfaces (menu and command) and provides complete procedures and examples for using each. Audience The primary audience for this guide is any individual using electronic mail, including both administrative and technical personnel. The site administrator is the secondary audience for this guide. Prerequisites You should be familiar with the operation of the terminal you will be using. If you are using the IPF command interface, a knowledge of IPF 1100 is helpful, but not required. How to Use This Document No matter which mail processor interface you plan to use, you should read Section 1 first. It tells you what TAS is and what the mail processor does. It explains the mail processor’s capabilities, and includes the concepts that apply to both of its user interfaces. After reading Section 1, decide which interface to use and refer to the other appropriate sections of this guide: $ If you are using the menu interface, use Section 2 to get started. Move on to Section 3 to find detailed command procedures. $ If you are using the command interface, use Section 4 to get started. Move on to Section 5 to find detailed command formats and procedures. 3787 3239-101 xv About This Guide Organization Section 1. Introduction This section is an overview of the TAS Mail Processor and the concepts that apply to users of both the menu interface and the command interface. Section 2. Getting Started with the Menu Interface This section tells you how to use the menu interface to: $ Call the mail processor $ Use the main menu and command screens $ Get online help $ Exit the mail processor Section 3. Using the Menu Interface This section provides detailed procedures for using each command. Section 4. Getting Started with the Command Interface This section tells you how to use the command interface to: $ Call the mail processor $ Use the IPF commands $ Get online help $ Exit the mail processor It also includes a command and parameter format summary. Section 5. Using the Command Interface This section provides formats and detailed procedures for each mail processor command using the IPF command interface. Appendix A. OS 2200 File Naming Conventions This appendix provides the standard file naming conventions for OS 2200 System Data Format (SDF) files and for program files. Refer to these if you are creating files in which to save mail items or create message text. Appendix B. Remote Host Error Messages This appendix contains expanded error messages that are returned in abbreviated form to a file on a remote host when it encounters errors. xvi 3787 3239-101 About This Guide Appendix C. Special Considerations This appendix discusses the limitations and special considerations which apply to the use of Mail. Related Product Information OS 2200 TCP/IP Application Services (TAS) Implementation and Administration Guide (3787 3221) Contains procedures for installing and verifying installation of TAS. OS 2200 TCP/IP Application Services (TAS) File Transfer User Guide (3787 3213) Describes how to transfer files between local and remote hosts in a TAS network. OS 2200 TCP/IP Application Services (TAS) COBOL Programming Guide (3787 3205) Describes how to write COBOL applications programs for file transfer or mail between hosts in a TAS network. OS 2200 TCP/IP Application Services (TAS) FORTRAN Programming Guide (4173 3247) Describes how to write FORTRAN applications programs for file transfer or mail between hosts in a TAS network. OS 2200 TCP/IP Application Services (TAS) C Language Programming Guide (4173 5135) Describes how to write C Language applications programs for file transfer between hosts in a TAS network. 3787 3239-101 xvii Section 1 Introduction This section discusses concepts that affect your use of mail. These include overviews of: 1.1. $ TAS $ The mail processor system $ Mail features $ Options for defining host-ids $ Mail commands What Is TAS? TAS (TCP/IP Application Services) is a software product that provides communication between hosts in: $ An X.25 public data network (PDN) $ A local area network (LAN) Communications Protocol is TCP/IP The communications protocol used by TAS is TCP/IP (Transmission Control Protocol/Internet Protocol), originally defined for the data network of the United States Department of Defense (DDN). TAS Components TAS consists of three components: $ The TAS File Transfer Facility $ The TAS Programming Interfaces (COBOL, FORTRAN, and C Language) $ The TAS Mail Processor (the subject of this manual) All TAS components provide interhost processing that can be: $ Homogeneous (OS 2200 host to OS 2200 host) $ Heterogeneous (OS 2200 host to non-OS 2200 host) 3787 3239-101 1-1 What Is The Mail Processor? 1.2. What Is The Mail Processor? The protocol standard for mail processing is called the Simple Mail Transfer Protocol (SMTP), and is described in MIL-STD-1781. The TAS Mail Processor is based on this SMTP standard. It allows OS 2200 hosts in a TCP/IP network to communicate in a homogeneous or a heterogeneous environment. User Interfaces to the Mail Processor There are two user interfaces to the mail processor: $ Menus - the Display Processing System (DPS 1100) The menu interface provides easy-to-use command screens for each mail processor command. It also provides online help and error messages. Section 2 of this manual tells how to get started with the menu interface. Section 3 provides detailed walk-through instructions for each command. $ Commands - the Interactive Processing Facility (IPF 1100) The command interface allows you to enter mail processor commands within the IPF environment. It also provides online help and error messages. Section 4 of this manual tells how to get started. Section 5 provides detailed procedures and examples for each command. Environment Whether you use menus or commands to interface with the mail processor, you work at a terminal where you can create, send, and receive mail messages. You may be working within a single local host, or you may be part of a larger, multiple-host environment. Figure 1-1 illustrates a typical mail processing environment. User User User IPF and Menu Interface Mail Processor (SMTP) User TCP/IP to Remote Hosts Figure 1-1. Typical Mail Processor Environment 1-2 3787 3239-101 Overview of Mail 1.3. Overview of Mail This subsection gives an overview of mail. It discusses several mail features, including: $ Use of mailboxes $ Identifying messages and maintaining a mail database $ Differences between local and remote mail $ Distribution lists Using Mailboxes The database where you work consists of the mailbox or mailboxes to which you have access. Each mailbox has: $ A mailbox name $ An optional mailbox key for security $ An optional user name The mailbox name, not a personal user name, is considered to be the destination of a mail message. However, the user name is important to the mail processor for several reasons, and you should keep these in mind when deciding whether to specify a user name when you create a mailbox. The user name associated with a mailbox: $ Becomes the default author name for the PREPARE and SEND commands $ Allows the mail processor to verify users in the network (see the VERIFY command in 3.10 or 5.11) $ Identifies the owner or local members of a local distribution list (see the DISTRIBUTION command in 3.3 or 5.4) Individual and Shared Mailboxes A site’s mail processing environment reflects the needs of its users as well as its organizational structure. For example: $ Each user may have a personal mailbox $ A group of users can share the same mailbox $ Users may designate one shared mailbox as a group bulletin board, but maintain their own individual mailboxes When you begin a session and assign a mailbox for your use (see the MAILBOX command description in 3.5 or 5.6), the mail processor provides an informational message to tell you whether you have any incoming mail and whether anyone else is currently assigned to the same mailbox. 3787 3239-101 1-3 Overview of Mail Certain command functions are restricted while more than one person is assigned to the mailbox at the same time. For example, you cannot delete mail from a mailbox while someone else is assigned to that mailbox. Figure 1-2 illustrates a single user with access to multiple mailboxes. Figure 1-3 shows multiple users with access to a shared mailbox. NEWS/ K001 MAIL NEWS/K001 MAIL JAS/JP2 JAS/ JP2 Figure 1-2. Single User with Multiple Mailboxes MAIL NEWS/ K001 NEWS/ K001 MAIL NEWS/ K001 Figure 1-3. Multiple Users with Shared Mailbox Identifying Messages and Maintaining the database When you receive incoming mail items in your mailbox, a message identifier (mail-id) is assigned to each item according to its delivery sequence. As items are deleted, the mail-ids resequence, which means that incoming mail-ids can change. When you create outgoing mail items with the PREPARE command, you permanently assign the messages’ mail-ids (see 3.7 or 5.8 for complete details). Outgoing mail-ids remain the same. It is important that you delete both incoming and outgoing mail items when you no longer need them. You should also remove unused mailboxes and distribution lists. Leaving unused items in the database wastes system resources and increases the amount of time required to execute mail processor commands. 1-4 3787 3239-101 Identifying Local or Remote Hosts 1.4. Identifying Local or Remote Hosts The mail processor can be used to send mail items between users on a single host (local mail) or between users on different hosts (remote mail). The following paragraphs describe some of the differences between local and remote mail processing. Specifying Local and Remote Host-ids Each host in a network has its own host identifier (host-id). When you use commands for local mail processing, you do not need to specify host-ids; the local host is the default. However, when you use commands for remote mail processing, you must specify the remote host-id. You can specify the host-id in one of two formats: $ Internet physical address This format is always valid for specifying a host-id. See "Defining Host-Ids," in this section, for complete information on this format. $ Logical host name This format is valid if your site administrator defined logical host names in the TCP/IP configuration. In that case, the logical name translates to the physical address of the host. See "Defining Host-Ids," in this section, for complete information on this format. See your site administrator for information on host-ids in your network. Defining Host-ids If you are the site administrator, use the following guidelines when defining host-ids in the TCP/IP configuration. Internet Physical Address Host-id Format A host-id that follows the internet physical address format appears in two forms: $ n1-n2-n3-n4 (when specified as input to the mail processor) $ n1.n2.n3.n4 (when presented to or received from the network) Table 1-1 describes the four components of an internet physical address. 3787 3239-101 1-5 Identifying Local or Remote Hosts Table 1-1. Internet Physical Address Components Variable Description n1 Is the network number (0-233) n2 Is the host number (0-255) n3 Is the logical host number (0-255) n4 Is the interface message processor (IMP) number (0-255) An example of a host-id in correct internet physical address format is: Logical Host Name Format A logical host name is easier to use than a physical address. In addition, it can provide meaningful information, such as geographical location or organization name to users of the system. A host-id that follows the logical host name format: $ Can be up to 24 characters in length $ Can include alphanumerics, as well as the minus sign (-) and the period (.) $ Is not case sensitive, which means that HOSTABC, HostAbc, and hostabc are all considered to be the same host-id An example of a host-id in correct logical host name format is: This particular host-id represents the geographical location and system number of the host. The logical name translates to the physical address of the host. So, if you define a logical name in the TCP/IP configuration, users can specify the host-id by using either the logical host name or the physical address. 1-6 3787 3239-101 Identifying Local or Remote Hosts Local and Remote Message Delivery When you send a message to local users or to remote OS 2200 users, the mail processor always delivers the message to the mailbox you specify on the SEND command. When you send messages to remote non-OS 2200 users, you have several delivery options. These options, based on the SMTP requirement, are as follows: $ MAIL The same as for local users, the message goes only to the mailbox. $ SEND The message goes only to the remote recipient’s terminal. $ Send Or Mail (SOML) The message goes to the remote recipient’s terminal if it is active when the message arrives; otherwise, the message goes to the mailbox. $ Send And Mail (SAML) The message goes to the remote recipient’s terminal if it is active when the message arrives. In addition, the message always goes to the mailbox. Local and Remote Message Display Formats The mail processor supplies header information for each message based on the information you supply on the PREPARE or SEND commands. This header information is independent of any message heading that is part of the message text. The display format for message headers depends on whether an incoming mail item is from the local host or from a remote host. Header Format for Local Incoming Mail The header format for local incoming mail is: Note that the mail processor does not display the recipient list in the heading for incoming local mail. 3787 3239-101 1-7 Identifying Local or Remote Hosts Header Format for Remote Incoming Mail The header format for remote incoming mail is: Note that the mail processor displays the recipient list in the heading for incoming remote mail. Updating Local and Remote Distribution Lists and Members Automatic Update The mail processor automatically updates local distribution lists when local members change or delete their information. For example, if a local member of a local distribution list removes a mailbox name from the host, the mail processor deletes the mailbox name from every local distribution list that contains that mailbox name as a member. Non-automatic Update The mail processor does not automatically update local distribution lists when remote users change or delete their mailboxes. In addition, distribution lists on remote hosts are not automatically updated when information changes for members on the local host. 1-8 3787 3239-101 Overview of Mail Commands 1.5. Overview of Mail Commands There are 10 mail processor commands. All commands except DISCONNECT are available through both the menu interface and the command interface. The menu interface uses the F3 function key to DISCONNECT. The following is a list of the mail processing commands and their uses: $ CHECK Lists incoming and outgoing mail items in a currently-assigned mailbox $ DISCONNECT Used only by the command interface, ends a mailbox assignment and terminates a mail session $ DISTRIBUTION Creates, displays, prints, updates, and deletes distribution lists $ GET Retrieves incoming and outgoing mail for a currently-assigned mailbox $ MAILBOX Creates, updates,and assigns user information for a specific mailbox $ MHELP Provides information about the mail implementation on a local or remote host in the network $ PREPARE Creates an outgoing mail item by entering text at a terminal or by using text contained in a file $ REMOVE Deletes incoming or outgoing mail for a currently-assigned mailbox $ SEND Creates and sends a new mail item by entering text at a terminal, or by using text contained in a file; or sends an existing incoming or outgoing mail item $ VERIFY Verifies that a user is a valid recipient of mail on a given host and determines the corresponding mailbox name for that user 3787 3239-101 1-9 Section 2 Getting Started with the Menu Interface 2.1. Starting and Ending a Mail Processor Session This subsection explains how to start and end a mail processor session. Calling the Mail Processor Before calling the mail processor, you must sign on to your OS 2200 host and open a session using your site-specific procedures (see your site administrator if you need more information). To call the mail processor: 1. Enter the @SMTP processor call. !iiiiiiiiiiiiiiiiiiiiiiiiiiiiiiiiiiiiiiiiiiiiiiiiiiiiiiiiiiiiii"# c 3 3 3 3 3 3 3 3 3 3 2. Press TRANSMIT to display the main menu (Figure 2-1). 3787 3239-101 2-1 Starting and Ending a Mail Processor Session !iiiiiiiiiiiiiiiiiiiiiiiiiiiiiiiiiiiiiiiiiiiiiiiiiiiiiiiiiiiiii"# 3 3 3 3 3 3 3 3 3 3 3 3 3 3 3 3 3 3 3 3 3 3 3 3 3 3 3 3 3 3 3 3 3 3 3 3 3 3 3 3 3 3 3 3 3 3 3 3 $%JJJJJJJJJJJJJJJJJJJJJJJJJJJJJJJJJJJJJJJJJJJJJJJJJJJJJJJJJJJJJJ&' Figure 2-1. Mail Processor Main Menu Command Prerequisites You can perform mail processing commands in any order with two exceptions: $ Before using the mail processor for the first time, you must create a mailbox. See the MAILBOX command in 3.5 for complete details on creating a mailbox. $ Each time you call the mail processor (@SMTP), you must assign a mailbox for your use. See the MAILBOX command in 3.5 for complete details on assigning a mailbox. Exiting the Mail Processor To exit the mail processor from any command screen, press the F3 function key or tab to the F3-Exit field and press TRANSMIT. 2-2 3787 3239-101 Using Command Screens 2.2. Using Command Screens This subsection explains how to use command screens. Accessing Command Screens There are two ways to access command screens: $ From the main menu $ From another command screen Accessing a Command Screen from the Main Menu There are two ways to access a command screen from the main menu: $ Enter the two-letter command code at the prompt and press TRANSMIT. For example, you can request the CHECK command screen by entering the two-letter command code CH on the main menu: !iiiiiiiiiiiiiiiiiiiiiiiiiiiiiiiiiiiiiiiiiiiiiiiiiiiiiiiiiiiiii"# 3 3 3 3 3 3 3 3 3 3 3 3 3 3 3 3 3 3 3 3 3 3 3 3 3 3 3 3 3 3 3 3 3 3 3 3 3 3 3 3 3 3 3 3 3 3 3 3 $%JJJJJJJJJJJJJJJJJJJJJJJJJJJJJJJJJJJJJJJJJJJJJJJJJJJJJJJJJJJJJJ&' $ Move the cursor to the command you want and press TRANSMIT. For example, you can request the CHECK command screen by positioning the cursor in the CHECK field of the main menu: 3787 3239-101 2-3 Using Command Screens !iiiiiiiiiiiiiiiiiiiiiiiiiiiiiiiiiiiiiiiiiiiiiiiiiiiiiiiiiiiiii"# 3 3 3 3 3 3 3 3 3 3 3 3 3 3 3 3 3 3 3 3 3 3 3 3 3 ! 3 3 3 3 3 3 3 3 3 3 3 3 3 3 3 3 3 3 3 3 3 3 3 $%JJJJJJJJJJJJJJJJJJJJJJJJJJJJJJJJJJJJJJJJJJJJJJJJJJJJJJJJJJJJJJ&' Accessing a Command Screen from Another Command Screen You can access a command screen from any other command screen using the following procedure: 1. Move the cursor to the Command field on the current screen. 2. Enter the two-letter command code and press TRANSMIT. 2-4 3787 3239-101 Using Command Screens For example, you can enter the GET command code on the CHECK command screen: !iiiiiiiiiiiiiiiiiiiiiiiiiiiiiiiiiiiiiiiiiiiiiiiiiiiiiiiiiiiiii"# 3 3 3 3 3 ! 3 3 3 3 3 3 3 3 3 3 3 3 3 3 3 3 3 3 3 3 3 3 3 3 3 3 3 3 3 3 3 3 3 3 3 3 3 3 3 3 3 3 3 $%JJJJJJJJJJJJJJJJJJJJJJJJJJJJJJJJJJJJJJJJJJJJJJJJJJJJJJJJJJJJJJ&' Sections of a Command Screen Every command screen has four sections: $ The command header $ The function key section $ The command section $ The message section Figure 2-2 uses the MAILBOX command screen to show the sections of a command screen. 3787 3239-101 2-5 Using Command Screens Header Section Function Key Section SMTP5R1 MAILBOX F1-Help < > F2-Refresh < > F3-Exit < > F4-Main Menu < > 93/03/29 Command __ < > *Mailbox name: MYBOX___ Mailbox key : SECRET__ User: Mary_Smith__________ Command Section Mode: IDENTIFY _ Create _ Delete _ Change x New mailbox name: ______ New mailbox key: KEY01___ New user: M._Smith__________Mailbox: Message Section SMTP5095 Command processing successfully completed. Accept Data < > Figure 2-2. Sample Command Screen Using the Header Section The command screen header appears at the top of every command screen. Refer to it for the following information: $ The product name and release number $ The version of the product (SMTP 5R1) $ The name of the command $ The current date in YY/MM/DD format Using the Function Key Section The function key section allows you to make general requests such as Help and Refresh. Some function keys let you continue or end command processing. The general request function keys are at the top of each screen; the command-specific function keys are found near the bottom. There are two ways to issue function key requests: 2-6 $ Press the appropriate function key. $ Move the cursor between the angle brackets following the function you are requesting and press TRANSMIT. 3787 3239-101 Using Command Screens Table 2-1 summarizes the requests available in the function key section of the various mail processor command screens. Table 2-1. Function Key Section Requests Function Key Transmit Position Request COMMAND AND AUXILIARY SCREENS F1 Help < > Display help information for the current screen. F2 Refresh < > Refresh the screen. F3 Exit < > End the current mail processor session. F4 Main menu < > Display the mail processor main menu. F5 Return < > Return control to the command screen. Command __ < > Display the command screen specified in the input field preceding the angle brackets (< >). AUXILIARY SCREENS F5 More < > More data to enter. F6 Abort < > Terminate command processing. F7 Process < > No more data to enter. Process the command. OUTPUT SCREENS F2 Refresh < > Refresh the screen. F5 Return < > Return to the previous screen. F6 Delete < > Delete the tagged mail items. F7 Display < > Display the tagged mail items. F8 Next < > Display the next mail item. F10 More < > Display additional information. Appears at the bottom of the screen. For example: 3787 3239-101 $ More information about an error message $ More message text $ More distribution list members 2-7 Using Command Screens Using the Command Section The command section is the center section of the command screen where you enter information that describes the command to be executed. Specifying Case Sensitive Field Values Some field values are case sensitive. This means that for the mail processor to recognize a match on that value, it must match in terms of upper and lower case characters. For example, user name is a case sensitive field value. If you specify a user name of JDOE for your mailbox, only JDOE is a valid user. Other variations such as jDOE, Jdoe, and jdoe do not match because the field is case sensitive. This is especially important when you use the VERIFY command to obtain user information. See 3.10 for information on VERIFY. Types of Fields There are three types of fields for entering command information: $ Input fields Input fields contain a field name and a blank line on which to enter the requested information. Required input fields begin with an asterisk (*). For example: $ Choice fields Choice fields specify options you can choose. The default choice always appears in uppercase letters. For example: $ The Accept Data field The Accept Data field is used to process a command screen. You can tab to the field before pressing TRANSMIT or let the mail processor move the cursor to the field. For example: ! 2-8 3787 3239-101 Using Command Screens Required Fields Required fields begin with an asterisk. For example: Some input fields and choice fields are required fields: $ You must complete required fields to successfully process a command $ If you transmit a command before completing a required field, the mail processor prompts you to enter a value in that field Entering Information How you enter information varies with each type of field. Table 2-2 shows how to complete the different kinds of command screen fields. Table 2-2. Filling in Command Screen Fields To enter information in: Perform this action: An Input Field Enter information on the blank line. A Choice Field Enter any alphanumeric, such as "X", in the field to the right of your choice. Default values are in uppercase. If you make no selection, the default is assumed. The Accept Data Fiel Place the cursor between the angle brackets and then press TRANSMIT. Using the Message Section The message section is the bottom section of the command screen. It displays: $ Mail processor messages $ The name of the currently assigned mailbox $ On-line help information that you request for fields in the command section 3787 3239-101 2-9 Using Command Screens Executing a Command Depending on the command screen, you execute a command by: $ Pressing TRANSMIT $ Tabbing to the Accept Data field and pressing TRANSMIT $ Tabbing to the F7-Process field and pressing TRANSMIT, or pressing the F7 key If the screen requires you to press TRANSMIT, you can do so from any position within the command section. The mail processor moves the cursor to the Accept Data field (to allow more efficient processing) and then executes the command. After executing a command, the mail processor displays one of the following types of messages: $ An appropriate completion message $ An information message $ An error message If you decide not to complete a command, you can either return to the main menu or issue the same or another command call in the function key section of the screen. Some screens provide an Abort function key field for this purpose. 2-10 3787 3239-101 Using On-Line Help 2.3. Using On-Line Help This subsection explains how to use on-line help. Types of Help Available Five types of on-line help are available: $ General help - describes the TAS mail processor and how to operate it $ Command help - describes the purpose of a command and how to execute it $ Field help - describes an individual field on the current command screen $ Error help - provides more information on error messages that the mail processor issues $ MHELP - provides a list of available SMTP functions on a specified host For more information on MHELP, see 3.6. Accessing General Help from the Main Menu To access general help from the main menu: 1. Press the F1 function key or move the cursor to the F1- Help < > field at the top of the menu. !iiiiiiiiiiiiiiiiiiiiiiiiiiiiiiiiiiiiiiiiiiiiiiiiiiiiiiiiiiiiii"# 3 3 3 3 3 3 3 3 3 3 3 3 3 3 3 3 3 3 3 3 3 3 3 3 3 3 3 3 3 3 3 3 3 3 3 3 3 3 3 3 3 3 3 3 3 3 3 3 $%JJJJJJJJJJJJJJJJJJJJJJJJJJJJJJJJJJJJJJJJJJJJJJJJJJJJJJJJJJJJJJ&' 2. Press TRANSMIT to display the general help menu. 3787 3239-101 2-11 Using On-Line Help !iiiiiiiiiiiiiiiiiiiiiiiiiiiiiiiiiiiiiiiiiiiiiiiiiiiiiiiiiiiiii"# 3 3 3 3 3 3 3 3 3 3 3 3 3 3 3 3 3 3 3 3 3 3 3 3 3 3 3 3 3 3 3 3 3 3 3 3 3 3 3 3 3 3 3 3 3 3 3 3 $%JJJJJJJJJJJJJJJJJJJJJJJJJJJJJJJJJJJJJJJJJJJJJJJJJJJJJJJJJJJJJJ&' Accessing Command Help To access command help for the command screen currently displayed, press the F1 function key, or move the cursor to the F1- Help < > field at the top of the screen and press TRANSMIT. The mail processor redisplays the screen with the help message at the bottom. Figure 2-3 shows the results of a request for command help on the MAILBOX screen. 2-12 3787 3239-101 Using On-Line Help !iiiiiiiiiiiiiiiiiiiiiiiiiiiiiiiiiiiiiiiiiiiiiiiiiiiiiiiiiiiiii"# 3 3 3 3 3 ! 3 3 3 3 3 3 3 3 3 3 3 3 3 3 3 3 3 3 3 3 3 3 3 3 3 3 3 3 3 3 3 3 3 3 3 3 3 3 3 3 3 3 3 $%JJJJJJJJJJJJJJJJJJJJJJJJJJJJJJJJJJJJJJJJJJJJJJJJJJJJJJJJJJJJJJ&' Figure 2-3. Sample Command Help Screen Note that the last line on the screen displays the F10-MORE field. This field indicates that there is more help available through additional messages. You can continue to press the F10 key or press TRANSMIT from this position to display the next information screen until you get the following message: Accessing Field Help The following procedure uses the INCOMING field on the CHECK command screen to show how to access field help: 1. Move the cursor in the first space of the field for which you want help. 2. Enter a question mark (?). 3787 3239-101 2-13 Using On-Line Help !iiiiiiiiiiiiiiiiiiiiiiiiiiiiiiiiiiiiiiiiiiiiiiiiiiiiiiiiiiiiii"# 3 3 3 3 3 3 3 3 3 3 3 3 3 3 3 3 3 3 3 3 3 3 3 3 3 3 3 3 3 3 3 3 3 3 3 3 3 3 3 3 3 3 3 3 3 3 3 3 $%JJJJJJJJJJJJJJJJJJJJJJJJJJJJJJJJJJJJJJJJJJJJJJJJJJJJJJJJJJJJJJ&' 3. Press TRANSMIT to display an explanation of the field. The question mark (?) disappears from the field, the help message appears at the bottom of the screen and you can enter data in the field. !iiiiiiiiiiiiiiiiiiiiiiiiiiiiiiiiiiiiiiiiiiiiiiiiiiiiiiiiiiiiii"# 3 3 3 3 3 3 3 3 3 3 3 3 3 3 3 3 3 3 3 3 3 3 3 3 3 3 3 3 3 3 3 3 3 3 3 3 3 3 3 3 3 3 3 3 3 3 3 3 $%JJJJJJJJJJJJJJJJJJJJJJJJJJJJJJJJJJJJJJJJJJJJJJJJJJJJJJJJJJJJJJ&' 2-14 3787 3239-101 Using On-Line Help Accessing Help for Errors When the mail processor returns an error to you, it also provides the F10-More function key field to allow you to get more information about the message. Figure 2-4 shows a sample error message returned on the MAILBOX command screen. !iiiiiiiiiiiiiiiiiiiiiiiiiiiiiiiiiiiiiiiiiiiiiiiiiiiiiiiiiiiiii"# 3 3 3 3 3 3 3 3 3 3 3 3 3 3 3 3 3 3 3 3 3 3 3 3 3 3 3 3 3 3 3 3 3 3 3 3 3 3 3 3 3 3 3 3 3 3 3 3 $%JJJJJJJJJJJJJJJJJJJJJJJJJJJJJJJJJJJJJJJJJJJJJJJJJJJJJJJJJJJJJJ&' Figure 2-4. Sample Error Message Note that the last line on the screen displays the F10-MORE field. This field indicates that there is more help available through additional messages. You can continue to press the F10 key or press TRANSMIT from this position to display the next message screen until you get the following message: Using the MHELP Command The MHELP command provides information on mail processor implementation on the various hosts in your network. See 3.6 for complete instructions on using this command. 3787 3239-101 2-15 Section 3 Using the Menu Interface 3.1. Command Overview This section covers the following mail processor command screens in alphabetical order: $ CHECK $ DISTRIBUTION $ GET $ MAILBOX $ MHELP $ PREPARE $ REMOVE $ SEND $ VERIFY Note: 3787 3239-101 You must assign a mailbox every time you begin a mail processing session. Do this using the MAILBOX command in IDENTIFY mode. See 3.5 for complete instructions. 3-1 Checking Mailbox Contents (CHECK Screen) 3.2. Checking Mailbox Contents (CHECK Screen) Use the CHECK screen to display or print a list of the incoming or outgoing mail contained in the currently assigned mailbox. In addition, the CHECK command allows you to display or delete the actual mail-items by selecting them and specifying a function on the CHECK result screen. Figure 3-1 shows the CHECK command screen. !iiiiiiiiiiiiiiiiiiiiiiiiiiiiiiiiiiiiiiiiiiiiiiiiiiiiiiiiiiiiii"# 3 3 3 3 3 3 3 3 3 3 3 3 3 3 3 3 3 3 3 3 3 3 3 3 3 3 3 3 3 3 3 3 3 3 3 3 3 3 3 3 3 3 3 3 3 3 $%JJJJJJJJJJJJJJJJJJJJJJJJJJJJJJJJJJJJJJJJJJJJJJJJJJJJJJJJJJJJJJ&' Figure 3-1. CHECK Command Screen 3-2 3787 3239-101 Checking Mailbox Contents (CHECK Screen) Table 3-1 summarizes the fields in the CHECK screen. Table 3-1. CHECK Screen Fields Field Name Description Type: INCOMING Default value; checks for incoming mail. Outgoing Checks outgoing mail. Print: NO Default value; specifies not to print the results of the CHECK command. yes Prints the results of the CHECK command on the auxiliary or system printer, as well as on the terminal. When you print the results of the CHECK command, the mail processor provides you with a MAIL PRINT screen. Table 3-2 summarizes the fields that you supply on that screen. See your site administrator for information on the correct values for your specific site. Table 3-2. MAIL PRINT Screen Fields Field Name Description Print Destination: SYM Sends the CHECK result to the system printer whose site-id you specify. cop Sends the CHECK result to an auxiliary printer attached to your terminal. For SYM: site-id 1 to 6 characters that identify the system printer on which to print the CHECK result. If you select a print destination of SYM and you do not specify a site-id, the mail processor uses your system default. number of copies Indicates the number of copies you want to print. Maximum number of copies is 63. Default is 1. banner Specifies a large-print banner to appear on the first page of the printout for identification purposes. Default is the run-id. For cop: printer number 3787 3239-101 If more than 1 auxiliary printer is configured to your terminal, specify the id of the one on which to print the CHECK result. Default is 1. 3-3 Checking Mailbox Contents (CHECK Screen) Checking for Incoming Mail When you check for incoming mail, the mail processor lists all incoming mail items and assigns a mail-id to each message in the order in which it was received. Each time you check for incoming mail, the mail processor resequences the mail items. This helps avoid confusion if anyone deletes a mail item from the mailbox. For example, assume you have five incoming mail items in your mailbox and you delete a mail item whose mail-id is 3. The next time you issue a CHECK command, what used to be mail-id 4 is now mail-id 3, and what used to be mail-id 5 is now mail-id 4. And, of course, what used to be mail-id 3 is no longer in the mailbox. For each incoming mail item, the mail processor provides the following information: $ Mail-id $ Subject $ Author $ Date received $ Length (in pages, based on 20 lines per page) $ For local mail only, whether the sender requested a reply (Y or N in the R column) $ When the mail item was last read (date in the SEEN column) Displaying an Incoming Mail List Use the following procedure to display a list of incoming mail: (See Table 3-1 for complete information on screen field specifications.) 1. Make sure you have assigned a mailbox for your use. (See "Assigning a Mailbox" in 3.5.) 2. Access the CHECK command screen from the main menu or from any other command screen. 3. Optionally, tab to the Type: INCOMING (default type) field and enter any character. 3-4 3787 3239-101 Checking Mailbox Contents (CHECK Screen) !iiiiiiiiiiiiiiiiiiiiiiiiiiiiiiiiiiiiiiiiiiiiiiiiiiiiiiiiiiiiii"# 3 3 3 3 3 3 3 3 3 3 3 3 3 3 3 3 3 3 3 3 3 3 3 3 3 3 3 3 3 3 3 3 3 3 3 ! 3 3 3 3 3 3 3 3 3 3 3 3 3 $%JJJJJJJJJJJJJJJJJJJJJJJJJJJJJJJJJJJJJJJJJJJJJJJJJJJJJJJJJJJJJJ&' 4. Press TRANSMIT to display the CHECK result. !iiiiiiiiiiiiiiiiiiiiiiiiiiiiiiiiiiiiiiiiiiiiiiiiiiiiiiiiiiiiii"# 3 3 3 3 3 3 3 3 3 3 3 3 3 3 3 3 3 3 3 3 3 3 3 3 3 3 3 3 3 3 3 3 3 3 3 3 3 3 3 3 3 3 3 3 3 3 3 ! 3 $%JJJJJJJJJJJJJJJJJJJJJJJJJJJJJJJJJJJJJJJJJJJJJJJJJJJJJJJJJJJJJJ&' 3787 3239-101 3-5 Checking Mailbox Contents (CHECK Screen) Deleting Mail Items from the CHECK Incoming Result Screen To delete mail items from the CHECK result screen, tag each item in the field preceding the mail-id. If the CHECK result continues on additional screens, you use the F10-More function to scroll to the next screen. You can continue tagging the mail items on subsequent screens until you have tagged all of the items you want to delete. When you have tagged all of the items to delete, you use the F6-Delete function to delete the items from the mailbox. The mail processor returns you to the first CHECK result screen, and you can continue processing -- display mail items or delete more items -without issuing additional CHECK commands. Use the following procedure to delete mail items from a CHECK result screen: 1. Tab to the fields preceding the mail items you want to delete and enter any character in each field. !iiiiiiiiiiiiiiiiiiiiiiiiiiiiiiiiiiiiiiiiiiiiiiiiiiiiiiiiiiiiii"# 3 3 3 3 3 3 3 3 3 3 3 3 3 3 3 3 3 3 3 3 3 3 3 3 3 3 3 3 3 3 3 3 3 3 3 3 3 3 3 3 3 3 3 3 3 3 ! 3 3 $%JJJJJJJJJJJJJJJJJJJJJJJJJJJJJJJJJJJJJJJJJJJJJJJJJJJJJJJJJJJJJJ&' 2. To delete mail items on a subsequent CHECK result screen, press the F10 key, or tab to the F10-More field and press TRANSMIT. The mail processor displays the next screen. 3-6 3787 3239-101 Checking Mailbox Contents (CHECK Screen) !iiiiiiiiiiiiiiiiiiiiiiiiiiiiiiiiiiiiiiiiiiiiiiiiiiiiiiiiiiiiii"# 3 3 3 3 3 3 3 3 3 3 3 3 3 3 3 3 3 3 3 3 3 3 3 3 3 3 3 3 3 3 3 3 3 3 3 3 3 3 3 3 3 3 3 3 3 3 3 3 $%JJJJJJJJJJJJJJJJJJJJJJJJJJJJJJJJJJJJJJJJJJJJJJJJJJJJJJJJJJJJJJ&' 3. Tab to the fields preceding the mail items you want to delete and enter any character in each field. !iiiiiiiiiiiiiiiiiiiiiiiiiiiiiiiiiiiiiiiiiiiiiiiiiiiiiiiiiiiiii"# 3 3 3 3 3 3 3 3 3 3 3 3 3 3 3 3 3 3 3 3 3 3 3 3 3 3 3 3 3 3 3 3 3 3 3 3 3 3 3 3 3 3 3 3 3 3 3 ! 3 $%JJJJJJJJJJJJJJJJJJJJJJJJJJJJJJJJJJJJJJJJJJJJJJJJJJJJJJJJJJJJJJ&' 4. Repeat steps 2 and 3 until you have tagged all of the mail items you want to delete. 3787 3239-101 3-7 Checking Mailbox Contents (CHECK Screen) 5. When you have finished tagging all of the mail items you want to delete, press the F6 key, or tab to the F6-Delete field and press TRANSMIT. The mail processor deletes the items from the mailbox and redisplays the first CHECK result screen. !iiiiiiiiiiiiiiiiiiiiiiiiiiiiiiiiiiiiiiiiiiiiiiiiiiiiiiiiiiiiii"# 3 3 3 3 3 3 3 3 3 3 3 3 3 3 3 3 3 3 3 3 3 3 3 3 3 3 3 3 3 3 3 3 3 3 3 3 3 3 3 3 3 3 3 3 3 3 3 3 $%JJJJJJJJJJJJJJJJJJJJJJJJJJJJJJJJJJJJJJJJJJJJJJJJJJJJJJJJJJJJJJ&' Displaying Mail Items from the CHECK Incoming Result Screen To display mail items from the CHECK result screen, you tag each item in the field preceding the mail-id. $ If the CHECK result contains only one mail item, you do not need to tag that item to display it. $ If the CHECK result continues on additional screens, you use the F10-More function to scroll to the next screen. You can continue tagging the mail items on subsequent screens until you have tagged all of the items you want to display. When you have tagged all of the items to be displayed, you use the F7-Display function to display each item, one at a time. If you press F7 after displaying the last tagged item, the mail processor returns you to the first CHECK result screen. From there you can continue processing -- display mail items or delete more items -- without issuing additional CHECK commands. 3-8 3787 3239-101 Checking Mailbox Contents (CHECK Screen) Use the following procedure to display mail items from a CHECK result screen: 1. Tab to the field preceding the mail items you want to display and enter any character. !iiiiiiiiiiiiiiiiiiiiiiiiiiiiiiiiiiiiiiiiiiiiiiiiiiiiiiiiiiiiii"# 3 3 3 3 3 3 3 3 3 3 3 3 3 3 3 3 3 3 3 3 3 3 3 3 3 3 3 3 3 3 3 3 3 3 3 3 3 3 3 3 3 3 3 3 3 3 ! 3 3 $%JJJJJJJJJJJJJJJJJJJJJJJJJJJJJJJJJJJJJJJJJJJJJJJJJJJJJJJJJJJJJJ&' 2. If you want to display mail items that are listed on a subsequent CHECK result screen, press the F10 key, or tab to the F10-More field and press TRANSMIT. The mail processor displays the next screen. !iiiiiiiiiiiiiiiiiiiiiiiiiiiiiiiiiiiiiiiiiiiiiiiiiiiiiiiiiiiiii"# 3 3 3 3 3 3 3 3 3 3 3 3 3 3 3 3 3 3 3 3 3 3 3 3 3 3 3 3 3 3 3 3 3 3 3 3 3 3 3 3 3 3 3 3 3 3 3 3 $%JJJJJJJJJJJJJJJJJJJJJJJJJJJJJJJJJJJJJJJJJJJJJJJJJJJJJJJJJJJJJJ&' 3. Tab to the fields preceding the mail items you want to display and enter any character. 3787 3239-101 3-9 Checking Mailbox Contents (CHECK Screen) !iiiiiiiiiiiiiiiiiiiiiiiiiiiiiiiiiiiiiiiiiiiiiiiiiiiiiiiiiiiiii"# 3 3 3 3 3 3 3 3 3 3 3 3 3 3 3 3 3 3 3 3 3 3 3 3 3 3 3 3 3 3 3 3 3 3 3 3 3 3 3 3 3 3 3 3 3 3 3 ! 3 $%JJJJJJJJJJJJJJJJJJJJJJJJJJJJJJJJJJJJJJJJJJJJJJJJJJJJJJJJJJJJJJ&' 4. Repeat steps 2 and 3 until you have tagged all of the mail items you want to display. 5. When you have finished tagging all of the mail items you want to display, press the F7 key, or tab to the F7-Display field and press TRANSMIT. The mail processor displays the first mail item. !iiiiiiiiiiiiiiiiiiiiiiiiiiiiiiiiiiiiiiiiiiiiiiiiiiiiiiiiiiiiii"# 3 3 3 3 3 3 3 3 3 3 3 3 3 3 3 3 3 3 3 3 3 3 3 3 3 3 3 3 3 3 3 3 3 3 3 3 3 3 3 3 3 3 3 3 3 3 3 3 $%JJJJJJJJJJJJJJJJJJJJJJJJJJJJJJJJJJJJJJJJJJJJJJJJJJJJJJJJJJJJJJ&' 6. From the displayed mail item, you can perform four functions: 3-10 $ Display more of the current mail item (Step 6a, to follow) $ Display the next mail item (Step 6b, to follow) 3787 3239-101 Checking Mailbox Contents (CHECK Screen) $ Delete the current mail item from the mailbox (Step 6c, to follow) $ Return to the CHECK result screen (Step 6d, to follow) Displaying More of the Current Mail Item (Step 6a) To display more of the current mail item, press the F10 key, or tab to the F10-More field. (The F10 field only appears when the message is too long to display on a single screen.) !iiiiiiiiiiiiiiiiiiiiiiiiiiiiiiiiiiiiiiiiiiiiiiiiiiiiiiiiiiiiii"# 3 3 3 3 3 3 3 3 3 3 3 3 3 3 3 3 3 3 3 3 3 3 3 3 3 3 3 3 3 3 3 3 3 3 3 3 3 3 3 3 3 3 3 3 3 3 3 ! 3 $%JJJJJJJJJJJJJJJJJJJJJJJJJJJJJJJJJJJJJJJJJJJJJJJJJJJJJJJJJJJJJJ&' The mail processor displays the next screen of message text: !iiiiiiiiiiiiiiiiiiiiiiiiiiiiiiiiiiiiiiiiiiiiiiiiiiiiiiiiiiiiii"# 3 3 3 3 3 3 3 3 3 3 3 3 3 3 3 3 3 3 3 3 $%JJJJJJJJJJJJJJJJJJJJJJJJJJJJJJJJJJJJJJJJJJJJJJJJJJJJJJJJJJJJJJ&' 3787 3239-101 3-11 Checking Mailbox Contents (CHECK Screen) Displaying the Next Mail Item (Step 6b) To display the next mail item from a currently displayed mail item, press the F8 key, or tab to the F8-Next field and press TRANSMIT. !iiiiiiiiiiiiiiiiiiiiiiiiiiiiiiiiiiiiiiiiiiiiiiiiiiiiiiiiiiiiii"# 3 3 3 3 3 3 3 3 3 3 3 3 3 3 3 3 3 3 3 ! 3 $%JJJJJJJJJJJJJJJJJJJJJJJJJJJJJJJJJJJJJJJJJJJJJJJJJJJJJJJJJJJJJJ&' The mail processor displays the next mail item. !iiiiiiiiiiiiiiiiiiiiiiiiiiiiiiiiiiiiiiiiiiiiiiiiiiiiiiiiiiiiii"# 3 3 3 3 3 3 3 3 3 3 3 3 3 3 3 3 3 3 3 3 3 3 3 3 $%JJJJJJJJJJJJJJJJJJJJJJJJJJJJJJJJJJJJJJJJJJJJJJJJJJJJJJJJJJJJJJ&' Repeat this step until you have displayed all mail items, or perform steps c or d. 3-12 3787 3239-101 Checking Mailbox Contents (CHECK Screen) Deleting a Displayed Mail Item (Step 6c) To delete a displayed mail item, press the F6 key, or tab to the F6-Delete field and press TRANSMIT. !iiiiiiiiiiiiiiiiiiiiiiiiiiiiiiiiiiiiiiiiiiiiiiiiiiiiiiiiiiiiii"# 3 3 3 3 3 3 3 3 3 3 3 3 3 3 3 3 3 3 3 3 3 3 3 ! 3 $%JJJJJJJJJJJJJJJJJJJJJJJJJJJJJJJJJJJJJJJJJJJJJJJJJJJJJJJJJJJJJJ&' The mail processor deletes the item. If there are no more tagged items, the mail processor redisplays the first CHECK result screen (see step 1). If there are more tagged mail items, the mail processor displays the next item. (If the currently displayed mail item is the last tagged item, no F8-Next field is returned.) !iiiiiiiiiiiiiiiiiiiiiiiiiiiiiiiiiiiiiiiiiiiiiiiiiiiiiiiiiiiiii"# 3 3 3 3 3 3 3 3 3 3 3 3 3 3 3 3 3 3 3 3 3 3 3 3 $%JJJJJJJJJJJJJJJJJJJJJJJJJJJJJJJJJJJJJJJJJJJJJJJJJJJJJJJJJJJJJJ&' 3787 3239-101 3-13 Checking Mailbox Contents (CHECK Screen) Returning from a Displayed Mail Item (Step 6d) To return from a displayed mail item, press the F5 key, or tab to the F5-Return key and press TRANSMIT. !iiiiiiiiiiiiiiiiiiiiiiiiiiiiiiiiiiiiiiiiiiiiiiiiiiiiiiiiiiiiii"# 3 3 3 3 3 3 3 3 3 3 3 3 3 3 3 3 3 3 3 3 3 3 3 ! 3 $%JJJJJJJJJJJJJJJJJJJJJJJJJJJJJJJJJJJJJJJJJJJJJJJJJJJJJJJJJJJJJJ&' The mail processor redisplays the first CHECK result screen. (Note that the mail items you displayed now contain the date in the SEEN column.) !iiiiiiiiiiiiiiiiiiiiiiiiiiiiiiiiiiiiiiiiiiiiiiiiiiiiiiiiiiiiii"# 3 3 3 3 3 3 3 3 3 3 3 3 3 3 3 3 3 3 3 3 3 3 3 3 3 3 3 3 3 3 3 3 3 3 3 3 3 3 3 3 3 3 3 3 3 3 3 3 $%JJJJJJJJJJJJJJJJJJJJJJJJJJJJJJJJJJJJJJJJJJJJJJJJJJJJJJJJJJJJJJ&' You can continue processing from the CHECK result screen or return to the CHECK command screen using the F5-Return function (see "Returning Control to the CHECK Command Screen," next in this subsection). 3-14 3787 3239-101 Checking Mailbox Contents (CHECK Screen) Returning Control to the CHECK Command Screen When you perform a CHECK function for incoming mail, the following CHECK result screen is displayed on your terminal screen: !iiiiiiiiiiiiiiiiiiiiiiiiiiiiiiiiiiiiiiiiiiiiiiiiiiiiiiiiiiiiii"# 3 3 3 3 3 3 3 3 3 3 3 3 3 3 3 3 3 3 3 3 3 3 3 3 3 3 3 3 3 3 3 3 3 3 3 3 3 3 3 3 3 3 3 3 3 3 3 3 $%JJJJJJJJJJJJJJJJJJJJJJJJJJJJJJJJJJJJJJJJJJJJJJJJJJJJJJJJJJJJJJ&' Use the following procedure to return control from the CHECK result to the CHECK command screen: 1. From the CHECK INCOMING result screen, press the F5 key, or tab to the F5-Return field and press TRANSMIT. The mail processor displays the previous CHECK screen. !iiiiiiiiiiiiiiiiiiiiiiiiiiiiiiiiiiiiiiiiiiiiiiiiiiiiiiiiiiiiii"# 3 3 3 3 3 3 3 3 3 3 3 3 3 3 3 3 3 3 3 3 3 3 3 3 3 3 3 3 3 3 3 3 3 3 3 3 3 3 3 3 3 3 3 3 3 3 $%JJJJJJJJJJJJJJJJJJJJJJJJJJJJJJJJJJJJJJJJJJJJJJJJJJJJJJJJJJJJJJ&' 3787 3239-101 3-15 Checking Mailbox Contents (CHECK Screen) 2. If the CHECK result contains more than one screen of information, and if you are not currently displaying the first of those screens, repeat step 1 until the mail processor displays the command screen. Printing an Incoming Mail List Use the following procedure to print a list of incoming mail. (See Table 3-1 for complete information on screen field specifications): 1. Make sure you have assigned a mailbox for your use. 2. Access the CHECK command screen from the main menu or from any other command screen. 3. Optionally, tab to the Type:INCOMING (default type) field and enter any character. 4. Tab to the Print:yes field and enter any character. !iiiiiiiiiiiiiiiiiiiiiiiiiiiiiiiiiiiiiiiiiiiiiiiiiiiiiiiiiiiiii"# 3 3 3 3 3 3 3 3 3 3 3 3 3 3 3 3 3 3 3 3 3 3 3 3 3 3 3 3 3 3 3 3 3 3 3 ! 3 3 3 3 3 3 3 3 3 $%JJJJJJJJJJJJJJJJJJJJJJJJJJJJJJJJJJJJJJJJJJJJJJJJJJJJJJJJJJJJJJ&' 5. Press TRANSMIT to display the MAIL PRINT screen. 3-16 3787 3239-101 Checking Mailbox Contents (CHECK Screen) !iiiiiiiiiiiiiiiiiiiiiiiiiiiiiiiiiiiiiiiiiiiiiiiiiiiiiiiiiiiiii"# 3 3 3 3 3 3 3 3 3 3 3 3 3 3 3 3 3 3 3 3 3 3 3 3 3 3 3 3 3 3 3 3 3 3 ! 3 3 3 3 3 3 3 3 3 3 3 3 $%JJJJJJJJJJJJJJJJJJJJJJJJJJJJJJJJJJJJJJJJJJJJJJJJJJJJJJJJJJJJJJ&' 6. Tab to the fields and enter the appropriate information. See Table 3-2 for print screen field descriptions. 7. To print the CHECK result on the printer you selected, press TRANSMIT; to return to the CHECK command screen, press the F5 key, or tab to the F5-Return field and press TRANSMIT. Checking for Outgoing Mail When you check for outgoing mail, the mail processor lists all mail items originating from the current mailbox in the order in which they were created. For each outgoing message, it provides the following information: $ Mail-id $ Author $ Date created $ Subject $ Length (in pages, based on 20 lines per page) 3787 3239-101 3-17 Checking Mailbox Contents (CHECK Screen) Displaying an Outgoing Mail List Use the following procedure to display a list of outgoing mail: (See Table 3-1 for complete information on screen field specifications.) 1. Make sure you have assigned a mailbox for your use. (See "Assigning a Mailbox" in 3.5.) 2. Access the CHECK command screen from the main menu or from any other command screen. 3. Tab to the Type:Outgoing field and enter any character. !iiiiiiiiiiiiiiiiiiiiiiiiiiiiiiiiiiiiiiiiiiiiiiiiiiiiiiiiiiiiii"# 3 3 3 3 3 3 3 3 3 3 3 3 3 3 3 3 3 3 3 3 3 3 3 3 3 3 3 3 3 3 3 3 3 3 3 3 3 3 3 3 3 3 3 3 $%JJJJJJJJJJJJJJJJJJJJJJJJJJJJJJJJJJJJJJJJJJJJJJJJJJJJJJJJJJJJJJ&' 3-18 3787 3239-101 Checking Mailbox Contents (CHECK Screen) 4. Transmit the screen to display the CHECK result. !iiiiiiiiiiiiiiiiiiiiiiiiiiiiiiiiiiiiiiiiiiiiiiiiiiiiiiiiiiiiii"# 3 3 3 3 3 3 3 3 3 3 3 3 3 3 3 3 3 3 3 3 3 3 3 3 3 3 3 3 3 3 3 3 3 3 3 3 3 3 3 3 3 3 3 3 3 3 3 3 $%JJJJJJJJJJJJJJJJJJJJJJJJJJJJJJJJJJJJJJJJJJJJJJJJJJJJJJJJJJJJJJ&' Deleting Mail Items from the CHECK Outgoing Result Screen To delete mail items from the CHECK result screen, you tag each item in the field preceding the mail-id. If the CHECK result continues on additional screens, you use the F10-More function to scroll to the next screen. You can continue tagging the mail items on subsequent screens until you have tagged all of the items you want to delete. When you have tagged all of the items to be deleted, you use the F6-Delete function to delete the items from the mailbox. The mail processor returns you to the first CHECK result screen and you can continue processing -- display mail items or delete more items -without issuing additional CHECK commands. Use the following procedure to delete mail items from a CHECK result screen: 1. Tab to the fields preceding the mail items you want to delete and enter any character. 3787 3239-101 3-19 Checking Mailbox Contents (CHECK Screen) !iiiiiiiiiiiiiiiiiiiiiiiiiiiiiiiiiiiiiiiiiiiiiiiiiiiiiiiiiiiiii"# 3 3 3 3 3 3 3 3 3 3 3 3 3 3 3 3 3 3 3 3 3 3 3 3 3 3 3 3 3 3 3 3 3 3 3 3 3 3 3 3 3 3 3 3 3 3 3 3 $%JJJJJJJJJJJJJJJJJJJJJJJJJJJJJJJJJJJJJJJJJJJJJJJJJJJJJJJJJJJJJJ&' 2. If you want to delete mail items on a subsequent CHECK result screen, press the F10 key, or tab to the F10-More field and press TRANSMIT. The mail processor displays the next screen. !iiiiiiiiiiiiiiiiiiiiiiiiiiiiiiiiiiiiiiiiiiiiiiiiiiiiiiiiiiiiii"# 3 3 3 3 3 3 3 3 3 3 3 3 3 3 3 3 3 3 3 3 3 3 3 3 3 3 3 3 3 3 3 3 3 3 3 3 3 3 3 3 3 3 3 3 3 3 3 3 $%JJJJJJJJJJJJJJJJJJJJJJJJJJJJJJJJJJJJJJJJJJJJJJJJJJJJJJJJJJJJJJ&' 3. Tab to the fields preceding the mail items you want to delete and enter any character. 3-20 3787 3239-101 Checking Mailbox Contents (CHECK Screen) !iiiiiiiiiiiiiiiiiiiiiiiiiiiiiiiiiiiiiiiiiiiiiiiiiiiiiiiiiiiiii"# 3 3 3 3 3 3 3 3 3 3 3 3 3 3 3 3 3 3 3 3 3 3 3 3 3 3 3 3 3 3 3 3 3 3 3 3 3 3 3 3 3 3 3 3 3 3 3 ! 3 $%JJJJJJJJJJJJJJJJJJJJJJJJJJJJJJJJJJJJJJJJJJJJJJJJJJJJJJJJJJJJJJ&' 4. Repeat steps 2 and 3 until you have tagged all of the mail items you want to delete. 5. When you have finished tagging all of the mail items you want to delete, press the F6 key, or tab to the F6-Delete field and press TRANSMIT. The mail processor deletes the items from the mailbox and redisplays the first CHECK result screen. (Note that the message or messages marked for deletion are no longer on the screen.) !iiiiiiiiiiiiiiiiiiiiiiiiiiiiiiiiiiiiiiiiiiiiiiiiiiiiiiiiiiiiii"# 3 3 3 3 3 3 3 3 3 3 3 3 3 3 3 3 3 3 3 3 3 3 3 3 3 3 3 3 3 3 3 3 3 3 3 3 3 3 3 3 3 3 3 3 3 3 $%JJJJJJJJJJJJJJJJJJJJJJJJJJJJJJJJJJJJJJJJJJJJJJJJJJJJJJJJJJJJJJ&' 3787 3239-101 3-21 Checking Mailbox Contents (CHECK Screen) Displaying Mail Items from the CHECK Outgoing Result Screen To display mail items from the CHECK result screen, you tag each item in the field preceding the mail-id. If the CHECK result continues on additional screens, you use the F10-More function to scroll to the next screen. You can continue tagging the mail items on subsequent screens until you have tagged all of the items you want to display. When you have tagged all of the items to be displayed, you use the F7-Display function to display each item, one at a time. The mail processor returns you to the first CHECK result screen, and you can continue processing -- display mail items or delete more items -without issuing additional CHECK commands. Use the following procedure to display mail items from a CHECK result screen: 1. Tab to the field preceding the mail items you want to display and enter any character. !iiiiiiiiiiiiiiiiiiiiiiiiiiiiiiiiiiiiiiiiiiiiiiiiiiiiiiiiiiiiii"# 3 3 3 3 3 3 3 3 3 3 3 3 3 3 3 3 3 3 3 3 3 3 3 3 3 3 3 3 3 3 3 3 3 3 3 3 3 3 3 3 3 3 3 3 3 3 3 3 $%JJJJJJJJJJJJJJJJJJJJJJJJJJJJJJJJJJJJJJJJJJJJJJJJJJJJJJJJJJJJJJ&' 2. If you want to display mail items that are listed on a subsequent CHECK result screen, press the F10 key, or tab to the F10-More field and press TRANSMIT. The mail processor displays the next screen. 3-22 3787 3239-101 Checking Mailbox Contents (CHECK Screen) !iiiiiiiiiiiiiiiiiiiiiiiiiiiiiiiiiiiiiiiiiiiiiiiiiiiiiiiiiiiiii"# 3 3 3 3 3 3 3 3 3 3 3 3 3 3 3 3 3 3 3 3 3 3 3 3 3 3 3 3 3 3 3 3 3 3 3 3 3 3 3 3 3 3 3 3 3 3 3 3 $%JJJJJJJJJJJJJJJJJJJJJJJJJJJJJJJJJJJJJJJJJJJJJJJJJJJJJJJJJJJJJJ&' 3. Tab to the fields preceding the mail items you want to display and enter any character. !iiiiiiiiiiiiiiiiiiiiiiiiiiiiiiiiiiiiiiiiiiiiiiiiiiiiiiiiiiiiii"# 3 3 3 3 3 3 3 3 3 3 3 3 3 3 3 3 3 3 3 3 3 3 3 3 3 3 3 3 3 3 3 3 3 3 3 3 3 3 3 3 3 3 3 3 3 3 3 3 $%JJJJJJJJJJJJJJJJJJJJJJJJJJJJJJJJJJJJJJJJJJJJJJJJJJJJJJJJJJJJJJ&' 4. Repeat steps 2 and 3 until you have tagged all of the mail items you want to display. 5. When you have finished tagging all of the mail items you want to display, press the F7 key, or tab to the F7-Display field and press TRANSMIT. The mail processor displays the first mail item. 3787 3239-101 3-23 Checking Mailbox Contents (CHECK Screen) !iiiiiiiiiiiiiiiiiiiiiiiiiiiiiiiiiiiiiiiiiiiiiiiiiiiiiiiiiiiiii"# 3 3 3 3 3 3 3 3 3 3 3 3 3 3 3 3 3 3 3 3 3 3 3 3 3 3 3 3 3 3 3 3 3 3 3 3 3 3 3 3 3 3 3 3 3 3 3 3 $%JJJJJJJJJJJJJJJJJJJJJJJJJJJJJJJJJJJJJJJJJJJJJJJJJJJJJJJJJJJJJJ&' 6. From the displayed mail item, you can perform four functions: $ Display more of the current mail item (Step 6a, to follow) $ Display the next mail item (Step 6b, to follow) $ Delete the current mail item from the mailbox (Step 6c, to follow) $ Return to the CHECK result screen (Step 6d, to follow) Displaying More of the Current Mail Item (Step 6a) To display more of the current mail item, press the F10 key, or tab to the F10-More field. (The F10 field only appears when the message is too long to display on a single screen.) The mail processor displays the next screen of message text: !iiiiiiiiiiiiiiiiiiiiiiiiiiiiiiiiiiiiiiiiiiiiiiiiiiiiiiiiiiiiii"# 3 3 3 3 3 3 3 3 3 3 3 3 3 3 3 3 3 3 3 3 3 3 3 3 $%JJJJJJJJJJJJJJJJJJJJJJJJJJJJJJJJJJJJJJJJJJJJJJJJJJJJJJJJJJJJJJ&' 3-24 3787 3239-101 Checking Mailbox Contents (CHECK Screen) Displaying the Next Mail Item (Step 6b) To display the next mail item, press the F8 key, or tab to the F8-Next field and press TRANSMIT. You can repeat this step until you have displayed all mail items, or you can perform steps b or c. !iiiiiiiiiiiiiiiiiiiiiiiiiiiiiiiiiiiiiiiiiiiiiiiiiiiiiiiiiiiiii"# 3 3 3 3 3 3 3 3 3 3 3 3 3 3 3 3 3 3 3 3 3 3 3 3 3 3 3 3 3 3 $%JJJJJJJJJJJJJJJJJJJJJJJJJJJJJJJJJJJJJJJJJJJJJJJJJJJJJJJJJJJJJJ&' Deleting the Displayed Mail Item (Step 6c) To delete a displayed mail item, press the F6 key, or tab to the F6-Delete field and press TRANSMIT. If there are no more tagged items, the mail processor redisplays the first CHECK result screen. (See step c.) If there are more tagged mail items, the mail processor displays the next item. (Note that when this is the last tagged item, no F8-Next field is returned.) !iiiiiiiiiiiiiiiiiiiiiiiiiiiiiiiiiiiiiiiiiiiiiiiiiiiiiiiiiiiiii"# 3 3 3 3 3 3 3 3 3 3 3 3 3 3 3 3 3 3 3 3 3 3 3 3 3 3 3 3 3 ! 3 $%JJJJJJJJJJJJJJJJJJJJJJJJJJJJJJJJJJJJJJJJJJJJJJJJJJJJJJJJJJJJJJ&' 3787 3239-101 3-25 Checking Mailbox Contents (CHECK Screen) Returning from a Displayed Mail Item (Step 6d) To return from a displayed mail item, press the F5 key, or tab to the F5-Return key and press TRANSMIT. The mail processor redisplays the previous CHECK result screen. !iiiiiiiiiiiiiiiiiiiiiiiiiiiiiiiiiiiiiiiiiiiiiiiiiiiiiiiiiiiiii"# 3 3 3 3 3 3 3 3 3 3 3 3 3 3 3 3 3 3 3 3 3 3 3 3 3 3 3 3 3 3 3 3 3 3 3 3 3 3 3 3 3 3 3 3 3 3 3 3 $%JJJJJJJJJJJJJJJJJJJJJJJJJJJJJJJJJJJJJJJJJJJJJJJJJJJJJJJJJJJJJJ&' You can continue processing from the CHECK result screen or return to the CHECK command screen using the F5-Return function. (See "Returning Control to the CHECK Command Screen," next in this subsection.) 3-26 3787 3239-101 Checking Mailbox Contents (CHECK Screen) Returning Control to the CHECK Command Screen When you perform a CHECK function for outgoing mail, the following CHECK result screen is displayed on your terminal screen: !iiiiiiiiiiiiiiiiiiiiiiiiiiiiiiiiiiiiiiiiiiiiiiiiiiiiiiiiiiiiii"# 3 3 3 3 3 3 3 3 3 3 3 3 3 3 3 3 3 3 3 3 3 3 3 3 3 3 3 3 3 3 3 3 3 3 3 3 3 3 3 3 3 3 3 3 3 3 $%JJJJJJJJJJJJJJJJJJJJJJJJJJJJJJJJJJJJJJJJJJJJJJJJJJJJJJJJJJJJJJ&' Use the following procedure to return control from the CHECK result to the CHECK command screen: 1. From the CHECK OUTGOING result screen, press the F5 key, or tab to the F5-Return field and press TRANSMIT. The mail processor displays the previous CHECK screen. !iiiiiiiiiiiiiiiiiiiiiiiiiiiiiiiiiiiiiiiiiiiiiiiiiiiiiiiiiiiiii"# 3 3 3 3 3 3 3 3 3 3 3 3 3 3 3 3 3 3 3 3 3 3 3 3 3 3 3 3 3 3 3 3 3 3 3 3 3 3 3 3 3 3 3 3 3 3 $%JJJJJJJJJJJJJJJJJJJJJJJJJJJJJJJJJJJJJJJJJJJJJJJJJJJJJJJJJJJJJJ&' 3787 3239-101 3-27 Checking Mailbox Contents (CHECK Screen) 2. If the CHECK result contains more than one screen of information, and if you are not currently displaying the first of those screens, repeat step 1 until the mail processor displays the command screen.) Printing an Outgoing Mail List Use the following procedure to print a list of outgoing mail: (See Table 3-1 for complete information on screen field specifications) 1. Make sure you have assigned a mailbox for your use. 2. Access the CHECK command screen from the main menu or from any other command screen. 3. Tab to the Type:Outgoing field and enter any character. 4. Tab to the Print:yes field and enter any character. !iiiiiiiiiiiiiiiiiiiiiiiiiiiiiiiiiiiiiiiiiiiiiiiiiiiiiiiiiiiiii"# 3 3 3 3 3 3 3 3 3 3 3 3 3 3 3 3 3 3 3 3 3 3 3 3 3 3 3 3 3 3 3 3 3 3 3 ! 3 3 3 3 3 3 3 3 3 $%JJJJJJJJJJJJJJJJJJJJJJJJJJJJJJJJJJJJJJJJJJJJJJJJJJJJJJJJJJJJJJ&' 5. Press TRANSMIT to display the MAIL PRINT screen. 3-28 3787 3239-101 Checking Mailbox Contents (CHECK Screen) !iiiiiiiiiiiiiiiiiiiiiiiiiiiiiiiiiiiiiiiiiiiiiiiiiiiiiiiiiiiiii"# 3 3 3 3 3 3 3 3 3 3 3 3 3 3 3 3 3 3 3 3 3 3 3 3 3 3 3 3 3 3 3 3 3 3 ! 3 3 3 3 3 3 3 3 3 3 3 3 3 3 $%JJJJJJJJJJJJJJJJJJJJJJJJJJJJJJJJJJJJJJJJJJJJJJJJJJJJJJJJJJJJJJ&' 6. Tab to the fields and enter the appropriate information. See Table 3-2 for print screen field descriptions. 7. To print the CHECK result on the printer you selected, press TRANSMIT; to return to the CHECK result screen, press the F5 key, or tab to the F5-Return field and press TRANSMIT. 3787 3239-101 3-29 Working with Distribution Lists (DISTRIBUTION Screen) 3.3. Working with Distribution Lists (DISTRIBUTION Screen) Use the DISTRIBUTION screen to create, display, change, and delete distribution lists. All distribution lists you create are owned by the mailbox to which you are assigned when you create them. Distribution lists are public and can be accessed by any other user. However, only the list owner can delete or update the list. When local members of a local distribution list change their user information, the mail processor updates their information on the list automatically. However, you must manually update user information on the distribution list for: $ A local member of a remote distribution list $ A remote member of a local distribution list $ A remote member of a remote distribution list Figure 3-2 shows the DISTRIBUTION command screen. !iiiiiiiiiiiiiiiiiiiiiiiiiiiiiiiiiiiiiiiiiiiiiiiiiiiiiiiiiiiiii"# 3 3 3 3 3 3 3 3 3 3 3 3 3 3 3 3 3 3 3 3 3 3 3 3 3 3 3 3 3 3 3 3 3 3 3 3 3 3 3 3 3 3 3 3 $%JJJJJJJJJJJJJJJJJJJJJJJJJJJJJJJJJJJJJJJJJJJJJJJJJJJJJJJJJJJJJJ&' Figure 3-2. DISTRIBUTION Command Screen Table 3-3 summarizes the fields in the DISTRIBUTION screen. 3-30 3787 3239-101 Working with Distribution Lists (DISTRIBUTION Screen) Table 3-3. DISTRIBUTION Screen Fields Field Name List name Description 1 to 64 alphanumeric characters that specify a particular list on which to perform the DISTRIBUTION operation. List name is case sensitive. (See "Specifying Case Sensitive Field Values," in 2.2.) This is a required field. If the distribution list resides on an OS 2200 host, the list name cannot contain more than 12 characters. All Displays all distribution lists owned by the currently assigned mailbox. Mode: DISPLAY The default mode if no mode is specified. Displays the specified distribution list. create Creates the specified distribution list. delete Deletes a distribution list from the database. insert Adds a member or members to the specified distribution list. remove Removes a member or members from the specified distribution list. Print: NO Default value; specifies not to print the results of the DISTRIBUTION operation. Valid in DISPLAY mode only. yes Prints the results of the DISTRIBUTION operation on an auxiliary or system printer,as well as on the terminal. Host Specifies the host-id where the distribution list resides. Required only if the list resides on a remote host and valid only in DISPLAY mode. When you print the results of the DISTRIBUTION command, the mail processor provides you with a MAIL PRINT screen. Table 3-4 summarizes the fields that you supply on that screen. See your site administrator for information on the correct values for your specific site. Table 3-4. MAIL PRINT Screen Fields Field Name Description Print Destination: SYM Sends the DISTRIBUTION result to the system printer whose site-id you specify. cop Sends the DISTRIBUTION result to an auxiliary printer attached to your terminal. continued 3787 3239-101 3-31 Working with Distribution Lists (DISTRIBUTION Screen) Table 3-4. MAIL PRINT Screen Fields (cont.) Field Name Description For SYM: site-id 1 to 6 characters that identify the system printer on which to print the DISTRIBUTION result. If you select a print destination of SYM and you do not specify a site-id, the mail processor uses your system default. number of copies Indicates the number of copies you want to print. Maximum number of copies is 63. Default is 1. banner Specifies a large-print banner to appear on the first page of the printout for identification purposes. Default is the run-id. For cop: printer number If more than 1 auxiliary printer is configured to your terminal, specify the id of the one on which to print the DISTRIBUTION result. Default is 1. Creating a Distribution List Use the following procedure to create a new distribution list: (See Table 3-3 for complete information on screen field specifications.) 1. Make sure you have assigned a mailbox for your use. 2. Access the DISTRIBUTION screen from the main menu or from any other command screen. 3. Tab to the List name field and enter the name of the distribution list to create. 4. Tab to the create field and enter any character. 3-32 3787 3239-101 Working with Distribution Lists (DISTRIBUTION Screen) !iiiiiiiiiiiiiiiiiiiiiiiiiiiiiiiiiiiiiiiiiiiiiiiiiiiiiiiiiiiiii"# 3 3 3 3 3 3 3 3 3 3 3 3 3 3 3 3 3 3 3 3 3 3 3 3 3 3 3 3 3 3 3 3 3 3 3 ! 3 3 3 3 3 3 3 3 3 $%JJJJJJJJJJJJJJJJJJJJJJJJJJJJJJJJJJJJJJJJJJJJJJJJJJJJJJJJJJJJJJ&' 5. Press TRANSMIT to display a MAILBOX screen on which to enter the members of the distribution list. !iiiiiiiiiiiiiiiiiiiiiiiiiiiiiiiiiiiiiiiiiiiiiiiiiiiiiiiiiiiiii"# 3 3 3 3 3 3 3 3 3 3 3 3 3 3 3 3 3 3 3 3 3 3 3 3 3 3 3 3 3 3 3 3 3 3 3 3 3 3 3 3 3 3 3 3 $%JJJJJJJJJJJJJJJJJJJJJJJJJJJJJJJJJJJJJJJJJJJJJJJJJJJJJJJJJJJJJJ&' 6. Enter the mailbox names of the members to include in the distribution list. (Mailbox names on OS 2200 systems can be up to 8 characters long; mailbox names on non-OS 2200 systems may be up to 64 characters long.) Include the host-id for mailboxes residing on a remote host. 7. If you have more than five members to include in the list, press the F5 key, or tab to the F5-MORE field and press TRANSMIT. The mail processor displays another MAILBOX screen on which to enter list members. 3787 3239-101 3-33 Working with Distribution Lists (DISTRIBUTION Screen) 8. Repeat steps 5 and 6 until you have entered as many list members as needed, up to 20. (If you have more than 20 list members, complete step 10 and then repeat the entire procedure (steps 1 through 10). !iiiiiiiiiiiiiiiiiiiiiiiiiiiiiiiiiiiiiiiiiiiiiiiiiiiiiiiiiiiiii"# 3 3 3 3 3 3 3 3 3 3 3 3 3 3 3 3 3 3 3 3 3 3 3 3 3 3 3 3 3 3 3 3 3 3 3 3 3 3 3 3 3 3 3 3 $%JJJJJJJJJJJJJJJJJJJJJJJJJJJJJJJJJJJJJJJJJJJJJJJJJJJJJJJJJJJJJJ&' 9. To abort the list creation, press the F6 key, or tab to the F6-Abort field and press TRANSMIT. 10. To create the list, press the F7 key, or tab to the F7-Process field and press TRANSMIT. The mail processor redisplays the DISTRIBUTION screen with a successful completion message (or an error message, if appropriate). !iiiiiiiiiiiiiiiiiiiiiiiiiiiiiiiiiiiiiiiiiiiiiiiiiiiiiiiiiiiiii"# 3 3 3 3 3 3 3 3 3 3 3 3 3 3 3 3 3 3 3 3 3 3 3 3 3 3 3 3 3 3 3 3 3 3 3 3 3 3 3 3 3 3 3 3 3 3 $%JJJJJJJJJJJJJJJJJJJJJJJJJJJJJJJJJJJJJJJJJJJJJJJJJJJJJJJJJJJJJJ&' 3-34 3787 3239-101 Working with Distribution Lists (DISTRIBUTION Screen) Displaying and Printing Distribution List Names The DISTRIBUTION screen lets you display and print a list of distribution lists owned by the currently assigned mailbox. If you are printing the list, you can direct it to: $ Your terminal’s auxiliary printer $ The system printer Use the following procedure to display and/or print a list of all the distribution lists owned by the current mailbox: (See Table 3-3 for complete information on screen field specifications.) 1. Make sure you have assigned a mailbox for your use. (See "Assigning a Mailbox" in 3.5.) 2. Access the DISTRIBUTION screen from the main menu or from any other command screen. 3. Tab to the All field and enter any character. 4. Optionally, tab to the DISPLAY (default mode) field and enter any character. 5. If you want to print the result, tab to the Print:yes field and enter any character. !iiiiiiiiiiiiiiiiiiiiiiiiiiiiiiiiiiiiiiiiiiiiiiiiiiiiiiiiiiiiii"# 3 3 3 3 3 3 3 3 3 3 3 3 3 3 3 3 3 3 3 3 3 3 3 3 3 3 3 3 3 3 3 3 3 3 ! 3 3 3 3 3 3 3 3 3 3 $%JJJJJJJJJJJJJJJJJJJJJJJJJJJJJJJJJJJJJJJJJJJJJJJJJJJJJJJJJJJJJJ&' 6. Press TRANSMIT to display: $ The distribution list (a) $ The MAIL PRINT screen (b) v v 3787 3239 101 If you did not specify Print:yes, the mail processor displays the list of distribution lists owned by the currently assigned mailbox. v 3 35 Working with Distribution Lists (DISTRIBUTION Screen) !iiiiiiiiiiiiiiiiiiiiiiiiiiiiiiiiiiiiiiiiiiiiiiiiiiiiiiiiiiiiii"# 3 3 3 3 3 3 3 3 3 3 3 3 3 3 3 3 3 3 $%JJJJJJJJJJJJJJJJJJJJJJJJJJJJJJJJJJJJJJJJJJJJJJJJJJJJJJJJJJJJJJ&' v If you specified Print:yes, the mail processor displays the following print screen. !iiiiiiiiiiiiiiiiiiiiiiiiiiiiiiiiiiiiiiiiiiiiiiiiiiiiiiiiiiiiii"# 3 3 3 3 3 3 3 3 3 3 3 3 3 3 3 3 3 3 3 3 3 3 3 3 3 3 3 3 3 3 3 3 3 3 ! 3 3 3 3 3 3 3 3 3 3 3 3 3 3 $%JJJJJJJJJJJJJJJJJJJJJJJJJJJJJJJJJJJJJJJJJJJJJJJJJJJJJJJJJJJJJJ&' 7. Tab to the fields and enter the appropriate information. See Table 3-4 for print screen field descriptions. 8. To display and print the distribution lists owned by the currently assigned mailbox press TRANSMIT; to return to the DISTRIBUTION command screen, press the F5 key, or tab to the F5-Return field and press TRANSMIT. Displaying and Printing Distribution List Members When you display the members of a local distribution list, the information that the mail processor returns includes: 3-36 $ The host id and mailbox name (but no user names) for each remote list member $ The mailbox name and user names for each local member. Note that the host id for local members is listed simply as LOCAL. 3787 3239-101 Working with Distribution Lists (DISTRIBUTION Screen) When you display the members of a remote distribution list, the information that the mail processor returns includes: $ The host id and mailbox name for each member, regardless of host $ The user name of some members, depending on host implementation Use the following procedure to display or print the members of a local or remote distribution list: 1. Make sure you have assigned a mailbox for your use. (See "Assigning a Mailbox" in 3.5.) 2. Access the DISTRIBUTION screen from the main menu or from any other command screen. 3. Tab to the *List name field and enter the name of the distribution list whose members you want to display or print. (List names on OS 2200 systems can be up to 12 characters long; list names on non-OS 2200 systems may be up to 64 characters long.) Include the host-id for mailboxes residing on a remote host. 4. Optionally, tab to the DISPLAY (default mode) field and enter any character. 5. If you want to print the result, tab to the Print:yes field and enter any character. 6. If you want to display a remote distribution list, tab to the Host field and enter the id of the host where the list resides. !iiiiiiiiiiiiiiiiiiiiiiiiiiiiiiiiiiiiiiiiiiiiiiiiiiiiiiiiiiiiii"# 3 3 3 3 3 3 3 3 3 3 3 3 3 3 3 3 3 3 3 3 3 3 3 3 3 3 3 3 3 3 3 3 3 3 3 ! 3 3 3 3 3 3 3 3 3 $%JJJJJJJJJJJJJJJJJJJJJJJJJJJJJJJJJJJJJJJJJJJJJJJJJJJJJJJJJJJJJJ&' 7. Press TRANSMIT to display the distribution list or the MAIL PRINT screen. $ 3787 3239-101 If you did not specify Print:yes, the mail processor displays the specified distribution list. 3-37 Working with Distribution Lists (DISTRIBUTION Screen) !iiiiiiiiiiiiiiiiiiiiiiiiiiiiiiiiiiiiiiiiiiiiiiiiiiiiiiiiiiiiii"# 3 3 3 3 3 3 3 3 3 3 3 3 3 3 3 3 3 3 3 3 3 3 3 3 3 3 3 3 3 3 3 3 3 3 3 3 $%JJJJJJJJJJJJJJJJJJJJJJJJJJJJJJJJJJJJJJJJJJJJJJJJJJJJJJJJJJJJJJ&' $ If you specified Print:yes, the mail processor displays the following print screen. !iiiiiiiiiiiiiiiiiiiiiiiiiiiiiiiiiiiiiiiiiiiiiiiiiiiiiiiiiiiiii"# 3 3 3 3 3 3 3 3 3 3 3 3 3 3 3 3 3 3 3 3 3 3 3 3 3 3 3 3 3 3 3 3 3 ! 3 3 3 3 3 3 3 3 3 3 3 3 3 $%JJJJJJJJJJJJJJJJJJJJJJJJJJJJJJJJJJJJJJJJJJJJJJJJJJJJJJJJJJJJJJ&' 8. Tab to the fields and enter the appropriate information. See Table 3-4 for print screen field descriptions. 9. To display and print the members of the distribution list you specified, press TRANSMIT; to return to the DISTRIBUTION command screen, press the F5 key, or tab to the F5-Return field and press TRANSMIT. 3-38 3787 3239-101 Working with Distribution Lists (DISTRIBUTION Screen) Adding Members to a Distribution List You can add members to any distribution list owned by the mailbox to which you are currently assigned. Use the following procedure to add members to an existing distribution list: (See Table 3-3 for complete information on screen field specifications.) 1. Make sure you have assigned a mailbox for your use. (See "Assigning a Mailbox" in 3.5.) 2. Access the DISTRIBUTION screen from the main menu or from any other command screen. 3. Tab to the *List name field and enter the name of the distribution list to which you are adding members. 4. Tab to the insert field and enter any character. !iiiiiiiiiiiiiiiiiiiiiiiiiiiiiiiiiiiiiiiiiiiiiiiiiiiiiiiiiiiiii"# 3 3 3 3 3 3 3 3 3 3 3 3 3 3 3 3 3 3 3 3 3 3 3 3 3 3 3 3 3 3 3 3 3 3 3 3 ! 3 3 3 3 3 3 3 3 3 3 $%JJJJJJJJJJJJJJJJJJJJJJJJJJJJJJJJJJJJJJJJJJJJJJJJJJJJJJJJJJJJJJ&' 5. Press TRANSMIT to display a MAILBOX screen on which to enter the new members. 3787 3239-101 3-39 Working with Distribution Lists (DISTRIBUTION Screen) !iiiiiiiiiiiiiiiiiiiiiiiiiiiiiiiiiiiiiiiiiiiiiiiiiiiiiiiiiiiiii"# 3 3 3 3 3 3 3 3 3 3 3 3 3 3 3 3 3 3 3 3 3 3 3 3 3 3 3 3 3 3 3 3 3 3 3 3 3 3 3 3 3 3 3 3 $%JJJJJJJJJJJJJJJJJJJJJJJJJJJJJJJJJJJJJJJJJJJJJJJJJJJJJJJJJJJJJJ&' 6. Enter the mailbox names of the members you want to add to the distribution list. (Mailbox names on OS 2200 systems can be up to 8 characters long; mailbox names on non-OS 2200 systems may be up to 64 characters long.) Include the host id for members residing on a remote host. 7. If you have more than five names to add to the list, press the F5 key, or tab to the F5-More field and TRANSMIT. The mail processor displays another MAILBOX screen on which to enter new members. 8. Repeat steps 5 and 6 until you have entered as many list members as needed, up to 20. (If you have more than 20 list members to add, complete step 10 and then repeat the entire procedure (steps 1 through 10). !iiiiiiiiiiiiiiiiiiiiiiiiiiiiiiiiiiiiiiiiiiiiiiiiiiiiiiiiiiiiii"# 3 3 3 3 3 3 3 3 3 3 3 3 3 3 3 3 3 3 3 3 3 3 3 3 3 3 3 3 3 3 3 3 3 3 3 3 3 3 3 3 3 3 3 3 $%JJJJJJJJJJJJJJJJJJJJJJJJJJJJJJJJJJJJJJJJJJJJJJJJJJJJJJJJJJJJJJ&' 3-40 3787 3239-101 Working with Distribution Lists (DISTRIBUTION Screen) 9. To abort the insert request, press the F6 key, or tab to the F6-Abort field and press TRANSMIT. 10. To add the members to the list, press the F7 key, or tab to the F7-Process field and press TRANSMIT. The mail processor redisplays the DISTRIBUTION screen with a successful completion message (or an error message, if appropriate). !iiiiiiiiiiiiiiiiiiiiiiiiiiiiiiiiiiiiiiiiiiiiiiiiiiiiiiiiiiiiii"# 3 3 3 3 3 3 3 3 3 3 3 3 3 3 3 3 3 3 3 3 3 3 3 3 3 3 3 3 3 3 3 3 3 3 3 3 3 3 3 3 3 3 3 3 $%JJJJJJJJJJJJJJJJJJJJJJJJJJJJJJJJJJJJJJJJJJJJJJJJJJJJJJJJJJJJJJ&' Removing Members from a Distribution List Use the following procedure to remove members from any distribution list owned by the mailbox to which you are currently assigned: 1. Make sure you have assigned a mailbox for your use. 2. Access the DISTRIBUTION screen from the main menu or from any other command screen. 3. Tab to the *List name field and enter the name of the distribution list from which to remove members. 4. Tab to the remove field and enter any character. 3787 3239-101 3-41 Working with Distribution Lists (DISTRIBUTION Screen) !iiiiiiiiiiiiiiiiiiiiiiiiiiiiiiiiiiiiiiiiiiiiiiiiiiiiiiiiiiiiii"# 3 3 3 3 3 3 3 3 3 3 3 3 3 3 3 3 3 3 3 3 3 3 3 3 3 3 3 3 3 3 3 3 3 3 3 ! 3 3 3 3 3 3 3 3 3 $%JJJJJJJJJJJJJJJJJJJJJJJJJJJJJJJJJJJJJJJJJJJJJJJJJJJJJJJJJJJJJJ&' 5. Press TRANSMIT to display a MAILBOX screen on which to enter the member names you want to remove from the distribution list. 6. Enter the members you want to remove from the list. (Mailbox names on OS 2200 systems can be up to 8 characters long; mailbox names on non-OS 2200 systems may be up to 64 characters long.) Include the host id for members that reside on a remote host. 7. If you have more than five names to remove from the list, press the F5 key, or tab to the F5-More field and press TRANSMIT. The mail processor displays another MAILBOX screen on which to enter members. 8. Repeat steps 5 and 6 until you have entered as many list members as needed, up to 20. (If you have more than 20 list members to remove, complete step 10 and then repeat the entire procedure (steps 1 through 10). 3-42 3787 3239-101 Working with Distribution Lists (DISTRIBUTION Screen) !iiiiiiiiiiiiiiiiiiiiiiiiiiiiiiiiiiiiiiiiiiiiiiiiiiiiiiiiiiiiii"# 3 3 3 3 3 3 3 3 3 3 3 3 3 3 3 3 3 3 3 3 3 3 3 3 3 3 3 3 3 3 3 3 3 3 3 3 3 3 3 3 3 3 3 3 $%JJJJJJJJJJJJJJJJJJJJJJJJJJJJJJJJJJJJJJJJJJJJJJJJJJJJJJJJJJJJJJ&' 9. To abort the remove request, press the F6 key, or tab to the F6-Abort field and press TRANSMIT. 10. To remove the members from the list, press the F7 key, or tab to the F7-Process field and press TRANSMIT. The mail processor redisplays the DISTRIBUTION screen with a successful completion message (or an error message, if appropriate). !iiiiiiiiiiiiiiiiiiiiiiiiiiiiiiiiiiiiiiiiiiiiiiiiiiiiiiiiiiiiii"# 3 3 3 3 3 3 3 3 3 3 3 3 3 3 3 3 3 3 3 3 3 3 3 3 3 3 3 3 3 3 3 3 3 3 3 3 3 3 3 3 3 3 3 3 3 3 $%JJJJJJJJJJJJJJJJJJJJJJJJJJJJJJJJJJJJJJJJJJJJJJJJJJJJJJJJJJJJJJ&' 3787 3239-101 3-43 Working with Distribution Lists (DISTRIBUTION Screen) Deleting a Distribution List Use the following procedure to delete a distribution list from the data base: (Remember that you can only delete a distribution list owned by the mailbox to which you are currently assigned.) 1. Make sure you have assigned a mailbox for your use. 2. Access the DISTRIBUTION screen from the main menu or from any other command screen. 3. Tab to the *List name field and enter the name of the distribution list to delete from the data base. 4. Tab to the delete field and enter any character. !iiiiiiiiiiiiiiiiiiiiiiiiiiiiiiiiiiiiiiiiiiiiiiiiiiiiiiiiiiiiii"# 3 3 3 3 3 3 3 3 3 3 3 3 3 3 3 3 3 3 3 3 3 3 3 3 3 3 3 3 3 3 3 3 3 3 3 ! 3 3 3 3 3 3 3 3 3 $%JJJJJJJJJJJJJJJJJJJJJJJJJJJJJJJJJJJJJJJJJJJJJJJJJJJJJJJJJJJJJJ&' 3-44 3787 3239-101 Working with Distribution Lists (DISTRIBUTION Screen) 5. Press TRANSMIT to delete the list and display a successful completion message (or an error message, if appropriate). !iiiiiiiiiiiiiiiiiiiiiiiiiiiiiiiiiiiiiiiiiiiiiiiiiiiiiiiiiiiiii"# 3 3 3 3 3 3 3 3 3 3 3 3 3 3 3 3 3 3 3 3 3 3 3 3 3 3 3 3 3 3 3 3 3 3 3 3 3 3 3 3 3 3 3 3 3 3 $%JJJJJJJJJJJJJJJJJJJJJJJJJJJJJJJJJJJJJJJJJJJJJJJJJJJJJJJJJJJJJJ&' 3787 3239-101 3-45 Retrieving and Saving Mail (GET Screen) 3.4. Retrieving and Saving Mail (GET Screen) Use the GET screen to retrieve an incoming or outgoing mail item for the currently assigned mailbox. The various screen fields allow you to do the following with the mail item whose mail-id you specify: $ Display it $ Print it on an auxiliary or system printer $ Save to an OS 2200 system data format (SDF) file or an element of a program file $ Delete it from the mailbox If you save mail to a file, you must first catalog the file using standard OS 2200 file naming conventions (see Appendix A). You must know the mail identifier (mail-id) for the mail you want to retrieve. Use the CHECK screen to produce a list of the current mail-ids for incoming or outgoing mail in your mailbox. (See 3.1.) Figure 3-3 shows the GET command screen. !iiiiiiiiiiiiiiiiiiiiiiiiiiiiiiiiiiiiiiiiiiiiiiiiiiiiiiiiiiiiii"# 3 3 3 3 3 3 3 3 3 3 3 3 3 3 3 3 3 3 3 3 3 3 3 3 3 3 3 3 3 3 3 3 3 3 3 3 3 3 3 3 3 3 3 3 $%JJJJJJJJJJJJJJJJJJJJJJJJJJJJJJJJJJJJJJJJJJJJJJJJJJJJJJJJJJJJJJ&' Figure 3-3. GET Command Screen Table 3-5 summarizes the fields in the GET screen. 3-46 3787 3239-101 Retrieving and Saving Mail (GET Screen) Table 3-5. GET Screen Fields Field Name Mail id Description Specifies the identifier of the mail-item to retrieve Type: INCOMING Default value; retrieves an incoming mail item. Outgoing Retrieves an outgoing mail item. Display: YES Default value; displays the specified mail item. no Specifies not to display the mail item. Print: NO Default value; specifies not to print the mail-item being retrieved. yes Prints the specified mail item on the auxiliary or system printer. Save file name: Specify if you want to save the mail item being retrieved in an OS 2200 SDF file oran element of a program file. Always include the period after name of an SDF file. The file must already be created using standard OS 2200 procedures and file-naming conventions. See Appendix A for file-naming conventions. If you specify an SDF file, the specified mail item overwrites any current contents of the file. If you specify an existing element of a program file, the specified mail item overwrites any current contents of that element. If you specify a new element of an existing program file, the mail processor creates the element and saves the mail item to it. When you print the results of the GET command, the mail processor provides you with a MAIL PRINT screen. Table 3-6 summarizes the fields that you supply on that screen. See your site administrator for information on the correct values for your specific site. 3787 3239-101 3-47 Retrieving and Saving Mail (GET Screen) Table 3-6. MAIL PRINT Screen Fields Field Name Description Print Destination: SYM Sends the GET result to the system printer whose site-id you specify. cop Sends the GET result to an auxiliary printer attached to your terminal. For SYM: site-id 1 to 6 characters that identify the system printer on which to print the GET result. If you select a print destination of SYM and you do not specify a site-id, the mail processor uses your system default. number of copies Indicates the number of copies you want to print. Maximum number of copies is 63. Default is 1. banner Specifies a large-print banner to appear on the first page of the printout for identification purposes. Default is the run-id. For cop: printer number If more than 1 auxiliary printer is configured to your terminal, specify the id of the one on which to print the GET result. Default is 1. Retrieving Incoming Mail Before attempting to retrieve incoming mail, remember to issue a CHECK command because the mail processor resequences the ids whenever an item is received or deleted (see 3.1). Therefore, a particular incoming mail item’s id at one point in time may differ from its id at another point in time. Use the following procedure to display, print, or save incoming mail to a file: (See Table 3-5 for complete information on screen field specifications.) 1. Make sure you have assigned a mailbox for your use. (See "Assigning a Mailbox" in 3.5.) 2. Access the GET screen from the main menu or from any other command screen. 3. Tab to the *Mail id field and enter the id of the mail item you want to retrieve. 4. Optionally, tab to the Type:INCOMING (default type) field and enter any character. 5. If you do not want to display the mail item on the terminal, tab to the Display:no field and enter any character. 6. If you want to print the mail item, tab to the Print:yes field and enter any character. 7. If you want to save the mail item to an OS 2200 SDF file or program file element, tab to the Save file name field and enter the name of the file. (Remember that the file must already exist.) 3-48 3787 3239-101 Retrieving and Saving Mail (GET Screen) !iiiiiiiiiiiiiiiiiiiiiiiiiiiiiiiiiiiiiiiiiiiiiiiiiiiiiiiiiiiiii"# 3 3 3 3 3 3 3 3 3 3 3 3 3 3 3 3 3 3 3 3 3 3 3 3 3 3 3 3 3 3 3 3 3 3 3 3 3 3 3 3 3 3 3 3 $%JJJJJJJJJJJJJJJJJJJJJJJJJJJJJJJJJJJJJJJJJJJJJJJJJJJJJJJJJJJJJJ&' 8. Press TRANSMIT to execute the command. $ If you did not specify Print:yes, the mail processor displays the specified mail item. (The following screen shows a local incoming mail item; if the incoming mail item is from a remote host, the heading is slightly different. For more information, see "Local and Remote Message Display Formats, " in 1.2.) !iiiiiiiiiiiiiiiiiiiiiiiiiiiiiiiiiiiiiiiiiiiiiiiiiiiiiiiiiiiiii"# 3 3 3 3 3 3 3 3 3 3 3 3 3 3 3 3 3 3 3 3 3 3 3 3 3 3 3 3 3 3 3 3 3 3 3 3 3 3 3 3 3 3 3 3 3 3 3 3 $%JJJJJJJJJJJJJJJJJJJJJJJJJJJJJJJJJJJJJJJJJJJJJJJJJJJJJJJJJJJJJJ&' 3787 3239-101 3-49 Retrieving and Saving Mail (GET Screen) $ If you specified Print:yes, the mail processor displays the following print screen. !iiiiiiiiiiiiiiiiiiiiiiiiiiiiiiiiiiiiiiiiiiiiiiiiiiiiiiiiiiiiii"# 3 3 3 3 3 3 3 3 3 3 3 3 3 3 3 3 3 3 3 3 3 3 3 3 3 3 3 3 3 3 3 3 3 3 3 3 3 3 3 3 3 3 3 3 3 3 3 3 3 3 $%JJJJJJJJJJJJJJJJJJJJJJJJJJJJJJJJJJJJJJJJJJJJJJJJJJJJJJJJJJJJJJ&' 9. Tab to the fields and enter the appropriate information. See Table 3-6 for print screen field descriptions. 10. To print the mail item on the printer you selected, press TRANSMIT; to return to the GET command screen, press the F5 key, or tab to the F5-Return field and press TRANSMIT. 11. If you specified Display:no, the mail processor redisplays the GET screen with a successful completion message (or an error message, if necessary). !iiiiiiiiiiiiiiiiiiiiiiiiiiiiiiiiiiiiiiiiiiiiiiiiiiiiiiiiiiiiii"# 3 3 3 3 3 3 3 3 3 3 3 3 3 3 3 3 3 3 3 3 3 3 3 3 3 3 3 3 3 3 3 3 3 3 3 3 3 3 3 3 3 3 3 3 3 3 $%JJJJJJJJJJJJJJJJJJJJJJJJJJJJJJJJJJJJJJJJJJJJJJJJJJJJJJJJJJJJJJ&' 3-50 3787 3239-101 Retrieving and Saving Mail (GET Screen) 12. If you specified Display:yes, the mail processor displays the mail item. Deleting the Mail Item from the Mailbox If you specified Display:yes (or took it as the default), you now have a mail item displayed on your terminal screen. For example: !iiiiiiiiiiiiiiiiiiiiiiiiiiiiiiiiiiiiiiiiiiiiiiiiiiiiiiiiiiiiii"# 3 3 3 3 3 3 3 3 3 3 3 3 3 3 3 3 3 3 3 3 3 3 3 3 3 3 3 3 3 3 3 3 3 3 3 3 3 3 3 3 3 3 3 3 3 3 $%JJJJJJJJJJJJJJJJJJJJJJJJJJJJJJJJJJJJJJJJJJJJJJJJJJJJJJJJJJJJJJ&' To delete the mail item you just retrieved, press the F6 key, or tab to the F6-Delete field and press TRANSMIT. The mail processor redisplays the GET screen with a successful completion message (or an error message, if appropriate). !iiiiiiiiiiiiiiiiiiiiiiiiiiiiiiiiiiiiiiiiiiiiiiiiiiiiiiiiiiiiii"# 3 3 3 3 3 3 3 3 3 3 3 3 3 3 3 3 3 3 3 3 3 3 3 3 3 3 3 3 3 3 3 3 3 3 3 3 3 3 3 3 3 3 3 3 3 3 $%JJJJJJJJJJJJJJJJJJJJJJJJJJJJJJJJJJJJJJJJJJJJJJJJJJJJJJJJJJJJJJ&' 3787 3239-101 3-51 Retrieving and Saving Mail (GET Screen) Returning Control to the GET Command Screen If you retrieved the incoming message using the GET function with Display:yes, you now have an incoming message displayed on your screen. For example: !iiiiiiiiiiiiiiiiiiiiiiiiiiiiiiiiiiiiiiiiiiiiiiiiiiiiiiiiiiiiii"# 3 3 3 3 3 3 3 3 3 3 3 3 3 3 3 3 3 3 3 3 3 3 3 3 3 3 3 3 3 3 3 3 3 3 3 3 3 3 3 3 3 3 3 3 $%JJJJJJJJJJJJJJJJJJJJJJJJJJJJJJJJJJJJJJJJJJJJJJJJJJJJJJJJJJJJJJ&' To return control from the displayed message to the GET command screen, press the F5 key, or tab to the F5-Return field and press TRANSMIT. The mail processor returns you to the GET screen and displays a successful completion message. !iiiiiiiiiiiiiiiiiiiiiiiiiiiiiiiiiiiiiiiiiiiiiiiiiiiiiiiiiiiiii"# 3 3 3 3 3 3 3 3 3 3 3 3 3 3 3 3 3 3 3 3 3 3 3 3 3 3 3 3 3 3 3 3 3 3 3 3 3 3 3 3 3 3 3 3 3 3 $%JJJJJJJJJJJJJJJJJJJJJJJJJJJJJJJJJJJJJJJJJJJJJJJJJJJJJJJJJJJJJJ&' 3-52 3787 3239-101 Retrieving and Saving Mail (GET Screen) Retrieving Outgoing Mail In order to retrieve an outgoing mail item, you need its mail-identifier. You can obtain this by issuing a CHECK command. Because the mail processor does not resequence mail-ids for outgoing mail, you do not have to issue a CHECK command if you already know the mail-id.Use the following procedure to display, print, or save outgoing mail to a file: (See Table 3-3 for complete information on screen field specifications). 1. Make sure you have assigned a mailbox for your use. (See 3.5.) 2. Access the GET screen from the main menu or from any other command screen. 3. Tab to the *Mail id field and enter the id of the mail item you want to retrieve. 4. Tab to the Type:outgoing field and enter any character. 5. If you do not want to display the mail item on the terminal, tab to the Display:no field and enter any character. 6. If you want to print the mail item, tab to the Print:yes field and enter any character. 7. If you want to save the mail item to an OS 2200 SDF file or program file element, tab to the Save file name field and enter the name of the file. (Remember that the file must already exist.) !iiiiiiiiiiiiiiiiiiiiiiiiiiiiiiiiiiiiiiiiiiiiiiiiiiiiiiiiiiiiii"# 3 3 3 3 3 3 3 3 3 3 3 3 3 3 3 3 3 3 3 3 3 3 3 3 3 3 3 3 3 3 3 3 3 3 3 ! 3 3 3 3 3 3 3 3 3 $%JJJJJJJJJJJJJJJJJJJJJJJJJJJJJJJJJJJJJJJJJJJJJJJJJJJJJJJJJJJJJJ&' 8. Press TRANSMIT to execute the command. 9. If you did not specify Print:yes, skip to step 12. 10. If you specified Print:yes, the mail processor displays the following print screen. 3787 3239-101 3-53 Retrieving and Saving Mail (GET Screen) !iiiiiiiiiiiiiiiiiiiiiiiiiiiiiiiiiiiiiiiiiiiiiiiiiiiiiiiiiiiiii"# 3 3 3 3 3 3 3 3 3 3 3 3 3 3 3 3 3 3 3 3 3 3 3 3 3 3 3 3 3 3 3 3 3 3 3 3 3 3 3 3 3 3 3 3 3 3 3 3 $%JJJJJJJJJJJJJJJJJJJJJJJJJJJJJJJJJJJJJJJJJJJJJJJJJJJJJJJJJJJJJJ&' 11. Tab to the fields and enter the appropriate information. See Table 3-6 for print screen field descriptions. 12. Press TRANSMIT to print the mail item; or, press the F5 key, or tab to the F5-Return field and press TRANSMIT. The mail processor returns to the GET command screen. 13. If you specified Display:no, the mail processor redisplays the GET screen with a successful completion message (or an error message, if appropriate). !iiiiiiiiiiiiiiiiiiiiiiiiiiiiiiiiiiiiiiiiiiiiiiiiiiiiiiiiiiiiii"# 3 3 3 3 3 3 3 3 3 3 3 3 3 3 3 3 3 3 3 3 3 3 3 3 3 3 3 3 3 3 3 3 3 3 3 3 3 3 3 3 3 3 3 3 3 3 $%JJJJJJJJJJJJJJJJJJJJJJJJJJJJJJJJJJJJJJJJJJJJJJJJJJJJJJJJJJJJJJ&' 3-54 3787 3239-101 Retrieving and Saving Mail (GET Screen) 14. If you specified Display:yes, the mail processor displays the mail item. !iiiiiiiiiiiiiiiiiiiiiiiiiiiiiiiiiiiiiiiiiiiiiiiiiiiiiiiiiiiiii"# 3 3 3 3 3 3 3 3 3 3 3 3 3 3 3 3 3 3 3 3 3 3 3 3 3 3 3 3 3 3 3 3 3 3 3 3 3 3 3 3 3 3 3 3 3 3 3 3 $%JJJJJJJJJJJJJJJJJJJJJJJJJJJJJJJJJJJJJJJJJJJJJJJJJJJJJJJJJJJJJJ&' Deleting the Mail Item from the Mailbox If you specified Display:yes (or took it as the default), you now have a mail item displayed on your terminal screen. For example: !iiiiiiiiiiiiiiiiiiiiiiiiiiiiiiiiiiiiiiiiiiiiiiiiiiiiiiiiiiiiii"# 3 3 3 3 3 3 3 3 3 3 3 3 3 3 3 3 3 3 3 3 3 3 3 3 3 3 3 3 3 3 3 3 3 3 3 3 3 3 3 3 3 3 3 3 3 3 3 3 $%JJJJJJJJJJJJJJJJJJJJJJJJJJJJJJJJJJJJJJJJJJJJJJJJJJJJJJJJJJJJJJ&' 3787 3239-101 3-55 Retrieving and Saving Mail (GET Screen) Press the F6 key, or tab to the F6-Delete field and press TRANSMIT. The mail processor redisplays the GET screen with a successful completion message (or an error message, if appropriate). !iiiiiiiiiiiiiiiiiiiiiiiiiiiiiiiiiiiiiiiiiiiiiiiiiiiiiiiiiiiiii"# 3 3 3 3 3 3 3 3 3 3 3 3 3 3 3 3 3 3 3 3 3 3 3 3 3 3 3 3 3 3 3 3 3 3 3 3 3 3 3 3 3 3 3 3 3 3 $%JJJJJJJJJJJJJJJJJJJJJJJJJJJJJJJJJJJJJJJJJJJJJJJJJJJJJJJJJJJJJJ&' Returning Control to the GET Command Screen If you retrieved the outgoing message using the GET function with Display:yes, you now have an outgoing message displayed on your screen. For example: !iiiiiiiiiiiiiiiiiiiiiiiiiiiiiiiiiiiiiiiiiiiiiiiiiiiiiiiiiiiiii"# 3 3 3 3 3 3 3 3 3 3 3 3 3 3 3 3 3 3 3 3 3 3 3 3 3 3 3 3 3 3 3 3 3 3 3 3 3 3 3 3 3 3 3 3 3 3 3 ! 3 $%JJJJJJJJJJJJJJJJJJJJJJJJJJJJJJJJJJJJJJJJJJJJJJJJJJJJJJJJJJJJJJ&' 3-56 3787 3239-101 Retrieving and Saving Mail (GET Screen) To return control from the displayed message to the GET command screen, press the F5 key, or tab to the F5-Return field and press TRANSMIT. The mail processor returns you to the GET screen and displays a successful completion message. !iiiiiiiiiiiiiiiiiiiiiiiiiiiiiiiiiiiiiiiiiiiiiiiiiiiiiiiiiiiiii"# 3 3 3 3 3 3 3 3 3 3 3 3 3 3 3 3 3 3 3 3 3 3 3 3 3 3 3 3 3 3 3 3 3 3 3 3 3 3 3 3 3 3 3 3 3 3 $%JJJJJJJJJJJJJJJJJJJJJJJJJJJJJJJJJJJJJJJJJJJJJJJJJJJJJJJJJJJJJJ&' 3787 3239-101 3-57 Setting Up and Assigning a Mailbox (MAILBOX Screen) 3.5. Setting Up and Assigning a Mailbox (MAILBOX Screen) Use the MAILBOX screen to assign, create, change, or delete a mailbox. Before performing other mail processor commands, you must assign a to mailbox for your use during the session. The mailbox assignment remains in effect until you: $ Change the mailbox assignment during the session $ Exit the mail processor If you create a new mailbox or change information for a mailbox, the mail processor automatically assigns you to that mailbox; otherwise, you must use the MAILBOX command in IDENTIFY mode before requesting any other mail processor command. Figure 3-4 shows the MAILBOX command screen. !iiiiiiiiiiiiiiiiiiiiiiiiiiiiiiiiiiiiiiiiiiiiiiiiiiiiiiiiiiiiii"# 3 3 3 3 3 3 3 3 3 3 3 3 3 3 3 3 3 3 3 3 3 3 3 3 3 3 3 3 3 3 3 3 3 3 3 3 3 3 3 3 3 3 3 3 $%JJJJJJJJJJJJJJJJJJJJJJJJJJJJJJJJJJJJJJJJJJJJJJJJJJJJJJJJJJJJJJ&' Figure 3-4. MAILBOX Command Screen Table 3-7 summarizes the fields in the MAILBOX screen. 3-58 3787 3239-101 Setting Up and Assigning a Mailbox (MAILBOX Screen) Table 3-7. MAILBOX Screen Fields Field Name Mailbox name Description 1 to 8 characters that identify the mailbox name on which to perform the MAILBOX operation. Mailbox name can consist of any alphanumerics and special characters EXCEPT for a slash (/) or double colon (::). This is a required field. Mailbox names are not case sensitive; the mail processor translates any lowercase characters into uppercase characters. Mailbox key 1 to 8 character security key for the specified mailbox. Mailbox key can consist of any alphanumerics and special characters EXCEPT for a slash (/) or double colon (::) Mailbox keys are not case sensitive; the mail processor translates any lowercase characters into uppercase characters. User Optionally specifies a 1- to 20-character user name for the mailbox. Appears as the default author name for all outgoing mail originating from this mailbox. In addition, appears on all distribution lists owned by this mailbox. User name is case sensitive and must always appear exactly as you specify it on this command. Mode: IDENTIFY Default value; explicitly assigns the specified mailbox for your use. (If you specify Create or Change mode, the mail processor automatically assigns the specified mailbox for your use. To perform any other commands, you must first assign a mailbox for your use during the current session. Create Creates a new mailbox with the specified name and key and assigns it for your use. Some sites restrict this mode. See your site administrator for this information. Delete Deletes the specified mailbox name. You cannot delete a mailbox while someone else is using it. Some sites restrict this mode. See your site administrator for this information. Change Changes information for the specified mailbox and assigns the mailbox for your use. Some sites restrict this mode. See your site administrator for this information. New mailbox name 1 to 8 characters that identify a new mailbox name when MODE is Change. Mailbox name can consist of any alphanumerics and special characters EXCEPT for a slash (/) or double colon (::). Mailbox names are not case sensitive; the mail processor translates any lowercase characters into uppercase characters. continued 3787 3239-101 3-59 Setting Up and Assigning a Mailbox (MAILBOX Screen) Table 3-7. MAILBOX Screen Fields (cont.) Field Name New mailbox key Description 1 to 8 characters that identify a new security key when Mode is Change. Mailbox key can consist of any alphanumerics and special characters EXCEPT for a slash (/) or double colon (::). Mailbox keys are not case sensitive; the mail processor translates any lowercase characters into uppercase characters. New user 1 to 20 characters that identify a new user name when Mode is Change. If no user name already exists, this user name is added. If a user name already exists, this user name replaces the existing user name. User name is case sensitive and must always appear exactly as you specify it on this command. Creating a Mailbox When you create a mailbox, the mail processor automatically assigns that mailbox for your use. (See "Assigning a Mailbox," earlier in this section.) You can create as many mailboxes as you need. If you select a mailbox name that already exists, you get an error message; retry the command with a new mailbox name. If you specify a user name when you create the mailbox, the mail processor uses it for the following purposes: $ To provide a default author name for all outgoing mail originating from this mailbox (see the PREPARE and SEND commands) $ To further identify the owner of a distribution list (see the DISTRIBUTION command) $ To further identify a member of a local distribution list when it is displayed (see the DISTRIBUTION command) $ To verify a user or mailbox name (see the VERIFY command) Use the following procedure to create a new mailbox: (See Table 3-4 for complete information on screen field specifications.) 1. Access the MAILBOX screen from the main menu or from any other command screen. 2. Tab to the Mailbox name field and enter the name of the mailbox to create. 3. Optionally, tab to the Mailbox key field and enter a security key for the mailbox. 4. Optionally, tab to the User field and enter a user name for the mailbox. 5. Tab to Mode:Create field and enter any character. 3-60 3787 3239-101 Setting Up and Assigning a Mailbox (MAILBOX Screen) !iiiiiiiiiiiiiiiiiiiiiiiiiiiiiiiiiiiiiiiiiiiiiiiiiiiiiiiiiiiiii"# 3 3 3 3 3 3 3 3 3 3 3 3 3 3 3 3 3 3 3 3 3 3 3 3 3 3 3 3 3 3 3 3 3 3 3 ! 3 3 3 3 3 3 3 3 3 $%JJJJJJJJJJJJJJJJJJJJJJJJJJJJJJJJJJJJJJJJJJJJJJJJJJJJJJJJJJJJJJ&' 6. Press TRANSMIT to create the mailbox. 7. The mail processor redisplays the mailbox screen with a successful completion message (or an error message, if appropriate). Note that if the create request is successful, the MAILBOX field in the lower right of the screen displays the mailbox name. This is the active mailbox and is displayed on each subsequent command screen. !iiiiiiiiiiiiiiiiiiiiiiiiiiiiiiiiiiiiiiiiiiiiiiiiiiiiiiiiiiiiii"# 3 3 3 3 3 3 3 3 3 3 3 3 3 3 3 3 3 3 3 3 3 3 3 3 3 3 3 3 3 3 3 3 3 3 3 3 3 3 3 3 3 3 3 3 3 3 $%JJJJJJJJJJJJJJJJJJJJJJJJJJJJJJJJJJJJJJJJJJJJJJJJJJJJJJJJJJJJJJ&' 3787 3239-101 3-61 Setting Up and Assigning a Mailbox (MAILBOX Screen) Assigning a Mailbox Before you can read or write mail, you must assign a mailbox for your use during a session. Use the MAILBOX command in IDENTIFY mode to assign a mailbox. If you use more than one mailbox, you can change your mailbox assignment during the session by issuing additional MAILBOX commands. The mail processor automatically disconnects the previous mailbox assignment and assigns the new mailbox you specify. If you create a mailbox or change mailbox information, that mailbox is automatically assigned for your use. You do not have to assign it explicitly. Use the following procedure to assign a mailbox for your use: (See Table 3-2 for complete information on screen field specifications.) 1. Access the MAILBOX screen from the main menu or from any other command screen. 2. Tab to the Mailbox name field and enter the name of the mailbox to assign. 3. If you created the mailbox with a key, tab to the Mailbox key field and enter the security key of the mailbox to assign. 4. Optionally, tab to the Mode:IDENTIFY (default mode) field and enter any character. !iiiiiiiiiiiiiiiiiiiiiiiiiiiiiiiiiiiiiiiiiiiiiiiiiiiiiiiiiiiiii"# 3 3 3 3 3 3 3 3 3 3 3 3 3 3 3 3 3 3 3 3 3 3 3 3 3 3 3 3 3 3 3 3 3 3 3 ! 3 3 3 3 3 3 3 3 3 $%JJJJJJJJJJJJJJJJJJJJJJJJJJJJJJJJJJJJJJJJJJJJJJJJJJJJJJJJJJJJJJ&' 5. Press TRANSMIT to assign the mailbox. 3-62 3787 3239-101 Setting Up and Assigning a Mailbox (MAILBOX Screen) Changing Mailbox Information When you change mailbox information, the mail processor automatically assigns that mailbox for your use. (See "Assigning a Mailbox," earlier in this section.) If you change the mailbox name or user name for a mailbox, the mail processor automatically updates this information on any local distribution list of which the mailbox is a member; however, it does not update the information on remote distribution lists. Note: You cannot use MAILBOX in CHANGE mode while someone else is assigned to the mailbox you want to change. Use the following procedure to change a mailbox name, mailbox key, or to change or create a user name for a mailbox: 1. Access the MAILBOX screen from the main menu or from any other command screen. 2. Tab to the Mailbox name field and enter the name of the mailbox to change. 3. If you created the mailbox with a key, tab to the Mailbox key field and enter the security key for the mailbox. 4. Tab to the Mode:change field and enter any character. 5. Do any or all of the following: $ Tab to the New mailbox name field and enter a new name for the current mailbox. $ Tab to the New mailbox key field and enter a new security key for the mailbox. $ Tab to the New user name field and enter a new user name. If a user name exists for the mailbox, the mail processor will replace it with this new name. If no user name exists for the mailbox, the mail processor will create one with the name you specify in this field. !iiiiiiiiiiiiiiiiiiiiiiiiiiiiiiiiiiiiiiiiiiiiiiiiiiiiiiiiiiiiii"# 3 3 3 3 3 3 3 3 3 3 3 3 3 3 3 3 3 3 3 3 3 3 3 3 3 3 3 3 3 3 3 3 3 3 3 ! 3 3 3 3 3 3 3 3 3 $%JJJJJJJJJJJJJJJJJJJJJJJJJJJJJJJJJJJJJJJJJJJJJJJJJJJJJJJJJJJJJJ&' 3787 3239-101 3-63 Setting Up and Assigning a Mailbox (MAILBOX Screen) 6. Press TRANSMIT to execute the command and display a successful completion message (or an error message, if appropriate). !iiiiiiiiiiiiiiiiiiiiiiiiiiiiiiiiiiiiiiiiiiiiiiiiiiiiiiiiiiiiii"# 3 3 3 3 3 3 3 3 3 3 3 3 3 3 3 3 3 3 3 3 3 3 3 3 3 3 3 3 3 3 3 3 3 3 3 3 3 3 3 3 3 3 3 3 3 3 $%JJJJJJJJJJJJJJJJJJJJJJJJJJJJJJJJJJJJJJJJJJJJJJJJJJJJJJJJJJJJJJ&' Deleting a Mailbox To delete a mailbox, use the MAILBOX command in DELETE mode. The mail processor automatically removes the deleted mailbox name from any local distribution lists on which it appears; however, it does not remove the mailbox name from remote distribution lists. See the DISTRIBUTION command for information on updating remote distribution lists. You cannot use MAILBOX in DELETE mode while someone else is assigned to the mailbox you want to delete. Use the following procedure to delete a mailbox from the data base: 1. Make sure the mailbox is assigned for your use. (See "Assigning a Mailbox, in this section.) 2. Tab to the Mailbox name field and enter the mailbox name to delete. 3. If you created the mailbox with a key, tab to the Mailbox key field and enter the security key for the mailbox. 4. Tab to the Mode:Delete field and enter any character. 3-64 3787 3239-101 Setting Up and Assigning a Mailbox (MAILBOX Screen) !iiiiiiiiiiiiiiiiiiiiiiiiiiiiiiiiiiiiiiiiiiiiiiiiiiiiiiiiiiiiii"# 3 3 3 3 3 3 3 3 3 3 3 3 3 3 3 3 3 3 3 3 3 3 3 3 3 3 3 3 3 3 3 3 3 3 3 ! 3 3 3 3 3 3 3 3 3 $%JJJJJJJJJJJJJJJJJJJJJJJJJJJJJJJJJJJJJJJJJJJJJJJJJJJJJJJJJJJJJJ&' 5. Press TRANSMIT to delete the mailbox and display a successful completion message (or an error message, if appropriate). !iiiiiiiiiiiiiiiiiiiiiiiiiiiiiiiiiiiiiiiiiiiiiiiiiiiiiiiiiiiiii"# 3 3 3 3 3 3 3 3 3 3 3 3 3 3 3 3 3 3 3 3 3 3 3 3 3 3 3 3 3 3 3 3 3 3 3 3 3 3 3 3 3 3 3 3 3 3 $%JJJJJJJJJJJJJJJJJJJJJJJJJJJJJJJJJJJJJJJJJJJJJJJJJJJJJJJJJJJJJJ&' 3787 3239-101 3-65 Getting Host Implementation Information (MHELP Screen) 3.6. Getting Host Implementation Information (MHELP Screen) Use the MHELP screen to get a list of the mail processor commands that are implemented on a given host in the network. Figure 3-5 shows the MHELP command screen. !iiiiiiiiiiiiiiiiiiiiiiiiiiiiiiiiiiiiiiiiiiiiiiiiiiiiiiiiiiiiii"# 3 3 3 3 3 3 3 3 3 3 3 3 3 3 3 3 3 3 3 3 3 3 3 3 3 3 3 3 3 3 3 3 3 3 3 3 3 3 3 3 3 3 3 3 $%JJJJJJJJJJJJJJJJJJJJJJJJJJJJJJJJJJJJJJJJJJJJJJJJJJJJJJJJJJJJJJ&' Figure 3-5. MHELP Command Screen Table 3-8 summarizes the fields in the MHELP screen. Table 3-8. MHELP Screen Fields Field Name Host Description Specifies the host id of the host for which you want information. The default is the local host. Required field for remote host. Use the following procedure to get command implementation information for a host in the network: 1. Make sure the mailbox is assigned for your use. (See "Assigning a Mailbox" in 3.5.) 2. Access the MHELP screen from the main menu or from any other command screen. 3. If you want information on a remote host, tab to the Host field and enter the host id. 3-66 3787 3239-101 Getting Host Implementation Information (MHELP Screen) !iiiiiiiiiiiiiiiiiiiiiiiiiiiiiiiiiiiiiiiiiiiiiiiiiiiiiiiiiiiiii"# 3 3 3 3 3 3 3 3 3 3 3 3 3 3 3 3 3 3 3 3 3 3 3 3 3 3 3 3 3 3 3 3 3 3 3 ! 3 3 3 3 3 3 3 3 3 $%JJJJJJJJJJJJJJJJJJJJJJJJJJJJJJJJJJJJJJJJJJJJJJJJJJJJJJJJJJJJJJ&' 4. Press TRANSMIT to display the implementation information. !iiiiiiiiiiiiiiiiiiiiiiiiiiiiiiiiiiiiiiiiiiiiiiiiiiiiiiiiiiiiii"# 3 3 3 3 3 3 3 3 3 3 3 3 3 3 3 3 3 3 3 3 3 3 3 3 3 3 3 3 3 3 3 3 3 3 3 3 3 3 3 3 3 3 3 3 3 3 $%JJJJJJJJJJJJJJJJJJJJJJJJJJJJJJJJJJJJJJJJJJJJJJJJJJJJJJJJJJJJJJ&' 5. Press the F5 key or tab to the F5-Return field and press TRANSMIT to return to the MHELP command screen. 3787 3239-101 3-67 Creating Outgoing Mail (PREPARE Screen) 3.7. Creating Outgoing Mail (PREPARE Screen) Use the PREPARE screen to create an item of mail and store it until you are ready to send it. To create and send mail immediately without storing it in the database, see the SEND screen (3.9). You can create mail in one of two ways: 1. By entering the text directly at the terminal 2. By using text you already saved in an OS 2200 SDF or program file When you create a mail item, you supply certain heading information for the message, and the mail processor supplies additional information. The mail processor returns this heading information when a user issues a CHECK command. If you share a mailbox, it is particularly useful to have the author name in the heading so that: $ You can recognize which outgoing mail items in your mailbox belong to you. $ Recipients of your mail items can immediately see from whom the message is coming. If you want to specify an author name on the heading information of a mail item, include the AUTHOR parameter. If you want to supply a subject in the heading, include the SUBJECT parameter on the command. If you do not specify an author name, the mail processor supplies the user name associated with the mailbox. If no user name exists for the mailbox, then the message heading contains no information on the originator of the mail item.Figure 3-6 shows the PREPARE command screen. 3-68 3787 3239-101 Creating Outgoing Mail (PREPARE Screen) !iiiiiiiiiiiiiiiiiiiiiiiiiiiiiiiiiiiiiiiiiiiiiiiiiiiiiiiiiiiiii"# 3 3 3 3 3 3 3 3 3 3 3 3 3 3 3 3 3 3 3 3 3 3 3 3 3 3 3 3 3 3 3 3 3 3 3 3 3 3 3 3 3 3 $%JJJJJJJJJJJJJJJJJJJJJJJJJJJJJJJJJJJJJJJJJJJJJJJJJJJJJJJJJJJJJJ&' Figure 3-6. PREPARE Command Screen Table 3-9 summarizes the fields in the PREPARE screen. Table 3-9. PREPARE Screen Fields Field Name Mail id Description Specifies 1 to 8 unique alphanumeric characters that identify an outgoing mail item to create. This is a required field. Note: Only numeric characters are used for incoming mail-ids. To avoid the possibility of identical incoming and outgoing mail-ids, always include at least one alphabetic character in the outgoing mail-ids you create. (See "Sending an Existing Mail Item" in 3.9 for more information.) Author Optionally specifies a 1- to 20-character author name for the mail item. Appears on recipients’ CHECK result screen. Subject Optionally describes the subject using up to 25 characters. Appears on recipients’ CHECK result screen. Text file name: Identifies an OS 2200 SDF file (filename.) or an element of a program file (filename.element) that contains the text for the mail item you want to create. Always include the period after the file name. The file must have been created using standard OS 2200 procedures and file-naming conventions. See Appendix A for file-naming conventions. 3787 3239-101 3-69 Creating Outgoing Mail (PREPARE Screen) Creating Outgoing Mail by Entering Text at the Terminal Use the following procedure to create mail at the terminal: 1. Make sure the mailbox is assigned for your use. (See "Assigning a Mailbox" in 3.5.) 2. Access the PREPARE screen from the main menu or from any other command screen. 3. Tab to the Mail id field and enter an identifier for the mail item. 4. Optionally, tab to the Author field and enter the author name to appear in the heading of the mail item. If you do not specify an author name, the user name appears in place of author name. 5. Optionally, tab to the Subject field and enter the subject to appear on recipients’ CHECK result screen. !iiiiiiiiiiiiiiiiiiiiiiiiiiiiiiiiiiiiiiiiiiiiiiiiiiiiiiiiiiiiii"# 3 3 3 3 3 3 3 3 3 3 3 3 3 3 3 3 3 3 3 3 3 3 3 3 3 3 3 3 3 3 3 3 3 3 3 ! 3 3 3 3 3 3 3 3 3 $%JJJJJJJJJJJJJJJJJJJJJJJJJJJJJJJJJJJJJJJJJJJJJJJJJJJJJJJJJJJJJJ&' 6. Press TRANSMIT to display a TEXT screen for entering the text of the mail item you are creating. 7. Tab to the Text field and enter the text of the mail item. 8. If you need more lines to complete the message, press the F5 key, or tab to the F5-More field and press TRANSMIT. 9. Repeat steps 7 and 8 until the message text is complete. 3-70 3787 3239-101 Creating Outgoing Mail (PREPARE Screen) !iiiiiiiiiiiiiiiiiiiiiiiiiiiiiiiiiiiiiiiiiiiiiiiiiiiiiiiiiiiiii"# 3 3 3 3 3 3 3 3 3 3 3 3 3 3 3 3 3 3 3 3 3 3 3 3 3 3 3 3 3 3 3 3 3 3 3 3 3 3 3 3 3 3 3 3 $%JJJJJJJJJJJJJJJJJJJJJJJJJJJJJJJJJJJJJJJJJJJJJJJJJJJJJJJJJJJJJJ&' 10. To abort the creation of the mail item, press the F6 key, or tab to the F6-Abort key and press TRANSMIT. 11. When the message is complete, press the F7 key, or tab to the F7-Process field and press TRANSMIT. 12. The mail processor creates the mail item and displays a successful completion message (or an error message, if appropriate). !iiiiiiiiiiiiiiiiiiiiiiiiiiiiiiiiiiiiiiiiiiiiiiiiiiiiiiiiiiiiii"# 3 3 3 3 3 3 3 3 3 3 3 3 3 3 3 3 3 3 3 3 3 3 3 3 3 3 3 3 3 3 3 3 3 3 3 3 3 3 3 3 3 3 3 3 3 3 $%JJJJJJJJJJJJJJJJJJJJJJJJJJJJJJJJJJJJJJJJJJJJJJJJJJJJJJJJJJJJJJ&' 3787 3239-101 3-71 Creating Outgoing Mail (PREPARE Screen) Creating Outgoing Mail with Text from a File Use the following procedure to create a mail item from text contained in a file: 1. Make sure a mailbox is assigned for your use. (See "Assigning a Mailbox"in 3.5.) 2. Access the PREPARE screen from the main menu or from any other command screen. 3. Tab to the Mail id field and enter an identifier for the mail item. 4. Optionally tab to the Author field and enter the author name to appear on the recipients’ CHECK result screen. 5. Optionally tab to the Subject field and enter the subject to appear on recipients’ CHECK result screen. 6. Tab to the Text file name field and enter the name of the OS 2200 SDF file or the program file and element name that contains the text of the message. !iiiiiiiiiiiiiiiiiiiiiiiiiiiiiiiiiiiiiiiiiiiiiiiiiiiiiiiiiiiiii"# 3 3 3 3 3 3 3 3 3 3 3 3 3 3 3 3 3 3 3 3 3 3 3 3 3 3 3 3 3 3 3 3 3 3 3 ! 3 3 3 3 3 3 3 3 3 $%JJJJJJJJJJJJJJJJJJJJJJJJJJJJJJJJJJJJJJJJJJJJJJJJJJJJJJJJJJJJJJ&' 3-72 3787 3239-101 Creating Outgoing Mail (PREPARE Screen) 7. Press TRANSMIT to create the mail item and display a successful completion message (or an error message, if appropriate). !iiiiiiiiiiiiiiiiiiiiiiiiiiiiiiiiiiiiiiiiiiiiiiiiiiiiiiiiiiiiii"# 3 3 3 3 3 3 3 3 3 3 3 3 3 3 3 3 3 3 3 3 3 3 3 3 3 3 3 3 3 3 3 3 3 3 3 3 3 3 3 3 3 3 3 3 3 3 $%JJJJJJJJJJJJJJJJJJJJJJJJJJJJJJJJJJJJJJJJJJJJJJJJJJJJJJJJJJJJJJ&' 3787 3239-101 3-73 Deleting Mail (REMOVE Screen) 3.8. Deleting Mail (REMOVE Screen) The REMOVE screen allows you to delete incoming or outgoing mail items from your mailbox when you no longer need them. It is important to do this because unneeded mail wastes data base space and increases the amount of time required to access mail on the system. If you need to keep a mail item for future reference, you can save it in a file or print it on your auxiliary printer (see the GET screen in 3.4) rather than leaving it in your mailbox for a long period of time. If you share a mailbox and someone else is currently assigned to the mailbox, you cannot remove mail until that person ends their mailbox assignment. Notes: 1. You can remove more than one mail item by using the CHECK command and deleting the items directly from the CHECK result. See the CHECK command description in 3.2 for complete instructions. 2. Use care when deleting mail from a shared mailbox because, when you delete a mail item, you delete it for all users of that mailbox. Figure 3-7 shows the REMOVE command screen. !iiiiiiiiiiiiiiiiiiiiiiiiiiiiiiiiiiiiiiiiiiiiiiiiiiiiiiiiiiiiii"# 3 3 3 3 3 3 3 3 3 3 3 3 3 3 3 3 3 3 3 3 3 3 3 3 3 3 3 3 3 3 3 3 3 3 3 3 3 3 3 3 3 3 3 3 $%JJJJJJJJJJJJJJJJJJJJJJJJJJJJJJJJJJJJJJJJJJJJJJJJJJJJJJJJJJJJJJ&' Figure 3-7. REMOVE Command Screen Table 3-10 summarizes the fields in the REMOVE command screen. 3-74 3787 3239-101 Deleting Mail (REMOVE Screen) Table 3-10. REMOVE Screen Fields Field Name Description Mail id Specifies the 1- to 8- character identifier of the mail item you are deleting. All Deletes from the mailbox all mail items of the specified type (incoming or outgoing). Type: OUTGOING Default type, indicates that the mail item or items to be deleted are outgoing. incoming Indicates that the mail item or items to be deleted are incoming. Removing Incoming Mail Items from a Mailbox Use the following procedure to remove incoming mail items from your mailbox: (You can remove mail items all at once or one at a time.) Note: Exercise care when deleting mail from a shared mailbox because when you delete a mail item you delete it for all users of that mailbox. 1. Make sure a mailbox is assigned for your use. (See "Assigning a Mailbox" in 3.5.) 2. Access the REMOVE screen from the main menu or from any other command screen. 3. Tab to the Mail id field and enter the identifier of the mail item you want to delete, or tab to the All field and enter any character. 4. Tab to the Type:Incoming field and enter any character. !iiiiiiiiiiiiiiiiiiiiiiiiiiiiiiiiiiiiiiiiiiiiiiiiiiiiiiiiiiiiii"# 3 3 3 3 3 3 3 3 3 3 3 3 3 3 3 3 3 3 3 3 3 3 3 3 3 3 3 3 3 3 3 3 3 3 ! 3 3 3 3 3 3 3 3 3 3 $%JJJJJJJJJJJJJJJJJJJJJJJJJJJJJJJJJJJJJJJJJJJJJJJJJJJJJJJJJJJJJJ&' 3787 3239-101 3-75 Deleting Mail (REMOVE Screen) 5. Press TRANSMIT to delete the mail item and display a successful completion message (or an error message, if appropriate). !iiiiiiiiiiiiiiiiiiiiiiiiiiiiiiiiiiiiiiiiiiiiiiiiiiiiiiiiiiiiii"# 3 3 3 3 3 3 3 3 3 3 3 3 3 3 3 3 3 3 3 3 3 3 3 3 3 3 3 3 3 3 3 3 3 3 3 3 3 3 3 3 3 3 3 3 3 3 $%JJJJJJJJJJJJJJJJJJJJJJJJJJJJJJJJJJJJJJJJJJJJJJJJJJJJJJJJJJJJJJ&' Removing Outgoing Mail Items from a Mailbox Use the following procedure to remove outgoing mail items from your mailbox: (You can remove mail items all at once or one at a time.) Note: Exercise care when deleting mail from a shared mailbox because when you delete a mail item you delete it for all users of that mailbox. 1. Make sure a mailbox is assigned for your use. (See "Assigning a Mailbox" in 3.5.). 2. Access the REMOVE screen from the main menu or from any other command screen. 3. Tab to the Mail id field and enter the identifier of the mail item you want to delete, or tab to the All field and enter any character. 4. Optionally, tab to the Type:OUTGOING (the default type) field and enter any character. 3-76 3787 3239-101 Deleting Mail (REMOVE Screen) !iiiiiiiiiiiiiiiiiiiiiiiiiiiiiiiiiiiiiiiiiiiiiiiiiiiiiiiiiiiiii"# 3 3 3 3 3 3 3 3 3 3 3 3 3 3 3 3 3 3 3 3 3 3 3 3 3 3 3 3 3 3 3 3 3 3 3 ! 3 3 3 3 3 3 3 3 3 $%JJJJJJJJJJJJJJJJJJJJJJJJJJJJJJJJJJJJJJJJJJJJJJJJJJJJJJJJJJJJJJ&' 5. Press TRANSMIT to delete the mail item(s) and display a successful completion message (or an error message, if appropriate). !iiiiiiiiiiiiiiiiiiiiiiiiiiiiiiiiiiiiiiiiiiiiiiiiiiiiiiiiiiiiii"# 3 3 3 3 3 3 3 3 3 3 3 3 3 3 3 3 3 3 3 3 3 3 3 3 3 3 3 3 3 3 3 3 3 3 3 3 3 3 3 3 3 3 3 3 3 3 $%JJJJJJJJJJJJJJJJJJJJJJJJJJJJJJJJJJJJJJJJJJJJJJJJJJJJJJJJJJJJJJ&' 3787 3239-101 3-77 Sending New or Existing Mail (SEND Screen) 3.9. Sending New or Existing Mail (SEND Screen) Use the SEND command to: $ Create and send new mail $ Send a mail item you already created using the PREPARE command (see 3.6) $ Forward incoming mail Figure Figure 3-8 shows the SEND command screen. !iiiiiiiiiiiiiiiiiiiiiiiiiiiiiiiiiiiiiiiiiiiiiiiiiiiiiiiiiiiiii"# 3 3 3 3 3 3 3 3 3 3 3 3 3 3 3 3 3 3 3 3 3 3 3 3 3 3 3 3 3 3 3 3 3 3 3 3 3 3 3 3 3 3 3 3 $%JJJJJJJJJJJJJJJJJJJJJJJJJJJJJJJJJJJJJJJJJJJJJJJJJJJJJJJJJJJJJJ&' Figure 3-8. SEND Command Screen Table 3-11 summarizes the fields in the SEND command screen. Table 3-11. SEND Screen Fields Field Name Description Mail id Specifies the 1 to 8 alphanumeric characters that identify an existing mail item to send. Author Optionally specifies a 1- to 20-character author name for the mail item. Appears on recipients’ CHECK result screen. The mail processor ignores this field if you specify a mail id. continued 3-78 3787 3239-101 Sending New or Existing Mail (SEND Screen) Table 3-11. SEND Screen Fields (cont.) Field Name Subject Description Optionally describes the subject in up to 25 characters. Appears on recipients’ CHECK result screen. The mail processor ignores this field if you specify a mail id. Mode: Use only for sending mail to recipients residing on a remote non-OS 2200 host. (All OS 2200 recipients receive in MAIL mode. MAIL The default mode if no mode is specified. Sends the mail item to the recipients’ mailbox only. saml Abbreviation for Send And MaiL. Sends the mail item to a remote recipient’s mailbox and terminal if the user’s terminal is active at the time you issue the SEND. soml Abbreviation for Send Or Mail. Sends the mail item to a remote recipient’s terminal if it is currently active; otherwise sends the mail item to the recipient’s mailbox. send Sends the mail item to a remote recipient’s terminal only. Text file name: Identifies an OS 2200 SDF file (filename.) or an element of a program file (filename.element) that contains the text for the mail item you want to send. Always include the period after the file name. The file must have been created using standard OS 2200 procedures and file naming conventions. See Appendix A for file naming conventions. The mail processor ignores this field if you specify a mail id. Mailbox list YES Default value; indicates that you have individual mailbox names to specify as recipients of this mail item. no Indicates that you have no individual mailbox names to specify as recipients of this mail item. Distribution list NO Default value; indicates that you have no distribution lists to specify as recipients of this mail item. yes Indicates that you have one or more distribution lists to specify as recipients of this mail item. 3787 3239-101 3-79 Sending New or Existing Mail (SEND Screen) Creating and Sending New Mail You can create and send new mail by entering text at a terminal or using text contained in a file. To create and send a new mail item, use the SEND command without a mail identifier. Because you do not provide a mail-id, no outgoing mail item is stored in the database. For this reason, you should only use SEND to both create and send mail if you are sure that you will not need the item again. If you expect to need an outgoing mail item for any reason, you should first use PREPARE to create the item and then use SEND to mail it. Creating and Sending a New Mail Item by Entering Text at a Terminal Use the following procedure to create and send a new item of mail by entering text at the terminal: (See Table 3-8 for complete field specifications.) 1. Make sure that a mailbox is assigned for your use. (See "Assigning a Mailbox" in 3.5.) 2. Access the SEND screen from the main menu or from any other command screen. 3. Optionally, tab to the Author field and enter the name to appear on the recipients’ CHECK result screen. 4. Optionally, tab to the Subject field and enter the subject to appear on the recipients’ CHECK result screen. 5. If any recipients reside on remote hosts, tab to the Mode field you want and enter any character. (See Table 3-8 for complete information on the mode fields). 6. If you want recipients to reply to the mail item, tab to the Reply:yes field and enter any character. 7. If you do not have individual mailbox recipients, tab to the Mailbox list:no field and enter any character; otherwise, take the default (Mailbox list:YES). 8. If you do have distribution list recipients, tab to the Distribution list:yes field and enter any character; otherwise, take the default (Distribution list:NO). 3-80 3787 3239-101 Sending New or Existing Mail (SEND Screen) !iiiiiiiiiiiiiiiiiiiiiiiiiiiiiiiiiiiiiiiiiiiiiiiiiiiiiiiiiiiiii"# 3 3 3 3 3 3 3 3 3 3 3 3 3 3 3 3 3 3 3 3 3 3 3 3 3 3 3 3 3 3 3 3 3 3 3 3 3 3 3 3 3 3 3 3 $%JJJJJJJJJJJJJJJJJJJJJJJJJJJJJJJJJJJJJJJJJJJJJJJJJJJJJJJJJJJJJJ&' 9. Press TRANSMIT to display the next menu. 10. Perform the steps (10a, 10b, or 10c) in one of the following three subsections. Entering Mailbox Names and No Distribution Lists (Step 10a) Perform the following if you specified Mailbox name:YES and Distribution list:NO; otherwise, perform the steps (10b or 10c) in one of the following two subsections. 3787 3239-101 $ Enter the mailbox name of each recipient. (Mailbox names on OS 2200 systems can be up to 8 characters long; mailbox names on non-OS 2200 systems may be up to 64 characters long.) Include the host-id for mailboxes residing on a remote host. $ If you have more than five mailboxes, press the F5 key, or tab to the F5-MORE field and press TRANSMIT. The mail processor displays another MAILBOX screen on which to enter recipients list members. $ Repeat until you have entered all of the recipients (up to 20 mailbox names). 3-81 Sending New or Existing Mail (SEND Screen) !iiiiiiiiiiiiiiiiiiiiiiiiiiiiiiiiiiiiiiiiiiiiiiiiiiiiiiiiiiiiii"# 3 3 3 3 3 3 3 3 3 3 3 3 3 3 3 3 3 3 3 3 3 3 3 3 3 3 3 3 3 3 3 3 3 3 3 3 3 3 3 3 3 3 3 3 $%JJJJJJJJJJJJJJJJJJJJJJJJJJJJJJJJJJJJJJJJJJJJJJJJJJJJJJJJJJJJJJ&' $ Process the last screen of mailbox names by pressing the F7 key or by tabbing to the F7-Process field and pressing TRANSMIT. The mail processor displays a TEXT screen on which to enter the text of the mail item. !iiiiiiiiiiiiiiiiiiiiiiiiiiiiiiiiiiiiiiiiiiiiiiiiiiiiiiiiiiiiii"# 3 3 3 3 3 3 3 3 3 3 3 3 3 3 3 3 3 3 3 3 3 3 3 3 3 3 3 3 3 3 3 3 3 3 3 3 3 3 3 3 3 3 3 3 $%JJJJJJJJJJJJJJJJJJJJJJJJJJJJJJJJJJJJJJJJJJJJJJJJJJJJJJJJJJJJJJ&' $ 3-82 Go to step 11. 3787 3239-101 Sending New or Existing Mail (SEND Screen) Entering Distribution List Names and No Mailbox Names (Step 10b) Perform the following if you specified Mailbox name:np and Distribution list:yes; otherwise, perform the steps (10a or 10c) in the preceding or the following subsection. $ Enter each distribution list name. (List names on OS 2200 systems can be up to 12 characters long; list names on non-OS 2200 systems may be up to 64 characters long. List names are case sensitive.) Include the host id for lists residing on a remote host. $ If you have more than five distribution lists, press the F5 key, or tab to the F5-MORE field and press TRANSMIT. The mail processor displays another screen for entering list names. $ Repeat until you have entered all of the distribution lists (up to 20 list names). !iiiiiiiiiiiiiiiiiiiiiiiiiiiiiiiiiiiiiiiiiiiiiiiiiiiiiiiiiiiiii"# 3 3 3 3 3 3 3 3 3 3 3 3 3 3 3 3 3 3 3 3 3 3 3 3 3 3 3 3 3 3 3 3 3 3 3 ! 3 3 3 3 3 3 3 3 3 $%JJJJJJJJJJJJJJJJJJJJJJJJJJJJJJJJJJJJJJJJJJJJJJJJJJJJJJJJJJJJJJ&' $ 3787 3239-101 Process the last screen of distribution list names by pressing the F7 key or by tabbing to the F7-Process field and pressing TRANSMIT. The mail processor displays a TEXT screen on which to enter the text of the mail item. 3-83 Sending New or Existing Mail (SEND Screen) !iiiiiiiiiiiiiiiiiiiiiiiiiiiiiiiiiiiiiiiiiiiiiiiiiiiiiiiiiiiiii"# 3 3 3 3 3 3 3 3 3 3 3 3 3 3 3 3 3 3 3 3 3 3 3 3 3 3 3 3 3 3 3 3 3 3 3 3 3 3 3 3 3 3 3 3 $%JJJJJJJJJJJJJJJJJJJJJJJJJJJJJJJJJJJJJJJJJJJJJJJJJJJJJJJJJJJJJJ&' $ Go to step 11. Entering Mailbox Names and Distribution List Names (Step 10c) Perform the following if you specified Mailbox name:YES and Distribution list:yes; otherwise, perform the steps (10a or 10b) in one of the two preceding subsections. 3-84 $ Enter the mailbox name of each recipient. (Mailbox names on OS 2200 systems can be up to 8 characters long; mailbox names on non-OS 2200 systems may be up to 64 characters long.) Include the host-id for mailboxes residing on a remote host. $ If you have more than five mailboxes, press the F5 key, or tab to the F5-MORE field and press TRANSMIT. The mail processor displays another MAILBOX screen on which to enter recipients list members. $ Repeat until you have entered all of the recipients (up to 20 mailbox names). 3787 3239-101 Sending New or Existing Mail (SEND Screen) !iiiiiiiiiiiiiiiiiiiiiiiiiiiiiiiiiiiiiiiiiiiiiiiiiiiiiiiiiiiiii"# 3 3 3 3 3 3 3 3 3 3 3 3 3 3 3 3 3 3 3 3 3 3 3 3 3 3 3 3 3 3 3 3 3 3 3 3 3 3 3 3 3 3 3 3 $%JJJJJJJJJJJJJJJJJJJJJJJJJJJJJJJJJJJJJJJJJJJJJJJJJJJJJJJJJJJJJJ&' $ Process the last screen of mailbox names by pressing the F7 key or by tabbing to the F7-Process field and pressing TRANSMIT. The mail processor displays a DISTRIBUTION LISTS screen on which to enter the distribution list names. !iiiiiiiiiiiiiiiiiiiiiiiiiiiiiiiiiiiiiiiiiiiiiiiiiiiiiiiiiiiiii"# 3 3 3 3 3 3 3 3 3 3 3 3 3 3 3 3 3 3 3 3 3 3 3 3 3 3 3 3 3 3 3 3 3 3 3 ! 3 3 3 3 3 3 3 3 3 $%JJJJJJJJJJJJJJJJJJJJJJJJJJJJJJJJJJJJJJJJJJJJJJJJJJJJJJJJJJJJJJ&' 3787 3239-101 $ Enter each distribution list name. (List names on OS 2200 systems can be up to 12 characters long; list names on non-OS 2200 systems may be up to 64 characters long. List names are case sensitive.) Include the host id for lists residing on a remote host. $ If you have more than five distribution lists, press the F5 key, or tab to the F5-MORE field and press TRANSMIT. The mail processor to displays another screen for entering list names. $ Repeat until you have entered all of the distribution lists (up to 20 list names). 3-85 Sending New or Existing Mail (SEND Screen) !iiiiiiiiiiiiiiiiiiiiiiiiiiiiiiiiiiiiiiiiiiiiiiiiiiiiiiiiiiiiii"# 3 3 3 3 3 3 3 3 3 3 3 3 3 3 3 3 3 3 3 3 3 3 3 3 3 3 3 3 3 3 3 3 3 3 3 ! 3 3 3 3 3 3 3 3 3 $%JJJJJJJJJJJJJJJJJJJJJJJJJJJJJJJJJJJJJJJJJJJJJJJJJJJJJJJJJJJJJJ&' $ Process the last screen of distribution list names by pressing the F7 key or by tabbing to the F7-Process field and pressing TRANSMIT. The mail processor displays a TEXT screen on which to enter the text of the mail item. !iiiiiiiiiiiiiiiiiiiiiiiiiiiiiiiiiiiiiiiiiiiiiiiiiiiiiiiiiiiiii"# 3 3 3 3 3 3 3 3 3 3 3 3 3 3 3 3 3 3 3 3 3 3 3 3 3 3 3 3 3 3 3 3 3 3 3 3 3 3 3 3 3 3 3 3 $%JJJJJJJJJJJJJJJJJJJJJJJJJJJJJJJJJJJJJJJJJJJJJJJJJJJJJJJJJJJJJJ&' 11. Tab to the Text field and enter the text of the message. 12. If you need more lines to complete the message, press the F5 key, or tab to the F5-More field and press TRANSMIT. 13. Repeat steps 11 and 12 until the message text is complete. 3-86 3787 3239-101 Sending New or Existing Mail (SEND Screen) !iiiiiiiiiiiiiiiiiiiiiiiiiiiiiiiiiiiiiiiiiiiiiiiiiiiiiiiiiiiiii"# 3 3 3 3 3 3 3 3 3 3 3 3 3 3 3 3 3 3 3 3 3 3 3 3 3 3 3 3 3 3 3 3 3 3 3 3 3 3 3 3 3 3 3 3 $%JJJJJJJJJJJJJJJJJJJJJJJJJJJJJJJJJJJJJJJJJJJJJJJJJJJJJJJJJJJJJJ&' 14. To abort the create and send, press the F6 key, or tab to the F6-Abort key and press TRANSMIT. 15. When the message is complete, press the F7 key, or tab to the F7-Process field and press TRANSMIT. The mail processor creates the mail item and displays a successful completion message (or an error message, if appropriate). !iiiiiiiiiiiiiiiiiiiiiiiiiiiiiiiiiiiiiiiiiiiiiiiiiiiiiiiiiiiiii"# 3 3 3 3 3 3 3 3 3 3 3 3 3 3 3 3 3 3 3 3 3 3 3 3 3 3 3 3 3 3 3 3 3 3 3 3 3 3 3 3 3 3 3 3 3 3 $%JJJJJJJJJJJJJJJJJJJJJJJJJJJJJJJJJJJJJJJJJJJJJJJJJJJJJJJJJJJJJJ&' 3787 3239-101 3-87 Sending New or Existing Mail (SEND Screen) Creating and Sending a New Mail Item Using Text from a File Use the following procedure to create and send a new mail item using text contained in a file: (See Table 3-8 for complete field specifications.) 1. Make sure that a mailbox is assigned for your use. (See "Assigning a Mailbox" in 3.5.) 2. Access the SEND screen from the main menu or from any other command screen. 3. Optionally, tab to the Author field and enter the name to appear on the recipients’ CHECK result screen. 4. Optionally tab to the Subject field and enter the subject to appear on the recipients’ CHECK result screen. 5. If any recipients reside on remote hosts, tab to the Mode field you want and enter any character. (See Table 3-8 for complete information on the mode fields.) 6. If you want recipients to reply to the mail item, tab to the Reply:yes field and enter any character. 7. Tab to the Text File name field and enter the name of the file that contains the message text. 8. If you do not have individual mailbox recipients, tab to the Mailbox list:no field and enter any character; otherwise, take the default (Mailbox list:YES). 9. If you do have distribution list recipients, tab to the Distribution list:yes field and enter any character; otherwise, take the default (Distribution list:NO). !iiiiiiiiiiiiiiiiiiiiiiiiiiiiiiiiiiiiiiiiiiiiiiiiiiiiiiiiiiiiii"# 3 3 3 3 3 3 3 3 3 3 3 3 3 3 3 3 3 3 3 3 3 3 3 3 3 3 3 3 3 3 3 3 3 3 3 3 3 3 3 3 3 3 3 3 $%JJJJJJJJJJJJJJJJJJJJJJJJJJJJJJJJJJJJJJJJJJJJJJJJJJJJJJJJJJJJJJ&' 10. Press TRANSMIT to display the next menu. 11. Perform the steps (11a, 11b, or 11c) in one of the following three subsections. 3-88 3787 3239-101 Sending New or Existing Mail (SEND Screen) Entering Mailbox Names and No Distribution Lists (Step 11a) Perform the following if you specified Mailbox name:YES and Distribution list:NO; otherwise, perform the steps (10b or 10c) in one of the following two subsections. $ Enter the mailbox name of each recipient. (Mailbox names on OS 2200 systems can be up to 8 characters long; mailbox names on non-OS 2200 systems may be up to 64 characters long.) Include the host-id for mailboxes residing on a remote host. $ If you have more than five mailboxes, press the F5 key, or tab to the F5-MORE field and press TRANSMIT. The mail processor displays another MAILBOX screen on which to enter recipients list members. $ Repeat until you have entered all of the recipients (up to 20 mailbox names). !iiiiiiiiiiiiiiiiiiiiiiiiiiiiiiiiiiiiiiiiiiiiiiiiiiiiiiiiiiiiii"# 3 3 3 3 3 3 3 3 3 3 3 3 3 3 3 3 3 3 3 3 3 3 3 3 3 3 3 3 3 3 3 3 3 3 3 3 3 3 3 3 3 3 3 3 $%JJJJJJJJJJJJJJJJJJJJJJJJJJJJJJJJJJJJJJJJJJJJJJJJJJJJJJJJJJJJJJ&' $ To abort the create and send, press the F6 key, or tab to the F6-Abort key and press TRANSMIT. 3787 3239-101 3-89 Sending New or Existing Mail (SEND Screen) $ Process the last screen of mailbox names by pressing the F7 key or by tabbing to the F7-Process field and pressing TRANSMIT. The mail processor displays the SEND screen with a successful completion message or an error message, if appropriate. !iiiiiiiiiiiiiiiiiiiiiiiiiiiiiiiiiiiiiiiiiiiiiiiiiiiiiiiiiiiiii"# 3 3 3 3 3 3 3 3 3 3 3 3 3 3 3 3 3 3 3 3 3 3 3 3 3 3 3 3 3 3 3 3 3 3 3 3 3 3 3 3 3 3 3 3 3 3 $%JJJJJJJJJJJJJJJJJJJJJJJJJJJJJJJJJJJJJJJJJJJJJJJJJJJJJJJJJJJJJJ&' Entering Distribution List Names and No Mailbox Names (Step 11b) Perform the following if you specified Mailbox name:no and Distribution list:yes; otherwise, perform the steps (10a or 10c) in the preceding or the following subsection. 3-90 $ Enter each distribution list name. (List names on OS 2200 systems can be up to 12 characters long; list names on non-OS 2200 systems may be up to 64 characters long. List names are case sensitive.) Include the host id for lists residing on a remote host. $ If you have more than five distribution lists, press the F5 key, or tab to the F5-MORE field and press TRANSMIT. The mail processor displays another screen for entering list names. $ Repeat until you have entered all of the distribution lists (up to 20 list names). 3787 3239-101 Sending New or Existing Mail (SEND Screen) !iiiiiiiiiiiiiiiiiiiiiiiiiiiiiiiiiiiiiiiiiiiiiiiiiiiiiiiiiiiiii"# 3 3 3 3 3 3 3 3 3 3 3 3 3 3 3 3 3 3 3 3 3 3 3 3 3 3 3 3 3 3 3 3 3 3 3 ! 3 3 3 3 3 3 3 3 3 $%JJJJJJJJJJJJJJJJJJJJJJJJJJJJJJJJJJJJJJJJJJJJJJJJJJJJJJJJJJJJJJ&' $ To abort the create and send, press the F6 key, or tab to the F6-Abort key and press TRANSMIT. $ Process the last screen of distribution list names by pressing the F7 key or by tabbing to the F7-Process field and pressing TRANSMIT. The mail processor displays the SEND screen with a successful completion message or an error message, if appropriate. !iiiiiiiiiiiiiiiiiiiiiiiiiiiiiiiiiiiiiiiiiiiiiiiiiiiiiiiiiiiiii"# 3 3 3 3 3 3 3 3 3 3 3 3 3 3 3 3 3 3 3 3 3 3 3 3 3 3 3 3 3 3 3 3 3 3 3 3 3 3 3 3 3 3 3 3 3 3 $%JJJJJJJJJJJJJJJJJJJJJJJJJJJJJJJJJJJJJJJJJJJJJJJJJJJJJJJJJJJJJJ&' 3787 3239-101 3-91 Sending New or Existing Mail (SEND Screen) Entering Mailbox Names and Distribution List Names (Step 11c) Perform the following if you specified Mailbox name:YES and Distribution list:yes; otherwise, perform the steps (10a or 10b) in one of the two preceding subsections. $ Enter the mailbox name of each recipient. (Mailbox names on OS 2200 systems can be up to 8 characters long; mailbox names on non-OS 2200 systems may be up to 64 characters long.) Include the host-id for mailboxes residing on a remote host. $ If you have more than five mailboxes, press the F5 key, or tab to the F5-MORE field and press TRANSMIT. The mail processor displays another MAILBOX screen on which to enter recipients list members. $ Repeat until you have entered all of the recipients (up to 20 mailbox names). !iiiiiiiiiiiiiiiiiiiiiiiiiiiiiiiiiiiiiiiiiiiiiiiiiiiiiiiiiiiiii"# 3 3 3 3 3 3 3 3 3 3 3 3 3 3 3 3 3 3 3 3 3 3 3 3 3 3 3 3 3 3 3 3 3 3 3 3 3 3 3 3 3 3 3 3 $%JJJJJJJJJJJJJJJJJJJJJJJJJJJJJJJJJJJJJJJJJJJJJJJJJJJJJJJJJJJJJJ&' 3-92 $ To abort the send, press the F6 key, or tab to the F6-Abort key and press TRANSMIT. $ Process the last screen of mailbox names by pressing the F7 key or by tabbing to the F7-Process field and pressing TRANSMIT. The mail processor displays a DISTRIBUTION LISTS screen on which to enter the distribution list names. 3787 3239-101 Sending New or Existing Mail (SEND Screen) !iiiiiiiiiiiiiiiiiiiiiiiiiiiiiiiiiiiiiiiiiiiiiiiiiiiiiiiiiiiiii"# 3 3 3 3 3 3 3 3 3 3 3 3 3 3 3 3 3 3 3 3 3 3 3 3 3 3 3 3 3 3 3 3 3 3 3 ! 3 3 3 3 3 3 3 3 3 $%JJJJJJJJJJJJJJJJJJJJJJJJJJJJJJJJJJJJJJJJJJJJJJJJJJJJJJJJJJJJJJ&' $ Enter each distribution list name. (List names on OS 2200 systems can be up to 12 characters long; list names on non-OS 2200 systems may be up to 64 characters long. List names are case sensitive.) Include the host id for lists residing on a remote host. $ If you have more than five distribution lists, press the F5 key, or tab to the F5-MORE field and press TRANSMIT. The mail processor displays another screen for entering list names. $ Repeat until you have entered all of the distribution lists (up to 20 list names). $ To abort the send, press the F6 key, or tab to the F6-Abort key and press TRANSMIT. 3787 3239-101 3-93 Sending New or Existing Mail (SEND Screen) $ Process the last screen of distribution list names by pressing the F7 key or by tabbing to the F7-Process field and pressing TRANSMIT. The mail processor displays the SEND screen with a successful completion message or an error message, if appropriate. !iiiiiiiiiiiiiiiiiiiiiiiiiiiiiiiiiiiiiiiiiiiiiiiiiiiiiiiiiiiiii"# 3 3 3 3 3 3 3 3 3 3 3 3 3 3 3 3 3 3 3 3 3 3 3 3 3 3 3 3 3 3 3 3 3 3 3 3 3 3 3 3 3 3 3 3 3 3 $%JJJJJJJJJJJJJJJJJJJJJJJJJJJJJJJJJJJJJJJJJJJJJJJJJJJJJJJJJJJJJJ&' Sending an Existing Mail Item You can send two types of existing mail items: $ Outgoing mail that you previously created using the PREPARE command (see 3.7) $ Received incoming mail that you want to resend as outgoing mail To send an existing mail item, use the SEND command and specify the mail-identifier of the item to be sent. Do not specify subject, author, or file name because these are already specified on the existing item. Note: When searching for the mail item whose mail-id you specified, the mail processor checks outgoing mail-ids before checking incoming mail-ids. Therefore, if an outgoing and an incoming mail item have the same mail-id, the mail processor sends the outgoing mail item. Use the following procedure to send an existing incoming or outgoing mail item: 1. Make sure that a mailbox is assigned for your use. (See "Assigning a Mailbox" in 3.5.) 2. Access the SEND screen from the main menu or from any other command screen. 3. Tab to the Mail id field and enter the mail-id of the mail item you want to send. (If you do not know the mail-id, use the CHECK command to get a list of mail items and their mail-ids.) 3-94 3787 3239-101 Sending New or Existing Mail (SEND Screen) 4. If any recipients reside on remote hosts, tab to the Mode field you want and enter any character. (See Table 3-8 for complete information on the mode fields). 5. If you want recipients to reply to the mail item, tab to the Reply:yes field and enter any character. 6. If you do not have individual mailbox recipients, tab to the Mailbox list:no field and enter any character; otherwise, take the default (Mailbox list:YES). 7. If you do have distribution list recipients, tab to the Distribution list:yes field and enter any character; otherwise, take the default (Distribution list:NO). !iiiiiiiiiiiiiiiiiiiiiiiiiiiiiiiiiiiiiiiiiiiiiiiiiiiiiiiiiiiiii"# 3 3 3 3 3 3 3 3 3 3 3 3 3 3 3 3 3 3 3 3 3 3 3 3 3 3 3 3 3 3 3 3 3 3 3 3 3 3 3 3 3 3 3 3 $%JJJJJJJJJJJJJJJJJJJJJJJJJJJJJJJJJJJJJJJJJJJJJJJJJJJJJJJJJJJJJJ&' 8. Press TRANSMIT to display the next menu. 9. Perform the steps (9a, 9b, or 9c) in one of the following three subsections. Entering Mailbox Names and No Distribution Lists (Step 9a) Perform the following if you specified Mailbox name:YES and Distribution list:NO; otherwise, perform the steps (10b or 10c) in one of the following two subsections. $ Enter the mailbox name of each recipient. (Mailbox names on OS 2200 systems can be up to 8 characters long; mailbox names on non-OS 2200 systems may be up to 64 characters long.) Include the host-id for mailboxes residing on a remote host. $ If you have more than five mailboxes, press the F5 key, or tab to the F5-MORE field and press TRANSMIT. The mail processor displays another MAILBOX screen on which to enter recipients list members. $ Repeat until you have entered all of the recipients (up to 20 mailbox names). 3787 3239-101 3-95 Sending New or Existing Mail (SEND Screen) !iiiiiiiiiiiiiiiiiiiiiiiiiiiiiiiiiiiiiiiiiiiiiiiiiiiiiiiiiiiiii"# 3 3 3 3 3 3 3 3 3 3 3 3 3 3 3 3 3 3 3 3 3 3 3 3 3 3 3 3 3 3 3 3 3 3 3 3 3 3 3 3 3 3 3 3 $%JJJJJJJJJJJJJJJJJJJJJJJJJJJJJJJJJJJJJJJJJJJJJJJJJJJJJJJJJJJJJJ&' $ To abort the send, press the F6 key, or tab to the F6-Abort key and press TRANSMIT. $ Process the last screen of mailbox names by pressing the F7 key or by tabbing to the F7-Process field and pressing TRANSMIT. The mail processor displays the SEND screen with a successful completion message or an error message, if appropriate. !iiiiiiiiiiiiiiiiiiiiiiiiiiiiiiiiiiiiiiiiiiiiiiiiiiiiiiiiiiiiii"# 3 3 3 3 3 3 3 3 3 3 3 3 3 3 3 3 3 3 3 3 3 3 3 3 3 3 3 3 3 3 3 3 3 3 3 3 3 3 3 3 3 3 3 3 3 3 $%JJJJJJJJJJJJJJJJJJJJJJJJJJJJJJJJJJJJJJJJJJJJJJJJJJJJJJJJJJJJJJ&' 3-96 3787 3239-101 Sending New or Existing Mail (SEND Screen) Entering Distribution List Names and No Mailbox Names (Step 9b) Perform the following if you specified Mailbox name:no and Distribution list:yes; otherwise, perform the steps (10a or 10c) in the preceding or following subsection. $ Enter each distribution list name. (List names on OS 2200 systems can be up to 12 characters long; list names on non-OS 2200 systems may be up to 64 characters long. List names are case sensitive.) Include the host id for lists residing on a remote host. $ If you have more than five distribution lists, press the F5 key, or tab to the F5-MORE field and press TRANSMIT. The mail processor displays another screen for entering list names. $ Repeat until you have entered all of the distribution lists (up to 20 list names). !iiiiiiiiiiiiiiiiiiiiiiiiiiiiiiiiiiiiiiiiiiiiiiiiiiiiiiiiiiiiii"# 3 3 3 3 3 3 3 3 3 3 3 3 3 3 3 3 3 3 3 3 3 3 3 3 3 3 3 3 3 3 3 3 3 3 3 ! 3 3 3 3 3 3 3 3 3 $%JJJJJJJJJJJJJJJJJJJJJJJJJJJJJJJJJJJJJJJJJJJJJJJJJJJJJJJJJJJJJJ&' $ To abort the send, press the F6 key, or tab to the F6-Abort key and press TRANSMIT. 3787 3239-101 3-97 Sending New or Existing Mail (SEND Screen) $ Process the last screen of distribution list names by pressing the F7 key or by tabbing to the F7-Process field and pressing TRANSMIT. The mail processor displays the SEND screen with a successful completion message or an error message, if appropriate. !iiiiiiiiiiiiiiiiiiiiiiiiiiiiiiiiiiiiiiiiiiiiiiiiiiiiiiiiiiiiii"# 3 3 3 3 3 3 3 3 3 3 3 3 3 3 3 3 3 3 3 3 3 3 3 3 3 3 3 3 3 3 3 3 3 3 3 3 3 3 3 3 3 3 3 3 3 3 $%JJJJJJJJJJJJJJJJJJJJJJJJJJJJJJJJJJJJJJJJJJJJJJJJJJJJJJJJJJJJJJ&' Entering Mailbox Names and Distribution List Names (Step 9c) Perform the following if you specified Mailbox name:YES and Distribution list:yes; otherwise, perform the steps (10a or 10b) in one of the two preceding subsections. 3-98 $ Enter the mailbox name of each recipient. (Mailbox names on OS 2200 systems can be up to 8 characters long; mailbox names on non-OS 2200 systems may be up to 64 characters long.) Include the host-id for mailboxes residing on a remote host. $ If you have more than five mailboxes, press the F5 key, or tab to the F5-MORE field and press TRANSMIT. The mail processor displays another MAILBOX screen on which to enter recipients list members. $ Repeat until you have entered all of the recipients (up to 20 mailbox names). 3787 3239-101 Sending New or Existing Mail (SEND Screen) !iiiiiiiiiiiiiiiiiiiiiiiiiiiiiiiiiiiiiiiiiiiiiiiiiiiiiiiiiiiiii"# 3 3 3 3 3 3 3 3 3 3 3 3 3 3 3 3 3 3 3 3 3 3 3 3 3 3 3 3 3 3 3 3 3 3 3 3 3 3 3 3 3 3 3 3 $%JJJJJJJJJJJJJJJJJJJJJJJJJJJJJJJJJJJJJJJJJJJJJJJJJJJJJJJJJJJJJJ&' $ Process the last screen of mailbox names by pressing the F7 key or by tabbing to the F7-Process field and pressing TRANSMIT. The mail processor displays a DISTRIBUTION LISTS screen on which to enter the distribution list names. !iiiiiiiiiiiiiiiiiiiiiiiiiiiiiiiiiiiiiiiiiiiiiiiiiiiiiiiiiiiiii"# 3 3 3 3 3 3 3 3 3 3 3 3 3 3 3 3 3 3 3 3 3 3 3 3 3 3 3 3 3 3 3 3 3 3 3 ! 3 3 3 3 3 3 3 3 3 $%JJJJJJJJJJJJJJJJJJJJJJJJJJJJJJJJJJJJJJJJJJJJJJJJJJJJJJJJJJJJJJ&' $ Enter each distribution list name. (List names on OS 2200 systems can be up to 12 characters long; list names on non-OS 2200 systems may be up to 64 characters long. List names are case sensitive.) Include the host id for lists residing on a remote host. $ If you have more than five distribution lists, press the F5 key, or tab to the F5-MORE field and press TRANSMIT. The mail processor displays another screen for entering list names. $ Repeat until you have entered all of the distribution lists (up to 20 list names). $ To abort the send, press the F6 key, or tab to the F6-Abort key and press TRANSMIT. 3787 3239-101 3-99 Sending New or Existing Mail (SEND Screen) $ Process the last screen of distribution list names by pressing the F7 key, or by tabbing to the F7-Process field and pressing TRANSMIT. The mail processor displays the SEND screen with a successful completion message or an error message, if appropriate. !iiiiiiiiiiiiiiiiiiiiiiiiiiiiiiiiiiiiiiiiiiiiiiiiiiiiiiiiiiiiii"# 3 3 3 3 3 3 3 3 3 3 3 3 3 3 3 3 3 3 3 3 3 3 3 3 3 3 3 3 3 3 3 3 3 3 3 3 3 3 3 3 3 3 3 3 3 3 $%JJJJJJJJJJJJJJJJJJJJJJJJJJJJJJJJJJJJJJJJJJJJJJJJJJJJJJJJJJJJJJ&' 3-100 3787 3239-101 Obtaining User Information (VERIFY Screen) 3.10. Obtaining User Information (VERIFY Screen) Use the verify screen to obtain the mailbox name for a person whose user name you know. You can also use this command to find out if a user whose mailbox name you know is valid on a given host. The VERIFY command provides this flexibility because of the way in which it searches for the user name you specify. 1. First, the mail processor searches for the user name you specify. If it finds a match, the mail processor provides a verification message and displays the user name and mailbox name. 2. If no user match is found, the mail processor searches for a matching mailbox name. If it finds a matching mailbox name, the mail processor provides a verification message and displays the user name and mailbox name. 3. If no match is found for either user name or mailbox name, the mail processor provides an appropriate error message. When you use the VERIFY command for users on a remote non-OS 2200 host, the search procedure varies depending on the way that the verify procedure is implemented on that particular host. Figure Figure 3-9 shows the VERIFY command screen. !iiiiiiiiiiiiiiiiiiiiiiiiiiiiiiiiiiiiiiiiiiiiiiiiiiiiiiiiiiiiii"# 3 3 3 3 3 3 3 3 3 3 3 3 3 3 3 3 3 3 3 3 3 3 3 3 3 3 3 3 3 3 3 3 3 3 3 3 3 3 3 3 3 3 3 3 $%JJJJJJJJJJJJJJJJJJJJJJJJJJJJJJJJJJJJJJJJJJJJJJJJJJJJJJJJJJJJJJ&' Figure 3-9. VERIFY Command Screen Table 3-12 summarizes the fields in the VERIFY command screen. 3787 3239-101 3-101 Obtaining User Information (VERIFY Screen) Table 3-12. VERIFY Screen Fields Field Name User Description Required field. Specifies a 1- to 64-character user name or mailbox name to be verified. For verification on the local host, or on any remote OS 2200 host, user names are from 1 to 20 characters in length and mailbox names are from 1 to 8 characters in length. User name is case sensitive and must always appear exactly as specified when it was created. Mailbox name is not case sensitive. Host Specify the host id if the user to be verified resides on a remote host. Use the following procedure to verify a user in your network: 1. Make sure a mailbox is assigned for your use. (See "Assigning a Mailbox" in 3.5.) 2. Access the VERIFY screen from the main menu or from any other command screen. 3. Tab to the User field and enter the user name or mailbox name to be verified. 4. If the user resides on a remote host, tab to the Host field and enter the host-id. !iiiiiiiiiiiiiiiiiiiiiiiiiiiiiiiiiiiiiiiiiiiiiiiiiiiiiiiiiiiiii"# 3 3 3 3 3 3 3 3 3 3 3 3 3 3 3 3 3 3 3 3 3 3 3 3 3 3 3 3 3 3 3 3 3 3 3 ! 3 3 3 3 3 3 3 3 3 $%JJJJJJJJJJJJJJJJJJJJJJJJJJJJJJJJJJJJJJJJJJJJJJJJJJJJJJJJJJJJJJ&' 5. Press TRANSMIT to display the verification information. 3-102 3787 3239-101 Obtaining User Information (VERIFY Screen) !iiiiiiiiiiiiiiiiiiiiiiiiiiiiiiiiiiiiiiiiiiiiiiiiiiiiiiiiiiiiii"# 3 3 3 3 3 3 3 3 3 3 3 3 3 3 3 3 3 3 3 3 3 3 3 3 3 3 3 3 3 3 3 3 3 3 3 3 3 3 3 3 3 3 3 3 $%JJJJJJJJJJJJJJJJJJJJJJJJJJJJJJJJJJJJJJJJJJJJJJJJJJJJJJJJJJJJJJ&' 6. Perform one of the following two steps. $ To return control to the VERIFY function screen, press the F5 key, or tab to the F5-Return field and press TRANSMIT. !iiiiiiiiiiiiiiiiiiiiiiiiiiiiiiiiiiiiiiiiiiiiiiiiiiiiiiiiiiiiii"# 3 3 3 3 3 3 3 3 3 3 3 3 3 3 3 3 3 3 3 3 3 3 3 3 3 3 3 3 3 3 3 3 3 3 3 3 3 3 3 3 3 3 3 3 3 3 3 ! 3 $%JJJJJJJJJJJJJJJJJJJJJJJJJJJJJJJJJJJJJJJJJJJJJJJJJJJJJJJJJJJJJJ&' 3787 3239-101 3-103 Obtaining User Information (VERIFY Screen) $ Press TRANSMIT to display the verification information. !iiiiiiiiiiiiiiiiiiiiiiiiiiiiiiiiiiiiiiiiiiiiiiiiiiiiiiiiiiiiii"# 3 3 3 3 3 3 3 3 3 3 3 3 3 3 3 3 3 3 3 3 3 3 3 3 3 3 3 3 3 3 3 3 3 3 3 3 3 3 3 3 3 3 3 3 $%JJJJJJJJJJJJJJJJJJJJJJJJJJJJJJJJJJJJJJJJJJJJJJJJJJJJJJJJJJJJJJ&' 3-104 3787 3239-101 Section 4 Getting Started with the Command Interface 4.1. Starting and Ending a Mail Processor Session This subsection explains how to start and end a mail processor session. Calling the Mail Processor Before calling the mail processor, you must sign on to your OS 2200 host and open a session using your site specific procedures. (See your site administrator if you need more information.) To call the command interface to the mail processor, call the Interactive Processing Facility (IPF) using the @IPF processor call. Figure Figure 4-1 shows the @IPF call and the IPF response. !iiiiiiiiiiiiiiiiiiiiiiiiiiiiiiiiiiiiiiiiiiiiiiiiiiiiiiiiiiiiii"# c 3 c 3 cc 3 3 3 3 Figure 4-1. Calling the Mail Processor You can enter mail processor commands directly following the IPF start-of-entry character (a~C~a). Command Prerequisites You can issue mail processing commands from the IPF command prompt in any order with two exceptions: $ Before using the mail processor for the first time, you must create a mailbox. See the MAILBOX command in 5.6 for complete details on creating a mailbox. $ Each time you begin a mail processor session, you must assign a mailbox for your use. You do this using the MAILBOX command in IDENTIFY mode. See the MAILBOX command in 5.6 for complete details on assigning a mailbox. 3787 3239-101 4-1 Starting and Ending a Mail Processor Session Exiting the Mail Processor To exit the mail processor: 4-2 $ Use the DISCONNECT command to end your mailbox assignment and exit from the mail processor. Refer to 5.3 for complete instructions on using this command. $ Use the standard IPF 1100 LOGOFF command to exit from IPF. $ If you LOGOFF from IPF without using the DISCONNECT command, you automatically end your mailbox assignment and exit from the mail processor. 3787 3239-101 Specifying Commands 4.2. Specifying Commands Each command consists of a verb followed by a series of keyword parameters. The keyword parameters are either optional or required. In some cases, you enter more than one parameter with the command. Specifying Case Sensitive Parameter Values Some parameter values are case sensitive. This means that for the mail processor to recognize a match, the values must match in terms of upper and lower case characters. For example, a user name is a case sensitive parameter value. If you specify a user name of JDOE for your mailbox, only JDOE is a valid user. Other variations such as jDOE, Jdoe, and jdoe do not match because the parameter is case sensitive. This is especially important when you use the VERIFY command to obtain user information. See 5.11 for information on VERIFY. Using Positional Notation You can omit the keyword portion (KEYWORD=) of required parameters. This is known as positional notation. For example: is the same as: When you specify parameters both positionally and with keywords, the parameters in positional notation must appear first. For example: is the same as: When you specify parameters using the entire KEYWORD= syntax, place them in any order. For example: is the same as: 3787 3239-101 4-3 Specifying Commands Abbreviating and Continuing a Command You can abbreviate the mail processor commands and their associated keyword parameters by using only their first four letters. In the command formats, these abbreviations are indicated by underscores. For example: can be abbreviated like this: When you need to continue a command specification onto a new line, enter the ampersand (&) at the end of the first line of the command and press TRANSMIT to get a continuation start-of-entry character. You can continue the line from any point except from the middle of a word. Example Example 4-1 shows an invalid command continuation. !iiiiiiiiiiiiiiiiiiiiiiiiiiiiiiiiiiiiiiiiiiiiiiiiiiiiiiiiiiiiii"# 3 cc 3 3 cc 3 Example 4-1. Invalid Command Continuation Example Example 4-2 shows a valid command continuation. !iiiiiiiiiiiiiiiiiiiiiiiiiiiiiiiiiiiiiiiiiiiiiiiiiiiiiiiiiiiiii"# 3 3 cc 3 cc 3 $%JJJJJJJJJJJJJJJJJJJJJJJJJJJJJJJJJJJJJJJJJJJJJJJJJJJJJJJJJJJJJJ&' Example 4-2. Valid Command Continuation Entering Message Text at a Terminal As part of the PREPARE and SEND commands, the mail processor allow you to create the text of a mail item by entering it directly on the terminal screen. There are two additional commands you need to know when entering message text in this way: $ $CANCEL Use this mail processor command to abort a PREPARE or SEND command at any time before you complete the text and execute the command. $ 4-4 *END 3787 3239-101 Specifying Commands Use this IPF command to indicate that you have no more text to include in the message. Responding to Mail Processor Prompts The results of some mail processor commands include a prompt for your response. For example, when you check your incoming mail and the list is too long to display in its entirety, you get the prompt: c To respond to the prompt, enter a Y or N after the start-of-entry character and press TRANSMIT. Command Format Conventions The formats in Section 5 use certain notation conventions that indicate the correct use of keyword parameters and values. Table 4-1 describes these conventions and provides an example of each. Table 4-1. Command Format Conventions Item Abbreviations Example Description Abbreviate commands and parameters by keying in only the first four letters. Abbreviations are shown in italics. Note: You can abbreviate the following values which may not be in italics in the command formats: INCOMING (INCO), DISPLAY (DISP), IDENTIFY (IDEN), and OUTGOING (OUTG). Combinations Braces outside of brackets indicate that, of a set of optional entries, you may specify as many options as needed, and that you must specify at least one of the options. Default values 3 In command formats, default values are bolded. continued 3787 3239-101 4-5 Specifying Commands Table 4-1. Command Format Conventions (cont.) Item Keywords Optional entries Example AUTHOR 3 Description In command formats, words in all uppercase are keywords that you must enter in one of the following ways: $ Enter the entire keyword, in upper or lowercase letters $ Enter the abbreviation shown in italics. Brackets indicate optional parameters. Include the equal sign but not the brackets when you enter command parameters. Vertical bars within brackets indicate a choice of values for an optional parameter. Omit the bars when you enter the command parameters. Positional notation Angle brackets around a parameter indicates that positional notation is allowed. For more information on positional notation, see 4.2. Repeated entries Repeated entries are enclosed in parentheses and use an ellipsis to indicate that more items can be specified in the series. Include the parentheses with the set of entries, but omit the ellipsis. 4-6 Required entries 3 Required parameters appear in command formats without brackets. Vertical bars between values for the required parameter indicate a choice of values for that parameter. Omit the bars when you enter the command. User-defined variables Terms in lowercase indicate values you supply. User entries In examples, entries that you key in are bolded. 3787 3239-101 Specifying Commands Summary of Commands and Parameters The following is a summary of mail processor command and parameter formats. See Table 4-1 for information on format conventions. 3 3 3 3 3333 3 3 3 3 3 3 3 3 333 3 3 3 3 3 333 Note: 3787 3239-101 You can abbreviate the following values which may not be in italics in the command formats: INCOMING (INCO), DISPLAY (DISP), IDENTIFY (IDEN), and OUTGOING (OUTG). 4-7 Using Online Help for Commands 4.3. Using Online Help for Commands Types of Help Available Four types of online help are available: $ General help - provides a list of all mail processor commands $ Command help - describes the purpose of a command and command syntax $ Keyword parameter help - describes the purpose of a keyword and gives the default value, if there is one $ MHELP - provides a list of available functions implemented on the specified host. For more information on MHELP, see 5.7 Accessing General Help General help lists all of the mail processor commands. To access general help, enter the following: Note: Because MAIL is also the abbreviation for the MAILBOX command, if you request more help from the general help screen, you get command help for the MAILBOX command. Figure 4-2 shows the first screen of online general help. !iiiiiiiiiiiiiiiiiiiiiiiiiiiiiiiiiiiiiiiiiiiiiiiiiiiiiiiiiiiiii"# 3 cc 3 3 c 3 3 c 3 3 c 3 3 c 3 3 c 3 3 c 3 3 c 3 3 c 3 3 c 3 3 c 3 3 c 3 3 c 3 3 c 3 3 c 3 3 c 3 3 c 3 3 3 c 3 c 3 3 3 cc Figure 4-2. Accessing General Help 4-8 3787 3239-101 Using Online Help for Commands Accessing Command Help To access command help, enter the command name followed by a question mark (?). For example: Note: If you request help for the MAILBOX command, the first help screen will display general mail processor help. Type a ? to advance to the MAILBOX command help screen. The help facility responds with a short description of the command and the command syntax, including any required keywords. For more information enter a question mark (?) following the next start-of-entry character. You can continue to enter question marks to get more detailed information until you get the following message: Example 4-3 shows how to access command help for the GET command. !iiiiiiiiiiiiiiiiiiiiiiiiiiiiiiiiiiiiiiiiiiiiiiiiiiiiiiiiiiiiii"# cc 3 c 3 c 3 c 3 c 3 3 c 3 3 c 3 c 3 3 c 3 3 c 3 3 c 3 cc 3 c 3 cc 3 c 3 cc 3 3 3 3 3 3 3 3 3 3 3 3 3 3 3 3 3 Example 4-3. Accessing Command Help Accessing Keyword Parameter Help To access keyword parameter help, enter a command name followed by the keyword, an equal sign, and a question mark. For example: The help facility responds with information on the keyword parameter as it relates to the command name you specified with it, including any default values. 3787 3239-101 4-9 Using Online Help for Commands For more information enter a question mark (?) following the next start-of-entry character. You can continue to enter question marks to get more detailed information until you get the following message: Example 4-4 shows how to access keyword parameter help for the DISPLAY parameter used with the GET command. !iiiiiiiiiiiiiiiiiiiiiiiiiiiiiiiiiiiiiiiiiiiiiiiiiiiiiiiiiiiiii"# 3 3 cc 3 c 3 3 3 c 3 c 3 3 3 cc 3 c 3 3 cc 3 3 3 c 3 cc 3 Example 4-4. Accessing Keyword Parameter Help Getting Help with Errors To get further information on an error or diagnostic message, enter a question mark (?) after you receive the error message.Example 4-5 shows how to access online help for error SMTP550 returned on a MAILBOX. !iiiiiiiiiiiiiiiiiiiiiiiiiiiiiiiiiiiiiiiiiiiiiiiiiiiiiiiiiiiiii"# 3 cc 3 3 3 c 3 c 3 3 3 cc 3 c 3 3 3 cc Example 4-5. Accessing Online Help for Errors Using the MHELP Command The MHELP command provides information on mail processor implementation on the various hosts in your network. See 5.7 for complete instructions on using this command. 4-10 3787 3239-101 Section 5 Using Mail Processor Commands This section explains how to use mail processor commands. 5.1. Command Overview This section covers the following mail processor command screens: $ CHECK $ DISCONNECT $ DISTRIBUTION $ GET $ MAILBOX $ MHELP $ PREPARE $ REMOVE $ SEND $ VERIFY Note: 3787 3239-101 You must assign a mailbox every time you begin a mail processing session. Do this using the MAILBOX command in IDENTIFY mode. See 5.6 for complete instructions. 5-1 Checking Mailbox Contents (CHECK Command) 5.2. Checking Mailbox Contents (CHECK Command) Use the CHECK command to display or print a list of the incoming or outgoing mail contained in the currently assigned mailbox. Command Format 3 3 3 Keyword Parameters Table 5-1 describes the keyword parameters and their possible values for the CHECK command. Table 5-1. CHECK Command Keyword Parameter Descriptions Keyword TYPE= PRINT= PROMPT= Values Description INCOMING Default value; checks incoming mail. OUTGOING Checks outgoing mail. NO Default value; specifies not to print the results of the CHECK command. YES Prints the results of the CHECK command on an auxiliary printer as well as on the terminal. If PRINT=YES, you must either omit the PROMPT parameter or specify PROMPT=0. 23 Default value; indicates the number of lines to display before asking whether to continue. A value of 23 is appropriate for a 24-line screen. nn Specifies a number of lines to display before asking whether to continue. The value specified does not include the 1-line prompt message. If PROMPT=0, the display is continuous and no prompt is issued. If PRINT=YES, omit this parameter or specify PROMPT=0 to accommodate continuous printing. 5-2 3787 3239-101 Checking Mailbox Contents (CHECK Command) Checking for Incoming Mail Function The CHECK command with TYPE=INCOMING lists all incoming mail messages and assigns a mail-id to each message based on the order in which the message was received. Each time you check for incoming mail, the mail processor resequences the mail items in numerical order. This helps avoid confusion if anyone deletes a mail item from the mailbox. For example, assume you have five incoming mail items in your mailbox and you delete mail a item whose mail-id is 3. The next time you issue a CHECK command, what used to be mail-id 4 is now mail-id 3 and what used to be mail-id 5 is now mail-id 4. And, of course, what used to be mail-id 3 is no longer in the mailbox. For each incoming message, the mail processor provides the following information: $ Mail-id $ Author $ Date received $ Subject $ Length (in pages, based on 20 lines per page) $ For local mail only, whether the sender requested a reply (Y or N in the R column) $ When the message was last read (date in the SEEN column) For the layout of the CHECK result screen, see Example 5-1. If there are more items than can fit on a single display screen (or if you specify a number of lines using PROMPT=nn) the mail processor asks the following question each time the display reaches the limit: Format 3 3 Example Example 5-1: $ Checks the incoming mail (using the default type) for the currently assigned mailbox $ Prints the incoming mail information on an auxiliary printer 3787 3239-101 5-3 Checking Mailbox Contents (CHECK Command) $ Displays the incoming mail information on the terminal screen Note: $ The R column indicates whether a reply was requested; the SEEN column provides the date that the message was last retrieved. The terminal display is continuous because PROMPT must equal 0 when you specify the PRINT parameter; therefore, if the results of the check require more than 23 lines, the top portion of the results will scroll off the screen. Specifies PROMPT=0 to accommodate continuous printing !iiiiiiiiiiiiiiiiiiiiiiiiiiiiiiiiiiiiiiiiiiiiiiiiiiiiiiiiiiiiii"# 3 cc 3 3 3 c 3 3 c 3 c 3 3 3 c 3 c 3 3 3 c 3 c 3 3 3 c 3 c 3 3 3 c 3 c 3 3 3 c 3 c 3 3 3 c 3 c 3 3 3 c 3 c 3 3 3 c 3 c 3 3 3 c 3 c 3 $%JJJJJJJJJJJJJJJJJJJJJJJJJJJJJJJJJJJJJJJJJJJJJJJJJJJJJJJJJJJJJJ&' Example 5-1. Checking Incoming Mail 5-4 3787 3239-101 Checking Mailbox Contents (CHECK Command) Checking for Outgoing Mail Function The CHECK command with TYPE=OUTGOING lists all mail messages originating from the currently assigned mailbox. The list is based on the order in which the messages were created. For each outgoing message, the mail processor provides the following information: $ Mail-id $ Author $ Date created $ Subject $ Length (in pages, based on 20 lines per page) For the layout of the CHECK result screen, see Example 5-2. If there are more items than can fit on a single display screen (or if you specify a number of lines using PROMPT=nn) the mail processor asks the following question each time the display reaches the limit: Format 3 3 Example Example 5-2: $ Drops the TYPE= parameter from the command and uses positional notation to check outgoing mail originating from the currently assigned mailbox $ Displays the outgoing mail information on the terminal screen, 15 lines at a time 3787 3239-101 5-5 Checking Mailbox Contents (CHECK Command) !iiiiiiiiiiiiiiiiiiiiiiiiiiiiiiiiiiiiiiiiiiiiiiiiiiiiiiiiiiiiii"# 3 3 cc 3 c 3 3 3 c 3 c 3 3 3 c 3 c 3 3 3 c 3 c 3 3 3 c 3 c 3 3 c 3 3 c 3 3 c 3 3 c 3 3 c 3 3 c c 3 3 3 3 3 3 3 3 3 $%JJJJJJJJJJJJJJJJJJJJJJJJJJJJJJJJJJJJJJJJJJJJJJJJJJJJJJJJJJJJJJ&' Example 5-2. Checking Outgoing Mail 5-6 3787 3239-101 Disconnecting from the Mail Processor (DISCONNECT Command) 5.3. Disconnecting from the Mail Processor (DISCONNECT Command) Use the DISCONNECT command to end your currently assigned mailbox assignment and disconnect from the mail processor. Command Format Keyword Parameters The DISCONNECT command requires no keyword parameters. Function The mail processor restricts the use of certain commands as long as more than one user is assigned to the same mailbox at the same time (see 5.5, 5.6, 5.9). This means that another user is unable to perform these functions until all other users assigned to the same mailbox have ended their mailbox assignments. The DISCONNECT command, although not required before LOGOFF, is the most direct means of informing the mail processor that you are ending your mailbox assignment, thereby freeing all commands for use by other users assigned to this mailbox. Example Example 5-3 ends a currently assigned mailbox assignment. !iiiiiiiiiiiiiiiiiiiiiiiiiiiiiiiiiiiiiiiiiiiiiiiiiiiiiiiiiiiiii"# cc 3 3 cc 3 3 Example 5-3. Disconnecting from the Mail Processor 3787 3239-101 5-7 Working with Distribution Lists (DISTRIBUTION Command) 5.4. Working with Distribution Lists (DISTRIBUTION Command) Use the DISTRIBUTION command to create, display, change, and delete distribution lists. All distribution lists you create are owned by the mailbox to which you are assigned when you create them. Distribution lists are public and can be accessed by any other user. However, only the list owner can delete or update the list. When local members of a local distribution list change their user information (for example, mailbox name or user name), the mail processor automatically updates their information on the distribution list. However, you must manually update user information on the distribution list for: $ A local member of a remote distribution list $ A remote member of a local distribution list $ A remote member of a remote distribution list Command Format 3 3333 3 3 Keyword Parameters Table 5-2 describes the keyword parameters and their possible values for the DISTRIBUTION command. 5-8 3787 3239-101 Working with Distribution Lists (DISTRIBUTION Command) Table 5-2. DISTRIBUTION Command Keyword Parameter Keywords NAME= Values Description host-id:: If MODE=DISPLAY and the list resides on a remote host, you must include the host-id, followed by the double colon (::). list-name 1 to 12 alphanumeric characters that specify a particular list on which to perform the DISTRIBUTION operation. If the list resides on a remote non-OS 2200 host, up to 64 characters may be allowed for listname, depending on the implementation of SMTP on that host. The list name is case sensitive. MODE= *ALL Displays a list of all distribution lists owned by the currently assigned mailbox. This specification is valid only if MODE=DISPLAY (the default). CREATE Creates a distribution list under the name specified on the NAME parameter and consisting of up to 20 mailbox-names you specify with the MEMBERS= parameter. If there are more than 20 members, issue another DISTRIBUTION command with MODE=INSERT. DELETE Deletes the distribution list specified on the NAME parameter. DISPLAY The default mode if no mode is specified. Displays the distribution list specified on the NAME parameter. INSERT Adds up to 20 mailbox names specified on the MEMBERS=parameter to the distribution list specified on the NAME parameter. REMOVE MEMBERS= (host-id:: mailbox-name1,... host-id:: mailbox-name20) Can also be used to complete a newly created list that requires more than 20 members (see the description for the CREATE parameter.) Removes the specified mailbox names from the distribution list specified. Removes up to 20 mailbox names from the distribution list specified on the NAME parameter. Specifies up to 20 member names for a single DISTRIBUTION command. If a list member resides on a remote host, you must include its host-id, followed by the double colon (::). If you need more than 20 member names, issue another DISTRIBUTION command. continued 3787 3239-101 5-9 Working with Distribution Lists (DISTRIBUTION Command) Table 5-2. DISTRIBUTION Command Keyword Parameter (cont.) Keywords PRINT= Values Description NO Used only in DISPLAY mode; Default value specifies not to print the displayed information on the auxiliary printer. YES Used only in DISPLAY mode, requests a printout of the displayed information on the auxiliary printer. If PRINT=YES, you must either omit the PROMPT parameter or specify PROMPT=0. PROMPT= 23 Used only in DISPLAY mode, indicates the number of lines to display before asking whether to continue. Default value is 23, the value for a 24-line screen. nn Specifies a number of lines to display before asking if you want to continue. The value specified does not include the 1-line prompt message. If PROMPT=0, the display is continuous and no prompt is issued. If PRINT=YES, omit this parameter or specify PROMPT=0. Creating a Distribution List Function The DISTRIBUTION command with MODE=CREATE, creates a new distribution list. All distribution lists you create are owned by the mailbox to which you are assigned when you create them. Distribution lists are public and can be accessed by any other user. However, only the list owner can delete or update the list. Format Example Example 5-4: 5-10 $ Creates distribution list MYLIST on a local host (no host-id specified) $ Drops the NAME= parameter from the command and uses positional notation to specify the list name 3787 3239-101 Working with Distribution Lists (DISTRIBUTION Command) $ Includes four members: two on the local host, two on remote host NY01 !iiiiiiiiiiiiiiiiiiiiiiiiiiiiiiiiiiiiiiiiiiiiiiiiiiiiiiiiiiiiii"# 3 3 cc 3 cc 3 Example 5-4. Creating a Distribution List Displaying and Printing Distribution List Names Function The DISTRIBUTION command with MODE=DISPLAY displays and, optionally, prints a list of all the distribution lists owned by the currently assigned mailbox. The value of the NAME parameter must be *ALL. The mail processor displays the list names, four per row, in alphabetical order, with those names beginning with numbers appearing first. If there are more lists than can fit on a single display screen (or if you specify a different number of lines using PROMPT=nn) the mail processor asks the following question each time the display reaches the limit: Format 3 3 Examples Example 5-5: $ Displays all the distribution lists owned by the currently assigned mailbox, 10 lines at a time $ Drops the NAME= parameter from the command and uses positional notation to specify *ALL $ Does not specify MODE=DISPLAY because it is the default 3787 3239-101 5-11 Working with Distribution Lists (DISTRIBUTION Command) !iiiiiiiiiiiiiiiiiiiiiiiiiiiiiiiiiiiiiiiiiiiiiiiiiiiiiiiiiiiiii"# 3 cc 3 3 3 3 c 3 3 c cc 3 3 3 3 3 3 3 3 3 Example 5-5. Displaying Distribution List Names Example 5-6: $ Displays and prints all the distribution lists owned by the currently assigned mailbox $ Drops the NAME= parameter from the command and uses positional notation to specify *ALL $ Does not specify MODE=DISPLAY because it is the default $ Prints the information on an auxiliary printer $ Accommodates continuous printing by setting PROMPT=0; therefore, if there are more lists than fit on a single screen, some entries will scroll off the screen !iiiiiiiiiiiiiiiiiiiiiiiiiiiiiiiiiiiiiiiiiiiiiiiiiiiiiiiiiiiiii"# 3 3 cc 3 c 3 3 3 c 3 cc 3 Example 5-6. Displaying and Printing Distribution List Names Displaying and Printing Distribution List Members Function The DISTRIBUTION command with MODE=DISPLAY displays and, optionally, prints the members of a local or remote distribution list. Include the distribution list name as the value of the NAME parameter or specify it using positional notation. (List names are case sensitive.) If the list resides on a remote host, include the host-id, followed by a double colon (::) before the list name. 5-12 3787 3239-101 Working with Distribution Lists (DISTRIBUTION Command) When you display the members of a local distribution list, the information the mail processor returns includes: $ The host-id and mailbox name (but no user names) for each remote list member $ The mailbox name and user name for each local member of the list. Note that the host-id for local members is listed simply as LOCAL. When you display the members of a remote distribution list, the information that the mail processor returns includes: $ The host-id and mailbox name for each member, regardless of host implementation $ The user name of some members, depending on host implementation If there are more members than can fit on a single display screen (or if you specify a different number of lines using PROMPT=nn) the mail processor asks the following question each time the display reaches the limit: Format 3 3 Examples Example 5-7: $ Drops the NAME= parameter from the command and uses positional notation to display the member names of distribution list YOURLIST, which resides on a remote host $ Does not specify MODE=DISPLAY because it is the default $ Requests 11 lines of information (ten names plus one prompt line) at a time !iiiiiiiiiiiiiiiiiiiiiiiiiiiiiiiiiiiiiiiiiiiiiiiiiiiiiiiiiiiiii"# cc 3 c 3 c 3 c 3 c 3 c 3 cc 3 3 3 3 3 3 3 3 Example 5-7. Displaying Distribution List Members 3787 3239-101 5-13 Working with Distribution Lists (DISTRIBUTION Command) Example 5-8: $ Displays and prints the members of local distribution list MYLIST, dropping the NAME= parameter and using positional notation to specify the list name (List name is case sensitive.) $ Does not specify MODE=DISPLAY because it is the default $ Prints the member names on an auxiliary printer $ Accommodates continuous printing by setting PROMPT=0; therefore, if there are more members than fit on a single screen, some entries will scroll off the screen !iiiiiiiiiiiiiiiiiiiiiiiiiiiiiiiiiiiiiiiiiiiiiiiiiiiiiiiiiiiiii"# 3 cc 3 3 c 3 3 3 c 3 c 3 3 3 c 3 c 3 3 3 c 3 c 3 3 3 cc Example 5-8. Displaying and Printing Distribution List Members Adding Members to a Distribution List Function The DISTRIBUTION with MODE=INSERT adds members to an existing distribution list. Remember that you can only add members to a distribution list owned by the mailbox to which you are currently assigned. Note: You must also use INSERT mode if you are creating a distribution list with more than 20 members: Create the distribution list using CREATE mode and then insert the remaining members using INSERT mode. Format 5-14 3787 3239-101 Working with Distribution Lists (DISTRIBUTION Command) Example Example 5-9: $ Adds 2 local members (ACCOUNTS and LEGAL) and 2 remote members (JOHNSON and SMITH) to distribution list MYLIST, which resides on the local (default) host $ Drops the NAME= parameter from the command and uses positional notation to specify the list name (List name is case sensitive.) $ Does not display the updated distribution list. Use the DISTRIBUTION command with MODE=DISPLAY to display it !iiiiiiiiiiiiiiiiiiiiiiiiiiiiiiiiiiiiiiiiiiiiiiiiiiiiiiiiiiiiii"# 3 cc 3 3 3 cc Example 5-9. Adding Members to a Distribution List Removing Members from a Distribution List Function The DISTRIBUTION command with MODE=REMOVE removes members from a distribution list. Note that you can only remove members from a distribution list owned by the mailbox to which you are currently assigned. Format 3787 3239-101 5-15 Working with Distribution Lists (DISTRIBUTION Command) Example Example 5-10: $ Removes 1 remote member (JOHNSON) and 1 local member (LEGAL) from distribution list MYLIST, which resides on the local (default) host $ Drops the NAME= parameter from the command and uses positional notation to specify the list name (List name is case sensitive.) $ Does not display the updated distribution list. Use the DISTRIBUTION command with MODE=DISPLAY to display it. !iiiiiiiiiiiiiiiiiiiiiiiiiiiiiiiiiiiiiiiiiiiiiiiiiiiiiiiiiiiiii"# 3 cc 3 3 3 cc Example 5-10. Removing Members from a Distribution List Deleting a Distribution List Function The DISTRIBUTION function with MODE=DELETE deletes a distribution list from the data base. Note that you can only delete a distribution list owned by the mailbox to which you are currently assigned. Format Example Example 5-11: $ Deletes distribution list MYLIST, which resides on the local (default) host $ Drops the NAME= parameter from the command and uses positional notation to specify the list name (List name is case sensitive.) !iiiiiiiiiiiiiiiiiiiiiiiiiiiiiiiiiiiiiiiiiiiiiiiiiiiiiiiiiiiiii"# cc 3 cc 3 3 3 Example 5-11. Deleting a Distribution List 5-16 3787 3239-101 Retrieving and Saving Mail (GET Command) 5.5. Retrieving and Saving Mail (GET Command) Use the GET command to retrieve an incoming or outgoing mail item for the currently assigned mailbox. The various GET parameters allow you to display, print on an auxiliary printer, and delete the mail item whose ID you specify. In addition, you can save the mail item to an OS 2200 system data format (SDF) file or an element of a program file. If you save a mail item to a file, you must first catalog the file using standard OS 2200 file-naming conventions (see Appendix A). You must know the mail-id for the mail you want to retrieve. Use the CHECK command to produce a list of the current mail-ids for incoming or outgoing mail in your mailbox. (See 5.2.) Command Format 3 3 3 3 3 3 Keyword Parameters Table 5-3 describes the keyword parameters and their possible values for the GET command. Table 5-3. GET Command Keyword Parameter Descriptions Keywords ID= Values mail-id Description 1 to 8 unique, alphanumeric characters that identify an incoming or outgoing mail item. The mail processor assigns incoming mail-ids. Users assign outgoing mail-ids. TYPE= PRINT= INCOMING Default value; indicates that the mail item to be retrieved is an incoming message. OUTGOING Indicates that the mail item to be retrieved is an outgoing message. NO Default value; specifies not to print the retrieved mail item. YES Prints the retrieved mail item on your auxiliary printer, as well as on the terminal. If PRINT=YES, you must either omit the PROMPT parameter or specify PROMPT=0. continued 3787 3239-101 5-17 Retrieving and Saving Mail (GET Command) Table 5-3. GET Command Keyword Parameter Descriptions (cont.) Keywords PROMPT= Values Description 23 Default value; indicates the number of lines to display before asking whether to continue. nn Specifies a number of lines to display before asking whether to continue. Display length includes one line for mail processor messages and prompts. If PROMPT=0, the display is continuous and no prompt is issued. If PRINT=YES, omit this parameter or specify PROMPT=0 to accommodate continuous printing. DISPLAY= DELETE= YES Default value; displays on the terminal screen the mail item being retrieved. NO Specifies not to display the retrieved mail item. NO Default value; does not delete the mail item from the mailbox after retrieving it. YES Deletes the mail item from the mailbox after retrieving it. Note: Use care when deleting mail items from a shared mailbox because when you delete an item you delete it for all users of that mailbox. SAVE= filename. Saves the retrieved mail item in an OS 2200 SDF file. Always include the period after the file name. The file must already be created using standard OS 2200 procedures and file-naming conventions. See Appendix A for file-naming conventions. Note: Using the GET command with the SAVE parameter overwrites any current contents of the file you specify. filename.elementname Saves the retrieved mail item in an element of an OS 2200 program file. The file must already be created using standard OS 2200 procedures and file-naming conventions. See Appendix A for file-naming conventions. Note: When you specify an existing element, using the GET command with the SAVE parameter overwrites and current contents of the element you specify. When you specify a new element of an existing program file, using the GET command with the SAVE parameter creates the new element and saves the mail item to it. 5-18 3787 3239-101 Retrieving and Saving Mail (GET Command) Retrieving Incoming Mail Function The GET command with TYPE=INCOMING displays, prints, deletes, or saves incoming mail to a file, use the GET command, specify the mail-id of the item you want and choose the default TYPE=INCOMING. When you save a mail item to a file, see the filename. and filename.elementname descriptions in Table 5-3 for details on how the mail processor handles the file you specify. Always issue a CHECK command immediately before attempting to GET incoming mail because the mail processor resequences the ids for each CHECK command (see 5.2); therefore, a particular incoming mail item’s id at one point in time 5may differ from its id at another point in time. Because the mail processor does not resequence outgoing mail, you do not to recheck for current mail-ids. Format 3 3 3 3 3 Example Example 5-12: $ Drops the ID= parameter from the command and uses positional notation to display an incoming mail item whose mail-id is 3 $ Prints the item on an auxiliary printer $ Accommodates continuous printing by setting PROMPT=0; therefore, if the retrieved mail item is too long to fit on a single display screen, some of it will scroll off the screen $ Saves the item in an SDF file called inmail. $ Deletes the item from the mailbox !iiiiiiiiiiiiiiiiiiiiiiiiiiiiiiiiiiiiiiiiiiiiiiiiiiiiiiiiiiiiii"# 3 cc 3 3 c 3 3 c 3 3 c 3 3 c 3 3 c 3 3 c 3 3 c 3 3 c 3 3 cc 3 Example 5-12. Retrieving Incoming Mail 3787 3239-101 5-19 Retrieving and Saving Mail (GET Command) Retrieving Outgoing Mail Function The GET command with TYPE=OUTGOING displays, prints, deletes, or saves outgoing mail in a file. When you save a mail item to a file, see the filename. and filename.element-name descriptions in Table 5-3 for details on how the mail processor handles the file you specify. Format 3 3 3 3 3 Example Example 5-13: $ Drops the ID= parameter and uses positional notation to display the outgoing item with mail-id MEMO5, 15 lines at a time $ Saves the item to a program file element called outmail.001 $ Deletes the item from the mailbox !iiiiiiiiiiiiiiiiiiiiiiiiiiiiiiiiiiiiiiiiiiiiiiiiiiiiiiiiiiiiii"# 3 cc 3 3 c 3 3 c 3 3 c 3 3 c 3 3 c 3 3 c 3 3 c 3 3 c 3 3 c 3 3 cc 3 Example 5-13. Retrieving Outgoing Mail 5-20 3787 3239-101 Setting Up and Assigning a Mailbox (MAILBOX Command) 5.6. Setting Up and Assigning a Mailbox (MAILBOX Command) Use the MAILBOX command to assign, create, change, or delete a mailbox. Before you perform any other mail processing commands, you must assign a mailbox for your use. The mailbox assignment remains in effect until you: $ Change the mailbox assignment during the session by issuing another MAILBOX command $ Exit the mail processor If you create a new mailbox or change information for a mailbox, the mail processor automatically assigns you to that mailbox; otherwise you must use the MAILBOX command in IDENTIFY mode before requesting any other mail processor command. Command Format 333 Keyword Parameters Table 5-4 describes the keyword parameters and their possible values for the MAILBOX command. Table 5-4. MAILBOX Command Keyword Parameter Descriptions Keywords Values mailbox-name/ mailbox-key Description Identifies the mailbox on which to perform the MAILBOX operation. Specify a unique 1- to 8-character string for mailbox-name and for mailbox-key. The character strings can consist of alphanumerics and special characters except for the slash (/) or double colon (::). Mailbox names and keys are not case sensitive; the mail processor translates any lower-case characters into uppercase. continued 3787 3239-101 5-21 Setting Up and Assigning a Mailbox (MAILBOX Command) Table 5-4. MAILBOX Command Keyword Parameter Descriptions (cont.) Keywords MODE= Values IDENTIFY Description Default value; explicitly assigns the specified mailbox for your use. (If you specify CREATE or CHANGE mode, the mail processor automatically assigns the specified mailbox for your use.) To perform any other commands, you must first assign a mailbox for your use during the current session. To end one mailbox assignment and begin another, issue another MAILBOX command in IDENTIFY mode. CREATE Creates a mailbox with the name, key, and user name you specify. Automatically assigns the mailbox for your use. Note: Some sites may restrict the use of CREATE mode so that only the site administrator adds new mailboxes to the system. If you are unable to create your own mailbox, see your site administrator. DELETE Deletes the specified mailbox-name. You cannot delete a mailbox while someone else is using it. Note: Some sites may restrict the use of DELETE mode so that only the site administrator deletes mailboxes. If you are unable to delete your own mailbox, see your site administrator. CHANGE Changes the current mailbox name, mailbox key, or user-name to those you specify on the NAME, KEY, or USER parameters. Note: Some sites may restrict the use of CHANGE mode so that only the site administrator changes mailbox information in the system. If you are unable to change your own mailbox information, see your site administrator. NAME= new-mailbox-name A 1- to 8-character string which can include alphanumerics or special characters EXCEPT for the slash (/) or double colon (::). Mailbox name is not case sensitive. KEY= new-mailbox-key A 1- to 8-character string which can include alphanumerics or special characters except for the slash (/) or double colon (::). Mailbox key is not case sensitive. continued 5-22 3787 3239-101 Setting Up and Assigning a Mailbox (MAILBOX Command) Table 5-4. MAILBOX Command Keyword Parameter Descriptions (cont.) Keywords USER= Values new-user-name Description Specifies a new 1- to 20-character user name for the currently assigned mailbox. If the mailbox currently has no user-name associated with it, the user-name is created. If the mailbox already has a user-name, the user-name you specify here replaces the current user-name. If the user name includes embedded spaces, enclose it in quotation marks (e.g., "Mary Smith"). User-name is case sensitive and must always appear exactly as you specify it on this command. Creating a Mailbox Function The MAILBOX command with MODE=CREATE, creates a new mailbox. When you create a new mailbox, the mail processor automatically assigns that mailbox for your use. You can create as many mailboxes as you need. You can change your mailbox assignment during the session by issuing additional MAILBOX commands in IDENTIFY mode. (See "Assigning a Mailbox" in this section.) If you specify a mailbox name that already exists, you will get an error message. Try the command again with a new mailbox name. If you specify a user name when you create the mailbox, the mail processor uses it for the following purposes: $ To provide a default author name for all outgoing mail originating from this mailbox (See the PREPARE and SEND commands in 5.8 and 5.10.) $ To further identify the owner of a distribution list (See the DISTRIBUTION command in 5.4.) $ To further identify a member of a local distribution list when it is displayed (See the DISTRIBUTION command in 5.4.) $ To verify a user or mailbox name (See the VERIFY command in 5.11.) Format 3787 3239-101 5-23 Setting Up and Assigning a Mailbox (MAILBOX Command) Example Example 5-14 creates a new mailbox called MYBOX with mailbox-key SECRET and user name Mary Smith. !iiiiiiiiiiiiiiiiiiiiiiiiiiiiiiiiiiiiiiiiiiiiiiiiiiiiiiiiiiiiii"# 3 cc 3 3 cc 3 Example 5-14. Creating a New Mailbox Assigning a Mailbox Function Before you can read or write mail, you must assign a mailbox for your use. The MAILBOX with MODE=IDENTIFY assigns a mailbox. If you have access to more than one mailbox, you can change your mailbox assignment during the session by issuing additional MAILBOX commands in IDENTIFY mode. The mail processor automatically disconnects the previous mailbox assignment and assigns the new mailbox you specify. When you create a mailbox (MAILBOX with MODE=CREATE) or change mailbox information (MAILBOX with MODE=CHANGE), that mailbox is automatically assigned for your use. You do not have to assign it explicitly. Format Example Example 5-15 assigns the existing mailbox MYBOX by using the MAILBOX command in default mode IDENTIFY. !iiiiiiiiiiiiiiiiiiiiiiiiiiiiiiiiiiiiiiiiiiiiiiiiiiiiiiiiiiiiii"# cc 3 c 3 cc 3 3 3 3 Example 5-15. Assigning an Existing Mailbox 5-24 3787 3239-101 Setting Up and Assigning a Mailbox (MAILBOX Command) Changing Mailbox Information Function The MAILBOX command with MODE=CHANGE changes a mailbox name or mailbox key. It also creates a user name for a mailbox that previously had no user name associated with it or replaces an already existing user name with a new one. When you change mailbox information, the mail processor automatically assigns that mailbox for your use. (See "Assigning a Mailbox" in this section.) The mail processor automatically updates the mailbox information on any local distribution list on which it appears; however, it does not update the information on remote distribution lists. You cannot use MAILBOX in CHANGE mode while someone else is assigned to the mailbox you want to change. Format Example Example 5-16: $ Changes Mailbox-key SECRET to KEY01 $ Changes user-name Mary Smith to M. Smith !iiiiiiiiiiiiiiiiiiiiiiiiiiiiiiiiiiiiiiiiiiiiiiiiiiiiiiiiiiiiii"# 3 cc 3 3 cc 3 Example 5-16. Changing Mailbox Information 3787 3239-101 5-25 Setting Up and Assigning a Mailbox (MAILBOX Command) Deleting a Mailbox Function The MAILBOX command with MODE=DELETE deletes a mailbox. If you try to delete a mailbox that still contains incoming mail, you receive the following message: c The mail processor automatically removes the deleted mailbox name from any local distribution lists on which it appears; however, it does not remove the mailbox name from remote distribution lists. You cannot use MAILBOX in DELETE mode while someone else is assigned to the mailbox you want to delete. Format Example Example 5-17 attempts to delete mailbox MYBOX, but cancels the delete because the box still contains mail. !iiiiiiiiiiiiiiiiiiiiiiiiiiiiiiiiiiiiiiiiiiiiiiiiiiiiiiiiiiiiii"# 3 cc 3 3 c c 3 3 cc 3 Example 5-17. Deleting a Mailbox 5-26 3787 3239-101 Getting Host Implementation Information (MHELP Command) 5.7. Getting Host Implementation Information (MHELP Command) Use the MHELP command to get information about the SMTP implementation on a given host in the network. Command format Keyword parameters Table 5-5 describes the keyword parameters and their possible values for the MHELP command. Table 5-5. MHELP Command Keyword Parameter Descriptions Keywords HOST= Values host-id Description Optional parameter that specifies a remote host as the subject of the MHELP request. The default is the local host. Example Example 5-18 requests information about the SMTP implementation on remote OS 2200 host NY01. !iiiiiiiiiiiiiiiiiiiiiiiiiiiiiiiiiiiiiiiiiiiiiiiiiiiiiiiiiiiiii"# cc 3 3 c c 3 3 c c 3 c 3 c 3 c 3 c 3 c 3 c 3 c 3 c 3 c 3 c 3 c 3 c 3 c 3 c 3 cc 3 3 3 3 3 3 3 3 3 3 3 3 3 3 3 3 3 3 3 3 3 Example 5-18. Getting Host Implementation Information 3787 3239-101 5-27 Creating Outgoing Mail (PREPARE Command) 5.8. Creating Outgoing Mail (PREPARE Command) Use the PREPARE command to create an item of mail and store it in the data base until you are ready to send it. To create and send mail immediately without storing it in the data base, use the SEND command (see 5.10). You can create and store mail in two ways: 1. By entering the text directly at the terminal 2. By using text you already saved in an OS 2200 SDF or program file When you create a mail item, you supply certain heading information for the message and the mail processor supplies additional information. This heading information is what the mail processor returns when a user issues a CHECK command. If you want to specify an author name on the heading information for the mail item, include the AUTHOR parameter. If you share a mailbox, it is particularly useful to have the author name in the heading of your outgoing messages so that you know which ones in the mailbox are yours. In addition, the author name is useful when recipients receive incoming mail because they can see who sent each mail item as soon as they check for incoming mail, rather than waiting to actually read the mail item. If you do not specify an author name, the mail processor includes in the message heading the user name associated with the mailbox. If no user name is specified for the mailbox, then the message heading contains no information about the originator of the mail item. You can specify a subject in the heading by including the SUBJECT parameter on the command. Command Format 3 Keyword Parameters Table 5-6 describes the keyword parameters and their possible values for the PREPARE command. 5-28 3787 3239-101 Creating Outgoing Mail (PREPARE Command) Table 5-6. PREPARE Command Parameter Descriptions Keywords ID= Values mail-id Description Specify a unique 1 to 8 alphanumeric character string that identifies the outgoing mail item. Note: The mail processor uses only numeric characters for incoming mail-ids. To avoid the possibility of identical incoming and outgoing mail-ids, always include at least one alphabetic character in the outgoing mail-ids you create. (See "Sending an Existing Mail Item" in 5.10 for more information. AUTHOR= author-name 1- to 20- character author name for the mail item. If the string contains embedded spaces, you must enclose it in quotation marks (e.g., "M. Smith"). SUBJECT= subject 1- to 25-character string that describes the message subject. If the string contains embedded spaces, you must enclose it in quotation marks (e.g., "Budget Report"). FILE= filename. Identifies an OS 2200 SDF file that contains the text for the mail item you want to create. Always include the period after the file name. The file must already be created using standard OS 2200 procedures and file-naming conventions. See Appendix A for file-naming conventions. filename.elementname Identifies an OS 2200 program file element that contains the text for the mail item you want to create. The file must already be created using standard OS 2200 procedures and file-naming conventions. See Appendix A for file-naming conventions. Creating Outgoing Mail by Entering Text at the Terminal Function The PREPARE command with no FILE= parameter lets you create a mail item by entering text directly at the terminal. Key in the message text, one line at a time, and press TRANSMIT at the end of each line. The mail processor returns another start-of-entry character, after which you can key in the next line of text. To abort the PREPARE command while keying in the message, type $CANCEL following the start-of-entry symbol returned by the mail processor. After keying in the entire message, complete the command by typing *END following the start-of-entry character. 3787 3239-101 5-29 Creating Outgoing Mail (PREPARE Command) Format Example Example 5-19: $ Drops the ID= parameter and uses positional notation to prepare a mail item directly at the terminal $ Specifies the author as M. Smith and the subject as Budget Report $ Indicates the end of message text with *END !iiiiiiiiiiiiiiiiiiiiiiiiiiiiiiiiiiiiiiiiiiiiiiiiiiiiiiiiiiiiii"# 3 cc 3 3 c 3 3 c 3 3 cc 3 3 cc 3 3 cc 3 Example 5-19. Preparing Mail at the Terminal Creating Outgoing Mail with Text from a File Function The PREPARE command with the FILE= parameter creates a mail item using text contained in a file. See Appendix A for information on OS 2200 file-naming conventions. Format 3 Example Example 5-20: 5-30 $ Drops the ID= parameter and uses positional notation to prepare a mail item using text from an SDF file called BUDGET. $ Specifies the author as M. Smith and the subject as Budget Report 3787 3239-101 Creating Outgoing Mail (PREPARE Command) !iiiiiiiiiiiiiiiiiiiiiiiiiiiiiiiiiiiiiiiiiiiiiiiiiiiiiiiiiiiiii"# 3 3 cc 3 cc 3 Example 5-20. Preparing Mail from a File 3787 3239-101 5-31 Deleting Mail (REMOVE Command) 5.9. Deleting Mail (REMOVE Command) Use the REMOVE command to delete incoming or outgoing mail items from your mailbox when you no longer need them. It is important to do this because unneeded mail wastes data base space and increases the amount of time required to access mail on the system. If you need to keep a message for future reference, you can save it in a file or print it on your auxiliary printer (see the GET command in 5.5) rather than leaving it in your mailbox for a long period of time. If you share a mailbox, you cannot remove mail while someone else is assigned to that mailbox. Use care when deleting mail from a shared mailbox because, when you delete a mail item, you delete it for all users of that mailbox. Command Format 3 3 Keyword Parameters Table 5-7 describes the keyword parameters and their possible values for the REMOVE command. Table 5-7. REMOVE Command Keyword Parameter Descriptions Keywords ID= TYPE= Values Description mail-id 1 to 8 unique, alphanumeric characters that identify an incoming or outgoing mail item to remove from the mailbox. *ALL Removes all incoming or outgoing mail items from the mailbox. OUTGOING Default value; identifies the type of mail item to remove as OUTGOING. INCOMING Identifies the type of mail item to remove as incoming. Removing Outgoing Mail Function The REMOVE command with TYPE=OUTGOING removes outgoing mail from your mailbox. You can remove outgoing mail one item at a time or specify *ALL to remove all outgoing mail items from the mailbox. You can omit the TYPE=OUTGOING parameter because OUTGOING is the default for the REMOVE command. 5-32 3787 3239-101 Deleting Mail (REMOVE Command) Format 3 Example Example 5-21 drops the ID= parameter from the command and uses positional notation with *ALL to remove all outgoing mail from the currently assigned mailbox. !iiiiiiiiiiiiiiiiiiiiiiiiiiiiiiiiiiiiiiiiiiiiiiiiiiiiiiiiiiiiii"# 3 cc cc 3 3 3 Example 5-21. Removing Outgoing Mail Removing Incoming Mail Function The REMOVE command with TYPE=INCOMING removes incoming mail from your mailbox. You can remove incoming mail one item at time or specify *ALL to remove all incoming mail items from the mailbox. You must specify the TYPE parameter because the default type for the REMOVE command is not INCOMING. Note: The mail processor resequences incoming mail. Therefore, before deleting an incoming mail item, you should always issue a CHECK command to verify the item’s current mail-id and to avoid removing the wrong mail item from the mailbox. Format 3 Example Example 5-22 omits the ID= parameter from the command and uses positional notation to remove an incoming mail item whose mail-id is 1. !iiiiiiiiiiiiiiiiiiiiiiiiiiiiiiiiiiiiiiiiiiiiiiiiiiiiiiiiiiiiii"# cc 3 cc 3 3 3 Example 5-22. Removing Incoming Mail 3787 3239-101 5-33 Sending New or Existing Mail Messages (SEND Command) 5.10. Sending New or Existing Mail Messages (SEND Command) Use the SEND command to: $ Create and send new mail $ Send a mail item you already created using the PREPARE command (See 5.8.) $ Send a received incoming mail item as an outgoing mail item Command Format 3 3 333 Keyword Parameters Table 5-8 describes the keyword parameters and their possible values for the SEND command. Table 5-8. SEND Command Keyword Parameter Descriptions Keywords Values Description ID= mail-identifier 1 to 8 unique, alphanumeric characters that identify an existing mail item to send. REPLY= NO Default value; indicates to recipients that a reply is not necessary. When recipients CHECK their mail, an N appears in the REPLY column. YES Indicates to local recipients that a reply is requested. When a local recipient checks incoming mail, a Y appears in the R column for this message. author-name 1- to 20- character author name if you are creating and sending a new mail item. AUTHOR= If you do not specify an author name for a new message, the mail processor supplies the user name of the current mailbox in the message heading. If the name contains embedded spaces, you must enclose it in quotation marks (e.g., "M. Smith"). SUBJECT= subject 1- to 25- character subject if you are creating and sending a new mail item. If the subject contains embedded spaces, you must enclose it in quotation marks (e.g., "Budget Report"). continued 5-34 3787 3239-101 Sending New or Existing Mail Messages (SEND Command) Table 5-8. SEND Command Keyword Parameter Descriptions (cont.) Keywords FILE= Values filename. Description Identifies an OS 2200 SDF file that contains text for a new mail item you are creating and sending. Always include the period after the file name. The file must already be created using standard OS 2200 procedures and file-naming conventions. See Appendix A for file-naming conventions. filename.elementname Identifies an OS 2200 program file element that contains the text for the new mail item you want to create and send. The file must already be created using standard OS 2200 procedures and file-naming conventions. See Appendix A for file-naming conventions. MODE= The MODE= parameter allows varied delivery options for recipients on non-OS 2200 remote hosts. If a mail item specifies both local and remote recipients, the MODE= parameter affects only the remote, non-OS 2200 recipients. For recipients on a remote OS 2200 host, the MODE= parameter is ignored and the mail item is delivered to the recipients’ mailbox only. TO= MAIL Default value; sends the mail item to a remote recipient’s mailbox only. soml Abbreviation for Send Or MaiL; sends the mail item to a remote recipient’s terminal if the recipient is signed-on. Otherwise, sends it to the recipient’s mailbox. saml Abbreviation for Send And MaiL; sends the mail item to a remote recipient’s mailbox and terminal. If the recipient is not signed on to the terminal, sends the mail to the mailbox only. send Sends the mail item to a remote recipient’s terminal only. If the recipient is not signed on to the terminal, does not deliver the message. (host-id:: mailbox-name1,... host-id:: mailbox-name20) Specifies local or remote mailbox names as recipients of the mail item you are sending. If a mailbox resides on a remote host, you must include its host-id, followed by the double colon (::). You can combine the TO= parameter with the LISTS= parameter, or use it alone. continued 3787 3239-101 5-35 Sending New or Existing Mail Messages (SEND Command) Table 5-8. SEND Command Keyword Parameter Descriptions (cont.) Keywords LISTS= Values (host-id:: list-name1,... host-id:: list-name20) Description Specifies local or remote distribution lists as recipients of the mail item you are sending. If a list resides on a remote host, you must include its host-id, followed by the double colon (::). List-name is case sensitive. You can combine the LISTS= parameter with the TO= parameter, or use it alone. Creating and Sending a New Message Function The SEND command without a mail-id creates and sends a mail item in a single operation. You can create the message by entering text at the terminal or using text from a file. To abort the SEND while keying in the message, type $CANCEL following the start-of-entry symbol returned by the mail processor. After keying in the entire message, complete the command by typing *END following the start-of-entry character. When you use the SEND command to both create and send a message, you do not provide a mail-id; therefore, no outgoing message is stored in the data base. For this reason, you should only use SEND to both create and send mail if you are sure that you will not need the item again. If you expect to need an outgoing mail item for any reason, you should first use PREPARE (see 5.8) to create it and then use SEND to mail it. Format 3 3 333 5-36 3787 3239-101 Sending New or Existing Mail Messages (SEND Command) Examples Example 5-23: $ Creates a new mail item from text contained in the SDF file BUDGET. $ Specifies the author as Mary Smith and the subject as BUDGET $ Requests a reply $ Uses the & continuation character (see 4.2) to continue the command on another line $ Mails the item to: v The terminals and mailboxes of members of list YOURLIST on remote host NY01 v Mailbox-name J. Doe !iiiiiiiiiiiiiiiiiiiiiiiiiiiiiiiiiiiiiiiiiiiiiiiiiiiiiiiiiiiiii"# 3 cc 3 3 cc 3 3 cc 3 Example 5-23. Creating and Sending Mail from a File Example 5-24: $ Creates a new mail item at the terminal $ Does not provide a mail-id so the message does not remain in the data base $ Specifies the author as Mary Smith and the subject as BUDGET $ Requests a reply $ Mails the item to: v The terminals and mailboxes of members of list YOURLIST on remote host NY01 v Mailbox-name J. Doe !iiiiiiiiiiiiiiiiiiiiiiiiiiiiiiiiiiiiiiiiiiiiiiiiiiiiiiiiiiiiii"# 3 cc 3 3 cc 3 3 cc 3 3 cc 3 3 cc 3 3 cc 3 3 cc 3 Example 5-24. Creating and Sending Mail at the Terminal 3787 3239-101 5-37 Sending New or Existing Mail Messages (SEND Command) Sending an Existing Mail Item Function The SEND command with a mail-id allows you to send two types of existing mail items: $ Outgoing mail that you previously created using the PREPARE command (see 5.8) $ Received incoming mail that you want to resend as outgoing mail Note: When searching for the mail item whose mail-id you specified, the mail processor checks outgoing mail-ids before checking incoming mail-ids. Therefore, if an outgoing and an incoming mail item have the same mail-id, the mail processor sends the outgoing mail item. Do not specify subject, author, or file name because these are already specified on the existing item. Format 3 333 Example Example 5-25: $ Sends mail item MSG01 to: v The terminals and mailboxes of members of list YOURLIST on remote host NY01 v The mailboxes of members of local list MYLIST v Mailbox-name J. Doe $ Does not specify subject, author, or file name because you specified them when you created the message with the PREPARE command $ Requests a reply !iiiiiiiiiiiiiiiiiiiiiiiiiiiiiiiiiiiiiiiiiiiiiiiiiiiiiiiiiiiiii"# 3 cc 3 3 cc 3 Example 5-25. Sending Previously Created Mail 5-38 3787 3239-101 Obtaining User Information (VERIFY Command) 5.11. Obtaining User Information (VERIFY Command) Use the verify command to obtain the mailbox name for a person whose user name you know. On local or remote OS 2200 hosts, you can also use this command to find out if a user whose mailbox name you know is valid on a given host. The VERIFY command on OS 2200 systems provides this flexibility because of the way in which it searches for the user name you specify. 1. First, the mail processor searches for the user name you specify. If it finds a match, the mail processor provides a verification message and displays the user name and mailbox name. 2. If no user name match is found, the mail processor searches for a matching mailbox name. If it finds a matching mailbox name, the mail processor provides a verification message and displays the user name and mailbox name. 3. If no match is found for either user name or mailbox name, you get an appropriate error message. When you use the VERIFY command for users on a remote non-OS 2200 host, the search procedure varies depending on the way that the verify procedure is implemented on that particular host. Command Format Keyword Parameters Table 5-9. VERIFY Command Keyword Parameter Descriptions Keywords USER= Values host-id::user-name Description cifies the 1- to 64- character user name r mailbox name you want to verify. For verifications on the local host or on any remote OS 2200 host, user names can be from 1 to 20 characters long and mailbox names can be from 1 to 8 characters long. User name is case sensitive. If it contains embedded spaces, you must enclose it in quotation marks (e.g., "Mary Smith"). If the user resides on a remote host, include the host-id, followed by a double colon (::). 3787 3239-101 5-39 Obtaining User Information (VERIFY Command) Example Example 5-26 obtains the mailbox name for a user Jonathan Doe who resides on remote host NY01. !iiiiiiiiiiiiiiiiiiiiiiiiiiiiiiiiiiiiiiiiiiiiiiiiiiiiiiiiiiiiii"# 3 cc 3 3 c 3 3 c 3 3 c 3 3 cc 3 Example 5-26. Obtaining User Information 5-40 3787 3239-101 Appendix A OS 2200 File-Naming Conventions This appendix is comprised of two tables that provide file-naming conventions for OS 2200 files: $ Table A-1 provides conventions for naming system data format (SDF) files $ Table A-2 provides conventions for naming program files and elements You may want to reference these tables when you create files that contain message text or files where you want to save mail items. Notes: 1. The length of the field is in number of characters. 2. All fields are marked A/N, meaning alphanumeric. Table A-1. OS 2200 SDF File-Naming Conventions Format: qualifier*filename(F-cycle)/r-key/w-key Attribute Length Type Usage Remarks qualifier 1 - 12 A/N Required None. * 1 A/N Required An asterisk must be used to separate qualifier from filename. filename 1 - 12 A/N Required None. r-key 1-6 A/N Optional Read-key. If used, must be preceded by a slash (/). w-key 1-6 A/N Optional Write-key. If used, must be preceded by /r-key/ or by two slashes (//). . 1 A/N Required The SDF file name must be terminated by a period (.). 3787 3239-101 A-1 OS 2200 File-Naming Conventions Table A-2. OS 2200 Program File-Naming Conventions Format: qualifier*filename(F-cycle)/r-key/w-key.element-name/version(S-cycle) Attribute A-2 Length Type Usage Remarks qualifier 1 - 12 A/N Required None. * 1 A/N Required An asterisk must be used to separate qualifier from filename. filename 1 - 12 A/N Required None. r-key 1-6 A/N Optional Read-key. If used, must be preceded by a slash (/). w-key 1-6 A/N Optional Write-key. If used, must be preceded by /r-key/ or by two slashes (//). . 1 A/N Required Filename must be separated from element-name by a period (.) element-name 1 - 12 A/N Required None. version A/N Optional If specified, must be preceded by a slash (/). 1 - 12 3787 3239-101 Appendix B Remote Host Error Messages When you transfer mail between hosts, errors can occur on either host. When an error occurs on the remote host, that host sends a general error message to your host, but the detailed information is not available to you directly. When the remote host is an OS 2200 host, TAS on that host writes a detailed error message to a file called DDN*SMTPMSG. Each message in the DDN*SMTPMSG file has a time and date stamp for identification purposes. The site administrator responsible for the host on which the error occurred can locate and read the error message by using a standard editor to search for the date and time that matches the date and time when you received the general error message on your local host. The following errors and their descriptions correspond to the errors in the DDN*SMTPMSG file: SMTP1890 DDP-PPC is currently handling the maximum number of processes possible. Please try again later. SMTP1895 There is currently not enough memory for DDP-PPC to execute. Please try again later. SMTP1900 PCCMASTER is not running. PPCMASTER is necessary to service remote requests. Please contact your System Administrator to start the PPCMASTER. SMTP1905 Communication with the remote host cannot be established because the transport network is down. Please report the problem to your System Administrator. SMTP1910 The TAS processor in your local CMS 1100 is not up. Please contact your System Administrator to bring up TAS. SMTP2200 DDP-PPC is not running. DDP-PPC is necessary for servicing remote mail requests. Please contact your system administrator to start DDP-PPC. SMTP2205 DDP-PPC is currently handling the maximum number of processes possible. SMTP2210 There is currently not enough memory for DDP-PPC to process this remote mail request. SMTP2215 MCP reported internal error number nn. Please report the problem to your System Administrator or contact your Unisys Representative. 3787 3239-101 B-1 Remote Host Error Messages B-2 SMTP2220 Communication with the remote mail host cannot be established because the transport network is down. Please report the problem to your System Administrator. SMTP2225 The DDP-PPC process in your local CMS 1100 is not up. Please contact your System Administrator to bring up DDP-PPC. SMTP2230 A transport network time-out has occurred. Please report the problem to your System Administrator. SMTP2235 An out-of-sequence event has been received from MCP. Please report the problem to your System Administrator or your Unisys Representative. SMTP2240 The DMS 1100 interface routine for mail has returned an unexpected status of xxx. Please report the problem to your System Administrator or contact your Unisys Representative. SMTP2245 A time-out has occurred waiting for the establishment of the mail listening post. Please report the problem to your System Administrator. SMTP2250 An error has been encountered starting a mail receiver run. The CS$ status is xxx. Please report the problem to your System Administrator. SMTP2255 CMS 1100 is not running. Please report the problem to your System Administrator. SMTP2260 The communications processor at the remote host is down. SMTP2265 A DMS 1100 internal error has occurred. Please report the problem to your System Administrator or contact your Unisys Representative. SMTP2275 You have attempted remote mail processing from a local-mail-only installation. SMTP2280 A DMS 1100 deadlock condition has occurred in the mail data base. Heavy contention exists for a mailbox, mail identifier, or a distribution list. Retry of the remote request at a later time, when the activity is down, should be successful. SMTP2285 There is currently not enough mail processor memory to allow this run to process. Please retry at a later time. SMTP2290 The maximum number of mail processor receiver mailboxes has been exceeded. SMTP2295 The conversation has been aborted by the other host. SMTP2300 The CMS 1100 Configuration on your local host is in error. Please report the problem to your System Administrator. SMTP2305 The connection with the remote host has been aborted due to a connection timeout. 3787 3239-101 Appendix C Special Considerations Several special considerations should be kept in mind when using mail: $ Relaying of mail is not supported. $ Forwarding of mail is not supported. $ The TURN mail command is not supported and is refused when received from a remote host. $ SEND, SOML, and SAML commands are accepted when received from a remote hosts, but are processed in the same way as the MAIL command. $ Any file specified in the PREPARE or SEND commands must contain ASCII (not Fieldata) text. $ If a SEND command is interrupted, a temporary mail item may remain in the user’s mailbox. These items should be deleted with the REMOVE command. $ When there is a high volume of incoming mail traffic, there should be an adequate number of receiver runs to process the items. It is suggested that you have one more run than the number of concurrent users. 3787 3239-101 C-1 Bibliography OS 2200 TCP/IP Application Services (TAS) COBOL Programming Guide (3787 3205). Unisys Corporation. OS 2200 TCP/IP Application Services (TAS) File Transfer Operations Guide (3787 3213). Unisys Corporation. OS 2200 TCP/IP Application Services (TAS) Implementation and Administration Guide (3787 3221). Unisys Corporation. OS 2200 Interactive Processing Facility (IPF 1100) Command Language Operations Guide (UP-9611). Unisys Corporation. OS 2200 Interactive Processing Facility (IPF 1100) EDIT 1100 Operations Guide (UP-9612). Unisys Corporation. OS 2200 Interactive Processing Facility (IPF 1100) User Assistance (UA 1100) Operations Guide (UP-9615). Unisys Corporation. OS 2200 TCP/IP Application Services (TAS) FORTRAN Programming Guide (4173 5135). Unisys Corporation. OS 2200 TCP/IP Application Services (TAS) C Language Programming Guide (4173 5135). Unisys Corporation. 3787 3239-101 Bibliography-1