1
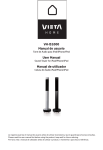
Turn in back on User Guide Evo Please read this manual carefully before using EVO and retain for future reference. Turn in back on content Important safety instruction 4 Included in the box 7 Identifying the parts 8 Main unit top view 8 Main unit bottom view 8 Remote control 9 Connections 10 Connect to FM antenna 10 Connect to external audio device 10 Connect power 10 Installing remote control battery 11 Preparing the remote control 11 Replace the remote control battery 11 Basic operation 12 Power12 Turning the system On 12 Turning the system Off 12 Set the clock 12 Play iPod,/iPhone/iPad 12 Pair a Bluetooth enabled device 13 Adjust sound Level 14 Adjust the brightness level of display 14 Tuning a FM station 14 Troubleshooting 15 Specification 16 Contacts 17 Notes 18 3 Turn in back on Important safety instruction Safety precautions The lightning flash with arrowhead symbol, within an equilateral triangle, is intended to alert the user to the presence of uninsulated “dangerous voltage” within the product’s enclosure, that may be of sufficient magnitude to constitute a risk of electric shock to persons. The exclamation point within an equilateral triangle is intended to alert the user to the presence of important operating and maintenance (servicing) instructions in the literature accompanying the appliance. The symbol for a CLASS II (double insulation) product. Warning TO REDUCE THE RISK OF FIRE OR ELECTRIC SHOCK DO NOT EXPOSE THIS APPARATUS TO LIQUID OR MOISTURE. Caution TO REDUCE THE RISK OF ELECTRIC SHOCK, DO NOT REMOVE COVER (OR BACK). NO USER-SERVICEABLE PARTS INSIDE. REFER SERVICING TO QUALIFIED SERVICE PERSONNEL. 4 Turn in back on Important Safety instruction Warning: It is important that you read and observe both the instructions in this manual and the instruction on the unit. Keep this manual for safe future reference. This unit was designed and manufactured with a view to providing maximum safety for the user. Incorrect use of the unit may cause an electric shock or fire. The protection devices built into this unit, will protect the user if the procedures below are observed in connection with installation, use and repair. This unit is fully electronic and contains no parts that can be repaired by the user. Do not remove the covers, risk of dangerous voltage. Only qualified technicians are allowed to repair the unit. Read the manual After unpacking the unit, please read the manual carefully and observe all the instructions given. Power supply Only the power supply indicated on the rating plate must be used for this unit. If you are not sure which power supply you have, please contact your local dealer. Earthing or polarisation If the plug cannot be inserted properly into the socket, or if the plug does not fit, the unit must not be used in your country. Ventilation The cabinet is provided with slots and openings to ensure ventilation and reliable operation, to protect the unit against overheating. Do not block or cover these openings. The openings must never be blocked, for instance by placing the unit on a bed, a sofa, or similar surface. Heat Do not place the unit near sources of heat such as radiators, ovens or other units that produce heat. Water and moisture. The unit must not be placed close to water, such as bathtub, wash basin, kitchen sink or washing machine, in a damp cellar or close to a swimming pool, etc. Cleaning Unplug the unit before cleaning. Do not use liquid detergents and aerosol cleaning agents. Use a dry cloth. Power cords Wiring must be organised to prevent people from stepping on the cables and to avoid pinching by objects placed on or beside them. Take special care around sockets and plug boxes and where the power cords leave the unit. Lightning Unplug the unit for additional protection during storms or when the unit is not used for prolonged periods. This will prevent damage to the unit from lightning and power surges. Penetration of objects and liquid Never push any foreign objects through the openings into the unit, as they may touch dangerous voltage points, or short-circuit parts and cause fire or an electric shock. Do not spill liquid onto the unit. Transportation Do not place the unit on unstable surfaces such as a trolley, stand, tripod, shelf or table. The unit may fall and injure persons or cause damage to the unit. The unit must be installed in accordance with the manufacturer’s instructions and by means of installation equipment recommended by the manufacturer. If the unit is placed on a trolley, the trolley must be moved very carefully. Sudden stops, unnecessary force and uneven surfaces may cause the trolley to turn over. 5 Turn in back on Important Safety instruction Loads Do not place heavy loads on the unit and do not steap on it. The load may fall and cause serious injury to persons or damage to the unit. Damage Unplug the unit and contact qualified technicians in the following cases: A) If the power cord or the plug is damaged. B) If liquid has been spilled on the unit or objects have fallen into the unit. C) If the unit has been exposed to liquid or moisture. D) If the unit does not work properly after adhering to the instructions in the operation manual. Only the settings described in the operation manual must be made, as incorrect setting may result in damage and often will make it difficult for a qualified technician to make the unit work properly again. E) If the unit has been dropped or damaged in any other way. F) When the operation of the unit changes drastically, the unit requires service. 6 Service Do not attempt to carry out any service work by yourself.By opening or removing the cover, you will be exposed to dangerous voltage or other hazards. Any service work should be carried out by qualified technicians. Recycling If at any time in the future you need to dispose of this product, please note that waste electrical products should not be disposed of with household waste. Please recycle where facilities exist. Check with your Local Authority or retailer for recycling advice. Approval This product complies with European Low Voltage and Electromagnetic Compatibility Directives when used and installed according to this instruction manual. Turn in back on Included in the box 1 x User Guide 1 x EVO 1 x Remote Control (battery included) Turn in back on User Guide Evo 1 x Power Cable 1 x Antenna Cable 7 Turn in back on Identifying the parts Main unit top view 1 SOURCE Press this button repeatedly to select a source. 2 OPEN Open the Dock for iPod/iPhone/iPad. 3 Press this button to turn on or switch to the Eco Power standby mode. 4 DOCK load an iPod/iPhone/iPad. 5 + VOLUME - Increase or decrease the volume. 1 2 4 5 3 6 Remote control sensor. 7 LED DISPLAY Show the current status. 8 POWER LIGHT Indicate power mode. 6 7 8 Main unit bottom view 1 FM antenna Connect to a FM antenna. 2 AUX IN Connect to an external audio device. 3 AC~ Power supply socket. 1 8 2 3 Turn in back on Identifying the parts Remote control 4 5 6 8 6 2 7 8 4 7 3 /SOUND Select a preset sound effect: Bass 1, Bass2 or Bass 3. SKIP skip to previous track. 1 Tune to a radio station by searching backward. Select previous radio station. Adjust brightness level in standby mode. / Start or pause playback. 3 Pair the Bluetooth enabled device. /MUTE Turn on the unit or switch to Eco Power standby 5 mode. Press and hold to turn off the product and switch to Eco Power standby mode. Mute or resume sound of the unit. /SOURCE Select a source. VOL+/VOL- Increase or decrease volume level. SKIP Skip to next track. Tune to a radio station by searching forward. Select next preset radio station. Adjust brightness level in standby mode. M/CLOCK Press and hold this button to set the clock. Press and hold this button to search radio stations automatically. Preset station for tuner. 2 1 RC-1 9 Turn in back on Connections Connect to FM antenna 1 2 Connect the supplied FM wire antenna to the FM antenna socket on the unit. If reception is poor, connect an outdoor antenna. Note: Before attaching a 75 ohm coaxial lead for outdoor antenna, disconnect the supplied FM wire antenna. Caution: To avoid noise, keep antenna away from the system, the connecting cord and the AC power cord. 1 2 Connect to external audio device You can also listen to an external audio device on this unit. Using AUX IN socket connect audio cables to the AUX IN sockets on back of the unit. The audio output sockets on external audio device. Note: Press SOURCE button on main unit or remote control to select AUX 1(AUX 2) for your connection. Connect power Caution: Risk of product damage! Ensure that the power supply voltage corresponds to the voltage printed on the back or the underside of the unit. Before connecting the AC power cord, ensure you have completed all other connections. Connect the AC power cord to the AC~ socket on the rear of the unit then plug into a wall socket. 10 Turn in back on Installing remote control battery Preparing the remote control The provided Remote Control allows the unit to be operated from a distance. Even if the Remote Control is operated within the effective range (6m), Remote Control operation may be impossible if there are any obstacles between the unit and the Remote Control. If the Remote Control is operated near other products which generate infrared rays, or if other Remote Control devices using infrared rays are used near the unit, it may operate incorrectly. Conversely, the other products may operate incorrectly. Replace the remote control battery 1 Use a needle to push the battery forward through the hole on rear of remote control. 2 Remove the old battery. Place a new CR2025 battery with correct polarity (+/-) as indicated. Then install the battery into the remote control. 1 2 Precautions concerning batteries • When the Remote Control is not to be used for a long time (more than a month), remove the battery from the Remote Control to prevent it from leaking. • If the batteries leak, wipe away the leakage inside the battery compartment and replace the batteries with new ones. • Do not use any batteries other than those specified. • Do not heat or disassemble batteries. Never throw them in fire or water. • Do not carry or store batteries with other metallic objects. Doing so could cause batteries to short circuit, leak or explode. • Never recharge a battery unless it is confirmed to be a rechargeable type. 11 Turn in back on Basic operation Power You can control all the functions on the main unit or remote control after connecting to power supply (called Standby Mode). Turning the system On Press the button to turn the system on from standby mode. Note: The set will switch to last selected source. Turning the system Off Press the button on main unit or press and hold the button on remote control to turn the system off and go to Eco mode. Note: Be sure to unplug the power cord from the outlet when the system is not in use for an extended period of time. Set the clock The built-in clock shows the correct time in the display panel. 1. In standby mode, press and hold the CLOCK button to activate the clock setting mode, hour indicator will blink. 2. Set the hour with the button or button. 3. Press CLOCK button to confirm, minute indicator will blink. 4. Set the minute with the button or button. 5. Press the CLOCK button to confirm, the built- in clock starts operating and the seconds start counting from 0. Play iPod/iPhone/iPad “Made for iPod” and “Made for iPhone,” and “Made for iPad,”mean that an electronic accessory has been designed to connect specifically to iPod, iPhone, or iPad, respectively, and has been certified by the developer to meet Apple performance standards. Apple is not responsible for the operation of this device or its compliance with safety and regulatory standards. Please note that the use of this accessory with iPod, iPhone or iPad may affect wireless performance. iPhone, iPod, iPod classic, iPod nano, iPod shuffle, and iPod touch are trademarks of Apple Inc., registered in the U.S. and other countries. iPad is trademarks of Apple Inc. You can listen to audio from iPod/iPhone/iPad on this unit. 1 Press the SOURCE button to select DOCK source then push down the OPEN area on top of the unit to rotate out the dock for iPod/iPhone/iPad. 2 Place an iPod/iPhone/iPad to the dock. 1 12 2 Turn in back on Basic operation Start to play the connected iPod/iPhone/iPad. • To pause/resume play, press the button. • To skip to a track, press the / buttons. • To search during play: Press and hold / buttons, then release to resume normal play. • To navigate through the menu: Hold and press M/CLOCK button, then press , to select, and press to confirm. Note: When you use , to navigate through the menu, the interval between each operation should be within some seconds, or it will return to normal function. Charge the iPod/iPhone/iPad The docked iPod/iPhone/iPad begins to charge automatically while the unit is connected to AC power. Remove the iPod/iPhone/iPad 1. Pull the iPod/iPhone/iPad out of the dock. 2. Raise up the buckle 1 , and rotate the dock module to original position 1 2 . 2 Playback using Bluetooth device You can listen to music from a Bluetooth enabled device on this unit. Pair a Bluetooth enabled device The first time you connect your Bluetooth device to the unit, you need to pair your device to the unit. 1. Turn on the Bluetooth function on your device. 2. Switch player’s source to Bluetooth, Display panel shows “BLU T”, then show “NO BT” (if there’s no Bluetooth device connected). 3. Press and hold “ / “ button on remote control for seconds to activate Bluetooth pairing mode, display panel shows “PAIR”. 4. Search for Bluetooth device with your device. 5. Select “BLUEPORT” in the pairing list. 6. Enter default password “0000”, if the pairing succeeds, display panel shows “BLU T” again. 7. To disconnect connection, turn off the Bluetooth function on your device or switch the unit to other source Note: The operational range between this player and a Bluetooth device is approximately 8 meters. Before you connect a Bluetooth device to this unit, familiarise yourself with the Bluetooth capabilities of the device. Compatibility with all Bluetooth devices is not guaranteed. Any obstacle between this unit and a Bluetooth device can reduce the operational range. Keep the unit away from any other electronic device that may cause interference. 13 Turn in back on Basic operation Tip: • If there’s an existing connection, hold and press “ / “ button on remote control for a few seconds and the unit will re-activate the pairing mode, the connection will be interrupted. • If there’s no other Bluetooth device paired with the unit in two minutes, the unit will return to previous connection. • The unit will also be disconnected when your device is moved beyond the operational range. • If you want to reconnect your device to the unit, place it within the operational range. • If the device is moved beyond the operational range, when it is brought back, please check if the device is still connected with the unit. • If they are connected, display panel shows “BLU T”. • If the connection is lost, display panel shows “NO BT”, follow the instruction above to pair your device to the player again. Listen to music from a Bluetooth Device If the connected Bluetooth device supports Advanced Audio Distribution Profile (A2DP), you can listen to the music stored on the device through the player. If the device also supports Audio Video Remote Control Profile (AVRCP), you can use the player’s remote control to play music stored on the device. 1. Pair your device with the player. 2. Start play music via your device (if it support A2DP). 3. Use supplied remote control to control play(if it support AVRCP). • To pause/resume play, press the “ / “button. • To skip to a track, press the / buttons. Adjust sound Level During play, press the +/- buttons to increase/decrease the volume level. Mute sound During play, press the MUTE button to mute or restore sound. Press this button again or -/+ buttons to cancel the effect. Adjust the brightness level of display In the standby mode, press the / button on the remote control to adjust the brightness level of display. Tuning a FM station 1. Ensure that you have connected and fully extended the FM antenna. Press the SOURCE button to select the TUNER source. 2. Press and hold the / buttons (until the digits move), then release the button, the frequency changes down or up automatically until a station is found. 3. Repeat steps 2-3 to tune more stations. Note: The unit will automatically switch from Stereo or MONO to receive the FM radio station. 14 Presetting Stations You can preset up to 20 FM stations. Program radio stations automatically press and hold the M/Clock button for some seconds to activate automatic programming. All available stations are programmed in the order of waveband reception strength. The first programed radio station is played automatically. Press the / buttons to skip to previous/next preset radio station. Note: If the system is unplugged or if a power failure occurs, the preset stations will not be erased. Turn in back on Troubleshooting To keep the warranty valid, never try to repair the system yourself. If you encounter problems when using this unit, check the following points before requesting service. No power • Ensure that the AC cord of the apparatus is connected properly. • Ensure that there is power at the AC outlet. • Press standby button to turn the unit on. Remote control does not work • Before you press any function button, first select the correct source. • Reduce the distance between the remote control and the unit. • Insert the battery with its polarities (+/-) aligned as indicated. • Replace the battery. • Aim the remote control directly at the sensor on the front of the unit. Poor radio reception • Increase the distance between the unit and your TV or VCR. • Fully extend the FM antenna. • Connect an outdoor FM antenna instead. Clock setting erased • Power has been interrupted or the power cord has been disconnected. • Reset the clock. Using iPhone to play music • While the iPhone is playing the music through the dock, there may be a chance that the iPhone may not receive a good signal to get the incoming call. No response from the unit • Disconnect and reconnect the AC power plug, then turn on the unit again. 15 Turn in back on Specification General Power Requirements AC 220-240V ~ 50/60Hz Power Consumption 100W Output Power 100W Total Harmonic Distortion 1%(1kHz, 1W ) Audio Input Sensitivity/Impedance 500mV/47kΩ Frequency Response 40Hz - 20,000Hz(±3dB) Unit Dimensions (D x H) Φ288 x 1192mm Speaker Front Impedance Rate Power Woofer Impedance Rate Power Remote Distance Angle 3Ω 2 x 25W 6Ω 50W 6m 30 º Tibo Ltd. reserves the rights to change the technical data and the design of the product without further notice as a result of further development. 16 Turn in back on Contacts TIBO Limited DSV House Maidstone road Milton Keynes MK10 0AJ Tel.: 0845 2711 906 E-mail: [email protected] Proof of purchase (attach your receipt here). 17 Turn in back on Notes 18 Turn in back on Turn in back on www.tibo-electronics.com