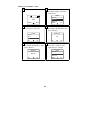
1
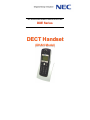
NEC INFRONTIA ISDN BUSINESS COMMUNICATION SYSTEM
DXE Series
DECT Handset
(DHAH Model)
Contents
FOR YOUR SAFETY ....................................................................................................... 4
BATTERY INFORMATION ........................................................................................... 7
Fitting the Battery Pack and Charger .............................................................................. 7
Charging & Operating Time............................................................................................ 8
HANDSET LAYOUT........................................................................................................ 9
Location of Controls........................................................................................................ 9
DISPLAY LAYOUT ....................................................................................................... 10
BASIC SET UP................................................................................................................ 11
Switching the Handset ON / OFF.................................................................................. 11
User Name Setting......................................................................................................... 11
Entering Alphabetical Characters.................................................................................. 12
Adjusting the Receiver/Speaker Volume ...................................................................... 13
Ringer Setting................................................................................................................ 13
Language Selection ....................................................................................................... 16
USING THE HANDSET................................................................................................. 17
Making Calls ................................................................................................................. 17
Answering Calls ............................................................................................................ 18
Mute/Handsfree ............................................................................................................. 19
Hold and Transfer.......................................................................................................... 20
Telephone Book (TelBook)........................................................................................... 21
Redial List
(
)................................................................................................... 27
Caller List...................................................................................................................... 30
Telephone Options ........................................................................................................ 34
SECURITY ...................................................................................................................... 35
Pin Number ................................................................................................................... 35
Key Pad Lock ................................................................................................................ 37
MENU CHART ............................................................................................................... 38
2
TELEPHONE SYSTEM FEATURES .......................................................................... 39
Abbreviated Dialling ..................................................................................................... 39
Account Code................................................................................................................ 39
Alarm Clock .................................................................................................................. 40
Break In ......................................................................................................................... 40
Call Forward.................................................................................................................. 40
Call Pickup .................................................................................................................... 41
Callback/Camp On ........................................................................................................ 41
Conference .................................................................................................................... 42
Department Group Calling ............................................................................................ 42
Dial Block ..................................................................................................................... 43
Do Not Disturb (DND).................................................................................................. 43
Doorphone..................................................................................................................... 43
Hold............................................................................................................................... 44
Night Service................................................................................................................. 45
Paging............................................................................................................................ 45
PC Based Voice Mail Connection ................................................................................. 46
Personal Code................................................................................................................ 47
Room Monitor ............................................................................................................... 48
Tandem Ring ................................................................................................................. 48
Toll Restriction.............................................................................................................. 49
Transfer ......................................................................................................................... 49
Trunk Call ..................................................................................................................... 49
Unsupervised Conference.............................................................................................. 51
Virtual Extension........................................................................................................... 51
Walking Toll Restriction ............................................................................................... 51
3
FOR YOUR SAFETY
-
Do not place the handset in locations where the temperature may rise, such as in
direct sunlight or near heating devices. If the handset is exposed to excessive
temperatures the handset is likely to suffer from deformation or discolouration.
The exposure the excessive temperatures may also lead to malfunction and in
extreme cases ignition of the internal circuitry.
-
Do not disassemble or modify the handset. If attempted this may lead to
malfunction of the handset and may lead to a fire hazard. Any attempt to
disassemble the handset will invalidate the warranty and repair of the handset
may be declined.
-
The handset charging unit should only be connected to 220-240VAC outlets.
-
Do not place the handset in a microwave oven or high pressure container. This
may cause heat ignition or explosion.
-
Do not touch any part of the equipment including the charging unit with wet
hands as this will present a risk of electric shock and will lead to the handset or
charger malfunctioning.
-
If the electric cord to the charger is damaged it must be replaced by your supplier
immediately.
-
Only the battery pack specifically designed for the handset can be used. Contact
the supplier for a replacement battery. Never dispose of the battery in a fire or
other heart source as this may lead to heat generation, ignition or explosion.
Never disable or modify the battery as this may lead to as this may lead to heat
generation, ignition or explosion.
-
Do not connect the contact points on the handset to anything which might short
circuit the contacts. Do not carry or store the battery pack with metal items such
as necklaces and coins which could lead to the battery contacts shorting. This
could cause heat generation, ignition or explosion.
-
If at any time the following are noticed while using the handset, charging, or
storing the battery pack remove the handset from the charger and do not use the
handset;o Offensive Smell
o Heat is generated by the battery pack or handset
o Discolouration of the handset or battery pack
o Deformation of the handset or battery pack
o Anything unusual
4
For Your Safety
(Cont’d)
-
If any liquid leaks from the handset or battery pack stop using the handset. Do
not expose the liquid or the handset or battery pack to any heat or fire. The
electrolyte may be ignite and result in fire or explosion.
-
If the any liquid from the battery pack or handset comes into contact with your
eyes rinse with cold clean water immediately and consult a doctor immediately
-
If any liquid leaked from the battery comes into contact with your skin or
clothing rinse immediately with cold water. Contact with your skin could lead to
a skin rash. If a rash appears and if there is any discomfort contact a doctor.
-
Never solder the battery pack. This will cause heat generation and may lead to
ignition or explosion
-
If the handset charging unit is damaged in any way disconnect the charger from
mains supply, taking care not to touch any damaged parts. Contact your supplier
for a replacement item.
-
Do not expose the handset or charger unit to steam or high humidity. Exposure to
these conditions may lead to malfunction of the handset or charger and may
result in a risk to electric shock
-
Abuse of the handset, such as throwing or dropping the handset may lead to
malfunction and cause heat generation, ignition or explosion
-
During thunder storms remove the charging unit from the mains supply as
lighting may result in the risk of electric shock and present a fire hazard.
5
For Your Safety
(Cont’d)
Note
Do not use the phone at the following places.
) In direct sunlight or near heating devices or boilers.
) Humid places or where the phone may be exposed to water, oil or chemicals.
) Dusty places or where iron powder or harmful gases can be produced.
) At places where the temperature drops below 5ºC.
) Where magnetism or electric wave may be received.
Do not leave the AC/DC adapter (power source) of the battery charger unplugged.
This will prevent charging of the handset.
Do not drop the phone or subject it to strong impact.
Use the phone at places with the ambient temperature from 5 to 35ºC, where it
will not be subject direct sunlight.
Do not use it in a bathroom. Do not soak it in water.
Do not expose it to running water.
When water splashes on the phone, wipe off with a dry cloth as soon as possible.
Do not leave the phone, if it has become wet, where the temperature can drop
under 0ºC.
When water drops on the holes of the receiver and microphone, wipe off before
use. (Otherwise the volume may be reduced.)
Do not put a phone in the battery charger if it has wet terminals.
When using the phone outside be careful not to expose it to rainfall.
Important Notice before using a DECT Handset
The DECT Handset uses wireless communication technology, therefore
sometimes some of the features / functions may not be activated due to the
environmental condition. We recommend that you do not use a DECT Handset for
essential communication such as ACD Agent, Guest Room Telephone (Hotel),
Client’s Telephone, for medical emergencies etc.
6
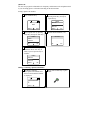
BATTERY INFORMATION
Fitting the Battery Pack and Charger
1. Push the back cover of the Handset upwards and insert the batteries.
Slide
Push
2. Make sure the battery contacts are correctly positioned. (Check battery polarity)
3. Replace the back cover correctly.
Slide
4. Connect the AC-DC Adapter plug to the socket on the left side of Handset Holder.
Handset Holder
(Left side view)
AC-DC Adapter
5. Put the AC-DC Adapter into the commercial AC socket.
6. Place the DECT Handset into the Handset Holder. The battery will automatically
start charging.
7
Charging & Operating Time
Charge the battery for 6-7 hours before using the DECT Handset for the first time.
This safety precaution extends the lifetime of your battery. The maximum
performance of the battery is only reached after 3 to 5 charging / discharging cycles.
Place the DECT Handset in the Holder regularly, in order to reach the optimum
battery charge.
Charging Time (to full capacity)
Call Time (fully charged)
Standby Time (fully charged)
6-7 hours
up to 9 hours
up to 130 hours
The charge level of the battery shall be indicated by the
The symbol has the following meaning.
in the Display.
80-100% charged
60-80% charged
40-60% charged
20-40% charged
0-20% charged
(Frame flashes) nearly discharged
Note : When the battery has been replaced, there is no charge level display until a
whole charge and discharge cycle has been completed.
When the battery capacity is nearly exhausted, you may hear 3 short beeps
repeated once a minute as a warning. If you are making a call at the time, you may
still have up to 5 minutes of call time before the handset switches itself off.
8
HANDSET LAYOUT
Location of Controls
LED ring
Lights up when there
is an incoming call.
Receiver
Display
Indicates quick
guidance
information, dialled
number and so on.
Volume Buttons
Used to adjust the
Receiver / Speaker
volume. (7 Levels)
Speaker (on the back)
Used for Handsfree
talking.
Soft Keys
Used for feature
setting.
Off/On-Hook Key
Used to off/on-hook
the call.
Scroll Keys
Used for menu
selection.
?
!
;
A
1
Clear Key
Used to return a
display indication to
the initial state.
G
H
B
C
I
J
P Q R
S
T
4
7
K
N
O
L
M
V
Z
W X Y
6
8
9
0
#
P
Headset Port
Used to connect the
Headset.
Recall Key
Used to transfer the
call.
Dial Keys
Used for numbers /
alphabets entry.
Microphone
Name
Display
Multi-Language
(Up to 10 languages)
Telephone Book
F
3
5
U
E
D
2
Description
96 × 48 dot, 5 Lines × 16 Characters
English, German, Spanish, French, Italy,
Dutch, Portuguese, Swedish, Danish, Norwegian
Up to 100 bins (32 digits, 32 characters)
Incoming Call History (Caller List) Up to 20 calls
Redial List
Up to 20 calls
Call Duration Timer
Yes
Handsfree
Yes
Headset Mode
Yes (Optional item is required.)
9
DISPLAY LAYOUT
Symbol/Text Line
ABC Corp 208
Mike
TelBook
Text Lines (3 Lines)
Menu
Soft Key Line
Symbol Line
Symbol
Description
Ringer off (Silence)
Signal strength is good if at least 2 bars are visible
On : active on a call,
Flashing : incoming call
Battery charging status (see Page 8)
Text Lines
The text lines display the information on the current call status or menu lists and
texts. In the idle state, it displays the system name with extension number and user
name.
Soft Key Line
Symbol
Description
Use to select the desired call from Redial List.
Move the cursor by pressing Scroll Keys in order to select the
desired call or menu.
Move the cursor by pressing Scroll Keys.
Illumination (Back-Light)
The display is automatically illuminated when there is an incoming call or when
you press a key. The illumination is switched off again automatically about 10 sec
after the last key was pressed.
10
BASIC SET UP
Switching the Handset ON / OFF
You can switch the handset ON by pressing Recall
Key. You switch it OFF by pressing Recall Key again
for more than 2 seconds in the idle state.
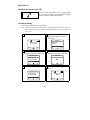
User Name Setting
You can register the name on your handset.
Note : The user name shall be used just for the identification of handset. The user
name is displayed on your handset during idle status, and is not registered to
the system.
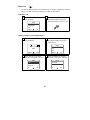
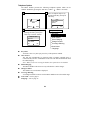
1 Press "Menu" Key.
2 Select "Telephone Option" by
pressing Scroll Key, then press
"OK" Key.
Menu
Caller Filter
System
Telephone Option
ABC Corp 208
No User Name
TelBook
OK
Menu
3 Select "User Name" by pressing
Scroll Key, then press "OK" Key.
4 Enter the user name by using dial
digit Keys, then press "OK" Key.
Telephone Option
Charge Counter
Coverage Warni
User Name
OK
User Name
MIKE
OK
Esc
5 Press "Esc" Key twice to finish.
Esc
6 The display shall be changed as
below.
Telephone Option
Charge Counter
Coverage Warni
User Name
OK
Esc
ABC Corp 208
MIKE
Esc
TelBook
11
Menu
Entering Alphabetical Characters
1
?
!
,
.
:
;
-
"
%
'
/
&
)
(
2
A
B
C
2
Ä
Å
À
Á
Ã
Æ
Ç
3
D
E
F
3
È
É
Ê
Ë
4
G
H
I
4
Ì
Í
Î
Ï
5
J
K
L
5
6
M
N
O
6
Ñ
Ö
Ò
Ó
Ô
Õ
Ø
7
P
Q
R
S
7
ß
8
T
U
V
8
Ü
Ù
Ú
Û
9
W
X
Y
Z
9
0
0
(Space)
1
Back Space Key
Move the cursor to back (1 character).
Move the cursor to forward (1 character).
Note : To obtain lowercase letters, the dial digit key has to be pressed
continuously until the character has been displayed. (about 1 sec)
12
Adjusting the Receiver/Speaker Volume
The 2 buttons on the side of the handset can be used
to adjust the Receiver / Speaker volume to any one of
7 levels. The volume level adjustment is shown on
the display.
Volume
Ringer Setting
Melody : Up to 30 melodies are provided, and you can assign a different melody to
distinguish between an internal and external call. (Melody 1 is not available).
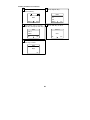
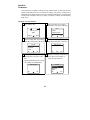
1 Press "Menu" Key.
2 Select "Ringer Settings" by
pressing Scroll Key, then press
"OK" Key.
Menu
Key Lock
Caller List
Ringer Settings
ABC Corp 208
MIKE
TelBook
OK
Menu
3 Select "Melody" by pressing
Scroll Key, then press "OK" Key.
Ringer Settings
Melody
Type
Device
OK
4 Select the call type by pressing
Scroll Key, then press "OK" Key.
Melody
Internal
External
Esc
OK
5 Select a melody by pressing
Scroll Key, then press "OK" Key.
Internal
Esc
6 Select the other call type to set a
melody, or press "Esc" Key to
return "Ringer Settings" menu.
Melody
Internal
External
3
OK
Esc
Esc
OK
13
Esc
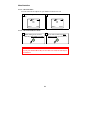
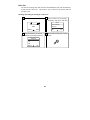
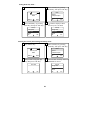
Ringer Type : You can select the type of ringer.
Full Melody
Silence
Chirp
Calls are signaled with the complete melody.
All ringer signals are off. In the idle state,
“Ringer Off” symbol shall be displayed.
Short melody, signaled only once.
1 Select "Type" by pressing Scroll
Key, then press "OK" Key.
2 Select the ringer type by pressing
Scroll Key.
Ringer Settings
Melody
Type
Device
OK
Type
Full Melody
Silence
Chirp
Esc
OK
3 Press "OK" Key to set.
" " shall be displayed.
4 Press "Esc" Key to return
"Ringer Settings" menu.
Type
Full Melody
Silence
Chirp
OK
Esc
Ringer Settings
Melody
Type
Device
Esc
OK
Esc
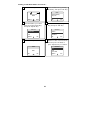
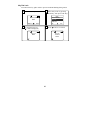
Volume : You can adjust the volume level of the ringer signal (7 levels).
1 Select "Volume" by pressing
Scroll Key, then press "OK" Key.
2 Press Scroll Key to adjust the
volume, then press "OK" Key.
Ringer Settings
Type
Device
Volume
OK
Volume
2
Esc
OK
14
Esc
Device : You can set / cancel the “Vibration” mode and “Buzzer” mode.
Note : If you cancel the “Buzzer” mode, the result becomes same as “Silence”
mode. In the idle state, “Ringer Off” symbol shall be displayed.
1 Select "Device" by pressing
Scroll Key, then press "OK" Key.
2 Select the mode by pressing
Scroll Key.
Ringer Settings
Melody
Type
Device
OK
Device
Buzzer
Vibrator
Esc
OK
3 Press "OK" Key to set / cancel.
" " shall be displayed if set.
4 Press "Esc" Key to return "Ringer
Settings" menu.
Device
Buzzer
Vibrator
OK
Esc
Ringer Settings
Melody
Type
Device
OK
Esc
Esc
15
Language Selection
You can select one of 10 languages from the List if necessary. (English / German /
Spanish / French / Italy / Dutch / Portuguese / Swedish / Danish / Norwegian)
1 Press "Menu" Key.
2 Select "Telephone Option" by
pressing Scroll Key, then press
"OK" Key.
Menu
Caller Filter
System
Telephone Option
OK
Esc
ABC Corp 208
MIKE
TelBook
Menu
3 Select "Language" by pressing
Scroll Key, then press "OK" Key.
4 Select the language by pressing
Scroll Key, then press "OK" Key.
Telephone Option
Coverage Warni
User Name
Language
OK
Language
Deutsch
English
Francais
Esc
OK
5 Press "Esc" Key twice to finish.
Telephone Option
Coverage Warni
User Name
Language
OK
Esc
16
Esc
USING THE HANDSET
Making Calls
To make an Intercom Call :
1 Press Off/On-Hook Key.
(Confirm Dial Tone.)
2 Dial the desired extension
number.
?
?
?
Note : Pre-set Dialling (Dial the number, then press Off/On-Hook Key) is also
possible.
To make an External Call :
1 Press Off/On-Hook Key.
(Confirm Dial Tone.)
2 Seize an idle Trunk.
9
3 Confirm Dial Tone. Dial the
desired telephone number.
?
?
?
Note 1 : The following trunk access codes may also be available. (It depends
on the system setting. Contact your supplier for the availability.)
- Specified Trunk Access (805 + Trunk No.)
- Trunk Group Access
(804+Trunk Group No.)
Note 2 : Pre-set Dialling (Dial the number, then press Off/On-Hook Key) is
also possible.
To redial a call :
1 (On-Hook Condition)
2 Select the desired number by
pressing Scroll Key, then press
Off/On-Hook Key to place a call.
Press Scroll Key.
Redial
204
90352825862
303
Options
Esc
17
Answering Calls
To answer an Incoming Call :
1 DECT Handset shall ring.
(The LED ring shall flash.)
2 Press Off/On-Hook Key to
answer a call.
209
Options
To reject an Incoming Call before answering :
1 DECT Handset shall ring. Press
"Option" Key.
2 Select "Reject" by pressing Scroll
Key, then press "OK" Key.
Options
Reject
Receive
209
Options
OK
Esc
Note :
The calling party on Intercom or
MSN/DDI shall receive Busy Tone.
3 The DECT Handset shall become
idle state.
ABC Corp 208
MIKE
TelBook
Menu
CLIP Indication
The CLIP (Telephone Number / Extension Number) shall be displayed when there
is an incoming call. If the delivered CLIP is stored in your Telephone Book, the
associated name shall be displayed. If there is an incoming call without CLIP,
“Unknown Number” message shall be displayed.
18
Mute/Handsfree
To set / cancel the Mute :
You can switch the microphone on your handset off whilst on a call.
1 (While talking) Press "Mute"
Key.
2 Press "Unmute" Key to cancel.
0:30
209
Options
0:30
209
Mute
Options
Unmute
To set / cancel the Handsfree Mode :
1 (While talking) Press Off/OnHook Key more than 2 seconds.
2 Press Off/On-Hook Key more
than 2 seconds again to cancel.
IMPORTANT !!
If you press Off/On-Hook Key for less than 2 seconds, the call may be
terminated.
19
Hold and Transfer
To hold / retrieve a call : (Exclusive Hold)
1 (While talking) Press Recall Key
to hold a call.
2 Press Recall Key again to retrieve
a call.
To transfer a call :
1 (While talking) Press Recall Key
to hold the call.
2 Dial the extension number you
want to transfer the call to.
?
3 <Screened Transfer>
Make announcement if the
dialled extension answers
?
?
4 Press Off/On-Hook Key to
complete the transfer.
<Unscreened Transfer>
Go to Step 4 immediately.
If the destination extension is busy
1 Press Off/On-Hook Key.
2 The Hold Recall shall appear
immediately. Press Off/On-Hook
Key to retrieve a original call.
20
Telephone Book (TelBook)
The DECT Handset has 100 speed dialling bins for personal use. Both the
telephone number and name can be stored so you can quickly place an outgoing
call without dialing the telephone number.
Storing a Telephone Number and Name :
1 Press "TelBook" Key.
2 Press "New" Key.
TelBook
ABC Corp 208
MIKE
TelBook
Empty
Menu
New
3 Dial telephone number you want
to store, then press "OK" Key.
Esc
4 Enter name you want to store,
then press "OK" Key.
Edit Number :
Edit Name :
_
_
OK
Esc
OK
5 The stored name shall be
displayed as below. Press "Esc"
Key to finish, or press "Option"
Key to continue.
6 Select "New" by pressing Scroll
Key, then press "OK" Key.
TelBook
Search
New
Edit
OK
TelBook
NEC-i EU
Option
Esc
Esc
Go to Step 3
Esc
Note 1 : If at least one bin has been stored, the storing operation shall be started
from “Step 5” after pressing “TelBook” Key in the idle state.
Note 2 : When storing an external number in the Telephone Book, prefix the
number with the digit 9 to access an external trunk line.
Note 3 : Refer to Page 12 for entering alphabetical characters.
21
Editing a stored number / name :
1 Press "TelBook" Key.
2 Select the desired name by
pressing Scroll Key, then press
"Option" Key.
TelBook
NEC-i EU
NEC-i Inc
NEC-i UK
ABC Corp 208
MIKE
TelBook
Menu
Options
3 Select "Edit" by pressing Scroll
Key, then press "OK" Key.
4 Edit the number by using Clear
Key and the dial digit Keys, then
press "OK" Key.
TelBook
Search
New
Edit
OK
Edit Number :
209_
OK
Esc
5 Edit the name by using Clear
Key and the dial digit Keys, then
press "OK" Key.
Esc
6 Return to TelBook menu. Press
"Esc" Key to finish, or press
"Option" Key to continue.
Edit Name :
TelBook
NEC-i EU
NEC-i Inc
NEC-i UK
NEC-i Inc_
OK
Esc
Esc
Options
Note : Refer to Page 12 for entering alphabetical characters.
22
Esc
Deleting an individual entry :
1 Press "TelBook" Key.
2 Select the desired name by
pressing Scroll Key, then press
"Option" Key.
TelBook
NEC-i EU
NEC-i Inc
NEC-i UK
Options
ABC Corp 208
MIKE
TelBook
Menu
3 Select "Delete" by pressing Scroll
Key, then press "OK" Key.
4 Press "OK" Key to delete.
TelBook
New
Edit
Delete
OK
Delete
Sure?
OK
Esc
5 Return to TelBook menu. Press
"Esc" Key to finish, or press
"Option" Key to continue.
TelBook
NEC-i EU
NEC-i UK
NEC-i US
Options
Esc
Esc
23
Esc
Deleting all stored entries :
1 Press "TelBook" Key.
2 Press "Option" Key.
TelBook
NEC-i EU
NEC-i Inc
NEC-i UK
Options
ABC Corp 208
MIKE
TelBook
Menu
3 Select "Delete All" by pressing
Scroll Key, then press "OK" Key.
TelBook
Edit
Delete
Delete All
OK
4 Press "OK" Key to delete.
Delete All
Sure?
OK
Esc
5 Return to TelBook menu. Press
"Esc" Key to finish, or press
"New" Key to restore.
TelBook
Empty
New
Esc
Esc
24
Esc
Making an outgoing call using the Telephone Book :
1 Press "TelBook" Key.
2 Select the desired destination by
pressing Scroll Key.
TelBook
NEC-i EU
NEC-i Inc
NEC-i UK
ABC Corp 208
MIKE
TelBook
Menu
Options
Esc
3 Press Off/On-Hook Key to place
a call.
Searching by name to make an outgoing call :
1 Press "TelBook" Key.
2 Press "Option" Key.
TelBook
NEC-i EU
NEC-i Inc
NEC-i UK
ABC Corp 208
MIKE
TelBook
Options
Menu
3 Select "Search" by pressing
Scroll Key, then press "OK" Key.
TelBook
Search
New
Edit
OK
4 Enter the 1st character of desired
name by using dial digit Key.
Search:S
NEC-i EU
NEC-i Inc
NEC-i UK
Esc
OK
5 The cursor shall automatically be
moved to applicable name.
Search:S
Robert
Sales DP
SC Office
OK
Esc
Esc
25
Esc
6 Press Off/On-Hook Key to place
a call, or search the desired name
by pressing Scroll Key.
Quick Call :
You can set up 9 Quick Call Numbers for frequently called names in the Telephone Book
so you can simply place a call without searching for the desired name.
Storing a Quick Call Number :
1 Press "TelBook" Key.
2 Select the desired name by
pressing Scroll Key, then press
"Option" Key.
TelBook
NEC-i EU
NEC-i JP
NEC-i US
Options
ABC Corp 208
MIKE
TelBook
Menu
3 Select "Quick Call" by pressing
Scroll Key, then press "OK" Key.
TelBook
Delete
Delete All
Quick Call
OK
Esc
4 Dial the desired number (1-9).
Quick Call
_
OK
Esc
Esc
5 Quick Call Number is displayed
with name. Press "Esc" Key to
finish, or press "Option" Key to
continue.
TelBook
NEC-i EU
1 NEC-i JP
NEC-i US
Options
Esc
Making a call using a Quick Call number :
1 (On-Hook Condition)
2 Press Off/On-Hook Key to place
Press Quick Call Number more
a call.
than 2 seconds until the Number
is displayed.
9035282586
2
Options
26
Redial List (
)
The last 20 dialled numbers will automatically be stored in a Redial List making it
easy to view and redial without having to re-enter the full number.
To Redial a call:
1 (On-Hook Condition)
2 Select the desired number by
pressing Scroll Key, then press
Off/On-Hook Key to place a call.
Press Scroll Key.
Redial
204
90352825862
303
Options
Esc
Adding a number to the Telephone Book :
1 (On-Hook Condition)
Press Scroll Key.
2 Select the desired number by
pressing Scroll Key, then press
"Option" Key.
Redial
90352825862
204
303
ABC Corp 208
MIKE
TelBook
Options
Menu
3 Select "Add To" by pressing
Scroll Key, then press "OK" Key.
Redial
Add To
Delete
Delete All
OK
Esc
4 Select "TelBook" by pressing
Scroll Key, then press "OK" Key.
Add To
Caller Filter
TelBook
Esc
OK
27
Esc
5 Edit the number if necessary,
then press "OK" Key.
6 Edit the name by using dial digit
Keys, then press "OK" Key.
Edit Number :
Edit Name :
90352825862_
NEC-i JP_
OK
Esc
OK
Esc
7 The stored name shall be
displayed. Press "Esc" Key to
finish, or press "Option" Key to
continue TelBook menu.
Deleting an individual number from the list :
1 (On-Hook Condition)
Press Scroll Key.
2 Select the number you want to
delete by pressing Scroll Key,
then press "Option" Key.
Redial
0352825862
201
330
Options
ABC Corp 208
MIKE
TelBook
Menu
3 Select "Delete" by pressing Scroll
Key, then press "OK" Key.
Redial
Add To
Delete
Delete All
OK
4 Press "OK" Key to delete.
Delete
Sure?
OK
Esc
5 Return to Redial menu. Press
"Esc" Key to finish, or press
"Options" Key to continue.
Redial
201
330
031112222
Options
Esc
Esc
28
Esc
Deleting all numbers from the list :
1 (On-Hook Condition)
Press Scroll Key.
2 Press "Option" Key.
Redial
0352825862
201
330
ABC Corp 208
MIKE
TelBook
Menu
Options
3 Select "Delete All" by pressing
Scroll Key, then press "OK" Key.
Redial
Add To
Delete
Delete All
OK
Esc
4 Press "OK" Key to delete.
Delete All
Sure?
Esc
OK
5 Return to Redial menu. Press
"Esc" Key to finish.
Redial
Empty
Esc
29
Esc
Caller List
The last 20 incoming calls (both answered and abandoned calls) will automatically
be stored in the Caller List. This makes it easy to check for any missed calls and
to return a call.
Checking and calling back using the Caller List :
1 Press "Menu" Key.
2 Select "Caller List" by pressing
Scroll Key, then press "OK" Key.
Menu
Call Forwarding
Key Lock
Caller List
ABC Corp 208
MIKE
TelBook
OK
Menu
3 Select the number you want to
callback by pressing Scroll Key.
4 Press Off/On-Hook Key to place
a call.
Caller List
202
201
330
Options
Esc
Esc
30
Adding a number to the Telephone Book :
1 Press "Menu" Key.
2 Select "Caller List" by pressing
Scroll Key, then press "OK" Key.
Menu
Call Forwarding
Key Lock
Caller List
ABC Corp 208
MIKE
TelBook
Menu
OK
3 Select the number you want to
transfer by pressing Scroll Key,
then press "Option" Key.
Esc
4 Select "Add To" by pressing
Scroll Key, then press "OK" Key.
Caller List
0352825862
201
330
Options
Esc
Caller List
Add To
Delete
Delete All
OK
Esc
5 Select "TelBook" by pressing
Scroll Key, then press "OK" Key.
6 Edit the number if necessary, then
press "OK" Key.
Add To
Caller Filter
TelBook
OK
Edit Number :
90352825862_
Esc
OK
7 Edit the name by using Ten Keys,
then press "OK" Key.
8 The stored name shall be
displayed on TelBook menu.
Press "Esc" Key to finish, or
press "Option" Key to continue
TelBook menu.
Edit Name :
NEC-i JP_
OK
Esc
Esc
Note 1 : When adding an external number to the Telephone Book, edit the
number to prefix with the digit 9 for an external trunk line.
Note 2 : Refer to Page 12 for entering alphabetical characters.
31
Deleting an individual number from the list :
1 Press "Menu" Key.
2 Select "Caller List" by pressing
Scroll Key, then press "OK" Key.
Menu
Call Forwarding
Key Lock
Caller List
ABC Corp 208
MIKE
TelBook
Menu
OK
3 Select the number you want to
delete by pressing Scroll Key,
then press "Option" Key.
4 Select "Delete" by pressing Scroll
Key, then press "OK" Key.
Caller List
0352825862
201
330
Options
Esc
Caller List
Add To
Delete
Delete All
OK
Esc
5 Press "OK" Key to delete.
6 Return to Caller List menu. Press
"Esc" Key twice to finish, or
press "Options" Key to continue.
Delete
Caller List
201
330
031112222
Options
Esc
Sure?
OK
Esc
Esc
32
Deleting all numbers from the list :
1 Press "Menu" Key.
2 Select "Caller List" by pressing
Scroll Key, then press "OK" Key.
Menu
Call Forwarding
Key Lock
Caller List
ABC Corp 208
MIKE
TelBook
Menu
OK
3 Press "Options" Key.
4 Select "Delete All" by pressing
Scroll Key, then press "OK" Key.
Caller List
0352825862
201
330
Options
Esc
Caller List
Add To
Delete
Delete All
OK
Esc
5 Press "OK" Key to delete.
OK
Esc
6 Return to Caller List menu. Press
"Esc" Key to finish.
Delete All
Caller List
Sure?
Empty
Esc
Esc
33
Telephone Options
The DECT handset provides the following Telephone Options which can be
enabled / disabled by pressing the “OK” Key. (enable :
, disable : No mark)
1 Press "Menu" Key.
2 Select "Telephone Option" by
pressing Scroll Key, then press
"OK" Key.
Menu
Caller Filter
System
Telephone Option
OK
Esc
ABC Corp 208
MIKE
TelBook
Menu
3 Select the desired option by
pressing Scroll Key, then press
"OK" Key to enable / disable.
Telephone Option
Key Click
Alarm (No Service)
Auto Answer
Silent Charging
Charge Counter
Coverage Warning
User Name
Language
Telephone Option
Key Click
Alarm
Auto Answer
OK
Esc
Key Click
You hear a tone every time you press a key if this option is enabled.
Auto Answer
The call will automatically be answered when a headset (optional item) is
connected and you have set Handsfree mode. The call shall be terminated when
the caller hangs up.
Note : When you are not wearing the headset, this option has to be disabled.
Silent Charging
The DECT Handset will not receive any calls while it is in the charger.
Charge Counter
The number of received units is displayed.
Coverage Warning
A warning tone shall be sent in case the DECT Handset leaves from radio range.
User Name – refer to page 11
Language – refer to page 16
34
SECURITY
Pin Number
You can protect your phone’s setting by using a PIN number. If within the Security
options, Read Only has been set, nobody can change your phone’s setting such as
Telephone Book, Ringer Setting and so on without the PIN number. A warning tone
will be heard if anybody does try to change your phone’s setting while Read Only
mode is set.
Changing your PIN number :
1 Press "Menu" Key.
2 Select "Security" by pressing
Scroll Key, then press "OK" Key.
Menu
System
Telephone Option
Security
ABC Corp 208
MIKE
TelBook
OK
Menu
3 Select "Change PIN" by pressing
Scroll Key, then press "OK" Key.
4 Dial old PIN (4 digits) using dial
digit Keys, then press "OK" Key.
Security
Change PIN
Read Only
Reset
OK
Enter Old PIN
_
Esc
OK
5 Dial a new PIN (4 digits) using
dial digit Keys, then press "OK"
Key.
(Same operation has to be carried
out 2 times for confirmation.)
Esc
6 Return to "Security" menu. Press
"Esc" Key twice to finish, or
select the other function.
Enter New PIN
Security
Change PIN
Read Only
Reset
_
OK
Esc
Esc
OK
Note : The default PIN is “0000”.
35
Esc
Setting Read Only mode :
1 Press "Menu" Key.
2 Select "Security" by pressing
Scroll Key, then press "OK" Key.
Menu
System
Telephone Option
Security
ABC Corp 208
MIKE
TelBook
Menu
OK
3 Select "Read Only" by pressing
Scroll Key, then press "OK" Key.
Security
Change PIN
Read Only
Reset
OK
Esc
4 " " shall be displayed. Press
"Esc" Key twice to finish.
Security
Change PIN
Read Only
Reset
OK
Esc
Esc
Entering the Security menu during Read Only mode :
1 Press "Menu" Key.
2 Select "Security" by pressing
Scroll Key, then press "OK" Key.
Menu
System
Telephone Option
Security
ABC Corp 208
MIKE
TelBook
OK
Menu
3 Dial your PIN using dial digit
Keys, then press "OK" Key.
4 You can enter "Security" menu if
dialled PIN is correct.
Enter PIN
Security
Change PIN
Read Only
Reset
_
OK
Esc
Esc
OK
36
Esc
Key Pad Lock
You can lock the key pad in order to prevent accidental dialling during transit.
1 Press "Menu" Key.
2 Select "Key Lock" by pressing
Scroll Key, then press "OK" Key.
Menu
Call Forwarding
Key Lock
Caller List
ABC Corp 208
MIKE
TelBook
Menu
OK
3 Key Lock has been set.
(" " shall be displayed.)
4 Press "
Key Lock
MIKE
Esc
" and "#" to unlock.
Key Lock
To Unlock
Press #
37
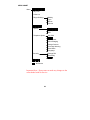
MENU CHART
Menu
Call Forwarding
Key Lock
Caller List
Ringer Settings
Melody
Type
Device
Volume
Caller Filter
System
Configuration
Subscription
IPEI
Telephone Option
Key Click
Alarm
Auto Answer
Silent Charging
Charge Counter
Coverage Warning
User Name
Language
Security
Change PIN
Read Only
Reset
Repark
No Service
Important Note : Do not enter or make any changes to the
areas shaded with No Service.
38
TELEPHONE SYSTEM FEATURES
The DECT handset can access many of the DXE telephone system features using
service codes.
Abbreviated Dialling
There may be a block of frequently dialled numbers stored with abbreviated codes
(abdials) to speed up access. These codes may be split into common or group
abdials as necessary within system programming.
To dial an abdial
Press the Off/On-Hook key
Dial 813 for a common or 814 for a group abdial
Dial the abdial code number
Account Code
These are user dialled codes that may be optionally entered at any time during a call or
you may be forced to enter a code in order to make an external call.
To enter an optional account code
Press the Recall key
Dial 891 and the account code (max 8 digits)
Press the Recall key to continue talking
To enter a forced account code
Access an external line
Press the * key
Dial the account code (max 8 digits)
Press the * key
Dial the external number
39
Alarm Clock
You may set an alarm as a one-off (type 1) or to be repeated every day (type 2). The
alarm will not work if the DECT is out of area when the set time comes. To stop the
audible alarm, press the Off/On-Hook key twice.
To set/cancel
Press the Off/On-Hook key
Dial 827 and the alarm clock type (1 or 2)
To set dial the alarm clock time in the 24 hour clock
OR to cancel the alarm clock dial 9999
Press the Off/On-Hook key to finish
Break In
If you ring an extension and it is busy it may be possible to break in to the call and all
parties will hear and be able to speak.
To break in
The extension is busy
Dial 810
You are immediately into the call
Call Forward
You may wish to redirect your calls to another destination. There are different
conditions under which you can set a call forward, and one setup called tandem ring
allows a user to have two extensions that work as a single extension.
To set/cancel call forward
Press the Off/On-Hook key
Dial the call forwarding code as follows
842 for dual ring – calls ring at your own and the destination extension but not if
your phone is busy
843 for busy transfer – calls only forward when your phone is busy
844 for tandem ring – calls to either extension will ring both extensions or if
either is busy, busy tone shall be heard by the caller.
845 for unanswered call transfer – calls only forward on no reply at your phone
848 for call forward – all calls forward immediately to the destination extension
To set the call forward dial 1 and enter the destination extension number
Or to cancel dial 0
Press the Off/On-Hook key to finish
40
It is possible if the system is programmed, to allow the call forward condition to be
transferred to an external number - it must be stored as a common abbreviated dial.
To set external call forward
Press the Off/On-Hook key
Dial the all call forward code 848 and 1 to set
Dial 813 (access code for abbreviated dial) and the target abdial code
Press the Off/On-Hook key to finish
To cancel external call forward
Press the Off/On-Hook key
Dial 848 and 0 to cancel
Press the Off/On-Hook key to finish
Call Pickup
You may wish to intercept a call ringing at another extension, this is referred to as
pickup. You may enter a code to pickup a specific ringing extension or you may be
programmed into a pickup group and will pick up calls just for your group.
To pick up a call
Press the Off/On-Hook key and dial
867 for an extension within your pickup group or
715 and the extension number for a specific extension
You will intercept and be connected to the call.
Callback/Camp On
If the extension you dial is busy or does not reply, you may set up a callback so that
you are alerted as soon as they become available or once that extension is next used.
To set the Callback/Camp On
Dial 850 and listen for confirmation tone
Press the Off/On-Hook key
When you hear the recall tone alerting you that the extension is available
Press the Off/On-Hook key to finish
41
If you wish to cancel a callback
Press the Off/On-Hook key
Dial 870 and listen for confirmation tone
Press the Off/On-Hook key to finish
Conference
You may wish to setup a multi-party conversation, and the system may allow up to
eight parties to be connected (up to 7 external if on ISDN lines).
To set up a Conference
Connect to an internal or external call
Press the Recall key and then dial 826
Dial the extension to be added or place an external call
When the called party answers press the Recall key twice
To hold the parties in conference
Press the Recall key
DO NOT press the Off-On hook key
To return to the conference press the Recall key
Department Group Calling
You may be a member of a department group and you can opt to withdraw or rejoin
the group.
To withdraw/rejoin a department group
Press the Off/On-Hook key
Dial 750
Dial 1 to set or 0 to cancel
Press the Off/On-Hook key to finish
42
Dial Block
Using a password you can temporarily change the toll restriction (for dialling) set for
your extension.
To set/release Dial Block
Press the Off/On-Hook key
Dial 700
Enter your personal password (any 4 digits but must be same to set/release)
Dial 1 to set or 0 to cancel
Press the Off/On-Hook key to finish
Do Not Disturb (DND)
This feature allows you to block different types of calls to your phone so that you are
undisturbed by incoming calls or paging announcements.
To set/cancel DND
Press the Off/On-Hook key
Dial 847
Dial the DND code as follows
1 to block incoming external calls
2 to block internal calls and external calls being transferred unannounced
3 to block all incoming calls
4 to block any calls being forwarded to you
0 to cancel any DND
Listen for confirmation tone
Press the Off/On-Hook key to finish
Doorphone
A doorphone may be programmed to ring on your DECT handset and you may release
the doorlock and possibly forward the doorphone calls to an external number.
To answer a doorphone chime
Press the Off/On-Hook key
To release the doorlock whilst talking to the doorphone
Press the Recall key
43
To set external call forward for the doorphone
Press the Off/On-Hook key
Dial 822 and the doorphone number (1-8)
Dial the target abbreviated dial number
Press the Off/On-Hook key to finish
To cancel external call forward for the doorphone
Press the Off/On-Hook key
Dial 822 and 0 to cancel
Press the Off/On-Hook key to finish
Hold
There area different types of hold on the system. The type of hold already described
earlier in this guide is exclusive hold where the call can only be retrieved at the DECT
handset that placed the external call on hold.
To use Exclusive Hold
Press Recall key to hold
Press Recall key to retrieve call
To Park Hold a call
Press Recall key
Dial 831 and the park hold position number
Press Off/On-Hook key to finish
Use a paging call to make an announcement if appropriate
To retrieve a Park Held call
Press Off/On-Hook key
Dial 861 and the announced park hold position number
44
Night Service
The system may be programmed with up to eight night modes to enable calls to be
routed differently. Certain users may be permitted to change the system manually
from one night service mode to another.
To change the mode
Press the Off/On-Hook key
Dial 818 and the Night Service Password
Dial the night service code (0-7)
Confirmation tone shall be heard
0 : Day mode
4 : Day-2 mode
1 : Night mode
5 : Night-2 mode
2 : Midnight mode
6 : Midnight mode
3 : Rest mode
7 : Rest-2 mode
Press the Off/On-Hook key to finish
Paging
You may need to make an announcement over the loudspeakers of idle key telephones
and/or external equipment. Key telephones may be programmed into internal paging
groups (DECT handsets cannot receive paging calls) so that an announcement is sent
simultaneously to the telephones in the group.
To page an Internal group
Press the Off/On-Hook key
Dial 801 and the paging group number (0 for all calls, 01-16)
Make the announcement
Press the Off/On-Hook key to finish
To page an External group
Press the Off/On-Hook key
Dial 801 and the paging group number (0 for all calls, 1-8)
Make the announcement
Press the Off/On-Hook key to finish
45
To page both internal and external groups together
Press the Off/On-Hook key
Dial 751 and the external page group number (1-8)
Make the announcement
Press the Off/On-Hook key to finish
Even though you are unable to receive a paging call you are able to answer a paging
request
To answer (join) a Meet Me External Page
Press the Off/On-Hook key
Dial 865
Dial the announced external paging zone number (0-8)
To answer (join) a Meet Me Internal Page (if you are in the same paging group)
Press the Off/On-Hook key
Dial 863
To answer (join) a Meet Me Internal Page (if you are not in the same paging group)
Press the Off/On-Hook key
Dial 864 and the paging group number
PC Based Voice Mail Connection
Your system may have an optional voice mail system installed and you may have a mail
box for the DECT handset.
Message Waiting Indication
When you have a new message in your mail box you will hear interupted dial tone when
you press the Off/On-Hook key.
To listen to your messages
Press Off/On-Hook key
Dial voice mail pilot number OR 717 (
)
When voice mail answers follow the voice prompts to listen to new messages.
To set / cancel Call Forward to Voice Mail :
Press Off/On-Hook Key.
Dial Call Forwarding code.
843 (
) for Divert on Busy
845 (
) for Divert on Ring No Answer
848 (
) for All Call Forward
Dial 1 to set or dial 0 to cancel.
46
Dial the Pilot Number of Voice Mail.
Press Off/On-Hook Key to finish.
Note 1 : In case of cancel operation, Step-4 operation shall be skipped.
Note 2 : If you want to set Busy/No Answer mode, you have to set the Busy mode first,
then set the No Answer mode.
To access to the Voice Mail :
Press Off/On-Hook Key.
Dial the Pilot Number for Voice Mail.
Transferring a call to someone else’s mail box :
Place the caller on hold by pressing Recall Key.
Dial Voice Mail Pilot Number.
Dial the required extension number. (Confirmation tone shall be heard.)
Press Off/On-Hook Key to finish.
OR
Place the caller on hold by pressing Recall Key.
Dial the required extension number
Dial 717 to go to the extension’s mail box
Press Off/On-Hook to finish
To record the conversation (External call only) :
Make conversation with outside caller.
Press Recall Key and Dial 754.
To stop the recording :
Press Recall Key twice.
OR
Press Off/On-Hook Key to finish the recording.
Personal Code
To place an outgoing call with Personal Code :
Press Off/On-Hook Key.
Dial 752 (
) and 4 digits Personal Code.
Seize an idle trunk then place an outgoing call.
47
Room Monitor
To activate Room Monitor (at the monitored extension) :
Press Off/On-Hook Key.
Dial 770 (
).
Dial 1.
Dial the monitoring extension number. (Confirmation tone shall be heard.)
Set the transmitter of the handset toward the room.
To activate Room Monitor (at the monitoring extension) :
Press Off/On-Hook Key.
Dial 770 (
).
Dial 2.
Dial the monitored extension number. (Confirmation tone shall be heard.)
Keep lifting the handset.
Note : The monitored DECT handset has to be set first, then the monitoring DECT
handset has to be set.
To cancel the Room Monitor (at both extension) :
Press Off/On-Hook Key to finish.
Tandem Ring
To set the Tandem Ring :
Press Off/On-Hook Key.
Dial 844 (
).
Dial 1 to set.
Dial the destination extension number. (Confirmation tone shall be heard.)
Press Off/On-Hook Key to finish.
To cancel the Tandem Ring :
Press Off/On-Hook Key.
Dial 844 (
).
Dial 0 to cancel. (Confirmation tone shall be heard.)
Press Off/On-Hook Key to finish.
48
Toll Restriction
To temporarily override a restricted extension's Toll Restriction :
Press Off/On-Hook Key.
Dial 875 (
).
Dial override password.
Seize an idle Trunk then dial the desired telephone number.
Transfer
To Transfer a Trunk / Intercom call to the other extension :
While conversation with the other party.
Press Recall Key.
Dial the desired extension number.
Make announcement then press Off/On-Hook Key to finish. (Screened Transfer)
OR
Press Off/On-Hook Key without announcement. (Unscreened Transfer)
Note 1: If the destination extension does not answer, or is busy status, you can dial
the other extension number to transfer the call or press Recall Key to
retrieve the held call.
Note 2 : If the destination extension is busy status but you have done Unscreened
Transfer, the transferred call shall immediately be returned.
Note 3 : If you have done Unscreened Transfer but the destination extension does not
answer, the transferred call shall be returned to you after pre-programmed
period has over. (Recall)
Trunk Call
To answer an incoming call from outside :
Press Off/On-Hook Key. (Automatic answer to ringing Trunk.)
To place an outgoing call over a specific Trunk :
Press Off/On-Hook Key.
Dial 805 (
) and Trunk number. (01-52)
Confirm the Dial Tone then dial the desired telephone number.
To place an outgoing call over a Trunk Group :
Press Off/On-Hook Key.
Dial 804 (
) and Group number. (01-32)
Confirm the Dial Tone then dial the desired telephone number.
49
Note : If less than 10 groups are available, only 1 digit Group No. shall be entered at
Step-2.
To place an outgoing call by using Trunk Group Routing :
Press Off/On-Hook Key.
Dial 9 (
) [Trunk Group Routing Code].
Confirm the Dial Tone then dial the desired telephone number.
To place an outgoing call by using Individual Trunk Group Routing :
Press Off/On-Hook Key.
Dial the Individual Trunk Group Routing code.
Confirm the Dial Tone then dial the desired telephone number.
To place an outgoing call by using F-Route Service :
Press Off/On-Hook Key.
Dial F-Route Number.
To place an outgoing call by using Multi-Carrier Indirect Access (LCR) Service :
Place an outgoing call. (The system shall automatically use LCR service.)
Trunk Outgoing Call via Interconnection Line :
Press Off/On-Hook Key.
Dial 866 (
) and Network ID No. (1-8).
To set the Trunk Port Disable :
Press Off/On-Hook Key.
Dial 745 (
).
Dial disabling trunk port number. (01-52)
Dial 1 to set.
Press Off/On-Hook Key to finish.
To release the Trunk Port Disable :
Press Off/On-Hook Key.
Dial 745 (
).
Dial disabled trunk port number. (01-52)
Dial 0 to release.
Press Off/On-Hook Key to finish.
50
To disconnect the busy status Trunk :
Press Off/On-Hook Key.
Dial 805 (
) and Trunk number. (01-52) (Busy tone shall be heard.)
Dial 724 (
).
Press Off/On-Hook Key to finish.
Unsupervised Conference
To establish the Unsupervised Conference :
Make conversation with 1st Line.
Press Recall Key to hold the 1st Line.
Seize 2nd Line then place an outgoing call.
Make conversation with 2nd Line.
Press Off/On-Hook Key to establish the Unsupervised Conference.
Virtual Extension
To place a call to a Virtual Extension Number :
Press Off/On-Hook Key.
Dial Virtual Extension number.
Walking Toll Restriction
To place an outgoing call by using Walking Toll Restriction :
Press Off/On-Hook Key.
Dial 763 (
).
Dial your Password. (6 digits fixed)
Note : If the dialed password is correct, dial tone shall be heard. If the dialed
password is incorrect, warning tone shall be heard.
Seize an idle Trunk.
Dial the telephone number.
51
Nothing contained in this document shall be deemed to be, and this document does not constitute,
a warranty of, or representation with respect to, any of the equipment covered. This document is
subject to change without notice and NEC Infrontia Corporation has no obligation to provide any
updates or corrections to this document. Further, NEC Infrontia Corporation also reserves the
right, without prior notice, to make changes in equipment design or components as it deems
appropriate.
No representation is made that this document is complete or accurate in all respects and NEC
Infrontia Corporation shall not be liable for any errors or omissions. In no event shall NEC
Infrontia Corporation be liable for any incidental or consequential damages in connection with
the use of this document.
This document shall not provide the basis for any contract without the written permission of the
NEC Infrontia Corporation.
No part of this document may be photocopied or reproduced without prior written consent of
NEC Infrontia Corporation
Part Code Number : NKUK-423
52
Issue 1