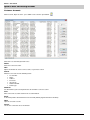
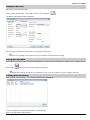
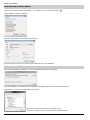
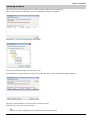
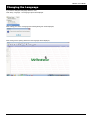
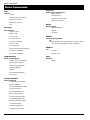
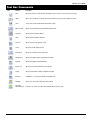
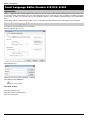
1
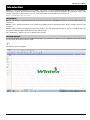
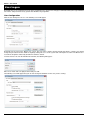
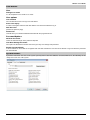
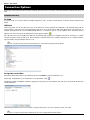
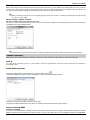
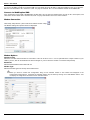
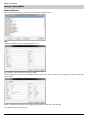
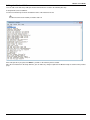
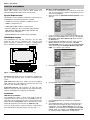
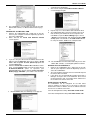
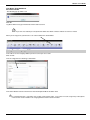
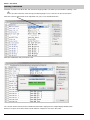
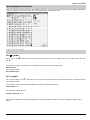
WINTEX ™ User Guide INS549-3 Wintex™ User Guide Contents Contents .................................................................... 2 Event Log ................................................................. 38 Introduction .............................................................. 3 Remote/Anti Code Reset ......................................... 39 Installation .................................................................. 3 Online Printer ........................................................... 40 Starting Wintex ........................................................... 3 Changing the Language ........................................ 41 User Logon ................................................................ 4 Menu Commands ................................................... 42 User Details ................................................................ 5 Tool Bar Commands .............................................. 43 System Access ........................................................... 5 Panel Language Editor Premier 412/816/ & 832 . 44 Panel Access .............................................................. 6 Introduction .............................................................. 44 Accounts/Customers ............................................... 7 Enable Panel Language Editor ............................... 44 Creating a New Account/Customer .......................... 7 Using Panel Language Editor ................................. 45 Customer Details ........................................................ 7 Starting Translation ................................................. 46 Panel Details ............................................................... 8 Inserting Special Characters .................................. 47 Panel Information ....................................................... 9 IMPORTANT NOTES ................................................ 47 Open or Alter an Existing Account.......................... 10 Updating the Panel Language ................................ 48 Editing an Account ................................................... 11 Language Manager for Wintex™ ........................... 49 Saving Account Data ................................................ 11 Viewing Account History.......................................... 11 Print Account & Panel Details ................................. 12 Backup Account Data............................................... 12 Restoring accounts .................................................. 13 Starting Translation ................................................. 49 Creating a New Language .DLL file ........................ 50 Notes for Translation............................................... 50 Future Versions of WINTEX™ .................................. 50 Connection Options ............................................... 14 Connect Locally ........................................................ 14 Connect Remotely .................................................... 15 Modem Information .................................................. 17 Adding a New Modem .............................................. 18 Texecom USB Modem.............................................. 20 Wintex Options ......................................................... 22 Programming the Control Panel ........................... 23 Elite 640..................................................................... 23 Zones & Attributes.................................................... 23 Programming Areas/Partitions Timers & Options . 25 Programming Global System Options .................... 26 Remote Keypad Options .......................................... 27 Programming Expander Options............................. 28 Programming Outputs.............................................. 29 Programming Communications Options ................ 30 Programming Users ................................................. 31 Connecting with the control panel ....................... 32 Waiting for the Panel to Call .................................... 32 Requesting a Call Back............................................ 32 Disconnecting from the Control Panel ................... 32 Connecting to Ricochet™ Monitor (V6.16 & Later only)........................................................................... 32 Sending & Receiving Configuration Data ............ 33 Receiving .................................................................. 33 Sending ..................................................................... 35 Diagnostics ............................................................. 37 Elite 640..................................................................... 37 Online Status & Control ........................................... 37 Online Keypad .......................................................... 38 2 INS549-3 Wintex™ User Guide Introduction Wintex™ is a user-friendly Windows™ based software, designed for use with the Premier & Premier Elite Series of control panels, and provides complete upload/ download and systems diagnostics for total control and flexibility. The programme can be used whether connected to a Control Panel or not, to create panel profiles and add and delete customers etc... Windows is a registered trademark of Microsoft Corporation Installation Wintex™ will function on any Windows PC with an operating system that is XP/2000/Vista & Seven. 32 Bit and 64Bit systems are supported. Wintex™ can be downloaded from the Texecom website providing you are a Registered Installer. Please visit http://www.texe.com to register. Wintex™ will be installed in C:\Programme Files\Texecom where C: is the designated hard drive. In the case of 64 bit systems, the programme will be installed in C:\Programme Files (x86)\Texecom. Once installation is complete you can use Wintex for the first time. Starting Wintex To open the program click on the Icon created during setup, if you chose not to create an Icon the application can be started from the programme list under the Texecom folder. The following window will appear. INS549-3 3 Wintex™ User Guide User Logon By default there is no requirement to log on to the programme once opened: it is strongly recommended that you assign individual user names and passwords for any person who will utilise the programme. User Configuration Click on User Change User Access. The following screen will appear. By default you are now on the Master user screen. The user name is Master and the default password is 123456. You should change the password from the default as anybody could gain access to the system and control panel accounts. The Master User account has all options enabled by default and cannot be deleted. To add a new user click on the Add New User button, the following will appear:- Enter a user name and a six digit password and press OK. The following screen will appear and you can now change the attributes for the user you are creating. 4 INS549-3 Wintex™ User Guide User Details User Change user name use the dropdown list to edit the users name User options User enabled If this is selected the user can log in and use Wintex Enable User expiry If a date is set against said user after this date the user will not be allowed to log in. Add New User (Please see previous page) Delete User This will allow you to delete all details associated with the programmed user. Password Options Minimum Password This is the minimum length of the password required User Must Change Password If this option is selected the next time the user logs in they must change their password Enable Password Expiry If this is selected on and a date is set against said user after this date the user will not be allowed to log in because the password has been deleted. System Access If you have more than one user on the system you may want to alter the attributes associated with users, the following can be changed for each user of the system. INS549-3 5 Wintex™ User Guide Panel Access As with System Access, you can customise each user to allow or deny access to any of the listed Panel Access Options. Once you have completed all of the required changes click OK. The next time you open Wintex™ you will be prompted to log on. 6 INS549-3 Wintex™ User Guide Accounts/Customers Creating a New Account/Customer Click Accounts, New Account...press CTRL+N or press the new button. The New Account Details window is displayed Customer Details It is possible to create a new account with just an Account Ref, however it is recommended you include as much detail here as possible, this will make it easier to manage the database as it grows. File Name This will be generated from the Account Ref Account Reference. This can contain up to 25 characters in length. Name Enter the Name of the customer. Address Enter the customer Address details. Postcode Enter the Post Code Tel No: Enter the customer contact telephone number Fax: Enter the Fax number Notes: Enter any other customer information (E.G. site specific information) INS549-3 7 Wintex™ User Guide Panel Details Click on the Panel Details tab to enter the panel information. Up to V6 V6.16 & Later Panel Details Panel Type: From the drop down list, select the Control Panel type that is fitted at site. Software Version From the drop down list, select the software version that is fitted in the Control Panel. If you do not know the version select the latest (highest number). The first time you connect with the Control Panel, Wintex will prompt you if the software version in the account mismatches the version in the Control Panel. If your panel software version is higher than that available in the drop down list, make sure you have the latest version of Wintex™ installed. Serial Number The Serial Number box will initially be blank, this will be automatically updated the first time you connect with the Control Panel. UDL Password Enter the UDL passcode that is programmed in the Control Panel at site. If one has not been set, it will be the last 4 digits of the engineers code. this must be programmed Date Installed Enter the date that the Control Panel was installed (optional) LCD Display Type select the Keypad type that is fitted at site (standard or International) Include Zone Text on Send/Receive Check this box to send/receive all zone text Include All Zones on Send/Receive In the Panel Tel No. entry box, enter the telephone number (including STD code) for the line that the Control Panel is connected. If you are using the USB-Com Module/IP module you may leave this blank. Include All Radio Config when Sending Data* If Wireless Technology is fitted to the control panel check this box Include All Ricochet Config when Sending Data (V6.13 & Later) Check this box to SEND data the panel when using Ricochet™MT2 Technology on Premier Elite panels 8 *If this box is not checked and Ricochet™ devices are installed no data will show in Wintex INS549-3 Wintex™ User Guide Panel Modem Details Panel Modem Type From the drop down list, select the modem type that is fitted to the control panel if none is fitted please leave as com300 Panel Telephone Number enter the telephone number (including STD code) for the line that the Control Panel is connected to. If you are using the USB-Com /IP module you may leave this blank. Always Connect at 300 baud If there is a RedCare STU connected to the same telephone line as the Control Panel then make sure the Always Connect at 300 Baud box has a tick in it (click on it to toggle). This will force PC modem to communicate at 300 Baud, which is the speed that RedCARE recommend to ensure that the modems do not corrupt the STU data. If this option is "greyed" out the Control Panel is only capable of communicating at 300 Baud. Enable 2-Call Answer Phone Defeat If the Control Panel has been programmed to uses the 2-Call Answer phone defeat option (this is a default parameter), then make sure the Enable 2-Call Answer Phone Defeat box has a tick in it (click on it to toggle). This will force the PC modem to dial out wait then hang up after a pre-programmed delay then dial out again. The Control Panel will only pick up the call on the second time the PC dials out. This allows the Control Panel to be used on the same telephone line as other equipment e.g. fax machines, telephones and answer phones. To program the 2-Call Answer Phone Defeat Delay, see Modem Configuration on page 16 Radio Pad Details Radio-Pad NUA If the panel is fitted with a Radio-Pad and you have a Radio-Pad connected to your PC you can communicate with the panel using the Paknet network. Enter the NUA number of the Radio-Pad that is fitted to the panel in the Radio-Pad NUA input box. Radio-Pad NES Enter the NES details for the Radio-Pad. Network Details Host Address If the panel is fitted with a COM-IP or a COM-GSM using a fixed IP SIM card, fill in the IP address Host Port Fill in the Port number associated with the IP address from above. Connect via WebWayOne SMG If the panel is using a WebWayOne or Emizon 21 module the check this box. Panel Information Panel Information Shows details of the installed panel. Software History Shows details of major changes to the Control Panels firmware, and the relevant release number. Click OK to save the account details, this account is now open and you can alter the programming parameters of the control panel. INS549-3 9 Wintex™ User Guide Open or Alter an Existing Account Customer Accounts Click Accounts, Open Account... press CRTL+O or select the open button. Click on the account that you want to use. Delete delete the selected account. New Opens the window to create a new account, see previous section. Search Allows free text search of the following fields:• • • • • • • Account Ref Name Address Postcode Site Tel No Radio-Pad NUA Panel Type Show All Use this button if your search parameters do not find the correct account Print Prints a list of the accounts shown in the account window. Email to send the profile of the selected account via email (default program Microsoft™ Outlook) Open open the selected account. Cancel cancels the action and closes the window 10 INS549-3 Wintex™ User Guide Editing an Account Open the Account you wish to Edit. Click Accounts; Edit Account... press CTRL+E or press the edit button. The Edit Account Details window is displayed: From here you can edit all the settings that have previously saved/stored. please see ‘Creating a new customer on page 7 for details on how and what to change Saving Account Data After making any changes to the accounts programming, the Accounts, Save Account option is enabled. To save changes to disk: Click on the button on the main tool bar (Or press CTRL+S) Wintex will prompt you to save the account before it closes, if you do not want to save your changes select "No" Viewing Account History Click Accounts, Account History.... The Customer History window is displayed: Use the scroll bar to scroll up/down through the customer history. Click on the Close button when finished. INS549-3 11 Wintex™ User Guide Print Account & Panel Details Click Accounts, Print Account & Panel Details... press CRTL+P or click on the Print button. The Print Options window is displayed: Select the options you require to print. Click on the Print button, the Print window is displayed: Select the Printer you wish to send the print job to and then click on the OK button. Backup Account Data Click Accounts|Backup Account Data... The Account Data Backup window is displayed. If you are backing the account data onto a removable media (floppy disk) then insert the disk into the drive. Click Browse... to select the location of the backup folder: Click on the required drive/folder and click OK to accept. Click start to copy the opened account data to the backup location. 12 INS549-3 Wintex™ User Guide Restoring accounts This feature can be used if you import an account from another computer or from a USB stick, Click Accounts, Restore Account Data... The Account Data Restore window is displayed. Click Browse... to select the location of the restore folder: Click on the required drive/folder and click OK to accept. Click Read Disk to read the available accounts on the restore disk. The accounts and information will be displayed: Click (Ctrl + Click to multi-select) on the accounts you want to restore. Click Restore to restore the selected accounts. INS549-3 if the account is locked with a password, please contact technical support. 13 Wintex™ User Guide Connection Options Connection can be achieved either locally or remotely. First you need to set up the connection method or methods that are to be used. Connect Locally PC COM If you are using a PC com this will be at default assigned to Com1, as this is a serial device, no drivers will be needed for this device. USB Com Connect the USB com to your PC and to one of the Com ports on the Control panel. Windows™ will automatically install the required drivers. If the drivers do not automatically install, they can be located in the folder that Wintex has been installed in, for example C:\Programme Files\Texecom\Wintex\FTDI Drivers\. To install the drivers use the Update Driver function in Device Manager. The device that needs updating will be shown with this symbol Once the drivers have been installed the USB Com be automatically assigned to an available Com Port on your PC, to see which com-port is being used by your PC go to ‘Device Manager’ and look under ‘Ports’ (It will be read by the PC as a ‘USB Serial Port’) The port number assigned will be between 1 & 16 The com port will only show once the USB Com is connected to the panel and has power. Assign the correct Port When using either the PC Com or the USB Com you must tell Wintex™ which port number to use. Click Setup, Setup Modem...press CTRL+M or select the button ‘setup’ . The Modem Settings and Options window is displayed, at this point select the PC Com Tab. This tab is used for both the PC-Com and the USB Com. Using the drop down box you can select which com-port is being used, once the selection is made select ‘OK’. 14 this is not the com-port of the control panel, this is the comport being used by the PC. INS549-3 Wintex™ User Guide Com IP When connecting via IP you should first make sure you have entered the correct details in the Panel Details Tab of the customer account. This can be found on Page 9. You will also need to ensure the Control Panel has been configured correctly. Please see the relevant Control Panel installation manual, and the instructions that came with the Com-IP. When connecting locally via IP you must either plug the Com-IP into a router, or if directly connecting to Com-IP from the PC use a crossover cable. Modem Settings & Options TCP/IP Ricochet™ Monitor Connection (V6.13 & later only) This box is used to determine which port to use to connect to Ricochet™ Monitor, and should only be used when connection to V2.XX Elite panels and V2.XX Expanders. Under normal circumstance there will be no need to change the packet size & Packet Time-Out options shown above. Connect Remotely Connection can be made remotely in a number of ways, this section details the requirements for each connection type. Com IP To setup the IP connection, please see the previous section for regarding the setup for Local IP connection, the principle is basically the same. Radio-Pad Connection Click Setup, Setup Modem...press CTRL+M or select the button ‘setup’ . The Modem Settings and Options window is displayed, at this point select the Radio Pad tab; Using the drop down select which com-port is to be used. To program the Radio-Pad Number to be used for connection please see Radio-Pad setup on page 9 Connect via Com GSM Connect over GSM To connect to the Control Panel via GSM you will need a SIM card with data services enabled, and a Modem for your PC. The Data Number should be entered into the as the Panel Tel No. See page 9 for details. Also see the installation manual for the COM-GSM. INS549-3 15 Wintex™ User Guide Connect over GPRS (IP) To connect via GPRS you will need a fixed IP SIM card, you will be given the IP address and Port number by your service provider. Enter the relevant details in the customer account. See page 9 for details. Also see the installation manual for the COM-GSM. Connect via WebWayOne SMG If the control panel is fitted with a WebWayOne module make sure you have programmed this correctly on the control panel, and entered the relevant details in the Customer Account. See page 9 and make sure to check the Tick Box. Modem Connection Click Setup, Setup Modem...press CTRL+M or select the button ‘setup’ . The Modem Settings and Options window is displayed. Modem Options Connect Using Select the Com Port that the modem is connected to. This can be set to Com1 - Com 16 (this will be the comport number of your USB on your PC, this can be obtained from device manager on your PC when the modem is connected and powered) Baud Rate Select the Baud Rate that the modem will use. Modem Type Select the Modem type from the drop down selection box. 16 When you select a modem the Configuration String for the selected modem is also loaded and displayed in the Configuration String edit box. If required the selected modem may be edited by clicking on the ‘Edit Modem button’. This will display all configuration information for the selected modem: INS549-3 Wintex™ User Guide Modem Information Commands Name The Name of the selected modem. ( This cannot be changed through Wintex) Initialize The command used to reset the modem, normally ATZ^M. Dial The command used to dial, normally ATD. Dial suffix The command used to initiate the dialling sequence, normally ^M. Cancel Dial The command used to cancel a dialling attempt, normally ^M. Hangup The command used to hang up the modem, normally ~~~+++~~~ATH0^M. Answer The command used to answer an incoming call, normally ~ATA^M. Configure The custom configuration string see Modem Configuration String Guidelines below V21 The parameter for 300 baud speed used by the panel, normally S37=3 V22bis The parameter for 2400 baud speed used by the panel, normally S37=6 Return Codes Okay The modem response to a valid command, normally OK. Connect The modem response when connected with another modem, normally CONNECT. Busy The modem response when a busy line is detected, normally BUSY. Voice The modem response when a voice response is detected, normally VOICE. No Carrier The modem response when a carrier could not be detected, normally NO CARRIER. No Dialtone The modem response when a no dial tone is detected, normally NO DIALTONE. Error The modem response to an invalid command, normally ERROR. Ring The modem response when ringing is detected, normally RING.Adding a new Modem INS549-3 17 Wintex™ User Guide Adding a New Modem Modem Database Click Setup/Modem Database you will be presented with the following screen Add Click Add you will be presented with the following screen Type the name of the new modem and then click OK. The New Modem is now in the list of available modems, select it and click on edit The screen will appear as follows with default values added. Edit the relevant fields to add the details supplied by your modem manufacturer and click OK. Your New Modem is now ready to use. 18 INS549-3 Wintex™ User Guide Editing the Modem INI file You can add a new modem by editing the modem INI file which is located in the following directory. C:\Program Files\Texecom\Wintex To add a new modem open the file and add the name of the modem to the list. after the name of the modem you need to add =# After saving the file if you go back to Wintex™ you will see the modem you have added. Once the new modem is in the drop down list, you can make any changes required to the Modem Setup as shown on the previous page. INS549-3 19 Wintex™ User Guide Texecom USB Modem The USB-Modem has been specifically designed for use with Wintex UDL software and a PC to allow trouble free uploading/downloading with Premier control panels. Windows 98SE and Windows ME System Requirements 2. 1. The following are the minimum requirements required for the USB-Modem to work properly with your computer: Connect the USB-Modem into a USB port on the PC. Turn on your computer to allow the Operating System to detect the USB-Modem. When detected the Add New Hardware Wizard screen appears: • 133 MHz or faster Intel® Pentium® or AMD® processor • 10 MB free hard disk space • 16 MB RAM (32 MB or higher recommended) • Microsoft® Windows® 98 Second Edition (SE), Windows 2000, Windows Millennium Edition (ME), Windows XP, Windows Vista or Windows 7 • DVD/CD-ROM drive for modem software installation 3. 4. If you are using the drivers from the Wintex CD insert the CD into your DVD/CD-ROM drive. Then click the Specify the location of the driver (Advanced) option and click the Next button. Click the Specify a location check box. Then, click the Browse button to locate the driver files in D:\USBCom\Win98ME (where D: represents your DVD/CD-ROM drive). Ensure that the Removable Media (Floppy, CDROM…) check box is not selected: 5. Click the Next button, the following screen appears: 6. Click the Next button, the following screen appears: 7. Click the Finish button to complete the USB-Modem installation. The USB-Modem will be assigned a virtual com port, to find out which port number has been assigned to the USB-Modem, open the Device Manager (press the +Break on your keyboard) and expand the Ports (COM & LPT) option. You should see the USB Serial Port and its com port number, COM6 in the example below: USB-Modem Layout The USB-Modem has only two connectors, one, the USB Connector, and two, the Telephone Line Jack. No extra power connector is needed as the unit is a USB-powered device that draws power from the computer’s USB port. Figure 1. USB-Modem Indicators and Connectors Telephone Line Jack: Connect the telephone supplied into this socket and plug the other end into a telephone wall socket. USB Connector: Connect the smaller end of the supplied USB cable into the USB Connector. Connect the other end into one of the computer’s USB ports. Power/Data Indicator: This indicator is lit when the USBModem is powered from the USB port. The indicator flickers when the USB-Modem is sending or receiving data. Installation USB Driver Installation The USB-Modem requires a driver to be installed onto the computer before it can be used. The USB-Modem uses the same driver as the USB-Com, the driver can be found on the Wintex CD in the D:\USB-Com folder or alternatively it can be downloaded from the Texecom web site www.texe.com. If you are already using a USB-Com with the computer then driver will already be installed and you can skip steps 2 - 7. 20 8. INS549-3 Wintex™ User Guide 6. 7. 9. The USB-Modem is now installed and ready for use with Wintex UDL software, see Modem Connection on page 16 Windows XP and Windows 2000 1. 2. 3. 4. Click the Finish button to complete the USB High Speed Serial Converter installation. After a short delay the Found New Hardware Wizard screen will appear again: Connect the USB-Modem into a USB port on the PC. Turn on your computer to allow the Operating System to detect the USB-Modem. When detected the Found New Hardware Wizard screen appears: If you are using the driver from the Wintex CD insert the CD into your CD-ROM/DVD drive. Then click the Install from a list or specific location (Advanced)option and click the Next button. Click the Include this location in the search check box. Then, click the Browse button to locate the driver files in D:\USB-Com\Win2kXP (where D: represents your DVD/CD-ROM drive). Ensure that the Search removable Media (Floppy, CD-ROM…) check box is not selected: 8. 9. Repeat steps 4 to 7 to install the USB Serial Port driver. The USB-Modem will be assigned a virtual com port, to find out which port number has been assigned to the USB-Modem, open the Device Manager (press the +Break on your keyboard) and expand the Ports (COM & LPT) option. You should see the USB Serial Port and its com port number, COM3 in the example below: 10. The USB-Modem is now installed and ready for use with Wintex UDL software, see Configuring Wintex Software. Windows Vista and Windows 7 1. 2. 3. Connect the USB-Modem into a USB port on the PC. Turn on your computer to allow the Operating System to detect the USB-Modem. The new hardware should be detected automatically and the drivers will be installed. If the drivers are not automatically installed open Device Manager and right click on the Unknown device listed under Ports Com & LPT, click update driver and brows to the location of the drivers on the CD. Earlier Versions of Wintex The USB-Modem can be configured for use with earlier releases of Wintex. In order to do so, you need to create two modem driver entries in Wintex, one for use with the Com-300 and one for use with the Com-2400: 5. Click the Next button, the following screen appears: Com-300 Configuration Setting: ATFC1S99=44S30=64^M* Com-2400 Configuration Setting: ATFC1S99=44S30=4^M* INS549-3 21 Wintex™ User Guide Specifications Environmental Electrical Operating Voltage: 5VDC Operating Temperature: 10°C to +55°C Current Consumption: 30mA Maximum Humidity: 95% non-condensing Modem: V21, V22, V22bis Dialling Formats: Pulse or DTMF Physical REN: 1.0 Dimensions: 145mm x 90mm x 30mm Telecommunication Standards: CTR21 Material: Polycarbonate Packed Weight: 150g Standards 2004/108/EC (CE directive): Hereby, Texecom declares that this device is in compliance with the essential requirements and other relevant provisions of Directive 2004/108/EC. Weee Directive: 2002/96/EC (WEEE directive): Products marked with this symbol cannot be disposed of as unsorted municipal waste in the European Union. For proper recycling, return this product to your local supplier upon the purchase of equivalent new equipment, or dispose of it at designated collection points. For more information see: www.recyclethis.info. Warranty All Texecom products are designed for reliable, trouble free operation. Quality is carefully monitored by extensive computerised testing. As a result the USB-Modem is covered by a two-year warranty against defects in materials or workmanship. Due to our policy of continuous improvements Texecom reserve the right to change specification without prior notice. Wintex Options Click Setup, Options... The Wintex Options window is displayed: Modem Idle Time-Out When the PC modem is online with the control panel and there are communication tasks running (send or receive), Wintex will prompt you that the modem has been Idle after the time-out duration has elapsed. You can either choose to stay connected with the panel or hang-up as required. Default UDL Password The default UDL password is 1234 Use Default UDL Password when Creating New Accounts If this option is ticked the default UDL password (1234) will be set when creating a new customer account. Customer Files Folder This option specifies where the customer files are located (by default they are stored in "C:\Program Files\Texecom\Wintex\Customers). Click on the Browse... button to specify an alternative location e.g., a network server. click on the Default button to return the Customer Files Folder back to the default setting. If you are using windows 7 (or service pack 2 or 3 of Vista) and you are not the admin on the PC (you may have admin rights, but this will apply if you are not the overall admin) then your customer files will be stored here; C:\Users\*NAME*\AppData\Local\VirtualStore\Program Files\Texecom\Wintex\Customers\ or for 64Bit systems C:\Users\*NAME*\AppData\Local\VirtualStore\Program Files (X86)\Texecom\Wintex\Customers\ 22 INS549-3 Wintex™ User Guide Programming the Control Panel Elite 640 When using the panel type "Elite 640" an Area Group selector will appear on the bottom left hand side of the screen. This allows you to select which group of 16 areas you will be working on. Once selected the programming options are the same as every other Elite panel. Area Group 1 Contains Areas 1-16 Area Group 2 Contains Areas 17-32 Area Group 3 Contains Areas 33-48 Area Group 4 Contains Areas 49-64 Zones & Attributes Click Programming/Zones and Attributes... or click on the Zones button on Panel Program Bar. The Zones and Attributes window is displayed: Premier 412/816 Zones and Attributes window INS549-3 23 Wintex™ User Guide Premier Elite 24/48/88/168 & 640 Zones and Attributes window To select a zone click on the required zone in the left hand panel. With the zone selected, Edit the options as required. To close all Panel Programming windows, click on the Close button on the Panel Program Bar. Include Zone Text on Send/Receive If this option is ticked then the zone text is included on a send/receive. If this option is not ticked the zone text is included on a send/receive, this will improve the send/receive time. Include All Zones on Send/Receive (Premier Elite 24/48/88/168 & 640 Only) If this option is ticked then the data for all zones is included on a send/receive, i.e., if the panel type is a Premier 168 then the data for all 168 zones is included on a send/receive. If this option is not ticked then only the data for the zones that are fitted are included on a send/receive, this will improve the send/receive time for systems that are not fully expanded. Copying Zone Data 1. 2. 3. 4. 24 Right click on the zone in the left hand panel that you want to copy. A popup menu will appear. Click on Copy to copy the zone information. Right click on the zone that you want to copy the information to. A popup menu will appear. Click on Paste to paste the information INS549-3 Wintex™ User Guide Programming Areas/Partitions Timers & Options Click Programming|Partition/Area Timers and Options... or click on the Partitions button on Panel Program Bar. The Partition Timers and Options window is displayed: Premier 412/816/816 Plus & 832 Partition Timers and Options window Premier Elite 24/48/88/168 & 640 Area Timers and Options window To select a partition/area click on the required partition/area in the left hand panel. With the required partition/area selected, Edit the options as required. To close all Panel Programming windows, click on the Close button on Panel Program Bar. Copying Partition/Area Data 1. 2. 3. 4. Right click on the partition/area in the left hand panel that you want to copy. A popup menu will appear. Click on Copy to copy the selected partition/area information. Right click on the partition/area that you want to copy the information to. A popup menu will appear. Click on Paste to paste the information. INS549-3 25 Wintex™ User Guide Programming Global System Options Click Programming|Global System Options... or click on the Global button on Panel Program Bar. The Global System Options window is displayed: Premier 412/816/ 816 Plus & 832 Global System Options window Premier Elite 24/48/88/168 & 640 Global System Options window This window contains multiple pages of options, to select a page click on the required tab (Timers, Configuration Options, Control Timers etc).With the required page selected, Edit the options as required. To close all Panel Programming windows, click on the Close button on the Panel Program Bar. Language The Language chosen will not show in Wintex until it has been changed in the control panel. Languages available are as detailed in the table below. 24/48/88/168 640 Identifier LS1 LS2 LS3 Identifier 0 1 2 3 4 5 6 7 English UK English Swedish French Belgian Dutch Text Danish Norwegian Finnish English UK English Spanish Italian Polish Hungarian English UK English Russian Slovenian Czech German Estonian 0 1 2 3 4 5 6 7 Identifier English UK English Swedish French Belgian Dutch Norwegian Finnish Spanish 8 9 10 11 12 13 14 15 Italian Polish Hungarian Russian Slovenian Czech German Estonian Country Code Country code selection chooses the defaults loaded in the panel, and is normally linked to the language chosen. 26 Country Code Defaults Country Code Defaults Export Russia South Africa Netherlands Belgium France Spain Hungary Italy Czech UK 0 7 27 31 32 33 34 36 39 42 44 UK UK South Africa UK Norway France UK UK UK UK UK Denmark Sweden Norway Poland Germany Finland Australia Test Themes Chinn Estonia 45 46 47 48 49 58 61 97 98 99 172 (372) Denmark Sweden Norway UK UK Norway Australia UK UK UK UK INS549-3 Wintex™ User Guide Restart Soak Test Timer When you change the Soak Test Timer option this option is automatically ticked. When you send this page or send all configuration data to the control panel, Wintex will instruct the control panel to restart the Soak Test Timer. Restart Service Timer When you change the Service Interval Timer option this option is automatically ticked. When you send this page or send all configuration data to the control panel, Wintex will instruct the control panel to restart the Service Timer. Restart Battery Test Timer (Premier Elite 24/48/88/168 & 640 Only) When you change the Battery Test Period Timer option this option is automatically ticked. When you send this page or send all configuration data to the control panel, Wintex will instruct the control panel to restart the Battery Test Timer. Remote Keypad Options Click Programming|Keypad Options... or click on the Keypads button on Panel Program Bar. The Keypad Options window is displayed: Premier 412/816/816 Plus & 832 Keypad Options window Premier Elite 24/48/88/168 & 640 Keypad Options window Select the keypad by clicking on the relevant keypad in the left hand panel. With the required Keypad selected, Edit the options as required. To close all Panel Programming windows, click on the Close button on the Panel Program Bar. INS549-3 27 Wintex™ User Guide Programming Expander Options Click Programming|Expander Options... or click on the Expanders button on Panel Program Bar. The Expander Options window is displayed: Premier 412/816/816Plus & 832 Expander Options window Premier Elite 24/48/88/168 & 640 Expander Options window Pre V6.16 V6.16 & Later Select the Expander by clicking on the relevant Expander in the left hand panel. With the required Expander selected, Edit the options as required. To close all Panel Programming windows, click on the Close button on Panel Program Bar. Radio Expander (pre V6.Build 16) The Radio Expander page shows all of the Radio Devices on the system, the Device Type, The Serial Number and to which Zone/User the device is mapped. Not applicable to Premier Elite™ V2.xx panels and Ricochet™ MT2 28 INS549-3 Wintex™ User Guide Programming Outputs Click Programming|Outputs... or click on the Outputs button on Panel Program Bar. The Output Options window is displayed: Premier 412/816/816 Plus & 832 Output Options window Premier Elite 24/48/88/168 & 640 Output Options window To select an output click on the required output in the left hand panel. With the required output selected, Edit the options as required. To close all Panel Programming windows, click on the Close button on the Panel Program Bar. INS549-3 29 Wintex™ User Guide Programming Communications Options Click Programming|Communication Options... or click on the Communication button on Panel Program Bar. The Communication Options window is displayed: Premier 412/816 Communication Options window Premier Elite 24/48/88/168 & 640Communication Options window This window contains multiple pages of options, to select a page click on the required tab (Options, ARCs etc). With the required page selected, Edit the options as required. To close all Panel Programming windows, click on the Close button on the Panel Program Bar. Telephone Numbers The following characters can be inserted in the telephone number: "," = 3 second pause "W" = 10 second pause "#" = hash (normally used for pagers) "*" = star (normally used for pagers) 30 INS549-3 Wintex™ User Guide Programming Users Click Programming|User codes... or click on the User Codes button on Panel Program Bar. The User Code Maintenance window is displayed: Premier 412/816/816 Plus & 832 User Code Maintenance window Premier Elite 24/48/88/168 & 640 User Code Maintenance window To select a user click on the required user in the left hand panel. With the required user selected, Edit the options as required. To close all Panel Programming windows, click on the Close button on Panel Program Bar. Copying User Data 1. Right click on the user in the left hand panel that you want to copy. 2. A popup menu will appear. Click on Copy to copy the user information. 3. Right click on the user that you want to copy the information to. 4. A popup menu will appear. Click on Paste to paste the information. INS549-3 31 Wintex™ User Guide Connecting with the control panel Now you have set up your connection options, you can use the full functionality of Wintex™ To connect with the Control Panel: Click Communications, Connect... or click on the Connect Button on the tool bar. You will be given a choice of connection options: • • • • • Connect using PC Com Connect using Modem 1 Connect using Modem 2 Connect using Radio-Pad Connect Via Network (this option will only appear if you have programmed in IP details) Click on the required connection option. Wintex will attempt to connect with Control Panel. Once the connection is established the bottom status bar will show "On-line Ready". The status bar will also show the name of the Wintex™ user accessing the system. The menu and tool bar options will now change to "Hang Up". Waiting for the Panel to Call Use this command to put the PC modem into "Waiting for Panel to Call..." mode. Once in this mode the user at site should initiate the download sequence by selecting the "Start Download" command on the Control Panel: Panel Type Start Download Command Premier 412 User Code + Menu + 9 + 94 Premier 816 & Plus User Code + Menu + 9 + 94 Premier 832 User Code + Menu + 9 + 94 Premier Elite 24 User Code + Menu +Yes+ scroll until "Call Remote PC?" is displayed. Premier Elite 48 User Code + Menu +Yes+ scroll until "Call Remote PC?" is displayed. Premier Elite 88 User Code + Menu +Yes+ scroll until "Call Remote PC?" is displayed. Premier Elite 168 User Code + Menu +Yes+ scroll until "Call Remote PC?" is displayed. Premier Elite 640 User Code + Menu +Yes+ scroll until "Call Remote PC?" is displayed. Requesting a Call Back This option is only enabled when you are connected to the control panel via a modem. Selecting this menu option will cause both the PC and control panel modem to hangup. The control panel will then call-back to the PC modem and re-establish the connection. Disconnecting from the Control Panel To disconnect with the Control Panel: Click Communications|Hang Up... or click on the Hang Up Button on the tool bar. The PC will disconnect with Control Panel. The comms status bar will show "Off-line Ready". Connecting to Ricochet™ Monitor (V6.16 & Later only) Connection can be made to launch and view Ricochet Expander(s) V2.xx & above data when connected to the control panel. The Ricochet™ Icon turns green when online with the panel, clicking this button launches and connects to Ricochet™ Monitor. 32 Should only be used on Local connections, or IP/GPRS connections if remote. INS549-3 Wintex™ User Guide Sending & Receiving Configuration Data Receiving Receive Configuration Data The Receive Configuration Data option retrieves all configuration data (except communicator reporting codes) from the Control Panel. Click Communications|Receive Configuration Data or click on the Receive button on the tool bar and select the Receive Configuration Data option. The Communication Status window will display progress of the communication: When the communication task is completed you may disconnect with the Control Panel if required, You can now edit the Control Panel data. Receive Panel Log The Receive Panel Log... option allows you to retrieve the system event log from the Control Panel. Click Communications|Receive Panel Log... or click on the Receive button on the tool bar and select the Receive Panel Log option. The Receive Event Log window is displayed: Select the Receive Options: Receive All Events: This option will retrieve all events from the Control Panel. Receive New Events Only: This option will only retrieve the events that have occurred since the last Receive Panel Log. Receive the Last ## Events: This option allows you to specify how many events to retrieve. Click on OK to start. The Communication Status window will display progress of the communication: When the communication task is completed you may disconnect with the Control Panel if required, You can now view Control Panel log, see Viewing the Log on page 38. INS549-3 33 Wintex™ User Guide Receive All The Receive All option retrieves all configuration data (including communicator reporting codes) and the system event log from the Control Panel. Click Communications|Receive All or press CTRL+A or click on the Receive button on the tool bar and select Receive All (Data & Log) option. The Communication Status window will display progress of the communication: When the communication task is completed you may disconnect with the Control Panel if required, You can now edit the Control Panel data, or view Control Panel log. Receive Current Page The Receive Current Page option retrieves the data for the active Panel Programming window, e.g. if you have the Program Zones and Attributes window active, selecting the Receive Current Page option will only retrieve data relating to Zones and Attributes. This option is only available when one or more Panel Programming windows are open. Click Communications|Receive Current Page or click on the Receive button on the tool bar and select the Receive Current Page option or click on the Receive Page button on the Panel Program Bar. The Communication Status window will display progress of the communication: When the communication task is completed you may disconnect with the Control Panel if required, Receive Reporting Codes The Receive Reporting Codes option allows you to select which group of communicator reporting codes to retrieve from the Control Panel. Either from the Communications menu or the Receive button on the tool bar click Receive Reporting Codes. A sub menu will appear, from the sub menu select one of the following options: • • • Pulse Codes: To retrieve the Pulse format communicator reporting codes (Premier 412/816/816 Plus & 832 Only). Contact ID Codes: To retrieve the Contact ID format communicator reporting codes. SIA Codes: To retrieve the SIA format communicator reporting codes. All Codes To retrieve all communicator reporting codes. The Communication Status window will display the progress of the communication: When the communication task is completed you may disconnect with the Control Panel if required, 34 INS549-3 Wintex™ User Guide Sending Send Configuration Data The Send Configuration Data option sends all configuration data (except communicator reporting codes) to the Control Panel. Click Communications|Send Configuration Data or press CTRL+D or click on the Send button on the tool bar and select the Send Configuration Data option. The Communication Status window will display the progress of the communication: When the communication task is completed you may disconnect with the Control Panel if required, Update Configuration Data The Update Configuration Data option only sends the configuration data that has been changed since the account was opened. In order for the update to work you MUST NOT save the changes that you have made since opening the account. Click Communications|Update Configuration Data or click on the Send button on the tool bar and select the Update Configuration Data option. The Communication Status window will display progress of the communication: When the communication task is completed you may disconnect with the Control Panel if required, You can now save the configuration data to disk by clicking on the Save button on the tool bar. Send Current Page The Send Current Page option sends the data for the active Panel Programming window, e.g. if you have the Program Zones and Attributes window active, selecting the Send Current Page option will only send the data relating to Zones and Attributes. This option is only available when one or more Panel Programming windows are open. Click Communications|Send Current Page or click on the Send button on the tool bar and select the Send Current Page option or click on the Send Page button on the Panel Program Bar. The Communication Status window will display progress of the communication: When the communication task is completed you may disconnect with the Control Panel if required, INS549-3 35 Wintex™ User Guide Send Reporting Codes The Send Reporting Codes option allows you to select which group of communicator reporting codes to send to the Control Panel. Either from the Communications menu or the Send button on the tool bar click Send Reporting Codes. A sub menu will appear, from the sub menu select one of the following options: • • • Pulse Codes: To send the Pulse format communicator reporting codes (Premier 412/816 Only). Contact ID Codes: To send the Contact ID format communicator reporting codes. SIA Codes: To send the SIA format communicator reporting codes. All Codes To send all communicator reporting codes. The Communication Status window will display the progress of the communication: When the communication task is completed you may disconnect with the Control Panel if required, Send/Read Time & Date The Send/Read Time & Date option allows you to send the date and time to the Control Panel, it also allows you to read the current Date and Time of the Control Panel. Click Communications|Send/Read Time & Date or press CTRL+T or click on the Send button on the tool bar and select the Send/Read Time & Date option. The Send/Read Panel Date and Time window is displayed: The Send Date and Send Time will default to the current date and time of the PC. If required adjust the date or time to the desired value, then click on the Send button. The Panel Date and Panel Time display the actual date and time of the panel clock. When finished Click Close to close the window. 36 INS549-3 Wintex™ User Guide Diagnostics Elite 640 When using the panel type "Elite 640", and area group selector will appear in the bottom tray. This allows you to view/remote control the selected Area Group. This is present on most Diagnostic pages, with the exception of System & RF Devices. Online Status & Control The On-line Status and Control mode allows you to view and control in real time the status of the alarm system. Click Diagnostics|Online Status and Control... or click on the Online Status button on the tool bar. The Online Status and Control window will be displayed: Click on the item you wish to view in the left hand panel (Zones & Outputs, System, Areas etc). Click on the relevant control buttons to change the status of the Control Panel. Remote Control Click on Remote control to bring up the controls for the panel, under this menu you can arm/disarm/reset the control panel, turn outputs on/off and send messages to the control panel. Click on the Close button when finished. INS549-3 37 Wintex™ User Guide Online Keypad The On-line Status and Control mode allows you to view and control in real time the status of the alarm system. Click Diagnostics|Online Keypad... or click on the Online Keypad button on the tool bar. The Online Keypad window will be displayed: Click on the keys to operate the online keypad. Click on the Close icon in the top right hand corner when finished. Event Log Click Diagnostics|View Event Log... or press CTRL+L or click on the Event Log button on the tool bar. The Control Panel Event Log window is displayed: (at default there will be no log as one has not been downloaded) See Receive Panel Log on page 33 to populate the Panel Log window 38 INS549-3 Wintex™ User Guide Event Log Buttons Icon Button Function Refresh Log Loads the log in memory into the log viewer. Load Log Load a previously saved log into the log viewer. Save Log Saves the log to the customer log file. Append Log Appends the log to an existing customer log file. Save As... Saves the log to a text file. Clear Log Clears the contents of log viewer. Print Log Prints the contents of the log viewer. Receive Log Opens the Receive Log window, see Uploading the Control Panel Log. Filter Opens the Log Event Filter window and allows you to filter events in the log viewer. Mandatory Events When checked shows only the mandatory event log Close Closes the Event Log Viewer Area Group 1 Displays information for Areas 1-16 Area Group 2 Displays information for Areas 17-32 Area Group 3 Displays information for Areas 33-48 Area Group 4 Displays information for Areas 49-64 Remote/Anti Code Reset All Premier Elite Control Panels have a Random Number Remote Reset feature. This option allows you to generate the Remote Reset number. Click Diagnostics|Remote Reset Generator... or press CTRL+R. The Remote Reset window is displayed: Enter the number that you require to decode in the Input Number box. The Remote Reset number is then displayed in Reset Number Box. Click on the Close button to close the Remote Reset window. INS549-3 39 Wintex™ User Guide Online Printer The Online Printer Mode allows you to monitor the printer port of the control panel. You can only use the feature if you are connected to the control panel via a PC-Com module. Click Diagnostics|Online Printer Mode... The Online Printer window will be displayed: As events occur they will be displayed in the window. Click on the Close icon in the right hand corner when finished. 40 INS549-3 Wintex™ User Guide Changing the Language If you wish to change the language Wintex™ uses; Click Setup, Language... The language options are displayed: After making your choice of language the following dialog box will be displayed; After closing and re-opening Wintex the new language will be displayed; INS549-3 41 Wintex™ User Guide Menu Commands User Log On... Diagnostics Online Status and Control... Online Keypad... Log Off View Event Log... Change Log On Password... Remote Reset Generator... Change User Name... Online Printer Mode... Change User Access... Exit Accounts Setup Modem Setup... Modem Database... New Account... Options... Open Account... Language Edit Account... Save Account Utilities Save Account As... Panel Language Editor Revert Account Data Close Account Account History Print Account and Panel Details... Only available with TexecomMaster Logon. Please see Panel Language Editor Section on page 44 . Window Tile Backup Account Data... Cascade Restore Account Data... Arrange icons Programming Help Zones and Attributes... Contents Partition Timers and Options... About.. Global System Options... Remote Keypad Options... Expander Options... Outputs... Communication Options... User Codes... Communications Connect/Hangup Waiting For Panel to Call Request Call-back Receive Configurations Data Receive Panel Log... Receive All (Data & Log) Receive Current Page Receive Reporting Codes Send Configuration Data Update Configuration Data Send Current Page Send Reporting Codes Send/Read Time & Date... 42 INS549-3 Wintex™ User Guide Tool Bar Commands Icon INS549-3 Button Function New Opens the New account window and allows you to create a new customer accounts. Open Opens the customer accounts window and allows you to open an existing account. Save Saves all account and Control Panel data to disk. Edit Account Opens the Control Panel programming button bar. Program Opens the Programme Menu Print Open the Print options window. Receive Opens the Receive options menu. Send Open the Send options menu. Rem.Reset Opens the Remote Reset Generator. Diagnostics Opens the Online Status and Control window. Keypad Opens the Online Keypad window. Event Log Opens the Control Panel Event Log Viewer. Setup Opens the Modem Settings & Options window Connect Establishes a connection with the Control Panel. Hangup Closes the connection with the Control Panel Ricochet QuickConnect Launches & connects to Ricochet Monitor (MT2 systems only) 43 Wintex™ User Guide Panel Language Editor Premier 412/816/ & 832 Introduction Wintex is equipped with a Language Editor which allows the user to create custom translated language files for the Premier 412, 816, 816 Plus & 832 Control Panels. Once the new language file has been created the user may use Wintex to install the language on the panel, or subject to approval may have the language installed as their standard default language at the manufacturing stage. The language editor is a hidden function which can be easily enabled to allow translation for all text displayed on the keypads. Enable Panel Language Editor To enable the Language Editor proceed as follows:Click User Change User Access Click Add New User Create the new user using the following credentials User Name: TexecomMaster This is case sensitive Password 123456 Click OK to add new user. Click OK to exit User Configuration. Now click User Log Off. 44 INS549-3 Wintex™ User Guide Click User Log On enter the following:- User Name TexecomMaster Password 123456 The following pop up will be seen Click OK Log On to Wintex using your normal User Name and Password If you have not created your own profile the default User Name is Master and the Password is 123456. When you are logged on you will now see an extra Toolbar item called Utilities. Using Panel Language Editor To be able to use the Language Editor you first need to open an account. Click on New In the Account Reference Filed Type Translation In the Panel Details Tab Select Premier 832 from the Dropdown Menu and Click Add. It is important that 832 is selected as this will then cover all panel types, if you select 412 at this stage many of the options in the 832 will not be available in the Language Editor and will not be translated. INS549-3 45 Wintex™ User Guide Starting Translation Next Click on Utilities in the Menu Bar, and click Panel Language Editor. You will be presented with the following screen. It is possible to load one of the existing translated languages to use as the basis for the new translation. Click on the Current Text Column on the right hand side, your screen should look like this Click on the Edit button and you should see this You can now edit the text in the Event Text Window and it will be displayed in the Sample Display Window below. Do this for every line of text in the Panel Text tab and then complete for each of the other Tabs. 46 INS549-3 Wintex™ User Guide Inserting Special Characters If you need to insert special characters, the available characters can be viewed by selecting the Character Map. Highlight the character required and click Select. Once you have completed your selection Click Insert. IMPORTANT NOTES The # symbol Where you see the number. # symbols in the text you are editing they must be the same symbol and in the same place and of the same For Example if I want to translate Line 11 from English to Greek the original text looks like this Zone ## Text The Translation will be Ζώνη ## Κείμενο The ? symbol The same rule applies to the same number of times ? symbol where this is present in the text it must be in the translated text in the same format and the For example if I want to edit Line 002 from English to Greek the original looks like this Enter Code > ?? The translation will look like this Εισάγετε Κωδικός > ?? Once all of the translations have been completed save the file. By default this will be saved in the Languages Subdirectory of Wintex. INS549-3 47 Wintex™ User Guide Updating the Panel Language Before updating the panel language, please make sure you have saved the new language to disk. Create a new account and fill in all of the relevant details. Connect to the panel The language can then be sent to the panel from the Communications Menu as shown below. Please send the completed translation files to [email protected] so they may be included in future versions of the Premier range of control panels. 48 only complete translations will be put into Control Panels. If you wish to use your translated file locally then you can do this by using the “Send All” or “Send Page” buttons in Panel Language Editor. If you choose to use the language file and at some point in the future you have to load the panel defaults the locally stored language will be lost and the default panel language re-loaded. INS549-3 Wintex™ User Guide Language Manager for Wintex™ Language Manager is a utility which allows you to translate Wintex™ into your chosen language Starting Translation 1. 2. Ensure that the correct version of WINTEX is installed on the PC that is going to be used to do the translation. Install the Language Manager (It is advisable to install it in the same folder as WINTEX). 3. 4. 5. The Language Manager .EXE file can be found in the directory C;\Programme Files\Texecom\Wintex\Language Manager. Run the Language Manager software (The shortcut is in the WINTEX Program folder on the start menu). After the program has started, click on File|Open Project… and open the file called “Wintex.ntv.lng”. If your language was installed at step 2 go to step 7 otherwise click on File|Create New Language… the following screen is displayed: 6. Select your language from the Language Identifier list then click OK. 7. In the main screen ensure that the “Units.WintexStrings” is selected as shown below: The Native Language (English) can be hidden by un-checking the “Show Native Language” check box on the main screen. Translate the text in each cell (click on the cell and press F2 or click twice on the cell). All un-translated cells are marked with a little blue triangle. See Notes for Translation on page 50 INS549-3 49 Wintex™ User Guide Creating a New Language .DLL file Once you have translated some or all of the text (you don’t have to translate all the text in one go), you need to create a Language DLL file. This operation only needs to be performed once. Before you create the DLL you need to select the Program Execution (PE) File. Click on File|Select PE file… and select the Wintex.EXE file as shown: Now click on File|Create DLL this will create a language DLL file. Note: The “Create DLL” option is only enabled if your language is selected, to select your language click on any cell in your language column. Once the DLL has been created you can test your translated file by running Wintex and going to Setup|Language and selecting the relevant language. Continue to translate the text, when you want to test your work click on File|Save Language then click on File|Synchronize DLLs. This will update the language DLL and will allow you test the updated file in WINTEX Notes for Translation Accelerator Keys: Most Windows menus and buttons have shortcut key that can be accessed by pressing the ALT key followed by the underlined letter of menu or button. For example the Accounts menu can be selected by pressing ALT followed by A. The strings in the language file will have the ampersand (&) character before the letter that will be underlined, so when you look at the text for the Accounts menu you see that it is written as “&Accounts”. If you want to use the ampersand character in the string then you must insert two. For example the Send PC Time & Date menu option is displayed in WINTEX as “Send PC Time & Date” (shortcut = T), the text in the language file is written as “Send PC &Time && Date”. Formatted Strings: Some strings within the language file have special format specifiers, all specifiers start with the % character, for example “Control Timer %d”. %d is used to specify that a number will be inserted in the string, e.g. “Control Timer %d” can be displayed as “Control Timer 3”. %.2d is used to specify that a two digit number will be inserted in the string, e.g. “Zone %.2d” can be displayed as “Zone 02”. %.3d is used to specify that a three digit number will be inserted in the string, e.g. “Zone %.3d” can be displayed as “Zone 002”. %s is used to specify that a string will be inserted in the string, e.g. “Do you want to save the account "%s" ?” can be displayed as “Do you want to save the account "My Test 816 Panel" ?” It is very important that the format specifiers remain included when the string is translated. Future Versions of WINTEX™ It is very important that once the translation is complete, that the language file is emailed back to Texecom this is so that when future versions of Wintex are released, the language files can be refreshed to include any new strings. If the file is not sent back you will have to translate all text again when next revision of WINTEX is released. The language file is “Wintex.XXX.lng” where XXX is the country abbreviation code as shown at step 5, for example the Spanish abbreviation code is ES so the language file name is “Wintex.ES.lng” 50 INS549-3 Wintex™ User Guide Texecom Limited, Bradwood Court, St. Crispin Way, Haslingden, Lancashire BB4 4PW, England. Technical Support: UK Customers Tel: 08456 300 600 (Calls charged at 3.36 pence per minute from a BT landline. Calls from other networks may vary.) International Customers Tel: +44 1706 233875 Email: [email protected] © Texecom Limited 2013 INS549-3 INS549-3 51