1
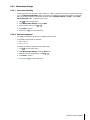
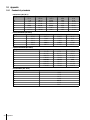
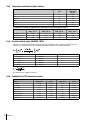
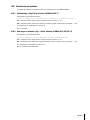
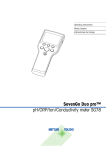
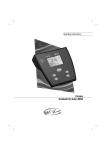
Sev en2 Go ME TTL ER TO LED O Operating Instructions Seven2Go™ Conductivity Meter S3 Cal Table of Contents 1 Introduction 5 2 Safety Measures 6 2.1 2.2 3 9 Overview Sensor connections T-Pad and hard keys Display and icons Setup menu Navigation Menu structure Measurable parameters 9 9 9 11 13 13 14 14 Putting into Operation 4.1 4.2 4.3 4.4 4.4.1 4.4.2 4.4.3 4.5 5 6 6 Design and Function 3.1 3.2 3.3 3.4 3.5 3.5.1 3.5.2 3.6 4 Definition of signal warnings and symbols Product specific safety notes 15 Scope of delivery Installing the batteries Connecting sensors Installing optional equipment Electrode holder Meter base stabilizing unit Wrist strap Switching the instrument on and off 15 16 17 18 18 18 19 20 Operation of the Instrument 5.1 5.1.1 5.1.2 5.1.3 5.1.4 5.2 5.2.1 5.2.1.1 5.2.2 5.2.2.1 5.2.2.2 5.2.2.3 5.2.2.4 5.2.2.5 5.3 5.3.1 5.3.2 5.4 5.4.1 5.4.2 5.4.3 5.5 5.6 5.7 21 Calibration Selecting a calibration standard Enter a cell constant Enter a user-defined standard Performing a calibration Settings General settings Endpoint Formats Measurement Settings Timed Interval Reading Reference temperature Temperature correction/alpha-coefficient TDS factor Conductivity Ash Sample measurement Performing a conductivity measurement Performing a TDS, salinity or resistivity measurement Using the memory Storing a measurement result Recalling from memory Clearing the memory Hot power on/off Instrument self-test Factory reset 21 21 21 21 22 22 22 22 23 23 23 24 25 25 26 26 26 27 27 27 27 28 28 28 Table of Contents 3 6 Maintenance 29 6.1 6.2 6.3 29 29 30 7 Product Portfolio 31 8 Accessories 32 9 Technical data 33 10 Appendix 34 10.1 10.2 10.3 10.4 10.5 10.6 10.6.1 10.6.2 4 Cleaning the housing Error messages Disposal Table of Contents Conductivity standards Temperature correction factors Temperature coefficients (alpha-values) Practical salinity scale (UNESCO 1978) Conductivity to TDS conversion factors Conductivity ash methods Refined sugar (28 g/100 g solution) ICUMSA GS2/3-17 Raw sugar or melasses (5 g / 100 mL solution) ICUMSA GS 1/3/4/7/8-13 34 35 36 36 36 37 37 37 1 Introduction Thank you for purchasing this high quality METTLER TOLEDO portable meter. Everywhere you measure pH, conductivity or dissolved oxygen - the Seven2Go™ portables are designed to offer you fast quality data, onehanded operation and an investment that lasts. Whether you work in the laboratory, at-line or outdoors, the Seven2Go™ meters will provide you with high quality measurement everywhere you go. The Seven2Go™ offers many exciting features, including: ● Simple and intuitive menus that shorten steps needed for setting up measurements and calibration ● T-pad hard keys for comfortable and fast navigation ● Rubber side-guards for comfortable, one-handed operation ● IP67 rating for the entire measurement system, including meter, sensor and the connection cables ● Useful accessories such as the electrode clip, the meter base stabilizing unit, the wrist strap and the uGo™ carrying case with hermetically sealed interior for easy cleaning Introduction 5 2 Safety Measures 2.1 Definition of signal warnings and symbols Safety notes are marked with signal words and warning symbols. These show safety issues and warnings. Ignoring the safety notes may lead to personal injury, damage to the instrument, malfunctions and false results. Signal words WARNING for a hazardous situation with medium risk, possibly resulting in severe injuries or death if not avoided. CAUTION for a hazardous situation with low risk, resulting in damage to the device or the property or in loss of data, or minor or medium injuries if not avoided. Attention (no symbol) for important information about the product. Note (no symbol) for useful information about the product. Warning symbols General hazard Toxic substance Inflammable or explosive substance 2.2 Product specific safety notes Your instrument represents state-of-the-art technology and complies with all recognized safety rules, however, certain hazards may arise in extraneous circumstances. Do not open the housing of the instrument; it does not contain any parts that can be maintained, repaired or replaced by the user. If you ever have problems with your instrument, contact your authorized METTLER TOLEDO dealer or service representative. Intended use This instrument is designed for a wide range of applications in various areas and is suitable for measuring pH (S2, S8), conductivity (S3, S7) or dissolved oxygen (S4, S9). The use therefore requires knowledge and experience in working with toxic and caustic sub stances as well as knowledge and experience working with application-specific reagents, which may be toxic or hazardous. The manufacturer shall not be held liable for any damage resulting from incorrect usage divergent to the operating instructions. Furthermore, the manufacturer`s technical specifica tions and limits must be adhered to at all times and in no way exceeded. Location The instrument has been developed for indoor and outdoor operation and may not be used in explosive environments. Use the instrument in a location which is suitable for the operation, protected from direct sun light and corrosive gases. Avoid powerful vibrations, excessive temperature fluctuations and temperatures below 0 °C and above 40 °C. 6 Safety Measures Protective Clothing It is advisable to wear protective clothing in the laboratory when working with hazardous or toxic substances. A lab coat should be worn. Suitable eye protection such as goggles should be worn. Use appropriate gloves when handling chemicals or hazardous substances, checking their integrity before use. Safety notes WARNING Chemicals All relevant safety measures are to be observed when working with chemicals. a) Set up the instrument in a well-ventilated location. b) Any spills should be wiped off immediately. c) When using chemicals and solvents, comply with the instructions of the producer and the general lab safety rules. WARNING Flammable solvents All relevant safety measures must be observed when working with flammable solvents and chemicals. a) Keep all sources of flame away from the workplace. b) When using chemicals and solvents, comply with the instructions of the producer and the general lab safety rules. Safety Measures 7 FCC Rules This device complies with Part 15 of the FCC Rules and Radio Interference Requirements of the Canadian Department of Communications. Operation is subject to the following conditions: (1) this device may not cause harmful interference, and (2) this device must accept any interference received, including interference that may cause undesired operation. This equipment has been tested and found to comply with the limits for a Class A digital device, pursuant to Part 15 of the FCC rules. These limits are designed to provide reasonable protection against harmful interfer ence when the equipment is operated in a commercial environment. This equipment generates, uses, and can radiate radio frequency energy and, if not installed and used in accordance with the instruction manual, may cause harmful interference to radio communications. Operation of this equipment in a residential area is likely to cause harmful interference in which case the user will be required to correct the interference at his own expense. 8 Safety Measures 3 Design and Function 3.1 Overview 8 8 9 10 11 1 2 3 4 5 6 Status LED (only Pro-series) Display Calibration key On/Off key Read key T-Pad 7 8 9 10 11 Rubber feet Fixing points for electrode holder Micro-USB port (only Pro-series) Battery compartment Slot for wrist strap 3.2 Sensor connections 1 LTW socket for conductivity signal input 3.3 T-Pad and hard keys 6 1 2 7 Cal 3 5 4 Design and Function 9 In Standard Screen Key 1 Read 2 3 4 5 6 7 Settings/Up Store/Right Mode/Down Recall/Left Cal On/Off Press and Release Start and manually stop a measure ment Open setup menu Save last measurement data Switch measurement mode Recall measurement data Start calibration --- In calibration mode (indicated by Key 1 Read 2 3 4 5 6 7 Settings/Up Store / Right Mode/Down Recall/Left Cal On/Off In Setup mode (indicated by 1 2 3 4 5 Read Settings/Up Store / Right Mode/Down Recall/Left 6 7 Cal On/Off ----- 10 Key Read Settings/Up Store / Right Mode/Down Recall/Left Cal On/Off Design and Function --------Recall last calibration result Switch instrument on (hold for 1 sec ond) or off (hold for 3 seconds) Press and hold --------Discard calibration result --- ) Press and Release Select submenu Confirm setting Edit value (increase) Switch between changeable values Edit value (decrease) Switch between changeable values 1 2 3 4 5 6 7 --- ) Press and Release Manually stop calibration Save cali bration result ------------- Key In Recall mode (indicated by Press and hold Press and hold Leave setup mode Fast value increase --Fast value decrease One level up (back to setup menu or leave setup mode) ----- ) Press and Release Clear memory and confirm deletion Navigate up --Navigate down ------- Press and hold ----Cancel data deletion --Leave recall mode --- 3.4 Display and icons When turning on the instrument, the startup screen appears for 3 seconds. The startup screen shows all icons which can appear on the display. In the following table you find a short description about these icons. Note Some icons are shown specific to the other Seven2Go routine level instruments (S2 pH/mV and S4 DO). These icons are not relevant to the operation of S3 and are not further explained below. Startup screen TEMP. Design and Function 11 Icon 1 2 3 4 5 --- A --- 6 Temperature reading Endpoint format A Automatic T Timed M Manual Conductivity reading ISM sensor is detected Power status fully charged, half-charged, lowly-charged fully discharged Measurement mode 7 8 9 Description Calibration settings Int. Hot power on (Never shut down automatically until power is used up or press shut down manually) Interval reading is on 10 Calibration mode Indicates calibration mode and appears whenever you are performing a cali bration or reviewing calibration data. 11 Error occured 12 Setup mode 13 Self-Diag. Self-diagnosis mode Self-diagnosis indicator Indication to press key Self-diagnosis passed Reference temperature 20° Self-Diag. 14 Ref.T. 20°C 15 Ref.T. Reference temperature 25° 25°C 16 17 18 12 Design and Function ------- Current measurement method Memory indicator / Calibration point / Error messages Main setup menu structure 3.5 Setup menu 3.5.1 Navigation For general navigation in the setup menu read the following information: ● Press to enter the setup menu. to exit the setup menu. ● Press Read to confirm a change. ● Press and hold Read to exit the setup menu and return directly to the measurement screen from every posi tion in the setup menu. ● Press and hold 1 1 2 --- Read ● Read / save cal data ● Confirm entered values Cal 2 ● Enter the setup menu. 3 5 Setup / Up ● Move up in the menu structure. ● Edit value (increase). 3 Save / Right ● Save measurement data. ● Store last calibration point to end calibration. 4 ● Go right. 4 Mode / Down ● Change measurement mode. ● Move down in the menu structure. ● Edit value (decrease). 5 Recall / Left ● Recall data / recall the last step. ● Go left. ● For menu or data memory exit (press >1 s). Design and Function 13 3.5.2 Menu structure 1. 2. 3. General Settings 1. Endpoint Formats 1.1 Automatic 1.2 Timed 1.2.1 Measurement Time 1.3 Manual Measurement Settings 1. Reference Temperature 2. Enter Alpha-coefficient 3. Enter TDS Factor 4. Measurement Time 5. Conductivity Ash Calibration Settings 1. Buffer Group / Standard 1.1 Standard 1 1.2 Standard 2 1.3 Standard 3 1.4 Standard 4 3.6 Measurable parameters With the S3 conductivity meter it is possible to measure the following parameters of a sample: ● Conductivity (µS/cm and mS/cm) ● ● ● ● The instrument will switch automatically to µS/m and mS/m depending on the measurement value (e.g. conductivity of ethanol according to the ABNT/ABR 10547 method). TDS (mg/L) Salinity (psu) Resistivity (MΩ·cm) Conductivity ash (%) To change the measurement mode, press as often as the desired appears. See also ● Performing a conductivity measurement (page 26) ● Performing a TDS, salinity or resistivity measurement (page 26) 14 Design and Function 4 Putting into Operation 4.1 Scope of delivery S3 instrument for conductivity measurement MET TLER TO LEDO Cal Battery LR3/AA 1.5V 4 pcs. Electrode holder CD-ROM including operating instructions Seven2Go Operating Instructions Test Report many more Putting into Operation 15 4.2 Installing the batteries 1 2 3 4 x LR3/AA 1.5V or 4 x HR6/AA 1.2V 2. 1. 4 16 Putting into Operation 5 6 4.3 Connecting sensors ISM® sensor When connecting an ISM® sensor to the meter, one of the following conditions have to be met for the calibra tion data to be transferred automatically from the chip of the sensor into the meter and is used for further mea surements. After attaching the ISM® sensor ... ● The meter must be switched on. ● (If the meter is already switched on) the READ key is pressed. ● (If the meter is already switched on) the CAL key is pressed. We strongly recommend you to switch off the meter when disconnecting an ISM sensor. In doing so, you make sure that the sensor is not removed while the instrument is reading data from or writing data to the ISM-chip of the sensor. The ISM icon display. appears on the display and the sensor ID of the sensor chip is registered and appears on the The calibration history, the initial certificate and the maximum temperature can be reviewed and printed in the data memory. Putting into Operation 17 4.4 Installing optional equipment 4.4.1 Electrode holder For a safe placing of the electrode you can mount an electrode holder on the side of the instrument. The elctrode holder is part of delivery. You can mount it on either sides of the instrument for your personal handling. 1 Remove the protective clips (1). 1 2 Push the electrode holder (1) into the recess (2) of the instrument. 1 2 4.4.2 Meter base stabilizing unit The meter base stabilizing unit should be mounted when using the instrument on a desk. It ensures a more firm and secure stand when pressing the keys. 1 Remove the protective clips (1). 1 2 Push the meter base stabilizing unit (1) into the recess es (2) of the instrument. 1 2 18 Putting into Operation 4.4.3 Wrist strap For better protection against damage caused by dropping, you can mount the wrist strap as shown in the fol lowing diagrams. 1 O LED ER TO METTL DO OLE 2 METT E T T L TO E R E M T T E L DO LE LE METTLER TOLEDO R R DO OLE L METTLER TO E D O 3 ER METTL DO OLE DO TOLE METTLER TOLEDO 4 ET TLER METTLER TOL ED O M METTLE R T OL Putting into Operation 19 4.5 Switching the instrument on and off 1 Press and release to switch on the instrument. All segmented digital numbers and icons are dis played for 2 seconds. After that the installed soft ware version appears (e.g. 1.00) and the instru ment is ready for use. 2 Press for 2 seconds and release to switch off the instrument. EDO Cal Note ● By default after 10 minutes not in use, the instrument shuts down automatically. The auto-off function can be turned on/off in the setup menu, under General settings. See also ● Hot power on/off (page 28) 20 Putting into Operation 5 Operation of the Instrument 5.1 Calibration Note To determine the cell constant of a conductivity sensor, perform a calibration as described below. 5.1.1 Selecting a calibration standard 1 Press to enter the setup menu. 2 Select Calibration Settings and press Read. 3 Select your standard by using and and press Read to confirm. By default the following 3 standards are available: ● 84 µS/cm ● 1413 µS/cm ● 12.88 mS/cm Tables for automatic temperature compensation are programmed in the meter for each standard. See also ● Appendix (page 34) 5.1.2 Enter a cell constant If the cell constant of the conductivity cell being used is accurately known, it can be entered directly in the meter (0.01 - 500.0 uS/cm). 1 Press to enter the setup menu. 2 Select Calibration Settings and press Read. 3 Select Standard 0 by using and and press to confirm. 4 Increase or decrease the cell constant value by using 5 Press and hold and and press Read to confirm. to exit the setup menu. 5.1.3 Enter a user-defined standard There are 4 standards to choose from in the Calibration Settings. Standard 1 - Standard 3 are fixed. Stan dard 4 can be altered (user-defined). ● Standard 1 = 84 uS/cm (fix) ● Standard 2 = 1413 uS/cm (fix) ● Standard 3 = 12.88 mS/cm (fix) ● Standard 4 = 0.01 - 200.00 mS/cm (user-defined) To define a user-defined standard follow these steps: 1 Press to enter the setup menu. 2 Select Calibration Settings, press Read and select Standard 4 using 3 Press and . to confirm. 4 Change the value by using and . 5 Press Read to confirm. 6 Press and hold to exit the setup menu. Operation of the Instrument 21 5.1.4 Performing a calibration A sensor is connected to the instrument. 1 Place the sensor in a defined calibration standard and press Cal. The calibration icon and the measurement icon appear on the display. 2 The automatic endpoint A is the default setting of the meter. When the signal has stabilized, the display freezes automatically, appears and the measurement icon disappears. - or To manually endpoint a measurement, press Read. The display freezes and appears. The relevant value is displayed and stored and the measurement icon disappears from the display. 3 Press Read to accept the calibration and return to sample measurement or press to reject the calibration. Note ● To ensure the most accurate conductivity readings, you should verify your cell constant with a standard solution regularly and recalibrate if necessary. Use always fresh standards. 5.2 Settings 5.2.1 General settings Stability criteria for conductivity measurement: The sensor input signal must not deviate by more than 0.4% from the measured average conductivity of the sample in 6 seconds. There is no user-defined configuration needed. 5.2.1.1 Endpoint Formats The Seven2Go™ offers three different endpoint formats: Automatic endpoint: With the automatic endpoint the selected stability criterion (fast, normal) determines the end of an individual reading depending on the behavior of the sensor used. This ensures an easy, quick, and precise measurement. Timed endpoint: The measurement stops after a user-defined period of time (5 s - 3600 s). Manual endpoint: Unlike Auto, user interaction is required to stop the measurement reading in manual mode. The three different endpoint formats can be selected in the General settings. 1 Press to enter the setup menu. 2 Select General Settings and press Read twice. 3 Choose the endpoint format by using or . 4 Press Read to confirm. 5 Press and hold 22 Operation of the Instrument to exit the setup menu. 5.2.2 Measurement Settings 5.2.2.1 Timed Interval Reading A reading is taken every time after a certain interval (1 - 200 s) defined in the menu has elapsed. When work ing in the Timed Interval Readings mode, the interval can be defined by entering the seconds. The measure ment series stops according to the selected endpoint format (Automatic, Manual, or Timed). When Timed Interval Readings is On, Int. appears on the screen. 1 Press to enter the setup menu. 2 Select Measurement Settings and press Read. 3 Choose interval time by using or . 4 Press Read to confirm. 5 Press and hold to exit the setup menu. 5.2.2.2 Reference temperature The reference temperature can be set in the Measurement settings. Two reference temperatures are available: ● 20 °C (68 °F) ● 25 °C (77 °F). To change the reference temperature follow these steps: 1 Press to enter the setup menu. 2 Select Measurement Settings and press Read twice. 3 Select the reference temperature by using or . 4 Press Read to confirm. 5 Press and hold to exit the setup menu. Operation of the Instrument 23 5.2.2.3 Temperature correction/alpha-coefficient If needed, you can define the alpha-coefficient In the measurement settings as follows: 1 Press to enter the setup menu. 2 Select Measurement Settings and press Read three times. 3 Edit the alpha-coefficient value by using or . 4 Press Read to confirm. 5 Press and hold to exit the setup menu. With most solutions, a linear interrelationship between conductivity and temperature is given. In such cases, select the linear temperature correction method. Enter a linear temperature correction factor (alpha-coefficient) to define this dependency. You can define a temperature correction coefficient between 0.000 – 10.000 %/°C. The measured conductivity is corrected and displayed using the following formula: GTRef = GT/(1 + ( (T – TRef))/100 %) Formula definitions ● GT = conductivity measured at temperature T (mS/cm) ● GTRef = conductivity (mS/cm) displayed by the instrument, calculated back to the reference temperature TRef ● = linear temperature correction coefficient (%/°C); = 0: no temperature correction ● T = measured temperature (°C) ● TRef = Reference temperature (20 °C or 25 °C) No temperature correction In some cases, for example, when measuring according to USP/EP (United States/European Pharmacopeia) you need to switch off the temperature correction. This can be done by entering a linear correction factor of 0 %/ °C. Each sample has different temperature behavior. For pure salt solutions the correct coefficient can be found in literature, otherwise you need to determine the -coefficient by measuring the conductivity of the sample at two temperatures and calculate the coefficient by using the formula below. = (GT1 - GT2) * 100% / (T1 - T2) / GT2 T1: Typical sample temperature T2: Reference temperature GT1: Measured conductivity at typical sample temperature GT2: Measured conductivity at reference temperature Non-linear The conductivity of natural water shows strong non-linear temperature behavior. For this reason, use the nonlinear correction for natural water. The measured, non-temperature corrected conductivity is multiplied by the factor f25 for the measured temperature (see value table in Appendix) and thus corrected to the reference tem perature of 25 °C: GT25 = GT · f25 The conductivity corrected to 25 °C is divided by 1.116 (see f25 for 20.0 °C) GT20 = (GT · f25)/1.116 Note Conductivity measurements of natural water can only be performed at temperatures ranging from 0 °C to 36 °C. Otherwise, the warning message "Temp. out of nLF correction range" appears. 24 Operation of the Instrument 5.2.2.4 TDS factor TDS (Total dissolved solids) is calculated by multiplying the conductivity value with the TDS factor. A factor between 0.40 and 1.00 can be entered. To edit the TDS factor follow these steps: 1 Press to enter the setup menu. 2 Select Measurement Settings and press Read four times. 3 Edit the TDS value by using or . 4 Press Read to confirm. 5 Press and hold to exit the setup menu. 5.2.2.5 Conductivity Ash Conductivity Ash (%) is an important parameter that reflects the content of soluble inorganic salts in refined sugar or raw sugar/melasses. The value expresses the amount of such impurities in the analyzed sugar sam ple. This meter can measure conductivity ash according to the following two ICUMSA methods (see "Appendix: Conductivity ash methods"): ● 28 g / 100 g solution (refined sugar - ICUMSA GS2/3-17) ● 5 g / 100 mL solution (raw sugar – ICUMSA GS1/3/4/7/8-13) The instrument will directly convert the measured conductivity to conductivity ash % according to the selected method. The user has the possibility to enter the conductivity of the used water for preparing the sugar solutions in μS/cm (0.0 to 100.0 μS/cm). This value is then used for correcting the measured conductivity ash values according to the formula given in the Appendix. Note Conductivity ash measurements are only possible in the temperature range from 15 °C to 25 °C. To edit the conductivity ash of used water follow these steps: 1 Press to enter the setup menu. 2 Select Measurement Settings and press Read five times. 3 Select the conductivity ash by using or . 4 Press Read to confirm. 5 Press and hold to exit the setup menu. Operation of the Instrument 25 5.3 Sample measurement Note Stability criterion for conductivity measurement The sensor input signal must not deviate by more than 0.4% from the measured average conductivity of the sample in 6 seconds. 5.3.1 Performing a conductivity measurement A sensor is connected to the instrument. The measurement parameters are fully set. 1 Place the sensor in the sample and press Read to start the measurement. The measurement icon appears on the display and the decimal point blinks. The display shows the value of the sample. 2 The automatic endpoint A is the default setting of the meter. When the signal has stabilized, the display freezes automatically, appears and the measurement icon disappears. - or To manually endpoint a measurement, press Read. The display freezes and appears. The measured value is displayed. 3 Press to store the measured value. Note ● Press Read to switch between the automatic and manual endpoint modes. 5.3.2 Performing a TDS, salinity or resistivity measurement A sensor is connected to the instrument. The measurement parameters are fully set. 1 Press Mode to switch between the measurement modes and select the desired. Press Read to confirm. 2 Place the sensor in the sample and press Read to start the measurement. The measurement icon appears on the display and the decimal point blinks. The display shows the value of the sample. 3 The automatic endpoint A is the default setting of the meter. When the signal has stabilized, the display freezes automatically, appears and the measurement icon disappears. - or To manually endpoint a measurement, press Read. The display freezes and M appears. The measured value is displayed. 4 Press to store the measured value. Note ● For accurate measurement with the S3 conductivity meter it is important to use a sensor with a built-in tem perature sensor. ● The use of the special IP67 conductivity and temperature sensor InLab®738-ISM or InLab®742-ISM guaran tees optimum performance even in very humid environments. 26 Operation of the Instrument 5.4 Using the memory 5.4.1 Storing a measurement result The Seven2Go™ can store up to 200 endpointed results. – Press when the measurement has endpointed. M0001 indicates that one result has been stored, and M2000 that the maximum of 200 results have been stored. Note ● If you press when M2000 is displayed, FUL indicates that the memory is full. To store further data you will have to clear the memory. See also ● Clearing the memory (page 27) 5.4.2 Recalling from memory 1 Press to recall the stored values from memory when the current measurement has endpointed. 2 Press or to scroll through the stored results. R0001 to R2000 indicates which result is currently displayed. 3 Press Read to exit. 5.4.3 Clearing the memory 1 Press to recall the stored values. 2 Press or to scroll through the stored results until ALL appears. 3 Press Read. CLr blinks on the display. 4 Press Read to confirm the deletion or long-press to cancel. Operation of the Instrument 27 5.5 Hot power on/off Generally the instrument shuts down automatically after 10 minutes of not in use. This is for saving battery life. With hot power on you can deactivate this setting. If hot power on is active, the instrument will never power off until battery power is used up or the user presses manually. Activate hot power on: – Press and Read simultaneously. Hot power on is activated, appears on the display. Deactivate hot power on: – Press and Read simultaneously. Hot power on is deactivated, disappears from the display. Note On delivery and after doing a factory reset, the hot power on function is OFF. 5.6 Instrument self-test 1 Press Read and Cal simultaneously until Self-Diag. appears. First that each icon blinks one after the other whereby you can check if all icons are correctly shown on the display. After that, the full screen will be displayed. After that, starts to blink and the 7 hardkey-icons are shown on the display. 2 Press any hardkey. The specific icon disappears from the display. 3 Press each hardkey one time. When the self-diagnosis is completed successfully, PAS and appears. appears. If the self-diagnosis is failed, Err 1 Note ● You must press all hardkeys within 2 minutes. Otherwise Err 1 appears and the self-diagnosis has to be redone. See also ● Error messages (page 29) 5.7 Factory reset Note Loss of data! With a factory reset all user-specific settings will be set to standard. Also all data memories (e.g. sample IDs, User IDs) will be deleted. The instrument is switched on. 1 Press Read and simultaneously. RST appears on the display. 2 Press . The instrument switches off. All settings are reset. 3 Press 28 to switch on the instrument. Operation of the Instrument 6 Maintenance 6.1 Cleaning the housing Note Damage to the instrument! Ensure that no liquid enters the interior of the instrument. Wipe off any spills immediately. The meters do not require any maintenance other than an occasional wipe with a damp cloth. The housing is made of acrylonitrile butadiene styrene/polycarbonate (ABS/PC). This material is sensitive to some organic sol vents, such as toluene, xylene and methyl ethyl ketone (MEK). – Clean the housing of the instrument using a cloth dampened with water and a mild detergent. 6.2 Error messages Error 0 Error to access memory ● Switch Seven2Go off and on again. ● If this error persists, call METTLER TOLEDO Ser vice. Error 1 Error 2 Self-diagnosis failed: Not all key presses recognized within 2 minutes ● Repeat the self-diagnosis procedure and make Conductivity, resistivity, TDS, salinity or cond.ash reading is outside specified range (see technical data in chapter 9) ● Make sure the electrode placed in the sample sure that you finish pressing all seven keys within two minutes. ● If the error appears again, call METTLER TOLEDO Service. ● ● ● ● ● solution. Check the calibration data. If needed, re-calibrate the sensor. Make sure that the sensor is not damaged. Check if the sensor is properly connected. Neither the electrode plug nor the instrument's connector must be oxidized. Verify that all pins of the sensor cable plugs are straight (not bent). To exclude a problem with the meter, measure the conductivity without connected sensor; it must be 0 µS/cm. Error 3 Measured temperature during calibration is ● Keep the calibration standard temperature within outside specified range the range for calibration. (see list of calibration standards in the ● To check the temperature reading, perform a mea appendix) surement in air at room temperature and verify correct reading. Error 8 Meter is set to cond. ash and measured temperature is outside range 15 ... 25 °C Measurement data cannot be stored twice Error 9 Error 10 Memory is full ● Adjust the temperature of the sample. ● Measured value has already been stored. ● Already 200 results have been saved. ● Delete some results or clear the memory. Maintenance 29 6.3 Disposal In conformance with the European Directive 2002/96/EC on Waste Electrical and Electronic Equipment (WEEE) this device may not be disposed of in domestic waste. This also applies to countries outside the EU, per their specific requirements. Please dispose of this product in accordance with local regulations at the collecting point specified for electrical and electronic equipment. If you have any questions, please contact the responsible authority or the distributor from which you purchased this device. Should this device be passed on to other parties (for private or professional use), the content of this regu lation must also be related. Thank you for your contribution to environmental protection. 30 Maintenance 7 Product Portfolio Meter and Kits Seven2Go Conductivity meter S3 ONLY S3-Standard Kit Seven2Go Conductivity meter S3-Standard Kit with InLab® 738-ISM S3-Field Kit Seven2Go Conductivity meter S3-Field Kit with InLab® 738-ISM and uGo™ carrying case S3-Bioethanol Kit Seven2Go Conductivity meter S3-Bioethanol Kit with InLab® 725 and uGo™ carrying case Order No. 30207954 30207955 30207956 30207957 Product Portfolio 31 8 Accessories 32 Parts uGo™ carrying case Seven2Go meter benchtop stabilizing base Seven2Go electrode clip and electrode clip covers (4 pcs.) Seven2Go wrist strap (METTLER TOLEDO) InLab® 738-ISM, 4 graphite poles, epoxy shaft, ATC, cell constant: 0.57cm-1 InLab® 742-ISM 2 steel poles, steel V4A shaft, ATC, cell constant: 0.105 cm-1 InLab® 725, 2 platinum poles, glass shaft, ATC, cell constant: 0.1 cm-1 Mini-DIN to LTW adapter (for InLab 725) uPlace electrode arm Order No. 30122300 30122303 30137805 30122304 51344110 Solutions 1.3 µS/cm conductivity check solution (single use), 250 mL: 10 μS/cm conductivity standard solution, 250 mL 10 µS/cm conductivity standard, 30 x 20 mL 84 μS/cm conductivity standard solution, 250 mL 84 µS/cm conductivity standard, 30 x 20 mL 500 μS/cm conductivity standard solution, 250 mL 1413 μS/cm conductivity standard solution, 30 x 20 mL 1413 μS/cm conductivity standard solution, 6 x 250 mL 12.88 mS/cm conductivity standard solution, 30 x 20 mL 12.88 mS/cm conductivity standard solution, 6 x 250 mL Order No. 30090847 51300169 30111141 51302153 30111140 51300170 51302049 51350096 51302050 51350098 Documents A Guide to Conductivity Measurement Order No. 3009912 Accessories 51344116 30014160 51302329 30019823 9 Technical data General Power requirements Batteries 4 x LR6/AA 1.5 V Alkaline - or 4 x HR6/AA 1.3 V NiMH recharge able Battery life Dimensions Height Width Depth Weight Display LCD Ambient conditions Operating temperature Relative humidity Overvoltage category Pollution degree Maximum operating altitude Range of application Materials Housing Window IP Protection class 250...400 h 222 mm 70 mm 35 mm 270 g Segmented LCD, b/w 0…40°C 5%...85% (non-condensing) at 31 °C, linearly descending to 50% at 40 °C Class II 2 Up to 2000 m For indoor and outdoor use ABS/PC reinforced Polymethyl methacrylate (PMMA) IP67 Measurement Parameters Conductivity, TDS, salinity, specific resistance, conductivity ash Sensor input Conductivity Standard LTW 7-pin (IP67) Conductivity Measuring range 0.01 µS/cm…500 mS/cm Resolution 0.01…1 (auto-range) Accuracy (sensor input) ± 0.5% TDS Measuring range 0.01 mg/L...300 g/L Resolution 0.01…1 Accuracy (sensor input) ± 0.5% Specific Resistance Measuring range 0.00..100.0 MΩ·cm Resolution 0.01…0.1 Accuracy (sensor input) ± 0.5% Salinity Measuring range 0.00…42 psu Resolution 0.01…0.1 Accuracy (sensor input) ± 0.5% Conductivity Ash Measuring range 0.00…2022 % Resolution 0.01, 0.1, 1% (auto-range) Accuracy (sensor input) 0.5% Temperature Measuring range –5…105 °C Resolution 0.1 °C Accuracy (sensor input) ± 0.2 °C ATC Yes Reference temperature 20/25 °C Temperature correction mode Linear Calibration Calibration points 1 Predefined conductivity standards 3 Data security / storage ISM® (light version) Yes Memory size 200 Technical data 33 10 Appendix 10.1 Conductivity standards International (Ref. 25°C) T [°C] 10 µS/cm 5 6.13 10 7.10 15 7.95 20 8.97 25 10.00 30 11.03 35 12.14 Chinese Standards (Ref. 25°C) T [°C] 146.5 µS/cm 15 118.5 18 126.7 20 132.2 25 146.5 35 176.5 Japanese Standards (Ref. 20°C) T [°C] 0 5 10 15 20 25 30 35 Saturated NaCl (Ref. 25°C) T [°C] 5 10 15 20 25 30 35 34 Appendix 84 µS/cm 53.02 60.34 67.61 75.80 84.00 92.19 100.92 500 µS/cm 315.3 359.6 402.9 451.5 500.0 548.5 602.5 1413 µS/cm 896 1020 1147 1278 1413 1552 1667 12.88 mS/cm 8.22 9.33 10.48 11.67 12.88 14.12 15.39 1408 µS/cm 1141.4 1220 1273.7 1408.3 1687.6 12.85 mS/cm 10.455 11.163 11.644 12.852 15.353 111.3 mS/cm 92.12 97.8 101.7 111.31 131.1 1330.00 µS/cm 771.40 911.05 1050.70 1190.35 1330.00 1469.65 1609.30 1748.95 133.00 µS/cm 77.14 91.11 105.07 119.04 133.00 146.97 160.93 174.90 26.6 µS/cm 15.428 18.221 21.014 23.807 26.6 29.393 32.186 34.979 251.3 mS/cm 155.5 177.9 201.5 226.0 251.3 277.4 304.1 10.2 Temperature correction factors Temperature correction factors f25 for non-linear conductivity correction °C .0 .1 .2 .3 .4 .5 .6 0 1.918 1.912 1.906 1.899 1.893 1.887 1.881 1 1.857 1.851 1.845 1.840 1.834 1.829 1.822 2 1.800 1.794 1.788 1.783 1.777 1.772 1.766 3 1.745 1.740 1.734 1.729 1.724 1.719 1.713 4 1.693 1.688 1.683 1.678 1.673 1.668 1.663 5 1.643 1.638 1.634 1.629 1.624 1.619 1.615 6 1.596 1.591 1.587 1.582 1.578 1.573 1.569 7 1.551 1.547 1.542 1.538 1.534 1.529 1.525 8 1.508 1.504 1.500 1.496 1.491 1.487 1.483 9 1.467 1.463 1.459 1.455 1.451 1.447 1.443 10 1.428 1.424 1.420 1.416 1.413 1.409 1.405 11 1.390 1.387 1.383 1.379 1.376 1.372 1.369 12 1.354 1.351 1.347 1.344 1.341 1.337 1.334 13 1.320 1.317 1.313 1.310 1.307 1.303 1.300 14 1.287 1.284 1.281 1.278 1.274 1.271 1.268 15 1.256 1.253 1.249 1.246 1.243 1.240 1.237 16 1.225 1.222 1.219 1.216 1.214 1.211 1.208 17 1.196 1.193 1.191 1.188 1.185 1.182 1.179 18 1.168 1.166 1.163 1.160 1.157 1.155 1.152 19 1.141 1.139 1.136 1.134 1.131 1.128 1.126 20 1.116 1.113 1.111 1.108 1.105 1.103 1.101 21 1.091 1.088 1.086 1.083 1.081 1.079 1.076 22 1.067 1.064 1.062 1.060 1.057 1.055 1.053 23 1.044 1.041 1.039 1.037 1.035 1.032 1.030 24 1.021 1.019 1.017 1.015 1.013 1.011 1.008 25 1.000 0.998 0.996 0.994 0.992 0.990 0.987 26 0.979 0.977 0.975 0.973 0.971 0.969 0.967 27 0.959 0.957 0.955 0.953 0.952 0.950 0.948 28 0.940 0.938 0.936 0.934 0.933 0.931 0.929 29 0.921 0.920 0.918 0.916 0.914 0.912 0.911 30 0.903 0.902 0.900 0.898 0.896 0.895 0.893 31 0.886 0.884 0.883 0.881 0.879 0.877 0.876 32 0.869 0.867 0.866 0.864 0.863 0.861 0.859 33 0.853 0.851 0.850 0.848 0.846 0.845 0.843 34 0.837 0.835 0.834 0.832 0.831 0.829 0.828 35 0.822 0.820 0.819 0.817 0.816 0.814 0.813 .7 1.875 1.817 1.761 1.708 1.658 1.610 1.564 1.521 1.479 1.439 1.401 1.365 1.330 1.297 1.265 1.234 1.205 1.177 1.149 1.123 1.098 1.074 1.051 1.028 1.006 0.985 0.965 0.946 0.927 0.909 0.891 0.874 0.858 0.842 0.826 0.811 .8 1.869 1.811 1.756 1.703 1.653 1.605 1.560 1.516 1.475 1.436 1.398 1.362 1.327 1.294 1.262 1.231 1.202 1.174 1.147 1.121 1.096 1.071 1.048 1.026 1.004 0.983 0.963 0.944 0.925 0.907 0.889 0.872 0.856 0.840 0.825 0.810 .9 1.863 1.805 1.750 1.698 1.648 1.601 1.555 1.512 1.471 1.432 1.384 1.358 1.323 1.290 1.259 1.228 1.199 1.171 1.144 1.118 1.093 1.069 1.046 1.024 1.002 0.981 0.961 0.942 0.923 0.905 0.888 0.871 0.854 0.839 0.823 0.808 Appendix 35 10.3 Temperature coefficients (alpha-values) Substance at 25°C Concentration [%] HCl KCl CH3COOH NaCl H2SO4 HF 10 10 10 10 10 1.5 Temperature coeffi cient alpha [%/°C] 1.56 1.88 1.69 2.14 1.28 7.20 -coefficients of conductivity standards for a calculation to reference temperature 25 °C Standard 84 µS/cm 1413 µS/cm 12.88 mS/cm Measurement temp.: 15 °C 1.95 1.94 1.90 Measurement temp.: 20 °C 1.95 1.94 1.89 Measurement temp.: 30 °C 1.95 1.94 1.91 Measurement temp.: 35 °C 2.01 1.99 1.95 10.4 Practical salinity scale (UNESCO 1978) The salinity is calculated according to the official definition of UNESCO 1978. Therefore the salinity Spsu of a sample in psu (practical salinity unit) at standard atmospheric pressure is calculated as follows: a0 = 0.0080 a1 = -0.1692 a2 = 25.3851 a3 = 14.0941 a4 = -7.0261 a5 = 2.7081 b0 = 0.0005 b1 = -0.0056 b2 = -0.0066 b3 = -0.0375 b4 = 0.0636 b5 = -0.0144 k = 0.00162 (32.4356 g KCl per 1000 g of solution) 10.5 Conductivity to TDS conversion factors Conductivity at 25 °C 84 µS/cm 447 µS/cm 1413 µS/cm 1500 µS/cm 8974 µS/cm 12.880 µS/cm 15.000 µS/cm 80 mS/cm 36 Appendix TDS KCl ppm value 40.38 225.6 744.7 757.1 5101 7447 8759 52.168 factor 0.5048 0.5047 0.527 0.5047 0.5685 0.5782 0.5839 0.6521 TDS NaCl ppm value 38.04 215.5 702.1 737.1 4487 7230 8532 48.384 factor 0.4755 0.4822 0.4969 0.4914 0.5000 0.5613 0.5688 0.6048 10.6 Conductivity ash methods The meter can measure the conductivity ash (%) according to the two ICUMSA methods: 10.6.1 Refined sugar (28 g/100 g solution) ICUMSA GS2/3-17 The formula that the instrument uses is: %(m/m)=0,0006x((C1/(1+0,026x(T-20)))–0,35x(C2/(1+0,026x(T-20)))xK) C1 = conductivity of the sugar solution in μS/cm with cell constant = 1 cm-1 C2 = conductivity of the water used in μS/cm to prepare the sugar solution with cell constant = 1 cm-1 T = temperature in °C between 15°C and 25°C K = cell constant 10.6.2 Raw sugar or melasses (5 g / 100 mL solution) ICUMSA GS 1/3/4/7/8-13 The formula that the instrument uses is: %(m/V)=0,0018x((C1/(1+0,023x(T-20))-C2/(1+0,023x(T-20)))xK) C1 = conductivity of the sugar solution in μS/cm with cell constant = 1 cm-1 C2 = conductivity of the water used to prepare the sugar solution in μS/cm with cell constant = 1 cm-1 T = temperature in °C between 15°C and 25°C K = cell constant of the used sensor Appendix 37 www.mt.com/ph For more information Mettler-Toledo AG, Analytical CH-8603 Schwerzenbach, Switzerland Tel. +41 (0)44 806 77 11 Fax +41 (0)44 806 73 50 www.mt.com Subject to technical changes. © Mettler-Toledo AG 08/2014 30219785A *30219785*