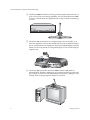
1
iPower Collaboration System
Tips and Troubleshooting
VS4000 User’s Guide
iPower Collaboration System Tips and Troubleshooting
Copyright © 2002: Polycom, Inc.
Polycom, Inc., 4750 Willow Road, Pleasanton, CA 94588
www.polycom.com
Polycom, the Polycom logo, and Vortex are registered trademarks of Polycom, Inc. Global Management System, IDEC,
ImageShare, iPower, LAMB, Look-At-Me-Button, PathNavigator, PowerCam, PowerMic, and WebOffice are trademarks
of Polycom, Inc.
Bose is a registered trademark of Bose Corporation.
Intel is a registered trademark of Intel Corporation.
Microsoft, NetMeeting, PowerPoint, Windows, and Windows NT are registered trademarks of Microsoft Corporation.
HP is a registered trademark of Hewlett-Packard Company.
Netscape is a registered trademark of Netscape Communications Corporation.
All other product and company names are the trademarks or registered trademarks of their respective owners.
The information contained in this document is subject to change without notice. Polycom assumes no responsibility for
technical or editorial errors or omissions that may appear in this document or for the use of this material. Nor does
Polycom make any commitment to update the information contained in this document. This document contains
proprietary information which is protected by copyright. All rights reserved. No part of this document may be
photocopied or reproduced in any form without the prior written consent of Polycom, Inc.
Edition: 3725-50171-001/A
Do you have any suggestions or comments on the documentation for this
product? If so, please send them by email to [email protected].
ii
www.polycom.com
Contents
About This Guide
Chapter 1 - Presenting the Polycom iPower Systems
About the iPower Systems ........................................................................................................................ 1
Standard Hardware Components ............................................................................................................ 3
Computer Box ...................................................................................................................................... 3
iPower 9000 System...................................................................................................................... 3
iPower 600 System........................................................................................................................ 3
iPower 900 System........................................................................................................................ 4
Main Camera ........................................................................................................................................ 4
iPower 9000 System...................................................................................................................... 4
iPower 600 System........................................................................................................................ 5
iPower 900 System........................................................................................................................ 5
Remote Control Devices ..................................................................................................................... 5
iPower 9000 System...................................................................................................................... 5
iPower 600 and iPower 900 Systems ......................................................................................... 6
PowerMic .............................................................................................................................................. 7
ImageShare or ImageShare II............................................................................................................. 7
iPower 9000 and iPower 600 Systems ....................................................................................... 7
iPower 900 System........................................................................................................................ 7
Optional Hardware Components............................................................................................................. 8
Display .................................................................................................................................................. 8
Cart ........................................................................................................................................................ 9
Additional Cameras ............................................................................................................................ 9
VCR...................................................................................................................................................... 10
Other Optional Hardware Components ........................................................................................ 10
Standard Software Applications............................................................................................................. 11
Optional Software Applications ............................................................................................................. 12
Chapter 2 - AdminTools Roadmap
Customizing the System ......................................................................................................................... 14
Setting Up System Security ..................................................................................................................... 14
Configuring Network Use ....................................................................................................................... 15
Configuring Audio ................................................................................................................................... 15
Configuring Video.................................................................................................................................... 16
Configuring Streaming ............................................................................................................................ 16
Setting Up Directories .............................................................................................................................. 16
Allowing Data Sharing ............................................................................................................................ 17
Maintaining
the System
...........................................................................................................................
17iii
© Polycom,
Inc.
Preliminary
and Confidential - For Internal Distribution Only
Using Remote Management Tools ......................................................................................................... 17
Configuring Multipoint Conferencing .................................................................................................. 18
© Polycom, Inc.
iii
iPower Collaboration System Tips and Troubleshooting
Chapter 3 - Tips for Tasks You Do Rarely
Setting Up the Log On Process ................................................................................................................19
Choosing Logon Options ..................................................................................................................19
Setting Up User Accounts for Standard Windows Logon ...........................................................20
Setting Up Additional Software ..............................................................................................................20
Remote Management Software ........................................................................................................20
WebRemote ..................................................................................................................................20
SNMP Management....................................................................................................................22
Global Management System......................................................................................................22
Document Servers ..............................................................................................................................24
PathNavigator Conference-on-Demand .........................................................................................25
WebOffice ............................................................................................................................................26
Restoring the System.................................................................................................................................28
Getting Ready to Reinstall ................................................................................................................28
Reinstalling the iPower System........................................................................................................28
iPower 9000 and iPower 900 Systems ......................................................................................29
iPower 600 System ......................................................................................................................29
Chapter 4 - Tips for Tasks You Do Regularly
Adding Applications.................................................................................................................................32
Monitoring System Statistics ...................................................................................................................32
Viewing Detailed System Statistics .................................................................................................32
Viewing the Configuration Summary.............................................................................................34
Viewing Statistics for the Current Call ...........................................................................................35
Accessing and Viewing Logs ...................................................................................................................36
Setting Up Virus Protection .....................................................................................................................37
Conserving Disk Space .............................................................................................................................37
Chapter 5 - Tips for Helping Users
Making Sure Users Have the Information They Need ........................................................................39
Sending the “Quick Tips Sheet” to Users .......................................................................................39
Customizing the “Getting Started Guide” .....................................................................................40
Displaying Room Information on the iPower System Home Page.............................................40
Making Sure Users Know How to Contact the System Administrator.............................................41
Finding Information in the Documentation ..........................................................................................42
Chapter 6 - Troubleshooting Tips
Solving Installation Problems..................................................................................................................46
Solving Startup Problems.........................................................................................................................46
Solving General System Problems ..........................................................................................................47
Solving Network Problems ......................................................................................................................49
Solving Video Problems ...........................................................................................................................55
Solving Audio Problems...........................................................................................................................59
Solving ImageShare and ImageShare II Problems ...............................................................................61
Appendix A - System Default Settings
iv
www.polycom.com
About This Guide
This guide is for system administrators who need to configure, maintain, and
troubleshoot the Polycom® iPower™ 9000, iPower 600, and iPower 900 systems.
Complete information about the iPower systems is available through the online
help. For installation information, refer to the hardcopy installation
documentation. Users can also refer to the documentation available on the iPower
Documentation Library CD. Both the installation documentation and the CD are
shipped with each iPower system. (For titles and descriptions of all the iPower
documentation, see Chapter 5, “Tips for Helping Users.”)
For support or service, please contact your Polycom service provider or call
Polycom Technical Support. You can find phone numbers for Technical Support in
your area, as well as the latest product information, at the Polycom web site,
www.polycom.com.
1
Presenting the
Polycom iPower Systems
This chapter provides an overview of the three Polycom iPower systems. It
includes these topics:
❑ About the iPower Systems — Describes each iPower system.
❑ Standard Hardware Components — Describes the hardware components that
come standard with each system, such as the computer box, cameras, and
remote control devices.
❑ Optional Hardware Components — Describes the hardware components that
you can purchase separately, such as displays, carts, and additional cameras.
❑ Standard Software Applications — Describes the software applications that
come standard with each system, such as the Collaboration application,
AdminTools, and Hardware Diagnostics.
❑ Optional Software Applications — Describes the software applications that
you can purchase separately, such as the Polycom Document Server, Polycom
PathNavigator™ Conference-on-Demand, the Polycom Global Management
System™, and WebOffice™.
About the iPower Systems
The Polycom iPower systems are state-of-the-art visual collaboration tools. Each
allows users to exchange ideas and share documents with people anywhere in the
world, as if they were all in the same room.
Three versions of the iPower system are available: the iPower 9000, the iPower 600,
and the iPower 900.
© Polycom, Inc.
1
iPower Collaboration System Tips and Troubleshooting
❑ The iPower 9000, like all iPower systems, provides quality audio and video, as
well as easy-to-use data sharing capabilities. You can install the iPower 9000
system in a 19-inch (48.26 cm) equipment rack, on top of a desk or credenza, or
in a cart.
❑ The iPower 600 system comes in a unique package. You can install it as an
all-in-one appliance, so that it conveniently fits on top of a traditional monitor.
Or, you can split it into two components: the Camera and Microphone module,
which you can easily mount on a flat-panel display or wall, and the compact
computer unit.
❑ The iPower 900 system, like the iPower 9000 and iPower 600, utilizes a
conventional PC platform, enabling you to use it for more than just video calls.
For example, you can use it for collaborating on documents, surfing the web,
sending email, accessing corporate databases, and more.
2
www.polycom.com
Chapter 1 - Presenting the Polycom iPower Systems
Standard Hardware Components
The following hardware components come standard with each iPower system:
❑ Computer box
❑ Main camera
❑ Remote control devices
❑ ImageShare™ or ImageShare II
Computer Box
iPower 9000 System
The computer box contains the system software, internal hardware, and power
supply.
To locate the power button on the iPower 9000 computer box, flip down the front
cover. The CD-ROM drive is also located at the front, whereas the connection panel
is located at the rear.
iPower 600 System
The computer box is known as the computer unit for the iPower 600 system.
The power button on the iPower 600 is located on the side of the computer unit.
The connection panel is at the rear.
© Polycom, Inc.
3
iPower Collaboration System Tips and Troubleshooting
iPower 900 System
The power button, as well as the CD-ROM drive and diskette drive, on the iPower
900 are at the front of the computer box. The connection panel is located at the rear.
Main Camera
iPower 9000 System
The iPower 9000 system uses either the PowerCam™ Plus or the PowerCam as its
standard main camera. You can also use either camera as an auxiliary camera.
The PowerCam Plus features the Automatic Camera Pointing (ACP) mechanism.
When you enable ACP, the camera uses the built-in ACP microphone to
automatically locate and frame the speaker.
PowerCam Plus
4
PowerCam
www.polycom.com
Chapter 1 - Presenting the Polycom iPower Systems
iPower 600 System
The iPower 600 system uses the Camera and Microphone module as its standard
main camera and microphone.
The standard main camera is a pan-tilt-zoom (PTZ) camera, which utilizes the
Automatic Camera Pointing (ACP) mechanism. The Camera and Microphone
module also includes the Zoom Mic.
You must power off the system to connect or disconnect the Camera and
Microphone module.
iPower 900 System
The iPower 900 system uses either the iPower 80 Dynamic Locating Camera or the
iPower 70 Room Camera as its standard main camera.
The iPower 80 features the Automatic Camera Pointing (ACP) mechanism.
iPower 80
iPower 70
Remote Control Devices
iPower 9000 System
You can use the iPower 9000 system keyboard for both administrative and user
tasks. It includes the standard keyboard character keys, an integrated trackball,
© Polycom, Inc.
5
iPower Collaboration System Tips and Troubleshooting
and buttons that correspond to common user tasks. For information about how to
use the buttons on the keyboard, see the iPower 9000 Collaboration System Quick Tips
Sheet.
The remote control is designed to make video collaboration easier. The buttons on
the remote correspond to common tasks that you perform during a video
collaboration meeting, such as making a call and zooming the camera.
Near/Far
PIP
Auto
Zoom
Call/Answer
Hang Up
Mute
Volume
Set
Preset
Auto
Near/Far
Zoom
Point
PIP
Point
Full Screen
Volume
Mute
Full
Screen
Presets
1
2
5
6
9
0
3
4
7
8
Set
iPower 600 and iPower 900 Systems
You can use the keyboard for the iPower 600 and iPower 900 systems for both
administrative and user tasks. It includes the standard keyboard character buttons
and an integrated trackball; however, it does not include buttons that correspond
to common user tasks.
Like the remote control for the iPower 9000 system, the buttons on the remote
control for the iPower 600 and iPower 900 correspond to common tasks that you
perform during a video collaboration meeting, such as making a call and zooming
the camera. For information about how to use the buttons on the remote control,
see the iPower Collaboration System Quick Tips Sheet.
HELP
ON/STANDBY
1
4
2
SET
3
ABC
DEF
5
JKL
6 MNO
8
TUV
9 WXYZ
0
#
CANCEL
PRESET
GHI
7 PQRS
*
OPTIONS
HANG UP
CALL/ANSWER
CONTENT
PEOPLE
PIP
ZOOM
VOLUME
MUTE
6
AUTO
www.polycom.com
Chapter 1 - Presenting the Polycom iPower Systems
PowerMic
All the iPower systems use the PowerMic™ as the main microphone. You can use
up to a total of eight PowerMic microphones with your iPower 9000, and up to four
with your iPower 600 and iPower 900.
ImageShare or ImageShare II
iPower 9000 and iPower 600 Systems
The ImageShare II device makes it easy for you to add audio and video from a
laptop to your system.
The ImageShare II is included with the iPower 9000 system and is available as an
option for the iPower 600 system.
iPower 900 System
The ImageShare device makes it easy for you to add audio and video input and
output devices, such as a laptop or a projector, to the iPower 900 system.
© Polycom, Inc.
7
iPower Collaboration System Tips and Troubleshooting
The ImageShare is included with the iPower 970 system and is available as an
option for the iPower 960 system.
Optional Hardware Components
The following hardware components can be purchased separately:
❑ Display
❑ Cart
❑ Additional cameras
❑ Other optional hardware components
Display
The display shows video from the cameras and other video sources, application
windows, online help, and so on. The display can be a regular display or a
flat-panel display, and you can have up to two displays connected to your system.
The display’s picture-in-picture (PIP) window is an area on the screen that is
usually used to show the image you are sending to the other call participants.
8
www.polycom.com
Chapter 1 - Presenting the Polycom iPower Systems
If your system has two displays, one must be an SVGA/XGA display and the other
an NTSC/PAL display. In systems with two displays, you view People on the
NTSC/PAL display and view Content, such as reports and presentations, on the
SVGA/XGA display. Because you view People on the NTSC/PAL display, you
should place the camera on that display.
Note
If you install a second display, you must open the AdminTools Monitor page and
check the Use second monitor check box. See the AdminTools online help for more
information. To access this help, press the
HELP button on the remote control,
press F1 on the keyboard, or click Help when you are within the AdminTools
application.
Cart
You can use one of several carts to hold the iPower system, display, peripheral
devices, and documentation. The Premier Cart includes enclosed storage for your
computer box, monitor, system components, and documentation. It also features a
built-in Bose® speaker. The Utility Cart offers a more basic means to hold and move
the system and display.
Additional Cameras
You can add additional cameras to your iPower system.
For the iPower 9000 and iPower 900 systems, you can use up to three cameras: a
main camera, an optional auxiliary camera, and an optional document camera.
© Polycom, Inc.
9
iPower Collaboration System Tips and Troubleshooting
For the iPower 600 system, you can use a camera other than the standard Camera
and Microphone Module as the main camera. You can also add a document
camera.
Document Camera
VCR
You can add one or two VCRs to any of the iPower systems so that users can play
videotapes during calls or create videotapes of meetings.
Note
If you install one or two VCRs, you must open the AdminTools Camera Controls
and VCR page and click either One VCR or Two VCRs. See the AdminTools online
help for more information. To access this help, press the
HELP button on the
remote control, press F1 on the keyboard, or click Help when you are within the
AdminTools application.
Other Optional Hardware Components
There are several other optional components you can add to the iPower systems:
❑ Remote control devices — You can add your own keyboard, mouse, or remote
control to any of the iPower systems.
❑ USB devices — You can add a USB device, such as a printer or a scanner, to the
iPower 9000 and iPower 600 systems, or to version 3.0 or higher of the iPower
900 system.
❑ Serial devices — You can add a serial device, such as a whiteboard, to any of
the iPower systems. You can also add a custom control panel to the iPower
9000 system.
10
www.polycom.com
Chapter 1 - Presenting the Polycom iPower Systems
❑ Room audio input devices — Instead of a second PowerMic, you can add a
room audio input device, such as a Polycom Vortex® device, to the iPower 9000
system.
❑ Look-At-Me-Button™ (LAMB™) — You can enable people who are not near
the keyboard or remote control to move the camera by adding LAMBs to the
iPower 600 and iPower 900 systems.
❑ Projector — You can connect a projector to the back of an iPower 9000 or
iPower 600 system or to the ImageShare device on an iPower 900 system.
Depending on your system, you may need to provide your own VGA splitter.
❑ Headset — You can connect a headset with earphones and microphones to an
iPower 600 system. The headset plugs into the side of the computer unit,
behind the power button. You can also connect a headset to an iPower 9000
system, but you must provide your own an RCA-to-phone adapter cable.
❑ Laptop — You can add laptop (or PC) audio output to your system by
connecting a laptop to the ImageShare or ImageShare II device, and then
connecting the ImageShare or ImageShare II to your system’s computer box.
Or, with the iPower 600, you can directly connect a laptop to the computer
unit; however, you must provide your own audio and VGA cables.
Standard Software Applications
The software applications listed in the following table are included on the Polycom
System Software CD.
You can find many of these applications by choosing Programs>iPower from the
Start menu.
This application...
Enables you to...
Setup Wizard
Easily install the Collaboration software onto your system.
Collaboration
application
Participate in videoconferences or in-room presentations.
AdminTools
Configure and maintain the iPower collaboration system.
Operating Statistics
Verify system performance, view a log of call-related statistics
and events, log system events, and run loopback tests.
Hardware Diagnostics
Test the performance of the system’s internal boards and
cables, and monitor input and output from audio and video
devices that are connected to the system.
File Transfer
Send and receive files during meetings.
NetMeeting®
© Polycom, Inc.
Chat
Use text chatting while you are in a call.
11
iPower Collaboration System Tips and Troubleshooting
This application...
Enables you to...
Acrobat Reader
Read user documents provided in PDF format.
Microsoft® Office
Viewer
View documents from Windows® applications, such as
PowerPoint® and Excel.
Optional Software Applications
The software applications listed in the following table are optional.
12
This application...
Enables you to...
Document Server
Store files on a server so they can be retrieved during meetings.
Directory Services
Setup
Set up and access Central and Personal Directories, or “phone
books,” of collaboration sites.
Network Manager
Manage networked collaboration systems.
PathNavigator
Conference-onDemand
Make a multipoint call in a single step by selecting multiple ISDN
and LAN addresses from a single directory or by entering multiple
addresses in the Make a Call dialog box.
Global
Management
System
Monitor general system information such as network interface
status and call status, receive notification when an iPower user
needs help, and send and receive messages from users.
WebOffice
Conduct online meetings and share information, files,
applications, or documents with other WebOffice users.
www.polycom.com
2
AdminTools Roadmap
AdminTools is a utility available with each iPower system. You use AdminTools to
initially set up the system. Thereafter, you may want to use this utility to fine-tune
the system and to make adjustments according to your organization’s video
collaboration needs.
This chapter provides a roadmap of all the tasks you can do using AdminTools. It
includes these topics:
❑ Customizing the System
❑ Setting Up System Security
❑ Configuring Network Use
❑ Configuring Audio
❑ Configuring Video
❑ Configuring Streaming
❑ Setting Up Directories
❑ Allowing Data Sharing
❑ Maintaining the System
❑ Using Remote Management Tools
❑ Configuring Multipoint Conferencing
Note
For complete information about any of these tasks, view the AdminTools help. To
access this help, press the
HELP button on the remote control, press F1 on the
keyboard, or click Help when you are within the AdminTools application.
To access AdminTools:
Choose Start>Programs>Polycom iPower>Administrator Information>AdminTools.
© Polycom, Inc.
13
iPower Collaboration System Tips and Troubleshooting
Customizing the System
To Do This...
First Click...
Then Click...
Change the second monitor’s PIP
position
Video
Monitor tab
Configure Standby Mode
General
Logoff and Standby tab
Set call preferences, such as how
incoming calls are answered or how the
redial function works
General
Call Preferences tab
Allow use of a custom control panel
Utilities
Custom Control tab
Provide a site name
General
System Information tab
List a name and number to call for help
General
System Information tab
Add applications to the Options menu
General
Options Menu
Configuration tab
Add applications to the People and
Content list
General
People and Content List
Configuration tab
Configure Quality of Service (QoS) on
an iPower 9000 system
LAN
QoS tab
Configure WebOffice for an iPower
system
Utilities
WebOffice tab
Setting Up System Security
14
To Do This...
First Click...
Then Click...
Configure the Adapter/NAT/Port Range
LAN
Adapter/NAT/Port Range
tab
Save numbers in a Call Log
General
Call Preferences tab
Choose the logon method
General
Logon and Security tab
Disable Auto Logon
General
Logon and Security tab
Set the logoff options
General
Logoff and Standby tab
Lock settings on a page
General
Locked Settings tab
www.polycom.com
Chapter 2 - AdminTools Roadmap
Configuring Network Use
To Do This...
First click...
Then click...
Set the basic ISDN configuration
ISDN
ISDN Configuration tab
Set the ISDN bandwidth options
ISDN
ISDN Bandwidth tab
Set the advanced ISDN configuration
ISDN
ISDN Configuration tab
Configure the system to use an IMUX
(iPower 9000 and iPower 900 systems)
ISDN
IMUX Setup tab
Reserve a line for voice calls
ISDN
Set Up ISDN button
Reserve a line for remote management
ISDN
ISDN Bandwidth tab
Set the basic LAN configuration
LAN
LAN Configuration tab
Set the LAN bandwidth options
LAN
LAN Bandwidth tab
Set up a gateway
ISDN
Gateway Setup tab
Set up a gatekeeper
LAN
Gatekeeper Setup tab
Configuring Audio
To Do This...
© Polycom, Inc.
First Click...
Then Click...
Set the audio algorithm for ISDN calls
Audio
Audio Preferences tab
Set the audio algorithm for LAN calls
Audio
Audio Preferences tab
Configure Automatic Gain Control
(AGC) for auxiliary audio
Audio
Audio Input and Output tab
Configure the microphones
Audio
Audio Input and Output tab
Define the number of speakers
Audio
Audio Input and Output tab
15
iPower Collaboration System Tips and Troubleshooting
Configuring Video
To Do This...
First Click...
Then Click...
Set the video algorithm for ISDN calls
Video
Video Preferences tab
Set the video algorithm for LAN calls
Video
Video Preferences tab
Enable flicker reduction
Video
Video Preferences tab
Enable or disable dual images
Video
Video Preferences tab
Set up cameras and video sources
Video
Cameras and Video
Sources tab
Configure camera behavior
Video
Camera Control and VCR
tab
Add a second monitor
General
Monitor tab
Add VCR(s)
Video
Camera Control and VCR
tab
Configuring Streaming
To Do This...
First Click...
Then Click...
Configure the Streaming option on an
iPower system
LAN
Streaming tab
Configure the Streaming option on an
external server
LAN
Streaming tab
Setting Up Directories
To Do This...
16
First Click...
Then Click...
Set up a Local Directory
Directory
Local Directory tab
Set up a Central Directory
Directory
Central Directory Server
Setup tab
Register with an ILS server
Directory
ILS Registration tab
www.polycom.com
Chapter 2 - AdminTools Roadmap
Allowing Data Sharing
To Do This...
First Click...
Then Click...
Allow file transfer
Utilities
File Transfer tab
Configure the system to use a
Document Server
Utilities
Document Server tab
Maintaining the System
To Do This...
First Click...
Then Click...
Update the system information
General
System Information tab
Set up Readiness Monitoring
Utilities
Readiness Monitoring tab
Using Remote Management Tools
To Do This...
© Polycom, Inc.
First Click...
Then Click...
Configure the system for WebRemote
management
Utilities
Network Management tab
Set up RAS access over ISDN
ISDN
ISDN Bandwidth tab
Configure the system for SNMP
management
Utilities
Network Management tab
Set up the Global Management System
on an iPower system
Utilities
Global Management
System tab
Disable the Global Management
System on an iPower system
Utilities
Global Management
System tab
17
iPower Collaboration System Tips and Troubleshooting
Configuring Multipoint Conferencing
To Do This...
18
Click...
Allow multipoint conferences
Multipoint
Set the default video display for internal multipoint
Multipoint
Set the audio and video preferences for internal multipoint
Multipoint
www.polycom.com
3
Tips for Tasks You Do Rarely
This chapter provides information about tasks that you need to perform only once
or very rarely. It includes these topics:
❑ Setting Up the Log On Process — Describes how to choose logon options and
set up user accounts.
❑ Setting Up Additional Software — Describes additional software that you may
install with your system, such as remote management software, Document
Servers, PathNavigator Conference-on-Demand, and the Polycom Global
Management System.
❑ Restoring the System — Describes how to reinstall the iPower system
software.
Setting Up the Log On Process
To control how users access the iPower system, you must decide which logon
options to use.
Choosing Logon Options
The iPower system offers two logon options:
❑ Standard Windows logon lets users log on by entering a valid user or
administrator name and password for either a local Windows user account or
a Windows domain account. After they log on, users have the privileges you
define for the local Windows user account or Windows domain account.
❑ Auto Logon lets users log on to the iPower system using the default user
account. With the Auto Logon feature, the Logon dialog box appears with the
default user name and password already filled in. Therefore, users don’t have
to log on using their own accounts, and they all have the privileges defined for
© Polycom, Inc.
19
iPower Collaboration System Tips and Troubleshooting
the default user account. Auto Logon is the default logon option for the iPower
system.
Setting Up User Accounts for Standard Windows Logon
The available user accounts are as follows:
Type of Account
Description
How to Create This Account
Local user
account
Requires a unique account
for each user, which allows
the user to access the
system.
Use the Windows User Manager
to create local user accounts. For
specific instructions, see your
Windows documentation.
Domain account
Requires a unique account
for each user, which allows
the user to access each
system in the domain.
Use the Windows User Manager
for Domains to create domain
accounts. For specific instructions,
see your Windows documentation.
iPower system
default user
account
Allows all users to access the
system. The default user
name and password appear
in the Logon dialog box.
Use the AdminTools Logon and
Security page to set up the iPower
system default user account. Set
the default user name and
password using the Default User
Account section of this page.
Setting Up Additional Software
This section describes additional software that you may have added to the iPower
system, such as remote management software, Document Servers, PathNavigator
Conference-on-Demand, and Polycom WebOffice.
Remote Management Software
Three remote management software applications are available with the iPower
system: WebRemote, SNMP Management, and the Polycom Global Management
System.
WebRemote
Before you use WebRemote, you must configure your iPower system to use it. If
you plan to perform network management of the iPower system, but your network
management station (NMS) is not connected to the system via a LAN, you may
also need to set up RAS access over ISDN.
20
www.polycom.com
Chapter 3 - Tips for Tasks You Do Rarely
For information about how to configure the system to use WebRemote and how to
set up RAS access over ISDN, see the AdminTools online help. To access this help,
press the
HELP button on the remote control, press F1 on the keyboard, or click
Help when you are within the AdminTools application.
WebRemote also requires you to log on with an administrator account and to have
one of the following browsers:
❑ Microsoft Internet Explorer 5.0 or higher
❑ Netscape® Navigator 4.6 or higher
To use WebRemote:
1.
Launch your web browser.
2.
Enter the system’s IP address or DNS name.
A web page opens.
3.
Click WebRemote.
4.
Enter a user name and password for an account that has administrator
privileges on the iPower system.
WebRemote opens.
5.
Use WebRemote as follows:
Click...
To...
Call Control
Access the iPower system Collaboration application.
AdminTools
Access the AdminTools application.
Diagnostics
Access the Hardware Diagnostics application to perform
tests and download error log files.
System State
View Readiness Monitoring error messages, shut down the
iPower system applications, or restart the system.
Statistics
View the system statistics.
Alarms
View SNMP alarms.
Help
Access WebRemote online help.
For more information about WebRemote, see the WebRemote online help.
© Polycom, Inc.
21
iPower Collaboration System Tips and Troubleshooting
SNMP Management
To enable SNMP management, you must do the following:
1.
Set up an SNMP environment.
To set up an SNMP environment, you must install network management
software (such as HP® OpenView) on the computer you intend to use as your
network management station (NMS). You cannot use the iPower system as the
NMS.
2.
Install the iPower MIBs:
a.
Access the appropriate iPower system MIB file at one of these locations:
–
On the iPower system at C:\Program Files\PictureTel\VCS\SNMP\Mib.
–
From the Polycom web site at www.polycom.com.
b. Install the MIBs on the network management station as required by your
management software.
For more information, see the management application’s documentation.
c.
Using AdminTools, configure the iPower system for SNMP management.
For more information, see the AdminTools online help. To access this help,
press the
HELP button on the remote control, press F1 on the keyboard,
or click Help when you are within the AdminTools application.
3.
Add the iPower Network Manager.
Once you’ve configured the iPower system to allow remote management via
SNMP, you may choose to use the iPower Network Manager application,
which is available on the iPower Network Manager CD. This optional
application enhances HP OpenView or other network management software.
For information on how to use the iPower Network Manager application, see
the Network Manager online help. For information on how to use your SNMP
network management application to control a remote system, see the
documentation that came with the application.
Global Management System
The Polycom Global Management System is a web-based software application that
provides centralized video network management. As long as you have a web
browser, you can use the Global Management System with the iPower system to
monitor and maintain local and remote videoconferencing systems and networks
from anywhere in the world.
You can use the Global Management System with the iPower system to:
❑ Monitor system status
❑ Obtain general system information and addresses
22
www.polycom.com
Chapter 3 - Tips for Tasks You Do Rarely
❑ Provide Remote Alert Notification
❑ Obtain Call Detail Record information, such as call time, start and end time,
video bandwidth, and number dialed
❑ Configure videoconferencing equipment
❑ Update iPower software
❑ Send messages to the Network Administrator
In order to use the Global Management System with an iPower system, you must
set up the Global Management System user account on an iPower system. To do
this:
1.
Start AdminTools and click
2.
Click the Global Management System tab.
3.
Check the Allow Management via Global Management System check box.
4.
Click Set Password.
5.
Enter a password to access the iPower system from the Global Management
system.
Utilities.
To disable the Global Management System on an iPower system:
Utilities.
1.
Start AdminTools and click
2.
Click the Global Management System tab.
3.
Uncheck the Allow Management via Global Management System check box.
The password used to access the iPower system is not affected.
To remove a Global Management System IP address:
1.
Start AdminTools and click
2.
Click the Global Management System tab.
3.
In the Global Management System Station URLs list, highlight the IP address that
you want to remove.
4.
Click Remove.
Utilities.
When you enable the Global Management System, you can designate the Polycom
Global Directory as one of the Central Directories. For more information about this
and about the Global Management System in general, see the Global Management
System documentation.
© Polycom, Inc.
23
iPower Collaboration System Tips and Troubleshooting
Document Servers
A Document Server provides several advantages, such as:
❑ Flexibility. Users aren’t hindered by the space limitations imposed by
diskettes.
❑ Frees hard drive space. Users store the files they intend to share on the server,
not on the iPower system.
❑ Security. User data is secure. Each user’s access to the server is limited to an
individual folder created at logon.
To set up a Document Server, you must install the server software on a Windows
NT® server and then configure the iPower system to use it. The server must meet
these requirements:
❑ Microsoft Internet Information Server (IIS) version 4.0 or higher
❑ Microsoft Windows NT Server 4.0 or higher with Service Pack 3 or higher
❑ An NTFS partition
❑ 90 MHz or faster Intel® Pentium processor
❑ 64 MB of RAM
❑ 10 MB of hard drive disk space per user
To install the Document Server software:
1.
Log on to the system you intend to use as the server.
2.
Insert the iPower Document Server CD into the CD-ROM drive.
3.
Double-click the CD-ROM drive icon and then double-click the Install
Document Server icon.
4.
Follow the onscreen instructions to complete the installation.
5.
Using AdminTools, configure how your users utilize the Document Server.
For additional information, see the AdminTools online help. To access this
help, press the
HELP button on the remote control, press F1 on the
keyboard, or click Help when you are within the AdminTools application.
24
www.polycom.com
Chapter 3 - Tips for Tasks You Do Rarely
If You Allow Document Server Use...
Note
•
Check that users have Microsoft Internet Explorer version 4.0 or higher or
Netscape Navigator version 4.0 or higher installed on their desktop
computers.
•
Publish the Document Server URL(s) throughout your organization.
•
Customize the Document Server logon message to suit your collaboration
environment. To customize the message, edit the Welcome.txt file at
C:\inetpub\wwwroot\documentserver\ on the Document Server.
•
Maintain user permissions for the Document Server so that unauthorized
individuals can’t access other people’s accounts.
•
Install a virus protection package and keep it updated with the latest
definitions.
PathNavigator Conference-on-Demand
PathNavigator Conference-on-Demand works in conjunction with a Polycom
PathNavigator call processing server and allows users to:
❑ Select multiple ISDN and LAN addresses from a single directory to make a
multipoint call in a single step.
❑ Enter multiple addresses manually in the Make a Call dialog box to make a
multipoint call in a single step.
❑ Use the ISDN Callback feature, which dials all participants designated for a
multipoint videoconference.
❑ Save multiple dialing addresses as a single entry.
Note
If both PathNavigator Conference-on-Demand and the iPower Internal Multipoint
option are available for multipoint calls, the iPower system uses PathNavigator
Conference-on-Demand.
To configure PathNavigator Conference-on-Demand:
© Polycom, Inc.
1.
Start AdminTools and click
2.
Click the Gatekeeper Setup tab.
LAN.
25
iPower Collaboration System Tips and Troubleshooting
3.
Click the Use a gatekeeper option.
4.
In the Gatekeeper DNS name or IP address field, enter the PathNavigator
gatekeeper DNS name or IP address.
5.
Enter the video call alias and voice call alias in the appropriate fields.
The video call and voice call aliases must be unique.
6.
Click OK.
7.
Configure PathNavigator for the Conference-on-Demand feature.
For more information about using PathNavigator Conference-on-Demand
with the iPower system, see the AdminTools online help. For more
information on how to configure PathNavigator Conference-on-Demand, see
the PathNavigator documentation.
Note
The default profile as defined in PathNavigator includes the line rate, the T.120
rate, and video session information. In this release, you cannot modify this
information.
To place a call using PathNavigator Conference-on-Demand:
1.
Access the iPower Collaboration application.
2.
Click Make a Call.
3.
Click Directory.
4.
Click on each number that you want to dial.
A check mark appears next to the number. You can select as many numbers as
your bridge supports. You can also enter numbers manually, separated by
commas.
5.
Click OK to place the call.
For more information about placing a call using PathNavigator
Conference-on-Demand, see the Collaboration help. To access the
Collaboration help, press the
HELP button on the remote control, press F1
on the keyboard, or click Help when you are within the Collaboration
application.
WebOffice
Polycom WebOffice enables iPower users to use their web browsers to conduct
online meetings and to share information, files, applications, or documents with
other WebOffice users. WebOffice also provides instant messaging capabilities.
26
www.polycom.com
Chapter 3 - Tips for Tasks You Do Rarely
In order to use WebOffice on the iPower system, you must set up a WebOffice
account for the iPower system on a separate WebOffice server. Once you do this,
anyone who uses the iPower system can also use WebOffice to share information
with other WebOffice users on the server. Users do not need to be in a call to share
information; they need only to log into the iPower account on the WebOffice
server.
To set up a WebOffice account for the iPower system on the WebOffice server:
1.
Start AdminTools and click
2.
Click the WebOffice tab.
3.
Check the Use Polycom WebOffice check box.
4.
Enter the WebOffice information:
a.
Utilities.
Enter the name or web address of the WebOffice server in the WebOffice
Server Name or URL field (for example, weboffice.mycompany.com).
b. Enter the name of the WebOffice account in the Unique system name field
(for example, iPower80).
To easily identify the WebOffice account for the iPower system, use a name
associated with the iPower system, such as the system name or the room
where the system is located.
c.
Enter the company internet address in the Domain name of company or
organization field (for example, mycompany.com).
The office name, which is based on the system name and domain name,
then automatically appears in the Office name field. The office name is
always in email address format (for example, [email protected]).
d. If your WebOffice service is configured to require a registration key, you
must enter a valid key in the Registration Key (if required) field.
For more information, contact your WebOffice server administrator.
5.
Click Create Office.
6.
Confirm the password that you specified.
To access WebOffice from an iPower system:
Click on the WebOffice icon on the desktop.
© Polycom, Inc.
27
iPower Collaboration System Tips and Troubleshooting
Restoring the System
When you restore the iPower system, the system is returned to its original factory
state. You should only restore the system when directed by a Polycom support
representative.
For a list of system default settings, see Appendix A, “System Default Settings.”
Getting Ready to Reinstall
Before you reinstall your system software:
1.
Back up the Local Directory data.
Save your Local Directory data by copying
C:\Program Files\PictureTel\vcs\tsdir.ini to external media.
2.
Record the configuration settings.
Make a record of your configuration settings by running the iPower Operating
Statistics utility. On the Configuration Summary page, click Save As to save the
file iPowerSysConfigLog.txt to external media. You can use this information to
help reconfigure the system after you reinstall the software.
3.
Make sure you have the system serial number and your LAN and ISDN
settings.
The serial number is printed on the back of the computer box.
Reinstalling the iPower System
When you reinstall your iPower system software, any Directory entries and
customized settings you have entered are lost, and any additional software is
erased, including system upgrades that you may have applied. (When you install
upgrades to the system, Directory entries are retained and any additional software
you may have installed is not erased.
Note
28
The iPower system software does not provide an uninstall program to remove the
system software. However, reinstalling the system software will overwrite all of
the files created and installed during the original installation.
www.polycom.com
Chapter 3 - Tips for Tasks You Do Rarely
iPower 9000 and iPower 900 Systems
To reinstall an iPower 9000 or iPower 900 system:
1.
Do one of the following:
•
For iPower 9000 systems, insert the CD marked Disk 1 of 2 into the
CD-ROM drive, and then power on the system.
•
For iPower 900 systems, insert the boot diskette into the diskette drive and
the CD marked Disk 1 of 2 into the CD-ROM drive, and then power on the
system.
2.
When you see the following dialog box, choose a language for the installation
and press OK. (Note that the text in this dialog box may be in English, even if
your system is running in another language.)
3.
Insert the CD marked Disk 2 of 2 when you see this dialog box instructing you
to insert the next media:
Press Enter after you insert the second CD.
4.
Follow the instructions on the screen, and restart the system to complete the
reinstallation.
If the system does not restart automatically after completing the upgrade, you
must restart it manually.
5.
Copy your Local Directory data back to C:\Program Files\PictureTel\vcs\tsdir.ini.
iPower 600 System
To reinstall an iPower 600 system:
1.
© Polycom, Inc.
Power off the iPower 600 system.
29
iPower Collaboration System Tips and Troubleshooting
2.
From the Windows desktop, right-click the My Computer icon and select
Properties.
3.
Click the Advanced tab and then choose Startup and Recovery.
4.
Check the Display list of Operating Systems for 30 seconds check box and then click
Apply.
5.
Restart the system.
6.
Select Factory Default Reload and press Enter.
If Factory Default Reload does not appear, choose Return to OS Choices Menu, and
then choose Factory Default Reload.
30
7.
When you see the following dialog box, choose a language for the installation
and press OK. (Note that the text in this dialog box may be in English, even if
your system is running in another language.)
8.
Follow the onscreen instructions to complete the reinstallation.
9.
Copy your Local Directory data back to C:\Program Files\PictureTel\vcs\tsdir.ini.
www.polycom.com
4
Tips for Tasks You Do Regularly
This chapter provides information about tasks that you need to perform on a
regular basis. It includes these topics:
❑ Adding Applications — Provides information about adding software
applications to the iPower system.
❑ Monitoring System Statistics — Describes how to view system statistics using
the Operating Statistics application and the Conference Statistics screen.
❑ Accessing and Viewing Logs — Lists the log files available from Operating
Statistics, Hardware Diagnostics, and Windows.
❑ Setting Up Virus Protection — Provides information on protecting the iPower
system from computer viruses.
❑ Conserving Disk Space — Provides information on saving space on the iPower
hard drive.
© Polycom, Inc.
www.polycom.com
iPower Collaboration System Tips and Troubleshooting
Adding Applications
To extend your users’ collaboration effectiveness, install the software applications
you think users will use most often to create or edit documents.
For the iPower 600, install applications on the D: drive to conserve space on the C:
drive.
To install software applications, follow the same procedure as you would to install
a software application on a typical PC running Microsoft Windows. For specific
instructions, see the Windows documentation.
Monitoring System Statistics
The Operating Statistics application and the Conference Statistics screen allow you
to view a wide variety of statistics on the system’s performance during calls. You
can also view these statistics using SNMP Management, WebRemote, and the
Polycom Global Management System.
Note
The Operating Statistics and Collaboration applications may be run
simultaneously, whereas the AdminTools and Collaboration applications cannot be
run simultaneously.
Viewing Detailed System Statistics
Use the Operating Statistics application to track detailed statistics on the video,
audio, and network performance for the current or most recent call.
To start Operating Statistics:
1.
32
Make sure the Collaboration application is running.
www.polycom.com
Chapter 4 - Tips for Tasks You Do Regularly
2.
Choose Start >Programs>Polycom iPower>Administrator Information>Operating
Statistics.
3.
Choose the category of statistics that you want to view.
Category
© Polycom, Inc.
Description
System Statistics
Displays the total number of calls, total time of
calls, and total number of remote control and
camera commands issued.
H.323 Statistics
Displays information about H.323 calls on seven
pages (State, Video, Audio, Video Channel, Audio
Channel, Control Data, and Channel).
H.320 Statistics
Displays information about H.320 calls on six
pages (State, Video, Video Errors, Audio,
Channel, and Data).
Voice Statistics
Displays information about voice calls.
Configuration Summary
Displays summary information about the
configuration on seven pages (General, ISDN,
LAN, Video, Audio, Directory, and Utilities).
Running Loopback Tests
Displays a list of loopback tests available to run.
Logging
Displays information about the Call Log and the
System Logs.
Preferences
Displays preferences that can be set by the
system administrator.
33
iPower Collaboration System Tips and Troubleshooting
Viewing the Configuration Summary
You can view the system configuration settings using the Configuration Summary
page in the Operating Statistics application.
To view the system configuration:
1.
Choose Start >Programs>Polycom iPower>Administrator Information>Operating
Statistics.
2.
Click
3.
Choose a tab to view detailed information.
Configuration Summary.
Page
34
Description
General
Provides details related to System Information,
Call Preferences, Logon and Security, Logoff and
Standby, and Monitor.
ISDN
Provides details related to ISDN, Advanced ISDN
Configuration, ISDN Bandwidth, ISDN Setup,
IMUX Setup, and Gateway Setup.
LAN
Provides details related to LAN Configuration,
Gatekeeper Setup, and LAN Bandwidth.
Video
Provides details related to Video Preferences and
Camera and Video Sources.
Audio
Provides details related to Audio Preferences and
Audio Inputs.
www.polycom.com
Chapter 4 - Tips for Tasks You Do Regularly
Page
Description
Directory
Provides details related to Directory Options,
Central Directory Server Setup, and ILS
Registration.
Utilities
Provides details related to Document Server, File
Transfer, Readiness, and Network Management.
Internal Multipoint
Provides details related to Internal Multipoint, such
as the key code, audio preference, video
algorithm, and maximum video frame rate.
Viewing Statistics for the Current Call
The Conference Statistics screen provides general information on system
performance for the current call.
To display the Conference Statistics screen:
Double-click the round
Conference Statistics icon in the Windows
system tray at the bottom of the screen.
© Polycom, Inc.
35
iPower Collaboration System Tips and Troubleshooting
Accessing and Viewing Logs
A number of log files are available for your use.
❑ From Operating Statistics:
•
Call Log — Tracks general information on all of the calls made and
answered by the system. From Operating Statistics, you can view the
statistics and save the log as a text file to the location you specify.
•
System Logs (four logs) — Record a variety of technical information that
can help you verify system performance and troubleshoot problems. The
System Detailed Log, ISDN Log, and BAS Codes Log files are located at
C:\DiagLogFile.ptl, C:\ISDNLog.log, and C:\BASCodesLog.log. You can start
and stop these logs from Operating Statistics. A log containing a subset of
the information in the System Detailed Log is located at C:\SysLogFile.ptl
and is designed to be copied onto a diskette.
•
Configuration Summary — Lists the specific system settings configured
through the AdminTools application. From Operating Statistics, you can
view the settings and save them as a text file to the location you specify
and with a file name you specify. The default file name is
iPowerSysConfigLog.txt. Polycom recommends that you save this
information electronically as a text file and then print and save it for future
reference.
❑ From Hardware Diagnostics:
•
Hardware Diagnostics Error Log — Tracks information generated by the
Hardware Diagnostics application. This log file is designed to be copied
onto a diskette and then sent to Polycom for analysis, should you
encounter problems you can’t resolve. This log is intended for use by
Polycom, not end users. It is located at C:\Program
Files\PictureTel\VCS\Diagnostics\ErrorLog.txt.
❑ From Windows:
•
36
System, Security, and Application logs — Track system, security, and
application events. Use Microsoft Event Viewer to view and manage these
event logs.
www.polycom.com
Chapter 4 - Tips for Tasks You Do Regularly
Setting Up Virus Protection
Although infection from a computer virus is rare, you should be aware that the
iPower system is a PC-based product and is therefore susceptible to virus infection.
To ensure the security of your system, take these precautions:
❑ Make sure that all accounts use effective passwords, especially accounts with
administrative privileges.
❑ Install, update, and use anti-virus software.
❑ Install the latest security updates for Windows and for any applications you
install.
❑ Activate auditing for Windows events and monitor the audit log.
❑ Restrict anonymous logins.
❑ Conduct periodic reviews of your system. The Microsoft Personal Security
Advisor (available free at http://www.microsoft.com/technet/security
/tools/tools.asp), can assist you in this review.
❑ Check with your network administrator for security procedures.
Note
The iPower 900 system version 3.0.0 or higher and all versions of the iPower 9000
and iPower 600 system use the multi-language version of Windows 2000. When
you download language-specific Microsoft patches, always use the
English-language version even if you run your system in another language.
Conserving Disk Space
You should conserve space on the iPower hard drive by periodically checking for
and eliminating unwanted files or applications. This is particularly important if
many users access the system.
On the iPower 9000 and iPower 900, users install their own applications, such as
Microsoft Office, on the C: drive. On the iPower 600, users install their own
applications on the D: drive.
© Polycom, Inc.
37
iPower Collaboration System Tips and Troubleshooting
Check for unwanted files in the following places:
❑ Received files
❑ Document Server documents
❑ Documents placed on the hard drive
38
www.polycom.com
5
Tips for Helping Users
This chapter provides information that you can use to help the iPower users in
your organization. It includes these topics:
❑ Making Sure Users Have the Information They Need — Explains how you can
use the Quick Tips Sheet and Getting Started Guide to provide users with
information. Also explains how to change the room information that appears
on the iPower system home page.
❑ Making Sure Users Know How to Contact the System Administrator — Lists
various ways that you can inform users about how to contact you.
❑ Finding Information in the Documentation — Provides a list of the iPower
documentation, briefly describes it, and tells where to find it.
Making Sure Users Have the Information They Need
Providing information to the users enables them to begin using the iPower system
more quickly and reduces their need to get help from you or other resources.
Sending the “Quick Tips Sheet” to Users
The iPower Collaboration System Quick Tips Sheet provides basic system information
that users can quickly refer to when using the iPower system.
This sheet is available as a PDF file on the iPower Documentation CD. Polycom
encourages you to send this PDF file by email to video collaboration users
throughout your organization. Users can then print out the file and bring it with
them whenever they make a video call. You may also want to print it out and leave
a few copies in each conference room that is equipped with an iPower system.
© Polycom, Inc.
39
iPower Collaboration System Tips and Troubleshooting
Customizing the “Getting Started Guide”
Each iPower system comes with an online user’s guide, the iPower Collaboration
System Getting Started Guide. This guide is available as a .doc file.
Since iPower system options can vary, the Getting Started Guide is somewhat
generic. To make the guide as useful as possible for your users, you should
customize the original Microsoft Word version of this document according to your
particular collaboration environment.
At a minimum, Polycom recommends that you add information that is specific to
your site in the “Site Info” section, such as a name and phone number for users to
call if they have trouble using the system.
After you customize the Getting Started Guide using Word, you may want to make
a PDF version available to your users. You could, for example, send it to your users
by email or put it on your organization’s intranet. This way, users can view or print
the document when they’re away from the system to prepare for when they use the
system.
To edit the Getting Started Guide:
1.
Locate and open the Microsoft Word version of the Getting Started Guide
document.
The file is located on the iPower Documentation Library CD.
2.
Use Microsoft Word to customize the document to meet your users’ needs.
3.
Save the document as GetStart.pdf and distribute it to your users.
Displaying Room Information on the iPower System Home Page
The iPower system home page provides access to WebRemote, WebOffice, and
WebStreaming. This page also displays information about the room in which the
iPower system is located. You can enter this room information using the
InputText.txt file.
Each line of the InputText.txt file contains a field name and a text string. You can
enter information in the text strings. This information, along with the field names,
appear on the iPower system home page. Even if you do not enter any text, the
field names still appear.
To display room information on the iPower system home page:
1.
Open the InputText.txt file at C:\Program
Files\PictureTel\VCS\WebInterface\ConfigureMain.
40
www.polycom.com
Chapter 5 - Tips for Helping Users
2.
Enter information about the room:
Lets you enter information
about...
Such as...
RoomName
The name of the room where the
iPower system resides.
Bigelow or Main
Conference Room
RoomNumber
The room number, if any.
105 or 29A
RoomSize
The size of the room.
20 seats or 20’ x 40’
AvailableEquipment
The equipment available in the
room.
Projector or VCR
Location
The location of the room.
Near the Cafeteria or
Second Floor Lobby
Extras
Any additional information that you
want to include.
You must reserve this
room before using it or Not
available on Mondays
Imagename
An image, such as a logo, that
appears as a thumbnail on the
iPower system home page. When
you click the thumbnail, the
full-size image opens in a separate
browser window.
MapofBigelow.jpg or
MainLogo.jpg
This field...
Do not change, delete, or add field names in the InputText.txt file. If you do, any text
strings that you enter will not appear on the iPower system home page.
Note
3.
Save the InputText.txt file and the Imagename file in the Program
Files\PictureTel\VCS\WebInterface\ConfigureMain directory. You cannot move
these files to another directory.
Making Sure Users Know How to Contact the System
Administrator
In case of problems or questions regarding the iPower system, users should be able
to know where to find you, the system administrator.
To ensure that users can easily contact you:
❑ Add your name and number to the “Site Info” section of the Getting Started
Guide and then distribute it to users.
© Polycom, Inc.
41
iPower Collaboration System Tips and Troubleshooting
See the previous section, “Customizing the Getting Started Guide,” for more
information.
❑ Enter your name on the AdminTools System Information page.
See the AdminTools online help for more information.
Finding Information in the Documentation
This section contains information about the iPower documentation, such as the
document titles and the purpose of each document. You can use this information
yourself or use it to refer your users to the proper documentation.
You can find all the documents either on the iPower Documentation CD that came
with your system or online. To access the online help systems, press the
HELP
button on the remote control or click Help or press F1 on the keyboard when you
are within the corresponding application.
If you need to....
42
Refer to....
Located on the....
Prepare for system installation by
ordering ISDN, verifying
requirements, and getting the
network ready
Preparing Your Network for
Collaboration
iPower Documentation CD
Observe regulatory information,
notices, and approvals
Product Regulatory Information
iPower Documentation CD
Install the system hardware
•
Easy Install Poster (for iPower
9000 or iPower 600)
•
Installing the iPower 900
System (for iPower 900)
Polycom web site at www.polycom.com
Polycom web site at www.polycom.com
Learn how to perform the tasks
you need to get started with your
system, learn what the system
features are, and get tips on video
collaboration
Getting Started Guide
Quickly obtain basic system
information, such as which key to
press on the keypad or how to
make a simple video call
Quick Tips Sheet
Configure, maintain, and
troubleshoot the system
Tips and Troubleshooting
Hardcopy documentation
iPower Documentation CD
Polycom web site at www.polycom.com
iPower Documentation CD
Polycom web site at www.polycom.com
iPower Documentation CD
Polycom web site at www.polycom.com
iPower Documentation CD
Polycom web site at www.polycom.com
www.polycom.com
Chapter 5 - Tips for Helping Users
If you need to....
Set up the PowerMic microphone
Refer to....
•
PowerMic Setup Sheet (for
quick setup)
•
Installing the PowerMic (for
complete information)
Located on the....
iPower Documentation CD
Polycom web site at www.polycom.com
Install the PowerCam Plus
camera
PowerCam Plus Setup Sheet
Install the iPower 80 camera
Installing the iPower 80 Dynamic
Locating Camera
iPower Documentation CD
Installing the iPower 70 Room
Camera
iPower Documentation CD
•
ImageShare Setup Sheet (for
quick setup)
iPower Documentation CD
•
ImageShare II Setup Sheet (for
quick setup)
•
Installing and Using the
ImageShare Devices (for
complete information)
•
Premier Cart Setup Sheet (for
quick setup)
•
Installing a Collaboration
System on a Premier Cart (for
complete information)
•
Utility Cart Setup Sheet (for
quick setup)
•
Installing a Collaboration
System on a Utility Cart (for
complete information)
Install the iPower 70 camera
Install and use the ImageShare or
ImageShare II device
Set up the Premier Cart
Set up the Utility Cart
Install the Thin Display Adaptor
iPower Documentation CD
Polycom web site at www.polycom.com
Thin Display Adaptor Setup Sheet
Polycom web site at www.polycom.com
Polycom web site at www.polycom.com
Polycom web site at www.polycom.com
iPower Documentation CD
Polycom web site at www.polycom.com
iPower Documentation CD
Polycom web site at www.polycom.com
iPower Documentation CD
Polycom web site at www.polycom.com
Install the iPower Executive
system
iPower Executive Setup Sheet
License Microsoft 2000 for use
Microsoft Windows 2000
Licensing Agreement
Hardcopy documentation
Use AdminTools to configure and
maintain the system
AdminTools Help
Online
Use the collaboration system to
make and answer calls, share
data, and so on
Collaboration Help
Online
Verify system performance
Operating Statistics Help
Online
© Polycom, Inc.
iPower Documentation CD
Polycom web site at www.polycom.com
43
iPower Collaboration System Tips and Troubleshooting
If you need to....
44
Refer to....
Located on the....
Test the system hardware
Hardware Diagnostics Help
Online
Manage the system remotely
WebRemote Help
Online
Store data files and then access
them during meetings
iPower Document Server Help
(optional)
Online
Enhance remote SNMP
management
iPower Network Manager Help
(optional)
Online
Observe usage notes and other
release information
iPower Software Release Bulletin
Polycom web site at www.polycom.com
www.polycom.com
6
Troubleshooting Tips
This chapter contains information about how to troubleshoot problems with the
iPower system. For support or service, please contact your Polycom service
provider or call Polycom Technical Support. You can find phone numbers for
Technical Support in your area at the Polycom Web site, www.polycom.com.
This chapter includes the following topics:
❑ Solving Installation Problems
❑ Solving Startup Problems
❑ Solving General System Problems
❑ Solving Network Problems
❑ Solving Video Problems
❑ Solving Audio Problems
❑ Solving ImageShare and ImageShare II Problems
© Polycom, Inc.
45
iPower Collaboration System Tips and Troubleshooting
Solving Installation Problems
Problem
First-time installation has failed
Corrective Action
•
Make sure that all monitor, ImageShare
device, infrared receiver, camera, and power
cables are correctly installed and secure. (If
necessary, consult the manual that came with
your monitor.)
•
Retry the installation.
Windows Wizard has failed
•
Perform standard PC debugging procedures.
iPower Setup Wizard has failed
•
View any error messages.
•
From the Hardware Diagnostics application,
start Automated Testing. If the test fails, call
for service.
Solving Startup Problems
Problem
System does not start
Corrective Action
•
Check for bad hardware.
- From the Hardware Diagnostics
application, start Automated Testing. If the
test fails, call for service.
- Check the Windows Event Viewer, either on
the local system or from a remote PC.
Splash screen is frozen
A splash screen that does not move
indicates bad hardware.
Note
•
46
Restart the system. If the problem persists,
call for service.
www.polycom.com
Chapter 6 - Troubleshooting Tips
Solving General System Problems
Problem
Parts of the system are not working
Keyboard is not working
© Polycom, Inc.
Corrective Action
•
Make sure that all cables are correctly
installed and secure.
•
Make sure that all power cables are plugged
into a power source (cart power strip, wall
outlet, or uninterruptible power supply).
•
Make sure that the cart power strip or
uninterruptible power supply is turned on.
•
Enable Readiness Monitoring in AdminTools.
Address any warnings generated.
•
Make sure that the keyboard and remote
control are not being used at the same time.
You can’t use both infrared devices
simultaneously.
•
Make sure that keys on the keyboard are not
being accidentally held down.
•
Make sure that the infrared path to the
infrared receiver is not blocked.
•
Make sure that the infrared receiver is
plugged in correctly. Make sure that the LED
indicator on the front of the receiver is on
when the system is on.
•
Make sure that the camera can detect the
infrared signal. Get close to the camera, then
point the keyboard at the camera. Watch the
local video and see if flashing is visible from
the keyboard.
•
Make sure that the keyboard contains fresh
batteries. Check the keyboard batteries at
least every two months.
47
iPower Collaboration System Tips and Troubleshooting
Problem
Remote control is not working
Corrective Action
•
Make sure that the keyboard and remote
control are not being used at the same time.
You can’t use both infrared devices
simultaneously.
•
Make sure that the infrared path from the
remote control to the infrared receiver at the
base of the main camera is not blocked.
•
Make sure that the remote control contains
fresh batteries.
- Check the remote control batteries at least
every two months with the Hardware
Diagnostics application.
- Enable Readiness Monitoring in
AdminTools. The iPower system will receive
a message when the batteries are low.
ISDN or voice number is displayed
incorrectly in the “To call this
system” field
•
Make sure that the camera can detect the
infrared signal. Get close to the camera, then
point the keyboard at the camera. Watch the
local video and see if flashing is visible from
the keyboard.
•
If the remote control still doesn’t work, restart
the system.
•
Make sure that your location information is
correct. To correct the local area code or city
code:
- Choose Start>Settings>Control
Panel>Telephony.
- On the My Location page, type the correct
code.
- On the My Location page, in the I am in
field, choose the country.
- Click OK to close the Dialing Properties
dialog box.
•
48
Enter your local numbers without the area
code or city code, in AdminTools.
www.polycom.com
Chapter 6 - Troubleshooting Tips
Solving Network Problems
Problem
Corrective Action
Readiness icon is displayed in the
corner of the taskbar
•
Double-click the exclamation mark icon in the
system tray to view the Readiness message.
Readiness message:
TCP/IP Connection Error:
Network cable unplugged or
network configured improperly
•
Check the network cables to be sure that they
are properly connected and secure.
•
Use the Windows Control Panel to check the
TCP/IP settings.
•
Contact your network administrator.
Readiness message: ISDN cable is
unplugged or the ISDN line is not
active
Note
•
Use ISDN Readiness only in North
America. Elsewhere, the network
deactivates ISDN lines between calls,
which will cause false Readiness
messages.
Verify that the ISDN lines are connected and
active.
- From the Hardware Diagnostics
application, click Test ISDN Lines. If a line
does not reach the active state, make sure
that it is connected properly. See the iPower
installation documentation for information
about how to connect ISDN lines.
- If the ISDN lines activate, close the
Hardware Diagnostics application and start
the Collaboration application.
- If you still see an ISDN Readiness condition
and your switch type is DMS100, NI1, 5ESS
G3, or 5ESS Multipoint, you may have a
problem registering your SPIDs with the
network. From the Operating Statistics
application, check your ISDN configuration
or contact your network provider.
© Polycom, Inc.
•
Check the lights on the NT-1 boxes. Rapid
blinking (8/second) usually indicates a
network problem. Slow blinking (1/second)
usually indicates an interface or
videoconferencing error.
•
If the problem persists, check the provisioning
of the line or contact the network
administrator.
49
iPower Collaboration System Tips and Troubleshooting
Problem
ISDN call attempt has failed; the
user has received an error message
(continued on next page)
Corrective Action
•
Perform those tasks specified in the error
message. For example:
- Check the dialed number.
- Redial the call as “restricted”.
- Ask the far end to call you.
- Redial the call later.
- Verify that the far-end system is working.
- Contact the network provider.
Note
•
A No ISDN Channel message may
indicate a problem with the ISDN lines
between your system and the
network.
Verify that the ISDN lines are connected and
active. Perform the following steps:
1. From the Hardware Diagnostics
application, click Test ISDN Lines. If a line
does not reach the active state, make sure
that it is connected properly. See the
iPower installation documentation for
information about how to connect ISDN
lines.
2. If the ISDN lines activate, close the
Hardware Diagnostics application and start
the Collaboration application.
3. If you still have call problems and your
switch type is DMS100, NI1, 5ESS G3, or
5ESS Multipoint, you may have a problem
registering your SPIDs with the network.
From the Operating Statistics application,
check your ISDN configuration or contact
your network provider.
•
Make sure that the number being dialed is
correct and properly formatted and try the call
again. Callers may need to dial 9 or include a
long distance access code or country code.
•
Verify that the far-end system is in working
order.
Telephone the far-end site and find out if the
system is turned on and is functioning
properly.
50
www.polycom.com
Chapter 6 - Troubleshooting Tips
Problem
ISDN call attempt has failed; the
user has received an error message
Corrective Action
•
Have the far-end system call your system.
To find out if the problem exists in one
direction only, ask the person at the far-end
site to call your system.
•
Check the ISDN configuration.
- Contact your ISDN service provider and
verify that the ISDN lines are provisioned
according to the Preparing Your Network for
Collaboration document, which is available
at www.polycom.com.
- Check the configuration in the ISDN Setup
page in AdminTools. (Obtain the correct
numbers from your ISDN service provider.)
•
Call a known good ISDN number.
•
Run the ISDN Bit Error Rate Test. This test
allows you to place a call from one line to
another in order to verify line integrity.
Select Start>Programs>Polycom iPower>
Administrator>Network Test. If a line
connects, then the line is good.
Difficulty making LAN calls
(continued on next page)
•
Check the number, system name, or LAN
address of the far-end system.
Make sure that the number being dialed is
correct and properly formatted and try the call
again.
•
Make sure that the network cable is
connected and secure.
The LAN cable must be connected properly,
as shown in the iPower installation
documentation.
•
Verify that the far-end system is working.
- To find out if the problem exists in one
direction only, ask the person at the far-end
site to call your system.
- Telephone the far end and find out if the
system is turned on and is functioning
properly. Ask whether the far-end system is
behind an IP network firewall. If it is, the far
end must provide a way for LAN traffic to go
through, which will allow a successful
connection.
© Polycom, Inc.
51
iPower Collaboration System Tips and Troubleshooting
Problem
Corrective Action
Difficulty making LAN calls
The call briefly enters the
“Connecting” state and then
disconnects (continued on next
page)
- If you are using an extension or an alias to
place the call to the far-end site, use the IP
address instead. If you can place the call
using the IP address, your H.323
gatekeeper or your access to the
gatekeeper is faulty. Notify your network
administrator.
•
Check the LAN configuration in the LAN
Setup page in AdminTools. (Obtain correct
numbers from your network provider.)
•
Call a known good LAN number.
•
Check the phone number, system name, or
TCP/IP address to make sure that you are
dialing a videoconferencing system.
•
Redial the call using a lower rate (1x512 to
1x384, 1x384 to 2x64, 2x64 to 2x56) because
the far end or network may not support the
call rate you requested.
•
Operationally test the lines for making
outgoing calls. Perform the following steps:
1. Make a 1x512 call to another iPower
system using a number that is known to be
correct.
2. After the call connects, check the call rate
from the Conference Statistics screen.
- If the call connected at 1x512, all lines
work.
- If some lines do not come up, the lines
may not be connected to the network
properly.
•
Verify that the ISDN lines are connected and
active. Perform the following steps:
1. From the Hardware Diagnostics
application, click Test ISDN Lines. If a line
does not reach the active state, make sure
that it is connected properly. See the
iPower installation documentation for
information about how to connect ISDN
lines.
52
www.polycom.com
Chapter 6 - Troubleshooting Tips
Problem
Corrective Action
The call briefly enters the
“Connecting” state and then
disconnects
2. If all ISDN lines activate, close the
Hardware Diagnostics application and start
the Collaboration application.
3. If you still have call problems and your
switch type is DMS100, NI1, 5ESS G3, or
5ESS Multipoint, you may have a problem
registering your SPIDs with the network.
From the Operating Statistics application,
check your ISDN configuration or contact
your network provider.
Readiness message: Gatekeeper
registration failed
The system can make calls but
cannot receive them
•
From the Operating Statistics application,
check the gatekeeper configuration.
•
Notify the network administrator.
•
Place LAN calls using IP addresses that do
not require a gatekeeper.
•
From the Configuration Summary category of
the Operating Statistics application, check the
local phone numbers.
•
Run the ISDN Bit Error Rate Test. This test
allows you to place a call from one line to
another in order to verify line integrity.
Select Start>Programs>Polycom iPower>
Administrator>Network Test. If a line
connects, then the line is good.
A call stays in the “Connecting”
state
The call connects at less than the
requested rate; the system displays
“Call connected at maximum
available rate”
•
Check the phone number, system name, or
TCP/IP address to make sure that you are
dialing a videoconferencing system.
•
Redial the call as “restricted”.
•
Double-click the
Conference
Statistics icon on the taskbar in the lower
right-hand corner of the screen. Check the
report and the far-end data.
•
Remain in the call at the reduced rate. The
call is operating at the maximum rate
supported by the far end.
Note
© Polycom, Inc.
A single-BRI system provides 1x128
maximum and a Quad-BRI system
provides 1x512 maximum.
53
iPower Collaboration System Tips and Troubleshooting
Problem
The call connects at less than the
requested rate; the system displays
“Call connected at <rate>”
Corrective Action
•
Operationally test the lines for making
outgoing calls. Perform the following steps:
1. Call a known good number. If the call
connects at the requested rate, all lines
work.
2. After the call connects, check the call rate
from the Conference Statistics screen.
- If the call connected at 512, all lines work.
- If some lines do not come up, the lines
may not be connected to the network
properly.
•
Verify that the ISDN lines are connected and
active. Perform the following steps:
1. From the Hardware Diagnostics
application, click Test ISDN Lines. If a line
does not reach the active state, make sure
that it is connected properly. See the
iPower installation documentation for
information about how to connect ISDN
lines.
2. If all ISDN lines activate, close the
Hardware Diagnostics application and start
the Collaboration application.
3. If you still have call problems and your
switch type is DMS100, NI1, 5ESS G3, or
5ESS Multipoint, you may have a problem
registering your SPIDs with the network.
From the Operating Statistics application,
check your ISDN configuration or contact
your network provider.
54
www.polycom.com
Chapter 6 - Troubleshooting Tips
Solving Video Problems
Problem
Far-end receives or transmits poor
video
Corrective Action
•
Double-click the
Conference
Statistics icon on the taskbar in the lower
right-hand corner of the screen. Check the
video statistics.
- Check the Key frames. A large number or a
steadily increasing number in this field
indicates a network quality problem.
- Redial the call or try connecting at a lower
rate.
Poor local (near-end) video
•
If the problem persists, call for service.
•
Make sure that all video, camera, and monitor
cables are correctly installed and secure. (If
necessary, consult the manual that came with
your monitor.)
•
From the Hardware Diagnostics application,
start Automated Testing. If the test passes,
the video board is good.
•
From the Hardware Diagnostics application,
click Test Video and select the appropriate
video source. If no source is detected,
perform the following steps:
1. Unplug the camera video cable and then
plug it in again, or turn off the Camera and
Microphone module, unplug the video
cable, and then plug it in again.
2. Replace the video cable.
3. Change the cable connections.
4. If the test fails, the video board is faulty. Call
for service.
•
© Polycom, Inc.
If the problem persists, call for service.
55
iPower Collaboration System Tips and Troubleshooting
Problem
No thumbnail or blank thumbnail or
Video Readiness indication
Corrective Action
•
Make sure that the video source is turned on.
If you are using a laptop with or without an
ImageShare or ImageShare II:
- Make sure that the laptop is selected as the
source of input in the Collaboration
application.
- Make sure that your laptop is enabled to
send to an external screen (as you would
do if you connected a projector to your
laptop). Note that the laptop is added to the
People and Content list.
- Make sure that the laptop screen resolution
is set to 480x640, 600x800, or 1024x768.
Note
If you use a screen resolution of
1024x768, make sure the refresh
frequency is set to 75 Hz or lower.
•
From the Hardware Diagnostics application,
start Automated Testing. If the test passes,
the video board is good.
•
From the Hardware Diagnostics application,
click Test Video and select the appropriate
video source. If no source is detected, do the
following:
1. Unplug the camera video cable and then
plug it in again, or turn off the Camera and
Microphone module, unplug the video
cable, and then plug it in again.
2. Replace the video cable.
3. Change the cable connections.
4. If the test fails, the video board is faulty. Call
for service.
No video (VGA) output (blank VGA
monitor)
56
•
If the problem persists, call for service.
•
Check all video and power cable connections
to and from the VGA monitor.
•
Check the brightness setting on the monitor to
be sure that it is not set to one extreme or the
other.
www.polycom.com
Chapter 6 - Troubleshooting Tips
Problem
Cannot control the camera using the
remote or keyboard
Corrective Action
•
From the Hardware Diagnostics application,
start Automated Testing.
- If the test passes, from the Hardware
Diagnostics application, click Test Video
and select the video source. If the source is
detected, attempt to control the camera.
- If the test fails, call for service.
•
If you still cannot control the camera, turn off
the camera and do the following:
- Unplug the camera cable(s) and plug them
in again
- Replace the video cable
- Change the cable connections
•
Make sure that other commands from the
remote control and keyboard work.
•
If the problem persists, call for service.
No video (NTSC or PAL) output
Note
The NTSC/PAL monitor is used only if
in a call. If the system is not in a call,
this monitor will not display video.
•
Make sure that all cables to and from the
NTSC or PAL monitor are correctly installed
and secure, and that the monitor power is on.
•
From the Operating Statistics or AdminTools
application, check the system configuration
for the NTSC or PAL settings. If appropriate,
enable dual-monitor use and restart the
collaboration system.
•
Make sure the far-end is sending video by
checking the Receive field in Conference
Statistics. (Conference Statistics verifies that
you are receiving video from the far-end.)
•
From the Hardware Diagnostics application,
start Automated Testing.
- If the test passes, click Test Video and
select the NTSC Color Bar video source. If
the color bar does not appear on the
NTSC/PAL monitor, call for service.
- If the test fails, call for service.
© Polycom, Inc.
57
iPower Collaboration System Tips and Troubleshooting
Problem
Corrective Action
Slow video image in an ISDN call
Note
•
An ISDN line sends signals on one or
more B channels. If the call is using
only one channel, the video image
becomes slow.
Check to be sure that the call connected at
the rate you requested.
- With the call still connected, double-click
the
Conference Statistics icon on
the taskbar in the lower right-hand corner of
the screen.
- Check the Key frames. A large number or a
steadily increasing number in this field
indicates a network quality problem. Redial
the call or try connecting at a lower rate.
Camera is in Standby mode
(powered down)
No output from VCR
•
Minimize and then maximize the
Collaboration application, click a mouse
button, press a remote control button, or clear
the screen saver.
•
Turn off the camera (if necessary), unplug the
video cable, and then plug it in again.
•
From the Hardware Diagnostics application,
click Test Video and attempt to control the
camera.
•
Restart the collaboration system.
•
If the problem persists, call for service.
•
Make sure that all power, audio, and video
cables to and from the system, display, and
VCR are correctly installed and secure.
•
If your VCR requires that you select an output,
choose the RCA or Composite output.
•
Play a known good VCR tape. If the tape will
not play, perform the following steps:
1. Restart the collaboration system.
2. From the Hardware Diagnostics
application, click Test Video and select the
VCR Video Source option.
3. Play a known good VCR tape again. If the
tape still will not play, call for service.
58
www.polycom.com
Chapter 6 - Troubleshooting Tips
Solving Audio Problems
Problem
Far-end participants cannot hear
you
Cannot hear the far-end participants
Corrective Action
•
Make sure that the near end has not muted
the call. A mute icon
appears in the status
bar when the call is muted.
•
Make sure that all power and audio cables to
and from the system, display, and peripherals
are correctly installed and secure.
•
Ask the far-end participants to check their
speakers.
•
Make sure that the far-end site has not muted
the call. A mute icon
appears in the status
bar when the call is muted.
If you are in a call and in Full-Screen
Note
mode, enable the status bar in order
to see the icon.
•
Check all volume controls (collaboration
application, speakers, etc.)
•
Make sure that all speaker cables to the
system are correctly installed and secure.
•
From the Operating Statistics application,
start the Local Channel loopback test (ISDN
systems).
•
From the Hardware Diagnostics application,
start Automated Testing.
- If the test passes, click Test Audio and
select one of the A/V Board-Generated or
Motherboard-Generated options as the
Audio Source. If you do not hear the audio
tones or noise, call for service.
- If the test fails, call for service.
Poor audio from the
far-end system
(continued on next page)
© Polycom, Inc.
•
Double-click the
Conference
Statistics icon on the taskbar in the lower
right-hand corner of the screen. Check the
audio statistics.
•
Check for network errors.
•
From the Hardware Diagnostics application,
start Automated Testing.
59
iPower Collaboration System Tips and Troubleshooting
Problem
60
Corrective Action
Poor audio from the
far-end system
•
From the Hardware Diagnostics application,
click Test Audio. Select one of the A/V
Board-Generated or Motherboard-Generated
options as the Audio Source. If the audio
tones or noise have poor quality, call for
service.
Cannot hear any audio or the
volume is too low or too high
•
If you are in a call, adjust the volume by using
the control buttons on the remote or by
manipulating on-screen controls with the
keyboard.
•
If your audio speakers have their own volume
control, check that the control is set
appropriately.
•
Listen for the dial-up tones during the dial-up
process.
•
From the Hardware Diagnostics application,
start Automated Testing. If the test fails, call
for service.
•
From the Hardware Diagnostics application,
click Test Audio. Select one of the A/V
Board-Generated or Motherboard-Generated
options as the Audio Source. If the audio
tones or noise have poor quality, call for
service.
Poor Automatic Gain Control (AGC).
Far end detects variations in audio
from near-end sources that are
different distances from the
microphone
•
From the Operating Statistics application,
check the audio settings.
•
If this is a custom audio system, try to bypass
AGC and Echo Cancellation and revert back
to the PowerMic to see if the symptoms
persist.
Poor Automatic Noise Suppression
(ANS). Far end hears near-end
background noise
•
From the Operating Statistics application,
check the audio settings.
Poor Integrated Dynamic Echo
Cancellation (IDEC™). Far-end
participants hear echoes of
themselves
•
From the Operating Statistics application,
check the audio settings.
www.polycom.com
Chapter 6 - Troubleshooting Tips
Solving ImageShare and ImageShare II Problems
Problem
Data or images will not pass through
the Monitor or VGA In connector of
the ImageShare device
Corrective Action
•
Make sure that all cables to and from the
ImageShare device are correctly installed and
secure.
•
If you are using a laptop with the ImageShare,
perform the following steps:
1. Make sure that the laptop screen has been
sent to the ImageShare device by enabling
your laptop to send to an external screen
(as you would do if you connected a
projector to your laptop). Make sure that
the laptop is added to the People and
Content list.
2. Make sure that the laptop screen
resolution, capture resolution, and
frequency settings are correct
(1024x768@ 75 hz). See the laptop
documentation if you need information on
setting up the laptop to send video from its
VGA port.
3. From the Hardware Diagnostics
application, start Automated Testing.
- If the test passes, from the Hardware
Diagnostics application, start Test Video
and select the ImageShare Video Source
option. If the PC or laptop video image
does not appear, call for service.
- If the test fails, call for service.
Projector connected to the
ImageShare is not displaying output
© Polycom, Inc.
•
Make sure that all cables to and from the
ImageShare device are correctly installed and
secure.
•
Consult the documentation that came with the
projector.
61
iPower Collaboration System Tips and Troubleshooting
Problem
ImageShare capture feature is not
working (no thumbnail)
Corrective Action
•
Make sure that all cables to and from the
ImageShare device are correctly installed and
secure.
•
Make sure that the laptop screen has been
sent to the ImageShare device by enabling
your laptop to send to an external screen (as
you would do if you connected a projector to
your laptop). Note that an icon for the laptop
is added to the People and Content list.
•
Restart the collaboration system.
•
From the Hardware Diagnostics application,
start Automated Testing.
- If the test passes, from the Hardware
Diagnostics application, start Test Video;
select the appropriate Video Source option;
if the video image does not appear, call for
service.
- If the test fails, call for service.
Pushing the blue Selection button
does not display the laptop content
•
Choose the ImageShare device on the
People and Content list.
•
If the ImageShare device becomes the
Content source:
- Make sure that all cables to and from the
ImageShare device are correctly installed
and secure.
- Make sure that the laptop settings are
correct.
- Make sure that the laptop is recognized as
the source of input.
•
62
If the ImageShare device does not become
the Content source, restart the collaboration
system.
www.polycom.com
A
System Default Settings
The following table lists the system default settings. Options not listed do not have
default settings.
Option
Default Setting
Allow far-end sites to control the camera on this
system
Enabled
Allow ISDN calls on this system
Enabled
Allow near-end Automatic Camera Pointing
Enabled
Allow rate adaptation to 56 kbps if 64 kbps fails
Disabled in Italy
Enabled in all other countries
Answer incoming video calls automatically
Disabled
Audio algorithm for ISDN (H.320) calls
Automatic
Audio algorithm for LAN (H.323) calls
Automatic
Components to monitor
Remote devices (remote control
and LAMB)
Color depth and resolution
Camera(s)
Microphone(s)
Countdown for
30 seconds
Display number last dialed
Always
Dual Images
Enabled
Encoding law for G.711
µ-law (in North America, Japan, and
Korea)
a-law (in most other parts of the
world)
© Polycom, Inc.
ISDN bandwidth: Default
Standard
ISDN bandwidth: Premium
1x512 kbps (normal configurations)
ISDN bandwidth: Standard
1x384 kbps (normal configurations)
63
iPower Collaboration System Tips and Troubleshooting
Option
Default Setting
[LAN] Incoming call transmission bandwidth
4 Mbps
[LAN] Outgoing call bandwidth: Default
Standard
[LAN] Outgoing call bandwidth: Premium
1x768 kbps
[LAN] Outgoing call bandwidth: Standard
1x384 kbps
Local Directory (stored on system)
Enabled
Log file security
Disabled
Log off automatically after
30 minutes
Logon
Auto Logon
Mute audio for automatically answered calls
Enabled
Number type
Unknown
Numbering plan
Unknown
Pan direction of near-end camera
Normal
Picture-in-Picture (PIP) position on second
monitor
Bottom right
Put the system in Standby mode after
Disabled
Transmit a Sending Complete information
element
Enabled for Euro ISDN, NET3
(Taiwan), and VN3
Disabled for all other dialects
64
Use a second monitor
Disabled
Use Automatic Gain Control (AGC)
Enabled
Use Automatic Gain Control (AGC) for auxiliary
audio source
Enabled
Use echo cancellation (IDEC)
Enabled
Use noise suppression
Enabled
Use this line for network management via RAS
None
Use this line for voice-add and voice-only calls
Line 4
VCR setup
One VCR (for both recording and
playback)
Video algorithm for ISDN (H.320) calls
Automatic
Video algorithm for LAN (H.323) calls
Automatic
www.polycom.com
Index
A
C
ACP. See Automatic Camera Pointing
adapter, configuring 14
administrator, contacting 41
AdminTools
accessing 13
accessing help for 13
allowing data sharing using 17
configuring audio using 15
configuring multipoint using 18
configuring network use using 15
configuring remote management tools using 17
configuring streaming using 16
configuring video using 16
customizing the system using 14
description of 11
documentation about 43
maintaining the system using 17
roadmap of 13
setting up directories using 16
setting up system security using 14
ANS (Automatic Noise Suppression), solving problems with 60
Application Log 36
applications
adding to iPower system 32
optional on iPower system 12
standard on iPower system 11
audio
adding to iPower system 11
configuring 15
setting for internal multipoint 18
solving problems with 59
Auto Logon
description of 19
disabling 14
Automatic Camera Pointing (ACP) 4
Automatic Gain Control (AGC), solving problems
with 60
Automatic Noise Suppression (ANS), solving problems with 60
auxiliary camera, description of 9
call
© Polycom, Inc.
setting preferences for 14
viewing statistics for 35
Call Log, description of 36
camera
adding additional 9
configuring behavior of 16
description of 4
documentation about 43
iPower 600 5
iPower 900 5
iPower 9000 4
setting up sources of 16
solving problems with 57
Camera and Microphone module 5
cart, description of 9
Central Directory. See directory
Collaboration application
description of 11
documentation about 43
components, optional for iPower system
additional cameras 9
cart 9
display 8
other hardware components 10
VCR 10
components, standard for iPower system
computer box 3
ImageShare or ImageShare II 7
main camera 4
PowerMic 7
remote control devices 5
computer box
iPower 600 3
iPower 900 4
iPower 9000 3
computer unit 3
Conference Statistics
Conference Statistics page 35
viewing 35
Conference-on-Demand. See PathNavigator Conference-on-Demand
Index-1
iPower Collaboration System Tips and Troubleshooting
configuration
of audio 15
of data sharing 17
of directories 16
of multipoint 18
of network use 15
of remote management tools 17
of streaming 16
of system 14
of video 16
Configuration Summary
Configuration Summary page 34
listing settings 36
viewing 34
control panel, allowing use of 14
custom control panel, allowing use of 14
customizing the system 14
D
data sharing, allowing 17
default settings, for iPower system 63
default user account 20
directory
backing up Local before reinstalling 28
Directory Services Setup 12
setting up Central 16
setting up Local 16
Directory Services. See directory
disk space, conserving 37
display
adding second monitor 16
description of 8
solving problems with 56
using two displays 9
document camera, description of 9
Document Server
advantages of 24
configuring 17
description of 12
installing software for 24
setting up 24
system requirements of 24
tips and guidelines for 25
documentation
finding information in 42
list of documents 42
domain account 20
dual images, enabling or disabling 16
Index-2
dual monitor 9
F
File Transfer
configuring 17
description of 11
flicker reduction, enabling 16
G
gatekeeper, setting up 15
gateway, setting up 15
Getting Started Guide
customizing 40
location of 40
Global Management System
description of 22
disabling 23
removing an IP address 23
setting up user account for 23
H
hardware
components, optional 8
components, standard 3
documentation about installing iPower system
42
documentation about testing 44
Hardware Diagnostics
description of 11
description of Error Log 36
documentation about 44
headset, adding to iPower system 11
help, list of online help systems 42
I
ImageShare
documentation about 43
iPower 600 7
iPower 900 7
iPower 9000 7
solving problems with 61
www.polycom.com
Index
ImageShare II
documentation about 43
iPower 600 7
iPower 9000 7
solving problems with 61
IMUX, setting up 15
information, providing to users 39
installation
documentation about 42
reinstalling the iPower system 28
solving problems during 46
Integrated Dynamic Echo Cancellation (IDEC),
solving problems with 60
iPower 70 Room Camera
description of 5
documentation about 43
iPower 80 Dynamic Locating Camera
description of 5
documentation about 43
iPower Documentation CD, list of documents on 42
iPower Executive, documentation about 43
iPower system
accessing and viewing logs for 36
adding applications to 32
AdminTools Roadmap 13
conserving disk space for 37
customizing the system 14
default settings for 63
description of 1
finding information in documentation 42
hardware components, optional 8
hardware components, standard 3
ImageShare or ImageShare II 7
installation documentation about 42
iPower 600 description 2
iPower 900 description 2
iPower 9000 description 2
monitoring system statistics 32
providing users with information 39
restoring the system 28
setting up additional software on 20
setting up system security 14
setting up the log on process on 19
setting up virus protection for 37
software applications, optional 12
software applications, standard 11
tasks you do rarely 19
tasks you do regularly 31
telling users how to contact system administrator 41
© Polycom, Inc.
tips for helping users 39
troubleshooting 45
updating information for 17
ISDN, setting up 15
K
keyboard
description of 5
iPower 600 6
iPower 900 6
iPower 9000 6
solving problems with 47
L
LAMB. See Look-At-Me-Button
LAN, setting up 15
laptop, adding to iPower system 11
Local Directory. See directory
local user account 20
Locked Settings 14
logging in. See logon
logoff, setting options 14
logon
choosing logon options 19
choosing method 14
setting up 19
logs
accessing and viewing 36
Application Log 36
Call Log 36
Configuration Summary 36
Hardware Diagnostics Error Log 36
saving numbers in Call Log 14
Security Log 36
System Log 36
Look-At-Me-Button, adding to iPower system 11
M
maintenance
of system using AdminTools 17
restoring the system 28
Management Information Bases. See MIBs
MIBs, installing 22
Index-3
iPower Collaboration System Tips and Troubleshooting
microphone
configuring 15
documentation about 43
PowerMic 7
Zoom Mic 5
monitor
solving problems with 57
monitor. See display
multipoint, configuring 18
muting, solving problems with 59
N
NAT, configuring 14
NetMeeting Chat, description of 11
network
configuring use of 15
installing network management software 22
network management station (NMS) 22
solving problems with 49
network management station (NMS) 22
Network Manager
adding to SNMP management 22
description of 12
NTSC/PAL display 9
O
online help
accessing 42
list of 42
Operating Statistics
description of 11
Operating Statistics page 33
starting 32
P
PathNavigator Conference-on-Demand
configuring 25
description of 25
placing a call using 26
uses of 25
People and Content list, adding applications to 14
picture-in-picture (PIP). See PIP
PIP
changing position of 14
description of 8
Index-4
Polycom iPower system. See iPower system
Polycom Technical Support v
port range, configuring 14
PowerCam Plus
description of 4
documentation about 43
PowerCam, description of 4
PowerMic
description of 7
documentation about 43
Premier Cart
description of 9
documentation about 43
printer, adding to iPower system 10
problems, solving. See troubleshooting
projector, adding to iPower system 11
Q
QoS, configuring 14
Quality of Service, configuring 14
Quick Tips Sheet, sending to users 39
R
RAS, setting up 17
Readiness Monitoring, setting up 17
regulatory, documentation about 42
reinstalling, system 28
Release Bulletin, location of 44
remote control devices
iPower 600 6
iPower 900 6
iPower 9000 5
solving problems with 47
remote management
description of software for 20
SNMP management 22
using tools for 17
WebRemote 20
restoring, system 28
room audio input devices, adding to iPower system
11
S
scanner, adding to iPower system 10
www.polycom.com
Index
security
setting up for system 14
setting up virus protection 37
Security Log 36
serial devices, adding to iPower system 10
server. See Document Server
service, contacting Polycom v
settings, locking 14
Setup Wizard, description of 11
SNMP management
adding iPower Network Manager 22
configuring system for 17
documentation about 44
enabling 22
installing iPower MIBs 22
setting up network management station (NMS)
22
software
adding applications 32
applications, optional 12
applications, standard 11
Document Server 24
for remote management 20
Global Management System 22
PathNavigator Conference-on-Demand 25
reinstalling the system software 28
setting up additional 20
WebOffice 26
solving problems. See troubleshooting
space, conserving on disk 37
speakers, defining number of 15
Standard Windows logon
description of 19
setting up user accounts for 20
Standby Mode, configuring 14
startup, solving problems during 46
statistics. See system statistics
streaming, configuring 16
support, contacting Polycom v
SVGA/XGA display 9
system administrator, contacting 41
System Logs, description of 36
system management. See AdminTools
System Software CD, applications on 11
© Polycom, Inc.
system statistics
monitoring 32
starting Operating Statistics 32
viewing detailed 32
viewing statistics for current call 35
viewing the Configuration Summary 34
system. See iPower system
T
tasks
accessing and viewing logs 36
adding applications 32
conserving disk space 37
in Getting Started Guide 42
in Quick Tips Sheet 42
monitoring system statistics 32
restoring the system 28
setting up additional software 20
setting up the log on process 19
setting up virus protection 37
technical support, Polycom v
Thin Display Adaptor, documentation about 43
troubleshooting 45
audio problems 59
general system problems 47
ImageShare problems 61
installation problems 46
network problems 49
startup problems 46
video problems 55
U
USB devices, adding to iPower system 10
user access, managing 19
user account
domain account 20
iPower system default user account 20
local user account 20
setting up 20
User Guide. See Getting Started Guide
users
finding information in documentation 42
providing with information they need 39
telling how to contact system administrator 41
tips for helping 39
Index-5
iPower Collaboration System Tips and Troubleshooting
Utility Cart
description of 9
documentation about 43
V
VCR
adding 16
solving problems with 58
using with iPower system 10
video
configuring 16
setting for internal multipoint 18
setting up video sources 16
solving problems with 55
virus, setting up protection against 37
Vortex, adding to iPower system 11
W
Web site, Polycom v
WebOffice
accessing 27
description of 26
WebRemote
configuring system for 17
documentation about 44
enabling 20
requirements for 20
using 21
whiteboard, adding to iPower system 10
Windows logon
description of 19
setting up user accounts for 20
Z
Zoom Mic 5
Index-6
www.polycom.com