1
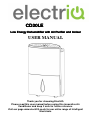
CD20LE
Low Energy Dehumidifier with Air Purifier and Ioniser
USER MANUAL
Thank you for choosing ElectrIQ.
Please read this user manual before using this innovative Air
Conditioner and keep it safe for future reference.
Visit our page www.electrIQ.co.uk for our entire range of Intelligent
Electricals
Contents
Safety Instructions
……………….. 1
Quick reference
……………….. 3
Questions
……………….. 5
Installation
……………….. 6
Parts
……………….. 7
Control panel
……………….. 8
Operation and Settings
……………….. 11
Water Drainage
……………….. 13
Air Purifier Function & Filters ……………….. 16
Maintenance
……………….. 17
Troubleshooting
……………….. 18
Technical data
……………….. 19
SAFETY INSTRUCTIONS
Important
•
Carefully read the instructions before operating the unit
•
This appliance is for indoor use only.
•
Rating: This unit must be only connected to a 220-240 V / 50 Hz
earthed outlet.
•
Installation must be in accordance with regulations of the country
where the unit is used.
•
If you are in any doubt about the suitability of your electrical
supply have it checked and, if necessary, modified by a qualified
electrician.
•
This dehumidifier has been tested and is safe to use. However,
as with any electrical appliances - use it with care.
•
Disconnect the power plug from socket before dismantling,
assembling or cleaning.
•
Avoid touching any moving parts of the appliance.
•
Never insert fingers, pencils or any other objects though the
guard
•
This appliance is not intended for use by persons (including
children) with reduced physical, sensory or mental capabilities. It is
also not intended for use by those with a lack of experience and
knowledge, unless they have been given supervision or instruction
concerning the use of the appliance by a person responsible for their
safety.
•
Do not leave children unsupervised with this appliance.
•
Do not clean the unit by spraying it or immersing it in water.
•
Never connect the unit to an electrical outlet using an extension
cord. If an outlet is not available, one should be installed by a
qualified electrician.
1
•
Never operate this appliance if the cord or plug is damaged.
Ensure the power cord is not stretched or exposed to sharp
object/edges.
•
A damaged supply cord should be replaced by the manufacturer
or a qualified electrician in order to avoid a hazard.
•
Any service other than regular cleaning or filter replacement
should be performed by an authorized service representative. Failure
to comply could result in a voided warranty.
•
Do not use the appliance for any other purposes than its
intended use.
•
This dehumidifier must always be stored and transported upright,
otherwise irreparable damage may be caused to the compressor; if in
doubt we suggest waiting at least 24 hours before starting the unit.
•
Avoid restarting the dehumidifier unit unless 3 minutes have
passed since being turned off. This prevents damage to the
compressor.
•
Never use the mains plug as a switch to start and turn off the
dehumidifier. Use the provided ON/OFF switch located on the control
panel.
•
Always place the unit on a dry and stable surface.
•
The appliance should not be installed in laundry or wet rooms
where the humidity is higher than 85% RH
•
Do not place the unit next to heat sources (e.g. Electrical fires,
fireplaces, etc.)
Energy Saving and Unit Safety Protection Tips
•
•
•
•
Do not cover or restrict the airflow from the outlet or inlet grills.
For maximum performance the minimum distance from a wall or
objects should be 50cm.
Keep the filters clean. Under normal conditions, filters should only
need cleaning once every three weeks (approximately).
Since the filters remove airborne particles, more frequent
cleaning maybe necessary, depending on the air quality. Vacuum
2 wash the mesh filters with hot
the Activated Carbon Filters and
soapy water and dry them before placing them back in the unit
Quick Reference Guide
Reduce the room
humidity:
Setting the unit in dehumidifying function :
choose high dehumidifying
or low dehumidifying
high dehumidifying:
POWER
MODE
low dehumidifying:
POWER
MODE
Setting the exact humidity:
Choose auto dehumidifying
from 40% to 70%.
when the humidity in the room ranges
When the unit is plugged for the first time, it will run in auto
dehumidifying mode with a humidity level of 50% as default. If you want
to reset the humidity, please follow the steps below:
First setting
Second setting
POWER
MODE
HUMIDITY
3
Air Purifier
*
POWER
MODE
Pressing the HUMIDITY key will adjust the fan speed to high
or low in Air Purifier mode.
Pressing the SWING key will adjust the position of air outlet
louvres for improved air flow.
Notes:
You can press the IONISER key to turn on the ioniser function. The
green indicator lamp will light up.
The Ioniser will sterilise the air; helping to remove any foul smells
Attention:
Please insert the mesh air filter (or activated carbon filter) into the
filter frame before you choose the air purifier function.
4
Questions
Why doesn’t the dehumidifier seem to extract much water if the
temperature is low?
•
•
This is a compressor dehumidifier which works best in temperatures
above 15℃. If the temperature is low and the air is dryer than the
setting on the humidistat the unit will not extract water.
If you want to use a dehumidifier for outside buildings, unheated
properties, boats or garages please check our desiccant range.
Why doesn’t the unit work /stop suddenly?
•
The water tank may be full or displaced.
To rectify: empty the tank and carefully place the tank back in the unit.
•
The unit may be running in “dehumidifying mode” with a low room
temperature.
Please check if the room temperature is lower than 5 ℃ . If so, the unit
will stop working while in dehumidifying mode.
(The low temperature Icon should flash on the display)
The ambient operating range is between 5℃ and 35℃ with a relative
humidity ranging from 30% to 80%.
For maximum efficiency use the unit between 16℃ and 32℃.
Sometimes cold and/or hot air comes out from the air outlet grill, why?
•
When the unit is in dehumidifying mode it absorbs humid air from
room and freezes it to reduce the humidity.
During the cold cycle there should be cold air coming out of the unit
During the defrost cycle hot dry air should be coming out of the outlet
grill.
5
Installation
Remove any water from the water tank before
starting the unit
In order to save energy, do not open windows or
doors while the unit is running.
Place the unit on a hard / flat surface
To reduce noise levels:
Place a piece of carpet or a rubber mat under the
unit to reduce any vibrations while the unit is
running.
6
Parts
Front
Air outlet grill
Control panel
Float
Tank Cover
Water tank
Visible window of water tank
Rear
7
Control Panel
Keys
POWER key: Press this key to turn the unit on and off.
MODE key: Press this key to select the operation mode auto dehumidifying, high dehumidifying, low dehumidifying
or air purifier.
TIMER key: Press this key to set the unit to switch off after
a selected amount of time.
Each press of the button increased the time in increments
of 1 hour.
HUMIDITY key: Press this key to set the humidity level you
desire.
The humidity settings start at 40% and each press of the
button increases the range by 5%
The same key is used to set the fan speed to high or low
when the unit is running in air purifier mode.
DRYING key: Press this key to remove any water /
moisture trapped internally in the unit and to avoid any
mildew that may affect performance.
Then select a high fan speed8for about 1 hour. Press the
key again to cancel the drying function.
SWING key: Press this to start the louvres swinging or to
adjust the position of air outlet grill.
Press the key again to lock the louvres in the desired
position.
LOCK key: Press the key for 3 seconds to turn on the
keypad lock function.
Press for 3 seconds again to turn off keypad locked status.
IONISER key: Press the key to turn on the ioniser, press
again to turn off it
LCD DISPLAY
Auto Dehumidifying mode. When unit
will is started for the first time it will be
set to Auto Mode which will maintain a
Relative Humidity of 50%
High dehumidifying mode. This
symbol is also used for Laundry Mode
Low dehumidifying mode. Used for
maintenance and power saving.
Air Purifying mode. Use for air
cleaning. Ioniser can be turned on/ off
9
Tank full or not properly in place.
Tank needs emptying or fitting properly.
Low room temperature alarm. When
temperature <15 ℃ this icon indicates
that dehumidifying is less efficient.
When the room temperature is
<5℃,
the dehumidifying function will stop to
prevent damage to the compressor and
the icon will flash.
Internal Drying operation.
Locking mode. This icon signals that
the key lock has been activated.
Humidity read out. This will show the
room humidity when the unit is running
in high or low dehumidifying & air
purifier mode.
When a set humidity level has been
selected – this amount will be displayed
(not the room humidity).
Temperature read out: Room
temperature is displayed when the
timer function is off.
To switch between ℃ & ℉ simply press
MODE & TIMER at the same.
Ioniser controls. Ioniser will sterilise
the air and remove unpleasant odours.
It will also reduce the growth of any
mould spores.
10
Operation
Timer-off setting
Press the TIMER key (while the unit is on) to set the unit to switch off after a
selected amount of time.
will flash for 5 times and disappear when your first press the TIMER key.
Each press of the button increased the time in increments of 1 hour.
Time-on setting
Press the TIMER key (while the unit is off/standby) to set the unit to switch on
after a selected amount of time.
will flash for 5 times and disappear when your first press the TIMER key.
Each press of the button increased the time in increments of 1 hour.
Auto Dehumidifying
Press MODE to select the auto dehumidifying mode with a relative humidity of
50% as default.
•
If the room humidity rises to more than 5% of the humidity set on the
unit it will begin to run at the high fan speed.
•
If the room humidity is around the set humidity level the unit will run
at the low fan speed.
•
If the room humidity drops to less than 5% of the humidity set on the
unit the auto dehumidifying mode will be switched off and the unit will run at
the low fan speed only.
High Dehumidifying / Laundry Mode
Press the MODE key to select the high dehumidifying
mode
11
In high dehumidifying mode the unit will run with the high fan speed.
Low Dehumidifying / Maintenance Mode
Press MODE key to select the low dehumidifying
mode
In low dehumidifying mode the unit will run with the low fan speed.
Air purifier
Press the MODE key to select the air purifier mode. In this mode the unit runs
at a slow fan speed as default. Pressing the HUMIDITY key allows you to adjust
fan speeds.
Internal Drying function
When the unit has been running in an environment with a high humidity for a
long time, or when putting the unit into storage, you can press the DRYING key
to remove any internal water / moisture. This helps to avoid issues mildew and
prolong the life of the unit.
Once you have run the unit through drying mode run it the high fan speed for 1
hour.
How to stop the DRYING mode?
1.
Press the DRYING key again to cancel the drying function. The unit will
be returned to previous operation mode before DRYING mode was
selected.
2.
Press the POWER key to stop the drying function. The unit will stop
running.
Keypad locked function
1.
Press the LOCK key for 3 seconds and control panel will lock
2.
Press LOCK again for 3 seconds and normal operation will resume
3.
The LOCK icon will appear on the LCD screen if the control panel is
locked.
12
Water Drainage
The usage of water tank
When the water tank is full, the unit will stop automatically.
When this happens the ‘water full’ icon will be flash and
beep
Put one hand on the
concaves at the side of
water tank to remove it
the unit.
Then remove the cover
from the water tank to
remove water.
Place the cover on the water
tank and insert it back
into the unit, gently, until it
reaches the right position.
Now restart the unit.
handle
Attention: Only empty the water tank when it is full.
Please ensure the tank cover is assembled correctly after
emptying the tank.
13
Optional Continuous drainage
If you do not want to empty the water frequently, connect the
continuous drainage pipe (I.D. 9mm) as instructed below.
Remove the drainage
stopper from the unit
Find the continuous
drainage port in the rear
panel.
Gently connect the drainage
pipe
14
Please check carefully
before using to avoid any
water leaks.
Filters
Open the filter frame and
remove it from the unit as
illustrated (right)
Insert the air filter or (optional)
carbon filter in the filter frame
as illustrated (right)
The webbing of the air filter
face upwards
The activated carbon filter can
face either direction
After the above steps,
insert the filter frame back
into place.
15
Air Purifiers Function & Cleaning of air
filter
Attention:
If the air purifier mode is to be used frequently,
please clean the air filter at least once a month.
Do not use chemical solvents or hot water.
While using the unit in the dehumidifier mode
please be aware that filters will slightly affect the air
flow. So for better performance remove any additional
filters and use only the mesh filters.
If the filter is fairly clean simply use a
vacuum to remove the dust/dirt.
The same process can be used on
the activated carbon filte.
If the washable air filter is dirty, clean it
with warm water.
Ensure the water temperature does not
exceed 40°C (104 °F)
To avoid deformation, let the air
filter dry naturally and keep it away
from any heat sources.
Please clean the carbon filter in
the water for no longer than 5 minutes.
Then leave it to dry in the sun/naturally.
16
Maintenance
Note:
•
Shut off the unit and unplug from the mains before cleaning
or performing any maintenance P
•
When it is not in use for long periods it is advised to
remove the plug from the plug socket.
•
Do not use chemical solvents (such as benzene, alcohol or
gasoline) as they may cause irreversible damage..
Clean the plastic housing of the water
tank with a duster or a soft wet cloth.
Clean the surface of the
unit with a duster or a soft
wet cloth. Do not use
detergents or an abrasive
sponges, these may
damage the plastic surface
17
Clean the washable filter
every two weeks, simply
using some cool or warm
water.
Do not use chemical
solvents or hot water.
Trouble shooting
Issue
Cause
Solution
Hot or cold air
being produced
Normal Operation
Unit does not
operate
Is the plug properly
inserted in the socket?
When the unit is in dehumidifying
mode it absorbs humid air from room
and freezes it to reduce the humidity.
During the cold cycle there should be
cold air coming out of the unit
During the defrost cycle hot dry air
should be coming out of the outlet grill.
Insert the plug into the socket and turn
the switch on.
Dehumidifier does
not extract water
Does the tank full
indicator flash?
Tank full, float displaced or tank not
properly inserted. Empty tank, check
float and make sure tank is properly
inserted in unit.
Is the unit set to a
humidity level lower
than the one in the
room?
Is the temperature too
low for water extraction
to be efficient?
Set the humidity level on the
humidistat bellow current humidity
reading.
Is any intake grill or
discharge blocked? Is the
unit too close to walls.
Increase temperature in the room or
reposition the unit.
Remove obstructions and restart the
unit.
Ensure a distance of at least 50cm
between the unit & walls
Please service the filters regularly as
per user manual.
Airflow seems
weak
Is filter dirty or clogged?
Unit is noisy
during operation
Is the unit on uneven
surface?
Please place on flat horizontal surface.
Is filter clogged?
Please service the filters regularly as
per user manual.
Any other malfunctions will need to be reported to ElectrIQ service
centre. Do not attempt unauthorised repairs as these may invalidate the
warranty.
18
Technical data
Model
CD20LE
Voltage
220-240V / 50Hz
Dehumidifying
20 L / day (at 30⁰ C /
capacity
80%RH)
Rated Power
245 W, 1.2 Amp
Tank Capacity
5.5 litres
Dimensions
14 kgs / 64x42.5x29 cm
Refrigerant
R134, 140 grams
All information provided is for reference only. Products
specifications may change because of continuous product
development.
Disposal: Do not dispose this product as
unsorted waste. Collection of such waste
must be handled separately as special
treatment is necessary.
Recycling facilities are now available for all customers at
which you can deposit your old electrical products.
Customers will be able to take any old electrical equipment
to participating civic amenity sites run by their local councils.
Please remember that this equipment will be further handled
during the recycling process, so please be considerate when
depositing your equipment. Please contact the local council
for details of your local household
waste recycling centres.
19
ElectrIQ UK SUPPORT
www.ElectrIQ.co.uk/support
Please, for your own convenience, make
these simple checks before calling the
service line.
If the unit still fails to operate call: 0871 620
1057 or complete the online form
1. Has the unit been standing upright for at
least 2 hours?
2. Is the unit plugged into the mains?
3. Is the fuse OK?
4. Switch the unit off and wait three minutes to
see if the issue is resolved. Restart the unit.
5. Check if the water tank is full.
Office hours: 9AM - 5PM Monday to
Friday
www.ElectrIQ.co.uk
Unit 2, The Nursery
Berristow Lane
South Normanton
Derbyshire, DE55 2FX
20