1
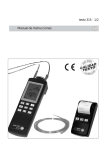
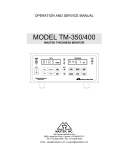
Electrodeposition Procedure No.: Procedure Title: Revision: Date: Author: Checked By: Physics CR-006 Electrodeposition 1 20th June 2009 Laura Thevenard Electrodeposition kit User manual This set-up is property of Prof. Cowburn’s Group and was intended to deposit Nickel, Iron and Copper. It is not meant to be in public access, in order not to contaminate the glassware and the electrodes. Please contact Laura Thevenard ([email protected]) for more details. This set-up is equipped with a home-made electrode holder, which is linked to a Princeton Applied Research/Ametek potentiostat, designed to function solely with the V3 Studio software. The bung is equipped to hold a Pt mesh electrode, a Ag/AgCl reference electrode, and a crocodile clip holding the sample. An Argon buller and a thermometer can also easily be installed in it. Check at the back of this sheet for potentiostat specs. This tool enables to apply either potential or current pulses (single or multiple), or to perform cyclovoltammetric or cyclogalvanostatic experiments. It is not equipped to do impedance measurements. For each experiment, current, voltage, and charge are recorded as a function of time, and can be exported as an ascii file. Should you require to store your data, please create a new folder in DATA: with your name. The V3 Studio install CD is in the cupboard below, and the user manual on the Desktop of the PC. For any technical enquiries, please contact the sales engineer from PAP, Andrew White ([email protected]). Solution preparation: Prepare and date a fresh solution for each experiment, using 18 M dionized water. Use prelabelled Nickel, Py, or Py/Cu bottles, in order to avoid Iron contamination. If no clean 250 mL bottle is available, thoroughly wash one with D.I water, and dry it out in the furnace behind you before using it. Metal salts are located in the cupboard below the deposition kit, and are often best dissolved above 50°C. Sample preparation: Samples should be thoroughly cleaned before deposition (ultra-sounds in IPA), and then mounted on a clean crocodile clip, as parallel as possible to the Pt counterelectrode. Take the reference electrode out of its KCl bath, rinse it with DI water, GENTLY dab it dry with a wipe, and mount it in its slot. Deposition: Once the V3 Studio software started, load a known sequence, or create your own, by choosing the desired steps from the menu. It is also possible to specify in the “Advanced menu” the electrode type, the experiment name, and a limiting charge, current, or voltage putting the on-going step to an end. Be careful to indicate a reasonable number of points. There is also an iR compensation option. The bottom bar on the V3 window indicates the current rest potential, and current flowing between the electrodes. To launch the deposition, press the green “Start” triangle in the upper menu. If it is red or greyed, close the software, and restart the potentiostat. Finishing: Clean thoroughly the reference electrode with a spray of DI water, and put it back in its KCl bath. The reference electrode should never be left out of its bath to dry up !! It is not meant to be a consumable, and should be treated with care ! If necessary, use a pipette to carefully refill the electrode with a saturated KCl solution by unscrewing the top part. Clean thoroughly the counter-electrode with a spray of DI water, dab dry, and put back on its clip. Dab dry with filter paper any solution that may have come in contact with the sample holder clip. Rinse all the glass-ware thoroughly with DI water, and put to dry upside down on the rack, or on clean-room wipes. Leave your working area cleared out and clean. Turn off the potentiostat, log off your IC session, and turn the screen off. SPECS -- Princeton Applied Research VersaSTAT3 Data acquisition 3 x 16-bit 500k samples per second ADCs synchronized Time base resolution (minimum) 10μs (100k samples / second) Voltage compliance ± 12V Current compliance ± 650mA (standard) ± 2A (with 2A option) Potentiostat bandwidth 1 MHz, Stability settings high-speed, high-stability Slew rate ≥ 8V per μs typical (no load), Rise time (-1.0V to +1.0V) <350ns (no load) Applied voltage resolution for ±10mV signal = 300nV; for ±100mV signal = 3μV; for ±1V signal = 30μV; for ±10V signal = 300μV Applied voltage accuracy ±0.2% of value ± 2mV Maximum scan rate 5000Vs-1 (50mV step) Maximum scan range / resolution ± 10V / 300μV Applied current range ± full scale (depends on range selected) ± 650mA (standard) Applied current resolution ±1/32,000 x full scale Applied current accuracy ±0.2% of reading, ±0.2 % of range Maximum current range / resolution ± 650mA / 60μA Minimum current range / resolution ± 200nA / 6pA Max input range ±10V Bandwidth ≥ 10MHz (3dB) Input impedance ≥ 1012Ω in parallel with ≤ 5pF (typical) Leakage current ≤ 5pA at less than 25°C CMRR 60dB at 100kHz (typical) Voltage range ± 10V Voltage resolution 6μV Voltage accuracy ±0.2% of reading, ±0.2% of range Current ranges Auto-ranging (8 ranges) 650mA to 200nA (8 ranges) 2A to 200nA (with option) Current resolution 120fA ; Current accuracy (DC) ±0.2% of reading, ±0.2% of range Bandwidth 1MHz (signal ≥2mA range typical); Frequency range 10μHz to 1MHz Voltage range 90Vac to 250Vac, 50-60Hz, Minimum AC voltage amplitude 0.1mV RMS