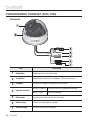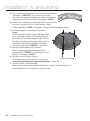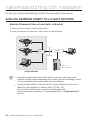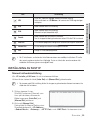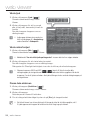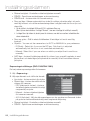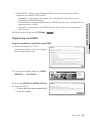
1
NÄTVERKSKAMERA Bruksanvisning SNB-1001/ SND-1080/SNV-1080 Nätverkskamera Bruksanvisning Copyright © 2011 Samsung Techwin Co., Ltd. Tous droits réservés. Marque commerciale est le logo déposé de Samsung Techwin Co., Ltd. Le nom du produit est la marque commerciale déposée de Samsung Techwin Co., Ltd. Les autres marques commerciales mentionnées dans ce manuel sont des marques déposées de leurs propriétaires respectifs. Restriction Les droits de copyright de ce document sont la propriété exclusive de Samsung Techwin Co., Ltd. Ce document ne saurait en aucun cas être reproduit, distribué ou modifié, tout ou en partie, sans le consentement formel de Samsung Techwin. Clause de non responsabilité Samsung Techwin fait de son mieux pour vérifier l’intégrité et l’exactitude des contenus de ce document, mais aucune garantie formelle ne sera fournie à cet effet. L’utilisation de ce document et les résultats subséquents seront entièrement de la responsabilité de l’utilisateur. Samsung Techwin se réserve le droit de modifier les contenus de ce document sans avis préalable. Utseendet och specifikationerna kan ändras utan föregående meddelande. Standardlösenordet kan spridas och göra datorn mer sårbar för hot, därför rekommenderar vi att du ändrar lösenordet efter att produkten har installerats. Observera att säkerhet och andra relaterade problem som orsakats av att lösenordet inte har ändrats faller på användarens ansvar. översikt VIKTIGA SÄKERHETSANVISNINGAR 1. Läs de här instruktionerna. 2. Behåll de här instruktionerna. ● ÖVERSIKT 3. Dölj alla varningar. 4. Följ alla instruktioner. 5. Använd inte apparaten nära vatten. 6. Rengör endast med torr trasa. 7. Blockera inga ventilationsöppningar, installera i enlighet med tillverkarens anvisningar. 8. Installera inte nära några värmekällor, såsom element, värmeaggregat, spisar eller motsvarande apparater (inklusive förstärkare) som producerar värme. 9. Bryt inte mot säkerhetsreglerna för den polariserade eller jordade kontakten. En polariserad kontakt har två blad som är bredare än de andra. En jordad kontakt har två blad och ett tredje jordningsstift. Det breda bladet eller det tredje stiftet finns för din säkerhet. Om den medföljande kontakten inte passar i uttaget ska du kontakta en elektriker för att byta det gamla uttaget. 10. Skydda strömsladden från att utsättas för tryck på grund av att du går på den, eller att den kläms, samt skydda bekväma recepterorer och den punkt där de går ut ur apparaten. 11. Använd bara tillbehör/accessoarer som specificeras av tillverkaren. 12. Använd bara med kundvagn, stativ, konsol eller bord som specificeras av tillverkaren eller säljs med apparaten. När en kundvagn används ska du vara försiktig när du flyttar kundvagnen/ apparaten för att undvika att skada den till följd av att den välter. 13. Koppla från den här apparaten under åskväder eller när den inte används under längre perioder. 14. Överlåt all service åt behörig personal Service krävs när apparaten har skadats på något sätt, exempelvis då en elsladd eller kontakt har skadats, vätska har spillts ut eller föremål har ramlat ned på apparaten, om apparaten har utsatts för regn eller fukt, inte fungerar normalt eller har fallit. Svenska _3 översikt VARNING FÖR ATT MINSKA RISKEN FÖR BRAND OCH ELEKTRISK KORTSLUTNING SKA DU INTE UTSÄTTA PRODUKTEN FÖR REGN ELLER FUKT. FÖR INTE IN NÅGRA METALLFÖREMÅL I VENTILATIONSGALLREN ELLER I ANDRA ÖPPNINGAR PÅ ENHETEN. Apparaten får inte utsättas för droppar eller fukt och därför skall inte föremål som innehåller vatten, exempelvis vaser, placeras på apparaten. OBSERVERA OBSERVERA RISK FÖR ELEKTRISKA STÖTAR ÖPPNA INTE OBSERVERA : MINSKA RISKEN FÖR ELEKTRISK KORTSLUTNING. TA INTE BORT SKYDDET (ELLER BAKSIDAN). DET FINNS INGA DELAR INUTI SOM DU KAN REPARERA. ÖVERLÄMNA ALLA REPARATIONER ÅT KVALIFICERAD PERSONAL. FÖRKLARING AV GRAFISKA SYMBOLER Blixtsymbolen med pilsymbol, inom en likformig triangel, är avsedd att varna användaren för att det finns ”farlig spänning” inom produktens infattning, som är tillräckligt stark för att utföra en risk för att personer ska utsättas för kortslutning. Utropstecknet inom en likformad triangel är avsett att informera användaren om att det finns viktiga drifts- och underhållsanvisningar (service) i litteraturen som medföljer produkten. 4_ översikt Klass konstruktion En apparat med KLASS konstruktion ska anslutas till ett jordat EL-uttag. Batteri Frånkopplingsenhet Koppla från kontakten från apparaten om den är trasig. Kontakta en reparatör som finns i närheten Om du befinner dig utanför USA kan det användas en HAR-kod från en godkänd myndighet som är engagerad i tillbehörsmontering. OBSERVERA De här serviceanvisningarna ska bara användas av kvalificerad servicepersonal. För att minska risken för elektrisk kortslutning ska du inte utföra någon annan service än den som finns i användaranvisningarna om du inte är behörig för det. BNC Out-uttaget på produkten är till för enklare installation och rekommenderas inte för övervakning. Om du håller BNC-kabeln ansluten finns en risk för att det kan inträffa blixtnedslag på grund av skada eller felfunktion på produkten. Svenska _5 ● ÖVERSIKT Batterier (löstagbart batteri eller installerat) får inte utsättas för extrem hetta, t.ex. direkt solljus eller eld. översikt Läs följande rekommenderade säkerhetsföreskrifter noggrant. Placera inte den här apparaten på en ojämn yta. Installera inte på en yta där den utsätts för direkt solljus, nära värmeaggregat eller på en mycket kall plats. Placera inte den här apparaten i närheten av ledande material. Försök inte utföra service på apparaten själv. Ställ inte ett glas vatten på produkten. Installera inte produkten nära några magnetiska källor. Blockera inte ventilationsöppningarna. Placera inte tunga föremål på strömsladden. Bruksanvisningen är en vägledningsbok för hur du använder produkterna. Användarsymbolerna i boken har följande betydelser Referens : när det gäller att erbjuda information för att fungera som en hjälp för produktanvändning Obs : Om det finns någon risk för skador på produkter eller den mänskliga hälsan om anvisningarna inte följs. Läs den här manualen av säkerhetsskäl innan du använder produkterna och förvara den på en säker plats. 6_ översikt INNEHÅLL ÖVERSIKT 10 10 12 16 19 INSTALLATION & ANSLUTNING 21 NÄTVERKSANSLUTNING OCH INSTALLATION 34 21 23 25 27 29 29 34 35 36 37 38 39 43 44 46 46 Viktiga Säkerhetsanvisningar Produktegenskaper Rekomenderade Datorspecifikationer Specifikationer för Rekommenderade Micro SD/ SDHC Minneskort Vad ingar Övergripande Översikt (SNB-1001) Övergripande översikt (SND-1080) Övergripande översikt (SNV-1080) Installation (SND-1080) Installation (SNV-1080) Montera Linsen (SNB-1001) Mata In/Mata ut SD-minneskort Minneskortsinformation (Medföljer Ej) Anslutning till en Annan Enhet Ansluta Kameran Direkt till Lokalt Nätverk Ansluta Kameran Direkt till ett DHCP-Baserat DSL/ Kabelmodem Ansluta Kameran Direkt till ett PPPoE-Modem Ansluta Kameran till en Bredbandsrouter med PPPoE-/ Kabelmodem Knappar som Används i IPInstallationen Inställning av fast IP Dynamisk IP-Inställning Portintervallsinställning Framåt (portmappning) Ansluta till Kameran Från en delad, Lokal Dator Ansluta till Kameran Från en Fjärrdator via Internet Svenska _7 ● ÖVERSIKT 3 3 9 9 översikt WEB VIEWER 47 INSTÄLLNINGSSKÄRMEN 58 BILAGA 86 8_ översikt 47 48 49 50 52 55 56 Ansluta till Kameran Inloggning Installera Activex Installera Silverlight Runtime Använda Live-skärmen Uppspelning (Händ) Uppspelning (Tid) 58 58 67 74 81 Inställningar Inställningar för Audio & Video Nätverksinställning Händelsinställningar Systeminställningar 86 91 94 96 98 Specifikationer Produktöversikt Felsökning Open Source Announcement GPL/LGPL Software License PRODUKTEGENSKAPER REKOMENDERADE DATORSPECIFIKATIONER • Processor : Intel(R) Core(TM)2 2.4 GHz eller högre • Operativsystem : Windows XP, VISTA, 7 Mac OS • Upplösning : 1280X1024 pixlar eller högre • RAM : 2GB eller högre • Webbläsare : Internet Explorer 7.0 eller senare, Firefox 3.0 eller senare, Chrome 8.0 eller senare, Safari 4.0 eller senare Varken en betatestversion som skiljer sig från versionen som är publicerad på företagswebbsidan eller en utvecklingsversion stöds. Vi rekommenderar att du ansluter till Ipv6 i Windows 7. Svenska _9 ● ÖVERSIKT • Multi-Streaming Den här nätverkskameran kan visa videos i olika upplösningar och kvaliteter samtidigt genom att använda olika CODECs. • Webbläsarbaserad övervakning Använda Internet-webbläsaren för att visa bilden i en lokal nätverksmiljö. • Alarm Om det inträffar en händelse överförs händelserelaterad video till den e-post som är angiven av användaren, eller sparad till SD-minnet. • Videorörelsedetektor Detekterar en rörelse på videon innan den utlöser en händelse. • Ansiktsdetektering Identifierar ett ansikte från kameringångsvideon eller överför en klarare bild av ditt angivna område. • Automatisk detektering av frånkopplade nätverk Detekterar nätverksfrånkopplingar innan den utlöser en händelse. • ONVIF-efterlevnad För mer information, se www.onvif.org. översikt • Videominne : 256MB eller högre J Om drivrutinen för videografikadaptern inte installeras korrekt, eller inte är den senaste versionen kan videon inte spelas upp korrekt. För multi-övervakningssystem som involverar minst 2 skärmar kan uppspelningsprestandan försämras beroende på system. SPECIFIKATIONER FÖR REKOMMENDERADE MICRO SD/ SDHC MINNESKORT • 2GB ~ 32GB • För att säkerställa lämplig inspelning av videodata rekommenderar vi att du använder ett minneskort som stöder en läs-/skrivhastighet på minst 10 Mbps och klass 6. VAD INGAR Kontrollera om kameran och tillbehören är inkluderade i produktförpackningen. Utseende Artikelnamn Kamera 10_ översikt Kvantitet Beskrivning Modellnamn 1 SNB-1001 1 SND-1080 1 SNV-1080 Bruksanvisning, CD med installationsprogram, DVD med CMS-program 2 Snabbguide 1 SNB-1001 SND-1080 SNV-1080 Utseende Kvantitet Beskrivning Modellnamn Kabel för skärmtestning 1 Används för att testa kameraanslutningen för en bärbar skärm SNB-1001 SND-1080 SNV-1080 Järnskruv 3 Används för att montera i en järnplatta SND-1080 SNV-1080 Alarmkabel 1 Används för att ansluta till alarmingång SNB-1001 C-monteringsadapter 1 Används för att ansluta till alarmingång Sexkantsnyckel 1 Används för att ta bort/montera skyddskåpan Mall 1 Produktinstallationsguide SNV-1080 Linsalternativ (medföljer ej) CS- / C-lins Tillbehörslins för montering i en kamera SNB-1001 Svenska _11 ● ÖVERSIKT Artikelnamn översikt ÖVERGRIPANDE ÖVERSIKT (SNB-1001) Framsidan Post Beskrivning Skruvhål på monteringskonsol Används till att fästa kameran på en konsol eller en monteringskonsol. Skruvstorlek : använd den här skruven för att fästa monteringskonsolen. 1/4” - 20UNC (20THREAD/1”) L: 4,5 mm±0,2 mm (ISO-standard) eller 0,197” (ASA-standard) b Anslutning för automatisk iris Används för tillförsel av stöm och utgående signal som kontrollerar linsens iris. 12_ översikt Post Beskrivning FBL-reglage Ändra FBL-värdet (Flange-Back Length) i enlighet med linsen. Automatisk iris (tillval) Installerad på linsadaptern. M ● ÖVERSIKT c Torka av den smutsiga ytan på linsen försiktigt med en servett eller trasa som du har fuktat med ethanol. Monteringskonsol medföljer inte. Mer information om hur du använder monteringskonsolen finns i produktdokumentationen. Svenska _13 översikt Baksidan OUT IN VIDEO RESET AUDIO GND ACT LINK NETWORK ALARM IN DC12V Post Mikro SDminneskortsplats b Terminal för ljud c Video Out-port Beskrivning Fack för Mikro SD-minneskort. AUDIO OUT Terminal för utgående ljud. AUDIO IN Terminal för ingående ljud. Port Analog videoutgångsport. (för installation) Återställer kamerainställningar till standardvärdet. Tryck och håll in i omkring 5 sekunder för att starta om systemet. Återställningsknapp 14_ översikt J Om du återställer kameran justeras nätverksinställningarna så att DHCP kan aktiveras. Om det inte finns någon DHCP-server i nätverket måste du köra IP-installeringsprogrammet för att ändra de grundläggande nätverksinställningarna så som IP-adress, Nätmask, Gateway, etc., innan du kan ansluta till nätverket. Post Strömport Används för att koppla in strömkabeln. Ingående alarmport Används för att ansluta ingående alarmsignal. Nätverksport Används för att ansluta en PoE- eller LAN-kabel. ● ÖVERSIKT Beskrivning Svenska _15 översikt ÖVERGRIPANDE ÖVERSIKT (SND-1080) Utseende Post Beskrivning Skyddskåpa Skyddskåpa för lins och enhetsskydd. b Huvudenhet Huvudenheten inkluderar lins, växlingskort, PCB-kort och skruvar. c Strömport Används för att koppla in strömkabeln.(för installation) Ingående alarmport Nätverksport Används för att ansluta en PoE- eller LAN-kabel. Audio in-uttag Används för anslutning till en mikrofon. Audio Out-uttag Används för att ansluta till högtalare. BROWN = Alarm IN Används för att ansluta ingående alarmsensor. BLACK = GND 16_ översikt Används för jordning. I förpackningen 3 VIDEO OUT RESET UNLOCK 7 6 Post Beskrivning Återställer kamerainställningar till standardvärdet. Tryck och håll ned knappen i omkring 5 sekunder för att slå av systemindikatorn och starta om systemet. Återställningsknapp b Mikro SDminneskortsplats Fack för Mikro SD-minneskort. c Skärm-ut Genom att använda testskärmskabeln kan du ansluta till en mobil skärm för kameratest. Fokusspak Vrid barrel åt vänster eller höger för att justera fokus och vrid ratten medurs för att låsa fokus. J Om du återställer kameran justeras nätverksinställningarna så att DHCP kan aktiveras. Om det inte finns någon DHCP-server i nätverket måste du köra IP-installeringsprogrammet för att ändra de grundläggande nätverksinställningarna så som IP-adress, Nätmask, Gateway, etc., innan du kan ansluta till nätverket. Svenska _17 ● ÖVERSIKT 4 5 översikt Post Beskrivning ZOOM-spak Vrid barrel åt vänster eller höger för att justera zoomen och vrid ratten medurs för att låsa zoomen. Upplåsning För att separera konsolen från huvudenheten för installation eller separera kameran från en installerad kamera, trycker du på den här upplåsningsspaken och vrider huvudenheten i den markerade riktningen för <UNLOCK>. Kabelskydd Dra kablarna genom hålet. 18_ översikt ÖVERGRIPANDE ÖVERSIKT (SNV-1080) Utseende ● INSTALLATION & ANSLUTNING Post Beskrivning Skyddskåpa Skyddskåpa för lins och enhetsskydd. b Huvudenhet Huvudenheten inkluderar lins, växlingskort, PCB-kort och skruvar. c Strömport Används för att koppla in strömkabeln.(för installation) Ingående alarmport Nätverksport Används för att ansluta en PoE- eller LAN-kabel. Audio in-uttag Används för anslutning till en mikrofon. Audio Out-uttag Används för att ansluta till högtalare. BROWN = Alarm IN Används för att ansluta ingående alarmsensor. BLACK = GND Används för jordning. Svenska _19 installation & anslutning I förpackningen 3 4 5 VIDEO OUT RESET Post Beskrivning Återställer kamerainställningar till standardvärdet. Tryck och håll ned knappen i omkring 5 sekunder för att slå av systemindikatorn och starta om systemet. Återställningsknapp b Mikro SDminneskortsplats Fack för Mikro SD-minneskort. c Skärm-ut Genom att använda testskärmskabeln kan du ansluta till en mobil skärm för kameratest. Fokusspak Vrid barrel åt vänster eller höger för att justera fokus och vrid ratten medurs för att låsa fokus. ZOOM-spak Vrid barrel åt vänster eller höger för att justera zoomen och vrid ratten medurs för att låsa zoomen. 20_ installation & anslutning J Om du återställer kameran justeras nätverksinställningarna så att DHCP kan aktiveras. Om det inte finns någon DHCP-server i nätverket måste du köra IP-installeringsprogrammet för att ändra de grundläggande nätverksinställningarna så som IP-adress, Nätmask, Gateway, etc., innan du kan ansluta till nätverket. installation & anslutning INSTALLATION (SND-1080) Föreskrifter före installation Se till att läsa följande anvisningar innan du installerar kameran: Installera kameran 1. Håll ned det nedre hålet samtidigt som du tar bort kåpan med andra handen. När du tar bort skyddet blottas huvudenheten. Svenska _21 ● INSTALLATION & ANSLUTNING • Välj en installationsplats (innertak eller vägg) som klarar minst 5 gånger kameravikten. • Instuckna eller avskalade kablar kan orsaka skada på produkten eller brandrisk. • Av säkerhetsskäl ska du hålla alla borta från installationsplatsen. Plocka även för säkerhets skull bort personliga tillhörigheter från platsen. installation & anslutning 2. Dra ut upplåssningsspaken när du vrider huvudenheten i riktningen <UNLOCK> för att ta bort konsolen. Om detta inte fungerar använder du hålet på konsolens undersida för att vrida konsolen i riktningen <LOCK>. UNLOCK 3. Använd de medföljande skruvarna (x3) för att montera konsolen i önskad position (innertak eller vägg). Se till att etiketten <FRONT> på konsolen är riktad framåt för kameraövervakning. 4. Dra kablarna genom konsolen mot taket eller väggen. Om du har tänkt borra ett hål på installationsstället för att dra kablar kan du ta bort kabelskyddet för att visa ett hål. Dra kablarna genom hålet. Om du har tänkt dra kablarna utan att borra ett hål ska du använda det tomma området som ligger mitt emot etikettsidan <FRONT> i kabelsyfte. 5. Montera huvudenheten på konsolen. Rikta in markeringshålet på huvudenheten med etiketten <FRONT> på konsolen och vrid enheten i riktningen <LOCK>. 6. Justera linsen i önskad riktning. Cubierta de cableado För justering av linsens riktning, se avsnittet "Justera monteringsriktningen för kameran". (sidan 24) 7. Fixera skyddet i huvudenheten. Montera den utskjutande delen inuti kåpan i överensstämmande hål på huvudenheten och vrid kåpan för att fixera den. 22_ installation & anslutning INSTALLATION (SNV-1080) Föreskrifter före installation Se till att läsa följande anvisningar innan du installerar kameran: Installera direkt i taket 1. Använd den medföljande sexkantsnyckeln och lossa de 3 skruvarna genom att vrida dem moturs och dela på den kupolformade kåpan. 2. Borra ett hål (5 mm i diameter och minst 35 mm djupt) på önskad plats i lådans underdel och för in den medföljande plastförankningen (HUD 5) i änden. Passa undersidans hål mot förankringshålet och sätt in och fixera ASSYskruven (TH M4xL30). 3. Anslut ström- och videokablarna och ordna den löpande kabeln så att den inte skadas eller kläms och montera kameraenheten på motsatt sätt. 4. Justera linsriktningen till önskad position. 5. Montera kupolskyddet. För att skydda mot vatten ska du fixera bulten med den medföljande sexkantsnyckeln. Svenska _23 ● INSTALLATION & ANSLUTNING • Välj en installationsplats (innertak eller vägg) som klarar minst 5 gånger kameravikten. • Instuckna eller avskalade kablar kan orsaka skada på produkten eller brandrisk. • Av säkerhetsskäl ska du hålla alla borta från installationsplatsen. Plocka även för säkerhets skull bort personliga tillhörigheter från platsen. installation & anslutning Justera monteringsriktningen för kameran (SND-1080/SNV-1080) Panorering Tiltning 0˚ Linsrotation 17˚ ~ 90˚ ❖ Justera övervakningsriktning Du kan bara justera kamerariktningen när kameran sitter fastmonterad i taket. Vrid sedan kameran åt vänster eller höger för att utföra “Panorering”, eller ändra vinkel genom så kallad “Tiltning”. För panorering är panoreringsgränsen 177,5° medurs och 177,5° moturs, totalt 352° möjligt; ytterligare rotation stoppas av stoppenheten. - Justera panoreringsvinkeln så att kameran ställs i rätt, horiontell position. Du kan justera panoreringen upp till 177,5° i valfri riktning och 177,5° i andra riktningen, totalt 352°. - Justera lutningsvinkeln så att kameran ställs i rätt, vertikal position. Du kan justera lutningsvinkeln mellan 17° och 90°. - Den totala rotationsvinkeln är 351°. Du kan göra justeringar i ena riktningen upp till 124° och 227° i andra riktningen. ❖ Justeringsmetoder • Vid vägginstallation ① Efter att kameran har monterats på väggen ska du justera panoreringsvinkeln så att kameran är riktad i önskad riktning vid lutningen. ② Justera rotationspositionen så att den passar videon i skärmens kanter. ③ Justera sedan lutningsvinkeln så att kameran riktas i övervakningsläge • Vid takinstallation ① Efter montering av kameran i taket justerar du panoreringsvinkeln enligt övervakningsriktningen. Du ska justera panoreringsvinkeln så att videon åtminstone visas uppifrån och ned på skärmen. ② Justera rotationspositionen så att den passar videon i skärmens kanter. ③ Justera sedan lutningsvinkeln så att kameran riktas i övervakningsläge. J För mjukare rotationsjustering ställer du in lutningspositionen mellan 60° ~ 80°. 24_ installation & anslutning MONTERA LINSEN (SNB-1001) Koppla från strömmen innan du fortsätter. C- och CS-linsen medföljer inte i produktförpackningen. Montera CS-linsen Vrid tillbehörs-CS-linsen medurs för att föra in den. CS-lins Montera C-linsen Vrid C-monteringsadaptern för att föra in den och gör samma sak med C-linsen. C-lins Svenska _25 ● INSTALLATION & ANSLUTNING M installation & anslutning Ansluta den automatiska linskontakten För in linskontakten i överensstämmande hål på kameran. Fokusering Vrid linsen åt vänster eller höger för att kontrollera zoom och fokus för linsen så att du kan få ett klart, tydligt motiv. 26_ installation & anslutning MATA IN/MATA UT SD-MINNESKORT J Koppla från strömkabeln från kameran innan du matar in SD-minneskortet. ● INSTALLATION & ANSLUTNING Mata in ett SD-minneskort För in SD-minneskortet i pilens riktning så som visas i diagrammet. OUT OUT IN IN AUDIO AUDIO ACT LIN NETWO K ALARM RK IN DC12V J För inte in SD-minneskortet upp och ned med tvång. Annars kan du skada SD-minneskortet. Svenska _27 installation & anslutning Mata ut ett SD-minneskort Tryck försiktigt nedåt på minneskortet så som visas i diagrammet för att mata ut det ur kortplatsen. OUT OUT IN IN AUDIO AUDIO ACT LIN NETWO K ALARM RK IN DC12V J Om du trycker för hårt på SD-minneskortet kan det göra att kortet kommer ut okontrollerat ur kortplatsen när det matas ut. För att ta bort SD-minneskortet ställer du in <Inspelning> till <Av> från <SD-inspelning> och trycker på [Tillämpa ( )]. (sidan 75) Om du har sparat data på SD-minneskortet kommer det att förstöra data som lagrats på det om du tar ut SD-minneskortet för inställning a inspelning. 28_ installation & anslutning MINNESKORTSINFORMATION (MEDFÖLJER EJ) Vad är ett minneskort? Välja ett minneskort som är lämpligt för dig Den här kameran stöder Micro SD/SDHC-minneskort. Du kan dock uppleva kompatibilitetsproblem beroende på modell och fabrikat av minneskortet. För din kamera rekommenderar vi att du använder ett minneskort från följande tillverkare: Mikro SD-/SDHC-minneskort : Sandisk, Transcend Uppspelningsprestandan kan påverkas beroende på hastigheten på minneskortet, så du bör använda ett höghastighetskort. ANSLUTNING TILL EN ANNAN ENHET Skärm (för installation) OUT IN VIDEO RESET AUDIO GND ACT LINK NETWORK Ethernet J ALARM IN DC12V Ström BNC Out-uttaget på produkten är till för enklare installation och rekommenderas inte för övervakning. Om du håller BNC-kabeln ansluten finns en risk för att det kan inträffa blixtnedslag på grund av skada eller felfunktion på produkten. Svenska _29 ● INSTALLATION & ANSLUTNING Minneskortet är ett externt datalagringsmedia som har utvecklats för att erbjuda ett helt nytt sätt att spela in och dela video, ljud och textinformation vid användning av digitala enheter. installation & anslutning Ethernet-anslutning Anslut Ethernet-kabeln till det lokala nätverket eller till Internet. Strömkälla Använd skruvmejseln för att ansluta varje linje (+, –) för strömkabeln till överensstämmande port på kameran. J Var försiktig så att du inte vänder polerna när du ansluter strömkabeln. Du kan också använda en router med PoE (Power over Ethernet) för att få strömtillförsel till kameran. Om både PoE och DC 12V erbjuds fungerar produkten med den först använda strömkällan. Se till att skärm och kamera är avstängda när du kopplar in dem. 30_ installation & anslutning Ansluta till ingående/utgående ljud Högtalare PC Mikrofon Nätverk OUT IN AUDIO ACT LINK NETWOR ALARM K IN DC12V Högtalare Amp Amp Mikrofon Amp Mikrofon Mikrofon Högtalare Amp Svenska _31 ● INSTALLATION & ANSLUTNING Mikrofon installation & anslutning 1. Anslut porten AUDIO IN på kameran med mikrofonen direkt till porten LINE OUT på förstärkaren som mikrofonen är ansluten till. 2. Anslut porten AUDIO OUT på kameran till porten LINE IN på högtalaren. 3. Kontrollera specifikationerna för ljudingång. • Audio Codec G.711 PCM. μ-law 64kbps 8kHz sampling • Full duplex Audio • Audio in Används för mono-signallinjeingång (Max.2.4 Vpp) • Audio out Används för mono-signallinjeutgång (Max.2.4 Vpp) • Impedans för linje ut 600 Kablagediagram för alarmingång ALARM IN 1 (5mA sink) 2 GND Så här ansluter du till alarmingångsporten (SNB-1001) Anslut alarmingångssignalen till bakre panelens ingångsport. OUT ALARM IN IN VIDEO RESET AUDIO GND ACT LINK NETWORK ALARM IN DC12V • ALARM IN : Används för att ansluta ingående alarmsignal. 32_ installation & anslutning Så här ansluter du till alarmingångsporten (SND-1080/SNV-1080) Anslut alarmingångssignalen till kabelingångsporten. ● INSTALLATION & ANSLUTNING N = Alarm IN BROW K = GND BLAC SENSOR Port Beskrivning Port Beskrivning ARM-IN Sensor för ingående alarmport GND Port för jordat uttag Ansluta insignal för larm Anslut ena slingan på varje signallinje (2-slingor) för sensorerna till porten [ARM-IN] och anslut andra slingan till porten [GND]. Svenska _33 nätverksanslutning och installation Du kan göra nätverksinställningar enligt dina nätverkskonfigurationer. ANSLUTA KAMERAN DIREKT TILL LOKALT NÄTVERK Ansluta till kameran från en lokal dator i nätverket 1. Starta Internet-klienten på den lokala datorn. 2. Ange IP-adressen för kameran i adressfältet för webbläsaren. Kamera INTERNET Switch Kamera Lokal dator Brandvägg Extern fjärransluten PC DDNS-server (Data Center, KOREA) <Lokalt nätverk> M En fjärrdator på externt Internet utanför LAN-nätverket kan inte ansluta till kameran som är installerad i Intranätet om portvidarebefordran inte har ställts in eller om en brandvägg är inställd. I så fall ska du kontakta nätverksadministratören för att lösa problemet. Enligt fabriksstandard tilldelas IP-adressen från DHCP-servern automatiskt. Om det inte finns någon DHCP-server tillgänglig är IP-adressen ställd till 192.168.1.100. Om du vill ändra IP-adressen ska du använda IP-installationsprogrammet. För mer information om användning av IP-installationsprogrammet, se ”Inställning av fast IP”. (sidan 39) 34_ nätverksanslutning och installation ANSLUTA KAMERAN DIREKT TILL ETT DHCP-BASERAT DSL/KABELMODEM Extern fjärransluten PC Kamera DDNS-serve (Data Center, KOREA) 1. Använd LAN-kabeln för att ansluta nätverkskabeln direkt till din dator. 2. Kör IP-installationsprogrammet och ändra IP-adress för kameran så att du kan använda webbläsaren på skrivbordet för att ansluta till Internet. 3. Använd Internet-klienten för att ansluta till kameran. 4. Gå till sidan [Inst.] 5. Gå till [Nätverk] – [DDNS] och konfigurera DDNS-inställningarna. 6. Gå till [Nätverk] – [Gränssnitt] och ställ in nätverkstyp till [DHCP]. 7. Anslut kameran, som togs bort från datorn, direkt till modemet. 8. Starta om kameran. M För registrering av DDNS-inställningarna, se ”Registrering med DDNS”. (sidan 69) För konfigurering av DDNS-inställningarna, se ”DDNS”. (sidan 68) För inställning av nätverkstyp, se ”Gränssnitt”. (sidan 67) Svenska _35 ● NÄTVERKSANSLUTNING OCH INSTALLATION INTERNET DSL-/kabel modem nätverksanslutning och installation ANSLUTA KAMERAN DIREKT TILL ETT PPPoE-MODEM INTERNET SNB-70 00 PPPoE Modem External Remote PC Kamera DDNS Server (Data Center, KOREA) 1. Använd LAN-kabeln för att ansluta nätverkskabeln direkt till din dator. 2. Kör IP-installationsprogrammet och ändra IP-adress för kameran så att du kan använda webbläsaren på skrivbordet för att ansluta till Internet. 3. Använd Internet-klienten för att ansluta till kameran. 4. Gå till sidan [Inst.] 5. Gå till [Nätverk] – [DDNS] och konfigurera DDNS-inställningarna. 6. Gå till [Nätverk] – [Gränssnitt] och ställ in nätverkstyp till [PPPoE]. 7. Anslut kameran, som togs bort från datorn, direkt till modemet. 8. Starta om kameran. M För registrering av DDNS-inställningarna, se ”Registrering med DDNS”. (sidan 69) För konfigurering av DDNS-inställningarna, se ”DDNS”. (sidan 68) För inställning av nätverkstyp, se ”Gränssnitt”. (sidan 67) 36_ nätverksanslutning och installation ANSLUTA KAMERAN TILL EN BREDBANDSROUTER MED PPPoE-/KABELMODEM Det här är för små nätverksmiljöer, såsom hem, SOHO och vanliga butiker. INTERNET Bredbandsrouter PPPoE eller kabelmodem PPPoE eller kabelmodem Extern fjärransluten PC Kamera DDNS-server (Data Center, KOREA) Lokal dator Konfigurera nätverksinställningar för den lokala datorn som är ansluten till en Bredbandsrouter Konfigurera nätverksinställningar för den lokala datorn som är ansluten till en Bredbandsrouter enligt anvisningarna nedan. • Välj : <Närliggande nätverk> <Egenskaper> <Lokalt nätverk> <Egenskaper> <Allmänt> <Internet Protocol (TCP/IP)> <Egenskaper> <Erhåll en IP-adress automatiskt> eller <Använd följande IP-adress>. • Följ anvisningarna nedan om du väljer <Använd följande IP-adress>: ex1) Om adressen (LAN IP) för Bredbandsrouter är 192.168.1.1 IP-adress : 192.168.1.100 Nätmask : 255.255.255.0 Standard-Gateway : 192.168.1.1 ex2) Om adressen (LAN IP) för Bredbandsrouter är 192.168.0.1 IP-adress : 192.168.0.100 Nätmask : 255.255.255.0 Standard-Gatewa : 192.168.0.1 ex3) Om adressen (LAN IP) för Bredbandsrouter är 192.168.xxx.1 IP-adress : 192.168.xxx.100 Nätmask : 255.255.255.0 Standard-Gateway : 192.168.xxx.1 M Se produktdokumentationen för Bredbandsrouter adress. Se avsnittet ”Portintervallsinstallning framat (portmappning)” i dokumentationen för Bredbandsrouter. (sidan 44) Svenska _37 ● NÄTVERKSANSLUTNING OCH INSTALLATION Kamera nätverksanslutning och installation KNAPPAR SOM ANVÄNDS I IP-INSTALLATIONEN Post Beskrivning Device Name Modellnamn för ansluten kamera. Klicka i kolumnen för att sortera listan enligt modellnamn. Sökningen stoppas dock om du klickar under sökningen. b Alias Den här funktionen är inte implementerad just nu. c Mode Visar antingen <Static> eller <Dynamic> för aktuell nätverksanslutningsstatus. MAC(Ethernet) Address Ethernet-adress för ansluten kamera. Klicka i kolumnen för att sortera listan enligt Ethernet-adress. Sökningen stoppas dock om du klickar under sökningen. IP Address IP-adress. Klicka i kolumnen för att sortera listan enligt IP-adress. Sökningen stoppas dock om du klickar under sökningen. Fabriksstandard är "192.168.1.100" Protocol Nätverksinställning för kamera. Fabriksstandard är "IPv4". Kameror med IPv6-inställning visas som "IPv6". 38_ nätverksanslutning och installation Post Beskrivning URL DDNS URL-adressen möjliggör åtkomst från externt Internet. Detta ersätts dock av <IP Address> för kameran om DDNS-registreringen misslyckas. IPv4 Söker kameror med IPv4-inställning. IPv6 Söker kameror med IPv6-inställning. Aktiverad i en Ipv6-kompatibel miljö. Search Söker kameror som är anslutna till nätverket. Den här knappen blir dock gråmarkera om varken IPv4 eller IPv6 är markerat. Auto Set IP-installationsprogrammet konfigurerar nätverksinställningarna automatiskt. Manual Set Du ska konfigurera nätverksinställningarna manuellt. Exit Stänger IP-installationsprogrammet m M För IP-installeraren, använd endast installationsversionen som medföljer installations-CD:n eller den senaste versionen om den finns tillgänglig. Du kan nu hämta den senaste versionen från webbsidan för Samsung (www.samsungipolis.com). INSTÄLLNING AV FAST IP Manuell nätverksinställning Kör <IP Installer_vX.XX.exe> för att visa kamerasöklistan. Vid den första starten blir både [Auto Set] och [Manual Set] gråmarkerade. M För kameror med IPv6-inställning blir de här knapparna gråmarkerade, eftersom kamerorna inte stöder den här funktionen. 1. Sök en kamera i listan. Sök MAC-adressen (Ethernet) som finns på baksidan på kameran. Båda knapparna [Auto Set] och [Manual Set] aktiveras. 2. Klicka på [Manual Set]. Dialogrutan för Manual Setting visas. Standardvärdena för <IP Address>, <Subnet Mask>, <Gateway>, <HTTP Port> och <VNP Port> för kameran visas. Svenska _39 ● NÄTVERKSANSLUTNING OCH INSTALLATION nätverksanslutning och installation 3. I rutan <Address> anger du nödvändig information. • MAC (Ethernet) Address : MACadressen (Ethernet) för den tillämpliga kameran ställs in automatiskt så att du inte behöver mata in den manuellt. M Du kan konfigurera statiska IP-inställningar endast om DHCP-kryssrutan är avmarkerad. Utan användning av en Bredbandsrouter : För inställning av <IP Address>, <Subnet Mask> och <Gateway>, kontakta nätverksadministratören. 4. I rutan <Port> anger du nödvändig information. • HTTP Port : Används för att komma åt kameran med Internetklienten, med standard på 80. Använd den här knappen för att ändra HTTP-portvärde. • VNP Port : Används för att kontrollera videosignalöverföringen, med 4520 som standard. 5. Ange lösenord. Det här är inloggningslösenordet för användaren "admin" som har åtkomst till kameran. Standardlösenordet är "4321". J Standardlösenordet kan spridas och göra datorn mer sårbar för hot, därför rekommenderar vi att du ändrar lösenordet efter att produkten har installerats. Observera att säkerhet och andra relaterade problem som orsakats av att lösenordet inte har ändrats faller på användarens ansvar. 6. Klicka på [OK]. Den manuella nätverksinställningen slutförs. 40_ nätverksanslutning och installation Vid användning av en Bredbandsrouter M Inställningarna kan variera beroende på ansluten Bredbandsrouter modell. För vidare information, se användarhandboken för tillämplig router. Se avsnittet ”Portintervallsinstallning framat (portmappning)” i dokumentationen för Bredbandsrouter. (sidan 44) Om Bredbandsrouter har mer än en kamera ansluten Konfigurera IP-relaterade inställningar och portrelaterade inställningar separerat från varandra. Kategori Kamera #1 Kamera #2 IP-relaterade inställningar IP Address Subnet Mask Gateway 192.168.1.100 255.255.255.0 192.168.1.1 192.168.1.101 255.255.255.0 192.168.1.1 Portrelaterade inställningar HTTP Port VNP Port 8080 4520 8081 4521 M Om <HTTP Port> är inställd på något annat än 80, måste du ange <Port>-numret i adressfältet på Internet-klienten innan du kan komma åt kameran. ex) http://IP-adress: HTTP-port http://192.168.1.100:8080 Svenska _41 ● NÄTVERKSANSLUTNING OCH INSTALLATION • IP-adress : Ange en adress som ligger inom IP-intervallet som erbjuds av Bredbandsrouter. ex) 192.168.1.2~254, 192.168.0.2~254, 192.168.XXX.2~254 • Subnet Mask : <Subnet Mask> för Bredbandsrouter blir kamerans <Subnet Mask>. • Gateway : <Local IP Address> för Bredbandsrouter blir <Gateway> för kameran. nätverksanslutning och installation Automatisk nätverksinställning Kör <IP Installer_vX.XX.exe> för att visa kamerasöklistan. Vid den första starten blir både [Auto Set] och [Manual Set] gråmarkerade. M För kameror med IPv6-inställning blir de här knapparna gråmarkerade, eftersom kamerorna inte stöder den här funktionen. 1. Välj en kamera i söklistan. Sök MAC-adressen (Ethernet) som finns på baksidan på kameran. Båda knapparna [Auto Set] och [Manual Set] aktiveras. 2. Klicka på [Auto Set]. Dialogrutan Auto Setting visas. <IP Address>, <Subnet Mask> och <Gateway> ställs in automatiskt. 3. Ange lösenord. Det här är inloggningslösenordet för användaren "admin" som har åtkomst till kameran. Standardlösenordet är "4321". Standardlösenordet kan spridas och göra datorn mer sårbar för hot, därför rekommenderar vi att du ändrar lösenordet efter att produkten har installerats. Observera att säkerhet och andra relaterade problem som orsakats av att lösenordet inte har ändrats faller på användarens ansvar. 4. Klicka på [OK]. Den automatiska nätverksinställningen slutförs. 42_ nätverksanslutning och installation DYNAMISK IP-INSTÄLLNING Inställning av dynamisk IP-miljö Kontrollera dynamisk IP 1. Kör IP-installationsprogrammet på användarens lokala dator för att visa kameror som allokerats med <Dynamic IP>-adresser i listan. 2. Välj en kamera i listan och klicka på [Manual Set] för att markera <Dynamic IP> på kameran. Om du avmarkerar <DHCP>, kan du ändra IP till <Static>. Svenska _43 ● NÄTVERKSANSLUTNING OCH INSTALLATION • Exempel på dynamisk IP-miljö - Om en Bredbandsrouter, med anslutna kameror, tilldelas en IP-adress av DHCPservern - Om kameran ansluts direkt till modemet med DHCP-protokoll - Om IP-adresser tilldelas av den interna DHCP-servern via LAN nätverksanslutning och installation PORTINTERVALLSINSTÄLLNING FRAMÅT (PORTMAPPNING) Om du har installerat en Bredbandsrouter med en kamera ansluten måste du ställa in portintervall för vidarebefordran av Bredbandsrouter så att en fjärrdator kan få åtkomst till kameran i den. Manuell vidarebefordran för portintervall 1. I inställningsmenyn för Bredbandsrouter väljer du <Applications & Gaming> <Port Range Forward>. För inställning av vidarebefordran för portintervall gällande en tredjeparts Bredbandsrouter, läs bruksanvisningen för Bredbandsrouter. 2. Välj <TCP> och <UDP Port> för varje ansluten kamera till Bredbandsrouter. Varje portnummer för Bredbandsrouter ska matcha det som anges i <Nätverk> - <Port> från kamerans inställningsmeny. 3. När du är klar klickar du på [Save Settings]. Inställningarna sparas. M Instruktionerna ovan är baserade på CISCO:s Bredbandsrouter (modell: LINKSYS). Inställningarna kan variera beroende på ansluten Bredbandsrouter modell. För vidare information, se användarhandboken för tillämplig router. 44_ nätverksanslutning och installation Installera vidarebefordran av port för flera nätverkskameror När flera nätverkskameror ansluter till en Bredbandsrouter ska du vidarebefordra porten TCP 943 på routern till porten TCP 943 på den anslutna kameran. Om du inte ställer in porten TCP 943 på routern så som den ska vara kan du inte hämta några videoströmmar från webbsidan för kameran. • Porten TCP 943 är en port för Silverlight-policyservern på en kamera. När Kamera1 och Kamera2 är anslutna till en router. Användare Internet Start 943 3000 3001 4520 4521 8080 8081 Bredbandsrouter Slut Protokoll 943 TCP 3000 TCP/UDP 3001 TCP/UDP 4520 TCP/UDP 4521 TCP/UDP 8080 TCP/UDP 8081 TCP/UDP IP-adress 192.168.1.100 192.168.1.100 192.168.1.101 192.168.1.100 192.168.1.101 192.168.1.100 192.168.1.101 Kamera1 (192.168.1.100) Webbserverport 8080 VNP-port 4520 RTSP-port 3000 Policyserverport 943 Kamera2 (192.168.1.101) Webbserverport 8081 VNP-port 4521 RTSP-port 3001 Policyserverport 943 • Du kan ställa in en regel för portvidarebefordran på Bredbandsrouter enheten genom dess konfiguration för webbsidan. • Du kan inte ändra policyserverporten för Silverlight på kameran. • Du kan ändra portarna på kameran, förutom policyserverporten genom dess konfigurationswebbsidor. Svenska _45 ● NÄTVERKSANSLUTNING OCH INSTALLATION J nätverksanslutning och installation ANSLUTA TILL KAMERAN FRÅN EN DELAD, LOKAL DATOR 1. Kör IP-installationsprogrammet. Den söker efter anslutna kameror och visar en lista över dem. 2. Dubbelklicka på en kamera du vill komma åt. Internetklienten startar och ansluter till kameran. M Du kan även komma åt kameran genom att skriva in IP-adressen för den uppsökta kameran i adressfältet för Internet-klienten. ANSLUTA TILL KAMERAN FRÅN EN FJÄRRDATOR VIA INTERNET Eftersom användning av IP-installationsprogrammet på en fjärrdator som inte är i Bredbandsrouter nätverk är otillåten kan anävndare få tillgång till kameror inom ett Bredbandsrouter nätverk genom att använda kamerans DDNS-URL. 1. Innan du kan få åtkomst till en kamera i nätverket för Bredbandsrouter ska du ha ställt in portintervall för vidarebefordran för Bredbandsrouter. 2. Starta Internet-klienten från fjärrdarotn och skriv in DDNS URL-adressen för kameran, eller IP-adressen för Bredbandsrouter i adressfältet. ex) http://www.samsungipolis.com/[Produkt-ID] 46_ nätverksanslutning och installation web viewer ANSLUTA TILL KAMERAN I normala ska du ● WEB VIEWER 1. Starta Internet-klienten 2. Skriva in IP-adressen för kameran i adressfältet. ex) • IP-adress (IPv4): 192.168.1.100 http://192.168.1.100 - inloggningsfönstret ska öppnas. • IP-adress (IPv6) : 2001:230:abcd: ffff:0000:0000:ffff:1111 http://[2001:230:abcd:ffff:0000 :0000:ffff:1111] - inloggningsfönstret ska öppnas. Om HTTP-porten är någon annan än 80 1. Starta Internet-klienten. 2. Skriva in IP-adressen och HTTP-portnumret för kameran i adressfältet. ex) IP-adress: 192.168.1.100:HTTP Port number(8080) http://192.168.1.100:8080 - inloggningsfönstret ska öppnas. Använda URL 1. Starta Internet-klienten. 2. Skriv in DDNS URL-adressen för kameran i adressfältet. ex) URL-adress: http://www.samsungipolis.com/[Produkt-ID] - inloggningsfönstret ska öppnas. Svenska _47 web viewer Kontrollera DDNS-adressen Om kameran är ansluten direkt till DHCP-kabelmodem, DSL-modem eller PPPoE-modem, ändras IP-adressen för ditt nätverk varje gång du försöker ansluta till ISP-servern (Internet Service Provider). Om detta är fallet informeras du inte om att IP-adressen har ändrats av DDNS. Så fort du registrerar en dynamisk, IP-baserad enhet med DDNS-servern kan du enkelt kontrollera den ändrade IP-adressen när du försöker få tillgång till enheten. För att lägga till IP-adress till <DDNS>-servern ska du gå till www.samsungipolis.com och registrera enheten och ställa in DDNS-alternativet som <Samsung DDNS> innan du anger värdnamnet för DDNS-servern. INLOGGNING Standardanvändar-ID:t är "admin" och standardlösenordet är "4321". 1. Ange "admin" i inmatningsrutan <User Name>. 2. Ange "4321" i inmatningsrutan <Password>. Om lösenordet har ändrats anger du det ändrade lösenordet istället. 3. Klicka på [OK]. Om du har loggat in utan problem kommer du till skärmen Live Viewer. M Av säkerhetsskäl ska du se till att ändra lösenordet i <System> - <användare>. Administratörs-ID, "admin", är fast och kan inte ändras. Standardlösenordet kan spridas och göra datorn mer sårbar för hot, därför rekommenderar vi att du ändrar lösenordet efter att produkten har installerats. Observera att säkerhet och andra relaterade problem som orsakats av att lösenordet inte har ändrats faller på användarens ansvar. Om du markerar alternativet "Remember my password" när inmatningen har gjorts loggas du automatiskt in utan att tillfrågas om att ange inloggningsinformationen från nästa gång. J Du får bästa videokvaliteten om skärmstorleken är 100 %. Om du minskar förhållandet kan det kapa bilden i kanterna. 48_ web viewer INSTALLERA ACTIVEX Om du ansluter till en kamera för första gången ser du installationsmeddelandet. Sedan installerar du den ActiveX som behövs för att öppna kameran och kontrollera videon från den i realtid. ● WEB VIEWER 1. När startskärmen på övervakningssidan öppnas ska du klicka på det gula varningsmeddelandet högst upp på sidan. 2. Klicka på <Install This Add-on for All users on This Computer...>. 3. Meddelandet för säkerhetsvarning visas, klicka där på [Install]. 4. När obligatorisk ActiveX har installerats korrekt efter att du har öppnat kameran ska Live-skärmen visas. Svenska _49 web viewer INSTALLERA SILVERLIGHT RUNTIME Om datorn inte har installerat Silverlight Runtime eller bara har installerat en gammal runtimeversion omdirigeras du till installationssidan för Silverlight Runtime automatiskt när du öppnar web viewer. 1. Klicka på <Click Here>. 2. När dialogrutan för filhämtning visas klickar du på <Run>. 3. När hämtningen är klar klickar du på <Run>. 4. Installationssidan för Silverlight Runtime visas. Välj <Install now> för att fortsätta med installationen. 50_ web viewer 5. När du är klar klickar du på <Close>. ● WEB VIEWER 6. Stäng och starta om webbläsaren och försök få åtkomst till Web Viewer. När Silverlight Runtime är korrekt installerad ser du Live-skärmen. J För normal installation ställer du in inställningarna för blockering av popupfönster enligt följande: ex) Internet Explorer Verktyg Blockering av popupfönster Stäng av blockerare av popup-fönster (B) MAC OS X-användare som inte är anslutna till Internet kan använda medföljande installations-CD för att installera Silverlight Runtime (öppna den körbara filen "Silverlight_xxx.dmg" på CD:n och du blir guidad genom programinstallationen). Svenska _51 web viewer ANVÄNDA LIVE-SKÄRMEN Post Beskrivning Övervakning Gå till övervakningsskärmen. b Upspelning Växla till övervakningsskärmen som visar inspelningsdata i SD-minnet. c Inställningar Gå till inställningsskärmen. Visningsskärmen Visar Live-video på skärmen. Ljud Visa knapparna för att växla mellan att lyssna och tala på skärmen. Döljer alarmindikatorn nära kanten på visninsskärmen. Dölj alarmindikatorn 52_ web viewer I följande fall kommer alarmmeddelandet visas nära kanten på visaren. - Om en händelse (alarm, rörelsedetektering ) inträffar - Om kameran är avstängd - Om nätverket inte är anslutet Post Beskrivning Digital zoom Använd mushjulet för att kontrollera digital zoom. Skärmoptimering, helskärm Justera skärmen till optimal storlek och visa ikonen för helskärm på Live-skärmen. Lagring Sparar ögonblicksbilden som en bildfil i .jpeg- eller .bmp-format. Videoformat Du kan välja en profiltyp i <Videoprofil> under inställningsmenyn <Ljud och video>. M M Om meddelandet ”Ogiltig codec” visas väljer en profiltyp från profillistan igen. Webbsidor relaterade till uppspelnings- och inställningsmenyer är åtkomliga för admin. För andra konton avaktiveras knapparna. Lagra ögonblicksbilden 1. Klicka på [ ] på det motiv du vill lagra. Fönstret för lagring ska öppnas. 2. Klicka på knappen [Save]. Skärmbilden sparas under angiven sökväg. M Om påträffar en avbruten video när du tar en bild med IE8 på en Windows 7-baserad PC, avmarkerar du “Slå på skyddat läge” i “Verktyg – Internetalternativ – Säkerhet”. Svenska _53 ● WEB VIEWER web viewer Växla ljud 1. Klicka på knappen [Ljud ( )]. Överensstämmande knapp visas i Viewer. 2. Klicka på knappen för att lyssna på eller tysta ljudet, beroende på vad du önskar. Den här knappen fungerar som en växlingsknapp. J Ljudknappen aktiveras bara om du har ställt in ljudingången till <Användning> under alternativet <Videoprofil>. Växla mikrofonljud 1. Klicka på knappen [Mic ( )]. Överensstämmande knapp visas i Viewer. J Meddelandet ”Kan inte hitta ljudinspelningsenhet” visas om det inte finns någon mikrofon. 2. Klicka på knappen för att starta/avbryta samtal. Den här knappen fungerar som en växlingsknapp. Dialogrutan för Silverlight-behörighet visas när du klickar på mikrofonknappen. J Eftersom knapparna AUDIO och MIC ( , ) bara är till för att visa eller dölja växlingsknappen på visningsskärmen kan du inte kontrollera de faktiska uppgifterna för de här knapparna. Om du vill justera mikrofon- eller ljudinställningar ska du använda växlingsknappen på visningsskärmen. Passa hela skärmen 1. Klicka på knappen [Helskärm ( )]. Överensstämmande knapp visas i Viewer. 2. Klicka på knappen. Detta anpassar Viewer till helskärm. 3. För att stänga helskärmsläget trycker du på [Esc] på tangentbordet. M För ActiveX viewer, kan du bara klicka på rätt knapp på sidan för att utföra uppgiften, när I/ O-ljudknapparna och knappen för helskärm inte visas längst upp på skärmen. 54_ web viewer UPPSPELNING (HÄND) 1. Klicka på knappen [Upspelning ( )]. 2. Ange start- och sluttid för sökningen. ● WEB VIEWER 3. Välj en händelsetyp för din sökning inom den angivna perioden. 4. Klicka på knappen [Sök ( Sökresultaten visas i listan. M )]. Om fler än 500 händelser registreras inom sökperioden kommer sökningen att begränsas till det datum den 500:e händelsen registrerades. Om sökperioden t.ex. är mellan den 10:e och den 15:e en månad och det finns mer än 500 poster mellan den 10:e och 11:e kommer sökningen att begränsas upp till den 11:e med totalt 500 händelser. Händelser därefter (från den 12:e) kommer inte att inkluderas. 5. Välj ett dataalternativ att visa i söklistan. 6. Klicka på knappen [Spela ( )]. 7. För att stoppa uppspelning av videon )]. klickar du på [Stopp ( För att återgå till sökskärmen klickar du )]. på [Stäng ( Svenska _55 web viewer UPPSPELNING (TID) 1. Klicka på [Sök efter tid ( )]. 2. Klicka på önskat datum i kalendern. Videon för det valda datumet spelas upp. 3. Om videouppspelningen stoppas väljer )] du en tid och klickar på [Spela ( för att spela upp videon för den valda tiden. När videon spelas upp visas inspelningstiden för den aktuella videon. 4. Sök efter video framåt eller bakåt och kontrollera uppspelningshastigheten Omvideon spelas upp växlar knappen till [ , , , , , , , ] med information för uppspelningsriktning och –hastighet. - Så här kontrollerar du uppspelningshastigheten Om du väljer ), växlar knappen till x1, x2, x4, x8 så ökar uppspelningshastigheten därefter. Om du väljer (, växlar knappen till x8, x4, x2, x1 så ökar uppspelningshastigheten därefter. - Så här kontrollerar du uppspelningsriktningen Om du ser knappen ) med visning av uppspelningshastighet spelas videon upp framåt; Om du däremot ser knappen ( med uppspelningshastigheten visad spelas videon upp bakåt. ] till önskad tidpunkt för videon innan du spelar upp den. 5. Flytta [ Datum som innehåller en kodningsfil markeras i blått, men tiden med händelseinspelningen markeras i rött. J Tidssökningen är inte tillgänglig med andra webbläsare än Internet Explorer. Kontrollera tidsinformationen för den uppspelade videon 1. Klicka på knappen [Omkring ( )]. 2. Information om datum och tid visas på skärmen. 56_ web viewer Säkerhetskopiera den sökta videon 1. Klicka på [ ] på det motiv du vill säkerhetskopiera. Fönstret för lagring ska öppnas. ● WEB VIEWER 2. Klicka på [Save]. Skärmbilden säkerhetskopieras under angiven sökväg. Spela upp säkerhetskopierad video Den säkerhetskopierade videon sparas i avi-format. Den säkerhetskopierade videon kan spelas upp på valfri mediespelare som stöder datorns format. Svenska _57 inställningsskärmen INSTÄLLNINGAR Du kan konfigurera audio & video, nätverk, händelse- och systeminställningar för kameran i nätverket. )]. 1. På liveskärmen klickar du på [Inställningar ( 2. Inställningsskärmen visas. INSTÄLLNINGAR FÖR AUDIO & VIDEO Videoprofil 1. På inställningsmenyn väljer du fliken <Ljud och video ( )>. 2. Klicka på <Videoprofil>. 3. Välj ett nummer för <Videoprofil>. 4. Klicka i inmatningsrutan för varje alternativ och ange/välj ett önskat värde. Kontextmenyn kan variera beroende på vald codec-typ. • Standardprofil : Detta är standardvideoprofilen. • Profil för E-mail/FTP : Videoprofilen som ska överföras till angiven E-post- eller FTP-plats. Endast MJPEG codec kan ställas in som e-post-/FTP-profil. • Inspelningsprofil : Det här är profilen som används för videoinspelning. 5. När du är klar klickar du på [Tillämpa ( 58_ inställningsskärmen )]. Lägga till en videoprofil Du kan lägga till så många codec som behövs så att ett urval av profiler kan användas beroende på inspelningsförhållanden. 1. Välj ett profilnummer. 3. Specificera förhållanden under vilka codec används. 4. Specificera detaljerna för vald codec, inklusive upplösning och ruthastighet. • Upplösning : Ställ in videostorleken för H.264- och MJPEG-filerna. • Bildhastighet : Specificera ruthastigheten. • Kompression : Specificera komprimeringshastigheten för video. • Maximal bithastighet : Ange maximal bithastighet för videon. J Eftersom bithastigheten till en viss del kan justeras efter upplösningen, bildrutefrekvensen och skärmens komplexitet kan den verkliga bithastigheten vara högre än den maximala bithastigheten. Därför bör du överväga förhållandena när du anger värdet. • Styrning av bithastighet : Konstant bithastighet (CBR) varierar videokvaliteten och åtgärdar bithastighet för övering, medan variabel bithastighet förstärker kvaliteten genom att variera nätverksöverföringens bithastighet. • Målbithastighet : Specificera den bithastighet du vill använda för videoöverföring. • Kodningsprioritet : Du kan ställa in videoöverföringssätt till Bildhastighet eller Kompression. • GOP-storlek : Välj en GOP-storlek mellan 1 och 15. • Profil : Du kan välja profileringsmetoden H.264. • Entropikodning : Minska möjlig komprimeringsförlust på grund av kodning. • Smart codec : Ange användning av Smart codec. • Multisändning(VNP) : Specificera användning av VNP-protokoll. - IPv4 : Ange en IPv4-adress med vilken du kan ansluta till IPv4-nätverket. - Port : Specificera videokommunikationsporten. - TTL : Ställ in TTL för VNP-paket • Multisändning(RTP) : Specificera användning av RTP-protokoll. - IPv4 : Ange en IPv4-adress med vilken du kan ansluta till IPv4-nätverket. - Port : Specificera videokommunikationsporten. - TTL : Du kan ställa in TTL för RTP-paket. • Ljud-in : Specificera användning av ljudingångsporten. Svenska _59 ● INSTÄLLNINGSSKÄRMEN 2. Ange namnet och välj en codec. inställningsskärmen Vad är GOP-storlek? GOP(Group of Pictures) är en samling videoramar för H.264-komprimering, vilka indikerar en samling av ramar från den första I-ramen (nyckelram) till nästa I-ram. GOP består av 2 typer av rutor: I-ruta och P-ruta. I-rutan är den grundläggande ramen för komprimering, även känt som nyckelramen, som innehåller en komplett P-ruta för bilddata med enbart den information som har ändrats sedan den föregående I-rutan. Du kan ange ett värde mellan 1 och 15 för H.264-COCEC. Videoinställningar 1. På inställningsmenyn väljer du fliken )>. <Ljud och video ( 2. Klicka på <Videoinställningar>. 3. Välj ett läge läge för <Videokälla>. • Rotationsläge : Vänd bilden upp och ned som tas med kameran. • Spegelläge : Vänd bilden horisontellt som tas med kameran. 4. Ange <Videoutgång>. -Om du väljer <Av> sker ingen utgående signal via porten VIDEO OUT. 5. Välj videotypen. 6. Specificera sekretessområde. 7. När du är klar klickar du på [Tillämpa ( )]. 60_ inställningsskärmen Ställa in sekretesszon Du kan ange ett visst område på kameravideon som ska skyddas för din säkerhet. 1. Ställ in till <Aktivera>. ● INSTÄLLNINGSSKÄRMEN 2. På videoskärmen klickar du på en vertex för det valda området för att visa dialogrutan så som visas på bilden. 3. Ange namn och färg. Tryck sedan på [OK]. 4. Om du vill radera ett område ska vu markera det området i listan och trycka på [Ta baort ( )]. 5. När du är klar klickar du på [Tillämpa ( )]. Ljudinställningar Du kan konfigurera I/O-inställningarna för ljudkällan från kameran. 1. På inställningsmenyn väljer du fliken <Ljud och video ( )>. 2. Klicka på <Ljudinställningar>. 3. Justera I/O-ljudnivåerna enligt önskemål. • Ljud-in : Ställ in ljudingångsvärdet. • Ljud-ut : Du kan ange användning av ljudutgång och specificera utgångsvärdet. 4. När du är klar klickar du på [Tillämpa ( )]. Svenska _61 inställningsskärmen Inställningar för Kamera Du kan ändra kamerainställningarna enligt den miljö där kameran är placerad. 1. På inställningsmenyn väljer du fliken )>. <Ljud och video ( 2. Klicka på <Inställningar för Kamera>. 3. Ställ in inställningarna enligt nödvändigt för : SSDR, Vitbal., Motljus, Exponering, Special, OSD, Tid OSD 4. När du är klar klickar du på [Tillämpa )]. ( Om en viss tid (timeout: 240s) förflyter när du inte trycker på knappen [Tillämpa ( )] efter att du har ändrat inställningarna så verkställs inte ändringarna. SSDR-inställning (Samsung Super Dynamic Range) Är en scen där skillnaden mellan ljust och mörkt är stor och du kan öka ljusstyrkan för det mörka området för att reglera den totala ljusstyrkan. 1. Välj <SSDR>. 2. Ställ <Läge> till <På>. 3. Konfigurera inställningarna för <Nivå> efter behov. • Nivå : Justera nivån för det dynamiska intervallet. Inställningar av vitbalans Du kan korrigera bildens färger baserat på mängden vitt under alla belysningsförhållanden. 1. Välj <Vitbal.>. 2. Välj <Läge>. • ATW : Korrigerar färgerna för kameravideon automatiskt. • Manuell : Du kan justera röda och blå gains för kameravideon manuellt. 62_ inställningsskärmen M Klicka på knappen [AWC Set] om du vill behålla nivån för vitbalans för den aktuella bilden. Inställn. BLC Du kan specificera ett önskat område manuellt på videon och ställa in så att området visas tydligare. 1. Välj <Motljus>. 2. Ställ <Läge> till <MOTLJUSKOMP>. 3. Ställ in <BLC nivå>. Du kan ändra nivån för att justera ljusstyrkan på övervakningsområdet. 4. Ställ in nivåerna <Upp, Ned, V, H> för att specificera målområdet. Exponeringsinställningar (SNB-1001) Du kan justera exponeringsnivån för kameran. 1. Välj <Exponering>. 2. Välj varje alternativ och ställ in det korrekt. • Ljusstyrka : Justera motivets ljusstyrka. • Slutare läge : Justera den elektroniska slutaren för kameran. - ESC (elektronisk slutare) : Justerar slutarhastigheten automatiskt enligt omgivande ljusstyrka. - Manual : Justera slutarhastigheten för kameran manuellt. - A.FLK (Antiskak) : Välj den här egenskapen om du upplever en flimrande skärm på grund av frekvensfelmatchning med omgivande belysning. Svenska _63 ● INSTÄLLNINGSSKÄRMEN • AWC : Korrigerar färgerna för kameravideon som ska optimeras till aktuella belysningsförhållanden och skärmläge. Du kan behöva göra omjusteringar om belysningsförhållandena ändras. • Utomhus : Korrigerar automatiskt videofärgerna för kameran som ska optimeras för utomhusmiljö. • Inomhus : Korrigerar automatiskt videofärgerna för kameran som ska optimeras för inomhusmiljö. inställningsskärmen • • • • Slutare hastighet : Kontrollera slutarhastigheten manuellt. SSNR3 : Specificera användningen av brusreducering. SSNR3 nivå : Justera nivån för brusreducering. Sens-up läge : Känner automatiskt av nivån för mörker på natten eller i ett motiv med låg kontrast och utökar ackumuleringstiden i enlighet med det för en ljus och skarp bild. Om du ställer in slutarläget till Manual/A.FLK, avaktiveras Sens-up. (Sens-Up kan dock aktiveras i linsläget ”Manuell”, även om slutarläget är inställt på manuellt). Ju högre Sens-Up-faktorn är, desto ljusare blir skärmen, men det kan resultera i efterbilder eller sämre videokvalitet. • Sens-up gräns : Ställ in arbetsförhållanden till autoläge i ett motiv med låg kontrast. • Objektiv : You can set the camera lens to AUTO or MANUAL to your preference. - DC(Auto) : Select this if you use the DC lens. Only the iris is adjusted automatically, but the focus is not controlled automatically. - Manual : Select this if you use a lens on which you adjust the iris and focus manually. • AGC läge : Justera förstärkningsvärdet för videon (som speciellt spelades in med låg kontrast och hade lägre ljusstyrkenivå än normalt) för att kontrollera videons ljusstyrka. Exponeringsinställningar (SND-1080/SNV-1080) Du kan justera exponeringsnivån för kameran. 1. Välj <Exponering>. 2. Välj varje alternativ och ställ in det korrekt. • Ljusstyrka : Justera motivets ljusstyrka. • Slutare läge : Justera den elektroniska slutaren för kameran. - ESC (elektronisk slutare) : Justerar slutarhastigheten automatiskt enligt omgivande ljusstyrka. - Manual : Justera slutarhastigheten för kameran manuellt. - A.FLK (Antiskak) : Välj den här egenskapen om du upplever en flimrande skärm på grund av frekvensfelmatchning med omgivande belysning. • Slutare hastighet : Kontrollera slutarhastigheten manuellt. • SSNR3 : Specificera användningen av brusreducering. 64_ inställningsskärmen Ju högre Sens-Up-faktorn är, desto ljusare blir skärmen, men det kan resultera i efterbilder eller sämre videokvalitet. • Sens-up gräns : Ställ in arbetsförhållanden till autoläge i ett motiv med låg kontrast. • Iris : Du kan ställa in iris för kameran på Auto eller Manuell efter önskemål. För en kamera med ESC-slutartyp fungerar iris korrekt endast om det är inställt på <Manuell>. Om iris är inställt på <Auto> blir slutarhastigheten fast inställd på 1/60 sekund i ESC-läge. • AGC läge : Justera förstärkningsvärdet för videon (som speciellt spelades in med låg kontrast och hade lägre ljusstyrkenivå än normalt) för att kontrollera videons ljusstyrka. Configuración de Espec 1. Välj <Special>. 2. Välj varje alternativ och ställ in det korrekt. • Dag/natt : Du kan växla läge för att justera nivån för svart och vitt, samt färgerna. - Färg : Visar alltid video i färger. - B/W : Visar alltid videon i svartvitt. - Auto : Visningar i färgläge under normal dagtid och växlar till svartvitt i lågkontrastlägen på natten. Om du ställer in AGC-läget till AV från <Exponering> så avaktiveras läget AUTO DAG/NATT. - Extern SV : Kontrollera bildläget för färg och B/W när en extern IR är synkroniserad via Alarm-inporten. • Fördröjn.tid : Det här är tiden då varje tillämpligt belysningsförhållande hålls i ordning för att aktivera växlingen mellan dag- och nattlägen. • Löptid : Justera hastigheten för belysningen som fångar lägesbrytaren. • Skärpa : Justera den övergripande skärpan för bilden. Om du väljer <På> kan du justera bildens skärpa. Svenska _65 ● INSTÄLLNINGSSKÄRMEN • SSNR3 nivå : Justera nivån för brusreducering. • Sens-up läge : Känner automatiskt av nivån för mörker på natten eller i ett motiv med låg kontrast och utökar ackumuleringstiden i enlighet med det för en ljus och skarp bild. Om du ställer in slutarläget till Manual/A.FLK, avaktiveras Sens-up. inställningsskärmen • Inställn. skärpa : Ju högre nivån blir desto skarpare och klarare blir bilden i utkanterna. • Gamma : Justera kontrasten för bilden. • Färg nivå : Justera färgnivån för bilden. • Alarm in : Ställ in bild till färg eller B/W beroende på läget för alarmsensorn synkroniserad med IR. Om läget Dag och Natt är inställt till Extern SV inaktiveras funktionen alarm in från händelsealarm på ingångssidan. • Negativt läge: Visar den spegelvända bilden för videon. OSD-inställningar 1. Välj <OSD>. 2. Välj varje alternativ och ställ in det korrekt. • Kamera titel : Använd alfanumeriska tecken i listan och ange en önskad titel i nedre inmatningsraden. Titeln kan bestå av upp till 15 tecken. • Kamera titel pos x, y : Specificera koordinaterna där kameratiteln visas. Inställningar för Tid OSD 1. Välj <Tid OSD>. 2. Välj varje alternativ och ställ in det korrekt. • Tid display : Specificera användning av tidsvisning. • Datumformat : Specificera datumformatet som ska visas på skärmen. • Time position display X, Y : Specificera positionen för tid. • Visa veckodag : Ange om veckodagen ska visas på skärmen. 66_ inställningsskärmen NÄTVERKSINSTÄLLNING Gränssnitt 2. Klicka på <Gränssnitt>. 3. Ställ in <Gränssnitt> och <Inställningar för IPv6> enligt önskemål. • IP-typ : Välj en IP-anslutningstyp. - Manuell : Specificera IP-adress, Subnätsmask, Gateway, DNS1 och DNS2. - DHCP : Specificera DNS1 och DNS2. - PPPoE : Specificera DNS1, DNS2, Namn och Lösenord. Om du ställer in på <Manuell> ska du specificera IP, Subnätsmask, Gateway, DNS 1 & 2 manuellt. • • • • • • • MAC-adress : Visar MAC-adressen. IP-adress : Visar aktuell IP-adress. Subnätsmask : Visar <Subnätsmask> för inställd IP. Gateway : Visar <Gateway> för inställd IP. DNS1/DNS2 : Visar DNS-serveradress (Domain Name Service). IPv6-användning : Specificera användning av IPv6. IPv6-standardadress : Erhåller IPv6-adress för åtkomst till IPv6-nätverket. - Använd bara standardadress : använd bara Ipv6-standardadressen. - Erhåll IP-adress via DHCP : Visa och använd Ipv6-adressen som erhålls från DHCP-servern. - Använd följande IP-adress : Ange en IP-adress manuellt och använd den. 4. När du är klar klickar du på [Tillämpa ( J )]. IP-adressystemet är som standard DHCP. Om ingen DHCP-server hittas kommer föregående inställningar att återställas automatiskt. Svenska _67 ● INSTÄLLNINGSSKÄRMEN 1. På inställningsmenyn väljer du fliken <Nätverk ( )>. inställningsskärmen Port 1. På inställningsmenyn väljer du fliken )>. <Nätverk ( 2. Klicka på <Port>. 3. Skriv in varje alternativ i portmenyn enligt önskemål. Inget portintervall mellan 0 och 1023 och inte heller port 3702 är tillgängligt. • HTTP-port : HTTP-port används för åtkomst till kameran via webbläsaren. Standard är 80 (TCP). • VNP-port : Ställ in en port för överföring av videosignaler med Samsung-protokoll. • RTSP-port : Används för att överföra videor i RTSP-läge, standard är 554. • Viewer-port : Används för att överföra videor till Web Viewer, standard är 4520. • Silverlight policy-port : Silverlight används för att tillåta att en nätverksanslutning förvärvas; standard är 943. Portintervallet för Viewer ligger mellan 4502 och 4534. Om VNP-porten ligger inom det effektiva intervallet ska Viewer-porten specificeras med samma namn som VNP-porten. Du kan inte ändra policyserverporten för Viewer/Silverlight på kameran. 4. När du är klar klickar du på [Tillämpa ( )]. DDNS DDNS är en förkortning av Dynamic Domain Name Service som konverterar IP-adressen för en kamera till ett allmänt värdnamn, så att användaren enkelt kan komma ihåg den. 1. På inställningsmenyn väljer du fliken <Nätverk ( )>. 2. Klicka på <DDNS>. 3. Välj <DDNS>. 4. Skriv in DDNS-alternativen enligt vald typ. • Samsung DDNS : Välj det här alternativet om du använder DDNSservern som erbjuds av Samsung Techwin. 68_ inställningsskärmen 5. När du är klar klickar du på [Tillämpa ( )]. Registrering med DDNS Registrera produkten med Samsung DDNS 1. Besök webbsidan för iPOLiS (www.samsungipolis.com) och logga in med ett registrerat konto. 2. Från övre menyfältet väljer du <DDNS SERVICE> - <MY DDNS>. 3. Klicka på [PRODUCT REGISTRATION]. 4. Ange produkt-ID. Du måste utföra den dubbla kontrollen för det ID som du har angett. Svenska _69 ● INSTÄLLNINGSSKÄRMEN • Publik DDNS : Välj en av de offentliga DDNS-servrarna som erbjuds när du använder en offentlig DDNS-server. - Värdnamn : Ange namnet på värden (dvs. värdnamnet på Dyndns) som är registrerad med DDNS-servern. - Användarnamn : Ange användarnamn för DDNS-tjänsten. (dvs. användar-ID som registreras med Dyndns) - Lösenord : Ange lösenord för DDNS-tjänsten. (dvs. lösenord som registreras med Dyndns) inställningsskärmen 5. Välj en <CLASSIFICATION> och ange <MODEL NUMBER>. 6. Specificera produktplaceringen med en beskrivning om det behövs. 7. Klicka på [REGISTRATION]. Den här produkten läggs till produktlistan som du kan kontrollera. Ansluta till Samsung DDNS i kamerainställningarna 1. Från DDNS-inställningssidan ställer du in <DDNS> till <Samsung DDNS>. 2. Ange det <Värdnamn> du angav när du registrerade produkt-ID på DDNSplatsen. 3. Klicka på [Tillämpa ( )]. När anslutningen har gjorts ser du meddelandet <(Framgång)> på skärmen. Konfigurera offentlig DDNS i kamerainställningar 1. Öppna sidan för DDNS-inställningar och välj <Publik DDNS> för <DDNS>. 2. Ange överensstämmande värdnamn för platsen, användarnamn och lösenord. 3. Klicka på knappen [Tillämpa ( )]. Om anslutningen upprättas som den ska visas meddelandet <(Framgång)>. 4. När du är klar klickar du på [Tillämpa ( 70_ inställningsskärmen )]. IP-filtrering Du kan skapa en lista över IP-adresser som du vill tillåta eller förneka åtkomst för. 1. På inställningsmenyn väljer du fliken )>. <Nätverk ( ● INSTÄLLNINGSSKÄRMEN 2. Klicka på <IP-filtrering>. 3. Välj <Filtreringstyp>. • Neka : Om du väljer det här alternativet begränsas åtkomsten för de IP-adresser som läggs till filtreringen. • Tillåt : Om du väljer det här alternativet godkänns åtkomsten endast för de IP-adresser som läggs till filtreringen 4. Ange den IP som du vill utdela eller neka åtkomst för. För IPv4, är standard-IP-adressen 0.0.0.0, och standardprefixet är 32. 5. Välj önskad IP-adress som ska godkännas eller avvisas bland de angivna IP-adresserna. Endast valda IP-adresser filtreras ut. 6. När du är klar klickar du på [Tillämpa ( )]. SSL Du kan välja ett säkert anslutningssystem eller installera allmänt certifikat i det här syftet. 1. På inställningsmenyn väljer du fliken )>. <Nätverk ( 2. Klicka på <SSL>. 3. Välj ett säkert anslutningssytem. För att få åtkomst till kameran med HTTPSläge, måste du skriva in IP-adressen för kameran i form av “https://<Camera_IP>”. 4. Sök det publika certifikat som du vill installera på kameran. För att installera certifikatet på kameran behöver du ange ett certifikatsnamn (kan tilldelas av användaren), publicerad certifikatsfil från certifieringsmyndigheten och en nyckelfil. Alternativet <HTTPS (säker anslutning som använder det publika certifikatet)> blir bara aktiverat om det finns ett publikt certifikat installerat. 5. När du är klar klickar du på [Tillämpa ( )]. Svenska _71 inställningsskärmen Installera certifikatet 1. Ange certifikatsnamnet. 2. Markera certifikatsfilen som ska installeras och certifikatsnyckeln och klickar sedan på knappen [Installera ( )]. Radera certifikatet 1. Klicka på knappen [Ta bort ( )]. 2. Om du vill radera ett publikt certifikat ska du öppna nätverksvideodekodern i läget för <HTTP (använder inte säker anslutning)> eller <HTTPS (säker anslutning som använder ett unikt certifikat)>. 802.1x Vid anslutning till nätverket kan du välja om du vill använda protokollet 802.1x och sedan installera certifieringen. 1. På inställningsmenyn väljer du fliken <Nätverk ( )>. 2. Klicka på <802.1x>. 3. Ställ in <Inställningen IEEE 802.1x(EAPOL med EAP-TLS)>. • Aktivera IEEE 802.1x : Specificera användning av 802.1x-protokoll. • EAPOL-version : Välj version 1 eller 2. • EAPOL-id : Ange EAPOL-ID. • EAPOL-lösenord : Ange EAPOL-lösenordet. J Om den anslutna nätverksenheten inte stöder protokollet 802.1x, kommer inte protokollet att fungera korrekt även om du ställer in det. Så här installerar/tar du bort 802.1x-relaterade certifikat 1. Tryck på knappen [Bläddra ( installera. )] för varje alternativ och välj ett certifikat att 2. Om inga certifikat är installerade visas meddelandet ”Inte tillgänglig” intill det valda alternativet. )] för att starta installationen med ett 3. Tryck på knappen [Installera ( meddelande för ”Installerad” intill alternativet. 4. Tryck på knappen [Ta bort ( 72_ inställningsskärmen )] för att ta bort certifikatet. QoS Du kan ange prioritet för att få en stabil överföringshastighet för en specifik IP. 1. På inställningsmenyn väljer du fliken )>. <Nätverk ( ● INSTÄLLNINGSSKÄRMEN 2. Klicka på <QoS>. 3. Ange IP-adress. Standardprefixet är 32. För DSCP är standard 63. 4. Välj en IP-adress som du vill använda för QoS. Endast de valda IP-adresserna kan prioriteras. 5. När du är klar klickar du på [Tillämpa )]. ( SNMP Med SNMP-protokoll kan system- eller nätverksadmininstratören övervaka nätverksenheter på en fjärrstyrd plats och konfigurera miljöinställningarna. 1. På inställningsmenyn väljer du fliken )>. <Nätverk ( 2. Klicka på <SNMP>. 3. Ange <SNMP>. • Aktivera SNMP v1 : SNMP version 1 aktiveras. • Aktivera SNMP v2c : SNMP version 2 aktiveras. - Aktivera SNMP v2c : Uppge i f ti namnet på den läsgrupp där du kan komma åt SNMP SNMP-informationen. Standardnamnet är ”pubic”. - Skrivgrupp : Uppge namnet på den skrivgrupp där du kan komma åt SNMPinformationen. Standardnamnet är ”write”. Svenska _73 inställningsskärmen • Aktivera SNMP v3 : SNMP version 3 aktiveras. - Lösenord: Specificera standardlösenordet för SNMP version 3. Standardlösenordet är “admin4321”. Standardlösenordet kan spridas och göra datorn mer sårbar för hot, därför rekommenderar vi att du ändrar lösenordet efter att produkten har installerats. Observera att säkerhet och andra relaterade problem som orsakats av att lösenordet inte har ändrats faller på användarens ansvar. 4. När du är klar klickar du på [Tillämpa ( J )]. SNMP v3 kan endast ställas in när säkerhetsanslutningsläget är HTTPS. HÄNDELSINSTÄLLNINGAR FTP / E-mail Du kan konfigurera FTP-/E-postserverinställningarna så att du kan överföra bilderna som har lagrats i kameran till din dator om en händelse inträffar. 1. På inställningsmenyn väljer du fliken <Händelse ( )>. 2. Klicka på <FTP / E-mail>. 3. Välj <Konfiguration av FTP> eller <Konfiguration av E-mail> och ange/ välj önskat värde. • Konfiguration av FTP - Serveradress : Ange IP-adress för FTP-servern som du överför alarmbilder till. - Användar-ID : Ange användar-ID med vilket du vill logga in på FTPservern. - Lösenord : Ange lösenord för användarkonto för att logga in på FTP-servern. - Överföringskatalog : Specificera FTP-sökvägen där du ska överföra alarmbilder. - Port : Standardporten för FTP-servern är 21; du kan dock använda ett annat portnummer enligt FTP-serverinställningarna. - Passivt läge : Välj <På> om du behöver ansluta i passivt läge på grund av brandväggen eller FTP-serverinställningar. 74_ inställningsskärmen 4. När du är klar klickar du på [Tillämpa ( )]. SD-inspelning Du kan ställa in inspelningsförhållanden eller användning av inspelning för SD-minnet, kontrollera storlek på lagrad information eller formatera själva SD-minnet. 1. På inställningsmenyn väljer du fliken )>. <Händelse ( 2. Klicka på <SD-inspelning>. Svenska _75 ● INSTÄLLNINGSSKÄRMEN • Konfiguration av E-mail - SSL-användning : Specificera användning av SSL. - Serveradress : Ange IP-adress för e-postservern som du använder för e-postöverföring. - Användarautenticering : Välj om du vill använda behörighet. - Användar-ID : Ange användar-ID för att logga in på e-postservern. - Lösenord : Ange lösenord för användarkonto för att logga in på e-postservern. - Port : Standardporten för e-postservern är 25; du kan dock använda ett annat portnummer enligt e-postinställningarna. - Mottagare : Ange adress för e-postmottagare. - Avsändare : Ange adress för e-postavsändare. Om avsändaradressen är felaktig kan e-posten från avsändaren klassificeras som SPAM av e-postservern och därmed inte skickas. - Ämne : Ange ett ämne för e-postmeddelandet. - Text : Ange text för meddelandet. Bifoga alarmbilder till e-postmeddelandet som du förbereder. inställningsskärmen Göra en inspelning i SD-minnet 1. Kontrollera <Total storlek> och <Ledigt utrymme>. 2. Om SD-minnet har tillräckligt med ledigt utrymme ställer du in <Inspelning> till <På>. Annars ska du kontrollera lagrade data och om du tycker de är oviktiga kan du klicka på <Format> för att formatera SD-minnet. Om ditt SD-minneskort skriver långsamt lagras bara en ruta per sekund. För ett SD-minneskort med stor kapacitet blir formateringen långsammare. Om storleken på data växer med tid kan bara 1 fps lagras även om du ställer in inspelningskvaliteten till helbild. 3. Specificera inspelningsförhållanden. • Inspelningsprofil : Visa numret för den profil du vill spela in. • Skriv över : Om SD-minnet är fullt raderar detta gamla data och lagrar nya istället. • Förlarmets varaktighet : Specificera tidpunkten före alarmet ska aktiveras, med start från tidpunkten då bilderna ska överföras. Du kan specificera upp till 5 sekunder innan alarmet ska aktiveras. • Efterlarmets varaktighet : Specificera tidpunkten efter att alarmet har aktiveras, till tidpunkten då bilderna ska överföras. Du kan specificera upp till 120 sekunder efter att alarmet har aktiveras. • Normal: Gör inspelningen med en viss bildrutehastighet. • Händelse: Ange inspelningstyp för en viss händelse som inträffar. 4. Specificera <Aktiveringstid>. • Alltid : Kontrollera alltid om ett alarm inträffar. Kontrollera alltid om ett alarm inträffar. Om alternativet är inställt på Alltid kan aktiveringstiden inte ändras. • Enbart schemalagd tid : Kontrollera om ett alarm aktiveras på en viss veckodag och en viss tids- period. Aktiveras i använt läge när alarmet hörs. ] : Återställ alla inställningar. • [ 5. När du är klar klickar du på [Tillämpa ( 76_ inställningsskärmen )]. Larmingång Du kan ställa in ingångtyp för alarm, aktiveringstid och användningsläge. 1. På inställningsmenyn väljer du fliken )>. <Händelse ( ● INSTÄLLNINGSSKÄRMEN 2. Klicka på <Larmingång>. 3. Specificera en inmatningsenhet. • Typ - Normalt öppen : Den är normalt öppen, men om den är stängd utlöses ett alarm. - Normalt stängd : Den är normalt stängd, men om den är öppen utlöses ett alarm. 4. Specificera <Aktiveringstid>. • Alltid : Kontrollera alltid om ett alarm inträffar. Kontrollera alltid om ett alarm inträffar. Om alternativet är inställt på Alltid kan aktiveringstiden inte ändras. • Enbart schemalagd tid : Kontrollera om ett alarm aktiveras på en viss veckodag och en viss tids- period. Aktiveras i använt läge när alarmet hörs. • [ ] : Återställ alla inställningar. 5. Specificera en åtgärd som utförs om ett alarm aktiveras. • FTP-sändning : Specificera användningen av FTP-överföring i inställningarna för alarmingång. • E-mail sändning : Specificera användningen av e-postöverföring i inställningarna för alarmingång. • Inspelning : Specificera användningen av inspelning i inställningarna för alarmingång. 6. När du är klar klickar du på [Tillämpa ( )]. Svenska _77 inställningsskärmen Rörelsedetektering 1. På inställningsmenyn väljer du fliken )>. <Händelse ( 2. Klicka på <Rörelsedetektering>. ❖ Rörelsedetektering 1. Ange användning av rörelsedetektering. 2. Ställ in rörelsedetekteringsläget till mask. • Detektera: Detektera en rörelse som kan inträffa i det valda området. • Mask: Detektera en rörelse som kan inträffa i andra områden än det valda området. 3. Välj känslighetsnivå för rörelsedetektering. Ju högre känsligheten är, desto mindre rörelser kan identifieras. 4. Använd dra-och-släpp för att specificera identifieringsområdet i videon. Du kan specificera upp till 4 områden för rörelsedetektering. Det rödmarkerade området längst ned är inte tillämpligt för inställningen för rörelsedetektering. 5. Ange storleken för ett objekt du vill detektera. 6. Ange om motsvarande region ska markeras för rörelsedetektering. - Välj <På> för att markera en ruta på det identifierade rörliga föremålet på skärmen. 7. Specificera aktiveringstid och aktiveringsvillkor. För mer information om <Aktiveringstid> och <Åtgärd>, se “Larmingång”. (sidan 77) 8. När du är klar klickar du på [Tillämpa ( J )]. Om kameran tar en närbild av motivet kan rörelsedetekteringsprestandan försämras. Rörelsedetekteringsfunktionen kan inte fungera korrekt i följande fall. - Motivets färg eller ljusstyrka liknar bakgrunden - Flera, slumpmässiga rörelser fortsätter på grund av motivförändringar eller andra orsaker. - Ett fast motiv fortsätter röra sig på samma plats. 78_ inställningsskärmen Ett motiv döljer andra motiv som ligger bakom. Två eller flera motiv överlappar varandra eller så delas ett motiv upp i flera delar. För snabbt rörligt motiv (för detektering ska ett motiv överlappas mellan pågående ramar). Reflektion/suddighet/skuggor på grund av direkt solljus, belysning eller strålkastare I tät snö, regn, vind eller skymning/gryning. Tidsschemaläggning Du kan konfigurera så att en händelse inträffar vid en schemalagd tid, oavsett när händelsen faktiskt inträffar. 1. På inställningsmenyn väljer du fliken <Händelse ( )>. 2. Klicka på <Tidsschemaläggning>. Ställa in timerhändelsen 1. Ställ in <Inställningar för timerhändelser> på <Aktivera>. 2. Specificera <Aktiveringstid> • Alltid : Aktiveras alltid i använt läge på angivna intervaller. • Enbart schemalagd tid : Aktiveras periodiskt i använt läge på specifik tid och specifikt datum. 3. Ange <Överföringsintervall>. 4. Specificera aktiveringsförhållanden. • FTP-sändning : Specificera användning av FTP-överföring om en händelse inträffar. • Inspelning : Specificera användning av inspelning om en händelse inträffar. 5. När du är klar klickar du på [Tillämpa ( )]. Svenska _79 ● INSTÄLLNINGSSKÄRMEN - inställningsskärmen Frånkoppling av nätverk Du kan utföra sparande/relä/förinställning efter att du har tagit emot en händelse för ett fysiskt frånkopplat nätverk. 1. På inställningsmenyn väljer du fliken <Händelse ( )>. 2. Klicka på <Frånkoppling av nätverk>. 3. Specificera användning av ”Nätverksfrånkoppling”. 4. Specificera aktiveringstid och aktiveringsvillkor. För mer information om <Aktiveringstid> och <Åtgärd>, se “Larmingång”. (sidan 77) 5. När du är klar klickar du på [Tillämpa ( )]. Ansiktsdetektering Du kan ställa in för att aktivera den här funktionen om ett ansikte identifieras på övervakningsskärmen. 1. På inställningsmenyn väljer du fliken <Händelse ( )>. 2. Klicka på <Ansiktsdetektering>. 3. Specificera användning av funktionen för ansiktsdetektering. 4. Välj känslighetsnivå för ansiktsdetektering. Ju högre nivå, desto bättre känns ansiktet igen. 5. Använd dra-och-släpp för att specificera ansiktsdetekteringsområdet. 6. Specificera visning av funktionen för ansiktsdetektering. - Om du ställer in på <På>, placeras detekteringsområdet inom en ruta. 7. Specificera aktiveringstid och aktiveringsvillkor. För mer information om <Aktiveringstid> och <Åtgärd>, se “Larmingång”. (sidan 77) 8. När du är klar klickar du på [Tillämpa ( 80_ inställningsskärmen )]. SYSTEMINSTÄLLNINGAR Produktinformation 2. Klicka på <Produktinformation>. 3. Kontrollera kamerainformationen, eller ange detaljer beroende på nätverksmiljö. • Enhetsnamn : Ange ett enhetsnamn som ska visas på Live-skärmen. • Plats : Specificera platsen där kameran är installerad. • Beskrivning : Ange detaljerad information om kameraplatsen. • Anteckningar : Ange en förklaring om kameran för bättre förståelse. • Språk : Välj önskat språk för Web Viewer OSD. 4. När du är klar klickar du på [Tillämpa ( J )]. Produktrelaterad informaton tillåter bara engelska för inmatning. Datum och tid 1. På inställningsmenyn väljer du fliken <System ( )>. 2. Klicka på <Datum och tid>. 3. Ange tid och datum som ska användas för kameran. • Aktuell systemtid : Visar aktuella tidsinställningar för ditt system. • Tidszon : Specificera den lokala tidszonen baserat på GMT. • Tillämpa sommartid : Om alternativet är markerat ställs tiden in till en timme tidigare än den lokala tidszonen för angiven tidsperiod. Det här alternativet visas bara i områden där DST används. Svenska _81 ● INSTÄLLNINGSSKÄRMEN 1. På inställningsmenyn väljer du fliken <System ( )>. inställningsskärmen • Systemtidsinställningar : Ange tid och datum som ska användas för systemet. - Manuell : Specificera tiden manuellt. - Synkronisera med NTP-server : Synka med tiden för den angivna serveradressen. - Synkronisera med PC Viewer : Synka tiden med ansluten dator 4. När du är klar klickar du på [Tillämpa ( J )]. Om tidsinställnignarna varierar mellan kamera och dator kan det göra skillnad om du väljer <Synkronisera med PC Viewer>. Vi rekommenderar att du specificerar samma tidsinställningar för både kamera och dator. Användare 1. På inställningsmenyn väljer du fliken <System ( )>. 2. Klicka på <Användare>. 3. Ange nödvändig användarinformation. • Ändra administratörslösenord : Ändra lösenordet för administratören. Standardlösenordet kan spridas och göra datorn mer sårbar för hot, därför rekommenderar vi att du ändrar lösenordet efter att produkten har installerats. Observera att säkerhet och andra relaterade problem som orsakats av att lösenordet inte har ändrats faller på användarens ansvar. • Gästinställning : Om <Gäståtkomst> tillåts kan användaren som använder web viewer med gästkontot endast se Live viewer-skärmen. ID/lösenordet för gästkontot är gäst/gäst och kan inte ändras. • Nuvarande användare : Du kan ändra användarinformationen och justera behörighetsnivå för en användare som är inställd på <Aktivera>. - Video : Du kan välja en videoprofil i Live viewer-skärmen. - Ljud-in : Ljudingångsalternativet aktiveras på Live Viewer-skärmen. - Kontroller : Du kan styra kameramenyknapparna. 4. När du är klar klickar du på [Tillämpa ( 82_ inställningsskärmen )]. Uppgradera / starta om 1. På inställningsmenyn väljer du fliken <System ( )>. 2. Klicka på <Uppgradera / starta om>. • Konfiguration av säkerhetskopiering och återställning : Säkerhetskopierar aktuella systeminställningar innan du utför återställningsprocessen. Systemet startar automatiskt om efter säkerhetskopiering eller återställning. • Starta om : Startar om systemet. Utföra uppgraderingen 1. Klicka på [Uppgradera]. 2. Klicka på [Bläddra] och ange en fil som ska uppgraderas. 3. Klicka på [Skicka]. 4. Dialogrutan "Uppgradera" visas där förloppet visas längst ned. M Om du tvingas avsluta uppgraderingsprocessen kommer inte uppgraderingen att genomföras korrekt. Svenska _83 ● INSTÄLLNINGSSKÄRMEN 3. Välj önskat alternativ och ställ in det korrekt. • Uppgradera : Uppgraderar systemet. • Fabriksstandard : Återställer systemet till fabriksstandard. - Parameter för nätverksundantag : Återställer övriga inställningar förutom filterinställningar för gränssnitt/port/ DDNS/IP/SSL/802.1x/QoS/SNMP. - Alla : Återställer alla inställningar, inklusive kamerainställningarna. (inloggningsinformationen återställs dock inte) IP-adressystemet återställs till DHCP om du återställer kameran. Om ingen DHCP-server hittas kommer föregående inställningar att återställas automatiskt. inställningsskärmen Spara aktuella inställningar och återställa inställningar för säkerhetskopiering 1. Klicka på [Säkerhetskopiering]. Dialogrutan Spara som ska visas. 2. Specificera sökvägen för säkerhetskopian med lämpligt filnamn och klicka på [Save] . Säkerhetskopieringsfilen sparas till angiven sökväg i formatet ".bin". 3. Återställ säkerhetskopieringsinställningarna genom att klicka på [Återställning]. 4. Välj en säkerhetskopieringsfil och klicka på [Open]. M Om du gör en säkerhetskopia eller återställning kommer webbläsaren att stängas och kameran startar om. 84_ inställningsskärmen Logg Du kan kontrollera system- eller händelseloggen. 1. På inställningsmenyn väljer du fliken )>. <System ( ● BILAGA 2. Klicka på <Logg>. 3. Välj en loggtyp. • Syslog : Du kan kontrollera systemloggar där systemändringar lagras inklusive tidsinformationen. • Evtlog : Du kan kontrollera händelseloggar inklusive tidsinformation. 4. Från den högra logglistan väljer du ett alternativ att söka efter. • Om du väljer <All> i översta menyn till vänster så visas alla loggar för tillämplig loggtyp. 5. Om en sida inte kan visa alla tillgängliga loggar ska du använda de nedre knapparna för att gå till föregående, nästa eller sista alternativet. M Om du vill visa detaljerna för en logg klickar du på [Info ( )] i högra loggkolumnen, så visas logginformationen i nedersta rutan. Varje sida visar 15 loggar med den senaste visad överst. Händelse-/systemlogglistan kan innehålla upp till 1000 loggar; efter det kommer befintliga loggar att raderas, med start från den äldsta varje gång en ny logg skapas. Svenska _85 bilaga SPECIFIKATIONER Beskrivning Artiklar SNB-1001 Video SND-1080 Bildenhet 1/4” PS CMOS Totalt antal pixlar 680(H) x 512(V) Effektiva pixlar 640(H) x 480(V) Skanningssystem Progressivt Min. upplysning 0.7 lux (F1.2) S/N-kvot 50dB Video ut DIP-anslutning, för installation Fokallängd (zoomförhållande) - 2,2~7,7 mm (3,5x) Vari-fokal Max. bländarförhållande - F1.2 Vinkel på visningsfält - H : 94˚ (W) ~ 26,5˚ (T), V: 70˚ (W) ~ 20˚ (T) Min. avstånd till objekt - 500 mm Fokuskontroll - - Zoomhastighet - - Objektivtyp Manuell / DC Auto Iris DC Auto Iris Monteringstyp C/CS Korttyp (Ø14) Objektiv 86_ bilaga SNV-1080 Beskrivning Artiklar SNB-1001 SND-1080 - Pan-hastighet - - Tilt-intervall - 17°~90° Tilt-hastighet - - Roteringsintervall - 0°~351° Förinställning - - Förinställning, noggrannhet - - SNV-1080 0°~352° ● BILAGA Pan-intervall Pan / Tilt / Rotera Autospårning - Kameratitel Av / På (visas med 15 tecken) Dag och natt Auto (S/W) / Färg / Svartvitt Motljuskompensation Av / BLC Brett dynamiskt intervall - Kontrastförstärkning SSDR (Samsung Super Dynamic Range) (Av / På) Digital brusreducering SSNRIII (2D+3D brusfilter) (Av / På) Digital bildstabilisering - Rörelsedetektering Av / På (4 programmerbara zoner) Sekretessmask Av / På (32ea, 4 punkter polygont Sens-up (ramintegrering) Av / Auto (x2~x60) Gain-kontroll Av / Låg / medium / hög Vitbalans ATW / AWC / manuell / inomhus / utomhus Användning Svenska _87 bilaga Beskrivning Artiklar SNB-1001 Användning SND-1080 Elektronisk slutarhastighet Auto / A.FLK / Manuell (x60~1/12000 sek) Digital zoom - Vänd/Spegel Av / På Intelligent videoanalys Ansiktsdetektering Alarm I/O Ingång 1ea Fjärrkontrollsgränssnitt - RS-485-protokoll - Ethernet RJ-45 (10/100BASE-T) Videokomprimeringsformat H.264, MJPEG SNV-1080 <H.264> Upplösning 640x480 / 320x240 / 160x120 <MJPEG> 640x480 / 320x240 / 160x120 Max. ramhastighet Nätverk Videokvalitetsjustering Metod för bildhastighetskontroll 88_ bilaga Max 30 fps vid alla upplösningar H.264 : Komprimeringsnivå, målbithastighetskontroll MJPEG : Kvalitetsnivåkontroll H.264 : CBR eller VBR MJPEG : VBR Strömningskapacitet Multiströmning (upp till 10 profiler) Ljud I/O Mikrofon / Linje in, Linje ut Ljudkomprimeringsformat G.711 μ-law Ljudkommunikation 2-vägs Beskrivning Artiklar SNB-1001 SND-1080 SNV-1080 IPv4, IPv6 Protokoll TCP/IP, UDP/IP, RTP(UDP), RTP(TCP), RTSP, NTP, HTTP, HTTPS, SSL, DHCP, PPPoE, FTP, SMTP, ICMP, IGMP, SNMPv1/v2c/v3(MIB-2), ARP, DNS, DDNS, QoS HTTPS(SSL) inloggningsautentisering Digest inloggningsautentisering Säkerhet IP-adressfitrering användaråtkomstlogg 802.1X autentiseringsmetod Nätverk Strömningsmetod Unicast / Multicast Max. användaråtkomst 10 användare i Unicast-läge Minnesplats Mikro SD-/SDHC-minneskortsplats ONVIF-anpassad Ja Webbsidspråk Engelska, Franska, Tyska, Spanska, Italienska, Italienska, Kinesiska, Koreanska, Ryska, Japanska, Svenska, Danska, Portugisiska, Tjeckiska, Polska, Turkiska, Rumänska, Serbiska, Holländska, Kroatiska, Ungerska, Grekiska Operativsystem som stöds: Windows XP / VISTA / 7, MAC OS Webbviewer Webbläsare som stöds : Internet Explorer 7.0 eller högre, Firefox, Google Chrome, Apple Safari Centralhanteringsprogram NET-i viewer Svenska _89 ● BILAGA IP bilaga Beskrivning Artiklar SNB-1001 SND-1080 SNV-1080 Driftstemperatur /-luftfuktighet -10°C ~ +50°C (+14°F ~ +122°F) / 20% ~ 80% RH Vattentäthet - Volt / ström 12V DC, PoE(IEEE802.3af) Omgivande miljö IP66-klass (Vattentät) Elektricitet Mekanik 90_ bilaga Strömförbrukning Max. 3.4W (DC 12V), Max. 4W (PoE) Färg / Material Svart, Silver/ Aluminium, Plast Mått V 74,3 x H 54,5 x D 114,4 Ø 115,8 x H 92,7 Ø 137,0 x H mm exklusive mm 105,9 mm utskjutande delar Vikt 190g (0.19 kg) Elfenben/plast 380g Elfenben/ aluminium 770g PRODUKTÖVERSIKT Enhet : mm (tum) ❖ SNB-1001 ● BILAGA 114.4 (4.50") 54.5 (2.15") 74.3 (2.93") Svenska _91 bilaga ❖ SND-1080 115.8 (4.56") 92_ bilaga 92.7 (3.65") 42.4 (1.67") Ø115.8 (4.56") ❖ SNV-1080 Ø137.0 (5.39") 105.9 (4.17") ● BILAGA Ø100.0 (3.94") Svenska _93 bilaga FELSÖKNING PROBLEM LÖSNING Kontrollera för att säkerställa att kamerans nätverksinställningar är korrekta. Jag kan inte komma åt kameran från en webbläsare. Kontrollera för att säkerställa att alla nätverkskablar har anslutits korrekt. Om den är ansluten och du använder DHCP ska du kontrollera att kameran kan förvärva dynamiska IP-adresser utan problem. Om kameran har anslutits till en Bredbandsrouter ska du se till att portvidarebefordran är korrekt konfigurerat. Anslutna användare blir frånkopplade vid en ändring i kamera- eller nätverkskonfigurationen. Viewern har kopplats ur under övervakningen. Kontrollera alla nätverksanslutningar. Jag kan inte ansluta till systemet med en utforskare eller Internet Explorer 7.0. När du försöker ansluta till systemet med en utforskare delas samma cookie-information, vilket resulterar i fel under anslutningen. Använd därför istället en utforskare, öppna i ett nytt fönster för att ansluta till systemet. Den kamera som är ansluten till nätverket identifieras inte i IP-installationsprogrammet. Slå av inställningarna för brandväggen på datorn och sök kameran igen. Bilderna överlappas. Kontrollera om två eller fler kameror är inställda på enkel multicast-adress istället för olika adresser. Om en enkel adress används för flera kameror kan bilderna överlappas. Ingen bild visas. Om sändningsmetoden är inställd på multicast ska du kontrollera om det finns en router som stöder multicast i nätverket som kameran är ansluten till. 94_ bilaga Om kameran är ansluten över ett PPPoE-nätverk är det möjligt att Viewern kopplas från under dåliga nätverksförhållanden. PROBLEM Kan inte lagra på SD-minneskort. Kontrollera om det finns fel på minneskortet. Kontrollera om minneskoret har satts i på rätt håll. Användning av minneskorts som har formaterats av andra enheter garanteras inte med den här kameran. Formatera minneskortet igen i <Inställningar> <Händelse> <SD-inspelning>. Kan inte formatera SD-minneskort. Kontrollera om det finns fel på minneskortet. Svenska _95 ● BILAGA Ett SD-minneskort sätts i, men produkten känner inte av det. LÖSNING OPEN SOURCE ANNOUNCEMENT Some software components of this product incorporate source code covered under the BSD license as follows. Component Name License License URL lighttpd 1.4.25 librtp 1.20 BSD 2.0 BSD 1.0 http://www.opensource.org/licenses/bsd-license.html lighttpd is a secure, fast, compliant, and very flexible web-server that has been optimized for high-performance environments. It has a very low memory footprint compared to other webservers and takes care of cpu-load. Its advanced feature-set (FastCGI, CGI, Auth, Output-Compression, URL-Rewriting and many more) make lighttpd the perfect webserversoftware for every server that suffers load problems. For more additional information, send email to [email protected]. This Product uses the Source Code of T-Kernel under T-License granted by the T-Engine Forum (www.t-engine.org) Copyright (C) 2004, Kneschke, incremental All rights reserved. Redistribution and use in source and binary forms, with or without modification, are permitted provided that the following conditions are met : - Redistributions of source code must retain the above copyright notice, this list of conditions and the following disclaimer. - Redistributions in binary form must reproduce the above copyright notice, this list of conditions and the following disclaimer in the documentation and/or other materials provided with the distribution. - Neither the name of the ‘incremental’ nor the names of its contributors may be used to endorse or promote products derived from this software without specific prior written permission. THIS SOFTWARE IS PROVIDED BY THE COPYRIGHT HOLDERS AND CONTRIBUTORS “AS IS” AND ANY EXPRESS OR IMPLIED WARRANTIES, INCLUDING, BUT NOT LIMITED TO, THE IMPLIED WARRANTIES OF MERCHANTABILITY AND FITNESS FOR A PARTICULAR PURPOSE ARE DISCLAIMED. IN NO EVENT SHALL THE COPYRIGHT OWNER OR CONTRIBUTORS BE LIABLE FOR ANY DIRECT, INDIRECT, INCIDENTAL, SPECIAL, EXEMPLARY, OR CONSEQUENTIAL DAMAGES (INCLUDING, BUT NOT LIMITED TO, PROCUREMENT OF SUBSTITUTE GOODS OR SERVICES; LOSS OF USE, DATA, OR PROFITS; OR BUSINESS INTERRUPTION) HOWEVER CAUSED AND ON ANY THEORY OF LIABILITY, WHETHER IN CONTRACT, STRICT LIABILITY, OR TORT (INCLUDING NEGLIGENCE OR OTHERWISE) ARISING IN ANY WAY OUT OF THE USE OF THIS SOFTWARE, EVEN IF ADVISED OF THE POSSIBILITY OF SUCH DAMAGE. Copyright (c) 1998-2001 University College London All rights reserved. Redistribution and use in source and binary forms, with or without modification, is permitted provided that the following conditions are met : 1. Redistributions of source code must retain the above copyright notice, this list of conditions and the following disclaimer. 2. Redistributions in binary form must reproduce the above copyright notice, this list of conditions and the following disclaimer in the documentation and/or other materials provided with the distribution. 3. All advertising materials mentioning features or use of this software must display the following acknowledgement: This product includes software developed by the Computer Science Department at University College London. 4. Neither the name of the University nor of the Department may be used to endorse or promote products derived from this software without specific prior written permission. THIS SOFTWARE IS PROVIDED BY THE AUTHORS AND CONTRIBUTORS ``AS IS'' AND ANY EXPRESSED OR IMPLIED WARRANTIES, INCLUDING, BUT NOT LIMITED TO, THE IMPLIED WARRANTIES OF MERCHANTABILITY AND FITNESS FOR A PARTICULAR PURPOSEARE DISCLAIMED. IN NO EVENT SHALL THE AUTHORS OR CONTRIBUTORS BE LIABLE FOR ANY DIRECT, INDIRECT, INCIDENTAL, SPECIAL, EXEMPLARY, OR CONSEQUENTIAL DAMAGES (INCLUDING, BUT NOT LIMITED TO, PROCUREMENT OF SUBSTITUTE GOODS OR SERVICES; LOSS OF USE, DATA, OR PROFITS; OR BUSINESS INTERRUPTION) HOWEVER CAUSED AND ON ANY THEORY OF LIABILITY, WHETHER IN CONTRACT, STRICT LIABILITY, OR TORT (INCLUDING NEGLIGENCE OR OTHERWISE) ARISING IN ANY WAY OUT OF THE USE OF THIS SOFTWARE, EVEN IF ADVISED OF THE POSSIBILITY OF SUCH DAMAGE. GPL/LGPL SOFTWARE LICENSE The software included in this product contains copyrighted software that is licensed under the GPL/LGPL. You may obtain the complete Corresponding Source code from us for a period of three years after our last shipment of this product by sending email to [email protected] If you want to obtain the complete Corresponding Source code in the physical medium such as CD-ROM, the cost of physically performing source distribution might be charged. • GPL S/W - Base Kernel, Busybox, Sysvinit, dosfstools • LGPL S/W - gLibc, Inetutils GNU GENERAL PUBLIC LICENSE Version 2, June 1991 Copyright (C)1989, 1991 Free Software Foundation, Inc. 51 Franklin Street,Fifth Floor, Boston, MA 02110-1301, USA Everyone is permitted to copy and distribute verbatim copies of this license document, but changing it is not allowed. Preamble The licenses for most software are designed to take away your freedom to share and change it. By contrast, the GNU General Public License is intended to guarantee your freedom to share and change free software-- to make sure the software is free for all its users. This General Public License applies to most of the Free Software Foundation's software and to any other program whose authors commit to using it. (Some other Free Software Foundation software is covered by the GNU Lesser General Public License instead.) You can apply it to your programs, too. When we speak of free software, we are referring to freedom, not price. Our General Public Licenses are designed to make sure that you have the freedom to distribute copies of free software (and charge for this service if you wish), that you receive source code or can get it if you want it, that you can change the software or use pieces of it in new free programs ; and that you know you can do these things. To protect your rights, we need to make restrictions that forbid anyone to deny you these rights or to ask you to surrender the rights. These restrictions translate to certain responsibilities for you if you distribute copies of the software, or if you modify it. For example, if you distribute copies of such a program, whether gratis or for a fee, you must give the recipients all the rights that you have. You must make sure that they, too, receive or can get the source code. And you must show them these terms so they know their rights. We protect your rights with two steps : (1)copyright the software, and (2)offer you this license which gives you legal permission to copy, distribute and/or modify the software. Also, for each author's protection and ours, we want to make certain that everyone understands that there is no warranty for this free software. If the software is modified by someone else and passed on, we want its recipients to know that what they have is not the original, so that any problems introduced by others will not reflect on the original authors' reputations. Finally, any free program is threatened constantly by software patents. We wish to avoid the danger that redistributors of a free program will individually obtain patent licenses, in effect making the program proprietary. To prevent this, we have made it clear that any patent must be licensed for everyone's free use or not licensed at all. The precise terms and conditions for copying, distribution and modification follow. TERMS AND CONDITIONS FOR COPYING, DISTRIBUTION AND MODIFICATION Version 2, June 1991 Copyright (C) 1989, 1991 Free Software Foundation, Inc. 51 Franklin S 0. This License applies to any program or other work which contains a notice placed by the copyright holder saying it may be distributed under the terms of this General Public License. The "Program", below, refers to any such program or work, and a "work based on the Program" means either the Program or any derivative work under copyright law : that is to say, a work containing the Program or a portion of it, either verbatim or with modifications and/or translated into another language. (Hereinafter, translation is included without limitation in the term "modification".) Each licensee is addressed as "you". Activities other than copying, distribution and modification are not covered by this License ; they are outside its scope. The act of running the Program is not restricted, and the output from the Program is covered only if its contents constitute a work based on the Program (independent of having been made by running the Program). Whether that is true depends on what the Program does. 1. You may copy and distribute verbatim copies of the Program's source code as you receive it, in any medium, provided that you conspicuously and appropriately publish on each copy an appropriate copyright notice and disclaimer of warranty; keep intact all the notices that refer to this License and to the absence of any warranty ; and give any other recipients of the Program a copy of this License along with the Program. You may charge a fee for the physical act of transferring a copy, and you may at your option offer warranty protection in exchange for a fee. 2. You may modify your copy or copies of the Program or any portion of it, thus forming a work based on the Program, and copy and distribute such modifications or work under the terms of Section 1 above, provided that you also meet all of these conditions : a) You must cause the modified files to carry prominent notices stating that you changed the files and the date of any change. b) You must cause any work that you distribute or publish, that in whole or in part contains or is derived from the Program or any part thereof, to be licensed as a whole at no charge to all third parties under the terms of this License. c) If the modified program normally reads commands interactively when run,you must cause it, when started running for such interactive use in the most ordinary way, to print or display an announcement including an appropriate copyright notice and a notice that there is no warranty (or else, saying that you provide a warranty) and that users may redistribute the program under these conditions, and telling the user how to view a copy of this License. (Exception:if the Program itself is interactive but does not normally print such an announcement, your work based on the Program is not required to print an announcement.) These requirements apply to the modified work as a whole. If identifiable sections of that work are not derived from the Program, and can be reasonably considered independent and separate works in themselves, then this License, and its terms, do not apply to those sections when you distribute them as separate works. But when you distribute the same sections as part of a whole which is a work based on the Program, the distribution of the whole must be on the terms of this License, whose permissions for other licensees extend to the entire whole, and thus to each and every part regardless of who wrote it. Thus, it is not the intent of this section to claim rights or contest your rights to work written entirely by you ; rather, the intent is to exercise the right to control the distribution of derivative or collective works based on the Program. In addition, mere aggregation of another work not based on the Program with the Program (or with a work based on the Program)on a volume of a storage or distribution medium does not bring the other work under the scope of this License. 3. You may copy and distribute the Program (or a work based on it, under Section 2)in object code or executable form under the terms of Sections 1 and 2 above provided that you also do one of the following : a) Accompany it with the complete corresponding machine-readable source code, which must be distributed under the terms of Sections 1 and 2 above on a medium customarily used for software interchange ; or, b) Accompany it with a written offer, valid for at least three years, to give any third party, for a charge no more than your cost of physically performing source distribution, a complete machinereadable copy of the corresponding source code, to be distributed under the terms of Sections 1 and 2 above on a medium customarily used for software interchange ; or, c) Accompany it with the information you received as to the offer to distribute corresponding source code. (This alternative is allowed only for noncommercial distribution and only if you received the program in object code or executable form with such an offer, in accord with Subsection b above.) The source code for a work means the preferred form of the work for making modifications to it. For an executable work, complete source code means all the source code for all modules it contains, plus any associated interface definition files, plus the scripts used to control compilation and installation of the executable. However, as a special exception, the source code distributed need not include anything that is normally distributed (in either source or binary form)with the major components (compiler, kernel, and so on)of the operating system on which the executable runs, unless that component itself accompanies the executable. If distribution of executable or object code is made by offering access to copy from a designated place, then offering equivalent access to copy the source code from the same place counts as distribution of the source code, even though third parties are not compelled to copy the source along with the object code. 4. You may not copy, modify, sublicense, or distribute the Program except as expressly provided under this License. Any attempt otherwise to copy, modify, sublicense or distribute the Program is void, and will automatically terminate your rights under this License. However, parties who have received copies, or rights, from you under this License will not have their licenses terminated so long as such parties remain in full compliance. 5. You are not required to accept this License, since you have not signed it. However, nothing else grants you permission to modify or distribute the Program or its derivative works. These actions are prohibited by law if you do not accept this License.Therefore, by modifying or distributing the Program (or any work based on the Program), you indicate your acceptance of this License to do so, and all its terms and conditions for copying, distributing or modifying the Program or works based on it. 6. Each time you redistribute the Program (or any work based on the Program), the recipient automatically receives a license from the original licensor to copy, distribute or modify the Program subject to these terms and conditions. You may not impose any further restrictions on the recipients' exercise of the rights granted herein. You are not responsible for enforcing compliance by third parties to this License. 7. If, as a consequence of a court judgment or allegation of patent infringement or for any other reason (not limited to patent issues), conditions are imposed on you (whether by court order, agreement or otherwise)that contradict the conditions of this License, they do not excuse you from the conditions of this License. If you cannot distribute so as to satisfy simultaneously your obligations under this License and any other pertinent obligations, then as a consequence you may not distribute the Program at all. For example, if a patent license would not permit royalty-free redistribution of the Program by all those who receive copies directly or indirectly through you, then the only way you could satisfy both it and this License would be to refrain entirely from distribution of the Program. If any portion of this section is held invalid or unenforceable under any particular circumstance, the balance of the section is intended to apply and the section as a whole is intended to apply in other circumstances. It is not the purpose of this section to induce you to infringe any patents or other property right claims or to contest validity of any such claims; this section has the sole purpose of protecting the integrity of the free software distribution system, which is implemented by public license practices. Many people have made generous contributions to the wide range of software distributed through that system in reliance on consistent application of that system ; it is up to the author/donor to decide if he or she is willing to distribute software through any other system and a licensee cannot impose that choice. This section is intended to make thoroughly clear what is believed to be a consequence of the rest of this License. 8. If the distribution and/or use of the Program is restricted in certain countries either by patents or by copyrighted interfaces, the original copyright holder who places the Program under this License may add an explicit geographical distribution limitation excluding those countries,so that distribution is permitted only in or among countries not thus excluded. In such case, this License incorporates the limitation as if written in the body of this License. 9. The Free Software Foundation may publish revised and/or new versions of the General Public License from time to time. Such new versions will be similar in spirit to the present version, but may differ in detail to address new problems or concerns. Each version is given a distinguishing version number. If the Program specifies a version number of this License which applies to it and "any later version", you have the option of following the terms and conditions either of that version or of any later version published by the Free Software Foundation. If the Program does not specify a version number of this License, you may choose any version ever published by the Free Software Foundation. 10. If you wish to incorporate parts of the Program into other free programs whose distribution conditions are different, write to the author to ask for permission. For software which is copyrighted by the Free Software Foundation,write to the Free Software Foundation ; we sometimes make exceptions for this. Our decision will be guided by the two goals of preserving the free status of all derivatives of our free software and of promoting the sharing and reuse of software generally. NO WARRANTY 11. BECAUSE THE PROGRAM IS LICENSED FREE OF CHARGE, THERE IS NO WARRANTY FOR THE PROGRAM, TO THE EXTENT PERMITTED BY APPLICABLE LAW. EXCEPT WHEN OTHERWISE STATED IN WRITING THE COPYRIGHT HOLDERS AND/OR OTHER PARTIES PROVIDE THE PROGRAM "ASIS" WITHOUT WARRANTY OF ANY KIND, EITHER EXPRESSED OR IMPLIED, INCLUDING, BUT NOT LIMITED TO, THE IMPLIED WARRANTIES OF MERCHANTABILITY AND FITNESS FOR A PARTICULAR PURPOSE. THE ENTIRE RISK AS TO THE QUALITY AND PERFORMANCE OF THE PROGRAM IS WITH YOU. SHOULD THE PROGRAMPROVE DEFECTIVE, YOU ASSUME THE COST OF ALL NECESSARY SERVICING, REPAIR OR CORRECTION. 12. IN NO EVENT UNLESS REQUIRED BY APPLICABLE LAW OR AGREED TO IN WRITING WILL ANY COPYRIGHT HOLDER, OR ANY OTHER PARTY WHO MAY MODIFY AND/OR REDISTRIBUTE DAMAGES, INCLUDING ANY GENERAL, SPECIAL, INCIDENTAL OR CONSEQUENTIAL DAMAGES ARISING OUT OF THE USE OR INABILITY TO USE THE PROGRAM (INCLUDING BUT NOT LIMITED TO LOSS OF DATA OR DATA BEING RENDERED INACCURATE OR LOSSES SUSTAINED BY YOU OR THIRD PARTIES OR A FAILURE OF THE PROGRAM TO OPERATE WITH ANY OTHER PROGRAMS), EVEN IF SUCH HOLDER OR OTHER PARTY HAS BEEN ADVISED OF THE POSSIBILITY OF SUCH DAMAGES. END OF TERMS AND CONDITIONS How to Apply These Terms to Your New Programs If you develop a new program, and you want it to be of the greatest possible use to the public, the best way to achieve this is to make it free software which everyone can redistribute and change under these terms. To do so, attach the following notices to the program. It is safest to attach them to the start of each source file to most effectively convey the exclusion of warranty ; and each file should have at least the "copyright" line and a pointer to where the full notice is found. one line to give the program's name and an idea of what it does. Copyright (C)yyyy name of author This program is free software ; you can redistribute it and/or modify it under the terms of the GNU General Public License as published by the Free Software Foundation ; either version 2 of the License, or (at your option)any later version. This program is distributed in the hope that it will be useful, but WITHOUT ANY WARRANTY ; without even the implied warranty of MERCHANTABILITY or FITNESS FOR A PARTICULAR PURPOSE. See the GNU General Public License for more details. You should have received a copy of the GNU General Public License along with this program ; if not, write to the Free Software Foundation, Inc.,51 Franklin Street, Fifth Floor, Boston, MA 02110-1301, USA. Also add information on how to contact you by electronic and paper mail. If the program is interactive, make it output a short notice like this when it starts in an interactive mode : program is a subroutine library, you may consider it more useful to permit linking proprietary applications with the library. If this is what you want to do, use the GNU Lesser General Public License instead of this License. GNU GENERAL PUBLIC LICENSE Version 3, 29 June 2007 Copyright © 2007 Free Software Foundation, Inc. <http://fsf.org/> Everyone is permitted to copy and distribute verbatim copies of this license document, but changing it is not allowed. Gnomovision version 69, Preamble Copyright (C) year name of author The GNU General Public License is a free, copyleft Gnomovision comes with ABSOLUTELY NO WARRANTY ; for details type ‘show w’. This is free software, and you are welcome to redistribute it under certain conditions ; type ‘show c’ for details. The hypothetical commands ‘show w’ and ‘show c’ should show the appropriate parts of the General Public License. Of course, the commands you use may be called something other than ‘show w’ and ‘show c’ ; they could even be mouse-clicks or menu items-- whatever suits your program. You should also get your employer (if you work as a programmer)or your school, if any, to sign a "copyright disclaimer" for the program,if necessary. Here is a sample ; alter the names: Yoyodyne, Inc.,hereby disclaims all copyright interest in the program ‘ Gnomovision’ (which makes passes at compilers) written by James Hacker. signature of Ty Coon, 1 April 1989 Ty Coon, President of Vice This General Public License does not permit incorporating your program into proprietary programs. If your license for software and other kinds of works. The licenses for most software and other practical works are designed to take away your freedom to share and change the works. By contrast, the GNU General Public License is intended to guarantee your freedom to share and change all versions of a program--to make sure it remains free software for all its users. We, the Free Software Foundation, use the GNU General Public License for most of our software; it applies also to any other work released this way by its authors. You can apply it to your programs, too. When we speak of free software, we are referring to freedom, not price. Our General Public Licenses are designed to make sure that you have the freedom to distribute copies of free software (and charge for them if you wish), that you receive source code or can get it if you want it, that you can change the software or use pieces of it in new free programs, and that you know you can do these things. To protect your rights, we need to prevent others from denying you these rights or asking you to surrender the rights. Therefore, you have certain responsibilities if you distribute copies of the software, or if you modify it: responsibilities to respect the freedom of others. For example, if you distribute copies of such a program, whether gratis or for a fee, you must pass on to the recipients the same freedoms that you received. You must make sure that they, too, receive or can get the source code. And you must show them these terms so they know their rights. Developers that use the GNU GPL protect your rights with two steps: (1) assert copyright on the software, and (2) offer you this License giving you legal permission to copy, distribute and/or modify it. For the developers' and authors' protection, the GPL clearly explains that there is no warranty for this free software. For both users' and authors' sake, the GPL requires that modified versions be marked as changed, so that their problems will not be attributed erroneously to authors of previous versions. Some devices are designed to deny users access to install or run modified versions of the software inside them, although the manufacturer can do so. This is fundamentally incompatible with the aim of protecting users' freedom to change the software. The systematic pattern of such abuse occurs in the area of products for individuals to use, which is precisely where it is most unacceptable. Therefore, we have designed this version of the GPL to prohibit the practice for those products. If such problems arise substantially in other domains, we stand ready to extend this provision to those domains in future versions of the GPL, as needed to protect the freedom of users. Finally, every program is threatened constantly by software patents. States should not allow patents to restrict development and use of software on general-purpose computers, but in those that do, we wish to avoid the special danger that patents applied to a free program could make it effectively proprietary. To prevent this, the GPL assures that patents cannot be used to render the program nonfree. The precise terms and conditions for copying, distribution and modification follow. TERMS AND CONDITIONS 0. Definitions. “This License” refers to version 3 of the GNU General Public License. “Copyright” also means copyright-like laws that apply to other kinds of works, such as semiconductor masks. “The Program” refers to any copyrightable work licensed under this License. Each licensee is addressed as “you”. “Licensees” and “recipients” may be individuals or organizations. To “modify” a work means to copy from or adapt all or part of the work in a fashion requiring copyright permission, other than the making of an exact copy. The resulting work is called a “modified version” of the earlier work or a work “based on” the earlier work. A “covered work” means either the unmodified Program or a work based on the Program. To “propagate” a work means to do anything with it that, without permission, would make you directly or secondarily liable for infringement under applicable copyright law, except executing it on a computer or modifying a private copy. Propagation includes copying, distribution (with or without modification), making available to the public, and in some countries other activities as well. To “convey” a work means any kind of propagation that enables other parties to make or receive copies. Mere interaction with a user through a computer network, with no transfer of a copy, is not conveying. An interactive user interface displays “Appropriate Legal Notices” to the extent that it includes a convenient and prominently visible feature that (1) displays an appropriate copyright notice, and (2) tells the user that there is no warranty for the work (except to the extent that warranties are provided), that licensees may convey the work under this License, and how to view a copy of this License. If the interface presents a list of user commands or options, such as a menu, a prominent item in the list meets this criterion. 1. Source Code. The “source code” for a work means the preferred form of the work for making modifications to it. “Object code” means any non-source form of a work. A “Standard Interface” means an interface that either is an official standard defined by a recognized standards body, or, in the case of interfaces specified for a particular programming language, one that is widely used among developers working in that language. The “System Libraries” of an executable work include anything, other than the work as a whole, that (a) is included in the normal form of packaging a Major Component, but which is not part of that Major Component, and (b) serves only to enable use of the work with that Major Component, or to implement a Standard Interface for which an implementation is available to the public in source code form. A “Major Component”, in this context, means a major essential component (kernel, window system, and so on) of the specific operating system (if any) on which the executable work runs, or a compiler used to produce the work, or an object code interpreter used to run it. The “Corresponding Source” for a work in object code form means all the source code needed to generate, install, and (for an executable work) run the object code and to modify the work, including scripts to control those activities. However, it does not include the work's System Libraries, or general-purpose tools or generally available free programs which are used unmodified in performing those activities but which are not part of the work. For example, Corresponding Source includes interface definition files associated with source files for the work, and the source code for shared libraries and dynamically linked subprograms that the work is specifically designed to require, such as by intimate data communication or control flow between those subprograms and other parts of the work. The Corresponding Source need not include anything that users can regenerate automatically from other parts of the Corresponding Source. The Corresponding Source for a work in source code form is that same work. 2. Basic Permissions. All rights granted under this License are granted for the term of copyright on the Program, and are irrevocable provided the stated conditions are met. This License explicitly affirms your unlimited permission to run the unmodified Program. The output from running a covered work is covered by this License only if the output, given its content, constitutes a covered work. This License acknowledges your rights of fair use or other equivalent, as provided by copyright law. You may make, run and propagate covered works that you do not convey, without conditions so long as your license otherwise remains in force. You may convey covered works to others for the sole purpose of having them make modifications exclusively for you, or provide you with facilities for running those works, provided that you comply with the terms of this License in conveying all material for which you do not control copyright. Those thus making or running the covered works for you must do so exclusively on your behalf, under your direction and control, on terms that prohibit them from making any copies of your copyrighted material outside their relationship with you. Conveying under any other circumstances is permitted solely under the conditions stated below. Sublicensing is not allowed; section 10 makes it unnecessary. 3. Protecting Users' Legal Rights From Anti-Circumvention Law. No covered work shall be deemed part of an effective technological measure under any applicable law fulfilling obligations under article 11 of the WIPO copyright treaty adopted on 20 December 1996, or similar laws prohibiting or restricting circumvention of such measures. When you convey a covered work, you waive any legal power to forbid circumvention of technological measures to the extent such circumvention is effected by exercising rights under this License with respect to the covered work, and you disclaim any intention to limit operation or modification of the work as a means of enforcing, against the work's users, your or third parties' legal rights to forbid circumvention of technological measures. 4. Conveying Verbatim Copies. You may convey verbatim copies of the Program's source code as you receive it, in any medium, provided that you conspicuously and appropriately publish on each copy an appropriate copyright notice; keep intact all notices stating that this License and any non-permissive terms added in accord with section 7 apply to the code; keep intact all notices of the absence of any warranty; and give all recipients a copy of this License along with the Program. You may charge any price or no price for each copy that you convey, and you may offer support or warranty protection for a fee. 5. Conveying Modified Source Versions. You may convey a work based on the Program, or the modifications to produce it from the Program, in the form of source code under the terms of section 4, provided that you also meet all of these conditions: a) The work must carry prominent notices stating that you modified it, and giving a relevant date. b) The work must carry prominent notices stating that it is released under this License and any conditions added under section 7. This requirement modifies the requirement in section 4 to “keep intact all notices”. c) You must license the entire work, as a whole, under this License to anyone who comes into possession of a copy. This License will therefore apply, along with any applicable section 7 additional terms, to the whole of the work, and all its parts, regardless of how they are packaged. This License gives no permission to license the work in any other way, but it does not invalidate such permission if you have separately received it. d) If the work has interactive user interfaces, each must display Appropriate Legal Notices; however, if the Program has interactive interfaces that do not display Appropriate Legal Notices, your work need not make them do so. A compilation of a covered work with other separate and independent works, which are not by their nature extensions of the covered work, and which are not combined with it such as to form a larger program, in or on a volume of a storage or distribution medium, is called an “aggregate” if the compilation and its resulting copyright are not used to limit the access or legal rights of the compilation's users beyond what the individual works permit. Inclusion of a covered work in an aggregate does not cause this License to apply to the other parts of the aggregate. 6. Conveying Non-Source Forms. You may convey a covered work in object code form under the terms of sections 4 and 5, provided that you also convey the machinereadable Corresponding Source under the terms of this License, in one of these ways: a) Convey the object code in, or embodied in, a physical product (including a physical distribution medium), accompanied by the Corresponding Source fixed on a durable physical medium customarily used for software interchange. b) Convey the object code in, or embodied in, a physical product (including a physical distribution medium), accompanied by a written offer, valid for at least three years and valid for as long as you offer spare parts or customer support for that product model, to give anyone who possesses the object code either (1) a copy of the Corresponding Source for all the software in the product that is covered by this License, on a durable physical medium customarily used for software interchange, for a price no more than your reasonable cost of physically performing this conveying of source, or (2) access to copy the Corresponding Source from a network server at no charge. c) Convey individual copies of the object code with a copy of the written offer to provide the corresponding Source. This alternative is allowed only occasionally and noncommercially, and only if you received the object code with such an offer, in accord with subsection 6b. d) Convey the object code by offering access from a designated place (gratis or for a charge), and offer equivalent access to the Corresponding Source in the same way through the same place at no further charge. You need not require recipients to copy the Corresponding Source along with the object code. If the place to copy the object code is a network server, the Corresponding Source may be on a different server (operated by you or a third party) that supports equivalent copying facilities, provided you maintain clear directions next to the object code saying where to find the Corresponding Source. Regardless of what server hosts the Corresponding Source, you remain obligated to ensure that it is available for as long as needed to satisfy these requirements. e) Convey the object code using peer-topeer transmission, provided you inform other peers where the object code and Corresponding Source of the work are being offered to the general public at no charge under subsection 6d. A separable portion of the object code, whose source code is excluded from the Corresponding Source as a System Library, need not be included in conveying the object code work. A “User Product” is either (1) a “consumer product”, which means any tangible personal property which is normally used for personal, family, or household purposes, or (2) anything designed or sold for incorporation into a dwelling. In determining whether a product is a consumer product, doubtful cases shall be resolved in favor of coverage. For a particular product received by a particular user, “normally used” refers to a typical or common use of that class of product, regardless of the status of the particular user or of the way in which the particular user actually uses, or expects or is expected to use, the product. A product is a consumer product regardless of whether the product has substantial commercial, industrial or non-consumer uses, unless such uses represent the only significant mode of use of the product. “Installation Information” for a User Product means any methods, procedures, authorization keys, or other information required to install and execute modified versions of a covered work in that User Product from a modified version of its Corresponding Source. The information must suffice to ensure that the continued functioning of the modified object code is in no case prevented or interfered with solely because modification has been made. If you convey an object code work under this section in, or with, or specifically for use in, a User Product, and the conveying occurs as part of a transaction in which the right of possession and use of the User Product is transferred to the recipient in perpetuity or for a fixed term (regardless of how the transaction is characterized), the Corresponding Source conveyed under this section must be accompanied by the Installation Information. But this requirement does not apply if neither you nor any third party retains the ability to install modified object code on the User Product (for example, the work has been installed in ROM). The requirement to provide Installation Information does not include a requirement to continue to provide support service, warranty, or updates for a work that has been modified or installed by the recipient, or for the User Product in which it has been modified or installed. Access to a network may be denied when the modification itself materially and adversely affects the operation of the network or violates the rules and protocols for communication across the network. Corresponding Source conveyed, and Installation Information provided, in accord with this section must be in a format that is publicly documented (and with an implementation available to the public in source code form), and must require no special password or key for unpacking, reading or copying. 7. Additional Terms. “Additional permissions” are terms that supplement the terms of this License by making exceptions from one or more of its conditions. Additional permissions that are applicable to the entire Program shall be treated as though they were included in this License, to the extent that they are valid under applicable law. If additional permissions apply only to part of the Program, that part may be used separately under those permissions, but the entire Program remains governed by this License without regard to the additional permissions. When you convey a copy of a covered work, you may at your option remove any additional permissions from that copy, or from any part of it. (Additional permissions may be written to require their own removal in certain cases when you modify the work.) You may place additional permissions on material, added by you to a covered work, for which you have or can give appropriate copyright permission. Notwithstanding any other provision of this License, for material you add to a covered work, you may (if authorized by the copyright holders of that material) supplement the terms of this License with terms: a) Disclaiming warranty or limiting liability differently from the terms of sections 15 and 16 of this License; or b) Requiring preservation of specified reasonable legal notices or author attributions in that material or in the Appropriate Legal Notices displayed by works containing it; or c) Prohibiting misrepresentation of the origin of that material, or requiring that modified versions of such material be marked in reasonable ways as different from the original version; or d) Limiting the use for publicity purposes of names of licensors or authors of the material; or e) Declining to grant rights under trademark law for use of some trade names, trademarks, or service marks; or f) Requiring indemnification of licensors and authors of that material by anyone who conveys the material (or modified versions of it) with contractual assumptions of liability to the recipient, for any liability that these contractual assumptions directly impose on those licensors and authors. All other non-permissive additional terms are considered “further restrictions” within the meaning of section 10. If the Program as you received it, or any part of it, contains a notice stating that it is governed by this License along with a term that is a further restriction, you may remove that term. If a license document contains a further restriction but permits relicensing or conveying under this License, you may add to a covered work material governed by the terms of that license document, provided that the further restriction does not survive such relicensing or conveying. If you add terms to a covered work in accord with this section, you must place, in the relevant source files, a statement of the additional terms that apply to those files, or a notice indicating where to find the applicable terms. Additional terms, permissive or nonpermissive, may be stated in the form of a separately written license, or stated as exceptions; the above requirements apply either way. 8. Termination. You may not propagate or modify a covered work except as expressly provided under this License. Any attempt otherwise to propagate or modify it is void, and will automatically terminate your rights under this License (including any patent licenses granted under the third paragraph of section 11). from the original licensors, to run, modify and propagate that work, subject to this License. You are not responsible for enforcing compliance by third parties with this License. However, if you cease all violation of this License, then your license from a particular copyright holder is reinstated (a) provisionally, unless and until the copyright holder explicitly and finally terminates your license, and (b) permanently, if the copyright holder fails to notify you of the violation by some reasonable means prior to 60 days after the cessation. An “entity transaction” is a transaction transferring control of an organization, or substantially all assets of one, or subdividing an organization, or merging organizations. If propagation of a covered work results from an entity transaction, each party to that transaction who receives a copy of the work also receives whatever licenses to the work the party's predecessor in interest had or could give under the previous paragraph, plus a right to possession of the Corresponding Source of the work from the predecessor in interest, if the predecessor has it or can get it with reasonable efforts. Moreover, your license from a particular copyright holder is reinstated permanently if the copyright holder notifies you of the violation by some reasonable means, this is the first time you have received notice of violation of this License (for any work) from that copyright holder, and you cure the violation prior to 30 days after your receipt of the notice. Termination of your rights under this section does not terminate the licenses of parties who have received copies or rights from you under this License. If your rights have been terminated and not permanently reinstated, you do not qualify to receive new licenses for the same material under section 10. 9. Acceptance Not Required for Having Copies. You are not required to accept this License in order to receive or run a copy of the Program. Ancillary propagation of a covered work occurring solely as a consequence of using peer-to-peer transmission to receive a copy likewise does not require acceptance. However, nothing other than this License grants you permission to propagate or modify any covered work. These actions infringe copyright if you do not accept this License. Therefore, by modifying or propagating a covered work, you indicate your acceptance of this License to do so. 10. Automatic Licensing of Downstream Recipients. Each time you convey a covered work, the recipient automatically receives a license You may not impose any further restrictions on the exercise of the rights granted or affirmed under this License. For example, you may not impose a license fee, royalty, or other charge for exercise of rights granted under this License, and you may not initiate litigation (including a cross-claim or counterclaim in a lawsuit) alleging that any patent claim is infringed by making, using, selling, offering for sale, or importing the Program or any portion of it. 11. Patents. A “contributor” is a copyright holder who authorizes use under this License of the Program or a work on which the Program is based. The work thus licensed is called the contributor's “contributor version”. A contributor's “essential patent claims” are all patent claims owned or controlled by the contributor, whether already acquired or hereafter acquired, that would be infringed by some manner, permitted by this License, of making, using, or selling its contributor version, but do not include claims that would be infringed only as a consequence of further modification of the contributor version. For purposes of this definition, “control” includes the right to grant patent sublicenses in a manner consistent with the requirements of this License. Each contributor grants you a non-exclusive, worldwide, royalty-free patent license under the contributor's essential patent claims, to make, use, sell, offer for sale, import and otherwise run, modify and propagate the contents of its contributor version. In the following three paragraphs, a “patent license” is any express agreement or commitment, however denominated, not to enforce a patent (such as an express permission to practice a patent or covenant not to sue for patent infringement). To “grant” such a patent license to a party means to make such an agreement or commitment not to enforce a patent against the party. If you convey a covered work, knowingly relying on a patent license, and the Corresponding Source of the work is not available for anyone to copy, free of charge and under the terms of this License, through a publicly available network server or other readily accessible means, then you must either (1) cause the Corresponding Source to be so available, or (2) arrange to deprive yourself of the benefit of the patent license for this particular work, or (3) arrange, in a manner consistent with the requirements of this License, to extend the patent license to downstream recipients. “Knowingly relying” means you have actual knowledge that, but for the patent license, your conveying the covered work in a country, or your recipient's use of the covered work in a country, would infringe one or more identifiable patents in that country that you have reason to believe are valid. If, pursuant to or in connection with a single transaction or arrangement, you convey, or propagate by procuring conveyance of, a covered work, and grant a patent license to some of the parties receiving the covered work authorizing them to use, propagate, modify or convey a specific copy of the covered work, then the patent license you grant is automatically extended to all recipients of the covered work and works based on it. A patent license is “discriminatory” if it does not include within the scope of its coverage, prohibits the exercise of, or is conditioned on the non-exercise of one or more of the rights that are specifically granted under this License. You may not convey a covered work if you are a party to an arrangement with a third party that is in the business of distributing software, under which you make payment to the third party based on the extent of your activity of conveying the work, and under which the third party grants, to any of the parties who would receive the covered work from you, a discriminatory patent license (a) in connection with copies of the covered work conveyed by you (or copies made from those copies), or (b) primarily for and in connection with specific products or compilations that contain the covered work, unless you entered into that arrangement, or that patent license was granted, prior to 28 March 2007. Nothing in this License shall be construed as excluding or limiting any implied license or other defenses to infringement that may otherwise be available to you under applicable patent law. 12. No Surrender of Others' Freedom. If conditions are imposed on you (whether by court order, agreement or otherwise) that contradict the conditions of this License, they do not excuse you from the conditions of this License. If you cannot convey a covered work so as to satisfy simultaneously your obligations under this License and any other pertinent obligations, then as a consequence you may not convey it at all. For example, if you agree to terms that obligate you to collect a royalty for further conveying from those to whom you convey the Program, the only way you could satisfy both those terms and this License would be to refrain entirely from conveying the Program. 13. Use with the GNU Affero General Public License. Notwithstanding any other provision of this License, you have permission to link or combine any covered work with a work licensed under version 3 of the GNU Affero General Public License into a single combined work, and to convey the resulting work. The terms of this License will continue to apply to the part which is the covered work, but the special requirements of the GNU Affero General Public License, section 13, concerning interaction through a network will apply to the combination as such. 14. Revised Versions of this License. The Free Software Foundation may publish revised and/ or new versions of the GNU General Public License from time to time. Such new versions will be similar in spirit to the present version, but may differ in detail to address new problems or concerns. Each version is given a distinguishing version number. If the Program specifies that a certain numbered version of the GNU General Public License “or any later version” applies to it, you have the option of following the terms and conditions either of that numbered version or of any later version published by the Free Software Foundation. If the Program does not specify a version number of the GNU General Public License, you may choose any version ever published by the Free Software Foundation. If the Program specifies that a proxy can decide which future versions of the GNU General Public License can be used, that proxy's public statement of acceptance of a version permanently authorizes you to choose that version for the Program. Later license versions may give you additional or different permissions. However, no additional obligations are imposed on any author or copyright holder as a result of your choosing to follow a later version. 15. Disclaimer of Warranty. THERE IS NO WARRANTY FOR THE PROGRAM, TO THE EXTENT PERMITTED BY APPLICABLE LAW. EXCEPT WHEN OTHERWISE STATED IN WRITING THE COPYRIGHT HOLDERS AND/OR OTHER PARTIES PROVIDE THE PROGRAM “AS IS” WITHOUT WARRANTY OF ANY KIND, EITHER EXPRESSED OR IMPLIED, INCLUDING, BUT NOT LIMITED TO, THE IMPLIED WARRANTIES OF MERCHANTABILITY AND FITNESS FOR A PARTICULAR PURPOSE. THE ENTIRE RISK AS TO THE QUALITY AND PERFORMANCE OF THE PROGRAM IS WITH YOU. SHOULD THE PROGRAM PROVE DEFECTIVE, YOU ASSUME THE COST OF ALL NECESSARY SERVICING, REPAIR OR CORRECTION. 16. Limitation of Liability. IN NO EVENT UNLESS REQUIRED BY APPLICABLE LAW OR AGREED TO IN WRITING WILL ANY COPYRIGHT HOLDER, OR ANY OTHER PARTY WHO MODIFIES AND/OR CONVEYS THE PROGRAM AS PERMITTED ABOVE, BE LIABLE TO YOU FOR DAMAGES, INCLUDING ANY GENERAL, SPECIAL, INCIDENTAL OR CONSEQUENTIAL DAMAGES ARISING OUT OF THE USE OR INABILITY TO USE THE PROGRAM (INCLUDING BUT NOT LIMITED TO LOSS OF DATA OR DATA BEING RENDERED INACCURATE OR LOSSES SUSTAINED BY YOU OR THIRD PARTIES OR A FAILURE OF THE PROGRAM TO OPERATE WITH ANY OTHER PROGRAMS), EVEN IF SUCH HOLDER OR OTHER PARTY HAS BEEN ADVISED OF THE POSSIBILITY OF SUCH DAMAGES. 17. Interpretation of Sections 15 and 16. If the disclaimer of warranty and limitation of liability provided above cannot be given local legal effect according to their terms, reviewing courts shall apply local law that most closely approximates an absolute waiver of all civil liability in connection with the Program, unless a warranty or assumption of liability accompanies a copy of the Program in return for a fee. END OF TERMS AND CONDITIONS GNU LESSER GENERAL PUBLIC LICENSE Version 2.1, February 1999 Copyright (C) 1991, 1999 Free Software Foundation, Inc. 51 Franklin Street, Fifth Floor, Boston, MA 02110-1301 USA Everyone is permitted to copy and distribute verbatim copies of this license document, but changing it is not allowed. [This is the first released version of the Lesser GPL. It also counts as the successor of the GNU Library Public License, version 2, hence the version number 2.1.] Preamble The licenses for most software are designed to take away your freedom to share and change it. By contrast, the GNU General Public Licenses are intended to guarantee your freedom to share and change free software to make sure the software is free for all its users. This license, the Lesser General Public License, applies to some specially designated software packages-typically libraries-of the Free Software Foundation and other authors who decide to use it. You can use it too, but we suggest you first think carefully about whether this license or the ordinary General Public License is the better strategy to use in any particular case, based on the explanations below. When we speak of free software, we are referring to freedom of use, not price. Our General Public Licenses are designed to make sure that you have the freedom to distribute copies of free software (and charge for this service if you wish); that you receive source code or can get it if you want it; that you can change the software and use pieces of it in new free programs; and that you are informed that you can do these things. To protect your rights, we need to make restrictions that forbid distributors to deny you these rights or to ask you to surrender these rights. These restrictions translate to certain responsibilities for you if you distribute copies of the library or if you modify it. For example, if you distribute copies of the library, whether gratis or for a fee, you must give the recipients all the rights that we gave you. You must make sure that they, too, receive or can get the source code. If you link other code with the library, you must provide complete object files to the recipients, so that they can relink them with the library after making changes to the library and recompiling it. And you must show them these terms so they know their rights. We protect your rights with a two-step method: (1) we copyright the library, and (2) we offer you this license, which gives you legal permission to copy, distribute and/or modify the library. To protect each distributor, we want to make it very clear that there is no warranty for the free library. Also, if the library is modified by someone else and passed on, the recipients should know that what they have is not the original version, so that the original author’s reputation will not be affected by problems that might be introduced by others. Finally, software patents pose a constant threat to the existence of any free program. We wish to make sure that a company cannot effectively restrict the users of a free program by obtaining a restrictive license from a patent holder. Therefore, we insist that any patent license obtained for a version of the library must be consistent with the full freedom of use specified in this license. Most GNU software, including some libraries, is covered by the ordinary GNU General Public License. This license, the GNU Lesser General Public License, applies to certain designated libraries, and is quite different from the ordinary General Public License. We use this license for certain libraries in order to permit linking those libraries into non-free programs. When a program is linked with a library, whether statically or using a shared library, the combination of the two is legally speaking a combined work, a derivative of the original library. The ordinary General Public License therefore permits such linking only if the entire combination fits its criteria of freedom. The Lesser General Public License permits more lax criteria for linking other code with the library. We call this license the “Lesser” General Public License because it does Less to protect the user’s freedom than the ordinary General Public License. It also provides other free software developers Less of an advantage over competing nonfree programs. These disadvantages are the reason we use the ordinary General Public License for many libraries. However, the Lesser license provides advantages in certain special circumstances. For example, on rare occasions, there may be a special need to encourage the widest possible use of a certain library, so that it becomes a de-facto standard. To achieve this, non-free programs must be allowed to use the library. A more frequent case is that a free library does the same job as widely used non-free libraries. In this case, there is little to gain by limiting the free library to free software only, so we use the Lesser General Public License. In other cases, permission to use a particular library in non-free programs enables a greater number of people to use a large body of free software. For example, permission to use the GNU C Library in non-free programs enables many more people to use the whole GNU operating system, as well as its variant, the GNU/ Linux operating system. Although the Lesser General Public License is Less protective of the users’ freedom, it does ensure that the user of a program that is linked with the Library has the freedom and the wherewithal to run that program using a modified version of the Library. The precise terms and conditions for copying, distribution and modification follow. Pay close attention to the difference between a “work based on the library” and a “work that uses the library”. The former contains code derived from the library, whereas the latter must be combined with the library in order to run. TERMS AND CONDITIONS FOR COPYING, DISTRIBUTION AND MODIFICATION 0. This License Agreement applies to any software library or other program which contains a notice placed by the copyright holder or other authorized party saying it may be distributed under the terms of this Lesser General Public License (also called “this License”). Each licensee is addressed as “you”. A “library” means a collection of software functions and/ or data prepared so as to be conveniently linked with application programs (which use some of those functions and data) to form executables. The “Library”, below, refers to any such software library or work which has been distributed under these terms. A “work based on the Library” means either the Library or any derivative work under copyright law: that is to say, a work containing the Library or a portion of it, either verbatim or with modifications and/or translated straightforwardly into another language. (Hereinafter, translation is included without limitation in the term “modification”.) “Source code” for a work means the preferred form of the work for making modifications to it. For a library, complete source code means all the source code for all modules it contains, plus any associated interface definition files, plus the scripts used to control compilation and installation of the library. Activities other than copying, distribution and modification are not covered by this License; they are outside its scope. The act of running a program using the Library is not restricted, and output from such a program is covered only if its contents constitute a work based on the Library (independent of the use of the Library in a tool for writing it). Whether that is true depends on what the Library does and what the program that uses the Library does. 1. You may copy and distribute verbatim copies of the Library’s complete source code as you receive it, in any medium, provided that you conspicuously and appropriately publish on each copy an appropriate copyright notice and disclaimer of warranty; keep intact all the notices that refer to this License and to the absence of any warranty; and distribute a copy of this License along with the Library. You may charge a fee for the physical act of transferring a copy, and you may at your option offer warranty protection in exchange for a fee. 2. You may modify your copy or copies of the Library or any portion of it, thus forming a work based on the Library, and copy and distribute such modifications or work under the terms of Section 1 above, provided that you also meet all of these conditions: a) The modified work must itself be a software library. b) You must cause the files modified to carry prominent notices stating that you changed the files and the date of any change. c) You must cause the whole of the work to be licensed at no charge to all third parties under the terms of this License. d) If a facility in the modified Library refers to a function or a table of data to be supplied by an application program that uses the facility, other than as an argument passed when the facility is invoked, then you must make a good faith effort to ensure that, in the event an application does not supply such function or table, the facility still operates, and performs whatever part of its purpose remains meaningful. (For example, a function in a library to compute square roots has a purpose that is entirely well-defined independent of the application. Therefore, Subsection 2d requires that any application-supplied function or table used by this function must be optional: if the application does not supply it, the square root function must still compute square roots.) These requirements apply to the modified work as a whole. If identifiable sections of that work are not derived from the Library, and can be reasonably considered independent and separate works in themselves, then this License, and its terms, do not apply to those sections when you distribute them as separate works. But when you distribute the same sections as part of a whole which is a work based on the Library, the distribution of the whole must be on the terms of this License, whose permissions for other licensees extend to the entire whole, and thus to each and every part regardless of who wrote it. Thus, it is not the intent of this section to claim rights or contest your rights to work written entirely by you; rather, the intent is to exercise the right to control the distribution of derivative or collective works based on the Library. In addition, mere aggregation of another work not based on the Library with the Library (or with a work based on the Library) on a volume of a storage or distribution medium does not bring the other work under the scope of this License. 3. You may opt to apply the terms of the ordinary GNU General Public License instead of this License to a given copy of the Library. To do this, you must alter all the notices that refer to this License, so that they refer to the ordinary GNU General Public License, version 2, instead of to this License. (If a newer version than version 2 of the ordinary GNU General Public License has appeared, then you can specify that version instead if you wish.) Do not make any other change in these notices. Once this change is made in a given copy, it is irreversible for that copy, so the ordinary GNU General Public License applies to all subsequent copies and derivative works made from that copy. This option is useful when you wish to copy part of the code of the Library into a program that is not a library. 4. You may copy and distribute the Library (or a portion or derivative of it, under Section 2) in object code or executable form under the terms of Sections 1 and 2 above provided t hat you accompany it with the complete corresponding machine-readable source code, which must be distributed under the terms of Sections 1 and 2 above on a medium customarily used for software interchange. If distribution of object code is made by offering access to copy from a designated place, then offering equivalent access to copy the source code from the same place satisfies the requirement to distribute the source code, even though third parties are not compelled to copy the source along with the object code. 5. A program that contains no derivative of any portion of the Library, but is designed to work with the Library by being compiled or linked with it, is called a “work that uses the Library”. Such a work, in isolation, is not a derivative work of the Library, and therefore falls outside the scope of this License. However, linking a “work that uses the Library” with the Library creates an executable that is a derivative of the Library (because it contains portions of the Library), rather than a “work that uses the library”. The executable is therefore covered by this License. Section 6 states terms for distribution of such executables. When a “work that uses the Library” uses material from a header file that is part of the Library, the object code for the work may be a derivative work of the Library even though the source code is not. Whether this is true is especially significant if the work can be linked without the Library, or if the work is itself a library. The threshold for this to be true is not precisely defined by law. If such an object file uses only numerical parameters, data structure layouts and accessors, and small macros and small inline functions (ten lines or less in length), then the use of the object file is unrestricted, regardless of whether it is legally a derivative work. (Executables containing this object code plus portions of the Library will still fall under Section 6.) Otherwise, if the work is a derivative of the Library, you may distribute the object code for the work under the terms of Section 6. Any executables containing that work also fall under Section 6, whether or not they are linked directly with the Library itself. 6. As an exception to the Sections above, you may also combine or link a “work that uses the Library” with the Library to produce a work containing portions of the Library, and distribute that work under terms of your choice, provided that the terms permit modification of the work for the customer’s own use and reverse engineering for debugging such modifications. You must give prominent notice with each copy of the work that the Library is used in it and that the Library and its use are covered by this License. You must supply a copy of this License. If the work during execution displays copyright notices, you must include the copyright notice for the Library among them, as well as a reference directing the user to the copy of this License. Also, you must do one of these things: a) Accompany the work with the complete corresponding machine-readable source code for the Library including whatever changes were used in the work (which must be distributed under Sections 1 and 2 above); and, if the work is an executable linked with the Library, with the complete machine readable “ work that uses the Library”, as object code and/or source code, so that the user can modify the Library and then relink to produce a modified executable containing the modified Library. (It is understood that the user who changes the contents of definitions files in the Library will not necessarily be able to recompile the application to use the modified definitions.) b) Use a suitable shared library mechanism for linking with the Library. A suitable mechanism is one that (1) uses at run time a copy of the library already present on the user’s computer system, rather than copying library functions into the executable, and (2) will operate properly with a modified version of the library, if the user installs one, as long as the modified version is interfacecompatible with the version that the work was made with. c) Accompany the work with a written offer, valid for at least three years, to give the same user the materials specified in Subsection 6a, above, for a charge no more than the cost of performing this distribution. d) If distribution of the work is made by offering access to copy from a designated place, offer equivalent access to copy the above specified materials from the same place. e) Verify that the user has already received a copy of these materials or that you have already sent this user a copy. For an executable, the required form of the “work that uses the Library” must include any data and utility programs needed for reproducing the executable from it. However, as a special exception, the materials to be distributed need not include anything that is normally distributed (in either source or binary form) with the major components (compiler, kernel, and so on) of the operating system on which the executable runs, unless that component itself accompanies the executable. It may happen that this requirement contradicts the license restrictions of other proprietary libraries that do not normally accompany the operating system. Such a contradiction means you cannot use both them and the Library together in an executable that you distribute. 7. You may place library facilities that are a work based on the Library side-byside in a single library together with other library facilities not covered by this License, and distribute such a combined library, provided that the separate distribution of the work based on the Library and of the other library facilities is otherwise permitted, and provided that you do these two things: a) Accompany the combined library with a copy of the same work based on the Library, uncombined with any other library facilities. This must be distributed under the terms of the Sections above. b) Give prominent notice with the combined library of the fact that part of it is a work based on the Library, and explaining where to find the accompanying uncombined form of the same work. 8. You may not copy, modify, sublicense, link with, or distribute the Library except as expressly provided under this License. Any attempt otherwise to copy, modify, sublicense, link with, or distribute the Library is void, and will automatically terminate your rights under this License. However, parties who have received copies, or rights, from you under this License will not have their licenses terminated so long as such parties remain in full compliance. 9. You are not required to accept this License, since you have not signed it. However, nothing else grants you permission to modify or distribute the Library or its derivative works. These actions are prohibited by law if you do not accept this License. Therefore, by modifying or distributing the Library (or any work based on the Library), you indicate your acceptance of this License to do so, and all its terms and conditions for copying, distributing or modifying the Library or works based on it. 10. Each time you redistribute the Library (or any work based on the Library), the recipient automatically receives a license from the original licensor to copy, distribute, link with or modify the Library subject to these terms and conditions. You may not impose any further restrictions on the recipients’ exercise of the rights granted herein. You are not responsible for enforcing compliance by third parties with this License. 11. If, as a consequence of a court judgment or allegation of patent infringement or for any other reason (not limited to patent issues), conditions are imposed on you (whether by court order, agreement or otherwise) that contradict the conditions of this License, they do not excuse you from the conditions of this License. If you cannot distribute so as to satisfy simultaneously your obligations under this License and any other pertinent obligations, then as a consequence you may not distribute the Library at all. For example, if a patent license would not permit royalty free redistribution of the Library by all those who receive copies directly or indirectly through you, then the only way you could satisfy both it and this License would be to refrain entirely from distribution of the Library. If any portion of this section is held invalid or unenforceable under any particular circumstance, the balance of the section is intended to apply, and the section as a whole is intended to apply in other circumstances. It is not the purpose of this section to induce you to infringe any patents or other property right claims or to contest validity of any such claims; this section has the sole purpose of protecting the integrity of the free software distribution system which is implemented by public license practices. Many people have made generous contributions to the wide range of software distributed through that system in reliance on consistent application of that system; it is up to the author/donor to decide if he or she is willing to distribute software through any other system and a licensee cannot impose that choice. This section is intended to make thoroughly clear what is believed to be a consequence of the rest of this License. 12. If the distribution and/or use of the Library is restricted in certain countries either by patents or by copyrighted interfaces, the original copyright holder who places the Library under this License may add an explicit geographical distribution limitation excluding those countries, so that distribution is permitted only in or among countries not thus excluded. In such case, this License incorporates the limitation as if written in the body of this License. 13. The Free Software Foundation may publish revised and/or new versions of the Lesser General Public License from time to time. Such new versions will be similar in spirit to the present version, but may differ in detail to address new problems or concerns. Each version is given a distinguishing version number. If the Library specifies a version number of this License which applies to it and “any later version”, you have the option of following the terms and conditions either of that version or of any later version published by the Free Software Foundation. If the Library does not specify a license version number, you may choose any version ever published by the Free Software Foundation. 14. If you wish to incorporate parts of the Library into other free programs whose distribution conditions are incompatible with these, write to the author to ask for permission. For software which is copyrighted by the Free Software Foundation, write to the Free Software Foundation; we sometimes make exceptions for this. Our decision will be guided by the two goals of preserving the free status of all derivatives of our free software and of promoting the sharing and reuse of software generally. NO WARRANTY 15. BECAUSE THE LIBRARY IS LICENSED FREE OF CHARGE, THERE IS NO WARRANTY FOR THE LIBRARY, TO THE EXTENT PERMITTED BY APPLICABLE LAW. EXCEPT WHEN OTHERWISE STATED IN WRITING THE COPYRIGHT HOLDERS AND/ OR OTHER PARTIES PROVIDE THE LIBRARY “AS IS” WITHOUT WARRANTY OF ANY KIND, EITHER EXPRESSED OR IMPLIED, INCLUDING, BUT NOT LIMITED TO, THE IMPLIED WARRANTIES OF MERCHANTABILITY AND FITNESS FOR A PARTICULAR PURPOSE. THE ENTIRE RISK AS TO THE QUALITY AND PERFORMANCE OF THE LIBRARY IS WITH YOU. SHOULD THE LIBRARY PROVE DEFECTIVE, YOU ASSUME THE COST OF ALL NECESSARY SERVICING, REPAIR OR CORRECTION. 16. IN NO EVENT UNLESS REQUIRED BY APPLICABLE LAW OR AGREED TO IN WRITING WILL ANY COPYRIGHT HOLDER, OR ANY OTHER PARTY WHO MAY MODIFY AND/OR REDISTRIBUTE THE LIBRARY AS PERMITTED ABOVE, BE LIABLE TO YOU FOR DAMAGES, INCLUDING ANY GENERAL, SPECIAL, INCIDENTAL OR CONSEQUENTIAL DAMAGES ARISING OUT OF THE USE OR INABILITY TO USE THE LIBRARY (INCLUDING BUT NOT LIMITED TO LOSS OF DATA OR DATA BEING RENDERED INACCURATE OR LOSSES SUSTAINED BY YOU OR THIRD PARTIES OR A FAILURE OF THE LIBRARY TO OPERATE WITH ANY OTHER SOFTWARE), EVEN IF SUCH HOLDER OR OTHER PARTY HAS BEEN ADVISED OF THE POSSIBILITY OF SUCH DAMAGES. END OF TERMS AND CONDITIONS How to Apply These Terms to Your New Libraries If you develop a new library, and you want it to be of the greatest possible use to the public, we recommend making it free software that everyone can redistribute and change. You can do so by permitting redistribution under these terms (or, alternatively, under the terms of the ordinary General Public License). To apply these terms, attach the following notices to the library. It is safest to attach them to the start of each source file to most effectively convey the exclusion of warranty; and each file should have at least the “copyright” line and a pointer to where the full notice is found. one line to give the library’s name and an idea of what it does. Copyright (C) year name of author This library is free software; you can redistribute it and/ or modify it under the terms of the GNU Lesser General Public License as published by the Free Software Foundation; either version 2.1 of the License, or (at your option) any later version. This library is distributed in the hope that it will be useful, but WITHOUT ANY WARRANTY; without even the implied warranty of MERCHANTABILITY or FITNESS FOR A PARTICULAR PURPOSE. See the GNU Lesser General Public License for more details. You should have received a copy of the GNU Lesser General Public License along with this library; if not, write to the Free Software Foundation, Inc., 51 Franklin Street, Fifth Floor, Boston, MA 02110-1301 USA Also add information on how to contact you by electronic and paper mail. You should also get your employer (if you work as a programmer) or your school, if any, to sign a “copyright disclaimer” for the library, if necessary. Here is a sample; alter the names: Yoyodyne, Inc., hereby disclaims all copyright interest in the library ‘Frob’ (a library for tweaking knobs) written by James Random Hacker. signature of Ty Coon, 1 April 1990 Ty Coon, President of Vice. OpenSSL LICENSE Copyright (c) 1998-2006 The OpenSSL Project. All rights reserved. Redistribution and use in source and binary forms, with or without modification, are permitted provided that the following conditions are met: 1. Redistributions of source code must retain the above copyright notice, this list of conditions and the following disclaimer. 2. Redistributions in binary form must reproduce the above copyright notice, this list of conditions and the following disclaimer in the documentation and/or other materials provided with the distribution. 3. All advertising materials mentioning features or use of this software must display the following acknowledgment: “This product includes software developed by the OpenSSL Project for use in the OpenSSL Toolkit. (http://www. openssl.org/)” 4. The names “OpenSSL Toolkit” and “OpenSSL Project” must not be used to endorse or promote products derived from this software without prior written permission. For written permission, please contact [email protected]. 5. Products derived from this software may not be called “OpenSSL” nor may “OpenSSL” appear in their names without prior written permission of the OpenSSL Project. 6. Redistributions of any form whatsoever must retain the following acknowledgment: “This product includes software developed by the OpenSSL Project for use in the OpenSSL Toolkit (http://www.openssl.org/)” THIS SOFTWARE IS PROVIDED BY THE OpenSSL PROJECT “AS IS” AND ANY EXPRESSED OR IMPLIED WARRANTIES, INCLUDING, BUT NOT LIMITED TO, THE IMPLIED WARRANTIES OF MERCHANTABILITY AND FITNESS FOR A PARTICULAR PURPOSE ARE DISCLAIMED. IN NO EVENT SHALL THE OpenSSL PROJECT OR ITS CONTRIBUTORS BE LIABLE FOR ANY DIRECT, INDIRECT, INCIDENTAL, SPECIAL, EXEMPLARY, OR CONSEQUENTIAL DAMAGES (INCLUDING, BUT NOT LIMITED TO, PROCUREMENT OF SUBSTITUTE GOODS OR SERVICES; LOSS OF USE, DATA, OR PROFITS; OR BUSINESS INTERRUPTION) HOWEVER CAUSED AND ON ANY THEORY OF LIABILITY, WHETHER IN CONTRACT, STRICT LIABILITY, OR TORT (INCLUDING NEGLIGENCE OR OTHERWISE) ARISING IN ANY WAY OUT OF THE USE OF THIS SOFTWARE, EVEN IF ADVISED OF THE POSSIBILITY OF SUCH DAMAGE. This product includes cryptographic software written by Eric Young ([email protected]). This product includes software written by Tim Hudson([email protected]). Original SSLeay License Copyright (C) 1995-1998 Eric Young (eay@ cryptsoft. com) All rights reserved. This package is an SSL implementation written by Eric Young (eay@cryptsoft. com). The implementation was written so as to conform with Netscapes SSL. This library is free for commercial and non-commercial use as long as the following conditions are aheared to. The following conditions apply to all code found in this distribution, be it the RC4, RSA, lhash, DES, etc., code; not just the SSL code. The SSL documentation included with this distribution is covered by the same copyright terms except that the holder is Tim Hudson ([email protected]). Copyright remains Eric Young’s, and as such any Copyright notices in the code are not to be removed. If this package is used in a product, Eric Young should be given attribution as the author of the parts of the library used. This can be in the form of a textual message at program startup or in documentation (online or textual) provided with the package. Redistribution and use in source and binary forms, with or without modification, are permitted provided that the following conditions are met: 1. Redistributions of source code must retain the copyright notice, this list of conditions and the following disclaimer. 2. Redistributions in binary form must reproduce the above copyright notice, this list of conditions and the following disclaimer in the documentation and/or other materials provided with the distribution. 3. All advertising materials mentioning features or use of this software must display the following acknowledgement: “This product includes cryptographic software written by Eric Young (eay@ cryptsoft.com)” The word ‘cryptographic’ can be left out if the rouines from the library being used are not cryptographic related :-). 4. If you include any Windows specific code (or a derivative thereof) from the apps directory (application code) you must include an acknowledgement: “This product includes software written by Tim Hudson (tjh@ cryptsoft.com)” THIS SOFTWARE IS PROVIDED BY ERIC YOUNG ‘‘AS IS AND ANY EXPRESS OR IMPLIED WARRANTIES, INCLUDING, BUT NOT LIMITED TO, THE IMPLIED WARRANTIES OF MERCHANTABILITY AND FITNESS FOR A PARTICULAR PURPOSE ARE DISCLAIMED. IN NO EVENT SHALL THE AUTHOR OR CONTRIBUTORS BE LIABLE FOR ANY DIRECT, INDIRECT, INCIDENTAL, SPECIAL, EXEMPLARY, OR CONSEQUENTIAL DAMAGES (INCLUDING, BUT NOT LIMITED TO, PROCUREMENT OF SUBSTITUTE GOODS OR SERVICES; LOSS OF USE, DATA, OR PROFITS; OR BUSINESS INTERRUPTION) HOWEVER CAUSED AND ON ANY THEORY OF LIABILITY, WHETHER IN CONTRACT, STRICT LIABILITY, OR TORT (INCLUDING NEGLIGENCE OR OTHERWISE) ARISING IN ANY WAY OUT OF THE USE OF THIS SOFTWARE, EVEN IF ADVISED OF THE POSSIBILITY OF SUCH DAMAGE. The licence and distribution terms for any publically available version or derivative of this code cannot be changed. i.e. this code cannot simply be copied and put under another distribution licence [including the GNU Public Licence]. Samsung Techwin värnar om miljön i alla produkttillverkningssteg och vidtar ett antal åtgärder för att erbjuda kunderna miljövänligare produkter. Eco-märkningen symboliserar Samsung Techwins strävan att skapa miljövänligaprodukter och visar att produkten uppfyller EU RoHS Directive. Korrekt avfallshantering av produkten (elektriska och elektroniska produkter) Denna markering på produkten, tillbehören och i manualen anger att produkten och de elektroniska tillbehören (t.ex. laddare, headset, USBkabel) inte bör sorteras tillsammans med annat hushållsavfall när de kasseras. Till förebyggande av skada på miljö och hälsa bör dessa föremål hanteras separat för ändamålsenlig återvinning av beståndsdelarna. Hushållsanvändare bör kontakta den återförsäljare som sålt produkten eller sin kommun för vidare information om var och hur produkten och tillbehören kan återvinnas på ett miljösäkert sätt. Företagsanvändare bör kontakta leverantören samt verifi era angivna villkor i köpekontraktet. Produkten och de elektroniska tillbehören bör inte hanteras tillsammans med annat kommersiellt avfall. Korrekt avfallshantering av den här produktens batterier (Gäller i EU och andra europeiska länder med separata insamlingssystem för batterier.) Märkningen på batteriet, manualen eller förpackningen visar att batterierna i den här produkten inte får slängas i hushållssoporna vid livsslut. Det kan finnas en märkning med de kemiska symbolerna Hg, Cd eller Pb vilket visar att batteriet innehåller kvicksilver, kadmium eller bly över referensnivåerna i EU-direktivet 2006/66. Om batterierna inte avfallshanteras korrekt kan dessa ämnen orsaka skador på människors hälsa eller på miljön. För att skydda våra naturresurser och främja återvinning ska batterierna separeras från andra typer av avfall och återvinnas via det lokala återvinningssystemet. SÄLJNÄTVERK SAMSUNG TECHWIN CO., LTD. Samsungtechwin R&D Center, 701, Sampyeong-dong, Bundang-gu, Seongnam-si, Gyeonggi-do, Korea, 463-400 TEL : +82-70-7147-8740~60 FAX : +82-31-8018-3745 SAMSUNG TECHWIN AMERICA Inc. 100 Challenger Rd. Suite 700 Ridgefield Park, NJ 07660 Toll Free : +1-877-213-1222 Direct : +1-201-325-6920 Fax : +1-201-373-0124 www.samsungcctvusa.com www.samsungtechwin.com www.samsungsecurity.com www.samsungipolis.com SAMSUNG TECHWIN EUROPE LTD. Samsung House, 1000 Hillswood Drive, Hillswood Business Park Chertsey, Surrey, UNITED KINGDOM KT16 OPS TEL : +44-1932-45-5300 FAX : +44-1932-45-5325