1
Train
User Manual
© 2008 LMP
All rights reserved. No parts of this work may be reproduced in any form or by any means graphic, electronic, or mechanical, including photocopying, recording, taping, or information
storage and retrieval systems - without the written permission of the publisher.
Products that are referred to in this document may be either trademarks and/or registered
trademarks of the respective owners. The publisher and the author make no claim to these
trademarks.
While every precaution has been taken in the preparation of this document, the publisher and the
author assume no responsibility for errors or omissions, or for damages resulting from the use of
information contained in this document or from the use of programs and source code that may
accompany it. In no event shall the publisher and the author be liable for any loss of profit or any
other commercial damage caused or alleged to have been caused directly or indirectly by this
document.
The text of this manual is subject to change without notice. The current version of the manual is
available from the Train documentation page: www.lmp.co.uk/train_docs.html
© 2008 LMP
Contents
I
Table of Contents
Part I Introducing Electronic Reporting
5
Part II Getting Started
8
1 Logging
...................................................................................................................................
On
8
2 Exiting ...................................................................................................................................
Train
8
3 Screen...................................................................................................................................
Layout
9
4 Email Options
................................................................................................................................... 9
Part III Today
14
Part IV Alert (Report Overview)
20
1 Overdue
...................................................................................................................................
Inspections
24
2 Repairs
................................................................................................................................... 26
3 Not Available
................................................................................................................................... 27
Part V View
30
Part VI History
36
Part VII Dates
42
Part VIII Graph
48
1 Working
...................................................................................................................................
with Graph
48
Part IX Search
54
1 Working
...................................................................................................................................
with Search Results
57
Part X Location
62
Part XI Advanced Features
68
1 Setup ...................................................................................................................................
Filter
68
2 Grouping,
...................................................................................................................................
Sorting and Filtering Report Lists
68
Part XII Forms available within Train
Index
© 2008 LMP
74
77
I
Introducing Electronic
Reporting
Part
I
Introducing Electronic Reporting
1
5
Introducing Electronic Reporting
Q:
A:
What is an Electronic Report?
An Electronic Report is simply a computer version of a paper report. It looks the
same as the original and contains the same information.
Q:
A:
Do Electronic Reports replace paper versions of reports?
Yes. Electronic Reports remove the need to hold paper copies of reports, though a
printed copy can still be produced if necessary.
Q:
A:
How do I know if someone has changed a report?
Electronic Reports cannot be altered. The functionality of Train prevents changes
being made to reports.
Q:
A:
What are the benefits of adopting Electronic Reports?
Time - Train will process all reports and automatically identify those which require
action.
Peace of mind - Train will quickly identify any inspections which are overdue.
Faster reporting - a report can be received within minutes of leaving the inspecting
authority.
© 2008 LMP
Getting Started
Part
II
8
Train (3.01.00)
2
Getting Started
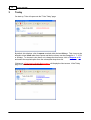
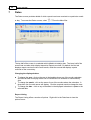
2.1
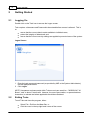
Logging On
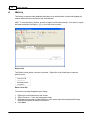
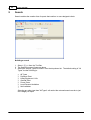
Double-click on the Train icon to access the Logon screen.
Train requires a Username and Password to be entered before access is allowed. This is
to:
ensure that the correct data is made available to individual users,
protect the integrity of data stored, and
ensure that the correct security settings are applied to prevent misuse of the system.
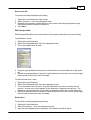
Logon Screen
1. Enter the login name and password (as provided by LMP or the System Administrator)
into the appropriate boxes.
2. Click Logon.
NOTE: Usernames and passwords within Train are not case sensitive – "M BROWN", "M
Brown", and "m brown" are all valid. However, the use of punctuation, or spaces between
characters, is relevant and where applicable should be maintained.
2.2
Exiting Train
To exit Train and close the program, either:
Select File > Exit from the Menu Bar, or
Click the cross in the top right hand corner of the screen.
© 2008 LMP
Getting Started
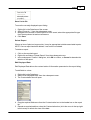
2.3
9
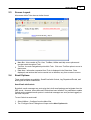
Screen Layout
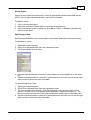
All screens within Train share a similar format:
Menu Bar - this consists of File, View, ToolBars, Utilities and Help menu options and
remains static throughout Train.
Tool Bar - the main navigational point within Train. Click on a Tool Bar option to move to
that screen.
Data Area - information requested from Train is displayed in the Data Area. Data
displayed, and actions that can be carried out on the data, vary from screen to screen.
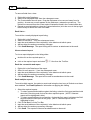
2.4
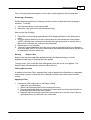
Email Options
Three email settings are available - Send Email with Outlook; Log Dispatched Emails, and
altering the format of emailed lists.
Send Email with Outlook
By default, email messages are sent using the in-built email package and originate from the
LMP server. However, where Microsoft Outlook has been installed, it is preferable to enable
Outlook as the standard email system in order that messages are sent (and are logged) on
the local computer.
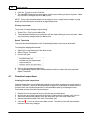
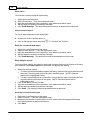
To use Outlook to send email:
1. Select Utilities > Configure from the Menu Bar.
2. The "Configure Serve" dialog box will open on the Alert Options tab.
© 2008 LMP
10
Train (3.01.00)
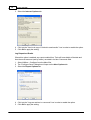
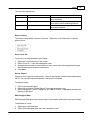
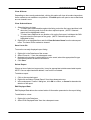
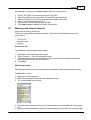
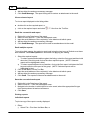
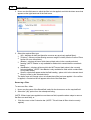
3. Select the Internet Options tab:
4. Click into the "Use local copy of Outlook to send emails." box in order to enable the option.
5. Click OK to apply the setting.
Log Dispatched Emails
Where this option is enabled, any report emailed from Train will have details of the date and
time the email was sent (and by whom) recorded in its User Comments field.
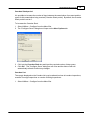
1. Select Utilities > Configure from the Menu Bar.
2. The "Configure Serve" dialog box will open on the Alert Options tab.
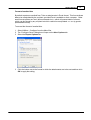
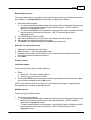
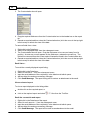
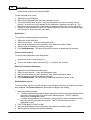
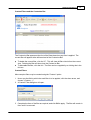
3. Select the Report Options tab:
4. Click into the "Log user actions in comments" box in order to enable the option.
5. Click OK to apply the setting.
© 2008 LMP
Getting Started
11
Format of emailed lists
By default reports are emailed from Train as attachments in Excel format. This format allows
data to be manipulated by the recipient, provided Excel is available on their computer. Other
email format options are .html (browser based view) - which will present data in a format
which can be viewed by any recipient but which cannot be manipulated - or .csv (a generic
spreadsheet format).
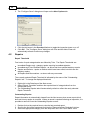
To amend the format of emailed lists:
1. Select Utilities > Configure from the Menu Bar.
2. The "Configure Serve" dialog box will open on the Alert Options tab.
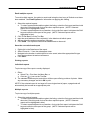
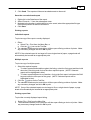
3. Select the Report Options tab:
3. Click the button next to the format in which the attachments are to be sent and then click
OK to apply the setting.
© 2008 LMP
Today
Part
III
14
3
Train (3.01.00)
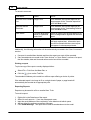
Today
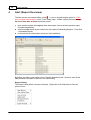
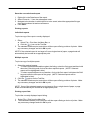
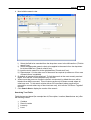
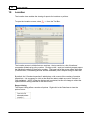
On start-up, Train will open onto the "Train Today" page:
By default, this displays a list of reports received within the last 28 days. This view may be
altered to show items rather than reports and the time-frame can be changed to 1, 7, 14, 21
or 28 days. To choose to view items or to change the time-frame, click on Reports or 28
and select the required option from the subsequent drop-down list.
Clicking on <Click here to refresh Alert screen> will display the Alert screen. If the Today
page is re-selected, the view will alter:
© 2008 LMP
Today
15
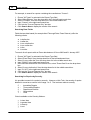
The new links operate thus:
Action
Single click
On What
Overdue Inspections
Single click
Outstanding Serious Defects
Single click
Not Availables
Result
Switches to the Alert page and displays
list of overdues
Switches to the Alert page and displays
list of items with Outstanding Defects
Switches to the Alert page and displays
list of Not Availables
Report Listing
The Report Listing offers a number of options. Right-click in the Data Area to view the
options menu:
Save List to file
To save the currently displayed report listing:
1. Right-click in the Data Area of the screen.
2. Select "Save As..." from the subsequent menu.
3. Navigate to the location in which the file is to be saved, select the appropriate file type
from the drop-down list and set a filename.
4. Click Save.
Delete Report
Where an item of plant no longer exists, it may be appropriate to delete associated reports.
NOTE: Once a report has been deleted, it can not be re-instated.
To delete a report:
1. Click on the required report.
2. Right-click and select "Delete Report" from the subsequent menu.
3. In the subsequent "Confirm" dialog box, click OK to confirm, or Cancel to abandon the
deletion of the report.
Edit Displayed Data
Edit Displayed Data allows the customization of information presented on the report listing.
To add fields to a view:
1. Right-click in the Data Area.
2. Select "Edit Displayed Data" from the subsequent menu.
© 2008 LMP
16
Train (3.01.00)
3. The Customization box will open:
4. Drag the required field name from the Customization box to the header bar on the report
list.
5. Repeat as required and then close the Customization box (click the cross in the top righthand corner) to refresh the view of the data.
To remove fields from a view:
1. Right-click in the Data Area.
2. Select "Edit Displayed Data" from the subsequent menu.
3. The Customization box will open. Drag the field name to be removed away from its
position. As soon as a cross appears on the field name, release the mouse key. The
field will be removed from the screen and will instead be listed in the Customization box.
4. Repeat as required and then close the Customization box (click the cross in the top righthand corner) to refresh the view of the data.
Email list to...
To email the currently displayed report listing:
1.
2.
3.
4.
5.
Right-click in the Data Area.
Select "Email list to..." from the subsequent menu.
Input the email address of the recipient(s) in the blank email which opens.
Add a subject line and any necessary message.
Click Send Message. The report listing will be sent as an attachment to the email.
View a selected report
To view a report displayed on the listing either:
double-click on the required report, or
click on the required report and select
View from the Tool Bar.
Email the current/viewed report
1.
2.
3.
4.
5.
Right-click in the Data Area of the report.
Select "e-mail report to..." from the subsequent menu.
Input the email address of the recipient(s) in the blank email which opens.
Add a subject line and any necessary message.
Click Send Message. The report will be sent as an attachment to the email.
© 2008 LMP
Today
17
Email multiple reports
To email multiple reports, the option to send email using the local copy of Outlook must have
been enabled. See Email Options for information on applying this setting.
1. Select the required reports:
To select reports distributed throughout the listing, select the first report and then hold
down the Control key and click on the other required reports. (NOTE: Selected
reports will be highlighted in blue).
To select reports adjacent to one another, click on the first report, hold down the Shift
key and select the last report of the group. (NOTE: Selected reports will be
highlighted in blue).
2. Click "Email Batch" on the Tool Bar.
3. Input the email address of the recipient(s) in the blank email which opens.
4. Add a subject line and any necessary message.
5. Click Send. The reports will be sent as attachments to the email.
Save the current/viewed report
1. Right-click in the Data Area of the report.
2. Select "Save As..." from the subsequent menu.
3. Navigate to the location in which the file is to be saved, select the appropriate file type
from the drop-down list and set a filename.
4. Click Save.
Printing reports
Individual reports
To print a copy of the report currently displayed:
1. Either:
Select File > Print from the Menu Bar, or
Click the
icon on the Tool Bar.
2. The standard Windows print control box will then open offering a choice of printer. Make
any necessary changes and click OK to print.
NOTE: If the selected report is too large to fit on a single sheet of paper, a page break will
automatically be inserted at an appropriate point.
Multiple reports
To print a copy of multiple reports:
1. Select the required reports:
To select reports distributed throughout the listing, select the first report and then hold
down the Control key and click on the other required reports. (NOTE: Selected
reports will be highlighted in blue).
To select reports adjacent to one another, click on the first report, hold down the Shift
key and select the last report of the group. (NOTE: Selected reports will be
highlighted in blue).
© 2008 LMP
18
Train (3.01.00)
2. Click the
icon on the Tool Bar.
3. The standard Windows print control box will then open offering a choice of printer. Make
any necessary changes and click OK to print.
NOTE: If any of the selected reports are too large to fit on a single sheet of paper, a page
break will automatically be inserted at an appropriate point.
Printing report lists
To print the currently displayed report listing:
1. Select File > Print from the Menu Bar.
2. The standard Windows print control box will then open offering a choice of printer. Make
any necessary changes and click OK to print.
© 2008 LMP
Alert (Report Overview)
Part
IV
20
4
Train (3.01.00)
Alert (Report Overview)
The Alert screen is accessed either via the
icon or by selecting the option to <Click
here to refresh Alert screen> on the "Train Today" page. It offers a quick overview, through
the use of three tabs, of those inspections which:
have overdue reports listed against them and require a more recent inspection report
(Overdue Inspections).
require remedial action by the owner/user of the plant (Outstanding Repairs - Time Qual.
+ Immediate Repair).
could not have an examination carried out (Not Availables).
By default, the Alert screen opens on the Overdue Inspections tab. However, each of the
tabs presents information in the form of a report listing.
Report Listing
The Report Listing offers a number of options. Right-click in the Data Area to view the
options menu:
© 2008 LMP
Alert (Report Overview)
21
Clear All Items
Depending on the currently selected tab, clicking this option will clear all overdue inspections,
items marked as not available or any defects. A Confirm option will open to ensure that items
are not cleared in error.
Clear Selected Items
1. Select the items to clear:
To select items distributed throughout the listing, select the first report and then hold
down the Control key and click on the other required reports. (NOTE: Selected
reports will be highlighted in blue).
To select items adjacent to one another, click on the first report, hold down the Shift
key and select the last report of the group. (NOTE: Selected reports will be
highlighted in blue).
2. Right-click on a highlighted item and click Clear Selected Items from the subsequent
menu. The items will be marked as cleared.
Save List to file
To save the currently displayed report listing:
1. Right-click in the Data Area of the screen.
2. Select "Save As..." from the subsequent menu.
3. Navigate to the location in which the file is to be saved, select the appropriate file type
from the drop-down list and set a filename.
4. Click Save.
Delete Report
Where an item of plant no longer exists, it may be appropriate to delete associated reports.
NOTE: Once a report has been deleted, it can not be re-instated.
To delete a report:
1. Click on the required report.
2. Right-click and select "Delete Report" from the subsequent menu.
3. In the subsequent "Confirm" dialog box, click OK to confirm, or Cancel to abandon the
deletion of the report.
Edit Displayed Data
Edit Displayed Data allows the customization of information presented on the report listing.
To add fields to a view:
1. Right-click in the Data Area.
2. Select "Edit Displayed Data" from the subsequent menu.
© 2008 LMP
22
Train (3.01.00)
3. The Customization box will open:
4. Drag the required field name from the Customization box to the header bar on the report
list.
5. Repeat as required and then close the Customization box (click the cross in the top righthand corner) to refresh the view of the data.
To remove fields from a view:
1. Right-click in the Data Area.
2. Select "Edit Displayed Data" from the subsequent menu.
3. The Customization box will open. Drag the field name to be removed away from its
position. As soon as a cross appears on the field name, release the mouse key. The
field will be removed from the screen and will instead be listed in the Customization box.
4. Repeat as required and then close the Customization box (click the cross in the top righthand corner) to refresh the view of the data.
Email list to...
To email the currently displayed report listing:
1.
2.
3.
4.
5.
Right-click in the Data Area.
Select "Email list to..." from the subsequent menu.
Input the email address of the recipient(s) in the blank email which opens.
Add a subject line and any necessary message.
Click Send Message. The report listing will be sent as an attachment to the email.
View a selected report
To view a report displayed on the listing either:
double-click on the required report, or
click on the required report and select
View from the Tool Bar.
Email the current/viewed report
1.
2.
3.
4.
5.
Right-click in the Data Area of the report.
Select "e-mail report to..." from the subsequent menu.
Input the email address of the recipient(s) in the blank email which opens.
Add a subject line and any necessary message.
Click Send Message. The report will be sent as an attachment to the email.
© 2008 LMP
Alert (Report Overview)
23
Email multiple reports
To email multiple reports, the option to send email using the local copy of Outlook must have
been enabled. See Email Options for information on applying this setting.
1. Select the required reports:
To select reports distributed throughout the listing, select the first report and then hold
down the Control key and click on the other required reports. (NOTE: Selected
reports will be highlighted in blue).
To select reports adjacent to one another, click on the first report, hold down the Shift
key and select the last report of the group. (NOTE: Selected reports will be
highlighted in blue).
2. Click "Email Batch" on the Tool Bar.
3. Input the email address of the recipient(s) in the blank email which opens.
4. Add a subject line and any necessary message.
5. Click Send. The reports will be sent as attachments to the email.
Save the current/viewed report
1. Right-click in the Data Area of the report.
2. Select "Save As..." from the subsequent menu.
3. Navigate to the location in which the file is to be saved, select the appropriate file type
from the drop-down list and set a filename.
4. Click Save.
Printing reports
Individual reports
To print a copy of the report currently displayed:
1. Either:
Select File > Print from the Menu Bar, or
Click the
icon on the Tool Bar.
2. The standard Windows print control box will then open offering a choice of printer. Make
any necessary changes and click OK to print.
NOTE: If the selected report is too large to fit on a single sheet of paper, a page break will
automatically be inserted at an appropriate point.
Multiple reports
To print a copy of multiple reports:
1. Select the required reports:
To select reports distributed throughout the listing, select the first report and then hold
down the Control key and click on the other required reports. (NOTE: Selected
reports will be highlighted in blue).
To select reports adjacent to one another, click on the first report, hold down the Shift
key and select the last report of the group. (NOTE: Selected reports will be
highlighted in blue).
© 2008 LMP
24
Train (3.01.00)
2. Click the
icon on the Tool Bar.
3. The standard Windows print control box will then open offering a choice of printer. Make
any necessary changes and click OK to print.
NOTE: If any of the selected reports are too large to fit on a single sheet of paper, a page
break will automatically be inserted at an appropriate point.
Printing report lists
To print the currently displayed report listing:
1. Select File > Print from the Menu Bar.
2. The standard Windows print control box will then open offering a choice of printer. Make
any necessary changes and click OK to print.
Repair Threshold
The repair threshold displayed on the "Outstanding Repairs" tab may be amended.
To change the displayed threshold:
1. Right-click in the Data Area of the Alert screen.
2. Select "Repair Threshold".
3. A menu will open:
4. Click on the required threshold level.
5. The Outstanding Repairs tab will automatically refresh to reflect the newly selected
Repair Threshold.
4.1
Overdue Inspections
Clearing Overdue Inspections
Overdue Inspections are automatically cleared from the Alert screen when a new report is
received. However, where an asset has been scrapped or mothballed, its details may be
removed from the Overdue Inspections or Not Availables tabs by amending the User
Comments section of the last received report:
1.
2.
3.
4.
Double-click on the required item to view the last received report.
Scroll to the foot of the report and click into the "Remove from Overdue List" tick box.
Select the appropriate category from the drop-down list in the User Status box.
Add any necessary detail in the User Comments field.
5. Click the
icon to return to the Alert screen. The Alert screen will automatically
refresh to reflect any changes.
© 2008 LMP
Alert (Report Overview)
25
Overdue Slack period
It is possible to increase the number of days between the examination of an asset and the
report for this examination being received (Overdue Slack period). By default, the Overdue
Slack period is set to 0.
To increase the Overdue Slack:
1. Select Utilities > Configure from the Menu Bar.
2. The "Configure Serve" dialog box will open on the Alert Options tab:
3. Click into the Overdue Slack box and input the required number of days grace.
4. Click OK. The "Configure Serve" dialog box will close and the Alert screen will
automatically refresh to reflect any changes.
Overdue List
The reports displayed on the Overdue List may be altered to show all overdue inspections,
overdue Thorough inspections or overdue Working inspections:
1. Select Utilities > Configure from the Menu Bar.
© 2008 LMP
26
Train (3.01.00)
2. The "Configure Serve" dialog box will open on the Alert Options tab:
3. Click the tick boxes in the Overdue List box to toggle the inspection types on or off.
4. Click OK. The "Configure Serve" dialog box will close and the Alert screen will
automatically refresh to reflect any changes.
4.2
Repairs
Repair Threshold
Four levels of repair categorisation are offered by Train. The Repair Thresholds are:
Immediate Repairs only - statutory repairs requiring immediate attention.
Immediate and Time Qualified Repairs - as above and time-qualified statutory repairs.
Repairs and Defects - repairs or defects which have been noted, but which are not
statutory repairs.
All Repairs and Observations - as above with any comments.
The currently selected Repair Threshold is indicated by the name of the "Outstanding
Repairs" tab. To change the displayed threshold:
1. Right-click in the Data Area of the Alert screen.
2. Select "Repair Threshold" and then the required level of categorisation from the
subsequent menu.
3. The Outstanding Repairs tab will automatically refresh to reflect the newly selected
Repair Threshold.
Outstanding Repairs
Repair information is automatically cleared from the Alert screen when a new report which
does not list any repairs is received. Where an asset is repaired following an inspection, it is
possible to remove it from the Outstanding Repairs screen:
1. Double-click on the required item to view the last received report.
2. Scroll to the foot of the report and click into the "Remove Actions Reminder" tick box.
3. Select the appropriate category from the drop-down list in the "User Status" box if
© 2008 LMP
Alert (Report Overview)
27
required.
4. Add any necessary detail in the User Comments field.
5. Click the
icon to return to the Alert screen. The Alert screen will automatically
refresh to reflect any changes.
AutoClense
By default, all outstanding repairs are displayed. This view may be amended to display only
those repairs identified by the most recent report through the user of "AutoClense":
1. Select Utilities > Configure from the Menu Bar.
2. The "Configure Serve" dialog box will open on the Alert Options tab:
3. Click into the AutoClense tick box.
4. Click OK. The Configure Serve dialog box will close and the Alert screen will
automatically refresh to remove any superseded repairs.
4.3
Not Available
Reports listed on the 'Not Available' tab are reports of non-inspection. Reasons for the noninspection are detailed within individual reports. Double-click on the required report in order
to view the details and reasons for non-inspection.
© 2008 LMP
View
Part
V
30
5
Train (3.01.00)
View
The View option displays the selected report on the screen in a similar format to the paper
version:
Normally, the entire report will not fit onto the screen, so a scroll bar at the right hand edge
allows a view of the whole report to be obtained through scrolling up or down.
User Comments
Uniquely, electronic reporting offers a User Comments section. This enables the tracking of
actions performed as a result of the report and also allows the action and overdue reminders
for a particular report to be disenabled:
© 2008 LMP
View
© 2008 LMP
31
32
Train (3.01.00)
To record a comment:
Field Name
Action
Result
Remove from Overdue Single Click
List.
Once selected, the current report will no
longer appear in the "Overdue Inspection"
list of the Alert screen.
Remove Actions
Reminder.
Single Click
Once selected, the current report will no
longer appear in the "Outstanding Defects"
list of the Alert screen.
User Status
Click the drop-down Select an option from the drop-down list to
arrow to right-hand place a categorisation against the selected
end of box
report.
User Comments
Text entry
Click into the box under "User Comments"
and input required text. Information input
here will be stored with the current report
and appear in subsequent printouts.
Additionally, the following information will be automatically recorded in the "User Comments"
section:
If a report is emailed then the date and time the report was sent will be recorded.
If any amendments are made to the "User Actions" or "User Status" sections of a report,
the user details, date and time and action carried out will be recorded.
Printing a report
To print a copy of the report currently displayed either:
Select File > Print from the Menu Bar, or
Click the
icon on the Tool Bar.
The standard Windows print control box will then open offering a choice of printer.
If the selected report is too large to fit on a single sheet of paper, a page break will
automatically be inserted at an appropriate point.
Exporting Reports
Reports may be saved to a file or emailed from Train.
To email a report:
1.
2.
3.
4.
5.
Right-click in the Data Area of the report.
Select "e-mail report to..." from the subsequent menu.
Input the email address of the recipient(s) in the blank email which opens.
Add a subject line and any necessary message.
Click Send Message. The report will be sent as an attachment to the email.
© 2008 LMP
View
33
To save a report:
1. Right-click in the Data Area of the report.
2. Select "Save As..." from the subsequent menu.
3. Navigate to the location in which the file is to be saved, select the appropriate file type
from the drop-down list and set a filename.
4. Click Save.
© 2008 LMP
History
Part
VI
36
6
Train (3.01.00)
History
The History screen provides detailed information on a selected item of plant and displays all
reports that have been received for the selected item.
HINT: To view the History screen, an item of plant must first be selected - if no asset or report
has been selected, clicking the
icon will have no effect.
Report List
The Report Listing offers a number of options. Right-click in the Data Area to view the
options menu:
Save List to file
To save the currently displayed report listing:
1. Right-click in the Data Area of the screen.
2. Select "Save As..." from the subsequent menu.
3. Navigate to the location in which the file is to be saved, select the appropriate file type
from the drop-down list and set a filename.
4. Click Save.
© 2008 LMP
History
37
Delete Report
Where an item of plant no longer exists, it may be appropriate to delete associated reports.
NOTE: Once a report has been deleted, it can not be re-instated.
To delete a report:
1. Click on the required report.
2. Right-click and select "Delete Report" from the subsequent menu.
3. In the subsequent "Confirm" dialog box, click OK to confirm, or Cancel to abandon the
deletion of the report.
Edit Displayed Data
Edit Displayed Data allows the customization of information presented on the report listing.
To add fields to a view:
1. Right-click in the Data Area.
2. Select "Edit Displayed Data" from the subsequent menu.
3. The Customization box will open:
4. Drag the required field name from the Customization box to the header bar on the report
list.
5. Repeat as required and then close the Customization box (click the cross in the top righthand corner) to refresh the view of the data.
To remove fields from a view:
1. Right-click in the Data Area.
2. Select "Edit Displayed Data" from the subsequent menu.
3. The Customization box will open. Drag the field name to be removed away from its
position. As soon as a cross appears on the field name, release the mouse key. The
field will be removed from the screen and will instead be listed in the Customization box.
4. Repeat as required and then close the Customization box (click the cross in the top righthand corner) to refresh the view of the data.
© 2008 LMP
38
Train (3.01.00)
Email list to...
To email the currently displayed report listing:
1.
2.
3.
4.
5.
Right-click in the Data Area.
Select "Email list to..." from the subsequent menu.
Input the email address of the recipient(s) in the blank email which opens.
Add a subject line and any necessary message.
Click Send Message. The report listing will be sent as an attachment to the email.
View a selected report
To view a report displayed on the listing either:
double-click on the required report, or
click on the required report and select
View from the Tool Bar.
Email the current/viewed report
1.
2.
3.
4.
5.
Right-click in the Data Area of the report.
Select "e-mail report to..." from the subsequent menu.
Input the email address of the recipient(s) in the blank email which opens.
Add a subject line and any necessary message.
Click Send Message. The report will be sent as an attachment to the email.
Email multiple reports
To email multiple reports, the option to send email using the local copy of Outlook must have
been enabled. See Email Options for information on applying this setting.
1. Select the required reports:
To select reports distributed throughout the listing, select the first report and then hold
down the Control key and click on the other required reports. (NOTE: Selected
reports will be highlighted in blue).
To select reports adjacent to one another, click on the first report, hold down the Shift
key and select the last report of the group. (NOTE: Selected reports will be
highlighted in blue).
2. Click "Email Batch" on the Tool Bar.
3. Input the email address of the recipient(s) in the blank email which opens.
4. Add a subject line and any necessary message.
5. Click Send. The reports will be sent as attachments to the email.
Save the current/viewed report
1. Right-click in the Data Area of the report.
2. Select "Save As..." from the subsequent menu.
3. Navigate to the location in which the file is to be saved, select the appropriate file type
from the drop-down list and set a filename.
4. Click Save.
© 2008 LMP
History
39
Printing reports
Individual reports
To print a copy of the report currently displayed:
1. Either:
Select File > Print from the Menu Bar, or
Click the
icon on the Tool Bar.
2. The standard Windows print control box will then open offering a choice of printer. Make
any necessary changes and click OK to print.
NOTE: If the selected report is too large to fit on a single sheet of paper, a page break will
automatically be inserted at an appropriate point.
Multiple reports
To print a copy of multiple reports:
1. Select the required reports:
To select reports distributed throughout the listing, select the first report and then hold
down the Control key and click on the other required reports. (NOTE: Selected
reports will be highlighted in blue).
To select reports adjacent to one another, click on the first report, hold down the Shift
key and select the last report of the group. (NOTE: Selected reports will be
highlighted in blue).
2. Click the
icon on the Tool Bar.
3. The standard Windows print control box will then open offering a choice of printer. Make
any necessary changes and click OK to print.
NOTE: If any of the selected reports are too large to fit on a single sheet of paper, a page
break will automatically be inserted at an appropriate point.
Printing report lists
To print the currently displayed report listing:
1. Select File > Print from the Menu Bar.
2. The standard Windows print control box will then open offering a choice of printer. Make
any necessary changes and click OK to print.
Attaching Documents
Train enables documents (for example, scanned images or Word documents) to be stored
against an individual asset through "drag and drop". To attach a document:
1. Navigate to the location in which the required file is held.
2. Click on the required file name and, holding down the left-hand mouse button, drag the file
to the Drag and Drop Area of the History screen and release the mouse key.
3. In the subsequent "Document Details" dialog box, select how to save the document:
Document stored in database - a copy of the document will be stored in the Train
database. This is the most secure method of saving a file as, once saved, the file
© 2008 LMP
40
Train (3.01.00)
cannot subsequently be altered.
Document stored as link
- saving files as links creates a shortcut from the Train
database to the location in which the file is held. Any changes made to the file will be
reflected in the file accessed via Train.
4. Add a Document Description.
5. Click OK to save the document, or Cancel to abandon the file attachment.
© 2008 LMP
Dates
Part
VII
42
7
Train (3.01.00)
Dates
The Dates screen provides details of which reports have been received on a particular month
or day. To access the Dates screen, select
from the Menu Bar:
The top half of the screen is a calendar which defaults to today's date. The lower half of the
screen has two tabs which display Inspection Reports received. By default, the first tab
displays reports received in the current month, whilst the second tab displays reports
received on the current day.
Changing the displayed dates:
To change the year - click on the year in the heading above any of the month calendars.
Up/Down arrows will display which can be clicked to move forwards or backwards by
year.
To change the month - click on the name of one of the months above the calendars. A
drop-down list of month names will display. Click the required month to change the view.
To change the date - click on any of the dates in the displayed calendars to update to the
selected date.
Report Listing
The Report Listing offers a number of options. Right-click in the Data Area to view the
options menu:
© 2008 LMP
Dates
43
Save List to file
To save the currently displayed report listing:
1. Right-click in the Data Area of the screen.
2. Select "Save As..." from the subsequent menu.
3. Navigate to the location in which the file is to be saved, select the appropriate file type
from the drop-down list and set a filename.
4. Click Save.
Delete Report
Where an item of plant no longer exists, it may be appropriate to delete associated reports.
NOTE: Once a report has been deleted, it can not be re-instated.
To delete a report:
1. Click on the required report.
2. Right-click and select "Delete Report" from the subsequent menu.
3. In the subsequent "Confirm" dialog box, click OK to confirm, or Cancel to abandon the
deletion of the report.
Edit Displayed Data
Edit Displayed Data allows the customization of information presented on the report listing.
To add fields to a view:
1. Right-click in the Data Area.
2. Select "Edit Displayed Data" from the subsequent menu.
3. The Customization box will open:
4. Drag the required field name from the Customization box to the header bar on the report
list.
5. Repeat as required and then close the Customization box (click the cross in the top righthand corner) to refresh the view of the data.
© 2008 LMP
44
Train (3.01.00)
To remove fields from a view:
1. Right-click in the Data Area.
2. Select "Edit Displayed Data" from the subsequent menu.
3. The Customization box will open. Drag the field name to be removed away from its
position. As soon as a cross appears on the field name, release the mouse key. The
field will be removed from the screen and will instead be listed in the Customization box.
4. Repeat as required and then close the Customization box (click the cross in the top righthand corner) to refresh the view of the data.
Email list to...
To email the currently displayed report listing:
1.
2.
3.
4.
5.
Right-click in the Data Area.
Select "Email list to..." from the subsequent menu.
Input the email address of the recipient(s) in the blank email which opens.
Add a subject line and any necessary message.
Click Send Message. The report listing will be sent as an attachment to the email.
View a selected report
To view a report displayed on the listing either:
double-click on the required report, or
click on the required report and select
View from the Tool Bar.
Email the current/viewed report
1.
2.
3.
4.
5.
Right-click in the Data Area of the report.
Select "e-mail report to..." from the subsequent menu.
Input the email address of the recipient(s) in the blank email which opens.
Add a subject line and any necessary message.
Click Send Message. The report will be sent as an attachment to the email.
Email multiple reports
To email multiple reports, the option to send email using the local copy of Outlook must have
been enabled. See Email Options for information on applying this setting.
1. Select the required reports:
To select reports distributed throughout the listing, select the first report and then hold
down the Control key and click on the other required reports. (NOTE: Selected
reports will be highlighted in blue).
To select reports adjacent to one another, click on the first report, hold down the Shift
key and select the last report of the group. (NOTE: Selected reports will be
highlighted in blue).
2. Click "Email Batch" on the Tool Bar.
3. Input the email address of the recipient(s) in the blank email which opens.
4. Add a subject line and any necessary message.
5. Click Send. The reports will be sent as attachments to the email.
© 2008 LMP
Dates
45
Save the current/viewed report
1. Right-click in the Data Area of the report.
2. Select "Save As..." from the subsequent menu.
3. Navigate to the location in which the file is to be saved, select the appropriate file type
from the drop-down list and set a filename.
4. Click Save.
Printing reports
Individual reports
To print a copy of the report currently displayed:
1. Either:
Select File > Print from the Menu Bar, or
Click the
icon on the Tool Bar.
2. The standard Windows print control box will then open offering a choice of printer. Make
any necessary changes and click OK to print.
NOTE: If the selected report is too large to fit on a single sheet of paper, a page break will
automatically be inserted at an appropriate point.
Multiple reports
To print a copy of multiple reports:
1. Select the required reports:
To select reports distributed throughout the listing, select the first report and then hold
down the Control key and click on the other required reports. (NOTE: Selected
reports will be highlighted in blue).
To select reports adjacent to one another, click on the first report, hold down the Shift
key and select the last report of the group. (NOTE: Selected reports will be
highlighted in blue).
2. Click the
icon on the Tool Bar.
3. The standard Windows print control box will then open offering a choice of printer. Make
any necessary changes and click OK to print.
NOTE: If any of the selected reports are too large to fit on a single sheet of paper, a page
break will automatically be inserted at an appropriate point.
Printing report lists
To print the currently displayed report listing:
1. Select File > Print from the Menu Bar.
2. The standard Windows print control box will then open offering a choice of printer. Make
any necessary changes and click OK to print.
© 2008 LMP
Graph
Part
VIII
48
8
Train (3.01.00)
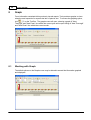
Graph
From information contained within previously issued reports, Train produces graphs to show
when the next inspection for a particular item of plant is due. To access the graphing option,
click
on the Tool Bar. The graph screen will open, showing a graph of "Next
Thorough" and "Next Exam" due within the current year and a report listing of "Next Thorough"
and "Next Exam" due within the current month:
8.1
Working with Graph
The default options on the Graph screen may be altered to amend the information graphed
and displayed:
© 2008 LMP
Graph
49
Inspection Type and Superseded Reports
The "Next Thorough", "Next Exam" and "Historics" tick boxes may be ticked/unticked to alter
the information presented by the graph. The "Next Thorough" and "Next Exam" tick boxes
control which type of inspection to display, whilst the Historics box controls whether
superseded reports are displayed. As the selection is amended, the Graph screen will
automatically update to reflect the changes.
Time frame displayed
By default, the current year and month are displayed when Graph is first selected. To amend
the year, click the Year selection arrows to increase or decrease the year as required. To
change the reports displayed in the Report Listing area, click on one of the month bars of the
graph to show the reports for that month.
Report Listing
The Report Listing offers a number of options. Right-click in the Data Area to view the
options menu:
Copy to Excel
To save the currently displayed report listing to an Excel spreadsheet:
1. Right-click in the Data Area of the screen.
2. Select "Save As..." from the subsequent menu.
3. Navigate to the location in which the file is to be saved, select the appropriate file type
from the drop-down list and set a filename.
4. Click Save.
Delete Report
Where an item of plant no longer exists, it may be appropriate to delete associated reports.
NOTE: Once a report has been deleted, it can not be re-instated.
To delete a report:
1. Click on the required report.
2. Right-click and select "Delete Report" from the subsequent menu.
3. In the subsequent "Confirm" dialog box, click OK to confirm, or Cancel to abandon the
deletion of the report.
Edit Displayed Data
Edit Displayed Data allows the customization of information presented on the report listing.
To add fields to a view:
© 2008 LMP
50
Train (3.01.00)
1. Right-click in the Data Area.
2. Select "Edit Displayed Data" from the subsequent menu.
3. The Customization box will open:
4. Drag the required field name from the Customization box to the header bar on the report
list.
5. Repeat as required and then close the Customization box (click the cross in the top righthand corner) to refresh the view of the data.
To remove fields from a view:
1. Right-click in the Data Area.
2. Select "Edit Displayed Data" from the subsequent menu.
3. The Customization box will open. Drag the field name to be removed away from its
position. As soon as a cross appears on the field name, release the mouse key. The
field will be removed from the screen and will instead be listed in the Customization box.
4. Repeat as required and then close the Customization box (click the cross in the top righthand corner) to refresh the view of the data.
Email list to...
To email the currently displayed report listing:
1.
2.
3.
4.
5.
Right-click in the Data Area.
Select "Email list to..." from the subsequent menu.
Input the email address of the recipient(s) in the blank email which opens.
Add a subject line and any necessary message.
Click Send Message. The report listing will be sent as an attachment to the email.
View a selected report
To view a report displayed on the listing either:
double-click on the required report, or
click on the required report and select
View from the Tool Bar.
© 2008 LMP
Graph
51
Email the current/viewed report
1.
2.
3.
4.
5.
Right-click in the Data Area of the report.
Select "e-mail report to..." from the subsequent menu.
Input the email address of the recipient(s) in the blank email which opens.
Add a subject line and any necessary message.
Click Send Message. The report will be sent as an attachment to the email.
Email multiple reports
To email multiple reports, the option to send email using the local copy of Outlook must have
been enabled. See Email Options for information on applying this setting.
1. Select the required reports:
To select reports distributed throughout the listing, select the first report and then hold
down the Control key and click on the other required reports. (NOTE: Selected
reports will be highlighted in blue).
To select reports adjacent to one another, click on the first report, hold down the Shift
key and select the last report of the group. (NOTE: Selected reports will be
highlighted in blue).
2. Click "Email Batch" on the Tool Bar.
3. Input the email address of the recipient(s) in the blank email which opens.
4. Add a subject line and any necessary message.
5. Click Send. The reports will be sent as attachments to the email.
Save the current/viewed report
1. Right-click in the Data Area of the report.
2. Select "Save As..." from the subsequent menu.
3. Navigate to the location in which the file is to be saved, select the appropriate file type
from the drop-down list and set a filename.
4. Click Save.
Printing reports
Individual reports
To print a copy of the report currently displayed:
1. Either:
Select File > Print from the Menu Bar, or
Click the
icon on the Tool Bar.
2. The standard Windows print control box will then open offering a choice of printer. Make
any necessary changes and click OK to print.
NOTE: If the selected report is too large to fit on a single sheet of paper, a page break will
automatically be inserted at an appropriate point.
Multiple reports
To print a copy of multiple reports:
© 2008 LMP
52
Train (3.01.00)
1. Select the required reports:
To select reports distributed throughout the listing, select the first report and then hold
down the Control key and click on the other required reports. (NOTE: Selected
reports will be highlighted in blue).
To select reports adjacent to one another, click on the first report, hold down the Shift
key and select the last report of the group. (NOTE: Selected reports will be
highlighted in blue).
2. Click the
icon on the Tool Bar.
3. The standard Windows print control box will then open offering a choice of printer. Make
any necessary changes and click OK to print.
NOTE: If any of the selected reports are too large to fit on a single sheet of paper, a page
break will automatically be inserted at an appropriate point.
Printing report lists
To print the currently displayed report listing:
1. Select File > Print from the Menu Bar.
2. The standard Windows print control box will then open offering a choice of printer. Make
any necessary changes and click OK to print.
© 2008 LMP
Search
Part
IX
54
9
Train (3.01.00)
Search
Search enables the creation lists of reports that conform to user-designed criteria.
Building a search
1. Select
from the Tool Bar.
2. The Search screen will open as above.
3. Select the "Report Types to Search" from the drop-down list. The default setting is "All
Types" but the full listing is:
All Types
Pressure Plant
Lifting Equipment / Lifts
General Plant
Power Press
Local Exhaust Ventilation
Not Availables
Selecting any other type than "All Types" will restrict the returned search results to just
one category of report.
© 2008 LMP
Search
55
4. Now build the search rules:
i)
Select the field to be searched from the drop-down menu in the left-hand box ("Field to
search" box).
ii) Select the appropriate search criteria to be applied to the search from the drop-down
list in the middle box ("Search criteria" box).
iii) Input the text to search for in the right-hand box ("Search text" box).
iv) Repeat steps i-iii in the other rows of the search as required (a maximum of four rows
of search terms is available).
5. By default, all reports will be searched. To limit the search to the most recently received
report, click into the "Current Reports Only" tick box.
6. Where more than one row of search criteria is constructed, by default the rows will be
linked with an AND command. This will return results only for those records where all
criteria are met. To link search criteria with an OR command (where results will be
returned for records where any of the criteria are met), click into the "OR Rows Together"
tick box.
7. Click Search Now to display the results of the search.
Searching Text Fields
Fields that are text based (for example Item Id, Description, Location, Manufacturer etc) offer
the following criteria:
Contains
Doesn't contain
Is exactly
Is not
© 2008 LMP
56
Train (3.01.00)
For example, to search for reports containing the manufacturer "Craven":
1.
2.
3.
4.
5.
6.
Ensure "All Types" is selected in the Report Type field.
Select "Manufacturer" from the drop-down list in the left-hand search box.
Select "Contains" from the drop-down list in the middle search box.
Input "Craven" in the right-hand search box.
Click into the "Current Reports Only" text box.
Click Search Now to display the results of the search.
Searching Date Fields
Fields that are date based (for example Next Thorough Date, Exam Date etc) offer the
following criteria:
Is
Is
Is
Is
Is
Is
before the
after the
on or before the
on or after the
the
not the
To search for all reports with an Exam date between 30 June 2006 and 31 January 2007:
1.
2.
3.
4.
5.
6.
7.
8.
9.
Ensure "All Types" is selected in the Report Type field.
Select "Exam Date" from the drop-down list in the left-hand search box.
Select "Is on or after the" from the drop-down list in the middle search box.
Input "30/6/06" in the right-hand search box.
In the left-hand search box of the second row, select "Exam Date" from the drop-down
box.
Select "Is on or before the" from the drop-down list in the middle search box.
Input "31/1/07" in the right-hand search box.
Click into the "Current Reports Only" text box.
Click Search Now to display the results of the search.
Searching for Repairs by Severity
It is possible to search for repairs by severity. However, within Train, the severity of repairs
detailed is stored as a number in the range 1 to 5. The numbers relate to severity:
5
4
3
2
1
-
Immediate Repairs
Time qualified Repairs
Repairs and Defects
Observations
Clear
Criteria available on the Severity field are:
Is
Is
Is
Is
less than
greater than
exactly
not
© 2008 LMP
Search
57
For example, to search for immediate repairs listed on current reports:
1.
2.
3.
4.
5.
6.
9.1
Ensure "All Types" is selected in the Report Type field.
Select "Severity" from the drop-down list in the left-hand search box.
Select "Is Exactly" from the drop-down list in the middle search box.
Input "5" in the right-hand search box.
Click into the "Current Reports Only" text box.
Click Search Now to display the results of the search.
Working with Search Results
Search results form a Report List.
The Report Listing offers a number of options. Right-click in the Data Area to view the
options menu:
Save List to file
To save the currently displayed report listing:
1. Right-click in the Data Area of the screen.
2. Select "Save As..." from the subsequent menu.
3. Navigate to the location in which the file is to be saved, select the appropriate file type
from the drop-down list and set a filename.
4. Click Save.
Edit Displayed Data
Edit Displayed Data allows the customization of information presented on the report listing.
To add fields to a view:
1. Right-click in the Data Area.
2. Select "Edit Displayed Data" from the subsequent menu.
3. The Customization box will open:
4. Drag the required field name from the Customization box to the header bar on the report
list.
5. Repeat as required and then close the Customization box (click the cross in the top right© 2008 LMP
58
Train (3.01.00)
hand corner) to refresh the view of the data.
To remove fields from a view:
1. Right-click in the Data Area.
2. Select "Edit Displayed Data" from the subsequent menu.
3. The Customization box will open. Drag the field name to be removed away from its
position. As soon as a cross appears on the field name, release the mouse key. The
field will be removed from the screen and will instead be listed in the Customization box.
4. Repeat as required and then close the Customization box (click the cross in the top righthand corner) to refresh the view of the data.
Email list to...
To email the currently displayed report listing:
1.
2.
3.
4.
5.
Right-click in the Data Area.
Select "Email list to..." from the subsequent menu.
Input the email address of the recipient(s) in the blank email which opens.
Add a subject line and any necessary message.
Click Send Message. The report listing will be sent as an attachment to the email.
View a selected report
To view a report displayed on the listing either:
double-click on the required report, or
click on the required report and select
View from the Tool Bar.
Email the current/viewed report
1.
2.
3.
4.
5.
Right-click in the Data Area of the report.
Select "e-mail report to..." from the subsequent menu.
Input the email address of the recipient(s) in the blank email which opens.
Add a subject line and any necessary message.
Click Send Message. The report will be sent as an attachment to the email.
Email multiple reports
To email multiple reports, the option to send email using the local copy of Outlook must have
been enabled. See Email Options for information on applying this setting.
1. Select the required reports:
To select reports distributed throughout the listing, select the first report and then hold
down the Control key and click on the other required reports. (NOTE: Selected
reports will be highlighted in blue).
To select reports adjacent to one another, click on the first report, hold down the Shift
key and select the last report of the group. (NOTE: Selected reports will be
highlighted in blue).
2. Click "Email Batch" on the Tool Bar.
3. Input the email address of the recipient(s) in the blank email which opens.
4. Add a subject line and any necessary message.
© 2008 LMP
Search
59
5. Click Send. The reports will be sent as attachments to the email.
Save the current/viewed report
1. Right-click in the Data Area of the report.
2. Select "Save As..." from the subsequent menu.
3. Navigate to the location in which the file is to be saved, select the appropriate file type
from the drop-down list and set a filename.
4. Click Save.
Printing reports
Individual reports
To print a copy of the report currently displayed:
1. Either:
Select File > Print from the Menu Bar, or
Click the
icon on the Tool Bar.
2. The standard Windows print control box will then open offering a choice of printer. Make
any necessary changes and click OK to print.
NOTE: If the selected report is too large to fit on a single sheet of paper, a page break will
automatically be inserted at an appropriate point.
Multiple reports
To print a copy of multiple reports:
1. Select the required reports:
To select reports distributed throughout the listing, select the first report and then hold
down the Control key and click on the other required reports. (NOTE: Selected
reports will be highlighted in blue).
To select reports adjacent to one another, click on the first report, hold down the Shift
key and select the last report of the group. (NOTE: Selected reports will be
highlighted in blue).
2. Click the
icon on the Tool Bar.
3. The standard Windows print control box will then open offering a choice of printer. Make
any necessary changes and click OK to print.
NOTE: If any of the selected reports are too large to fit on a single sheet of paper, a page
break will automatically be inserted at an appropriate point.
Printing report lists
To print the currently displayed report listing:
1. Select File > Print from the Menu Bar.
2. The standard Windows print control box will then open offering a choice of printer. Make
any necessary changes and click OK to print.
© 2008 LMP
Location
Part
X
62
10
Train (3.01.00)
Location
The Location view enables the viewing of reports for locations or policies.
To open the Location screen, select
from the Tool Bar:
The Location screen is divided into two sections - the top section is a list of locations/
companies divided up by policy number. Clicking on the + next to a location/company opens
the individual locations for that policy number. The lower half of the screen offers three tabs
(Overdue Items, Outstanding Actions and Not Availables) with a Report Listing for each tab.
By default, the "Overdue Inspections" tab displays, with a count of the number of overdue
inspections. It is necessary to click on the other two tabs to obtain a count of "Actions" or
"Not Availables". NOTE: When the Actions tab is selected, its title will change to reflect the
repairs/defects setting selected on the Alert screen.
Report Listing
The Report Listing offers a number of options. Right-click in the Data Area to view the
options menu:
© 2008 LMP
Location
63
Save List to file
To save the currently displayed report listing:
1. Right-click in the Data Area of the screen.
2. Select "Save As..." from the subsequent menu.
3. Navigate to the location in which the file is to be saved, select the appropriate file type
from the drop-down list and set a filename.
4. Click Save.
Edit Displayed Data
Edit Displayed Data allows the customization of information presented on the report listing.
To add fields to a view:
1. Right-click in the Data Area.
2. Select "Edit Displayed Data" from the subsequent menu.
3. The Customization box will open:
4. Drag the required field name from the Customization box to the header bar on the report
list.
5. Repeat as required and then close the Customization box (click the cross in the top righthand corner) to refresh the view of the data.
To remove fields from a view:
1. Right-click in the Data Area.
2. Select "Edit Displayed Data" from the subsequent menu.
3. The Customization box will open. Drag the field name to be removed away from its
position. As soon as a cross appears on the field name, release the mouse key. The
field will be removed from the screen and will instead be listed in the Customization box.
4. Repeat as required and then close the Customization box (click the cross in the top righthand corner) to refresh the view of the data.
Email list to...
To email the currently displayed report listing:
1. Right-click in the Data Area.
2. Select "Email list to..." from the subsequent menu.
3. Input the email address of the recipient(s) in the blank email which opens.
© 2008 LMP
64
Train (3.01.00)
4. Add a subject line and any necessary message.
5. Click Send Message. The report listing will be sent as an attachment to the email.
View a selected report
To view a report displayed on the listing either:
double-click on the required report, or
click on the required report and select
View from the Tool Bar.
Email the current/viewed report
1.
2.
3.
4.
5.
Right-click in the Data Area of the report.
Select "e-mail report to..." from the subsequent menu.
Input the email address of the recipient(s) in the blank email which opens.
Add a subject line and any necessary message.
Click Send Message. The report will be sent as an attachment to the email.
Email multiple reports
To email multiple reports, the option to send email using the local copy of Outlook must have
been enabled. See Email Options for information on applying this setting.
1. Select the required reports:
To select reports distributed throughout the listing, select the first report and then hold
down the Control key and click on the other required reports. (NOTE: Selected
reports will be highlighted in blue).
To select reports adjacent to one another, click on the first report, hold down the Shift
key and select the last report of the group. (NOTE: Selected reports will be
highlighted in blue).
2. Click "Email Batch" on the Tool Bar.
3. Input the email address of the recipient(s) in the blank email which opens.
4. Add a subject line and any necessary message.
5. Click Send. The reports will be sent as attachments to the email.
Save the current/viewed report
1. Right-click in the Data Area of the report.
2. Select "Save As..." from the subsequent menu.
3. Navigate to the location in which the file is to be saved, select the appropriate file type
from the drop-down list and set a filename.
4. Click Save.
Printing reports
Individual reports
To print a copy of the report currently displayed:
1. Either:
Select File > Print from the Menu Bar, or
© 2008 LMP
Location
65
Click the
icon on the Tool Bar.
2. The standard Windows print control box will then open offering a choice of printer. Make
any necessary changes and click OK to print.
NOTE: If the selected report is too large to fit on a single sheet of paper, a page break will
automatically be inserted at an appropriate point.
Multiple reports
To print a copy of multiple reports:
1. Select the required reports:
To select reports distributed throughout the listing, select the first report and then hold
down the Control key and click on the other required reports. (NOTE: Selected
reports will be highlighted in blue).
To select reports adjacent to one another, click on the first report, hold down the Shift
key and select the last report of the group. (NOTE: Selected reports will be
highlighted in blue).
2. Click the
icon on the Tool Bar.
3. The standard Windows print control box will then open offering a choice of printer. Make
any necessary changes and click OK to print.
NOTE: If any of the selected reports are too large to fit on a single sheet of paper, a page
break will automatically be inserted at an appropriate point.
Printing report lists
To print the currently displayed report listing:
1. Select File > Print from the Menu Bar.
2. The standard Windows print control box will then open offering a choice of printer. Make
any necessary changes and click OK to print.
© 2008 LMP
Advanced Features
Part
XI
68
Train (3.01.00)
11
Advanced Features
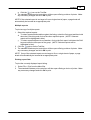
11.1
Setup Filter
The Setup Filter enables a restriction to be placed on the set of reports with which Train is
currently working - once a filter is applied, all screens within Train will only display those
reports which meet the filter criteria.
Applying a Setup Filter
1. Select Utilities > Setup Filter from the Menu Bar.
2. The "Filter Setup" dialog box will open:
3. In the "Filter Control" box, select Filter On.
4. If a restriction on the type of report is required, click the drop-down arrow in the "Reports
of Type" box to select the type of report.
5. Apply "Additional Filter Rules" as required. (NOTE: The Additional Filter Rules are
constructed in the same way as a Search. Please consult the Search section for more
details).
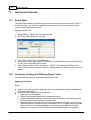
11.2
Grouping, Sorting and Filtering Report Lists
Train allows the grouping, sorting or filtering of Report Lists.
Applying a Grouping
Either:
drag a Column title to the Grouping Area (green arrows indicate where the heading may
be dropped into place); or
insert a new field name in the Grouping Area:
i. Right-click in the Data Area.
ii. Select Edit Displayed Data from the subsequent menu.
iii. Drag the appropriate field name from the Customization box to the required point in
the Grouping Area and release the mouse button.
iv. Repeat if required, and then close the Customization box (click the cross in the top
right-hand corner) to refresh the view of the data. (NOTE: The data refresh may take
up to a minute to complete depending on the quantity of data affected. Do NOT
attempt to re-close the Customization box whilst the data refresh is in progress).
© 2008 LMP
Advanced Features
69
Once a Grouping has been applied, a sort or filter may be applied to the Grouped data.
Removing a Grouping
If a filter has been applied to a Grouping, the filter must be cleared before the Grouping is
removed. To do this:
1. Click the down arrow on the required field.
2. Select the "(All)" option from the subsequent listing.
Now remove the Grouping:
3. Right-click in the Grouping Area and select Edit Displayed Data from the subsequent
menu.
4. Drag the required field name to the Customization box and release the mouse button.
(NOTE: If the filter has not been removed before the grouping option is undone, then a
filtered view of the data will continue to be presented).
5. Repeat steps 1-4 as required.
6. Close the Customization box (click the cross in the top right-hand corner) to refresh the
view of the data. (NOTE: If Prime is exited before the refresh has taken place, the filter will
be retained by Prime for future use).
Sorting
Report Lists
Report Lists may be sorted either alphanumerically (the default setting) or reverse
alphanumerically once a Grouping has been applied.
To apply a sort, click on the title of the field against which the sort is to be applied. The
Report Listing will automatically refresh to reflect the sort.
Filtering Report Lists
In addition to the Setup Filter, separate filters may be applied to the field titles on a displayed
report listing in order to restrict the view to display only those items which meet the filter
criteria.
Applying a Filter
1. If necessary, add a field name to the Report Listing:
i. Right-click in the Data Area.
ii. Select Edit Displayed Data from the subsequent menu.
iii. Drag the appropriate field name from the Customization box to the required point on
the screen and release the mouse button.
iv. Repeat if required, and then close the Customization box (click the cross in the top
right-hand corner) to refresh the view of the data.
© 2008 LMP
70
Train (3.01.00)
2. Hover over the field name to which the filter is to be applied, and click the down arrow that
appears at the right-hand end of the field name:
3. Select the required filter type:
(All) – displays all data (and therefore removes any previously applied filters).
(Custom) – allows complex filtering across a range of criteria (see the Custom Filters
section for more information).
(Blanks) – displays all items which have a blank value in the currently selected
heading. (NOTE: Blanks is only available for fields which contain blank or non-blank
items).
(NonBlanks) – displays all items which do NOT have a blank value in the currently
selected heading. (NOTE: Non-Blanks is only available for fields which contain blank
or non-blank items).
Specific criteria that appear under the field heading - place a tick in the relevant check
box(es) to filter by the selected criteria.
The down arrow will change colour to indicate that a filter has been applied. Once a filter
is applied, a Customize bar will appear at the foot of the Data Area.
Removing a Filter
To remove a filter, either:
1. Hover over the name of the filtered field, and click the down arrow on the required field.
2. Select the "(All)" option from the subsequent listing.
(NOTE: If filters have been applied to more than one field, repeat the above steps to remove
the filters on each field); or
1. Click the cross on the Customize bar. (NOTE: This will clear all filter criteria currently
applied).
© 2008 LMP
Advanced Features
71
Custom Filters and the Customize Bar
The Customize Bar appears at the foot of the Data Area when any filter is applied. The
current filter will appear at the left-hand end of the Customize Bar.
To delete the current filter, click the "X". This will clear all filter criteria from the current
view. Deleting the filter will also close the Customize Bar.
To disenable the filter, click the tick. The filter can be re-applied by re-clicking the in the
tick box.
Custom Filters
More complex filters may be created using the "Custom" option:
1. Hover over the field to which the main filter is to be applied, click the down arrow, and
choose "(Custom…)".
2. A Custom Filter dialog box will open:
3. Complete the lines of the filter as required, and click OK to apply. The filter will remain in
force until it is removed.
© 2008 LMP
Forms available within
Train
Part
XII
74
12
Train (3.01.00)
Forms available within Train
The following report types are available within Train:
CAL1
DELI1
EC1
ESC1
F2197
FLT1
FORM54
HIM1
HSB/E1
HWB1
LEV2A
LEV2B
LEV3A
LEV3B
LOL54
LOLI1
LOLM1
LOLP1
LOLT1
LOLT1C
MC1
NSP1
NSPP1
PIR1
PP1
PPM1
PS1
RONI1
VN1
VR1
© 2008 LMP
Index
Index
Index
-Hhistorics
-Aattach documents
autoclense 26
48
-L-
36
log out 8
logon screen
-B-
8
-M-
batch email 14, 36, 42
batch print reports 14, 36, 42
Microsoft Outlook
-C-
-N-
clear all items 20
clear selected items 20
clearing overdue inspections
copy to Excel 48
custom filters 68
customize bar 68
next exam 48
next thorough 48
non-inspection 27
not availables 27
-D-
24
9
-Ooutstanding repairs 26
remove actions reminder
overdue inspections 24
remove from overdue list
slack period 24
overdue list 24
documents 36
attach 36
-E-
26
24
edit displayed data 14, 36, 42
email
batch email 14, 36, 42
email list to 14, 36, 42
Excel
copy to 48
exit 8
-P-
-F-
remove actions reminder 26, 30
remove from overdue list 24, 30
repair threshold 20, 26
repairs 26
report
batch print reports 14, 36, 42
print report 14, 36, 42
view report 14, 36, 42
report lists 14, 36, 42
report type 54
filtering report lists 68
filters
custom filters 68
customize bar 68
filtering report lists 68
-Ggrouping report lists
© 2008 LMP
68
password 8
printing report
14, 36, 42
-R-
77
78
Train (3.01.00)
-Ssave list to file 14, 36, 42
setup filter 68
slack period 24
sorting report lists 68
-Tthorough inspection
24
-Uuser comments 30
user status 30
username 8
-Vview report
14, 36, 42
-Wworking inspection
24
© 2008 LMP
LMP Technical Services Ltd
Rockleigh Court
Rock Road
Finedon
Northants
NN9 5EL
Telephone: 01933 683810
Fax: 01933 683819
Web: www.lmp.co.uk
Email: [email protected]