1
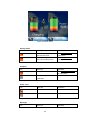
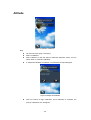
FunTrek 130
User Manual
Version: 5.0
Holux Technology Inc.
www.holux.com
Copyright Declaration:
HOLUX is trademarks of HOLUX Technology, Inc.
All other trademarks belong to registered companies.
Note:
The contents of this manual will be modified without further notice.
Without the written consent of HOLUX Technology, Inc, this manual may not be
translated or copied. Copyright ©2009 HOLUX Technology, Inc. All rights
reserved.
The operation temperature for the product is between -10℃~60℃.
Operating or recharging in an environment with a temperature over 45℃ might
cause the system to malfunction. However, this should be considered a normal
phenomenon. Please do not operate under extreme temperatures.
ii
Safety Precautions
1. Use the power adapter included with the package. Using other power adapters than the
one provided will result to malfunction and could prove to be dangerous.
2. The device should only be used with the supplied batteries.
• About the power adapter:
1. Do not use the power adapter in a wet environment. When hands and feet are wet, do not
touch the power adapter.
2. While using the power adaptor, ensure that the area is well ventilated. Do not let paper or
other material cover the power adaptor, as this will interfere with cooling. Do not use the
power adaptor whilst it is in a bag.
3. Do not attempt to repair the device. If device is damaged or is in a wet environment,
replace the device immediately.
4. It is not recommended to charge from a PC because the PC power voltage is not enough
to supply the device.
• About the battery
1. Use only the original factory approved power adapter.
2. A Lithium battery is built into the device. To prevent fire or skin burns, do not disassemble,
pierce, impact, or expose the battery to fire. The battery will crack, explode, or release
dangerous chemicals if placed in a fire.
• Important instructions
1. Note: Replacing with an incorrect battery may result in an explosion. When disposing of
the battery, follow the instructions. The replacement battery must be a factory approved
original.
2. Regulations must be observed when recycling or disposing of batteries.
3. The battery should only be used in this device.
iii
Table of Contents
Copyright Declaration: ................................................................................................................ii
Safety Precautions .................................................................................................................... iii
Table of Contents ......................................................................................................................iv
Product introduction................................................................................................................... 1
Product Spec ...................................................................................................................... 2
Spec. ........................................................................................................................... 2
Unit Overview .............................................................................................................. 3
Basic Operation ......................................................................................................................... 5
Power on and off ................................................................................................................ 5
Charging Battery ................................................................................................................ 5
Right button ........................................................................................................................ 7
Backlight...................................................................................................................... 7
Auto Light .................................................................................................................... 7
New Track ................................................................................................................... 7
Mark Waypoint ............................................................................................................ 9
Left button......................................................................................................................... 13
Trip Computer ........................................................................................................... 13
Change Trip Computer Items............................................................................. 13
Page Display Selection ...................................................................................... 14
View Altitude.............................................................................................................. 15
Compass ................................................................................................................... 16
General information................................................................................................... 17
Map Navigation ......................................................................................................... 18
Lock/Unlock the screen............................................................................................. 18
Screen Lock ....................................................................................................... 18
Unlock the screen .............................................................................................. 19
Connect to PC ........................................................................................................... 20
Storage mode..................................................................................................... 20
Folders ............................................................................................................... 20
Charging mode .................................................................................................. 21
Screenshot ................................................................................................................ 21
Main menu list.......................................................................................................................... 22
Status Bar ......................................................................................................................... 22
Main Menu........................................................................................................................ 27
Setup ......................................................................................................................... 27
Profile ................................................................................................................. 27
Odometer.................................................................................................... 28
Sport mode ................................................................................................. 28
Auto track.................................................................................................... 29
Log Interval ................................................................................................. 30
Personal profile........................................................................................... 31
- iv -
Background................................................................................................. 33
Calibration .......................................................................................................... 34
Compass..................................................................................................... 34
Altitude........................................................................................................ 36
Screen ........................................................................................................ 38
System ............................................................................................................... 39
Left Key....................................................................................................... 39
Altitude Mode.............................................................................................. 41
Screen Lock................................................................................................ 42
Backlight ..................................................................................................... 42
Beep ........................................................................................................... 43
Auto Power Off ........................................................................................... 44
Coordinates Setup ...................................................................................... 45
Shortcut ...................................................................................................... 49
Unit Setup ................................................................................................... 49
Time Setup.................................................................................................. 51
File Saving Location ................................................................................... 52
Language.................................................................................................... 53
Clear Odometer/CO2.................................................................................. 53
Alert.................................................................................................................... 55
Distance alert.............................................................................................. 55
BAR ALT (Barometer Altitude) alert ............................................................ 56
Time alert .................................................................................................... 57
Factory ............................................................................................................... 58
Version ............................................................................................................... 59
Tools .......................................................................................................................... 61
G-Finder ............................................................................................................. 61
Calendar ............................................................................................................ 63
Alarm Clock........................................................................................................ 63
Calculator ........................................................................................................... 64
Stopwatch .......................................................................................................... 65
Unit Conversion ................................................................................................. 66
Health................................................................................................................. 68
Emer. (Emergency info) ..................................................................................... 68
Tracks........................................................................................................................ 70
View Track.......................................................................................................... 70
Area Calculation................................................................................................. 71
Track Detail ........................................................................................................ 72
Delete Track....................................................................................................... 72
View multiple Tracks .......................................................................................... 73
Waypoints.................................................................................................................. 74
View Waypoints.................................................................................................. 74
Waypoint Detail .................................................................................................. 75
Geocaching ............................................................................................................... 75
-v-
Information ......................................................................................................... 76
GeoRadar .......................................................................................................... 77
Compass ............................................................................................................ 78
Mark Found........................................................................................................ 79
Add Geocaching Notes ...................................................................................... 80
- vi -
Product introduction
FunTrek 130 is a latest handheld GPS navigation device. It comes with a variety of GPS
applications:
GPS Positioning: hidden antenna design, high-sensitivity GPS receiver chip can
quickly position
Electronic compass: Provides direction for location information, with compass
function.
Altimeter: Measure the altimeter by using the GPS altitude and pressure
altimeter calibration.
Touch screen LCD: 3-inch-wide touch screen, you can click your fingers sliding
intuitive operation.
Chinese handwriting input: The system provides simple Chinese handwriting
functions, can be free to write on the screen.
Mode switching: a variety of GPS application mode can be switched according
to recreational sports or navigation page is displayed.
Water resistant: IPX6
Navigation function: with navigation guidance capabilities.
Records Information: store destinations (including coordinates, altitude, time,
name, description and type) and trail information
Personal assistant tools: Add calendar, computers and stopwatch
Geo-Caching: Using the GPS positioning capabilities to carry out treasure hunt.
FunTrek 130 is not only a hand-held GPS device, which includes walking, bicycle car
navigation and other recreational resources, with a convenient mode of operation to meet
various needs of customers.
-1-
Product Spec
Spec.
CPU
Battery
Samsung S3C2416, 400MHz
Battery life: 8.5 hrs (on the basis of 50%
backlight brightness & 1/5 duty)
GPS chip
High Sensitivity (-159dBm) GPS Chip.
Removable, Li-Ion 1050mAh
Operating Temperature
Memory
Built-in 2GB Flash.
Charge: 0℃~45℃
Support SD V2.0
Discharge: -20℃~60℃
Display
Waterproof
3.0” WQVGA (16:9) TFT LCD
IPX-6
Transflective Touch Screen (Sunlight
IO interface
USB 2.0 high speed (mini USB
viewable)
240 x 400 Pixels Resolution
connector)
Adaptor (For indoor use only)
Sensors
Input: 100-240Vac, 0.5A, 50/60Hz
3D Digital Compass
DC Input:5V, 1A
Altimeter
Operating Temp: 0℃~40℃
Auto backlight adjustment sensor
Storage Temp: -20℃~65℃
Dimension
58 x 105 x 23 mm
Weight
124g (with battery)
Environment temperature
Operating Temp: -10℃~60℃
Storage Temp: -20℃~70℃
-2-
Unit Overview
Component Function Description: (Front View)
Item
Description
Touch Screen LCD
The device is using the touch-screen control.
Right button
When the device is powered off, press the right button for 3
seconds to turn on this device.
When powered on, press this button for 3 seconds to turn off.
Left button
When the device is powered on, press the left button to
switch Main Menu, Trip Computer page and Navigation.
LED
1. The LED flashes red when charging
2. The LED stop flashing but glows when charging is
complete.
3. The LED dims when the USB is unplugged.
4. The LED will first light a second, and the opening screen
prompts.
Component Function Description: (Rear View)
Item
Description
Battery lid
Press and push to open the battery lid for installing or
replacing batteries.
Screw holes
Fix and secure screws.
Component Function Description:
Item
Description
USB port
Connect power or PC/NB for charger or data transfer.
Stylus Hanging Hole
You can tie the bundled stylus to the device.
-3-
Front View
Back View
-4-
Low Rear View
Basic Operation
Power on and off
When device is on, hold down the right button for 3 seconds to power off. The prompt "Saving
data… please wait." will appear while the device is powering off.
Figure 1 Power off
When device is off, hold down the right button for 3 seconds to power on.
Charging Battery
You may choose one of the following methods to charge the device.
1. Connect the USB adapter to a wall outlet.
Figure 2 Connect the USB adapter to a wall outlet.
-5-
2. Connect the USB cable to your computer.
Figure 3 Connect the USB cable to your computer.
-6-
Right button
The main function of the Right button is to turn on/off the device; it also contains shortcut keys
to adjust backlight brightness, new a track and mark waypoints.
Figure 4 Right Button Shortcut page
Backlight
You can adjust the backlight brightness by following below steps:
1.
Press the right button once to enter the operation page as shown above.
2.
Click
button to increase/decrease the backlight brightness.
Auto Light
FunTrek 130 is equipped with a sensor that automatically detects the ambient light level
and adjusts the backlight brightness to save power.
Step:
Press the right button once to enter the operation page.
Select the
in the backlight adjustment area and the backlight brightness will
be automatically adjusted to suit the ambient light.
New Track
You can also use the right button to add a track.
-7-
Step:
Press the right button once to enter the operation page.
The middle area of the screen shown as
operation area.
Click the "New Track"
is the
button, you will be prompted a
dialogue box for you to save your track log.
Figure 5
New track
Note:
The current track will be saved when a new track is created. The new track will
appear in the track log list.
Check
to enter the Digital Keyboard. You can press the left right
arrow sign to switch among different symbol input methods to edit the track
log name.
Enter the track log’s name, and press the confirmation button
track log.
-8-
to save the
Figure 6 a new track started
Press
button to pause recording; press
button to start/continue
recording.
Note:
If you don’t define the track name manually, the device will use default name to
save the track log automatically.
The device will firstly save the track log existing in memory, and then start to
record new track log.
When turned off, the track log will save to the FunTrek 130 automatically. When
connected this device with your computer, you can use the built-in memory of
the device to operate track log.
Please save track logs regularly so they are not accidentally lost.
When auto power off is enabled, the track log will automatically be saved when
powering off.
When device power is off due to low battery the track log will be automatically
saved.
When device is powered off manually, the track log will be automatically saved.
The track log will be lost if power is accidentally interrupted or the battery is
removed after a crash.
When the device is connected to a computer, the track logs in memory can be
manipulated.
Mark Waypoint
You can also use the right button to mark a waypoint.
Step:
Press the right button once to enter the operation page.
The bottom of page is the area to mark waypoints.
-9-
Press the "Mark Waypoint"
button, you will be prompted a dialogue box for
you to name the waypoint.
Figure 7 Mark Waypoint
Press
to enter the symbol input page, and edit the point name.
Figure 8 Edit new waypoint name
After edit the name, press the confirmation button
to select waypoint category.
-10-
, and you will be prompted
Figure 9 Waypoint category
Press confirmation button “” to enter the category list. In the list, you can define
the category. Use the up/down button to skip to next/previous page.
Figure 10 select a waypoint category
Select the category, and press the confirmation button
If you don’t define the waypoint manually, the device will use default name to save
.
the waypoint automatically.
When finished, you will be prompted a message that new waypoint is successfully
marked.
-11-
Figure 11 waypoint marked
Note: If the GPS positioning is not ready yet, the device will not mark a waypoint, and
the screen prompts “No GPS signal! Marking waypoint failed!”.
Figure 12 Marking waypoint failed
-12-
Left button
Trip Computer
Figure 13 Trip Computer pages
Press the left button to enter the Trip Computer screen
Step:
Press the left button once to enter the Trip Computer.
In the Trip Computer, you can view travel distance, travel time, current speed and
altitude, etc.
Use
button to enter the next page, which contains information of current
speed, heart rate, calories, and CO2 reduced, etc.
Change Trip Computer Items
You can change the screen layout to 3 pages or 6 pages in screen.
Step:
You can use the setting button
to select the frequently used items (3 or .6
items to be
Press the setting button
you can select the item that you want to change.
Click the item to enter the trip computer list, and use the up/down button to flip
page and search.
-13-
Figure 14 Select Items
Select the item to be added, press confirmation button to change.
Page Display Selection
You can use
and
button to change the number of pages displayed on
the screen.
: displays 3 items of Trip Computer on screen.
: displays 6 items of Trip Computer on screen.
Figure 15 Pages shown on screen
-14-
View Altitude
Use the left button to view altitude.
Figure 16 Altitude information
Figure 17 Speed information
Step:
Press the left button once to enter the Trip Computer.
Press the
The altitude page displays the current altitude and speed. Press the
button, and enter the altitude page.
button
to enter the Switch Axis page. Select the desired viewing option then return to the
altitude or speed graph.
-15-
Figure 18 select graph
You can use
When you change the graph scale, use
and
to zoom in and zoom out.
to return normal status.
Note:
The altitude graph corresponds to the track log. If the track log has been cleared or
there are no records, there will be no altitude data.
The altitude graph can only be clicked and dragged when its larger than the screen
display.
is used to reset the altitude graph display after manual scrolling.
Compass
Use the left button; you also can view compass information.
-16-
Figure 19 Compass information
Step:
Press the left button once to enter the Trip Computer.
Press the
You can also check the compass pointer and G-Finder information.
To calibrate the compass, press
Follow the on-screen instruction to calibrate the compass. When finished, the
button three times to enter the compass page.
。
system will restore to the compass screen.
Note:
During the calibration, you are not allowed to exit; nor is the Left/Right button
functional.
Please play the FunTrek 130 on a flat surface for a more precise bearing.
General information
General information contains GPS coordinates information, GPS signal strength, power,
battery status and current time.
-17-
Figure 20 General information
Step:
Press the left button once to enter the Trip Computer.
Press the
In the page, you can view GPS coordinates information, GPS signal strength,
button four times to enter the compass page.
power, battery status and current time.
Use left/ right button to skip to other function page.
Note:
If the GPS positioning is not ready yet, the screen will not display the coordinate
information.
The items to be displayed on the General Information page can be configured in the
Select Info page under Setup.
Map Navigation
FunTrek 130 contains map navigation function, which provides real-time navigation services
for you.
Turn on the device and press the left button twice to enter the Map Navigation. Please refer to
the latter section titled “Map Navigation” for details.
Lock/Unlock the screen
FunTrek 130 is designed for touch-screen control, to avoid accidental touches which lead
to wrong operation. The FunTrek 130 provides a Screen Lock/Unlock function.
Screen Lock
If the screen is unlocked, press the left button for 3 seconds to lock the screen, the
message of "Screen locked. Press left key for 3 seconds to unlock" pops up. Once the
-18-
screen is locked, the device will not respond to any of your operation unless you have the
screen unlocked.
Figure 21 Lock screen
Unlock the screen
If the screen is locked, press the left button for 3 seconds to unlock the screen, "screen
unlocked!" pops out.
Figure 22 Unlock screen
-19-
Connect to PC
When the FunTrek 130 is connected to a PC the following prompt will appear. You can choose
to enter storage mode or charging mode.
Figure 23 storage mode
Storage mode
Connect Funtrek 130 to the PC with a USB cable. When the prompt appears, click on
to enter storage mode.
Folders
In Storage mode you will be able to see the folders in the memory card.
Folder Name
bg
Description
Stores background pictures. The user can add or delete pictures in
this folder.
cache
Stores geo-gaching gpx files. The user can add or delete cache
files in this folder.
map
Stores the navigation program.
sc
Store screenshot pictures.
track
Stores track files. The user can add or delete tracks in this folder.
wpt
Stores waypoint files. The user can add or delete waypoints in this
folder.
update
Stores applications.
-20-
Charging mode
Connect Funtrek 130 to the PC with an USB cable. When the prompt appears, click on
to enter charging mode.
Screenshot
Press both the left and right buttons at once to take a screenshot. If screenshot is successful a
prompt will appear. When the Funtrek 130 is connected to a PC in storage mode, the saved
screenshot can be accessed in the "sc" folder.
Figure 24 screenshot
-21-
Main menu list
When turned on, the top of main menu is status bar. The six icons are function list in below of
main menu.
Status
Main Menu
Figure 25 Status Bar & Main Menu
Status Bar
Figure 26 Status Bar
Satellite information
Click on the satellite icon in the status bar to open the Satellite Status page.
-22-
Figure 27 Satellites status
Satellite information
Icon
/
Descript
Operation
Satellite information
Click the icon to enter the
Indicated the signal
satellite page, and view the
strength / no signal
satellite quantity and the
signal strength
Cold start
Click the cold start button in
satellite page to re-search
the satellite signal.
DOP
Positioning precision
View in Satellite Status page
Not Fixed
Positioning status
View in Satellite Status page
WGS1984
Coordination System
View in Satellite Status page
TWD’97
WGS1984 is the satellite
/2D Fixed/3D Fixed
positioning coordinate
system;
TWD’97 is the user
configured coordinate
system. It changes
according to user settings.
GPS H
GPS measured Height
View in Satellite Status page
EPE
GPS
View in Satellite Status page
Estimated Position Error
GPS signal's CN value
-23-
View in Satellite Status page
Time
Icon
Descript
Operation
Time information contains
Click the icon to enter the
time information including
page to view the exact time.
clock, date and week.
You can set the alarm
Please refer to section titled
quickly.
Alarm for details.
Alarm is turned on.
Alarm is turned off.
Click on
n/a
to enter the Time page. Here you can check the current date, time
and alarm settings. To set the alarm, click on the alarm icon to open the Alarm Setup
page.
Figure 28 Time page
Attention:
GPS positioning should be enabled to ensure that the correct time is displayed.
Power message
Icon
Descript
Operation
Power message
Click the icon to enter the
power page.
Battery down to 1/3 charge
n/a
Battery low message
n/a
Click on the Power icon to open the Power Status page and check the charge
remaining.
-24-
Figure 29 Power status
Storage mode
Icon
Descript
Operation
Track and waypoint data
See Storage Location for
stored in SD card.
instructions.
Track and waypoint data
See Storage Location for
store in internal memory.
instructions
Descript
Operation
Compass calibrated
See Compass Calibration
Compass
Icon
for instructions.
Compass requires
n/a
calibration
Alarm clock
Icon
Descript
Operation
Alarm is turned on.
n/a
Alarm is turned off.
n/a
Descript
Operation
Backlight
Icon
-25-
Backlight is on.
The detailed step, please
refer to Backlight
Backlight is off.
The detailed step, please
refer to backlight
Locked the screen
Icon
Descript
Operation
The screen is locked.
The detailed step, please
refer to Screen Lock/Unlock
The screen is unlocked.
The detailed step, please
refer to Screen Lock/Unlock
Track log
Icon
Descript
Operation
The track log was
The detailed step, please
recording.
refer to New Track
The track log was paused.
The detailed step, please
refer to New Track
-26-
Main Menu
The main menu contains Geocaching、Tracks、Waypoints、Setup、Tools and Shortcut.
。
Figure 1 Menu
Setup
Through Setup, you can set the “Trip Information”, “Sport Mode”, “Log Interval”, “Backlight”,
and “Lock Screen”. The setting function contains “Profile”, “Calibration”, “System”, “Warning”,
“Factory reset” and “Version”.
Profile
Figure 30 Profile
-27-
Odometer
You can save trip information in ODO1 or ODO2. The default is ODO1。
Figure 31 Select Odometer
Step:
On the main menu page, click Setup.
Select “Profile”
Select “Odometer”. It contains “ODO1” and “ODO2”.
The default value is “ODO1” Select “ODO1” or “ODO2”.
When completed, return to the main menu page.
Sport mode
You can select your sport mode among walking, running, biking or vehicle. Trip
Computer will calculate calories consumed, CO2 consumed, and etc. based on your
selection.
-28-
Figure 32 Sport modes
Step:
On the main menu page, click Setup.
Select “Profile”
Select “Sport Mode”.
Select one your sport mode from “walking”, “running”, “biking” and “vehicle”.
The default mode is “biking”.
When completed, return to the main menu page.
Note:
The new Sport mode will be applied to new tracks.
Auto track
Select start tracking manually or automatically.
Figure 33 Auto track
-29-
Step:
On the main menu page, click Setup.
Select “Profile”
Select “Log Interval”
Select and enter “Auto track”.
Select “Manually” or “Automatically”
Note: If "Manually" is selected you must use the right button to create a new track in
order to begin recording.
Log Interval
Select time or distance for log interval.
Step:
On the main menu page, click Setup.
Select “Profile”
Select “Log Interval” to open the menu. The two options are "Distance" and
"Time".
Figure 34 Log Interval
When "Distance" or "Time" is selected the digital keyboard appears.
Enter time interval or distance interval.
-30-
Figure 35 Enter interval
When completed, press confirmation button
Return to the main menu page.
.
If imperial units were selected in Unit Setup, you can enter the interval as an imperial
value.
Attention:
Under the metric system, the track log "Interval" can be a value between 1
and 1000 meters.
Under the imperial system, the track log "interval" can be a value between
1 to 4000 feet.
Personal profile
Enter personal profile. The system will calculate the consumed calories based on the
entered personal profile and sport mode. Accordingly, it will give the calories that you
burn.
-31-
Figure 36 Personal Profile
Figure 37 Profile Keyboard
Step:
On the main menu page, click Setup.
Select “Profile”
Select “Profile” to enter the personal information list. The personal
information includes Birthday and weight.
Select each item in turn to enter appropriate information.
When completed, press confirmation button to save your setting.
If imperial units were selected in Unit Setup, you can enter the interval as an imperial
value.
Attention:
Under the metric system, the input range for weight is between 1 ~ 200
kilograms.
Under the imperial system, the input range for weight is between 1 ~ 500
pounds.
-32-
Background
You can select the background picture that you like through this function
Step:
On the main menu page, click Setup.
Select “Profile”
Select “Background” to enter the “Background” menu.
Figure 38 background
Select one of the pictures.
When completed, return to the main menu page.
You can add pictures to the list by loading the picture files to the Holux\bg
file folder.
The default value is the picture named “sunflower”.
Note: FunTrek 130 supports only .bmp file format and the file size should be less
than 500K.
-33-
Calibration
You can calibrate Altitude, Compass, G-Sensor and Screen.
Figure 39 Calibration
Compass
Step:
On the main menu page, click Setup.
Select “Calibration”.
Select “Compass”.
Click the Start button
to calibrate the compass.
Figure 40 Compass calibration
-34-
Figure 41 Calibrating
When the calibration is completed, the system will prompt a message for
completion. Click the return button to the previous step.
Figure 42 Calibration OK
-35-
Altitude
Figure 43 Altitude Calibration
Step:
On the main menu page, click Setup.
Select “Calibration”.
Select “Altitude” to view the option of altimeter calibration mode. You can
select “GPS” or “Manual” calibration.
If "Adopt GPS altitude" is selected, a confirmation prompt will appear.
Figure 44 Adopt GPS altitude
Click on Confirm to begin calibration. Once calibration is complete, the
prompt "Calibration OK" will appear.
-36-
Figure 45 Calibration OK
If "Manual" calibration is selected, you will be prompted to enter the current
altitude.
Figure 46 Enter altitude
Click on Confirm to open the Enter Altitude page.
-37-
Figure 47 Manual Calibration
When completed, pop-up confirmation prompts. Return automatically.
Screen
Step:
On the main menu page, click Setup.
Select “Calibration”.
Select “Screen” to calibrate the screen.
When the calibration is completed, the system will return to the previous
screen automatically.
Note:
You can't interrupt the screen calibration process.
-38-
System
System provides you to 1). Select the unit of distance/speed; 2). Set time format (24/12
hours) and time zone; 3).File saving location (built-in memory or SD card), and 4).
Coordinates format and Map Datum.
You can also clear the value of ODO1, ODO2 and the CO2/Tree saved.
Figure 48 System setting
Left Key
Use the left key to set the project displayed on Trip Information and the auto-flip.
Figure 49 Left key setting
-39-
Select Info Page
Figure 50 Left key info page
Step:
On the main menu page, click Setup.
Select “System”
Select “Left Key”
Click “Select Info Page”.
You can select by checking items to be displayed for Left Key operation.
Items to be selected are: Trip Computer1, Trip Computer2, Altitude Graph,
Compass and Information.
When completed, return to the main menu page.
Note:
At least one item must be selected in the Select Info page.
If no item is selected, when you click on Confirm you will be prompted to
select an item for the left button shortcut.
Flip Page Time
Flip page time is the time interval set to automatically switch among Info Page
for Left Key operation.
-40-
Figure 51 Flip page time
Step:
On the main menu page, click Setup.
Select “System”
Select “Left Key”
Click “Flip Page Time”
You can select from “Off”, “5 sec”, “10 sec”, “30 sec” and “1 minute”. When
completed, return to the main menu page.
Altitude Mode
FunTrek 130 provides altitude display including barometer and GPS.
Figure 52 Altitude mode
Step:
On the main menu page, click Setup.
-41-
Select “System”
Select “Altitude Mode”.
You can select between “From Barometer” and “ From GPS”.
When completed, return to main menu page.
Screen Lock
You can enable the screen lock function to make the device automatically locked.
Figure 53 Screen lock
Step:
On the main menu page, click Setup.
Select “System”
Select “Lock Screen”.
You can select to disable this function or select from “30 seconds”, “1
minute”, “3 minutes” or “5 minutes” for the device to automatically lock
screen.
When completed, return to the main menu page.
When the screen is locked, press the left button for 3 seconds to unlock the screen,
and "Screen unlocked!" pops out.
Backlight
Use this function to set the duration of the backlight. This will save the battery power
for the system automatically turns off backlight when it is not necessary.
-42-
Figure 54 Backlight
Step:
On the main menu page, click Setup.
Select “System”
Select “backlight”.
You can select to keep the backlight always on or to keep it on for “10
seconds”, “30 seconds”, “1 minute”, “3 minutes” or “5 minutes”.
When completed, return to the main menu page.
Beep
Use the Beep setting to turn on/off the button/ message sounds and adjust the
volume.
Figure 55 Beep setting
-43-
Step:
On the main menu page, click Setup.
Select “System”
Select “Beep”. You can change settings for “sound” and “volume”.
Select “Sound” to enter the sound setting. You can select to turn off the
Beep sound, or select to enable sound for key, message or both key and
message.
Select “Volume” to enter the volume setting. You can select to turn off the
volume or adjust the volume to “Low”, “Normal”, and “High”.
When completed, return to main menu page.
Auto Power Off
Use this function to set a determined time to automatically power off.
Figure 56 Auto power off
Step:
On the main menu page, click Setup.
Select “System”
Select “Auto Power Off” to enter the auto power off menu. It contains “off”,
“15 minutes”, “30 minutes”, “1 hour” and “2 hours”.
When completed, return to the main menu page.
Note:
If device fails to acquire a fix within the set time it will automatically power
off.
If a satellite fix is acquired within the set time, the timer will reset.
-44-
Coordinates Setup
You can set the coordinate format and map datum.
Figure 57 Coordinates Setup
Coordinates Format
User can choose the appropriate format for their use.
Figure 58 Coordinates format list
Step:
On the main menu page, click Setup.
Select “System”
Select “Coordinates Format”.
-45-
Use up/ down button to flip page.
When selection is completed, return automatically.
User Grid
Select User Grid in Coordinates Format List, and enter the parameter page.
Figure 59 User grid parameters
Select the parameter you want to define, and the digital keyboard appears.
In longitude and latitude page, you can use
change the directions.
Figure 60 Longitude and latitude origin
Define the parameters step by step, and then return.
-46-
and
to
Map Datum
From the Map Datum you can select the appropriate coordinate system for
users, and complete the coordinate system transformation.
Figure 61 Map datum
Step:
On the main menu page, click Setup.
Select “System”.
Select “Coordinate format” .
Select “Map Datum”
Use up/ down button to flip page.
When selection is completed, return automatically.
-47-
User Datum
Figure 62 User datum
On the Map Datum page, select “User Datum”
Select the parameters.
The digital keyboard appears.
Enter the value and press the confirmation button.
Define the parameters step by step, and then return.
-48-
Shortcut
You can select a major application and make a shortcut for it. The selected
application will be displayed on the main menu for fast access.
Figure 63 Shortcut setup
Step:
On the main menu page, click Setup.
Select “System”
Select “Shortcut”.
Select the application you want to make shortcut. You can select from,
“G-Finder”, “Calendar”, “Alarm clock”, “Calculator”, “Stopwatch”, “Unit
Convert.”, “Health Info.” and “ER (Emergency) Info.”.
When completed, return to the main menu page.
Unit Setup
You can setup system units in this function, and switch between in imperial and metric. In
English system, the default is imperial.
Step:
On the main menu page, click Setup.
Select “System”.
Select “Unit Setup”.
-49-
Figure 64 Unit setup
Select “Distance/Speed” to choose metric as “km/m” or imperial as “mi/ft”.
Figure 65 Unit select
When selection is completed, system will return to the previous screen.
If "km/m/" is selected all information including alerts will be displayed using
metric units.
If "mi/ft" is selected all information including alerts will be displayed using
imperial units.
-50-
Time Setup
Figure 66 Time set up
Step:
On the main menu page, click Setup.
Select “System”.
Select “Time Setup”.
Select “Time Format”.
Select format “24 hours” and “12 hours”.
Figure 67 Time format
Select “Time Zone”. Click the up and down arrow sign to select.
-51-
Figure 68 Time zone
When selection is completed, system will return automatically.
File Saving Location
Step:
On the main menu page, click Setup.
Select “System”.
Click “File Saving Location”.
Select “Holux Internal Memory” or “SD card”.
If you choose SD card to save track log file, make sure the SD card is well
Figure 69 File saving location
inserted. If no SD is inserted, system will prompt "No SD card is found.”
When completed, system will prompt “Setup ok! You need to restart!”
-52-
Language
In the Language setup menu you can change the interface language. Available options include
Simplified Chinese, Traditional Chinese and English.
Figure 70 Language select
Step:
At the Main Menu click on "Setup".
Select "System" to open the system setup page. Use the change page button to
cycle through the pages.
Select Language to open the language setup menu. The options are: Simplified
Chinese, Traditional Chinese and English.
Select your preferred interface language then click on Back to exit.
Clear Odometer/CO2
Clear Odometer/CO2 enables users to clear the existing trip information and the total
amount of carbon reduction / total tree planted volume.
Step:
On the main menu page, click Setup.
Select “System”.
Click “Reset”.
Select “ODO1”, “ODO2” or “Total CO2/Tree saved”.
-53-
Figure 71 Select item
When selection is completed, system will return automatically.
Figure 72 Clear odometer
-54-
Alert
You can set alert for Distance, Altitude, and Time.
Figure 73 Alert is off
Distance alert
Step:
On the main menu page, click Setup.
Select “Warning”.
Select “Distance”.
Enter the appropriate value. The unit is meter.
When completed, press the confirmation button. System will return to the
previous step automatically.
To turn off alerts, click on
to exit the Digital Keypad then turn off the
alerts.
Attention:
Under the metric system, the input range for alerts is between 100m ~ 999km.
Under the imperial system, the input range for alerts is between 0.1 ~ 700.0
miles.
-55-
Figure 2 Enter alert distance
BAR ALT (Barometer Altitude) alert
Step:
On the main menu page, click Setup.
Select “Alert”.
Select “BAR ALT”. BAR ALT is barometer altitude.
Enter the appropriate value. The unit is meter.
When completed, press the confirmation button. System will return to the
previous step automatically.
To turn off alerts, click on
to exit the Digital Keypad then turn off the
alerts.
Attention:
Under the metric system, the input range for BAR ALT is between -1000m ~
9999m.
Under the imperial system, the input range for BAR ALT is between -3000 ~
40000 feet.
BAR ALT alert is based on the altitude.
When current altitude reaches or exceeds the set value, the alert prompt
will pop up.
-56-
Figure 74 Altitude alert
If "Repeat Alert" is selected then the alert will continue to pop up when the
current altitude is equal or exceeds the set value. To turn off alert, select
"Alert Off".
Notice!
The device estimates altitude based on air pressure. The means that altitude
readings for the same location may vary if air pressure changes.
The semiconductor pressure sensor used by the device for altitude
measurements also is affected by temperature. When taking altitude
measurements, make sure the device is not subjected to temperature changes.
Do not use this device for measuring altitude in applications that demand
professional or industrial level precision.
Do not rely upon this device for altitude measurements or perform button
operations while sky diving, hang gliding, or riding a gyrocopter where there is
the chance of sudden altitude changes.
The air inside of a commercial aircraft is pressurized. Because of this, the
readings produced by this device will not match the altitude readings announced
or indicated the flight crew.
Time alert
Step:
On the main menu page, click Setup.
Select “Alert”.
Select “Time”.
Enter appropriate value. The unit is minute.
When completed, press the confirmation button. System will return to the
-57-
previous step automatically.
Note:
The input range for Time alert is between 1 ~ 120 minutes.
Once Warning is turned ON, system will prompt warning message and start
warning beep sound when determined warning distance, altitude or time is
achieved. You can select “Alert off” or “Repeat Alert”.
If you select “Alert off”, both warning message and warning beep sound will
be turned off.
If you select “Repeat Alert”, both warning message and warning beep
sound will repeat every time when one of the warning values is reached.
Figure 75 Alert is on
Factory
Press Factory is to restore the setting of “Profile”, “System”, and “Alert” to the factory
default. Please note that all existing values/setting will be cleared.
Step:
On the main menu page, click Setup.
Select “Factory”.
The System will prompt a warning message for you to confirm.
-58-
Figure 76 Factory reset
Press the confirmation button
, the device will return to initial setup
and “Factory reset ok” pops out when finished.
Figure 77 Factory reset OK
When completed, system will return to the previous step automatically.
Version
You can get the version information of the OS and AP for this device.
Step:
On the main menu page, click Setup.
Select “Version”.
-59-
Figure 78 Version
When completed, press back button to return.
-60-
Tools
FunTrek 130 offers a set of daily tools including “G-Finder”, “Calendar”, and “Alarm clock”,
“Calculator”, “Stopwatch”, “Unit (Unit convert), “Health” and “Emer. (emergency).
Figure 79 Tools
G-Finder
The G-Finder enables users to mark their starting points. It helps you get current position
and distance from where you started. This helps guide you to return to the starting point.
Figure 80 G-Finder
Step:
On the main menu page, click “Tools”.
Click “G-Finder”.
-61-
If no G-Finder has been marked, a message of current position will appear. The
system will also prompt “Mark this point as a start?” for you to mark your current
position as the Start Point.
Once the Start Point is marked, the compass will display distance between your
current position and the Start Point. The Compass will display relative position
between two positions.
Figure 81 Mark start point
Press confirmation button, the setting is completed.
Next time when you enter Compass, the system will display the relative distance
and position. Arrow
points the start direction.
Figure 82 G-Finder was set
-62-
Calendar
Step:
On the main menu page, click “Tools” icon to enter the tool menu.
Click “Calendar” icon to view the calendar page.
After viewing the page, press back button to return.
Figure 83 Calendar
Alarm Clock
Step:
On the main menu page, click “Tools” icon to enter the tool menu.
Click “Alarm clock” icon to view the alarm clock page. You can set a specific time
on one day or other and turn on the alarm as a reminder.
Press the
button to increase/decrease the value for setting the
time. For day selection, click the day directly. You can select more than one day.
When completed, click “Turn On” to start the alarm clock.
-63-
Figure 84 Turn on alarm clock
To turn off the alarm clock, clock, enter the alarm setting page, click “Turn Off”
button.
Figure 85 Turn off alarm clock
Calculator
Step:
On the main menu page, click “Tools” icon to enter the tool menu.
Click “Calendar” icon to use the calendar function.
-64-
Figure 86 Calculator
Note:
Up to 9 digits can be entered into the calculator.
If the result exceeds 10 places it will be displayed using scientific notation.
Figure 87 Scientific notation
Stopwatch
Stopwatch enables you to accurately measure elapsed time.
Step:
On the main menu page, click “Tools” icon to enter the tool menu.
Click “Stopwatch” icon to enter the stopwatch function.
Click the start button
to start.
-65-
Figure 88 Stopwatch
When the timing is completed, press pause button
If the timing is pause, press
to get the elapsed time.
to resume counting time.
Figure 89 Stopwatch paused
When you want to re-timing, press the
press start button
button to clear up the value, and
to re-timing.
Unit Conversion
Unit Conversion converts units of length, area, weight and volume.
Step:
On the main menu page, click “Tools” icon to enter the tools menu.
-66-
Click “Unit” icon.
Figure 90 Unit conversion
Select “Length”, “Area”, “Weight” or “Volume”.
The digital keyboard appears.
Figure 91 Length Conversion
Enter the value you want to convert on the upper left cell.
Click the upper/lower right buttons to select units from the unit list. The upper
right button is the source unit (before conversion), and the lower right button is
the target unit (after conversion).
-67-
Figure 92 Units list
Figure 93 Conversion
Health
In Health, you can read or add health information.
On the main menu page, click “Tool” icon to enter the tool menu.
Click “Health”.
Select one of the options, click it to enter and view the Health Info.
Use the up/down button to flip page. After viewing the page, press back button
to return.
Emer. (Emergency info)
In Emergency info, user can read or add emergency information.
On the main menu page, click “Tool” icon to enter the tool menu.
-68-
Click “Emer.”, and enter the information list.
Select one of the options, click it to enter and view the emergency information.
Use the up/down button to flip page. After viewing the page, press back button
to return.
-69-
Tracks
You can use Tracks to view track, get the detail information of each track log, and delete track.
Figure 94 Tracks list
Figure 95 Track Menu
View Track
You can select tracks from the track list displayed on the screen.
Step:
On the main menu page, click “Track” to enter the track list.
Select the track that you will operate, click to enter the Track Menu.
-70-
Select View Track, the screen will display the track. You can zoom in or zoom
out to change the scale. The track name is shown on the top of the screen.
Figure 96 View track
Area Calculation
On the Track Browse screen, click Area Calculation to display the measure of the track
area.
Note:
Click on
for area calculation. A result will only be shown when the track log
and display is correct and when an area can be calculated. When no area can be
calculated for the track, the area calculation button won't be displayed.
Figure 97 Area calculation
-71-
Track Detail
Figure 98 Track Detail
Step:
On the main menu page, click “Track” to enter the track list.
Select the track that you will operate, click to enter the Track Menu.
Select “Detail” to view the details information of track.
When completed, press the back button to return.
Delete Track
Figure 99 Prompt for Track Delete
-72-
Step:
On the main menu page, click “Track” to enter the track list.
Select the track that you will operate, click to enter the Track Menu.
Select “Delete”. The confirmation message pops out. Press the confirmation
button to delete.
After delete the track log, the system will return to the previous step
automatically.
View multiple Tracks
Figure 100 Multiple Track Display
On the main menu page, click “Track” to enter the track list. Check the tracks
you want to display.
Click the "display" button
to enter the path displayed page.
Note:
You can select up to three tracks to be displayed at one time.
The FunTrek130 stores one track per GPX file.
If a GPX file with multiple tracks is downloaded from the Internet, FunTrek 130
will display them as one single track.
-73-
Waypoints
You can view the waypoints and the detail information of each waypoint.
Figure 101 Waypoints lists
Figure 102 Waypoints menu
View Waypoints
On the main menu page, click “Waypoints”.
Select the point that you will operate, click to enter the Waypoints menu.
Select "Browse”, the screen will display the waypoint position. You can zoom in
or zoom out for different scale. The name of the waypoint is shown on the top of
the page.
-74-
Figure 103 View Waypoint
Waypoint Detail
Step:
On the main menu page, click “Waypoints”. .
Select the point that you will operate, click to enter the Waypoints Menu.
Select “detail” to view the detail information of the selected waypoint.
When completed, press the back button to return.
Figure 104 Waypoint Detail
Geocaching
Geocaching provide you the information to find the location and the essential information to
-75-
find it.
Figure 105 No Geocaching info
Figure 106 Geocaching list
Information
The information includes “Difficulty”, “Terrain”, “Cache Size” and “Trackable” and Hints.
-76-
Figure 107 Geocaching Information
Step:
On the main menu page, click “Geocaching”.
Use the up/down button to flip page. The cache that has been found will be
marked , contrarily mark .
Select the cache that you will operate, click to enter the information. Use the
up/down button to flip page.
When completed, press the back button to return.
Note:
The FunTrek 130 can store up to 500 cache locations.
GeoRadar
One the cache information page, you can view the GeoRadar page.
Step:
On the information page, click
button to view the GeoRadar.
-77-
Figure 108 GeoRadar
On the GeoRadar information page, you can view the coordinates, distance and
relative orientation of current location and the Geocaching location.
Press confirmation button to add notes, enter the input method page to edit the
note.
After you add the note, return to the GeoRadar page.
If you don’t add the note, return to the GeoRadar page directly.
Compass
On the GeoRadar page, you can switch to the compass page.
Step:
On the GeoRadar page, click
button to view the compass information.
The compass displayed current coordinates, altitude, speed and direction
information.
-78-
Figure 109 Compass
After viewing the GeoRadar and compass, press the
button of compass
page below to return information.
Mark Found
On the GeoRadar page, you can mark the found cache.
Figure 110 Mark Geocaching found or not
Step:
On the GeoRadar page, press the
button. The message “Mark ‘found’. Add
note?”
Press the
button to confirm.
-79-
You can mark the found Geocaching as ‘not found’. Press
to mark it.
Add Geocaching Notes
The Geocaching that have been found can be added notes.
Step:
When the message “mark found” prompts, press
to enter the digital
keyboard page to add notes.
After adding the comments, return to the GeoRadar page.
If you don’t want to add comments, return to the GeoRadar page directly.
Note:
New notes will be stored in the memory card's cache file in the
geocache_visits.txt file.
-80-