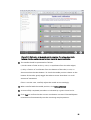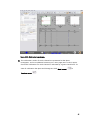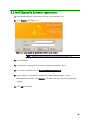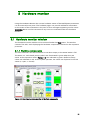
1
MACSQuant® Instrument
User manual
Version 3 EN
Original instructions
Miltenyi Biotec GmbH
Friedrich-Ebert-Straße 68
51429 Bergisch Gladbach
Germany
Phone: +49 2204 8306-0
Fax: +49 2204 85197
E-mail: [email protected]
www.miltenyibiotec.com
Read manual before using the
device
Before using the device read the chapter Important safety information and all other
information contained in this user manual, including any safety and operating
instructions. Pay special attention to all warnings displayed on the device. Failure to
read and follow these guidelines could lead to improper or incorrect usage and result
in damage to the instrument. Improper usage could also cause severe personal injury,
death, unpredictable results, device malfunction, and premature wear to components
shortening the lifetime of the instrument. Such actions may void your warranty. Keep
this user manual and any other safety and operating instructions provided with the
instrument in a safe place accessible to all users for future reference.
If you have a serious concern regarding the safe use of your device, please contact
your authorized Miltenyi Biotec service provider or call Miltenyi Biotec Customer
Service.
3
No part of this user manual may be reproduced, stored in a retrieval system, transmitted, published, or
distributed in any form or by any means, electronically, mechanically, by photocopying, microfilming,
recording, or otherwise, without the prior written consent of Miltenyi Biotec; however, notwithstanding the
foregoing, the owners of the MACSQuant Instrument may make copies solely for purposes of training
personnel in the use and servicing of the unit within their business or organization.
Maximal care has been taken by Miltenyi Biotec in the preparation of this user manual. However, Miltenyi
Biotec shall not be liable for any technical or editorial errors or omissions contained herein or for incidental
or consequential damages in connection with the furnishing, performance, or use of this document. The
information in this document is provided “as is” without warranty of any kind, and is subject to change
without notice.
MACS, MACSQuant, MACSQuantify, and the MACS logo are either registered trademarks or trademarks of
Miltenyi Biotec GmbH or its affiliates in Germany, the United States and/or other countries. Ficoll and FicollPaque are trademarks of GE Healthcare companies. BD and BD Falcon are trademarks of Becton, Dickinson
and Company. All other trademarks mentioned in this document are the property of their respective owners
and are used for identification purposes only.
Unless otherwise specifically indicated, Miltenyi Biotec products and services are for
research use only and not for therapeutic or diagnostic use.
Software version 2.3
Copyright © 2011 Miltenyi Biotec. All rights reserved.
4
Content
Read manual before using the device --------------------------------------- 3
1
Important information ----------------------------------------------- 7
1.1 WARNINGS AND PRECAUTIONS -------------------------------------------------- 7
1.2 HAZARD LEVELS ------------------------------------------------------------ 7
1.3 SAFETY SYMBOLS ------------------------------------------------------------ 7
1.4 SAFETY LABELS ------------------------------------------------------------- 8
1.5 GENERAL SAFETY INSTRUCTIONS ------------------------------------------------- 9
1.6 HAZARDS OF ELECTRIC SHOCK AND SPREAD OF FIRE ------------------------------------ 9
1.7 STRONG MAGNETIC FIELD ----------------------------------------------------- 11
1.8 MECHANICAL HAZARDS ------------------------------------------------------ 11
1.9 OPTICAL RADIATION HAZARDS ------------------------------------------------- 12
1.10 CHEMICAL AND BIOLOGICAL HAZARDS ------------------------------------------- 13
1.11 SERVICING AND TRANSPORT -------------------------------------------------- 14
2
Assembly and installation of hardware ---------------------------------16
2.1 UNPACKING THE MACSQUANT INSTRUMENT --------------------------------------- 16
2.2 INSTALLATION OF THE MACSQUANT INSTRUMENT ----------------------------------- 19
2.2.1 Connecting the fluid containers and fluid sensor cables -------------------- 19
2.2.2 Connecting the power cord -------------------------------------------- 22
2.2.3 Installation of the MACS MiniSampler, tube racks, and reagent rack ---------- 23
2.2.4 Positioning of Chill Racks and the MACS Reagent Rack 4-------------------- 24
2.2.5 Switching ON/OFF the MACSQuant Instrument ---------------------------- 25
2.2.6 Installation of the MACSQuant Column (optional) -------------------------- 26
2.2.7 Installation of the webcam (optional) ------------------------------------ 27
2.2.8 Installation checklist ------------------------------------------------- 28
2.3 MATERIALS REQUIRED FOR OPERATION OF THE MACSQUANT INSTRUMENT ------------------- 28
2.3.1 Buffers and solutions ------------------------------------------------- 28
2.3.2 Hardware and disposables--------------------------------------------- 30
2.4 MATERIALS REQUIRED FOR MAINTENANCE OF THE MACSQUANT INSTRUMENT ----------------- 30
2.4.1 Solutions ----------------------------------------------------------- 30
2.4.2 Hardware ----------------------------------------------------------- 31
2.5 CALIBRATION OF THE MACSQUANT INSTRUMENT HARDWARE ---------------------------- 31
2.5.1 Calibration of the uptake unit ------------------------------------------ 32
2.5.2 Calibration: rack detection -------------------------------------------- 42
2.6 CALIBRATION OF THE INSTRUMENT SETTINGS ---------------------------------------- 45
2.6.1 Performing a fully automated calibration--------------------------------- 45
2.6.2 Performing manual calibration ----------------------------------------- 49
3
Installation of the MACSQuantify™ Software -----------------------------51
3.1 INSTALLING SOFTWARE ONTO A PERSONAL COMPUTER --------------------------------- 51
3.1.1 Registering the MACSQuantify Software on a personal computer ------------- 52
3.2 MACSQUANTIFY SOFTWARE REGISTRATION ---------------------------------------- 53
3.3 LOGGING ON TO MACSQUANTIFY SOFTWARE --------------------------------------- 54
3.4 UPDATING THE MACSQUANTIFY SOFTWARE ON THE MACSQUANT INSTRUMENT -------------- 54
5
4
Shutdown of the MACSQuant® Instrument ------------------------------55
4.1 MANUAL SHUTDOWN -------------------------------------------------------- 55
4.2 AUTOMATED SHUTDOWN ----------------------------------------------------- 55
5
MACSQuant® Live support -------------------------------------------57
6
Maintenance ------------------------------------------------------58
6.1 GENERAL MAINTENANCE ------------------------------------------------------ 58
6.1.1
6.1.2
6.1.3
6.1.4
6.1.5
6.1.6
Exchanging fluid containers ------------------------------------------- 58
Exchanging the MACSQuant Column ------------------------------------ 59
Exchanging fuses ---------------------------------------------------- 61
Exchanging the hydrophobic air filters----------------------------------- 61
Cleaning the washing station ------------------------------------------ 61
Cleaning the uptake port ---------------------------------------------- 62
7
Troubleshooting---------------------------------------------------63
6.1.7 Decontaminating the MACSQuant Instrument ----------------------------- 62
6.1.8 Long-term storage of the MACSQuant Instrument ------------------------- 62
6.2 INSTRUMENT DISPOSAL ------------------------------------------------------- 62
7.1 PROBLEMS NOT INDICATED BY ERROR MESSAGES -------------------------------------- 63
7.1.1
7.1.2
7.1.3
7.1.4
7.1.5
7.1.6
Column leakage ----------------------------------------------------- 63
Pump syringe leakage ------------------------------------------------ 63
MACS MiniSampler does not move properly ------------------------------ 64
Air bubbles during measurement or no events are acquired ----------------- 64
Excessive debris is present in acquisition -------------------------------- 64
Touchscreen remains dark -------------------------------------------- 65
8
Hardware monitor -------------------------------------------------66
8.1 HARDWARE MONITOR WINDOW ------------------------------------------------- 66
8.1.1 Fluidics components ------------------------------------------------- 66
8.1.2 Sample uptake ------------------------------------------------------ 67
8.1.3 Optical bench ------------------------------------------------------- 69
9
Technical data and specifications -------------------------------------70
9.1 LABELED DIAGRAMS OF THE MACSQUANT INSTRUMENT -------------------------------- 70
9.2 TECHNICAL DATA AND SPECIFICATIONS OF THE MACSQUANT INSTRUMENT ------------------ 75
9.3 TECHNICAL DATA AND SPECIFICATIONS OF THE MACS MINISAMPLER ----------------------- 78
10
Technical Support------------------------------------------------80
11
Limited warranty-------------------------------------------------82
12
Glossary -------------------------------------------------------83
6
1 Important information
The instrument is designed to operate safely after installation and when used by
trained personnel according to general safety practices and the instructions set forth in
this user manual.
1.1 Warnings and precautions
The guidelines in this section explain the potential risks associated with the operation
of the instrument and provide important supplemental safety information in order to
minimize these risks. By carefully following the instructions, you can protect yourself,
others, and the equipment from potential hazards and create a safe work environment.
If this instrument is used in a manner not specified by the manufacturer, protection
may be impaired.
At all times, local working area safety instructions, laboratory policies, and standards
regarding laboratory health and safety and prevention of accidents must be adhered
to. Contact your local authority governing electrical power supply, building
constructions, maintenance, or safety for more information regarding the installation
and operation of the equipment.
1.2 Hazard levels
Signal words are used to identify safety and property damage messages. The following
signal words are used throughout this user manual.
WARNING indicates a potentially hazardous situation which, if not avoided, could result
in death or serious injury.
CAUTION indicates a potentially hazardous situation which, if not avoided, may result
in minor or moderate injury. It may also be used to alert against unsafe practices.
NOTICE is used to address practices not related to personal injury.
1.3 Safety symbols
The following safety symbols are clearly displayed on the instrument and referred to
throughout this user manual.
Safety alert symbol. Risk of danger.
Biohazard. Risk of contamination if potentially dangerous biological material is used.
Risk of electric shock.
7
Hazardous optical radiation.
Hazardous laser radiation.
Hazardous magnetic fields.
Persons carrying pacemakers or electronic medical implants must mainatin distance
Hazard of crushing and shearing of bodily parts.
Protective conductor terminal. Symbol is attached on the inside of the instrument.
Information for service personnel.
On (supply)
Off (supply)
1.4 Safety labels
The following safety labels and safety symbols are attached to the instrument.
Figure 1.1: Safety label HAZARD OF CRUSHING AND SHEARING on automated needle arm.
Figure 1.2: Safety label STRONG MAGNETIC FIELD on front of device.
8
Figure 1.3: Safety label BIOHAZARD on waste bottle and back of device.
Figure 1.4: SAFETY ALERT SYMBOL on marking plate on back of device.
These safety labels and safety symbols are an important part of the user safety.
Periodically inspect all safety labels. Clean safety labels as necessary to maintain good
legibility. Replace safety labels that no longer meet the legibility requirements for safe
viewing distances. Contact Miltenyi Biotec for replacement labels.
1.5 General safety instructions
If the instrument is not working properly and instructions or messages on the display
screen advise to contact technical service, secure operation is no longer possible.
Immediately switch off and unplug the instrument from the power outlet, and contact
an authorized Miltenyi Biotec service provider or Miltenyi Biotec Technical Support.
1.6 Hazards of electric shock and spread of fire
Electrical devices pose the risk of an electric shock, electric short, and overheating.
Electric shock may lead to severe personal injury or death. An electric short and
overheating may lead to the spread of fire. Electronic equipment might emit sparks
which could ignite combustible vapors or dusts leading to explosion or spread of fire.
Do not use the instrument in areas classified as hazardous locations such as oxygenladen environments.
9
The housing of the instrument reduces the risks of electric shock, electric short, and
spread of fire. Except for the front access covers, do not remove or penetrate any
cover. All other covers of the device and accessory equipment are to be removed by
authorized personnel only. Do not use an opened or disassembled instrument. Do not
use the instrument if it is has been, dropped or damaged. Do not use an instrument
with damaged or broken parts. Do not operate an instrument with a damaged power
cable. Do not operate the instrument if an object has entered through the ventilation
slots or an object has been dropped into the instrument. Never push a foreign object
through an opening into the instrument.
If flames or smoke appear immediately switch off the instrument, unplug it from the
electrical outlet, and contact an authorized Miltenyi Biotec service provider or Miltenyi
Biotec Technical Support.
The device is intended for indoor use only. Water ingress may lead to electric short and
the risk of electric shock or spread of fire. Do not use the instrument in a wet or damp
location. Avoid high humidity or condensation and protect the machine against water
splashes. Special care must be taken while handling fluids. Clean up spillages
immediately. Do not allow fluids to enter the interior of the device. Do not operate the
instrument if liquids have spilled into the device. After moving the device from a cold
environment, for example, a cold room at 4 °C, to room temperature, condensing
liquid droplets may form inside the instrument. It is necessary to wait for the device to
dehumidify before operating the instrument. Unplug the instrument from the power
outlet before cleaning. Do not use liquid or aerosol cleaning agents; always use a
damp cloth.
Ambient air temperature might not be adequate to cool the instrument to acceptable
operating temperatures without adequate circulation. Make sure that the room in
which you operate the instrument has adequate air circulation. This is especially
important when using Heating Units for incubation steps. The instrument should not
be placed next to radiators, heat registers, stoves, or other pieces of equipment
(including amplifiers) that produce heat. Allow sufficient air circulation around the
instrument—at least 15 cm on all sides—during operation to ensure adequate cooling.
Prevent direct exposure of the instrument to sunlight. Slots and openings of the
instrument are provided for ventilation and should never be blocked or covered, as
these protect the device from overheating. Do not place the instrument within a builtin apparatus or a confined space such as a shelf rack unless the apparatus has been
specifically designed to accommodate the instrument, proper ventilation is provided,
and the mounting instructions for the instrument have been followed.
Make sure that the mains switch as well as the connector for the power cable are easily
accessible and located as close to the operator of the instrument as possible. If it is
necessary to disconnect the power supply, unplug the cable from the power outlet.
The instrument is equipped with a three-wire electrical grounding-type plug that has a
third pin for grounding. This plug only fits into a grounded power outlet. This is a
safety feature. Do not try to insert the plug into a non-grounded power outlet. If you
cannot insert the plug into the outlet, contact your local electrician to replace the
outlet.
10
The instrument should only be operated from a power source indicated on the
product’s electrical ratings label. If you have questions about the type of power source
to use, contact your authorized Miltenyi Biotec service provider or local power
company. Do not use extension cords or power strips. Do not overload an electrical
outlet.
Only original MACSQuant Instrument Equipment shall be attached to the connectors
labeled “External CAN”, “CAN1”, and “CAN2”. The voltage levels on these connectors
shall not exceed hazardous voltage levels of 30 Vrms. and 42.4 Vpeak or 60 Vdc. Only
the MACSQuant Instrument Bottle Sensor Cable should be attached to the “Bottle
Sensor” connector. Only a 2D code reader recommended by Miltenyi Biotec should be
connected to the “RS232/BCR” connector. External laser devices connected to the
connector labeled “RS232/BCR” have to comply with the standard IEC 60825-1.
External computing devices connected to the R232 interface connectors labeled “COM
1” have to be listed in accordance to the standard UL 60950-1. Only use connector
cables less than 3 m in length.
1.7 Strong magnetic field
The MACSQuant Instrument is equipped with an extremely strong permanent magnet
generating a strong magnetic field. There is a risk of severe personal injury for
persons carrying pacemakers, brain shunts, or electronic medical implants. Keep any
magnetic information carriers (such as credit cards, magnetic tapes, and floppy disks),
any electronic equipment (such as hearing aids, measuring and control instruments,
computers, and watches), and any magnetizable tools and objects at a distance of at
least 20 cm from the magnet cover. These items may be affected or damaged by the
magnetic field.
Figure 1.5: Location of magnet cover of the strong permanent magnet.
1.8 Mechanical hazards
Moving and revolving parts imply mechanical hazards. If equipped with the MACS
MiniSampler, keep the protective cover of the MACS MiniSampler closed and attached
to the instruments when operating. There is a hazard of crushing, shearing, or
puncturing bodily parts. Do not obstruct the movement of the automated arm and
accessory hardware during operation. Operate only with attached needle guard. The
exposed needle tip of the automated arm may lead to incised or puncturing wounds if
obstructed while moving. Do not circumvent any safety measures or devices. Do not
11
touch fluid pumps or adjust the tubing, while the device is in operation. Always switch
off the device before adjusting any part of the fluidic system. Always stop or abort a
procedure before handling accessory hardware, e.g. MACS MiniSampler, or
loading/removing tubes from the single tube holder or from the tube rack placed on
the MACS MiniSampler. Do not circumvent any safety measures or devices.
Needle guard
Figure 1.6: Moving parts implying mechanical hazards.
1.9 Optical radiation hazards
CAUTION! Use of controls, adjustments to the instrument, or performance of
procedures other than those specified herein may result in hazardous exposure to
laser radiation.
The MACSQuant Instrument is classified as a class 1M laser product per IEC 60825-
1:2007. The device is equipped with up to three Continous-Wave Lasers (laser class
12
3B) for fluorochrome excitation. These lasers are secured by protective housing. Do
not remove the protective housing.
The device is also equipped with four VCSELs for automated rack detection (maximum
output power: 3.3 mW, wavelength: 850 nm, pulse duration: 0.215 ms). The laser
radiation from this device is not visible. Do not view directly with optical instruments
(e.g. lenses, magnifying glasses, or microscopes). Viewing the VCSEL port within 100
mm distance using optical instruments could be hazardous to the eye.
The device is also equipped with powerful light emitting diodes (LEDs) for illuminating
of the buffer and waste bottles. The viewer-related risk is dependent on how the
instrument is installed and used. The optical radiation emitted from these LEDs may be
harmful to the eyes at close viewing distances. Do not remove the bottle baskets. Do
not stare at the operating illumination LEDs from a distance shorter than 30 cm from
the LED’s surface. According to the international standard IEC 62471 this lamp system
has an exposure hazard value (EHV) of 0.91 and is in excess of the Exempt Risk Group.
The hazard distance (HD) for the Exempt Risk Group is 61 cm. The hazard distance for
Risk Group 1 is 20 cm.
Also the integrated 2D code reader uses LEDs for illuminating the reading area. Do not
stare directly at the 2D code reader from a short distance while it is in operation.
Do not disassemble, modify or remove any of the optical radiation sources. Optical
radiation of disassembled instruments may be harmful to the eyes.
Figure 1.7: Position of external laser diodes and powerful light emitting diodes (LEDs). Invisible
rack detection laser diodes are located within the rectangle area. The visible 2D Code Reader
LEDs are located within the open circle. Bottle illumination LEDs are not shown.
1.10 Chemical and biological hazards
Depending on the biological material used, contamination or infection may lead to
severe personal injury or death. If biohazardous material is or has been used, the
operator shall choose and wear personal safety equipment in accordance with
warnings and precautions for the used substances. Wear protective gloves, protective
clothing, and safety glasses to prevent contact with skin and eyes. Also protect mouth
and nose as aerosols might leak from the system (e.g. washing station). Defective or
13
inadequate safety equipment might endanger the operator. The instrument shall be
operated in a safety hood if hazardous or unknown materials are processed. If
hazardous material has been used or spilled, care must be taken to thoroughly
decontaminate the system. Refer to section 6.1.7 for decontamination procedures.
Columns, tubes, and any other consumables that were in contact with biohazardous
samples shall be autoclaved prior to disposal. Liquid waste shall be autoclaved or
decontaminated using a disinfectant that is appropriate for the specific pathogen, e.g.,
10% bleach, isopropyl alcohol, or 70% ethanol.
Waste disposal must be in accordance with any local regulations.
All liquid and solid waste must be considered biohazardous and, therefore, must be
handled taking universal laboratory precautions. All clinical samples must be
considered potentially infectious. Toxic or corrosive chemicals, poisonous, acidic, or
radioactive substances may be present. It is strictly prohibited for anyone other than
the operator to handle contaminated accessories or contaminated parts of the device.
Always inspect the fluidics system (complete tubing set, reservoirs, bottles and their
closures, valves, columns, diluters, peristaltic pumps and needle) before switching on
the device. If leakage has been detected, replace all damaged parts before switching
on the device. If damaged parts cannot be replaced, unplug and do not use the device.
Failure of parts containing biohazardous material or liquids that have been in contact
with such material could cause a hazard.
1.11 Servicing and transport
Unless otherwise specifically noted in this user manual or other Miltenyi Biotec
documentation, do not service the instrument yourself. Servicing and repair must be
performed by qualified service personnel. Improper or incorrect servicing or repair of
the instrument can cause hazards to users, lead to unpredictable results, device
malfunction or damage, premature wear and reduced life time of the instrument, and
may void your warranty.
When replacement or spare parts are required, make sure that the service provider
uses only genuine Miltenyi Biotec parts or third-party parts specified and
recommended by Miltenyi Biotec. Using unauthorized replacement or spare parts can
cause malfunction of the device and impair results. Miltenyi Biotec does not honor any
warranty or accept any responsibility for device failure or damages resulting from the
use of inappropriate replacement or spare parts. After completing any service or repair
work, have your authorized Miltenyi Biotec service provider perform all safety checks
required by the repair procedure to ensure that the instrument is in proper operational
condition.
Inquire with your local Miltenyi Biotec representative about Miltenyi Biotec’s extensive
instrument service and support arrangements, or refer to
www.miltenyibiotec.com/support.
14
Only use options and upgrades recommended by Miltenyi Biotec. Inquire with your
local Miltenyi Biotec representative about Miltenyi Biotec’s extensive instrument service
and support arrangements, or refer to www.miltenyibiotec.com/support.
The instrument should be transported with care in packaging specified by Miltenyi
Biotec. Internal damage can occur, if it is subjected to excessive vibration or if it is
dropped. If the instrument needs to be shipped back to the manufacturer for service,
decontaminate the instrument from any hazardous material prior to shipment. If you
have questions regarding proper decontamination or shipment, please contact
Technical Support for assistance.
15
2 Assembly and installation of hardware
The following section describes how the MACSQuant Instrument is unpacked and
installed for first use.
Read the instructions in the chapter Warnings and precautions and
ensure that your site is properly prepared before continuing with
installation and assembly. Incorrect installation can lead to the spread of fire,
explosion, the risk of electric shock, or biohazards.
2.1 Unpacking the MACSQuant Instrument
Whenever possible, unpacking and installation of the MACSQuant Instrument should be
performed by a qualified Miltenyi Biotec trained representative.
Read through the following instructions carefully before commencing the installation
procedure. Before opening the transportation box, check for any visible external
damage to the box. Check also to see if the shock and position indicators (if present)
suggest incorrect transportation of the instrument. WARNING! If there is any damage,
do not use the instrument but contact your local Miltenyi Biotec representative or
Miltenyi Biotec Technical Support. The operation of a damaged device may lead to the
exposure of mechanical hazards, optical radiation hazards, electric shock, or the
spread of fire. Read the chapter Warnings and precautions before continuing with
installation and assembly.
Name, description
Position in box
Fluid sensor cable module
Top storage compartment
Power cable
Top storage compartment
Fluidics tubing (6´)
Top storage compartment
Bottle closures with sensors (4´)
Top storage compartment
MACS MiniSampler with cover
Packaged in box located in top storage compartment
Empty fluid containers with caps
In bottle holders
Single tube holder
Top storage compartment
Tube racks
Packaged in box located in top storage compartment
MACSQuant Instrument
Main storage compartment
User manual
Top storage compartment
Keyboard
Keyboard storage compartment located in side
compartment
Table 2.1: Inventory and location of parts within transportation box.
16
1) Open the flight box or cardboard box (not shown) and remove the top layer of
the packaging to reveal the instrument and associated packaging.
Figure 2.1: Opening the MACSQuant Instrument flight-box. The lock handle must be
turned (1) in order to release the lock-clip (2). The MACSQuant Instrument may also be
transported in a reinforced cardboard box.
Note:
The top layer holds the MACSQuant Instrument user manual, the
MACS MiniSampler (when included), and various bags containing accessories.
Carefully remove these parts.
2) Remove boxes containing the MACS MiniSampler and cover, and the
accessories.
Figure 2.2 Packing format of the MACSQuant Instrument and accessories.
3) Remove the foam packaging from both sides of the MACSQuant Instrument.
CAUTION! Two persons are required to lift the MACSQuant Instrument. Due
care should be taken to avoid personal strain or injury. The instrument must
be gripped at the base of the orange bottle baskets located at both sides of
the device. Note that the instrument is heavier at the front. Ensure the front of
17
the instrument is stabilized while lifting it. Miltenyi Biotec accepts no liability
for potential injuries sustained during lifting and/or movement of the device.
4) Place the instrument onto a stable worktop surface, e.g., laboratory bench.
Remove the plastic bag surrounding the device. WARNING! Take into
consideration that the instrument requires adequate air circulation for heat
exchange and cooling. Do not place the MACSQuant Instrument on an
unstable table, cart, stand, tripod, or bracket. As a consequence, the
instrument might fall down. This may cause serious bodily harm and/or
serious damage to the instrument. Use only on a table, cart, stand, tripod, or
bracket that can easily support a weight of 50 kg.
5) Carefully remove the uptake port needle from the foam packaging.
Figure 2.3: Left: The MACSQuant Instrument was securely placed on stable worktop.
Right: The plastic bag was removed. Note that the uptake needle is supported by foam.
6) Place the uptake port needle into its guiding at the needle arm.
Figure 2.4: The needle port is positioned as illustrated above.
18
NOTICE! Ensure that the tubing connected to the uptake port needle can move
freely when the needle arm extends, or when the needle moves into the
sample uptake position.
7)
Adjust the angle of the touchscreen in an upright position in order to access
the solution bottles and the fluidic ports on the back of the instrument.
2.2 Installation of the MACSQuant Instrument
The MACSQuant Instrument is a benchtop instrument that fits neatly onto a benchtop
and into standard sized laminar flow or safety cabinets. It should be installed on a
stable, flat and vibration-free surface. The operating environment should be dust-free,
sufficiently ventilated, and free from sources of electromagnetic radiation. In order to
ensure a flat surface in laminar flow hoods, the MACSQuant Instrument can be placed
on a MACS Laminar Hood Plate (# 130-093-246).
WARNING! Before operating the MACSQuant Instrument for the first time, carefully read
the user manual and contact your local Miltenyi Biotec representative for assistance.
When delivered, the MACSQuant Instrument fluidics system is delivered dry i.e.,
without storage solution.
2.2.1 Connecting the fluid containers and fluid sensor cables
Operating the MACSQuant Instrument requires running buffer, washing solution, and
storage solution. Always operate the instrument with ready-to-use MACS Buffers and
solutions. The MACSQuant Instrument is delivered with four empty fluid containers
(bottles) which can be found in the orange fluid container baskets connected to the
instrument. The bottle closures consist of a fluid uptake port (for solutions: green,
blue, and black closures) or a fluid outlet port (waste container) as well as an
electrolyte sensor for measuring liquid levels. The fluid containers, bottle closures, and
fluid sensor cables are color coded for easier handling (see Table 2.2).
Container
Symbol
Container
Running Buffer
Storage solution
Washing Solution
Waste
(green)
(red)
(blue)
Symbol
(black)
Table 2.2: Symbols and color coding of fluid containers.
1) Install one fluid at a time. Place a new bottle into the orange fluid container
basket. Please note the corresponding color coding (see Table 2.2).
19
2) Unscrew the lid of the bottle and replace it with the appropriate bottle
closures. WARNING! Do not unscrew the fluid container lids until the bottle is
placed in the basket to avoid spilling on the instrument and risk of electric
shock.
3) Remove the fluid sensor cables and bottle closures from the packaging.
Blue-, green - and
black-colored
closures and
accompanying
hydrophobic
filters in a single
bag
Red-colored
closure (waste)
is packed in a
separate bag
All bottle tubes
packed in a single
bag
Figure 2.5: Packaging format of the tubing, bottle closures (caps), and hydrophobic
filters.
4) Remove the end-caps from the bottle distribution block.
Figure 2.6: Before inserting the tubing into the fluid ports it is necessary to remove the
end-caps from the bottle distribution block.
20
5) Connect the tubing to the appropriate color-coded fluid port on the back of
the MACSQuant Instrument.
Figure 2.7: Connecting the tubing to the bottle distribution block.
6) Attach the sensor cable plug to the socket for sensor cables at the back of the
MACSQuant Instrument and fasten securely.
Figure 2.8: Connecting the sensor cables to the sensor cable port.
7) Note the color coding and connect each sensor cable to the respective bottle
closure.
Sensor cables
Air
filters
21
8) Connect the hydrophobic air filters (0.2 μm) to the appropriate connectors on
the bottle closures. NOTICE! The correct positioning of each solution
container—recognizable by the color code and the symbols—is crucial for
successful analyses using the MACSQuant Instrument.
To keep buffer sterile, each bottle closure should be equipped with a
hydrophobic air filter. Avoid any contact of hydrophobic air filters with fluids
as this may cause clogging of the filter. WARNING! When working with
biohazardous samples, it is recommended to fill the waste container with 100
mL of disinfectant (e.g. MACS Bleach Solution; # 130-093-663) before use.
For proper disposal, please follow local regulations and carefully read the
chapter Important information.
2.2.2 Connecting the power cord
1) Note the position of the power socket on the rear panel of the MACSQuant
Instrument.
Ensure that the main power switch is in position “0” before connecting the
power cord.
WARNING! The device is equipped with a three-wire electrical grounding-type
plug. This is a safety feature to reduce the risk of electric shock. Do not insert
the plug into a non-grounded power outlet. If you cannot insert the plug into
the outlet or if you are not sure whether the outlet is grounded, contact your
local electrician.
The device should only be operated from a power source indicated on the
product’s electrical ratings label. If you have questions about the type of
22
power source to use, contact your authorized Miltenyi Biotec service provider
or local power company.
Make sure that the mains switch as well as the connector for the power cable
are easily accessible and located as close to the operator of the instrument as
possible. If it is necessary to disconnect the instrument’s power supply,
unplug the cable from the power outlet.
2.2.3 Installation of the MACS MiniSampler, tube racks, and
reagent rack
Note:
If the MACSQuant Instrument is not delivered with the MACS
MiniSampler, the included CAN plug must be attached to the back of the
device in the socket labeled ‘External CAN’ (see Figure 2.11 ).
The MACSQuant Instrument is optionally delivered with the MACS MiniSampler,
different tube racks, and a reagent rack (MACS Reagent Rack 4). Once installed, the
MACS MiniSampler is automatically recognized by the MACSQuant Instrument. Each
tube rack has a barcode on the rear side that is detected upon starting the separation
process.
1) Remove the transparent protection foil from the lens of the rack detection.
Note the positions of the MACS MiniSampler guiding (2) and its corresponding
slot (1) located at the front of the instrument.
1
2
2
1
Figure 2.9: Location of the MACS MiniSampler guide (2) and receiving slot (1) for the
MACS MiniSampler.
2) Tilt the MACS MiniSampler and slide the guiding into the receiving slot until
resistance is met; lower the rack to a horizontal position i.e., the rack is
locked in the position illustrated by the above figure.
23
3) Open the front door of the MACSQuant Instrument and fix the MACS
MiniSampler with the according screw.
4) Close the front door of the MACSQuant Instrument.
5) Ensure that the MACS MiniSampler is completely inserted and secured.
6) Note the position of the lid guiding at both sides of the MACS MiniSampler
and attach the lid.
Figure 2.10: Rear view of MACS MiniSampler with MACS Reagent Rack and Chill 5 Rack.
7) Place the MACS MiniSampler cable underneath the MACSQuant Instrument and
connect it to the socket labeled “External CAN“ at the rear panel of the
instrument.
Figure 2.11: The MACS MiniSampler cable is attached to socket at the back of the
instrument.
2.2.4 Positioning of Chill Racks and the MACS Reagent Rack 4
1) Open the lid of the MACS MiniSampler.
24
2) Secure the MACS Reagent Rack 4 onto the MACS MiniSampler into the left
recess. The engagement hook has to snap into the undercut.
2
1
Figure 2.12: To remove the MACS Reagent Rack 4, gently press the rack in the planar
direction “1” followed by lifting the rack in an upwards direction (“2”).
3) Set a cool tube rack (e.g. Chill 5 Rack) onto the MACS MiniSampler into the
right recess ensuring that the rack barcode is facing the MACSQuant
Instrument.
Figure 2.13: Positioning the Chill 5 Rack adjacent to a MACS Reagent Rack 4 on the
MACS MiniSampler.
Note:
Racks can be pre-cooled for 3–4 hours at 2–8 °C. Do not cool below
0 °C since samples may freeze. If recognition of the tube rack fails, the
instrument will display a screen for manual selection of the tube rack. Before
confirming the choice, ensure that the rack is placed correctly into the recess.
2.2.5 Switching ON/OFF the MACSQuant Instrument
The main power switch is located on the right side of the instrument in front of the
container baskets (“I” indicates “On”, “O” indicates “Off”). Switch on the MACSQuant
Instrument.
25
On/off switch
Figure 2.14: Location of the on/off switch.
2.2.6 Installation of the MACSQuant Column (optional)
The MACSQuant Column can be ordered separately (# 130-094-458) and can provide
the flow user a fast and reproducible way to analyze rare cells without the necessity of
long flow analysis times. The rare cell must be labeled with one of the MACS MicroBead
reagents as well as the fluorochromes of interest. This process in the presence of the
MACS Enrichment Unit provides a flexible tool to pre-enrich a particular cell type prior
to analysis.
Note:
These cells cannot be retrieved. Please refer to section 6.1.2 for more
illustrated instructions on exchanging the MACSQuant Column.
Remove the column substitute and install the MACSQuant Column according to the
following instructions. Keep the column substitute; it can be reinstalled if the
MACSQuant Column is no longer needed.
1) Open the front door and note the position of the tubing and the pre-installed
substitute (dummy) of the MACSQuant Column.
2) Using both hands, hold the top and bottom of the column substitute, and pull
gently but firmly to remove it from its slot in the MACS Enrichment Unit.
3) Place a paper towel under the column substitute. Hold the column substitute
in one hand and gently unscrew the upper column connector anti-clockwise.
Tilt the column substitute downwards to empty any fluid. Then unscrew the
bottom column connector. Store the column substitute for later use.
4) Insert one end of the new MACSQuant Column into the bottom column
connector and gently screw in the column by turning it clockwise until you
feel resistance. Point the column towards the top of the device and screw in
the top column connector.
26
Note:
The column has an appropriate orientation. The top portion of the
column has a 3 mm filter in the end. This end must be in the upward position
in order to achieve the best enrichment. Refer to section 6.1.2 for more
details.
5) Align the column so that the top column connector sits on the guide of the
magnet cover. Press the column into the slot until you feel the guides click.
Verify that the column is placed in the center of the magnet cover.
6) Close the front door.
7) Prime column. In the software, go to Tools and select the Prime column
option. For more information, consult the software guide.
2.2.7 Installation of the webcam (optional)
A webcam is provided for use with MACSQuant Live Support. During normal operation
the webcam should not be installed on the instrument. Refer to section 5 for details of
how to contact Miltenyi Biotec Technical Support via MACSQuant Live Support.
Note:
A webcam should be supplied with the MACSQuant Instrument. If this
is NOT the case, please contact your nearest MACSQuant Specialist.
To install the webcam:
1) Place the webcam in the holder assembly at the side of the instrument.
Figure 2.15: Location of the web-cam holder assembly.
2) Attach the camera USB cable to a free USB port at the back of the MACSQuant
Instrument.
Note:
The web cam will automatically install. If this is not the case, please
contact Technical Support or your local MACSQuant Specialist.
27
2.2.8 Installation checklist
The following checklist can be used to ensure that the MACSQuant Instrument is
correctly installed:
1) Ensure that the power cord is securely plugged into the MACSQuant
Instrument and to a functional main power supply.
2) Ensure that all other tubing connections are fastened. If necessary, tighten
loose connections using a wrench.
3) Ensure that the fluid containers are filled and installed correctly, that the
correct tubing and fluid sensor cable is attached to the corresponding
container, and that the bottle closures are fastened. Make sure that the waste
bottle is empty. WARNING! When working with biohazardous samples, it is
recommended to fill the container with 100 mL of disinfectant before use (e.g.
MACS Bleach Solution). For proper disposal, follow local regulations.
4) (Optional) Open the front door and check that the MACSQuant Column is
installed correctly. Ensure that the tubes are securely fastened to the column
and that no part of the visible tubing is pinched or obstructed.
5) When all points of this installation checklist have been fulfilled, close the front
door.
6) Switch on the instrument using the power switch and pressing the touchscreen
by hand.
2.3 Materials required for operation of the MACSQuant
Instrument
The following section outlines the materials and consumables required for operation of
the MACSQuant Instrument.
2.3.1 Buffers and solutions
Running Buffer, Washing Solution, and Storage Solution are required for daily operation
of the instrument. Only use buffers and solutions supplied by Miltenyi Biotec for
operation of the MACSQuant Instrument. A reproducible and optimal performance of
the MACSQuant Instrument cannot be guaranteed when the instrument is operated
28
using self-made buffers and/or solutions procured from another manufacturer.
Information for ordering MACSQuant Buffers can be found in Table 2.3.
Description
Color code
Capacity
Order no.
MACSQuant Running Buffer
Blue
6 ´ 1.5 L
130-092-747
MACSQuant Washing Solution
Green
6 ´ 1.5 L
130-092-749
MACSQuant Storage Solution
Black
6 ´ 1.5 L
130-092-748
MACSQuant Starting Buffer pack
n/a
4x 1.5 L
130-094-190
1x1.5 L
1x 1.5 L
MACSQuant Washing & Storage Solution
Kit
MACS Bleach Solution
n/a
3 ´ 1.5 L
130-092-801
3 x 1.5 L
n/a
6 ´ 1.0 L
130-093-663
Table 2.3: Running buffer and solutions for use with the MACSQuant Instrument.
For safe operation of the MACSQuant Instrument, all fluid containers must contain at
least 150 mL of the respective solutions and running buffer (except for the waste
container). In order to prevent contamination of the fluidics system and the
MACSQuant Column, the use of non-sterile buffers and solutions is not recommended.
MACSQuant Running Buffer
The MACSQuant Running Buffer is a sterile filtered, ready-to-use buffer containing
0.09% azide as a preservative. The buffer is supplied in a 1.5 L container that can be
connected directly to the MACSQuant Instrument.
MACSQuant Washing Solution
The MACSQuant Washing Solution is a sterile filtered, ready-to-use solution to rinse
the fluidics system before the MACSQuant Instrument shutdown. It contains a
detergent that dissociates cell aggregates and prevents the formation of plaques in the
fluidics. The MACSQuant Washing Solution was developed for an optimal cleaning of
the MACSQuant Instrument tubing system and is provided in 1.5 L container.
MACSQuant Storage Solution
The MACSQuant Storage Solution is a sterile filtered, ready-to-use solution used for
the overnight or long-term storage of the MACSQuant Instrument. The MACSQuant
Storage Solution is supplied in a 1.5 L container and prevents the corrosion or
contamination of the fluidics system during long- or short-term storage of the
instrument. Exchange of solutions within the fluidics system to the storage solution is
performed automatically when the system shutdown protocol is activated in the
software.
29
MACS Bleach Solution
The MACS Bleach Solution is a sterile filtered, ready-to-use solution for the
decontamination of the MACSQuant Instrument. It contains a sodium hypochlorite
solution with 1% active chlorine and 0.8% sodium hydroxide. This solution should be
used when performing the clean program of the MACSQuant Instrument.
2.3.2 Hardware and disposables
The single-tube holder has been designed for compatibility with all standard flow
cytometry tubes, 1.5 mL , 2 mL, and 5 mL tubes.
Note:
Should the MACS MiniSampler be used, the three tube racks available
(Chill 5, Chill 15, and Chill 50) are designed to hold standard 5 mL, 15 mL,
and 50 mL tubes, respectively (see Table 2.4). Additionally, the Chill 96 Rack
can be used for 96-well microtiter plates.
Rack type
Tubes
Maximum number
Order numbers
of samples
Chill 5
5 mL
24
130-092-951
Chill 15
15 mL
15
130-092-952
Chill 50
50 mL
6
130-092-953
Chill 96
96-well microtiter
96
130-094-459
4
130-094-574
plate
Reagent rack
Reagent vials
Table 2.4: Rack types for the MACS MiniSampler and compatible sample tubes.
2.4 Materials required for maintenance of the MACSQuant
Instrument
Solutions and hardware required for maintenance of the MACSQuant Instrument are
discussed below.
2.4.1 Solutions
Disinfectant solution
On spillage or splashing of sample, it is recommended to clean the port of the
automated arm and the surface of the instrument with 70% ethanol or isopropyl
alcohol and a dampened tissue. Alternatively, use alcohol swabs.
30
Distilled water
It is recommended to remove build-up of salt crusts with the use of a tissue dampened
with distilled water.
2.4.2 Hardware
MACSQuant Columns
For pre-enrichment of rare cells prior to analysis. The MACSQuant Column has a
capacity of 5´106 magnetically labeled cells. The column should be replaced every
three months.
Column substitute
If the MACSQuant Column is not installed or will not be used for more than three
months, a column substitute should be installed. The instrument is delivered with
column substitute installed.
Hydrophobic 0.2 μm air filters
Hydrophobic air filters are used to vent fluid bottles and maintain sterility. Do not use
hydrophilic filters, since they are easily blocked upon contact with liquid.
Pre-filter
The pre-filter is designed to prevent particles (salt crystals etc.) from entering the
fluidics system. When installing the instrument, the white lid on the top of the filter
may need to be unscrewed to bleed the system.
2.5 Calibration of the MACSQuant Instrument hardware
Read the instructions in the chapter Warnings and precautions before
operation of the instrument.
When using the MACSQuant Instrument for the first time it is necessary to calibrate the
hardware before calibration of the instrument settings. This section discusses
hardware calibration.
Note:
It is highly recommended that hardware calibration is only performed
by an administrator who has been trained by Miltenyi Biotec.
Note: In order to calibrate of the MACSQuant Instrument the user must be
familiar with the MACSQuantify Software. Refer to the software guide for an
introduction to the MACSQuant Instrument user interface.
31
2.5.1 Calibration of the uptake unit
1) Click on the Tools tab and Calibrate uptake unit box.
Figure 2.16: Selection of Tools tab for calibration of uptake unit.
Note:
The red closed circles shown on Figure 2.16: indicate that all four
Note:
In order to meet the minimal hardware calibration requirements of the
uptake components (Needle arm, single tube rack, Chill 5 Rack, Chill 96 Rack,
Reagent Rack 4) are not calibrated.
MACSQuant Instrument, the position of the needle arm in relation to the
washing station and single tube rack must be calibrated.
Calibration of needle arm
The needle arm moves between the samples and sample injection port/needle wash
station along the y and z axis. It is imperative that the arm is correctly calibrated.
1) Ensure that the needle arm can freely move and that no object is obstructing
it.
2) Click Start calibration under the heading Needle arm calibration relative to
washing station. The needle arm will move toward the wash station (y-axis)
before being inserted into the sheath flow port (z-axis).
32
Note:
If the calibration unit is grossly misaligned, the needle may pop-out
of the needle-arm holder. This will cause a system failure, but will not damage
the resulting components. Simply reinsert the needle into the holder and
adjust the needle arm appropriately. A dialog box will appear to reinitialize,
press ok.
Figure 2.17: Calibration of the uptake unit is underway. The yellow closed circle
indicates that the needle arm may be freely moved for manual calibration.
3) Manually adjust the y-axis of the needle arm by moving it towards you, taking
care to ensure that the needle is correctly positioned over the center of the
sheath flow port.
4) Gently lower the needle arm into the sheath flow port until the needle makes
first contact with the bottom of the orifice. The needle should always remain
perpendicular to the horizontal plane, i.e., should not be arched or inserted
diagonally.
33
Measurement flow port
Figure 2.18: Inserting the needle arm into the measurement flow port.
5) Click Save calibration.
Figure 2.19: Coordinates of the needle arm are saved.
6) The closed green circle indicates that calibration of the needle arm position is
completed.
7) Click Test to confirm that the correct coordinates are saved.
34
Calibration of the single tube rack
1) Gently insert the single tube rack it into the corresponding slots located at the
front of the instrument (see Figure 2.20). The rack should ‘click’ into place.
Figure 2.20: The single tube rack is attached to the instrument as illustrated above.
2) Click the Experiment tab and select the Single tube rack format from the Rack
pull-down menu.
Note:
If the adjacent checkbox is activated (
) the rack will be detected
automatically. If rack detection has not previously been calibrated, deactivate
this checkmark before proceeding.
Figure 2.21: Selecting a “single tube rack” for rack calibration
3) Click Start calibration. The needle arm will automatically move forward and
insert the needle into the single tube.
The needle should be positioned as follows:
i) At the center of tube on the y-axis (i.e. equidistant from the tube edges).
ii) Only a fraction of a millimeter from the bottom of the tube (z-axis), i.e.
almost touches the tube bottom. To check the needle position, gently wiggle
the tube to ensure that there is a small amount of movement.
If this is not the case, carefully adjust the needle arm accordingly.
When satisfied with the needle position, click Save calibration.
4) A successfully completed procedure is indicated by a green closed circle.
35
5) Click Test to confirm that the correct coordinates are saved.
Figure 2.22: Green closed circles indicate successful calibration of the needle arm and
single tube rack.
Calibration of Chill Racks (recommended if a MACS MiniSampler is attached)
1) Ensure that the MACS MiniSampler is correctly attached to the instrument. This
includes fastening of the corresponding cable to the External CAN port located
at the back of the instrument (refer to section 2.2.3 for information about
correct connection of the MACS MiniSampler).
2) Click the Experiment tab and select the Chill 5 tube rack format from the Rack
pull-down menu.
Figure 2.23: Selecting Chill 5 Rack using the Experiment tab.
36
Note:
The Chill 15 and Chill 50 Rack do not need to be calibrated
separately. The calibration of the Chill 5 Rack will also ensure for the
appropriate calibration of the Chill 15 and Chill 50 Rack.
Note:
If the Chill 5 Rack is not selected the following error will be reported:
“Specified rack must be specified in the experiment settings”.
3) Load a Chill 5 Rack with empty 5 mL tubes in the position D6 (see Figure
2.24:).
Figure 2.24: Position D6 (marked ‘X’) is used for calibration of Chill 5 Rack.
4) Place the loaded rack onto the MACS MiniSampler.
5) Click Start calibration.
The needle arm will automatically insert the needle into a tube located at rack
position D6.
37
Figure 2.25: Calibration of the uptake unit is underway. The yellow closed circle
indicates that the needle arm may be freely moved for manual calibration.
6) The needle should be positioned as follows:
i) At the center of tube on the y-axis (i.e. equidistant from the tube edges).
ii) Only a fraction of a millimeter from the bottom of the tube (z-axis) i.e.
almost touches the tube bottom. To check the needle position relative to the
bottom of the tube, gently wiggle the tube to ensure that there is a small
amount of movement.
If this is not the case, carefully adjust the needle arm accordingly.
7) When satisfied with the needle position, click Save calibration.
8) A successfully completed procedure is indicated by a green closed circle.
9) Click Test to confirm that the correct coordinates are saved. The MACSQuant
Instrument will automatically test the remaining sample positions.
38
Figure 2.26: Chill 5 Rack is successfully calibrated
Calibration of MACS Chill 96
1) Ensure that the MACS MiniSampler is correctly attached to the instrument. This
includes fastening of the corresponding cable to the External CAN port located
at the back of the instrument (refer to section 2.2.3 for information about
correct connection of the MACS MiniSampler).
2) Click the Experiment tab and select the 96-well format from the Rack pulldown menu.
Figure 2.27: Selecting a 96-well rack for rack calibration: ensure the checkbox is
activated
3) Place an empty 96-well plate on a Chill 96 Rack and place both onto the MACS
MiniSampler.
39
4) Click Start calibration.
The needle arm will automatically insert the needle into a rack position H12,
specified by the MACSQuantify Software.
Figure 2.28: Calibration of the Chill 96 Rack is underway. The yellow closed circle
indicates that the needle arm may be freely moved for manual calibration.
5) The needle should be positioned as follows:
i) At the center of well on the y-axis (i.e. equidistant from the plate well
edges).
ii) Only a fraction of a millimeter from the bottom of the plate well (z-axis) i.e.
almost touches the bottom of the plate. To check the needle position relative
to the bottom of the plate well, gently wiggle the plate to ensure that there is a
small amount of movement.
If this is not the case, carefully adjust the needle arm accordingly.
6) When satisfied with the needle position, click Save calibration.
7) A successfully completed procedure is indicated by a green closed circle.
40
Calibration of MACS Reagent Rack 4
1) Ensure that the MACS MiniSampler is correctly attached to the instrument. This
includes fastening of the corresponding cable to the External CAN port located
at the back of the instrument (refer to section 2.2.3 for information about
correct connection of the MACS MiniSampler).
2) Ensure that the Reagent Rack 4 is correctly placed on the MACS MiniSampler.
Place an empty reagent vial in each of the 4 reagent positions.
3) Click Start calibration. A dialog box will prompt you to ensure that the Reagent
Rack is indeed correctly placed and that the single tube rack is removed. If this
is the case, click OK.
4) The needle arm will automatically be positioned in reagent vial position 1. If
the position is correct, click Save calibration.
41
5) Click Test to test the calibration. The needle arm should be correctly
positioned in all four vials.
Figure 2.29: All uptake units have been correctly calibrated.
2.5.2 Calibration: rack detection
Single tube rack and acquisition button detection
1) Click on the Tools tab and Calibrate rack detection.
2) Click Start calibration. Follow the prompts on the screen.
The dialog box will prompt you to remove the single tube holder from the
front of the instrument.
3) Remove the single tube holder by pinching the single tube rack using both
index fingers (the orange button is used only for acquisition; it does not
release the single tube rack from the instrument). The single tube rack can be
easily removed by gently pulling the component away from its dockingadaptor.
42
Figure 2.30: Removing the single tube holder. The orange button is for acquisition only.
4) The software will then direct you to re-connect the single tube rack.
This is performed by inserting the two male-pins of the single sample rack
into the female docking adaptor until its ‘clicks’ into position.
5) Lastly, the software will prompt you to press and hold the orange sample
acquisition button until the calibration is completed. A successful calibration is
indicated by a green closed circle.
Figure 2.31: Successful completion of single rack detection.
43
Note:
For the rack calibrations, the user must perform the prompted tasks
promptly in order to calibrate the racks properly. Otherwise, the calibration
will fail.
Rack detection
This step is required for the automatic detection of Chill 5, 15, and 50 Racks by the
MACS MiniSampler.
1) Ensure that the MACS MiniSampler is correctly attached to the instrument. This
includes fastening of the corresponding cable to the External CAN port located
at the back of the instrument. NOTICE! The single tube rack must be
disconnected before performing this procedure. Ensure that no objects are
obstructing the MACS MiniSampler as this component will move during
calibration.
2) Select the Chill 5 tube rack from the Experiment tab and Rack drop-down
menu.
Figure 2.32: The rack checkbox,
, must be activated in order to perform rack
detection. Prior to performing calibration of rack detection, this checkbox should be
inactivated.
3) Click Start calibration of the rack detection.
4) Place one Chill 5 Rack onto the MACS MiniSampler.
The MACSQuant Instrument will immediately move the Chill Rack to and for
while checking the barcode reader for operability.
44
5) A successful calibration is indicated by a green closed circle and the text
report Calibration done.
Figure 2.33: Rack detection is successfully completed.
2.6 Calibration of the instrument settings
In flow cytometry, fluorescence intensity is used to distinguish between ‘positive’ and
‘negative’ populations of particles. The reproducibility and stability of the fluorescence
signal over time is of vital importance. In order to ensure a stable measurement that is
independent of time and the specific analyzer, instrument calibration is performed.
Fluorescence calibration curves are calculated by using standardized fluorescence
MicroBeads that have predefined sizes and fluorescence intensities. A linear regression
equation is calculated from the instruments response in mean or modal histogram
channel values to these predefined values.
2.6.1 Performing a fully automated calibration
1) Prior to beginning calibration, ensure that the single tube holder is correctly
attached and the instrument has been in the acquisition mode for at least 30
minutes.
45
Figure 2.34: The single tube holder and orange acquisition button.
2) Activate the reader by clicking on the Barcode icon (
) and present the 2D
barcode of a vial of MACSQuant Calibration Beads in front of the barcode
reader.
3) Follow the dialog box instructions, i.e., place an empty tube into the single
tube holder and dispense one drop of MACSQuant Calibration Beads into it.
Note:
To ensure an optimal result of calibration it is necessary to mix
thoroughly the calibration beads prior to dispensing.
4) Click OK to commence the calibration process. The uptake needle will dilute
the calibration beads to a total volume of 0.5 mL, following which 150 mL will
be taken up and injected into the flow sheath port for the calibration
procedure. During calibration the gain for each respective channel will be
automatically adjusted. The MACSQuant Calibration Beads (# 130-093-607)
consist of two sizes of beads (2 μm unstained beads and 3 μm beads stained
with fluorochromes to emit fluorescence in all channels). For more information
about the MACSQuant Calibration Beads, please review the product data sheet
available at www.miltenyibiotec.com.
46
Figure 2.35: Calibration is underway.
5) The calibration results for each channel are presented as dot plots,
histograms, and as a tabulated summary on a two-page (two-screen) report.
Successful calibration for each channel is indicated by a green checkmark. To
view all calibration dot plots and histograms click Next screen,
Previous screen
or
.
47
Figure 2.36: Successful calibration of the MACSQuant Instrument as shown by an array
of histograms (upper) and associated summary table (lower).
6) When the process is successfully completed, the MACSQuant Instrument Status
bar should report MACSQuant ready: Calibration OK. Furthermore notification
48
Passed in the statistic shows the MACSQuant Instrument is well adjusted.
These settings will be automatically saved as the default settings.
Note:
Contact Technical Support if after the calibration the MACSQuant
Instrument displays Incomplete in the statistic and Calibration recommend in
the status bar.
2.6.2 Performing manual calibration
Custom mode users and administrators can perform manual calibration as follows.
Note:
The Calibration Beads must be pre-diluted and mixed before
performing this procedure. The MACSQuant Instrument can perform pre-
dilution and mixing of Calibration Beads; see section “Setting the dilution and
mixing of the calibration beads prior to calibration” below for more details.
1) In the Custom mode, select the Experiment tab on the left side of the screen.
Figure 2.37: Setting-up calibration in Custom mode using the Express option (radio
button).
2) Select the Settings tab in the lower section of the panel and click on the
Express radio button.
49
3) Click the Type pull-down list and select Setup. Similarly, choose Calibration
from the Mode pull-down list.
4) Click on the Start Measurement button,
.
This will start the calibration process.
Setting the dilution and mixing of the calibration beads prior to calibration
Dilution of the calibration beads can be performed by the MACSQuant Instrument.
1) Select the Autolabel tab within the Experiment tab.
2) Click <add…>. This will introduce a Reagent dialog box.
3) Select S1 Special and Buffer A and adjust the dilution appropriately. The buffer
should be set at 10:1 with no incubation time.
4) Follow the steps described for manual calibration.
50
3 Installation of the MACSQuantify™
Software
This chapter instructs the user how to install the MACSQuantify SoftwareTM onto an
independent personal computer and onto the MACSQuant Instrument.
3.1 Installing software onto a personal computer
Note: The recommended PC specifications to run the MACSQuantify Software follows:
Operating system: Microsoft® Windows® XP (SP2 is a minimum requirement although
SP3 is preferred).
Memory: 1GB (minimum).
Note: MACSQuantify Software is only compatible with Microsoft® Windows®
operating system.
1) Insert the MACSQuantify Software USB memory stick into an available USB port on
the PC.
2) Copy the folder entitled "cap" from the USB drive to the Windows desktop.
3) Open the cap folder.
4) Run file installCAP.
5) Answer the command prompts (Yes Y, No N, or Abort A) as instructed below:
6) At the prompt: Do you want to install a new cap-package? [(Y)es / (N)o / (A)bort]:
Select Y to continue with the installation (or A to abort the installation).
7) At the prompt: Install on MACSQuant ? [(Y)es / (N)o / (A)bort]:
Select N when installing the software onto a PC.
Select A to abort the installation.
8) (Optional, if you already used a previous software version before) At the prompt: Do
you want to keep old configurations and settings? [(Y)es / (N)o / (A)bort]:
Select Y when current software configurations and settings should NOT be deleted
51
by the new installation.
Select N when current software configurations and settings should be deleted by the
new installation.
Select A to abort the installation.
9) (Optional, if you already used a previous software version before) At the prompt: Do
you want to keep all data files? [(Y)es / (N)o / (A)bort]:
Select Y when saved data files should NOT be deleted by the new installation.
Select N when saved data files should be deleted by the new installation.
Select A to abort the installation.
10) When prompted press any key to continue.
11) The program will automatically install the software using the previously selected
settings. On personal computer installations, a software shortcut icon will be created
on the desktop.
3.1.1 Registering the MACSQuantify Software on a personal
computer
Note:
If your copy of MACSQuantify Software is not registered please
contact Miltenyi Biotec to obtain a registration code. Visit
www.macsquant.com for more information.
52
3.2 MACSQuantify Software registration
1) Launch MACSQuantify Software by clicking on the shortcut icon.
2) Click Register (see Figure 3.1).
Figure 3.1: Click register to identify the software serial number.
Note:
Note the software version and Activation key (see Figure 3.2).
3) Close software.
4) Complete the registration form on the supplied USB memory stick.
5) E-mail the completed form to [email protected].
6) Upon receipt of a registration number from MACSQuant Support, run the
MACSQuantify Software, click Register, and enter your user name and registration
number.
7) Click OK to continue.
53
Figure 3.2: The software version and activation key are required in order to register the
MACSQuantify Software.
3.3 Logging on to MACSQuantify Software
Note:
MACSQuantify Software will operate for a trial period of 30 days
without registration. Refer to the software guide for information on
registration of software.
1) Launch MACSQuantify Software.
2) Select Admin from the drop-down list and click Login.
3) Complete the password field. Confirm your password in the field underneath. Click
OK.
Note:
The name and registration code fields are case sensitive.
3.4 Updating the MACSQuantify Software on the
MACSQuant Instrument
Note:
Before performing a software update it is highly recommended to
perform a system backup.
Contact your Miltenyi Biotec representative to find out if a MACSQuantify Software
update is available for the MACSQuant Instrument. If available, follow instructions for
software update as directed by the Miltenyi Biotec representative.
54
4 Shutdown of the MACSQuant®
Instrument
The chapter outlines how a manual and automatic shutdown procedure is made.
4.1 Manual shutdown
If no further measurements are required, shut down the instrument as follows:
1) Click
to select ‘data analysis mode’ or ‘instrument off’.
This automatically starts a washing protocol that lasts for approximately
seven minutes, which includes an incubation of the washing solution in the
fluidics followed by the flushing of the washing solution and replacement with
the storage solution.
Note:
Data can be analyzed using the software interface even after the
instrument has been shutdown using the analysis mode.
4.2 Automated shutdown
An automatic shutdown procedure can be activated using the MACSQuantify Software.
This may be used to prevent the nonessential illumination of lasers (which shortens
diode lifespan) or to guard against accidentally leaving the instrument on overnight or
over the weekend.
Configuring automatic shutdown:
Note:
Configuration of the automatic shutdown can only be performed by
custom users and administrators.
55
1) Click Edit, Options…, Software and Timers.
Figure 4.1: Timers window.
2) Click on the Standby timer field. Modify the time (minutes) using the slider bar
or keyboard. This option will set the idle time before automated shutdown
begins. The Shutdown timer field sets the incubation time used during the
shutdown procedure. For optimal cleaning, this field should be set to at least
five minutes. The Needle primining time field is used to ensure that air is not
introduced during measurement due to evaporation while the needle is idle.
Under normal operation, the recommended priming time is 20 seconds.
3) Click Apply and OK.
Note:
Refer to the software guide for an overview of the MACSQuantify
Software Options window.
56
5 MACSQuant® Live support
MACSQuant® Live support is a real-time diagnostic service provided by Miltenyi Biotec
Technical Support. Highly trained MACSQuant Experts can be reached in real-time to
assist with any queries you may have.
Note:
As an option is it possible to use a web-cam in communication with
MACSQuant Technical Support. If no web cam is provided, please contact your
nearest MACSQuant Specialist.
Note:
The MACSQuant Instrument must have network access to the internet
for live support. Contact your local IT administrator if this is not the case.
To receive remote assistance:
1) Select the Tools menu.
2) Click MACSQuant Live Support….
A popup HTML field will appear. Complete the fields with your information
and detail any queries you may have using the Message/Question box.
3) Click Submit.
4) Live support will commence.
57
6 Maintenance
Do not service the equipment yourself. Service needed on components
inside the instrument must be carried out only by personnel trained
and authorized by Miltenyi Biotec. An improperly serviced instrument may lead to
exposure of mechanical hazards, hazardous optical radiation, and the risk of electric
shock and to severe personal injury or death. Read the chapter Warnings and
precautions for important safety information.
6.1 General maintenance
The following section describes procedures required for maintenance of the
instrument.
Read the chapter Warnings and precautions for important safety
information. Unplug the power cord before cleaning the instrument.
Do not allow fluids or objects to enter the interior of the instrument. If biohazardous
material is or has been used always use your personal safety equipment while
touching, adjusting or removing parts of the instrument for maintenance, cleaning, or
sterilization.
6.1.1 Exchanging fluid containers
When one or more containers need replacing, follow the instructions below to ensure a
safe exchange. Only exchange one container at a time and note the corresponding
color coding of the container to be exchanged.
1) Carefully remove the container to be exchanged from the fluid containter
holder.
2) Place the new, sealed container in its appropriate position. WARNING! Do not
open a new fluid container until it is in position within the fluid container
holder. Do not allow fluids to enter the interior of the device as there is a risk
of electric shock and fire.
3) Unscrew the bottle closure (this is the black bottle cap attached to the
MACSQuant Instrument) counter-clockwise and remove. Close the container to
be exchanged with a suitable cap and connect the bottle closure to the new
container. Do not disconnect the color-coded tubing from the bottle closure.
58
Take care not to invert the bottle closures as this could cause liquid to enter
the air filter.
4) For the waste container: If desired, exchange the container with a bottle
containing approximately 100 mL of disinfectant, e.g., 10% bleach. Empty
bottles from the Running Buffer, Washing Buffer, or Storage Buffer may be
used for waste containers. Mark the new container with a biohazard warning
label (see Figure 1.3). WARNING! Be extremely cautious with the waste fluids
and dispose of in accordance with institutional or governmental regulations.
Always seal container with a cap.
6.1.2 Exchanging the MACSQuant Column
The MACSQuant Column should be exchanged every three months. Exchange the
column as outlined below.
WARNING! Latex gloves and protective eyewear should be worn at all times to protect
against potential biohazard exposure.
1) Open the front door and note the position of the tubing and MACSQuant
Column in the MACS Cell Enrichment unit (magnet).
Figure 6.1: Position of the MACSQuant Column in the column holder.
Note:
The top end of the MACSQuant Column has a white filter (outlined in
the yellow box). The column must only be inserted with the white filter at the
top.
2) Using both hands, hold the top and bottom of the column and pull gently but
firmly to remove it from its slot.
59
3) Hold the column in one hand and gently unscrew the upper column connector
counter-clockwise. Tilt the column downwards to empty any fluid. Then,
unscrew the bottom column connector.
Figure 6.2: The top connector is removed from the old column.
4) Insert the bottom end (no white filter) of the new MACSQuant Column into the
bottom column connector and gently screw in the column by turning it
clockwise until you feel resistance. Point the column towards the top of the
device and screw in the top column connector.
Figure 6.3: The bottom column connector is attached to the new column before
attachment of the top connector.
5) Align the column so that the top column connector sits on the guide of the
magnet cover. Press the column into the slot until you feel the guides click.
Verify that the column is placed in the center of the magnet cover.
6) Close the front door.
60
6.1.3 Exchanging fuses
If the instrument fails to start when switching it on or if operation suddenly stops and
the screen is dark, an exchange of the fuses might be required. WARNING! Replace
fuses only with same type and rating (see marking plate). Follow steps 1 to 3 below to
safely exchange the fuses. Contact Technical Support for detailed instructions on
replacing fuses.
1) Turn the instrument OFF.
2) Unplug the main power cord from the power outlet as well as from the
instrument. The fuse holder is located below the main power connector on the
rear panel of the instrument.
3) Pull out the fuse holder from the housing and replace with the appropriate
fuses. Replace the fuse as instructed by the Miltenyi Biotec Technical Support,
return the fuse holder to the housing, and plug in the main power cord.
6.1.4 Exchanging the hydrophobic air filters
Hydrophobic air filters are attached to the bottle closures to vent the liquid bottles. To
avoid clogging of the filters and to prevent contamination of the liquids, the air filters
should be exchanged if they come into contact with liquid. They also should be
exchanged once a year to avoid clogging through the deposition of dust. Hydrophobic
air filters can be purchased from Miltenyi Biotec (# 130-090-385).
6.1.5 Cleaning the washing station
1) Remove single tube holder if needed.
2) Open the front cover to the right side.
3) Open the cover of the washing station to the left side. WARNING! Potentially
contaminated liquid may spill out of the orifice of the washing station and the
tubing. Therefore, wear protective gloves, protective clothing, and safety
glasses to avoid contact with skin and eyes.
4) Clean the washing station by wiping it with tissue and an appropriate
disinfectant, e.g. 70% ethanol, isopropyl alcohol, or 10% bleach. Finally, rinse
with distilled water.
61
6.1.6 Cleaning the uptake port
The uptake needle of the robotic arm should be cleaned regularly in order to prevent
contamination or blockages.
1) Turn OFF the instrument.
2) Wipe the needle with tissue soaked with 70% ethanol, isopropyl alcohol, or
alcohol swabs followed by distilled or deionized water. Move the needle holder
up and down to get access to the entire surface of the needle.
6.1.7 Decontaminating the MACSQuant Instrument
If the instrument has been used to process biohazardous samples, it is recommended
to decontaminate the fluidics system by running the standard shutdown sequence.
WARNING! Read the chapter Warnings and precautions for important safety
information. Unplug the power cord before cleaning the instrument.
In case of spillage, it is recommended to use the appropriate disinfectant for the
potential pathogen, e.g., MACS Bleach Solution. Use tissues or swabs to decontaminate
surfaces. The uptake needle of the robotic arm and the surface of the instrument also
can be decontaminated upon contact with biohazardous samples. WARNING! Dispose
of tissues and swabs appropriately. It is recommended to wear protective gloves,
protective clothing, and safety glasses to prevent contact with skin and eyes.
6.1.8 Long-term storage of the MACSQuant Instrument
The instrument should be run once in a week in order to prevent blockages. If the
instrument will not be used for more than one week, the following operation should be
performed.
1) Turn ON the instrument.
2) Run a calibration of the system (refer to section 2.6 for detailed information).
3) Turn OFF the instrument (refer to section 2.2.5 for detailed information).
6.2 Instrument disposal
The instrument shall be disposed of according to the biosafety level of its use.
Potentially contaminated parts must be sterilized before being disposed of, according
to local laboratory regulations.
WARNING! Decontamination is within the responsibility of the operator of the
instrument. Contaminated instruments or contaminated parts of the instrument must
not be sent or given to any person.
62
7 Troubleshooting
The instrument automatically analyzes the functionality of several hardware
components during the instrument initialization procedure. An error message will
appear if action is required by the user. Please refer to chapter 6, Maintenance, for
help with dealing with certain error messages, otherwise contact the Technical
Support.
7.1 Problems not indicated by error messages
This section addresses problems that are not indicated by a warning or error message
that might occur during measurement, cell separation, or rinsing programs. Identify
the problem and refer to the appropriate section.
7.1.1 Column leakage
1) If a freshly installed MACSQuant Column shows signs of leakage, check if the
column is installed properly. The column should be inserted correctly into the
column connector and fastened to the point of resistance. If this is not the
case, loosen the column connector, insert the column correctly, and tighten
the connector.
2) If the column leakage persists, unscrew the column and check if the
connectors of the columns are damaged. If this is the case, exchange the
leaking column with a new MACSQuant Column.
3) If the problem still persists, contact the Technical Support.
WARNING! Check that the column is not broken or cracked. In this event
replace the column. Refer to section 6.1.2 for more details.
7.1.2 Pump syringe leakage
1) Turn OFF the instrument (refer to section 2.2.5 for detailed information).
2) Check that the connection between the pump syringe and the valve is not
loose and tighten if needed.
63
3) If the leakage persists, contact Technical Support to order and install either a
new pump syringe (# 130-090-339) or a new pump seal (# 130-022-101).
Note:
Depending on the level of use, the pump syringe should be cleaned
every 1–3 months.
Note: Correct overnight and long-term storage assures that no salt deposits
accumulate in the pump syringe. Salt deposits may cause wear of the pump
seal and thus may lead to leakage.
Note: The pump syringe should not run dry at any time. This can damage the
pump seal and thereby may lead to leakage of the pump syringe.
7.1.3 MACS MiniSampler does not move properly
Check whether the MACS MiniSampler guide is inserted properly into the
corresponding slot on the MACSQuant Instrument and ensure that the cable
connecting the MACS MiniSampler to the back of the instrument is not obstructed in
any way.
7.1.4 Air bubbles during measurement or no events are
acquired
Check for leakage within the fluidics and tubing system and perform a rinse program.
Also, ensure that the pre-filter is devoid of air. Ensure that the needle calibration was
performed correctly. Furthermore, check that the tubes connected to the bottle
closures are tightly sealed. If the problem persists, contact the Technical Support.
7.1.5 Excessive debris is present in acquisition
Check all fluidics to ensure that all tubes are connected properly. Ensure that the prefilter is bled of air.
Additionally, you can rinse or clean the system. Push the rinse button
. Perform this
twice. If this does not work, try to clean the system by using the clean and/or flush
programs. To access these programs, right-click on the rinse button.
Press the Clean button to perform a system clean using MACS Bleach Solution (# 130-
093-663). Follow the information in the dialog box that appears and place the
required bleach solution in the single tube holder. The single tube holder must be
attached and selected in the Experiment tab to perform a clean procedure.
64
The Flush program will perform a system backflush. This process will take
approximately 16 minutes.
7.1.6 Touchscreen remains dark
1) Check if the power cord is plugged in correctly and the power supply is
switched on.
2) If the device is powered-up and the touchscreen remains dark, switch-off the
device, wait five seconds, and switch on again. If the MACSQuant Instrument
still does not initialize, contact Technical Support.
65
8 Hardware monitor
Using the Hardware Monitor the current hardware status of the MACSQuant Instrument
can be assessed at any time. The hardware pages can provide additional information
on the status of the instrument in the case of error messages appearing on the screen.
WARNING! Never run the instrument if any errors are indicated within the hardware
monitor.
8.1 Hardware monitor window
The hardware monitor window can be accessed under the View menu. The window
contains five tabs, each displaying the hardware components involved in the respective
processes.
8.1.1 Fluidics components
The fluid containers will be illuminated in red when empty or the waste bottle is full.
The waste, air, and sheath pump symbols are illuminated in green when they are
active. Active separator valves (Valves 1-3) are indicated in green. Defective rotary
valves are indicated in red. As the system operates, the valves are displaced in the live
status (o=open, c=closed)
Figure 8.1: Real-time hardware monitor of the fluid components.
66
Name
Further information
Fluid container
Displays buffer/solution levels in real time
monitor
Pump monitor
Displays the status of the waste (W), air (A), and fill (F)
pumps
Separation unit
Displays the status of the MACSQuant Column and
monitor
MACS Cell Enrichment Unit
Valves 1-3
Displays the position of the valves for the MACSQuant
monitor
Column: C = closed, O = open, green = in use
Valves 4-6
Displays the position of the general fluidics system
monitor
valves
Syringe drive
Diplays the position of the dilutor
monitor
Sensor monitor
Displays the general system pressure and fluid
reservoir levels.
Note:
Base plate temperature for 488 nm laser: 10-45 °C.
Note:
Bench temperature=33-37 °C.
Note:
Fan speed: This will fluctuate automatically depending on the ambient
Note:
If errors are reported please refer to section 7, Troubleshooting, or
room temperature and internal temperature of the MACSQuant Instrument.
contact Technical Support.
8.1.2 Sample uptake
The Sample uptake tab indicates the status of the robotic arm as well as whether the
MACS MiniSampler is connected or not. The relative position of the needle arm is listed
in the lower left box and if the single tube rack is connected.
67
Figure 8.2: Real-time hardware monitor of the sample uptake arm.
Name
Further information
Sample uptake needle
Indicates the coordinates of the needle
schematic
arm.
MACS MiniSampler monitor
The MiniSampler is not connected.
Washing mode rates
Measuring mode
Sheath pressure
Buffer
Sheath buffer
Total volume
(mbar)
consumption
consumption
(mL)
Total time (sec)
for rinsing (mL)
during rinse
208.4
Between
208.4 + 2300
Between
measurement:
= 2508.4
measurement:
750
minimum
4
cycle (mL)
Screen
300
volume
After last
2508.4 +
After last
measurement:
(750 µL x
measurement:
2300
count of
22
measurements)
Fast
300
4166.6
750
4916.6
12
Standard
300
4875
1700
6575
25
Extended
300
5250
5800
11050
72
68
Sheath consumption for a 100 µL measurement (without rinsing volume)
Measuring mode
Sheath pressure
Measurement
Sheath buffer consumption during
Total
(mbar) and flow
volume (mL)
measurement cycle i.e. without
measurement
rinse cycle (mL)
time (min)
100
18000
4
100
13000
2
100
8600
1
rate (mL/min)
Standard
300
Low = 25 µL/min
Standard
300
Med = 50 µL/min
Standard
300
High = 100 µL/min
8.1.3 Optical bench
Within the lasers and detectors tab it is possible to monitor the status of each laser
fluorescence channel and detector. The temperature, fan speed PMT voltage, and
annotated path of each laser is shown. Fluorescence channels that are active are
highlighted. A status overview of the optical bench is schematically represented.
Figure 8.3: Real-time hardware monitor of the fluid components.
69
9 Technical data and specifications
9.1 Labeled diagrams of the MACSQuant Instrument
The key accessible components of the MACSQuant Instrument are schematically shown
in figures Figure 9.1 to Figure 9.6, and can be roughly grouped into six categories
comprising:
·
the integrated computer and touchscreen,
·
the robotic arm and sample uptake port,
·
the access cover to tubing system (the fluidic system, including tube, and buffer bottles),
·
the fluid containers and their holders,
·
the MACS MiniSampler and tube racks,
·
the plugs, connectors, and guides.
Integrated computer for control of cell processing
All interactions with the computer may be performed using the TFT color touchscreen
or via an externally connected keyboard and mouse. The computer is integrated within
the MACSQuant Instrument and any software updates can be easily performed using
the DVD-RW drive, which is located at the top of the touchscreen monitor (Figure 9.1).
The computer operating system is Microsoft® Windows® XP embedded and the all cell
analysis and pre-enrichment programs are controlled by the MACSQuantify Software.
Automated arm with sample uptake port
The robotic arm (see Figure 9.1) is a computer-controlled component of the
MACSQuant Instrument fluidics system. It consists of two motors that drive the arm in
y and z directions and a needle for sample uptake. The needle and uptake port are
automatically washed in the MACSQuant Instrument washing station during and after
cell processing to prevent cross-contamination between samples.
70
Figure 9.1: Front view of MACSQuant Instrument.
Figure 9.2: Left and right views of the MACSQuant Instrument.
Access covers
The hinged front cover (see Figure 9.1) can be opened to the right to allow access to
the components of the fluidic system, including the syringe pumps, the MACSQuant
Instrument Enrichment Unit, the MACSQuant Column (or substitute column), and the
upper valves (see Figure 9.3). The hinged washing station cover is opened to the left
and gives access to the washing station, barcode readers, the peristaltic pump, and the
tubing of the washing station. Both hinged covers can be removed by opening the door
and lifting the covers vertically off of the guides. The bottom cover (see Figure 9.1)
gives access to the lower valves and can be removed by pulling gently toward you.
Fluidics system
The MACSQuant Instrument fluidics system supplies the instrument with all buffers
and solutions required during and after operation. The fluidics system (see Figure 9.3)
comprises of the tubing (with color-coded markers to assist correct connection to the
respective fluid container) as well as their guides, three solenoid valves, three valves, a
71
flow cell, four pressure sensors, two syringe pumps and the MACSQuant Column (see
Figure 9.3).
MACSQuant Column
The MACSQuant Column (see Figure 9.3) is an optional component that is designed for
the enrichment of cells using MACS Technology before fluorescence cell analysis. Up to
5´107 cells from up to 5 mL can be enriched in one isolation using the column; the
column should be replaced every three months. For further details refer to the
respective product data sheet.
Fluid containers and fluid container holders
Two orange baskets (see Figure 9.1) holding two fluid containers each are located on
either side of the instrument. The containers supply the MACSQuant Instrument with
Running Buffer for use during cell analysis, a Washing Solution for rinsing the
instrument, and a Storage Solution for overnight or long-term storage. A fourth bottle
is used to collect all waste produced during operation of the instrument. Fluid levels
within each container are constantly monitored by sensors contained within the bottle
closures and a warning message appears on screen when action is required by the
user.
Figure 9.3: Front of MACSQuant Instrument with access cover removed.
72
Figure 9.4: Rear view of the MACSQuant Instrument.
Air filter
The fluid particle filter provides a physical barrier to prevent debris larger than 70 mm
in size from entering the fluidics system from the system buffer/cleaning solution
containers. The fluid particle filter can easily be exchanged when blocked or at regular
intervals to prevent blockages.
Plugs, connections, and guides
Sockets for the main power supply, the fluid sensor cables and the MACS MiniSampler
are located at the rear of the instrument (see Figure 9.4). Extra sockets have been
provided for the case of further instrument development. The main power switch is
located at the right-hand side of the instrument (see Figure 9.2). Several guides at the
rear and sides of the instrument ease the safe connection of tubing and sensor cables.
Two USB ports, a VGA output port, an Ethernet port, and two serial ports are also
included. The serial ports are used for attachment of the MACS MiniSampler and
barcode reader. WARNING! Read the chapter 1.6 Hazards of electric shock and spread
of fire for important safety information on connecting peripheral devices.
MACSQuant Instrument fluid containers
The MACSQuant Instrument has two orange baskets on each side of the instrument
that holds the three fluid containers required for operation of the MACSQuant
Instrument, which are MACSQuant Running, Washing, and Storage Solutions. A fourth
in the orange buckets is reserved for the waste container. The bottle closures, the fluid
sensor cables, and the tubing connectors are all color-coded and indicated by
individual symbols for the specific position of each container on the MACSQuant
Instrument (see section 2.2.1 for more details).
Single-tube holder
The single-tube holder can be used for the analysis of individual samples. Each
measurement can be started using the orange button provided on the tube holder.
73
MACS MiniSampler, MACS Chill Racks, and MACS Reagent Rack
Figure 9.5: Rear view of MACS MiniSampler with MACS Reagent Rack and Chill 5 Rack.
The MACS MiniSampler (see Figure 9.5), an optional attachment, is designed for
automated, multiple sample processing by the MACSQuant Instrument. The MACS
MiniSampler can be loaded with MACS Chill Racks that hold cell samples and cell
separation fractions. The upper plate of the MACS MiniSampler moves horizontally (xplane of direction) and aligns the tube openings with the port of the automated arm.
The guide of the MACS MiniSampler is directly attached to the corresponding slot
located below the washing station. The MACS MiniSampler is automatically detected
upon attaching the MACS MiniSampler sensor cable to the corresponding socket at the
rear of the instrument. The type of tube rack carried by the MACS MiniSampler can be
automatically recognized by the rack detector using the rack detection barcode reader
(see Figure 9.6) or the user can specify which rack will be used. During operation, the
tube rack should be covered with the MACS MiniSampler lid that is connected to the lid
guide. The MACS MiniSampler can be disconnected from the MACSQuant Instrument by
gently lifting the MACS MiniSampler in an upward direction followed by carefully
pulling the device away from the MACS MiniSampler slot located on the MACSQuant
Instrument.
2D code reader
Figure 9.6: Expanded view of the MACSQuant Instrument 2D code reader (“barcode reader”).
74
The MACSQuant Instrument is equipped with a 2D code reader that uses lasers and
powerful light-emitting diodes (LEDs) for illuminating the reading area. The 2D code
reader light is classified as a Class 1 laser product per standard IEC 60825-1:1993 +
A1:19976 + A2: 2001 (maximum output 116 µW; wavelengths 655 nm, pulse duration
1 ms). Please refer also to section 1.9 (Important Information) of the MACSQuant
Instrument Manual for associated warning and precautionary information.
The technical specifications of the MACSQuant Instrument and the peripheral devices
are as follows:
9.2 Technical data and specifications of the MACSQuant
Instrument
The MACSQuant Instrument is labeled as a protection class I device and must be
plugged into a grounded power outlet, refer to section 1.1,Error! Reference source not
found. Warnings and precautions. The main power supply cord and plug of the
instrument shall comply with following specifications (USA and Canada only): UL listed
and KAM cord, minimum type SJ, minimum 18 AWG, 3 conductors. Rated for a
minimum temperature of 60 °C. Provided with grounding-type (NEMA 5-15P)
attachment plug, rated 125 VAC, 10 A. Opposite end terminates in IEC 320 style
connector, rated 125 VAC, 10 A.
Parameter
Specification
Color
Green/orange
Footprint
605 mm ´ 400 mm (w ´ d)
Footprint with MACS
605 mm ´ 500 mm (w ´ d)
MiniSampler
Height
392.5–520 mm (adjustable touchscreen)
Weight
50 kg
Table 9.1: Dimensions of the MACSQuant Instrument.
Parameter
Specification
Parameter
Specification
Model
MACSQuant
CAN Bus + DC-
Pins 1, 4, 8: NC
Instrument
Output (labeled
Pin 2: CAN-L
“External CAN”)
Pins 3, 6: GND
Pins 5, 9: 24 VDC / 2A
Pin 7: CAN-H
Input voltage
100–240 VAC,
AC Output (labeled
Pins 1, 2, 3, 4, 5: 5 VAC /
~50/60 HZ
“Bottle Sensor”)
10 kΩ
Pins 6, 7, 8, 14, 15: GND
Pins 9, 10, 11, 12, 13: Input
Power consumption
350 W
CAN Bus (labeled
Pins 1, 4, 5, 8, 9: NC
75
Parameter
Specification
Parameter
Specification
Model
MACSQuant
CAN Bus + DC-
Pins 1, 4, 8: NC
Output (labeled
Pin 2: CAN-L
Instrument
“External CAN”)
Pins 3, 6: GND
Pins 5, 9: 24 VDC / 2A
Pin 7: CAN-H
“CAN1” or “CAN2”)
Pin 2: CAN-L
Pins 3, 6: GND
Pin 7: CAN-H
Fuses
2 × 5AT, 250V
USB port (labeled
Pin 1: USB1_+5V
“USB”)
Pin 2: USB1Pin 3: USB1+
Pin 4: USB1_GND
Pin 5: USB2_+5V
Pin 6: USB2Pin 7: USB2+
Pin 8: USB2_GND
RS232 Interface
(labeled “COM 1”)
Pin 1: DCD
Pin 2: RxD
Ethernet port
(labeled “Ethernet”)
Pins 4, 5, 7, 8: NC
Pin 1: TXD+
Pin 3: TxD
Pin 2: TXD-
Pin 4: DTR
Pin 3: RXD+
Pin 5: GND
Pin 6: RXD-
Pin 6: DSR
Pin 7: RTS
Pin 8: CTS
Pin 9: RI
RS232 Interface
Pins 1, 4, 6, 7, 8, 9:
VGA Interface
Pin 1: RED
(labeled
NC
“RS232/AUX”)
Pin 2: RXD
Not in use
Pin 3: BLUE
Pin 3: TXD
Pin 5: GND
Pin 5: GND
Pin 6: GND
(labeled “VGA”)
Pin 2: GREEN
Pin 7: GND
Pin 8: GND
Pin 10: GND
Pin 13: HSYNC
Pin 14: VSYNC
RS232 Interface +
Pins 4, 6: NC
DC-Output (labeled
Pin 1: Input
“RS232/BCR”)
Pin 2: RXD
Pin 3: TXD
Pin 5: GND
Pins 7, 8: Shorted
Pin 9: 5 VDC / 0.5 A
Table 9.2: Power and interface/port technical specifications of the MACSQuant Instrument.
76
Conditions of operation: 20–25 °C with 0–85% humidity (non condensing) at a
maximum altitude of 2,000 m. Supply voltage fluctuations up to ±10% of the nominal
voltage. Transient over voltages (voltage in excess of the normal operating voltage)
present on the mains supply: Category II. The instrument is suitable for rated pollution
degree 2. The MACSQuant Instrument is not specified for use in a cold room.
WARNING! Read the chapter Warnings and precautions for important safety information
before installation and use.
Emission sound pressure level at workstation <70 dB(A).
This equipment has been tested and found to comply with the limits for a Class B
digital device, pursuant to Part 15 of the FCC Rules. These limits are designed to
provide reasonable protection against harmful interference in a residential installation.
This equipment generates, uses and can radiate radio frequency energy and, if not
installed and used in accordance with the instructions, may cause harmful interference
to radio communications. However, there is no guarantee that interference will not
occur in a particular installation. If this equipment does cause harmful interference to
radio or television reception, which can be determined by turning the equipment off
and on, the user is encouraged to try to correct the interference by one or more of the
following measures:
§
§
§
Reorient or relocate the receiving antenna.
Increase the separation between the equipment and receiver.
Connect the equipment into an outlet on a circuit different from that to which
the receiver is connected.
§
Consult the dealer or an experienced radio/TV technician for help.
Changes or modifications of the equipment unless expressly approved by Miltenyi
Biotec may void your authority to operate the equipment pursuant to FCC 47 CFR.
The MACSQuant Instrument has been investigated by Underwriter Laboratories in
accordance with the standards
UL 61010-1
CAN/CSA-C22.2 No. 61010-1
IEC 61010-2-081
and complies with all essential requirements of the following directives
2004/108/EC (electromagnetic compatibility)
2006/42/EC (machinery)
and is in conformity with the following harmonized standards
EN 61010-1
EN 61010-2-081
EN 61326-1
EN 62471.
For other safety considerations, refer to the product label, or visit
www.miltenyibiotec.com.
Design and specifications are subject to change without notice.
77
9.3 Technical data and specifications of the MACS
MiniSampler
Model
MACS MiniSampler
Size without lid
182 mm ´ 148 mm ´ 47 mm
Size with lid
280 mm ´ 153 mm ´ 172 mm
Weight
1.5 kg
Input voltage
24 VDC
Current
0.8 A
Sub D9 interface
Pin 1: NC
with shielding
Pin 2: CANPin 3: GND
Pin 4: NC
Pin 5: +24 V
Pin 6: GND
in 7: CAN+
Pin 8: NC
Pin 9: +24 V
Table 9.3: Technical data and pin assignment for MACS MiniSampler.
Note:
The MACS MiniSampler unit is an optional extra. If the MACS
MiniSampler is not ordered a dongle will be shipped with the MACSQuant
Instrument. It is essential to attach the dongle to the external MACS
MiniSampler CAN socket located at the back of the MACSQuant Instrument.
The MACS MiniSampler is labeled as a protection class III device and must only be
plugged into the connector labeled with “External CAN” of the MACSQuant Instrument.
WARNING! Read the chapter Warnings and precautions for important safety information
before installation and use.
The MACS MiniSampler is designed for operation with three different tube racks and a
reagent rack.
Rack type
Slots
Chill 5
24 ´ 5 mL
Chill 15
15 ´ 15 mL
5 ´ 5 mL
Chill 50
6 ´ 50 mL
78
3 ´ 15 mL
3 ´ 5 mL
Chill 96
96-well
microtiter plate
Table 9.4: MACS Chill Racks: Chill Racks 5, 15, 50, and 96.
Rack type
Slots
MACS Reagent Rack 4
4 ´ MACS Reagent vials
Table 9.5: MACS Reagent Rack 4.
Conditions of operation: 15–30 °C with 0–85% humidity (non condensing) at a
maximum altitude of 2000 m. The MACS MiniSampler is not specified for use in the
cold room. WARNING! Read the chapter Warnings and precautions for important safety
information before installation and use.
The MACS MiniSampler has been investigated by Underwriter Laboratories in
accordance with the standards
UL 61010-1
CAN/CSA-C22.2 No. 61010-1
and complies with all essential requirements of the following directives
2004/108/EC (electromagnetic compatibility)
2006/42/EC (machinery)
and is in conformity with the following harmonized standards
EN 61326-1.
79
10
Technical Support
Miltenyi Biotec offers a full range of customer Technical Support options for your
MACSQuant Instrument.
For support and technical questions, or if you think your MACSQuant Instrument is
malfunctioning, please contact your local Miltenyi Biotec representative or Miltenyi
Biotec’s Technical Support team:
Germany/Austria/Switzerland
Benelux
Friedrich-Ebert-Straße 68
Schipholweg 68H
Miltenyi Biotec GmbH
Miltenyi Biotec B.V.
51429 Bergisch Gladbach
2316 XE Leiden
Phone +49 2204 8306-830
[email protected]
Germany
Fax +49 2204 8306-89
The Netherlands
[email protected]
Customer service, Belgium
USA/Canada
Fax 0800 99626
Miltenyi Biotec Inc.
Phone 0800 94016
2303 Lindbergh Street
Customer service, Luxembourg
Phone +1 530 888 8871
Fax 0800 24984
Auburn, CA 95602, USA
Fax +1 530 888 8925
Phone 800 24971
Toll free 800 FOR MACS
Customer service, The Netherlands
[email protected]
Fax 0800 4020100
Toll free +1 800 367 6227
Phone 800 4020120
Australia
China
Unit 16A, 2 Eden Park Drive
Shanghai Office
Miltenyi Biotec Australia Pty. Ltd.
North Ryde, NSW 2113
Australia
Phone +61 02 8877 7400
Fax +61 02 9889 5044
[email protected]
Miltenyi Biotec GmbH
Fareast International Plaza A
Rm. 2301, No. 319 Xianxia Rd.
Shanghai 200051, P.R.China
Phone +86 21 62351005
Fax +86 21 62350953
[email protected]
80
Singapore
Italy
100 Beach Road
Via Persicetana, 2/D
Miltenyi Biotec Asia Pacific Pte Ltd.
#28-06 to 28-08 Shaw Tower
Singapore 038987
Phone +65 6238 8183
Fax +65 6238 0302
[email protected]
Miltenyi Biotec S.r.l.
40012 Calderara di Reno (Bologna)
Italy
Phone +39 051 64 60 411
Fax +39 051 64 60 499
[email protected]
Japan
Spain
Nittsu-Eitai Building 5F
C/ Luis Buñuel 2
Tokyo 135-0041, Japan
28223 Pozuelo de Alarcón (Madrid)
Miltenyi Biotec K.K.
16-10 Fuyuki, Koto-ku,
Phone +81 3 56 46 8910
Fax +81 3 5646 8911
[email protected]
France
Miltenyi Biotec S.L.
Ciudad de la Imagen
Spain
Phone +34 91 512 1290
Fax +34 91 512 1291
[email protected]
Miltenyi Biotec SAS
United Kingdom
75011 Paris, France
Almac House
10 rue Mercoeur
Phone +33 1 56 98 16 16
Fax +33 1 56 98 16 17
[email protected]
Miltenyi Biotec Ltd.
Church Lane, Bisley
Surrey GU24 9DR
United Kingdom
Phone +44 1483 799 800
Fax +44 1483 799 811
[email protected]
81
11
Limited warranty
Except as stated in a specific warranty statement, which may accompany your
MACSQuant Instrument (the “Product”), or unless otherwise agreed in writing by an
authorized representative of Miltenyi Biotec, Miltenyi Biotec’s warranty, if any, with
respect to this Product is subject to the terms and conditions of sale (the “Terms”) of
the company within the Miltenyi Biotec group which supplied the Product. The Terms
may vary by country and region. Copies of these Terms are available on request or at
www.miltenyibiotec.com.
Nothing in this document should be construed as constituting an additional warranty.
Miltenyi Biotec’s product warranty only covers Product issues caused by defects in
material or workmanship encountered during ordinary use, as described in the user
manual or other documentation provided by Miltenyi Biotec; it does not cover Product
issues not arising out of defects in material or workmanship, including but not limited
to Product issues resulting from: failure to follow installation, operating and/or
maintenance instructions, or environmental conditions prescribed in, this user manual
or other Product documentation; misuse; abuse; neglect; mishandling; unauthorized or
improperly performed maintenance or repairs; accident; acts of God; limitations of
technology; electrical current fluctuations; modification of or to any part of the
Product; use of accessories, spare parts and/or consumables other than those
recommended by Miltenyi Biotec; or normal wear and tear. Miltenyi Biotec’s product
warranty does not cover products sold AS IS or WITH ALL FAULTS, or which had its
serial number defaced, altered or removed, or any consumables, or parts identified as
being supplied by a third party; those third-party accessories or parts may be covered
by a separate warranty from their manufacturer.
Miltenyi Biotec must be informed immediately, if a claim is made under such warranty.
If a material or manufacturing defect occurs within the warranty period, Miltenyi Biotec
will take the appropriate steps to restore the full usability of your Product.
Limitation on damages:
Miltenyi Biotec shall not be liable for any incidental or consequential damages for
breach of any express or implied warranty or condition on this Product.
Some states or jurisdictions do not allow the exclusion or limitation of incidental or
consequential damages, so the above limitations or exclusions may not apply to you.
This warranty statement gives you specific legal rights and you may have other rights,
which may vary from county to country or jurisdiction to jurisdiction.
82
12
Glossary
Air filter
Hydrophobic 0.2 μm air filter attached to the bottle closure. Used to vent the
bottle and simultaneously prevent contaminants from entering or escaping
from the fluid bottle.
Air filter connector
Luer-to-thread connector for attaching the air filter to the threaded bottle
closure vent.
APC
Allophycocyanin.
MACSQuant Column
Separation column specifically designed for the MACSQuant Instrument.
MACSQuant
An automated flow cytometer that is also referred to as device or instrument.
Instrument
MACSQuant Running
Sterile and ready-to-use buffer for flow cytometry, cell enrichment, and
Buffer
washing programs. The tubing connector is color-coded blue.
MACSQuant Storage
Sterile and ready-to-use solution for overnight and longterm storage of the
MACSQuant Washing
Sterile and ready-to-use solution for washing and special cleaning programs.
Solution
The tubing connector is color-coded green.
Bottle closure
Vented screw-on closure with fluid uptake tubes. The bottle closures contain
Solution
MACSQuant Instrument. The tubing connector is color-coded black.
fluid sensors and are equipped with sensor cable connectors. Each bottle
closure is color coded
Column connector
Luer-to-thread connector holding the MACSQuant Column.
Column substitute
Column devoid of any paramagnetic particles. This column substitute can be
used when enrichments are not being performed or for long-term storage and
shipment. The column substitute cannot be used for cell enrichment prior to
analysis.
FITC
Fluorescein isothiocyanate.
Fluid container
1.5 L bottle that holds the system fluids for operational use of the MACSQuant
Instrument. Fluid sensors monitor the fluid levels in the containers for Running
Buffer, Washing Solution, Storage Solution, and waste via electrolyte
conductivity.
Fluid sensors
These sensors measure electrolyte conductivity and is integrated into the
closures of the Running Buffer, Washing Solution , Storage Solution, and waste
fluid containers.
Fluid sensor cable
Cable connecting the fluid sensor to the MACSQuant Instrument. The sensor
cables are color-coded: blue for Running Buffer, green for Washing Solution,
black for Storage Solution, and red for waste.
Front panel
The front panel opens sideways, giving access to the MACSQuant Instrument
Column, pumps, valves, washing station, and tubings.
MACS Cell
Black cover surrounds the area enclosing the magnet. The magnet cover is
Enrichment Unit
located in the center of the fluidics system and has a slot for the insertion of
the MACSQuant Column.
83
MACS MicroBeads
Superparamagnetic particles conjugated to antibodies for magnetic labeling of
cells or biomolecules.
MACS Technology
Technology for immunomagnetic labeling and subsequent separation of cells
or biomolecules in a high-gradient magnetic field.
Negative fraction
Sample fraction containing the cells not magnetically labeled. During MACS
Separation, these cells are not retained on the column and pass directly
through the column while the column is in the presence of the MACS Magnet.
PE
R-Phycoerythrin
Positive fraction
Sample fraction containing the cells labeled with MACS MicroBeads after MACS
Separation. These cells are retained on the column while the column is placed
in the magnetic field. The cells are eluted from the column after the column
has been removed from the magnet.
Cell enrichment
Process of cell enrichment is accomplished by the MACS Cell Enrichment Unit
and the MACSQuant Column. Target cells labeled with MACS MicroBeads are
enriched using MACS Technology.
Syringe pumps
Computer-controlled, high precision syringe pumps with Teflon®
seal plunger that drive fluids through the MACSQuant Instrument fluidics
system.
Touchscreen
High resolution TFT color touchscreen located on top of the
MACSQuant Instrument. The touchscreen is used to operate and monitor the
instrument via on-screen menus.
Tubing connector
Threaded plastic connector with a square nut used to connect the tubings to
the bottle closures, the column, the pump, or valves.
Tubing system
Permanent set of Teflon® tubing through which fluid circulates in the
MACSQuant Instrument fluidics system
Chill Racks
Different acrylic tube racks are available with the instrument and are designed
for optimal positioning of sample tubes. They contain a coolant allowing racks
to be pre-cooled in the refrigerator for subsequent cooling of the cells during
analysis.
Uptake needle
The automated arm carries a needle port designed for computer-controlled
uptake of sample. This needle is calibrated and self-cleaned. It is designed to
move in the y- and z-direction.
Waste container
Container for waste fluid. The closure is equipped with a fluid sensor. The
closure, the fluid sensor cable, and the tubing connector are color-coded red.
84