1
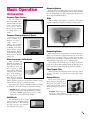
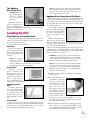
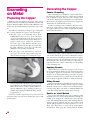
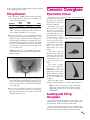
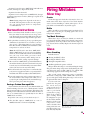
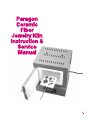
Paragon
Ceramic
Fiber
Jewelry Kiln
Instruction &
Service
Manual
1
Introduction
Thank you for choosing a Paragon kiln! We have designed it to
give you many years of reliable service.
Please read this manual. It will help you gain the maximum
enjoyment from your kiln. It will show you how to avoid damaging the kiln and will answer many questions. Your instruction
packet also includes a separate digital controller manual. Please
save both manuals.
Inspect the kiln. When you receive your kiln, check the carton
for damage (crushed, holes, etc.). Check the kiln for both interior and exterior damage. If the kiln is damaged, you can refuse
the shipment and have it returned, or accept the shipment after
having the driver note the damage on the Bill of Lading. Then
call Paragon at 800-876-4328 or 972-288-7557 (open Monday to
Thursday, 7 a.m. to 5:30 p.m. Central).
Check the Bill of Lading to insure that you received the correct
number of packages. Note any shortages on the Bill of Lading,
and have the driver sign the copy.
If there were no signs of visible kiln damage and you discover it
after the driver has left, notify the shipper immediately.
Save the shipping carton. It was carefully designed to provide maximum protection during shipping. Use the carton to
take the kiln to seminars or on vacation, or to return the kiln to
the factory for repairs.
Needless worries. Tremendous stresses are generated
within the kiln. The ceramic fiber firing chamber actually expands and contracts with each firing. Do not be concerned if
small cracks appear in the fiber. This is normal. These are surface cracks that close tightly when the heated fiber expands. You
may find a small pin hole in the center of the firing chamber. It
is from the manufacturing process and will not affect the kiln’s
performance.
The paint around the door will eventually discolor from heat.
This, again, will not affect the kiln’s performance.
During firing, you will hear an intermittent, distinct clicking.
This is the sound of the relay(s) sending power to the heating
elements. Do not be concerned with this sound.
The Electrical data plate. Important information about your
kiln is recorded on its electrical
data plate. Please include this information when ordering parts or
calling your dealer or the factory
about your kiln.
©2001, by Paragon Industries, Inc. IM-164/1-02
2
Contents
Safety
3
Setting Up the Kiln
4
Basic Operation
5
Silver & Gold Clay
8
Glass Fusing & Slumping
10
Enameling on Metal
12
Ceramic Overglaze
13
Lost Wax Burnout
14
Firing Mistakes
15
Kiln Maintenance
17
Paragon Kiln
Limited Warranty
20
Electrical Installation. . . . . . . . . . . . . . . . . . 4
Where to Locate the Kiln . . . . . . . . . . . . . . 4
Transporting the Kiln . . . . . . . . . . . . . . . . . 4
Accessories . . . . . . . . . . . . . . . . . . . . . . . . 5
Important Guidelines . . . . . . . . . . . . . . . . . 5
Loading the Kiln . . . . . . . . . . . . . . . . . . . . . 7
Venting the Kiln . . . . . . . . . . . . . . . . . . . . . 8
Drying Time . . . . . . . . . . . . . . . . . . . . . . . . 8
Loading the Kiln . . . . . . . . . . . . . . . . . . . . . 8
Venting the Kiln . . . . . . . . . . . . . . . . . . . . . 9
Rate, Temperature and Hold . . . . . . . . . . . 9
Cooling Time . . . . . . . . . . . . . . . . . . . . . . . 9
Combining Silver Clay
With Other Materials . . . . . . . . . . . . . . . . . . 9
How to Cut Glass . . . . . . . . . . . . . . . . . . . 10
Fusing Compatibility of Glass . . . . . . . . . . 10
The Annealing Range . . . . . . . . . . . . . . . . 10
Cleaning and Gluing the Glass . . . . . . . . . 11
Loading the Kiln . . . . . . . . . . . . . . . . . . . . 11
Firing the Glass . . . . . . . . . . . . . . . . . . . . . 11
Preparing the Copper . . . . . . . . . . . . . . . . 12
Decorating the Copper . . . . . . . . . . . . . . . 12
Firing Enamel . . . . . . . . . . . . . . . . . . . . . . 13
Pyrometric Cones . . . . . . . . . . . . . . . . . . . 13
Loading and Firing Overglaze. . . . . . . . . . 13
Overview . . . . . . . . . . . . . . . . . . . . . . . . . . 14
A Sample Program . . . . . . . . . . . . . . . . . . 14
Burnout Instructions . . . . . . . . . . . . . . . . . 15
Silver Clay . . . . . . . . . . . . . . . . . . . . . . . . . 15
Glass . . . . . . . . . . . . . . . . . . . . . . . . . . . . . 15
Ceramic Overglaze . . . . . . . . . . . . . . . . . . 16
Trouble-Shooter . . . . . . . . . . . . . . . . . . . . 17
Door Latch Adjustment . . . . . . . . . . . . . . . 17
Ceramic Fiber Repair . . . . . . . . . . . . . . . . 17
Cleaning or Replacing Glass View Port . . 17
Replacing the Thermocouple . . . . . . . . . . 18
Replacing a Relay or Transformer . . . . . . 18
Replacing the Temperature Controller . . . 19
Replacing the Firing Chamber
(testing the element) . . . . . . . . . . . . . . . . . 19
Safety
Important Safety Rules
Overfiring
The warranty on your Paragon kiln does
not cover damage from overfiring,
regardless of the circumstances. It is the
operator’s responsibility to make sure
the kiln turns off at the proper time.
The Ceramic Fiber
Avoid touching the firing chamber
surface with sharp or pointed objects.
They can damage the fiber surface.
T ou c hi ng th e em bedded h eating
element with sharp or pointed objects is
a shock hazard.
Read the Manual!
Read each page of this manual in detail
before operating your kiln. Warranty
does not cover damage caused by
failure to follow instructions.
Food or Drink Surfaces
Some decorative materials may be
unsafe and toxic when used for surfaces
that will be in contact with food or drink.
Whe n y ou m ake fo o d o r drink
containers, select a glaze or glass that
has been formulated, tested and labeled
as approved for surfaces that will be in
contact with food or drink. Follow the
g l az e o r gl ass m an u factu r er’s
instructions exactly, without any
variations.
An electric kiln is extremely safe to operate provided you
follow these basic safety rules:
G Unplug
G Do
kiln when not in use.
not touch hot sides.
G Keep
unsupervised children away.
G Place
kiln on a non-combustible surface.
G Do
not install closer than 12” from any wall
or combustible surface.
G Fire
only in a well ventilated, covered and
protected area.
G Keep
cordset away from hot sides of kiln.
G DANGEROUS
VOLTAGE: Do not touch
heating elements with anything.
G Disconnect
G Do
kiln before servicing.
not leave kiln unattended while firing.
G Wear
safety glasses when cutting glass.
G Wear firing safety glasses when looking into
a hot kiln.
G Keep
food away from your work area.
G Never
fire tempered glass inside a kiln. It
could explode.
G Avoid
firing toxic materials inside the kiln,
such as styrofoam (used as a core for hollow
beads).
G Kilns with the glass view port: do not fire the
kiln hotter than 1700°F/926°C. Firing hotter
will damage the glass.
3
Setting Up the Kiln
Electrical Installation
You must plug your kiln into a circuit that no other appliance uses while the kiln is firing. Turn off the circuit breaker
or unscrew the fuse for the circuit that your kiln will be
plugged into. Check to see
if other appliances shut off
too. If that circuit powers
appliances that must remain on while the kiln is
firing, plug your kiln into a
different circuit.
2 Remove gasoline, paint, and other flammable
materials from the kiln room.
3 Provide a minimum of 12 inches clearance between
kiln and the closest wall.
4 Never allow the room temperature of your firing
room to exceed 100 - 110° F. Measure the temperature about 3 feet from the kiln. If necessary, use fans
to lower room temperature.
Note: 120 volt kilns:
avoid extension cords
if possible. If you
must use one, never
use one smaller than
12 gauge and longer
than 20 feet. Never
plug it into a ceiling
outlet!
Voltage fluctuation can vary firing time from as little as
half to more than twice the average time. If the voltage is too
low, the kiln may never reach full temperature.
The receptacle must have a separate safety grounding
wire. This protects you from serious electrical shock.
Changing the cord plug will void your warranty!
Where to Locate the Kiln
1 Place your kiln in a well ventilated, covered and protected area such as the garage, basement, utility or
hobby room.
Note: Some people keep their kiln outside on a covered patio. This is okay so long as the kiln is not subjected to excessive humidity. We recommend good
ventilation. However, some materials, such as silver
clay, may not need special ventilation.
Place the kiln on a fire-proof surface, such as a large ceramic kiln shelf.
5 Keep the kiln away from curtains or other combustible materials.
6 Position kiln on a level, fire-proof surface. We recommend an 18” x 18” piece of sheet metal or a large
ceramic kiln shelf.
Note: If you are with the kiln at all times during firing, you can place it directly onto a workbench or
kitchen table. A fire-proof surface is ideal, though,
because it provides a safe place to lay hot shelves removed from the kiln.
7 Keep unsupervised children away.
8 Keep the power supply cord away from the kiln case.
There is little danger of serious burn from accidental
contact if you exercise the same caution you would use with
an electric iron.
Transporting the Kiln
Some people take their kilns to seminars or on vacation.
The easiest way to transport the kiln is to use the original
packing materials.
If you no longer have the packing materials, transport the
kiln on its back with the door facing up. Place a thin sheet of
foam cushioning between the door and the firing chamber to
prevent rubbing. Avoid subjecting the kiln to excessive vibration during travel.
4
Basic Operation
Alumina Hydrate
Accessories
Delicate silver or gold clay shapes may need extra support
during firing to prevent warping. Place these shapes in a thin
layer of alumina hydrate inside a small ceramic bisque bowl.
Do not breathe alumina hydrate.
Ceramic Fiber Shelves
Stilts
The soft ceramic fiber shelf, which comes
standard with the kiln,
cradles gold and silver
cl a y piec e s . These
shelves are not suitable
for firing glass or ceramics.
Stilts are points embedded in a ceramic base. The points
separate enameling and glazed ceramics from the shelf.
Ceramic Fireclay Shelves & Posts
C eramic f ireclay
shelves, available from
Paragon, are hard cera mic s urf ac e s on
which to fire ceramics
and glass. Firing glass,
enameling, and ceramic
glazes directly on the
firing chamber bottom
would ruin the bottom.
Shelves can be stacked
using posts.
Glass Separator & Kiln Wash
Glass separator and
kiln wash are mixtures of
finely ground minerals
that will not melt and
fuse together at high
temperatures. They prevent glass and ceramic
glaze from sticking to
fireclay shelves. The
main difference between
glass separator and kiln
wash is that the separator is ground more finely to leave a
smooth back to glass pieces laid on the shelf.
As powders, glass separator and kiln wash have an unlimited shelf life. Do not breathe the powder when mixing.
Caution: If glass separator or kiln wash contact a
heating element, that element will burn out in the
next firing. NEVER apply glass separator or kiln
wash to the ceramic fiber firing chamber.
The wire mesh above is referred to as an enameling rack. An enameling
fork lifts the rack out of the kiln. A stilt separates the piece from the rack.
Enameling Racks
Enameling is the art of firing glass onto metal. The metal
shapes are loaded onto a high temperature wire rack. The
enameled pieces and wire rack are loaded into a hot kiln,
fired for just a few minutes, and removed red hot. To load
and unload the racks safely, use an enameling fork.
The heating element under power is dangerous. Do not
touch the element with anything! Turn the kiln switch off
before inserting an enameling fork into the firing chamber.
Fiber Repair Filler
This is a permanent, high temperature refractory cement
used to repair holes or cracks in the ceramic fiber firing
chamber.
Safety Glasses
Wear clear safety glasses
when cutting or chipping glass.
Wear firing safety glasses when
looking into a hot kiln, such as
when checking the progress of
glass.
Caution: Always wear firing glasses when viewing
the interior through the optional glass view port.
Haik Brush
The haik brush is used to apply
glass separator to the kiln shelf in a
smooth, thin layer. The smoother
the glass separator, the smoother
the underside of the glass.
5
Important Guidelines
As you gain experience, you will find a wealth of information in your firing logs.
The Embedded Heating Element
Low Temperature Holds
The heating elements of your kiln are embedded into the
ceramic fiber firing chamber. The firing chamber surface is
hardened to a depth of ¼”. This makes the fiber more durable. It is important that you do not touch the firing chamber
with sharp objects. These can penetrate the fiber surface
and contact the heating element, which is a shock hazard.
Note: The heating element under power is dangerous. Do not touch the element with anything! Turn
the kiln switch off before inserting an enameling
fork into the firing chamber to remove a shelf.
The Clicking Noise
Do not be concerned if your kiln makes a clicking sound
during firing. Your kiln contains a relay, which sends power
to the element. The relay clicks as it cycles on and off to
maintain the correct temperature.
Check Thermocouple
You will find a small rod, called the thermocouple, extending into the firing chamber. The digital controller
senses temperature by reading a voltage from the thermocouple. If this rod is pushed out of the firing chamber, the
kiln will assume that the firing chamber is cold. This will result in an over-fire. Be sure the rod extends into the firing
chamber by ½” - ¾” before firing the kiln.
Vacuum the Kiln
Clean the kiln before firing glass, enameling, or ceramic
glaze. (Cleaning is not necessary when firing silver or gold
clay). Use a soft brush nozzle on a vacuum cleaner to remove
dust from inside the kiln.
Removing Hot Ware
To remove hot ware
from the kiln, turn off
the kiln. Carefully slide
an enameling fork under the shelf. Place the
hot shelf on a large ceramic kiln shelf in front
of the kiln. Wear thick
work gloves.
Firing Log Book
Record the following information in a firing log book:
I
Date
I
Firing temperature, speed and hold; or Ramp/Hold program
I
Starting time
I
Total firing time
I
Type of pieces
I
Firing results
6
A low temperature hold (i.e. 200° - 300°F) is more difficult to maintain than higher temperature holds (1400° 1700°F). At low temperatures, turning on the heating element affects firing temperature to a larger degree than at
high temperatures.
When holding at a low temperature, heat the kiln slowly.
Otherwise the temperature may overshoot the hold temperature before the element turns off.
Avoid Contaminating the Heating Element
Contact with silica or
silic a b e ar in g c ompounds, such as kiln
wash, glass separator,
alumina hydrate, glass,
enameling powder, and
ceramic glaze, will ruin
the heating element.
Never fire glazed ceramic
ware, glass, or enameling
directly on the firing chamber bottom. Use a ceramic shelf
on short posts to protect the bottom from glaze drips, glass
and enameling powder.
Caution: Some kilns contain a heating element
embedded in the bottom of the firing chamber. Materials such as glass and glaze, if absorbed into the
fiber firing chamber, can ruin the element. This
type of damage is not covered by warranty. Prevent
glass separator, kiln wash, and alumina hydrate
from falling from a shelf onto the firing chamber.
These materials can destroy the element.
Note: If a contaminant such as dripping
glass or glaze embeds
into the firing chamber, unplug the kiln.
Gently scrape off the
contaminant with a
knife, being careful
not to damage the
heating element. Vacuum the kiln.
The Effect of Silver Residue on Glass
Firing silver clay leaves traces of silver in the pores of the
firing chamber. Sometimes there is enough silver residue in
the kiln to affect colors of glass. For instance, green might
turn yellow.
Note: Before firing an important glass piece in a
kiln used for silver clay, perform color tests. Fire
small samples of each glass color on a base sheet of
clear glass. Place the glass on a fireclay shelf (not the
soft fiber shelf).
The Optional
Glass View Port
Caution: Wear firing safety glasses
whenever looking
into the optional
view port.
Maximum temperature for a kiln with view
port is 1700°F/926°C.
Firing hotter will damage the glass. See page 17 for glass port
maintenance instructions.
Loading the Kiln
Place Ware on a Protective Shelf
Always protect the firing chamber by firing your pieces on
a shelf or in a bowl. Do not place the pieces directly on the
bottom of the firing chamber.
Types of shelves and containers:
Fiber Shelf
Place the standard fiber shelf directly onto the
kiln bottom. This shelf is
used to support silver and
gold clay.
Note: Fire only silver
or gold clay on the fiber shelf—never ceramics, enameling or glass. Do not coat the fiber
shelf with glass separator or kiln wash.
Fireclay Shelf
Ce ra mic
f ireclay
shelves, available from
Paragon, protect the firing chamber bottom and
provide a smooth surface.
Use a ceramic shelf in
your jewelry kiln to fire ceramics, glass, and enameling.
Insulating Firebrick
Piece
Insulating firebricks
are porous, light-weight,
and can be shaped to support delicate silver clay
designs. Carve the firebrick with a knife or hacksaw.
Ceramic Bowl
You can purchase an unglazed, small ceramic bisque
bowl from a ceramic supply store. The bowl will last through
many firings. Use it to hold alumina hydrate. You can also
shape hot glass by slumping it into the bowl.
Note: Ceramic shelves and bowls and insulating
firebricks may slow the firing. They absorb more
heat than the ceramic fiber shelf. They also cool
more slowly than the fiber shelf.
Applying Glass Separator or Kiln Wash
Glass and ceramics are fired on a fireclay kiln shelf and
not directly on the kiln bottom. You can also slump glass over
a mold, such as a bowl. The kiln shelf and sagging mold must
be coated with glass separator to keep glass or ceramic glaze
from sticking to them.
A coat of glass separator or
kiln wash will usually last
through several firings. When
the shelf coating begins to
crack or chip, apply a fresh
coat.
When recoating a shelf, remove most of the old coating Separator lasts through several
with grit cloth (available from glass firings. Apply new separator
Paragon). This is an abra- when the old coat begins to flake.
sive-coated mesh that allows
residue to pass through. Removing the old coating gives you
a smooth surface to start with. Then recoat the shelf using
the following directions. (Both glass separator and kiln wash
will be referred to as “separator.”)
Caution: Do not apply glass separator or kiln wash
to the ceramic fiber firing chamber or to the bottom
of the shelf! Contact with glass separator or kiln
wash can ruin the embedded heating element.
Note: Do not coat the soft ceramic fiber shelf with
separator. If you are firing only silver or gold clay,
you do not need separator. When firing silver clay
with glass, however, fire the piece on a hard fireclay
shelf coated with separator.
1 Mix the separator with water following the directions
on the bag. Stir.
2 Use a haik brush or a soft
paint brush to apply the
separator to the shelf.
(The haik brush is easier
to use because it lays
down a more even coating.) Each time you dip
your brush into the separator mixture, swirl the
brush around the bottom
of the container. This is
because the separator settles quickly. Use two or
three thin coats changing the direction of the brush
stroke 90° with each coat.
3 Dry the shelf before firing. To speed drying, place the
shelf on three ½” posts inside the kiln. Heat at full
rate to 300°F/148°C and hold for five minutes. Then
turn off the kiln and leave the shelf inside.
7
4 After the separator has dried and your shelf is cool,
you can smoothen the separator further by rubbing
your hand lightly over the shelf. The smoother the
separator, the smoother the back side of the glass.
A coat of glass separator will usually last several firings.
The lower the fusing temperature, the more firings you can
get from one application of separator.
Using Ceramic Fireclay Posts
Ceramic posts support ceramic fireclay shelves inside a
kiln.
I
Do not use posts under the ceramic fiber soft shelf. Place
the fiber shelf directly onto the bottom of the firing
chamber.
I
Place three ½” posts under the ceramic hard fireclay
shelf. This aids air circulation, preventing heat built-up
under the shelf.
I
You can fire two or more ceramic fireclay shelves in a Paragon jewelry kiln. Support the bottom shelf on three ½”
posts. Separate the shelves with taller posts. The length
of the posts and the number of shelves you can fire depends on the size of the kiln. When you load multiple
shelves, fire at a slower rate. This aids heat distribution.
Silver & Gold Clay
With silver clay, it is possible to shape intricate, free-form
silver jewelry in minutes—even as a beginner. (The clay is
also available in gold; for simplicity we will refer to both metals as “silver clay.”) At the time of printing, the silver clay
brands available were Art Clay Silver and Precious Metals
Clay.
Silver clay looks and feels like modeling clay. It is formed
with simple tools such as a tooth pick, small knife, and razor
blade. Its surface is pliable and accepts impressions from
objects such as leaves, coins, and coarse fabrics. After the silver clay is formed, it is fired in a kiln. The recommended
temperature and hold time is included with the silver clay.
Forming and firing silver clay is simple. There is nothing
mysterious about making silver clay jewelry. The silver clay
is made of micron-size silver (or gold) particles held in an
organic binder. During firing, the binder burns away. The
silver particles then fuse together forming real silver. Since
the binder disappears, there is a certain amount of shrinkage
during firing. Shrinkage varies depending on the type of silver clay you use.
Drying Time
Small, thin silver clay pieces can be placed into the kiln
while still moist, and fired. Thicker pieces need time to dry.
Otherwise they may warp during firing.
To be on the safe side, give the silver clay plenty of time to
dry. As you gain experience, you will know just how much
drying time each type of piece needs. You can speed drying
with a hair dryer.
Venting the Kiln
Some types of ware, such as glass and ceramics, contain
impurities that burn off during firing. These impurities
must be released from the kiln. Otherwise they can affect the
quality of the ware.
Silver and gold clay need no venting unless you are firing
them with a material that burns out for a hollow shape, or you
are combining them with another material such as glass.
If the kiln has a vent hole, open the vent. If it does not have
a vent hole, open the door about ½”. Venting will be explained in greater detail in sections on glass and ceramics.
Loading the Kiln
Silver clay pieces that have a flat side can be placed inside
the kiln directly onto a shelf. Use the soft ceramic fiber type
shelf. It cushions the clay silver.
I
Silver clay pieces can be close together, but they must not
touch.
I
The soft ceramic fiber shelf can be placed directly onto
the firing chamber bottom. It is not necessary to support
the fiber shelf with posts, since the heat transfers easily
through the fiber shelf.
I
Do not coat the ceramic
fiber shelf with kiln
wash or glass separator.
I
You can also place the
silver clay on a piece of
ceramic fiber batting.
Alumina Hydrate
Rounded, hollow, or
other delicate shapes may
need support to prevent collapsing. You can lay these pieces
onto a mound of alumina hydrate.
8
If the piece needs only shallow support of ¼” depth or
less, pour the alumina hydrate onto a ceramic fireclay shelf.
Support the fireclay shelf on three ½” posts to aid heat flow
under the shelf.
combination, eliminating the need to visually check the
glass.
If the silver clay shape needs deeper support, pour the
alumina hydrate into an unglazed ceramic bisque bowl.
These are available at ceramic supply stores.
I
Place the ceramic bowl directly onto the kiln bottom.
I
NEVER use a glazed bowl to hold the alumina hydrate. If
the glaze runs, it can embed into the firing chamber.
Caution: Avoid breathing alumina hydrate dust.
Caution: Alumina hydrate can destroy the heating
element on contact. If it spills onto the firing chamber, remove with a vacuum cleaner.
Venting the Kiln
Silver clay by itself needs no venting. Load the kiln, close
the door, and leave it closed until the clay silver is ready to remove.
The kiln needs venting if you fire ceramics or glass with
the clay silver, or if you make hollow objects that contain a
core of organic materials.
Paper maché and paper clay are good core materials. Do
not use wax or styrofoam as a core. They emit harmful
fumes.
Rate, Temperature, Hold
Each brand of silver clay fires to a specific temperature
and hold time. This information is available from your silver
clay supplier.
Note: Hold time is the length of time that the recommended temperature is maintained in the kiln.
Do not fire longer than the recommended hold, or
the silver will begin to overfire.
Besides selecting a temperature and hold time on your
kiln’s digital controller, you will also need a firing rate. (See
the separate digital controller instruction booklet.) Select a
Full Power rate if you are firing silver clay alone. If you fire
glass or ceramics with the silver clay, select a rate best suited
for the glass or ceramics.
Note: Do not place silver clay into a kiln that is already hot unless the clay is completely dry. The kiln
should be no hotter than 500°F/260°C when inserting the silver clay.
After the kiln begins firing, leave the door closed. Do not
open the door until it is time to remove the clay. Visual inspection of the clay is unnecessary.
If you are firing glass with the silver clay, on the other
hand, you may need to check the fusing progress of the glass
by opening the door ½” and looking inside. Look for just a
second or two. As you gain experience, you will be able to
program the correct temperature for the silver clay and glass
Cooling Time
After the clay silver has fired to completion, you can crack
the door an inch to speed cooling. If you are firing stones,
glass, or other materials with the silver clay, it is safer to allow
the kiln to cool slowly with door closed. Remove the piece
when the kiln reaches room temperature.
Silver clay pieces that contain no other materials can be
removed from the kiln at 1100°F/593°C. You can remove
them with tongs and drop them into water.
Caution: Turn the kiln off before inserting tongs
into the firing chamber. Wear protective gloves.
Combining Silver Clay
With Other Materials
There are two ways to fire silver clay with other materials
such as glass:
I
Fire the silver clay first by itself. After you have cleaned
and polished the silver clay, fire it a second time with the
other material.
I
Fire the silver clay and other materials, such as a stone,
together in a single firing.
Enameling powder is easier to fire with the silver clay in a
second firing. See page 12. Glass is often fired with the silver
clay in a single firing. Many types of glass will melt to the
point of overfire at silver clay temperatures. So before
combining glass and silver clay in a single firing, test a small
sample of the glass. To do this, fire the glass during a silver
clay firing, keeping the glass separate from the silver clay
piece. (This way you won’t ruin the silver clay piece.) Place
the glass pieces on a ceramic fireclay shelf. You must coat the
shelf with glass separator, or otherwise the glass sample with
embed into the shelf.
If the glass sample survives the firing, you can fire that
type of glass with silver clay in a single firing. Note, however,
that different types of glass fire to different temperatures.
Every time you fire a different type of glass, be sure to test.
9
Glass Fusing &
Slumping
You will probably fire mostly stained glass, but you can
also fire standard float (window) glass. Some types of float
glass devitrify (form a dull, frosty surface) when fired.
Caution: Never fire tempered glass. It could explode if heated inside a kiln.
Basic Glass Tools
Reservoir Glass Cutter uses a reservoir of oil to lubricate the cutter wheel.
Running Pliers are for cutting large pieces of glass.
Breaking Pliers are for cutting small strips.
Grozing Pliers shape the glass by chipping away the
edges. They are often used when the score line doesn’t break
cleanly. Note that rough edges will become smooth when
fired to fusing temperature.
How to Cut Glass
Note: IMPORTANT! Wear safety glasses when
cutting or chipping glass.
1 Lay the glass on a clean surface. Mark off the cut
with a grease pencil or felt-tip pen. A small mark on
each end of the glass will do. Lay a wooden straight
edge over the glass and line it up with the marks you
just made.
2 Hold the straight edge firmly and score the glass
with the glass cutter. Press just hard enough so that
the scoring noise sounds steady and unbroken.
3 Place the straight edge under the glass so that an
edge is lined up with the score line you just made.
Press down on the glass. It will break cleanly.
Fusing Compatibility
of Glass
When glass changes temperature, it expands and contracts. The rate at which glass changes size is called the coefficient of thermal expansion. If you fuse two glass pieces together and one changes size faster or slower than the other,
the fused piece may crack—even several months after fusing.
When different glasses have a close enough coefficient of
expansion to fuse successfully, they’re called fusing compatible. Buy glass labeled fusing compatible. Or fuse glass that
has been cut from the same sheet, which guarantees compatibility.
Fusing Compatibility Test
1 To test glass for compatibility, fuse small ½” square
sample pieces of different glasses onto a larger base
piece of clear transparent. It should extend beyond
the small sample pieces by half an inch on each side.
One of the sample pieces should be cut from the
base piece.
2 Heat the glass to a temperature that completely
rounds the edges of the small sample pieces.
3 After the glass cools, place a polarizing filter under
the glass and another filter over the glass. Look at
the glass with light shining through it (hold it over a
lamp). Turn one of the filters until the filters are at
their darkest.
Results of the Test
If you see a halo around the edges of the small glass samples, this usually means the glass is not compatible. If you see
no halo, the glass is fusing compatible.
Why did we include a sample square cut from the base
transparent glass? It tests for annealing. A halo around that
piece means the glass was not annealed properly. Perform
the test again, this time cooling more slowly through the annealing range.
The Annealing Range
Each type of glass has a temperature range that it must
pass through slowly when it cools. This is called the annealing range. This slow cooling gives hot glass time to release
the stress of cooling. If you cool the glass too fast through the
annealing range, it will break.
The larger and thicker the glass, the slower it must pass
through its annealing range. You cannot over-anneal, so err
10
on the side of caution if you aren’t sure how long to anneal.
Small projects such as earrings rarely need annealing time as
they cool.
Cleaning and
Gluing the Glass
Grease, dirt, and
fingerprints etch permanently into the
glass during firing.
Clean the glass with
glass cleaner (the type
without silicones),
rubbing alcohol, or
even plain water just
before assembling
the pieces on the kiln
shelf.
Use white glue,
suc h a s Elmer’s
diluted 1:1 with water,
t o hold the glass
pieces together after
you place them on the
kiln shelf. Use the
glue sparingly. Glue is
especially important
when fusing wire into the glass. The glue prevents the glass
or wire from moving out of place before they fuse. The glue
disappears during firing.
Avoid using glue on the coated side of dichroic glass. If
you lay dichroic glass carefully onto the piece, glue is unnecessary, so avoid it altogether if you do not know which side of
the dichroic is coated.
Loading the Kiln
Air should circulate
between the shelf and
the bottom of the kiln,
so place three or four
1/2” posts in the kiln.
Lay the shelf over the
posts.
Firing the Glass
1 Vent kiln by opening the door ½” and leaving the vent
hole (if your kiln has one) open. Venting allows the
gases released to escape. When the kiln reaches 500 800° F / 260 - 426°C, close the door.
2 The first time you fire a particular brand or type of
glass, program the controller for a higher tempera-
Looking at the glass during firing. Open the door about ½”. Always
wear firing safety glasses when looking at the hot glass.
ture than the estimated fusing temperature. Watch
the glass by opening the door ½” for several seconds
at a time. Shut the kiln off when the glass fuses the
way you want. Make a note of the shut-off temperature. For future firings, program the kiln for that
temperature and rate.
Note: With every firing, be sure you are near the kiln
before the expected shut-off time.
3 After you shut the kiln off, vent the kiln for five minutes by opening the door 1”. Then close the door.
Note: Some glass artists flash cool the glass after it
fuses. They vent the kiln until the temperature
drops to 1000° F. Then they close the door again.
This speeds up cooling.
4 The annealing range for most glasses is between
950°/510°C and 700°F/371°C. Cool slowly through
this annealing range. Leaving the door closed will
slow the cooling enough for most projects. If you
need even slower cooling, program a separate segment for cooling. See the kiln’s digital controller
manual.
Note: For safest cooling, leave the ware inside the
kiln until the kiln reaches room temperature. If you
remove the ware too soon, the sudden temperature
change can crack the piece.
To remove small
pieces, such as glass
jewelry, before they
have cooled completely, remove the
shelf also. Leave the
pieces on the shelf
until they reach room
temperature. The
heat in the shelf will
help prevent them
from cooling too quickly.
Caution: Before removing a shelf, turn off power to
the kiln.
11
Enameling
on Metal
Preparing the Copper
Enamels come in transparent or opaque. They can be
purchased directly from Thompson Enamel, P.O. Box 310,
Newport, Kentucky 41072. Their Lead Free Enamels come
ready to use. No enamel washing is required for these enamels.
Start with one of the many pre-shaped copper forms available, or shape and trim the copper to your own design.
Decorating the Copper
Counter Enameling
Most enameled pieces should be counter enameled on
the back side. This gives the piece a much more finished
look, it eliminates a great deal of fire-scale cleaning, and it
controls the chipping and cracking that can result from the
different rates of expansion and contraction in copper and
enamel after the enamel has been fired.
Counter or backing enamel, a mixture that gives a mottled effect, can be used for counter enameling. Or you can
use regular enamel. Counter enamel is applied by the sifting
method described below.
1 Heat the copper on an enameling rack to about
1400°F/760°C to burn off oil or grease. Heat the
copper to just until smoke from oil or grease stops
coming off the metal and its color has changed to a
purple-red-pale green iridescence that moves
across the copper. This indicates that the grease
has vaporized. Do not fire the copper any longer than
this point. Otherwise excess fire scale will form,
making the next cleaning step difficult.
2 After the copper cools, brush any loose scale from
the copper. Use a brush or paper towel, being sure
that you do not put any grease or oil onto the copper,
When firing counter enamel, underfire it so that the fire
scale on the front of the piece isn’t too difficult to remove.
You can purchase a masking preparation from your supplier
to help prevent fire scale. You must place the piece on a stilt
when firing the other (front) side of the piece. The stilt prevents the back of the counter enameled piece from sticking
to the enameling rack.
Applying Enamels
Apply enamel over a clean sheet of paper so you can pour
the excess back into the bottle for reuse. Transparent enamels should be applied in several thin coats. Transparent
enamels can be mixed with fairly good results. If opaque
enamels are mixed, however, a grainy effect results. The two
basic methods of applying enamels are sifting and spatula.
Sifting Enamel
such as fingerprints. Clean the copper with a 3M
Scotch-Brite® pad. This pad does such a good job
that in most cases no further cleaning will be required. Additional copper cleaning products are
available in the Thompson Enamel Catalog, including Sparex No. 2.
It is best to clean the copper just before you decorate it. If
you wait too long to decorate after cleaning, the copper could
get dirty again.
12
Spray or brush Thompson holding agent onto the copper.
Then sift a 1/32” layer of enamel onto the copper. Use a #60
mesh sifter. If the coat is too thin, you can easily add another
coat after firing. But a coat that is too thick will bubble and
crack. The enamel must dry completely before firing.
Spatula or Inlaid Method
You can use this method to decorate a small area with
many different colors. Using a diluted solution of Thompson
holding agent, dampen the enamels just to the saturation
point, and maintain this moisture while working with the
enamels. Apply the enamels onto the copper with a small
spatula, and spread them out with a spreader to a coat of
about 1/32” thick. Lines of contact can be formed by the
spatula blade. Then spray the enamels with the holding
agent to keep the grains of enamel in place. Allow the enamel
to dry completely before firing.
Firing Enamel
1 Heat the kiln to 1450°F/787°C for most enameling.
Use a Single Segment. (Please see your digital controller instruction manual.)
Segment
1
Rate
°F/°C
Temp.
°F/°C
Hold
1799/999
1450/787
01.00
Note: Hold time should be the length of time you
will be inserting enameling into the kiln. In the
above example, hold time is for a one hour.
2 Lay the copper shape on an enameling rack. If the
part that touches the rack is enameled, place a stilt
under the copper. Some bowls or other shapes have
enameled sides that might run during firing. These
should be fired with a stilt even if the piece has a plain
bottom. Use an enameling fork or, if the rack is small,
a 6” putty knife, to place the rack into the kiln on top
of ½” ceramic posts.
Note: Firing the piece at enameling temperature
should take about three minutes and requires undivided attention!
3 Look at your piece every 15 seconds by cracking open
the door. Remove the rack when the copper piece appears a rosy red and the enamel is smooth. Place the
rack on a steel pad or large ceramic kiln shelf and let it
cool completely.
4 After counter enameling, you will need to clean the
fire scale off the front of the piece. A 3M Scotch
Brite® pad works well for this. Then clean it with
Thompson Sparex No. 2.
Ceramic Overglaze
Pyrometric Cones
Pyrometric cones are small pyramids of clay and mineral
oxide that soften and bend
when exposed to heat. They
indicate when ceramic ware
has fired to maturity.
Pyrometric cones come
in 1 1/8" and 2 ½" lengths.
Use the 2½” cones. Cones
mounted on the kiln shelf
must be slanted 8° from vertical. They will not bend accurately if they are slanted
t o t h e wr on g an gle .
S e lf - su ppor t in g lar ge
cones have the correct slant
built into the base. Stand ar d c on e s mu st b e
mounted in a clay or wire
plaque.
The chart on page 14
shows the temperatures of
pyrometric cones. Program
your controller to the cone
recommended for the ceramic ware that you are
firing.
F or small c e r amic
pieces, such as figurines,
pr ogr am a r at e of
400°F/222°C. Fire to the
temperature shown in the
108°F column of the Temperature Equivalents chart
for the cone number you
are firing.
A self-supporting cone fired to maturity. Do not be concerned if the tip is
slightly higher or lower than shown.
A “puddled” over-fired cone.
Under-fired cone.
Before deciding on the
firing speed of important pieces, test fire sample clay pieces.
Note: Do not fire beyond your kiln’s maximum
temperature. Firing hotter will void your warranty.
Kilns with glass view port: do not fire hotter than
1700°F/926°C.
Loading and Firing
Overglaze
Overglaze is decoration applied over fired glaze or polished porcelain bisque. Overglazes include china paints,
gold, and luster, which fire from cone 022 to 014.
Load overglazed ware the same way you would load ceramic glaze. Use stilts and make sure ware is not touching
other ware. Ware must be completely dry before firing.
13
China paints will
crack or peel if applied heavily. Apply
several light coats instead, firing between
each, until you get the
shade you want. Not
all china paint colors
r e a ch max imum
color saturation at the
same temperature
even when fired on
the same ware. So you
Open the door ½” to vent the kiln if your kiln
must know which col- does not have vent holes.
ors you should fire
first at higher temperatures to prevent burning out the original colors in later
firings. For example, reds mature at a lower temperature
than other colors and are fired after the other colors have
been fired. Reds and yellows should not be fired side by side.
Colors also mature at a lower temperature on ceramic pieces
than on porcelain or hard china. Check the overglaze manufacturer’s literature for information on which cone to use
with each color and type of ware.
Vent the door during the first hour of firing. If your kiln
has a vent hole, leave it open during the entire firing. Allow
kiln to cool to room temperature before opening the door.
Temperature Equivalents For Orton
Self-Supporting Pyrometric Cones
Cone
Number
Heated at:
Self-Supporting Cones
27° F
108° F
270° F
Per Hour* Per Hour* Per Hour*
Cone
Pre-Fire
Color
Caution: Only kilns with vent holes are designed
for lost wax burnout. However, you can use a kiln
without the vent hole provided that you open the
door ½” during venting.
Caution: Always use a wax tray.
Caution: If your kiln’s heating element is embedded in the floor of the firing chamber, place the
metal wax tray on 3 or 4 - ½” posts inside the kiln.
This prevents the element from possibly shorting
out against the tray.
Note: These instructions apply to injection wax that
melts at 200°F, not pattern waxes and plastics that
melt at higher temperatures. If smoke appears during wax elimination, turn off the kiln. Smoking wax
means the kiln fired hotter than 300°/148°C.
Overview
Lost wax casting is the process of carving a shape in wax ,
and then casting that shape in metal. After the wax has been
carved, a mold is made of the wax shape. The mold is a negative image of the wax. The wax is later melted out of the mold
through hollow channels called sprues.
Lost wax burnout is the process of preparing a casting
mold for the melted metal that will be poured into it. The
steps in lost wax burnout:
1 Melt the wax from the mold.
2 Remove wax from the kiln before raising the temperature higher than 300°F/148°C.
3 Harden the mold at high temperature.
022
—
1087
1094
Green
021
—
1112
1143
Fuschia
020
—
1159
1180
Orange
019
1213
1252
1283
Yellow
018
1267
1319
1353
White
017
1301
1360
1405
Pink
016
1368
1422
1465
Light Blue
015
1382
1456
1504
Violet
014
1395
1485
1540
Gray
013
1485
1539
1582
Green
012
1549
1582
1620
Fuschia
*Rate of temperature increase during last 90 - 120
minutes of firing. Tables by courtesy of the Edward
Orton, Jr. Ceramic Foundation.
14
Lost Wax Burnout
4 Maintain the mold at the casting temperature recommended for the type of metal that will be poured
into the mold.
Caution: Prevent wax or carbon from contacting
the kiln’s walls and elements. Carbon build-up inside a kiln ruins the interior. Carbon conducts electricity and causes elements to short circuit. Damage
to elements from contact with foreign materials is
not covered by warranty.
A Sample Program
See your digital controller instruction manual to enter
this program:
Rate
°F/°C
Temp.
°F/°C
Hold
1
500/277
300/148
01.00
2
500/277
1350/732
01.00
3
450/250
800/426
02.00
Segment
Segment 1 heats the wax to 300°F/148°C and holds it for
one hour, allowing it to drip from the mold.
Segment 2 hardens the mold.
Segment 3 lowers temperature to 800°F/426°C, the typical casting temperature for silver. (Most types of gold cast at
900°F/482°C.)
Note: Casting temperature depends on the size of
the mold. The temperatures above are only a guide.
See your jewelry supply dealer for temperature
recommendations.
Burnout Instructions
1 Place a metal tray inside the kiln on three ½” posts.
Place the mold on a wire mesh screen on top of the
tray. The mold’s sprue hole should be down. The tray
will catch melting wax as it drips from the sprue hole.
2 Keep the kiln’s vent hole(s), if any, open during wax
elimination. If the kiln has no vent hole, leave the
door open ½”. This allows fumes to escape from the
kiln. Heat the kiln to 300°F/148°C and hold it at that
temperature for at least one hour.
Note: Do NOT heat the wax above 300°F/148°C.
Hold at 300°F/148°C for at least one hour. During
this hour, the wax will melt from the mold and drip
into the tray. If the kiln gets hotter than
300°F/148°C, the wax may smoke and deposit carbon inside your kiln, causing expensive damage.
3 After one hour at 300°F/148°C, open the kiln. Remove
the mold and wax tray. Pour the wax from the tray and
leave the tray out of the kiln until your next wax elimination. (Do not leave the tray in the kiln!)
4 Heat the mold to the temperature recommended by
your jewelers’ supply house where you purchased the
mold material. This is usually around 1350°F/732°C.
5 Lower the temperature to the casting temperature of
the metal. Hold at that temperature until you are
ready to begin casting. Remove the mold with tongs.
Wear protective gloves and safety glasses.
Saving a Carbon-Damaged Kiln
If you follow the above directions, your kiln should be safe
from wax damage. In some cases, a small amount of carbon
may form on the walls over a period of time. This is due to the
burning of wax residue that was left in the mold. For this reason we recommend that you periodically fire the kiln to
1500°F/815°C as follows:
1 Open the vent cover(s) or leave the door ajar ½”.
2 Fire the kiln empty to 1500°F/815°C at a rate of
300°F/166°C with a one hour hold (01.00).
Firing Mistakes
Silver Clay
Cracks
Cracks that appear in fired silver clay may be due to too
much water in the silver clay before it was fired. Another
cause is careless handling of a dried, unfired piece. To repair, fill the crack with silver clay and fire again.
Brittle
Silver clay will not reach full strength if underfired. You
may be able to save the piece by firing again to the correct
temperature and hold.
Too Much Shrinkage
When silver clay is overfired, it shrinks too much and
loses detail. If the kiln is firing hotter than the temperature
programmed, check the position of the thermocouple (see
page 17, bottom left column). Replace the thermocouple if it
is old.
Glass
Glass Cracking
Probable Causes:
I
Heating the Kiln Too Fast
I
Cooling the Kiln Too Fast
I
Fusing Incompatible Glass
I
Not Enough Glass Separator on Shelf
Most problems in fusing are caused by rushing the firing.
The glass must change temperature slowly during the critical temperature range of 100° - 500° F / 37° - 260°C. This
critical range applies to both heating and cooling.
The second critical temperature range is annealing,
which is the cooling range of 950° - 700° F / 510° - 371°C average. Cool the glass slowly during this range so the stress in
the glass will have time to dissipate.
If you become impatient after the glass
has fused and you
crack open the door of
the kiln for a few seconds to peek inside,
you may hear a “ping,”
which is the sound of
glass cracking. Avoid
the temptation to open
the door. Wait until the
kiln has cooled to room
temperature. Some
artists schedule their
fusing so that it is completed before they go to
bed. That way they will
Flaking glass separator can cause the
glass to crack. This is because the glass
sticks to the shelf.
15
be asleep while the glass cools and they won’t be tempted to
open the door.
Ceramic Overglaze
After each firing, examine the shelf. Recoat if the kiln
wash is chipped. When glass sticks to a bare section of shelf,
the glass cracks.
Breaking in Overglaze Firing
Glass Bubbles
Probable Causes:
Can be caused by poorly fired bisque. A slow bisque fire is
always better for ware that is to be china painted. The
greenware should be completely dry before being placed in
the kiln.
Purple Spots in Gold
I
Heating the Kiln Too Fast
I
Air Trapped Between Layers of Glass
I
Grease or Dirt Between Layers of Glass
I
Uneven Glass Volume
Usually due to a thin application of gold or too much thinner. If gold is applied accidentally to an area it will show purple after being fired unless cleaned with a good gold remover.
I
Moisture or trapped Air Between the Glass and Shelf
Broken Lines in Gold
Make sure the shelf is completely dry before firing. If you
have applied fresh glass separator, leave the shelf in the kiln
at 300°F/148°C for 20 minutes before placing glass on it.
Can be caused by overfiring or too heavy an application.
However, this can be very attractive when gold is crackled
over a dark color of fired glaze.
One way to eliminate bubbles is to hold the temperature
at 100°F/55°C below fusing temperature for 15 minutes.
This gives the shelf time to heat up to match the temperature of the glass.
Peeling China Paint
Glass Devitrification (Frosty Surface)
Usually a result of overfiring or thinning your paint with
too much medium when applying.
Probable Causes:
I
Impurities in Glass
I
Kiln Not Vented Long Enough During Initial Heating
Can be caused by the paint being applied too heavily.
Loss of Color in China Paints
Faded Colors in Overglaze Decals
Devitrification is a frosty surface on the glass caused by
impurities. With some glasses, it is unavoidable. To lessen
devitrification, some artists vent the door of the kiln slightly
after fusing is completed. They close the door when the glass
reaches 1000°F/537°C.
This is the result of either underfiring or overfiring. If
pinks and reds are drab, refire to a hotter cone. When used
with a china paint background, apply and fire the decals first,
then china paint and fire again. Check the recommendations
of decal supplier. If decal was underfired, refire to proper firing cone. If decal was overfired, the design may be repainted
in china paints and refired.
Glass Separator Sticks To Glass
Weakening of Luster Colors
Probable Causes:
I
Firing Too Hot
I
Overglaze On the Back of the Piece
Instead of firing to a full fuse temperature, try firing
50°F/28°C cooler and holding at that temperature for several
minutes.
This can be caused by overfiring.
White Spots in Lusters or Metals
Can be caused by moisture on the ware before it was
placed in the kiln or from having been fired at the same time
as other overglazes.
Note: Apply lusters only on a dry day.
Powdering of Luster Colors
This can be caused by too heavy an application.
16
Kiln Maintenance
Trouble-Shooter
Kiln Does Not Turn On, Display is Blank
I
Make sure the circuit
breaker is in the “on” position.
I
If the circuit breaker is on,
check the kiln’s fuse. Remove by pressing on the
fuse holder and turning
counter-clockwise half a
turn. Check the fuse by
placing the probes of an
ohmmeter on the ends of
the fuse. If the ohmeter
reads less than one ohm
(digital meter) or reads 0
ohms (analog meter), the
fuse is bad. Replacement
fuse:
AGC ½ A 250V AC
Note: If you do not have an ohmmeter, visually inspect the fuse. You will see a thin strand of unbroken wire in a good fuse. The wire usually appears
broken in a burned fuse.
Circuit Breaker Trips
I
I
If the circuit breaker trips after the kiln has fired for
awhile, make sure no other appliances are operating on
the same circuit as the kiln.
If the c irc u it
breaker trips immediately after the
kiln is turned on,
the kiln may have a
short circuit. Unplug the kiln. Remove the bottom
cover and look for a
loose wire touching
the case.
Kiln Repairs
Door Latch
Adjustment
Adjust the two screws
on the door latch to
change the spring tension.
N o te : D o n ot
loosen the screws
t oo f ar , or t h e y
could fall out.
Ceramic Fiber Repair
If glass, ceramic glaze, or other materials drip onto the
firing chamber, repair before the next firing. Otherwise the
glaze will remelt and embed deeper into the fiber.
1 Unplug the kiln.
2 Cut or scrape the ceramic
fiber to remove the contaminant. Remove as little
fiber as possible. If a heating element is located
where you are scraping,
avoid touching the element.
Cleaning or Replacing the
Glass Viewing Port
Never fire a kiln equipped with the glass view port hotter
than 1700°F/926°C. Firing hotter will damage the glass.
To remove the window:
1 Remove the four
screws holding the
glass cover.
2 Remove the glass.
Clean with glass
cleaner. To remove
scratches, take the
glass to an eye glass
polisher.
Temperature is
Inaccurate
I
Make sure the thermocouple is pushed
½” - ¾” into the firing
chamber.
I
If the thermocouple is
Thermocouple
pushed into the firing
c hamber, a nd th e
temperature is inaccurate, replace the thermocouple.
17
Replacing the Thermocouple
1 Unplug the kiln.
2 Remove the four screws holding the controller to
the front of the kiln. Carefully remove the controller.
3 Remove the two thermocouple wires from the back
of the controller. They are held in place by button or
lever type connectors. To remove the wires, lift the
levers (or press down on the connector buttons)
and pull the wires out.
5 The thermocouple is located in the back of the firing chamber, held in place by a metal band. Remove
the thermocouple from the kiln.
6 Bend the new thermocouple between porcelain insulators. The thermocouple end should be two insulators long after bending.
7 Push the new thermocouple into the
hole in the firing
c h amb e r . T h e
twisted end must
extend into the firing chamber by ½”
- ¾”. Make sure
the band holds the
thermocouple.
Ot h e r wise , t h e The band must secure the thermocouthermocouple can ple. Otherwise the kiln could overfire.
be pushed out, resulting in an overfire.
8 Thread the thermocouple wires down to the controller opening at the front of the kiln. Keep the
thermocouple wires away from electrical components and other wires.
9 Strip ½” of insulation from the ends of the thermocouple wires.
10 Attach the wires to the back of the controller. One
wire is yellow, the other red. Make sure the wires
connect to the correct terminals, which are color
coded.
11 Install the controller and back cover of the kiln.
Replacing a Relay or Transformer
1 Unplug the kiln.
2 Place the kiln on its back.
3 Remove the screws holding the sheet metal bottom
to the kiln. Tilt the bottom forward to gain access to
the transformer and relay.
4 Remove the back cover of the kiln.
Removing the thermocouple.
18
Replacing the Temperature Controller
1 Unplug kiln.
2 Remove the 4 corner screws holding the controller faceplate to the switch box. Carefully lift out faceplate.
3 Disconnect the wires
from the back of the
board. You will find
two plugs and two single wires.
4 Connect the wires to
the new board. Reinstall faceplate.
Replacing the Firing Chamber
Place the new part next to the old one, aligned in the same direction. Remove and replace one wire at a time. In the photo, the relay is being replaced. The transformer is the part in the foreground.
4 Hold the new part next to the one you are replacing,
aligned in the same direction. Remove and transfer
one wire at a time from the old part to the new one.
Make sure each connection is tight.
5 Replace push-on
c onne c tors an d
wires damaged by
heat from a burned
terminal. If wire
connectors do not fit
snugly on terminals,
gently squeeze the
end of the terminal
with pliers.
When the element burns out, the ceramic fiber firing
chamber must be replaced.
To test for a burned out element, you will need an ohmmeter:
1 Unplug the kiln.
2 Remove the back of the kiln (page 18, left column).
3 Place ohmmeter leads against the element connectors. A no-needle-movement reading on an analog
meter, or OPEN on a digital meter, indicates a
burned out element.
6 As you move the sheet metal bottom back into place,
make sure the thermocouple wire attached to the
back of the board is away from the other wires.
7 Install the screws holding the bottom to the kiln.
Replacing the firing chamber is a factory repair. Please
call 800-876-4328 or 972-288-7557 for instructions, or see
the dealer who sold you the kiln.
19
Paragon Kiln Limited Warranty
Paragon kilns are warranted to the original purchaser by Paragon Industries, Inc. (herein “Paragon”), subject to the listed exclusions below, to be free
of defects in workmanship for the periods specified below. The warranty period begins from date of shipment
from the Paragon factory unless date of original purchase from an authorized Paragon distributor or dealer
can be established.
Warranty Period: J-series, SC-series: 1 year
This warranty period applies unless otherwise
agreed to in writing.
This warranty excludes: 1) Kilns or furnaces damaged by overfiring (exceeding the melting temperature
of the material being fired) regardless of cause of
overfiring; 2) Ware, tools, kiln furniture, or anything
inside damaged by overfire; 3) Kilns allowed to exceed
the maximum temperature shown on kiln’s nameplate,
regardless of cause; 4) Kilns subjected to abuse, neglect, freight damage or improper storage; 5) Kilns
used for either reduction or salt firing, 6) Kilns damaged by improper electrical installation; 7) Kilns used
for purposes other than firing ceramics, glass, heat
treating, or the purpose for which it was intended; 8)
Element burnout caused by contact with foreign materials; 9) The patented Dawson Kiln Sitter and/or Limit
Timer manufactured by W.P. Dawson, Inc., 399 Thor
Place, Brea, California 92621.
WARRANTY COVERAGE EXTENDS ONLY TO
THE ORIGINAL PURCHASER AND DOES NOT
COVER REPLACEMENT OF PARTS THAT ARE,
BY THEIR NATURE, EXPENDABLE. THIS WARRANTY IS VOIDED IF THE PRODUCT IS ADVERSELY AFFECTED BY ATTACHING ANY FEATURE OR DEVICE TO IT, OR IS IN ANY WAY
TAMPERED WITH OR MODIFIED WITHOUT EXPRESS WRITTEN PERMISSION FROM PARAGON
INDUSTRIES, INC.
Paragon Industries, Inc., will repair or replace any
parts that become defective under normal and proper
use during the specified period for the kiln purchased,
providing the kiln has not been subjected to misuse or
the listed exclusions. Paragon will furnish and install
replacement parts at the factory with transportation
costs to and from the factory paid by the owner; or upon
receipt of defective parts at the factory, and after factory
examination of the defect, Paragon will furnish replacement parts, complete with installation instructions, shipped postpaid to owner. The warranty on the
20
repaired and/or replaced parts will be limited to the unexpired term of the original warranty.
Any claim for adjustment under this warranty must
include name and address of dealer from whom kiln
was originally purchased. Repair or replacement of any
defective parts shall fulfill all obligations of Paragon.
No other obligations or liabilities are assumed in connection with Paragon kilns nor does Paragon Industries, Inc. authorize its distributors or dealers to assume any other obligations or liabilities on its behalf.
THERE ARE NO OTHER WARRANTIES EXPRESSED OR IMPLIED, INCLUDING BUT NOT
LIMITED TO ANY IMPLIED WARRANTIES OF
MERCHANTABILITY OR FITNESS FOR A PARTICULAR PURPOSE. IN NO EVENT SHALL PARAGON INDUSTRIES, INC. BE LIABLE FOR ANY
LOSS OF PROFITS OR ANY INDIRECT OR CONSEQUENTIAL DAMAGES ARISING OUT OF ANY
SUCH DEFECT IN MATERIAL OR WORKMANSHIP. NOTE: SOME STATES DO NOT ALLOW
THE EXCLUSION OR LIMITATION OF INCIDENTAL OR CONSEQUENTIAL DAMAGES SO
THE ABOVE LIMITATION OR EXCLUSION MAY
NOT APPLY TO YOU.
This agreement is made in the State of Texas and its
validity, construction, and all rights under it will be
governed by the laws of the State of Texas. This warranty gives you specific legal rights, and you may also
have other rights, which vary from state to state.
Paragon Industries, Inc.
2011 South Town East Blvd.
Mesquite,Texas 75149-1122
Toll Free: 800-876-4328
972/288-7557
Toll Free Fax: 888-222-6450
Fax: 972-222-0646
[email protected]
www.paragonweb.com