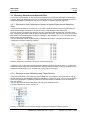
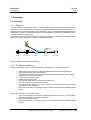
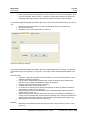
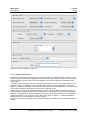
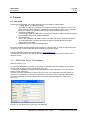
1
SPECCHIO User Guide Page 1 of 103 User Guide Version: Date: Status: Author: File: Pages: 2.1.1 02.11.2010 Valid A. Hueni, Remote Sensing Laboratories, University of Zurich \SPECCHIO_UserGuide_V2.1.1.docx 103 Classification: Distribution: SPECCHIO Users \SPECCHIO_UserGuide_V2.1.1.docx Version 2.1.1 / 02.11.2010 SPECCHIO User Guide Page 2 of 103 History Version Date Author Remark 0.1 15.12.2006 A. Hueni First valid version 0.2 13.02.2007 A. Hueni - Instructions for entering pathnames under UNIX - Updated installation description - Bug fix update - Tutorial 1.0c 14.02.2007 A. Hueni - Bug fixes and added features - Version number of this document is now synchronized with the software version number. 1.0d 21.02.2007 A. Hueni - Minor software changes - Some changes due to input from the first tutorial session 1.0f 29.05.2007 A. Hueni Added features: - txt file reader - CORINE landcover class displayed as tree in Metadata editor 1.1 18.10.2007 A. Hueni Updates due to: - adding multi-user capabilities to the data model and application. - pre-configuration of database connection details via the db_config.txt file - Admin functions not visible for normal users - Bug fixes 1.1a 03.11.2007 A. Hueni - Software updates and bug fixes - Description of plot control - other minor changes 1.1b 06.11.2007 A. Hueni - Change of the application bundle to flat file structure in order to prevent installation problems. Reflection of that change in the documentation. 1.1c 31.01.2008 A. Hueni - Added spectral plot to metadata editor - Added campaign export functionality - Time format option in the export dialog - Bugfix: Position.Location field in Metadata editor now accepts alphanumeric input. \SPECCHIO_UserGuide_V2.1.1.docx Version 2.1.1 / 02.11.2010 SPECCHIO User Guide 1.2 Page 3 of 103 29.05.2008 A. Hueni Major rework of the Metadata Editor: - Super-fast group updates - Shared data highlighting - Shared data update reimplementation - Shared data awareness for gonio and sun angle calculations - Direct selection of gonio and sun angle calculations from the ‘sampling geometry field’ 1.3 15.06.2008 A. Hueni Added campaign import function. Some bugfixes. 1.3a 25.07.2008 A. Hueni SPECCHIO would stall during data export due to the jgraph extension not being found. The application has been recompiled to include the jgraph extension in the needed extension list and jgraph is now bundled with the SPECCHIO application. 1.3c 26.09.2008 A. Hueni (a) A switch in the Query Browser that lets you restrict the data to your own data only, (b) The Data Browser in the Metadata Editor is now contained in a scroll pane and thus also displays correctly on small screens. 2.0 12.03.2009 A. Hueni Major update: - Database schema update to include reference panel handling including correction factors and uncertainty - Processing extension - Instrument and reference panel handling tools - Updated export/import functionality 2.0a 26.03.2009 A. Hueni ENVI spectral library loading problem has been addressed. 2.0c 07.07.2009 A. Hueni Numeric fields in the Metadata Editor now accept copy&paste operations. Support for new DB fields for instrument settings. \SPECCHIO_UserGuide_V2.1.1.docx Version 2.1.1 / 02.11.2010 SPECCHIO User Guide 2.1 Page 4 of 103 02.09.2010 A. Hueni - Added instrument settings support - Added associated measurements support - Names and Target Type dialogues have combobox values now updated when editing existing data. - Copy&paste operations now also work under Windows. - Config file reading routine more robust (multiple CR/LF possible and not causing a crash) - Time selection for file output now works from the space network processor as well. - Solved memory problem when loading > 3000 spectra plus further memory leaks. - Bug fix for picture loading in instrumentation admin - Added support for the SVC-HR1024 instrument - Added calibration definition for instruments - Added preliminary support for Apogee instrument 2.1c A. Hueni - Added button for direct spectral plot from Query Browser - Selection of space splitting approach in Query Browser - Added filename wildcard field in Query Browser - Progress info and multithreading for Data Remover - Added handling for SVC HR-1024 instruments measuring in radiance mode 2.1.1 A. Hueni - Bugfix for space splitting in Query Browser - Bugfix for campaign restriction in Query Browser - Preliminary support for SpectraSuite Data Files - Increased number of decimals in CSV file output \SPECCHIO_UserGuide_V2.1.1.docx Version 2.1.1 / 02.11.2010 SPECCHIO User Guide Page 5 of 103 Table of Contents 1 Introduction ...................................................................................................... 8 2 Installation and Configuration ........................................................................ 9 2.1 Database...................................................................................................................................9 2.1.1 MySQL Instance ................................................................................................................9 2.1.2 Network Access .................................................................................................................9 2.2 SPECCHIO Application.............................................................................................................9 2.2.1 Java Version ......................................................................................................................9 2.2.2 Application Bundle .............................................................................................................9 2.2.2.1 SPECCHIO Application Files ....................................................................................................9 2.2.2.2 Java Library Extensions............................................................................................................10 2.2.3 Microsoft Windows ...........................................................................................................10 2.2.4 UNIX ................................................................................................................................10 2.2.5 Apple Macintosh ..............................................................................................................10 3 Design of Sampling Experiments and Data Structuring ............................ 11 3.1 Overview .................................................................................................................................11 3.2 Hierarchical Structure .............................................................................................................11 3.3 Directory Structure and Spectral Files ....................................................................................12 3.3.1 Structure to store Reflectance Spectra of several Species and Sampling Sites..............12 3.3.2 Structure to store Reference and Target Spectra ............................................................12 4 SPECCHIO Concepts ..................................................................................... 13 4.1 Modelling of Hierarchies in the SPECCHIO Database and GUI .............................................13 4.2 Time Data ...............................................................................................................................13 4.3 Metadata Quality Levels .........................................................................................................14 4.4 Data Links ...............................................................................................................................15 4.5 Metadata .................................................................................................................................15 4.5.1 Cloud Cover .....................................................................................................................15 4.5.2 Measurement Types ........................................................................................................15 4.5.3 Target Types ....................................................................................................................16 4.5.4 Sensors and Instruments .................................................................................................16 4.6 Spaces, Space Factory and Data Processing using the Space Network ...............................16 5 Operation ........................................................................................................ 18 5.1 Overview .................................................................................................................................18 5.1.1 Dataflow ...........................................................................................................................18 5.1.2 File System Interfaces .....................................................................................................18 5.1.3 SPECCHIO Operation .....................................................................................................19 5.2 SPECCHIO Application...........................................................................................................19 5.2.1 Look and Feel ..................................................................................................................19 5.2.2 Main Window ...................................................................................................................20 5.2.3 Connecting to a Database ...............................................................................................20 5.2.4 Creating a new Campaign ...............................................................................................21 5.2.5 Loading Campaign Data ..................................................................................................22 5.2.5.1 ASD Files..................................................................................................................................23 5.2.5.2 GER Signature Files .................................................................................................................23 \SPECCHIO_UserGuide_V2.1.1.docx Version 2.1.1 / 02.11.2010 SPECCHIO User Guide Page 6 of 103 5.2.5.3 MFR OUT Files ........................................................................................................................24 5.2.5.4 SVC HR-1024 Files ..................................................................................................................24 5.2.5.5 Apogee Files .............................................................................................................................26 5.2.5.6 ENVI Spectral Library Files .....................................................................................................26 5.2.5.7 TXT Space Formatted Text Files..............................................................................................26 5.2.5.8 Ocean Optics SpectraSuite Data Files ......................................................................................27 5.2.6 Editing Metadata ..............................................................................................................27 5.2.6.1 Description of the Metadata GUI elements ..............................................................................27 5.2.6.2 Operation Principles of the Metadata Editor ............................................................................35 5.2.6.2.1 Displaying Metadata..........................................................................................................35 5.2.6.2.2 Data Conflicts....................................................................................................................35 5.2.6.2.3 Updates and Resets............................................................................................................35 5.2.6.2.4 Group Updates...................................................................................................................35 5.2.6.2.5 Overriding the Conflict Detection .....................................................................................36 5.2.6.2.6 Shared Field Colouring .....................................................................................................36 5.2.6.2.7 Mandatory Field Colouring ...............................................................................................37 5.2.6.2.8 Showing the Quality Compliance in the Metadata Browser Tree.....................................39 5.2.6.2.9 Definition of Data Links....................................................................................................39 5.2.6.2.10 Special Functions ............................................................................................................40 5.2.7 Querying Data ..................................................................................................................45 5.2.8 Report Generation ...........................................................................................................50 5.2.9 File Output .......................................................................................................................51 5.2.9.1 CSV File Format.......................................................................................................................53 5.2.10 Interactive Processing using Space Networks...............................................................54 5.2.10.1 Graphical Representations of Spaces and Modules................................................................55 5.2.10.2 Adding Modules and linking with Spaces ..............................................................................56 5.2.10.3 Configuration of Modules.......................................................................................................57 5.2.10.4 Processing Module Descriptions ............................................................................................57 5.2.10.4.1 Radiance to Reflectance Transformation ........................................................................57 5.2.10.4.2 Reference Panel Correction Factors ................................................................................57 5.2.10.4.3 Correct for Reference Panel Non-Idealness ....................................................................58 5.2.10.4.4 Delta ................................................................................................................................59 5.2.10.4.5 Waveband Filter ..............................................................................................................60 5.2.10.4.6 Broadband and Narrowband Filters ................................................................................61 5.2.10.5 Visualisation Modules ............................................................................................................62 5.2.10.5.1 Spectral Line Plot ............................................................................................................63 5.2.10.5.2 Spectral Scatter Plot ........................................................................................................63 5.2.10.5.3 Gonio Sampling Points Plot ............................................................................................64 5.2.10.5.4 Gonio Hemisphere Explorer............................................................................................64 5.2.10.5.5 Time Line Plot.................................................................................................................66 5.2.10.5.6 Time Line Explorer .........................................................................................................67 5.2.10.6 File Export Module.................................................................................................................68 5.2.11 Data Administration........................................................................................................68 5.2.11.1 Removing data ........................................................................................................................69 5.2.11.2 Campaign Export ....................................................................................................................69 5.2.11.3 Campaign Import ....................................................................................................................69 5.2.11.4 Definition of new Sensors ......................................................................................................70 5.2.11.5 Instrumentation Administration..............................................................................................71 5.2.11.5.1 Instrument Administration ..............................................................................................71 5.2.11.5.2 Reference Panel Administration......................................................................................73 5.2.11.6 Database Upgrade ...................................................................................................................75 5.2.12 Linking to a GIS System ................................................................................................76 5.2.12.1 Setting up the SPECCHIO DB as a Data Source ...................................................................76 5.2.12.2 Establishing a Database Connection in ArcCatalog ...............................................................77 5.2.12.3 Adding Table Data to a Map...................................................................................................78 6 Tutorial ............................................................................................................ 80 \SPECCHIO_UserGuide_V2.1.1.docx Version 2.1.1 / 02.11.2010 SPECCHIO User Guide Page 7 of 103 6.1 Overview .................................................................................................................................80 6.1.1 SPECCHIO Online Test Database ..................................................................................80 6.1.2 Creating Campaigns on the Test Database.....................................................................81 6.1.3 Downloading Test Data Sets ...........................................................................................81 6.2 Part 1: Loading, Editing and Retrieving Data..........................................................................81 6.2.1 Examine the Folder and File Structure ............................................................................81 6.2.2 Creating a new Campaign and Loading the Spectra .......................................................82 6.2.3 Get to Know Your Data ....................................................................................................83 6.2.4 Exporting Data to CSV .....................................................................................................84 6.2.5 Exporting Data to ENVI Spectral Libraries .......................................................................86 6.2.6 Editing Metadata ..............................................................................................................87 6.3 Part 2: GER Files ....................................................................................................................91 6.4 Part 3: Directional Data ...........................................................................................................92 6.5 Part 4: Data Querying, Processing and Exploration ...............................................................95 6.5.1 Converting Radiances to Reflectances ............................................................................95 6.5.2 Data Queries ....................................................................................................................98 7 Change History............................................................................................. 100 7.1 SPECCHIO Application.........................................................................................................100 7.1.1 Added Features .............................................................................................................100 7.1.2 Fixed Bugs .....................................................................................................................100 7.1.3 Known Bugs ...................................................................................................................102 7.2 SPECCHIO Database...........................................................................................................102 7.2.1 Added Features .............................................................................................................102 8 References .................................................................................................... 102 \SPECCHIO_UserGuide_V2.1.1.docx Version 2.1.1 / 02.11.2010 SPECCHIO User Guide Page 8 of 103 1 Introduction SPECCHIO is a spectral database combined with user-friendly interface software designed to store spectral data acquired by spectroradiometers and associated metadata. SPECCHIO was developed to support long term usability and data sharing between researchers. For further information please refer to the SPECCHIO website (www.specchio.ch) and to the following articles: Hueni, A., Kneubuehler, M. and Schaepman, M. (2010). DATA EXCHANGE BETWEEN SPECTRAL DATABASES. IGARSS, Hawaii, USA. Hueni, A., Malthus, T., Kneubuehler, M. and Schaepman, M. (submitted). "Data Exchange between distributed Spectral Databases." Computers & Geosciences. Hueni, A. and Kneubuehler, M. (2009). SPECCHIO: A Free Spectral Data Management and Processing System. SPIE Optics and Photonics, San Diego, CA. Hueni, A., Rey, S., Schläpfer, D., Schopfer, J. and Kneubuehler, M. (2009). VISUALISATION, PROCESSING AND STORAGE OF SPECTRODIRECTIONAL DATA BASED ON THE SPECTRAL DATABASE SPECCHIO. IGARSS 09, Cape Town, South Africa. Hueni, A., Kneubuehler, M., Nieke, J., Itten, K., 2009. PROCESSING EXTENSION FOR THE SPECTRAL DATABASE SPECCHIO. In: Proceedings EARSeL SIG IS, Tel Aviv, Israel. Hueni, A., Nieke, J., Schopfer, J., Kneubühler, M. and Itten, K. (2009). "The spectral database SPECCHIO for improved long term usability and data sharing." Computers & Geosciences 35(3): 557-565. Hueni, A., Schopfer, J., Schläpfer, D., Kneubuehler, M., Nieke, J., 2008. PRE-PROCESSING OF DUAL-VIEW FIGOS DATA: TOWARDS OPERATIONAL BRDF RETRIEVAL. In: Proceedings ISPRS, Beijing. Hüni, A. and Kneubühler, M. (2007). SPECCHIO: a system for storing and sharing spectroradiometer data. SPIE Newsroom, December 2007. DOI: 10.1117/2.1200711.0956. Online at http://spie.org/x18220.xml, PDF: 0956-2007-11-29.pdf Hüni, A., Nieke, J., Schopfer, J., Kneubühler, M. & Itten, K. (2007). Metadata of Spectral Data Collections. 5th EARSeL Workshop on Imaging Spectroscopy, Bruges, Belgium. Hüni, A., Nieke, J., Schopfer, J., Kneubühler, M. & Itten, K. (2007). 2nd Generation of RSL's Spectrum Database "SPECCHIO". ISMPSRS, Davos, Switzerland. Hueni, A. & Tuohy, M. (2006). "Spectroradiometer Data Structuring, Pre-Processing and Analysis An IT Based Approach." Journal of Spatial Science 51(2): 93-102. Hueni, A. (2006). Field Spectroradiometer Data: Acquisition, Organisation, Processing and Analysis on the Example of New Zealand Native Plants. Institute of Natural Resources. Palmerston North, Massey University. \SPECCHIO_UserGuide_V2.1.1.docx Version 2.1.1 / 02.11.2010 SPECCHIO User Guide Page 9 of 103 2 Installation and Configuration 2.1 Database 2.1.1 MySQL Instance SPECCHIO runs on version 5 of MySQL database. An online instance of the database is available on the db.specchio.ch database server. The SPECCHIO database can as well be installed locally (MySQL is available from www.mysql.com). A SPECCHIO system installation package allowing local installation is available from RSL. RSL distributes the SPECCHIO system package free of charge to interested parties. Please direct expressions of interest to [email protected]. 2.1.2 Network Access Note: this mainly applies if a locally administred instance of the SPECCHIO database must be configured for network access. The SPECCHIO application can access the database over the network if the following configurations are performed: □ The IP addresses of all machines from which the users can connect are added to the user privileges. Alternatively a range of IP addresses can be configured using a netmask (see MySQL online documentation for details) or a value of ‘%’ will allow access from any possible machine. □ The port of the MySQL server (3306 by default) must not be blocked by firewall 2.2 SPECCHIO Application 2.2.1 Java Version SPECCHIO requires Java runtime environment (JRE) version 1.5 and higher. To check the java version on your system open a system prompt (i.e. command window under Windows, terminal for Macintosh and UNIX systems) and type: java -version The output will be similar to: java version "1.5.0_06" Java(TM) 2 Runtime Environment, Standard Edition (build 1.5.0_06-b05) Java HotSpot(TM) Client VM (build 1.5.0_06-b05, mixed mode) 2.2.2 Application Bundle The SPECCHIO application plus the needed libraries are supplied as application bundle in ZIP file format. As a first step you must un-zip the ZIP archive. The files contained in the bundle are described hereafter. 2.2.2.1 SPECCHIO Application Files The SPECCHIO application is contained in a Java archive file: SPECCHIO_App_V<x.xx>.jar. <x.xx> stands for the version tag, e.g. 1.0c, i.e. the jar file would be named SPECCHIO_App_V1.0c.jar. The file db_config.txt contains database connection configurations. \SPECCHIO_UserGuide_V2.1.1.docx Version 2.1.1 / 02.11.2010 SPECCHIO User Guide Page 10 of 103 2.2.2.2 Java Library Extensions The following files are needed to run SPECCHIO: □ jcommon-1.0.5.jar □ jfreechart-1.0.2.jar □ jgraph.jar □ mysql-connector-java-3.1.13-bin.jar □ qcchart3djava.jar The extensions are supplied in the same folder as the SPECCHIO application file. 2.2.3 Microsoft Windows □ □ Copy the whole content of the ZIP file (SPECCHIO_Application.jar, the db_config.txt and the libraries) to some new directory on your machine. It is recommended to create a new folder in C:\Program Files and copy the above files to this folder. To start the SPECCHIO Application double click the SPECCHIO_App_V<x.xx>.jar icon. 2.2.4 UNIX The described installation procedure installs the software in a user directory. This implies that only users with access to this user account can run the software. For the installation on a server with access for every system user you need administrator rights on the concerned machine or have it installed by the system administrator. □ Copy the whole content of the ZIP file (SPECCHIO_Application.jar, the db_config.txt and the libraries) to some new directory on your user account. To start the software locally either double-click the SPECCHIO_App_V<x.xx>.jar file (may not work on all UNIX systems) or alternatively open a shell (terminal), navigate to the directory containing the applications and type java –jar SPECCHIO_App_V<x.xx>.jar For remote execution when having installed the application in your home drive which is mapped on to the servers, type: ssh –X <server_name> java -jar <path>/ SPECCHIO_App_V<x.xx>.jar E.g. to use terra as server with version 1.0c of the SPECCHIO application: ssh –X terra java -jar /home/rsl1/ahueni/SPECCHIO/SPECCHIO_App_V1.0c.jar 2.2.5 Apple Macintosh □ □ □ Double click the ZIP file. This will automatically unzip the file and create a new folder containing all SPECCHIO files. Copy the unzipped folder into the Applications (or some other directory of your choice) Double click the SPECCHIO_App_V<x.xx>.jar file to run SPECCHIO \SPECCHIO_UserGuide_V2.1.1.docx Version 2.1.1 / 02.11.2010 SPECCHIO User Guide Page 11 of 103 3 Design of Sampling Experiments and Data Structuring This section contains a description of a setup of a possible spectral sampling campaign. Users designing their own sampling campaigns and planning to load them into SPECCHIO can find some basic ideas on campaign planning and data structuring hereafter. 3.1 Overview The data collected during sampling campaigns must be organised in a structured way in order to allow the automated import into the spectral database. Section 3.2 explains the background of the structure used and section 3.3 gives a practical example of a directory and file structure that should be adopted for data collection. Preferably sampling experiments should be designed to include some form of data structuring from the beginning. Alternatively, existing data can be arranged to meet the requirements. 3.2 Hierarchical Structure The concept of hierarchical data structure has been adapted from SpectraProc (Hueni 2006). SpectraProc was built on a fixed hierarchy of three levels. The following example is based on the sampling design used for SpectraProc campaigns. A hierarchical data structure that reflects the real world and the setup of sampling campaigns for vegetation is used. This structure is derived from the following conditions: 1. Reflectances of several different species are captured 2. In order to describe the in-species variation, several specimens of a species are sampled 3. The variability of the specimens is described by several measurements per specimen The spatial extent where a specimen is sampled is termed a sample site, thus a species contains a number of sample sites. The sites are numbered in the order of sampling. At each site, several readings are taken to capture the variation exhibited by the specimen in question. A site therefore contains a number of spectra. This leads to a hierarchical directory structure (Figure 1). Figure 1: Hierarchical directory structure Although the term species is used it essentially represents the different classes found in a study. These classes can either be assigned due to already existing classification systems for e.g. plants or minerals. In other cases a hypothesis might exist that a number of objects can be separated into classes. If so the setup of the experiment should mirror this hypothesis. If no such assumption exists all objects can be put into the same class (i.e. species) and the identification of classes could then be carried out by e.g. cluster analysis. SPECCHIO builds up on the above concept of hierarchies. However there is no restriction on the number of levels used. Thus any level number (0:N) can be used. \SPECCHIO_UserGuide_V2.1.1.docx Version 2.1.1 / 02.11.2010 SPECCHIO User Guide Page 12 of 103 3.3 Directory Structure and Spectral Files This section lists examples of data structures employed to hold the files generated by spectroradiometers. Note that SPECCHIO enforces no particular structure. The provided examples are mere suggestions based on experience and you may decide to choose a different approach. 3.3.1 Structure to store Reflectance Spectra of several Species and Sampling Sites A hierarchical structure as introduced in 3.2 is used to build the directory structure that holds the spectral files. Ideally, this directory structure is setup when designing the experiment. Figure 2 shows an example of a directory structure containing ASD spectral files. The main directory ‘Vegetation_example’ holds all species directories of the study. This main directory is the folder that needs to be specified when creating a campaign in the database (cf. 5.2.4). The species directories contain the site directories. The site directories contain all spectral files collected at these sites. The spectral files are autonumbered by the ASD capturing software. Figure 2: Example of a directory structures holding spectral files Campaigns can contain spectra measured with different instruments and sensors, i.e. instruments of different sensor types and instruments with different calibration dates. The only restriction that is imposed is that a hierarchy (i.e. a folder) can contain only one file type. 3.3.2 Structure to store Reference and Target Spectra If a spectroradiometer is configured to acquire radiances, the irradiance will commonly be characterised indirectly by measuring the radiance reflected by a reference panel. This may be preferable to the direct acquisition of reflectance data as information about the irradiance can be retrieved from the dataset. The structure must therefore hold target and reference radiance spectra. A possible structure is shown in Figure 3: Figure 3: A possible structure for the storage of target and reference radiance spectra \SPECCHIO_UserGuide_V2.1.1.docx Version 2.1.1 / 02.11.2010 SPECCHIO User Guide Page 13 of 103 4 SPECCHIO Concepts 4.1 Modelling of Hierarchies in the SPECCHIO Database and GUI The hierarchical structure of a campaign is stored in the database using three tables: □ campaign □ hierarchy_level □ spectrum The hierarchy_level table recursively models the folder structure of the campaign, i.e. any depth of a tree structure can be stored in only one table. The data hierarchy is used in the GUI to build the contents of a component called ‘Spectral Data Browser’. This browser shows the structure as defined on the file system and adds a campaign node to the top of the structure. Figure 4 shows a Spectral Data Browser component that visualises the directory structure of the example in Figure 2. Note the added top node ‘Vegetation Example Campaign’. Figure 4: Example of a Spectral Data Browser component showing the directory structure holding spectral files 4.2 Time Data SPECCHIO expects time data in UTC (Coordinated Universal Time). For practical purposes UTC is considered equivalent to GMT, however, the term UTC is recommended for technical contexts (U.S. Naval Observatory 2003). The above implies that all computers capturing data for use in SPECCHIO should have their timezone set to GMT and their system time adjusted to UTC. The capturing date/time can be modified in the database using a special function in the Metadata Editor if a time different to UTC was used. \SPECCHIO_UserGuide_V2.1.1.docx Version 2.1.1 / 02.11.2010 SPECCHIO User Guide Page 14 of 103 4.3 Metadata Quality Levels The concept of metadata quality levels has been introduced to add a quality measure to spectral data. It is clear that by describing more metadata the spectral data quality is not improved as such. However the metadata can serve to increase the user confidence in the data as it defines the circumstances of the data capturing. The level A is foreseen to also include some quality measure for the spectral data. Metadata quality levels are implemented and enforced by so called metadata policies. These policies define the mandatory metadata fields for each database table. Quality levels are managed on spectrum level, i.e. each spectrum can have its own required quality. Required quality is a user defined level. It defines what metadata quality level the spectrum is supposed to reach at some point in time. Once all metadata required for the specified level are entered the attained quality level of the spectrum will be updated to reflect the required level. When new data are loaded they have no required quality level defined and thus no metadata policies are enforced. Currently the following levels have been defined or foreseen: Level A: not implemented yet, the exact specification is to be defined. Reserved for spectra of high quality, probably requiring some pre-processing like atmospheric noise removal and smoothing. Level B: defines the minimal set of metadata that must be entered to reach a metadata quality level of B. Level B should make spectral data useable by third persons who were not directly involved in the capturing process and are thus not familiar with the sampling circumstances. The required metadata fields are detailed hereafter (grouped by metadata groups as found in the metadata editor). Campaign: □ Investigator Spectrum: □ □ □ □ □ □ □ □ Sensor Instrument Foreoptic Landcover Target homogeneity Measurement unit Sampling environment Measurement type Position: □ □ □ Latitude Longitude Altitude Environmental condition: □ Cloud cover Sampling geometry: □ Sensor zenith □ Sensor azimuth □ Illumination zenith □ Illumination azimuth Target type: □ Target type \SPECCHIO_UserGuide_V2.1.1.docx Version 2.1.1 / 02.11.2010 SPECCHIO User Guide Page 15 of 103 4.4 Data Links Data links have been introduced as a means of defining relations between data sets or single spectra. I.e. data links are 1:1 relationships between either two hierarchies or two spectra. Data links are of a defined type. Implemented types are: (a) Photometer data, (b) Spectralon data and (c) Radiance data. Data links are in some cases set up automatically during campaign data loading. E.g. GER signature files include the spectra of both target and white reference. For more information on data links see 5.2.5.1 and 5.2.6.2.10.2. SPECCHIO uses data link information for e.g. the automatic calculation of reflectance from target and reference radiances. 4.5 Metadata A number of metadata parameters are detailed hereafter. For more information on the metadata parameters supported by SPECCHIO please refer to the Metadata Editor section and to Hüni et al.(2007). 4.5.1 Cloud Cover Description of the cloudiness of the sky by octas: “For the total cloud amount, codes 0 to 8 show the fraction, in octas, of the celestial dome covered by all clouds. An octa is one eighth of the celestial dome, so we estimate how many eighths of the celestial dome are covered up by clouds“ (University of Washington undated) Code Definition 0 Clear 1 1 octa or less, but not zero 2-6 2-6 octas 7 7 octas or more, but not 8 octas 8 8 octas Table 1: Cloud cover definition in octas (Source: University of Washington (undated)) 4.5.2 Measurement Types Three measurement types are currently distinguished: □ Single: The standard case when single measurements are taken. Single measurements are not grouped with other spectra by geometric or temporal conditions. □ Directional: Applies to goniometer measurements. A spectrum is part of a hemisphere and has a specific position given by its sampling geometry settings. □ Temporal: Applies to photometer data. Spectra have a specific capturing time on a common timeline. \SPECCHIO_UserGuide_V2.1.1.docx Version 2.1.1 / 02.11.2010 SPECCHIO User Guide Page 16 of 103 4.5.3 Target Types Target types are predefined in the database and can only be edited by the SPECCHIO administrator. Target types should always be chosen with the goal to help the search and selection of spectra for e.g. image classification tasks. The target types should therefore not be too detailed. It is foreseen that target types can be grouped into categories. This might be implemented in future when the number of target types becomes a handling problem for the user. 4.5.4 Sensors and Instruments SPECCHIO defines sensors and instruments. While these terms are sometimes interchanged in everyday scientific language, it is important to understand that sensors and instruments are modelled as two different entities in the database. Sensors define the physical setup of sensors, i.e. number of channels, average wavelength and FWHM per channel, sensor type number (usually a code given by the manufacturer, e.g. 4 for ASD FSFR sensor). Sensors are defined only once in the database. Instruments on the other hand are existing instances of a certain sensor type. There can be several different instruments that are all of one sensor type. Instruments also have a defined owner and a history of calibrations. Consider the example of a GER 3700 instrument: this instrument is an instance of a GER 3700 sensor. The sensor defines the average wavelength per channel. As long as no calibration for the instrument has been entered into the database the channels defined in the sensor will be used for plotting and exporting spectral data. When calibrations are entered for instruments they override the sensor specifications. For further information please refer to Hüni et al.(2007). Instruments that change the number of stored spectral bands based on user configurations (such as is possible with the new SVC HR-1024) are not yet supported. 4.6 Spaces, Space Factory and Data Processing using the Space Network Starting with version 2.0 SPECCHIO offers interactive, configurable data processing. The concept is based on the feature spaces (Landgrebe 1997) and complex process flows can be realised by building networks consisting of spaces and processing modules. For detailed information please refer to: (Hueni, Kneubuehler et al. 2009). Spaces are used throughout the system for processing, visualisation and file output. In all these cases, vector data must be related to spectral dimensions and this information is held by the space. Moreover, a space can hold only spectra that are of the same dimension. The Space Factory is a conceptual, central component of the SPECCHIO system. It creates new spaces based on given inputs and contains the logic to form ‘non-mixed’ spaces. Assume the use case of displaying spectral plots of a number of spectra. In a first step, the user will select the spectra to be plotted by effecting a subspace projection (Hüni, Nieke et al. 2007). Internally, this will yield a number of record id’s that are matching the user’s selection. These ids are now handed to the Space Factory. Internally, spaces are created for all existing combinations of the respective sensors, instruments, calibrations and measurement units associated with the spectra (see Figure 5). \SPECCHIO_UserGuide_V2.1.1.docx Version 2.1.1 / 02.11.2010 SPECCHIO User Guide Page 17 of 103 !R1?7&23;9& );7@&87V478& &;E:;R1?7&R@6W7?H64& ,-&23;9& !"#"$%&!'"$%()*+,-&.(/*& 0122+34562578+91:27;<&=>"("& 0122+?64;9@1349;<&AB-&0&@7C& DE3@78+'F+.F+?6G:341H64;<I& JKLM& JKLN& JKLK& JKLO& P& JKLQ& !R1?7&N& !R1?7& .1?96@S& T@6ER&:SP&;74;6@U& 34;9@EG749U&?123:@1H64U& G71;E@7G749&E439& !R1?7&K& !R1?7&B& Figure 5: Building spaces based on user defined subspace projections The Space Factory returns a list of the created spaces. Each space can now in turn be used as an input argument of a plotting class instance. Utilizing the Space Factory ensures that all spectra contained by a space have a common wavelength per band and the same measurement unit, i.e. the following processing modules do not need to carry out uniformity checks but can apply their algorithms directly, e.g. plotting of spectral vectors against the common wavelengths of the space. Interactive, flexible and configurable data processing is based on the concept of the Space Network. Such networks consist of processing modules and data sinks/sources, connected by directed edges. Figure 6: Transformation into a new space by a processing module Processing modules are effecting a transformation on a space, i.e. the spectral data vectors of the input space are transformed to an output space. The algorithm of the processing module defines the dimensionality of the resulting space. This is illustrated in Figure 6 with an input space of dimensionality N being transformed into another discrete space of dimensionality M. Although processing modules tend to have singular input/output in most cases, they may have multiple inputs and generate multiple outputs. \SPECCHIO_UserGuide_V2.1.1.docx Version 2.1.1 / 02.11.2010 SPECCHIO User Guide Page 18 of 103 5 Operation 5.1 Overview 5.1.1 Dataflow A typical dataflow is illustrated in Figure 7. A spectroradiometer is used to capture the radiance of field objects. Optionally a GPS connected to the field laptop (where supported by the capturing software) records the spatial position of the field object. This is a recommended setup as the spatial position can later be automatically loaded into the database. Spectral and metadata are automatically saved on the field laptop. These files are transferred to a laboratory computer where they are read by the SPECCHIO application and stored in the relevant tables in the spectral database. GPS device Spa tial pos ition Radiance Reflectance / Radiance / DN / Data file Spectral data & metadata Absorbance Field object Spectroradiometer Field laptop Lab computer SPECCHIO DB Figure 7: Dataflow and involved hardware 5.1.2 File System Interfaces SPECCHIO provides input and output interfaces to the file system. Input file formats are: □ □ □ □ □ □ □ □ □ ASD binary file as produced by the ASD FieldSpecPro/FS3 spectroradiometers ENVI Spectral library files (SLB and SLI) GER signature files as produced by the GER 3700 (Files produced by other GER instruments remain subject to testing) TXT space formatted text files MFR Photometer OUT files Apogee files (restricted to one tested file format only) SVC HR-1024 files (using PDA acquisition) Proprietary sensor definition file. Sensor definition files are an efficient way of defining new sensors in the database. XML type file format for campaign imports for data transfer between SPECCHIO databases Output can be written in three data formats: rd □ CSV (Comma Separated Values) for subsequent import into various 3 party applications like spreadsheets or statistic packages □ ENVI Spectral Library (SLB) □ XML type file format for campaign exports (for data transfer between SPECCHIO databases) \SPECCHIO_UserGuide_V2.1.1.docx Version 2.1.1 / 02.11.2010 SPECCHIO User Guide Page 19 of 103 5.1.3 SPECCHIO Operation SPECCHIO is campaign based, i.e. spectral data is grouped by campaigns. Advisably, a new campaign is created to hold data for every new sampling experiment. The spectral data files of a campaign must be held by a folder structure similar to the hierarchical structure introduced in 3.2. This structuring allows the automated loading of spectra into the database including the structure information. Typically, the operations carried out for each campaign are: 1. Creation of a new campaign 2. Loading of spectra 3. Entering of metadata 4. Repeated data query, visualisation, processing and file output New data can be added to ongoing campaigns by (a) storing them first in the already existing campaign data structure on the file system and (be) invoking the SPECCHIO loading operation for the respective campaign again. Only new spectra will be added to the database in this case. 5.2 SPECCHIO Application 5.2.1 Look and Feel SPECCHIO is written in Java and has been setup to use the native operating system look and feel. The screenshots provided in the following sections have been taken on Windows XP and MacOS X. Depending on your system, the windows and widgets will look differently. The functionality of the GUI is generally identical on all tested operating systems. There is however a minor difference in the selection of directory pathnames under UNIX. As a filename is required in the Open dialog, enter a dot ‘.’ in the filename box (cf. Figure 8). Alternatively, on some UNIX machines just click the folder but do not double click, in this fashion the folder will be selected and no ‘.’ has to be inserted in the filename box. Figure 8: Specifying a pathname under UNIX using the dot ‘.’ as entry in the filename box \SPECCHIO_UserGuide_V2.1.1.docx Version 2.1.1 / 02.11.2010 SPECCHIO User Guide Page 20 of 103 Depending on the UNIX windowing system, some of the dialogs are not properly displayed unless they are maximized. 5.2.2 Main Window The main window offers the main menu of the application and a progress report panel where the progress of certain processes (e.g. file loading) is reported (cf. Figure 9). The database connection status is shown in the progress report panel as well. The panel on the right side is currently not used but might be employed to display e.g. a log of operations or general user information. All SPECCHIO functionality is started by entries in the main menu. !"#"$"%&'()**&+,)*' -*.)' 34)54&%%'4&6)4#'6"*&7' /"0*'1&*2' Figure 9: Main window 5.2.3 Connecting to a Database SPECCHIO can be configured to automatically log into a database at the startup. In that case the connection parameters are read from the db_config.txt file. The database connection information panel (see also 5.2.2) always reflects the current connection status. Connect to a different database instance or change the database user by using the ‘Connect to database’ dialog. To start this dialog, select ‘Database‘->‘Connect to database’ (cf. Figure 10). Figure 10: Connect to database menu entry All connections that are configured in the db_config.txt file are listed in a list box (Known connections). To change the current connection either select a preconfigured connection from the list box or alternatively enter the server that hosts the MySQL instance you want to connect to, the listening port of the database (port 3306 by default), the database instance name, the user name and password (this is the database user name and password, which is different from your local/network account) in the relevant text entry fields. Press Connect to connect to the specified database/user. \SPECCHIO_UserGuide_V2.1.1.docx Version 2.1.1 / 02.11.2010 SPECCHIO User Guide Page 21 of 103 Figure 11: Connect to a database dialog Starting from version 2.0, a database version check is carried out. If a database with the wrong version is connected, a warning message is shown (Figure 12). The connection will still be set up, however, some functions will not work on older database versions. Old databases should be upgraded by the database administrator using the Upgrade function (see 5.2.11.6). Figure 12: Database version warning message 5.2.4 Creating a new Campaign To create a new Campaign, select ‘Data Input ‘->‘Create new campaign’ (Figure 13). This brings up the new campaign dialog (Figure 14). Figure 13: Create New Study menu entry Enter a campaign name of 45 characters maximum length. The main directory path is a file system pathname pointing to the directory that contains all hierarchies and spectra of this study. To set the path, select the ‘Browse’ button to display a directory tree (Figure 15) and select the appropriate directory. Note that when using a UNIX system you may have to enter a dot as filename (see 5.2.1). Click ‘Create’ to create the new, empty campaign on the database. Note that there is no check if a campaign of the same name already exists. It is technically feasible to have two campaigns named the same. However, it is suggested to check on existing campaigns to avoid multiple campaigns with identical names. \SPECCHIO_UserGuide_V2.1.1.docx Version 2.1.1 / 02.11.2010 SPECCHIO User Guide Page 22 of 103 A message box will appear once the campaign has been successfully created. No automatic loading of spectral files is initiated when a new campaign is created. To load data into a new campaign use the function ‘load campaign data’. Figure 14: New campaign dialog Figure 15: Directory selection dialog 5.2.5 Loading Campaign Data To automatically load the spectral data files of a campaign select ‘Data Input’->’Load campaign data’ (Figure 16). Note that if different file types (e.g. ASD binary files and GER signature files) are occurring in the same campaign, hierarchies must contain only one file type. This restriction is due to two reasons: (a) the file loading process is instantiating one concrete file loader class and applies it to all files in a directory and (b) it is against common sense to put files from different instruments/sensors into one directory. Consider a case where one species is being sampled with ASD and GER. A logical folder setup would be: a species folder with two subfolders for ASD and GER. These subfolders then contain the spectral files. \SPECCHIO_UserGuide_V2.1.1.docx Version 2.1.1 / 02.11.2010 SPECCHIO User Guide Page 23 of 103 Figure 16: Loading campaign data menu entry All names of the available campaigns of the current database user are contained in a combobox in the ‘Load Spectral Data’ dialog. Select the campaign that you want to load and click the ‘Load’ button. The loading progress is shown in the main window. A message box will appear once all data has been loaded to the system. If a campaign is ongoing over a longer period of time, new data can be added by first loading the new files and hierarchies into the existing file structure on the hard disc and then running the loading process again. Each spectral data loading process will check if hierarchies and spectra already exist in the database. Only new hierarchies and spectra will be inserted. Figure 17: Load Spectral Data dialog If a directory contains unknown file types, an according warning message is shown: Make sure that the files in the indicated directory are supported by SPECCHIO. 5.2.5.1 ASD Files SPECCHIO has been tested with ASD FS3, ASD FS PRO and ASD FSVNIR binary files. The new file format introduced by ASD is currently NOT supported -> please use the old file format in the meantime. 5.2.5.2 GER Signature Files These files hold two spectral measurements at once: the target and the white reference spectrum. When loading GER files two additional hierarchies are automatically created (named targets and references). The target and the reference keep the same filename (cf. Figure 18). A data link of the type ‘Spectralon’ is automatically inserted linking the target to the reference spectrum. \SPECCHIO_UserGuide_V2.1.1.docx Version 2.1.1 / 02.11.2010 SPECCHIO User Guide Page 24 of 103 Figure 18 Automatically created hierarchies for GER files 5.2.5.3 MFR OUT Files These files contain the capture time, the sun zenith angle and the spectral data for total, diffuse and direct irradiance. The sun angle and the direct irradiance data are discarded and only the total and diffuse spectra are stored. Upon insert into the database two new sub hierarchies, named total and diffuse are automatically created (cf. Figure 19). The filenames assigned to the spectra are auto-generated using the capturing date and time. Figure 19: Automatically created total and diffuse hierarchies for MFR data 5.2.5.4 SVC HR-1024 Files This version of SPECCHIO supports SVC HR-1024 files provided that they were captured using a PDA (files acquired with a laptop are different in file format and are not recognised by the current file loading routine). The HR-1024 stores radiances of reflectance panel, target and the computed target reflectance. During the data loading, SPECCHIO automatically generates a hierarchical structure to store these files (see Figure 20), setting up data links that connect the reflectance to the target radiance (Radiance data link) and connecting the target radiance to the reference radiance (Spectralon data link). If the instrument was set to acquire radiances only (i.e. no white reference taken), then no special structure will be created. \SPECCHIO_UserGuide_V2.1.1.docx Version 2.1.1 / 02.11.2010 SPECCHIO User Guide Page 25 of 103 Note: it is highly recommended to enter the instrument into the database and load a wavelengths calibration; the wavelengths between instruments differ quite a lot and the blueprint sensor definition in SPECCHIO is only a poor representation of the real wavelengths. Figure 20: Automatically generated hierarchy for HR-1024 files Examples of two valid files is given below: /*** Spectra Vista HR-1024 ***/ name= \My Documents\HR1024_Data\HR.071710.0017.sig instrument= HR: 0761008 integration= 2, 22, 20, 12, 50, 30 scan time=1, 1 optic= LENS14, LENS14 temp= 31.29, 0.41, -5.71, 31.53, 0.41, -5.77 battery= 7.7, 7.7 error= 0, 0 units= Radiance, Radiance time= 7/18/10 9:47:09 AM, 7/18/10 9:47:31 AM longitude= 11121.2335,W, 11121.2324,W latitude= 5330.5955,N, 5330.5964,N gpstime= 154336.000, 154356.000 comm= memory slot= 0, 0 factors= data= 344.2 56023.55 4381.86 7.82 345.8 54418.00 4186.00 7.69 347.3 56037.65 4365.57 7.79 348.9 59474.63 4568.75 7.68 …… /*** Spectra Vista SIG Data ***/ name= \My Documents\HR1024_Data\HR.080910.0010.sig instrument= HR: 0971030 integration= 20, 19.2, 30, 200, 60, 30 scan time= 3, 3 scan settings= AD, AI, AD, AI external data set1= 8224, 8224, 8224, 8224, 8224, 8224, 8224, 8224, 8224, 8224, 8224, 8224, 8224, 8224, 8224, 8224 external data set2= 8224, 8224, 8224, 8224, 8224, 8224, 8224, 8224, 8224, 8224, 8224, 8224, 8224, 8224, 8224, 8224 external data dark= 0,0,0,0,0,0,0,0 external data mask= 0 optic= LENS 4, LENS 4 temp= 36.21, 9.08, -5.30, 36.45, 9.08, -5.37 battery= 7.5, 7.4 error= 0, 0 units= Radiance, Radiance time= 8/9/10 10:49:47 AM, 8/9/10 10:52:36 AM longitude= 01116.9879,E, 01116.9933,E latitude= 4806.4988,N, 4806.5075,N gpstime= 084748.000, 085034.000 comm= \SPECCHIO_UserGuide_V2.1.1.docx Version 2.1.1 / 02.11.2010 SPECCHIO User Guide memory slot= 0, factors= data= 350.6 127369.73 352.1 130962.30 353.7 132239.65 355.3 128726.40 356.8 124030.10 358.4 123421.08 359.9 130810.10 Page 26 of 103 0 4658.17 4815.39 4916.35 4836.48 4677.99 4677.13 4966.42 3.66 3.68 3.72 3.76 3.77 3.79 3.80 … 5.2.5.5 Apogee Files Apogee files are supported but not extensively tested as yet. The file format currently recognised is shown below: " File: cachimbalito2\p5_2.TRM " TRANS-> Wave:733.53nm Pix:1050 400.00 1.102E+000 400.50 1.131E+000 401.00 1.205E+000 401.50 1.257E+000 402.00 1.260E+000 402.50 1.336E+000 403.00 1.341E+000 403.50 1.418E+000 404.00 1.451E+000 404.50 1.444E+000 405.00 1.488E+000 … Val: 25.767 Time:23ms Avg:7 Sm:0 Sg:0 Tc:on Xt:1 Ch:1 5.2.5.6 ENVI Spectral Library Files These files can contain more than one spectrum. Upon loading each spectrum is saved separately. Note that the sensor definition (i.e. central wavelengths) is not read from the ENVI header file. Spectra loaded from ENVI SLB or ENVI SLI files are automatically assigned a sensor based on the number of channels if existing; this approach my produce wrong sensor assignments. Use the Metadata Editor to set a sensor if needed. Spectra names are read from the header file if available and stored in the database as spectral name entry with a spectral name type = ‘ENVI Hdr’. Note: the import routine expects the spectral library files to have extensions of either .slb or .sli, a valid example is given hereafter: my_spectra.slb my_spectra.hdr 5.2.5.7 TXT Space Formatted Text Files These files are formatted as follows (specified using EBNF (Wirth 1977; ISO/IEC 1996)): txt_file = header, data; header = wsp, “wvl”, {wsp, spectrum_name}; data = {d_line}; d_line = wsp, wavelength, {wsp, value}; wsp = {space}; An example follows: wvl 350.000 351.000 352.000 353.000 354.000 355.000 356.000 357.000 mean_090499 0.0246756 0.0246917 0.0247316 0.0248502 0.0250081 0.0250736 0.0249883 0.0249174 mean_020599 0.0229771 0.0228430 0.0229652 0.0231014 0.0232272 0.0232273 0.0233005 0.0233962 \SPECCHIO_UserGuide_V2.1.1.docx Version 2.1.1 / 02.11.2010 SPECCHIO User Guide Page 27 of 103 358.000 359.000 360.000 361.000 0.0250481 0.0252141 0.0253346 0.0253806 0.0234734 0.0235376 0.0236057 0.0236832 5.2.5.8 Ocean Optics SpectraSuite Data Files The format of these files is as follows: SpectraSuite Data File ++++++++++++++++++++++++++++++++++++ Date: Wed Sep 15 19:14:15 CEST 2010 User: telerilevamento Dark Spectrum Present: No Reference Spectrum Present: No Number of Sampled Component Spectra: 1 Spectrometers: HR4C1076 Integration Time (usec): 1000000 (HR4C1076) Spectra Averaged: 10 (HR4C1076) Boxcar Smoothing: 0 (HR4C1076) Correct for Electrical Dark: No (HR4C1076) Strobe/Lamp Enabled: No (HR4C1076) Correct for Detector Non-linearity: No (HR4C1076) Correct for Stray Light: No (HR4C1076) Number of Pixels in Processed Spectrum: 3648 >>>>>Begin Processed Spectral Data<<<<< Wavelength(nm); radiance(W*m-2*sr-1*nm-1) 717.00000;0.17904775 717.02000;0.17878146 717.04000;0.17849983 717.06000;0.17820124 … The expected file extension is currently set to csv, although the files are not comma separated as such. The instrument number is taken to be the last four numbers of the spectrometer name, e.g. 1076 in the above example. The time format is expected to be as in the above example, i.e. it is probably depending on the settings of the controlling/post-processing computer. 5.2.6 Editing Metadata The SPECCHIO Metadata Editor is a powerful tool that allows you to enter metadata in a streamlined way, thus minimising the required user input. To open the metadata editor select ‘Data Input’->’Edit metadata’ (Figure 21). Figure 21: Selection of current study 5.2.6.1 Description of the Metadata GUI elements The campaign editor consists of a control panel on the left side and a data area on the right side with three tabs for campaign, hierarchy and spectrum data (cf. Figure 22). The control panel contains the following elements (from top to bottom): \SPECCHIO_UserGuide_V2.1.1.docx Version 2.1.1 / 02.11.2010 SPECCHIO User Guide □ □ □ □ □ □ □ Page 28 of 103 Campaign selection: only one campaign can be edited at the same time in one editor. Note that several metadata editors can be open simultaneously, each editing a different campaign. Note also that only campaigns belonging to the current user can be edited. Checkbox to highlight mandatory fields (mandatory fields only exist if a required quality level has been selected) Checkbox to highlight the shared data fields Checkbox to show the quality compliance in the tree of the spectral browser Checkbox to override the conflict detection when updating spectral groups Reset and Update buttons for campaign, hierarchy and spectrum data Spectral data browser that visualises the structure of the campaign as a tree. The data displayed in the hierarchy and spectrum data tabs depends on the selection in the spectral data browser (cf. also 4.1). Multiple selections are possible by using shift or control keys while selecting items with the mouse. Figure 22: Metadata editor showing the campaign tab A description of the information displayed by the tabs follows. Read only fields will be mentioned explicitly, all other fields are editable by default. The campaign tab shows the following information: □ Campaign name □ Description of the campaign: some free text □ Investigator: the person in charge of this campaign (i.e. the user defining and loading the campaign). This field is filled automatically. \SPECCHIO_UserGuide_V2.1.1.docx Version 2.1.1 / 02.11.2010 SPECCHIO User Guide □ Page 29 of 103 Path: the file system path pointing to the main directory. This can be changed by clicking on the ‘Browse’ button next to it. Use this to change the campaign file path if the campaign folder was shifted on the hard disc after the creation of the campaign. The hierarchy data tab displays information about the currently selected data hierarchy (cf. Figure 23): □ Name: hierarchy name taken from the corresponding folder name (read only) □ Description: free text □ Datalinks: links to other hierarchies (cf. also 4.4) Figure 23: Hierarchy data tab The spectrum data tab displays information about the selected spectrum or spectra. The data elements have been put into groups (cf. Figure 24 - Figure 26). These are described hereafter in detail. Spectrum Data: □ Filename: usually the filename of the spectral file (in some cases filenames are automatically produces) (read only) □ File comment: Automatically contains user comments entered when capturing the spectrum (e.g. possible with ASD’s R3 capturing software). □ Capture date in 24h format (UTC) (read only) □ Loading date in 24h format (system time) □ Is reference: an option that can define this spectrum as being a reference spectrum. Only specchio_admin can set this field. □ Required quality level: a user definable level of metadata quality that this spectrum should reach (cf. also 4.3) □ Attained quality level: this field stays empty as long as not all required metadata according to the required quality level have been captured. Once all required data are entered the attained quality level will be equal to the required quality level (read only). □ Spectral plot: a plot of the spectrum (read only) Datalink: □ Datalinks: lists all data links that this spectrum has to other spectra (cf. also 4.4 and 5.2.6.2.9) \SPECCHIO_UserGuide_V2.1.1.docx Version 2.1.1 / 02.11.2010 SPECCHIO User Guide Page 30 of 103 Position: Spatial and descriptive information about the capturing location. Coordinates are entered as degrees and fractions of degrees. □ Latitude: Northern hemisphere coordinates are positive, southern negative □ Longitude: West of Greenwich: positive. East of Greenwich: negative □ Altitude: metres above sea level □ Location: free text \SPECCHIO_UserGuide_V2.1.1.docx Version 2.1.1 / 02.11.2010 SPECCHIO User Guide Page 31 of 103 Figure 24: Spectrum data tab (part 1) Landcover Data: These landcover classes are based on the CORINE landcover scheme. They are ordered into three levels and visualized in the Metadata Editor using a tree structure. Only level 3 is stored for spectra. Levels 1 and 2 are merely displayed to help the selection of level 3. Environmental Data: □ Cloud cover: in octas (cf. also 4.5.1) □ Ambient temperature: in degrees Celsius □ Air pressure: hPa □ Relative humidity: as percentage □ Wind speed: calm, breezy, windy, stormy □ Wind direction: direction from where the wind originates in 45 degree steps: N, NE, E, SE, S, SW, W, NW Figure 25: Spectrum data tab (part 2) \SPECCHIO_UserGuide_V2.1.1.docx Version 2.1.1 / 02.11.2010 SPECCHIO User Guide Page 32 of 103 General Data: □ Measurement unit: Name of the spectral measurement unit (reflectance, absorbance, transmittance, DN, radiance) □ Measurement type: single, directional or temporal (cf. also 4.5.2) □ Illumination source: currently only the sun and a QTH lamp are defined as possible energy source. However, other sources can be entered by the administrator if needed. □ Sampling environment: Defines the general type of environment where the sampling took place: field, laboratory, hdrf to brf, or model. ‘model’ stands for simulated data using a computational model of some sort. □ Target homogeneity: Defines the possible values of homogeneity (Homogenous or Mixed) □ Goniometer: FIGOS or LAGOS Sampling Geometry Data: Numbers in this group can all be entered as floating point numbers. □ Sensor zenith: angle in degrees (where 0 degrees is equal to nadir) □ Sensor azimuth: angle in degrees measured relative to the principal plane. I.e. 0 degrees = the principal plane opposite of illumination source) □ Sensor distance: distance of sensor to target in metres □ Illumination zenith: angle in degrees (where 0 degrees is equal to nadir) □ Illumination azimuth: absolute angle in degrees □ Illumination distance: distance from source to target □ Two action buttons for the automatic calculation of goniometer and sun angles Spectrum Names: □ A list of spectrum names. Two name types are currently supported: Latin and Common (ENVI Hdr is used internally for data read from ENVI spectral libraries). Further name types can be defined by the administrator. Use the Add, Edit and Remove buttons next to the list to change to contents of the list. To edit or remove an existing name selected it in the list and then click the appropriate button. Target Type: □ Defines the target type and the abundance of this target type in the sampled object (cf. also 4.5.3). Further target types can be defined by the administrator. Use the Add, Edit and Remove buttons next to the list to change to contents of the list. Associated Measurements: □ Add any number of measurements (geo-physical parameters) associated with the current spectral measurement. Ask your administrator if physical units are missing. Sensor and Instrument Data: (cf. also 4.5.4) □ Sensor: sensor name □ Name: name of an instrument (this is the name given to the instrument by its owner) □ Foreoptic: degrees □ Button to bring up a new window showing information about the instrument (see Figure 28) Instrument Settings: □ Instrument settings, depending on the sensor. Automatically generated from the spectral input file. Reference Data: □ Name of the used reference panel □ Button to bring up a new window showing information about the reference panel (see Figure 29) \SPECCHIO_UserGuide_V2.1.1.docx Version 2.1.1 / 02.11.2010 SPECCHIO User Guide Pictures: □ Page 33 of 103 A list of pictures plus captions. To add a new picture click on the ‘Add’ button to the right of the list. To remove a picture bring up the context sensitive menu (on Windows click the right mouse button) and choose ‘Remove’. To change the caption, simply edit the text in the text box below the picture. Currently only the JPEG format is supported. Note: pictures should be reduced in size before loading to the database for speed reasons. Appropriate sizes are around 400-500 pixels width or height respectively. Figure 26: Spectrum data tab (part 3) \SPECCHIO_UserGuide_V2.1.1.docx Version 2.1.1 / 02.11.2010 SPECCHIO User Guide Page 34 of 103 Figure 27: : Spectrum data tab (part 4) Figure 28: Instrument information window \SPECCHIO_UserGuide_V2.1.1.docx Version 2.1.1 / 02.11.2010 SPECCHIO User Guide Page 35 of 103 Figure 29: Reference panel information window 5.2.6.2 Operation Principles of the Metadata Editor 5.2.6.2.1 Displaying Metadata The campaign tab automatically shows the campaign metadata of the selected campaign. To display hierarchy metadata, select a hierarchy level in the spectral data browser. To display spectrum metadata use the spectral data browser to select (a) a single spectrum, (b) multiple spectra (use shift and ctrl keys), (c) a single hierarchy or (d) multiple hierarchies (use shift and ctrl keys). Note: on Mac systems, the ctrl key is mapped to the ⌘ key. 5.2.6.2.2 Data Conflicts Selecting several spectra at once can lead to data conflicts. E.g. the filename of spectra is usually unique per hierarchy. Therefore a filename cannot be displayed in the Filename field when more than one spectrum is selected. A conflict check is automatically carried out when a multiple selection happens. All conflicting fields are cleared and set to read-only and thus cannot be changed by the user. 5.2.6.2.3 Updates and Resets The ‘Update’ button of the concerned metadata tab is activated as soon as a metadata field is edited by the user (cf. Figure 30 for an example). Clicking ‘Update’ will commit all the changes that have been entered in the metadata fields of the relevant tab to the database. Clicking ‘Reset’ will discard any changes and redisplay the values as currently stored in the database. Figure 30: Activated ‘Update’ button for the spectrum data tab The updates have been carried out when the ‘Update’ button reverts to being grey and disabled. 5.2.6.2.4 Group Updates \SPECCHIO_UserGuide_V2.1.1.docx Version 2.1.1 / 02.11.2010 SPECCHIO User Guide Page 36 of 103 Group updates are an efficient way to define metadata that is identical for a group of spectra. E.g. consider the case of a shrub being sampled ten times in the field with no GPS unit connected to the system. All ten spectra will have roughly the same spatial position and thus can be updated as a group. To carry out a group update select all spectra being part of the group. Note that only non-conflicting fields can be updated via group updates (see 5.2.6.2.5 how to perform updates on conflicting data). Enter the data that is shared by the spectra group (for the above example: latitude, longitude and altitude). Click ‘Update’. All spectra in the group will be updated to have a spatial position with the entered lat, long and altitude. Note that all spectra of the spectra group are now referencing the same position record in the database, i.e. there is no data redundancy. This shared record principle leads to conflicts when updating or deleting one or several spectra that belong to the same group. In the above example, three out of ten spectra would be selected to change their position again. This conflict is detected upon carrying out an update and an according option window is display (cf. Figure 31). The number of affected records is shown as well as the involved data group and the field name. Selecting ‘Apply to shared record’ will update the shared record, i.e. all members of the original spectra group will refer to these new settings. Selecting ‘Create new record for selected spectra' will create a new entry in the database, i.e. the original, shared data is not changed. Selecting ‘Cancel update action’ will not perform any update of the concerned field. Figure 31: Shared data update warning for the sensor zenith field of the sampling geometry data group 5.2.6.2.5 Overriding the Conflict Detection The conflict detection that disables updates of non-shared data in spectra groups can be switched off by selecting the ‘Override conflict detection’ checkbox on the control panel (cf. Figure 32). Be sure that you know what you are doing: all previously individual metadata of the selected spectra might be replaced with the new data. Overriding conflicts may lead to some unwanted effects; depending on what metadata parameter it is updated. The critical ones are: position, environmental data and sampling geometry. For these, only existing entries will be updated, i.e. if a group of spectra is updated and one of these spectra has no previous position record, then no new record will be inserted. This effect is due to the database model and additional software logic would be required to handle these special cases. If you use the conflict overriding option, check carefully the results of your updates! Figure 32: ‘Override conflict detection’ checkbox 5.2.6.2.6 Shared Field Colouring \SPECCHIO_UserGuide_V2.1.1.docx Version 2.1.1 / 02.11.2010 SPECCHIO User Guide Page 37 of 103 Tick this checkbox (see Figure 33) to show which fields of the current spectra selection are shared with other spectra. It may help to understand what data is shared and what the effect of an update might be (update of shared records). Figure 33: 'Highlight shared fields' checkbox See Figure 34 for an example of shared field colouring. The spectrum ‘lemonwoo.004’ shares spectrum name and pictures with all other spectra under the ‘site1’ folder of the Lemonwood folder. The instrument information is not shared, as each spectrum has a direct link to the appropriate instrument. Figure 34: Example of shared field colouring 5.2.6.2.7 Mandatory Field Colouring When a required quality level has been selected for a spectrum the mandatory fields can be highlighted (cf. 4.3 for more information on metadata quality, cf. Figure 36 for an example of mandatory field colouring). To use mandatory field colouring tick the ‘Highlight mandatory fields’ checkbox in the control panel (cf. Figure 35). \SPECCHIO_UserGuide_V2.1.1.docx Version 2.1.1 / 02.11.2010 SPECCHIO User Guide Page 38 of 103 Figure 35: ‘Highlight mandatory fields’ checkbox Figure 36: An example of mandatory field colouring \SPECCHIO_UserGuide_V2.1.1.docx Version 2.1.1 / 02.11.2010 SPECCHIO User Guide Page 39 of 103 5.2.6.2.8 Showing the Quality Compliance in the Metadata Browser Tree The metadata browser can display information about the quality compliance of the spectrum and the campaign. To switch on this option select the ‘Show quality compliance in tree’ checkbox in the control panel (cf. Figure 37). Tree nodes that do not yet comply with the required quality level are indicated by an asterisk. Quality compliance is propagated upwards in the tree. If a spectrum does not comply then all parent hierarchies and the campaign itself will show an asterisk (cf. Figure 38 for an example). Note that enabling this option reduces the responsiveness of the GUI as compliance checks have to be carried out on every metadata field. Figure 37: Show quality compliance in tree checkbox Figure 38: Quality non-compliance indicated by asterisks in the metadata browser 5.2.6.2.9 Definition of Data Links Data links can be defined on spectrum and hierarchy level, i.e. spectra link to spectra and hierarchies to hierarchies. The definition of links is explained for spectrum datalinks hereafter. The definition of hierarchy datalinks is identical in terms of user interactions. Clicking on ‘New’ right to the datalink list (cf. Figure 39) will open a new dialog (cf. Figure 40). Figure 39: Datalink list and ‘New” and ‘Delete’ buttons In this dialog use the spectral data browser to select the spectrum that shall be linked. The selected spectrum will be displayed in the right side in a read only field. Select the link type from the list box. Click ‘OK’ to create this link. Note that the function ‘Link targets to references’ provides a quicker and easier option to create reference panel links (see 5.2.6.2.10.2). \SPECCHIO_UserGuide_V2.1.1.docx Version 2.1.1 / 02.11.2010 SPECCHIO User Guide Page 40 of 103 Figure 40: Definition of a datalink on spectrum level 5.2.6.2.10 Special Functions The metadata editor provides some special data processing functions. They are either accessed via the metadata editor menu (cf. Figure 41) or via actions buttons in the spectrum tab. Figure 41: Metadata editor Special Functions menu Note: The special functions offered by the menu do not depend on the currently selected campaign in the metadata editor but offer access to all campaigns. \SPECCHIO_UserGuide_V2.1.1.docx Version 2.1.1 / 02.11.2010 SPECCHIO User Guide Page 41 of 103 5.2.6.2.10.1 Calculation of Goniometer Angles RSL uses a standard protocol for the capturing of directional data using a goniometer (FIGOS/LAGOS). The sensor zenith and azimuth are given by the capturing Methodiksequence (Figure 42). Abbildung 26: Messreihenfolge einer Hemisphäre: 1 entspricht 0°/75° (Azimut/Zenit) Figure 42: Data collection sequence Position of the RSL FIGOS/LAGOS system relativ zur "solar principle plane", Position 11 180°/75°. Auf diese Weise werden für die "reflected radiance" und die "incoming diffuse radiance" je 66 Spektren pro Hemisphäre A full directional set consists spectra. Thein routine a maximum gemessen, bei Winkelinkrementen von 30° of in 66 Azimut und 15° Zenit. expects Abbildung modifiziertnumber of 66 spectra, i.e.[67]. excessive spectra like white reference readings must be removed before the angles are calcunach Schopfer lated. The function can deal with gaps in the data, provided that the user can specify them. See Figure 43 for a screenshot of the dialog with the metadata editor in the background. e Halterung der beiden Voroptiken kann so gedreht werden, dass beide exakt im Lot nach The following user actions are needed: ten ausgerichtet werden Indemdata im browser Abstandof von ca. 30 cm einselect Spectralon □ können. In the spectral the metadata editor a hierarchy that contains the spectrodirectional measurements. 43 where the ‘target’ eferenzpanel unter die Voroptiken gehalten wird, kann (cf. fürFigure beide Sensoren eine hierarchy has been selected in the metadata editor) □ Clickwerden. the ‘Calc Gonio Angles’ button indienen the ‘Sampling eferenzmessung durchgeführt Referenzmessungen dazu, Geometry’ die zumsection of the meta- data editor. This will open the Goniometer Angle Calculation dialog. The selected hier- esszeitpunkt vorherrschenden atmosphärischen Bedingungen abzubilden für das archy and the number of spectra is displayed in theund according fields in the middle sec- the dialog. If the wrong hierarchy was selected in the metadata editor, you can erechnen von Reflektanzen tion aus ofden gemessenen "reflected radiance" Daten die nötigen redefine your selection in the metadata editor while leaving the Goniometer Angle Cal- culation 2.1.2). dialog opened. Changes in the spectral data browser of the metadata editor undlagen zu erheben (vgl. Kapitel Im weiteren Verlauf der Hemisphärenmessung will be reflected within the Goniometer Angle Calculation dialog. erden für den Sensor ASD Referenzmessungen durchgeführt, an input text field. The □ 1 Ifnoch theredrei areweitere any gaps, specify the positions of the gapsjeweils in the Gaps numbers must be separated with commas. Then click the ‘Insert gaps’ button and n Positionen 21, 43 und 65.gap Beim verwendeten Spectralon Referenzpanel handelt es sich the total number of spectra plus inserted gap dummies will be shown in the read only field ‘Spectra dummies’. Note that positions withannähernd 0. m ein Produkt der Firma Labsphere Inc.4, +das aus Bariumsulfat gefertigt start ist und □ Click ‘Calculate’. This fills the listbox one the right side of the dialog with a preview of □ Click ‘OK’ to insert the calculated angles into the database llständig und isotrop reflektiert. Die Referenzplatte wird wie in Abbildung 27 ersichtlich ist the calculated angles. The line format is: <position>: <azimuth>/<zenith> <filename> anuell positioniert. Kritisch zu beurteilen ist dabei die unmittelbare Nähe von Zenitbogen d Messperson: Die diffusen Einstrahlungsverhältnisse werden dadurch beeinflusst. absphere Inc.: http://www.labsphere.com. \SPECCHIO_UserGuide_V2.1.1.docx Version 2.1.1 / 02.11.2010 SPECCHIO User Guide Page 42 of 103 Figure 43: Goniometer angle calculation dialog 5.2.6.2.10.2 Linking Targets to References This dialog can be used to automatically create a datalink of the type ‘Spectralon’ between target spectra and white reference spectra. This function is applicable for campaigns where target and reference spectra are collected in separate spectral files. This is e.g. the case for campaigns utilising the ASD spectroradiometer in radiance mode. In order to tie the target to its corresponding white reference spectrum, a datalink on spectrum level must be inserted. This could be achieved manually for each spectrum using the metadata editor. Target and reference spectra must be stored in separate hierarchies. The example shown in Figure 44 is taken from a goniometer campaign. In the left spectral data browser select the hierarchy containing the targets. In the right browser select the hierarchy containing the references. The selected hierarchies are displayed in the read only fields on the right side of the dialog. Click link to create datalinks between targets and references. Details on the algorithm: The linking utilises the capture time stamps of the spectra. Consider two timelines: one for the targets and one for the references. A target must link to the most recent reference with the constraint that the reference capture time is smaller than the target capture time (see Figure 45). \SPECCHIO_UserGuide_V2.1.1.docx Version 2.1.1 / 02.11.2010 SPECCHIO User Guide Page 43 of 103 Referencing of reference panel spectra by target spectra based on the timeline inf Figure 44: Link Target to Reference dialog RS1 RS2 Entity timelines Reference panel spectra timeline TS1 TS2 TS3 TS4 t0 t1 TS5 TS6 t2 Target spectra timeline t : Referencing in the database via datalink TSN: Targetspectrum RSN: Reference panel spectrum Figure 45: Referencing of reference panel spectra by target spectra based on timeline information 5.2.6.2.10.3 Calculation of Sun Angles The sun angles are stored as part of the sampling geometry, namely as illumination zenith and azimuth. Sun angles can be calculated for a spectrum if the spatial position in latitude/longitude and the capture time in UTC are known. Select the spectra to be processed in the spectral data browser of the metadata editor (see Figure 46). Note that any selection (single spectra, hierarchy and mixed cases) is possible. The sun angle calculation dialog opens and the number of spectra is displayed. Click OK to calculate the sun angles and store the results in the database. \SPECCHIO_UserGuide_V2.1.1.docx Version 2.1.1 / 02.11.2010 SPECCHIO User Guide Page 44 of 103 Figure 46: Sun Angle Calculation dialog 5.2.6.2.10.4 Direct Irradiance Calculation The calculation of direct irradiances applies to photometers where the total and diffuse irradiance are known. Total and diffuse spectra must be stored in separate hierarchies (see Figure 47). Furthermore, all spectra need to have a defined sun zenith angle. The calculation cannot be carried out on hierarchies already containing a ‘direct’ hierarchy. If a recalculation is needed first remove the ‘direct’ hierarchy from the database using the ‘Data Remover’ dialog. Select the hierarchy containing the total and diffuse hierarchies. Note that they must be named ‘total’ and ‘diffuse’. This will be autogenerated in the case of MFR file input. The selected hierarchy and the number of total/diffuse spectra pairs will be shown. Click ‘OK’ to calculate the direct irradiance. A new hierarchy will be created called ‘direct’ (see Figure 48) containing all direct irradiance spectra. Details on the algorithm: For each channel i: direct_irr[i] = ((tot_irr[i] - diff_irr[i])/cos(sun_zenith)); Figure 47: Direct Irradiance Calculation dialog \SPECCHIO_UserGuide_V2.1.1.docx Version 2.1.1 / 02.11.2010 SPECCHIO User Guide Page 45 of 103 Figure 48: Direct irradiance hierarchy 5.2.6.2.10.5 UTC Time Correction This tool is provided to handle cases where the capturing time is not in UTC. Technically it applies a time shift based on the number of hours entered by the user in the UTC Time Correction dialog (see Figure 49). Select the hierarchy containing the spectra that need to be time shifted. The selected hierarchy and the number of spectra are shown on the left in read only fields. The hours are specified as East of GMT. The time shift is implemented as: Date_time_in_milliseconds = Date_time_in_milliseconds – hours_east_of_gmt*millies_per_hour. This means that if a time shift happens across midnight, the calendar date of the capture time will also be shifted (back or forth depending on the value of hours_east_of_gmt. E.g. for a local capture time around 10am in Oceania a time shift of around 12 hours East of GMT is needed. The UTC time will then be 10pm the previous day. Figure 49: UTC Time Correction dialog 5.2.7 Querying Data SPECCHIO features an intuitive way to query data by the means of the Query Builder (see Figure 52). To start the Query Builder select ‘Data Processing & Output’->’Build query’ from the main menu (see Figure 50). \SPECCHIO_UserGuide_V2.1.1.docx Version 2.1.1 / 02.11.2010 SPECCHIO User Guide Page 46 of 103 Two principal ways of data selection are supported: (a) by specifying the needed data using a spectral data browser in the ‘Browser’ tab and (b) by entering restricting conditions in the ‘Query conditions’ tab. Actions on both of these tabs will result in the automatic building of an SQL query. The query is updated in real time on each user input. The number of resulting rows (should the query be executed) is displayed and updated along with the SQL query. The query can be copied from the text area for e.g. direct execution in an SQL prompt. The selected spectra can be fed into four different further modules by pressing the respective buttons: ‘Show report’ ,‘File export’, ‘Process’ and ‘Spectral Plot’. Reports are described in 5.2.8. File exports are detailed in 5.2.9. Interactive processing is elaborated in 5.2.10. Figure 50: Build query menu entry The data displayed in the Spectral Data browser can be restricted to the data of the current user by clicking the tickbox ‘Show only my data.’ (see Figure 51). Figure 51: Restricting the data displayed in the spectral data browser to the current user For the options ‘Spectral Plot’ and ‘Process’, the building of spaces can be controlled by switching on/off the ‘Space split option’: if selected, spaces will only be created per sensor type and measurement unit, if deselected, spaces will be created per sensor type, measurement unit, instrument and instrument calibration. \SPECCHIO_UserGuide_V2.1.1.docx Version 2.1.1 / 02.11.2010 SPECCHIO User Guide Page 47 of 103 D&%("1.('0)()'(#' .,""&/(',%&"'2.E4*#A' 6>&.(")5'C)()' !"#$%&"' !"#$%&"'()*' +,&"-'.#/012#/%'()*' 6=#$'"&>#"('*,?#/' 6>).&'%>51(' #>2#/'2.E' 3,(#4*,15('6+7'8,&"-' @15&'&A>#"(' *,?#/' 9,:*&"'#;'"&%,52/<' "#$%' B"#.&%%'*,?#/' 6>&.(")5'B5#('*,?#/' Figure 52: Query Builder dialog The query conditions tab is grouped similarly to the Metadata Editor. The basic query GUI components are: (a) Simple combobox : One out of several options can be selected. The default ‘All (incl. none)’ imposes no restriction on the rows to be returned. (b) Combobox with wildcard box: One of several options in the combobox can be selected. Alternatively a wildcard string can be entered in the wildcard box. Standard SQL wildcards can be used. These are: % for any string expression and _ for one character. Note that when selecting a combobox entry the wildcard string is automatically blanked. Similarly, if a specific combobox entry is selected and wildcards are entered the combobox reverts to the default ‘All (incl. none)’. (c) Wildcard text field: This takes any SQL wildcard string \SPECCHIO_UserGuide_V2.1.1.docx Version 2.1.1 / 02.11.2010 SPECCHIO User Guide Page 48 of 103 (d) Numerical field with buffer: This consists of a main numerical field and a buffer that, when filled generates expressions of the type: field_name >= main_value – buffer AND field_name <= main_value + buffer. When applied to e.g. spatial metadata like latitude, the effect is similar to buffering functions found in GIS systems. (e) Multiple selection list: 0:N elements can be selected/deselected from the list by using ctrl and the mouse button. Note that the expressions built from the selected elements are logically related by OR and not by AND. I.e. the resulting expression has the SQL syntax ‘field_name in (<id> [, <id>])’. Figure 53 and Figure 54 show the query condition tab with some of the fields filled. The SQL query resulting from these entries is as follows: SELECT count(*) FROM spectrum, campaign, specchio_user, position, sampling_geometry WHERE (specchio_user.first_name like 'spe%' OR specchio_user.last_name like 'spe%') AND spectrum.landcover_id = '49' AND (position.latitude >= -50.0 AND position.latitude <= -30.0) AND (position.altitude >= 30.0 AND position.altitude <= 70.0) AND (sampling_geometry.illumination_zenith >= 40.0 AND sampling_geometry.illumination_zenith <= 50.0) AND spectrum.measurement_unit_id = '1' AND spectrum.illumination_source_id = '1' AND spectrum.instrument_id = '1' AND spectrum.campaign_id = campaign.campaign_id AND spectrum.user_id = specchio_user.user_id AND spectrum.position_id = position.position_id AND spectrum.sampling_geometry_id = sampling_geometry.sampling_geometry_id AND campaign.user_id = specchio_user.user_id AND specchio_user.user_id = position.user_id AND specchio_user.user_id = sampling_geometry.user_id \SPECCHIO_UserGuide_V2.1.1.docx Version 2.1.1 / 02.11.2010 SPECCHIO User Guide Page 49 of 103 Figure 53: Query conditions tab (part 1) \SPECCHIO_UserGuide_V2.1.1.docx Version 2.1.1 / 02.11.2010 SPECCHIO User Guide Page 50 of 103 Figure 54: Query conditions tab (part 2) 5.2.8 Report Generation Reports are generated by selecting the ‘Show report’ button in the Query Builder (see 5.2.7). The report consists of a Java frame displaying a list of spectrum report panels. Thus, for each spectrum being the result of a query built in the Query Builder, one spectrum report panel is added to the report frame. A spectrum report consists of two main elements: (a) a spectral plot on the left side and (b) a scrollable list containing metadata values (see Figure 55). Pictures saved for a spectrum can be displayed by clicking on the button ‘Show pictures’ at the bottom of the metadata list. This will bring up a new frame containing all pictures of this spectrum (see Figure 56). The spectral plot y axis is automatically scaled in order to correctly display spectra even when exhibiting strong atmospheric noise in the usual regions of 1350-1440nm, 1790-1980nm and 23602500nm. The algorithm consists of calculating the mean and standard deviation in the wavelength region 300-1200nm. The maximum of the y axis is then given by mean + 3 * standard deviation. Spectra having no sensor definition cannot be plotted. For sensors comprising broad and narrow band elements (e.g. MFR) only the narrow bands will be plotted. \SPECCHIO_UserGuide_V2.1.1.docx Version 2.1.1 / 02.11.2010 SPECCHIO User Guide Page 51 of 103 Figure 55: Spectrum report frame Figure 56: Spectrum report picture frame 5.2.9 File Output File output is invoked by selecting the ‘Show report’ button in the Query Builder (see 5.2.7). A File output dialog will appear (see Figure 57). Two file formats are currently supported: □ CSV: data is written to a text file as comma separated values. This file type can be e.g. read into Excel □ ENVI SLB: ENVI spectral library file consisting of a header (<file_name>.hdr) and a body (<file_name>.slb). Spectral data are written as floating point values, either 32bit or 64bit depending on the architecture of the machine; the datatype field in header file is set accordingly (datatype 4 or 5 respectively). \SPECCHIO_UserGuide_V2.1.1.docx Version 2.1.1 / 02.11.2010 SPECCHIO User Guide Page 52 of 103 A target directory must be specified by clicking on the ‘Browse’ button. All files that are created during file output will be written to this directory. Note that when using a UNIX system you may have to enter a dot as filename (cf. 5.2.1). A base name must be specified. This name should contain no characters that are not allowed in filenames (depending on the operating system). The base name is used to build the real filenames. Filenames use one of the following patterns: <base name>_<sensor_name>.<file extension> <base name>_<instrument_name>[cal<calibration sequence number>].<file extension> If no instrument has been defined the sensor name will be used. If an instrument has a defined calibration then the calibration sequence number is added to the filename. If the spectra being written have been captured with different instruments or different calibrations then for each combination of instrument and calibration a separate file will be written. E.g. consider a campaign containing spectra captured with: □ An ASD instrument belonging to the Institute of Natural Resources, Massey University (named INR ASD) with calibration sequence number 1 □ An ASD instrument belonging to the Remote Sensing Laboratories, University of Zurich (named RSL ASD 1) with no calibrations entered in the database □ A GER 3700 instrument belonging to the Remote Sensing Laboratories, University of Zurich (named RSL GER 3700) with no calibrations entered in the database A CSV file output of this campaign with the option ‘Split header and body’ results in the following files: The option ‘Split header and body’ is only available for CSV files (ENVI SLBs are automatically split into header and body). Two time formats are possible. Select the Milliseconds if you easily want to plot a timeline. Figure 57: File output dialog \SPECCHIO_UserGuide_V2.1.1.docx Version 2.1.1 / 02.11.2010 SPECCHIO User Guide Page 53 of 103 5.2.9.1 CSV File Format The CSV file format contains a header and a body. If the file is not split then header and body are written into the same file. Metadata are essentially adding dimensions a dataset, i.e. the total dimension is given by: number of spectral bands + number of metadata fields. The dimension of an output file is therefore: Number of rows (lines) = total spectrum dimension Number of columns = number of spectra + 1 dimension name column The line format is specified by: <dimension name>, <value>[,<value>] A file example showing part of a header and body follows (Figure 58): Figure 58: CSV file example (loaded into Excel) \SPECCHIO_UserGuide_V2.1.1.docx Version 2.1.1 / 02.11.2010 SPECCHIO User Guide Page 54 of 103 5.2.10 Interactive Processing using Space Networks For an introduction to the concept of the Space Processing Network please refer to 4.6. Pressing the ‘Process’ button in the Query Builder interface starts the processing tool. A number of spaces are placed on the processing plane of the Space Network Processor, depending on the query built in Query Builder. Figure 59 shows a space containing 66 spectra, created based on a selection in the Query Builder. Figure 59: Space Network Processor interface with the Query Builder in the background Figure 60 shows the common elements of the Space Network Processor: processing plane, spaces, edges, context sensitive menu of the processing plane and the Run button. \SPECCHIO_UserGuide_V2.1.1.docx Version 2.1.1 / 02.11.2010 SPECCHIO User Guide Page 55 of 103 .+-$%* !"#$%&&'()*:#07,%* /0)%* !"#$%&&'()*+,-(%* .+-$%* 1#(2%32*&%(&'45%* 6%(7*#8*29%* !"#$%&&'()*+,-(%* ;7(*<7=#(* Figure 60: Elements of the Space Network Processor 5.2.10.1 Graphical Representations of Spaces and Modules Spaces and modules are depicted as rectangular boxes (Figure 61). The space displays the following information: □ A unique number (zero in the example below) □ A space type, which can be ‘Sensor/Instrument Space’ if loaded from the database or ‘Spectral Space’ if generated by a processing module. □ A dimension D, which is equal to the number of spectral bands of the spectra held by this space □ A number of vectors, which is equal to the number of spectra held by this space The module displays the following: □ A module name □ Information about the configuration (if applicable) □ The current processing status (text and progress bar). During processing, the progress is shown by the progress bar. Figure 61: Examples of the graphical representation of a space (left) and a processing module (right) \SPECCHIO_UserGuide_V2.1.1.docx Version 2.1.1 / 02.11.2010 SPECCHIO User Guide Page 56 of 103 Spaces and modules can be rearranged by dragging with the mouse. The edges are updated automatically. A group of elements can be moved as single block. Selecting the elements by dragging a box around them using the mouse, then drag the selection (Figure 62). Figure 62: Multiple-selection of elements after dragging a box around them 5.2.10.2 Adding Modules and linking with Spaces To add a module, click the mouse menu button over some empty area of the processing plane. This brings up the context sensitive menu shown in Figure 60. Select ‘Add Module’ and a selection of the available modules will appear (Figure 63). Select one of the modules, click ‘OK’ and a new module will be added to the processing plane. To connect the module with an input space, click the menu button over the module. This displays the popup menu of the module (Figure 64). Select ‘Set Input Spaces’ and in the ‘Input Space Selection’ dialog select the number of the space to connect and click ‘OK’ (Figure 64). Note that all spaces are given a unique number, which is located on the top left of each space. Connecting an input space automatically generates an output space, which is added to the processing plane and connected with the module. Figure 63: Module selection dialog \SPECCHIO_UserGuide_V2.1.1.docx Version 2.1.1 / 02.11.2010 SPECCHIO User Guide Page 57 of 103 Figure 64: Popup menu of a module (left) and the input space selection dialog (right) 5.2.10.3 Configuration of Modules Some modules may need configuration. To display the configuration dialog of a module click menu over the module and select ‘Configure’. The possible configuration settings of each module are detailed in the respective module description. 5.2.10.4 Processing Module Descriptions 5.2.10.4.1 Radiance to Reflectance Transformation The module ‘Radiance to Reflectance’ is building ratios of target and reference panel radiances: As a prerequisite, datalinks of the type ‘Spectralon’ must exist between the target spectra and the corresponding reference spectra. For an explanation of how such links are created please refer to 5.2.6.2.10.2. 5.2.10.4.2 Reference Panel Correction Factors This module retrieves the correction factors for all reference panels that were used during data acquisition of the spectra contained by the input space. As prerequisites, a reference panel must be set for the input spectra using the Metadata Editor (Figure 65) and calibration data for the panel must have been loaded to the database. Calibration data loading is a task of the system administrator. For details on the reference panel administration see 5.2.11.5. Figure 65: Reference panel setting in the Metadata Editor If no calibration data can be found, a warning is displayed and the module creates no output space. Figure 66 shows a processing chain that selects the panel correction factors and plots using a spectral line plot (Figure 67). Figure 66: Processing chain selecting the correction factors and plotting them as a spectrum. \SPECCHIO_UserGuide_V2.1.1.docx Version 2.1.1 / 02.11.2010 SPECCHIO User Guide Page 58 of 103 Figure 67: Reference panel correction factors 5.2.10.4.3 Correct for Reference Panel Non-Idealness This module applies calibration factors to correct spectra for the reference panel non-idealness. These correction factors are selected from the database using the ‘Reference Panel Correction Factors’ module. The module requires two inputs: the spectra to be corrected and the correction factors. The input space selection dialog offers the according choices (Figure 68). Figure 68: Input space selection for the ‘Correct for Panel’ module Note that the dimensions of the spaces holding the spectra and correction factors must be identical (a check on the wavelengths is not carried out). In the example shown in Figure 69 a waveband filtering is applied to the correction factors as these were measured with a larger wavelength range. Figure 69: Space Processing Network for reference panel correction The panel correction can be applied to radiance or reflectance values. However, correcting radiances for the panel will only make sense if followed by a radiance to reflectance conversion such that: \SPECCHIO_UserGuide_V2.1.1.docx Version 2.1.1 / 02.11.2010 SPECCHIO User Guide Page 59 of 103 The correction procedure can handle multiple reference panels and multiple calibration coefficients and will apply the correct coefficients to the appropriate spectra. 5.2.10.4.4 Delta This module calculates a delta value, i.e. the difference between two inputs A and B: Delta = A – B where: A, B = MxN matrix of M spectra of dimensionality N Thus, a delta vector is calculated by: dm = am − bm where m = {1…M} € This implies that the input spaces must have identical number of vectors and dimensionalities. The delta module takes two input spaces (Figure 70): Figure 70: Input space selection for the Delta module A possible use is the calculation of the difference between recorded reflectance and reference panel corrected reflectance. Figure 71 shows a processing network for this purpose and Figure 72 shows the according spectral plots generated by the network. \SPECCHIO_UserGuide_V2.1.1.docx Version 2.1.1 / 02.11.2010 SPECCHIO User Guide Page 60 of 103 Figure 71: Space Processing Network for the panel correction and delta calculation Figure 72: Spectral plots of: input spectrum (left), panel corrected spectrum (middle) and delta spectrum (left) 5.2.10.4.5 Waveband Filter Waveband filtering is used to cut wavelengths regions from spectra. A typical example is the removal of noisy wavebands caused by water vapour absorption. The wavebands are freely configurable. The ‘Configure’ menu brings up the ‘Filter configuration’ dialog (Figure 73). Figure 73: Filter configuration window \SPECCHIO_UserGuide_V2.1.1.docx Version 2.1.1 / 02.11.2010 SPECCHIO User Guide Page 61 of 103 To add a new filter region, click ‘New’ and enter the upper and lower wavelengths in nanometres in the Filter Definition dialog (Figure 74). Figure 74: Filter definition dialog To remove an existing filter region, select the region in the list and click ‘Remove’. 5.2.10.4.6 Broadband and Narrowband Filters The filters act on the element type of sensor elements. They are useful to process data of sensors that contain bands widely differing spectral resolutions. An example is the MFR sunphotometer, which features one panchromatic band and 6 narrower bands. The value ranges of the broad and narrow bands are very different and even a simple plot cannot be created satisfactorily (see Figure 75). The broadband channel has been placed at the likely centre wavelength of 673nm. As the bands of the MFR are defined in the order of the broadband followed by the narrowbands in the database, the plot shows two spectral lines. Mixing broadand narrowbands should not be done from a physical point of view. Figure 75: Spectral plot of broad- and narrowband MFR channels Figure 76 shows a space processing network that illustrates the function of broad- and narrowband filters. \SPECCHIO_UserGuide_V2.1.1.docx Version 2.1.1 / 02.11.2010 SPECCHIO User Guide Page 62 of 103 Figure 76: A space processing network demonstrating the function of broad- and narrowband filters The plot shown in Figure 75 was generated by the ‘Spectral Line Plot’ of space number 0. Figure 77 shows the plots of space 2 (Broadband value as a scatter plot) and space 3 (Narrowband channels as a spectral curve). Figure 77: Plots of the narrowband channels (left) and of the broadband channel (right) 5.2.10.5 Visualisation Modules Visualisation modules can be attached to any space and do not generate an output space but display a new window containing the respective plot or data explorer. A visualisation module can be configured to produce a number of plots/explorers as listed in the following sections. Data explorers are graphical components that allow interactive data exploration. The titles of the plot windows do contain information about the plot type and the space the data was read from (Figure 78). Figure 78: Information displayed in the window title \SPECCHIO_UserGuide_V2.1.1.docx Version 2.1.1 / 02.11.2010 SPECCHIO User Guide Page 63 of 103 5.2.10.5.1 Spectral Line Plot Use this plot to display one or more spectra as continuous curves. Spectra are plotted with an automatic colour shift from red to blue for easier interpretation. Figure 79: Spectral line plot of snow avalanche reflectance spectra 5.2.10.5.2 Spectral Scatter Plot Use this plot to display values per spectral band as singular points. This is useful to plot e.g. data of sensors with just one band, e.g. MFR broadband, as single values cannot be visualized as line plots. Scatter plots are also useful to show the variation of the values per band. Figure 80 shows an example of the variation per channel for several MFR sunphotometer readings. Note: the generation of scatter plots of several spectra with high dimensionality tends to be quite slow. \SPECCHIO_UserGuide_V2.1.1.docx Version 2.1.1 / 02.11.2010 SPECCHIO User Guide Page 64 of 103 Figure 80: Scatterplot showing the variation per channel for several MFR sunphotometer readings 5.2.10.5.3 Gonio Sampling Points Plot Use this plot to visualise the sampling positions of directional measurements acquired by a goniometer system. The plot is not expecting any specific number of points or particular geometry. The sampling points are projected from their angular definition (zenith/azimuth) onto a 2d Cartesian coordinate system (Figure 81). Figure 81: Goniometer sampling point positions 5.2.10.5.4 Gonio Hemisphere Explorer The Hemisphere Explorer allows the interactive exploration of a spectrodirectional dataset, typically acquired by a goniometer system. Figure 82 shows an explorer window displaying a LAGOS (Laboratory goniometer system) dataset (Schopfer 2008). \SPECCHIO_UserGuide_V2.1.1.docx Version 2.1.1 / 02.11.2010 SPECCHIO User Guide Page 65 of 103 Figure 82: Gonio Hemisphere Explorer window The explorer window comprises a number of components interacting with each other as described hereafter. The hemispherical plot (Figure 83) displays an interpolated surface of a specific wavelength. Clicking the icon in the top-left of the plot brings up a control panel for plot adjustments (rotations). Figure 83: Interpolated 3D plot for a chosen wavelength (left) and rotation toolbox to manipulate the 3D plot \SPECCHIO_UserGuide_V2.1.1.docx Version 2.1.1 / 02.11.2010 SPECCHIO User Guide Page 66 of 103 Use the band selection slider to select a spectral band for display (Figure 84). The wavelength text field below is reflecting the wavelength of the chosen band. Selecting a band triggers a re-plotting of both hemispherical plot and spectral plot. Figure 84: Band selection slider and wavelength text field The sampling points plot shows the sampling point positions projected onto a 2d Cartesian coordinate system (Figure 85). One of these points is always selected (indicated by the little square around it). Information about the selected point is shown in the text fields on the right of the plot: filename of the respective spectrum, azimuth and zenith angles of the observation geometry. Changing the selected sampling point (by clicking the mouse on another point) changes the spectrum displayed in the spectrum plot automatically. The azimuth angle is measured relative to the solar principal plane, i.e. 0° = principal plane opposite of the illumination source. Figure 85: Sampling point position plot and information about the selected sampling point The spectral plot component displays the spectrum of the selected sampling point (Figure 86). A red, vertical line indicates the current wavelength as selected by the band selection slider. The text fields on the right of the plot display spectral statistics of the current spectrum. Figure 86: Spectral plot component with wavelength indicator and spectrum statistic information 5.2.10.5.5 Time Line Plot Use a time line plot to plot a spectral band versus time. Figure 87 shows showing the direct irradiance over time for an MFR sunphotometer band with centre wavelength 496.4nm. The channel to be plotted can be chosen in the list below the plot. Time information is retrieved from the sampling time of the spectra. \SPECCHIO_UserGuide_V2.1.1.docx Version 2.1.1 / 02.11.2010 SPECCHIO User Guide Page 67 of 103 Figure 87: Time Line Plot showing the direct irradiance over time for centre wavelength 496.4nm 5.2.10.5.6 Time Line Explorer The time line explorer consists of a time line plot and a spectral plot (Figure 88). The red bar in the time plot indicates what spectrum is plotted in the spectral plot, i.e. the spectral plot shows the spectrum taken at a certain time. The red bar in the spectral plot shows the currently selected instrument channel, which is plotted versus time in the time line plot. Figure 88: Time Line Explorer window The example given in Figure 88 is using MFR sunphotometer data. A removal of the broadband channel is needed for the spectral plot to work properly. The according processing chain is shown in Figure 89. \SPECCHIO_UserGuide_V2.1.1.docx Version 2.1.1 / 02.11.2010 SPECCHIO User Guide Page 68 of 103 Figure 89: Processing chain for the exploration of the narrowband MFR channels in the Time Line Explorer 5.2.10.6 File Export Module File export modules can be attached to any space and do not generate an output space but write the data to a file. A file export module must be configured using its configuration dialog (Figure 90). The dialog is identical to the one described in 5.2.9. Figure 90: File export configuration The spectral data written to the file reflects the data content of the space. The metadata is however mainly read from the database and may show some contradictions to the state of the space. 5.2.11 Data Administration Apart from the ‘Data Remover’, the ‘Campaign Export’ and the ‘Instrumentation Administration’ tools, all functions described hereafter are available to the SPECCHIO database administrator only. Some data administration GUIs are provided, however, some of the data definition must be done using MySQL Browser. \SPECCHIO_UserGuide_V2.1.1.docx Version 2.1.1 / 02.11.2010 SPECCHIO User Guide Page 69 of 103 5.2.11.1 Removing data Spectra, hierarchies and campaigns can be removed from the database using the Data Remover (cf. Figure 91). Users can only remove their own data from the database. The spectral database administrator can remove all datasets irrespective of their owner. Use the spectral data browser to select the nodes that should be removed and click the ‘Remove’ button. There is no further prompt to warn you! All data that is below the selected node will be deleted. E.g. if a campaign is selected then all hierarchies and spectra belonging to this campaign will be deleted. In addition, all metadata that has been entered for an object will be removed along with this object. Removing data can take a long time; the progress report shows which hierarchy is currently being removed. Figure 91: Data Remover dialog 5.2.11.2 Campaign Export The campaign export functionality is used to write all data of a campaign to an xml file while retaining the relational structure. These xml files can then be used to import the campaign into another SPECCHIO database instance. Figure 92: Campaign Export Dialog The xml file structure contains all table entries that are required to reproduce the exported campaign in its relational structure. Entries are ordered by their inserting sequence, i.e. the campaign import will carry out the inserts in the order given by the file. 5.2.11.3 Campaign Import The Campaign import function is only available for users that have the rights equal to the SPECCHIO database administrator user (sdb_admin). The import function requires an xml file created by the SPECCHIO campaign export function. The import will create an exact copy of the exported campaign and will insert new system table entries if required (e.g. new sensor definitions). \SPECCHIO_UserGuide_V2.1.1.docx Version 2.1.1 / 02.11.2010 SPECCHIO User Guide Page 70 of 103 Figure 93: Campaign Import Dialog The import function resolves all primary key – foreign key relations, making the imported campaign fitting seamless into the existing data environment, i.e. no possible conflicts between the imported and already existing campaigns. Note: the involved databases must have matching database version! This is currently not checked. Further issues of system table duplication may arise if e.g. institute or user information are not identical in both databases. 5.2.11.4 Definition of new Sensors New sensor can be defined by loading a sensor definition file. Select ‘Data Maintenance’->’Load sensor definition’ from the main menu. In the Read Sensor Definition File dialog specify the sensor definition file and click ‘OK’ to read the file and insert a new sensor into the database (cf. Figure 94). Figure 94: Read Sensor Definition File dialog Sensor definition files are tab separated text files that can be edited in e.g. Excel (cf. Figure 95). The file format is as follows: Name <sensor name> Band <band number> Description <sensor descr> Average Wavelength(nm) <wavelength> Company <company name> FWHM (nm) <fwhm> Type no <type number> no of channels <no of channels> The type number is a number given to a sensor, e.g. the ASD FSFR sensor has type number 4. The type number is usually part of spectral data files and the data loader can use it to automatically assign the correct sensor to a spectrum. The FWHM is currently not read into the database. \SPECCHIO_UserGuide_V2.1.1.docx Version 2.1.1 / 02.11.2010 SPECCHIO User Guide Page 71 of 103 Figure 95: Part of a sensor definition file being edited in Excel 5.2.11.5 Instrumentation Administration The instrumentation administration comprises metadata editing for instruments and reference panels. Any user can open the dialogs but only administrators will be able to commit any changes to the database. Editing data is identical with the function of the Metadata editor for spectral data. Every change of a field activates the ‘Update’ button. The dialog consists of two tabs: (a) Instrument Data and (b) Reference Data. 5.2.11.5.1 Instrument Administration The instrument data tab allows adding, editing and removing instruments and editing their metadata (Figure 96). Figure 96: Instrument data tab of the instrumentation administration window \SPECCHIO_UserGuide_V2.1.1.docx Version 2.1.1 / 02.11.2010 SPECCHIO User Guide Page 72 of 103 To edit or remove an instrument, select the instrument in the instrument list first. Removing an instrument is achieved by clicking ‘Delete instrument’. A confirmation dialog will be displayed (Figure 97): Figure 97: Instrument deletion confirmation dialog An instrument cannot be deleted while still referenced by one or more spectra in the database. An according message will be shown if the delete action failed (Figure 98): Figure 98: Instrument deletion error The currently selected instrument will only be removed if no database constraints are violated. To insert a new instrument, click ‘Insert new instrument’. A new record is created in the database and the instrument name is set to ‘dummy’ (Figure 99). Figure 99: New 'dummy' instrument The instrument can now be renamed and it’s metadata filled accordingly. To add a new calibration to an instrument, click the menu button over the ‘Calibrations’ section of the Instrumentation Metadata Editor and choose ‘Add calibration’ or ‘Add calibration from file’ (Figure 100). Selecting ‘Add calibration from file’ will bring up a file-choosing dialog. Two file types can be currently used to load calibration factors from: (a) HR-1024 spectral files (for loading the wavelengths calibration) and (b) TXT files as further detailed in the section on reference panels below (there is currently no real use in loading TXT files for instrument calibrations as only wavelengths are actively used in the system and these can currently only be loaded from HR-1024 spectral files). \SPECCHIO_UserGuide_V2.1.1.docx Version 2.1.1 / 02.11.2010 SPECCHIO User Guide Page 73 of 103 Figure 100: Adding calibrations 5.2.11.5.2 Reference Panel Administration The reference data tab allows adding, editing and removing reference panels and related metadata, in particular panel calibration data (Figure 101). Figure 101: Reference data tab of the instrumentation administration window To edit or remove a reference panel, select the reference in the reference list first. Removing a reference is achieved by clicking ‘Delete reference. A confirmation dialog will be displayed \SPECCHIO_UserGuide_V2.1.1.docx Version 2.1.1 / 02.11.2010 SPECCHIO User Guide Page 74 of 103 Figure 102: Reference deletion confirmation dialog A reference panel cannot be deleted while still being referenced by one or more spectra in the database. An according message will be shown if the delete action failed (Figure 102). The currently selected reference will only be removed if no database constraints are violated. Figure 103: Panel deletion error To insert a new reference, click ‘Insert new reference. A new record is created in the database and the reference name is set to ‘dummy’ (Figure 104). Figure 104: New ‘dummy’ reference The reference can now be renamed and it’s metadata filled accordingly. To add a new calibration to a reference, click the menu button over the ‘Calibrations’ section of the Instrumentation Metadata Editor and choose ‘Add calibration’ (Figure 105). Figure 105: Popup menu for the reference calibrations Use the file browser to select a calibration file (see below for a description of the file format) and click ‘Open’ (Figure 106). \SPECCHIO_UserGuide_V2.1.1.docx Version 2.1.1 / 02.11.2010 SPECCHIO User Guide Page 75 of 103 Figure 106: Calibration file selection dialog A calibration file holds the calibration factors and uncertainty estimations for a reference panel in a tab separated value file: wvl 250 251 252 253 254 255 256 257 258 259 260 261 262 263 rho 0.98 0.98 0.981 0.98 0.98 0.981 0.98 0.98 0.98 0.981 0.98 0.98 0.978 0.979 sigma 0.02 0.02 0.02 0.02 0.02 0.02 0.02 0.02 0.02 0.02 0.02 0.02 0.02 0.02 The wvl column holds the wavelength in nanometers, rho is the calibration factor linking the measured reference panel to the laboratory or national reference. I.e. in the above example, the panel is 98% reflective compared with an ideal panel. Sigma is the uncertainty estimate of rho, expressed as one standard deviation. Note that before loading the calibration file, a sensor definition fitting the wavelengths of the calibration must be loaded to the database. E.g. in the case of Spectralon reference panels, the sensor definition is the Perkin-Elmer Lambda 19 sensor. The calibration factors are used during the reference panel correction procedure as described in 5.2.10.4.2 and 5.2.10.4.3. 5.2.11.6 Database Upgrade Attention: before upgrading your database, make a backup! Selecting the database upgrade functionality automatically determines the current version of the database and carry out incremental updates till it reaches the latest version of the database. If the database is up to date, the following message will appear: \SPECCHIO_UserGuide_V2.1.1.docx Version 2.1.1 / 02.11.2010 SPECCHIO User Guide Page 76 of 103 If the database has a lower version than the latest available version, a message like to following appears: Click OK to carry out the upgrade. Once finished, the following message will appear (Number of errors should be zero, if not, revert to your backup, start the SPECCHIO application from the command line, then carry out the DB upgrade again: all statements are printed on the screen, including the error messages. If in doubt, contact [email protected]). 5.2.12 Linking to a GIS System If a GPS unit is used to record the spatial position of the sampling sites during the sampling process every site in the database contains the latitude, longitude and altitude in WGS84 format. Alternatively, spatial positions can be set using the metadata editor. The database tables can be accessed by a GIS system if ODBC connections are supported. The connection is shown here on the example of ArcGIS on Microsoft Windows. 5.2.12.1 Setting up the SPECCHIO DB as a Data Source Note that before the SPECCHIO DB can be configured as a data source the MySQL ODBC driver (available from the MySQL website) must be installed on the system. Start ‘Data Sources (ODBC)’ from the Windows administrative tools. In the New Data Source dialog (Figure 107) select the MySQL ODBC Driver and click on ‘Finish’. Figure 107: New Data Source dialog \SPECCHIO_UserGuide_V2.1.1.docx Version 2.1.1 / 02.11.2010 SPECCHIO User Guide Page 77 of 103 This brings up the ODBC configuration dialog (Figure 108). Type in a name for the Data Source Name. Set the Server to the address of the database server. Enter the User name and Password. Select the database schema containing the spectral data from the Database dropdown list. Figure 108: MySQL ODBC Configuration dialog 5.2.12.2 Establishing a Database Connection in ArcCatalog Start ArcCatalog and select ‘Add OLE DB Connection’ (Figure 109). Figure 109: Adding an OLE DB Connection in ArcCatalog In the Data Link Properties select ‘Microsoft OLE DB Provider for ODBC Drivers’ (Figure 110) and click ‘Next>>’. \SPECCHIO_UserGuide_V2.1.1.docx Version 2.1.1 / 02.11.2010 SPECCHIO User Guide Page 78 of 103 Figure 110: Data Link Properties; Provider tab (left) and Connection tab (right) In the Connection tab select the data source from the dropdown list and enter again the username and password (Figure 110). Click ‘OK’. The database is now listed in ArcCatalog and the tables are displayed when selecting the database (Figure 110). Figure 111: SPECCHIO and tables in ArcCatalog 5.2.12.3 Adding Table Data to a Map To add table data to a map select ‘Add Data’ in ArcMap and choose the SPECCHIO under Database Connections (Figure 112). Then select the spectrum table as the data source (Figure 113). The spectra positions can then be displayed on the map by selecting ‘Display XY Data’ and using the longitude and latitude fields of the site table as X and Y coordinates. \SPECCHIO_UserGuide_V2.1.1.docx Version 2.1.1 / 02.11.2010 SPECCHIO User Guide Page 79 of 103 Figure 112: Selecting the specchio database as data source Figure 113: Selecting the spectrum table as data source \SPECCHIO_UserGuide_V2.1.1.docx Version 2.1.1 / 02.11.2010 SPECCHIO User Guide Page 80 of 103 6 Tutorial 6.1 Overview The tutorial is comprised of four parts illustrating the functionality of SPECCHIO: 1. Loading, Editing and Retrieving Data: The folder and directory structure of a sampling campaign, the creation of a new campaign, loading of data, editing of metadata and data retrieval is shown on a vegetation example. The data set contains ASD spectra of New Zealand native plants. 2. Handling of GER Files: The automatic splitting of GER files into target and reference radiances upon loading is demonstrated using a RSL GER3700 dataset. 3. Directional Data: The handling of directional data including sun angle and sensor geometry calculation and automated linking of target to reference spectra is demonstrated using RSL FIGOS goniometer data. 4. Data Querying, Processing and Exploration Each part contains several exercises that are listed in a logical order. In order to support the learning process every exercise lists the relevant sections in the User Guide. All tutorial data are available for downloading on www.specchio.ch. The test data sets used for the specific tutorial parts are explicitly specified at the start of the respective section. 6.1.1 SPECCHIO Online Test Database Relevant section: 5.2.3 An online test database is provided on db.specchio.ch. Please use this database for the tutorial exercise and all other tests you would like to carry out. To change you database connection to the test database, select ‘Database‘->‘Connect to database’ from the main menu. Connect to the test database by entering ‘specchio_test’ in the database connection dialog (cf. Figure 114). Note that the user name and password you received when creating a SPECCHIO account are identical for both the productive and the test databases (specchio, resp. specchio_test). Figure 114: Connecting to the specchio_test database \SPECCHIO_UserGuide_V2.1.1.docx Version 2.1.1 / 02.11.2010 SPECCHIO User Guide Page 81 of 103 6.1.2 Creating Campaigns on the Test Database In order to keep things organised, always include your name in the campaign name by using the following template: <your name>_<campaign name>, e.g. Andy_veg_example. This will make it easier to find your campaigns in the Query Builder where you can see all campaigns of the other users as well (Note that the Query Browser includes a switch that will show only your own data). 6.1.3 Downloading Test Data Sets The data sets used in this tutorial are available on the internet: http://specchio.ch/tutorial_data.php. The following data sets are provided as ZIP archives: □ vegetation_example.zip □ ger_example.zip □ gonio_example.zip To download the ZIP files click on the links and select ‘Save to Disk’ in the web browser dialog (see Figure 115). Unzip the ZIP files to some working directory on your machine, e.g. create a new folder called ‘SPECCHIO_data’ and unzip all datasets into this directory. Figure 115: Tutorial data download page 6.2 Part 1: Loading, Editing and Retrieving Data Data set: Vegetation_example 6.2.1 Examine the Folder and File Structure Relevant sections: 3.2, 3.3 Open a filing system window and browse the directory structure of the ‘Vegetation_example’ folder. It contains three species folders: Blackfern, Cabbage tree and Lemonwood. Open each of these species folders and examine the contents of the site directories contained in them. Blackfern has only one sample site while Lemonwood and Cabbage tree have three resp. two. Also browse inside the site directories to find the ASD binary files (cf. Figure 116). \SPECCHIO_UserGuide_V2.1.1.docx Version 2.1.1 / 02.11.2010 SPECCHIO User Guide Page 82 of 103 Figure 116: Folder and file structure of the Vegetation_example campaign 6.2.2 Creating a new Campaign and Loading the Spectra Relevant sections: 5.2.4, 5.2.5 Create a new campaign by selecting ‘Data Input ‘->‘Create new campaign’. In the new dialog, enter <your name>_veg_example as campaign name, e.g. ahueni_veg_example. Set the Main directory to the Vegetation example folder (cf. Figure 117). Figure 117: Creation of a new campaign for the vegetation example Press the create button and a message box should pop up informing about the successful creation of the campaign (cf. Figure 11882). Figure 118: Message box informing on successful campaign creation Once the campaign has been created load the spectral data of your campaign by selecting ‘Data Input’->’Load campaign data’ and selecting the campaign you just created (cf. Figure 119). \SPECCHIO_UserGuide_V2.1.1.docx Version 2.1.1 / 02.11.2010 SPECCHIO User Guide Page 83 of 103 Figure 119: Loading spectral data into a campaign A message box pops up when the campaign has been loaded (cf. Figure 120). A total of 64 spectral files should now have been loaded into the database. Figure 120: Message box showing the number of processed files during campaign loading 6.2.3 Get to Know Your Data Relevant section: 5.2.7 Your data are now ready to be visualised and exported. Open the Query Builder by selecting ‘Data Processing & Output’->’Build query’. In the Spectral Data Browser (the tree like display on the left side of the dialog) select your campaign (tick the box ‘Show only my data’ to restrict the displayed campaigns to your own) and explore the structure. Note that the database has stored the hierarchical structure of the campaign folder and displays it accordingly (cf. Figure 121). Also note that as you click around the tree (selecting folders or files) the SQL query and the number of resulting rows on the right side are updated simultaneously. You can also use Ctrl and Shift keys to do multiple selections. Now select the first 6 spectra of the Blackfern, site1, (the number of resulting rows should be 6) and click on ‘Show report’. A new window will appear looking similar to Figure 122. Note that a scrollable list containing the metadata is associated with every spectrum. Have a look at the metadata and note the data filled in automatically: filename, capture date, spatial position, measurement unit, sensor name, number of spectral channels, instrument name, owner and serial number. The strong noise in the water bands is due to the generally high humidity found in New Zealand (maritime climate coupled with high yearly rainfall (up to 10 metres in Fjordland)). \SPECCHIO_UserGuide_V2.1.1.docx Version 2.1.1 / 02.11.2010 SPECCHIO User Guide Page 84 of 103 Figure 121: Vegetation example campaign shown in the Spectral Data Browser of the Query Builder Figure 122: Part of the report on Blackfern spectra 6.2.4 Exporting Data to CSV Relevant sections: 5.2.7, 5.2.9 Select File Export in the Query Builder (first select some data as described in 6.2.3). Specify CSV as file format, an output directory (use the Browse button to select a directory) and a base filename and then press ‘OK’ (cf. Figure 123) (see also 5.2.9). \SPECCHIO_UserGuide_V2.1.1.docx Version 2.1.1 / 02.11.2010 SPECCHIO User Guide Page 85 of 103 Figure 123: File export dialog A message box will appear once the export is finished. Use your file system browser to have a look at the output file that has been written into the output directory you specified (cf. Figure 124). The file name is partly auto-generated and includes the following parts: □ blackfern: the base name you specified □ INR_ASD: name of the instrument used to sample the data □ ASD FS FR-3: the sensor type Figure 124: Exported CSV file CSV files can be conveniently loaded into spreadsheet and statistics applications. Alternatively you can view them in a text editor. CSV files can be split into header and body, where the header contains all metadata and the body consists of the channel and spectral information. Figure 125 shows a spectral plot of the first six Blackfern spectra in Microsoft Excel. The first column contains the central wavelength of the bands in nanometres. Figure 125: Example of a spectral (XY) plot in Microsoft Excel \SPECCHIO_UserGuide_V2.1.1.docx Version 2.1.1 / 02.11.2010 SPECCHIO User Guide Page 86 of 103 6.2.5 Exporting Data to ENVI Spectral Libraries Relevant sections: 5.2.7, 5.2.9 Note: this exercise assumes that you have access to ENVI. If this is not the case you may skip it. As a first step repeat the process of file exporting as described for CSV Files in 6.2.4 but change the file format to ENVI SLB. To open SLB files in ENVI, start ENVI and select ‘Spectral’->’Spectral Libraries’->Spectral Library Viewer’. Specify an input file by selecting the .slb file (cf. Figure 126). Figure 126: Selecting an slb file to load as spectral library The spectra names can then be displayed in the Spectral Library viewer (cf. Figure 127) and plotted as Spectral Library Plots. Note that the maximum range of the Y axis must be set to 1 manually as otherwise only noise will be visible (cf. Figure 128). Figure 127: Spectra listed in the Spectral Library Viewer \SPECCHIO_UserGuide_V2.1.1.docx Version 2.1.1 / 02.11.2010 SPECCHIO User Guide Page 87 of 103 Figure 128: Blackfern spectra as Spectral Library Plots 6.2.6 Editing Metadata Relevant section: 5.2.6 Open the metadata editor by selecting ‘Data Input’->’Edit metadata’ from the main menu and select your campaign. Note that in the ‘Campaign Data’ tab your name is automatically listed as Investigator. Enter some description into the description text field, e.g. ‘Just a test’. Note that as soon as you change some data in the metadata editor the relevant ‘Update’ button (in this case the button in the campaign data section) gets activated (cf. Figure 129). Perform the update by clicking on the update button. This stores your changes in the database. The update is done when the ‘Update’ button reverts to being grey and inactive. Figure 129: Editing the description of a campaign Switch to the ‘Spectrum Data’ tab and select the ‘Blackfern’ folder in the Spectral Data Browser (cf. Figure 130). \SPECCHIO_UserGuide_V2.1.1.docx Version 2.1.1 / 02.11.2010 SPECCHIO User Guide Page 88 of 103 Figure 130: Selecting 'Blackfern' in the Spectral Data Browser of the Metadata Editor By selecting multiple spectra (e.g. by selecting a folder or several single spectra) you automatically enter the so called ‘group update modus’. All data that you enter will apply to all the selected spectra. Note that some fields are not editable but greyed and inactive. These fields contain already individual spectrum metadata and are therefore disabled. As all the spectra under the Blackfern hierarchy are of the same plant species and entering the plant names can be done for all spectra with a single operation. To enter a new name, click ‘Add’ in the ‘Names’ section. First type the common name ‘Blackfern’, then specify the type as ‘Common’ from the list (cf. Figure 131). In a similar manner enter the Latin name: ‘Cyathea medullaris’. Figure 131: Entering a common name The names now appear as shown in Figure 132. Note that the ‘Update’ button of the ‘Spectrum Data’ section has been activated. Perform now the update on the database by clicking the ‘Update’ button. Figure 132: Spectrum names All three species (Blackfern, Cabbage Tree and Lemonwood) are typical for New Zealand forests. They all share a common landcover type. To set the landcover for all spectra, first select the top folder called ‘Vegetation_example’. \SPECCHIO_UserGuide_V2.1.1.docx Version 2.1.1 / 02.11.2010 SPECCHIO User Guide Page 89 of 103 Figure 133: Selecting the top folder 'Vegetation_example' Now select the landcover type ‘Deciduous Forest’ in the CORINE landcover tree (cf. Figure 134). Press ‘Update’ to apply the selected landcover type to all spectra of this campaign. You can now check the fact that indeed all spectra have this landcover type set by selecting single spectra in the Spectral Data Browser. Figure 134: Specification of the landcover Pictures taken at the sampling sites can be entered into the spectral database. Pictures for Blackfern and Lemonwood are provided in the vegetation_example.zip file. You will find the pictures alongside with the Vegetation_example folder in the directory where you un-zipping the data. Figure 135: Location of the species pictures To apply the Blackfern picture to all Blackfern spectra select the Blackfern hierarchy in the Spectral Data Browser. Click ‘Add’ in the Pictures section, browse to the Tutorial folder and select blackfern.jpg. To enter a caption, simply type it into the editable field below the picture (cf. Figure 136). Then update the database. Figure 136: Example of a picture with a caption \SPECCHIO_UserGuide_V2.1.1.docx Version 2.1.1 / 02.11.2010 SPECCHIO User Guide Page 90 of 103 In a similar manner insert the supplied lemonwood.jpg picture for all Lemonwood spectra. Note that performing group updates not only speeds up the input process but also minimizes the amount of data stored in the database. All spectra in the selected group are referencing a single entry in the database, thus avoiding data redundancy. A general problem of spectral data collections is the quality and trustability of the data. This is especially true if the data were collected by third parties and the sampling conditions are unknown. One way to improve the usability and shareability of spectral data is to include more metadata. SPECCHIO addresses this by the means of metadata quality levels (cf. 4.3). In the Metadata Editor activate the checkboxes ‘Highlight mandatory fields’ and ‘Show quality compliance in tree’. Select the bfern.001 spectrum in the Spectral Data Browser and set the required quality level of this spectrum to B (cf. Figure 137). Figure 137: Required quality level set to B All required field should now be highlighted. Update the spectrum on the database. If the quality compliance is not shown in the tree, have it displayed properly by selecting your campaign explicitly again in the ‘Campaign Selection’ of the Metadata Editor (cf. Figure 22). All non-complying spectra plus the containing hierarchies are marked with an asterisk (cf. Figure 138). Figure 138: Non quality compliance indicated by asterisks Fill in the missing metadata for the bfern.001 spectrum: □ Cloud cover: 1 okta or less, but not zero □ Measurement type: Single □ Sampling Environment: Field □ Target Homogeneity: homogenous □ Sensor zenith: 0 □ Sensor azimuth: 180 (this is equivalent to the principal plane opposite the sun) □ Sensor distance: 1 □ Illumination zenith: 40 □ Illumination azimuth: 0 (In the Southern hemisphere the sun stands in the North at midday) □ Target type: Add a new target type by clicking the ‘Add’ button, then specify the target type as ‘Tree’ and set it’s abundance = 100 \SPECCHIO_UserGuide_V2.1.1.docx Version 2.1.1 / 02.11.2010 SPECCHIO User Guide Page 91 of 103 After updating the spectrum in the database, the non-compliance indicators in the spectral data browser should be removed. 6.3 Part 2: GER Files Data set: GER_example Relevant sections: 5.2.4, 5.2.5, 5.2.5.1, 5.2.7, 5.2.9 The GER files are contained in the GER_example folder. Explore the folder. You will notice that there are 10 files as created by the GER instrument. Create a new campaign to hold GER files (cf. Figure 139). Figure 139: Creation of a GER example campaign After creating the campaign load the spectral data into the database by selecting ‘Data Input’>’Load campaign data’ and selecting the campaign you just created (cf. Figure 140). Figure 140: Loading spectral data into the GER campaign Open the Query Builder. Open the tree of the GER campaign and study the contents. The files have been automatically split into target and reference spectra (cf. Figure 141). Remember that GER instruments write the sampled radiances of target and white reference into the same file. The names of the corresponding targets and references are identical, e.g. target GR083005.080 is associated with reference GR083005.080. \SPECCHIO_UserGuide_V2.1.1.docx Version 2.1.1 / 02.11.2010 SPECCHIO User Guide Page 92 of 103 Figure 141: GER files split into target and reference spectra (left) and report showing target and reference spectra (right) Targets and references are linked internally by a datalink on spectrum level (cf. 4.4). Open the Metadata Editor and display the spectrum data for one of the GER target spectra. Note that a link referring to the reference spectrum of the type Spectralon has been created (cf. Figure 142). These datalinks are used during radiance to reflectance conversion. Figure 142: Automatically created link between target and reference spectra 6.4 Part 3: Directional Data Data set: Gonio_example Relevant sections: 5.2.4, 5.2.5, 5.2.6 This exercise uses FIGOS goniometer data. FIGOS is used at RSL to acquire spectrodirectional measurements in 66 points arranged on a hemisphere. For more information please refer to Schopfer et al. (2007). Goniometer data is provided in the Gonio_example folder. It contains two subfolders: one holding the targets and one the references. The spectra of targets and references have been manually moved to these folders. This separation should be carried out before the data is loaded into SPECCHIO (alternatively all data can be loaded and the unwanted spectra removed using the Data Remover tool). It must also be noted that any surplus measurements must also be removed, i.e. the system expects 66 directional measurements maximum. SPECCHIO can however deal with gaps in the data as will be demonstrated hereafter. Create a new campaign for goniometer data and load the campaign data. \SPECCHIO_UserGuide_V2.1.1.docx Version 2.1.1 / 02.11.2010 SPECCHIO User Guide Page 93 of 103 If you explore the data in the Metadata Editor, you will find that the Measurement unit has been set to Radiance and the FOV to 3 degrees. Use a group update to set the Measurement type of all spectra of this campaign to ‘Directional’. In the Metadata Editor select the special function ‘Link targets to references’ (cf. 5.2.6.2.10.2). In the ‘Link Target to Reference’ dialog select the target and reference directories of the goniometer campaign as inputs (cf. Figure 143) and press ‘Link’. The datalinks have now been created. In the Metadata Editor explore the datalink settings (cf. Figure 142). You should find that the targets triticaa.001 – triticaa.005 are referencing the triticaa.000 white reference spectrum. Target triticaa.007 references triticaa.006 and so on and so forth. The linking mechanism is based on the spectrum capture time and does not depend on the spectrum file name. Figure 143: Specifying target and reference directories Figure 144: Example of an automatic created datalink The illumination geometry (i.e. the sun zenith angle and azimuth) can be calculated automatically if the spatial position (latitude and longitude) and the capture time in UTC are known. For the given dataset we assume that the time is local time and not UTC. This can be corrected by the special function ‘Correct local time to UTC’ (cf. 5.2.6.2.10.5). In the time correction dialog select the Gonio_example folder because the time shift should be applied to both target and reference spectra. The time difference to GMT is 2 hrs (East) as the sampling took place during summer in Switzerland, i.e. daylight saving applies (cf. Figure 145). \SPECCHIO_UserGuide_V2.1.1.docx Version 2.1.1 / 02.11.2010 SPECCHIO User Guide Page 94 of 103 Figure 145: Applying a time shift to goniometer data As a next step the coordinates of the sampling area must be defined. A position of N47° 22.400’ E08° 32.438’ is assumed. Positions must be entered as floating point degrees (GARMIN hddd.ddddd° format). This yields: N47.37333° E08.54063°. In the Metadata Editor select the Gonio_example hierarchy in the Spectral Data Browser. As the position applies to all spectra of the campaign a group update should be carried out. Now enter the latitude (47.37333) and longitude (-8.54063). Longitudes East of Greenwich are negative. Having entered position and time (do not forget to press the ‘Update’ button), the calculation of the illumination geometry can be carried out by clicking the ‘Calc Sun Angles’ button (cf. Figure 146). Figure 146: Sun angle calculation for goniometer data Use the Spectral Browser of the Metadata Editor to check the sun angles that have been calculated. Every spectrum has been assigned slightly differing sun angles according to the individual capturing time. The angles of the goniometer can be calculated for each spectrum using the ‘Calc Gonio Angles’ function (cf. 5.2.6.2.10.1). Select the target hierarchy and click the ‘Calc Gonio Angles’ button. On the left side of the dialog the number of spectra in the selected hierarchy is displayed (63 spectra). There are three spectra missing from the normal total of 66. If you study the names of the target spectra it seems that the missing spectra numbers are: 55, 56 and 57. Specify the gaps as 55,56,57 and press ‘Insert gaps’. The total number of positions is shown in the field ‘Spectra + dummies’, i.e. 66 in this case. Press ‘Calculate’. The list above the ‘Calculate’ button now contains the positions (starting at zero), the calculated angles and the spectrum filenames. Scroll down till you find the inserted dummies called ‘gap dummy’ (cf. Figure 147). \SPECCHIO_UserGuide_V2.1.1.docx Version 2.1.1 / 02.11.2010 SPECCHIO User Guide Page 95 of 103 Figure 147: Inserted gaps and resulting angles At this point you would have to refer to your field protocol in order to confirm that the gaps you specified did occur at the calculated angles. Let us assume that number 57 actually exists but number 60 is missing. Change the gap specification to: 55,56,60. Press ‘Insert gaps’ and ‘Calculate’ and check the list again. Once you are satisfied with the calculated angles press ‘Ok’ to store the angles in the database. Use the Metadata Editor to check that the angles have indeed been saved and are now correctly displayed. E.g. for the spectrum triticaa.040 you should find a sensor zenith of 30° and azimuth = 270° (cf. Figure 148). Figure 148: Calculated sensor zenith and azimuth angles 6.5 Part 4: Data Querying, Processing and Exploration 6.5.1 Converting Radiances to Reflectances Data set: GER_example The GER example data set contains reference and target measurements that have been linked automatically during data load. Our goal is the conversion of target radiances to reflectances using the respective function of the Space Network Processor. Open the Query Builder, browse to your GER example, select the targets hierarchy (Figure 149) and press the ‘Process’ button. Figure 149: Selection of the target hierarchy of the GER example data set \SPECCHIO_UserGuide_V2.1.1.docx Version 2.1.1 / 02.11.2010 SPECCHIO User Guide Page 96 of 103 A Space Network Processor window will open, containing a space holding the ten target spectra (Figure 150). The dimensionality of the space is 647, which is equal to the number of bands of the GER instrument. Figure 150: Space Network Processor window with space containing the target spectra Add ‘Radiance to Reflectance Transformation’ as a new processing module to the processing plane by clicking the menu button over the processing plane and selecting the module. Figure 151: Selection of the ‘Radiance to Reflectance Transformation’ module Connect the new module with the input space (space 0) by clicking the menu button over the module and selecting ‘Set Input Spaces’ in the module menu (Figure 152) and choosing space number 0 as input space (Figure 153). Figure 152: Module menu Figure 153: Input space selection for the ‘Radiance to Reflectance Transformation’ module \SPECCHIO_UserGuide_V2.1.1.docx Version 2.1.1 / 02.11.2010 SPECCHIO User Guide Page 97 of 103 A new space is added to the processing plane automatically, containing to output of the ‘Radiance to Reflectance Transformation’ module (Figure 154). Figure 154: Input and output spaces of the ‘Radiance to Reflectance Transformation’ module Now, we would like to see what this transformation is actually doing by plotting the input and output spectra. Add two new modules of the type ‘Visualisation Module’ to the processing plane, configure them as ‘Spectral Line Plot’ and connect them with the input space (space 0) and the output space (space 1) respectively. Your Space Processing Network should now be similar to the one shown in Figure 155. Figure 155: Space Processing Network for radiance to reflectance transformation and visualisation Press the ‘Run’ button of the Space Network Processor and two spectral plots should appear (Figure 156). Figure 156: Spectral plots of radiance and calculated reflectance \SPECCHIO_UserGuide_V2.1.1.docx Version 2.1.1 / 02.11.2010 SPECCHIO User Guide Page 98 of 103 The calculated reflectances show the typical features of a vegetation spectrum (green peak, red edge, water absorption features). The high reflectance in the UV-Blue of the first few bands is an artefact of the instrument and indicates an unreliable calibration of the according channels. 6.5.2 Data Queries Data set: all campaigns loaded to the database. If you worked through the whole tutorial a total of three new campaigns should now be loaded to the database. Note that you have access to campaigns other persons entered in the database. Queries on the database can thus return more rows than you might expect! Open the Query Builder and switch to the ‘Query conditions’ tab. In the wildcard field of the Campaign name type in your first or last name followed by the percentage sign, e.g. ‘hueni%’. Alternatively, select your name from the investigators list. The number of resulting rows should be 154 (if all 3 tutorial data sets were loaded). Select ‘Directional’ as measurement type. The number of rows should drop to 70 and the autobuilt SQL statement looks similar to: SELECT count(*) FROM spectrum, campaign WHERE name like 'hueni%' AND spectrum.measurement_type_id = '2' AND spectrum.campaign_id = campaign.campaign_id As a matter of fact, the spectra selected by this query all belong to the goniometer campaign that you created in this tutorial. The same result set is returned when the goniometer campaign is selected implicitly. The result set can be further restricted by e.g. sampling geometry conditions. Narrow the search for spectra with zenith angles between 0º and 30º by entering a sensor zenith angle of 15 and a buffer size of 15 and sensor azimuth of 90 with buffer size 90 (cf. Figure 157). Figure 157: Specifying a sensor zenith/azimuth angles and buffer values The resulting SQL statement should look like: SELECT count(*) FROM spectrum, campaign, sampling_geometry WHERE campaign.name = 'V2.0 Gonio Test' AND campaign.user_id = '1' AND (sampling_geometry.sensor_zenith >= 0.0 AND sampling_geometry.sensor_zenith <= 30.0) AND (sampling_geometry.sensor_azimuth >= 0.0 AND sampling_geometry.sensor_azimuth <= 180.0) AND spectrum.measurement_type_id = '2' AND spectrum.campaign_id = campaign.campaign_id AND spectrum.sampling_geometry_id = sampling_geometry.sampling_geometry_id The number of resulting rows should be 17. Press the ‘Process’ button in the Query Builder to load the selected data into the Space Network Processor. Add a new Visualisation Module, configure it as ‘Gonio Hemisphere Explorer’ and connect it with the input space (Figure 158). \SPECCHIO_UserGuide_V2.1.1.docx Version 2.1.1 / 02.11.2010 SPECCHIO User Guide Page 99 of 103 Figure 158: Gonio Hemisphere Explorer connected to the input space Press the ‘Run’ button of the Space Network Processor. A Gonio Hemisphere Explorer window will open (Figure 159). Figure 159: Gonio Hemisphere Explorer showing the data points selected in the Query Browser Note that according to the selection in the Query Browser, only a limited number of points are displayed. The Gonio Hemisphere Explorer can handle any number of spectrodirectional data points and could thus be used on data stemming from different goniometer systems as well. The data comprises spectrodirectional measurements of a wheat field (triticale). The hemispherical plot nicely illustrates the backward scattering of vegetation canopies (highest radiances are observed in the principal plane). The illumination source is at azimuth position 180° in the shown plot. \SPECCHIO_UserGuide_V2.1.1.docx Version 2.1.1 / 02.11.2010 SPECCHIO User Guide Page 100 of 103 7 Change History 7.1 SPECCHIO Application 7.1.1 Added Features SPECCHIO Version V1.0c V1.0d V1.0e V1.0f V1.1 V1.1a V1.2 V1.3 V2.0 V2.1 Feature Date Spectra names are read from ENVI slb header files and stored as part of the filenames in the database. Spectra names from slb headers are also inserted into the spectra name table with a name type of ‘ENVI Hdr’. Database connection status is shown in main window Added ENVI SLI files to recognized file types Automatic connect to localhost when louie.geo.unizh.ch is not available. Better error messages when connections to database fail. Landcover type selection in Metadata Editor now based on tree display. Support for loading TXT files. Multiuser support. Database connections configurable via db_config.txt file Lazy loading algorithm for spectral databrowser: allows efficient working with large datasets. Super-fast group updates. Shared data highlighting. Shared data update reimplementation. Shared data awareness for gonio and sun angle calculations. Direct selection of gonio and sun angle calculations from the ‘sampling geometry field’. Several progress reports added. Added campaign import function. Added file comment to spectrum report. Added help menu item and specchio info dialog box. Major rework of the whole code. Added instrumentation administration and Space Network Processor. Apogee and SVC HR-1024 support. Instrument calibration support for wavelength calibration. Instrument settings support. 14.02.2007 14.02.2007 21.02.2007 21.02.2007 10.04.2007 29.05.2007 18.10.2007 03.11.2007 03.06.2008 15.06.2008 05.03.2009 02.09.2010 7.1.2 Fixed Bugs SPECCHIO Version V1.0a Problem Fix Date ENVI SLB does not load into ENVI Group update using the ‘override conflict detection’ option on positions is not updating all positions if each spectrum has its own position. ASD files: zero coordinates (i.e. no GPS unit connected Modification of HDR file 19.01.2007 Individual update is now enforced in this case. 24.01.2007 Check for zero coordinates is carried out during reading of ASD 24.01.2007 \SPECCHIO_UserGuide_V2.1.1.docx Version 2.1.1 / 02.11.2010 SPECCHIO User Guide V1.0b 1.1 1.1a 1.2 1.3 2.0 Page 101 of 103 during sampling) trigger the creation of a positional record in the database with zero lat, long and altitude entries Some hidden dot files, e.g. .DStore prevent the correct loading of campaigns Missing date in ENVI slb crashes loading process The ENVI slb date bug fix crashes the loader process when determining the spectral file loader class Sensor definition loader crashes because of new element_type_id Previously inserted pictures are added along with new pictures. Pictures not updated on screen in metadata editor Some dialogs (e.g. Query Builder) are not opening correctly after changing the database connection (this only applies if the dialogs were opened already with the former connection) Goniometer angle calculation not working. Memory overflow when loading thousands of spectra. Shared data update/delete not working Datalink group update somehow inserting too many rows Various files. Positions are only inserted if lat, long and altitude are all different from zero. Added filter for dot files. 26.01.2007 NIL date handling 14.02.2007 Explicitly create date array in asd file reader constructor 14.02.2007 Add default narrowband element type id in insert procedure 14.02.2007 Clear added picture list in picture metadata object. 18.10.2007 Revalidate the metadata editor. 18.10.2007 Update default statement and connection in the SQL Statement builder instance upon reconnect. 18.10.2007 Carry out updates on view instead table. Close finished streams and files. 03.11.2007 Major redesign of the metadata editor update and shared data functions. Clear internal lists after updates. 29.05.2008 - 2.0a ENVI SLB loading problems - 2.0c 2.1 Copy/Paste not working in numeric fields in the Metadata Editor Memory leaks (spectra loading and spaces) Application crashing when - architecture dependant data type for ENVI SLBs thread safety for SQL statement builder Foreoptic is now treated as FOV and bare fibre FOVs are correctly inserted for ASD readings. Data type awareness on input Warning message if unknown file types exist in directory Update allowed key list - Fix of memory leaks - Config file routine more robust \SPECCHIO_UserGuide_V2.1.1.docx 03.11.2007 15.06.2008 05.03.2009 26.03.2009 07.07.2009 02.09.2010 Version 2.1.1 / 02.11.2010 SPECCHIO User Guide 2.1c Page 102 of 103 unexpected CR/LF in db_config file Heap space error Fix memory leaks. 15.09.2010 7.1.3 Known Bugs SPECCHIO Version V2.0 Problem Workaround Target type abundance: Number exception when no abundance specified Duplicate key error on update (only certain tables and not always occurring either) Attained quality level is wrongly set even if not all fields comply Conflict detection is not working for data links. Always enter a target abundance when defining target types. No user workaround. Write email to SPECCHIO admin. No user workaround If in doubt, check the links of the involved spectra to ensure they are set correctly. The datalinks will be replaced by new linking functions in the near future. 7.2 SPECCHIO Database 7.2.1 Added Features SPECCHIO Database Version 1.0a 1.1 1.1c 2.0 2.0c 2.1 Feature Date Changed the column type of latitude, longitude and illumination angles from Float to Double to increase precision Multiuser capability added. Changes for compatibility with the campaign export function. Various new features: reference panel links for spectra, reference panels, calibrations and according uncertainties, DB version Instrument settings table HR-1024 support. Associated measurements support 24.01.2007 15.10.2007 29.05.2008 05.03.2009 07.07.2009 02.09.2010 8 References Hueni, A. (2006). Field Spectroradiometer Data: Acquisition, Organisation, Processing and Analysis on the Example of New Zealand Native Plants. Institute of Natural Resources. Palmerston North, Massey University. Hueni, A., M. Kneubuehler, et al. (2009). PROCESSING EXTENSION FOR THE SPECTRAL DATABASE SPECCHIO. EARSeL SIG IS, Tel Aviv, Israel. \SPECCHIO_UserGuide_V2.1.1.docx Version 2.1.1 / 02.11.2010 SPECCHIO User Guide Page 103 of 103 Hüni, A., J. Nieke, et al. (2007). Metadata of Spectral Data Collections. 5th EARSeL Workshop on Imaging Spectroscopy, Bruges, Belgium. ISO/IEC (1996). Information technology -- Syntactic metalanguage -- Extended BNF (14977). Geneva, Switzerland, ISO/IEC Copyright Office. Landgrebe, D. (1997). On Information Extraction Principles for Hyperspectral Data. West Lafayette, IN, Purdue University. Schopfer, J. (2008). SPECTRODIRECTIONAL GROUND-BASED REMOTE SENSING USING DUAL-VIEW GONIOMETRY. Zurich, Remote Sensing Laboratories. Schopfer, J., S. Dangel, et al. (2007). Dual Field-of-View Goniometer System FIGOS. ISPMSRS, 12-14 March 2007, Davos, Switzerland. U.S. Naval Observatory. (2003). "What is Universal Time?", from http://aa.usno.navy.mil/faq/docs/UT.html. University of Washington. (undated). "Total Cloud Amounts." from http://www.atmos.washington.edu/gcg/MG/tepps/SPOON/photoen/cover.html. Wirth, N. (1977). "What can we do about the unnecessary diversity of notation for syntactic definitions?" Communications of the ACM 20(11): 822-823. \SPECCHIO_UserGuide_V2.1.1.docx Version 2.1.1 / 02.11.2010