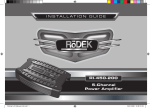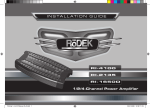
1
Ne2 XP6004/7005/8001 RZ (D+UK)
16.08.2000 6:32 PM
S tat e
o f
t h e
Seite 1
a r t
INSTALLATIONS- & BEDIENUNGSANLEITUNG
INSTALLATION & OPERATING MANUAL
Ne2 XP6004/7005/8001 RZ (D+UK)
2
16.08.2000 6:32 PM
Seite 2
Ne2 XP6004/7005/8001 RZ (D+UK)
16.08.2000 6:32 PM
INHALTSÜBERSICHT
Einleitung / Features . . . . . . . . . . . . . . . . . . . . .3
Auspacken / Lieferumfang . . . . . . . . . . . . . . . .5
Bedienungselemente XP600.4 . . . . . . . . . . . . .6
Bedienungselemente XP700.5 . . . . . . . . . . . . .8
Bedienungselemente XP800.1 . . . . . . . . . . . .10
Montage . . . . . . . . . . . . . . . . . . . . . . . . . . . . . .12
Verkabelung . . . . . . . . . . . . . . . . . . . . . . . . . . .12
Wahl der Betriebsart . . . . . . . . . . . . . . . . . . .14
Mögliche Systemkonfigurationen . . . . . . . . .15
Einstellungen . . . . . . . . . . . . . . . . . . . . . . . . . .15
Einstelltips XP600.4 . . . . . . . . . . . . . . . . . . . . .16
Einstelltips XP700.5 . . . . . . . . . . . . . . . . . . . . .17
Einstelltips XP800.1 . . . . . . . . . . . . . . . . . . . . .17
Technische Daten . . . . . . . . . . . . . . . . . . . . . .39
Garantiebestimmungen / Garantiekarte . . . .40
Seite 3
EINLEITUNG / FEATURES
Wir beglückwünschen Sie zum Erwerb Ihres
X-Pulse Verstärkers. Dieser Car-Amp ist das
Ergebnis einer Entwicklungsarbeit, in welcher
diverse neuartige, bisher auf dem Car-Hifi
Sektor in dieser Form nicht verwendete,
Class-D Schaltungs-Designs verwirklicht
wurden.
Die neue X-Pulse Verstärkergeneration bietet
eine sehr hohe Leistungs- und Funktionsdichte,
die sich sonst, bei herkömmlichen Schaltungskonzepten – und bei vergleichbaren Ausgangsleistungen – mit deutlich grösseren Aussendimensionen bemerkbar macht.
Introduction / Features . . . . . . . . . . . . . . . . . .18
Unpacking / Checking the Set Contents . . . .19
Connections and Controls XP600.4 . . . . . . . .20
Connections and Controls XP700.5 . . . . . . . .22
Connections and Controls XP800.1 . . . . . . . .24
Mounting . . . . . . . . . . . . . . . . . . . . . . . . . . . . .26
Connecting . . . . . . . . . . . . . . . . . . . . . . . . . . . .26
Settings and Adjustments . . . . . . . . . . . . . . .28
System Configurations XP600.4 . . . . . . . . . . .32
System Configurations XP700.5 . . . . . . . . . . .35
System Configurations XP800.1 . . . . . . . . . . .38
Tips fpr Input Level Settings . . . . . . . . . . . . . .30
Technical Specifications . . . . . . . . . . . . . . . .39
Warranty Conditions / Warranty Card . . . . . .40
3
Ne2 XP6004/7005/8001 RZ (D+UK)
16.08.2000 6:32 PM
X-PULSE VERSTÄRKER KEY FEATURES
✔ Hohe Ausgangsleistung
✔ Hoher Dämpfungsfaktor
✔ Hoher Wirkungsgrad
✔ Geregeltes, absolut laststabiles PWMSchaltnetzteil
✔ Mikro-Lüfter über Schaltnetzteil für
intensivere Kühlung und optimale Stabilität
an niederohmigen Lasten
✔ Geringstmögliche Erwärmung
✔ Verhältnismässig geringe Stromaufnahme
✔ Vielfältige Einstellmöglichkeiten
Ausserdem bieten alle drei X-Pulse
Verstärkermodelle zahlreiche und umfangreiche Einstellmöglichkeiten. Die X-PULSE
Verstärker stellen daher relativ komplexe
Audiokomponenten dar. Um die gebotene
Qualität im vorgesehenen Einsatzbereich des
jeweiligen Verstärkers voll nutzen zu können,
empfehlen wir Ihnen, sich umfassend mit den
Möglichkeiten und Features des von Ihnen
erworbenen Gerätes vertraut zu machen.
Lesen Sie also die nachfolgenden – speziell
aber die auf Ihr Verstärker-Modell zutreffenden
Abschnitte und Kapitel aufmerksam durch –
bevor Sie mit der Installation beginnen. Es
lohnt sich bestimmt!
State-of-the-Art Schaltungstechnik
Sowohl in der Verstärker-Schaltungstechnik
als auch im konzeptionellen Verstärker Aufbau
repräsentieren die drei neuen X-Pulse
Verstärker Modelle den derzeitigen Stand der
Technik. Die XP700.5 und die XP800.1 verwenden eine neuartige Digitalverstärkerschaltung
für den Subwoofer -Kanal. Die XP600.4 ist konventionell analog aufgebaut, verfügt jedoch
auch über die umfangreichen Einstellmöglichkeiten und die hohe Ausgangsleistung der
neuen X-PULSE Generation und stellt daher
eine optimale Ergänzung des X-PULSE Verstärkerprogrammes dar.
4
Seite 4
Der Hauptvorteil der bei der XP800.1 und
XP700.5 eingesetzten digitalen VerstärkerTechnologie liegt in der nahezu verlustfreien
Verstärkung, verbunden mit einem extrem
hohen Wirkungsgrad. Die hohe Effizienz stellt
sicher, dass ca. 80% der von der Batterie bzw.
vom Alternator abgegebenen Leistung auch in
entsprechende Verstärkerleistung umgewandelt wird, und nicht nutzlos als Wärme verpufft.
Ein durchaus erwünschter Nebeneffekt der
X-PULSE-Class-D-Schaltung ist die
Minimierung, der sonst bei konventionellen
Endstufen aufgrund der Blindleistung entstehenden Abwärme immer benötigten
Kühlfläche. Die Aussendimensionen
das Gehäuses können, weil – ausser vom
Schaltnetzteil über den Lüfter – weniger
Wärme abgeführt werden muss, viel kompakter ausfallen, als beim Einsatz von analogen
Schaltungen zur Bass-Verstärkung.
Analoge Verstärker-Technik zeichnet sich
weiterhin durch die höhere Auflösung, die
bessere Feinzeichnung und den grösseren
Dynamikumfang aus, und ist damit bestens
geeignet für Mittel-/Hochton-LautsprecherSysteme (Satelliten). Die Satelliten-(Fullrange)
Verstärker-Sektion in der XP600.4 und auch in
der XP700.5 basiert daher auf einer klanglich
optimierten analogen Schaltung.
Die während der Entwicklung in die Schaltungsprinzipien bzw. deren Lay-Out investierte
Sorgfalt setzt sich in der Verwendung von
modernsten Oualitäts-Bauteilen und dem
Einsatz neuester miniaturisierter SMDPlatinen-Bestückung (Surface Mounted
Devices) fort. Die konsequent durchdachten
Verstärker-Konzepte zahlen sich in Form einer
aussergewöhnlichen Audio Performance und
hoher Produktzuverlässigkeit aus.
Ne2 XP6004/7005/8001 RZ (D+UK)
16.08.2000 6:32 PM
Seite 5
Vielfältige Einstellmöglichkeiten
Alle drei neuen X-Pulse Verstärker ermöglichen durch Ihre komplett ausgestatteten integrierten Aktivweichen eine einfache und perfekte Anpassung an den jeweiligen
Einsatzzweck.
■ Die Eingangsempfindlichkeit bzw. der relative Lautstärke-Pegel kann für jeden
Verstärkerteil über einen sehr weiten Bereich
von 0,2 – 9V eingeregelt werden, was in
Verbindung mit neueren High-Output HeadUnits zu sehr hohen Störabständen und optimaler Einstrahlfestigkeit gegen externe induktive Störquellen führt.
■ In den Subwoofer-Kanal integrierte 12 dB /
Okt. Subsonic-Filter mit frei wählbaren
Einsatzfrequenzen zwischen 10 bis 50 Hz,
ermöglichen die Ausblendung von oft im
Musikmaterial vorhandenen unhörbaren subsonischen Frequenz-Anteilen. Damit wird dem
Verstärkerteil Blindleistung und dem angeschlossenen Subwoofer unnötige Hubarbeit
erspart.
■ Stufenlos einstellbare 12 dB / Okt. TiefpassFilter begrenzen den Einsatzbereich des
Subwoofers (oder des Kickbass-Systemes)
zwischen 35 bis 200 Hz.
■ Unabhängig voneinander einstellbare
12 dB / Okt. Hochpass-Filter regeln die Einsatzfrequenz der als Satelliten betrieben
Lautsprecher-Paare von 40 bis 200 Hz.
Die Phase-Shift Regelung der XP700.5 (nur im
Bassbereich) und der XP800.1 stellt sicher,
dass eine perfekte Anpassung der akustischen
Phase des angeschlossenen Subwoofers an
das Frontsystem möglich ist.
Bewahren Sie dieses Manual zusammen mit
der Kaufquittung für eventuell später auftauchende Fragen, respektive Anschluss- und
Einstellungsprobleme sorgfältig auf!
Wenn Sie den Einbau Ihres Auto-HiFi Systems
selbst vornehmen, lassen Sie dieses von Ihrem
authorisierten X-PULSE Fachhändler auf fachgerechte Installation und korrekte Einstellung
überprüfen. Damit sichern Sie sich Ihre
Garantieleistungen und haben die Gewährleistung, dass die Anlage ihre höchstmögliche
Klangqualität und Leistungsausbeute erreicht
AUSPACKEN / LIEFERUMFANG
XP600.4 / XP700.5 / XP800.1
1 X-Pulse Amp XP600.4 /XP700.5 / XP800.1
1 Sub-Level-Remote Fernbedienung &
Anschluss-Kabel (nur für XP700.5 und
XP800.1)
Montagezubehör-Set bestehend aus:
4 Blechschrauben (gross) für die
Verstärkerbefestigung
4 Gummiringe für isolierte VerstärkerMontage
4 Schrauben (klein) für die Befestigung des
Sub Level Remote Control Units
1 Inbus-Schlüssel für M3 Inbusschrauben
1 Bedienungsanleitung mit Garantiekarte
Bei nicht vollständigem Lieferumfang oder
sichtbaren Transportschäden bitten wir Sie,
sich umgehend mit Ihrem X-PULSE-Händler in
Verbindung zu setzen.
Die zusätzliche Basspegel-Fernbedienung der
XP800.1 und der XP700.1 ermöglicht eine sehr
praxisgerechte und einfache Einstellung des
Basspegels vom Fahrersitz aus.
5
Ne2 XP6004/7005/8001 RZ (D+UK)
16.08.2000 6:32 PM
Seite 6
BEDIENUNGSELEMENTE XP600.4
1+2 3+4
8
5
9
6
10
32
1
40
0.4
20
45
0.2 V
10Hz
50Hz
5
9V
12
13
36
1,8
3
11
SUBSONIC
LEVEL
14
7
15
17
HIGH PASS
135
16
100
180
LOW PASS
3/4 CH X-OVER
100
50
135
55
195
40
175
40Hz
200Hz
35Hz
200Hz
18
HI FULL LOW
SUBSONIC
LEVEL
1,8
19
3
36
32
1
5
9V
20
45
0.2 V
10Hz
50Hz
HIGH PASS
135
100
40
0.4
180
LOW PASS
1/2 CH X-OVER
100
50
135
55
195
40
175
40Hz
200Hz
35Hz
200Hz
HI FULL LOW
6
21
22
23
20
Ne2 XP6004/7005/8001 RZ (D+UK)
16.08.2000 6:32 PM
1&2
1-CH & 2-CH CINCH EINGÄNGE
Cinch Eingangsbuchsen (L-CH & R-CH; linker und
rechter Kanal). NF-Signal Eingang für den Anschluß
des Steuergerätes, z.B. Front Line-Out.
3&4
3-CH & 4-CH CINCH EINGÄNGE
Cinch Eingangsbuchsen (L-CH & R-CH; linker und
rechter Kanal). NF-Signal Eingang für den Anschluß
des Steuergerätes, z.B. Rear- oder Sub Line-Out.
5 INPUT MODE
Input- oder Eingangs-Wahlschalter zum Definieren
des Eingangsmodus, d.h. der Ansteuerung der
Endstufe mit einem oder zwei Stereo-Cinch NF-LineOuts vom Head-Unit.
6
POWER-PROTECT LED
Status-LED’s, leuchtet im normalen Betrieb (wenn
Remote-Spannung anliegt) grün auf. Leuchtet rot,
wenn sich die Endstufe in Protection-Modus befindet.
7 L-CH&R-CH LINE OUT
Cinch Stereo-Ausgangsbuchsen, zum Durchschleifen
des Summensignales von den Kanälen 1-CH + 3-CH
und 2-CH + 4-CH auf eine weitere Endstufe (z.B. auf
einen Mono-Subwoofer Amp).
8
SPEAKER TERMINAL 3-CH&4-CH
Lautsprecherausgangs Terminals für „” und „”
der Kanäle 3-CH und 4-CH. Der „” Terminal
Ausgang von Kanal 3-CH und der „” Terminal
Ausgang von Kanal 4-CH ergeben den gebrückten
Abgriff / Ausgang, bei gebrücktem („bridged“)
Betrieb der Kanäle 3&4-CH. Abschlussimpedanz
1 bis 4 Ohm stereo, bzw. 2 Ohm gebrückt!
9
SPEAKER TERMINAL 1-CH&2-CH
Lautsprecherausgangs Terminals für „” und „”
der Kanäle 1-CH und 2-CH. Der „” Terminal
Ausgang von Kanal 1-CH und der „” Terminal
Ausgang von Kanal 2-CH ergeben den gebrückten
Abgriff / Ausgang bei gebrücktem („bridged“)
Betrieb der Kanäle 1&2-CH. Abschlussimpedanz
1 bis 4 Ohm stereo, bzw. 2 Ohm gebrückt!
10 GND
Ground-Power-Terminal für den Anschluss an die
Chassis-Masse des Kfz’s, oder an den negativen Pol
der 12V Kfz-Batterie.
11
REM Remote Anschlussterminal zum Anschluss
an den Remote-Ausgang des Head-Units.
12
BAT +12V
+12 V Power-Terminal für den Anschluss an den 12 V
Pluspol der Kfz-Batterie.
Seite 7
13
FUSE
Interne Absicherung der Endstufe durch zwei 40
Ampere ATC-Sicherungen.
14 LEVEL
Regler zur Anpassung der Eingangsempfindlichkeit
der Kanäle 3&4-CH im Bereich von 0,2V bis 9V.
15 SUBSONIC
Regler zur Einstellung der Subsonic Hochpasstrennfrequenz der Kanäle 3&4-CH, von 10 Hz bis 50 Hz.
Wenn der Inputmode-Schalter (3/4-CH X-OVER) auf
„HI“, respektive High Pass steht, liegt der Subsonic
Regler nicht im Signalweg und ist daher nicht aktiv!
16 HIGH PASS
Regler zur Einstellung der Hochpasstrennfrequenz
der Kanäle 3&4-CH, von 40 Hz bis 200 Hz.
17
3&4-CH X-OVER
Betriebsart-Wahlschalter der Frequenzweiche,
definiert ob die Kanäle 3&4-CH im Hochpass (HI),
Tiefpass (LOW), oder Fullrange (FULL) Modus
arbeiten.
18
LOW PASS
Regel zur Einstellung der Tiefpasstrennfrequenz der
Kanäle 3&4-CH, von 35 Hz bis 200 Hz.
19 LEVEL
Regler zur Anpassung der Eingangsempfindlichkeit
der Kanäle 1&2-CH im Bereich von 0,2V bis 9V.
20 SUBSONIC
Regler zur Einstellung der Subsonic Hochpasstrennfrequenz der Kanäle 1&2-CH, von 10 Hz bis 50 Hz.
Wenn der Inputmode-Schalter (1/2-CH X-OVER) auf
„HI“, respektive High Pass steht, liegt der Subsonic
Regler nicht im Signalweg und ist daher nicht aktiv!
21
HIGH PASS
Regler zur Einstellung der Hochpasstrennfrequenz der Kanäle 1&2-CH, von 40 Hz bis 200 Hz.
22 1&2-CH X-OVER
Betriebsart-Wahlschalter der Frequenzweiche,
definiert ob die Kanäle 1&2-CH im Hochpass
(HI), Tiefpass (LOW) oder Fullrange (FULL)
Modus arbeiten.
23 LOW PASS
Regler zur Einstellung der
Tiefpasstrennfrequenz der Kanäle 1&2-CH, von
40 Hz bis 200 Hz.
7
Ne2 XP6004/7005/8001 RZ (D+UK)
16.08.2000 6:32 PM
Seite 8
BEDIENUNGSELEMENTE XP700.5
OVERLOAD
1
2
3
4
5
5 CH
6
7
8
9
13
14
120
72
150
30
0
38
PHASE SHIFT
48
200Hz 10Hz
LOW PASS
1,5
4
2,4
1
0.5
6
9V
REAR
0.2 V
19
SUB
135
100
165
0,8
0.4
4
9V
3/4 CH LEVEL
18
50Hz
SUBSONIC
2
17
45
20
177
35Hz
180
32
160
42
5 CH LEVEL
HP
FULL BP
85
50
135
195
45
175
40Hz
200Hz
35Hz
200Hz
3/4 CH X-OVER
HI PASS
170
265
45
345
40Hz
400Hz
HI PASS
HP
FRONT
LOW PASS
2
FULL
3
1
0.5
5
9V
1/2 CH X-OVER
0.2 V
1/2 CH LEVEL
2 CH 4 CH 5 CH
INPUT MODE
21 22 24
8
16
0.2 V
55
110
11
15
119
90
60
10
23
20
12
Ne2 XP6004/7005/8001 RZ (D+UK)
16.08.2000 6:32 PM
zwei 30 Ampere ATC-Sicherungen.
1
POWER-PROTECT / OVERLOAD LED Status-LED’s,
leuchtet im normalen Betrieb (wenn Remote Spannung
anliegt) grün auf. Leuchtet rot, wenn sich die Endstufe in
Protection-Modus befindet. Die Overload LED leuchtet
gelb, wenn der Sub-Kanal übersteuert wird.
2
1-CH & 2-CH LINE INPUT
Cinch Eingangsbuchsen (1-CH & 2-CH; linker und rechter Kanal). NF-Signal Eingang für den Anschluß des
Head-Units, bevorzugterweise der Front-Line-Outs.
3
3-CH & 4-CH LINE INPUT
Cinch Eingangsbuchsen (3-CH & 4-CH; linker und rechter Kanal). NF-Signal Eingang für den Anschluß des
Head-Units, bevorzugterweise der Rear-Line-Outs.
4
REMOTE INPUT Remote Control Input
Eingangsbuchse für den Anschluss des Kabels der
externen Pegel-Fernbedienung des Subkanales
(betrifft Kanäle 5&6-CH, bzw. Subwoofer-Ausgang).
5
5-CH & 6-CH (SUB) LINE INPUT Cinch Ein-gangsbuchsen (5-CH & 6-CH; linker und rechter Kanal). NFSignal Eingang für den Anschluß des Head-Units, bevorzugterweise der „Subwoofer“-Line-Outs.
6 SUBWOOFER SPEAKER TERMINAL 5-CH
Lautsprecherausgangs Terminals für „” und „”
der Kanäle 5-CH und 6-CH, bzw. der LautsprecherAusgang zum Anschluss des Subwoofers,
Abschlussimpedanz 1 bis 4 Ohm.
7 SPEAKER TERMINAL 3-CH&4-CH
Lautsprecherausgangs Terminals für „” und „”
der Kanäle 3-CH und 4-CH. Der „” Terminal Ausgang von Kanal 3-CH und der „” Terminal Ausgang
von Kanal 4-CH ergeben den gebrückten („bridged“)
Abgriff / Ausgang der Kanäle 3&4-CH. Abschlussimpedanz 1 bis 4 Ohm stereo, bzw. 2 Ohm gebrückt!
8
SPEAKER TERMINAL 1-CH&2-CH
Lautsprecherausgangs Terminals für „” und „”
der Kanäle 1-CH und 2-CH. Der „” Terminal Ausgang von Kanal 1-CH und der „” Terminal Ausgang
von Kanal 2-CH ergeben den gebrückten („bridged“)
Abgriff / Ausgang der Kanäle 1&2. Abschlussimpedanz 1 bis 4 Ohm stereo, bzw. 2 Ohm gebrückt!
9 GND Ground-Power-Terminal für den Anschluss
an die Chassis-Masse des Kfz’s, oder an den negativen Pol der 12V Kfz-Batterie.
10 REM Remote Anschlussterminal zum Anschluss
an den Remote-Ausgang des Steuergerätes.
11 BAT +12V +12 V Power-Terminal für den
Anschluss an den 12 V Pluspol der Kfz-Batterie.
12
Seite 9
FUSE Interne Absicherung der Endstufe durch
13 PHASE SHIFT Regler zur Einstellung der
akustischen Phase der Kanäle 5&6-CH (Subwoofer),
respektive Anpassung der absoluten Phase des
angeschlossenen Subwoofers an die Front-Satellitenlautsprecher.
14 LOW PASS Regler zur Einstellung der Tiefpasstrennfrequenz der Kanäle 5&6-CH / SUB, von 35 Hz
bis 200 Hz.
15
SUBSONIC Regler zur Einstellung der Subsonic
Hochpass-trennfrequenz der Kanäle 5&6-CH (Subwoofer), von 10 Hz bis 50 Hz.
16
5-CH LEVEL / SUB Regler zur Anpassung der
Eingangsempfindlichkeit der Kanäle 5&6-CH / SUB im
Bereich von 0,2V bis 9V.
17 3&4-CH LEVEL Regler zur Anpassung der
Eingangsempfindlichkeit der Kanäle 3&4-CH im
Bereich von 0,2V bis 9V.
18 HIGH PASS Regler zur Einstellung der
Hochpasstrennfrequenz der Kanäle 3&4-CH, von
40 Hz bis 200 Hz. Wenn der Inputmode-Schalter
(3/4-CH X-OVER) auf „HP“, respektive High Pass
steht, liegt der Subsonic Regler nicht im Signalweg und ist daher nicht aktiv!
19 3&4-CH X-OVER Betriebsart-Wahlschalter
der Frequenzweiche, definiert ob die Kanäle
3&4-CH im Hochpass (HP), Fullrange (FULL),
oder Bandpass (BP) Modus arbeiten.
20 LOW PASS Regel zur Einstellung der
Tiefpasstrennfrequenz der Kanäle 3&4-CH, von
35 Hz bis 200 Hz.
21 HIGH PASS Regler zur Einstellung der
Hochpasstrennfrequenz der Kanäle 1&2-CH, von
40 Hz bis 400 Hz.
22 1&2-CH X-OVER (FRONT) BetriebsartWahlschalter, definiert ob die Kanäle 1&2-CH im
Hochpass (HP), oder Fullrange (FULL) Modus
arbeiten.
23 1&2-CH LEVEL Regler zur Anpassung der
Eingangsempfindlichkeit der Kanäle 1&2-CH im
Bereich von 0,2V bis 9V.
24 INPUT MODE Input- oder EingangsWahlschalter zum Definieren des Eingangsmodus, d.h. der Ansteuerung der Endstufe mit
einem, zwei oder drei Stereo-Cinch NF-LineOuts vom Head-Unit.
9
Ne2 XP6004/7005/8001 RZ (D+UK)
16.08.2000 6:32 PM
Seite 10
BEDIENUNGSELEMENTE XP800.1
2a
2b
40
140
45
30
10Hz
1
3a
SP
10a
10
3b
4
5
50Hz
6
0.6
160
90
47 50
25
0.35
1.4
180 3.8
35Hz
200Hz
7
0.25
9V
0.2V
8
9
SP
10b
11
12
13
14
Ne2 XP6004/7005/8001 RZ (D+UK)
16.08.2000 6:32 PM
1 POWER-PROTECT LED
Die LED zeigt den normalen Endstufen-Betrieb
an und leuchtet grün auf, sobald ein RemoteEinschaltsignal am REMOTE Eingang anliegt
und die Digitalendstufe betriebsbereit ist. Die
LED leuchtet rot auf, wenn sich die Endstufe im
Protect Modus befindet.
2a&2b L-CH & R-CH CINCH EINGÄNGE
Eingangsbuchsen für den Anschluss des linken
und rechten Kanals des Head-Units.
3a&3b L-CH & R-CH CINCH AUSGÄNGE
Ausgangsbuchsen für den Anschluss, bzw.
Durchschleifen des Eingangssignals an eine
Endstufe, z.B. einer weiteren XP800.1
4 REMOTE INPUT
Remote Control Input Eingangsbuchse für den
Anschluss des Kabels der externen PegelFernbedienung.
5 OVERLOAD LED
Die rote Overload LED zeigt Überlastung des
PWM Netzteils durch Leistungsabgabe an.
Die LED leuchtet in diesem Falle gelb.
6 SUBSONIC
Regler zum Einstellen der Subsonic Hochpassfrequenz von 10 Hz bis 50 Hz. Das 12 dB / Okt.
Hochpassfilter liegt immer im Signalweg, es
lässt sich nicht deaktivieren!
Seite 11
9 PHASE SHIFT
Regler zur Einstellung der akustischen Phase
des Subwoofer Ausgangs, respektive
Anpassung der absoluten Phase des angeschlossenen Subwoofers an die FrontSatellitenlautsprecher.
10a&10b SUB
Ausgangsterminals für den Anschluss an die
Pluszuleitung(en) von einem oder zwei
Subwoofern. Beide Terminals sind parallelgeschaltet. Abschlussimpedanz 1 bis 4 Ohm
mono!
11 GND
Ground-Power-Terminal für den Anschluss an
die Chassis-Masse des Kfz’s, oder an den
negativen Pol der 12V Kfz-Batterie.
12 REM
Remote Anschlussterminal zum Anschluss an
den Remoteausgang des Head-Units.
13 BAT +12V
+12 V Power-Terminal für den Anschluss an
den 12 V Pluspol der Kfz-Batterie.
14 FUSE
Interne Absicherung der Endstufe durch zwei
40 Ampere ATC-Sicherungen.
7 LOW PASS
Regler zur Einstellung der
Tiefpasstrennfrequenz von 35 Hz bis 200 Hz.
8 LEVEL
Regler zur Anpassung der
Eingangsempfindlichkeit der Mono-Endstufe im
Bereich von 0,2V bis 9V.
11
Ne2 XP6004/7005/8001 RZ (D+UK)
16.08.2000 6:32 PM
MONTAGE
Wichtige Einbau-Tips
■ Verwenden Sie ein der Stromaufnahme bzw.
Leistungsabgabe dieses Verstärkers entsprechendes Stromkabel mit min. 20 mm2 HauptQuerschnitt. Stromkabel mit kleineren Querschnitten begrenzen – u.a. bei 1 oder 2 Ohm
Abschlussimpedanz der angeschlossenen
Lautsprecher (speziell Subwoofer!) – schon
deutlich die Ausgangsleistung des Verstärkers
und können bereits bei mittleren Lautstärkepegeln zu frühzeitigen Verzerrungen, oder
unnötiger Erhitzung der Elektronik bzw. zum
Ansprechen der thermischen ÜberlastSchutzschaltung führen.
■ Verwenden Sie für die NF-Eingangssignale
ausschliesslich hochwertige Cinchkabel mit
doppelter oder dreifacher Schirmung.
■ Benutzen Sie zur Durchführung der Cinchund Stromkabel entsprechende Kabeltüllen
aus Gummi. Dadurch verhindern Sie ein
Durchscheuern der Kabel an scharfkantigen
Teilen und eventuell dadurch verursachte
Folge-Schäden (z.B. Kurzschluss auf ChassisMasse).
■ Achten Sie auf eine ausreichende Kühlung.
Die Luftzirkulation um und speziell oberhalb
des Lüfters muss auch nach Abschluss der
Montage gewährleistet sein!
Montageort
Als Montageort für lhren \/erstärker eignet sich
meist ein gut zugänglicher Platz im Kofferraum.
Die Montage erfolgt entweder direkt an das
Kfz-Chassis, oder mittels einem stabilen Brett
aus Holz oder MDF. Der Montageort sollte frei
von Staub, Schmutz (Lüfter!) und Feuchtigkeit
und vorzugsweise nicht in der Nähe der elektrischen Hauptversorgung sein.
Bei der Montage des Verstärkers sollte auf
eine ausreichende Kühlmöglichkeit durch
Wärmekonvektion geachtet werden (mind.
5 cm Freiraum rund um das Gehäuse). Die
Kühlluft-Zirkulation für den eingebauten Lüfter
12
Seite 12
darf auf keinen Fall behindert werden!
Montageorte mit „unbekanntem Hinter- bzw.
Untergrund“ (z.B. Kraftstofftank, Kraftstoff- und
Bremsleitungen, Bordelektronik etc.) sollten
gemieden werden.
Das Bedienfeld zur Frequenzweicheneinstellung und Eingangspegeljustage auf den
Verstärkeroberseiten – im Falle der XP800.1
auch die NF-Eingang Stirnseite - muss auch
nach der festen Montage noch gut zugänglich
sein!
BEFESTIGUNG
Entfernen Sie die zwei seitlichen Backen-Profile durch Herausdrehen der M3-Inbus-Schrauben mit dem mitgelieferten Inbus-Schlüssel.
Verwenden Sie den Verstärker mit den nun
freiliegenden Montagelaschen als Maske und
markieren Sie die Positionen der Löcher für die
Montageschrauben mit einem Bleistift oder
Filzstift.
Bohren Sie die Montagelöcher für die Blechschrauben mit einem 2,5 mm oder 3 mm Bohrer
vor.
Montieren Sie den Verstärker. Legen Sie nun
den Verstärker auf die vorgebohrten Löcher
und benützen Sie die mitgelieferten Gummitüllen zur massenseitigen Entkopplung des
Verstärkergehäuses von der Kfz Chassismasse.
Ziehen Sie die vier Blechschrauben über's
Kreuz gleichmässig an.
VERKABELUNG
ACHTUNG! Entfernen Sie in jedem Fall das
„+12 V“-Kabel vom Pluspol der Batterie
(oder die Hauptsicherung!) vor Beginn der
Installationsarbeiten!
Für einen sicheren und richtigen Anschluss
aller benötigten Kabel beachten Sie bitte die
auf den nachfolgenden Seiten abgebildeten
Anschlussdiagramme!
Ne2 XP6004/7005/8001 RZ (D+UK)
16.08.2000 6:32 PM
Abb. Montage
Seite 13
Blechschrauben
Luftzirkulation
Lüfter
Gummitüllen
Inbusschrauben
Bei der Verkabelung Ihres neuen Verstärkers,
speziell dem Verlegen der NF-Signal führenden
Cinchkabel sollten Sie sorgfältig vorgehen und
bekannte elektrische Störquellen wie z.B.
Benzinpumpe, elektronische Black Box Geräte
umgehen. So sichern Sie eine störungsfreie
Signalübertragung.
Schliessen Sie das Remote-Kabel an das mit
„Antenna-Rem.“ oder „Amplifier-Rem.”
bezeichnete Kabel Ihres Steuergerätes an.
Anschliessend stecken Sie die Cinchkabel in
die betreffenden Cinch-Eingangsbuchsen des
Verstärker ein.
Verlegen Sie die Cinchkabel und die „Remote“Schaltleitung vom Steuergerät zur Endstufe. Im
Falle der XP800.1 und XP700.5 muss zusätzlich
noch das Sub-Level Remote Kabel der separaten Fernbedienung verlegt werden.
Diese Kabel sollten unbedingt räumlich getrennt von der Stromzuführung des Verstärkers
eingezogen werden. Verwenden Sie mindestens doppelt oder besser dreifach geschirmte
Cinch-Kabel!
Hinweise zu XP700.5 und XP800.1:
Montieren Sie die „SUB LEVEL CONTROL”
Fernbedienung in Griffnähe und schliessen Sie
den Stecker des Fernbedienungskabels sowohl
am Verstärker an der vorgesehenen Buchse
(REMOTE INPUT) und auch an der Fernbedienungs-Einheit an.
Bei Steuergeräten mit nur 5 Cinch-Ausgängen
(d.h. nur ein Mono-Subwoofer Line-Out) kann
der Mono Sub-Ausgang vom Head-Unit ein-
13
Ne2 XP6004/7005/8001 RZ (D+UK)
16.08.2000 6:32 PM
fach mit einem Y-Adapter (1W auf 2M) vor dem
Sub-Eingang an der XP700.5 verdoppelt werden.
Schliessen Sie die Chassis-Masse GND an.
Das an die GND/GROUND-Klemme anzuschliessende Massekabel sollte denselben
Querschnitt wie das Pluskabel besitzen, also
auch 20 mm2. Ausserdem sollte es sollte so
kurz wie möglich bemessen sein. Achten Sie
beim Anschluss dieses Kabels auf eine absolut
blanke und saubere Metalloberfläche am
Chassis des Kfz's. Schlechte Massepunkte
können massive Störungen verursachen und
reduzieren die maximale Ausgangsleistung des
Verstärkers.
Verlegen Sie nun das Pluskabel von der
Batterie zum Verstärker +12 V.
Eine Hauptsicherung direkt nach dem Abgriff
an der Batterie ist unbedingt erforderlich
(Vorschrift Kfz-Versicherungen). Sie schützt vor
Kurzschlüssen in der Strom-Zuleitung und evtl.
daraus resultierendem Kabelbrand. Die Hauptsicherung sollte nach dem Gesamtstrombedarf
aller in der Installation zum Einsatz kommenden Verbraucher, bzw. dem verwendeten
Powerkabel-Querschnitt dimensioniert werden.
Schliessen Sie die Lautsprecher-Kabel an die
entsprechenden mit SPEAKER OUTPUT
bezeichneten Terminals des Verstärkers an.
Verwenden Sie dabei Lautsprecherkabel mit
einem Querschnitt von mindestens 2,5 mm2 (für
den Subwoofer auch 4 mm2).
ACHTUNG! Beachten Sie unbedingt die richtige Polung der Lautsprecherkabel, "" auf ""
und "" auf ""!
Seite 14
chend an die Ausgangsterminals an. Die
gebrückten Kanäle sind jeweils 2 Ohm stabil,
die XP600.4 erlaubt somit den Betrieb eines
Sat/Sub Systemes – mit den Kanälen 3&4-CH
gebrückt und im Lowpass Betrieb für den
Subwoofer! Die XP700.5 erlaubt den gebrückten Betrieb der „Front“ und „Rear“-Kanäle
(1&2-CH / 3&4-CH) für den kraftvollen Antrieb
von grossen und belastbaren Satellitensystemen, z.B. passive 3-Weg Kompo’s mit
20 cm Woofer.
Abschliessend wird der Stromkreis zum
Verstärker durch das Einsetzen der Hauptsicherung geschlossen. Befestigen Sie nun
beide lichtgrauen Seiten-Profile wieder am
Verstärker mittels der vier anfangs entfernten
M3-lnbus-Schrauben.
WAHL DER BETRIEBSART
Betrifft die Modelle XP600.4 und XP700.5:
Anhand der vorhandenen Anzahl Cinch LineOuts an Ihrem Head-Unit müssen Sie nun die
Betriebsart (den INPUT MODE) an Ihrer
XP600.4 oder XP700.5 vorwählen.
XP600.4
Wenn Sie die XP-600.4 mit nur einem StereoCinchkabel betreiben, dann stellen Sie den
„INPUT MODE“ Wahlschalter an der Stirnseite
der Endstufe (rechts neben den Cincheingängen) auf „2-CH“! Wenn Sie die XP600.4 mit
zwei (Front / Rear, oder Front / Sub) StereoCinchpaaren betreiben, stellen Sie den
Wahlschalter entsprechend auf „4-CH“!
XP700.5
ZULÄSSIGE ABSCHLUSSIMPEDANZ /
BRÜCKENSCHALTUNG
Alle drei X-Pulse Verstärker-Modelle sind
1 Ohm stabil, auf jedem Kanal!
Die beiden Modelle XP600.4 und XP700.5
ermöglichen weiterhin die Brückenschaltung
(bridged mode) der Satellitenkanäle, ohne
interne Umschaltung. Zu diesem Zwecke
schliessen sie die Lautsprecherkabel entspre-
14
Wenn Sie die XP-700.5 mit nur einem StereoCinchkabel betreiben, dann stellen Sie den
„INPUT MODE“ Wahlschalter an der Oberseite
der Endstufe (unterhalb der FrequenzweichenRegler)) auf „2-CH“! Eine Fadingoption zwischen vorne-hinten besteht mit nur einem
Stereo-Cinchkabel natürlich nicht!
Wenn Sie die XP700.5 mit zwei StereoCinchpaaren betreiben, stellen Sie den
Wahlschalter entsprechend auf „4-CH“ (Fading
Ne2 XP6004/7005/8001 RZ (D+UK)
16.08.2000 6:32 PM
vorne-hinten möglich!), respektive auf „6-CH“
bei drei Stereo-Cinchkabel Line-Out Paaren!
ACHTUNG! Auf die INPUT MODE / BetriebsartWahl wird in den nachfolgenden Kapiteln und
in den Systemkonfigurationen nicht mehr weiter eingegangen. Stellen Sie deshalb sicher,
dass Sie diese Einstellung jetzt definitiv festlegen und vornehmen, sie ist dann für die
nachfolgenden Einstellungen an der
Frequenzweiche nicht mehr von belang.
!
Beim Einschalten des Head-Units sollten nun
die POWER PROTECT LED grün aufleuchten.
Leuchtet die LED rot auf, so muss die
Verkabelung Schritt für Schritt nochmals überprüft werden, da ein allgemeiner AnschlussFehler vorliegt, welcher den Verstärker in den
Protection-Modus schalten lässt.
XP600.4 Mögl. SYSTEMKONFIGURATIONEN
XP700.5 Mögl. SYSTEMKONFIGURATIONEN
XP800.1 Mögl. SYSTEMKONFIGURATIONEN
siehe Seite 32-38
Integrierte Frequenzweichen
GENERELL
HlGHPASS-Filter bewirken, dass der verstärkte
Übertragungsbereich der angeschlossenen
Lautsprecher (Satelliten) erst an dem eingestellten Frequenzwert („HIGH PASS“) beginnt.
Umgekehrt endet der Übertragungsbereich
beim LOWPASS-Filter für den angeschlossenen Subwoofer (oder dem Kickbass-System)
bei der eingestellten Frequenz („LOW PASS“).
Die integrierten Hochpass/Tiefpass-Funktionen
der separat einstellbaren Frequenzweichen/
Filter teilen also den eingesetzten
Lautsprechersystemen wie Subwoofer, Koaxoder Komponentensystemen bzw. deren
Verstärkerteilen nur den Frequenzbereich zu,
für welchen die Lautsprecher geeignet sind.
Das SUBSONIC Hochpass-Filter funktioniert
grundsätzlich gleich wie das HIGH PASS Filter
Seite 15
der Satelliten, d.h. der Übertragungsbereich
des Subwoofers beginnt beim gewählten Wert
(„SUBSONIC“) und endet bei der eingestellten
LOWPASS-Frequenz („LOW PASS“). Die 'subsonischen' Tiefbass-Signalanteile (meist
unhörbarer Infraschall) werden durch das
SUBSONIC-Filter entsprechend ausgeblendet.
Sämtliche Filter-Elektroniken der XP600.4 /
XP700.5 und XP800.1 arbeiten mit einer
Flankensteilheit von 12 dB/Okt.
Vor Beginn der Einstellungsarbeiten an Ihrem
X-PULSE Verstärker müssen alle Klangregler
am Steuergerät (Bass-, Höhen-Regler sowie
die Loudness-Funktion) in ihre Neutral- bzw.
Mittelstellung gebracht werden. Überprüfen
Sie auch, ob sich Fader und Balance in
Neutralstellung befinden.
Falls Ihr Steuergerät über einen separat regelbaren (Vollbereichs-) Sub-Ausgang verfügt,
muss auch dieser in seine Mittel- bzw.
Normalposition gebracht werden, bevor der
SUB LEVEL (Eingangsempfindlichkeit) an der
XP800.1 oder XP700.5 eingestellt wird.
WICHTIG! Die folgenden Einstellungen für
Trennfrequenzen, Empfindlichkeiten und sollten
idealerweise in derselben Reihenfolge vorgenommen werden, wie sie nachfolgend
beschrieben sind.
Trennfrequenz-Einstellungen
SUBSONIC Hochpass-Trennfrequenz
Falls die Pegelreserven des angeschlossenen
Subwoofers nur selten ausgelotet werden sollen, kann der SUBSONIC Hochpass Regler auf
die tiefstmögliche Frequenz von 10 Hz gestellt
werden. Dadurch werden Signalanteile unterhalb von 10 Hz (Infraschall) ausgeblendet.
Infraschall ist unhörbar, veranlasst aber die
Membrane des oder der Basslautsprecher zu
unnötiger Hubarbeit.
Bei entsprechend höheren Pegelansprüchen
oder bei Basslautsprechern mit einer
15
Ne2 XP6004/7005/8001 RZ (D+UK)
16.08.2000 6:32 PM
Nominalgrösse von weniger als 10“ (25 cm)
kann durch das Hochregeln des SUBSONIC
Reglers auf 25 bis 35 Hz die Pegelfestigkeit
enorm erhöht werden. Ab 20 Hz Einsatzfrequenz und höher, erfolgt die mechanische
und elektrische Entlastung allerdings auf
Kosten des nun durchaus hörbar geringeren
Tiefbassanteils.
LOW PASS Subwoofer-Trennfrequenz
Die zu wählende Trennfrequenz des LOW PASS
Reglers muss immer über der vorgewählten
SUBSONIC Frequenz liegen!!! Die korrekte
Funktion des Verstärkers ist sonst nicht
gewährleistet, bzw. die Ausgangsleistung wird
sonst deutlich beschnitten. Stellen Sie den
LOW PASS Regler auf ca. 80 Hz ein, die Feineinstellung dieser Trennfrequenz erfolgt später.
HIGH PASS (1&2-CH / 3&4-CH)
Front/Rear-Trennfrequenz
Durch die Einstellung der Hochpass-Trennfrequenzen (HIGH PASS) für die vorderen und
hinteren Satelliten (FRONT & REAR) soll auch
eine elektrische und mechanische Entlastung
der verwendeten Koax- oder Komponentensysteme erfolgen. Je nach der vorhandenen
Membranfläche und Nennbelastbarkeit der
verwendeten (Satelliten-) Systeme, empfiehlt
sich eine Trennfrequenz im Bereich zwischen
50 bis 120 Hz. Diese Einstellungen werden über
die entsprechenden HIGHPASS Regler für
FRONT und REAR getrennt vorgenommen.
Die Abstimmung sollte gehörmässig erfolgen
und orientiert sich an der Midbass-Wiedergabe und der gewünschten Pegelfestigkeit der
Satelliten-Lautsprecher.
Dabei führt eine zu tief gewählte Trennfrequenz zu einer guten Midbass-Wiedergabe,
schränkt aber die Pegelfestigkeit stark ein.
Eine zu hohe Trennfrequenz-Einstellung hat
einen 'dünnen' Klang mit guter Pegelfestigkeit
zur Folge. Suchen Sie also für die beiden
Kanalpaare 1&2-CH, sowie 3&4-CH Hochpass
Einstellungen einen dem Einsatzzweck, der
Belastbarkeit der verwendeten Lautsprecher
und Ihrem Geschmack angepassten
Kompromiss.
16
Seite 16
LEVEL EingangsempfindlichkeitsAnpassung
Die korrekte Eingangsempfindlichkeits-Anpassung zwischen Steuergerät und Verstärker
(LEVEL) ist wichtig für die Ausnutzung des optimalen Dynamikspielraumes Ihrer Steuergerät/ Verstärker-/ Lautsprecherkombination. Dieser
Empfindlichkeitsabgleich beeinflusst das
Grundrauschen ebenso, wie die verzerrungsfrei erzielbare Maximallautstärke. Auch für
diese Einstellungen müssen am Steuergerät
zuerst alle Klangregler (Sub, Bass, Treble)
sowie Fader und Balance in ihre Neutral- bzw.
Mittelstellung gebracht werden. Auch die
Loudness Funktion sollte deaktiviert sein.
Nachfolgend sind für alle drei Modelle entsprechende Einstelltips aufgeführt:
EINSTELLTIPS XP600.4
LEVEL FRONT (1&2-CH), REAR (3&4-CH)
Drehen Sie beide „LEVEL” Regler an der
XP600.4 im Gegenuhrzeigersinn in die Minimumposition. Schalten sie das Head-Unit ein
und stellen Sie den Lautstärkeregler Ihres
Steuergerätes auf ca. 3/4 der Maximallautstärke. Verwenden Sie für die nun kommende
Einstellung ein gut aufgenommenes dynamikreiches Musikstück. Drehen Sie den „LEVEL”
Regler des Kanal-Paares 1&2-CH (Front) Ihres
Verstärkers langsam im Uhrzeigersinn auf, bis
Sie gerade die Verzerrungsgrenze erreichen.
Drehen Sie die Lautstärke am Head-Unit
zurück und dosisieren Sie mit dem „LEVEL“
Regler des Kanalpaares 3&4-CH den
Rear(Satelliten)bereich dazu, bis Sie einen
guten homogenen Klangeindruck erzielt haben.
Bei Einsatz der XP600.4 als Sat/Sub Verstärker
drehen Sie den „LEVEL” Regler vom Kanalpaar
3&4-CH (Subwoofer) auf 3/4 bis voll auf, und
„dosieren” die Lautstärke des Frontkanalpaares 1&2-CH mit dem ”LEVEL” Regler dazu.
Nach dem Feinabgleich der Trennfrequenzen
muss eventuell die Eingangsempfindlichkeit
nochmals etwas nachgeregelt werden.
Ne2 XP6004/7005/8001 RZ (D+UK)
16.08.2000 6:32 PM
EINSTELLTIPS XP700.5
LEVEL FRONT (1&2-CH) REAR (3&4-CH)
und SUB (5-CH)
Drehen Sie alle 3 LEVEL-Regler an der XP700.5
im Gegenuhrzeigersinn auf ihre Mininumpositionen (9V).
Schalten Sie das Steuergerät ein und drehen
Sie den Lautstärkeregler Ihres Steuergerätes
auf ca. 3/4 der Maximallautstärke. Verwenden
Sie für die folgenden Einstellungen ein gut aufgenommenes dynamikreiches Musikstück.
Nun drehen Sie den Regler am Sub-Level
Control Fernbedienung voll auf. Drehen Sie den
SUB LEVEL Regler an der Endstufe langsam im
Uhrzeigersinn soweit auf, bis gerade erste
deutliche Verzerrungen im Bassbereich zu
hören sind. Drehen Sie den Regler gerade
soweit zurück bis die Verzerrungen wieder verschwunden sind.
Drehen Sie jetzt die Lautstärke am Steuergerät
auf ein mittleres Mass zurück.
Drehen Sie nun den LEVEL Regler 1&2-CH der
XP700.5 langsam im Uhrzeigersinn auf, bis Sie
einen tonal ausgewogenen Klangcharakter
erzielen. Eine leichte Bassbetonung ist vorzuziehen, sie wird später von den auftretenden
Fahrgeräuschen wieder 'überdeckt'.
Drehen Sie nun den LEVEL Regler 3&4-CH langsam auf und "dosieren" Sie die Lautstärke des
Heck-Lautsprechersystems (oder der Kickbass-Systeme!) entsprechend dazu, sodass
sich ein guter „Rear-Fill“, oder ein druckvoller
Kickbassbereich ergibt und das Gesamtklangbild ausgewogen ist.
LOW PASS TRENNFREQUENZ
Die zu wählende LOW PASS Trennfrequenz des
Subwoofer-Tiefpasses sollte sinnvollerweise im
Bereich zwischen 50 und 90 Hz liegen. Regeln
Sie den Subwoofer-Pegel (LEVEL) an der
XP700.5 soweit nach, bis ein bassstarker, ausgewogener Klang zu hören ist und nehmen Sie nun
die Feineinstellung der Trennfrequenz FLP vor.
Seite 17
EINSTELLTIPS XP800.1
LEVEL EINSTELLUNG
Drehen Sie den „LEVEL” Regler an Ihrem Verstärker im Gegenuhrzeigersinn in die Minimumposition (9V). Drehen Sie den Regler der separaten Sub-Level Fernbedienung voll auf. Schalten Sie Ihr Head-Unit ein und stellen Sie den
Lautstärkeregler auf ca. 3/4 der Maximallautstärke. Verwenden Sie für die nun kommenden
Einstellungen ein gut aufgenommenes dynamikreiches Musikstück. Drehen Sie den „LEVEL”
Regler der XP800.1 langsam im Uhrzeigersinn
auf, bis Sie gerade die Verzerrungsgrenze erreichen. Nun können Sie die Satellitenkanäle
von den weiteren vorhandenen Endstufen anpassen, indem Sie den Level Regler der Satellitenendstufen soweit aufdrehen, bis sich ein
homogenes Klangbild mit gutem Bassanteil einstellt.
LOW PASS Frequenz Feineinstellung
(Subwoofer) Justieren Sie den LOW PASS
Regler so, dass der Bass satt und trocken mit
genügend Tief-bassanteil wiedergegeben wird.
Generell gilt: Eine zu tief gewählte LOW PASS
Trennfrequenz lässt den Bassbereich zwar
tiefbaßstark, aber kraftlos und unkonturiert wirken. Eine zu hohe LOW PASS Trennfrequenz
bewirkt ein Dröhnen des Bassbereichs.
PHASE SHIFT Einstellung
(XP700.5 /XP800.1)
Der Phase-Shift Regler sollte sich bei geschlossenen (auch Free-Air) und BassreflexSystemen anfänglich im Bereich um 0° bis 90°
befinden. Von diesem Ausgangspunkt erfolgt
die Feineinstellung per Hörtest. Bei BandpassSystemen – diese drehen die akustische Phase
um 180° – empfiehlt sich als Ausgangspunkt
eine Grundeinstellung von 90° bis 180°. Die
Feineinstellung der Phase des Subwoofers
erfolgt immer rein nach „Gehör“, wobei der
Effekt einer perfekt passenden Phase zwischen
Frontsystem und Subwoofer zu einem homogenen oberen Bassbereich führt, der deutlich von
vorne ortbar ist (und nicht mehr hinten – wo
der Subwoofer spielt).
17
Ne2 XP6004/7005/8001 RZ (D+UK)
16.08.2000 6:32 PM
INTRODUCTION &
FEATURE DESCRIPTION
Congratulations on choosing and purchasing
this X-PULSE Amplifier. This exceptional car
audio amplifier is the result of a combination of
advanced switching technologies applied to
the field of car audio amplification.
All three new X-PULSE amplifier models combine the most comprehensive performance
data and controlling features accomplished in
the car-audio electronics field!
X-PULSE KEY FEATURES
✔
✔
✔
✔
✔
✔
✔
✔
✔
High Power Output
High Damping Factor
High Efficiency
Fully regulated PWM-Power Supply
Temperature-controlled Micro-Fan for
1-Ohm stability of each channel
Low Heat Generation
Compact Dimensions
Relatively Low Power Consumption
Versatile Controlling Options
State-of-the-Art Switching Technology
Class-D Amplification is ideal for the bass frequency range.
The major advantage of the digital amplifier
switching technology is based on the virtually
loss-free amplification combined with an
exceptionally high efficiency. The outstanding
efficiency guarantees that over 90% of the
electrical power drawn from the battery - or
generated by the alternator - is actually transformed directly into amplifier output power and
is not lost in the form of unnecessary waste
heat generation, as encountered with all traditional analogue amplifier switching technologies.
18
Seite 18
In fact the minimised power 'wasting' with
digital amplifier switching technology is surely
a desirable side effect, as conventional amplifiers also require a certain heatsink area that
is usually increasing proportionally with the
output power capacity of the amplifier.
Therefore - as there is hardly any power loss in
the form of waste heat with digital switching
technology - it is possible to keep the dimensions of the amplifier housing considerably
more compact.
Analog Amplification is still the best way to
drive component or fullrange speakers (satellites), because of its greater bandwidth, finer
resolution, higher transparency and its extended dynamic range.
The same special care, that has gone into the
designing and engineering of these unprecedented switching technologies, has also gone
into the selection of the electronic components
incorporated in the X-PULSE amplifier line.
Top-quality components, advanced SMD
(Surface Mounted Device) equipped PCB’s and
a meticulous quality control, guarantee outstanding audio performance, maximum stability
and a long trouble-free product life.
Ne2 XP6004/7005/8001 RZ (D+UK)
16.08.2000 6:32 PM
All three X-PULSE models offer numerous features and controlling options, usually not found
on comparable amplifiers of other brands.
X-PULSE amplifiers are therefore relatively
complex audio components. To enjoy the full
possibilities of this exceptional amplifier, and to
maximize the performance of your complete
car audio system, we recommend that you
acquaint yourself thoroughly with its full capabilities and features. So please read this
manual carefully, before undertaking the
installation of your new amplifier and please
retain this manual and your purchasing receipt
for future reference.
In case you are installing your X-PULSE amplifier yourself, it is recommended to have your
installation duly checked by an authorized, professional X-PULSE dealer/installer in order to
qualify for full warranty protection and to
reach the maximum power and audio performance possible with your individual automotive audio system.
Seite 19
In case any of these parts are missing or show
signs of transport damage, please contact your
X-PULSE dealer immediately.
UNPACKING / CHECKING
THE SET CONTENTS
XP600.4 / XP700.5 / XP800.1
Please check the set contents of your new
X-PULSE power amplifier carefully. The original
packaging should contain:
1 XP600.4 / XP700.5 / XP800.1 Power Amplifier
1 Sub-Level-Remote Control Unit &
Interconnect Cable (XP700.5/XP800.1 only)
Installation Accessory Set with
4 Self-Tapping Screws (large) for amplifier
mounting
4 Rubber Grommets for insulated amplifier
mounting
2 Self-Tapping Screws (small) for Sub-Level
Remote Control mounting
1 Allen Wrench Key for inside hex-head
screws
1 Installation & Operation Manual with
Guarantee Card
19
Ne2 XP6004/7005/8001 RZ (D+UK)
16.08.2000 6:32 PM
Seite 20
CONNECTIONS AND CONTROLS XP600.4
1+2 3+4
8
9
32
1
40
0.4
20
45
0.2 V
10Hz
50Hz
5
9V
10
HIGH PASS
135
16
180
135
40
175
40Hz
200Hz
35Hz
200Hz
3&4 3-CH&4-CH RCA Input Low-level
signal input sockets for connection with
the line-outputs of the head-unit (preferably the Rear- or Sub Line-Outs), or
external electronic equalizers, crossovers, DSP black boxes, etc.
HI FULL LOW
SUBSONIC
LEVEL
1,8
19
36
32
1
9V
40
0.4
20
45
0.2 V
10Hz
50Hz
HIGH PASS
135
100
180
LOW PASS
1/2 CH X-OVER
100
50
135
55
195
40
175
40Hz
200Hz
35Hz
200Hz
HI FULL LOW
20
21
13
18
100
50
195
3
12
1&2 1-CH&2-CH RCA Input Low-level
signal input sockets for connection with
the line-outputs of the head-unit (preferably the Front Line-Outs), or external
electronic equalizers, crossovers, DSP
black boxes, etc.
LOW PASS
3/4 CH X-OVER
55
5
11
15
17
100
7
36
1,8
14
6
SUBSONIC
LEVEL
3
5
22
23
20
5
INPUT MODE 2-position input
mode selector switch, allowing this
amplifier being driven by either one or
two stereo line-out signals from the
head-unit.
Ne2 XP6004/7005/8001 RZ (D+UK)
16.08.2000 6:32 PM
6
POWER-PROTECT LED’s Two LED’s, one lit green
in normal operating mode, or when the amplifier is
switched on by remote signal. The other LED is lit red
when a faulty connection or internal malfunction is
detected by the protection circuitry.
7
L-CH & R-CH LINE OUT One pair of output
sockets – loop through option - to drive an additional
amplifier without the need of a Y-adapter. The L-CH
and R-CH line outputs are the sum of the line input
signals fed to 1-CH & 3-CH and 2-CH & 4-CH.
8
SPEAKER OUTPUT TERMINAL 3-CH&4-CH
Speaker terminal to connect the positive (“+”) and
negative (“-“) speaker wires of channels 3&4 to the
amplifier. Note: The positive (“+”) terminal of channel
3-CH and the negative (“-“) terminal of channel 4-CH
provide the bridged output of the channel pair 3-CH &
4-CH! The load impedance may vary between 1 to 4
ohms per channel, or – consequently – 2 to 4 ohms in
bridged operation mode.
9 SPEAKER OUTPUT TERMINAL 1-CH&2-CH
Speaker terminal to connect the positive (“+”) and
negative (“-“) speaker wires of channels 1&2 to the
amplifier. Note: The positive (“+”) terminal of channel
1-CH and the negative (“-“) terminal of channel 2-CH
provide the bridged output of the channel pair 1-CH &
2-CH! The load impedance may vary between 1 to 4
ohms per channel, or – consequently - 2 to 4 ohms in
bridged operation mode.
10 GND Power terminal for the connection of the
amplifier to the chassis ground or the negative pole of
the car battery.
11 REM Remote terminal (switching contact) for the
automatic (remote) turn-on / turn-off of the power
amplifier from the head-unit’s remote lead (or antenna
control lead).
12
BATT +12V + 12 V power terminal for the connection
of the amplifier to the positive pole of the car battery.
13
FUSE Internal fuses, 2 x 40 Ampere ATC to protect the power supply circuitry of the XP600.4 amplifier.
14
LEVEL Input gain adjustment knob to
adjust/match the input gain of channels 3-CH&4-CH to
the incoming line-out signal from the head unit. The
input level stage accepts input voltages between 0,2V
to 9V.
15
SUBSONIC Subsonic frequency control knob to
adjust the integrated 12 dB/oct. subsonic highpass fil-
Seite 21
ter of channels 3-CH&4-CH. Allows the setting of the
desired subsonic highpass frequency between 10 Hz
and 50 Hz. The subsonic highpass filtering option is
only active, when the 3&4-CH X-OVER switch is set to
LOW PASS (LOW).
16
HIGH PASS Highpass frequency control knob to
adjust the integrated 12 dB/oct. highpass filter of
channels 3&4-CH, when the slide-switch of 3&4-CH
X-OVER is set to HI (highpass) mode. Allows the setting of the required highpass frequency between 40
Hz and 200 Hz.
17 3&4-CH X-OVER Input mode selector of the integrated active crossover, controlling the channels 3&4CH. The slide switch allows to set the crossover of
channel 3&4-CH to highpass (HI), fullrange (FULL), or
lowpass (LOW) operating mode.
18 LOW PASS Lowpass frequency control knob to
adjust the integrated 12 dB/oct. lowpass filter of channels 3&4-CH, when the slide-switch of 3&4-CH X-OVER is
set to LOW (lowpass) mode. Allows the setting of the
required lowpass frequency between 35 Hz and 200 Hz.
19 LEVEL Input gain adjustment knob to
adjust/match the input gain of channels 1&2-CH to the
incoming signal from the head unit. The input level
stage accepts input voltages between 0,2V to 9V.
20
SUBSONIC Subsonic frequency control knob to
adjust the integrated 12 dB/oct. highpass subsonic
filter of channels 1&2-CH. Allows the setting of the desired highpass frequency between 10 Hz and 50 Hz. The
subsonic highpass filtering option is only active, when
the 1&2-CH X-OVER switch is set to LOW PASS (LOW)
21 HIGH PASS Highpass frequency control knob to
adjust the integrated 12 dB/oct. highpass filter of
channels 1&2-CH, when the slide-switch of the 1&2CH X-OVER is set to HI (highpass) mode. Allows the
setting of the required highpass frequency between
40 Hz and 200 Hz.
22 1&2-CH X-OVER Input mode selector of the integrated active crossover, controlling the channels 1&2CH. The slide switch allows to set the crossover of
channels 1&2-CH to highpass (HI), fullrange (FULL), or
lowpass (LOW) operating mode.
23 LOW PASS Lowpass frequency control knob to
adjust the integrated 12 dB/oct. lowpass filter of
channels 1&2-CH, when the slide-switch of the 1&2CH X-OVER is set to LP (lowpass) mode. Allows the
setting of the required lowpass frequency between
40 Hz and 200 Hz.
21
Ne2 XP6004/7005/8001 RZ (D+UK)
16.08.2000 6:32 PM
Seite 22
CONNECTIONS & CONTROLS XP700.5
OVERLOAD
1
2
3
4
5
5 CH
6
7
8
9
10
11
12
1
13
14
120
72
150
30
0
38
119
90
60
PHASE SHIFT
48
200Hz 10Hz
LOW PASS
1,5
2,4
1
0.5
6
9V
REAR
135
100
165
SUB
19
0.2 V
3/4 CH LEVEL
18
50Hz
SUBSONIC
2
4
17
45
20
177
35Hz
180
32
160
42
HP
0,8
0.4
4
9V
5 CH LEVEL
FULL BP
85
50
135
195
45
175
40Hz
200Hz
35Hz
200Hz
3/4 CH X-OVER
HI PASS
170
265
HP
FRONT
40Hz
2
3
1
0.5
5
9V
400Hz
HI PASS
LOW PASS
FULL
345
45
1/2 CH X-OVER
0.2 V
1/2 CH LEVEL
INPUT MODE
22
20
2 1-CH&2-CH RCA INPUT Low-level signal
input sockets for connection with the line-outputs of the head-unit (preferably the front lineouts), or external electronic equalizers, crossovers, DSP black boxes, etc.
3 3-CH&4-CH RCA INPUT Low-level signal
input sockets for connection with the line-outputs of the head-unit (preferably the rear lineouts), or external electronic equalizers, crossovers, DSP black boxes, etc.
4 REMOTE CONTROL INPUT AT&T remote
control input socket for connection between
the remote Sub-Level-Control unit and XP700.5
amplifier.
5
2 CH 4 CH 5 CH
21 22 24
16
0.2 V
55
110
POWER-PROTECT LED’s Two LED’s, one is
lit green in normal operating mode, or when
the amplifier is switched on by remote signal,
turning red when a faulty connection or internal malfunction is detected. The overload LED
is lit yellow when the subchannel is overdriven.
15
23
5-CH&6-CH RCA SUB INPUT Low-level
signal input sockets for connection with the
line-outputs of the head-unit (preferably the
subwoofer line-outs), external electronic equalizers, cross-overs, DSP black boxes, etc.
The signal fed to the 5-CH&6CH SUB input
Ne2 XP6004/7005/8001 RZ (D+UK)
16.08.2000 6:32 PM
should be a fullrange (unfiltered) signal, in case the
integrated lowpass crossover shall be used!
6 SUBWOOFER OUTPUT TERMINAL
Speaker terminal to connect the positive (“+”) and
negative (“-“) speaker wires of the subwoofer to the
amplifier. The load impedance of the connected subwoofer system may vary between 1 to 4 ohms!
7 SPEAKER OUTPUT TERMINAL 3-CH&4-CH
Speaker terminal to connect the positive (“+”) and
negative (“-“) speaker wires of channels 3&4-CH to
the amplifier. Note: The positive (“+”) terminal of
channel 3-CH and the negative (“-“) terminal of channel 4-CH provide the bridged output of the channel
pair 3-CH&4-CH! The load impedance may vary between 1 to 4 ohms per channel, or – consequently - 2
to 4 ohms in bridged operation mode.
8 SPEAKER OUTPUT TERMINAL 1-CH&2-CH
Speaker terminal to connect the positive (“+”) and
negative (“-“) speaker wires of channels 1&2-CH to
the amplifier. Note: The positive (“+”) terminal of
channel 1-CH and the negative (“-“) terminal of channel 2-CH provide the bridged output of the channel
pair 1-CH&2-CH! The load impedance may vary between 1 to 4 ohms per channel, or – consequently - 2
to 4 ohms in bridged operation mode.
9
GND Power terminal for the connection of the
amplifier to the chassis ground or the negative pole of
the car battery.
10 REM Remote terminal (switching contact) for the
automatic (remote) turn-on / turn-off of the power
amplifier from the head-unit’s remote lead (or antenna
control lead).
11 BATT +12V + 12 V power terminal for the
connection of the amplifier to the positive pole of the
car battery.
12
FUSE Internal fuses, 2 x 30 Ampere ATC to protect
the power supply circuitry of the XP700.5 amplifier.
13
PHASE SHIFT Phase shift knob to adjust the
absolute phase of the amplified subwoofer output signal. Used to match the phase of the front
satellite speaker systems to the subwoofer.
14 LOW PASS Lowpass frequency control knob to
adjust the integrated 12 dB/oct. lowpass filter of the
subwoofer channel. Allows the setting of the required
lowpass frequency between 35 Hz and 200 Hz.
15
SUBSONIC Subsonic frequency control knob to
adjust the integrated 12 dB/oct. subsonic highpass fil-
Seite 23
ter of the subwoofer channel. Allows the setting of
the desired highpass frequency between 10 Hz and 50
Hz. The subsonic highpass filtering of the sub channel
can not be defeated!
16 5-CH (SUB) LEVEL Input gain adjustment knob to
adjust/match the input gain of the subwoofer channel
to the incoming signal from the head unit. The input
level stage accepts input voltages between 0,2V to 9V.
17 3&4-CH LEVEL Input gain adjustment knob to
adjust/match the input gain of channel 3&4-CH to the
incoming signal from the head unit. The input level
stage accepts input voltages between 0,2V to 9V.
18 HIGH PASS Highpass frequency control knob to
adjust the integrated 12 dB/oct. highpass filter of
channel 3&4-CH, when the slide-switch of the 3&4-CH
X-OVER is set to HP (highpass) mode. Allows the setting of the required highpass frequency between 40
Hz and 200 Hz.
19 3&4-CH X-OVER Input mode selector of the integrated active crossover, controlling the channels 3&4CH. The slide switch allows to set the crossover of
channel 3&4-CH to highpass (HP), fullrange (FULL), or
bandpass (BP) operating mode.
20 LOW PASS Lowpass frequency control knob to
adjust the integrated 12 dB/oct. lowpass filter of
channel 3&4-CH, when the slide-switch of 3&4-CH
X-OVER is set to BP (bandpass) mode. Allows the setting of the required lowpass frequency between 35 Hz
and 200 Hz.
21 HIGH PASS Highpass frequency control knob to
adjust the integrated 12 dB/oct. highpass filter of
channel 1&2-CH, when the slide-switch of 1&2-CH
X-OVER is set to HP (highpass) mode . Allows the setting of the required highpass frequency between
40 Hz and 400 Hz.
22
1&2-CH X-OVER Input mode selector of the integrated active crossover, controlling the channels 1&2CH. The slide switch allows to set the crossover of
channel 1&2-CH to highpass (HP), or fullrange (FULL)
operating mode.
23
1-CH&2-CH LEVEL Input gain adjustment knob to
adjust/ match the input gain of channel 1-CH&2-CH to
the incoming signal from the head unit. The input level
stage accepts input voltages between 0,2V to 9V.
24 INPUT MODE Input mode selector switch, allowing this amplifier being driven by either one, two or
three pairs of stereo line signals from the head-unit
and the corresponding RCA interconnect cables.
23
Ne2 XP6004/7005/8001 RZ (D+UK)
16.08.2000 6:32 PM
Seite 24
CONNECTIONS & CONTROLS XP800.1
2a
2b
40
140
45
30
10Hz
1
3a
SP
10a
24
3b
4
5
50Hz
6
0.6
160
90
47 50
25
0.35
1.4
180 3.8
35Hz
200Hz
7
0.25
9V
0.2V
8
9
SP
10b
11
12
13
14
Ne2 XP6004/7005/8001 RZ (D+UK)
16.08.2000 6:32 PM
1 POWER-PROTECT LED
Seite 25
8 LEVEL
Signalling regular operation when lit green and
faulty connection or faulty amplifier status
(amplifier in protection mode) when lit red.
Input gain adjustment knob to adjust the incoming signal from the head unit between 0,2V to
9V.
2a&2b L-CH & R-CH RCA INPUTS
LEFT & RIGHT input sockets for connection to
the stereo or mono line-out signals from headunit (preferably fullrange sub line-outs!).
9 PHASE SHIFT
Phase shift knob to adjust the absolute phase
of the amplified output signal. Used to match
the phase of the front satellite speaker
systems to the subwoofer.
3a&3b L-CH & R-CH RCA OUTPUTS
LEFT & RIGHT output sockets for “loopthrough” the input signals received from the
head-unit at L-CH&R-CH RCA INPUT sockets,
to a second amplifier – for example a second
XP800.1.
10a&10b SUBWOOFER OUTPUT TERMINAL
Speaker terminal for the connection of one or
two subwoofer units to the amplifier. The load
impedance of the connected subwoofer
system may vary between 1 to 4 ohms!
4 REMOTE CONTROL INPUT
AT&T remote control input socket for connection of the remote Sub Level Control unit and
the XP800.1 amplifier.
11 GND
Power terminal for the connection of the
amplifier to the chassis ground or the negative
pole of the car battery.
5 OVERLOAD LED
The overload LED is lit yellow, when the output
stage of the XP800.1 amplifier is overloaded by
exceeding the maximum power output level at
a low impedance load (below 1 ohm).
6 SUBSONIC
Subsonic frequency control knob to adjust the
integrated 12 dB/oct. highpass subsonic filter.
Allows the setting of the desired highpass frequency between 10 Hz and 50 Hz. The subsonic filtering is always active and can not be
defeated!
7 LOW PASS
12 REM
Remote terminal (switching contact) for the
automatic (remote) turn-on / turn-off of the
power amplifier from the head-unit’s remote
lead (or antenna control lead).
13 BATT +12V
+ 12 V power terminal for the connection of the
amplifier to the positive pole of the car battery.
14 FUSE
Internal fuses, 2 x 40 Ampere ATC to protect
the power supply circuitry of the XP800.1
amplifier.
Lowpass frequency control knob to adjust the
integrated 12 dB/oct. lowpass filter. Allows the
setting of the required lowpass frequency between 35 Hz and 200 Hz.
25
Ne2 XP6004/7005/8001 RZ (D+UK)
16.08.2000 6:32 PM
MOUNTING THE
X-PULSE AMPLIFIER
AMPLIFIER LOCATION
■ The location of the amplifier should be carefully selected and in the interest of passive driver and passenger safety, the amplifier must
also be securely mounted. Check the suitability
of your preferred amplifier location carefully,
before starting the installation. Preferably,
amplifiers are mounted in the trunk compartment of the car. The actual mounting surface
should be completely flat.
■ Please note that the amplifier location must
allow for a good airflow across and through
the amplifier housing. The air inlet for the
power supply ventilation is hidden underneath
the detachable side panel on the audio signal
input side of the amplifier. Adequate ventilation
will optimize the performance of the X-PULSE
amplifier and improve long-term stability dramatically.
■ In lack of a stable and flat mounting surface
you may also use a board made from ply-wood
or MDF (medium density fibre-board).
■ Make sure there is no wiring harness, fuel
tank etc. behind or below the mounting surface, that may be damaged by the drilling of the
holes for the amplifier mounting screws.
Seite 26
plied Allen hex-head wrench, in order to
access the four mounting holes on the four
outside corners of the amplifer.
Use the amplifier as a template for the marking
of the mounting holes on the selected mounting surface with pencil or felt-tip.
Pilot-drill the mounting holes on the mounting
surface using a 2,5 mm or 3 mm drill.
Mount the amplifier in place using the supplied
selftapping screws and the rubber grommets
(see drawing for reference). The rubber grommets protect the amplifier from excess vibrations and electrical ground-loops, that could
result in audible hum. Secure the amplifier in
its position by tightening the screws evenly
and re-check proper fit after completion.
CONNECTING THE
X-PULSE AMPLIFIER
IMPORTANT NOTICE!
Disconnect the positive battery terminal
(+12V) or remove the main fuse near the car
battery before you start with any wiring work!
Please note that the power supply of the car
must remain disconnected until the entire
wiring installation is completed.
Power Cables
■ Even after mounting is completed the amplifier should allow easy access of all controlling
elements on the top panel of the amplifier and
– in case of the XP800.1 – the access to the
side panel is crucial too, because all the control knobs are located there.
The minimum recommended power cable
cross-section (average cable length: 5 m) of
the main power supply cable – to obtain full
power output from the XP600.4 / XP700.5 and
XP800.1 - is 20 mm2. This applies for both +12V
and chassis ground (GND) connection power
cables. Using main power cables with smaller
cross-sections will result in lower power output - especially with 1 or 2 ohms subwoofer
load - and may cause unnecessary over-heating of the amplifier circuitry, elevated distortion at high volume levels or it may even trigger
the thermal protection circuitry, to shut-off the
amplifier.
MOUNTING
Basic Wiring Installation and Cable
Routing Tips!
■ Make sure the amplifier is not exposed to
dust (fan!) direct sunlight, humidity, water, oil or
spill of other fluids that may enter the amplifier.
■ Ideally after installation there should be a
clearance of at least 5 cm on all sides including the fan outlet on top of the amplifier.
Remove the side panels from the amplifier as
shown in the explosion drawing, using the sup-
26
Use rubber grommets when running cables
through any metal or sharp plastic to prevent
Ne2 XP6004/7005/8001 RZ (D+UK)
16.08.2000 6:32 PM
Seite 27
Self-Tapping Screws
fig. Mounting
Airflow through
amplifier housing
Rubber Grommets
accidental shorting or shearing. Make sure the
cables do not interfere with normal operation
of the vehicle.
When connecting cables/wires to the direct
connecting screw terminals (power and speaker connections), make sure no fine single
wires of the braid are sticking out of the terminal holes, which could cause shorting to the
amplifier chassis or neighbouring terminals.
Generally, the PCB design of the new X-PULSE
power amplifiers is guaranteed to offer best
possible immunity to all sorts of unwanted
noise originating from (inductive) interference
from in-car electronics or extensive cable
lengths. Therefore if you take some care in
routing the RCA signal interconnect cables,
you will be sure to benefit from a perfectly
noise-free signal transmission.
Inside
Hex-Head
Allen Screws
Carefully run the RCA interconnect cables from
the head-unit to the amplifier. To be on the safe
side, we recommend that the interconnects
should be routed away from the power cables
and any potential sources of electrical interference e.g. electronic vehicle management
systems (engine computers, relays etc.) fuel
pumps, wiring harnesses etc.!
Connect the RCA line-outs of your head-unit to
the interconnect cables. Route the RCA interconnects and the REMOTE lead from your
head-unit to the amplifier.
Attention: In case of the XP700.5 and XP800.1,
don’t forget to lay the remote control interconnect cable to be connected to the SubLevel device and the amplifier!
27
Ne2 XP6004/7005/8001 RZ (D+UK)
16.08.2000 6:32 PM
Route the ground cable to the GND (GROUND)
terminal of the amplifier. In most cases it will
be best to keep the ground cable (-12 V) as
short as possible, i.e. to find a chassis contact
very close to the amplifier. The chassis contact
point must be absolutely clean and well sandpapered, i.e. free from rust or paint. The (negative) ground power cable must have the same
cross-section as the positive power cable.
Keep in mind that bad ground contacts are the
cause of most audio interference (noise!) problems and amplifier overheating!
Run the positive power cable (+12 V) directly
from the positive terminal of the car battery to
the +12 V terminal of the amplifier. Make sure
the power cable makes good contact to the
battery, clean the battery pole from potential
corrosion before connecting the cable, preferably with a corrosion-resistant gold-plated
terminal.
For optimal protection of your car audio system
and your entire car against electrical fire
hazards from a short-circuit of the main power
cable with chassis ground, you must insert a
main fuse(holder) within the first 30 cm of
distance to the battery. The fuse type/value
should be matching the limitations of your main
power cable and the requirements of your car
audio system, i.e. minimum 60 Ampére with any
of the three X-PULSE amplifiers and 5 m power
cable with 20 mm2 cross-section.
ATTENTION! Do not insert the main fuse until
the entire installation is completed!
Connect the loudspeaker cables to the speakers or the corresponding crossovers and the
respective speaker terminals of the amplifier.
Use good quality speaker wires of minimum
2,5 mm2 cross-section for the satellites and 2,5
mm2 to 4,0 mm2 for the subwoofer.
Be sure to follow correct polarity, positive
(“”) to positive (“”), negative (““) to
negative (““)!
Now remount the gray side panels using the
supplied Allen wrench and the hex-head
screws.
28
Seite 28
MINIMUM IMPEDANCE LOAD /
OPTIONAL BRIDGED OPERATION MODE
All three X-PULSE amplifiers have been designed to operate at impedance loads as low as
1 ohm per channel. Make sure, that the total
impedance load in bridged mode (concerning
XP600.4 and XP700.5 only) will never be less
than 2 ohms!
For connecting speakers in bridged mode,
please refer to the respective connecting diagram printed on the output terminal blocks of
the amplifier. The channels can be operated in
bridged configuration without setting any internal switch on the amplifier. The mono-bridgedmode will provide almost three times the rated
power output of a single stereo channel.
The XP600.4 is perfectly suited to drive a
sub/sat speaker system with the “rear” (3&4CH) channels bridged to drive the subwoofer.
The XP700.5 provides bridging option of the
“front” (1&2-CH) and “rear” (3&4-CH) channels, to drive – for example -a big passive
3-way system with high power handling.
Close the electrical circuit by inserting the main
fuse or attaching the battery terminal clamp.
After turning-on the head-unit - keeping the
volume level at zero - the OPERATING-PROTECTION LED of the amplifier should light-up
green. If the LED is lit red, the installation is
faulty and the amplifier has switched to protection mode. Immediately turn off the headunit and re-check all the previous connecting
steps carefully!
SETTINGS & ADJUSTMENTS
IMPORTANT! All RCA input signals from the
head-unit should be unfiltered, i.e. fullrange
signals in case you want to use the integrated
electronic crossovers of your X-PULSE amplifier! Any pre-filtered signal will interfere with
the advanced filtering electronics! If you
intend to use the crossover options of your
head-unit (or DSP black box), make sure to set
the OPERATING MODE slide-switches of the
concerned channels to the FULL (fullrange)
position. Then proceed by configuring and setting the crossover options and cross-over fre-
Ne2 XP6004/7005/8001 RZ (D+UK)
16.08.2000 6:32 PM
quencies on the implemented electronic filtering of your head-unit or external DSP box etc.!
SELECTING THE INPUT OPERATING MODE
According to the number of available line outputs on your head unit, you have to select the
input operating mode of your X-PULSE amp
(only applicable to XP600.4 and XP700.1):
XP600.4
The XP600.4 offers two basic input operating
modes, depending on the number of line outputs available on the head-unit:
INPUT MODE 2-CH is used with head units featuring only one pair of RCA stereo line-outs,
usually the rear pre-outputs (L&R). In this case,
the amplifier must be switched to ”2-CH”
mode. In ”2-CH“ input mode, the front/rear
fader option of your head-unit can not be used;
i.e. the relative levels between the front and
rear satellite speaker systems have to be set
on the amplifier.
INPUT MODE set to 4-CH is used with head
units featuring two pairs of RCA stereo lineouts i.e. front- and rear- pre-outputs, or frontand sub- pre-outs, depending on your loudspeaker system configuration.
XP700.5
The XP700.5 offers three input operating
modes, depending on the number of the RCA
line outs found on your head-unit:
INPUT MODE set to 2-CH is used with head
units featuring only one pair of RCA stereo
line-outs.
INPUT MODE set to 4-CH is chosen with head
units featuring two pairs of RCA stereo lineouts, normally front and rear line-outputs. If
your head unit features three pairs of stereo
line-outs, front, rear and sub, this is the best
connection variant and should be chosen
because it provides full support of the fader
control on your head-unit, as well as subwoofer-gain volume adjustment accessible from
the head-unit!
ATTENTION! The input mode selector switch is
not being described in any of the forthcoming
sections and chapters. Please make sure to
select the proper the input mode now!
Seite 29
INTEGRATED ELECTRONIC CROSSOVERS
Basically the internal electronic subsonic/highpass/lowpass crossover filtering circuitry
separates the frequency spectrum from the
signal inputs into highpass signals (which
exclude all frequencies below the selected
point) and lowpass signals (which exclude all
frequencies above the selected point). The
HIGHPASS signals for FRONT and REAR are
then internally transferred to the respective
satellite amplification sections and the
LOWPASS signal is 'sent' to the SUB(woofer)
amplifier section. Therefore the actual speaker
outputs will only receive lowpass or highpass
filtered amplified signals, and the corresponding speakers will only have to work in the frequency bands, they will reproduce best. The
highpass filter of the SUBSONIC section cuts
out the frequencies below the set point completely (the subsonic option is only available
when the OPERATING MODE switch of the
XP700.5 and XP800.1 is set to LOW PASS!). AII
filters used In the X-PULSE amplifiers feature a
12 dB/oct cut-off/cut-in slope.
In addition to the individually adjustable filtering frequencies, the XP700.5 and the XP800.1
also offer fully variable phase shift control (0180°) for the subwoofer amplifier sections. The
phase shift function is used to match the acoustical phase of the front satellite systems to the
subwoofer (phase alignment).
Before you begin with the frequency, level and
phase shift settings, all tone controls (bass,
mid, treble) and all fader and balance controls
etc. on the head-unit have to be set to neutral
or center position! The "loudness" function
must also be deactivated.
If your head-unit features a separately adjustable (fullrange signal) Sub-Level line-out, make
sure to set this control to its center position
too, before adjusting the SUB LEVEL input gain
of the amplifier.
IMPORTANT! For best results it is recommended to carry out the settings and adjustments
of the frequency, level and phase shift controls
in the same order, as they are described in this
manual. For any further help, please contact
your X-PULSE dealer.
29
Ne2 XP6004/7005/8001 RZ (D+UK)
16.08.2000 6:32 PM
FREQUENCY SETTINGS
SUBSONIC Highpass Frequency
lf the subwoofer amplification power reserves
are rarely used to their full extent, or the subwoofer system is capable of handling high
input power loads, the SUBSONIC highpass
frequency control can basically be set at the
lowest possible level of 10 Hz. Subsonic frequencies are inaudible but they draw at lot of
amplifier power and cause unnecessary and
excessive speaker cone movement. Therefore
a fixed electronic subsonic filter in the signal
path (active in LOW PASS operating mode only,
driving a subwoofer), increases the overall
power handling of the subwoofer(s)!
In case the subwoofer will be played at high
volumes regularly or for extended periods of
time, a higher setting of the SUBSONIC control
between 25 and 35 Hz will increase the power
stability of the connected subwoofer(s) considerably, especially trunk boxes equipped with
drivers of 10" (25 cm) diameter or less.
LOWPASS Frequency
The LOW PASS frequency control must always
be set at a higher frequency than the SUBSONIC highpass frequency setting, otherwise the
amplifier cannot operate correctly, i.e. the
power output will be drastically reduced! In
general, the LOW PASS frequency adjustment
knob is set to approximately 80 Hz, to allow for
an initial input gain setting, the fine tuning of
the LOW PASS frequency will be executed
later on.
HIGHPASS Frequency
The highpass cross-over filtering for the channels 1&2-CH and 3&4-CH, will take away
unnecessary mechanical and electrical 'strain'
from coaxial or component speaker systems,
as they cannot reproduce bass signals
anyway. Depending on the actual cone surface, voice-coil diameter and the rated power
handling of the satellite speakers, it is recommended to set the highpass cross-over frequency between 50 and 120 Hz using the HIGH
PASS controls for channel 1&2-CH and 3&4-CH.
30
Seite 30
The appropriate settings should be determined
by ear. The two most important factors for the
individual adjustment will be the reproduction
of the mid-bass frequencies and the required
safe power-handling capacity of the satellites.
If the satellite cross-over frequency is very
low, the mid-bass reproduction will be increased, but at the same time the safe power-handling capacity of the satellites will decrease. If
the cross-over frequency is set too high, the
mid-bass reproduction will become 'thinner'
while the power handling capacity of the satellites will increase.
LEVEL SETTINGS & Fine Tuning of
LOW PASS (SUB) Frequency
To reach a maximum dynamic headroom from
each individual head unit/amplifier/speaker
combination, it is important to set the respective LEVEL (input gain) controls correctly. On
one hand, the LEVEL settings on the amplifier
determine the actual signal-to-noise ratio, on
the other hand they also determine the maximum distortion-free SPL (sound pressure
level), achievable with a specific car-audio
system.
TIPS FOR INPUT LEVEL SETTINGS
For the following LEVEL settings all tone, fader,
balance controls etc. on the head-unit still have
to remain in their neutral or center position!
XP600.4
Depending on the speaker configuration that
will be driven by the XP600.4, the input level
adjustment procedure varies slightly:
In case you are using the XP600.4 to drive a
subwoofer/satellite system, you should start
with the adjustment of the subwoofer LEVEL,
i.e. the 3&4-CH LEVEL of your XP600.4 amp.
Turn the input LEVEL on the 3&4-CH control
section of the amplifier at 3/4 to full (clockwise). Then you gradually turn up the LEVEL knob
of the 1&2-CH section, mixing in the mid-high
frequencies of the front satellite speakers, until
you reach a tonally balanced sound. The following section of this manual will describe the
fine-tuning of the cross-over frequencies con-
Ne2 XP6004/7005/8001 RZ (D+UK)
16.08.2000 6:32 PM
cerning the SUB channel, after which a final
fine-tuning of the input sensitivity setting for
the 1&2-CH channel („FRONT” section) has to
be carried out again.
The same procedure applies, if you intend to
drive two pairs of satellite systems – front and
rear - but you must start to set the input LEVEL
gain of the 1&2-CH first and mix-in in the
“rear” satellites (3&4-CH LEVEL) until you hear
a well balanced sound with a good “rear-fill”.
Seite 31
separate Sub-Level remote control unit to full
volume.
Slowly turn up the LEVEL control knob on the
amplifier, until you can just about hear distorted bass sounds.
Now you reduce the main volume level on the
head-unit to a medium listening level.
You can now proceed to set all the remaining
input gain adjustment controls of any other
amplifier channels, that are installed in your
car-audio system.
XP700.5
Turn all three LEVEL controls (1&2-CH, 3&4-CH,
5-CH) on the XP700.5 anti-clockwise to their
minimum positions (9V).
Turn-on your head-unit and keep the volume
control at the minimum!
Now you set the volume control of your headunit to approximately 3/4 of full volume, while
playing a dynamic piece of music. Turn up the
separate Sub-Level remote control unit to full
volume.
Slowly turn up the 5-CH LEVEL (Sub) control
knob on the amplifier, until you can just about
hear distorted bass sounds.
Now you reduce the main volume level on the
head-unit to a medium listening level.
Start turning up the 1&2-CH channels input
gain LEVEL control clockwise, until you have
reached a good tonal balance between the
front satellites and the subwoofer, a slight
attenuation of the bass range should be preferred, as this will be compensated later by normal driving noises.
Start turning up the 3&4-CH input gain LEVEL
control knob clockwise, until you feel that you
have reached an appropriate “rear-fill” level in
the back of the car, so that the overall sound
becomes smooth and homogenous.
XP800.1
Turn the LEVEL control knob on the XP800.1
anti-clockwise to its minimum position (9V).
Turn-on your head-unit and keep the volume
control at the minimum!
Now you set the volume control of your headunit to approximately 3/4 of full volume, while
playing a dynamic piece of music. Turn up the
Fine-Tuning of LOWPASS (Subwoofer)
Frequency
With the LOW PASS cut-off frequency for the
subwoofer set at 80 Hz initially you can now
start the actual fine-tuning of the LOW PASS
frequency. This adjustment should be 'played
entirely by ear'. The optimal bass reproduction
will be 'stiff' and 'rich', while still delivering a
good and solid low-end bass.
In general, setting the LOWPASS cut-off frequency too low, will result in a weak and
uncontoured bass response. Setting the
LOWPASS frequency too high, will result in a
'booming' sound.
PHASE SHIFT Control Settings
In general, the Phase-Shift control knob
should be set to a certain starting point, strongly depending on the acoustical phase of the
connected subwoofer system. Normally, sealed (free-air) or ported subwoofer systems will
allow for a perfect match (phase alignment)
with the front satellite system, when the phase
shift control knob is set anywhere from 0° to
90° Bandpass systems normally require to
have the phase shift knob set to 90° up to 180°
starting point.
The correct setting must be determined by ear,
a perfect phase alignment is present, when the
bass sounds from the subwoofer can no longer
be acoustically localized in the back of the car
(the subwoofer seems to play right in front of
the listener).
31
Ne2 XP6004/7005/8001 RZ (D+UK)
16.08.2000 6:32 PM
Seite 32
XP600.4 SYSTEM CONFIGURATION SAT/SUB
CD-CHANGER
PRE-OUT FRONT & REAR
HEAD-UNIT
TWEETER
TWEETER
X-OVER
X-OVER
CHANNEL
1-CH
CHANNEL
2-CH
BASS-MIDRANGE
BASS-MIDRANGE
CHANNEL
3 & 4-CH
BRIDGED
SUBSONIC
LEVEL
36
1,8
3
32
1
9V
20
45
0.2 V
10Hz
50Hz
HIGH PASS
135
100
40
0.4
5
180
LOW PASS
3/4 CH X-OVER
100
50
135
55
195
45
175
40Hz
200Hz
35Hz
200Hz
HI FULL LOW
SUBSONIC
LEVEL
36
1,8
3
32
1
9V
40
0.4
20
45
0.2 V
10Hz
50Hz
5
SUBSONIC
LEVEL
1,8
HIGH PASS
135
100
180
55
195
40Hz
200Hz
3
LOW PASS
3/4 CH X-OVER
100
50
36
32
1
40
135
45
175
35Hz
200Hz
5
0.4
20
45
0.2 V
10Hz
50Hz
HI FULL LOW
LEVEL
SUBSONIC
1,8
36
3
32
1
5
9V
20
45
10Hz
50Hz
HIGH PASS
135
100
40
0.4
0.2 V
180
55
195
40Hz
200Hz
9V
LOW PASS
1/2 CH X-OVER
HI FULL LOW
100
50
135
45
175
35Hz
200Hz
HIGH PASS
135
100
180
LOW PASS
1/2 CH X-OVER
135
55
195
45
175
40Hz
200Hz
35Hz
200Hz
HI FULL LOW
32
100
50
SUBWOOFER
PARALLEL (2 Ω)
Ne2 XP6004/7005/8001 RZ (D+UK)
16.08.2000 6:32 PM
Seite 33
XP600.4 SYSTEM CONFIGURATION STANDARD MODE
CD-CHANGER
PRE-OUT FRONT & REAR
HEAD-UNIT
TWEETER
TWEETER
X-OVER
X-OVER
CHANNEL 1-CH
CHANNEL 2-CH
BASS-MIDRANGE
BASS-MIDRANGE
TWEETER
X-OVER
X-OVER
CHANNEL 3-CH
TWEETER
CHANNEL 4-CH
BASS-MIDRANGE
BASS-MIDRANGE
SUBSONIC
LEVEL
36
1,8
3
32
1
9V
20
45
0.2 V
10Hz
50Hz
HIGH PASS
135
100
40
0.4
5
180
LOW PASS
3/4 CH X-OVER
100
50
135
55
195
45
175
40Hz
200Hz
35Hz
200Hz
HI FULL LOW
SUBSONIC
LEVEL
36
1,8
3
32
1
9V
20
45
10Hz
50Hz
SUBSONIC
LEVEL
40
0.4
0.2 V
5
1,8
HIGH PASS
135
100
180
55
195
40Hz
200Hz
3
LOW PASS
3/4 CH X-OVER
36
32
1
40
100
50
135
45
175
35Hz
200Hz
5
0.4
20
45
0.2 V
10Hz
50Hz
HI FULL LOW
9V
LEVEL
SUBSONIC
1,8
36
3
32
1
5
9V
20
45
10Hz
50Hz
HIGH PASS
135
100
40
0.4
0.2 V
180
55
195
40Hz
200Hz
LOW PASS
1/2 CH X-OVER
Hi FULL LOW
100
50
135
45
175
35Hz
200Hz
HIGH PASS
135
100
180
LOW PASS
1/2 CH X-OVER
100
50
135
55
195
45
175
40Hz
200Hz
35Hz
200Hz
Hi FULL LOW
33
Ne2 XP6004/7005/8001 RZ (D+UK)
16.08.2000 6:32 PM
Seite 34
XP600.4 SYSTEM CONFIGURATION SUB
CD-CHANGER
PRE-OUT SUB
HEAD-UNIT
CHANNEL
3 & 4-CH
BRIDGED
CHANNEL
1 & 2-CH
BRIDGED
SUBSONIC
LEVEL
36
1,8
3
32
1
9V
20
45
0.2 V
10Hz
50Hz
HIGH PASS
135
100
40
0.4
5
180
LOW PASS
3/4 CH X-OVER
100
50
135
55
195
45
175
40Hz
200Hz
35Hz
200Hz
HI FULL LOW
SUBSONIC
LEVEL
36
1,8
3
32
1
9V
40
0.4
20
45
0.2 V
10Hz
50Hz
5
SUBSONIC
LEVEL
1,8
HIGH PASS
135
100
180
55
195
40Hz
200Hz
3
LOW PASS
3/4 CH X-OVER
100
50
36
32
1
40
135
45
175
35Hz
200Hz
5
0.4
20
45
0.2 V
10Hz
50Hz
HI FULL LOW
LEVEL
SUBSONIC
1,8
36
3
32
1
5
9V
20
45
10Hz
50Hz
HIGH PASS
135
100
40
0.4
0.2 V
180
55
195
40Hz
200Hz
9V
LOW PASS
1/2 CH X-OVER
HI FULL LOW
100
50
135
45
175
35Hz
200Hz
HIGH PASS
135
100
180
LOW PASS
1/2 CH X-OVER
135
55
195
45
175
40Hz
200Hz
35Hz
200Hz
HI FULL LOW
34
100
50
Ne2 XP6004/7005/8001 RZ (D+UK)
16.08.2000 6:32 PM
Seite 35
XP700.5 SYSTEM CONFIGURATION STANDARD MODE
SUB LEVEL
CONTROL
CD/MD CHANGER
3 PRE-OUT
FRONT, REAR & SUB
HEAD-UNIT
TWEETER
PASSIVE
X-OVER
PASSIVE
X-OVER
TWEETER
CHANNEL
1-CH
CHANNEL
2-CH
BASS/MIDRANGE
BASS/MIDRANGE
CHANNEL 5-CH SUB
CHANNEL 3-CH
TRUNKBOX SUBWOOFER
PASSIVE
INLINE
X-OVER
PASSIVE
INLINE
X-OVER
CHANNEL 4-CH
COAXIAL/TRIAXIAL SYSTEM
COAXIAL/TRIAXIAL SYSTEM
120
72
150
0
38
119
90
60
30
PHASE SHIFT
48
200Hz 10Hz
1,5
2,4
1
0.5
6
9V
REAR
SUB
0.2 V
135
100
165
120
72
150
0
45
200Hz 10Hz
LOW PASS
50Hz
SUBSONIC
2
2,4
1
0.5
9V
REAR
SUB
0.2 V
135
165
0.4
9V
3/4 CH LEVEL
100
0,8
4
FULL BP
85
50
135
45
175
40Hz
200Hz
35Hz
200Hz
3/4 CH X-OVER
110
265
HP
FRONT
LOW PASS
45
345
2
FULL
3
40Hz
400Hz
5
1
FULL BP
85
50
0.5
45
175
35Hz
200Hz
3/4 CH X-OVER
170
265
HP
FRONT
2
3
5
9V
400Hz
HI PASS
1/2 CH X-OVER
2 CH 4 CH 5 CH
INPUT MODE
HI PASS
1/2 CH X-OVER
1/2 CH LEVEL
LOW PASS
FULL
345
45
0.2 V
135
195
200Hz
HI PASS
9V
0.2 V
5 CH LEVEL
HP
55
40Hz
110
HP
1,5
4
6
40Hz
5 CH LEVEL
48
20
177
35Hz
180
PHASE SHIFT
32
160
42
0.2 V
195
170
38
119
90
60
0.4
9V
55
HI PASS
30
0,8
4
3/4 CH LEVEL
5 CHANNEL AMPLIFIER
50Hz
SUBSONIC
LOW PASS
2
4
XP700.5
45
20
177
35Hz
180
32
160
42
1
0.5
2 CH 4 CH 5 CH
0.2 V
1/2 CH LEVEL
INPUT MODE
INPUT MODE
INPUT MODE
35
Ne2 XP6004/7005/8001 RZ (D+UK)
16.08.2000 6:32 PM
Seite 36
XP700.5 SYSTEM CONFIGURATION KICKBASS MODE
SUB LEVEL
CONTROL
CD/MD CHANGER
3 PRE-OUT
FRONT, REAR & SUB
HEAD-UNIT
TWEETER
TWEETER
PASSIVE
X-OVER
PASSIVE
X-OVER
CHANNEL
1-CH
CHANNEL
2-CH
BASS/MIDRANGE
BASS/MIDRANGE
CHANNEL 5-CH SUB
TRUNKBOX SUBWOOFER
CHANNEL 3 & 4-CH
16 cm KICKBASS UNITS
16 cm KICKBASS UNITS
120
72
150
30
0
38
119
90
60
48
200Hz 10Hz
35Hz
PHASE SHIFT
1,5
2,4
1
0.5
6
9V
REAR
SUB
0.2 V
135
100
165
120
72
150
0
200Hz 10Hz
LOW PASS
50Hz
SUBSONIC
HP
FULL BP
0.5
REAR
SUB
0.2 V
135
100
165
HP
FULL BP
85
50
170
265
HP
FRONT
135
45
175
40Hz
200Hz
35Hz
200Hz
3/4 CH X-OVER
110
265
HP
FRONT
LOW PASS
2
FULL
45
345
3
40Hz
400Hz
5
1/2 CH X-OVER
175
200Hz
2
3
5
9V
1/2 CH X-OVER
HI PASS
9V
LOW PASS
FULL
345
400Hz
HI PASS
135
45
35Hz
3/4 CH X-OVER
45
0.2 V
5 CH LEVEL
200Hz
HI PASS
0.4
9V
195
55
40Hz
0,8
4
3/4 CH LEVEL
1
0.5
2 CH 4 CH 5 CH
0.2 V
1/2 CH LEVEL
2 CH 4 CH 5 CH
INPUT MODE
INPUT MODE
INPUT MODE
36
85
50
1
0.5
1,5
2,4
1
9V
110
5 CH LEVEL
48
2
4
6
40Hz
45
20
177
35Hz
180
PHASE SHIFT
32
160
42
0.2 V
195
170
38
119
90
60
0.4
9V
55
HI PASS
30
0,8
4
3/4 CH LEVEL
5 CHANNEL AMPLIFIER
50Hz
SUBSONIC
LOW PASS
2
4
XP700.5
45
20
177
42
180
32
160
INPUT MODE
0.2 V
1/2 CH LEVEL
Ne2 XP6004/7005/8001 RZ (D+UK)
16.08.2000 6:32 PM
Seite 37
XP700.5 SYSTEM CONFIGURATION BRIDGED MODE SAT/SUB
SUB LEVEL
CONTROL
CD/MD CHANGER
3 PRE-OUT
FRONT, REAR & SUB
HEAD-UNIT
PASSIVE
X-OVER
PASSIVE
X-OVER
TWEETER
TWEETER
CHANNEL
3 & 4-CH
BRIDGED
CHANNEL
1 & 2-CH
BRIDGED
BASS/MIDRANGE
BASS/MIDRANGE
CHANNEL
5-CH (SUB)
WOOFER
WOOFER
TRUNKBOX SUBWOOFER
120
72
150
30
0
38
119
90
60
48
200Hz 10Hz
35Hz
PHASE SHIFT
LOW PASS
1,5
2,4
1
0.5
6
9V
REAR
SUB
0.2 V
135
100
165
120
72
150
0
200Hz 10Hz
LOW PASS
1,5
2,4
0.5
REAR
SUB
0.2 V
135
165
0.4
9V
3/4 CH LEVEL
100
FULL BP
85
50
45
35Hz
170
265
HP
FRONT
9V
1/2 CH X-OVER
2 CH 4 CH 5 CH
INPUT MODE
135
45
175
40Hz
200Hz
35Hz
200Hz
3/4 CH X-OVER
110
265
HP
FRONT
LOW PASS
45
345
2
FULL
3
40Hz
400Hz
5
1
9V
0.5
0.2 V
HI PASS
1/2 CH X-OVER
1/2 CH LEVEL
135
200Hz
2
3
5
400Hz
HI PASS
85
50
LOW PASS
FULL
345
45
FULL BP
175
195
200Hz
3/4 CH X-OVER
HP
0.2 V
5 CH LEVEL
HP
55
HI PASS
0,8
4
40Hz
110
50Hz
SUBSONIC
1
9V
5 CH LEVEL
48
2
4
6
40Hz
45
20
177
35Hz
180
PHASE SHIFT
32
160
42
0.2 V
195
170
38
119
90
60
0.4
9V
55
HI PASS
30
0,8
4
3/4 CH LEVEL
5 CHANNEL AMPLIFIER
50Hz
SUBSONIC
2
4
XP700.5
45
20
177
42
180
32
160
1
0.5
2 CH 4 CH 5 CH
0.2 V
1/2 CH LEVEL
INPUT MODE
INPUT MODE
INPUT MODE
37
Ne2 XP6004/7005/8001 RZ (D+UK)
16.08.2000 6:33 PM
Seite 38
XP800.1 SYSTEM CONFIGURATION
CD-CHANGER
PRE-OUT SUB
HEAD-UNIT
SUBWOOFER
40
30
25
10Hz
38
140
45
90
47 50
50Hz
35Hz
0.6
160
1.4
180 3.8
200Hz
0.35
0.25
9V
0.2V
Ne2 XP6004/7005/8001 RZ (D+UK)
16.08.2000 6:33 PM
Seite 39
TECHNICAL SPECIFICATIONS
XP600.4
XP700.5
XP800.1
4 Ohm Load at 13.8V
100Wx4CH
50Wx4CH+200Wx1CH
500Wx1CH
2 Ohm Load at 13.8V
190Wx4CH
90Wx4CH+400Wx1CH
900Wx1CH
1 Ohm Load at 13.8V
190Wx4CH
90Wx4CH+400Wx1CH
900Wx1CH
Mono Bridge at 4 Ohm
380Wx2CH
180Wx2CH+400Wx1CH
150Wx2CH
Output Power Circuit Configuration
Class AB
Class AB + D
Class D
Output Power Rating
Miscellaneous Spec
Input Selector S/W
2/4
2/4/6
No
Frequency Response-3dB
10 - 30KHz
10 - 30KHz
10 - 200Hz
Damping Factor 4Ω
200
200
200
S/N Ratio(A-weight)
95dB
95dB
66dB
THD
0,03%
0,03%
0,10%
Channel Separation
70dB
70dB
70dB
Input Gain Control
0.2V - 9.0V
0.2V - 9.0V
0.2V - 9.0V
Input Impedance
47k
47kΩ
47kΩ
Fan
Yes
Yes
Yes
LED
Power/Protect
Power/Protect/Overload Power/Protect/Overload
Protection( DC, Short, Thermal, Overload) Yes
Yes
Yes
Crossovers / Phase Shift
Phase Shift (0 - 180)
No
Yes, But only 5CH
Yes
Crossover S/W for 1+2 channel
HP/FULL/LP
HP/FULL
No
Variable Hi-Pass
40Hz - 200Hz
40Hz - 400Hz
No
Variable Low-Pass
35Hz - 200Hz
No
35Hz - 200Hz
Subsonic Filter
10Hz - 50Hz
No
10Hz - 50Hz
HP/FULL/LP
HP/FULL/BAND
No
Variable Hi-Pass
40Hz - 200Hz
40Hz - 200Hz
No
Variable Low-Pass
35Hz - 200Hz
35Hz - 200Hz
No
Subsonic Filter
10Hz - 50Hz
No
No
No
No
No
No
No
No
Crossover S/W for 3+4 channel
Crossover S/W for 5 channel
Variable Hi-Pass
Variable Low-Pass
No
35Hz -200Hz
No
Subsonic Filter
No
10Hz - 50Hz
No
Phone Jack for Remote Control
No
Yes
Yes
Fuse Type
2 x 40 A ATC
2 x 30 A ATC
2 x 40 A ATC
39
Ne2 XP6004/7005/8001 RZ (D+UK)
16.08.2000 6:33 PM
Seite 40
GARANTIEKARTE / GUARANTEE CARD
Bitte bewahren Sie diese Garantiekarte zusammen mit
Ihrer Kaufbestätigung auf. / Please keep this Guarantee
Card along with the sales slip/proof of purchase.
Seriennummer / Serial No.:
Modell / Model: XP6000.4 / XP7000.5 / XP8000.1
Adresse des Händlers / Dealer´s Address:
Wichtig!
Sehr geehrter Kunde, sehr geehrte Kundin,
vielen Dank, daß Sie sich zum Kauf eines X-PULSE-Gerätes entschlossen haben. Wir möchten Sie bitten, die Originalverpackung für den Fall einer Garantieleistung aufzuheben und die folgenden Garantiebestimmungen gut
durchzulesen.
Sollten Sie für Ihr X-PULSE-Produkt Garantieleistungen
beanspruchen, wenden Sie sich bitte direkt an den Händler, bei dem Sie das Gerät gekauft haben. Bitte senden
Sie keine Geräte an den Hersteller. Bei Schwierigkeiten,
ein geeignetes X-PULSE-Servicecenter zu finden, erhalten Sie bei ACR AG in CH-5330 Zurzach weitere Informationen.
Garantiebestimmungen
X-PULSE gewährleistet auf das in dieser Karte aufgeführte X-PULSE-Produkt für den Fall von Material- oder
Herstellungsfehlern 1 Jahr Garantie. Garantieansprüche
können nur mit einer korrekt und vollständig ausgefüllten
Garantiekarte zusammen mit dem Original-Kaufbeleg geltend gemacht werden.
Garantie-Einschränkungen
Nicht unter Garantie fallen Schäden infolge von:
1. unsachgemäßem Einbau,
unsachgemäßen Audio- oder Stromanschlüssen.
2. schädlichen Einwirkungen von übermäßiger
Feuchtigkeit, Flüssigkeiten, Hitze, Sonnenstrahlung oder übermäßiger Verschmutzung.
3. mechanischer Beschädigung durch Unfall, Fall
oder Stoss; Schäden durch nicht autorisierte
Reparaturversuche oder nicht durch den Hersteller
ausdrücklich autorisierte Modifikationen.
Die Garantie dieses Produkts bleibt in jedem Fall auf die
Reparatur bzw. den Ersatz (Entscheidung beim Hersteller)
des jeweiligen X-PULSE-Produkts beschränkt. Verlust durch
Transport bzw. auf dem Transportweg oder Schäden durch
ungenügende Verpackung oder Transportkosten sind durch
diese Garantie nicht gedeckt. Jeder über diese Garantie-Erklärung hinausgehende Anspruch und jede Haftung
für direkte oder indirekte Folgeschäden werden ausdrücklich
abgelehnt.
Important!
Dear customer,
Thank you for buying this X-PULSE product. It is advisable
to keep the original packing material for any future transporting of the product. Please read the guarantee specifications carefully.
Should your X-PULSE product require guarantee service,
please return it to the retailer from whom it was purchased or contact the official distributor in your country. Please do not send any product to X-Pulse, Germany or ACR
AG Switzerland. Should you have difficulty in finding an
authorized X-PULSE service centre, details are available
from your local distributor or from the ACR address below.
Limited Guarantee
The X-PULSE product listed overleaf is fully guaranteed
against defective materials or workmanship for a period of
1 YEAR from date of purchase. Guarantee will only be granted if the guarantee card is presented fully completed with
model, serial number (if applicable), purchaser´s address,
purchasing date and dealer stamp together with the original sales slip or proof of purchase.
Guarantee Limitations
This guarantee does not cover any damage due to:
1. Incorrect installation, audio or electrical connection or
electrical overload
2. Exposure to excessive humidity, fluids, heat, direct
sunlight or excessive dirt or dust.
3. Accidents or abuse, unauthorized repair attempts
and modifications not explicitly authorized by the
manufacturer
This guarantee is limited to the repair or the replacement
of the defective product at the manufacturer´s option and
does not include any other form of damage, whether incidential, consequential or otherwise.
This guarantee will not cover any loss during transportation, transport costs or any other damage caused by transport or shipment of the product.
X-Pulse Produkte werden entwickelt
und hergestellt von:
X-PULSE Schulze-Delitsch-Str. 3
D-79761 Waldshut-Tiengen, Deutschland
Exklusiv-Vertrieb für alle X-Pulse Produkte weltweit:
ACR, Brändli & Vögeli AG
Bohrturmweg 1, CH-5330 Zurzach, Schweiz
Tel. (+41) (0)56 - 269 64 64
Fax: (+41) (0)56 - 269 64 65